| The USS Hornet, CV-8, was laid down in
September 1939 as the third member of the Yorktown-class aircraft carriers.
She was commissioned in October 1941 and spent the next six months working
up in the Atlantic. The ship is best remembered for the celebrated
Doolittle Raid on Japan in April 1942. For that raid, she embarked
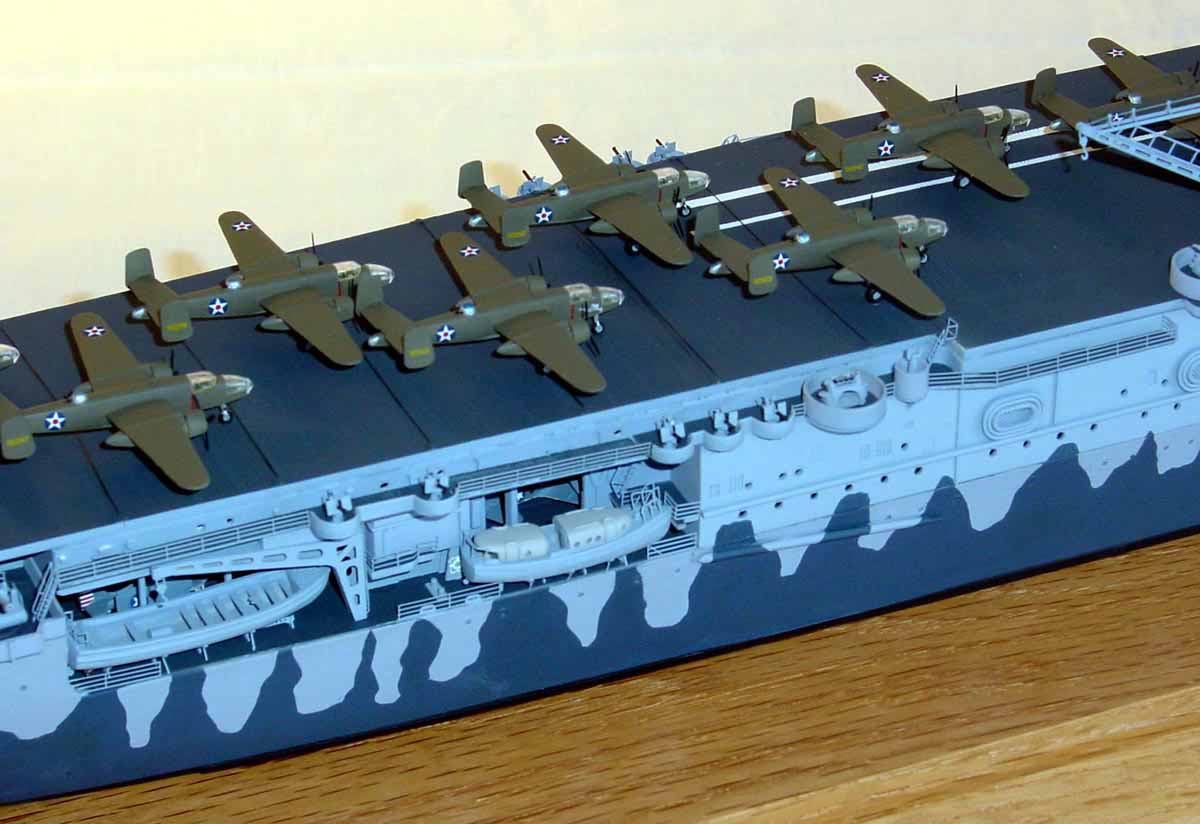
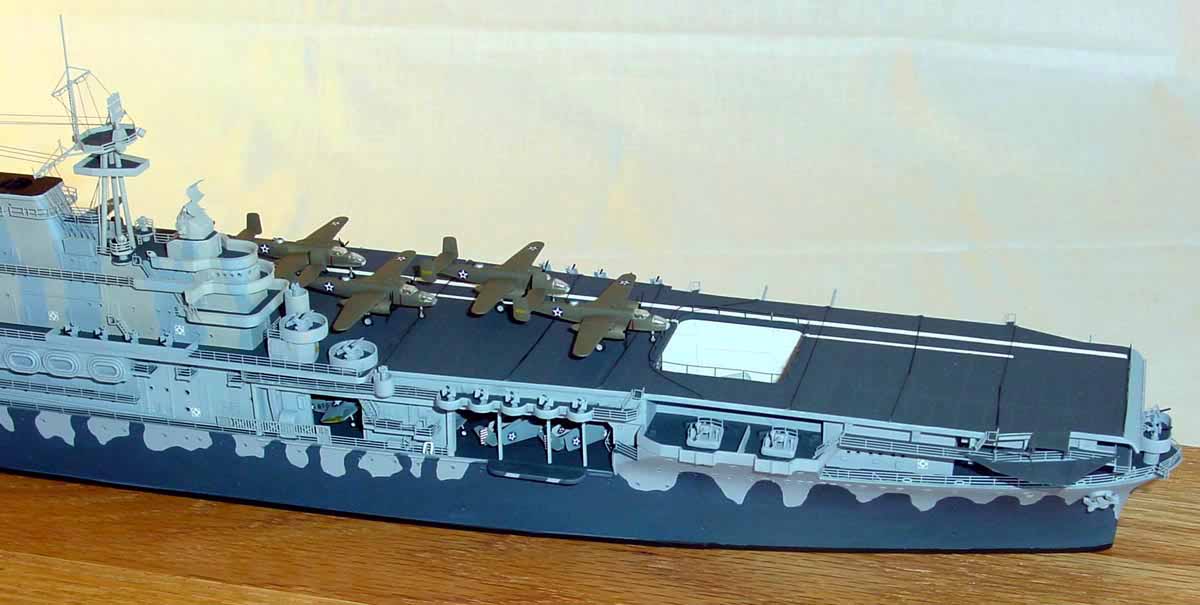
sixteen B-25s which were flown off the deck about 600 miles from Japan.
Her normal compliment of aircraft was stowed below in the hangar deck.
Although the raid caused minimal damage, the propaganda value of the raid
was immeasurable. The Hornet participated at the battle of Midway,
but was sunk at the Battle of Santa Cruz on 27 October 1942. She
was hit by four bombs and sixteen torpedoes from both US and Japanese vessels. |
|
|
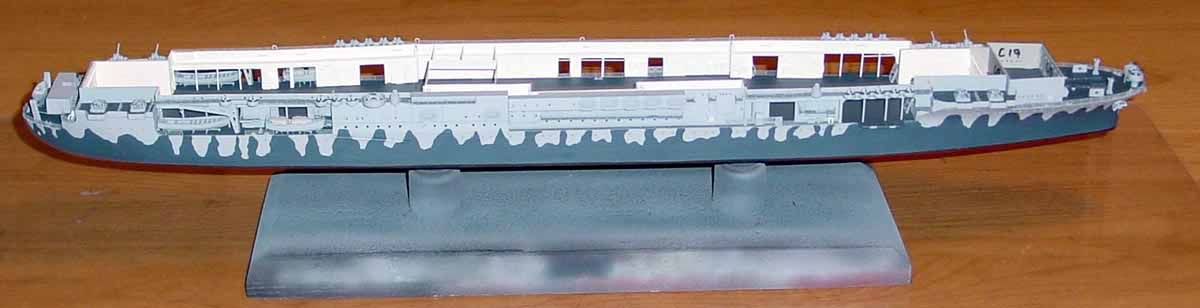
| This article is a follow-up to an
in-box review done on Trumpeters USS Hornet kit. This buildup
incorporates a number of aftermarket accessories that enhanced the final
appearance of the kit. |
click to
enlarge images |
 |
|
|
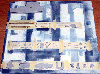
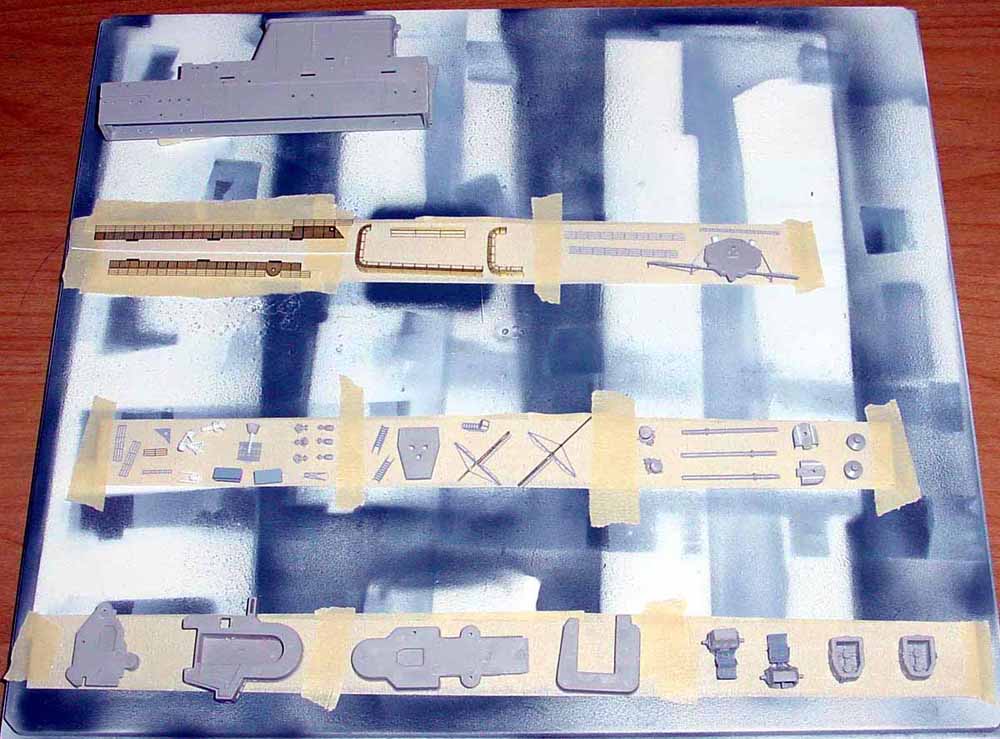
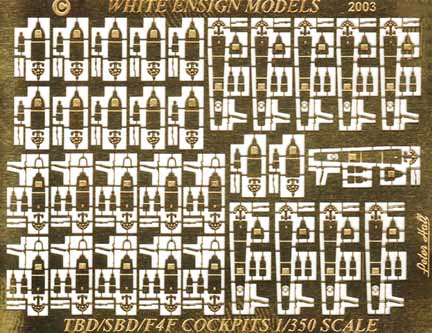
For this build, I incorporated five different photo-etch
(PE) sets, three Gold Medal Models (GMM) and two White Ensign Model (WEM)
sets. The primary PE set is the:
-
GMM Hornet detail set (GMM
350-21) contains railing, ladders, island details, radar, cranes, and
details for the boats and anti-aircraft weapons.
-
GMMs Gold Plus Hornet Extra Details set (GMM
350-21A) features perforated catwalks, more boat details, windbreaks,
and LSO platforms.
-
The airgroup was outfitted with PE from GMMWW2 USN Aircraft Parts (GMM
350-26).
-
The hangar deck interior fittings and bulkheads were assembled with WEMs
1/350 USS Hornet Interior
Fittings and Accessories set.
-
Finally, WEMs 1/350 USS Hornet The Airwing set (PE
3526) was used for aircraft interiors, bomb carts, torpedo carts, and
other miscellaneous deck equipment.
How these sets were integrated into the model will be discussed below. |
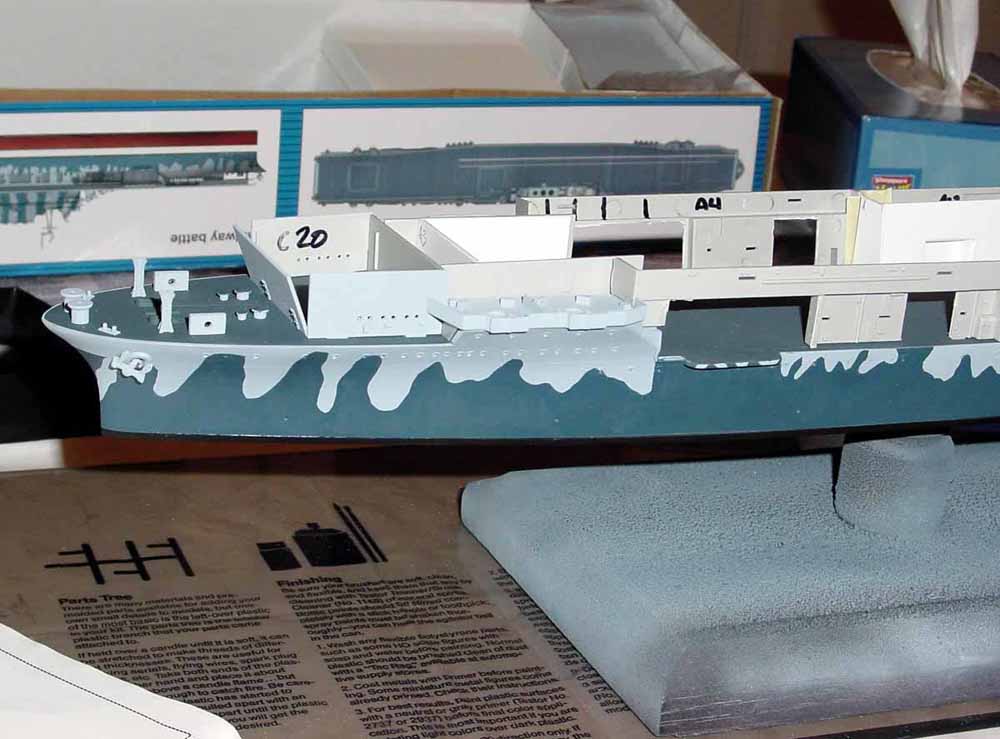
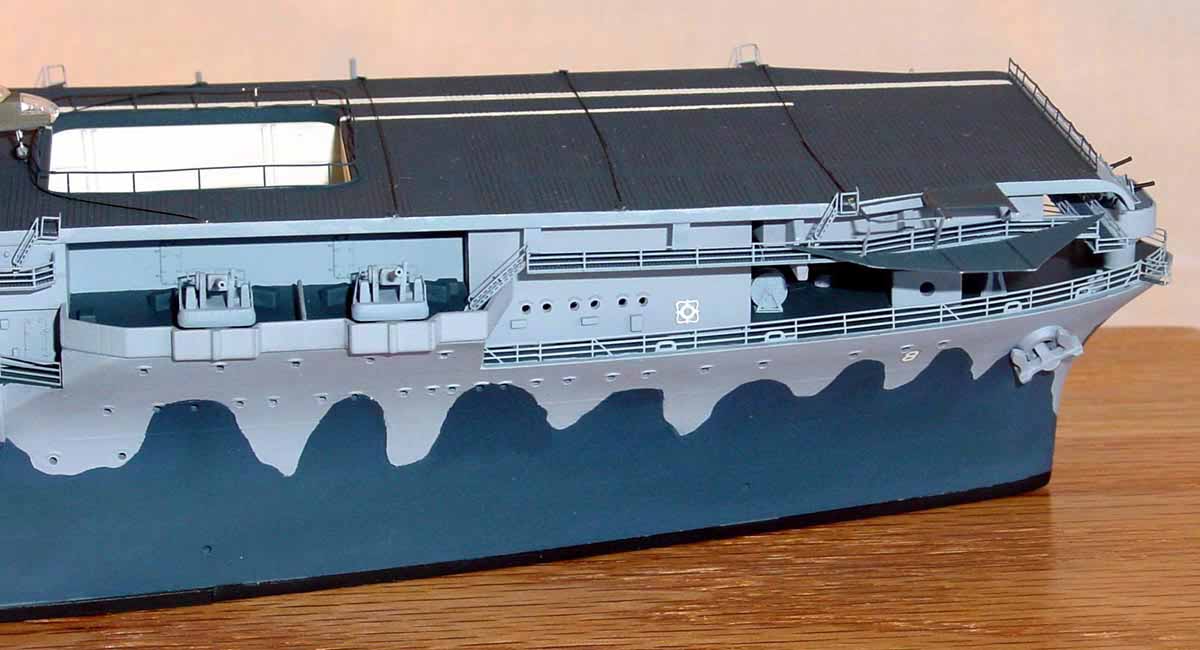
| The kit itself looks great in the box. The plastic parts are
molded without flaw, although there was some flash present on some parts.
The main difficulty that I ran into with this kit was the fit of the hangar
deck walls. This is most likely the product of panagraphing the master
from a resin kit. This theory is bolstered by the misshapen bow and
minor inaccuracies inherent with the original resin pattern. |
 |
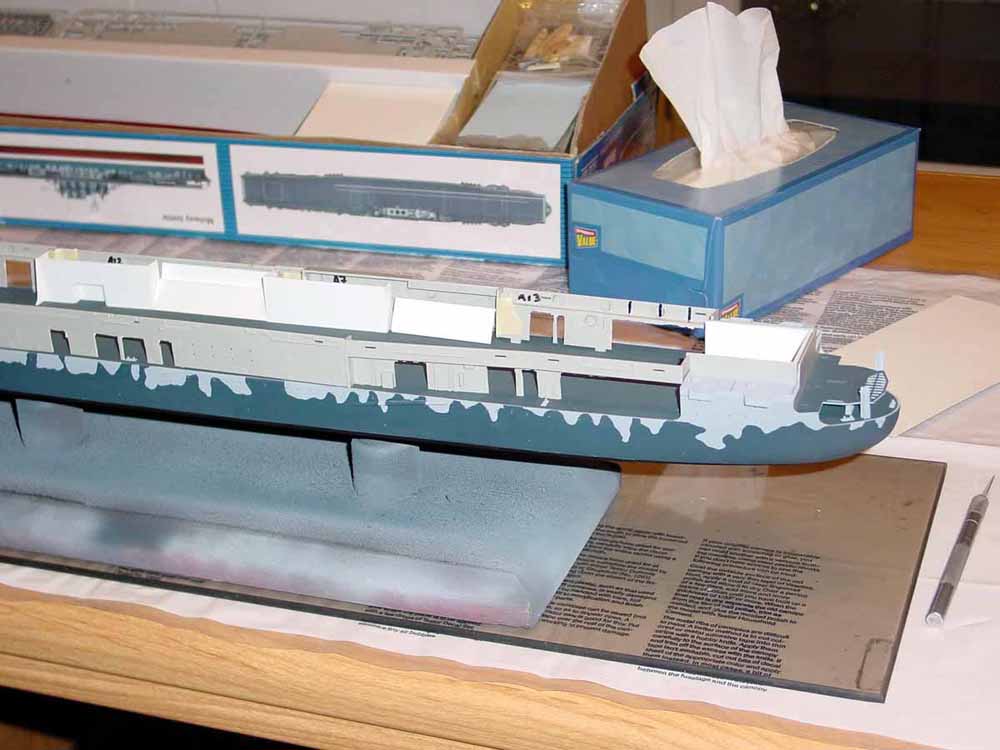
| I started the model by detailing the hull. The bow
is not correctly shaped, having a tug-boat appearance that is most noticeable
when built as a full-hull model. Instead of reshaping bow, I decided
to live with a waterline model since the inaccuracy is less apparent.
Missing from the hull is the armor belt, which I add using strip styrene.
I also drilled out the portholes and hawspipes for the anchors. Using
a technique from Keith Bender, I added hull plating by building up layers
of paint on the hull. The hull is cleanly molded but is devoid of
detail. To give the hull more life, I added boat booms and fuel lines.
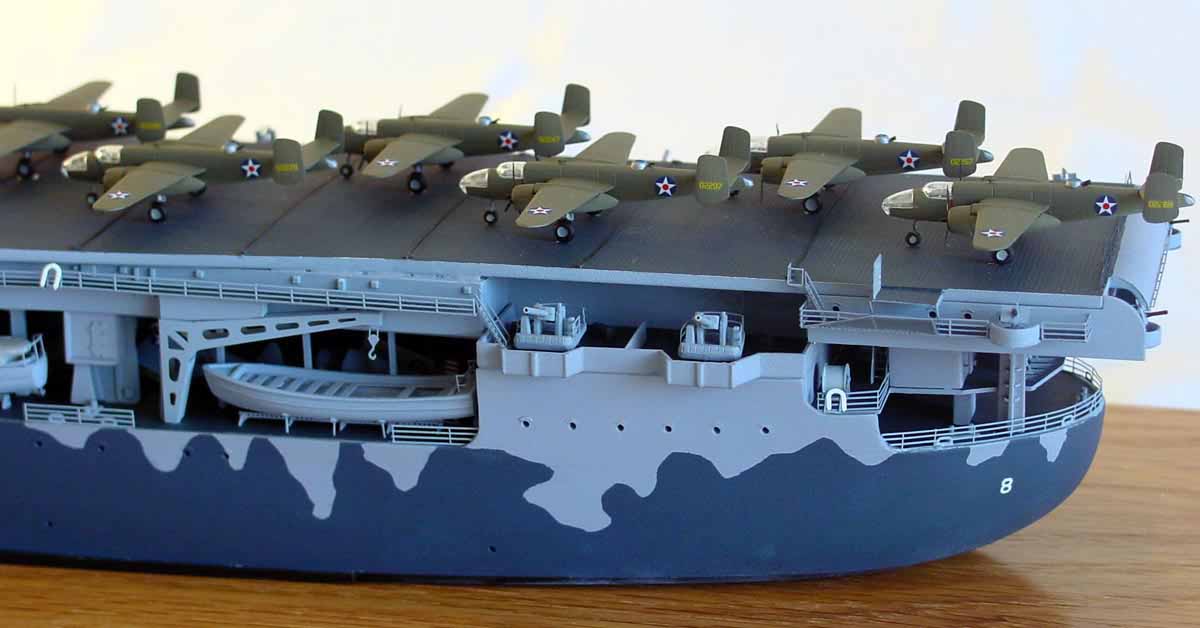
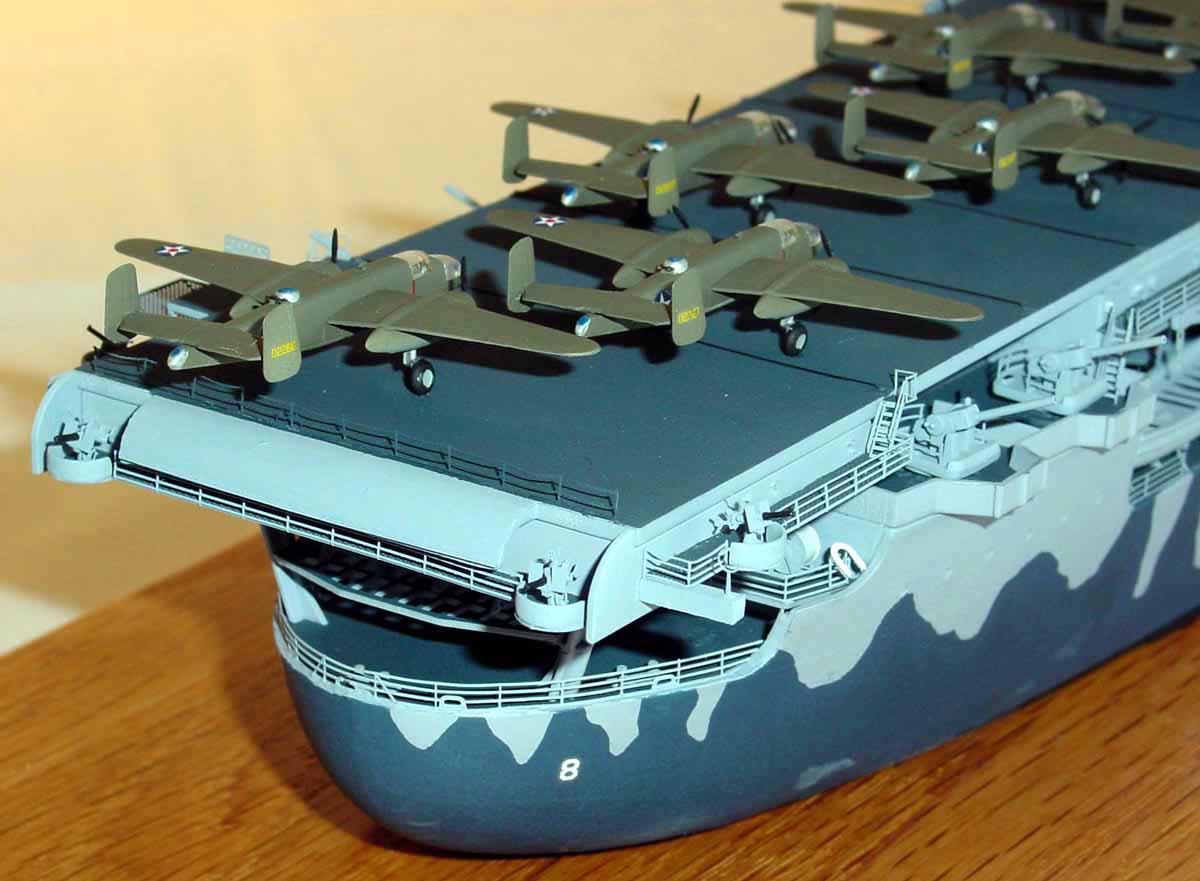
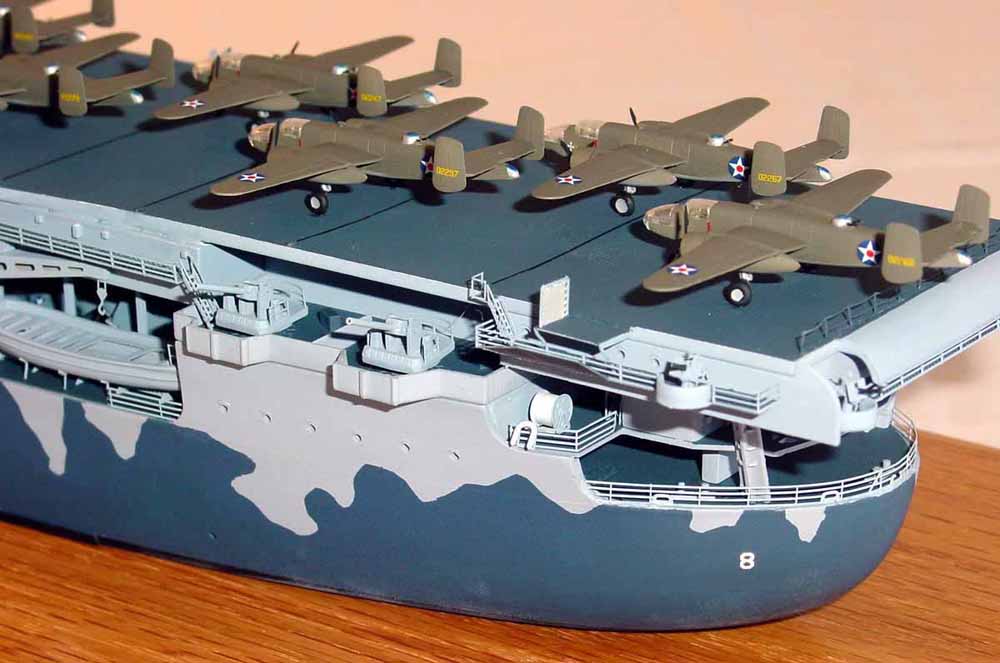
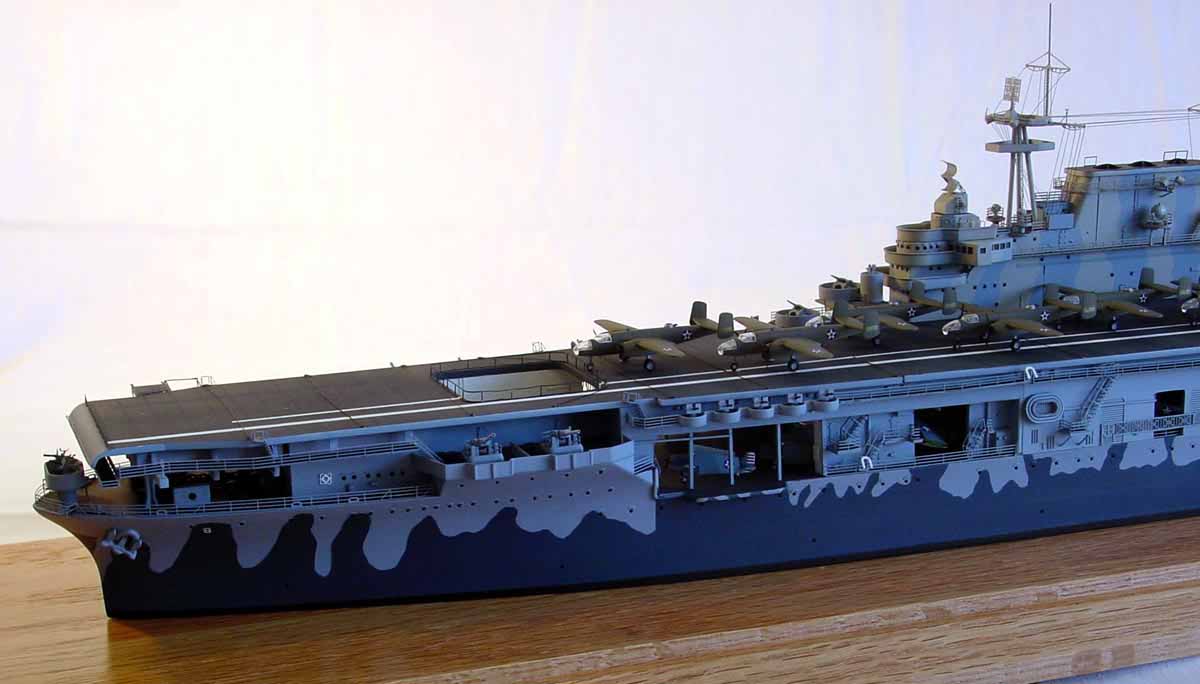
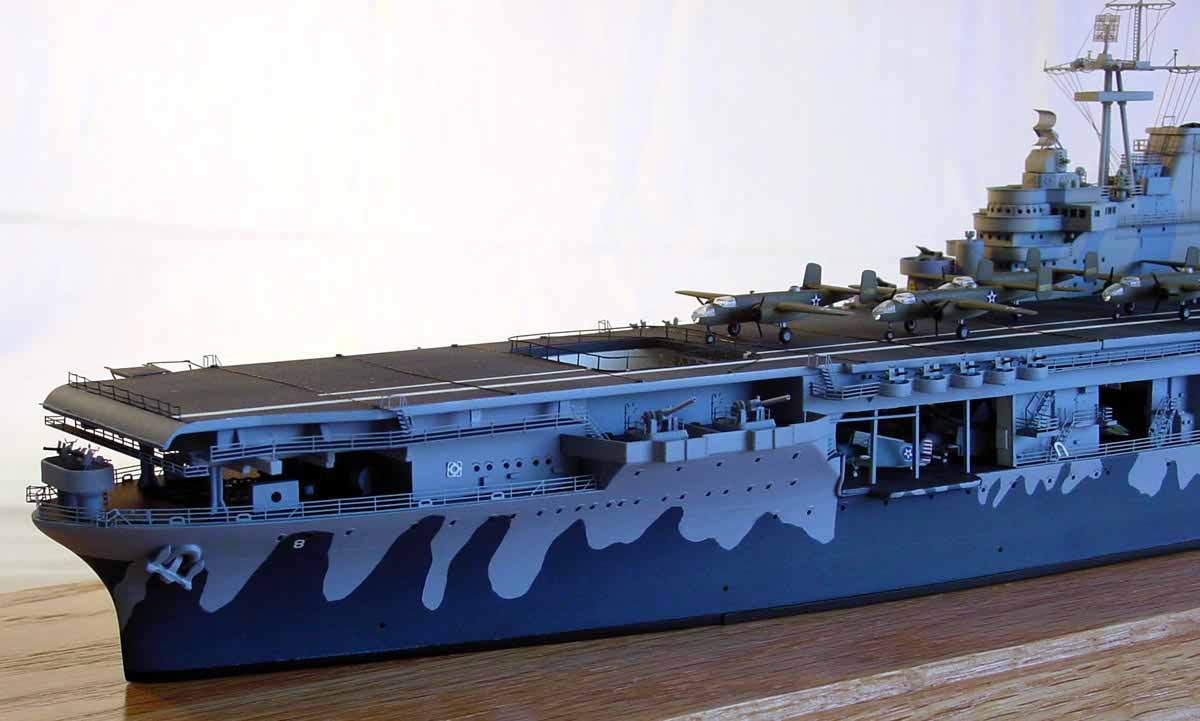
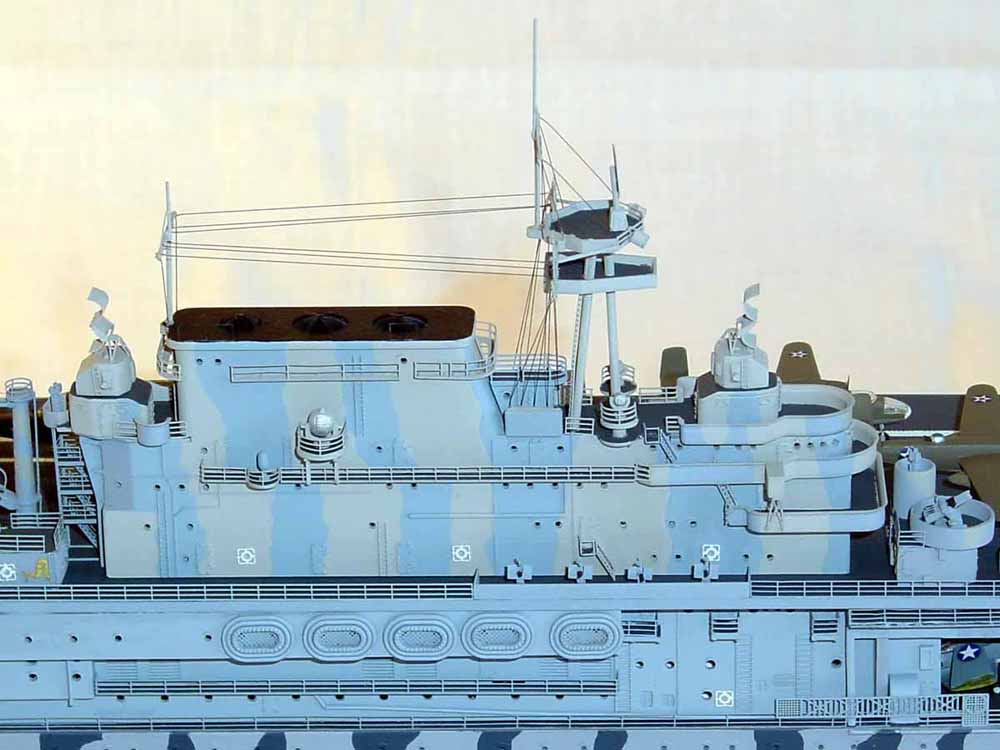
I then applied the Modified Measure 12 paint scheme. Hull number
decals from Classic Warships completed the hull work.
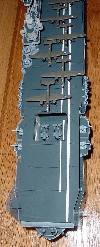
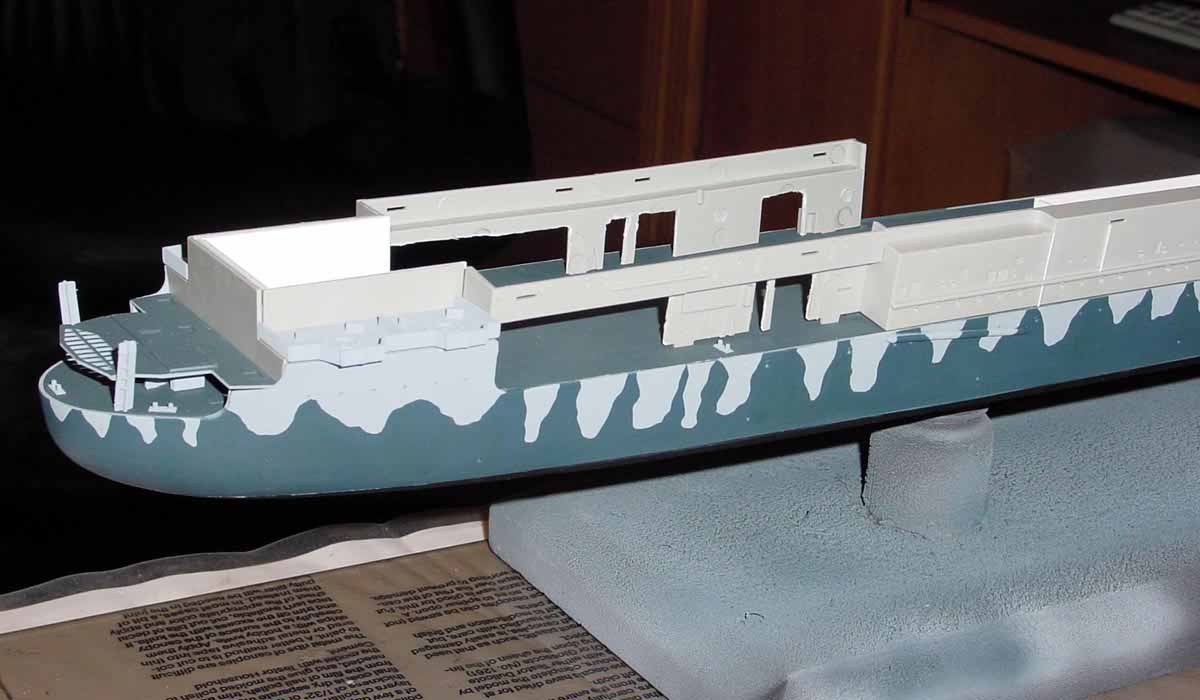
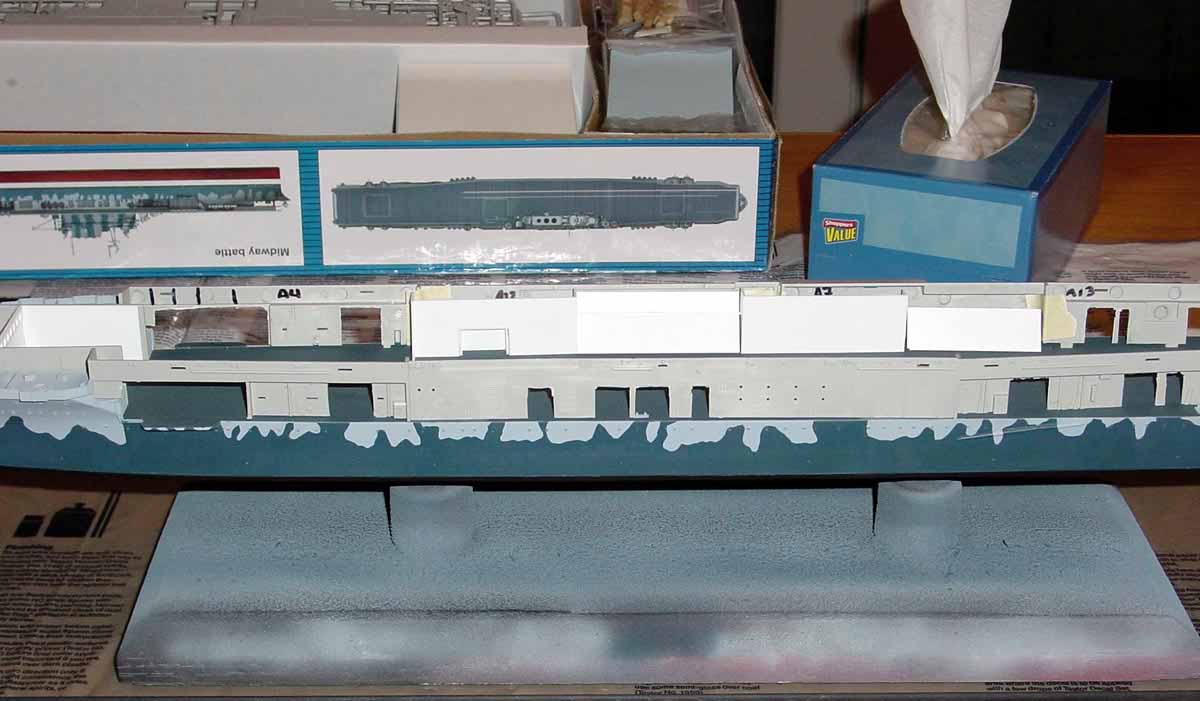
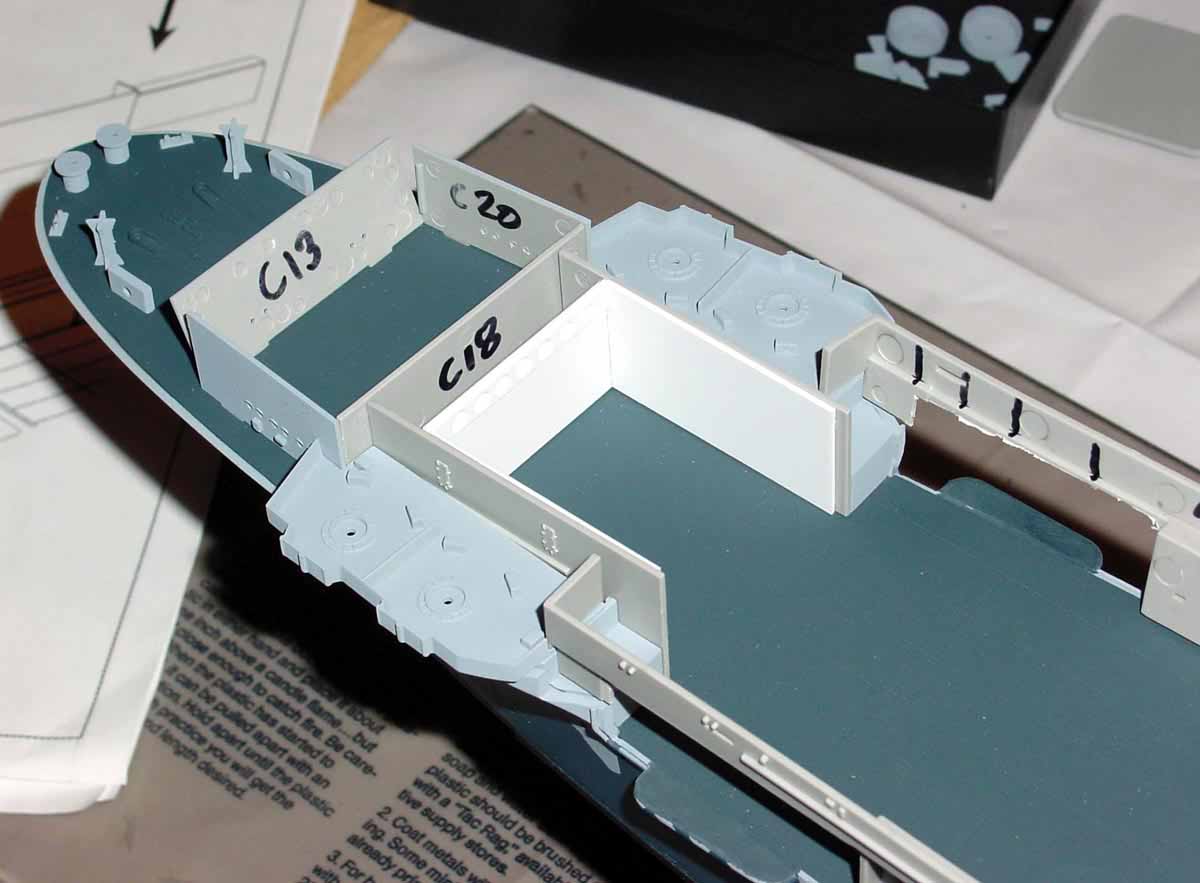
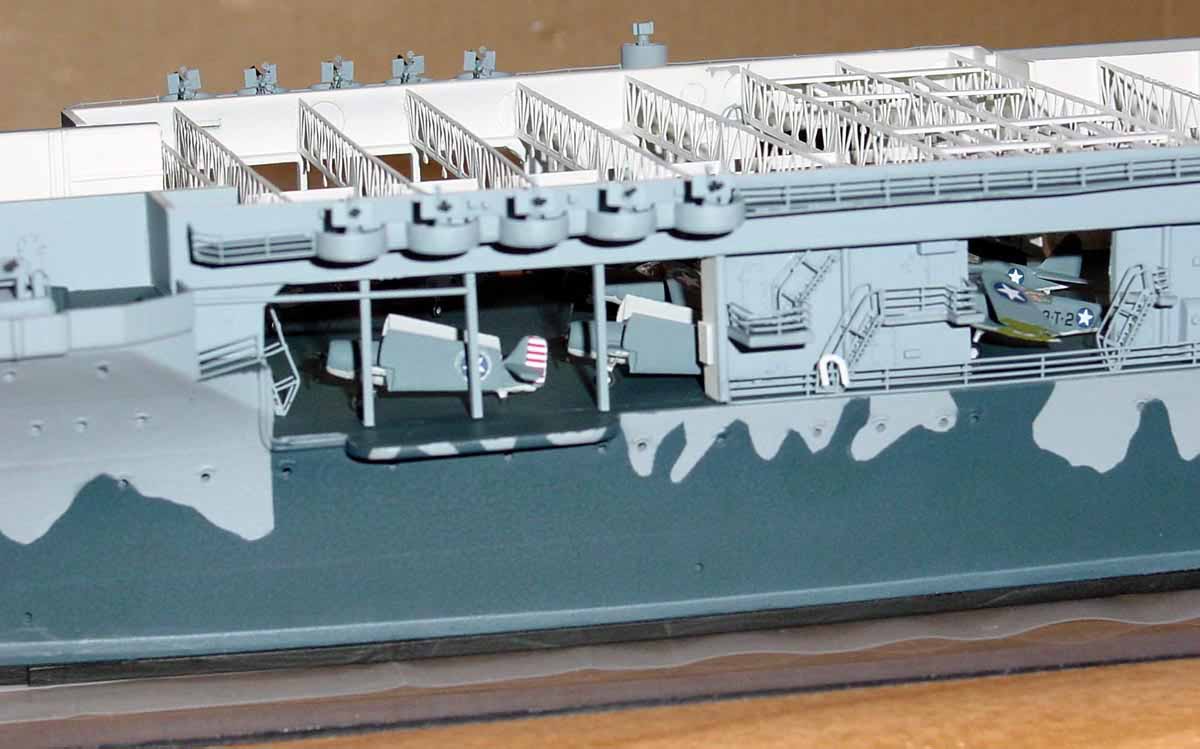
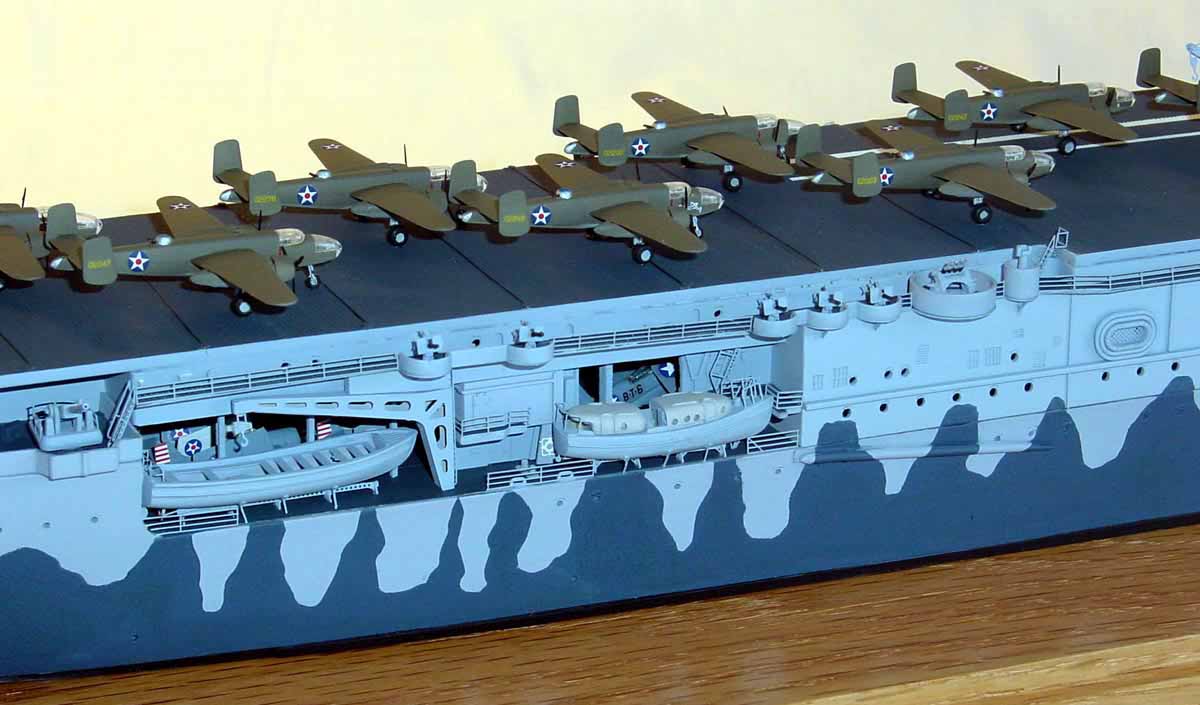
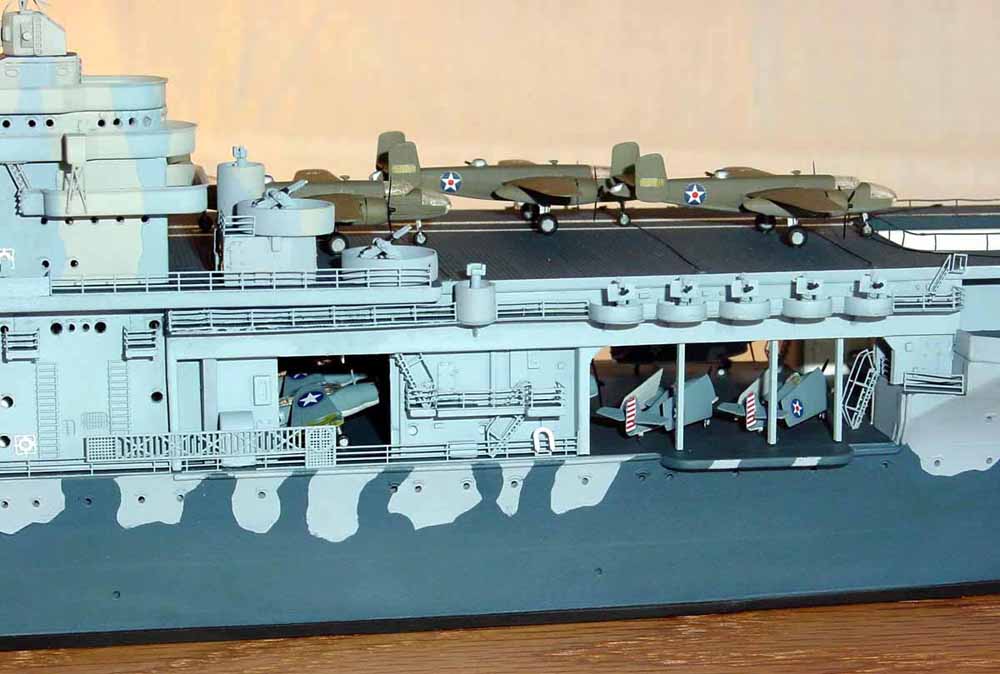
The hangar deck and forecastle were added to the hull along with various
deck fittings. I sanded off the molded on anchor chain to make room
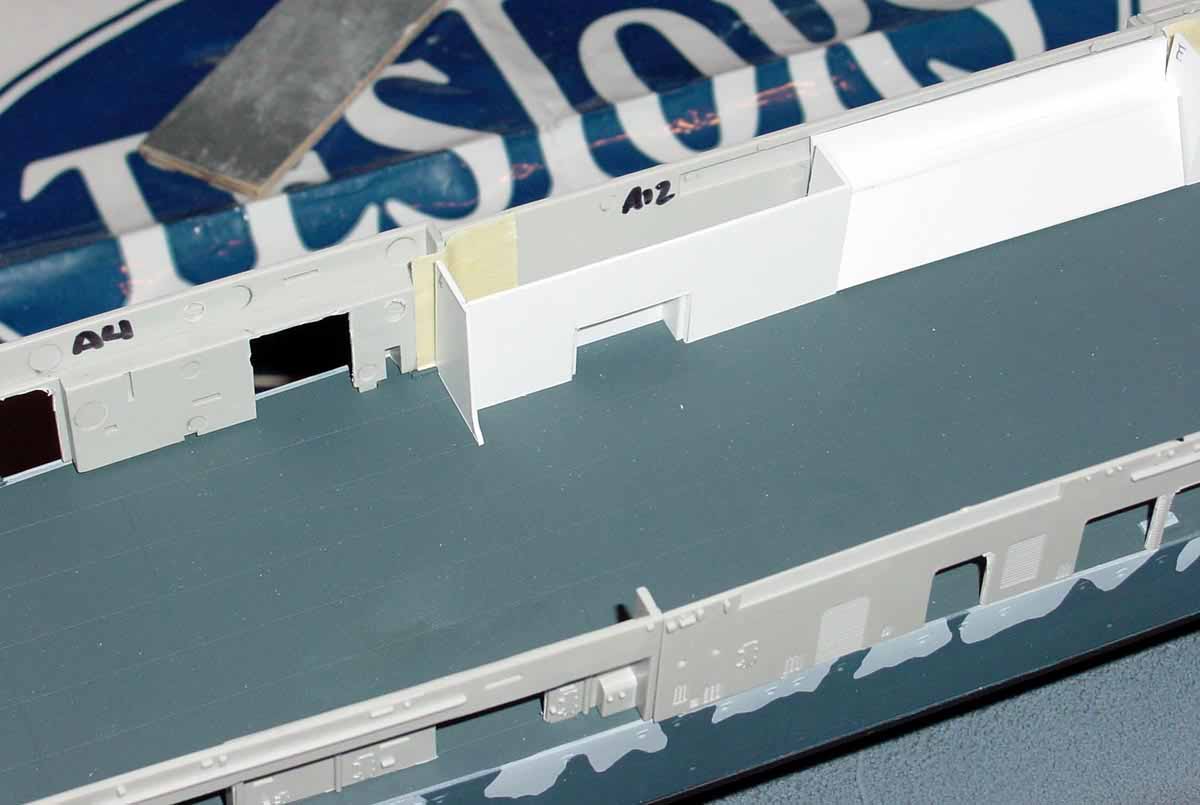
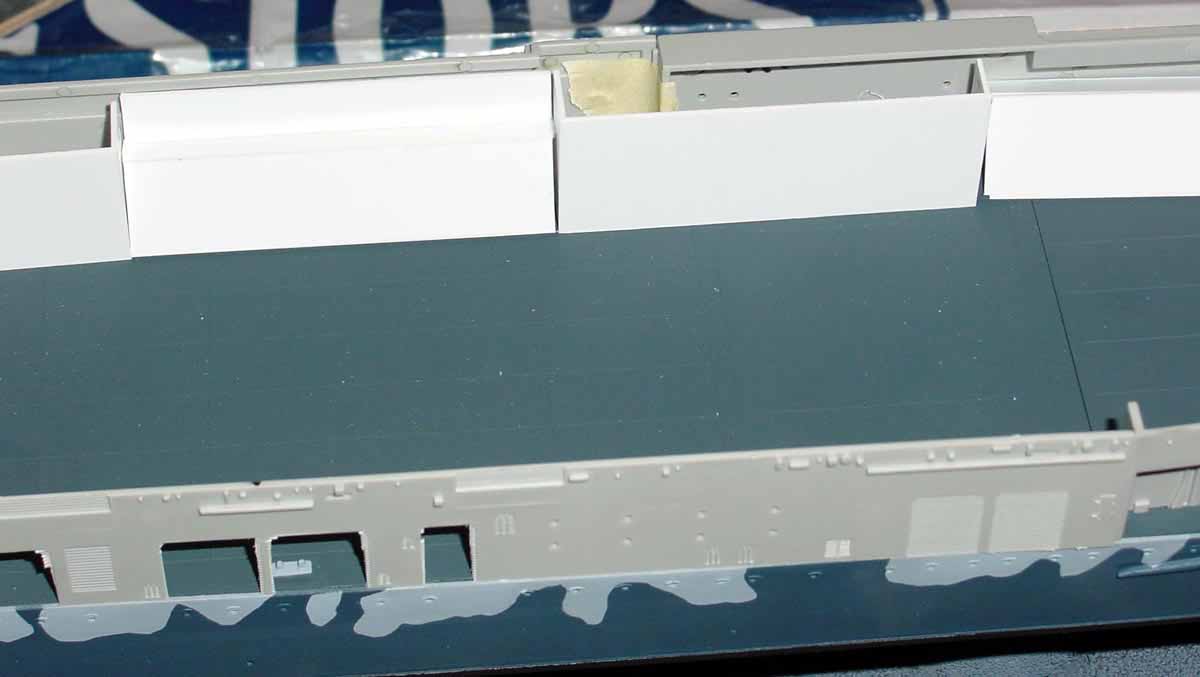
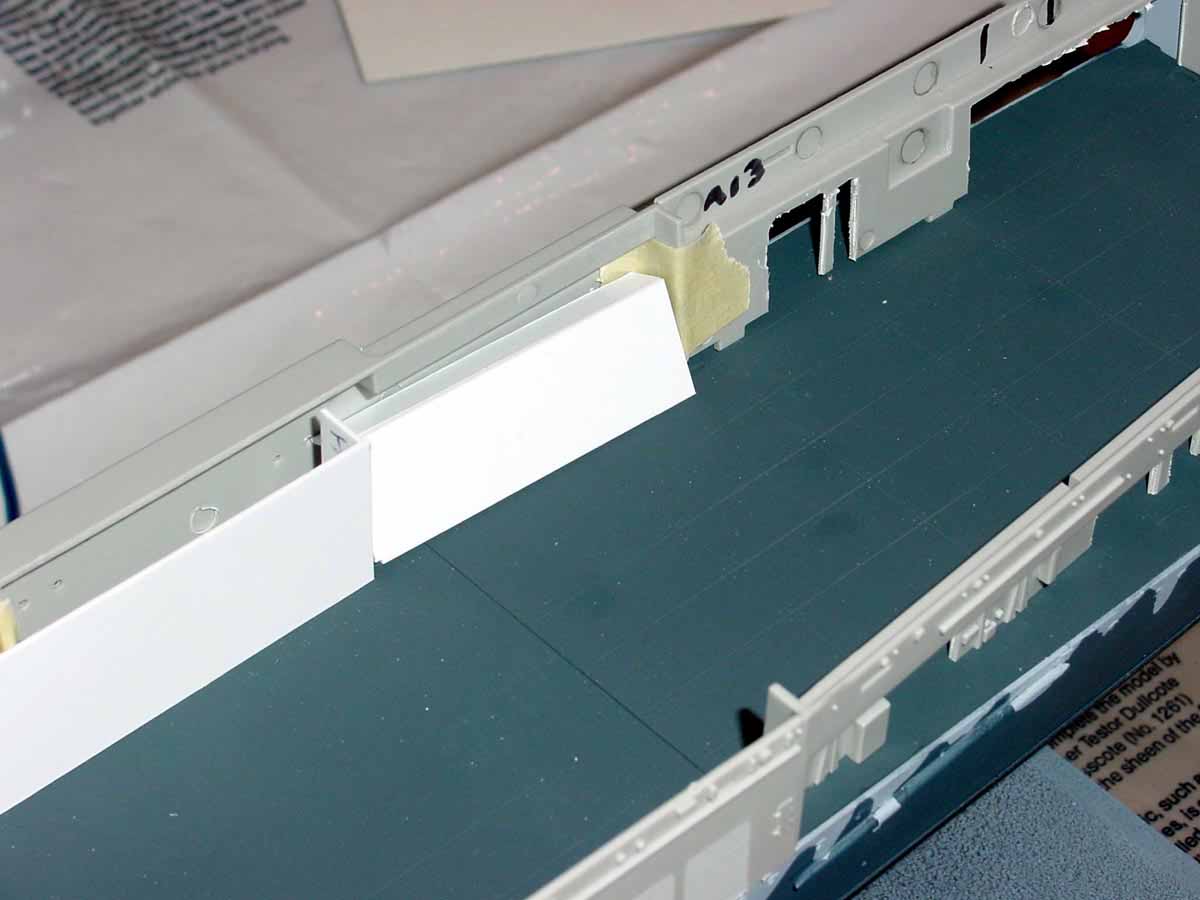
for jewelry chain. The next step was to add on the hangar deck walls.
Before I did this, I cut out the roller curtains so that the interior of
the hangar deck could be seen. Once completed, I added these parts
to the hull. Be careful and test fit these as the starboard kit parts
dont fit well. I had a lot of problems with parts A4 and A12 that
would later complicated adding GMMs PE catwalks. I would suggest
adding the hangar deck walls by starting forward and working aft.
|
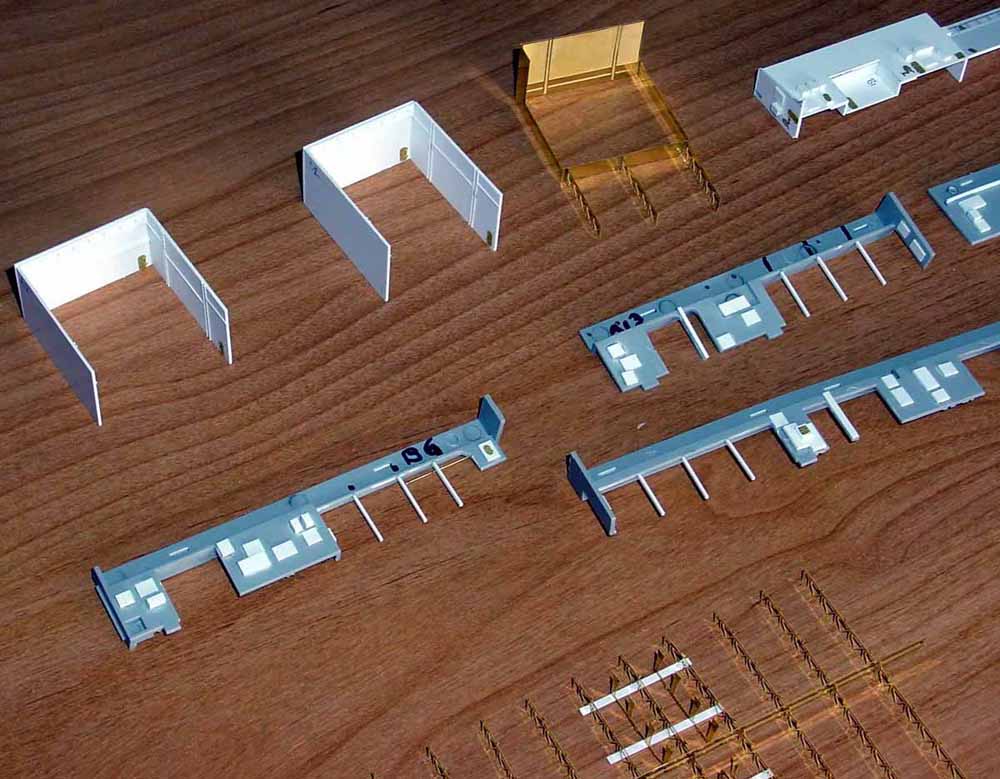
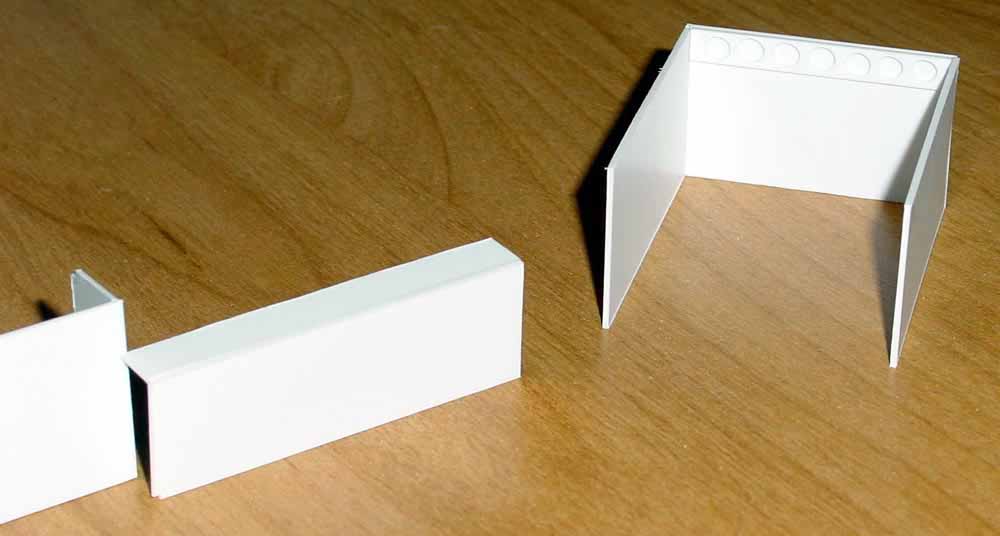
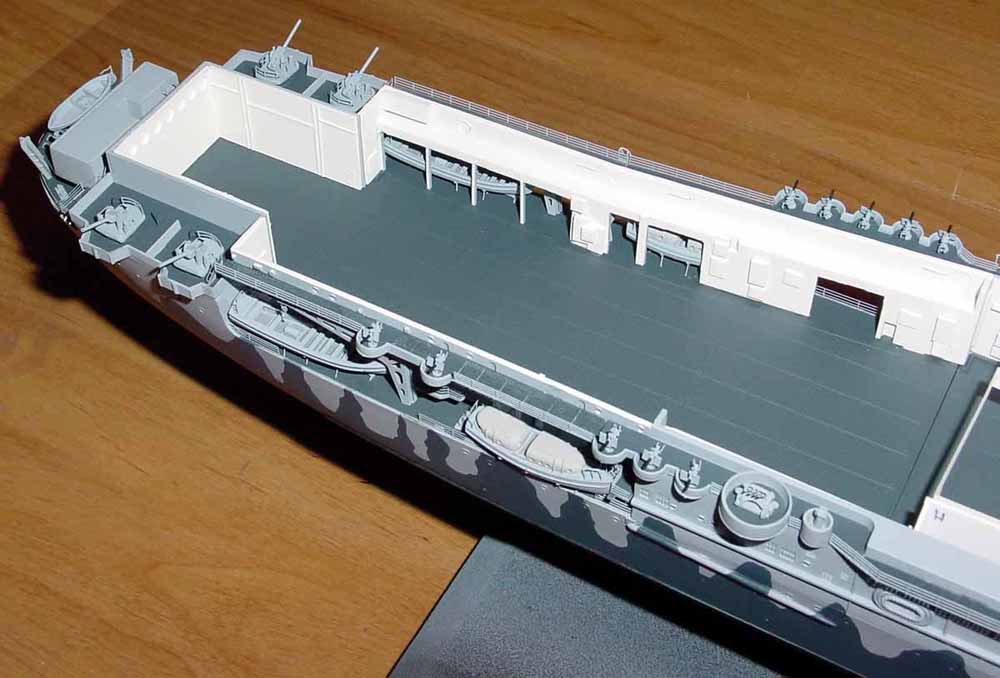
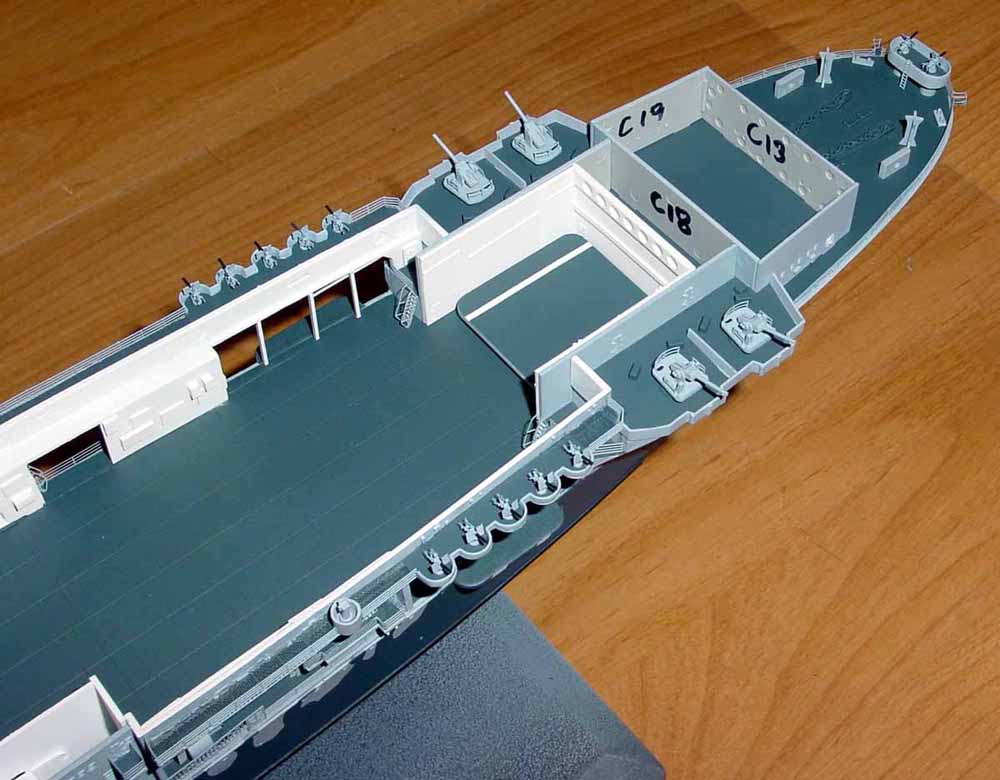
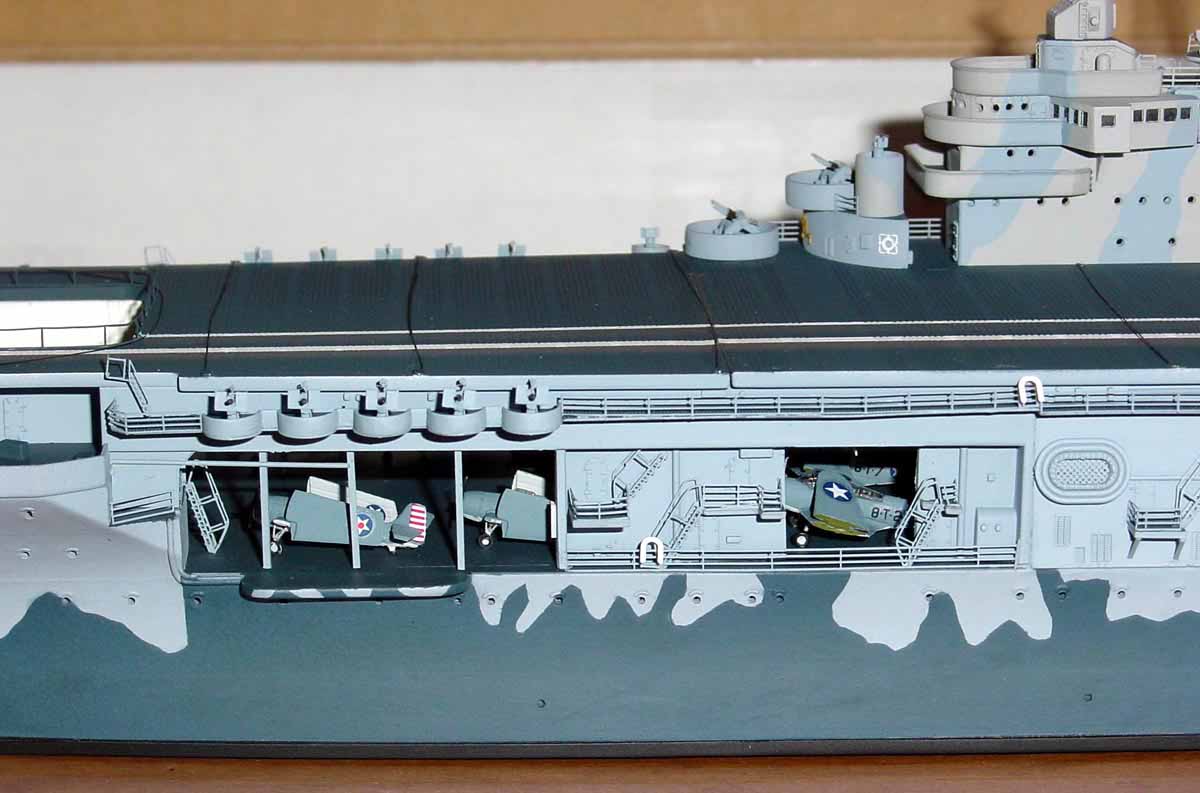
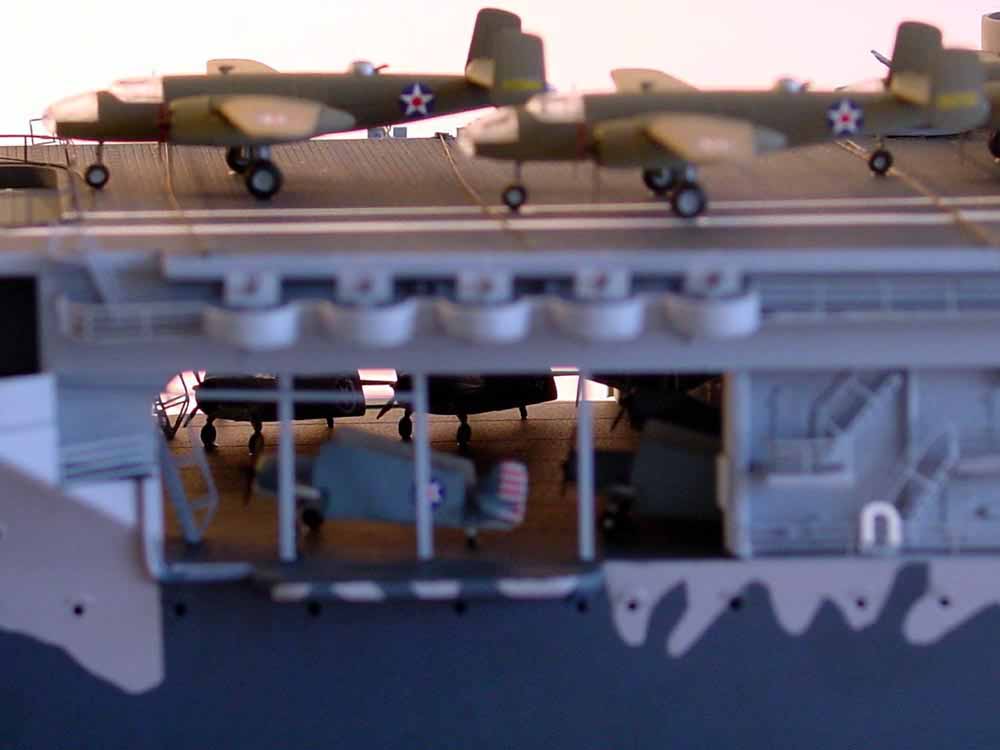
| The hangar deck interior was built using WEMs Interior
Fittings and Accessories set. This set comprises PE overhead girders
and vents and templates for assembling the hangar deck walls. Assembly
of the overhead girders was straightforward and their installation inside
the hangar deck was perfect once the main longitudinal truss aft was cut
short to fit properly. I used the templates in the set to assemble
the interior walls. I added bits of styrene and spare PE doors and
fittings to add detail to the interior. The fit of my scratchbuilt
walls was right-on. |
 |
 |
|
|
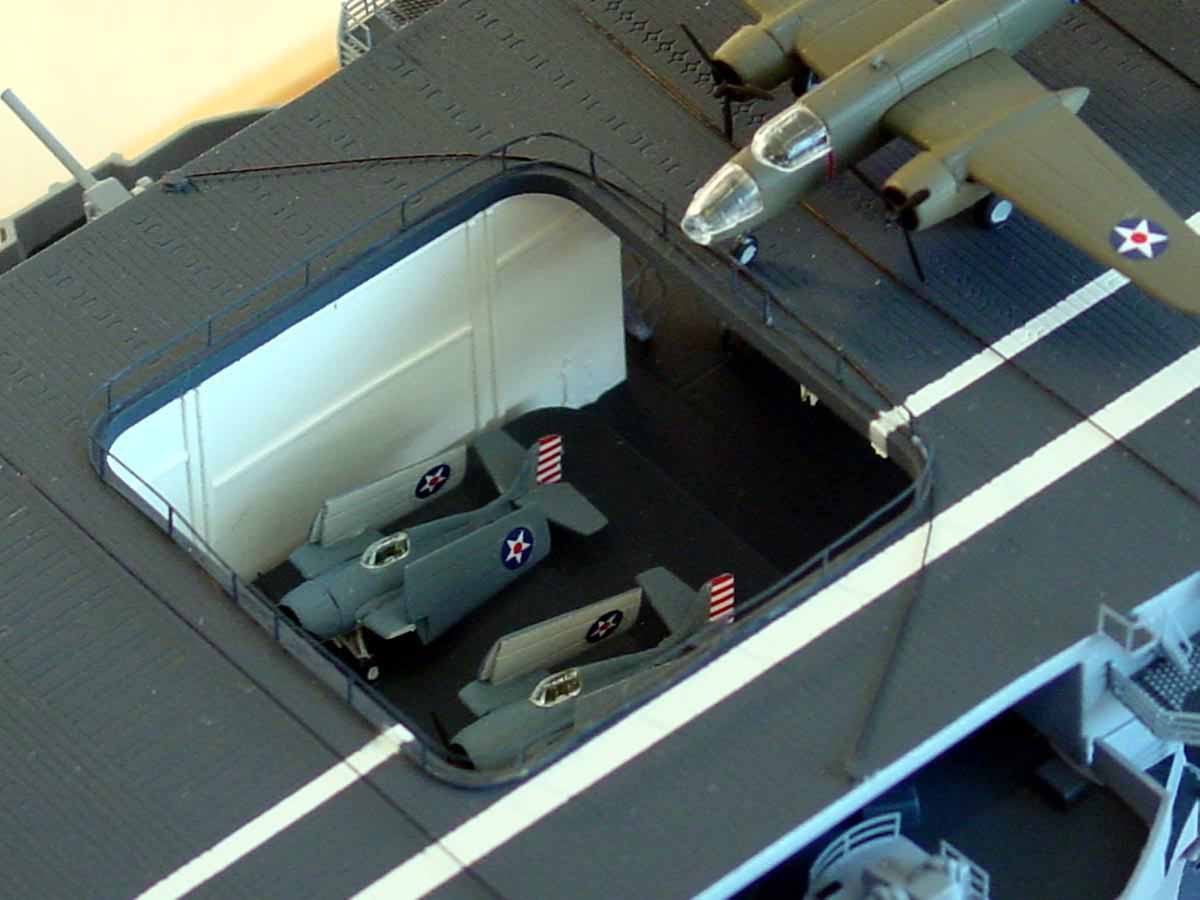
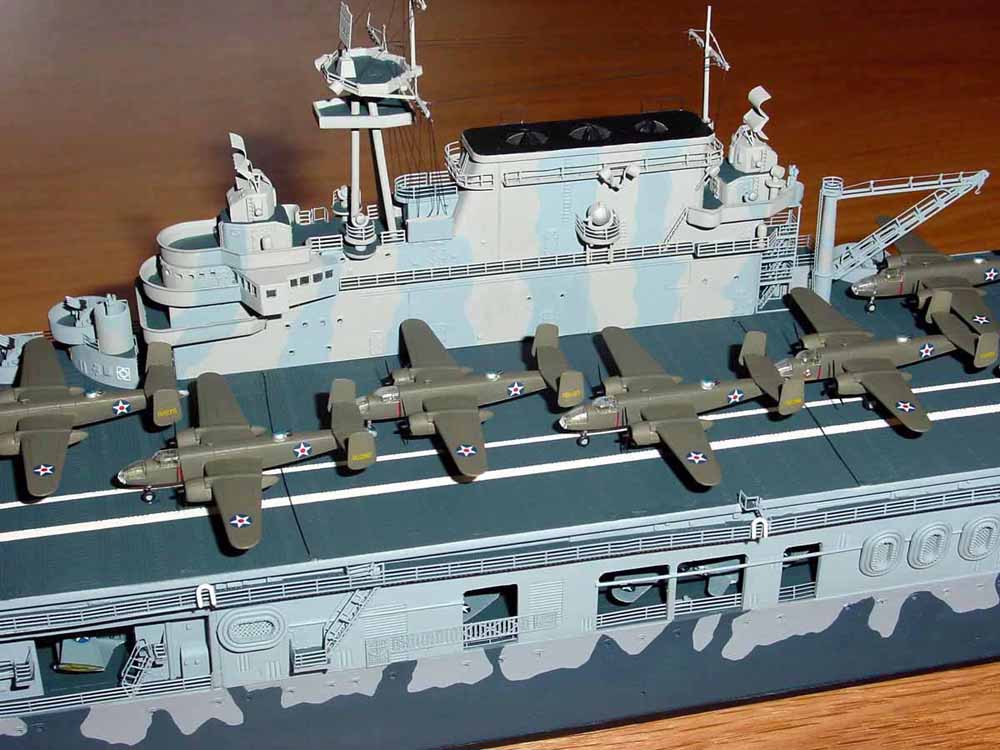
| Once painted, I added the interior walls to the hangar
deck. Before the girders were installed, the F4Fs, TDBs, and SBDs
that made up the airwing were emplaced with white glue. Since I did
not build an entire airwing, I liberally arranged the aircraft to give
the illusion of a full compliment of aircraft.
|
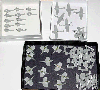
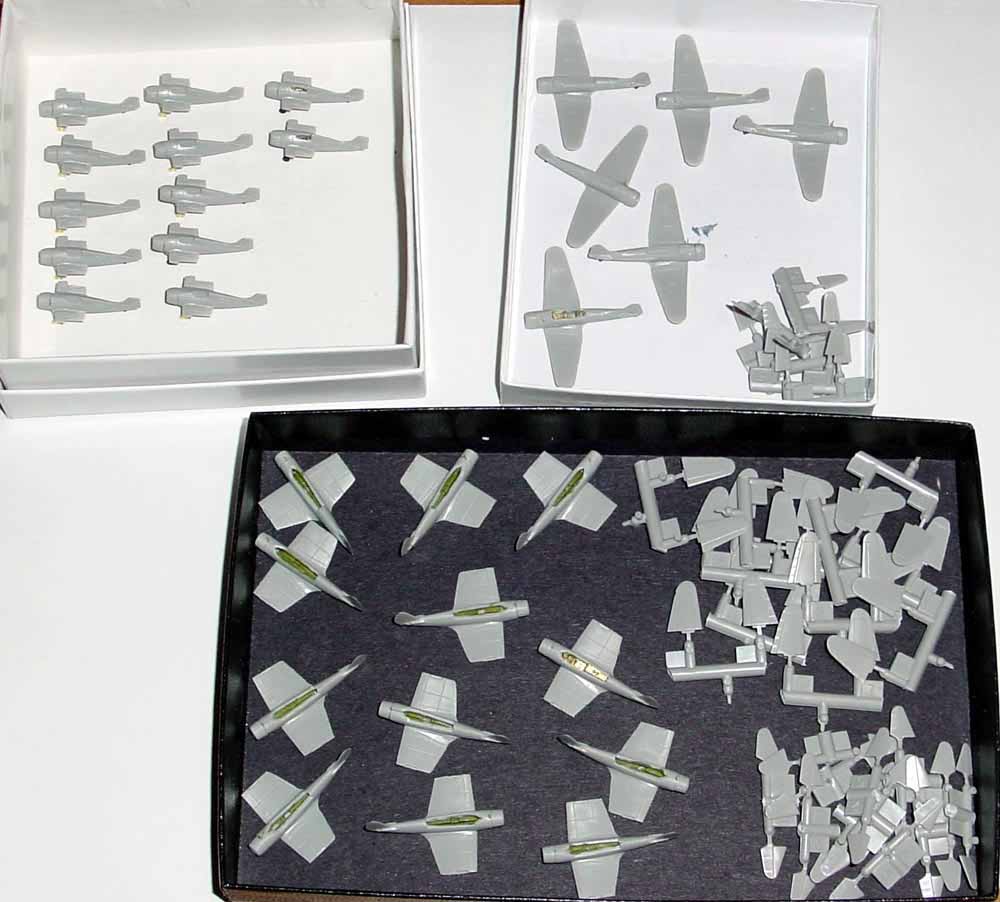
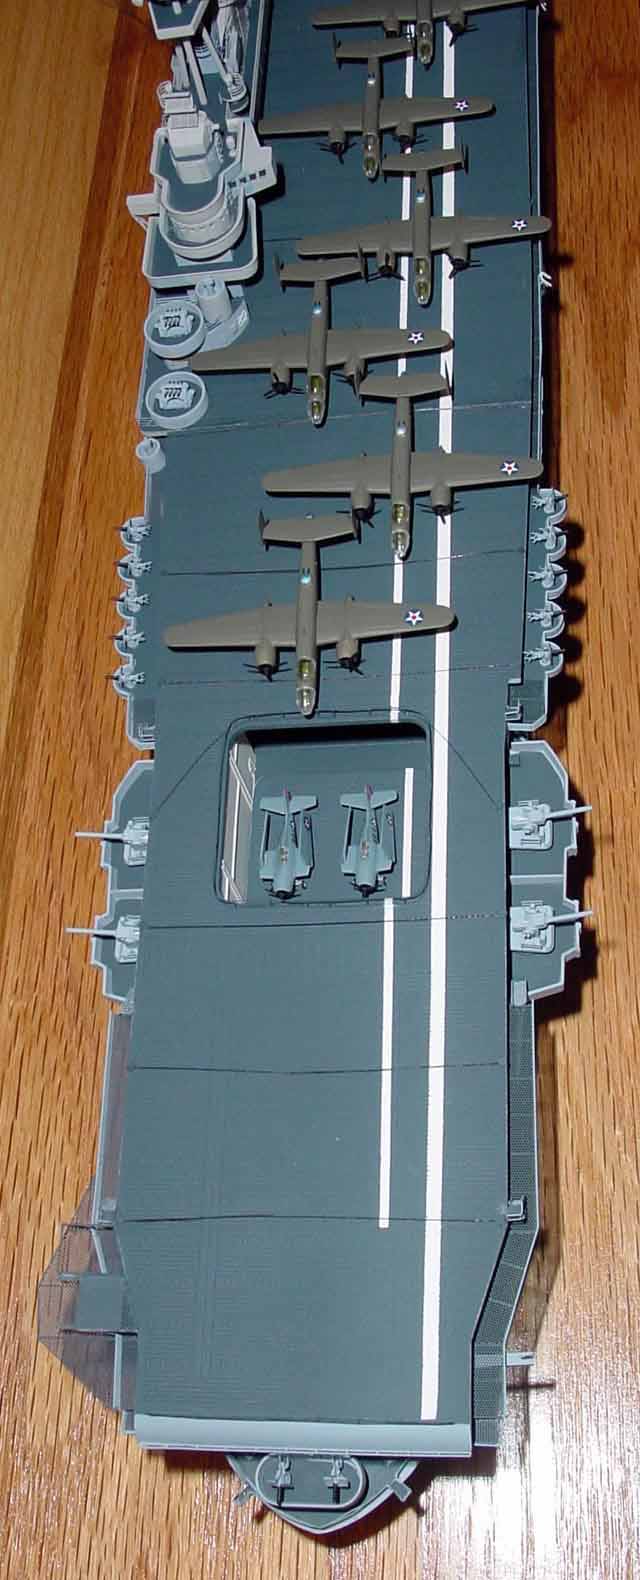
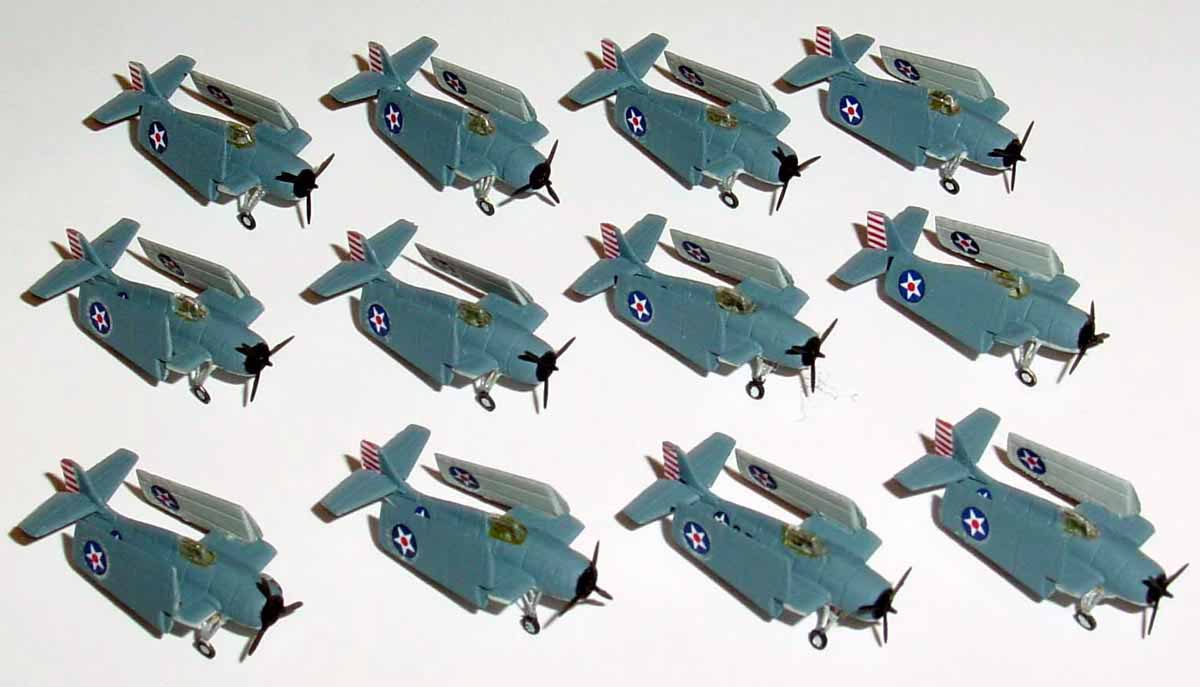
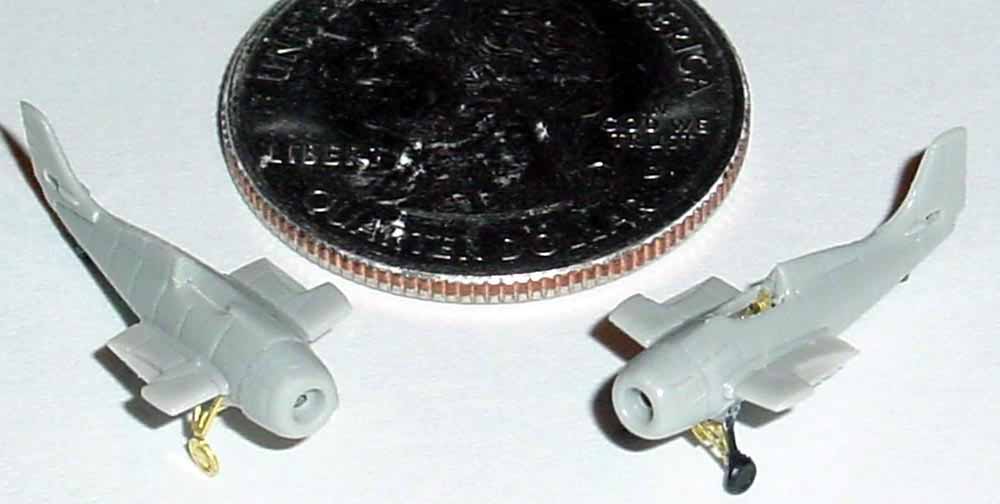
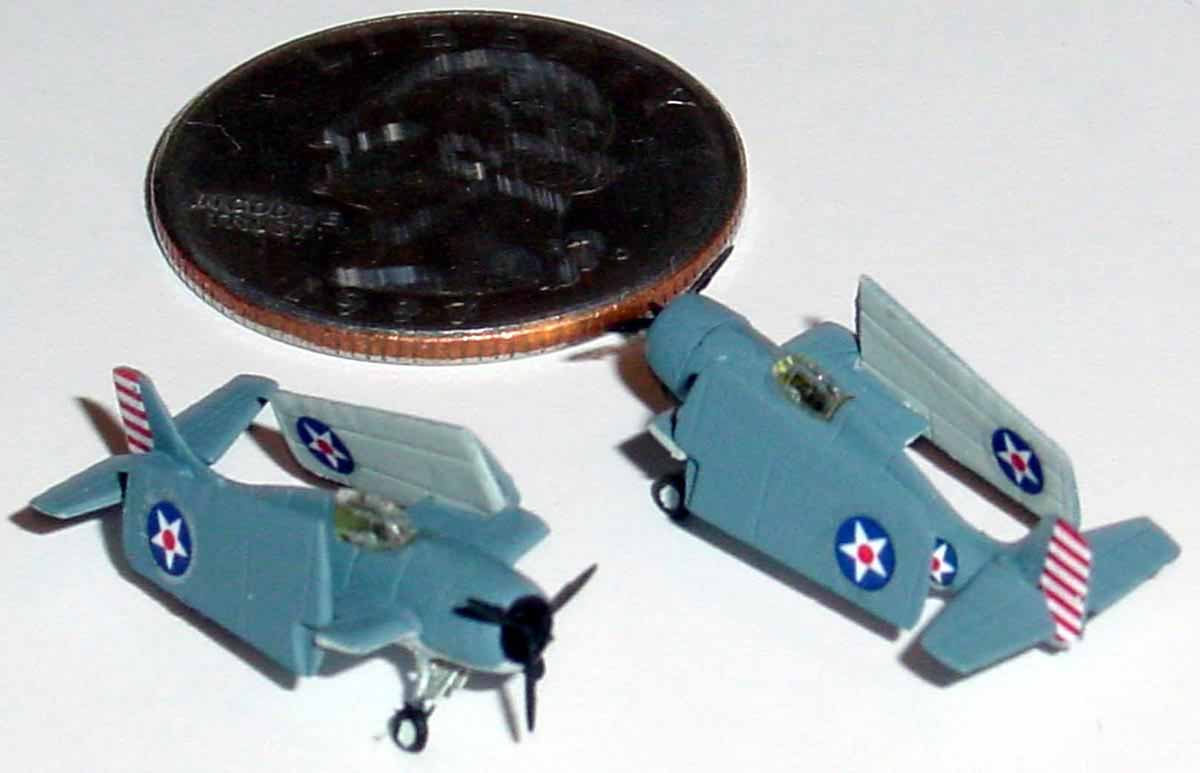
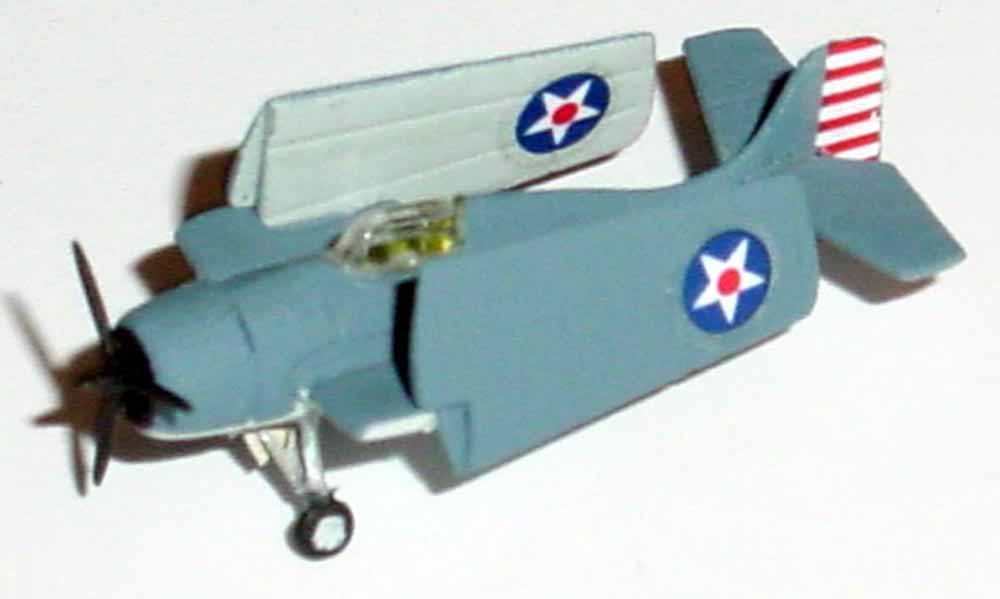
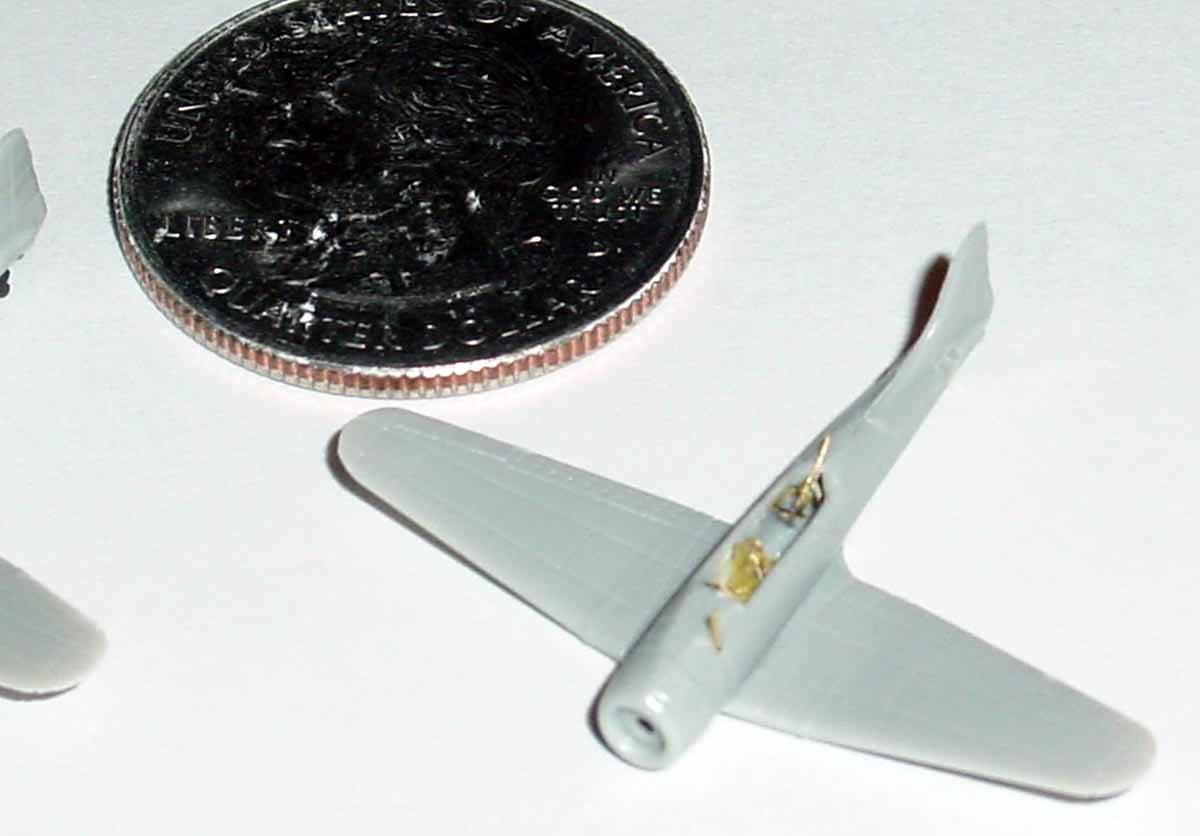
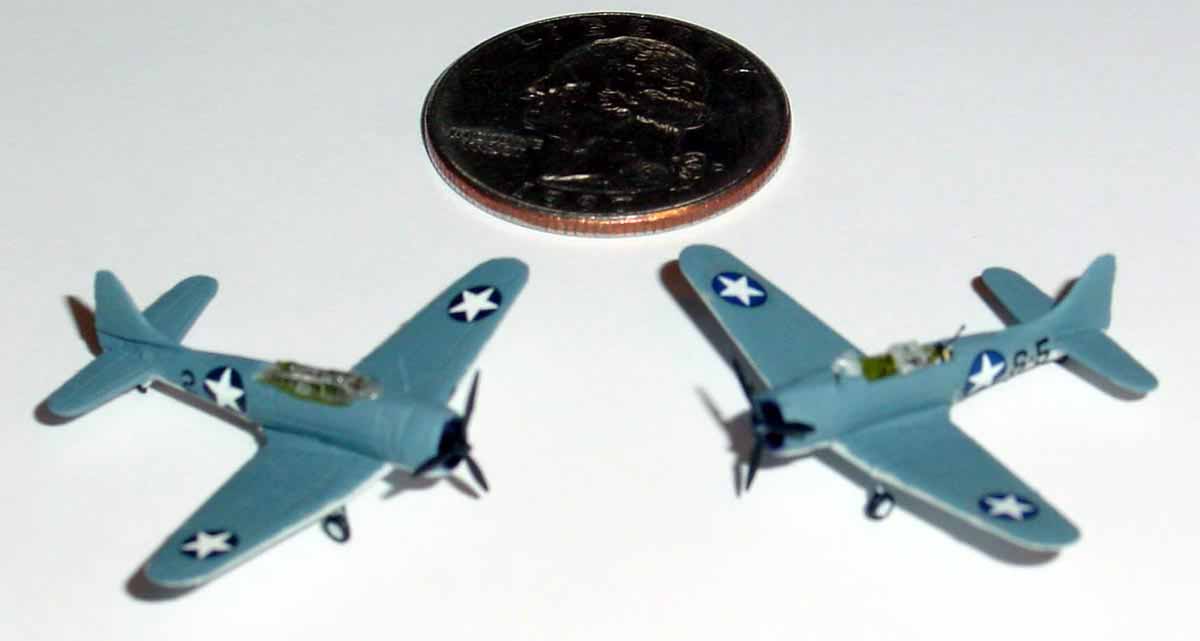
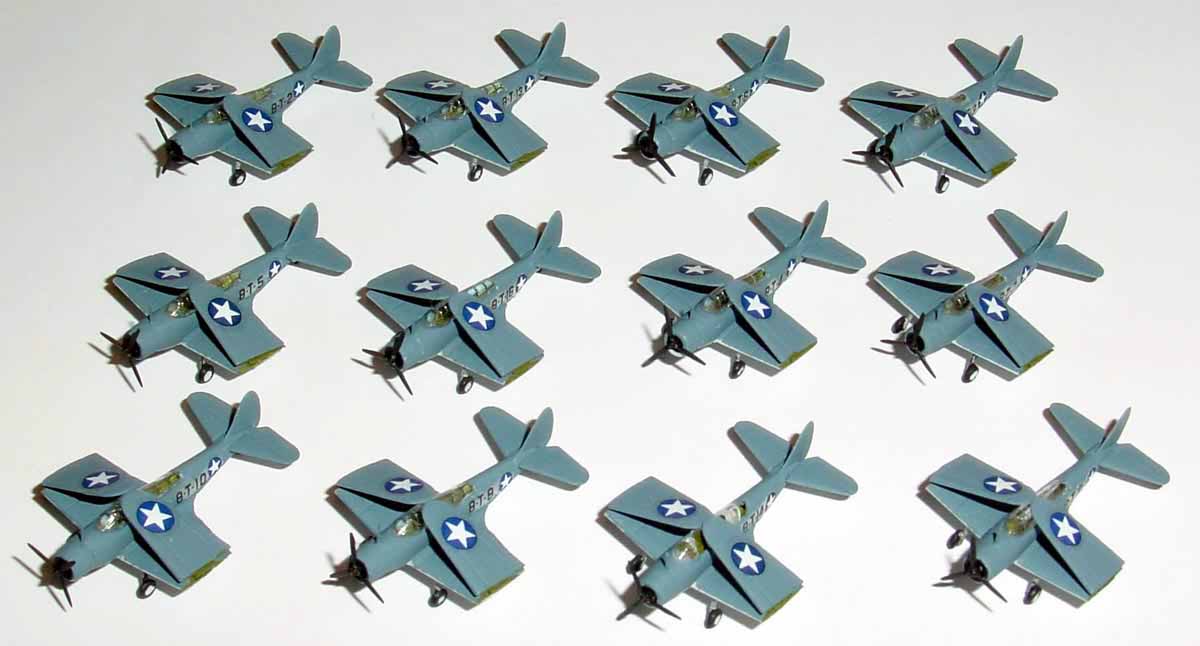
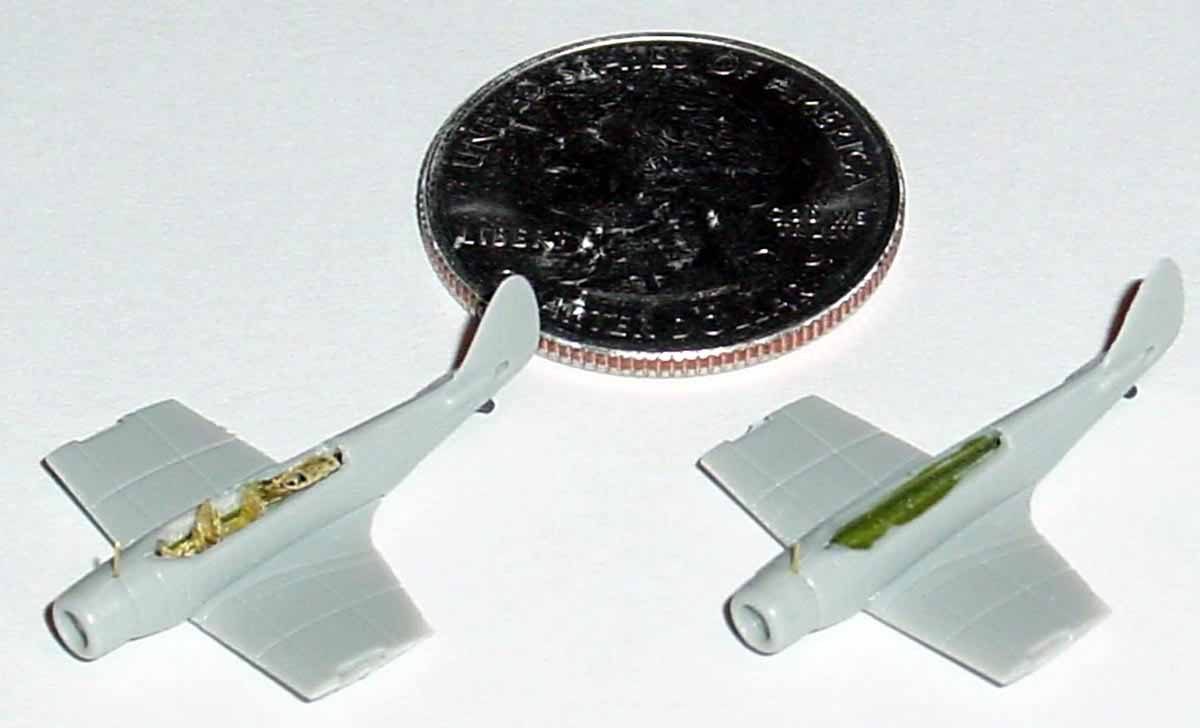
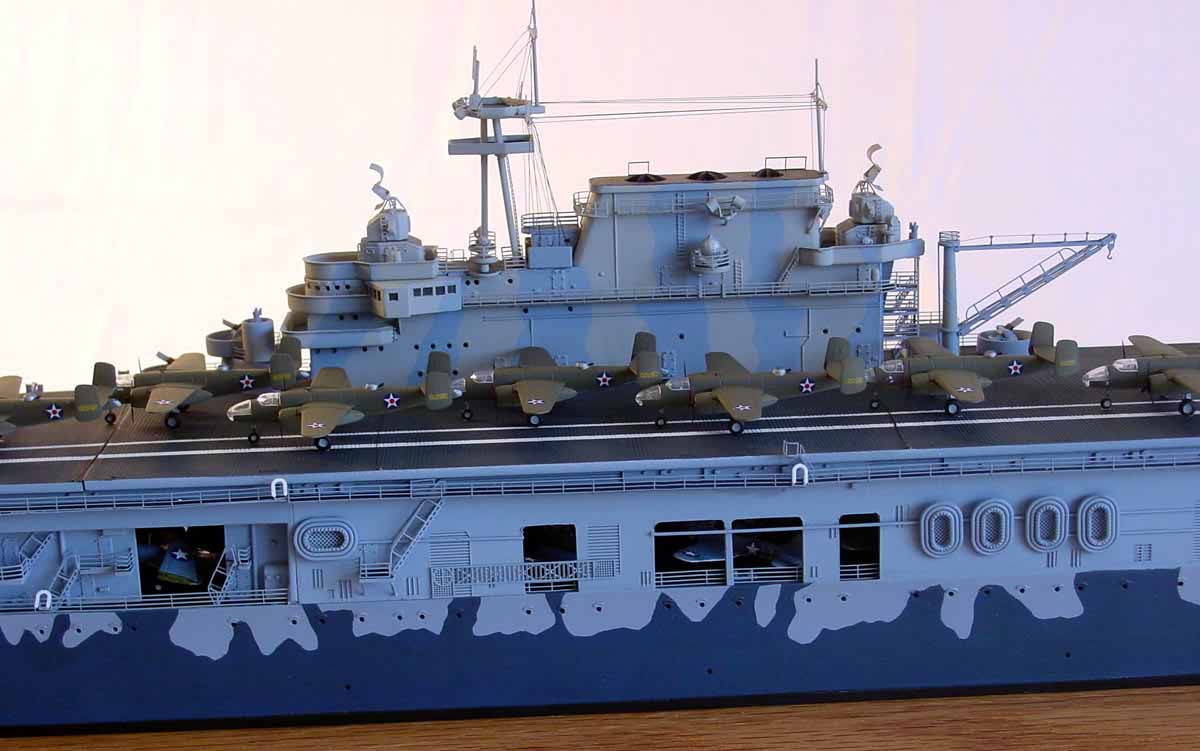
| For my build, I assembled 46 aircraft 12 F4F Wildcats,
12 TBD Devastators, 6 SBDs, and 16 B-25s. Each aircraft is in itself
a mini-kit, with separate wings, fuselages, nacelles, propellers, and landing
gear. PE brass from GMMs USN aircraft set and WEM
The Airwing set added extra details to each. For the USN aircraft,
I used decals provided in GMMs 1/350 WW2 USN
Aircraft Insignia Decals (GMM 350-6D) since the decals provided in
the kit are incorrect for April 1942. At that time, the US Navy still
had the red meatball in the center of the star. The decals settled
down well with SolvasetTM. Testors Dullcoat sealed the decals. |
|
|
| The aircraft are finely molded in plastic with exceptional detail.
Even the propellers look incredible and PE equivalents may not be required.
All the aircraft were assembled as indicated by the instructions.
The seams required minor filling with superglue and sanding with 400-grit
sandpaper. |
 |
|
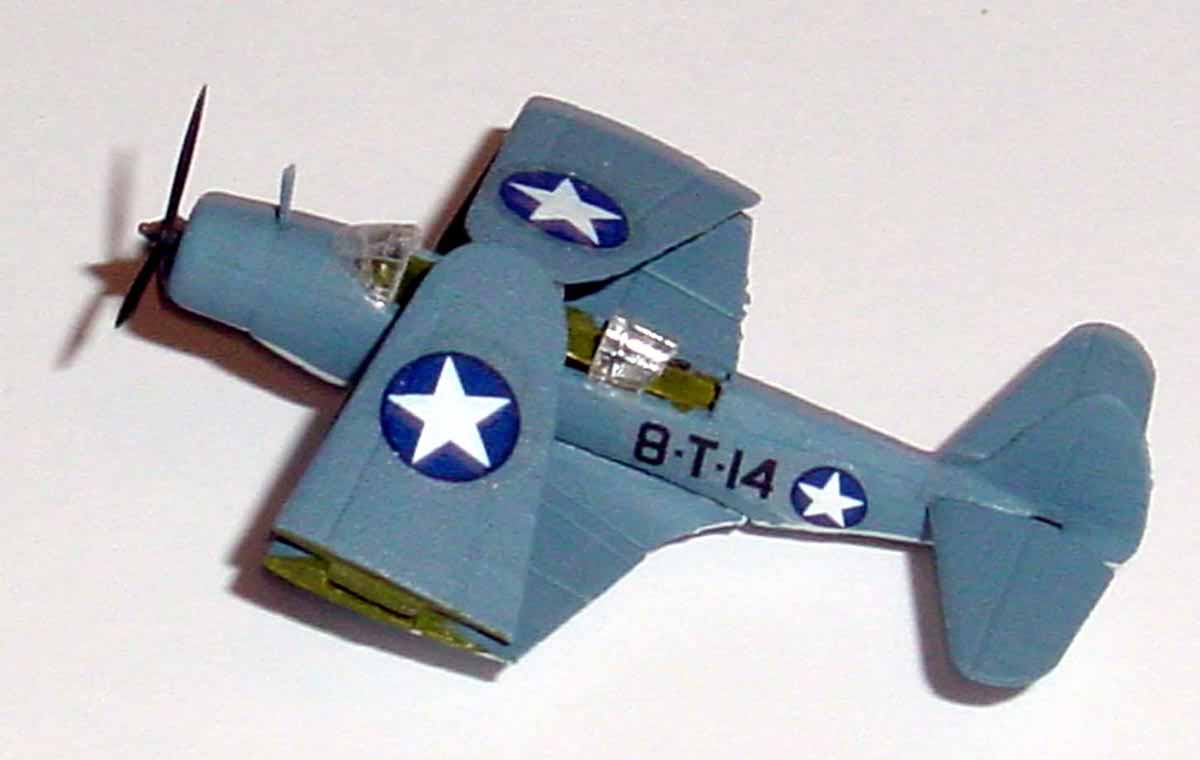
The F4F Wildcats
|
| The F4F Wildcats are cool little aircraft when assembled.
All of mine were assembled with the wings folded, although there is option
to have the wings extended. Be careful with the horizontal stabilizers,
as they did not fit well into the guide holes in the fuselage. GMM
provides parts for the complex landing gear arrangement. For two
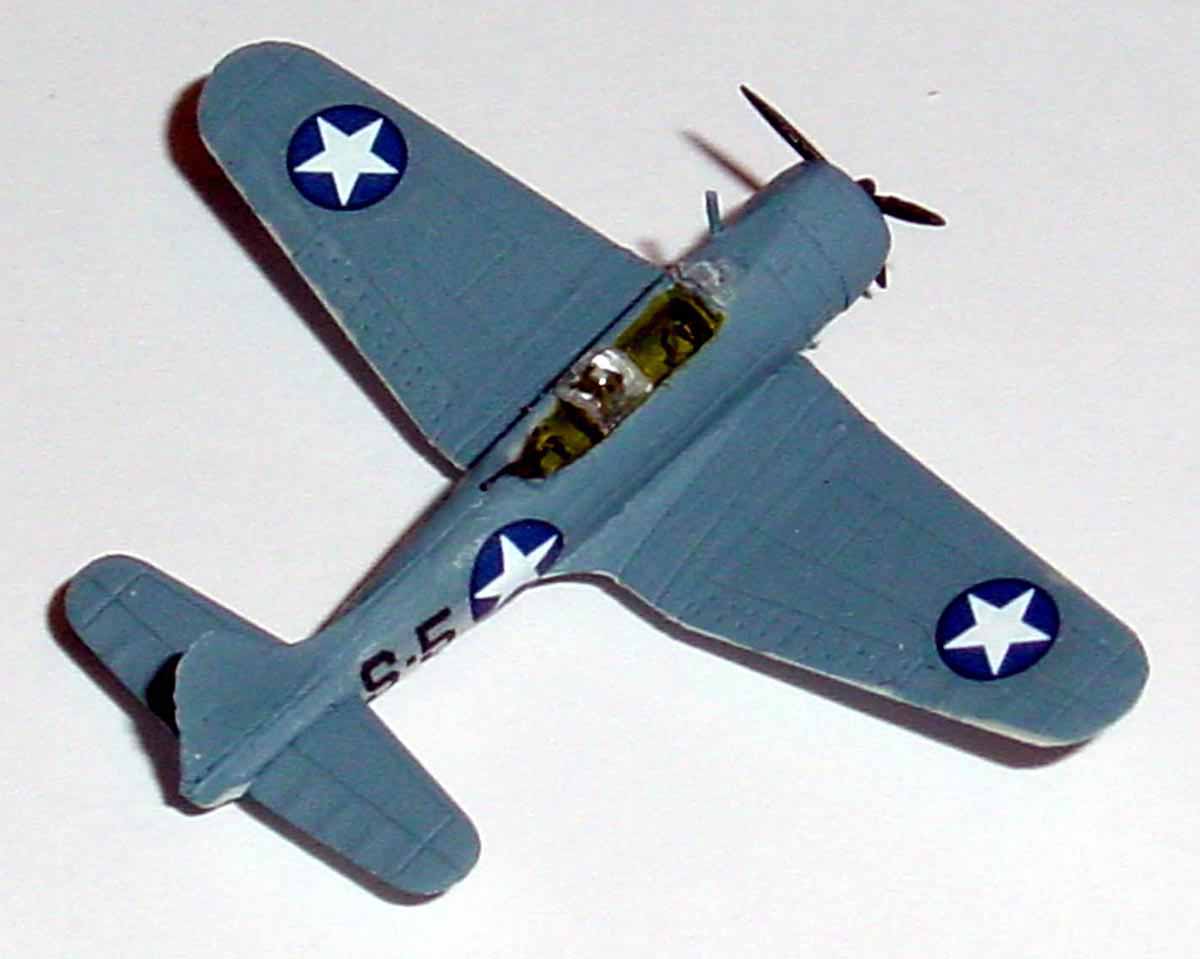
aircraft, I hollowed out the cockpit and added parts from the WEM PE set.
These extras included an instrument panel, floor, seat, and control
stick. Although the PE parts were tiny, careful handling and placement
led to good results.
|
|
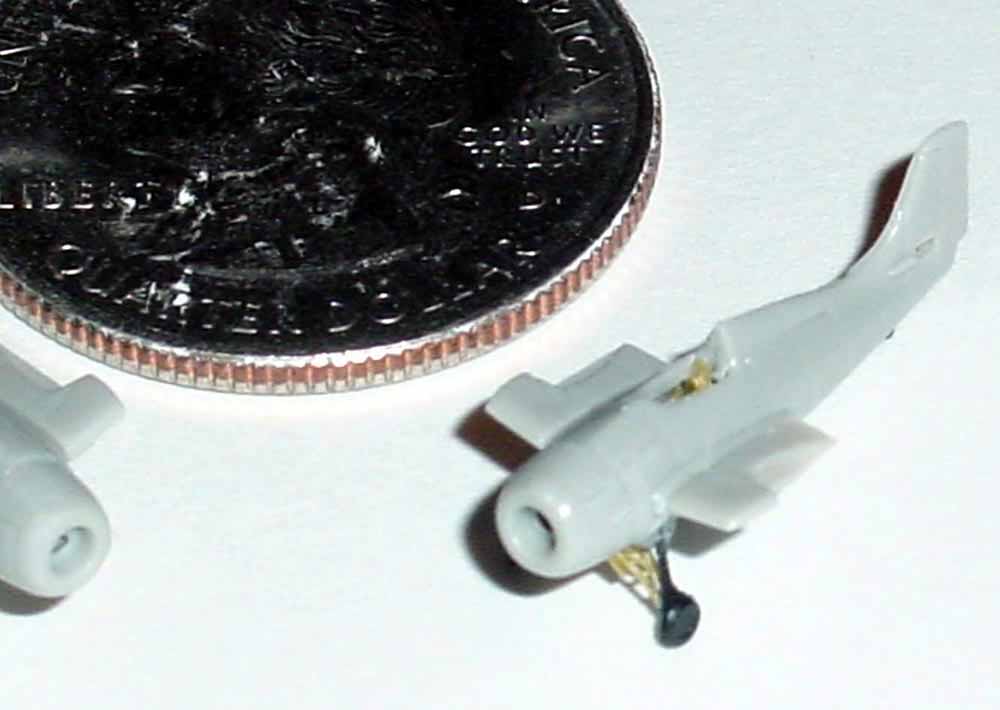
The SBD Dauntless Dive Bombers
|
| The SBDs were easy to assemble. The fit was good
except at the wing root. To hide the seam, I used a combination of
white glue and paint since sanding would have damaged some of the intricate
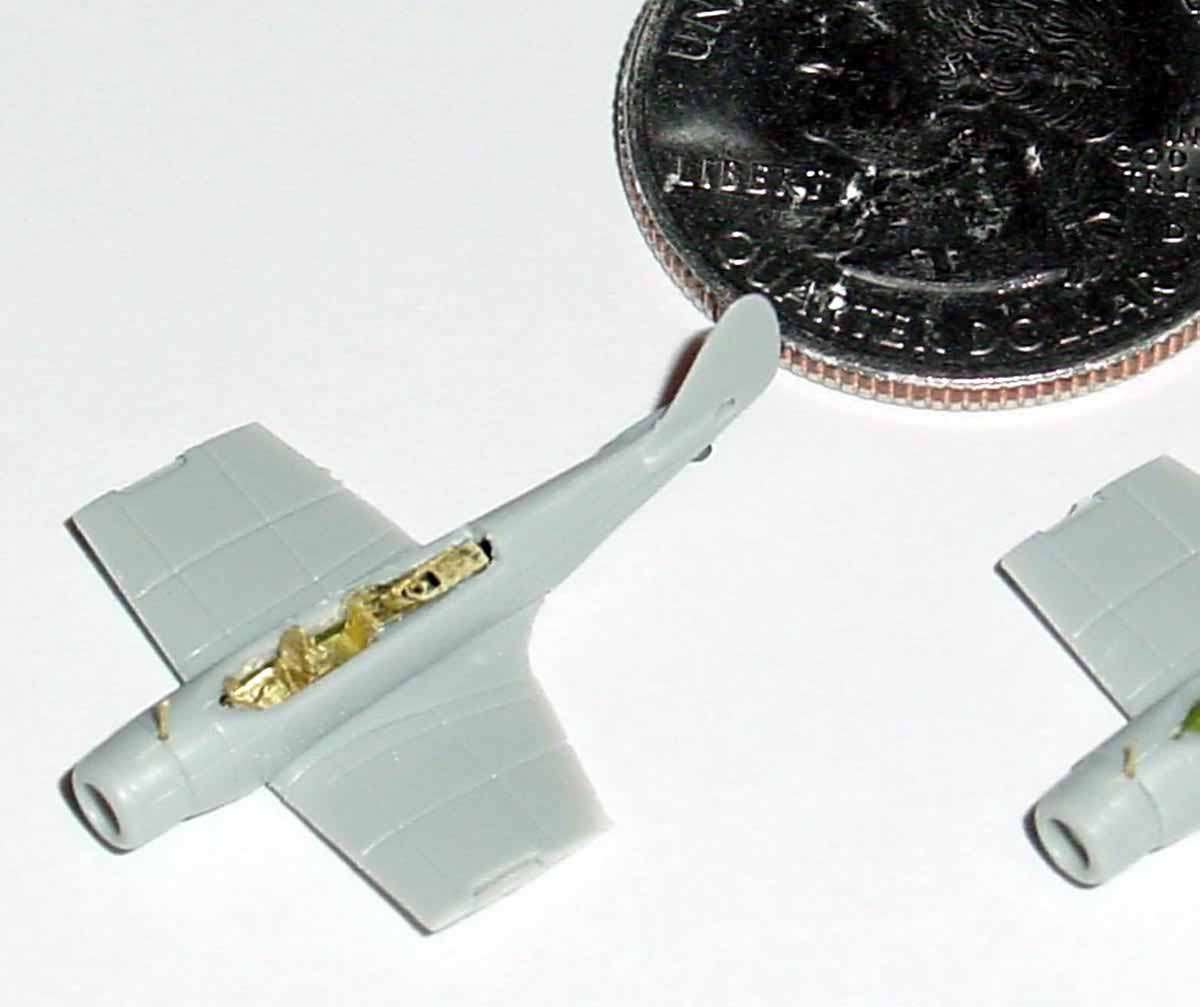
panel lines. For one aircraft, I hollowed out the cockpit and installed
WEM interior details made up of an instrument panel, two seats, bulkhead,
floor, control stick, and machine gun. The result, after cutting
the canopy into two sections, was astonishing. If I had more time,
I would added interior details to all the aircraft.
|
|
The TBD Torpedo Bombers
|
| Like the SBDs, the TBDs were a cinch to assemble but had
a noticeable gap in the wing root to fuselage joint. I installed
WEMs cockpit details to one aircraft and am impressed by how much extra
it adds to the aircraft. WEM provides an instrument panel, seats,
cockpit floor, bulkhead, and machine gun.
|
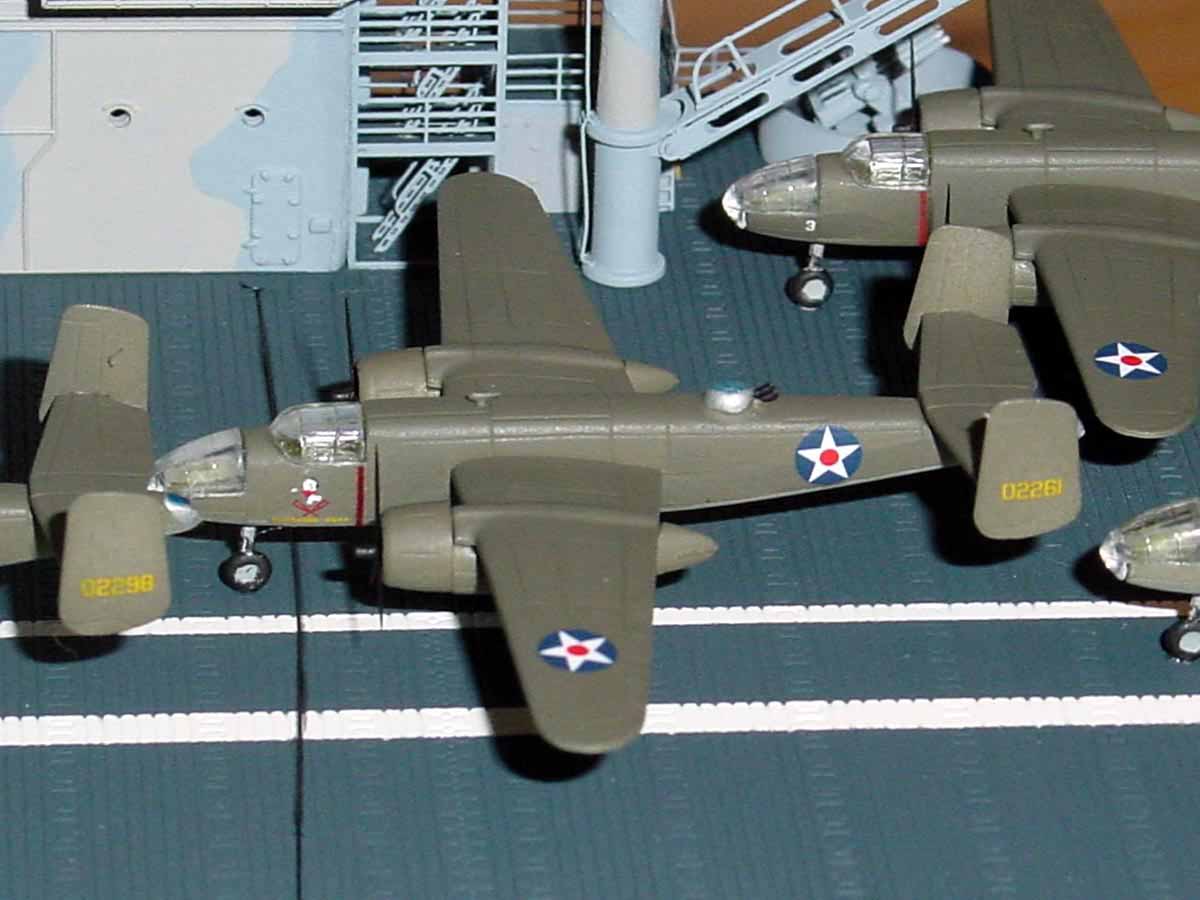
| The B-25 US Army Bombers |
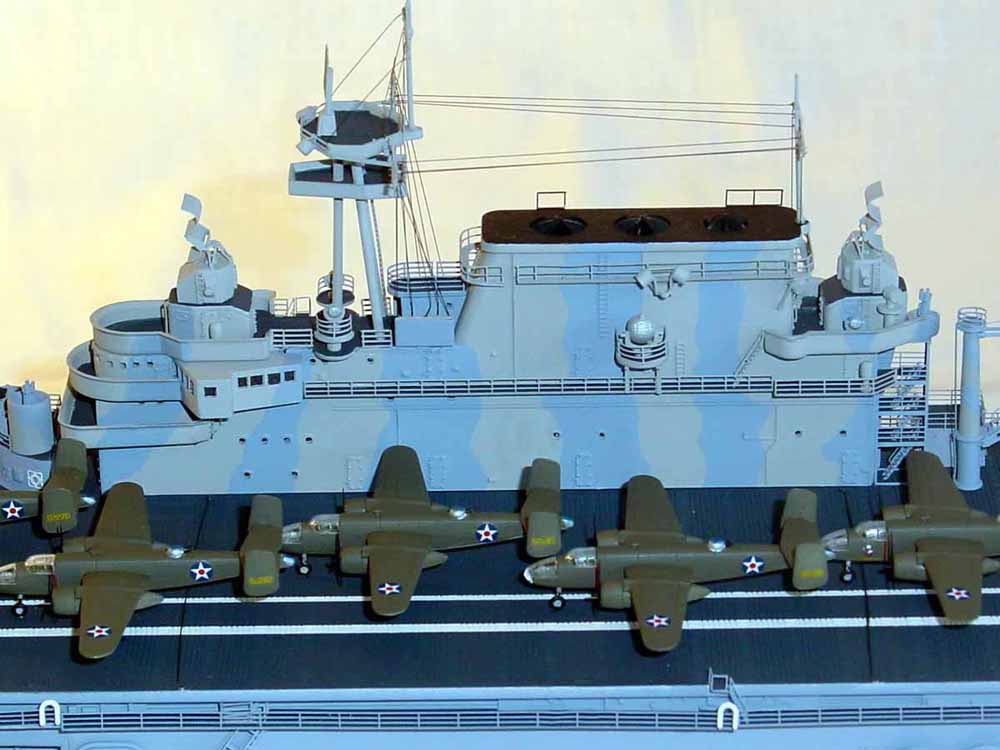
| Assembly of the sixteen B-25s was straightforward, although
a prominent seam in the fuselage required filling. Of note, the underside
turret needs to be removed since these were not on the aircraft flown off
the Hornet. Missing as well are the two dorsal turret guns on the
dorsal turret and the tail guns. I left the latter off and used fine
plastic rod for the former. After painting and assembly, I applied
General Quarters Decals fantastic set of decals. The set includes
insignias, correct aircraft numbers, red fuselage stripe, US ARMY decals,
and nose-art for six aircraft including the Ruptured Duck of Thirty
Seconds Over Tokyo fame. With references from the Internet, I was
able to place each aircraft in the proper sequence.
|
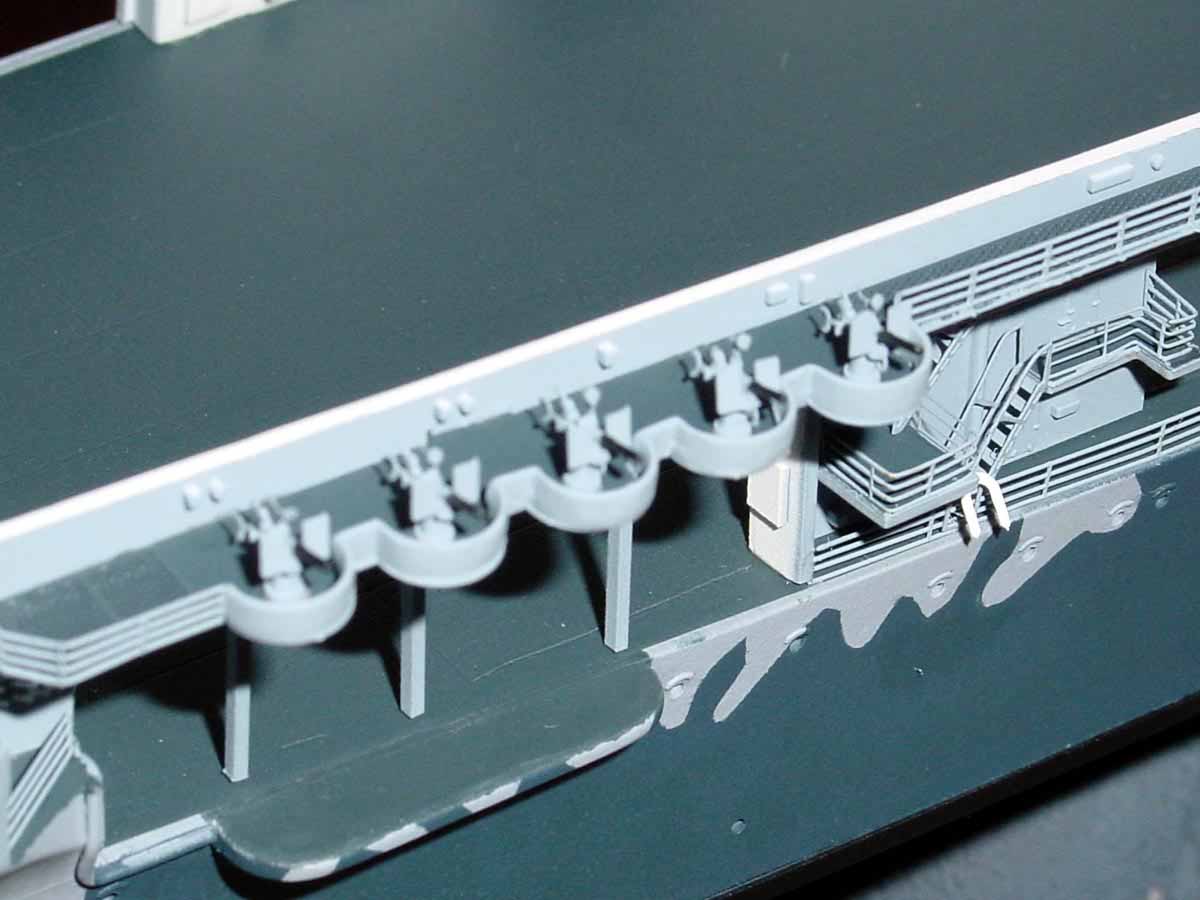
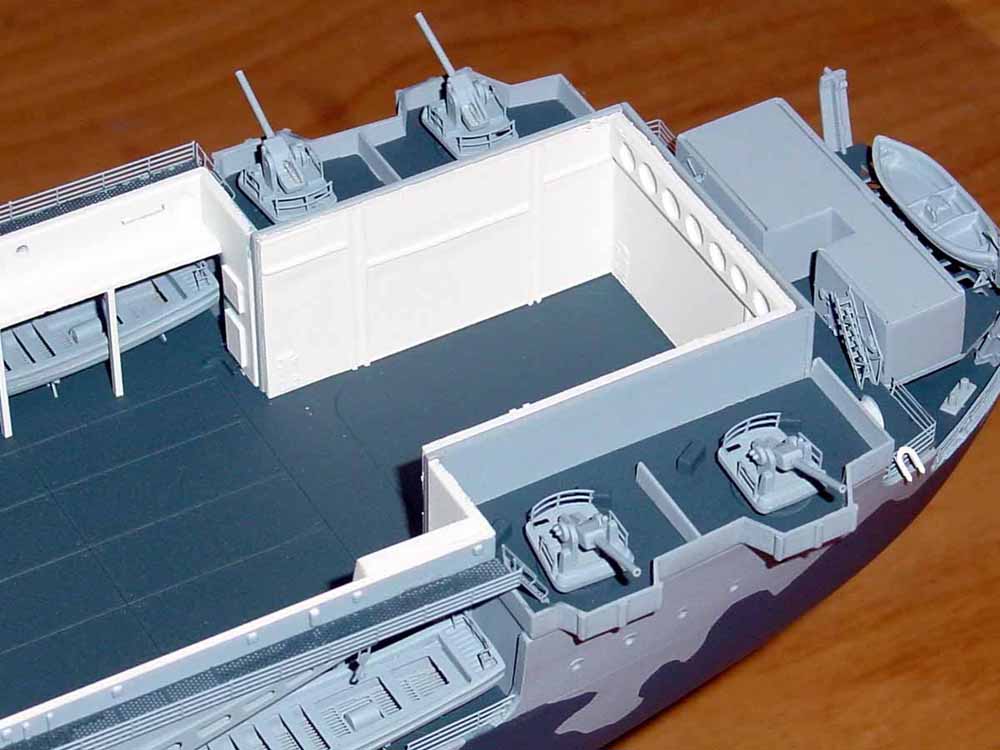
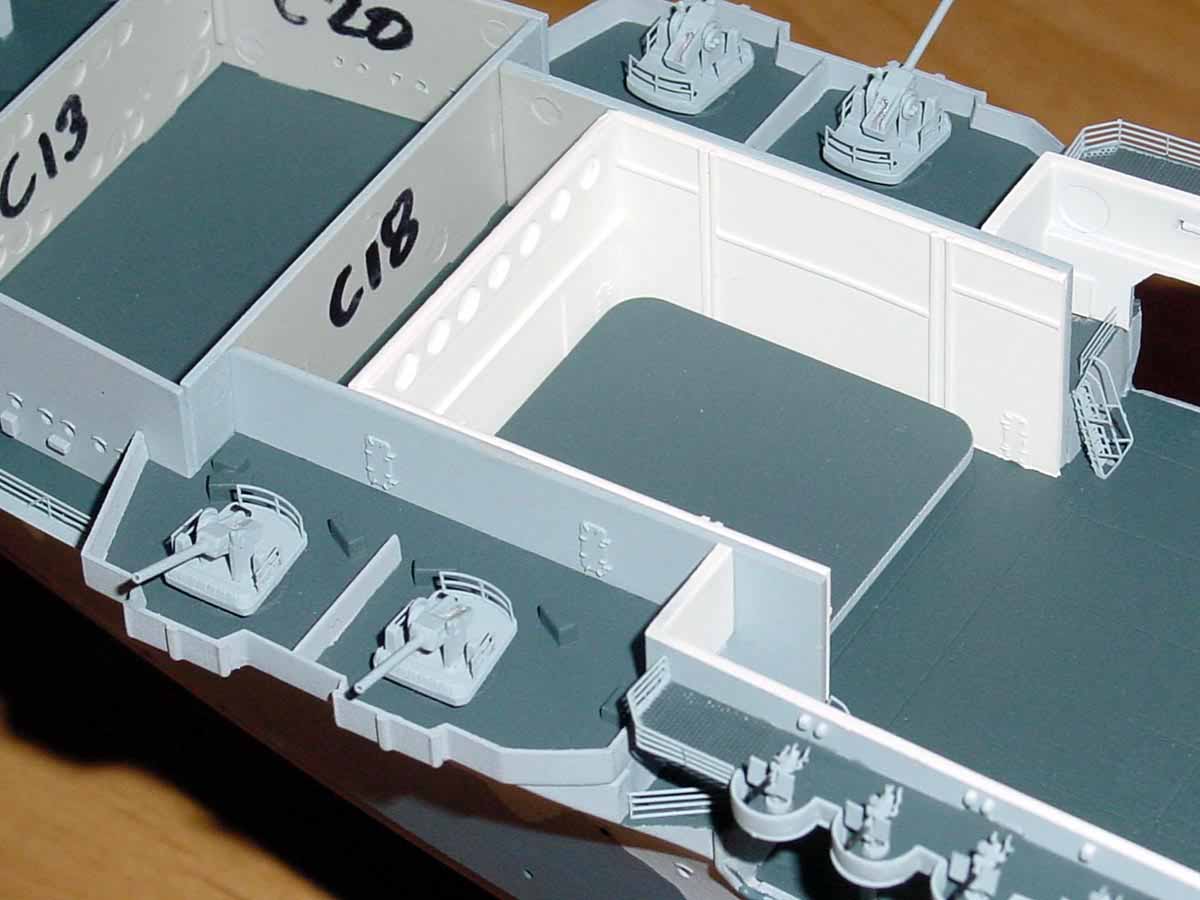
| I completed the hull by adding GMMs excellent hose reels,
ladders, railings, and cranes. All assembly required for these fittings
was easy since GMM has etched in folding lines. The catwalks from
GMM are an incredible addition to the model and are worth purchasing.
These went on easily and accepted the 20 mm guns and directors with minimal
trouble. Speaking of the weapons fit, GMM provides gun shields, sights,
elevation wheels, and shoulder harness for the 20 mm weapons. I replaced
the 5/38 plastic barrels with brass tubing and added railing to these
mounts. The 1.1 Chicago Pianos were Classic Warships parts that
are far superior to the kit parts. Once painted, these weapons were
added to the model. The boats were detailed with more GMM PE parts. |
 |
 |
|
|
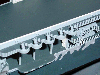
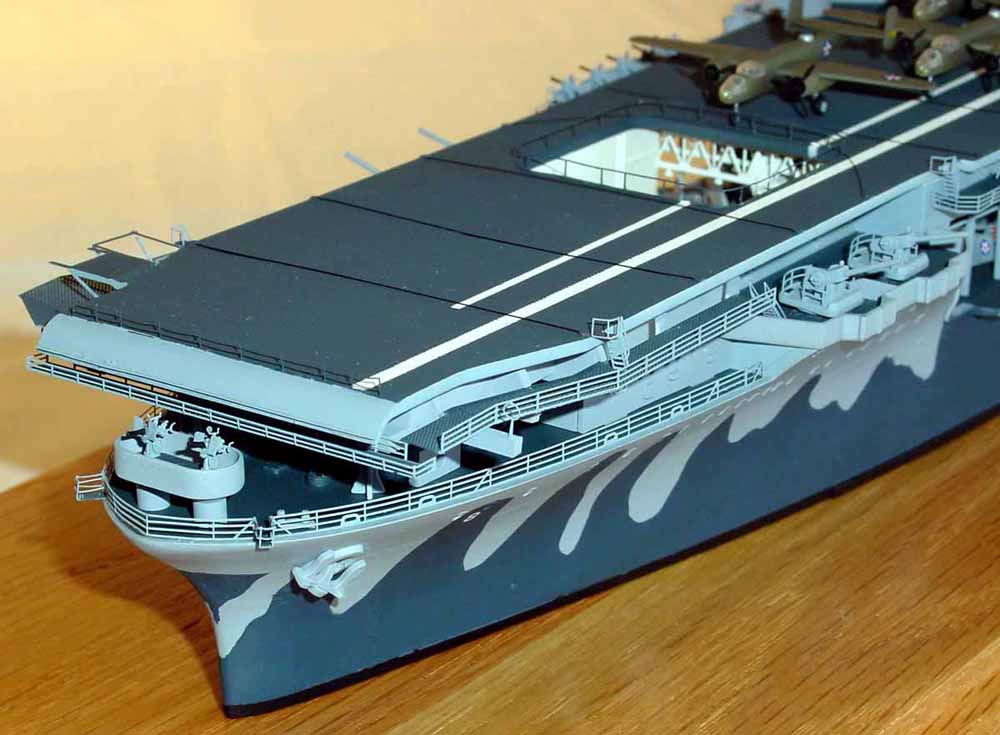
| The flight deck comes in three pieces and shows good planking
detail. The deck is, however, devoid of arresting wires, pulleys,
and crash barriers. Both GMM and WEM provide these parts in their
PE sets. I added the GMM parts to the deck before painting.
I then mounted the deck onto the hull. Mating these creates a couple
of seams that only careful filling and sanding will eliminate without scaring
the adjacent planking detail. I chose to use white glue as a filler
material.
|
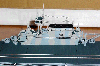
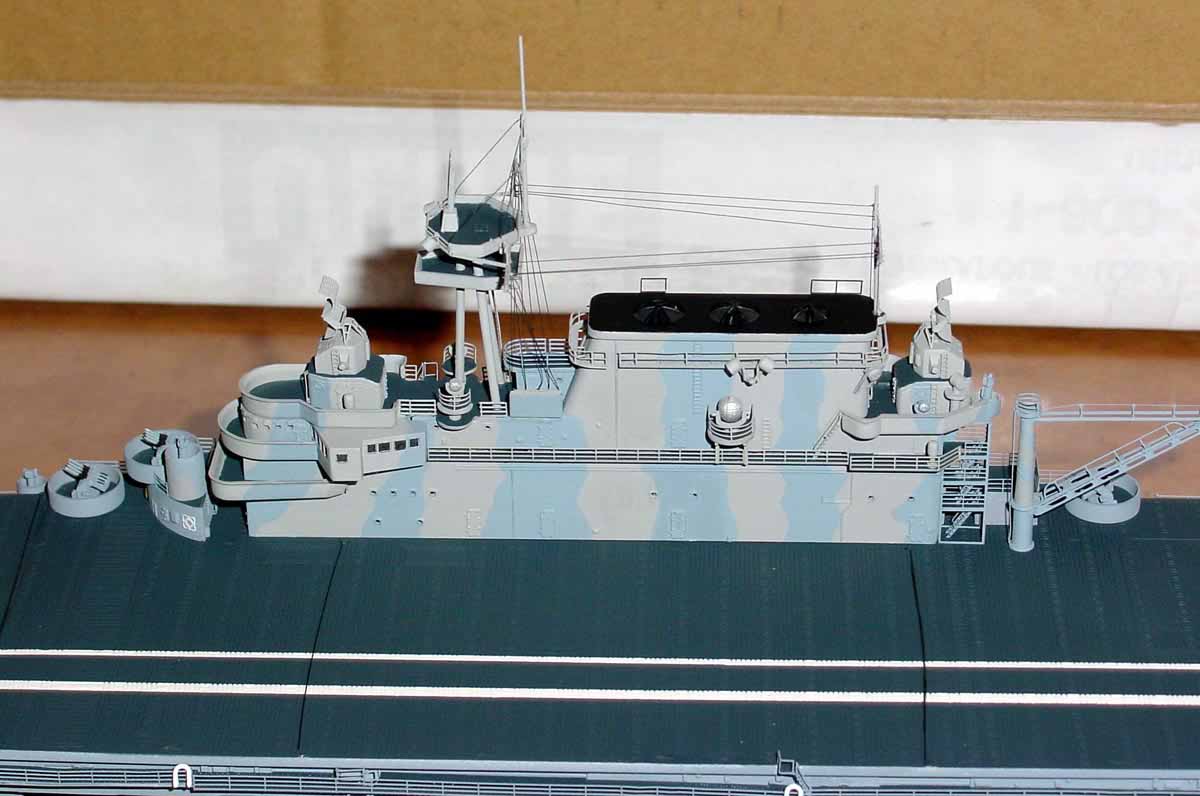
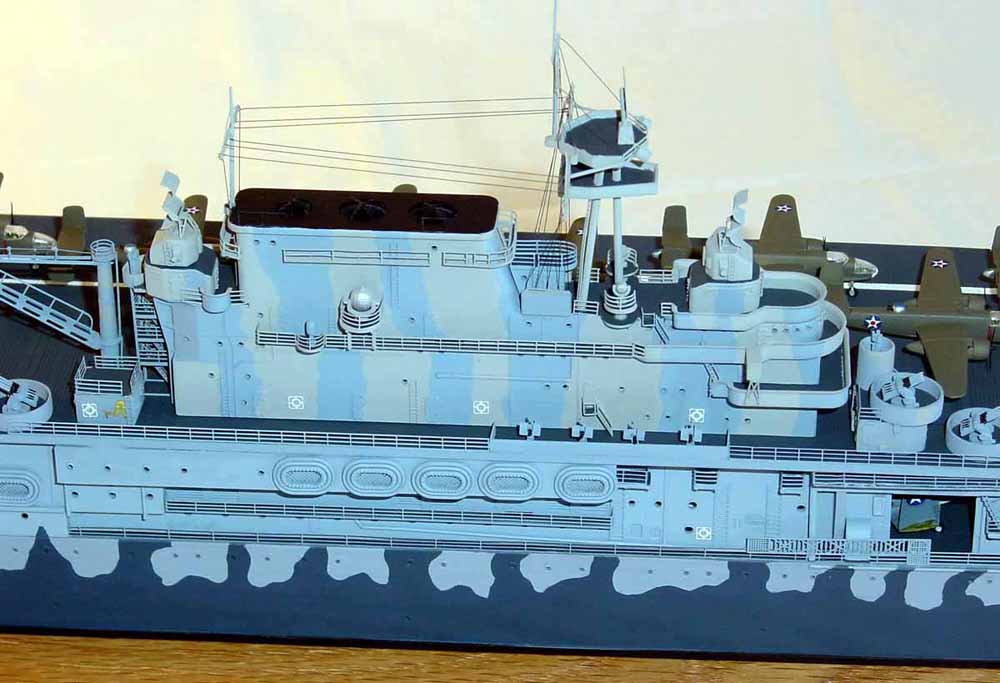
| The final step in building the hull was construction of the island.
This was simple to assemble but required some filler. GMMs PE details
enhanced the islands appearance with catwalks, radars, ladders, and yardarms
for the masts. After painting, I installed the rigging using monofilament
line. The island was attached to the hull and the model mounted to
its base. |
 |
|
|
My USS Hornet was one complicated model especially since I used five
different PE sets, three separate decal sets, and scratchbuilt a host of
missing detail. The end product, which took me more than 6 months
of work (not consistently though), is a wonderful addition to my collection.
All of the PE sets that I used were easy to work with and did not cause
any assembly problems. Aside from some inaccuracies in the kit and
fit problems, this was one enjoyable build.
The photoetch sets were obtained through Gold Medal Models and White
Ensign Models. The decals were courtesy of GMM, Classic Warships,
and General Quarters Decals.
Links:
|
 |


