Getting Started:
I start with the hull. It's the biggest part,
so why not.
1. 2.
2.
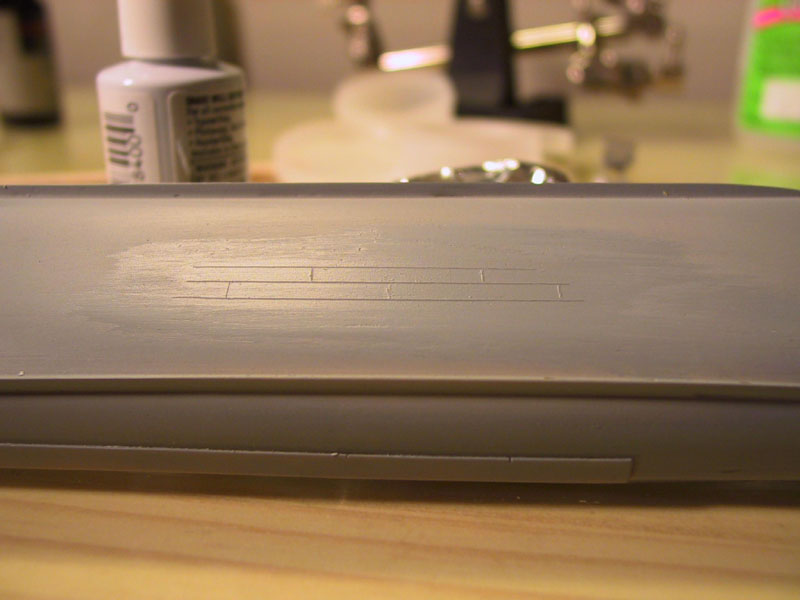
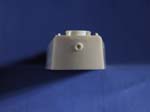
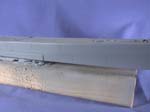
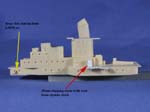
This is the only out-of-the-box kit part I want to
show. The hull's stern with the name. I love this detail.
It must be a heck of a job to get that fine lettering to show up so well.
It'll look good after final weathering; since war time ships did not have
the ship's name painted separately, raised detail with this and weathering
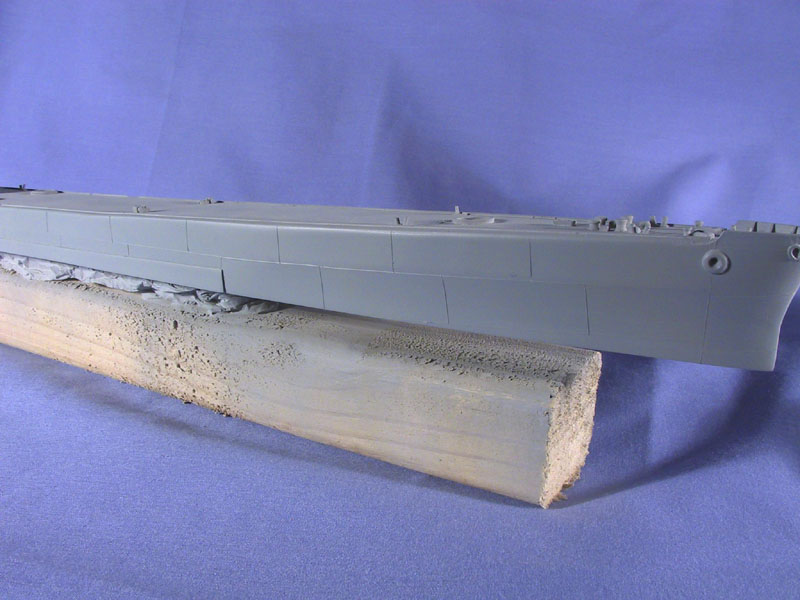
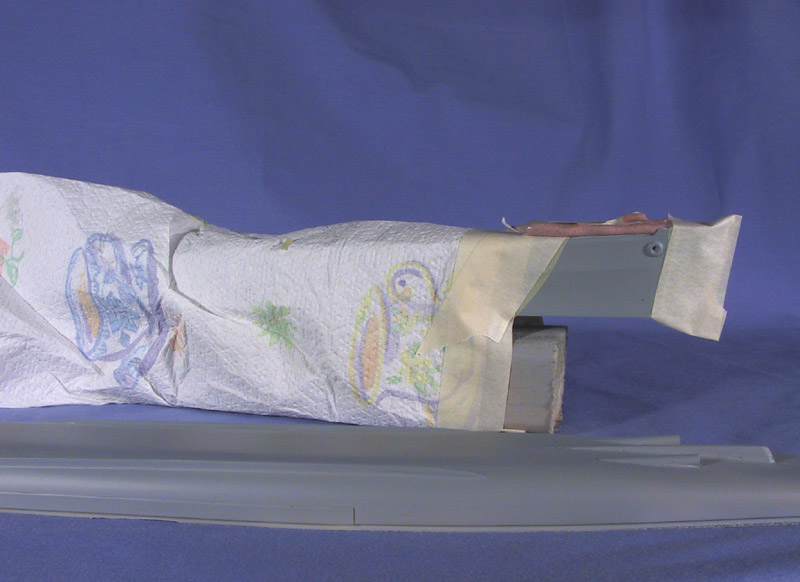
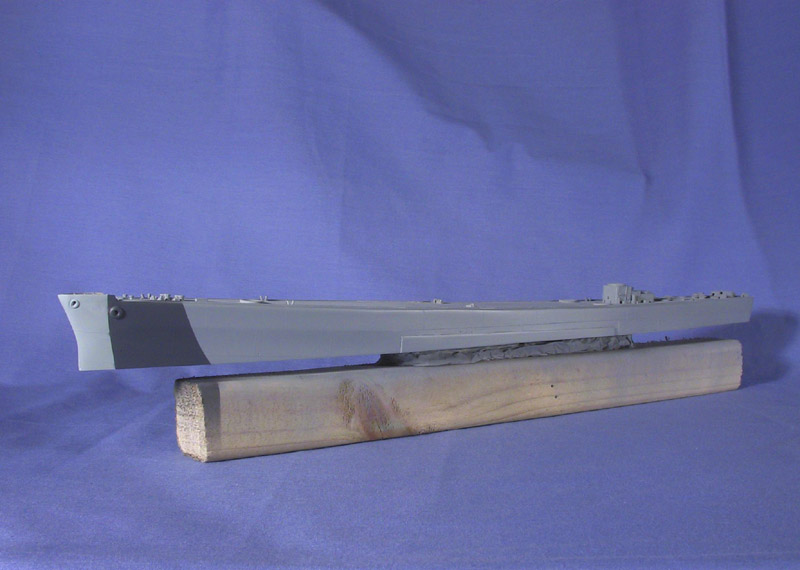
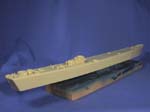
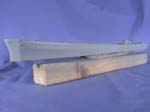
of it is the only way you can realistically show it. Photo 2 is of
the hull stuck to my make-shift painting and building platform; essentially
a block of wood with wadded up aluminum foil to get the hull up off of
the wood so paint doesn't bunch up at a temporary join.

Hull Plating:
3. 4.
4. 5.
5.
Aircraft modelers go nuts with panel lines; pre-shading,
scribing, building them up, etc. The truth is, it really does make
a difference in the finished model. I decided to give it a go on
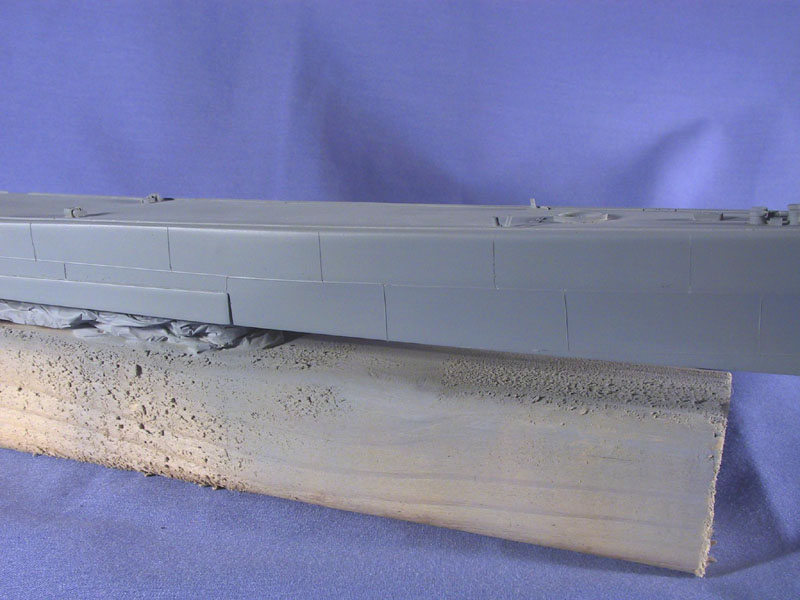
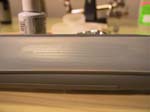
this ship. Photo 3 is of the lower hull of the Juneau. Since
I build waterline models, it always leaves me the lower hull to experiment
with. Asking on a model aircraft board about how to replicate RAISED
panel lines, I was given this idea. Take an extra sharp, brand new,
#11 blade and scribe the lines. When you do this, a recessed scribe
AND furrows on either side are left. Take some Mr. Surfacer 500,
or any thick paint, and then fill in the area between the furrows.
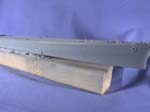
Presto, a raised weld line. Photos 4 and 5 are of the hull after
the lines were filled, and a coat of primer applied.
I like the effect. I don't know how well it
would work on styrene, though. For that, I would want to experiment
with scribing actual recessed lines, and then gluing fine styrene rod or
maybe nylon thread into the scribe, and then priming. Then again,
the procedure that I use later in this project for the USS Laffey's hull
plating works pretty well also, I actually think a combination of the scribing
method with paint shading is the way to go, but I have yet to test it.
Superstructure: Aft
6. 7.
7. 8.
8.
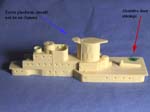
The aft superstructure is one of the larger pieces
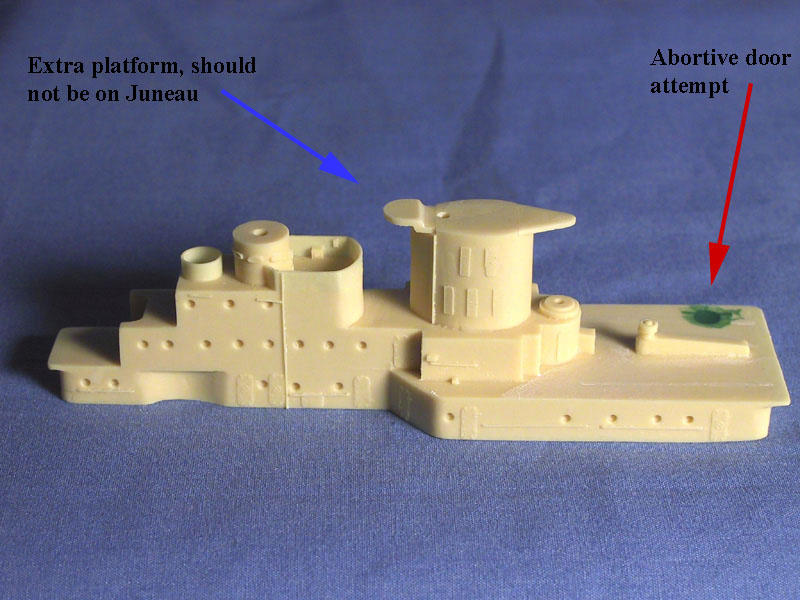
in the kit. Photo 6 shows the first two things I did to it, and ended
up having to undo! I wanted to show an open door, so I needed a recess
behind it. The green putty shows where I drilled through the deck,
and then closed up the hole at the top. I do NOT recommend doing
it that way. The other part is the stair step to the raised platform
just aft of the stack. This must be a USS Atlanta feature, as I could
find it on no Juneau photos or plans. I cut it off and sanded smooth.
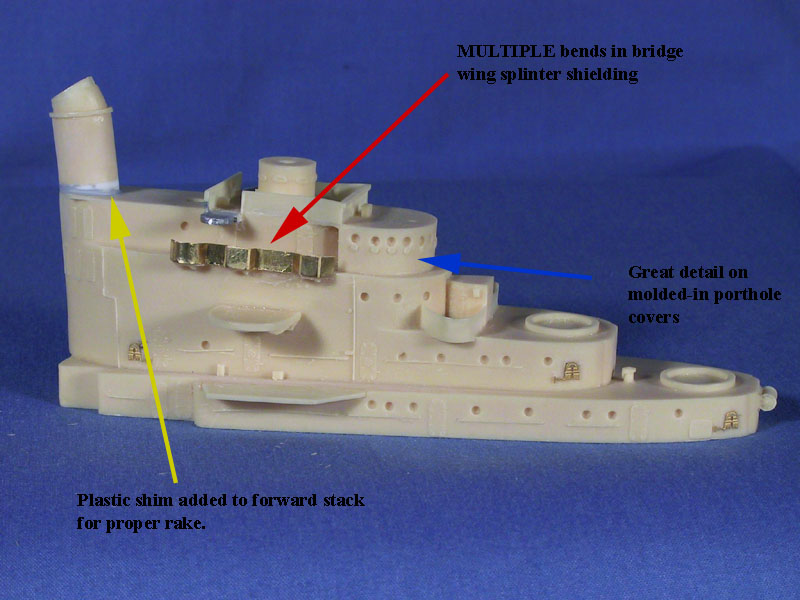
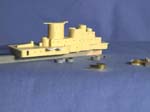
Photo 7 shows platforms for the waist 20mm guns cut from styrene (the
supplied resin ones did not match plans and photos) and the custom cut
brass shielding I then had to make for the new pieces. I used brass
"sprue" from the PE sheet, as it was exactly the right height. Photo
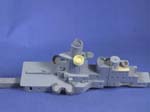
8 shows more views of these items, and the aft stack installed.
9. 10.
10. 11.
11.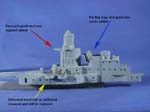
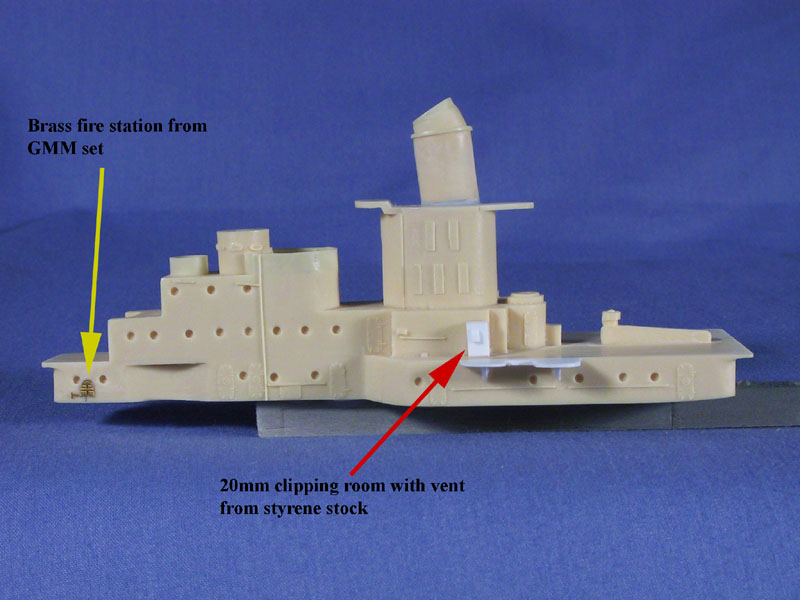
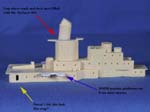
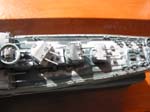
Photo 9 is of a little bit of the scratch building
I did; not much, just tiny details like the clipping room that show up
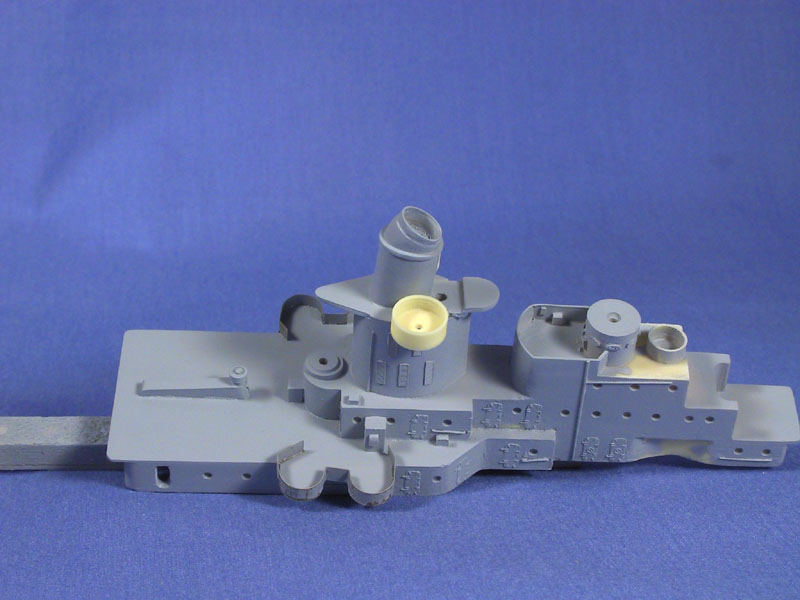
in photos but are not included in the casting. In photo 10 I've added
a coat of primer, spot sanded, and started adding other components.
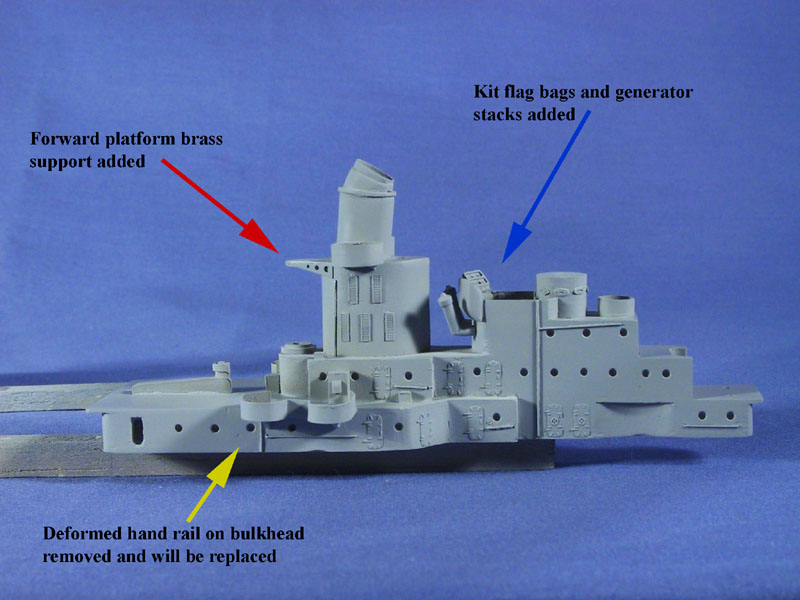
Photo 11 shows that aft platform behind the stack removed, and the forward
platform PE brass support added. Structural parts such as those are
added before priming, as seams are almost guaranteed.
Superstructure: Forward
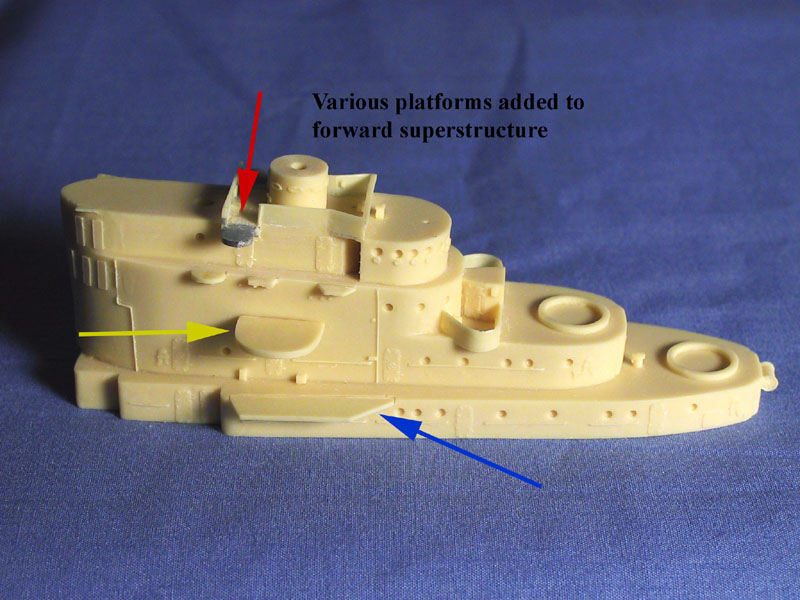
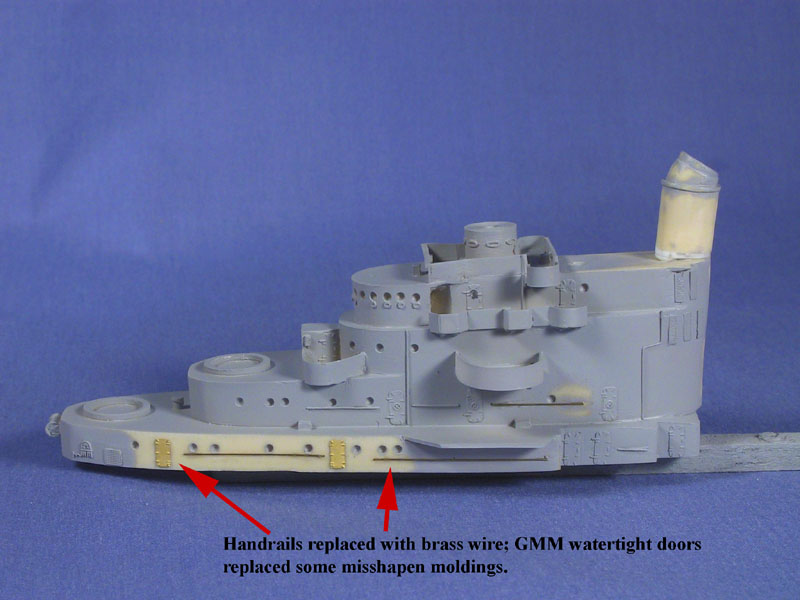
Photos 14 shows some of the detail I replaced
on the forward deck house. As I stated earlier, it looks as if my
kit was pulled from the mold before it was ready, the hand rail detail
was missing and broken in some areas, and surface detail such as doors
and fire stations was soft and muddied in a couple of places. Fortunately
this is easy to fix with brass wire and GMM PE fittings.
Fittings and Weapons
16. 17.
17. 18.
18.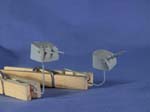
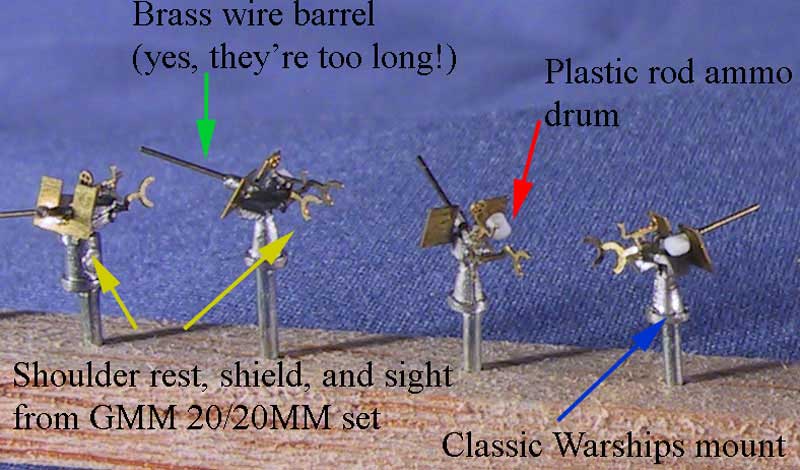
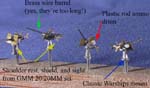
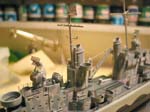
In Photo 16 you can see my bashed together 20mm mounts.
I started with the Classic Warships mounts, and cut off the barrel and
shoulder rest. Barrel is done with wire, shoulder rest, sight, and
shield are from the GMM set. I then got fancy and cut ammo drums
from rod styrene stock. They're probably a bit over scale, but I
like them.
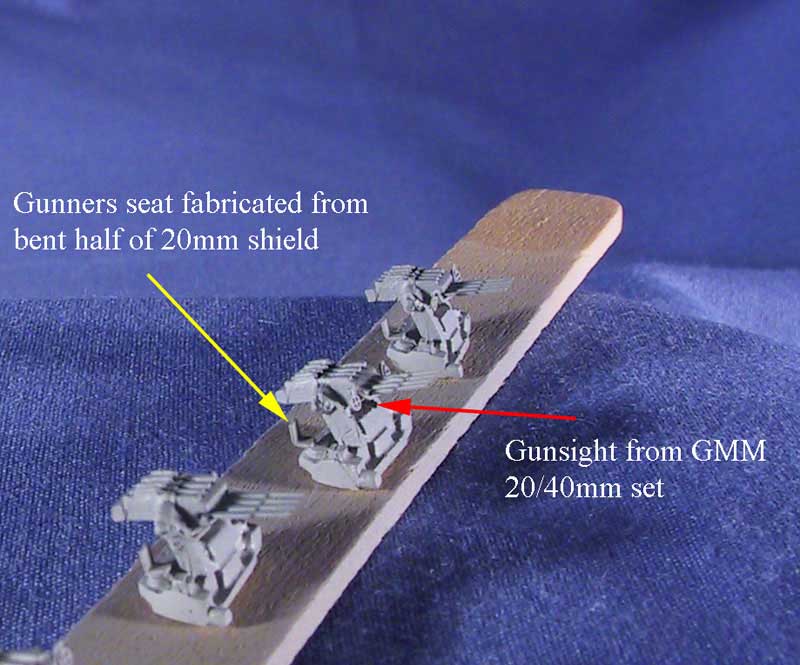
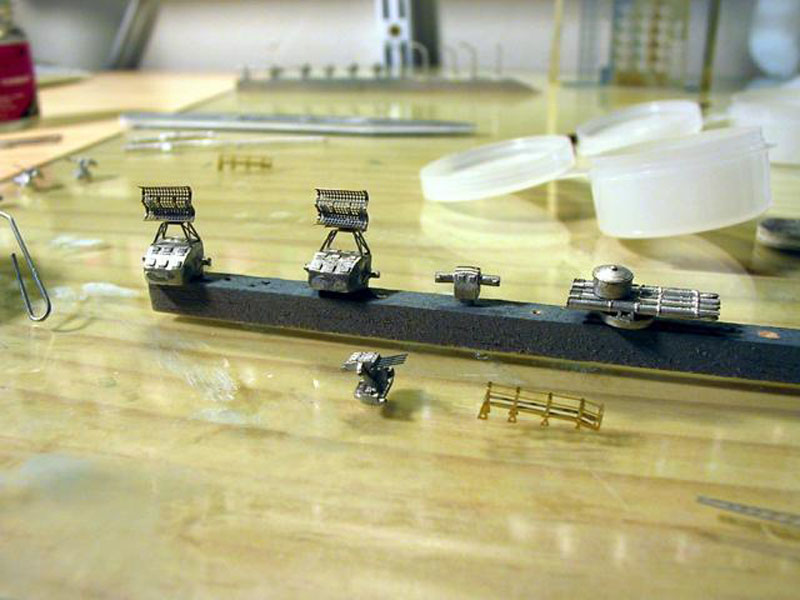
Photo 17 shows the 1.1" mounts. After seeing
a photo of a 1.1 on the USS Houston, I've decided that the BWN mounts are
the most accurate looking for my purposes. That real mount viewed
from the side looks EXACTLY like these BWN replicas. The only additions
I made were sights from the GMM 40mm detail set, and seats bent out of
1/2 of a 20mm shield.
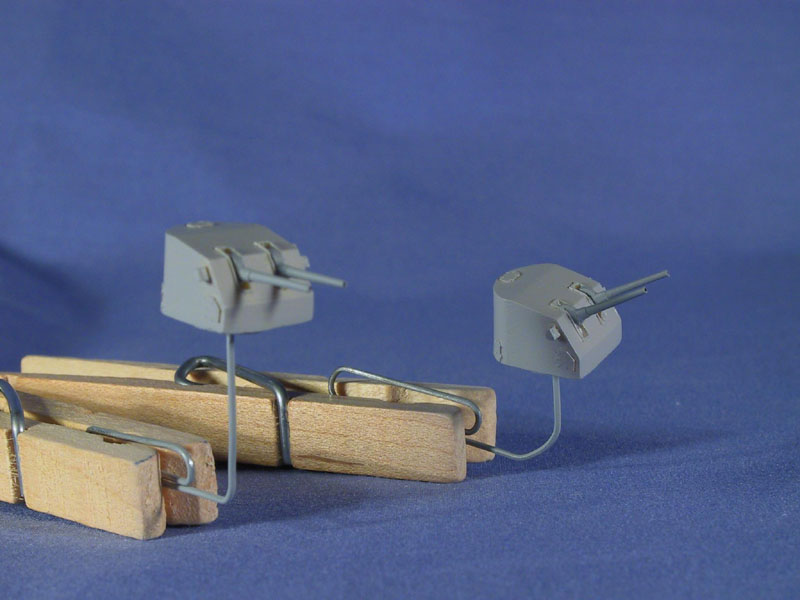
Photo 18's 5-inch mounts are built out of the box.
They look great as is. I only added blast bags from gel type superglue.
19. 20.
20. 21.
21.
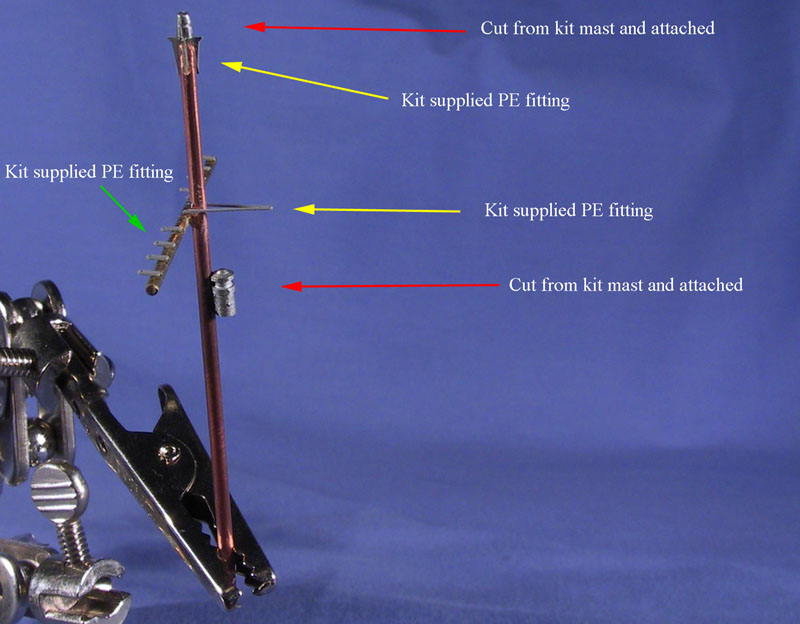
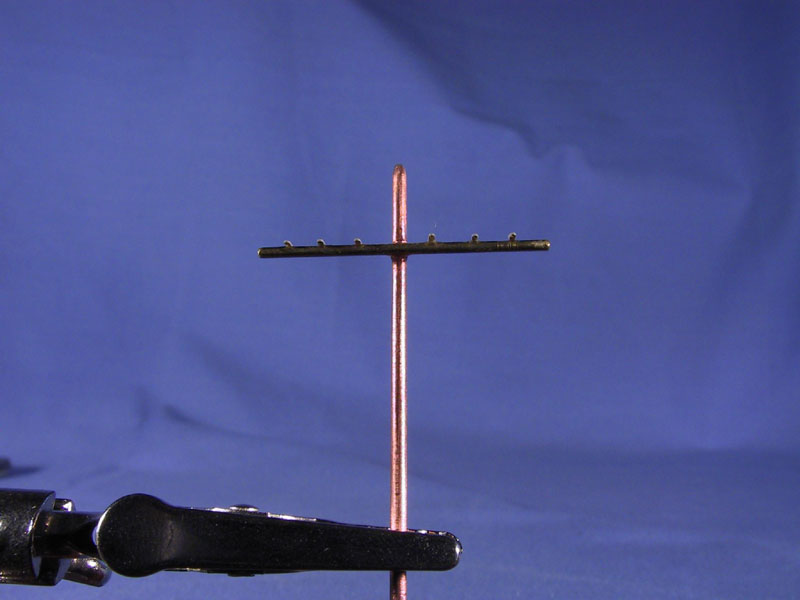
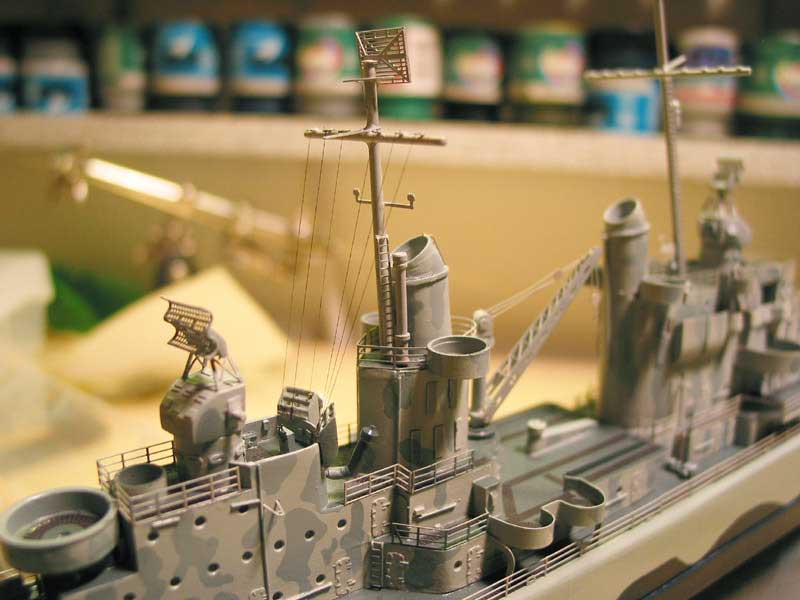
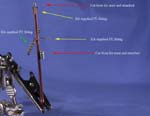
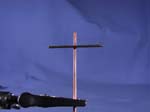
Photos 19 and 20 show the fore and aft mast.
Essentially I cut the details off of the white metal kit masts and attached
them to brass and copper rod; I'll be rigging Juneau and don't want the
kit supplied white metal masts bending over time.
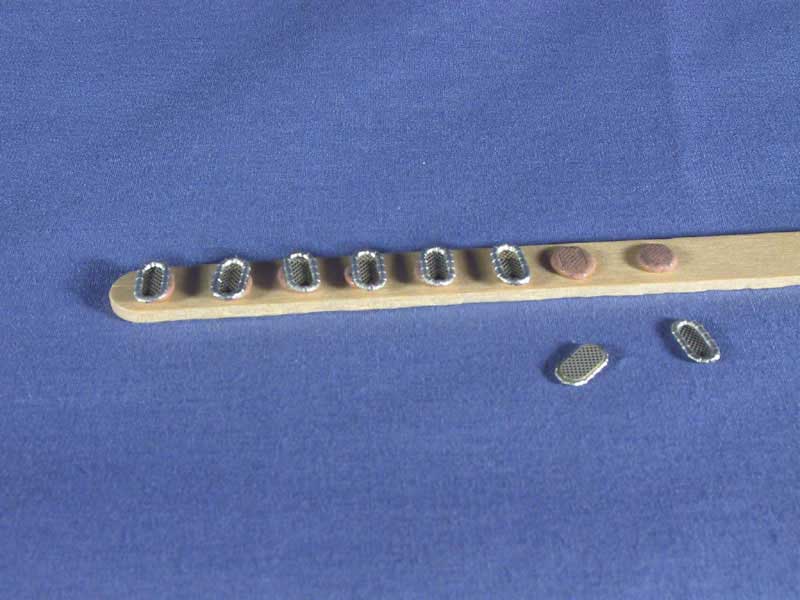
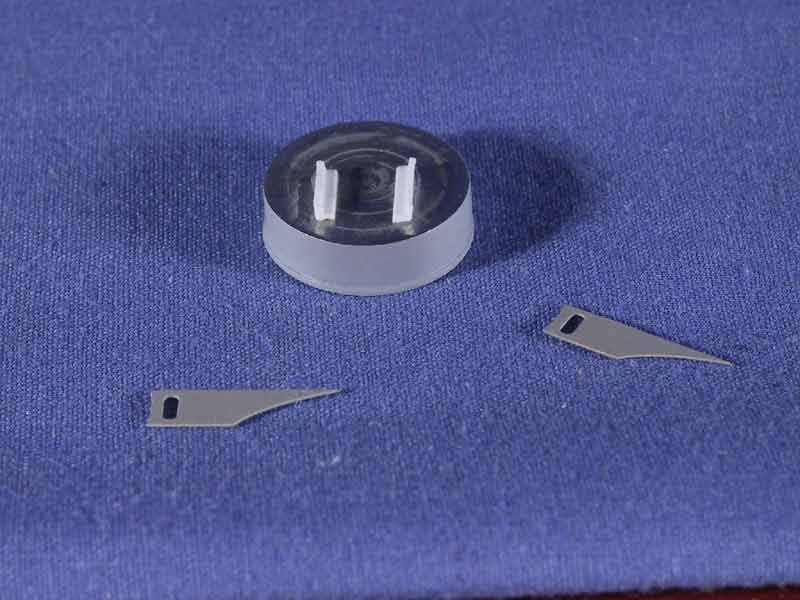
Photo 21 shows assembled life rafts. I stick
them to a blob of Silly Putty on a popsicle stick for painting.
22. 23.
23.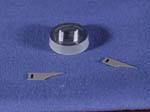
Photo 22 shows various other detail parts, painted
or ready for paint. Photo 23 shows the aft deckhouse 1.1 gun tub;
I added two pieces of styrene angle stock to support the PE stands; there
was just nothing to glue to otherwise.
Painting
The Floating Drydock monograph on the USS Juneau
hypothesizes that Juneau was painted out in overall 5-N prior to her sinking;
some parts of her having already been done in the photo at the start of
this article. I looked into it, played with that image in Photoshop,
looked at other photos, and I concluded that - at least as far as I was
concerned - I did not believe it. I went with the accepted Juneau
camo scheme - it's much more interesting as well.
For the Juneau I used the Badger Marine Flex line
of paints. Great paints, but check the colors before applying!
I had three different bottles of 5-N in my stash, and all three were different
shades. Otherwise, once the colors are mixed to the proper shade,
they airbrush beautifully. Living in an apartment and having to spray
indoors and do cleanup with the minimum amount of hassle possible, I have
totally switched to acrylics, except for primer and metallics. Some
people swear by solvent based paints, love the results, etc. That's
great. They just don't make any sense in my situation. Besides,
I get as good of a finish with acrylics as any enamels I've ever used.
Starting with this section on painting, I got a little
lax on the photos. Looking at the notes I kept on the build, it looks
like I started on this part of the project the first week of September,
2001. I guess that's why I started to drop the ball on documenting
the build. I'm surprised I even did any work at all on the model
during that time. Anyway, here's what I have:
24. 25.
25. 26.
26.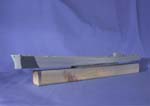
Photo 24 shows the forward most light gray band laid
in. I did this in 5L. There are all kinds of theories of Juneau's
exact colors (and any other ship of that period, for that matter), so I
went with what I thought looked close and looked good. This is the
first project I used Tamiya masking tape on. I was leery of it at
first - how specialized can freakin' tape be? Well, it works great,
and I've been using it ever since. Photos 25 and 26 show more of
the progress, adding the 5-D band of dark gray next.
27. 28.
28. 29.
29.
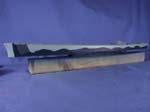
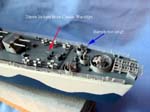
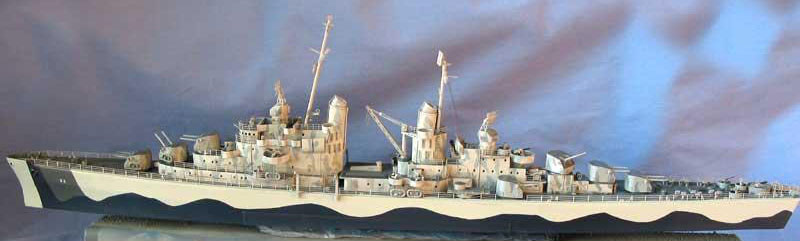
Photo 27 shows the famous wavy hull line of Juneau.
This is one of the parts I didn't photograph in progress. I did this
with Parafilm. It's like wax paper, but stretches and uses static
cling and friction to stick to the hull. I pulled it on there tight,
let it settle for a minute, and then free hand cut the design with an X-Acto
knife.
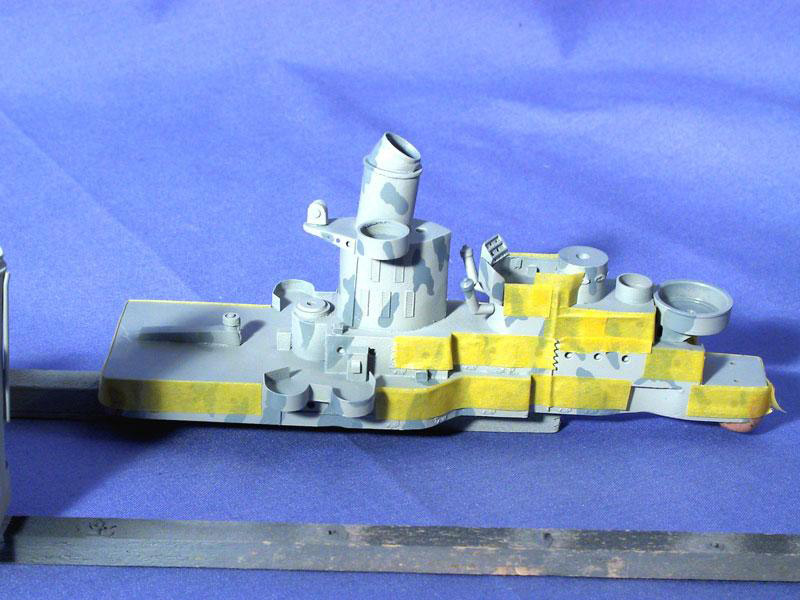
Photo 28 shows the masking procedure I use for the
20-B Deck Blue. I have already painted the superstructure at this
point with the dapple camouflage. I painted the darker ocean gray
first, let it dry, and then "painted" on the splotches with liquid masking
solution. The haze gray was then airbrushed over this; backwards
from the normal "light to dark" routine, but about the only way this would
work. As long as you have a gloss finish and a good liquid mask (I
use Hobbico's Master Mask), this works well.
I then mask off the vertical surfaces. Lots
of time, lots of tape involved. It's tedious, but it's worth it.
Photo 29 shows the forward superstructure after using this technique and
removing the masking.
PE and Assembly of Sub-Sections
At this point all parts are gloss coated with Future
floor wax. This stuff rules. Some people don't like it, but
I am not one of them. Easy to use, works great, and - when compared
to modeling gloss coats - it is dirt cheap. Parts were glossed for
application of deck and hull number decals, and for the forthcoming wash
with oils.
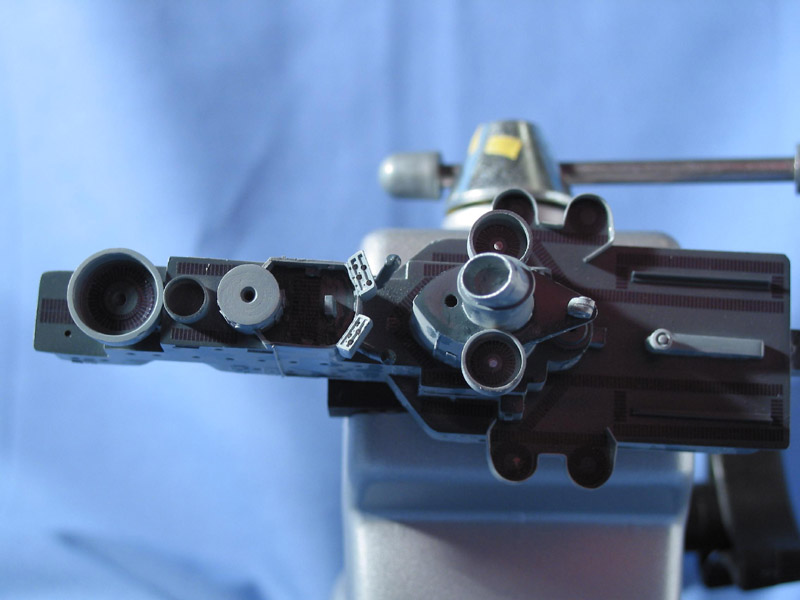
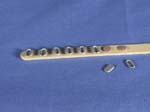
30.
Photo 30 shows an overhead shot of the Dunnagain
(sp?) Decals deck treads. Great decals. I hope they come back
in production someday. I'm working on my last set right now!
I decided to do the decaling at this point, as there are a lot of them.
As you have no doubt noticed, I build in sub-assemblies.
I've heard of some that will build an entire ship, PE and all, before even
starting to paint. More power to 'em. I can't imagine building
that way; my reliance on the airbrush has something to do with this, I'm
sure, but it's how I like to work.
A note about PE placement on this and most earlier
Blue Water Navy (and almost every other brand as well) resin kits:
GET REFERENCES! The instructions for this kit call out what each
piece of PE is in the parts list, and each piece is numbered nicely on
the fret. Unfortunately, that is about it. If it is not called
out specifically in one of the few photos on the instruction sheet, you
are left to figure it out on your own. Photos and reference material
are critical for this process.
31. 32.
32.
Photos 31 and 32 show the aft deck house/superstructure
attached after PE was added. Nothing special about the PE process,
tack it in place on the ends with thin super glue, and then use a bent
paperclip to run a bead of white glue and water mixture along the inside
of the entire join. The mast was set into a hole I hand drilled,
checked several times to make sure the proper rake was established (I eyeball
the angle, I'm not obsessed enough to get out the protractor- if it looks
right, it is).
In Photo 32 you can see the railings just forward
and above the 1.1" gun tub. After getting to this point, I discovered
in my references that this should not be open railing; it is either solid
splinter shielding like the further forward Aft Control station, or it
is canvas covered railing. At this point, though, I chose to leave
it as is. One mistake that I can live with.
33. 34.
34.
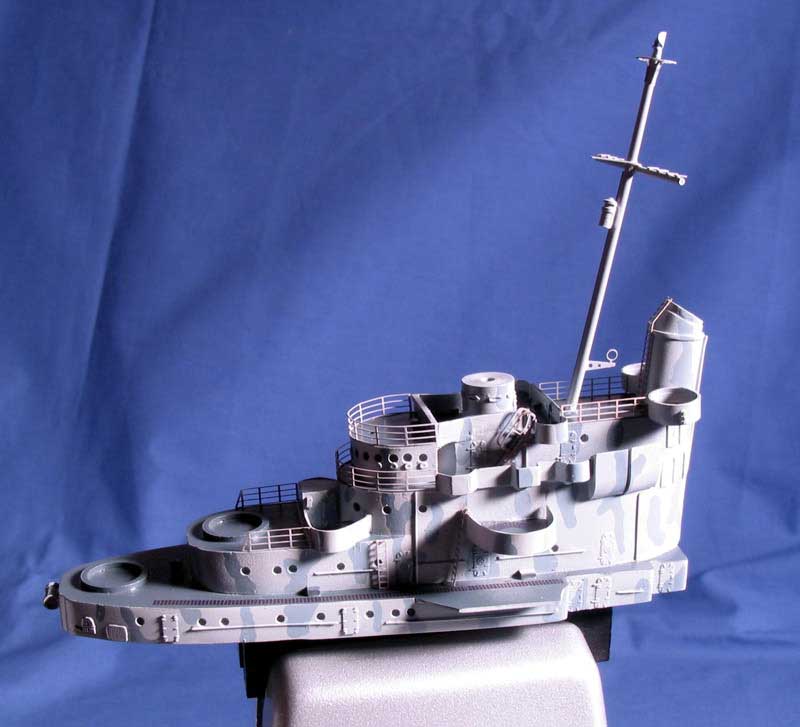
On to Photos 34 and 35, showing the forward superstructure
with PE applied. Again, no problems of note. One thing to note,
though, is to start at the TOP and work your way down. This keeps
errant hands and fingers from knocking off main deck railings while you're
fiddling with and swearing at the ladders for the bridge level.
35. 36.
36. 37.
37.
By the time we hit Photos 35 through 37, I have most
of the PE attached and both deck houses attached to the hull.
There is a huge amount of real estate on this model
where the deck houses meet the main deck. In order to keep from having
gaps, I attached them with white glue. There's enough surface area
between the two that the hold will be more than sufficient. Towards
the edges, I put in just a little bit extra glue, so that when they structure
was placed on the hull, there was a little oozing of glue from the seam.
This was quickly gone over with a damp Q-Tip, to smooth the seam and hide
any imperfections in my sanding of the flat surfaces (and there were plenty).
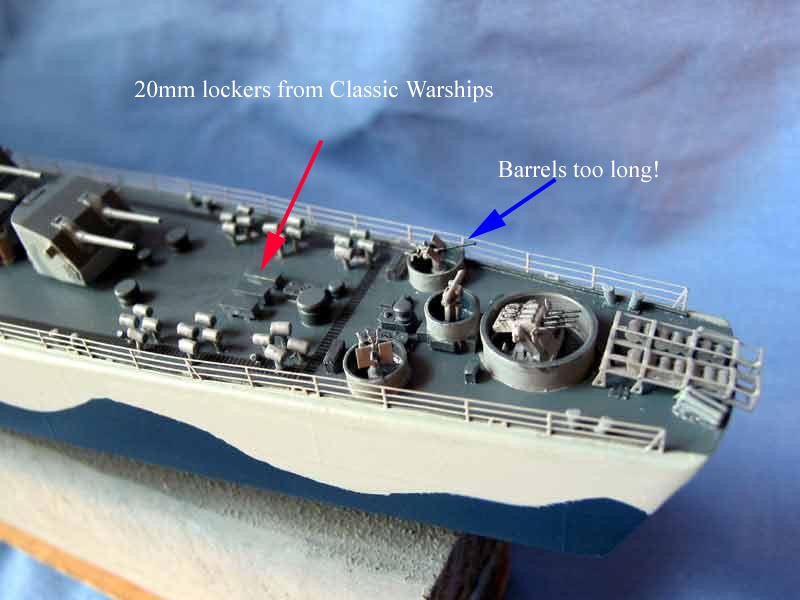
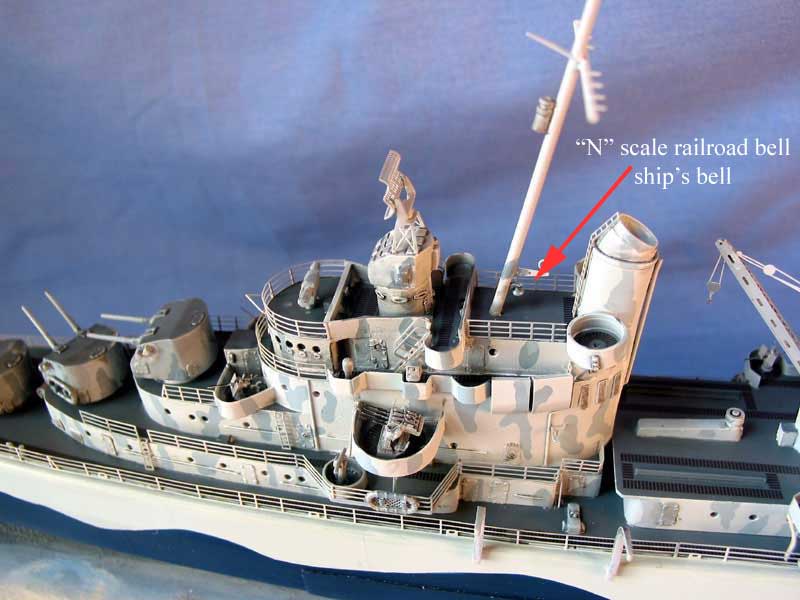
A couple of items pointed out in the above photos.
The 20mm gun barrels are noticeable too long when observed in their natural
environment. These will be trimmed down. The ship's bell is
a neat little addition I will be doing on all of my models. Simple
and adds a lot to the build.
38. 39.
39.
Ever heard the expression "Wanna see a grown man
cry"? As I had stated, I gloss coated the entire ship with Future
to gloss it up for decals and an oil wash. When all assembly was
done, it was time to flat coat. There was enough dust on the model
to warrant a rinse, and since I wanted to spray the flat coat RIGHT THEN,
I rinsed the thing with rubbing alcohol, so that it would dry quickly.
Photo 38 and 39 show the result. The alcohol
pooled on the model and crazed the Future. I almost lost it, I thought
at first that it was a case of having to repaint the entire model, lose
a lot of PE and decals, and essentially ruin the model.
The fix turned out to be simple. Future is
very forgiving if you just put more coats over what is already there.
So, I took a big honkin' brush, and started to brush straight Future over
the entire ship. In a few places I had to "scrub" it into the white
areas, but at the end of the process, I got rid of all of the white crazing
with this procedure.
After fixing the problem, I then attempted the flat
coat again. 25% Tamiya Flat base, 75% Future, and then I thinned
that mixture about 15% with rubbing alcohol. It came out perfect.
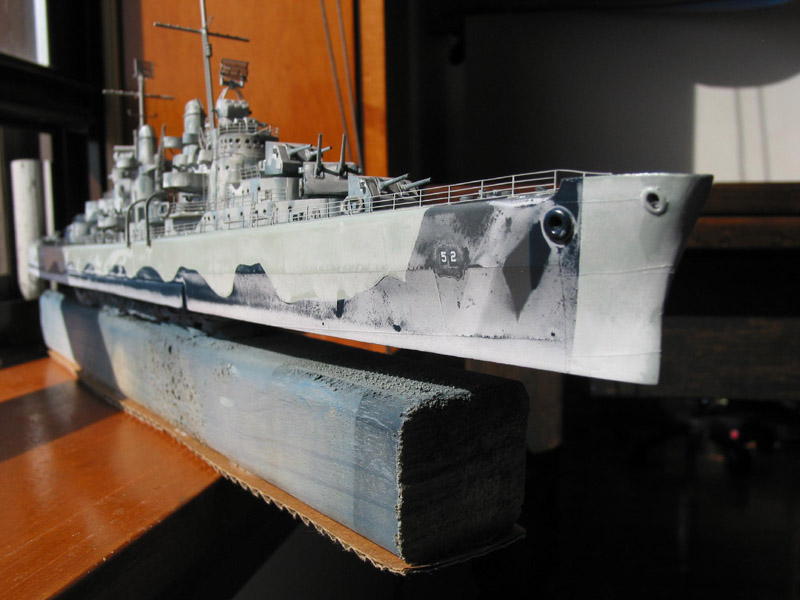
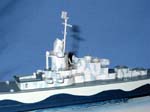
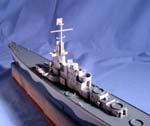
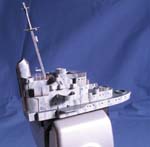
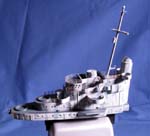
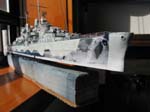
This is how she sits right now. Still needing
searchlights added, rigging applied, and the 20mm gun barrels fixed.
I also have not yet dry brushed the model. Most of the ships were
fairly beat up in the Guadalcanal era, so I plan on dirtying her up a bit,
and probably will do some hull panel shading with the airbrush to make
those more prominent. Otherwise, she is ready to be added to the
base and stuck in the "water".
On
to the USS Laffey.
Back to Build
main page