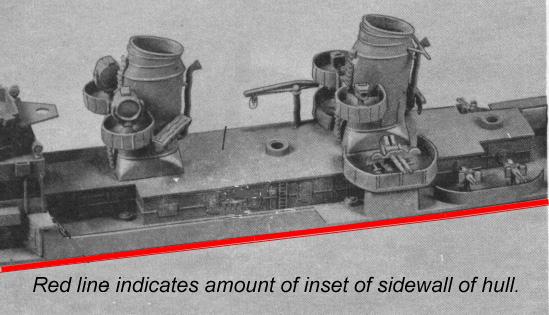
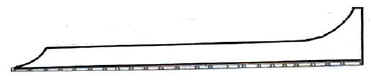
The first thing you'll want to do is remove those terrible midship bulwarks.Lindbergh though it was a great idea to mold these onto the main deck along with the supports for the midship 40mm, and the splinter shields for the waist 20mm, the only problem is, they set them in the width of the hull wall, about 1/16 of an inch. The result? They look STUPID. So grind them off. Once this has been accomplished, set the main deck into the hull, glue and fill. At this point you can start sanding off those lovely raised weld marks on the main deck. If these weld lines were scaled up, it would be equivalent of a fire hose glued to the deck. The waist bulwarks can be fabricated from Evergreen sheet styrene, below is a template.
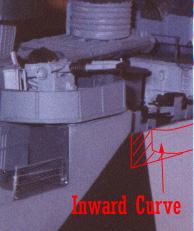
The waist bulwarks were supported on the backside by a series of triangular frames spaced at intervals. These frames can be replicated with Evergreen T-stock. The shield portion of the bulwark isn't straight up and down, it is angled inward approx. 2 degrees. Just enough to make it noticable in larger scales. Since the parts were originally set in from side of the hull, the break waters will be short on both sides. I added a piece of Plastruct to each side to bring the breakwaters out to the sides of the hull. Attach these parts later on, after you've attached the forward bridge structure to the deck.
The supports for the midship 40mm positions are too narrow and too shallow. I left mine in place, and built a box around the original part. You will require a set of plans to get the proper width. At this point, you'll need to determine which ship of the class you intend to build. This is important because of the positioning of the waist 20mm positions and the type of splinter shield. The Melvin is fitted with a 20mm shield that has a open forward end. Some ships, especially later ones, carried an integral splinter shield that ran from the 40mm supports all the way back. Regardless of which ship you choose, the splinter sheilds were flush with the sides of the hull, not inset as Lindbergh has made them.
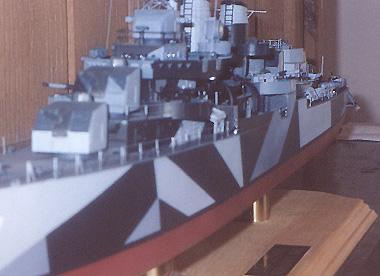
There are other things you may or may not want to do, such as removing the locating holes for the railing stanchions and filling in all of the locator holes for the deck fittings, such as 20mm guns, depth charge racks, etc. This is entirely up to the modeler. I removed the raised locator rings for the railing stanchions and filled the holes, as they were set in from the hull line too far. I redrilled the holes for the stanchions at the seam where the deck mates to the hull. I then set brass rod into the holes, used a height template and cut the brass to the proper height. I recommend doing this before you mount the superstructure to the deck. Railing was done with clear quilting thread, it is stretchable, and responds well to superglue. I then painted the deck and railings. I added black tull, a veil-like cloth, to the bottom of the railings. In this scale, it looks perfect. I had some trouble dealing with the cloth, as stretching it causes the netting to distort, and it doesn't look right. After several experiments, I dullcoated the cloth to give it a little less flexibility, and found it handled much better. At this point, I had already chosen which ship I was building, so the deck was masked, the hull painted in Oxide Red, and the camouflage pattern applied with the appropriate colors.
Home Hull Main Deck Forward Deckhouse and Bridge Weapons Aft Deckhouse and Fittings Depth Charges Facts Conclusion