1/200 Sovremenny 956 A/E
by Guido Hopp,
Düsseldorf, Germany
November 2002 - January 2003
The thing I really liked about Trumpeters 1/200 Sovremenny from the very beginning was, that there is almost no detail moulded onto the decks. Each tiny detail is a separate part, saving you extensive deck masking. The flip side of this coin is, that you have to clean up all of those parts, which can be very monotonous as well.
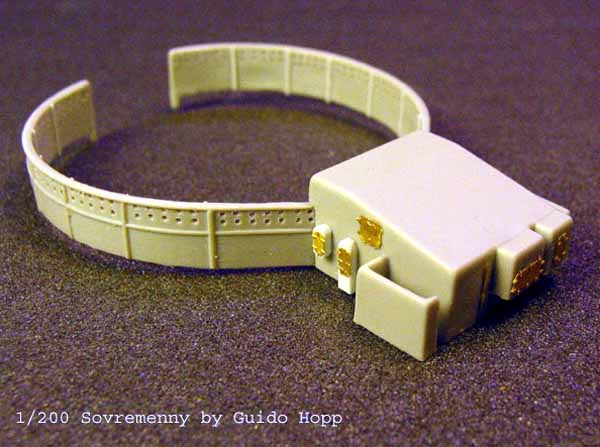
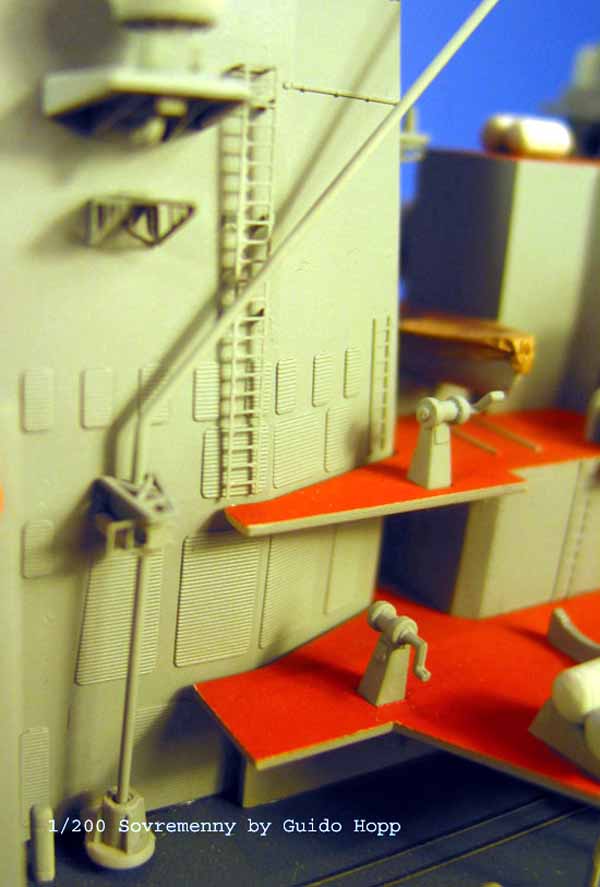
The aft turret ring needed some PE and styrene add-ons. For better depth I drilled out all the tiny holes. If you are using a Dremel or similar tool, take care that your drill bit is sharp and the rpm is kept low, so the bit doesnt melt, but cuts its way through the plastic. For extra detail on the turret ring I added PE stanchions to the inside of the ring. Please note that in real life there are no such stanchions, but adding those enhances the turret rings neatly.
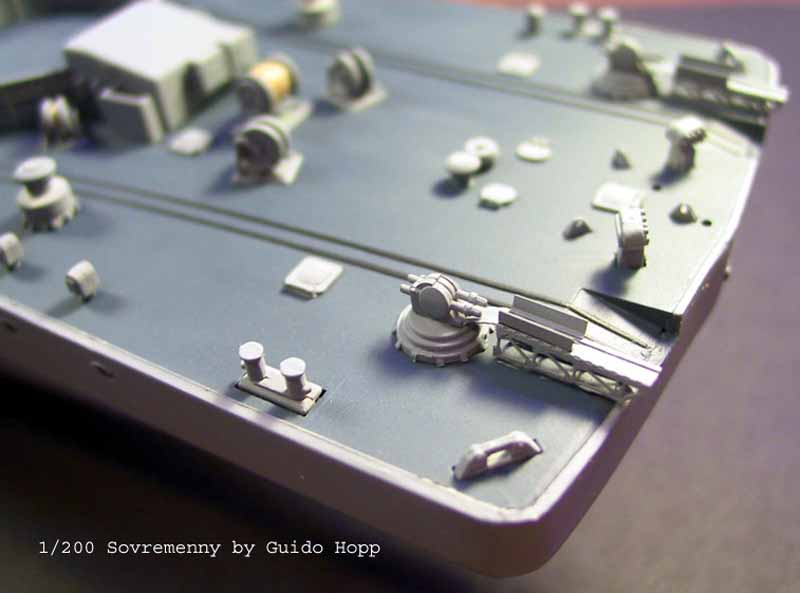
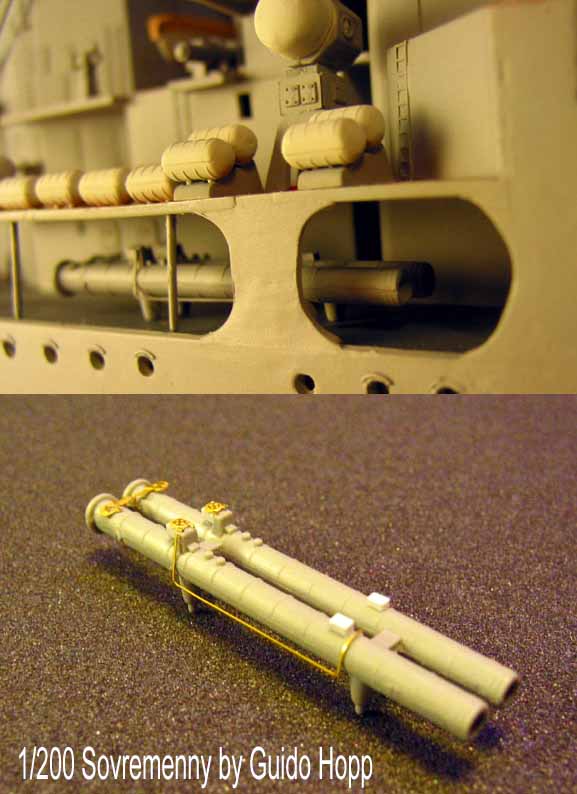
I drilled out the torpedo tubes and added some PE scratch. 1/350 GMM PE fire hoses represent the closing mechanism and 1/350 GMM PE deck hatches represent the pressure valves. According to the photos, provided by Mr. Doug Hallet, the torpedo tubes on the Sovremenny face forward!
If you read part one of this review, you already know my love for decals. I shall be checking for dry transfers to mark the launch canister numbers. (Who needs all the aggravation?)
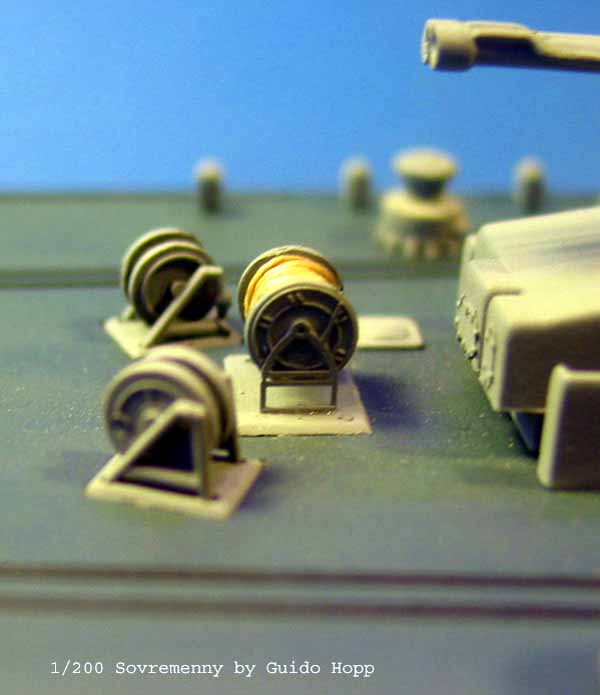
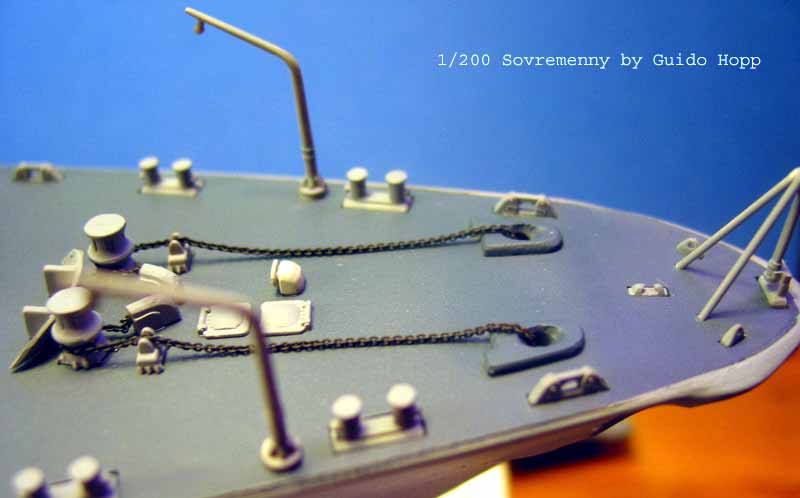
The anchor runs on the focsle are missing completely. I build mine from styrene scratch.
The anchor chain is a 22 links/cm (56links/in.) treated with Brünierungsmittel (supposedly same as US brand Blacken-It) both provided by the German Company Krick. All other details on the main decks except the AK-130 turrets- were installed as given by the book. Note, that I install flag staffs and davits always late in the construction process, because I tend to get caught in these and break them off, while working on the superstructure. Usually I install them before I apply the main decks railing.
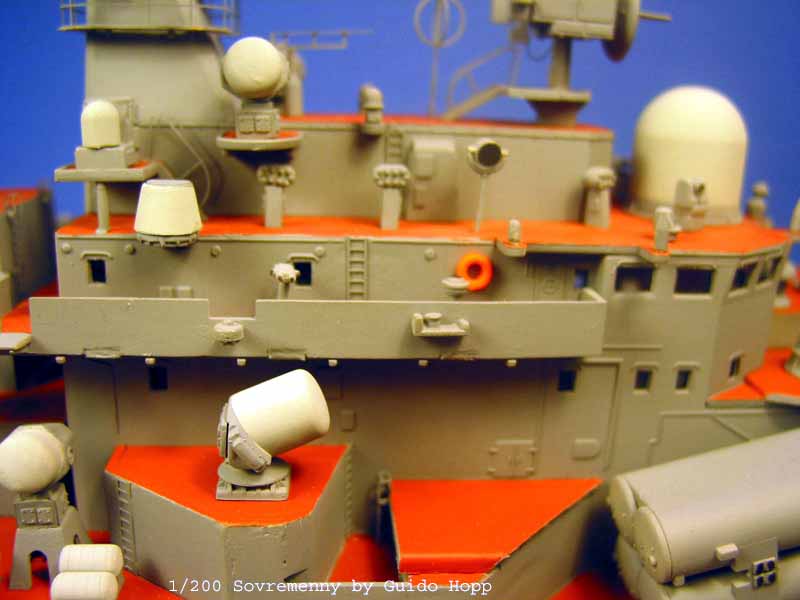
All other forward superstructure details were installed as provided by the kit. In this picture the nice effect of having cut out the windows on the bridge becomes quite evident.
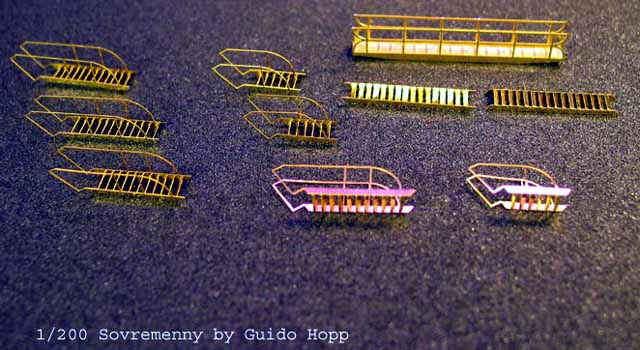
What may sound difficult is indeed easier to achieve, than one might
think: fold up the handrails, hold the ladder/walkway by its upper two
steps using pliers, or high tension cross-pliers. Now carefully flip the
steps into the proper position with the tip of your X-Acto or scalpel blade.
The positions are indicated by relief-etched lines on the inside of the
step runs on either side on the handrails. Finally fold up the upper two
steps. Each ladder was finished in about two minutes. WEM chose very stabile
brass for their ladders, the chances of messing them up is relatively small.
I sincerely hope we will see such features in future 1/350 PE sets.
I think it is feasible to etch those in this scale, too!
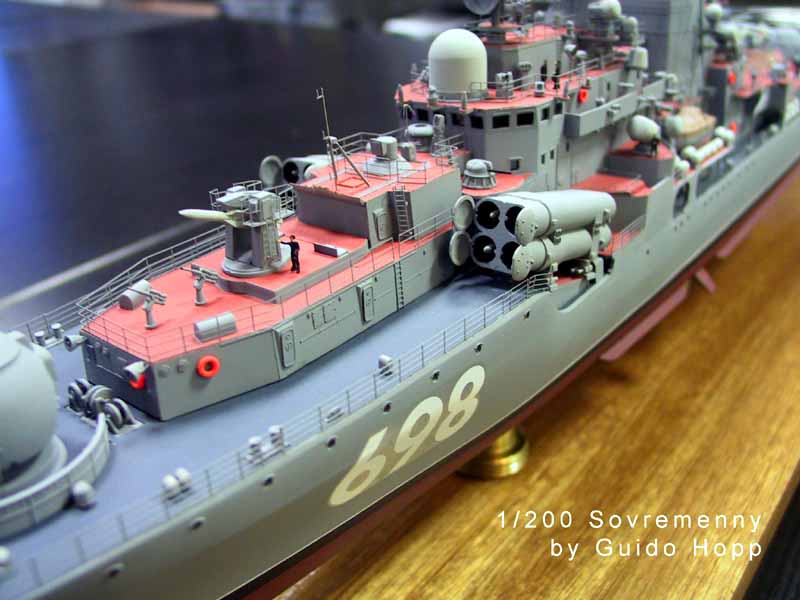
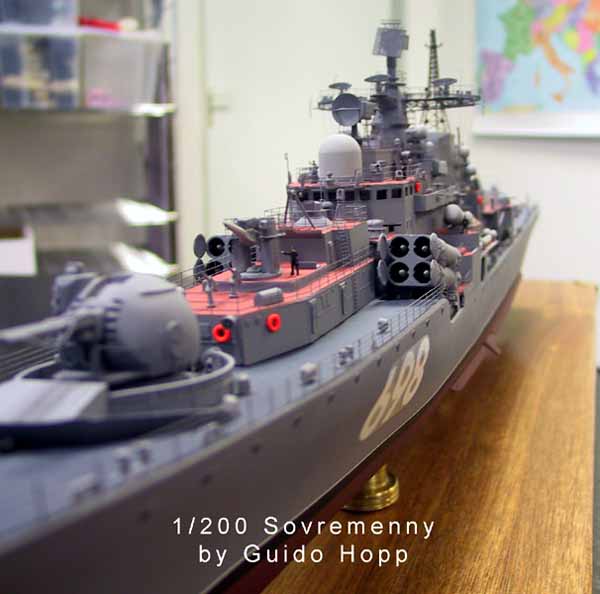
I rebuilt the saluting guns form styrene rod, as the kits parts were completely unusable, due to previously mentioned bad mold alignment. I added U shaped PE braces for all six speakers.
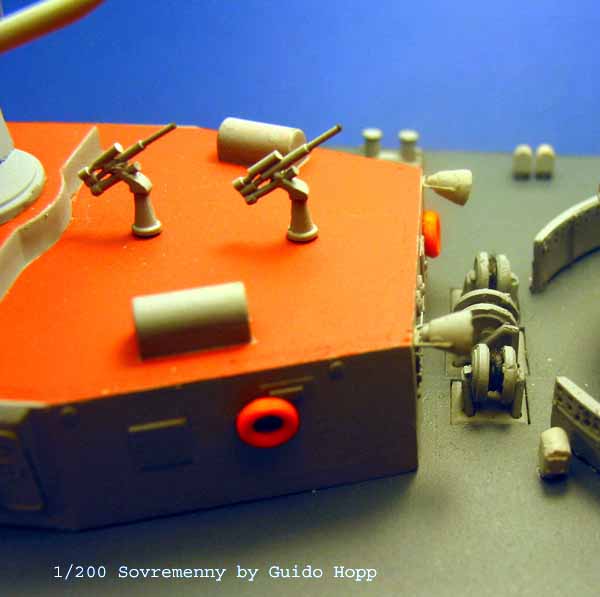
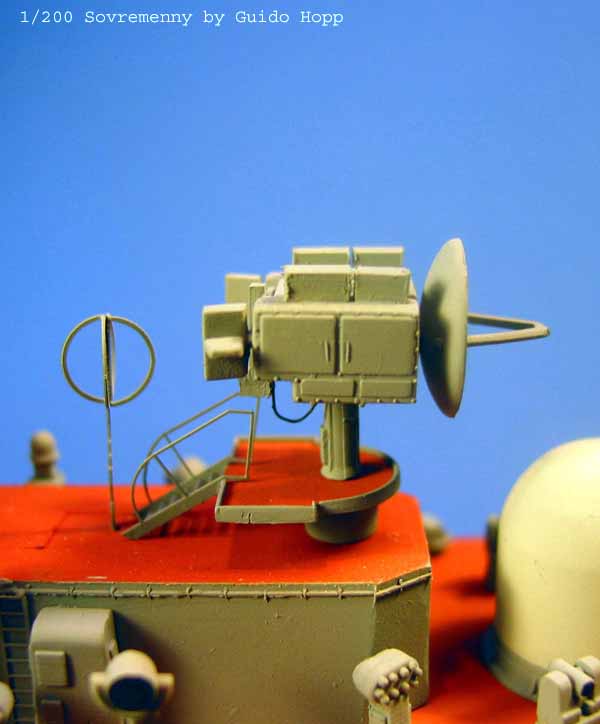
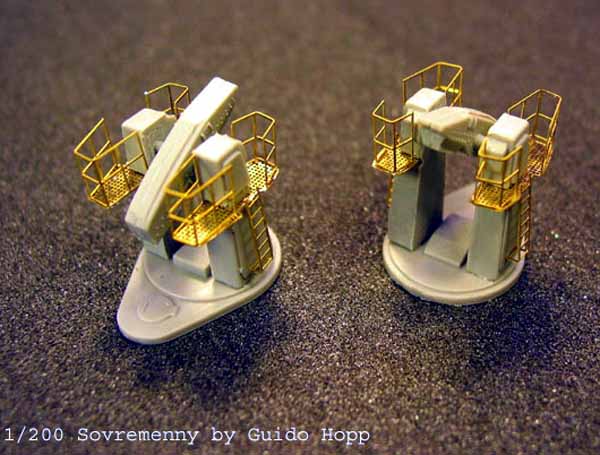
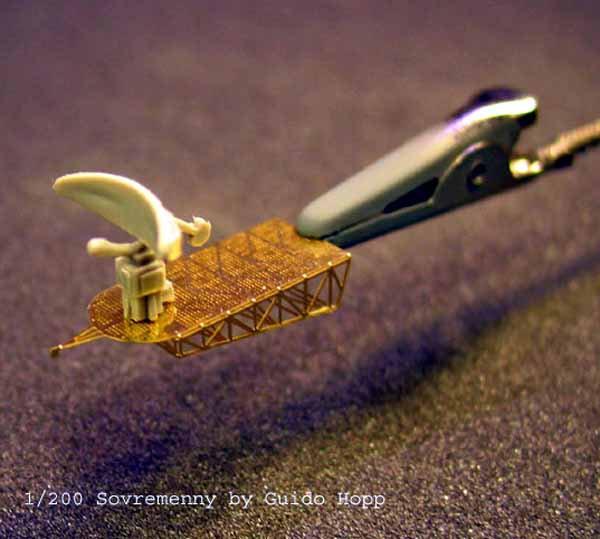
The kits cranes are very simplified. Adding PE and styrene scratch at the center brace helped it a lot, even though I could have done more to make it look like the real thing. Note that the actual crane is the on top of the center brace. Below this brace is a torsion bar. The torsion bar and the crane are not connected. So the setup of the kit is wrong in this case. Integral part of Sovremennys crane system are maintenance platforms and cable braces on the funnel right beneath the Light Bulb Sensor platform, which I constructed form PE and styrene scratch.
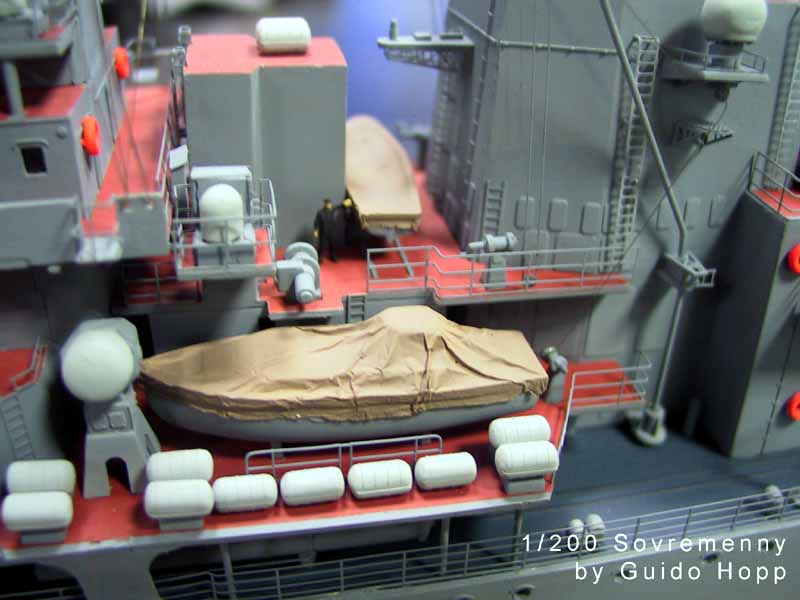
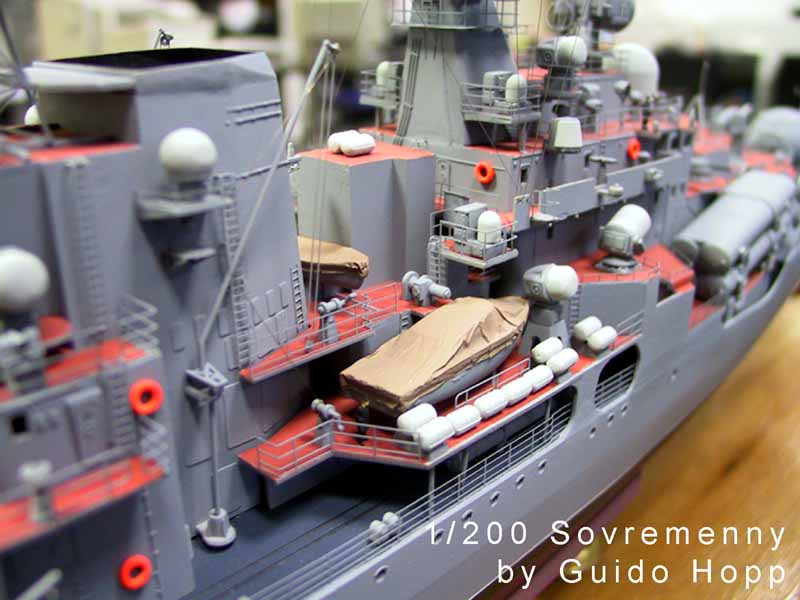
Boats and launches are covered by canvas made from aluminum foil, brushed onto the details of the boats with a bristle paintbrush. Folds appearing in the in the foil are naturally enhancing the depth of detail. The foil is painted in Tamiya Buff (XF-57 ), darkened with a couple of drops of Flat (XF-52), and Brown (X9). Most likely you will have to touch up unpainted spots after gluing the boats to the deck. You may choose to use any of the above three colors to do this: Using lighter and darker shades in the right spots - lighter shades on horizontal surfaces and darker around the folds- will create the effect of sun bleaching and dirt on the canvass.
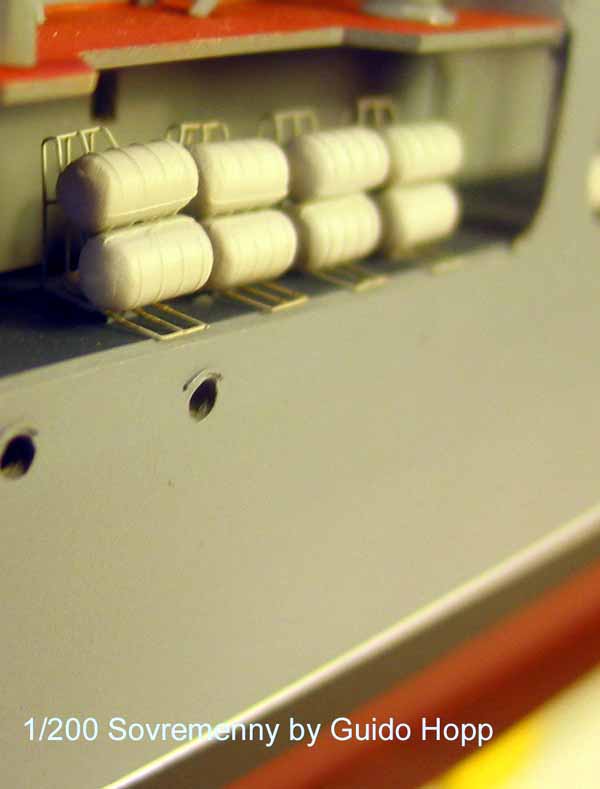
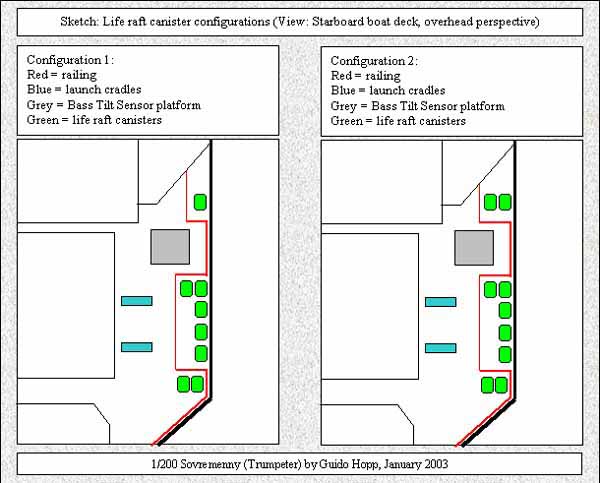
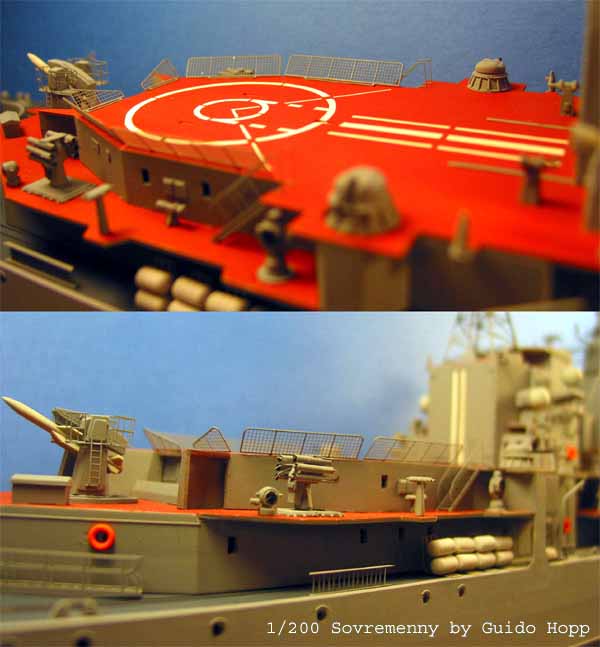
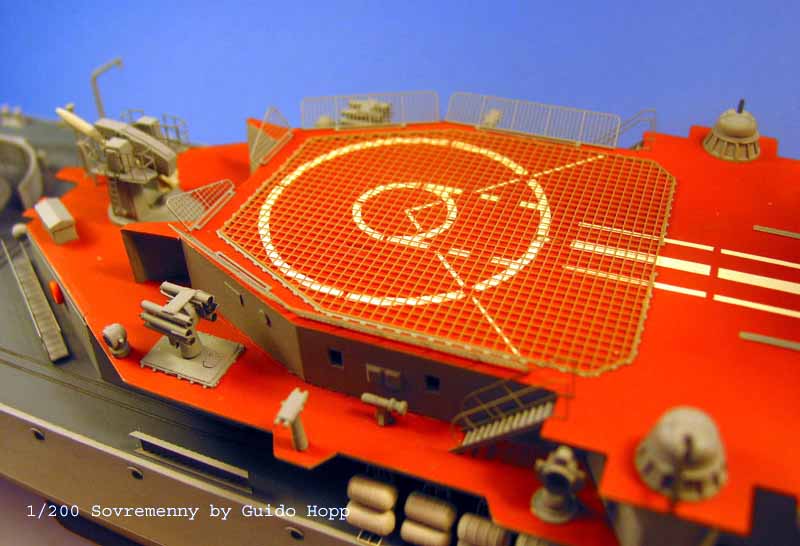
| According to the reference pics at hand the life raft canister setting of the kit is wrong (which I found out after having them installed as per the kits instruction. I still left them as they were. I hope nobody is going to eat my lunch for that). Closer research revealed two possible configurations, unfortunately I can not tell to which vessel what kind of setting applies. (see sketch) |
 |
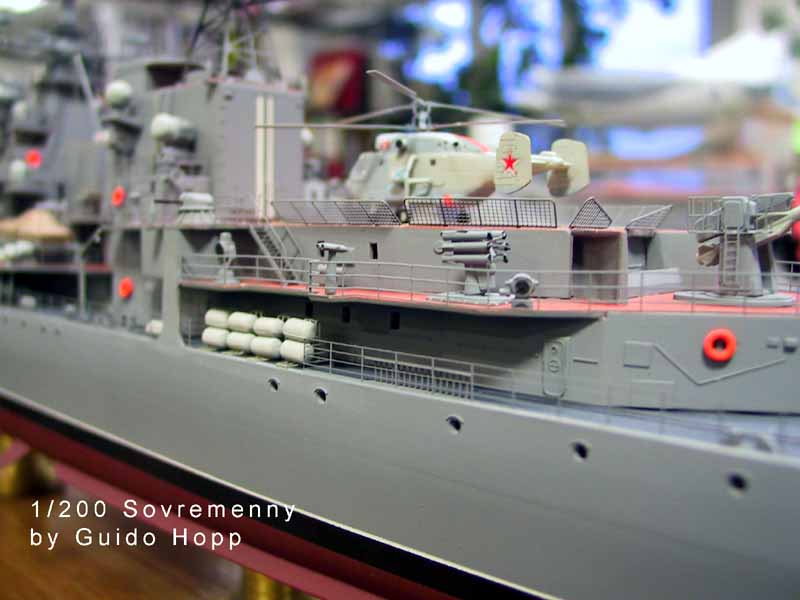
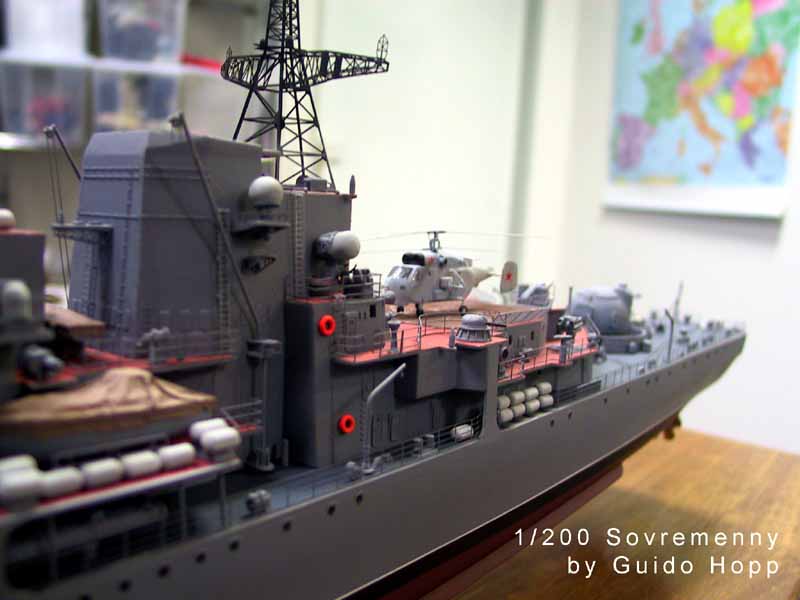
Some 2mm styrene rods were added to represent the exhausts. There are depressions on the choppers hull, but no parts for the actual exhausts. Right in front of the landing gear should be square boxes on either side of the choppers hull. A little styrene scratch did the job.
Be extra careful when removing the parts of the chopper: The clear material tends to shatter like glass - especially the landing gear, when mistreated or even just handled without extreme caution.
(Shame on careless me!).
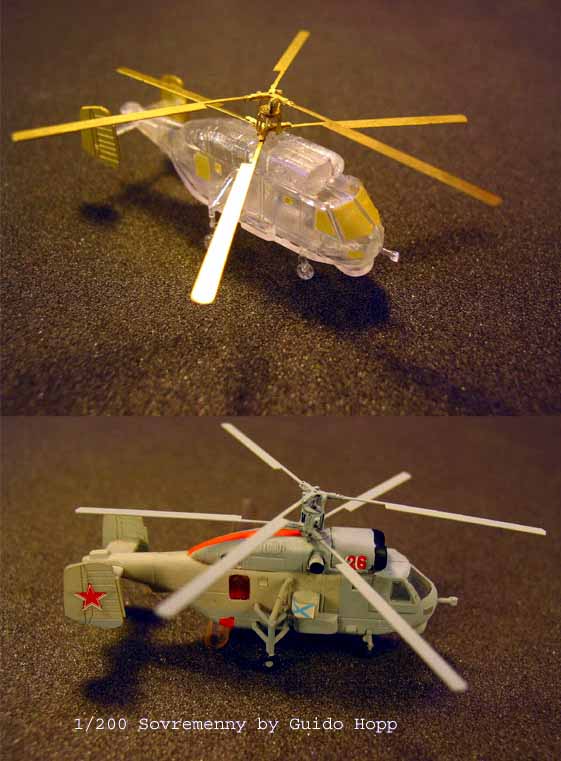
(To my complete surprise I had no problems applying the decals. Minor silvering, but hey ... still great for my skill!)
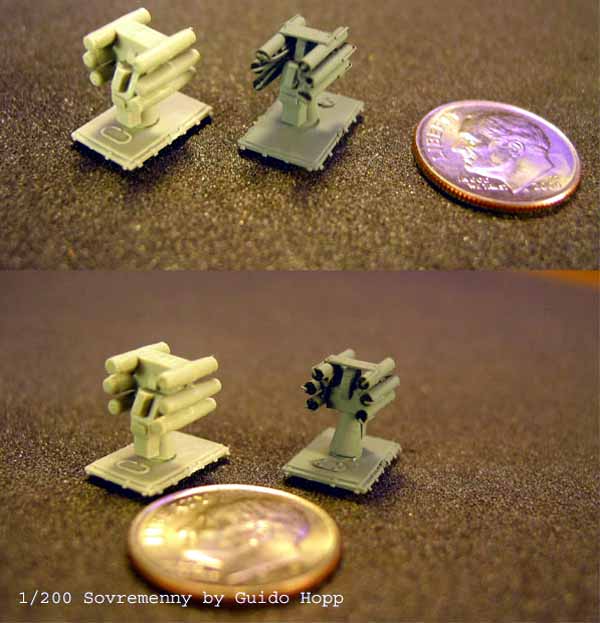
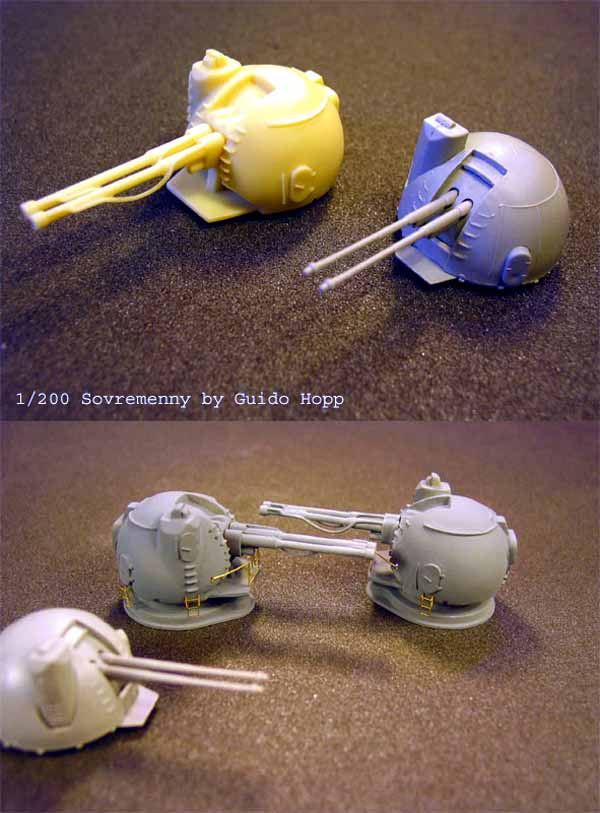
WEMs resin AK 130 turrets are beautifully made and clearly are much nicer than the igloo-shaped parts provided by the kit. These were the first resin parts I ever used. When I unpacked them I found the barrels slightly wrapped. I dipped them into boiling water for just a few seconds and straighten them out, which worked nicely. After rinsing the turrets in mild soap water, PE applications and color coats were accepted nicely.
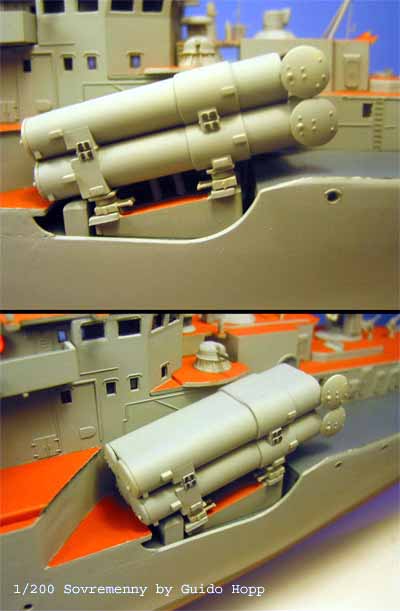
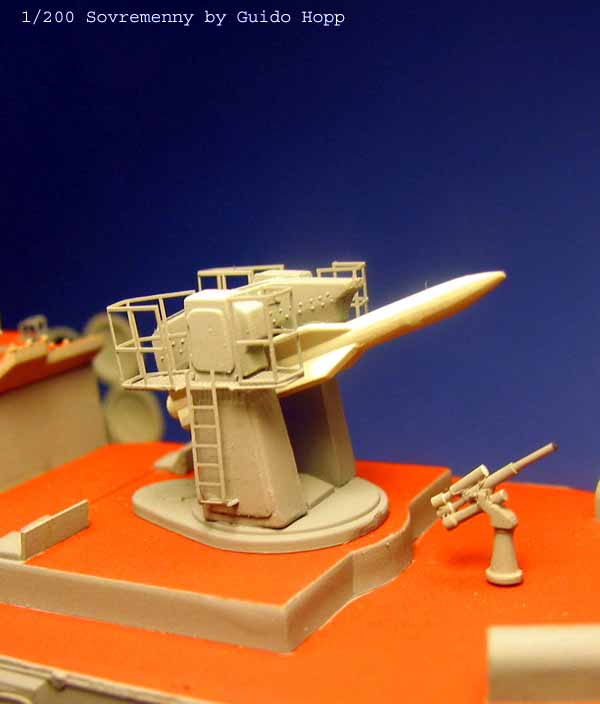
Building SA-N-7 launchers and adding PE platforms and railing was straight forward.
Please note the blast diversions right in front of the hatches on forward SA-N-7 deck made from styrene strip.
 |
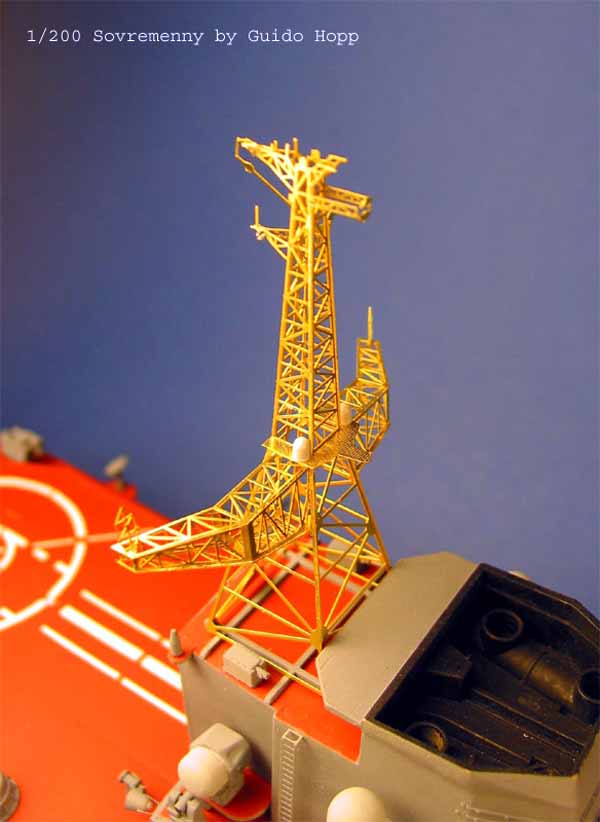 |
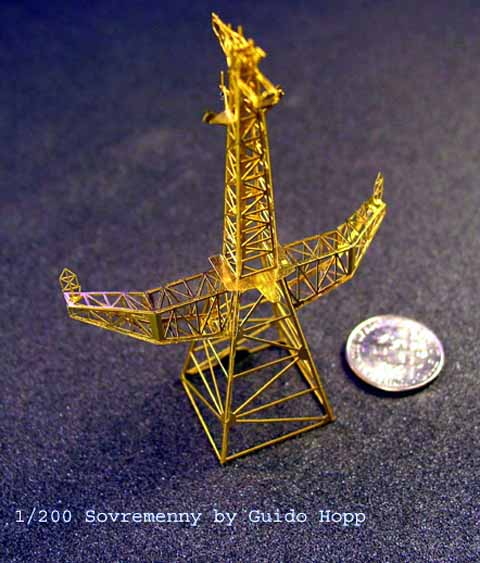
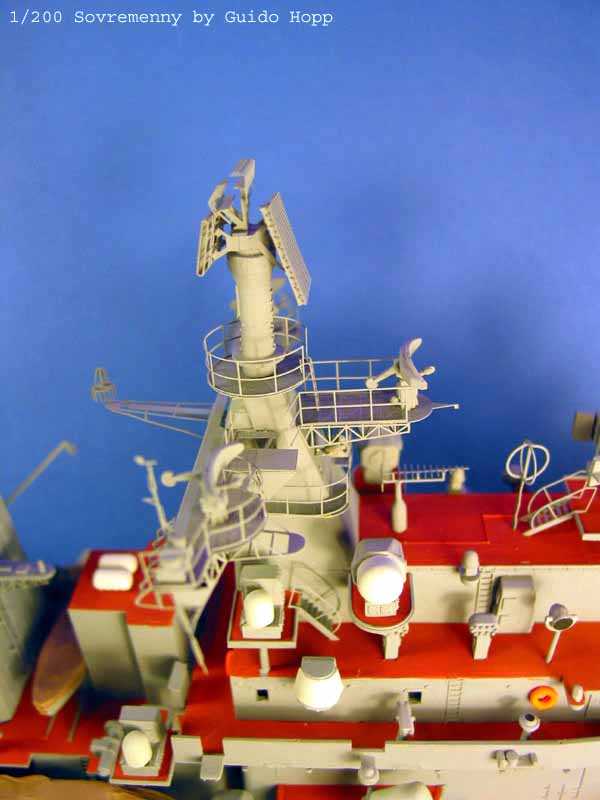
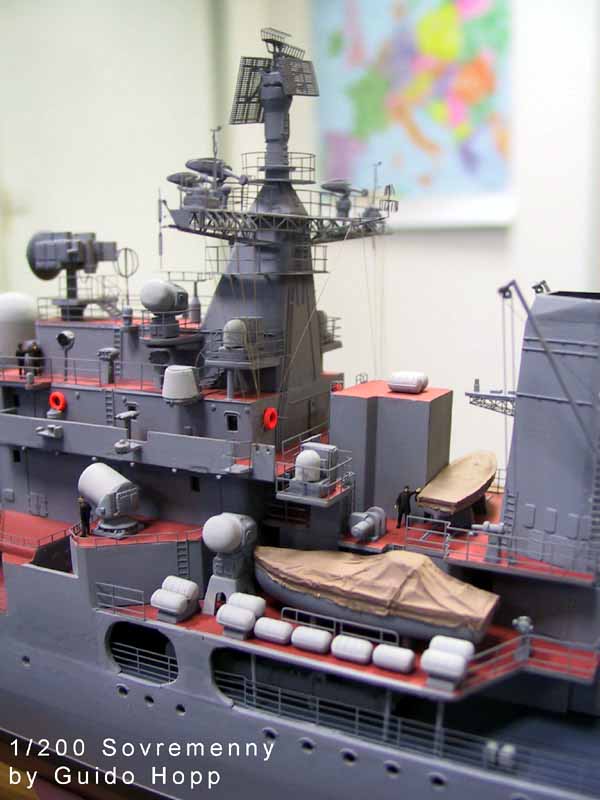
With setting up the foremast configuration I came to decide which ship I was finally going to build. Both type 956E Sovremennys were sold to China. According to my information, only 698 Yekataringburg was close to completion, when being sold. (The other was undesignated project "Alexander Nevsky" was listed as "Hull 19" only and is called 137 Fu Zhou today) Since Chinese vessels are painted in overall bluish off-white, Yekataringburg was my only choice. Subsequently the Top Plate radar configuration had to be applied. (Fortunate are those, who have 956A kits, as they may choose to install the more impressive Top Steer radar configuration). Hints to which vessel Top Steer or Top Plate radar is applied are given in WEM's instruction sheets. Still, further research is necessary. Combinations of Top Plate (Front) and Top Steer (Rear) called "Plate Steer", do apply to three ships of the Sovremenny Class. Decal pennant number application to the hull wasn't painless and curse-free, but OK.
Three sub-assemblies were necessary to build the foremast:
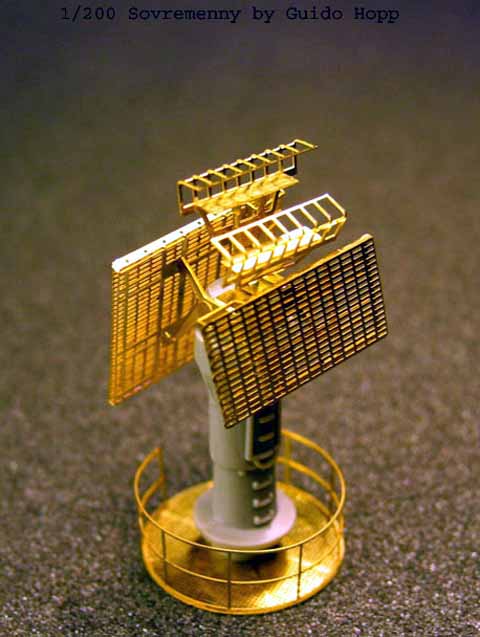
The mounting post for Top Plate radar had to be slightly modified, but with the instruction given by WEM, still easy to do. Building Top Plate radar was straight forward.
Next was the forward platform.
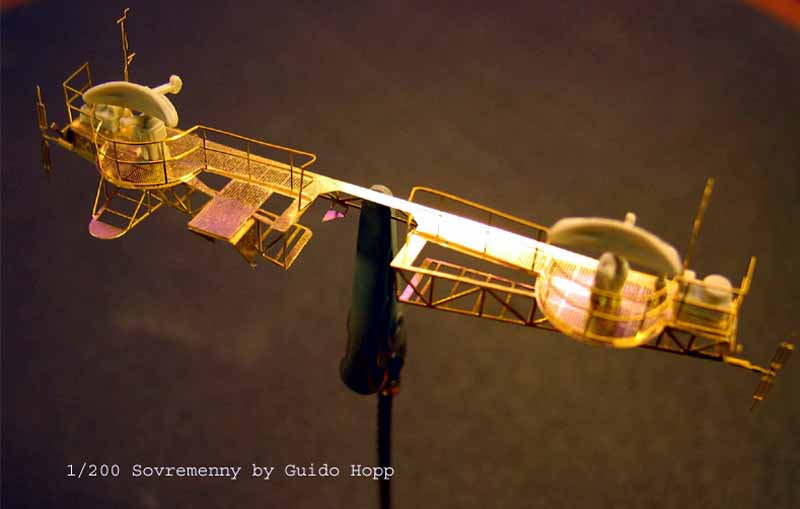
After painting and having applied the railing to the foremasts lower walkway, I installed the above mentioned parts into place. This revealed the only weakness of the PE set: There are considerable gaps between the forward platform and the yardarm platform. Finally, I added vertical ladders, where applicable and sub-assembly no. 4. the aft platform.
Having pre-shaped most of the upper deck's and walkway's railings, finishing and installing the kit's railing took about 6 hours including painting, only. The focsle railing, even though pre shaped in WEM's PE set, was a little tricky to install as it was not fully match the negative curve of the deck right in front of the SS-N-22 launchers. As well, they were a little too short and some segments had to be added.
 |
 |
 |
Still, there are cage aerials and a lot more rigging to be done. Mr. Jim Baumann has provided me with the how-tos and I have ordered necessary material form WEM. I guess it is going to take quite a while, until I have mastered this art. I promise to share my experience, as soon as I have finished the rigging.
 |
 |
 |
I can honestly say, that this kit tested me to the limits of skill and nerve. Several times I was on the brink of discontinuing the built. However, I learned many new techniques and skills and trained my patience quite a bit. Now, looking onto the (almost) final result, I have to admit, that even the tough parts were fun in their own special way.
The PE set and replacements of WEM are not exactly cheap, but magnificently made. I wont complain, but even on these is room for development still. Replacement boat-cradles and detail, chaff chutes for the stern, in-scale anchor chains and maybe some details for RBUs and an improved Kite Screetch platform could enhance this already great product.
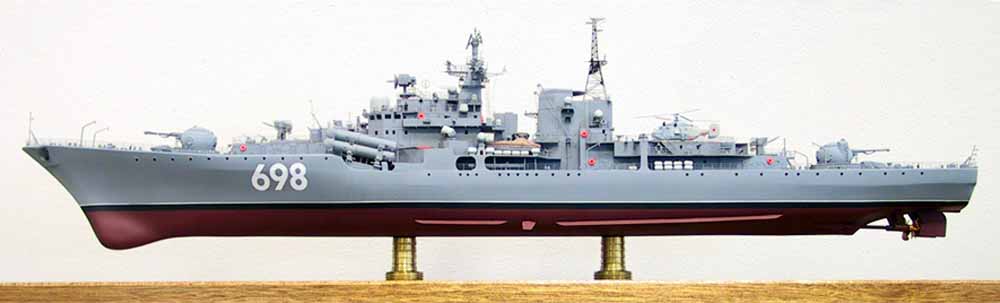
My 698 Yekatringburg is by no means perfect. Still, I am very satisfied and will most likely build another ship of this class some other time.
go to Timothy Dike for encouraging me to do this review and publishing it;
my wife for counter reading, patience with my hobby and keeping her vacuum cleaner away from my work bench
Mr. Jim Baumann for sharing his techniques and publishing so many pics of ships of unsurpassed quality, demonstrating, what is possible - even in much smaller scales;
Mr. Mark Meredith for sharing his invaluable pics of the ship
and finally Mr. Doug Hallet, for sharing his information and discussing various aspects of building and bettering
Trumpeters 1/200 956E Sovremenny Class
Destroyer.
(The End)
Opinions and comments are highly appreciated. Ill be glad to answer your questions on the message board of this homepage or directly at guido-hopp@hopp-import.de.
Back to Part 1
