 |
||||||||||||||||||||||||||||||||||||
| This whole idea came about as a result of being a subscriber
to the much lamented brainchild of Dan H Jones of Plastic Ship Modeler
magazine (PSM)..
In the 1994/4 issue there was a short article and a set of drawings
of the WW1 military transport ships known collectively as the Hog Islanders
The article was written and illustrated by Dan H Jones. A condensation
thereof below:
|
||||||||||||||||||||||||||||||||||||
| America was a late arrival in the First
World War and, as with all previous wars, was woefully unprepared. One
problem deemed of critical importance by her new allies, the British, was
the depredations of the German U-boats and surface raiders. Merchant ships
were the lifeline of the Empire and new tonnage the most urgent need for
applying America's production potential and vast manpower pool to the prosecution
of the war. With great enthusiasm but with little advanced planning, America
committed to a vast production program and boasted of spanning the seas
with a "bridge of ships" and darkening the skies with her aircraft. This
however, took time and the full effect of the American mass production
potential was just beginning to be felt when the armistice was signed.
Overnight, vast and lavish war contracts were canceled and many industries
collapsed. One of the more ambitious projects was for the mass production
of cargo ships. Yards were created and materials acquired but only a few
ships had been delivered when the war ended. Hog Island, the largest of
three new assembly yards, had not finished a single ship. There was still
a perceived need to rebuild the merchant marine and the possibility of
foreign sales seemed strong, thus the decision was made to complete most
of the Hog Island contracts.
A shortage of merchant shipping was one of the factors for America remaining neutral for so long. Reasoning was that if America could not transport its own men and material to the battlefield, then America could not fight. Addressing this problem, Congress passed the Federal Shipping Act of 1916. The act provided for the creation of a new public agency, The United States Shipping Board, to "create a merchant marine adequate for the United States". The Shipping Board was given wide reaching powers, and more importantly, was funded by $50,000,000 to implement its programs. A corporation using both public and private funds was formed. The Emergency Fleet Corp. found that existing American yards were not large or numerous enough to meet the needs so contracts were let to Japan and China. More importantly, contracts were entered into with private companies to form new yards, called "Agency Yards" to expand the building capability. These would be assembly yards, building prefabricated ships, rather than using traditional methods. One such company, the American International Corp. started by purchasing the New York Shipbuilding Company of Camden, New Jersey. Plans to expand the yard could only go so far due to the limits of available land. Across the Delaware River lies the city of Philadelphia. A little known island, swampy and barren apart from a single abandoned shack, near Philadelphia, called Hog Island, was deemed suitable and was easy to acquire. It faced the Delaware River, offered over two miles of shoreline and the river was deep enough to permit launchings. Soon the island was transformed with a connecting railroad and marshaling yards, thirty slipways, seven fitting out wet docks, a forest of cranes and gantries and a holding basin. Building the yards and setting up the assembly methods presented tremendous problems for the company and the Shipping Board. Nothing on this scale had ever before been attempted. The concept of building ships in parts and assembling them at a central location was revolutionary, the first time this had been done. There were delays and the costs were enormous. In spite of the coldest winter on record construction proceeded and the first keel of a Type A was laid on February 6, 1918. The first completed hull, the USS Quistconck, was christened on August 5, 1918. Two basic designs were to be fabricated at the yard, both to be collectively known as "Hog Islanders". The Type A design was a cargo carrier and the Type B was designed to transport troops. Both were simple designs geared toward mass production and aesthetic considerations were ignored. The hulls had no sheer and were symmetrical from the sides, resulting in some of the uglier ships ever to sail the seas. They were ugly but they were well built and had a good performance in terms of capacity and speed. All were oil fired and were very modern in design except for their silhouette. The Type B in particular was said to be designed with camouflage in mind because with their lack of sheer, high stern, and the evenly balanced superstructure, submarines would have trouble telling which direction they were going. The Hog Island contract called for 180 ships but with the end of the war, only 122 were completed. The last was completed in January 21, 1921. The Shipping Board now found itself in the shipping business. Over a third of the modern oil fired vessels in it's fleet were Hog Islanders and at first the Board was reluctant to sell them. Private operators petitioned successfully to force sale of these desirable hulls but when they were made available it was at inflated prices. In the postwar boom many owners paid the asking price which turned a nice profit for the Emergency Shipbuilding Corporation. With the shipping slump of 1921 everything changed. Hog Islanders were still at their original prices which then represented three times the market rate. Although the Shipping Board did not reduce their prices nor accept proposals of rebates, they did allow strapped owners to return ships to Shipping Board control. Most of the early sales reverted back to Government ownership. In the interest of helping the development of the American Merchant Marine a subsidy scheme was then created whereby an owner could bid on an established route and be compensated by Federal funds and be allowed a very reasonable purchase price for a Hog Islander hull. Many new companies were thus created to operate what would have been otherwise unprofitable routes. Most of the established shipping companies also took advantage of this scheme and the Hog Island type became a very important element in the between the wars merchant marine. Most of the ships were still around in WW II and did the job they were
designed for one war earlier. The hospital ship USS Samaritan was unmistakably
a Hog Islander, her silhouette was unaltered apart from her markings. Others
served in their intended roles as cargo and troop transports.
|
||||||||||||||||||||||||||||||||||||
| Being a connoisseur of the unusual as well as one who appreciates
the classic three Island type of freighter along with the functional
simplicity of the sheerless design of the Hogs I had always promised myself
I would someday use the drawings in PSM magazine to scratchbuild a model
.
Years passed.. and with an ever growing kit stash to build my way through
there was always another model to build before tackling the Hog Islander
My good intentions were overtaken by the appearance of a Hog Islander resin kit in 1/700, manufactured by Battlefleet Models--who specialize in the off-beat subjects. I obtained a kit, using copious drawings and plans set to workit would
be a quick build- a simple little freighter with no guns
..Ha!
|
||||||||||||||||||||||||||||||||||||
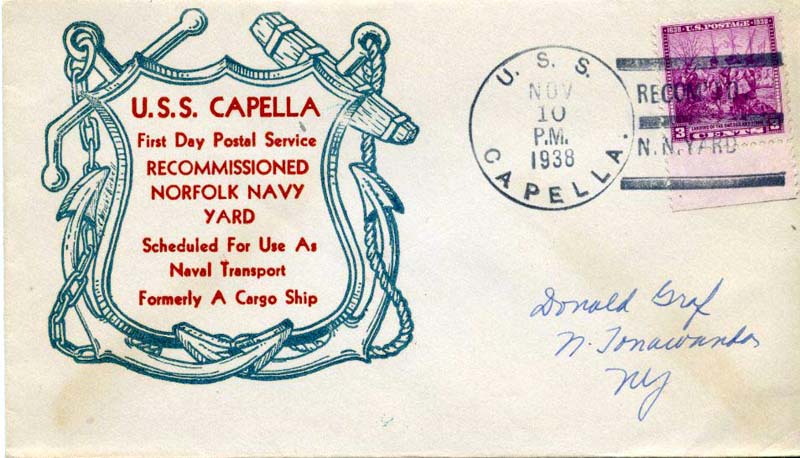
| Extensive study of plans and photos soon led to the conclusion that this standard design of ship was anything but standard! Variations in porthole numbers as well as locations, plating runs and superstructure shapes and layouts. I coincidentally obtained a USS Capella First day service envelope dating from 1938 so the USS Capella it would have to be! Fortunately there are some useful photo resources online showing this vessel, with some good close-up photos also here: | click images
to enlarge |
|||||||||||||||||||||||||||||||||||
 |
||||||||||||||||||||||||||||||||||||
| These allowed me to add extra detail to my build of the ship. At this stage I decided to have the ship lying to a buoy lightso that more of the underwater hull would be visiblethe kit shows the vessel at near full load. While |I liked the slightly ungainly look of the high on her marks as seen in many photos. So the first thing to add was additional plastic shims to gain the extra depth.. |  |
|||||||||||||||||||||||||||||||||||
| Once the cement had set I simply carved it to conform to the hull contours existing. So as to build a credible model of USS Capella required some portholes to be added-but rather more difficult -some needed to be removed and altered in height. Study of photos showed visible plating runs-so I decided to represent this by the application of 3-M Scotch Magic tape---thin, dead matt and easy! I have no concerns about the longevity of this material if properly sealed with varnish and paint. I have plated some hulls in this manner in the past-some of the models are 15 plus years old now with no sign of movement whatsoever. | 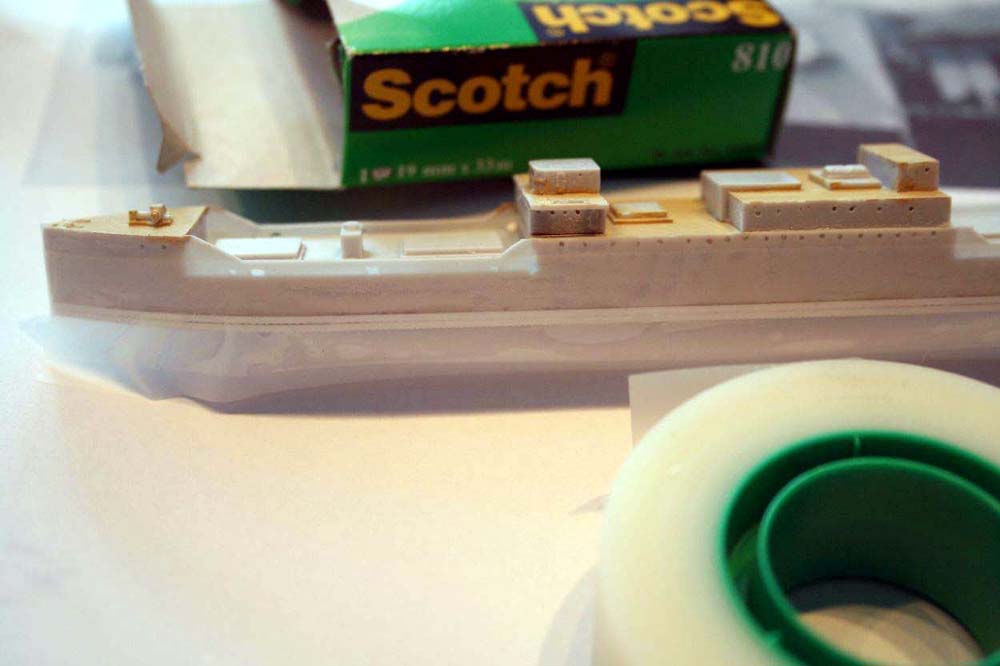 |
|||||||||||||||||||||||||||||||||||
| This allowed me to create overlapping runs that allowed me to replace and re-site the portholes according to the plans and photos. After initial painting I ran some Tamiya masking tape along the hull at the lower end of the desired porthole positions these were pricked through with a pushpin along the tape line prior to drilling out with a pin vice. At the same time I opened up the scuppers and fairlead apertures all around-the hull was taking life now! Due to a CA glue glitch on my part(!) the assembled deckhouse levels did not give me the completely slab-fronted look that the ships had-so I cut a new styrene overlay to smooth the area. | 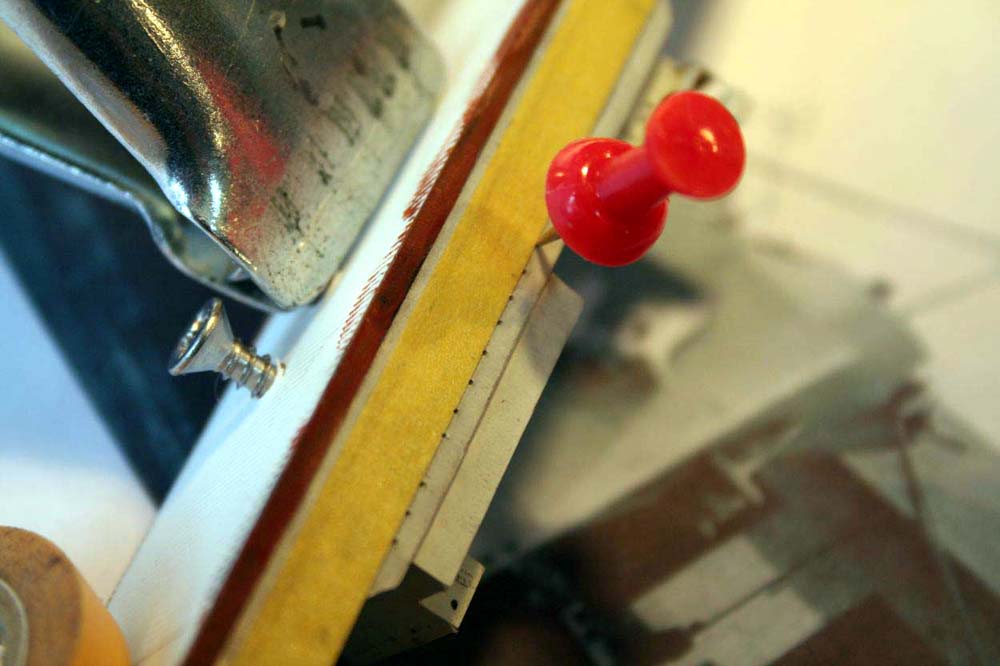 |
|||||||||||||||||||||||||||||||||||
 |
||||||||||||||||||||||||||||||||||||
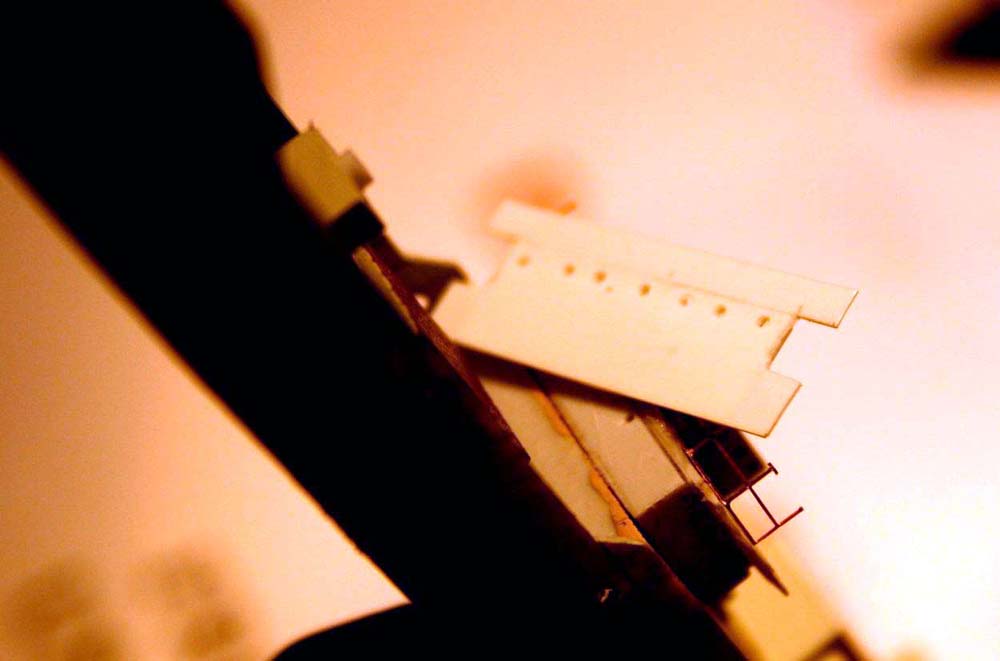
| I took the opportunity then to cut in the stairwell apertures and the inter-deck stanchions. The upper bridge had supports with T brackets-this caused me brief quandary a quick search through the old PE stash located some larger scale handril-when cut down it was perfect in all dimensions. | 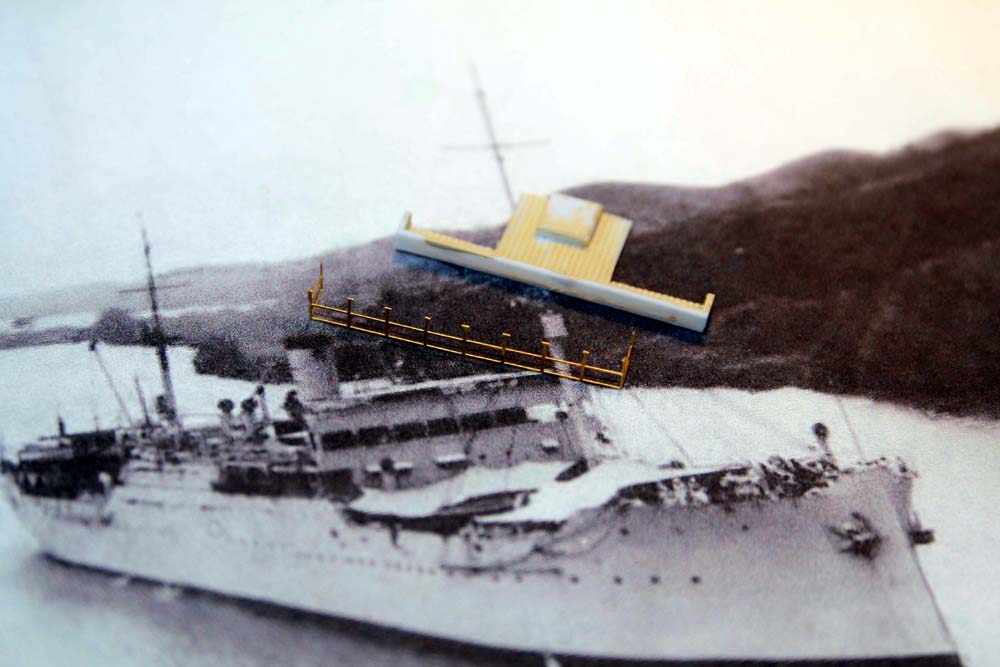 |
|||||||||||||||||||||||||||||||||||
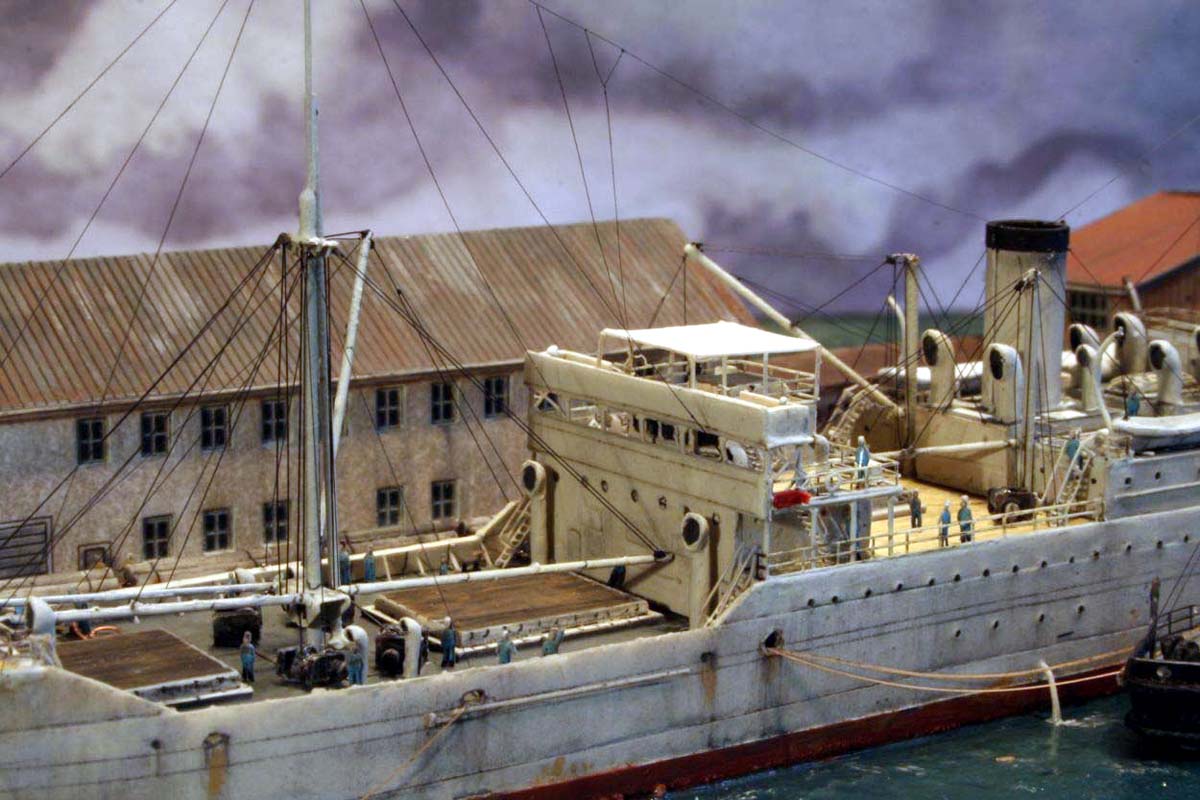
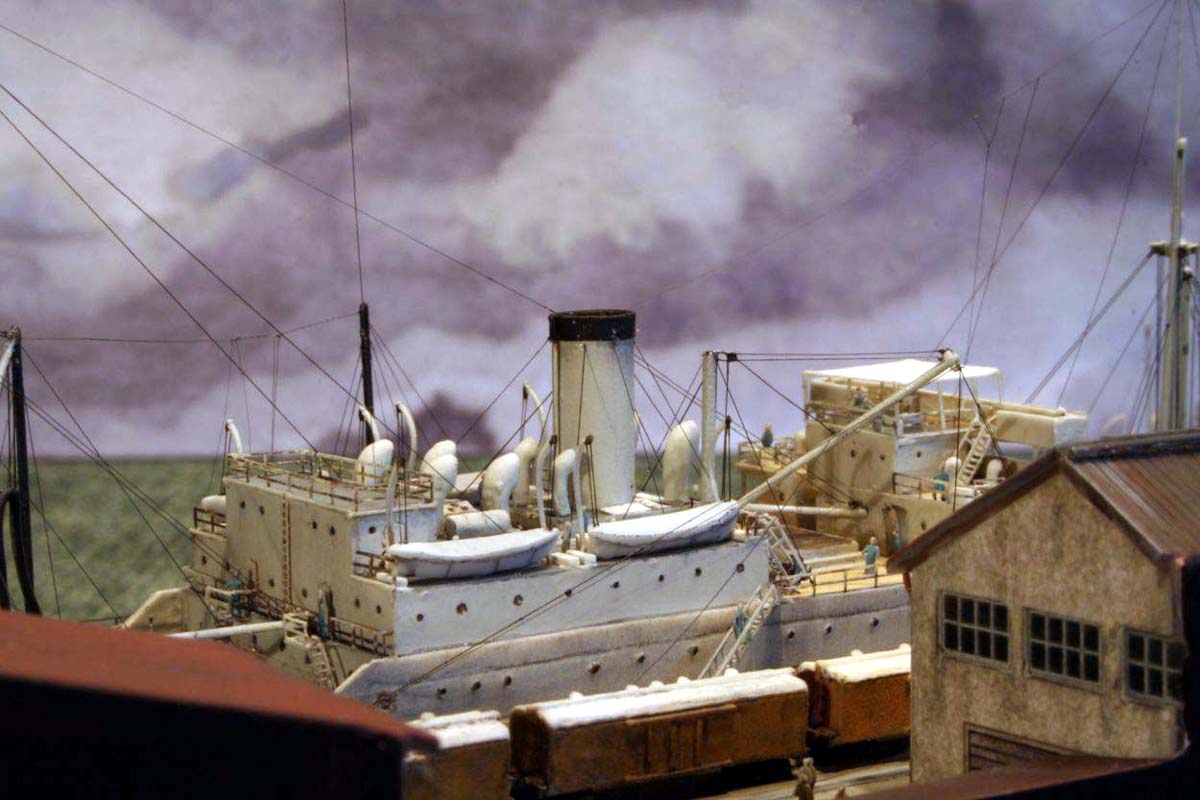
| The Hog Islanders were festooned all over with cowl ventilators. The supplied cast items had their mouths reduced in size, depth and were extensively drilled out to make the edges thinner. Additional vents need to be made-I used lead solder for this-an ideal material having a soft flux core making it very easy to bend, shape and drill out the mouth. The photo illustrates the sequence. |  |
|||||||||||||||||||||||||||||||||||
| These solder vents were also used on all the smaller vesselsmore later! The build became pretty straightforward thereafterI had previously screwed some countersunk screws into the underside to allow me to use a powerful spring loaded clamp to hold the model by whilst work progresses-I was still undecided as to how to present the model. | 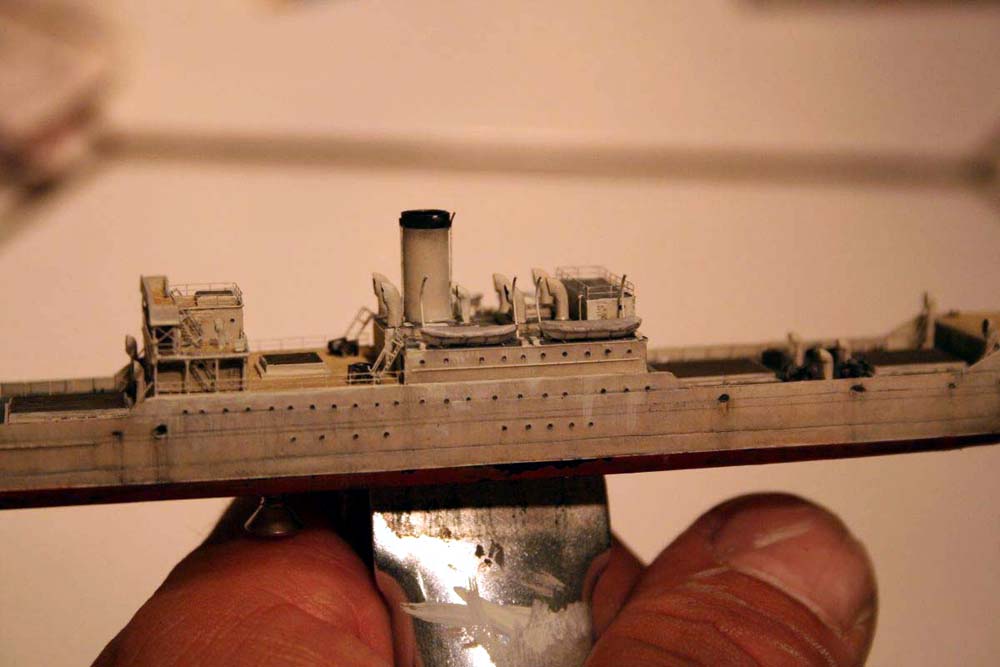 |
|||||||||||||||||||||||||||||||||||
| I removed the cast-on resin square mast mounting blocks-these were actually thick plate steel derrick brackets- as I discovered whilst looking at photos. The Mission models micro chisel was perfect for this purpose!! I then added some much needed bulkhead detail as well as the fore and aft deck overhangs using styrene strip. The topside supports on the inboard of the gunwhales were made of stretched sprue. | 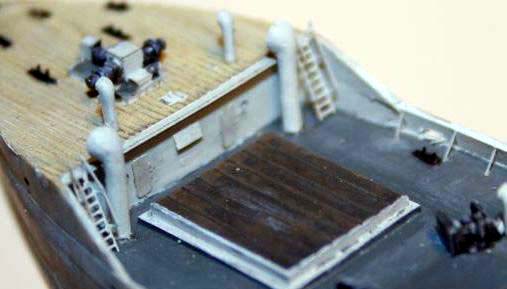 |
|||||||||||||||||||||||||||||||||||
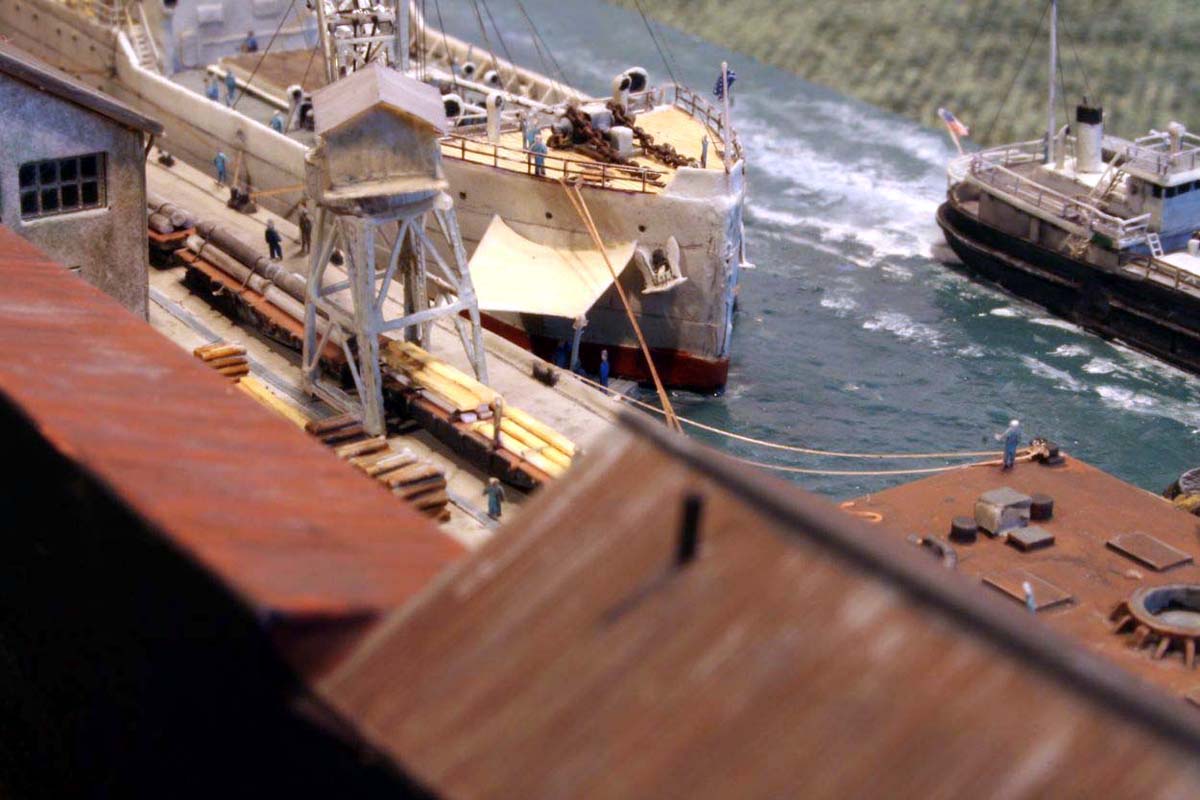
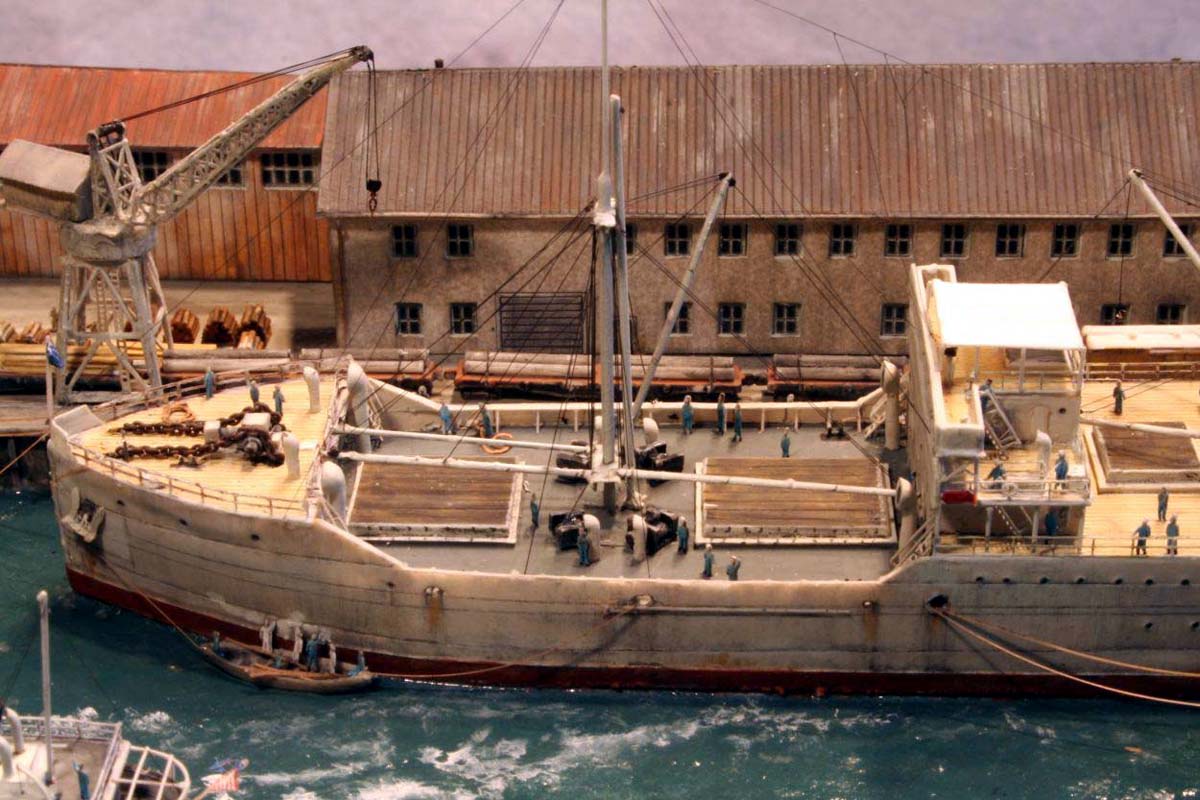
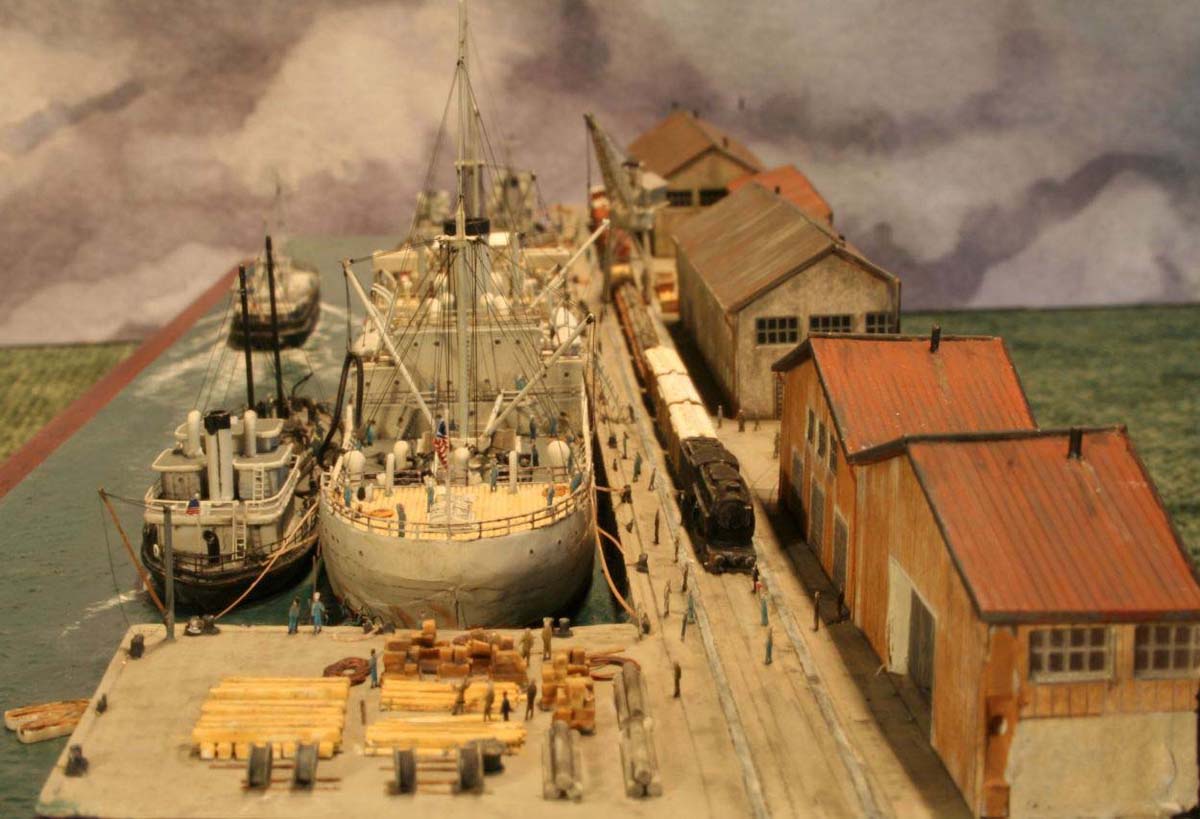
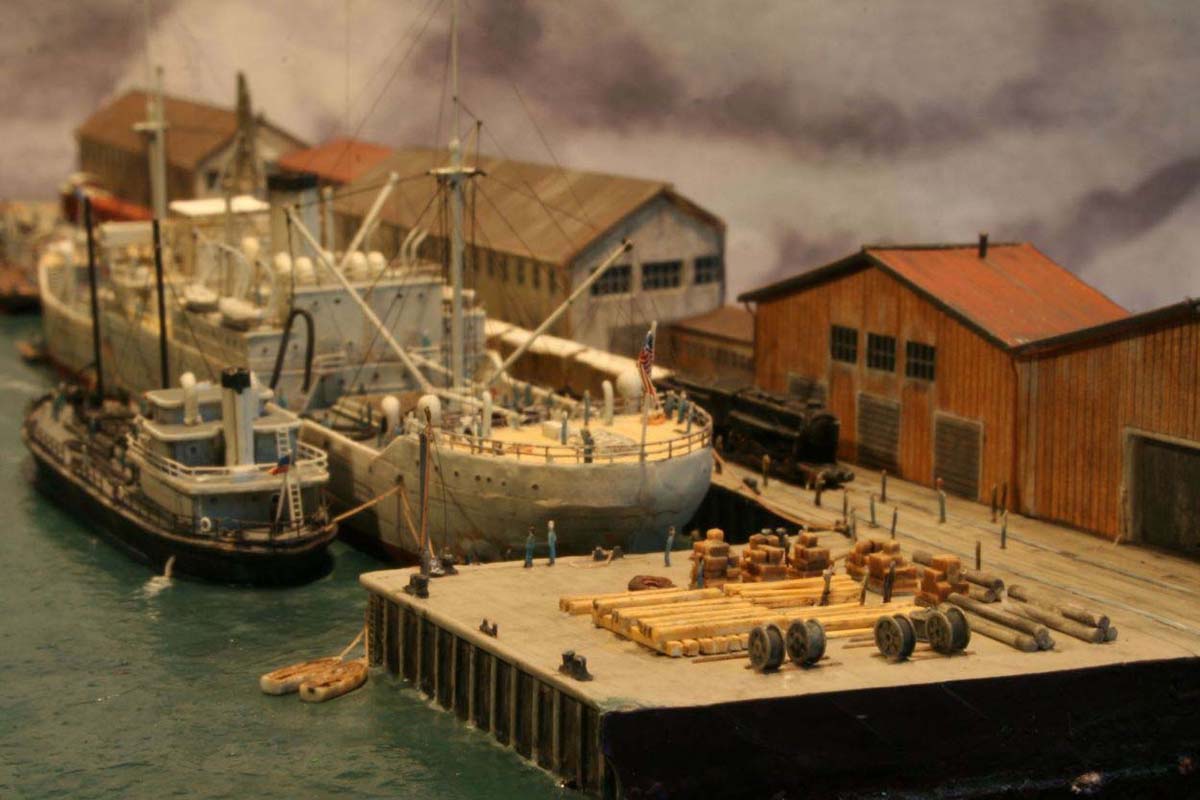
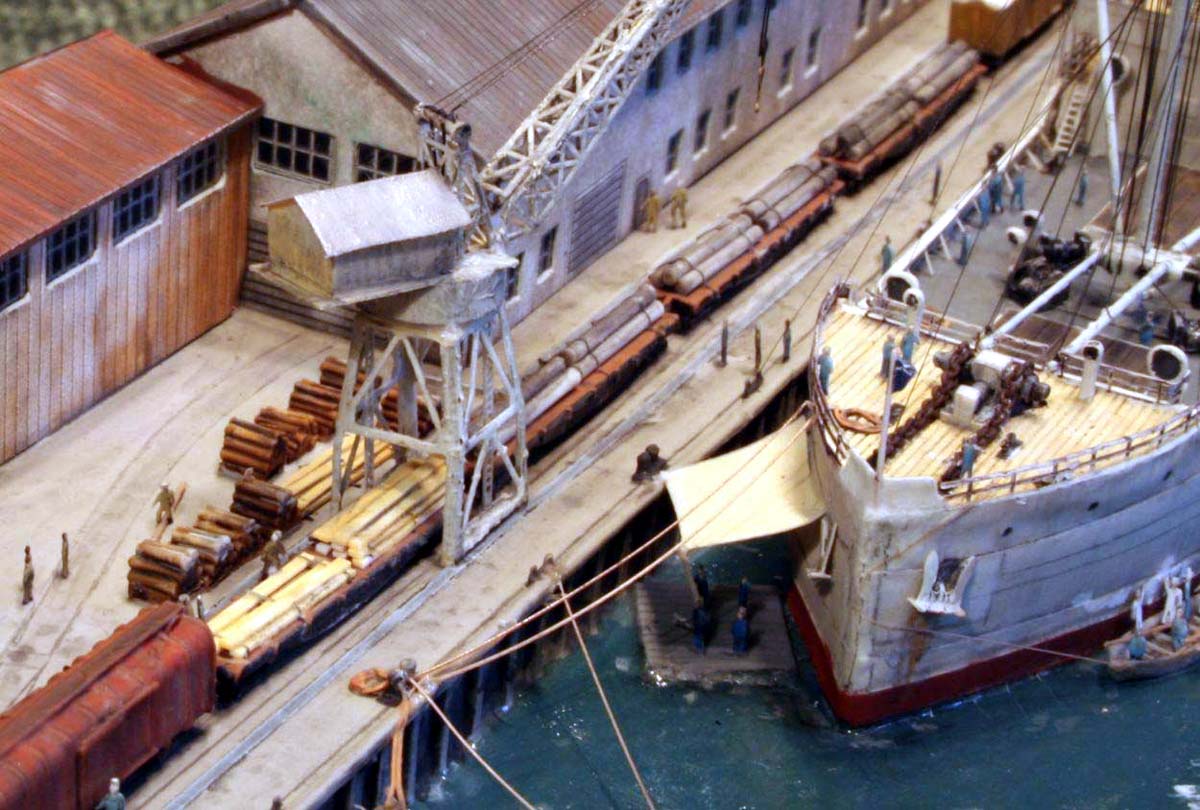
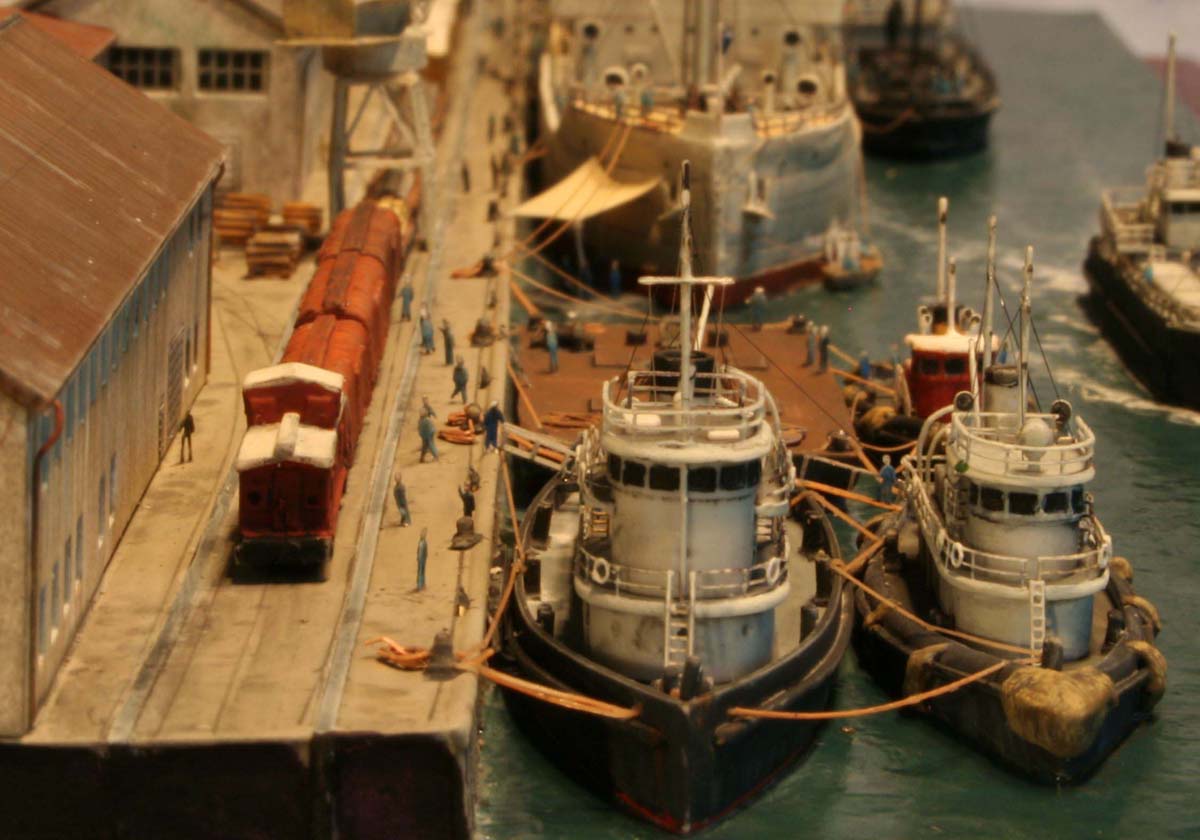
| At about this time I decided to have the ship alongside a quay wall. A perusal of the White Ensign Models Dockyard Mateys soon had me planning grander schemes! I obtained from WEM dock sections, steam locomotive(s), numerous railway freight cars, some buildings and a host of other goodies. |  |
|||||||||||||||||||||||||||||||||||
| I then decided that a handsome dockyard crane was a must have.! To the rescue came Loose Cannon productions who have a good variety of dockyard cranes as resin/PE combo kits and an extensive range of beautiful buildings. These are truly models within themselves, featuring recessed laser etched(?) window frames, printed card overlays to be stuck onto the Perspex carcass. As I was unable to have the space for the complete structures on my chosen base I modified the buildings to suit my bas-relief purposes by chopping, mixing and adapting the parts supplied. After adding rain guttering, down pipes, ridge tiles and chimney stacks I was able to return to matters nautical!! It was an interesting exercise in modelmakingI found myself when stuck in traffic observing the weathering pattern of buildings by the roadside . | ||||||||||||||||||||||||||||||||||||
| Having placed the pier side on its base-I decided that
being square to the base made it dull visually-so I angled the entire pier
around 8-10 digress to the long edge-and glued and screwed the resin sections,
filling the recessed screws with auto-bodyfiller. Only then I realized
that I had to also saw off all the backs of the buildings at the same angle
this was tricky to do with these delicate, assembled finished buildings
-so
I re-enforced all internal seams with Araldite epoxy, fastened the structures
to the dockside and base;
and when hard
- using a high-speed angle grinder(!!)
and ground off all overhanging building parts.it really does pay to PLAN
AHEAD- which I evidently did not!!
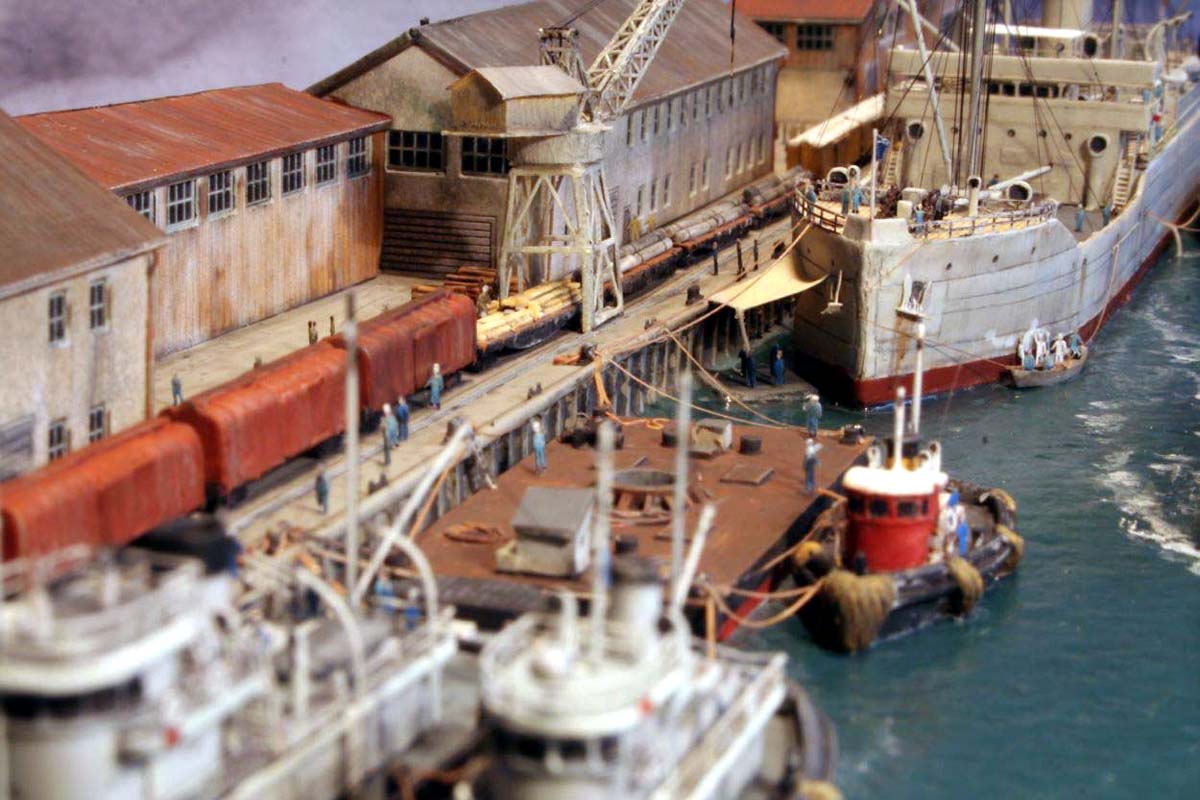
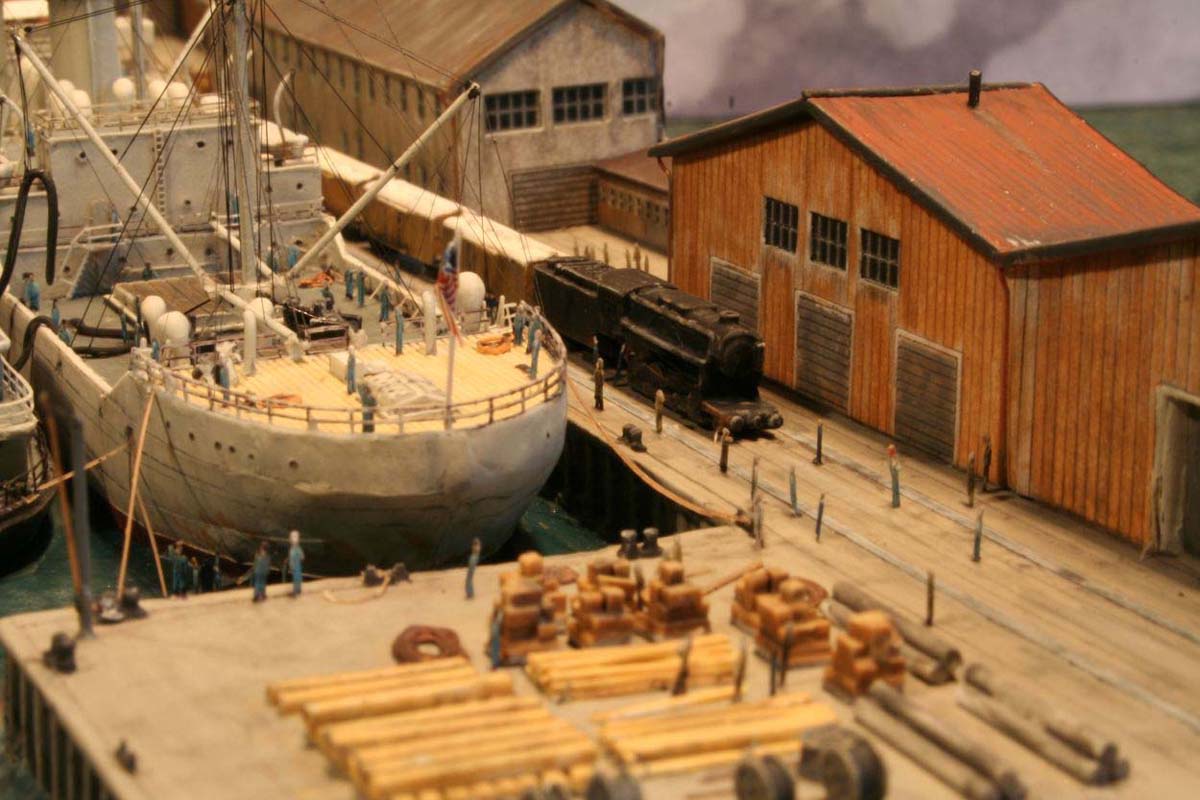
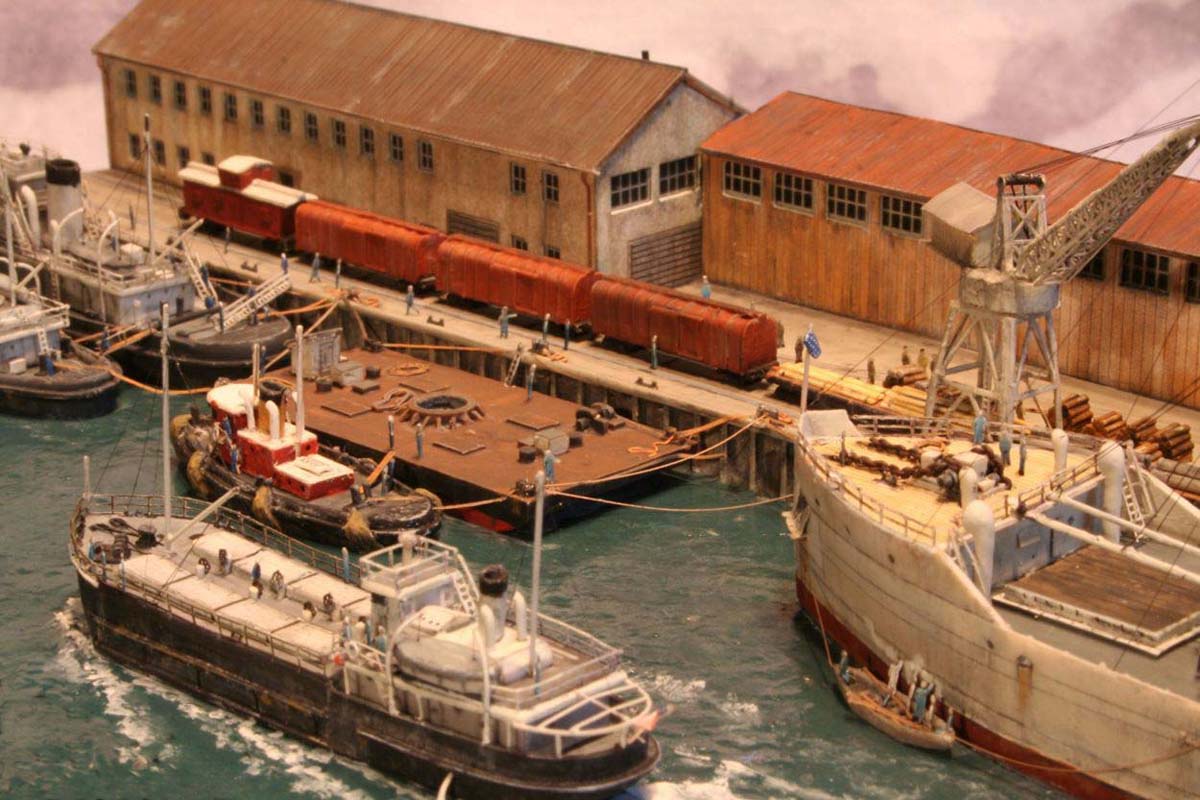
After placing the big ship alongside the pier it all looked rather sparse-so the freight train was built and placed into position . Prior to this I had hollowed out the 2-8-0 locomotives cab, installed window frames of ex radar PE, thinned down the crank and connecting rods, drilled out the smokestack and raised the chassis level to reduce the daylight below the boiler. |
||||||||||||||||||||||||||||||||||||
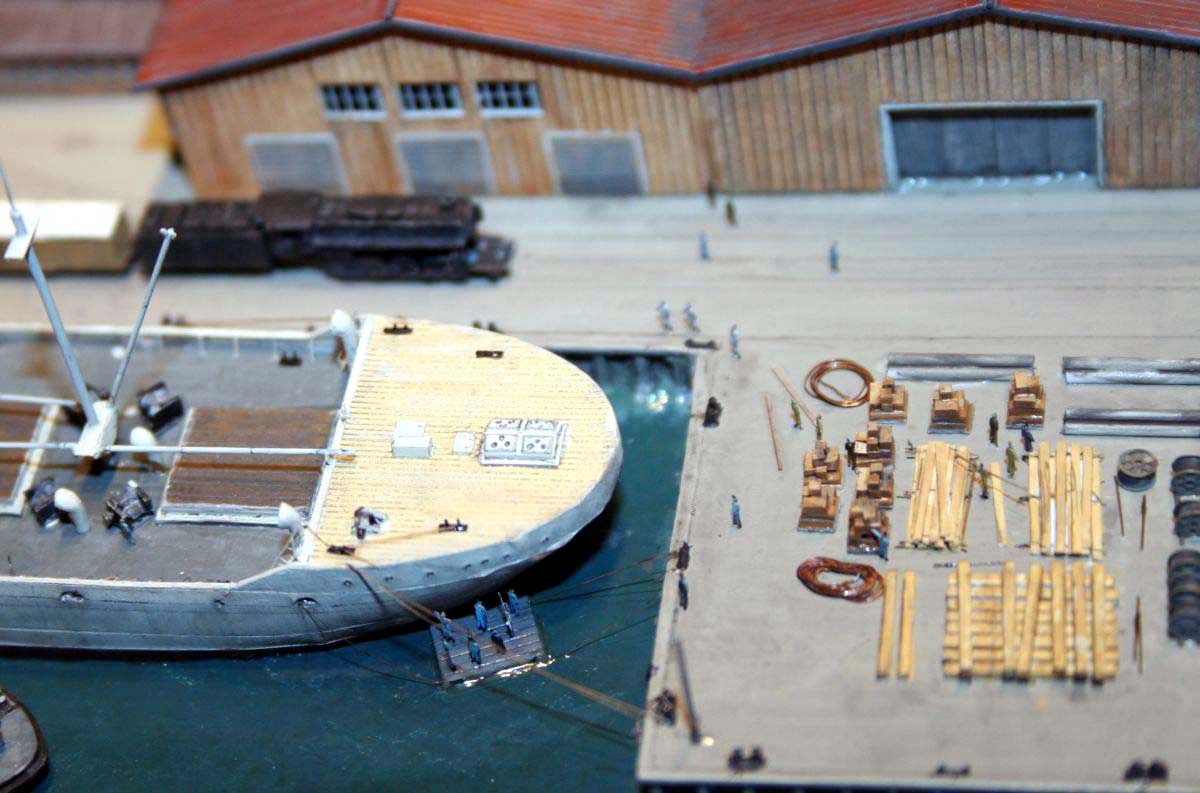
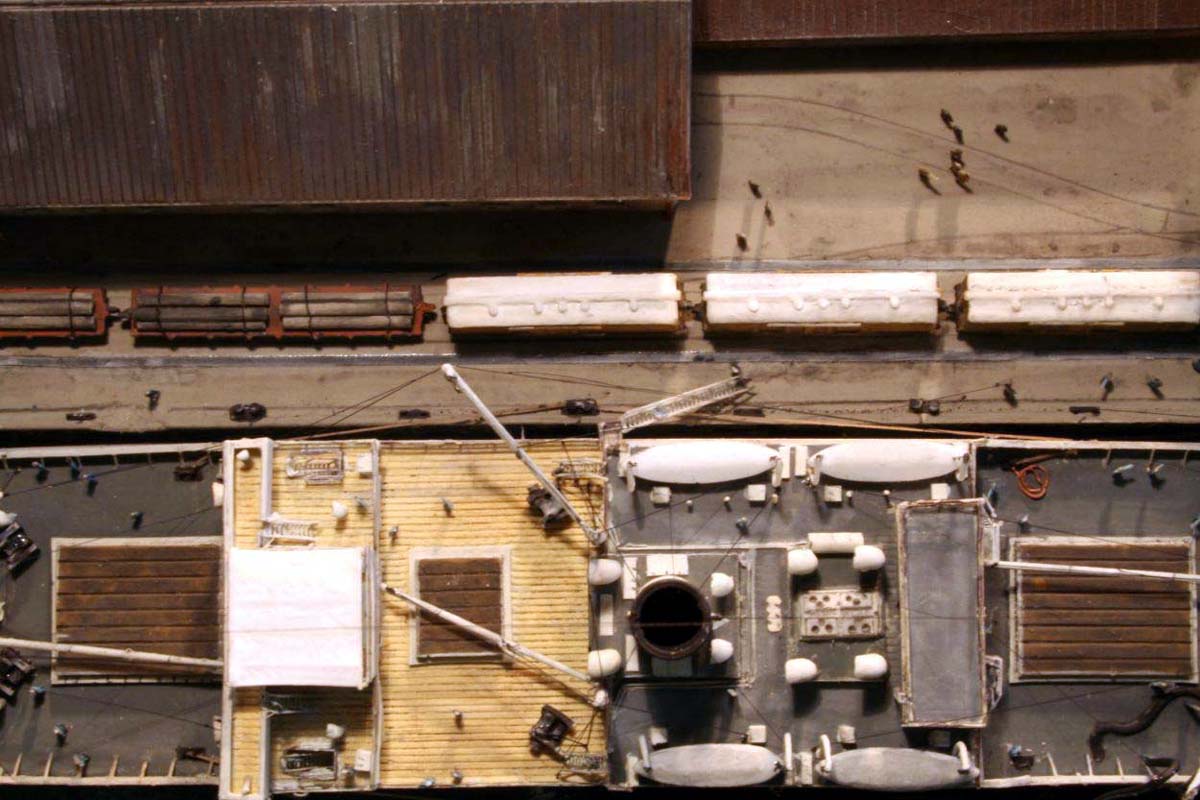
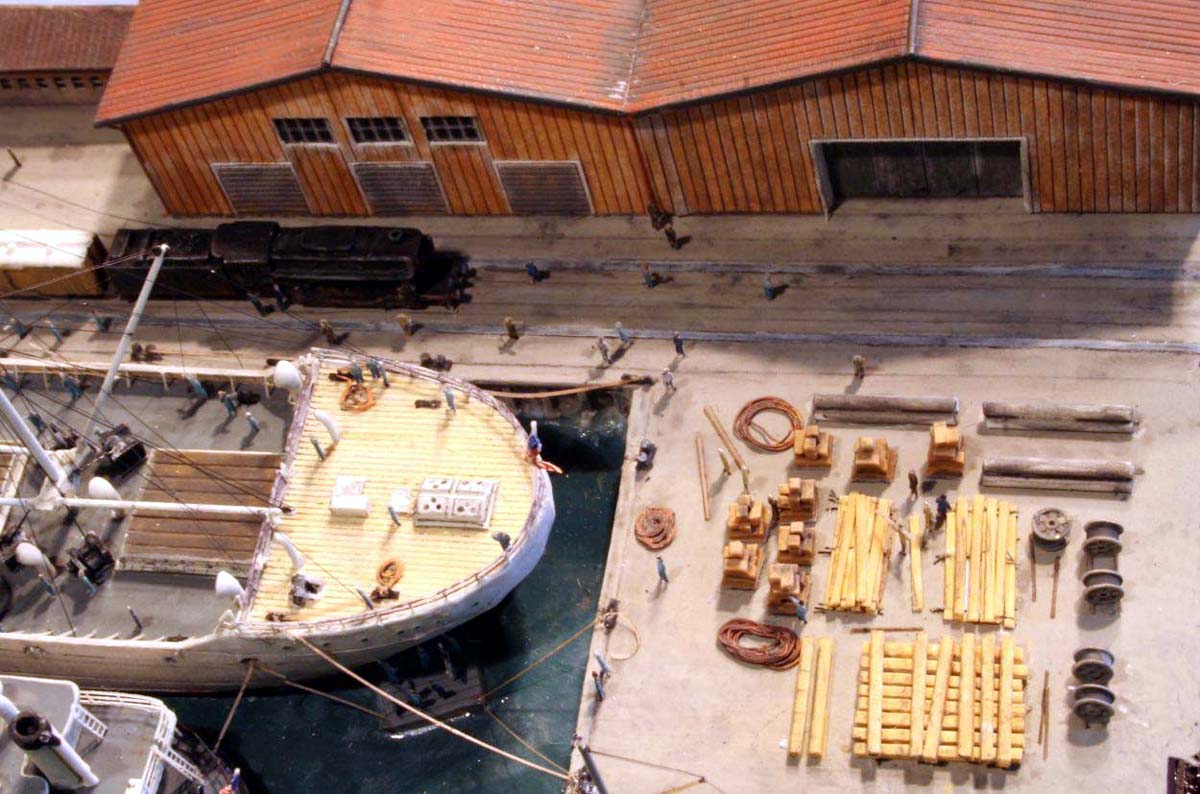
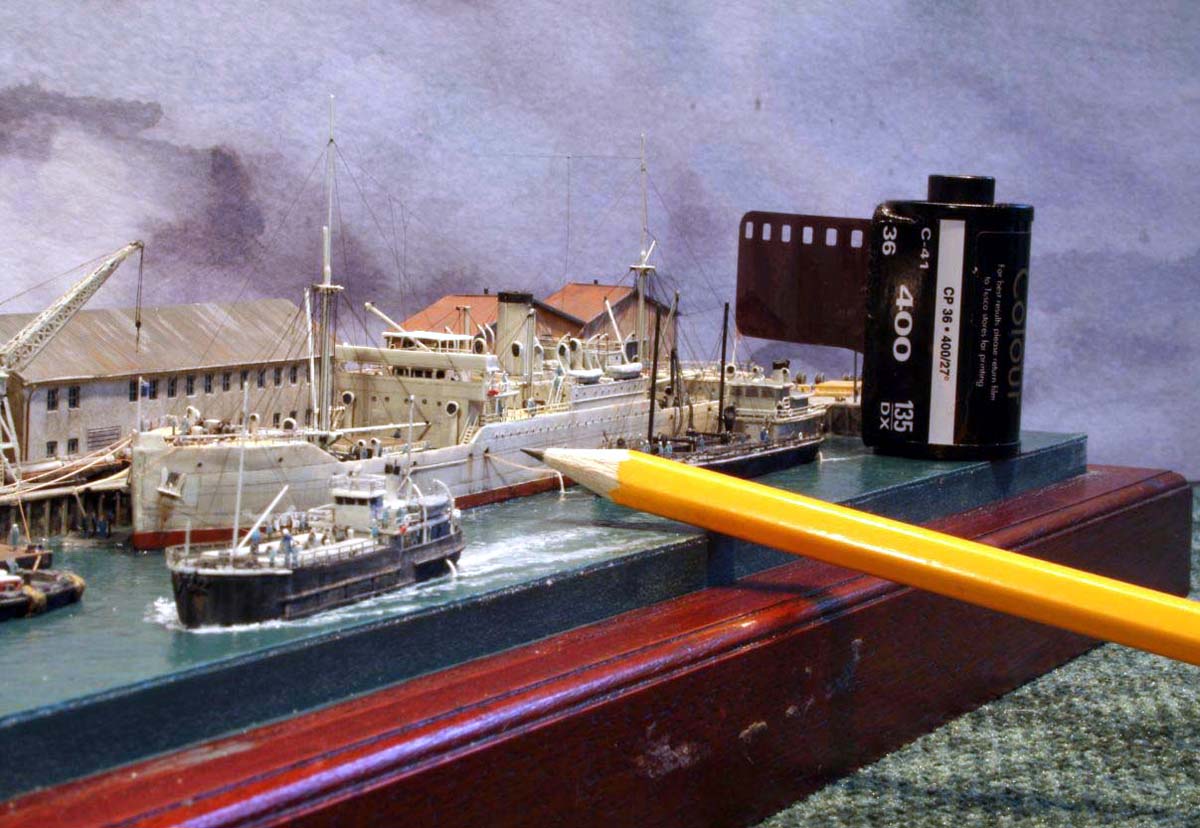
| The Railway track and turnouts were drawn alongside some suitably dimensioned
adhesive trim line tape lightly tacked down with a sharp pencilit more
or less scales to a gauge of 4ft 8.5in..!---the tape was then removed leaving
perfectly parallel lines effectively simulating track let into a flush
surface. The wood cargo stacks were made using styrene strip suitably colored
to represent lumber- I used the cast BFM crates piled up also along with
some cable reels made from Gold Medal Models parts. Rope and cable coils
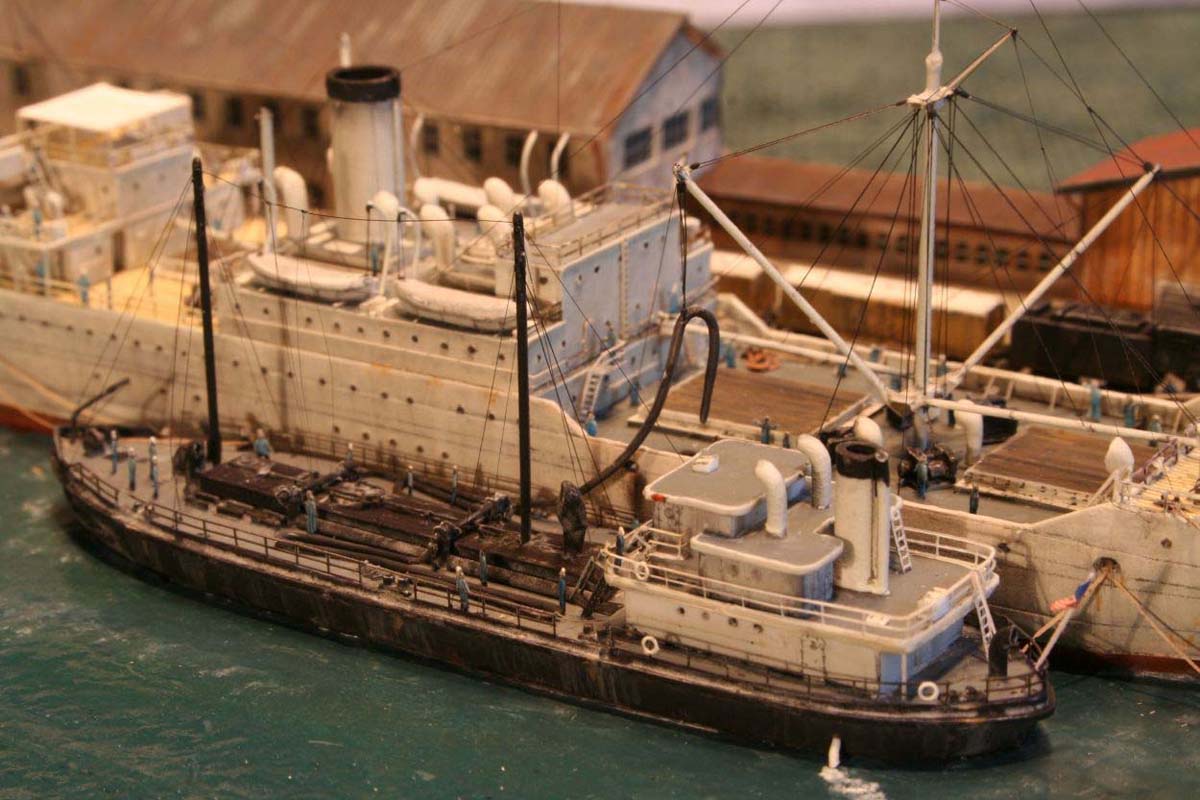
were made of copper wire. At this stage the BFM tugboats arrived, along
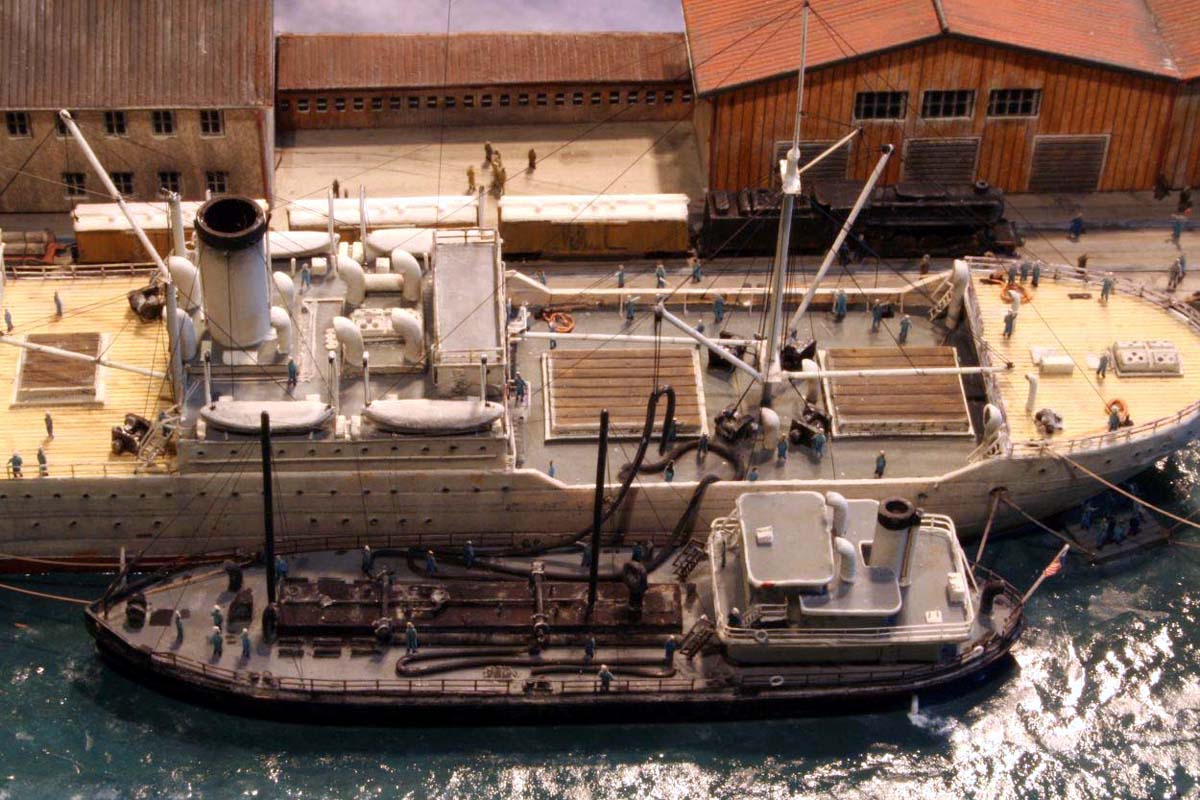
with an oiler and a garbage vessel
these were mini projects within themselves.
The oiler had some alterations carried out to make it look like an older
variant-pipe-work was added as well as valve wheels, along with the very
sturdy masts used, I surmised, for hoisting the heavy oil delivery pipes.
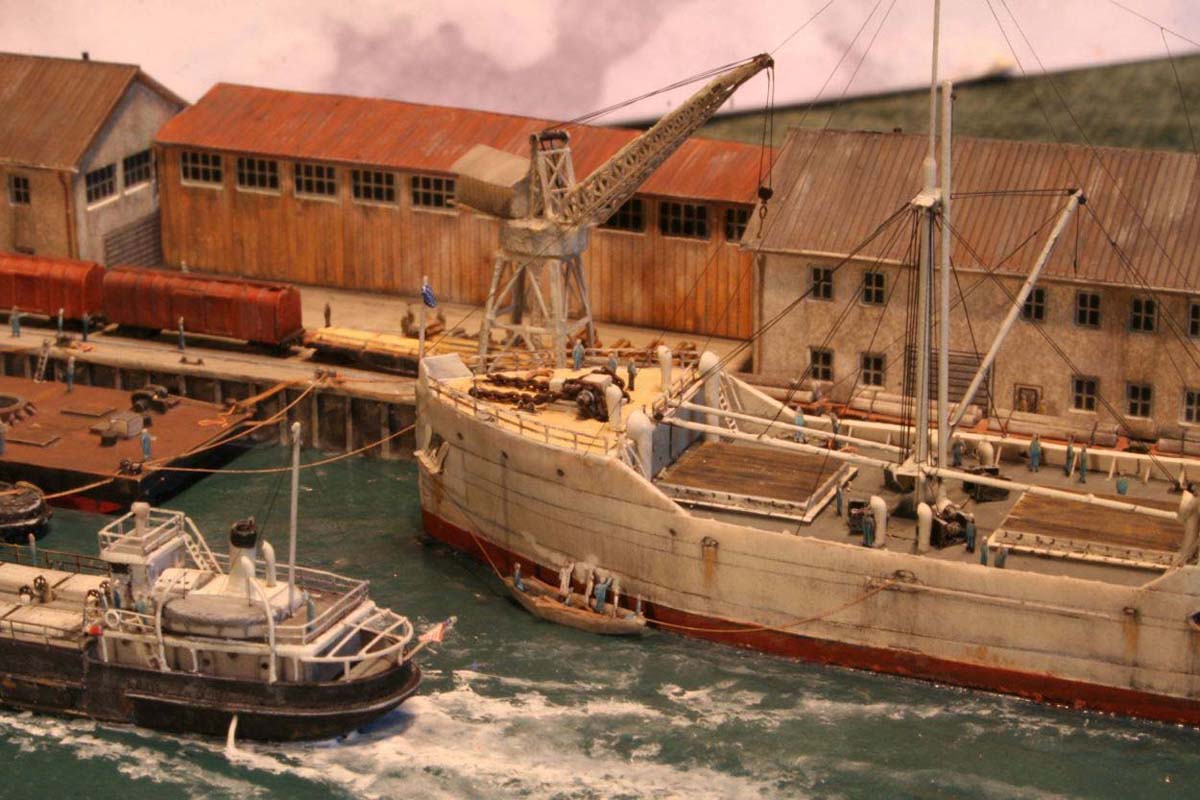
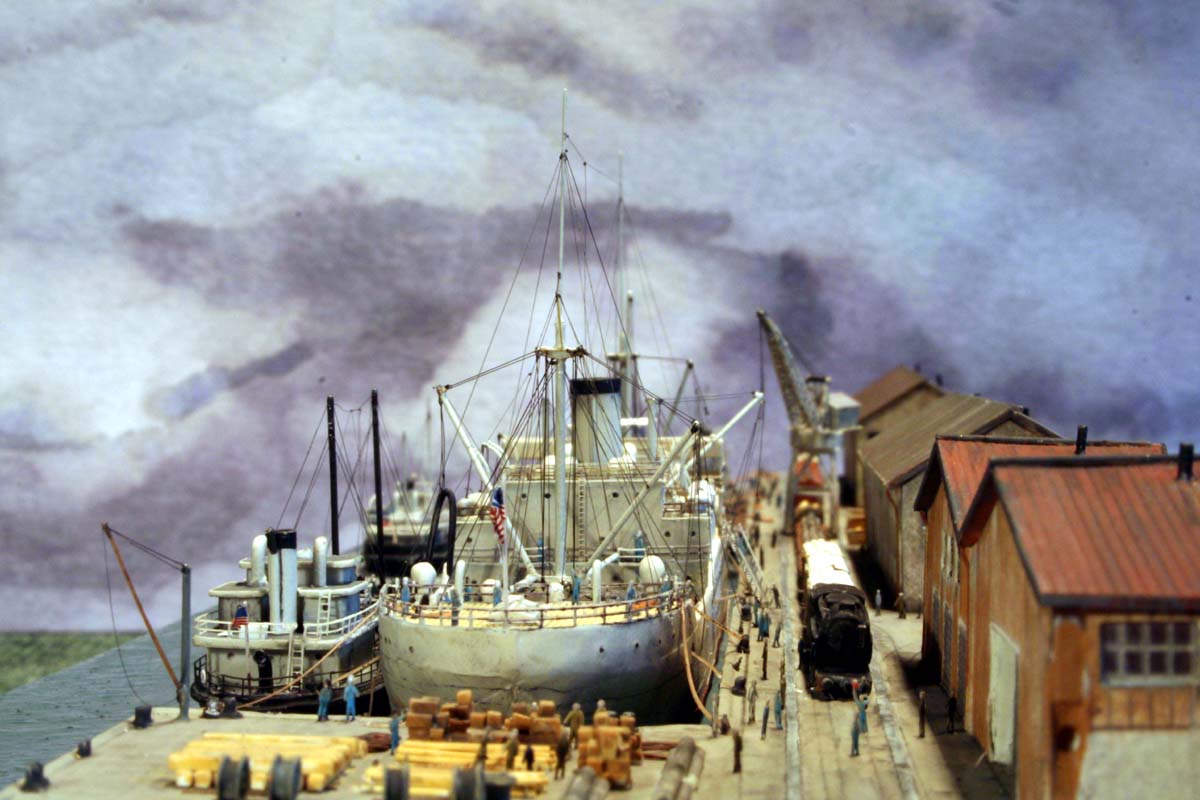
Which then led on to the next mini-feature -that of the refueling operation being prepared by hoisting the heavy hoses over the Hog Islanders deck edge, but in this instance using the powerful cargo boom-arm of the big ship. The hoses themselves were made of thin 0.5mm solder this medium allows the tight radii to be formed without distortion and is ideal for the purpose . |
 |
|||||||||||||||||||||||||||||||||||
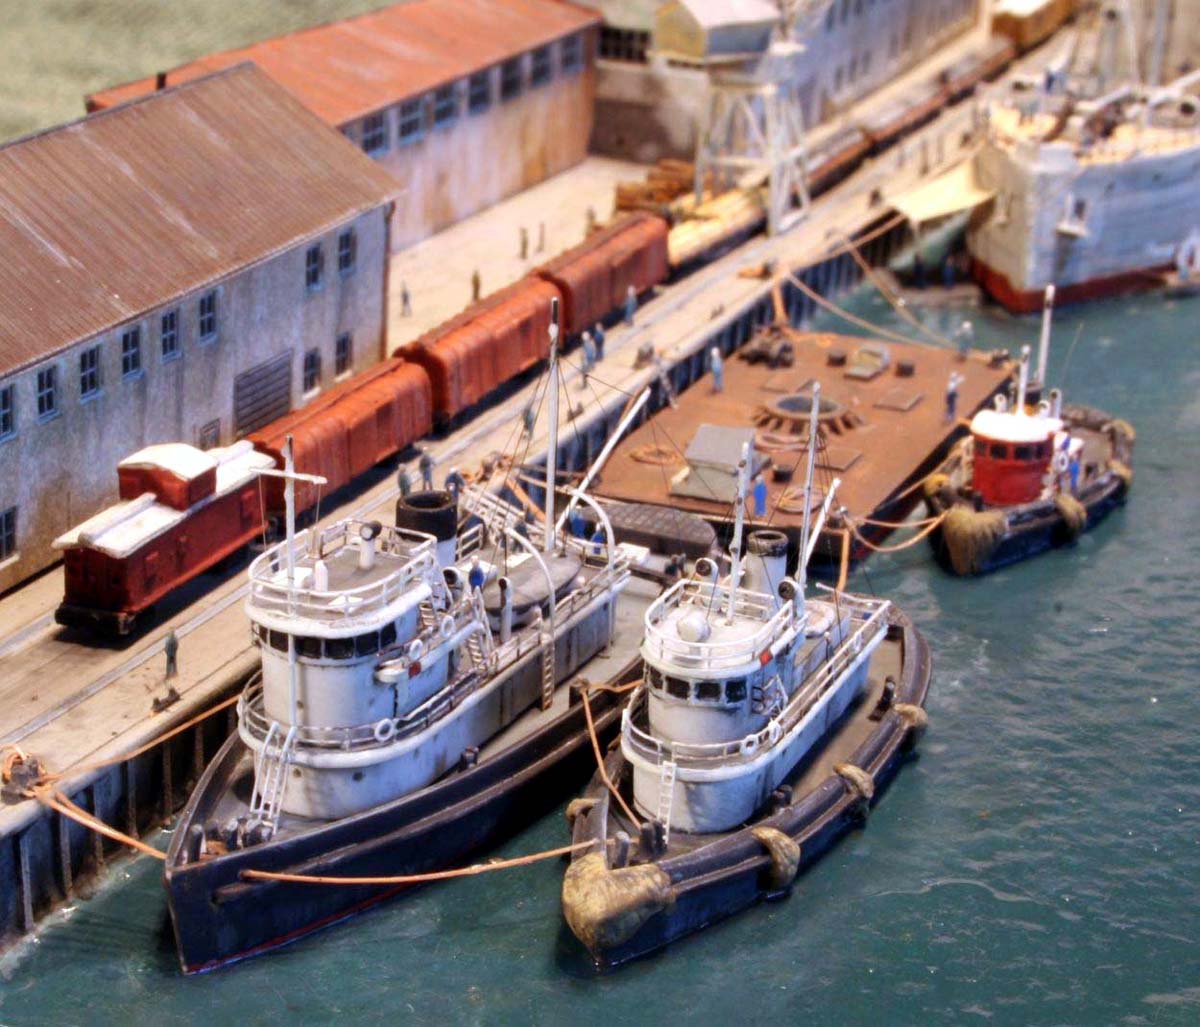
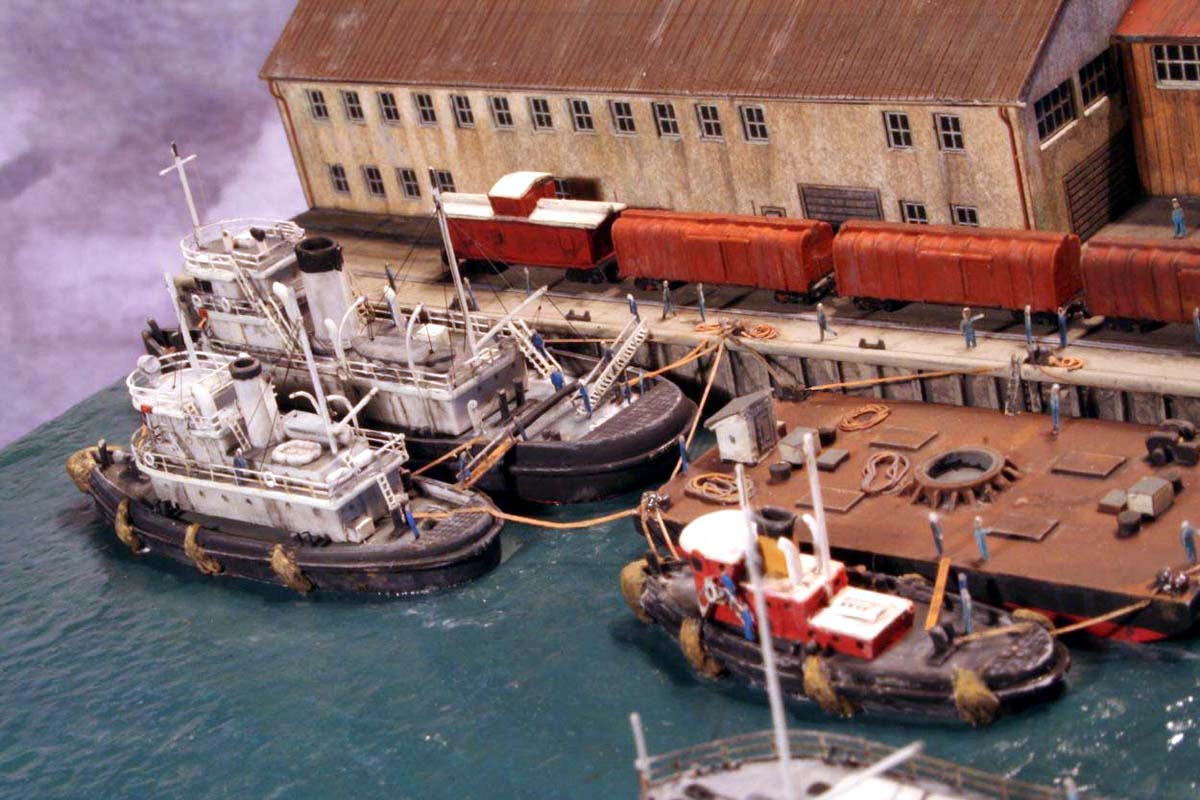
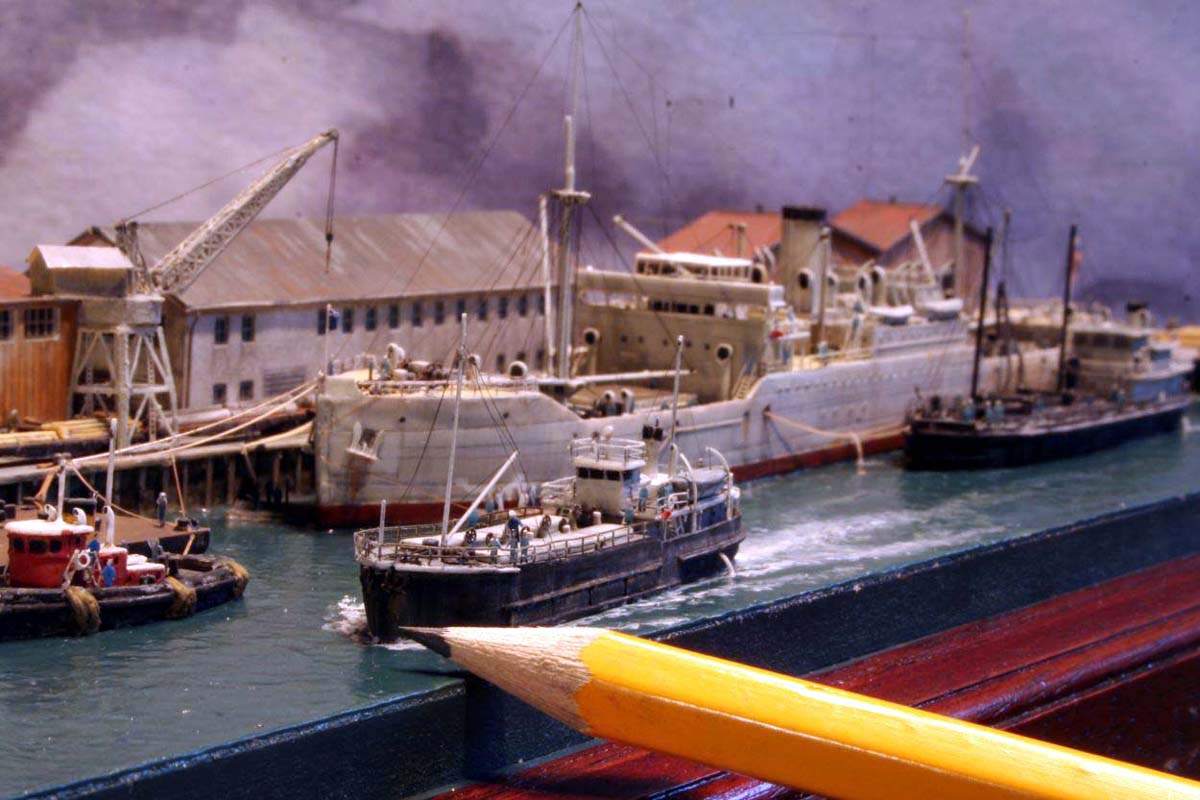
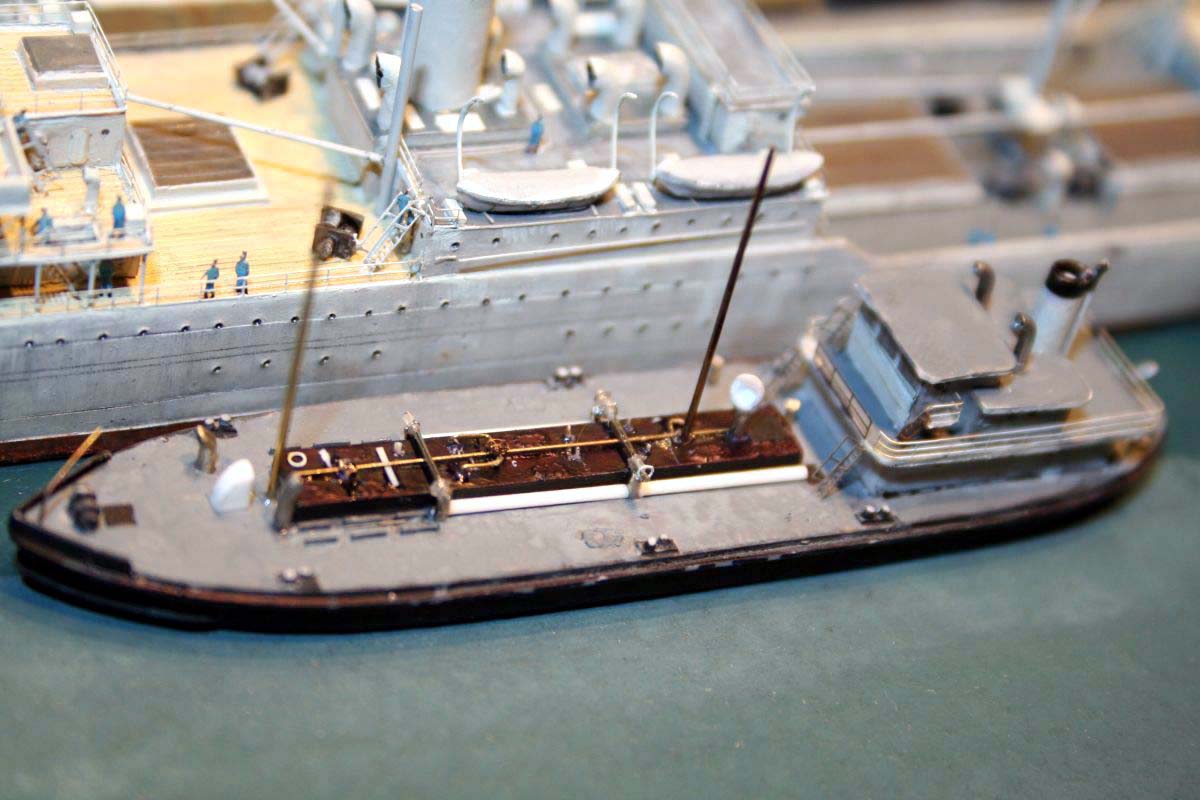
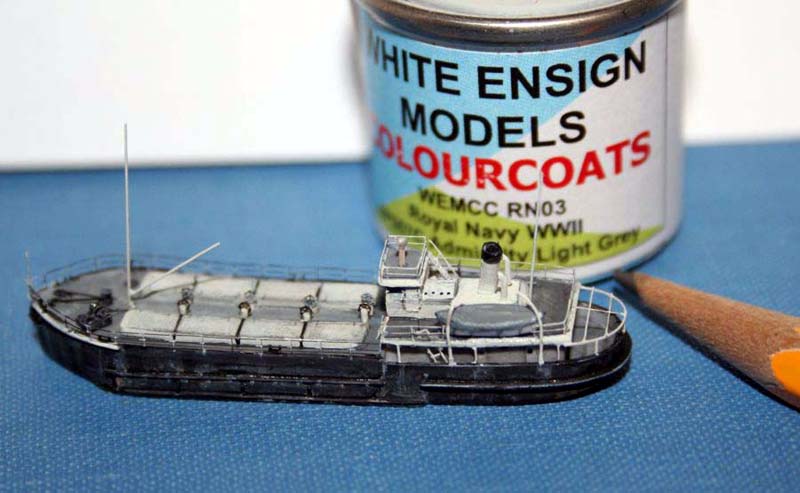
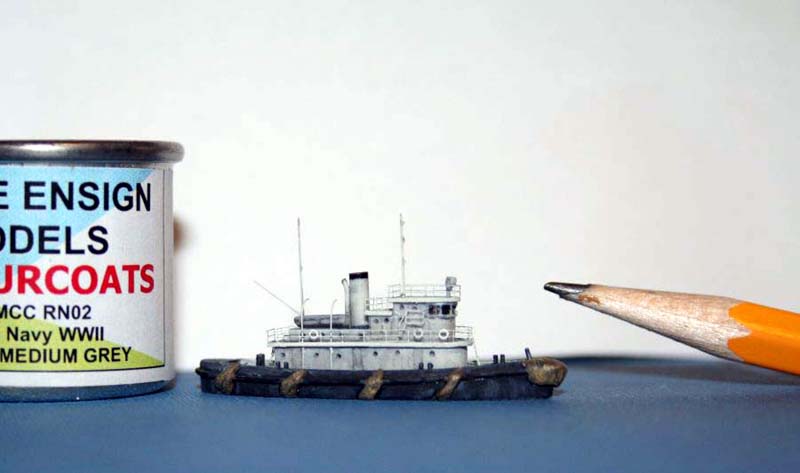
| The tugs from BFM are of a generic patternone look at
the premier US naval tug web-page
convinced me that attempting to replicate exact tugs would be difficult-as
they underwent numerous changes in their service life- so I produced amalgam
models incorporating of typical features of tugs of that era.
The garbage vessel was a fascinating vessel both to understand its ( non-ecofriendly!!) functions as well as the building of. On completion of these I was feeling suitably encouraged-I could see light at the end of the tunnel. Fun time! -planning the layout and disposition of the ships. |
 |
|||||||||||||||||||||||||||||||||||
 |
||||||||||||||||||||||||||||||||||||
 |
||||||||||||||||||||||||||||||||||||
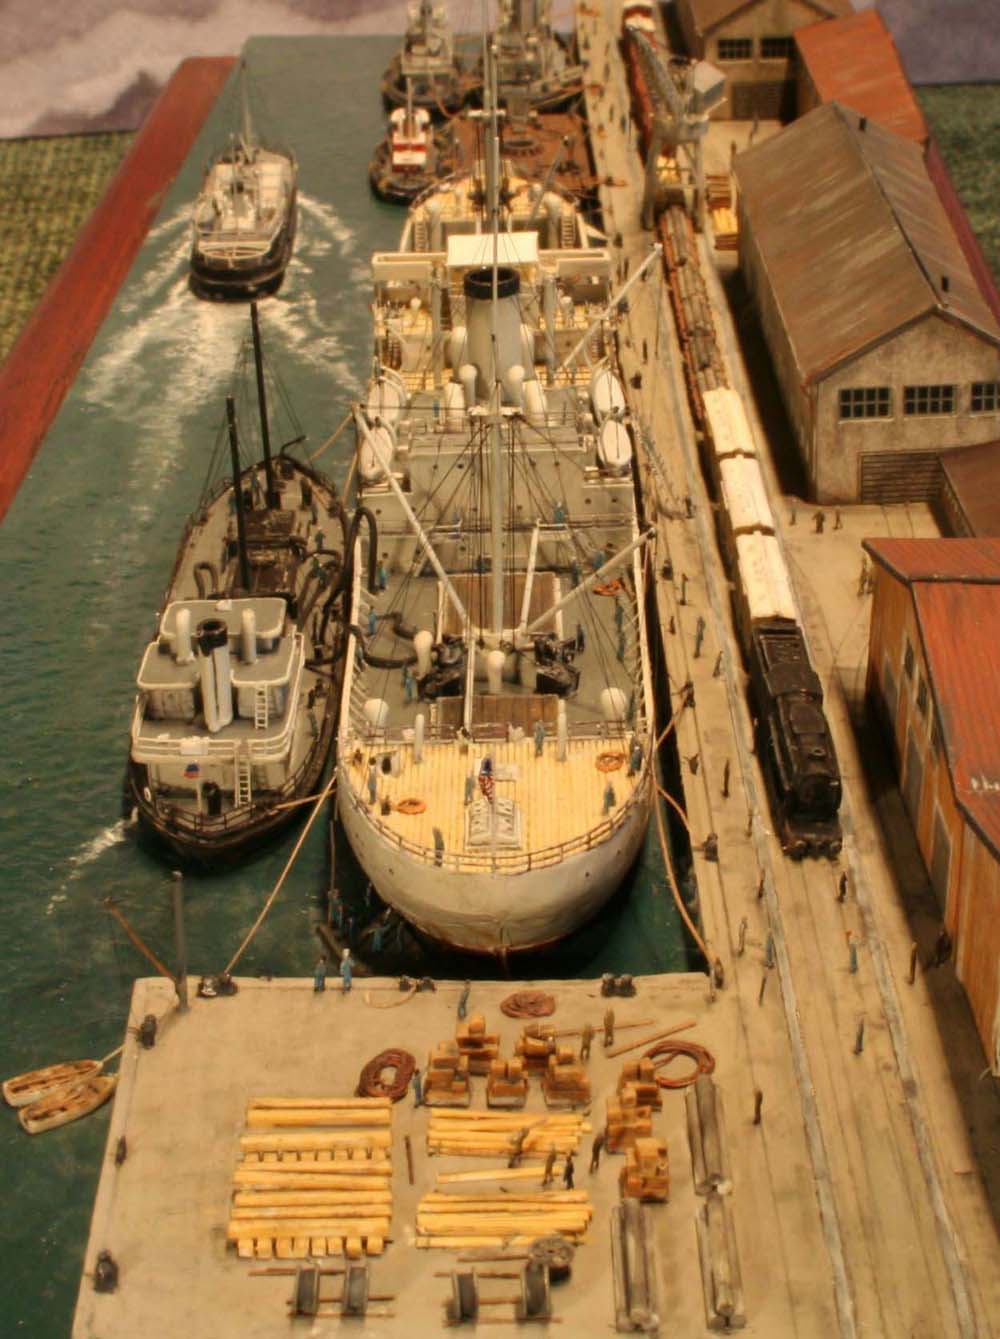
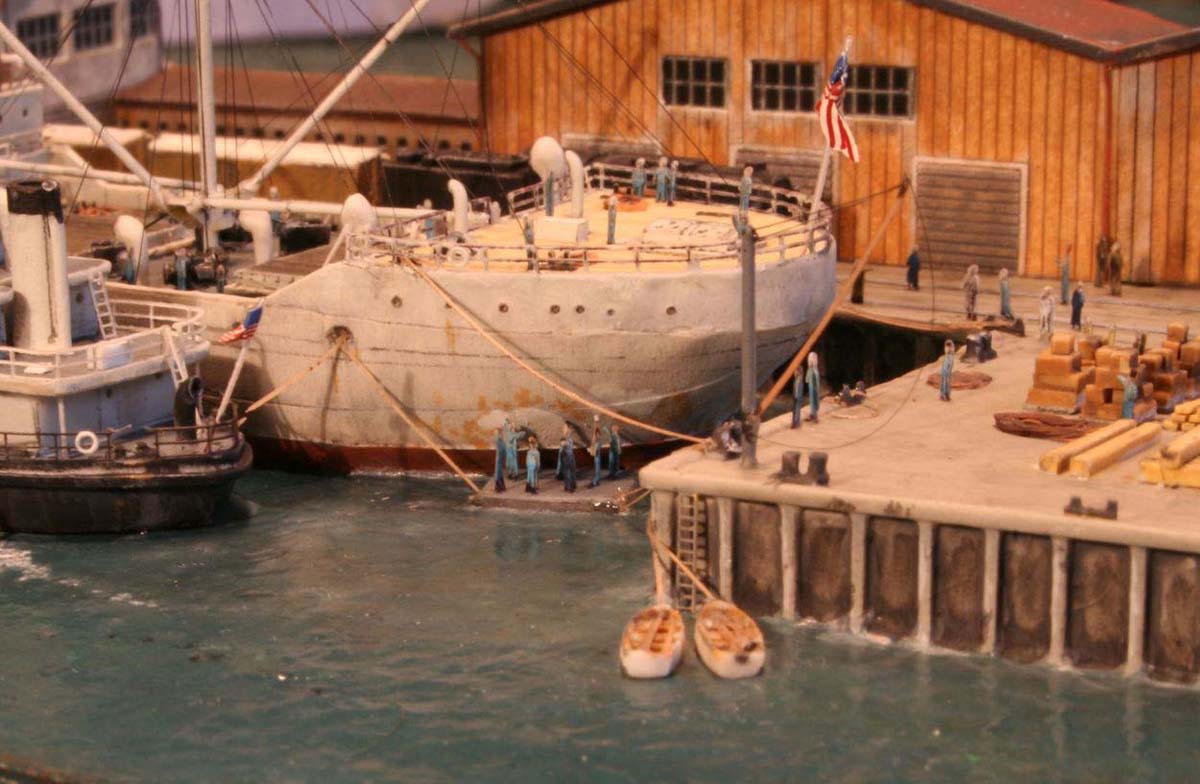
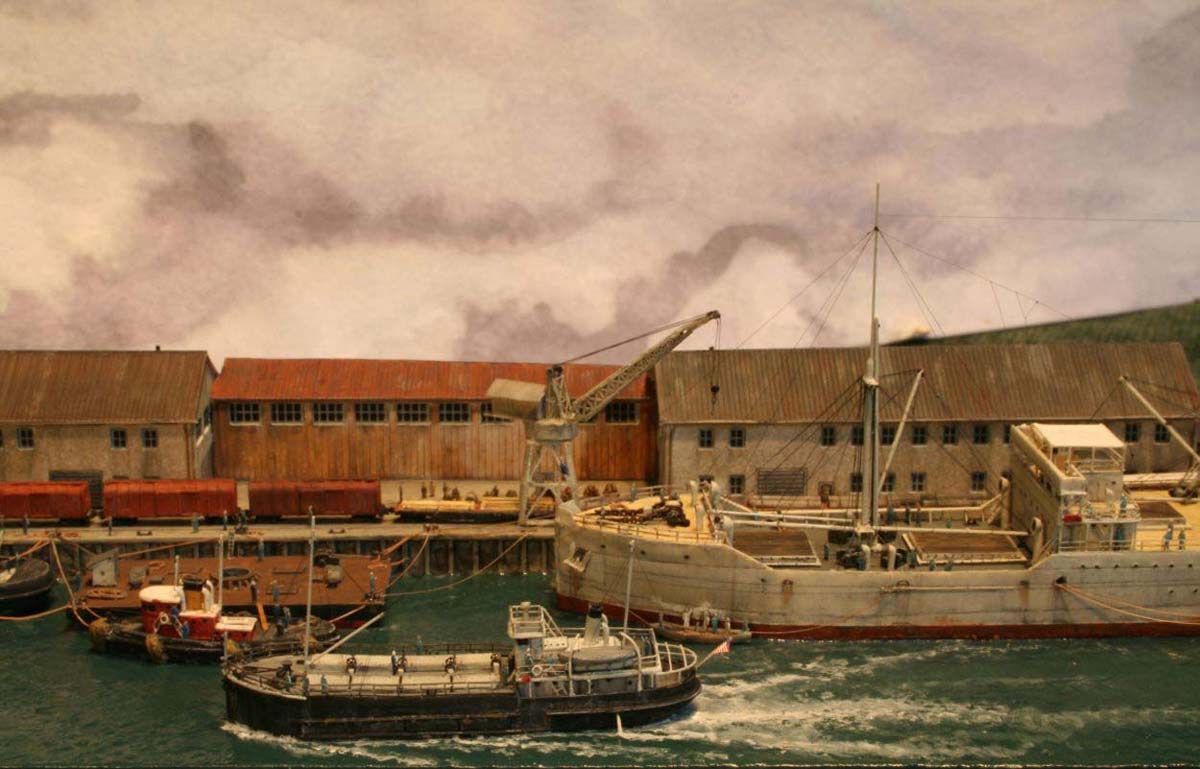
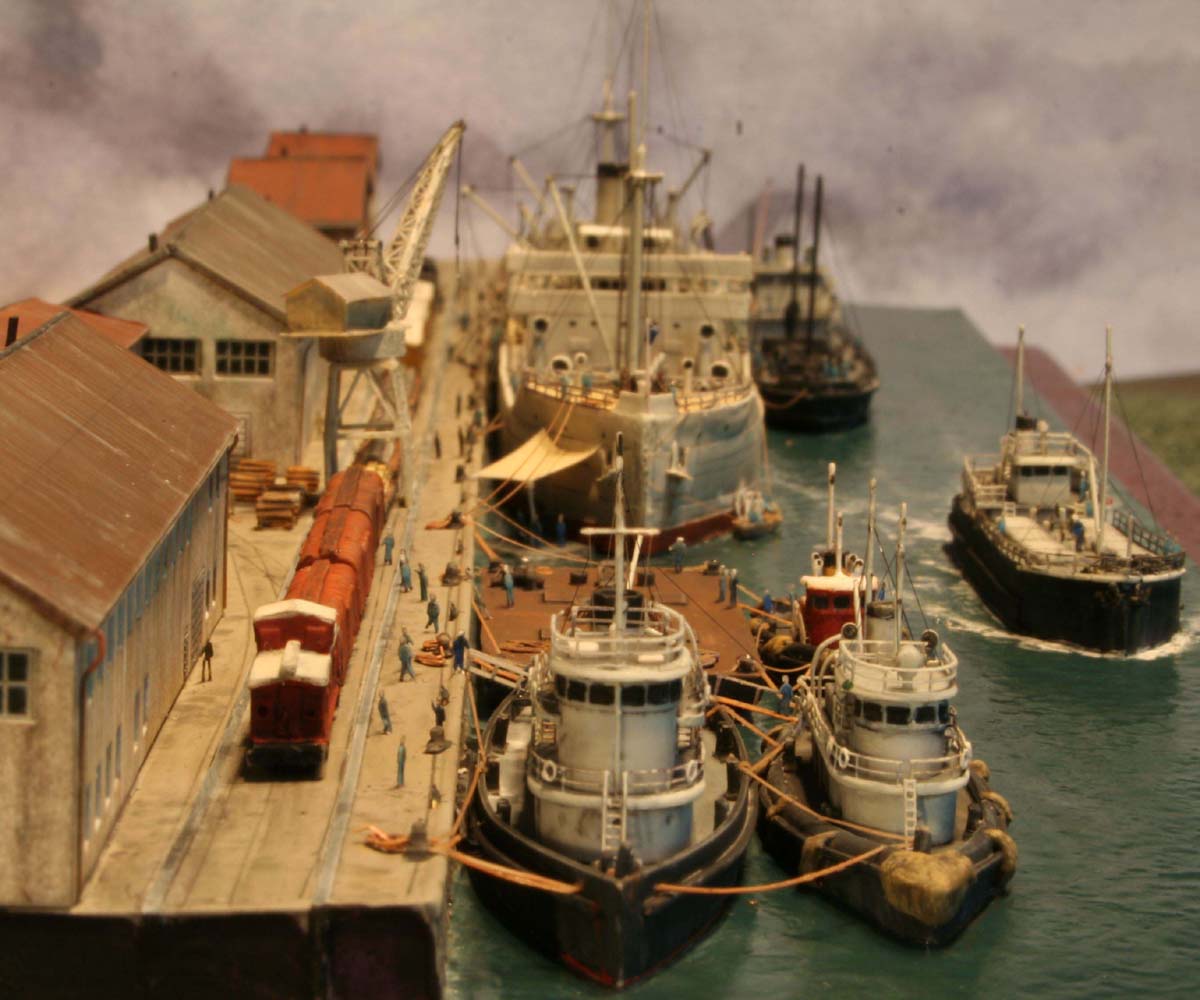
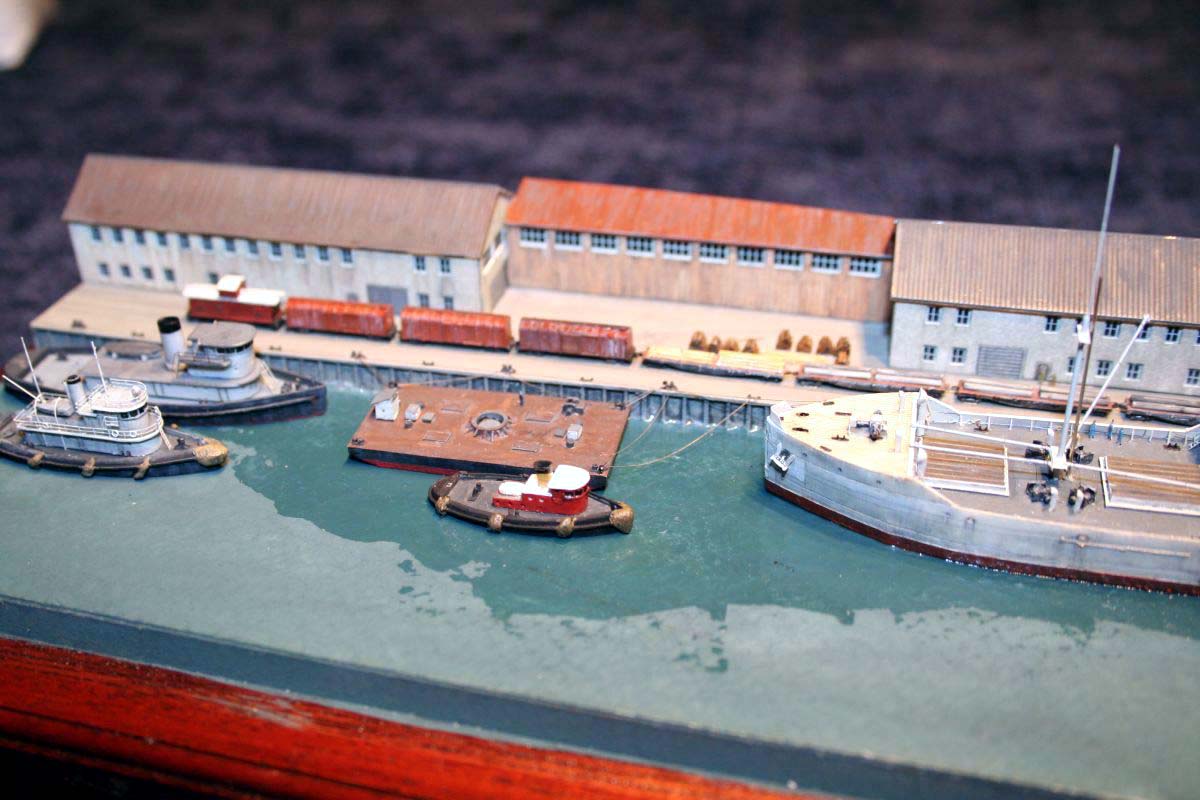
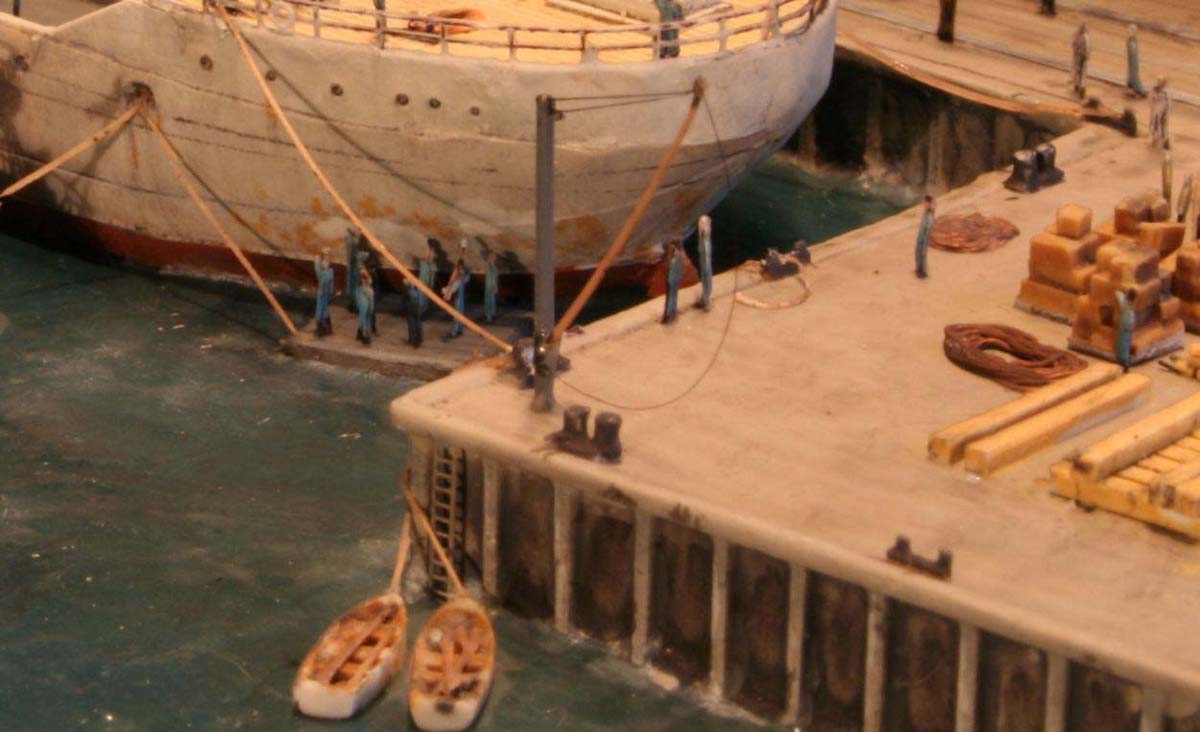
| The final layout was a little differentbut better balanced
in my view Additional action was provided by having small boats and rafts
from which hull maintenance was carried outchipping rust and painting
under the overhanging counter stern, a similar operation being carried
out fwd from a whaler.
I added an ex-crane barge from LCPto be used as a store and mooring pontoon-to which a small tug in civilian colors has made fast. Gangplank is a strip of brass. |
 |
|||||||||||||||||||||||||||||||||||
 |
||||||||||||||||||||||||||||||||||||
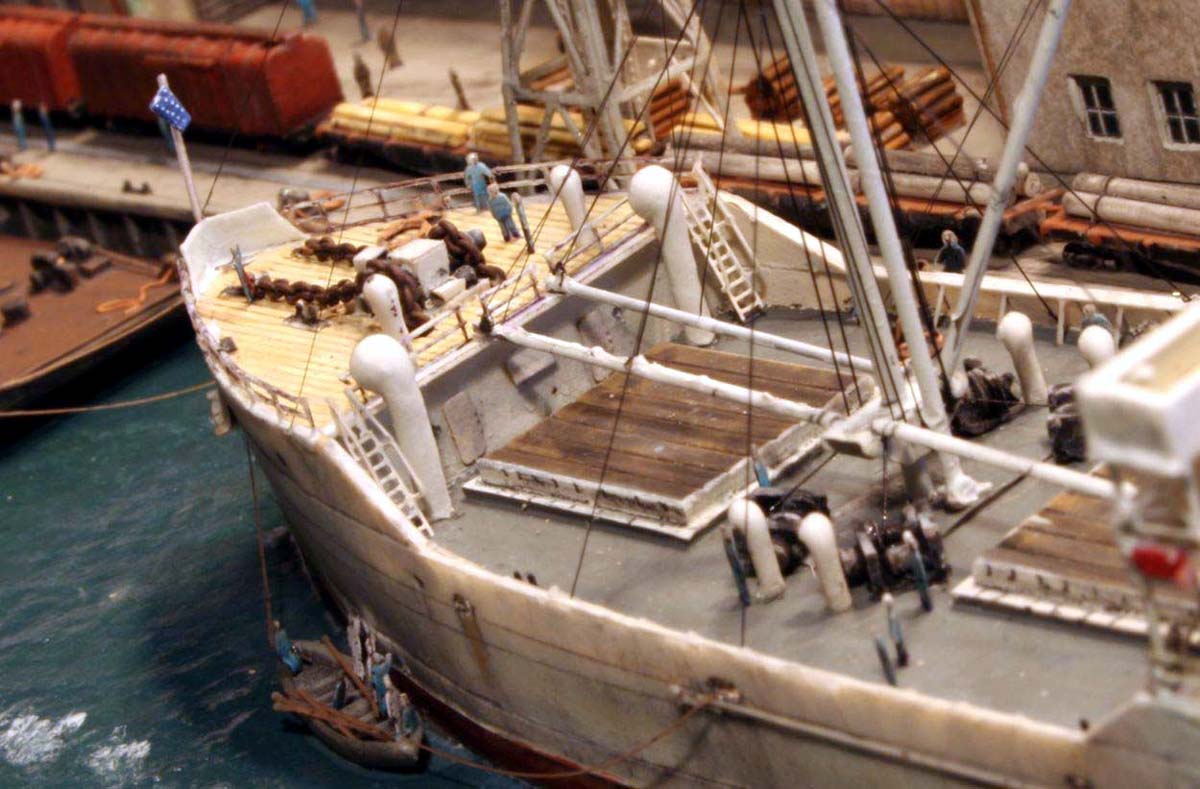
| The USS Capella had new masts and booms made of Steel rod,
the block platform being made of paper infused with CA. The fwd cast resin
breakwater on the foredeck was replaced with a paper version, chains and
mooring bits completing this area. Once all the boats had been positioned
I ran a covering sea of thin runny ZAP CA over the previously prepared
water-base of Artists watercolor paper. The CA was so runny that unlike
Future, gloss varnish etc. etc. it did not pile up at the hull sides.
A few squirts of CA accelerator( Zap kicker) gave some additional texture.
I tried out the( garish!) preprinted 1/700 PE figures from Eduard for the first time. These were given first a washing with light grey to tone down the colors, had caps and shoes painted in and then given another washing of very dark grey to give the some shadows and depth. I de-linaeted some of the figures with a sharp pencil to give a credible belt line. I mixed and matched with some GMM figures also to give a variety in poses. |
||||||||||||||||||||||||||||||||||||
| The models were rigged with stretched spruethe ships all being tied to the quayside using head ropes, some breast rope sand extensive spring linesof stretched revel sprue, pre-curved to simulate the sagging of heavy lines. All in all a most amusing projectwith no guns of any kind anywhere!! The model fits neatly into a small case and occupies a footprint of less than 15 in x 5in. Thereby not being an intrusion on the domestic display format |  |
|||||||||||||||||||||||||||||||||||
|
||||||||||||||||||||||||||||||||||||
| It was interesting to diversify a little into architectural as well
as Railway modelling in this tiny scale. I have satisfied my desire
for a Hog Islander in my collection much kudos to Battlefleet models for
producing affordable and cleanly cast kitsa good starting point in replicating
some of the less famous ships that make up a navy as a whole being.
A fair and well illustrated review of the Hog islander kit can be found here by clicking the image on the right. |
 |
|||||||||||||||||||||||||||||||||||
| More of Jim Baumann's work. | ||||||||||||||||||||||||||||||||||||