A build up review of Combrig's 1/700 Agincourt kit
by Martin J Quinn
A build up review of Combrig's 1/700 Agincourt kit
by Martin J Quinn
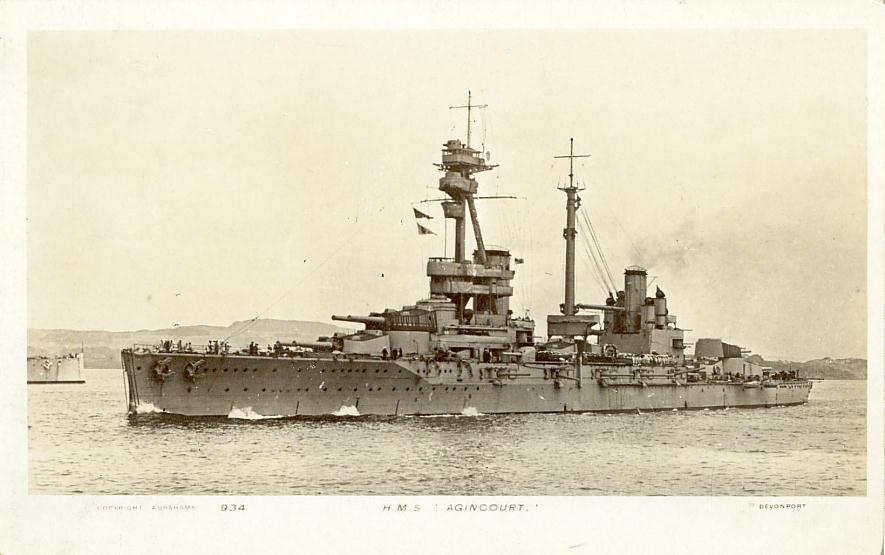
Not wanting this ship - or a second battleship being built for Turkey - being used against them in the event the Ottoman Empire came into the war on the German side, the British seized both ships in August and commissioned them into the Royal Navy. Sultan Osman I was renamed Agincourt, while the second battleship - Reshadiye - was renamed HMS Erin.
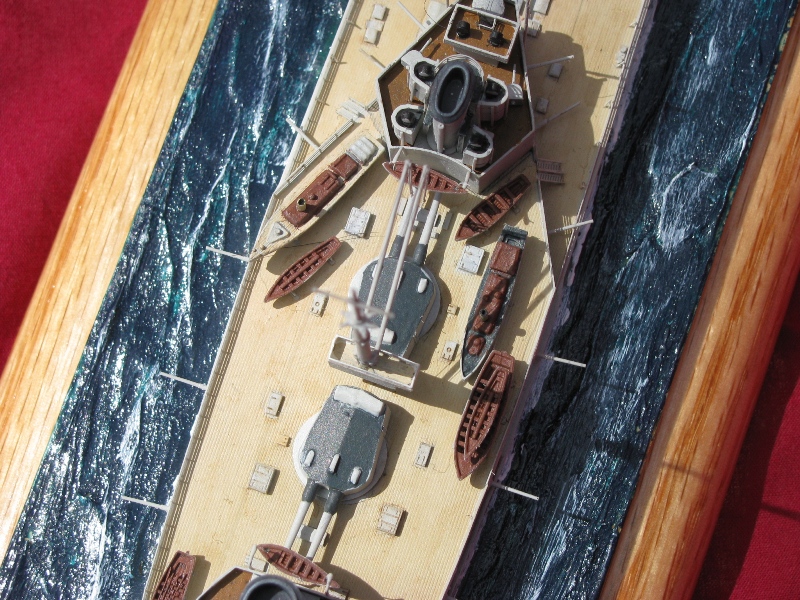
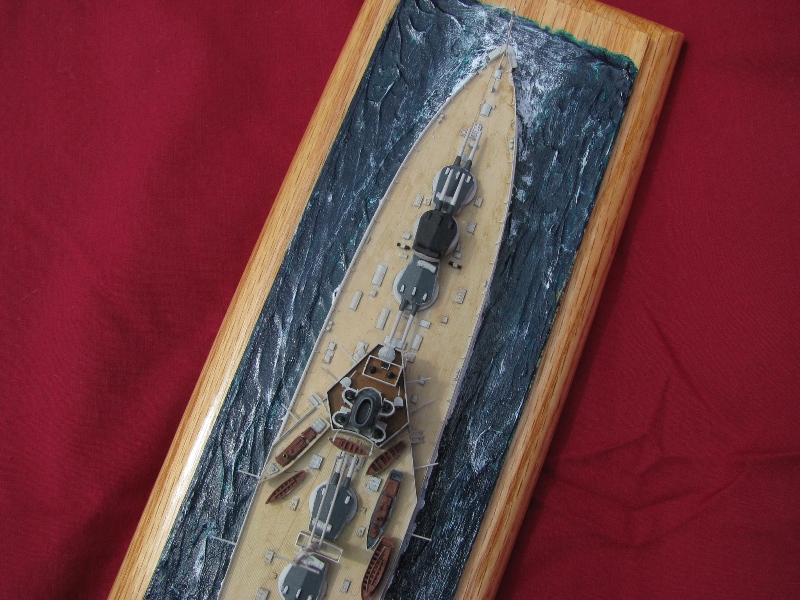
Due to her somewhat luxurious fittings, she acquired the nickname "The Gin Palace". At 671ft, 6 inches long, she had the distinction of being the longest battleship to serve in the Royal Navy during World War I. Her other oddity was her seven main battery turrets - the most carried by any battleship ever put into service. Unofficially, the turrets were named after the days of the week, starting with the forward most turret ("Sunday") and moving aft.
Despite her size and unique turret arrangement, Agincourt had a rather pedestrian career. As part of the 1st Battle Squadron, she did participate in the Battle of Jutland, where she fired 144 12in rounds at the High Seas Fleet, receiving no significant damage in return.
Decommissioned in 1919, the Gin Palace, like so many dreadnoughts of the age, fell victim to the Washington Naval Treaty, and was scrapped in 1922. For more on HMS Agincourt, check out the Wikipedia article here.
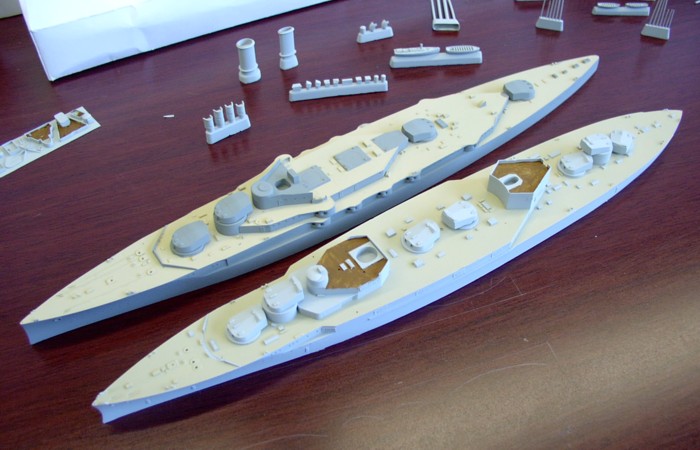
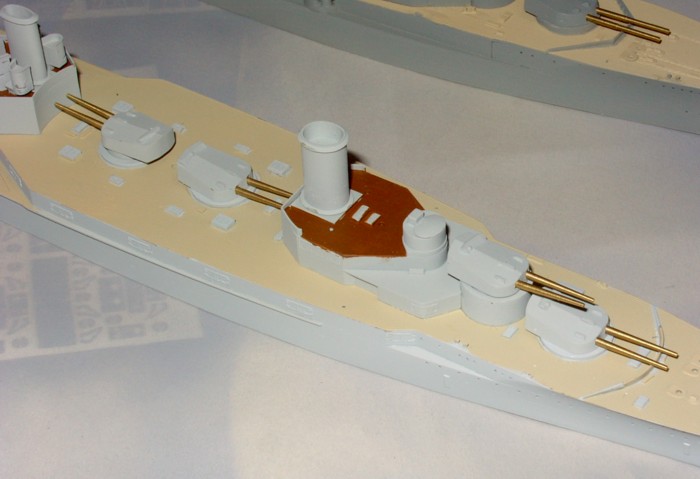
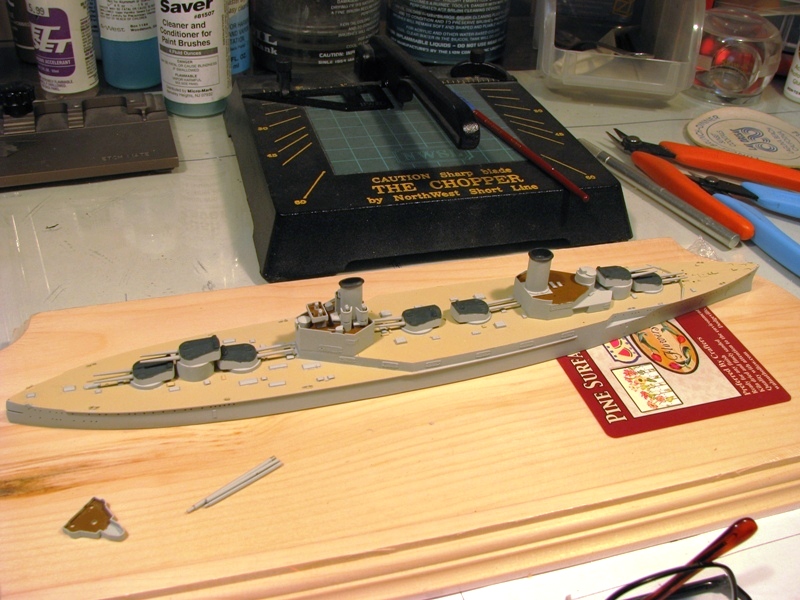
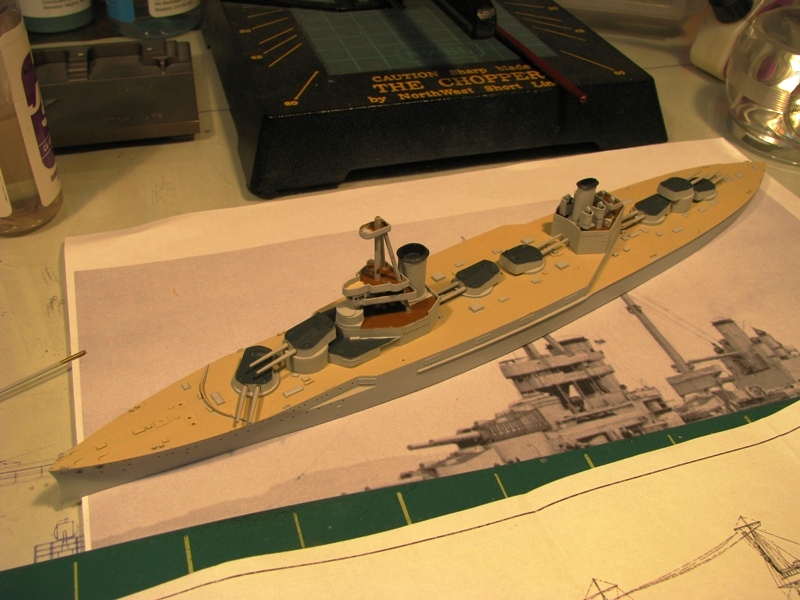
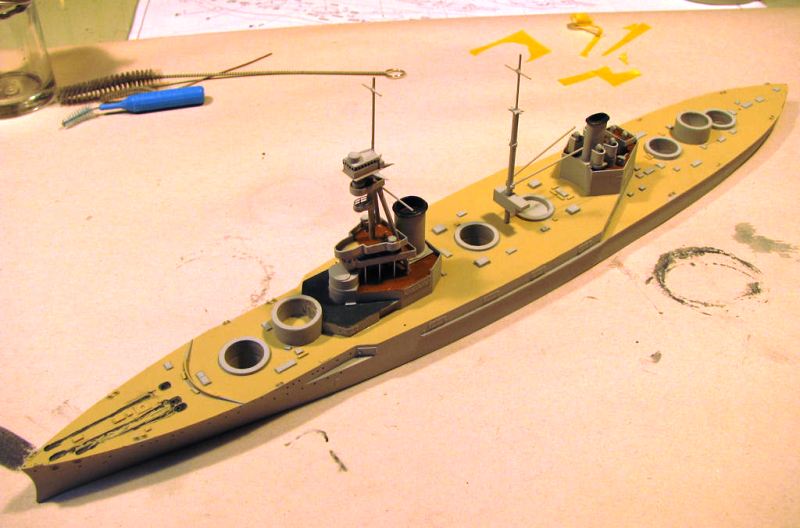
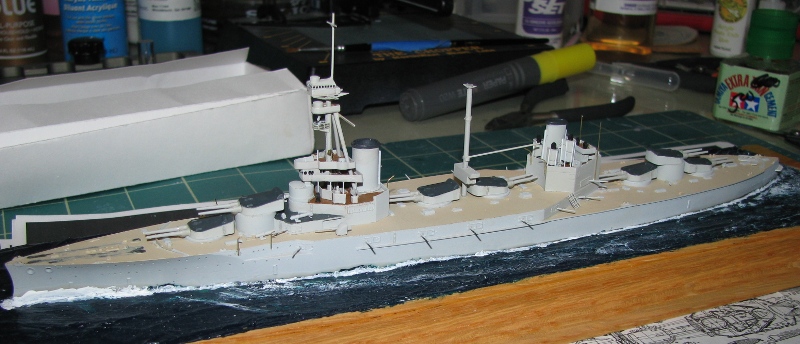
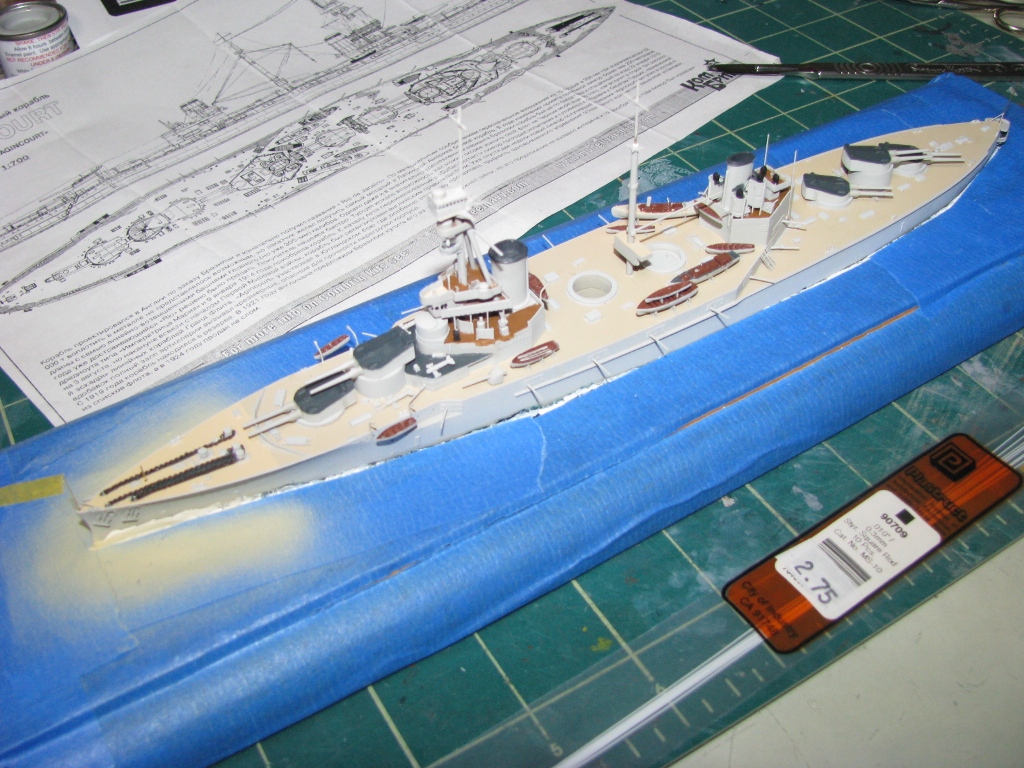
After the usual washing the parts in warm water,
etc., I painted the deck with WEM Teak. The deck was then masked
and the hull airbrushed with WEM Admiralty Light Gray 507C, as were all
the smaller parts. Technically that isn't the correct paint,
but I started this build before WEM released their World War I era paints.
 |
 |
 |
 |
 |
 |
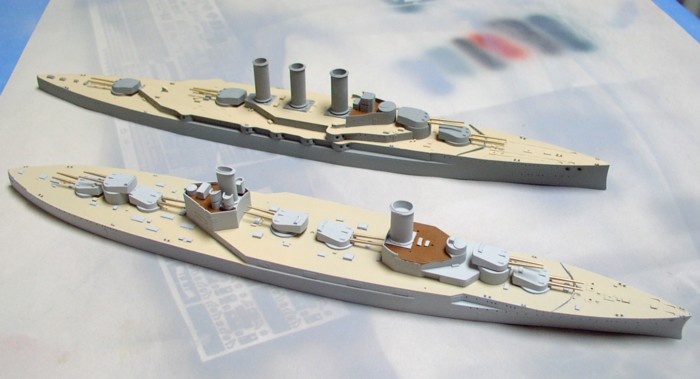
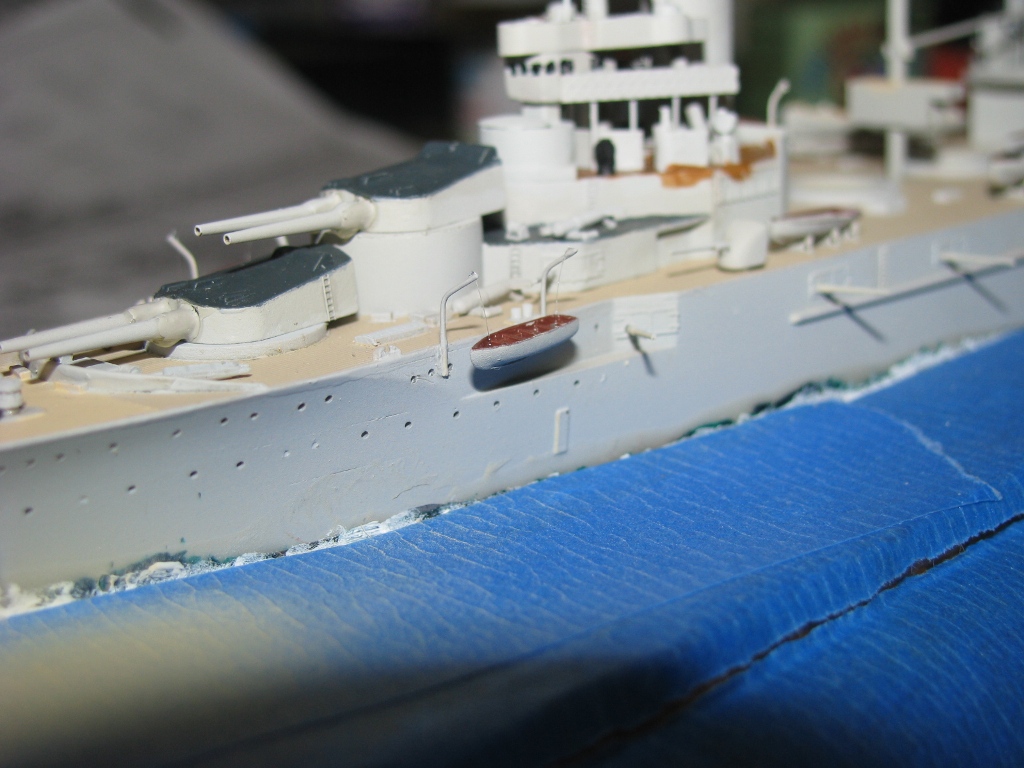
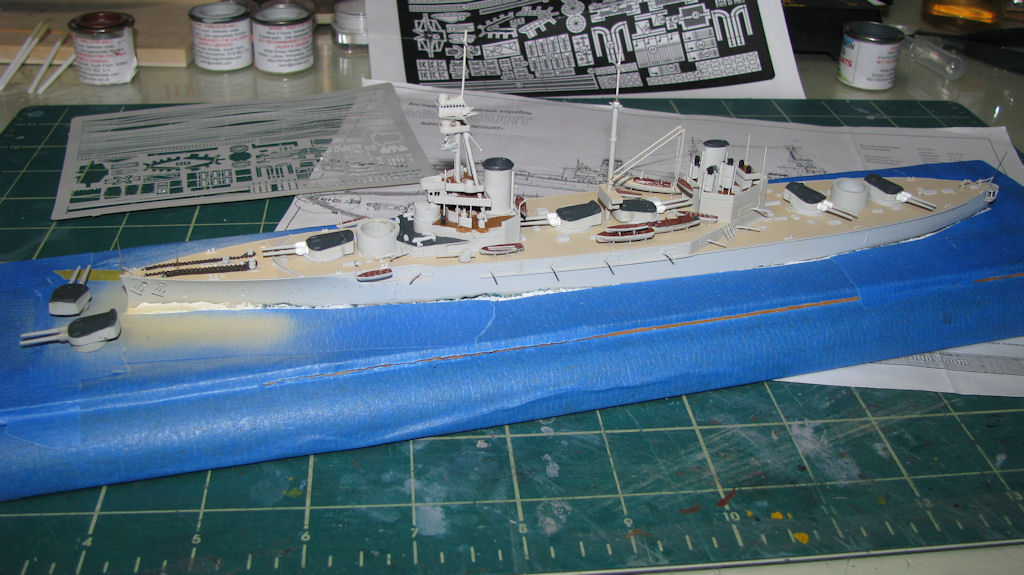
With the main color dry, I painted the decks, using
dark gray (WEM 507A) for the steel decks and WEM corticene for the linoleum.
While I wasn't 100% sure which bridge levels were corticene, I painted
those levels as if they were linoleum to give the ship a bit of color.
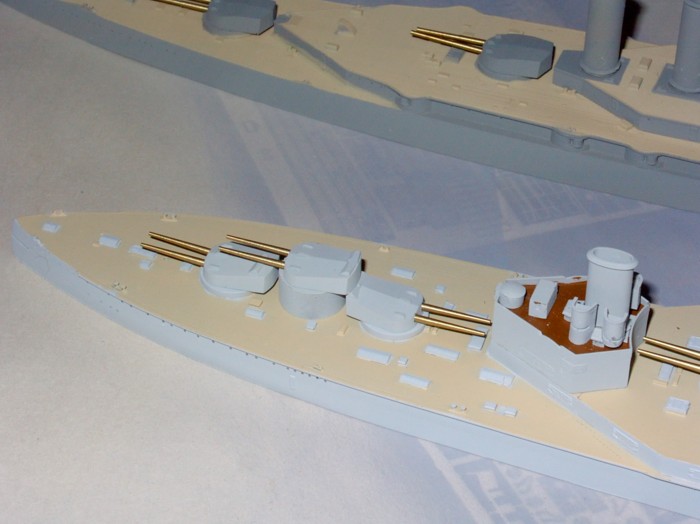
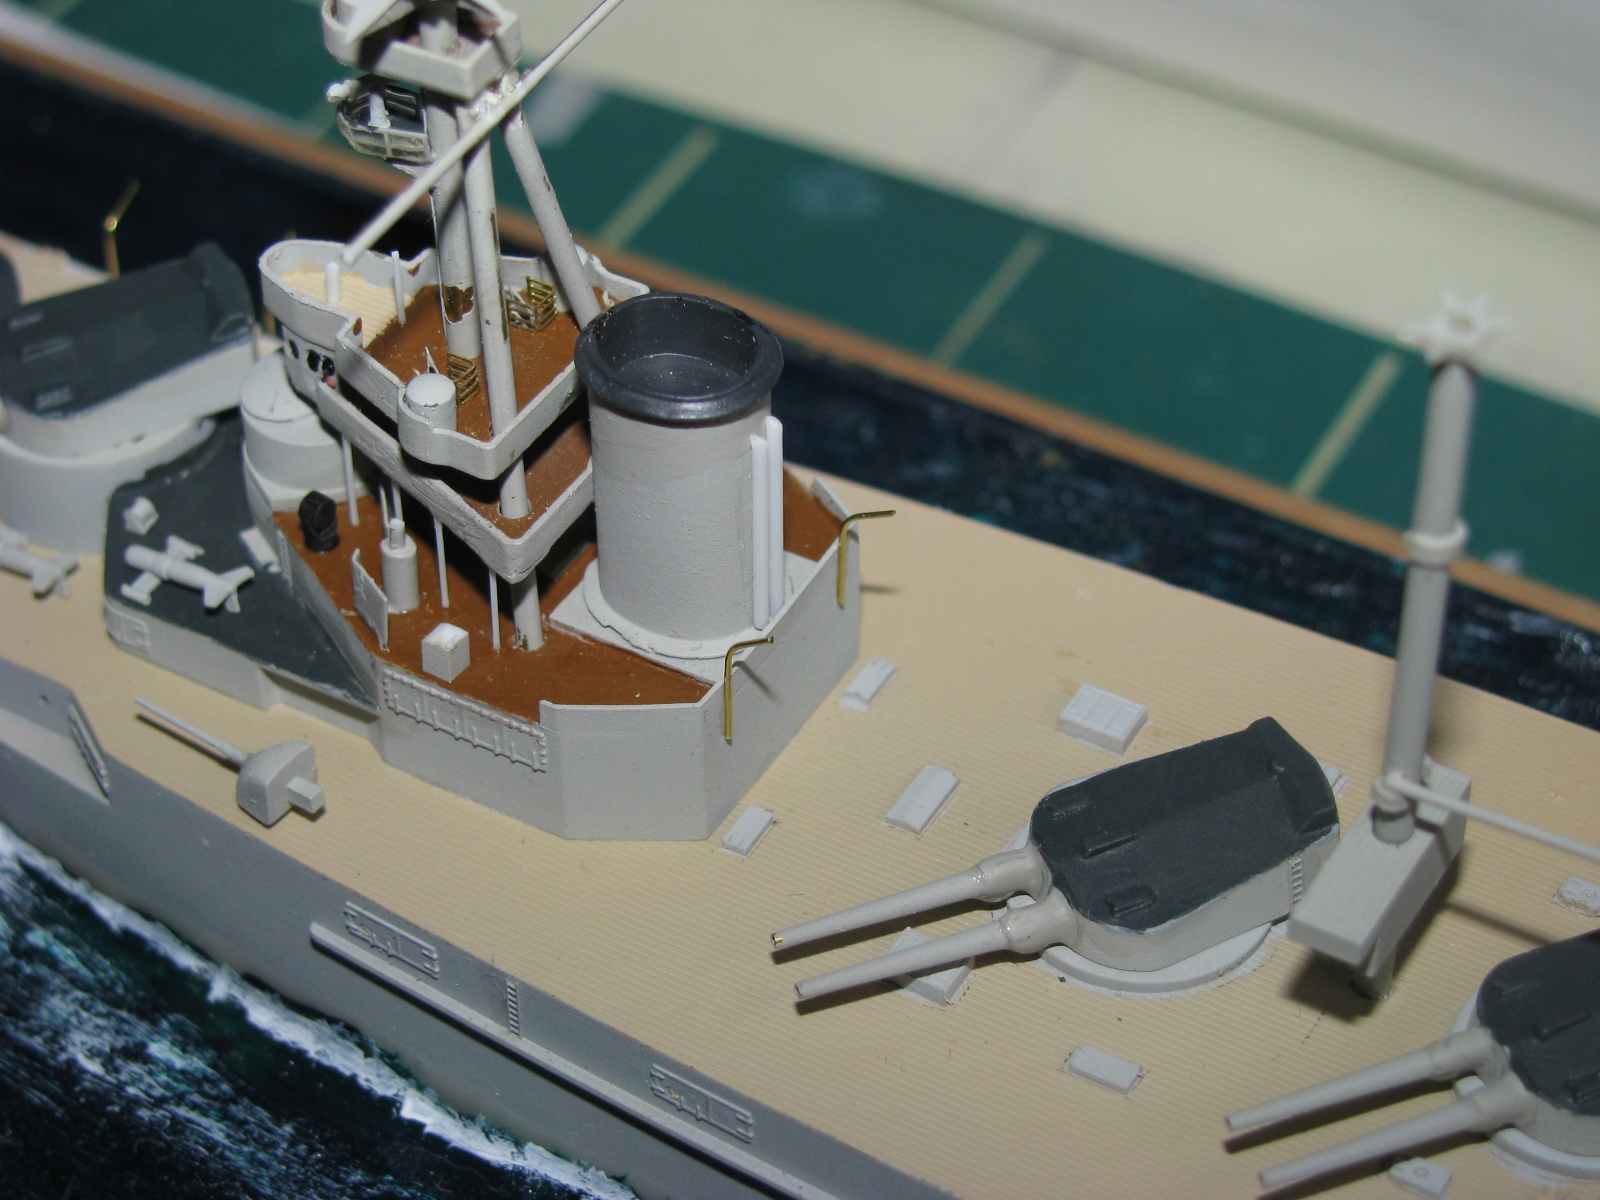
When everything was dry, I replaced the resin gun barrels with brass 12
inch barrels from NNT, then painted
the tops of the turrets tops dark gray. I also began adding the aft
superstructure, the funnels and then the foremast, working back to front.
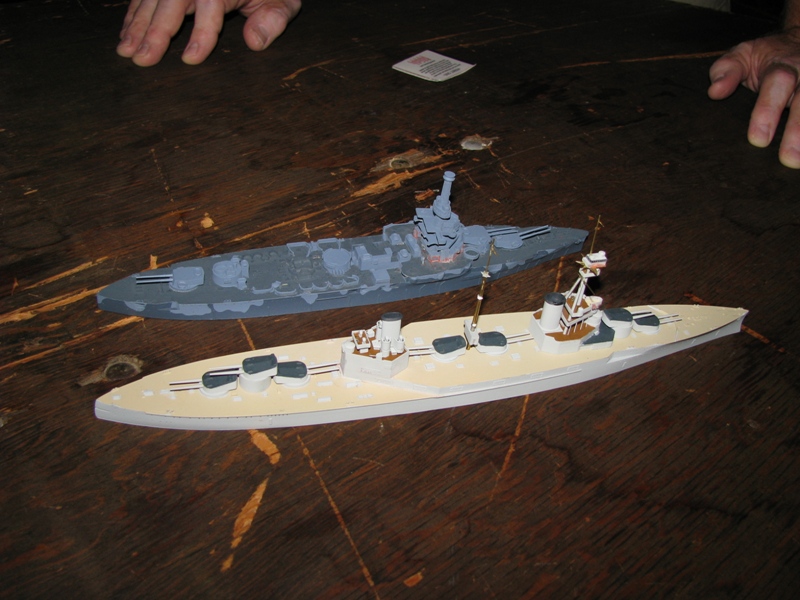
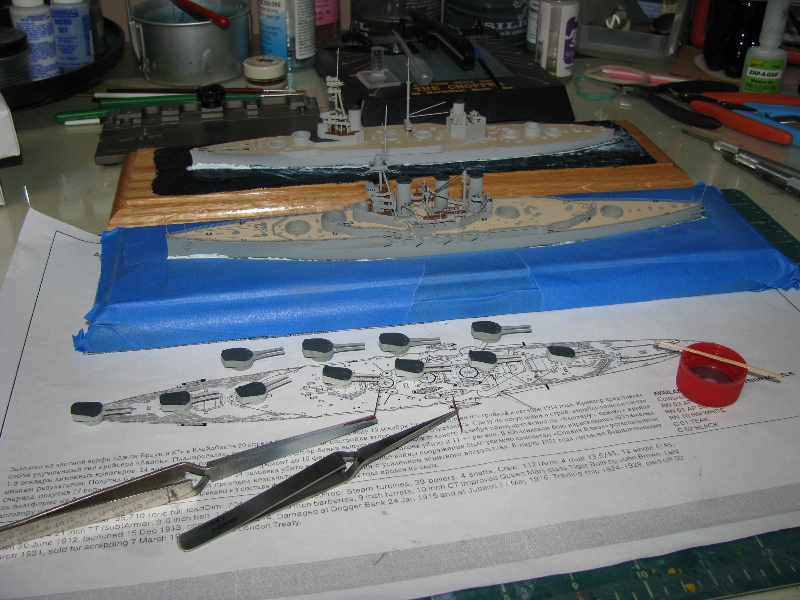
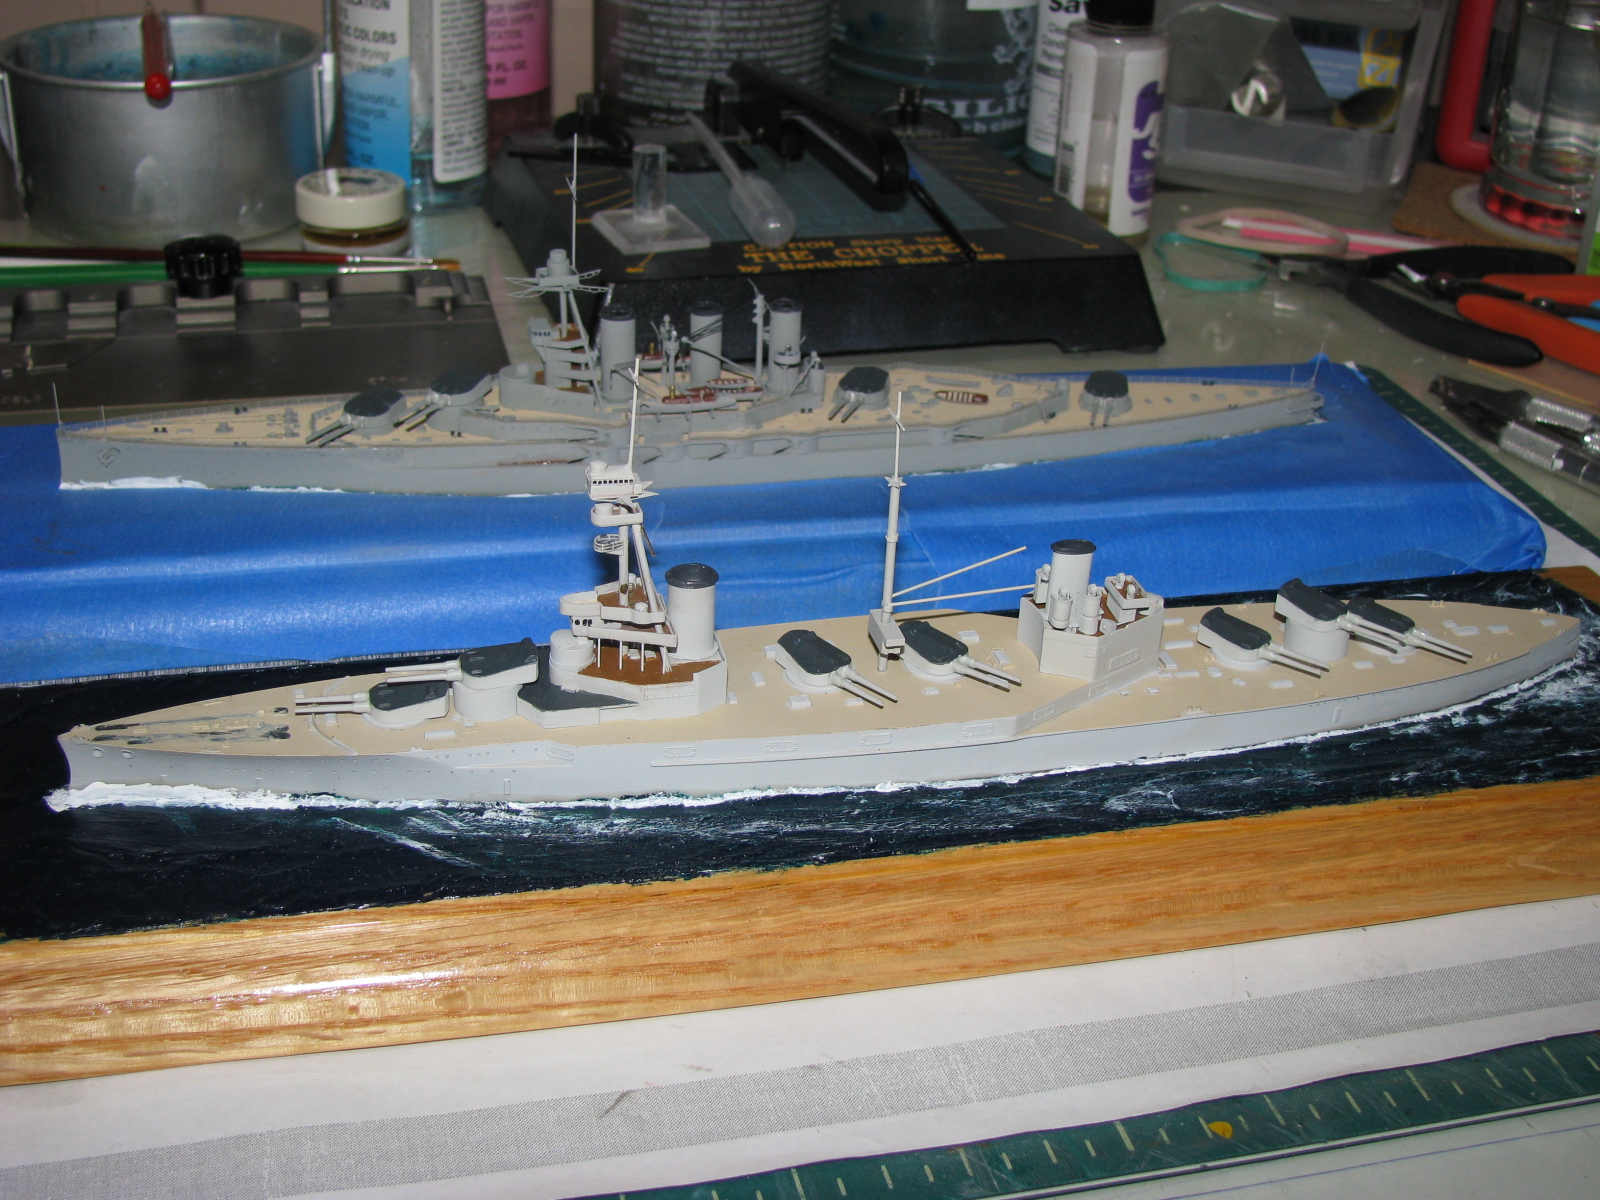
You'll notice the
Combrig
Tiger lurking in the background in some of the photos, the reason being
I was working on these ships in tandem for quite some time.
 |
 |
 |
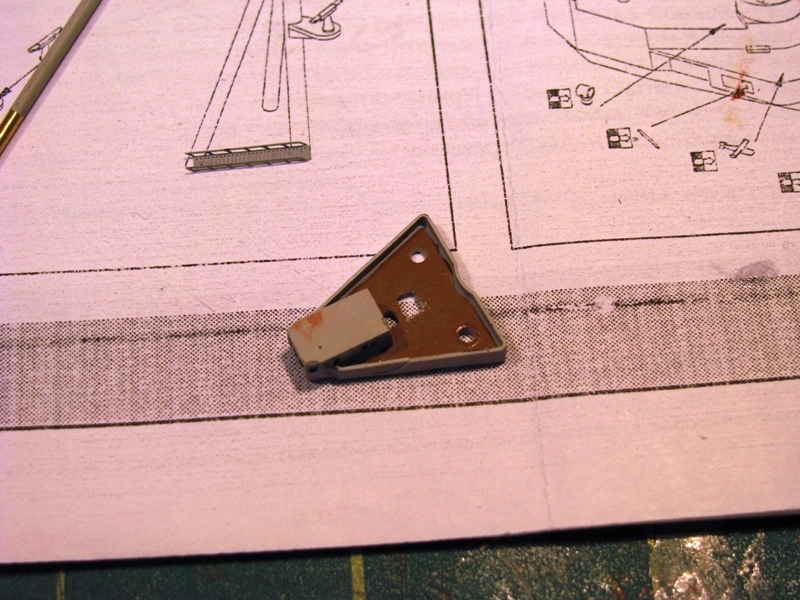
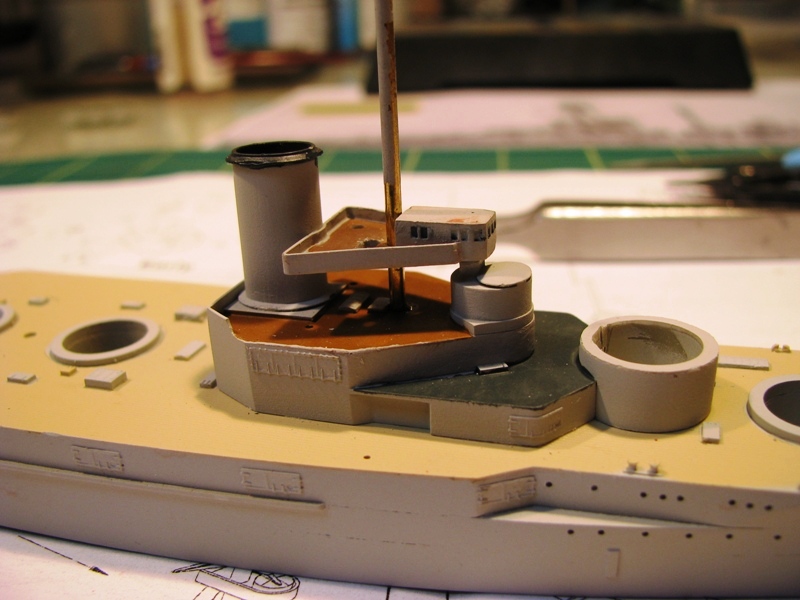
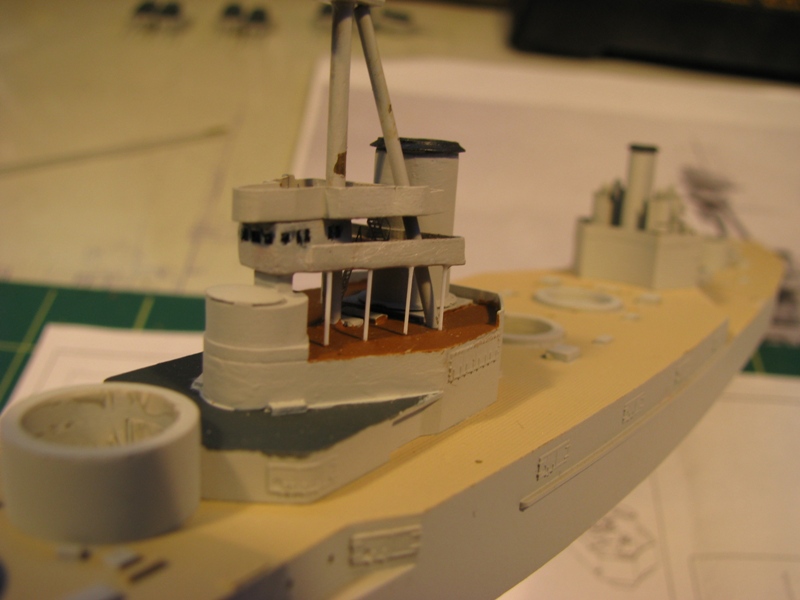
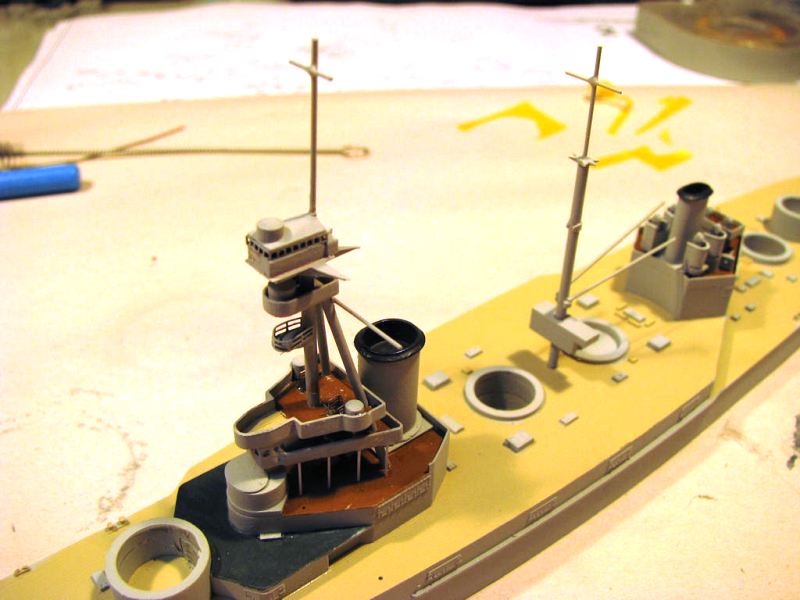
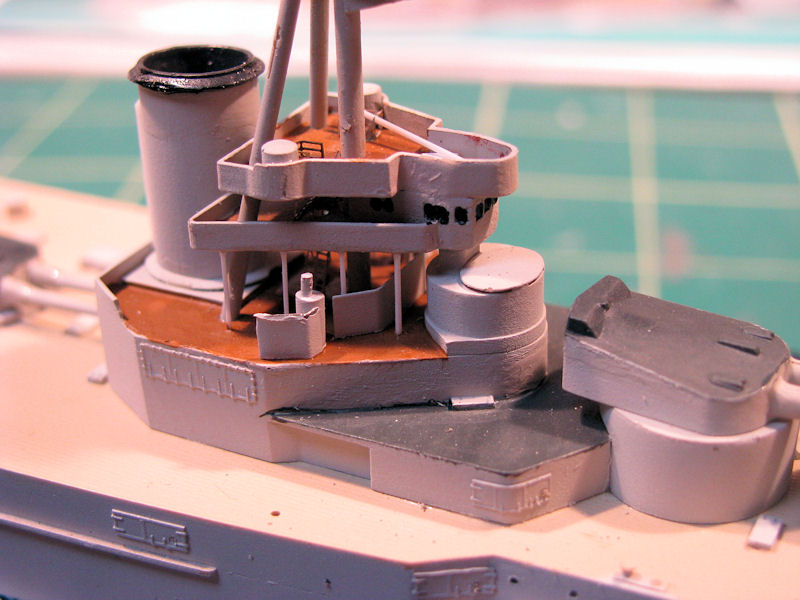
With the aft superstructure complete for now (more
on this later) and the funnels in place, I began working on the foremast.
As mentioned earlier, there are no opening in the bridge platforms for
inclined ladders, so these had to be cut out. I started by
marking the approximate location of the opening, drilling a pilot hole,
then squaring off the openings with a file.
 |
 |
 |
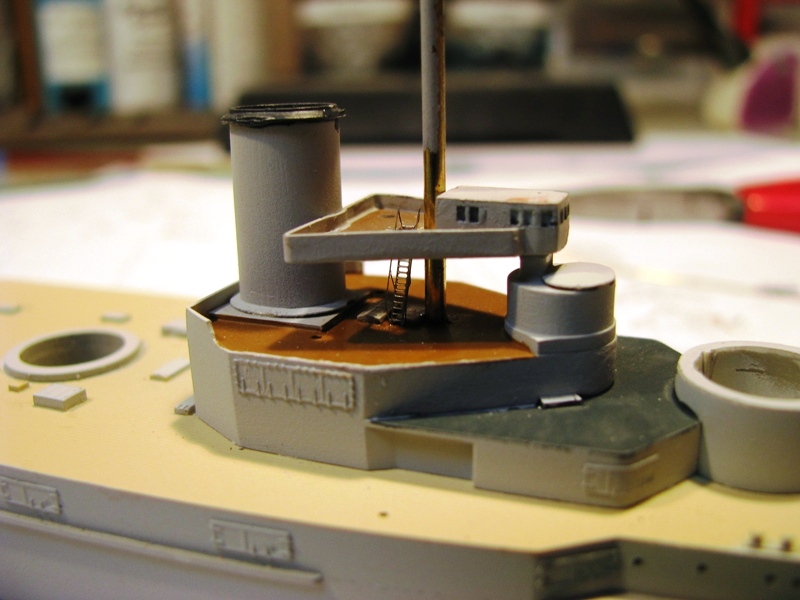
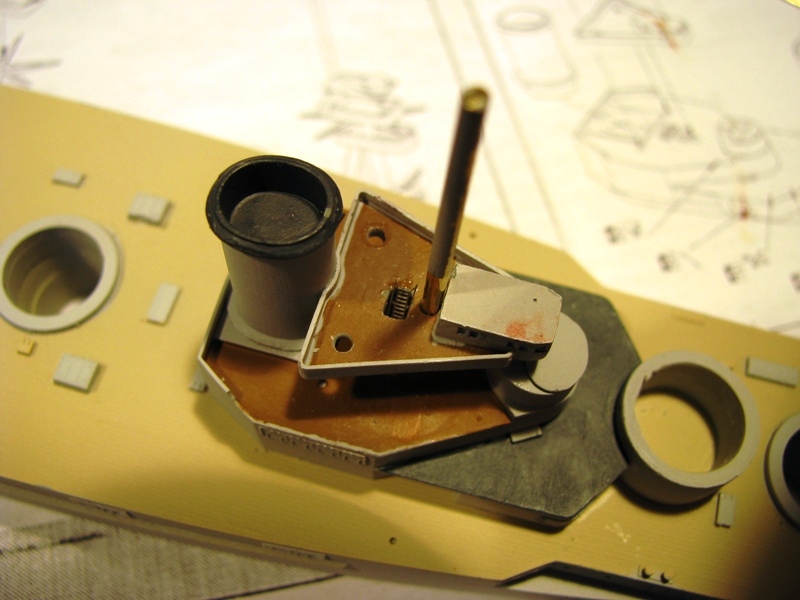
Once these were done, I started dry-fitting the
platforms in place, after replacing the resin foremast strut with a more
substantial piece of brass rod. As each platform was put in
place, the inclined ladder(s) were added, then the next level put in place.
 |
 |
 |
 |
 |
 |
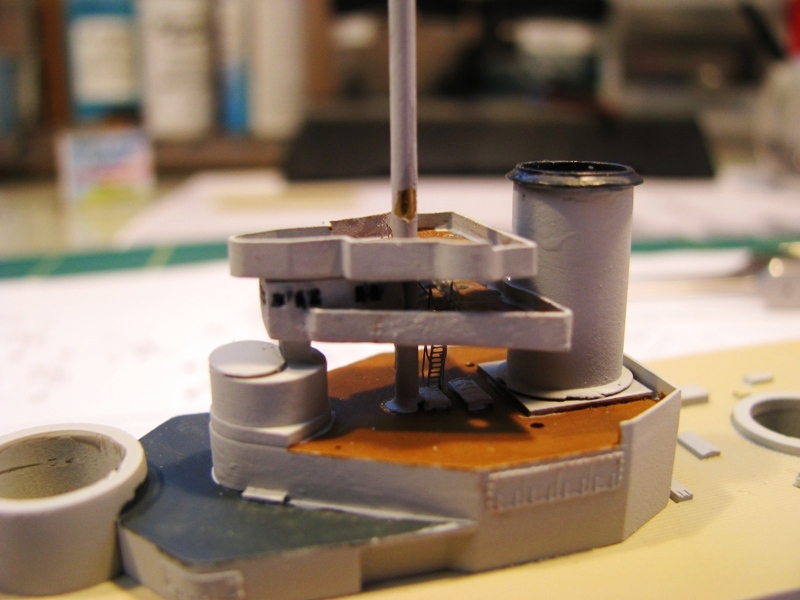
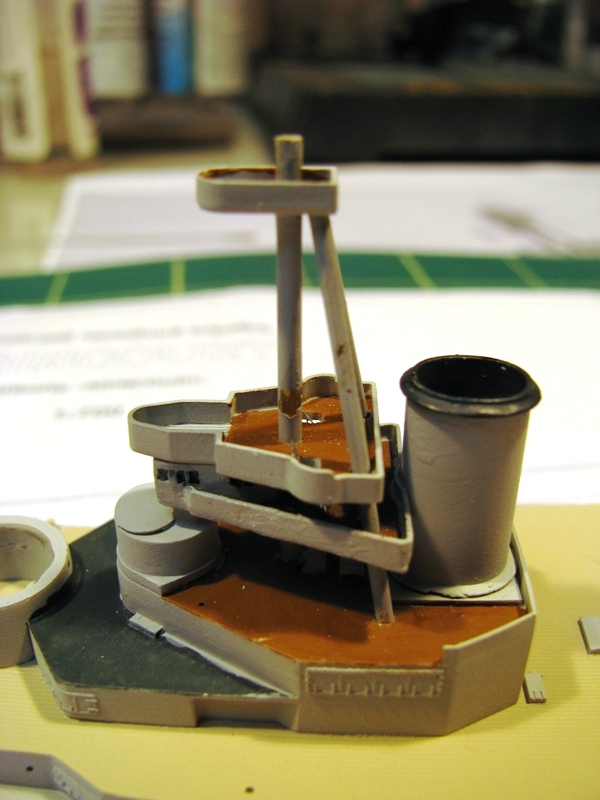
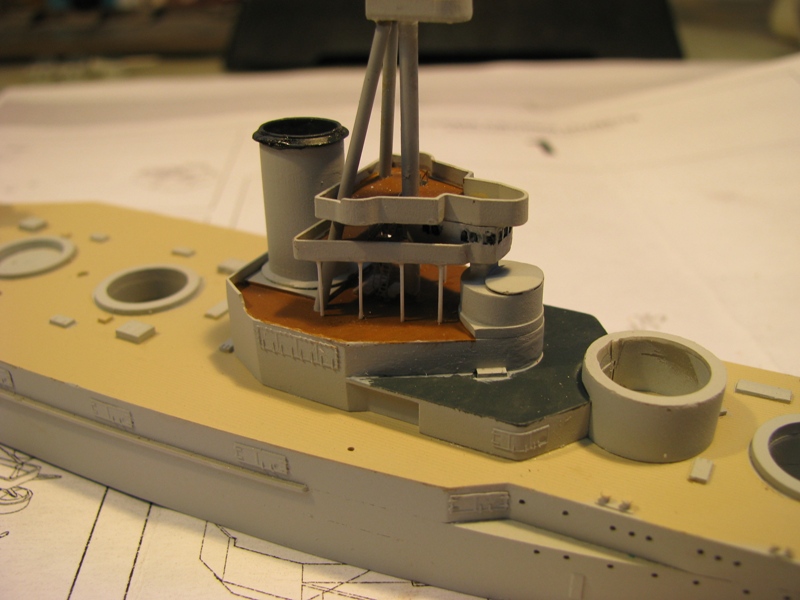
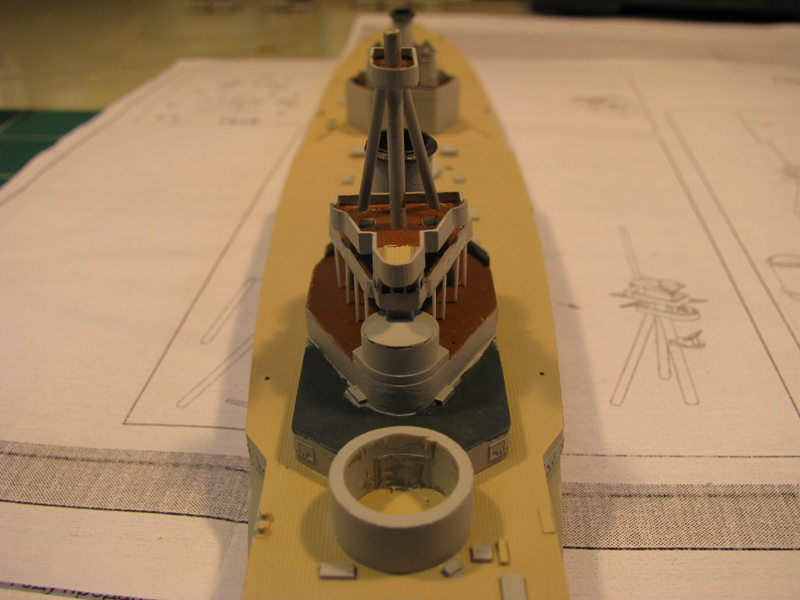
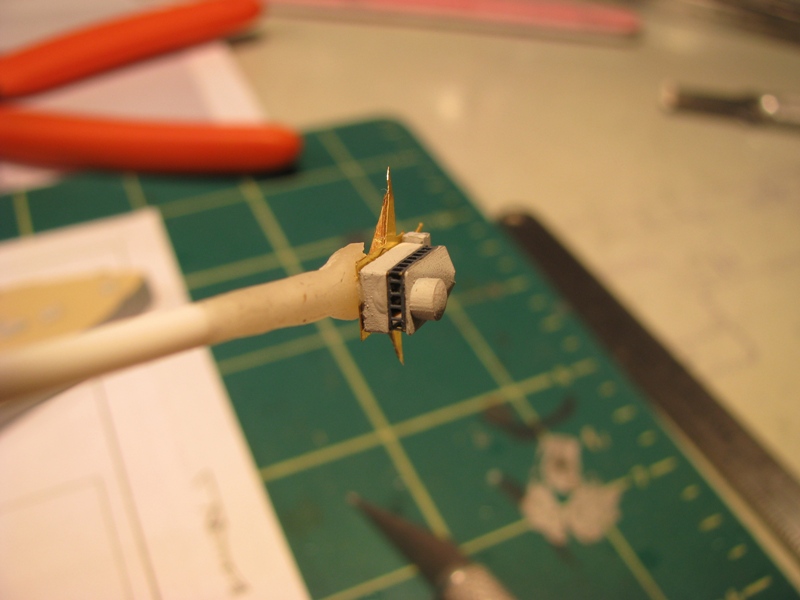
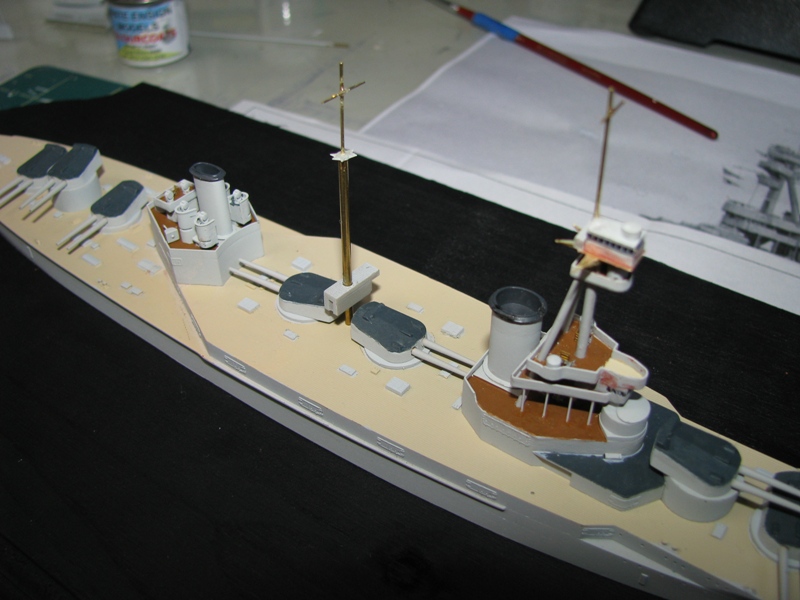
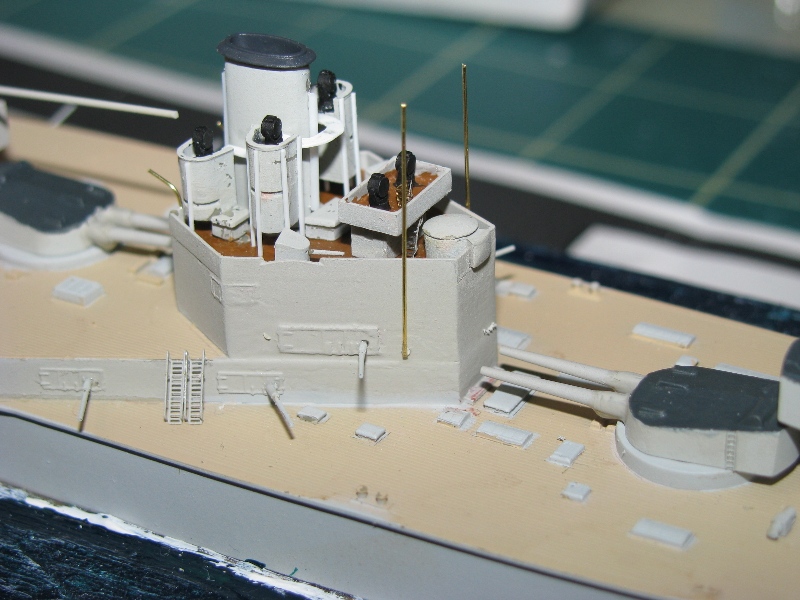
Next, the rear legs of the foremast tripod were
added. When these were dry, the small platform under the spotting
top was affixed.
 |
 |
 |
 |
 |
 |
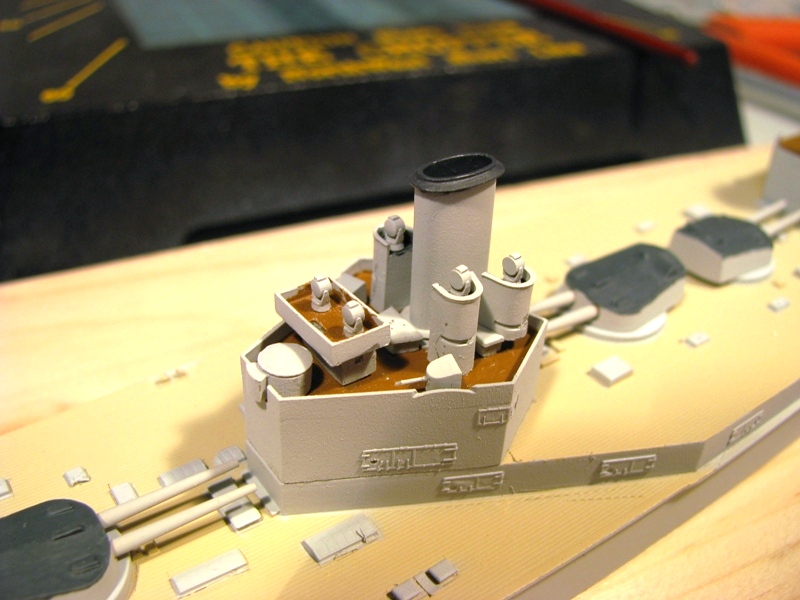
In my search for more information, CAD drawings
of Agincourt were posted by George Hargreaves in the
Calling
All Ship Fans thread pertaining to the Turkish Twins, Erin & Agincourt.
These showed support poles bracing the lowest level of the bridge platform.
They also showed additional details there were added later. Using
evergreen rod, I added four poles to each side of the bridge.
 |
 |
 |
 |
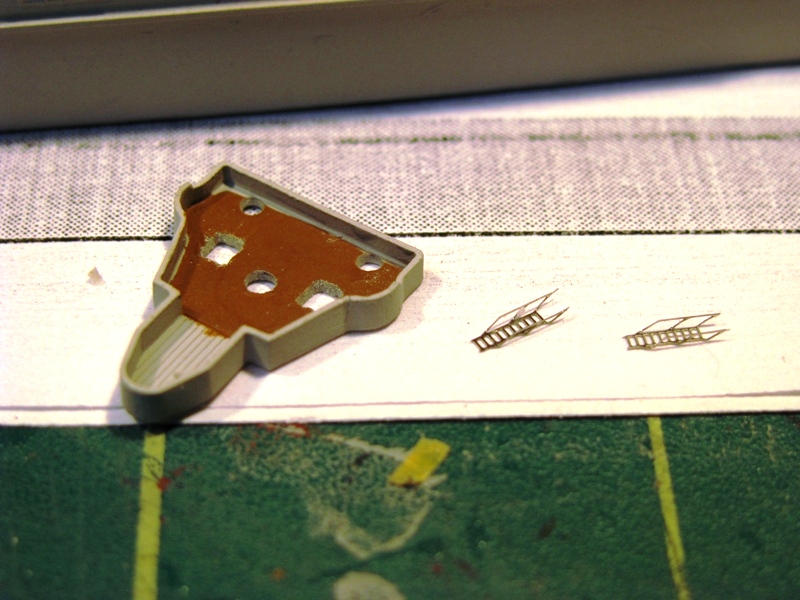
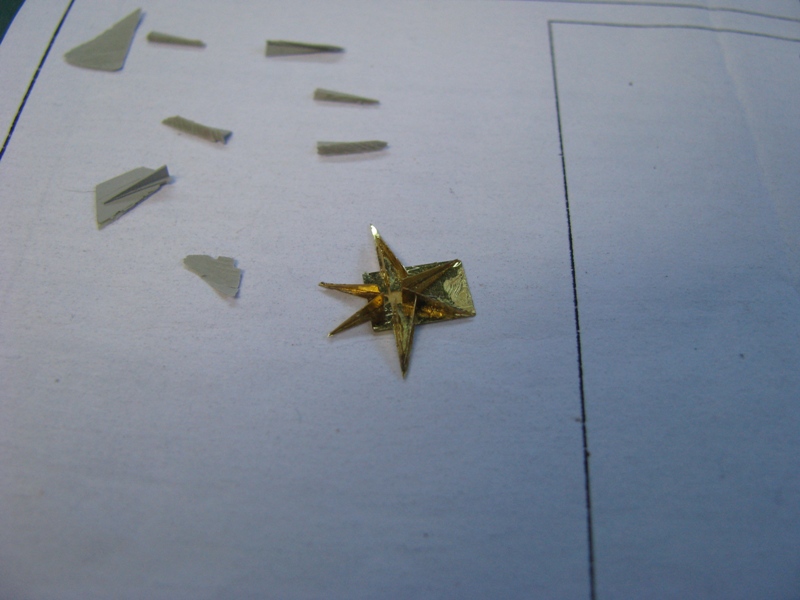
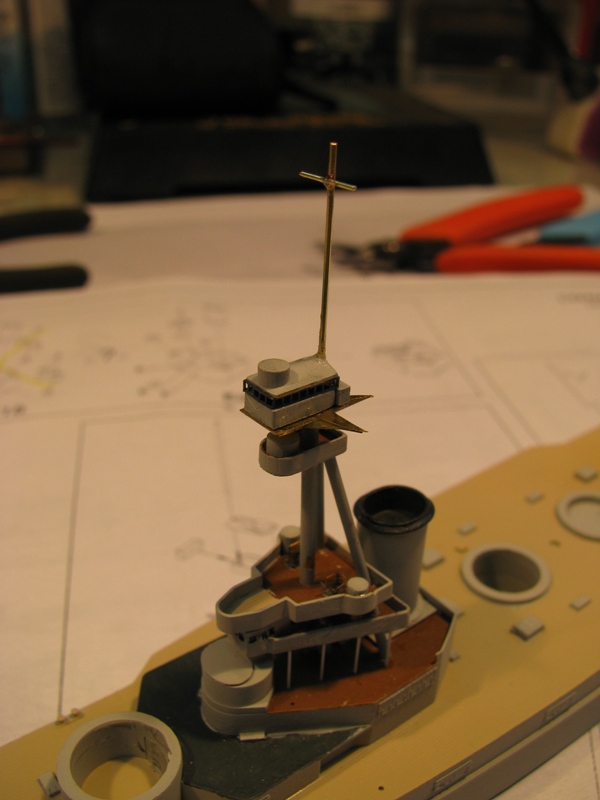
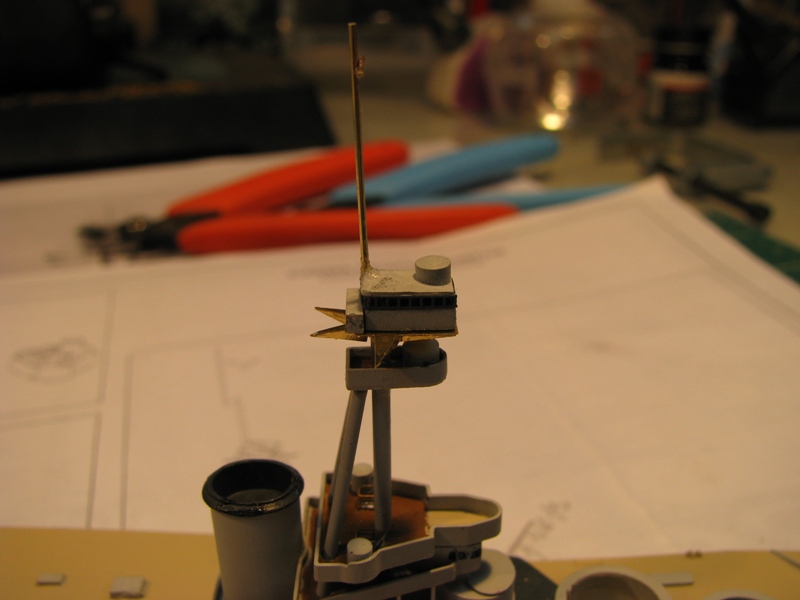
In my zeal to sand the parts off the resin wafers,
I decided to "cheat" and use a power sander, which was a bad move, as not
only where the bridge levels lopsided, but the resin starfish was rendered
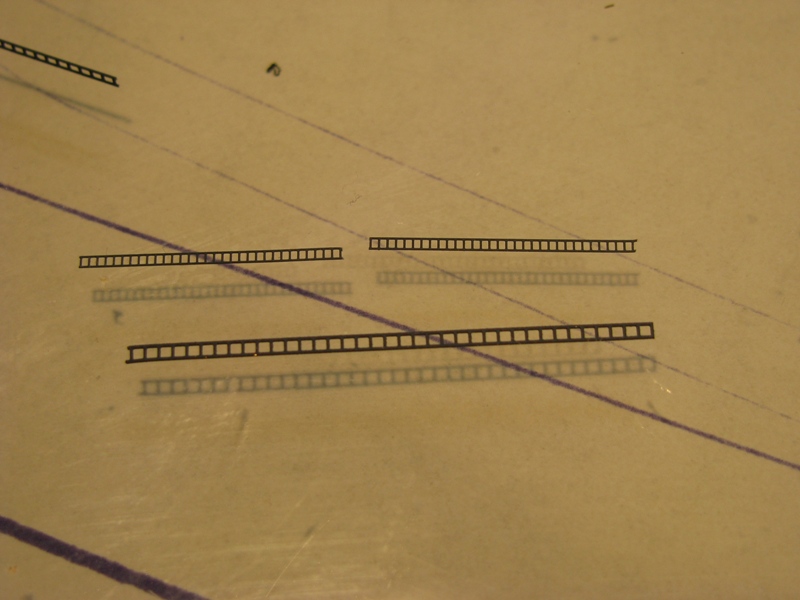
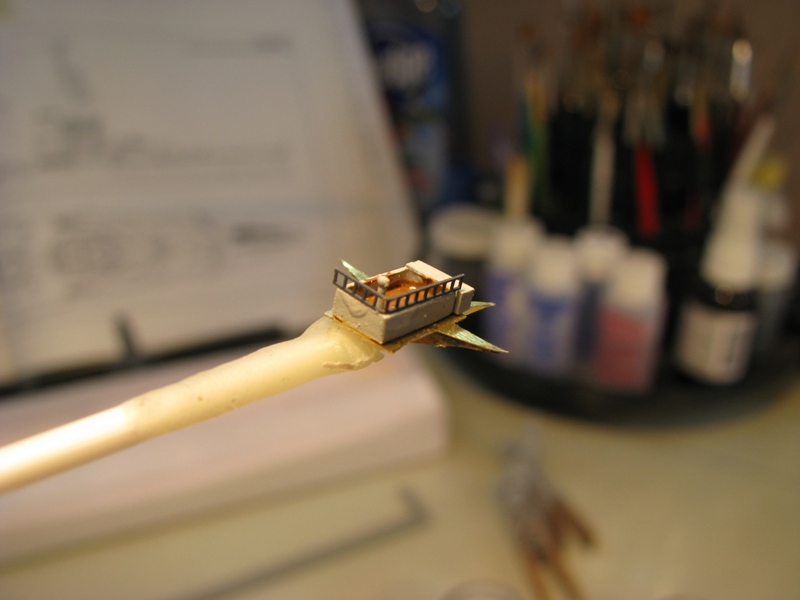
useless. Fortunately, I was using the WEM photo-etch set for
HMS Tiger, which had a photo-etch starfish included in the set. While
not 100% accurate, I chose to use this to replace the resin part.
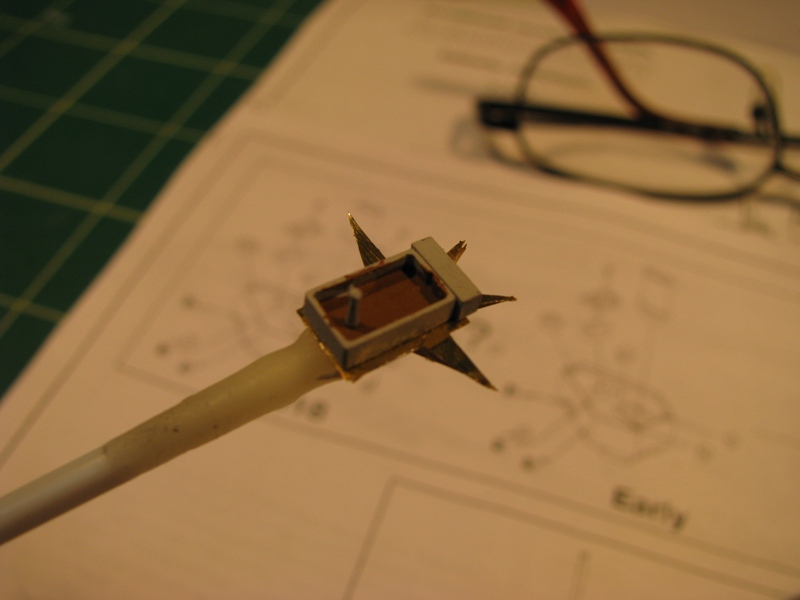
While it looks great, it's very fiddly to put together, as each brace is
a separate part that has to be added to the base. Once the
base was complete, I added the bottom of the spotting top to the completed
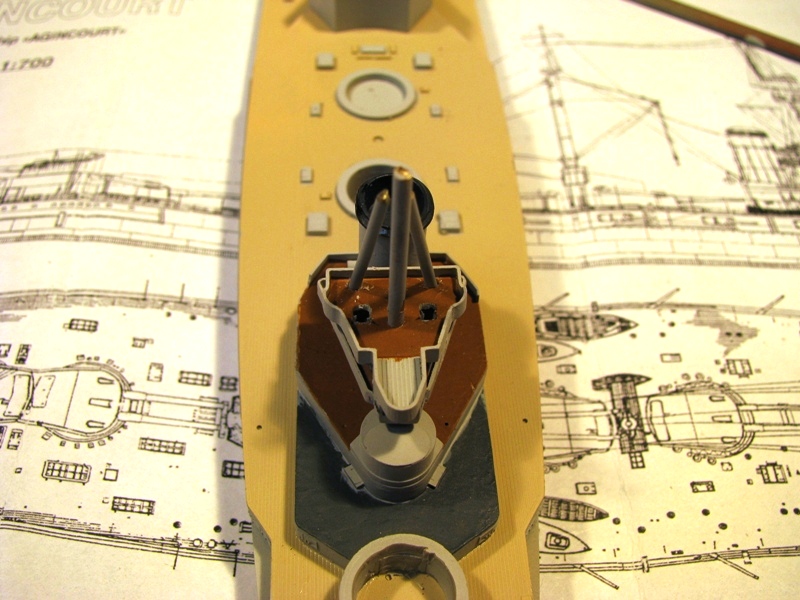
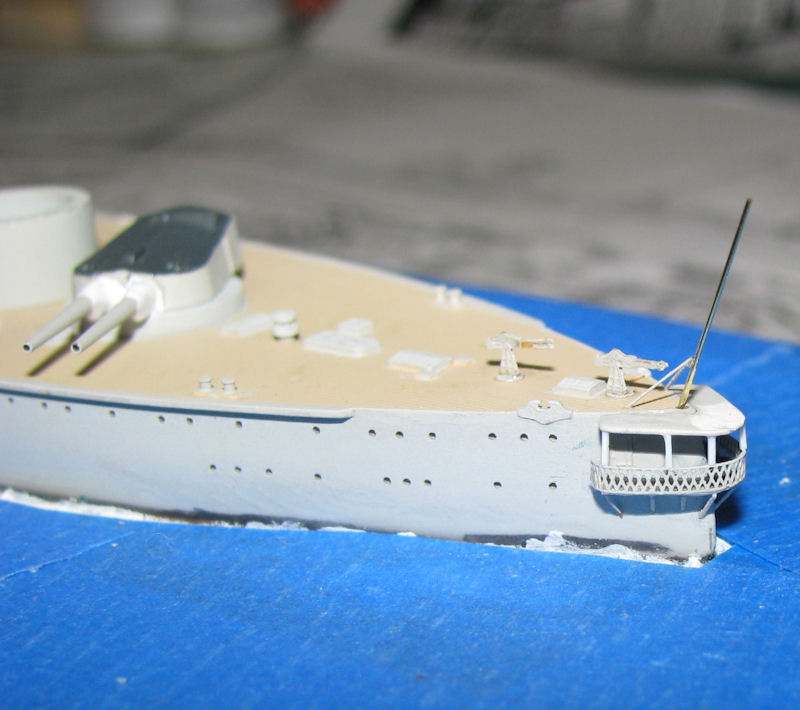
starfish. In the photograph at the top of the page, it's apparent
that the spotting top has windows - the model does not include any, depicting
instead an open spotting top. I therefore added 1/350 ladders
to depict windows, experimenting with various sizes until it looked right
and provided clearance for the rangefinder inside the spotting top.
 |
 |
 |
 |
 |
 |
 |
 |
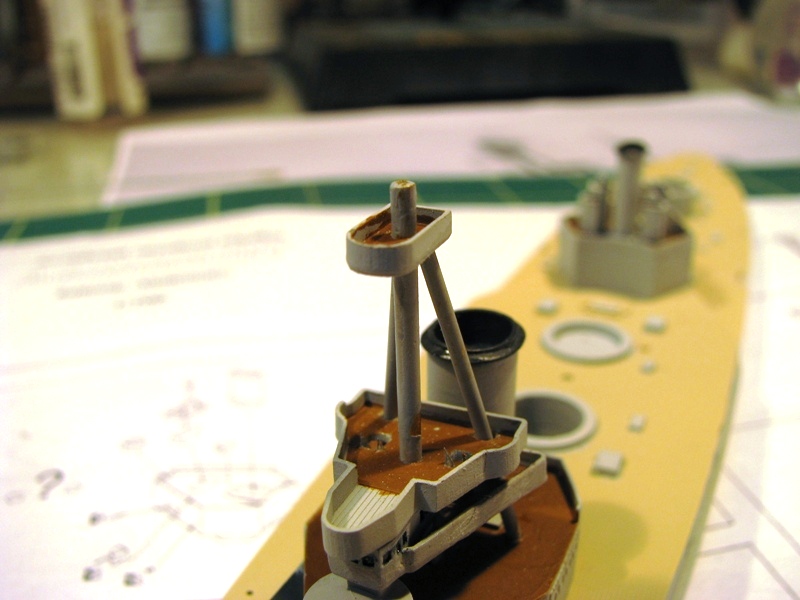
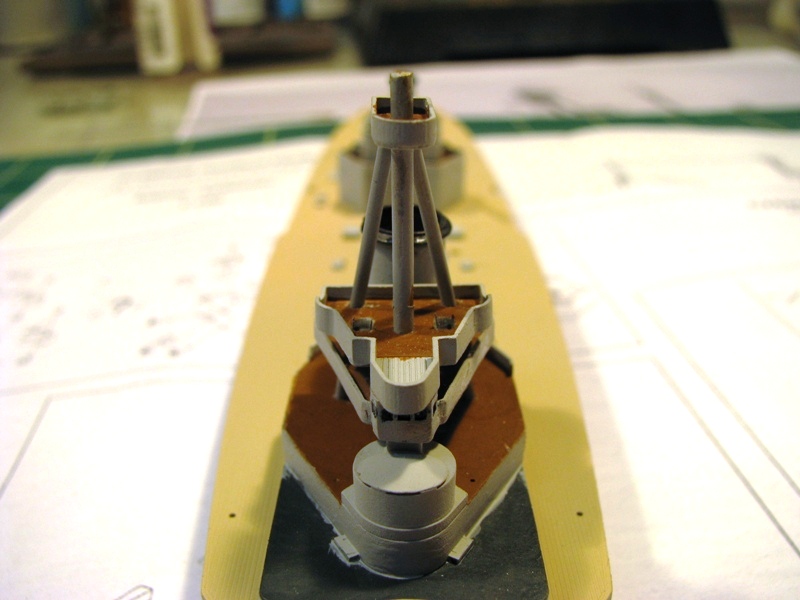
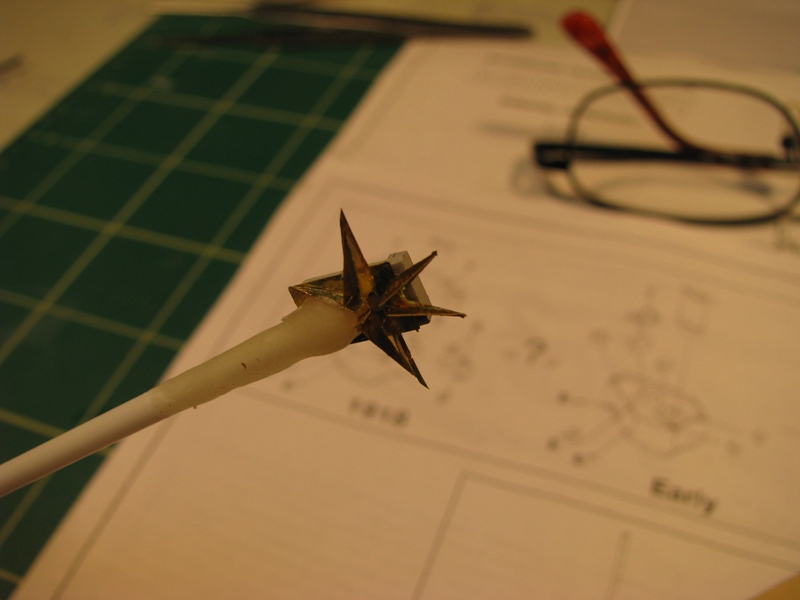
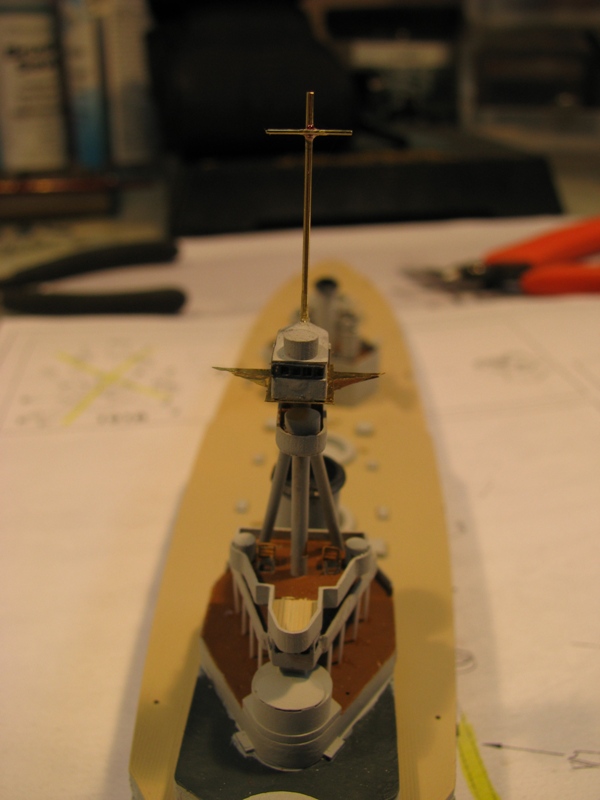
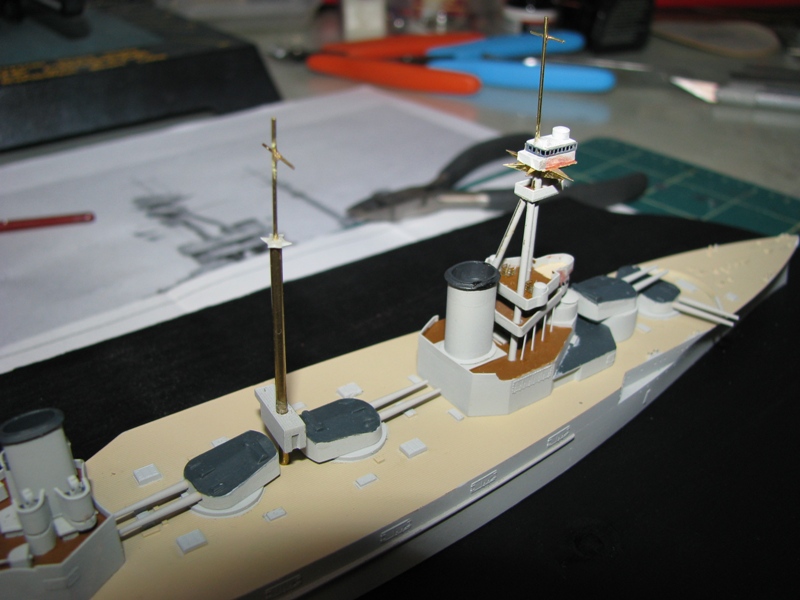
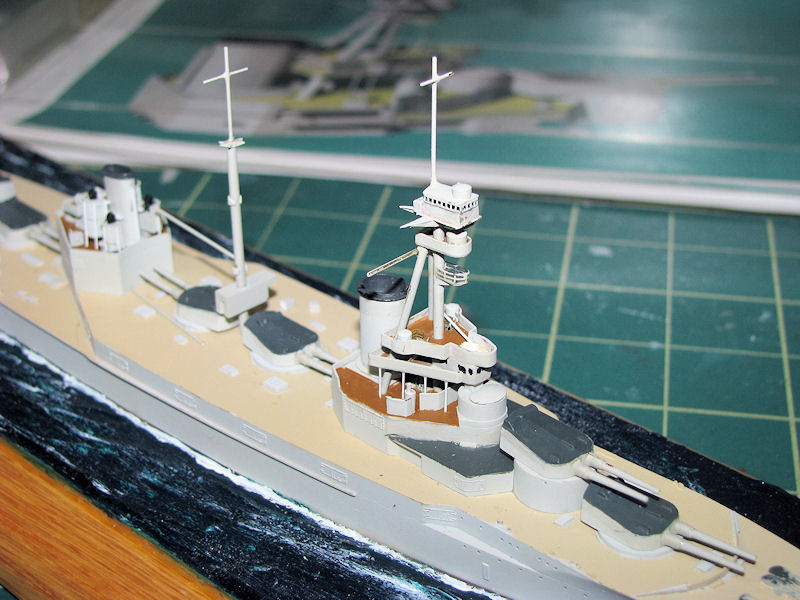
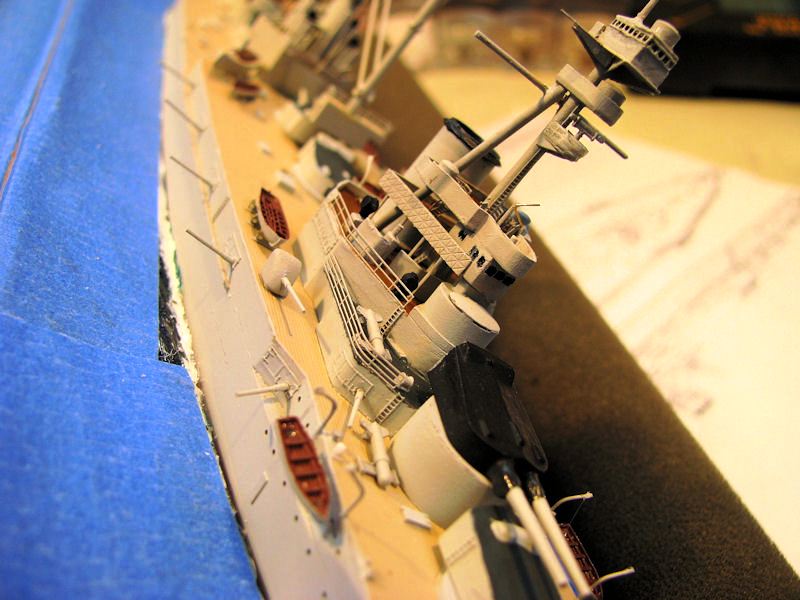
Brass rod was used for the mast and yard
arm on top of the spotting top, all of which was then added to the top
of the foremast. The Gin Palace was starting to look like a
World War I battleship at this point.
 |
 |
 |
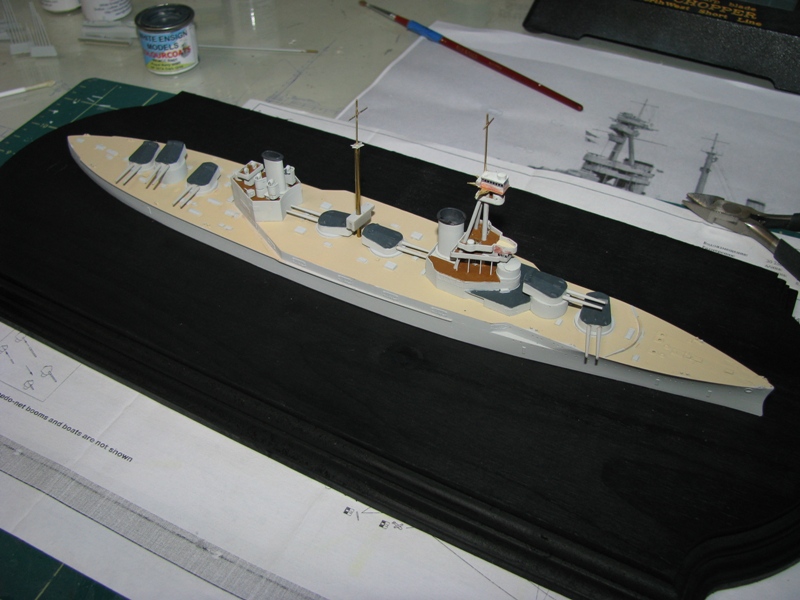
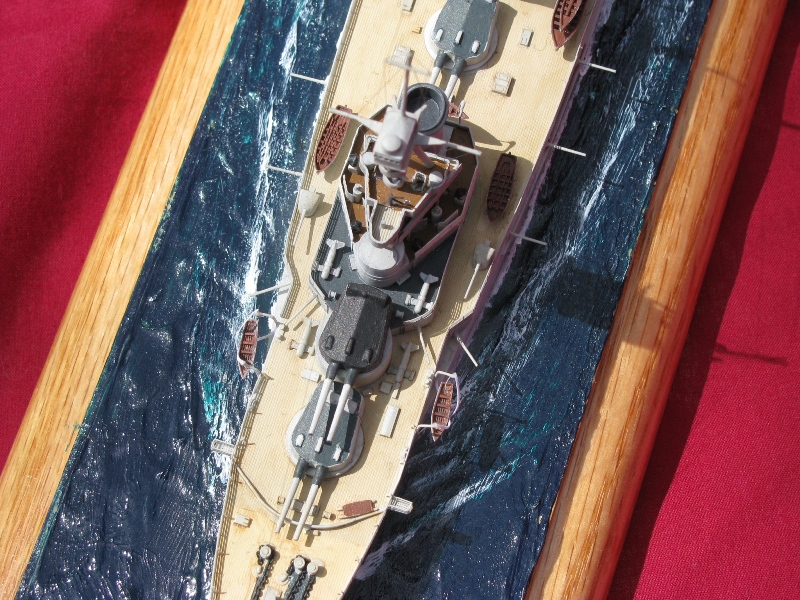
As
built,
the Agincourt carried two tripods - one fore and one aft - plus a third
mast in the middle of the massive flying bridge she originally carried.
The flying bridge was removed shortly after being commissioned into the
Royal Navy, the aft tripod followed sometime after, leaving the "mid-mast"
for the derricks that handled the ships boats, etc. Like the
main strut for the foremast, this mast was replaced with brass rod.
The derricks were also replaced with brass rod. After drilling a
deeper hole in the hull to hold the heavier mast, it was painted and secured
to the model.
 |
 |
 |
 |
 |
 |
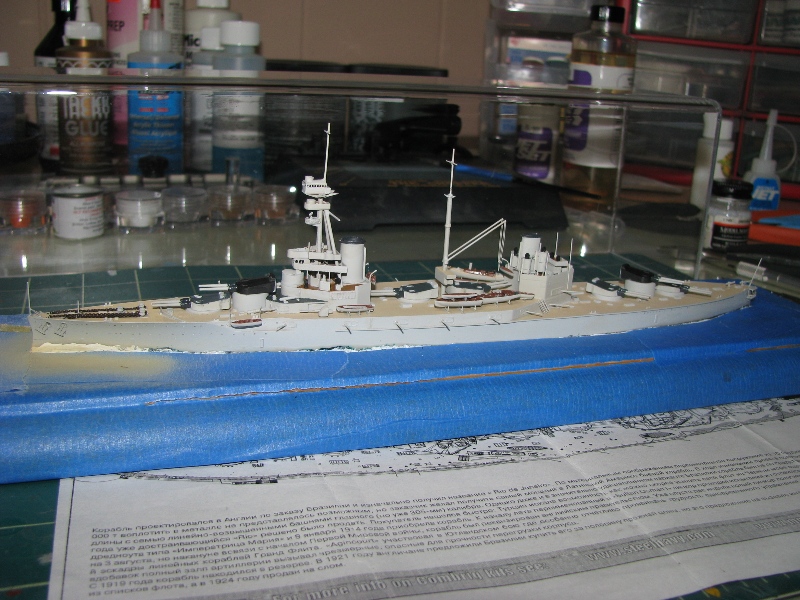
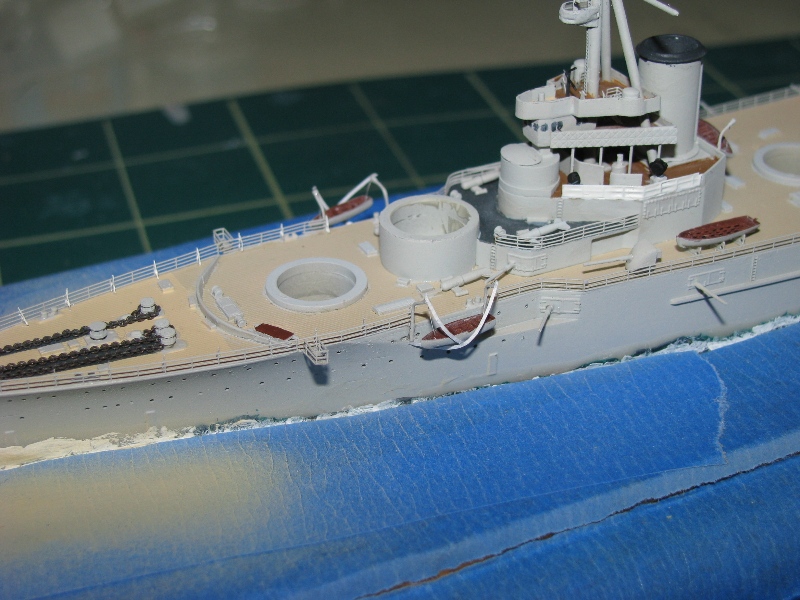
At this point I was humming along, making excellent progress. when a few things happened. First, a round of illness swept through the house, severely limiting building time. Secondly, on my way to visit with fellow ship modelers sometime after everyone was feeling better, the container holding Agincourt and a few other works in progress was jostled around the car in traffic. When I arrived at my destination, I found the spotting top had not only snapped off the model, but it had broken in two, split right along the photo-etch windows. Even after repairs were made, I was unhappy with the turn of events, and put the model on the shelf for an extended break, taking her off the shelf only to put her into a seascape on a base I had made specifically for this build.
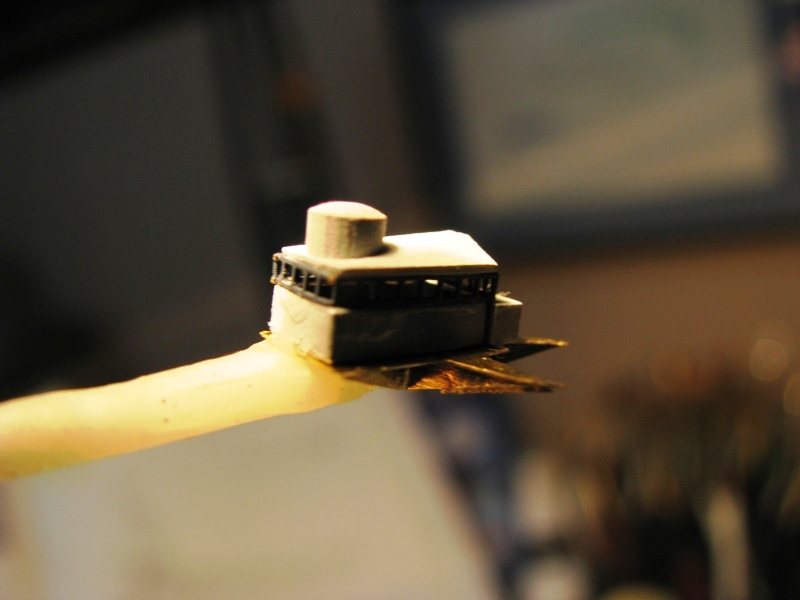
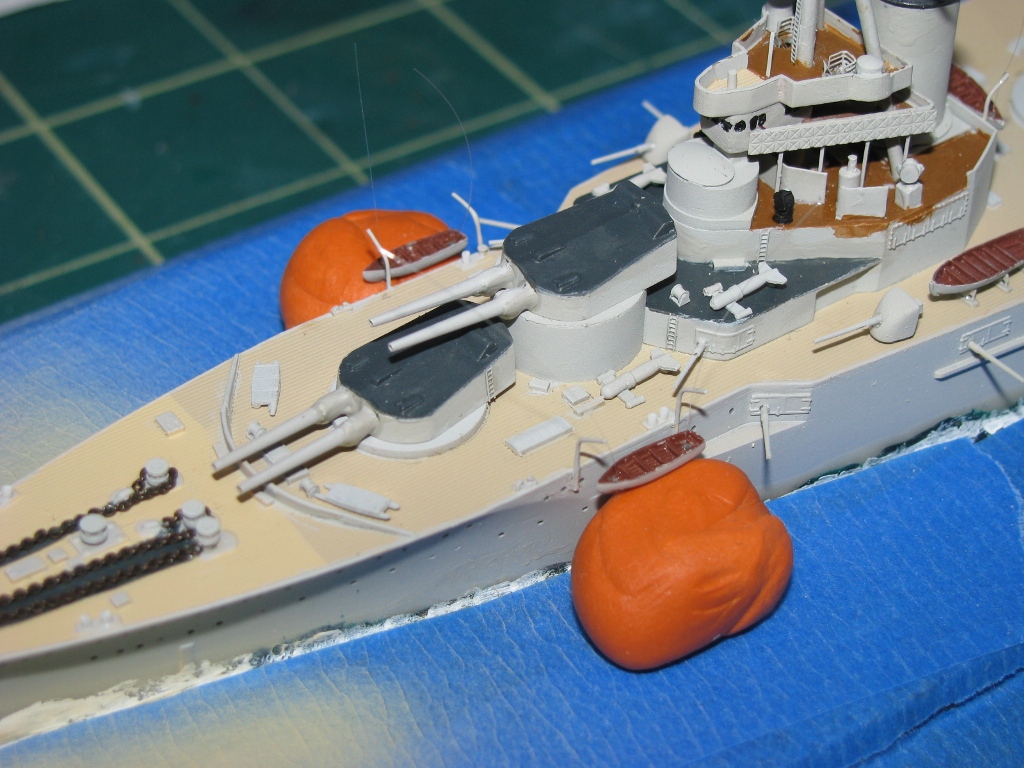
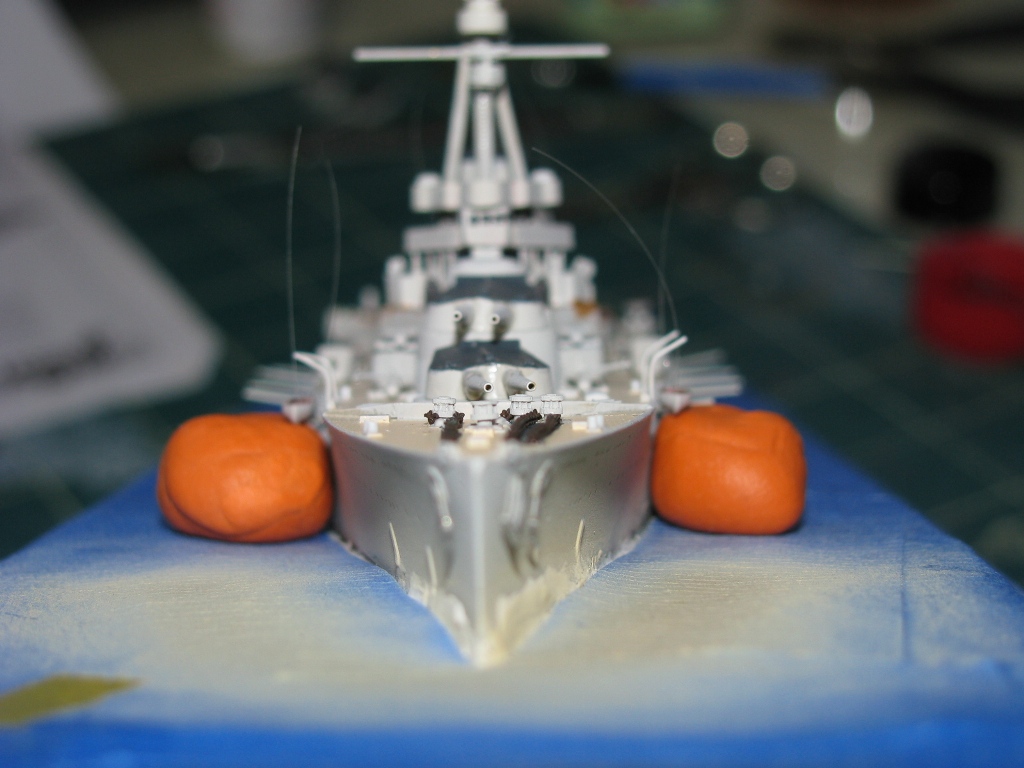
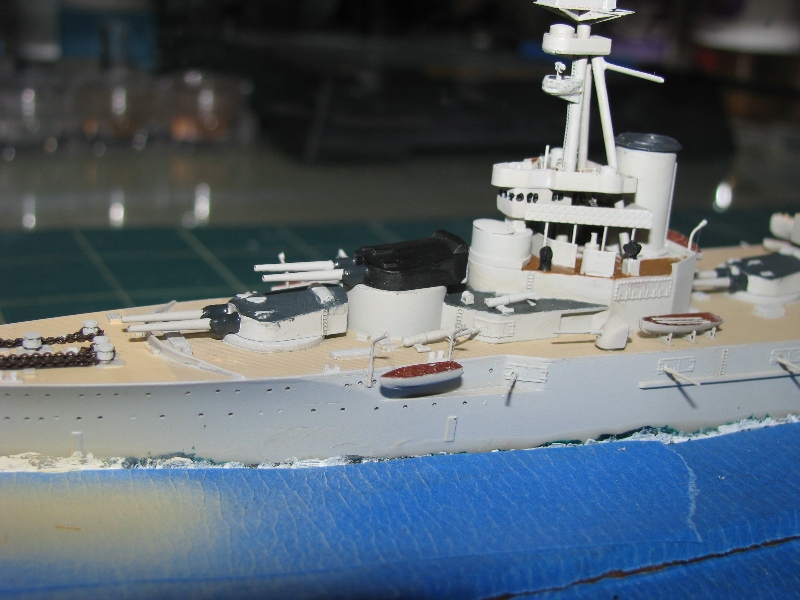
After almost a year and a half, I had started back
on the aforementioned Tiger build. When I got to creating the
blast bags on that model, I decided it was as good a time as any to make
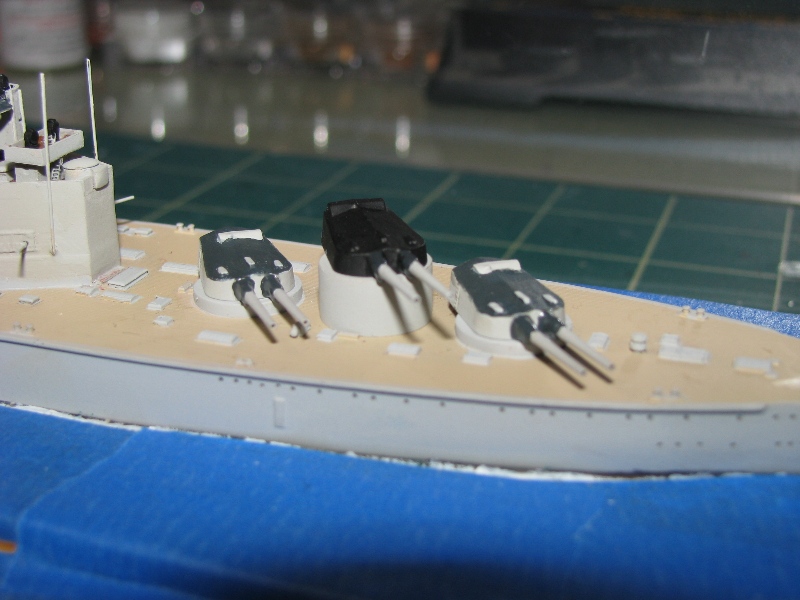
the blast bags for the Agincourt. Using white glue, I built
up the area around the base of the barrels to form a blast bag.
This was repeated, twice, for each turret. It took several applications
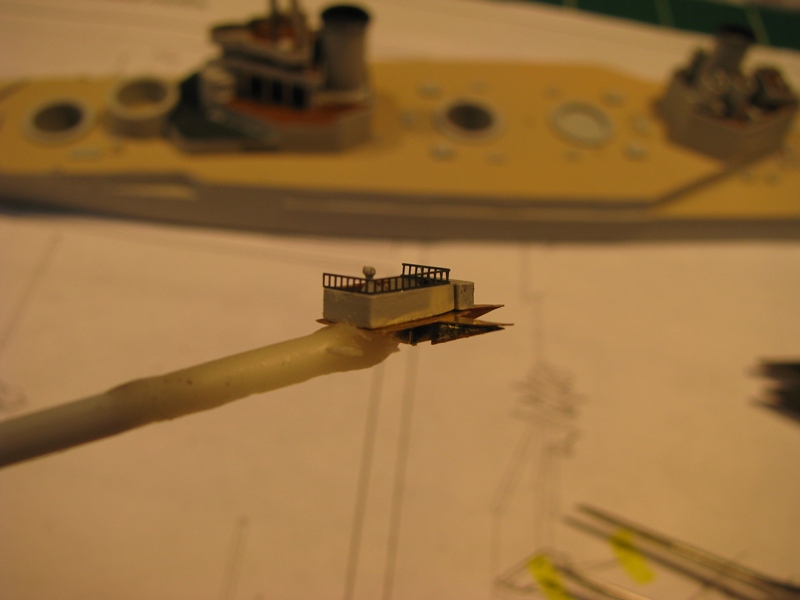
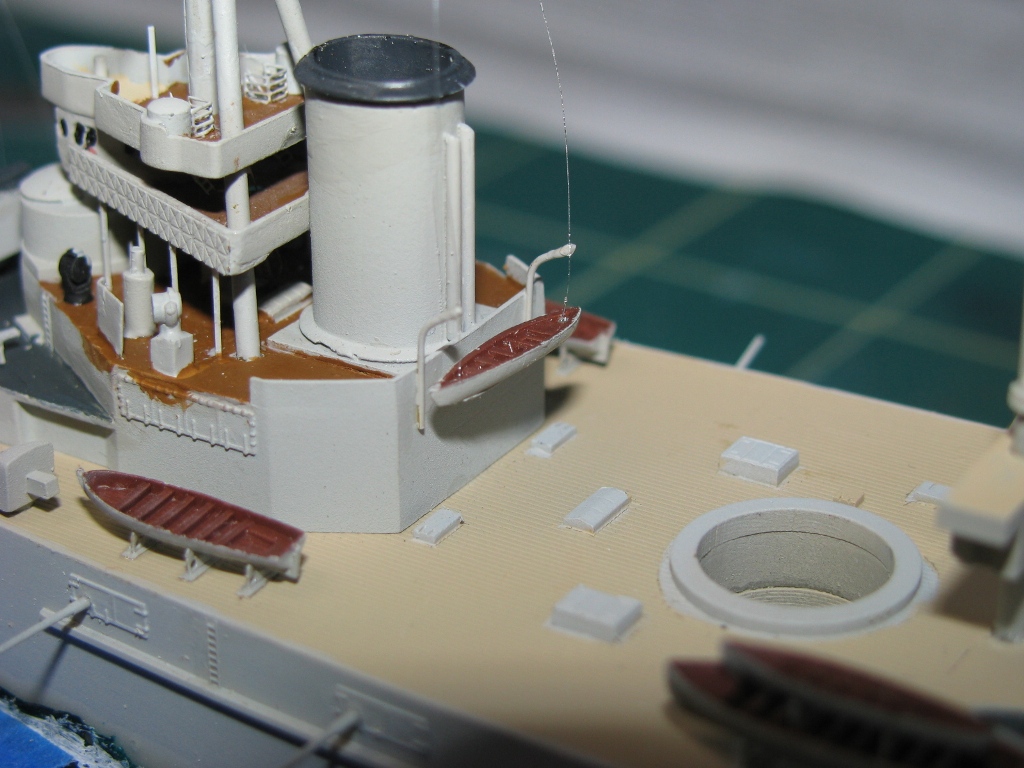
of white glue to achieve the desired look. Around this time
I also added the small platform on the main leg of the spotting top.
I also wrapped photo-etch railing around this platform and used more white
glue to create a canvas dodger.
 |
 |
 |
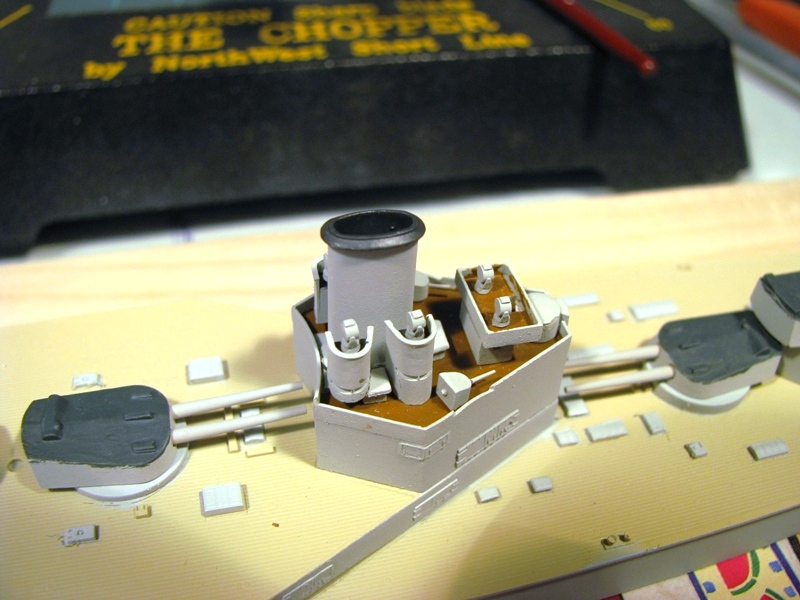
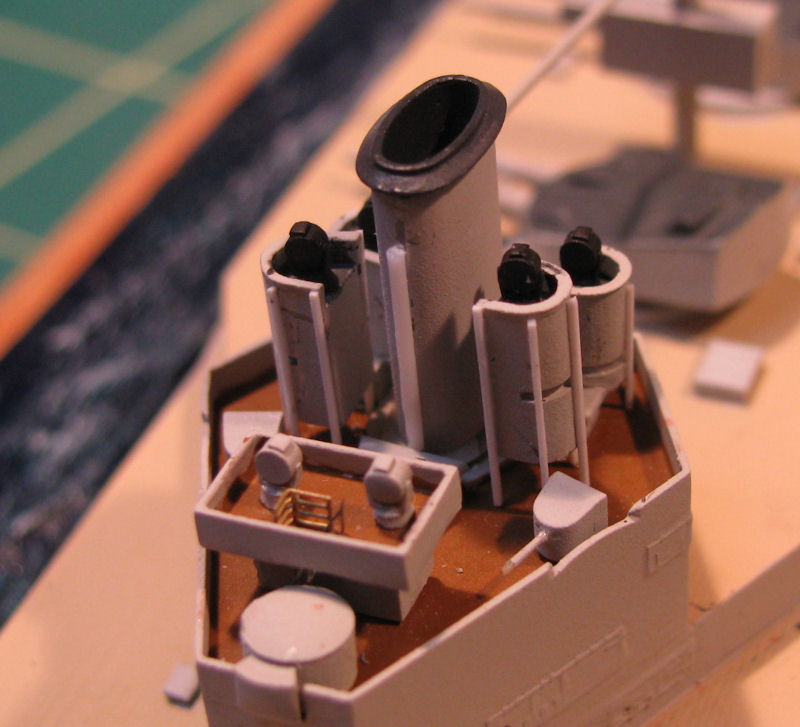
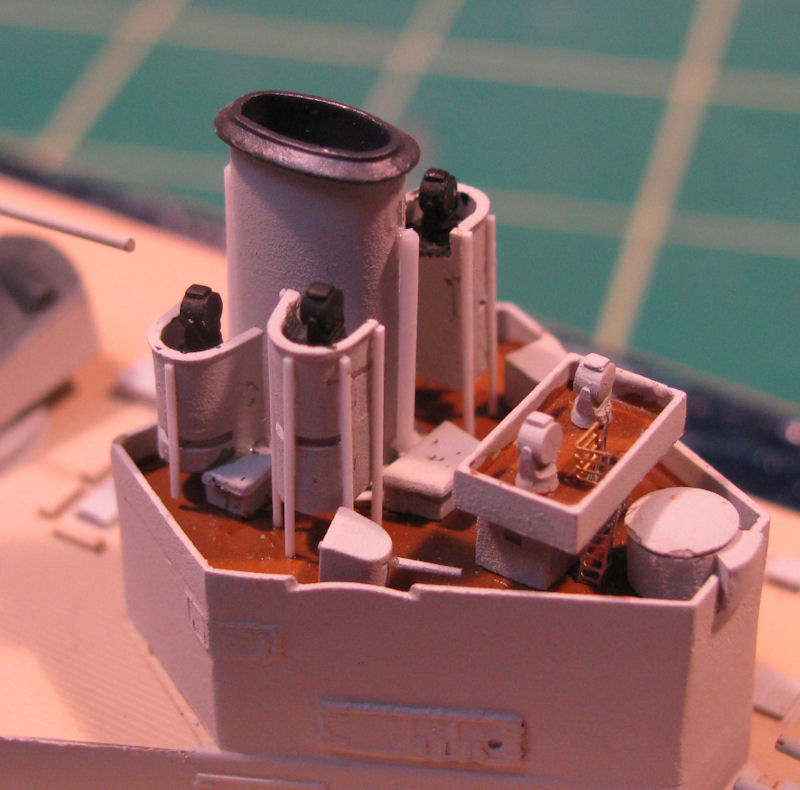
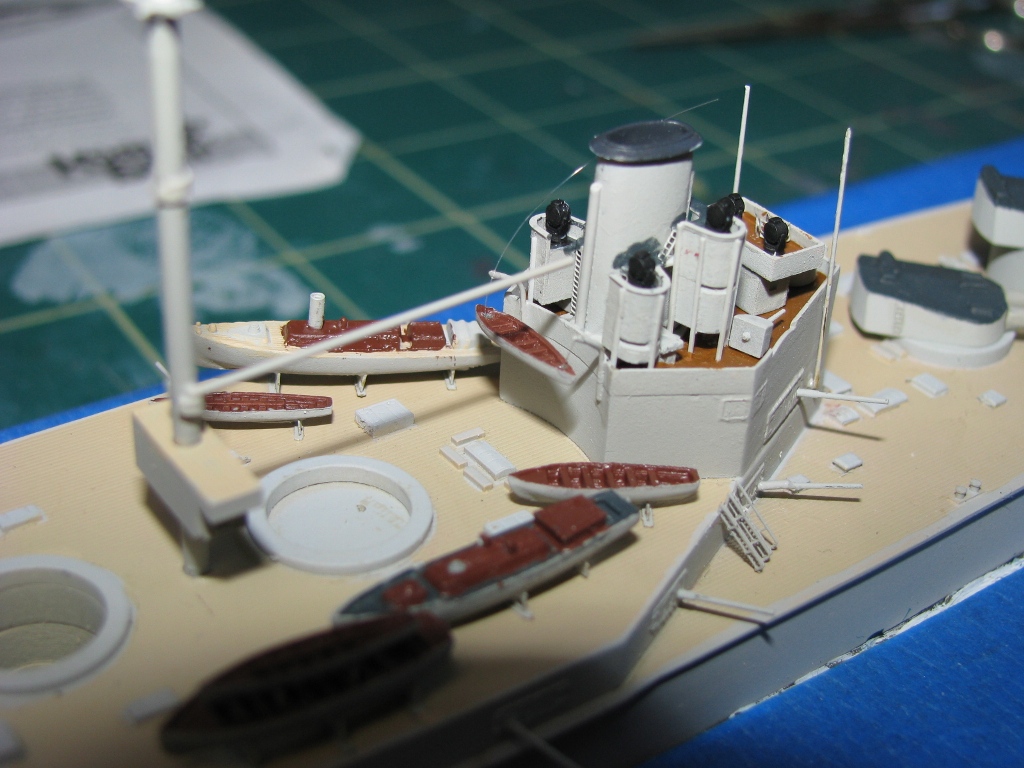
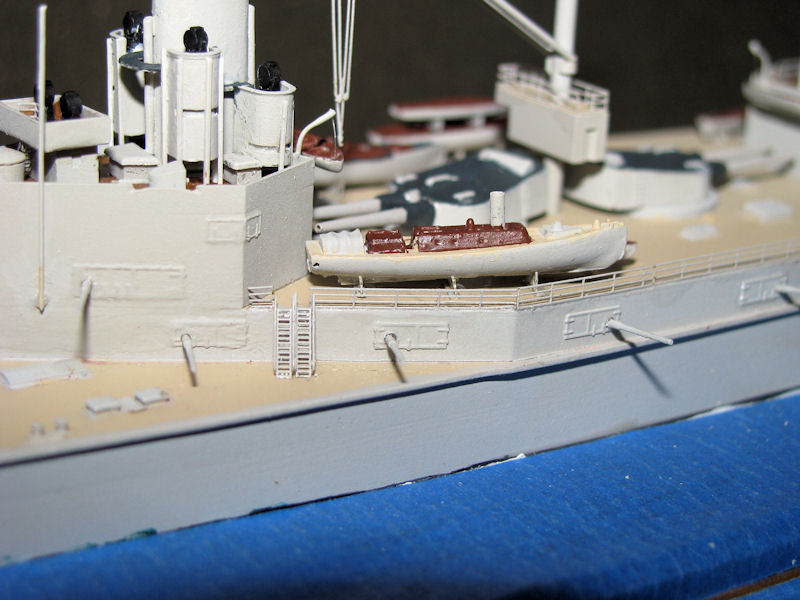
Around the time of the 2010 IPMS/USA National convention,
feeling sorry for myself that I wasn't able to attend, I decided to pull
Agincourt off the shelf (now that Tiger had been completed) and get back
to it. The first thing I did was review my references again,
including Burt's British Battleships of World War I and the previously
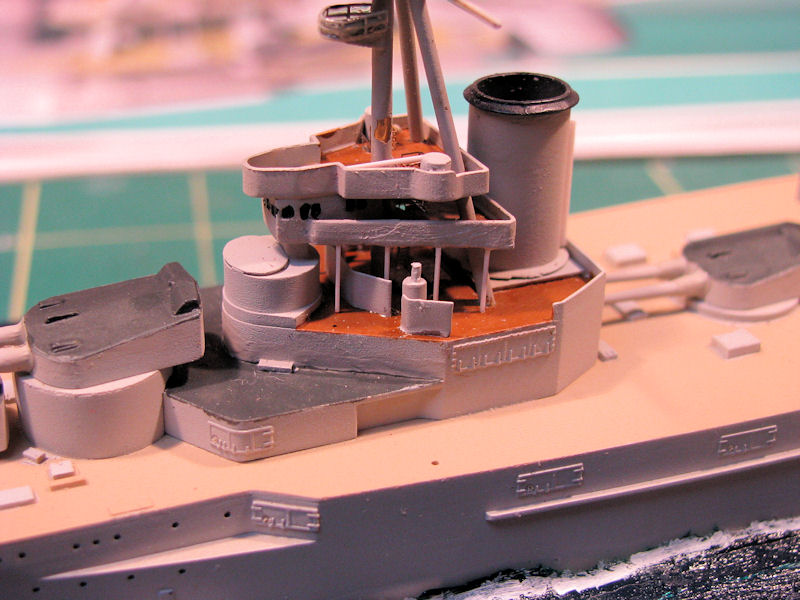
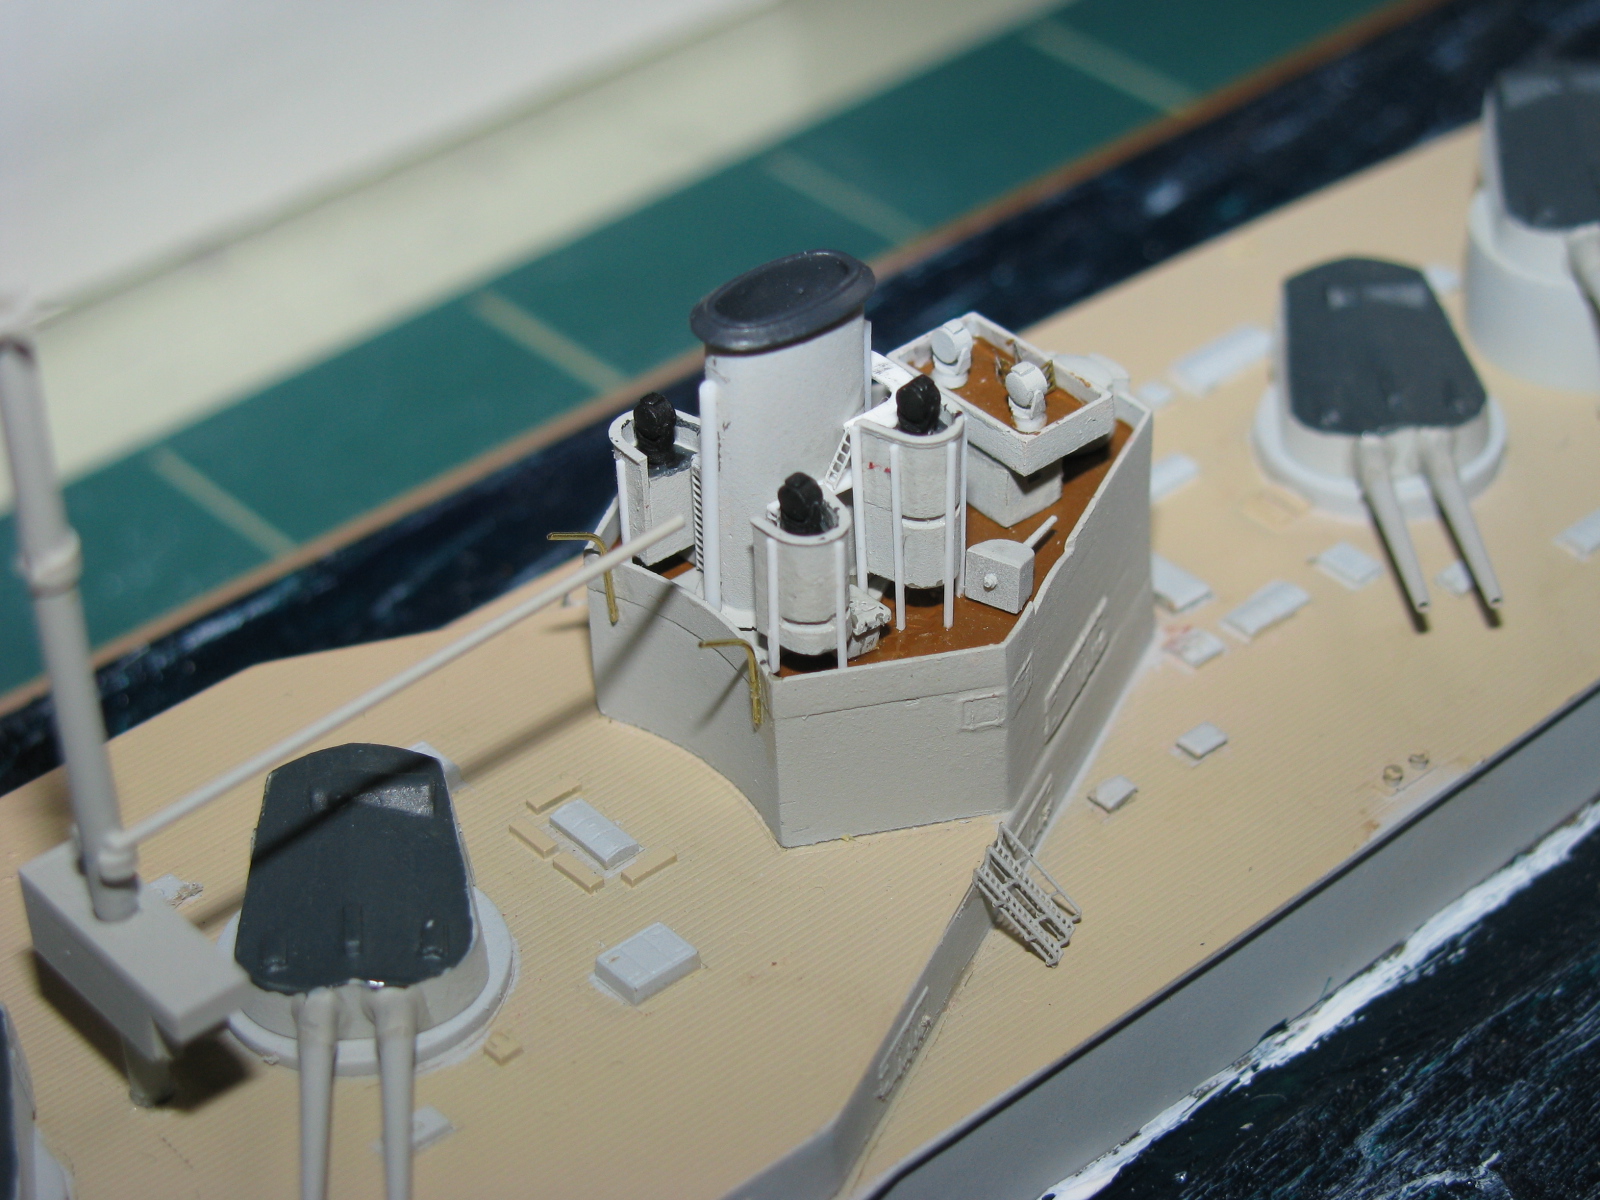
mentioned CAD drawings posted the Modelwarships forums. One
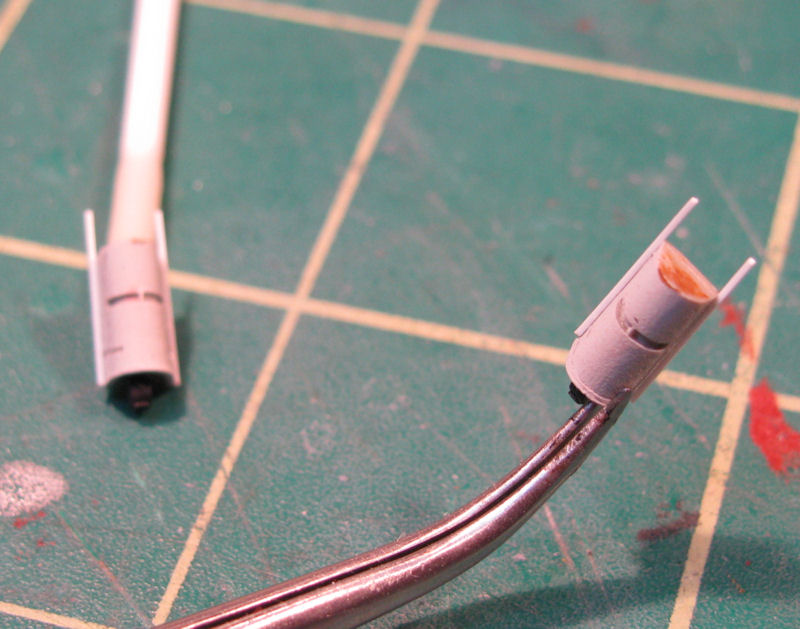
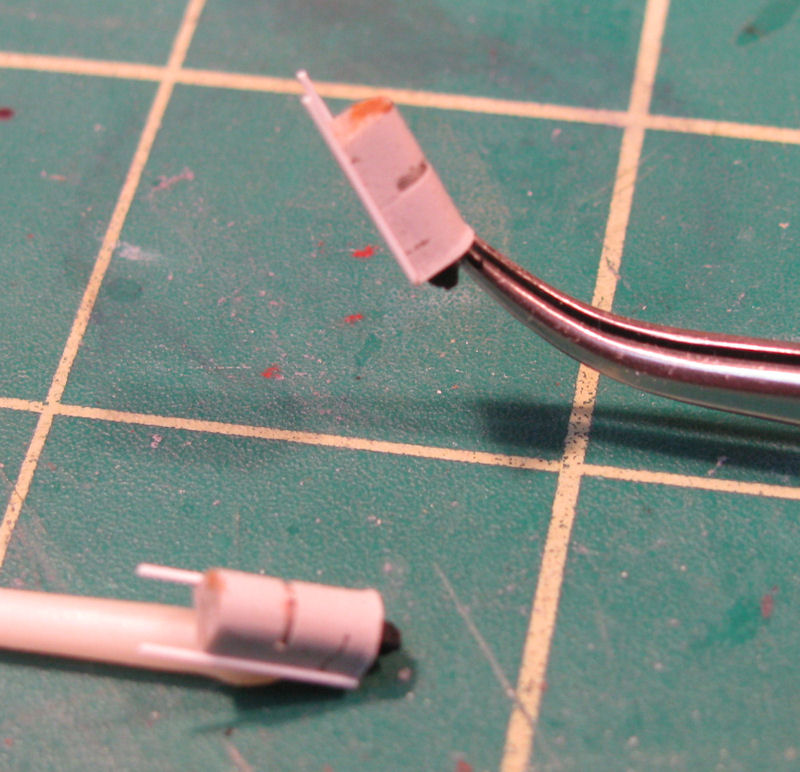
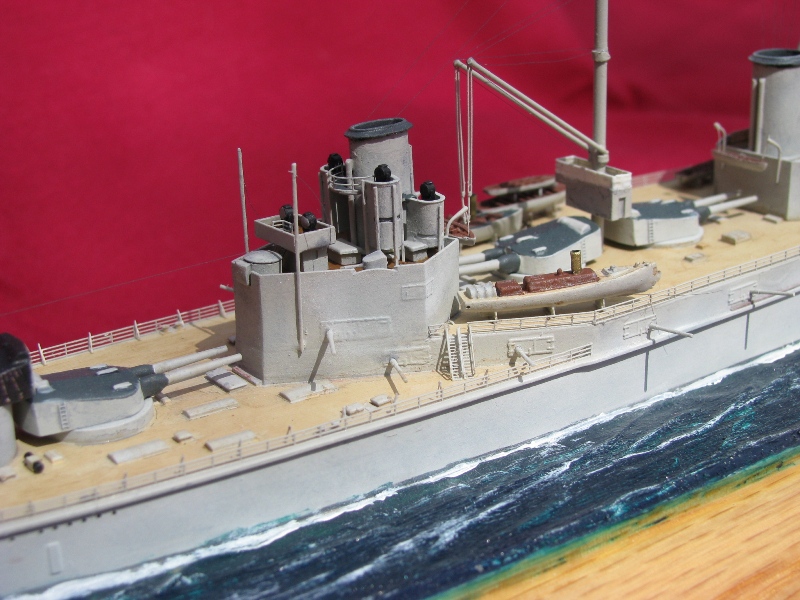
thing I noticed was that the searchlight towers around the aft funnel on
the real ship were supported by poles and were much higher than those on
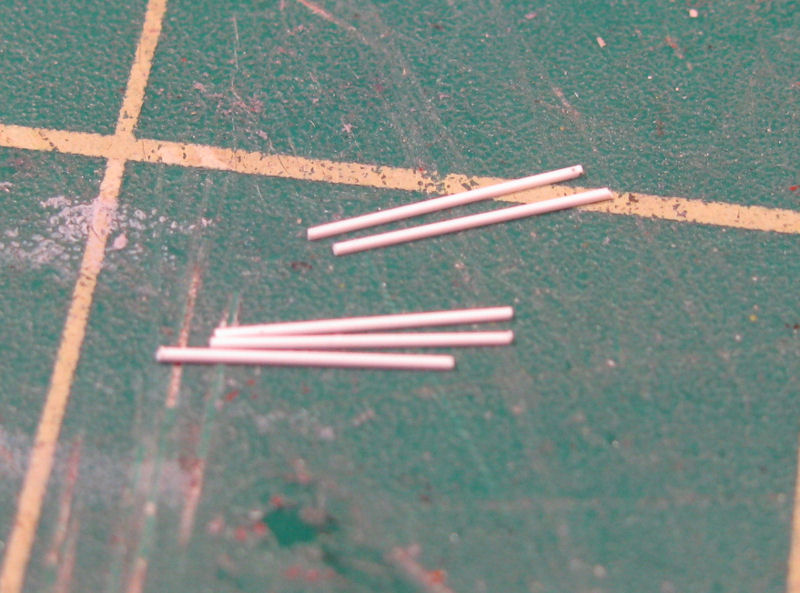
the model. Using evergreen rod cut to what I determined was
the correct height from Burt's book, I removed the towers, attached the
evergreen rod to each one and then re-attached them to the model.
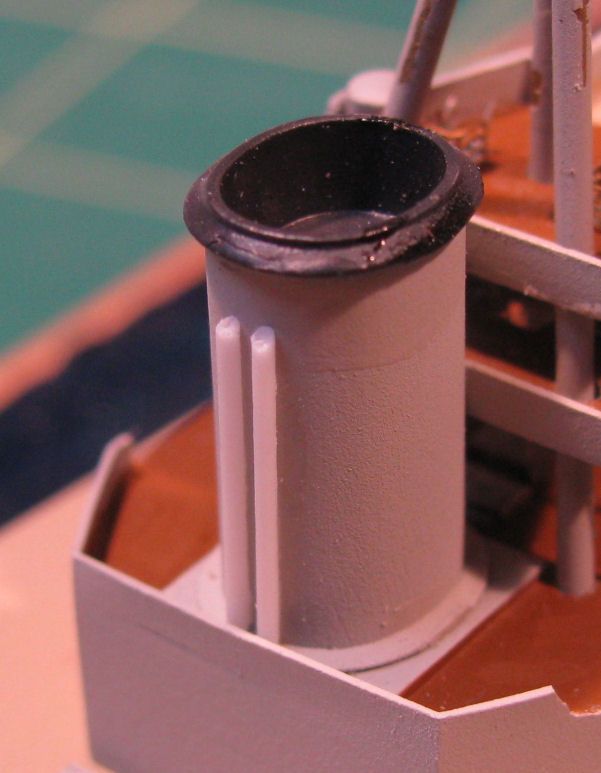
In my opinion, they looked much better this way. I also decided to
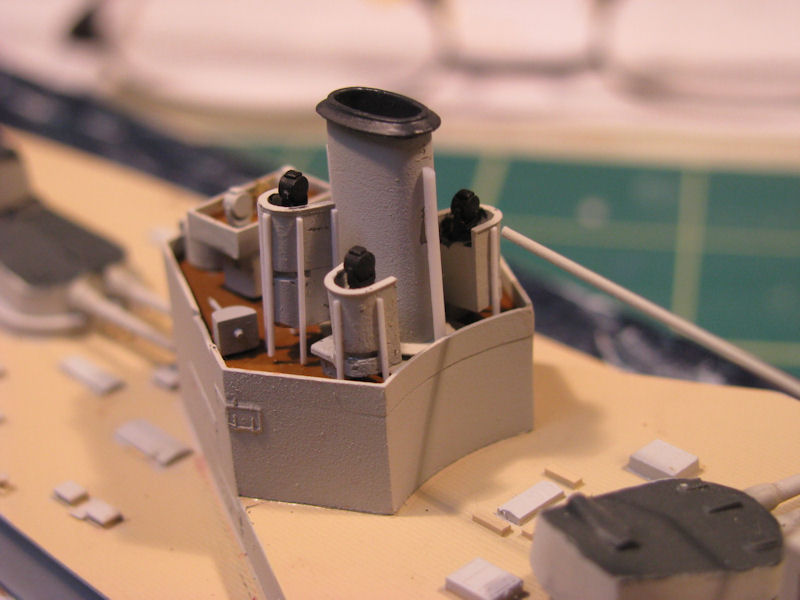
add piping to the funnels, again using evergreen rod. When
this was completed, I added platforms and ladders around the aft funnel,
as seen in the CAD drawings.
 |
 |
 |
 |
 |
 |
 |
 |
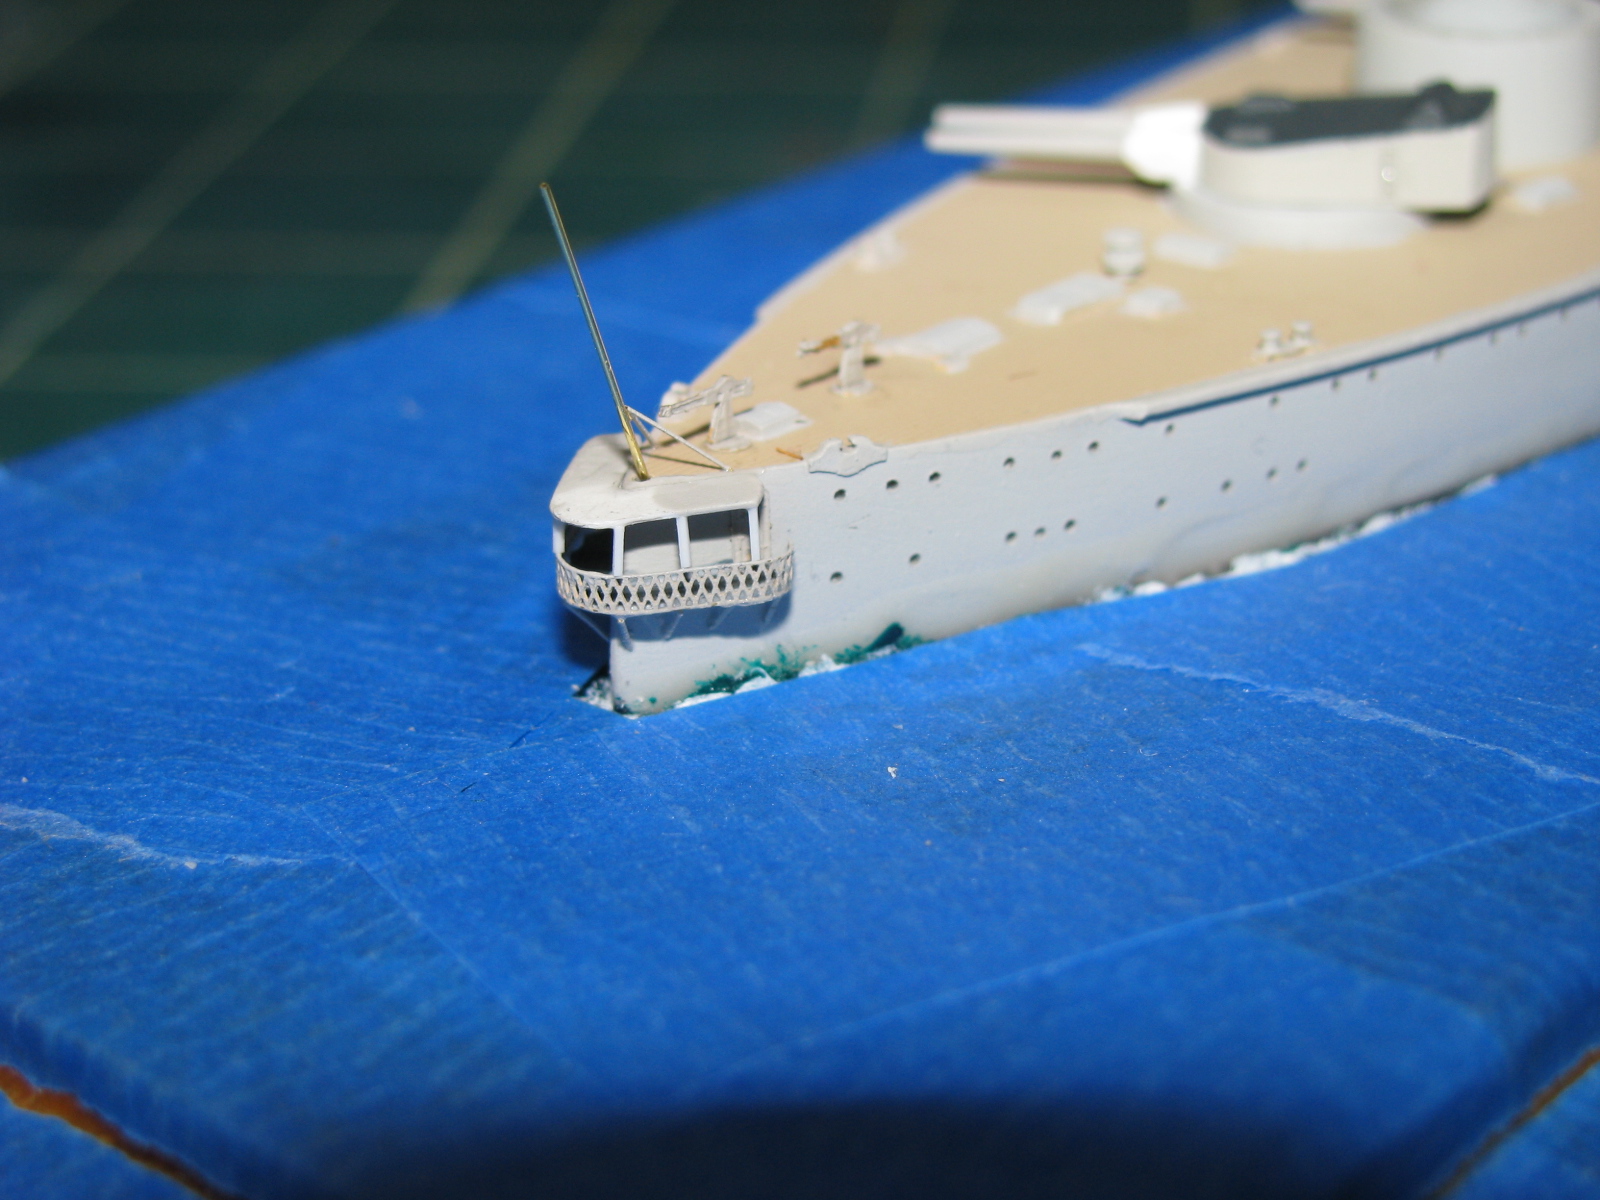
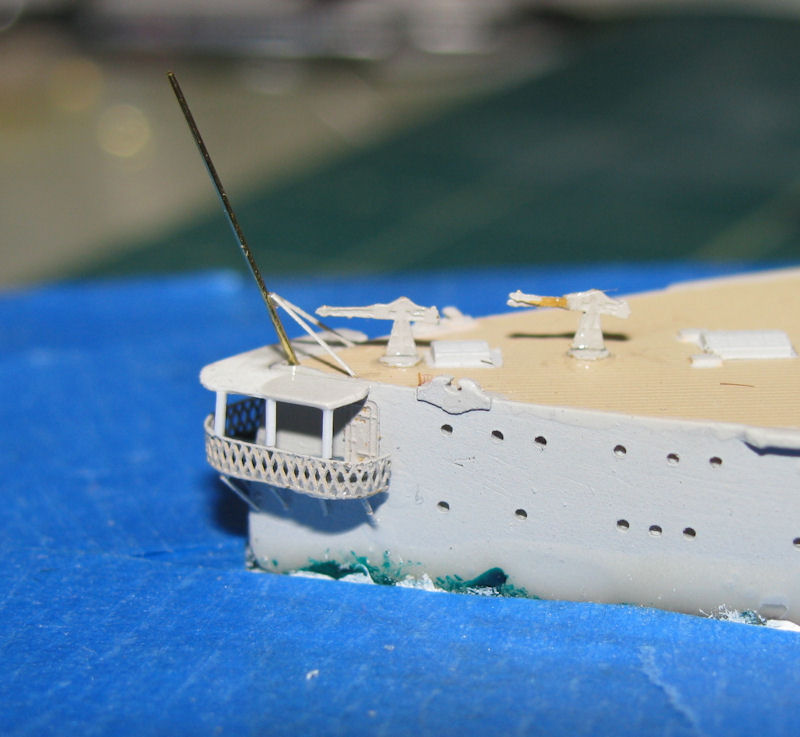
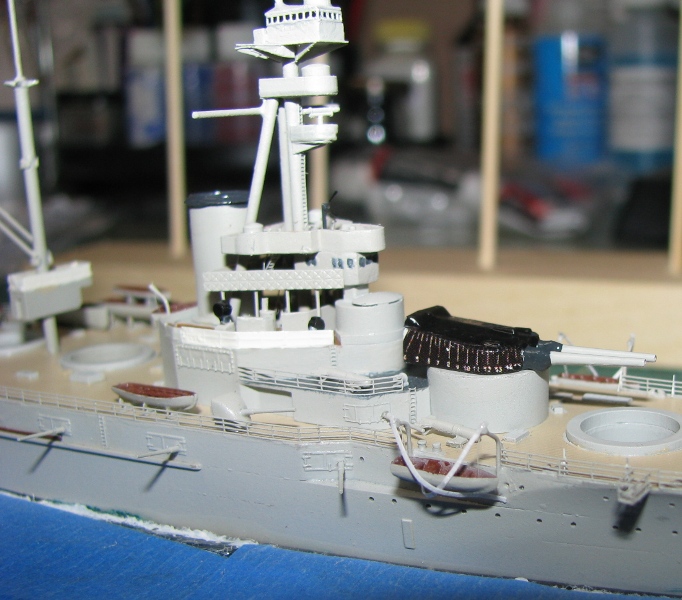
Using the references I had, I found that
there was more detail on the forward superstructure to be added.
There were 6 inch gun directors, an additional pair of searchlights (or
signal lamps?), and some shielding. The mounts for the additional
search/signal lights were made from plastic stock, while the lights came
from the spares box. The shielding was made from left over photo-etch
scraps. The extra detail certainly gave the ship a much busier
look.
 |
 |
 |
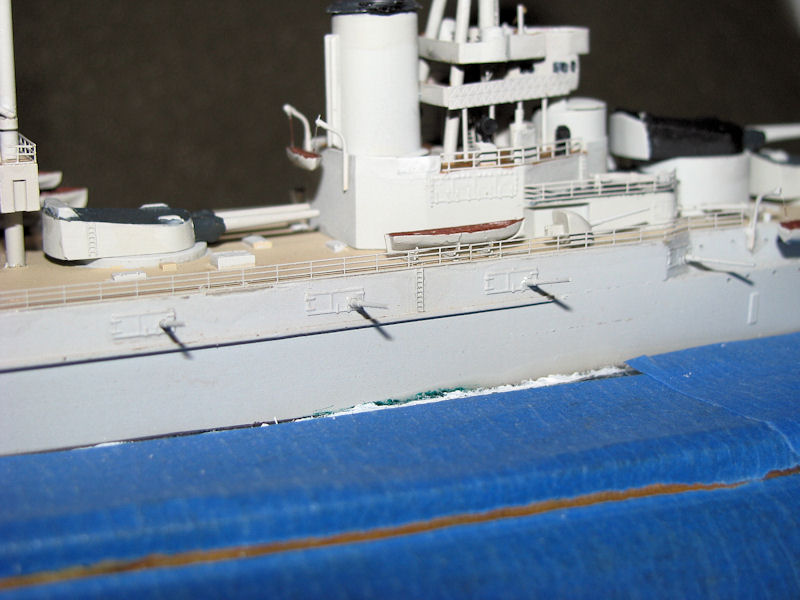
The kit came with resin boat davits, but these
were rather flimsy and replaced with brass rod. I also added davits
to the back of the forward superstructure and the forward part of the aft
superstructure, per the drawing in Burt's book. I also replaced the
resin coaling davits on the aft superstructure with brass rod.
 |
 |
 |
 |
 |
 |
The kit comes with an "Admiral's Walk", but it's
a thick, one piece resin affair that doesn't look very realistic, and doesn't
include the canopy. I found the shape of the photo-etch deck
and canopy from the White Ensign photo-etch set for Tiger did not fit the
Gin Palace's more substantial stern, so using the resin piece as a template,
I made my own. The deck was and canopy were plastic card, the
railing was the only part I was able to pirate from the WEM set.
I also clipped the braces off the deck and canopy pieces from the WEM set
and attached them to the new deck I had fashioned. After some trial
and error, I was able to add the posts holding up the canopy from scrap
PE railings. All in all, I was quite please with the
way it all came out.
 |
 |
 |
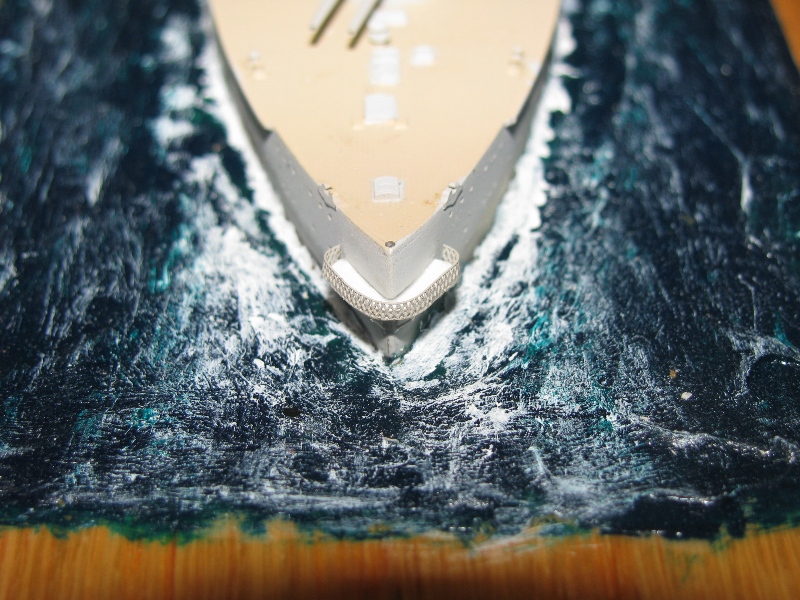 |
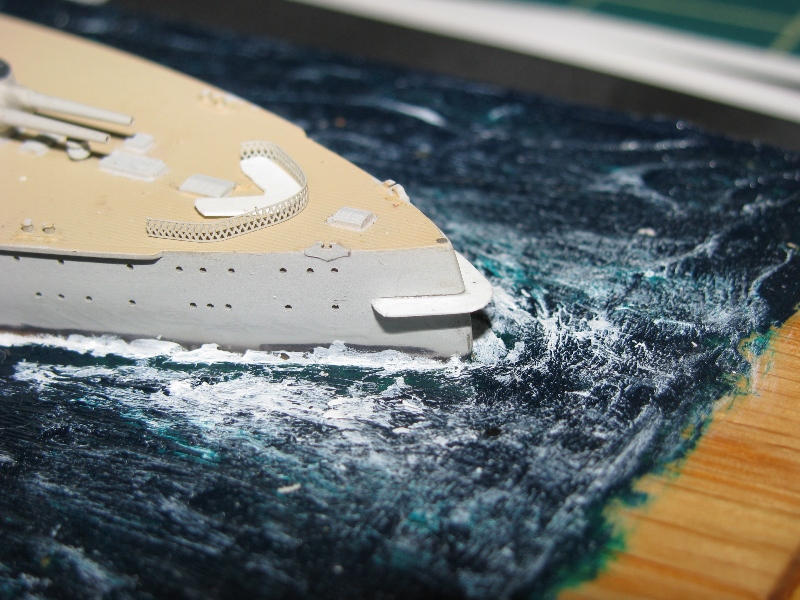
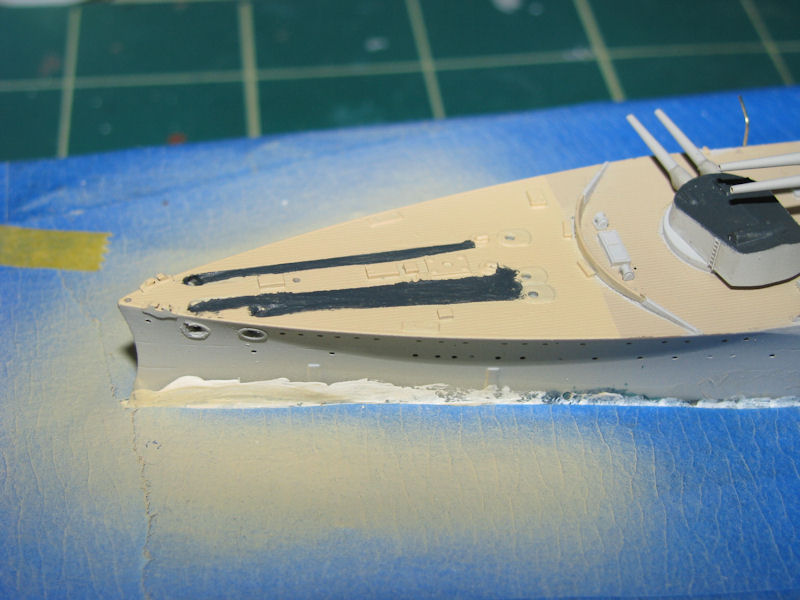
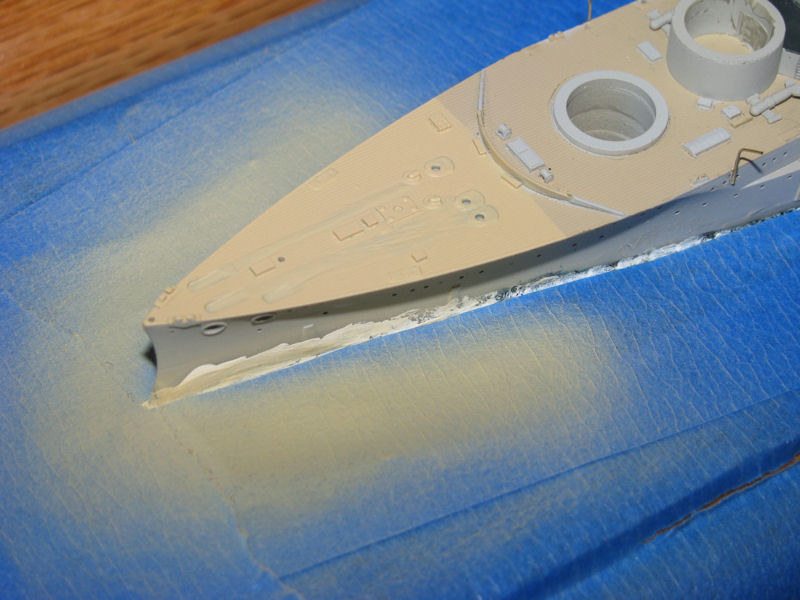
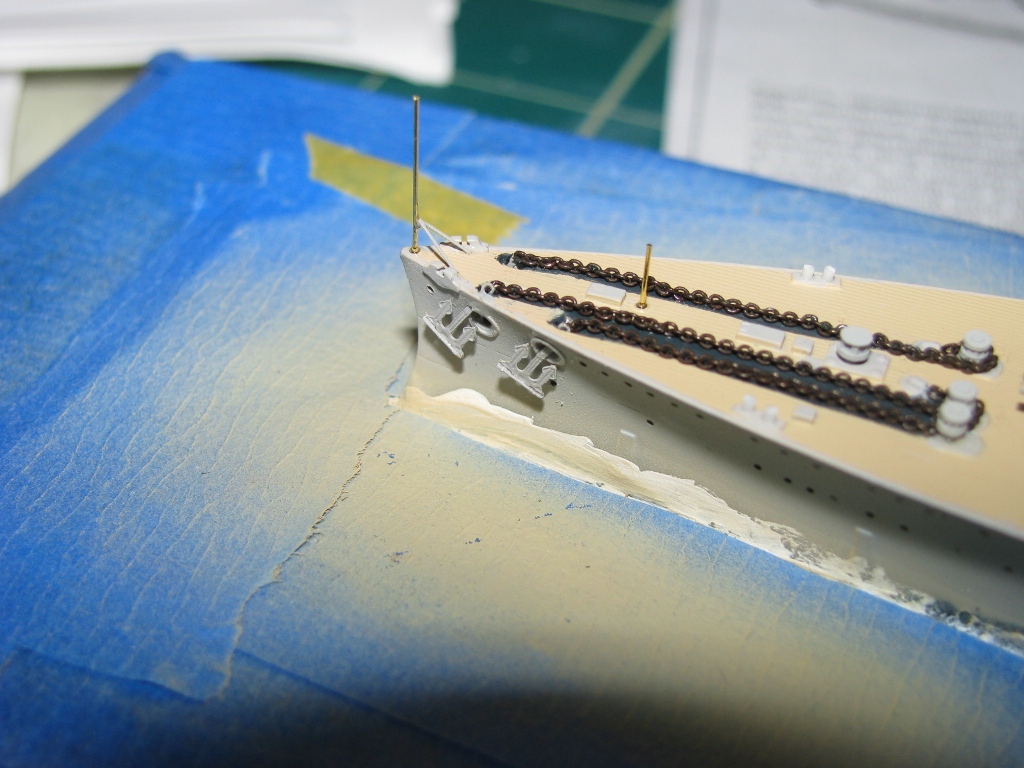
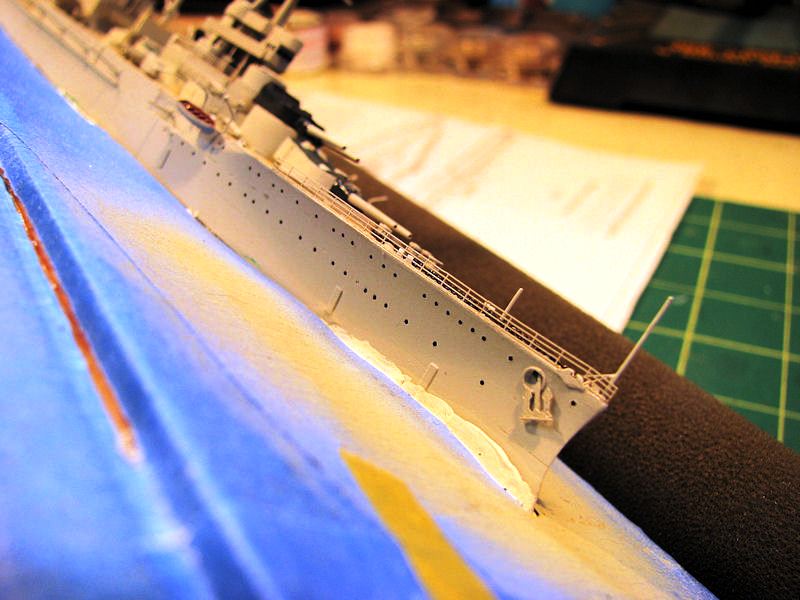
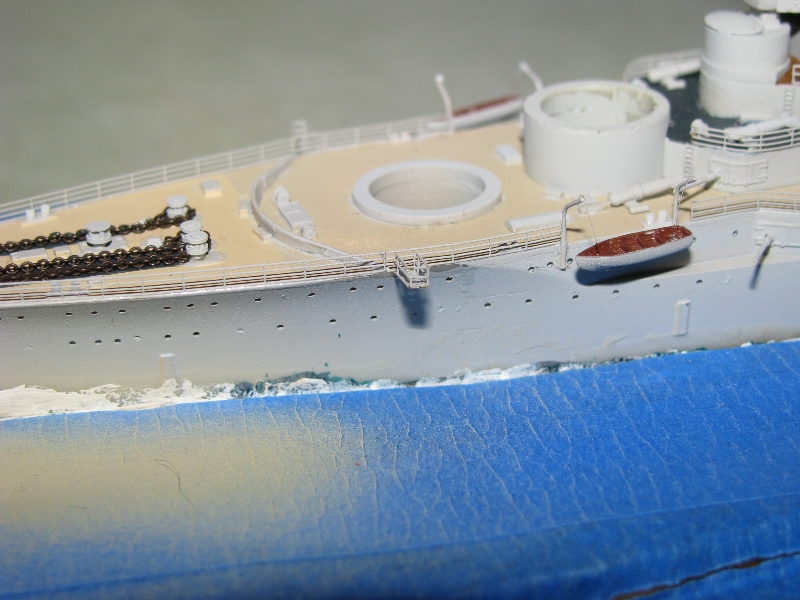
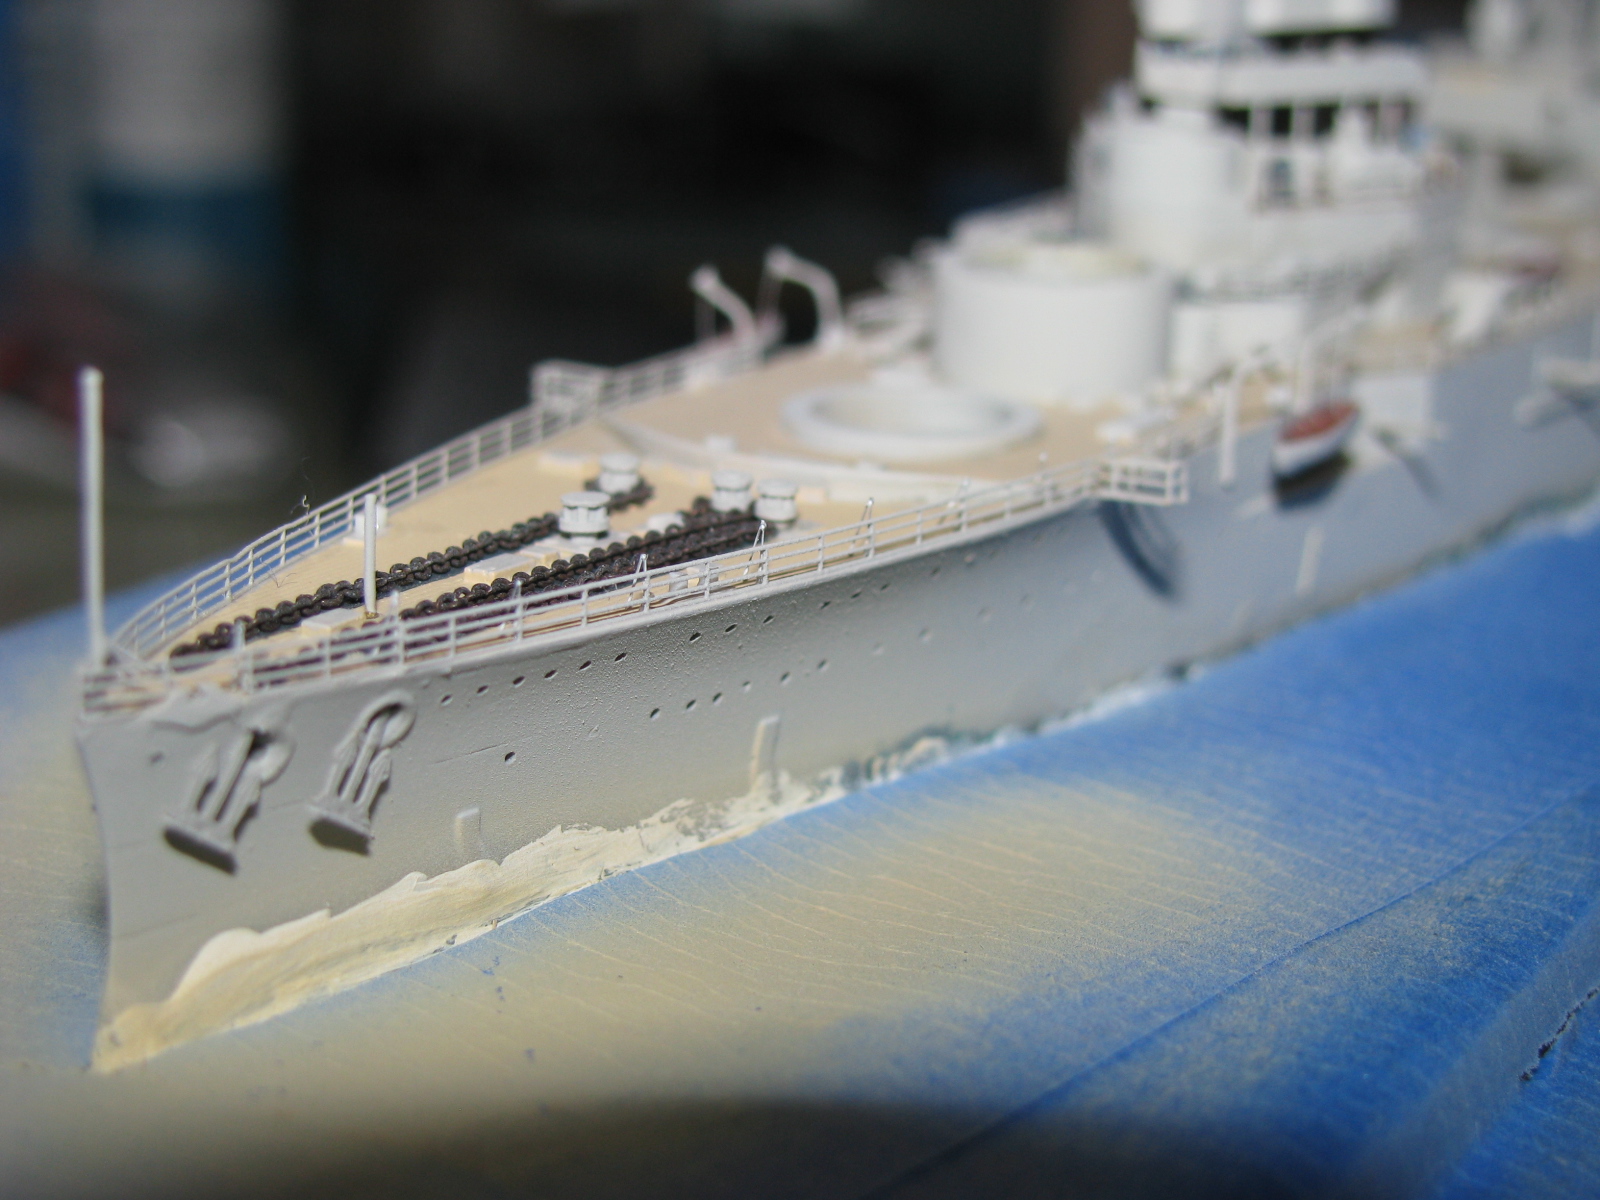
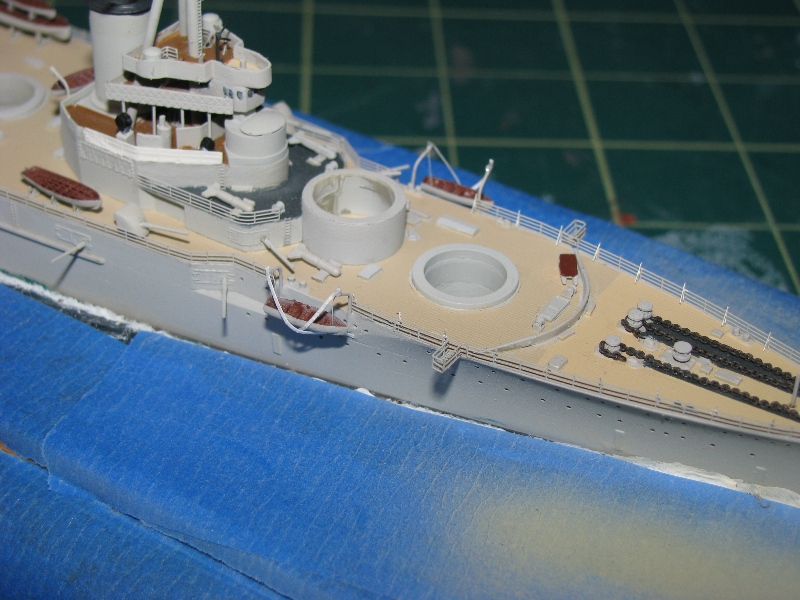
Early on in the build, I had painted the anchor
washboards dark grey. For some reason, the paint didn't want
to adhere and I never liked the way this came out, so I decided to repaint
the entire area. I scraped the offending paint off as best
I could, then airbrushed the forward section of the deck with WEM teak.
When that dried, I repainted the washboards, which came out much better.
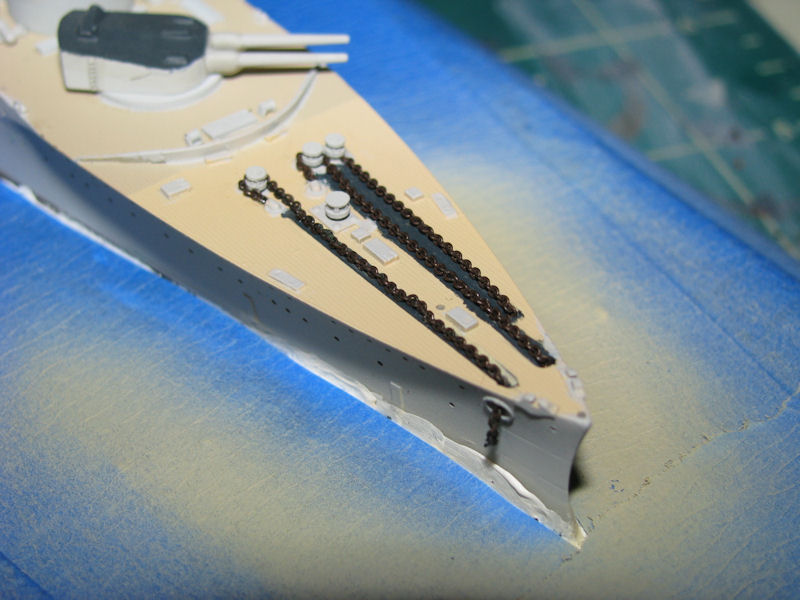
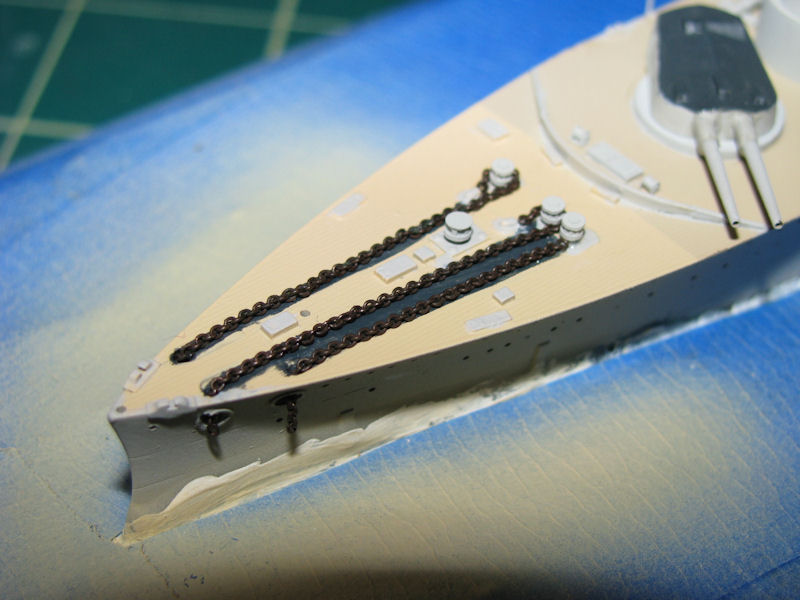
I also drilled out the hawse pipes and used chain from ModelExpo for the
anchor chain. The end result was much better. When finished,
the anchor chain was trimmed to the proper length, and photo-etch anchors
from the WEM photo-etch were attached to the ends of the chain.
 |
 |
 |
 |
 |
 |
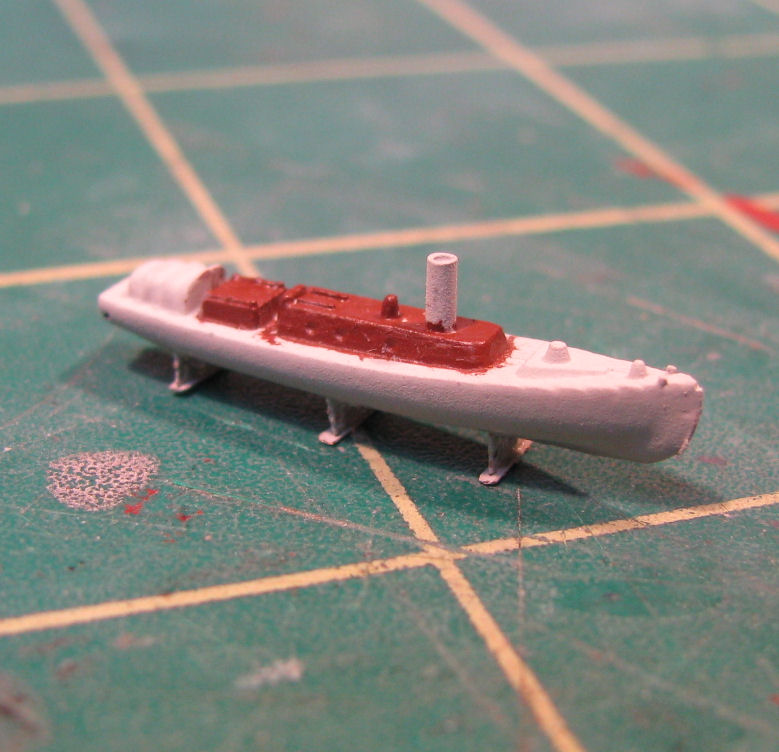
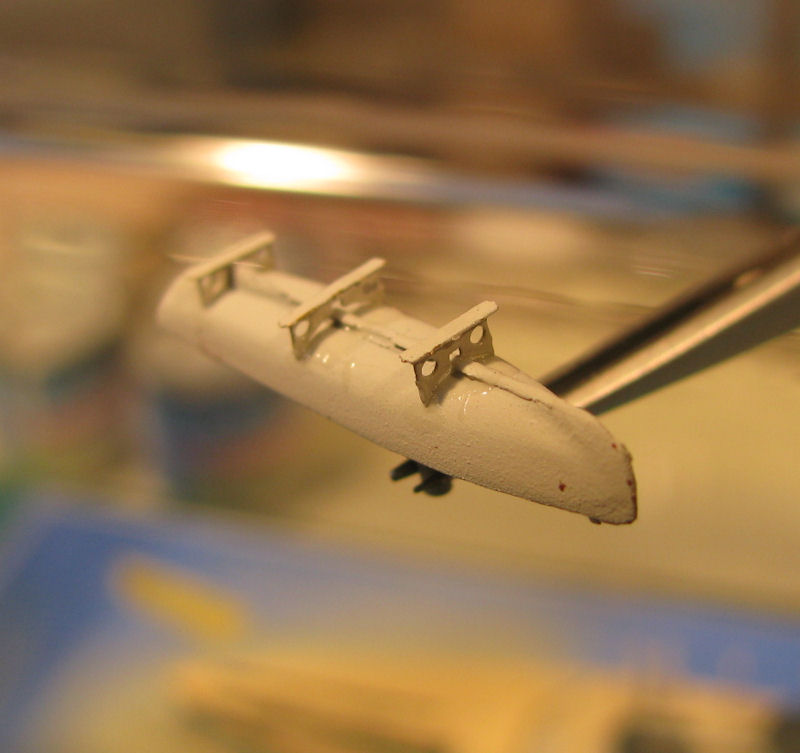
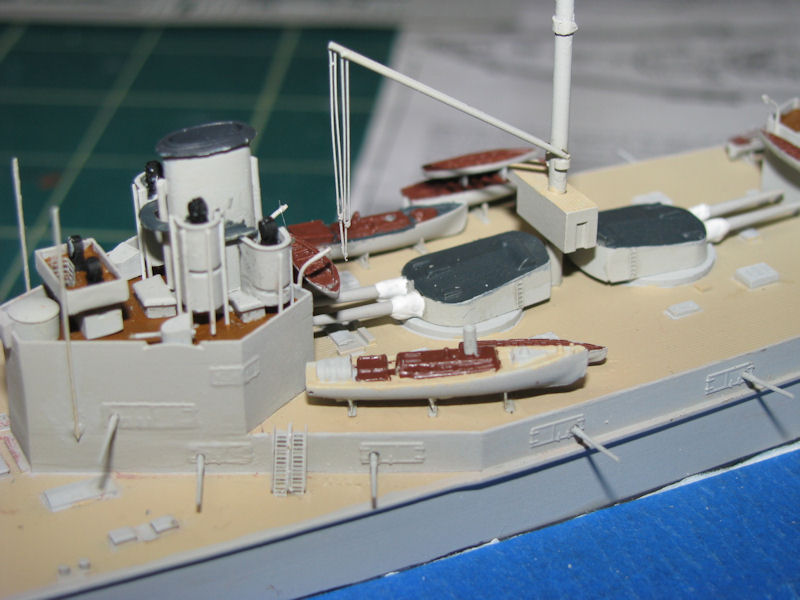
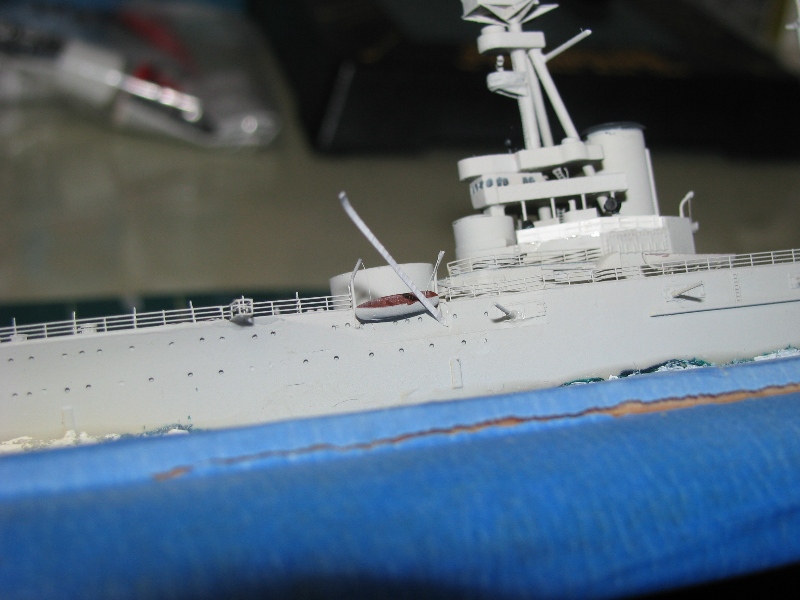
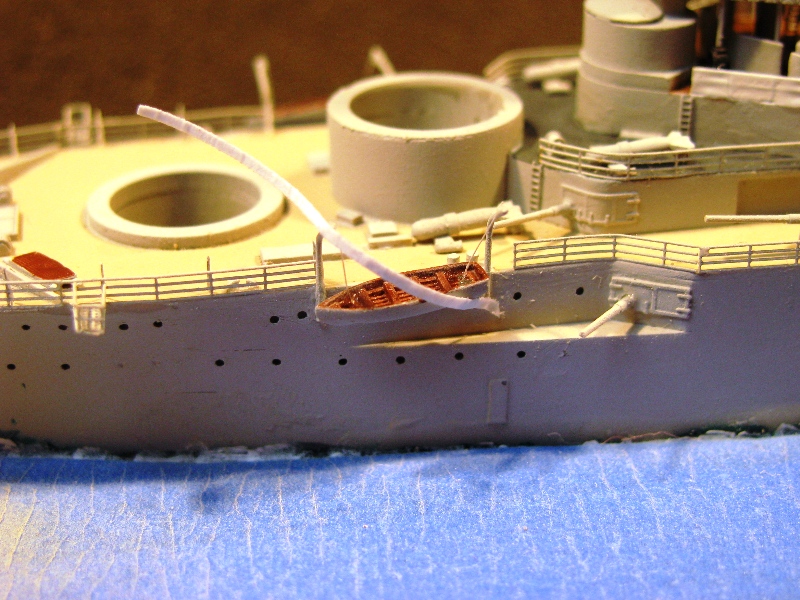
I turned now to the ships boats. The WEM
photo-etch set comes with a set of boat cradles in different scales.
I assembled these, added them to the boat and then glued the boats to the
ship. These are very fiddly and require a great deal of patience!
The boats that hang from the davits had small holes drilled in them, then
DaiRiki fishing line was super glued into each hole. Using reusable
adhesive tack to hold each boat in place and at the proper height I wanted,
the finish line was glued to the davits. When the reusable
adhesive tack was removed, the boats hung in place from their davits.
Many smaller parts like the secondary gun barrels, paravanes and searchlights
were added along the way.
 |
 |
 |
 |
 |
 |
 |
 |
 |
 |
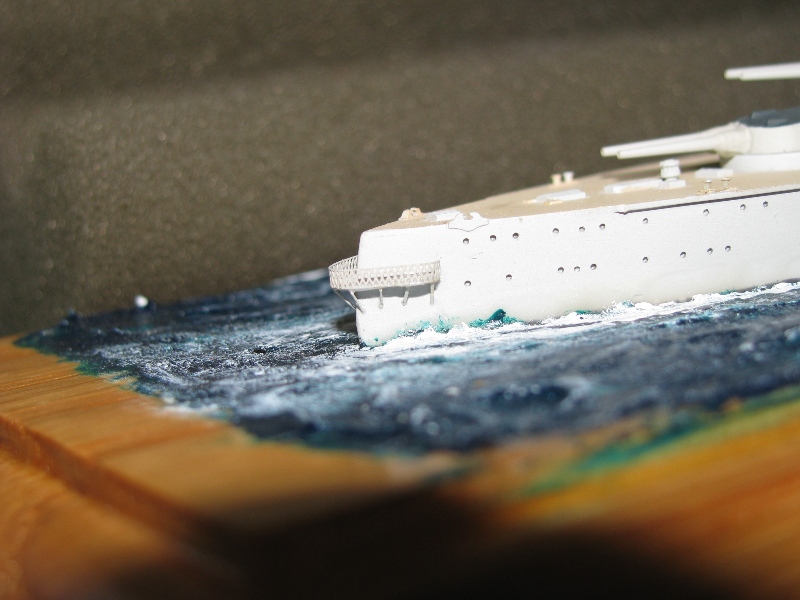
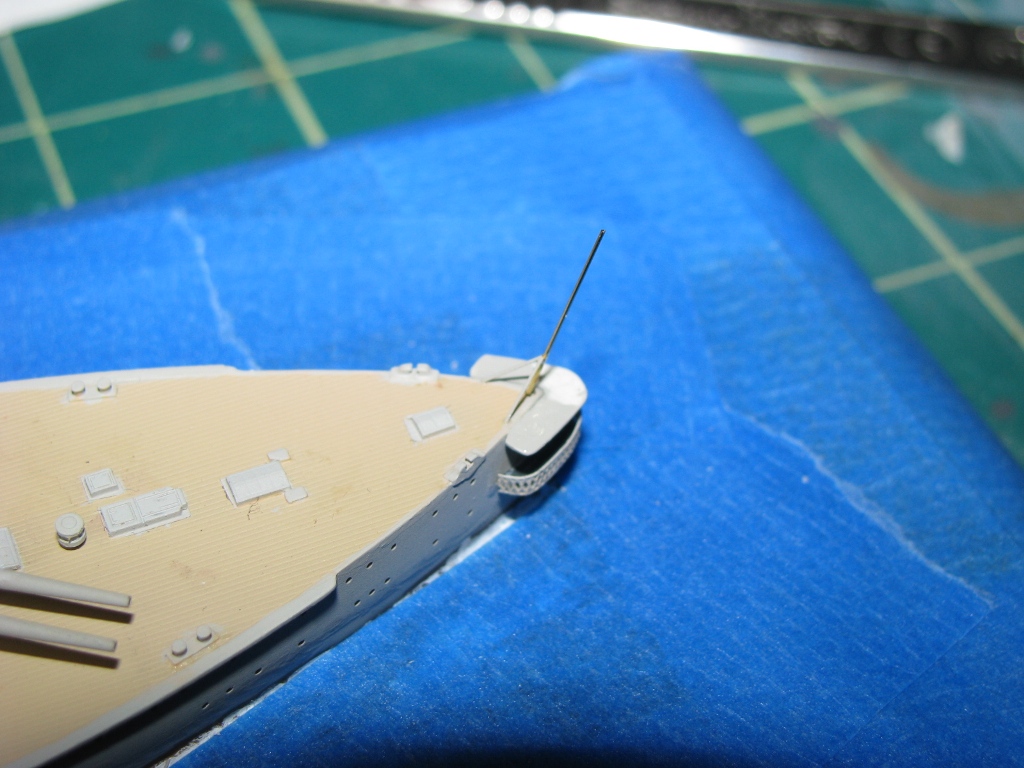
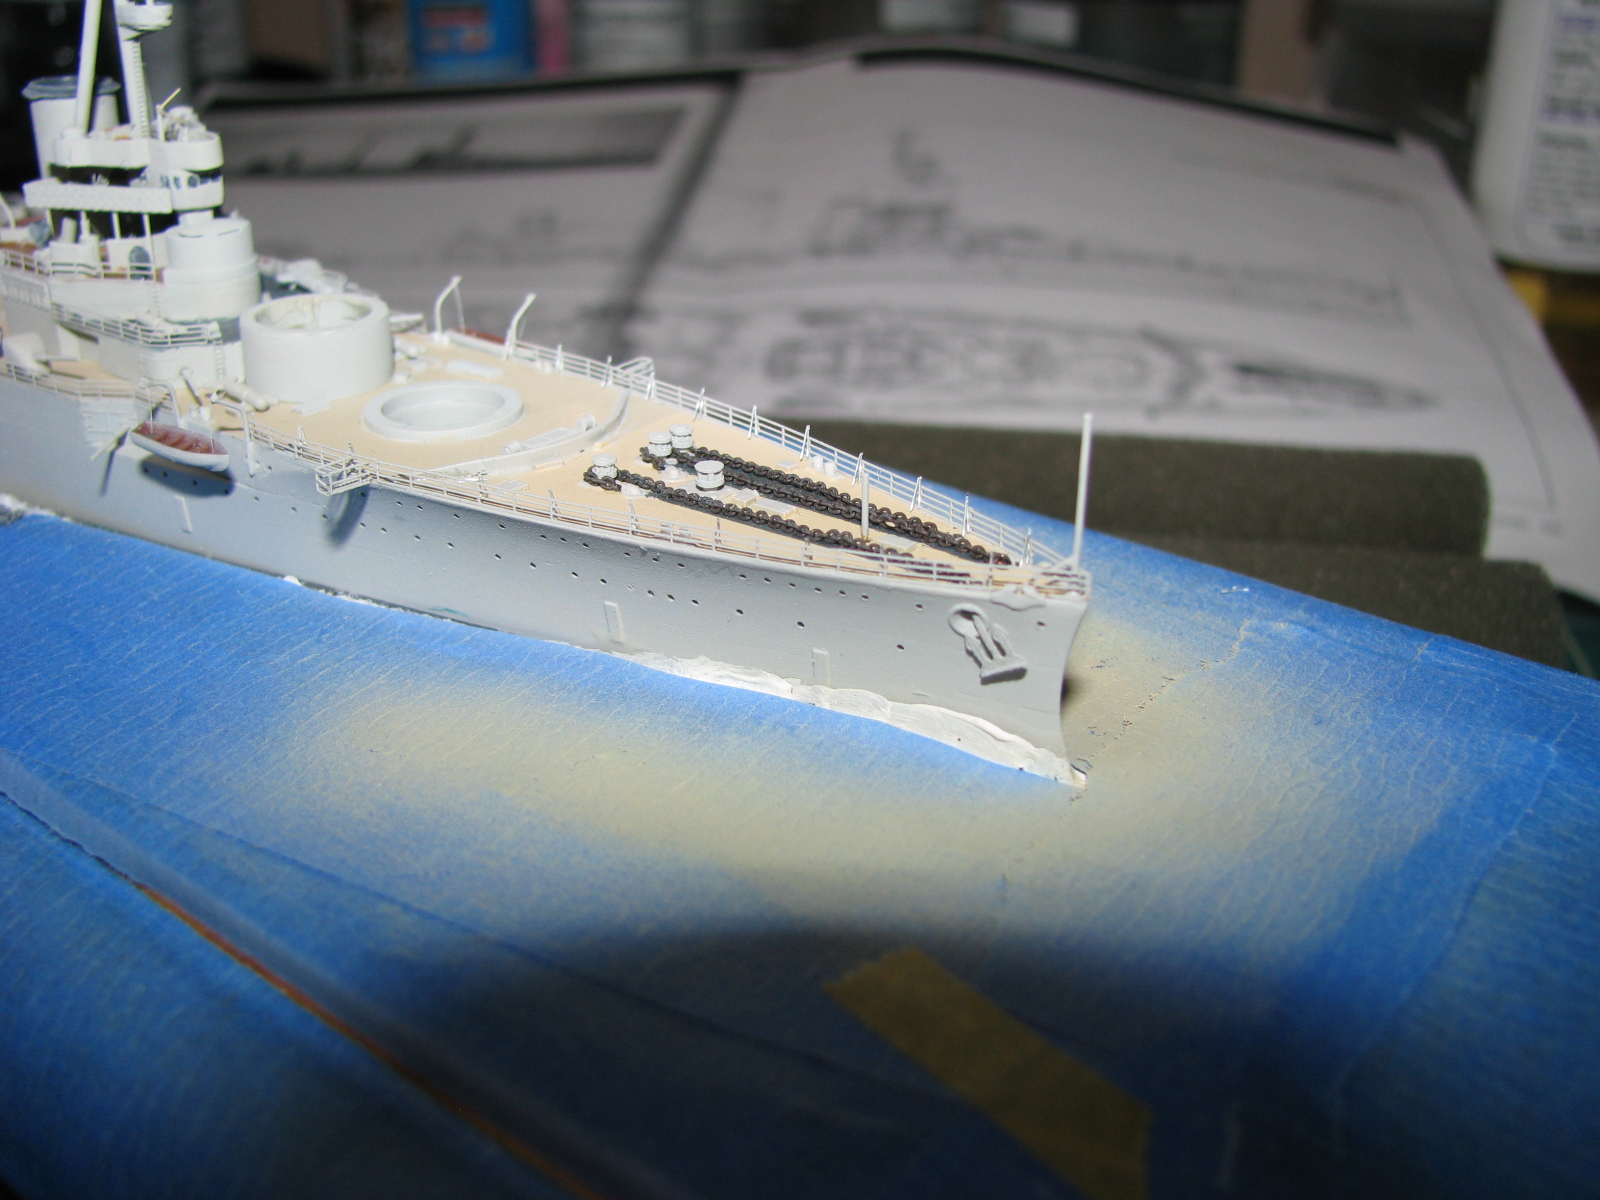
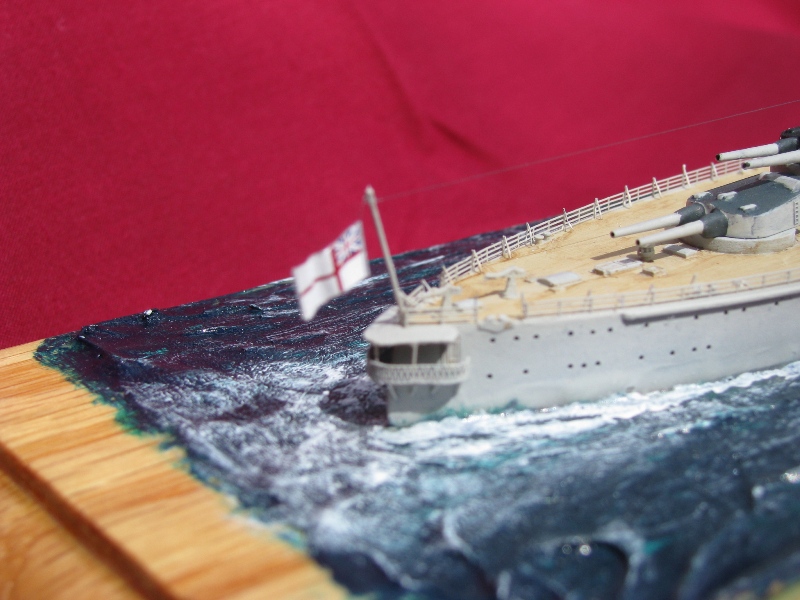
Jack and flagstaffs, made from brass rod, were
added to the bow and stern, using the braces from the WEM photo-etch flagstaffs
(I find the photo-etch flag staffs too thin). I also added
an antenna lead/anchor to the forecastle , as see in Burt's book.
 |
 |
 |
 |
 |
 |
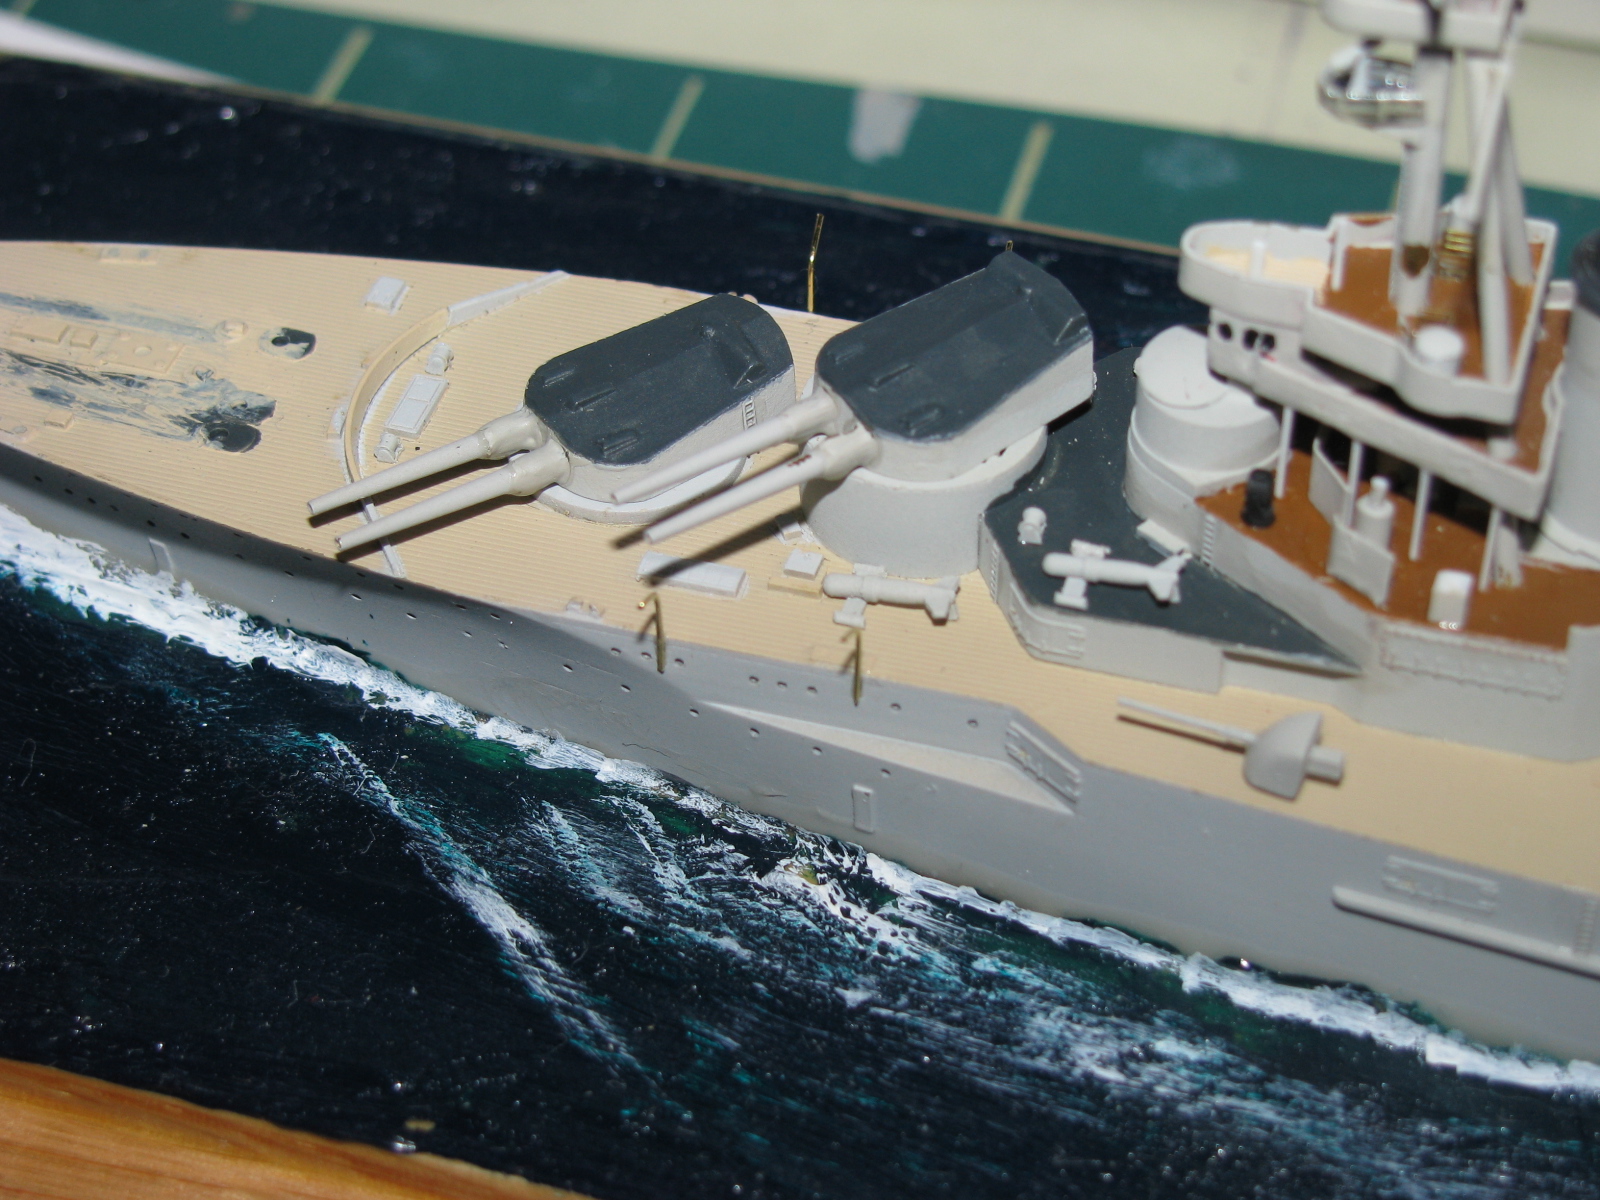
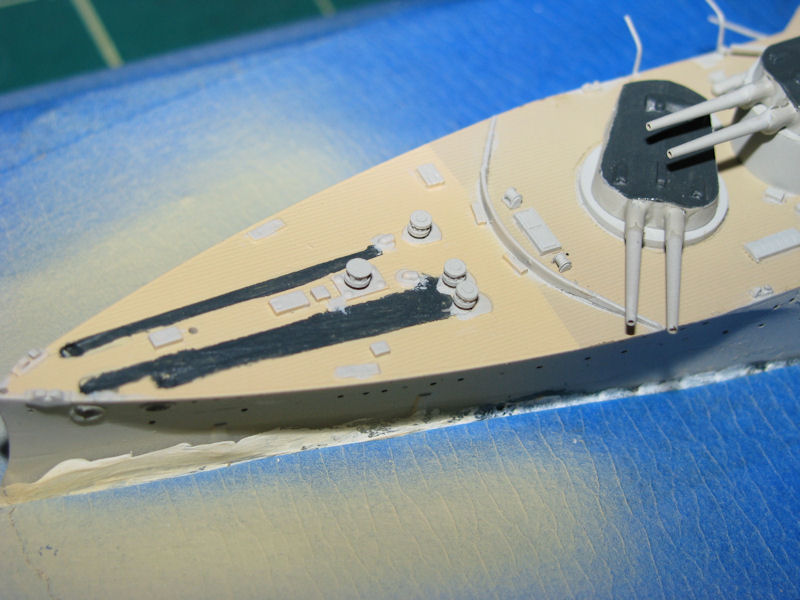
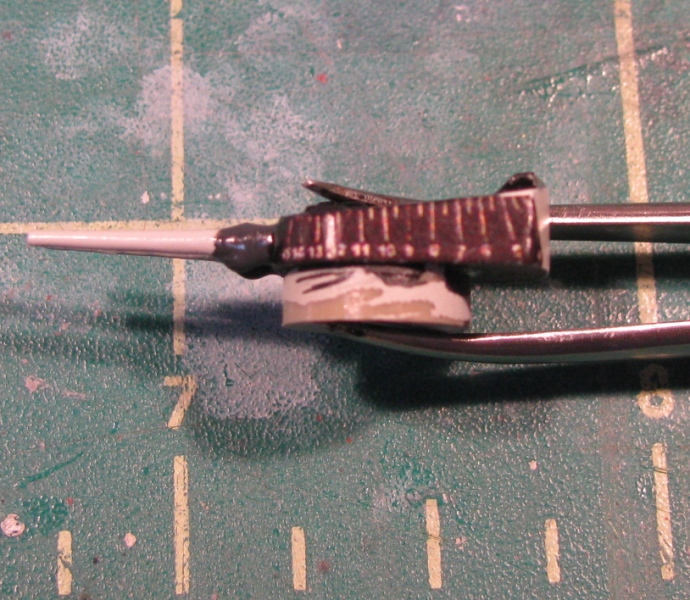
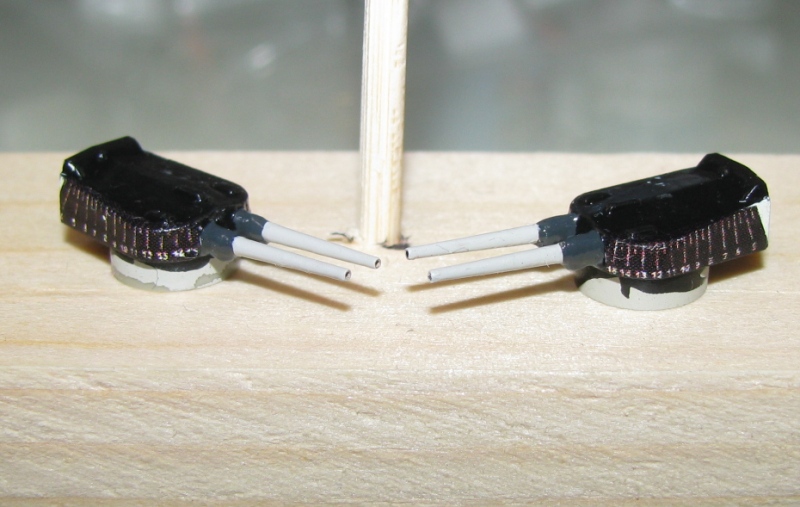
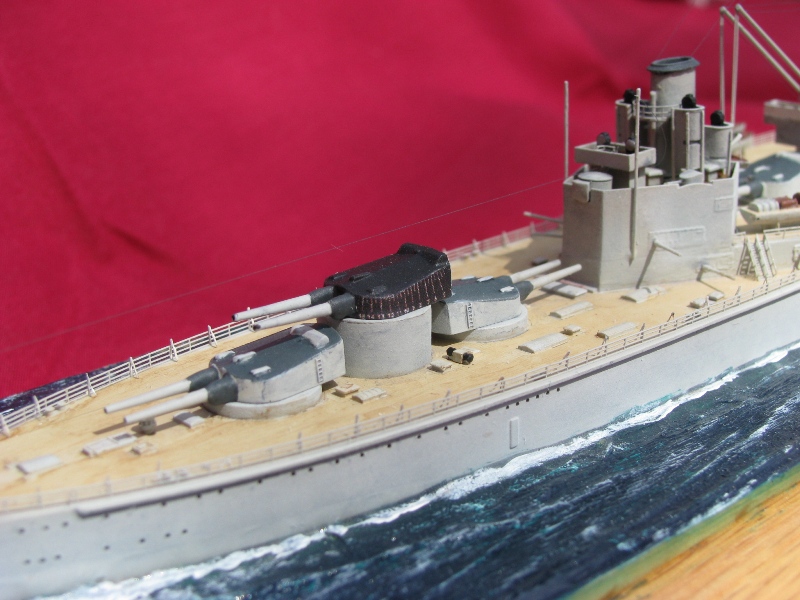
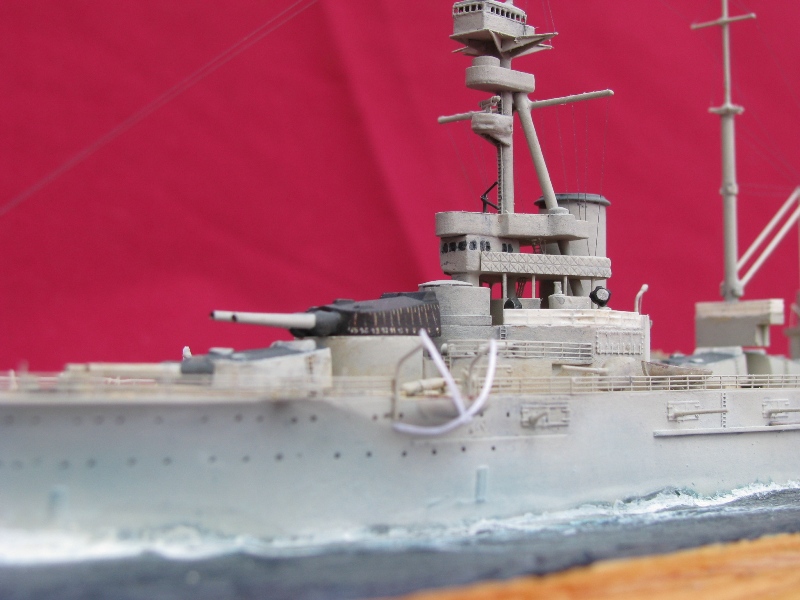
A prominent feature in the photo at the top of the page and in Burt's book were the deflection scales on two of the turrets - Monday & Friday. But how to replicate this? I remembered the master modeler Jim Baumann had made is own deflection scale decals for his HMS Courageous build a few years back. So, I e-mailed Jim and asked him if he could share them with him, which he graciously did. Once I had the artwork from Jim, I contacted Mark Tutton from Starfighter Decals, who printed and mailed them to me. The only problem was that Jim had designed his for the much large 15 inch gun turrets of Courageous, but I figured I would be able to cut these to fit the Gin Palace turrets.
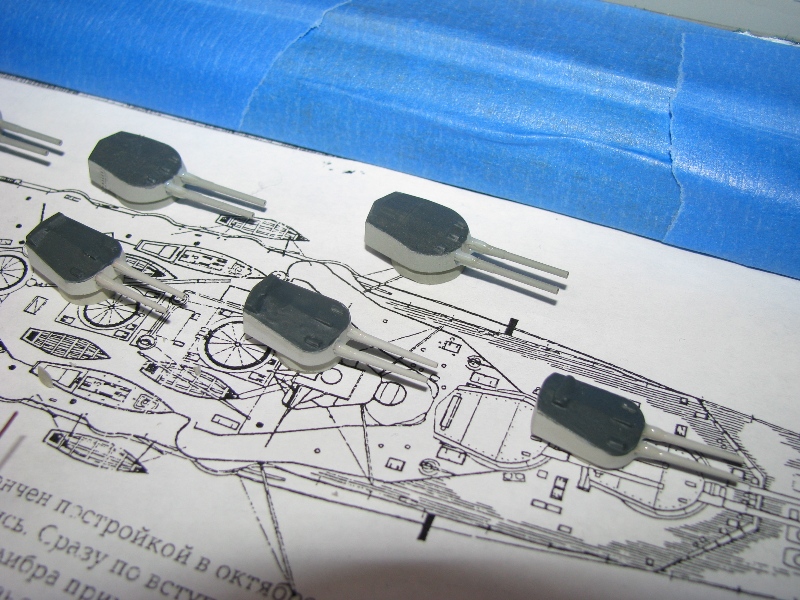
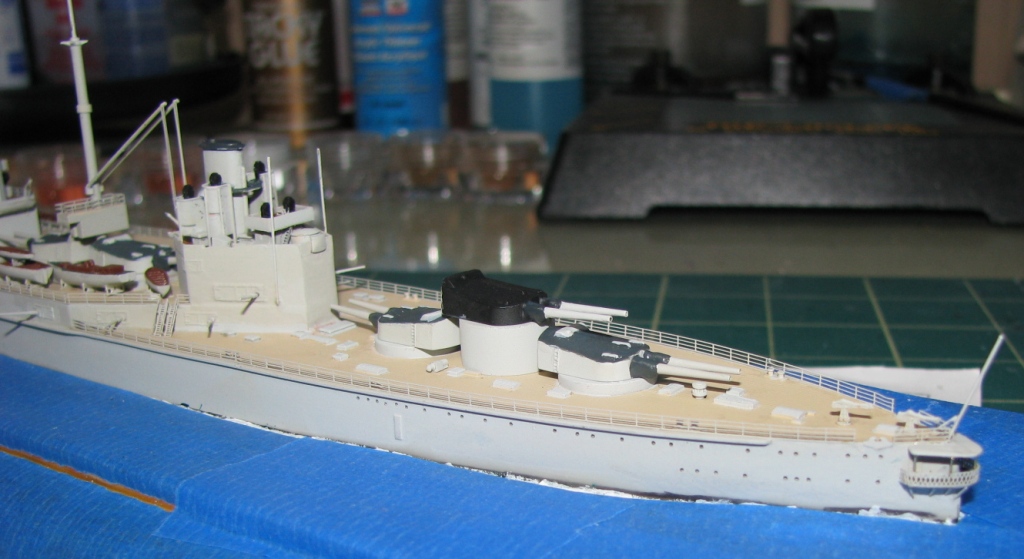
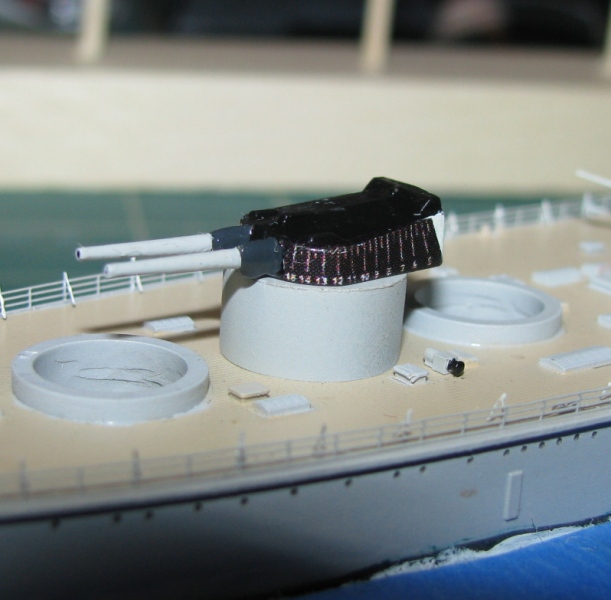
I started by repainting the turrets black.
I made a few mistakes along the way - I painted the entire turret and both
barrels black, in a color that I thought matched the color of the decals,
then noticed in the photo above the back of the turret and the barrels
were the main color. After some more trial and error, I got
the look I (thought) I wanted. I left adding the decals until
later, to avoid wrecking the decals once on.
 |
 |
 |
At this point, about the only major thing left
to do was add the photo-etch railings, which I began to do, working from
the forward superstructure on down.
 |
 |
 |
 |
 |
 |
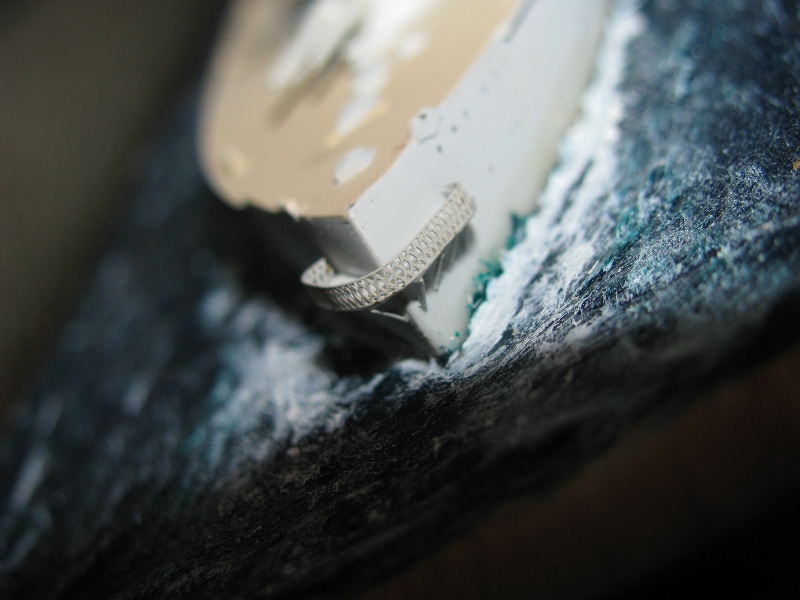
I then added the leadsman platforms, again from
the WEM Tiger set, along with some railings.
 |
 |
With the railings on and the leadsman platforms
attached, I decided to add awning stanchions from Lion Roar. These
are EXTREMELY fiddly (at least I found them to be), but when finished,
they really add to the overall "busy" look of the ship. Just be prepared
to lose more than a few.
 |
 |
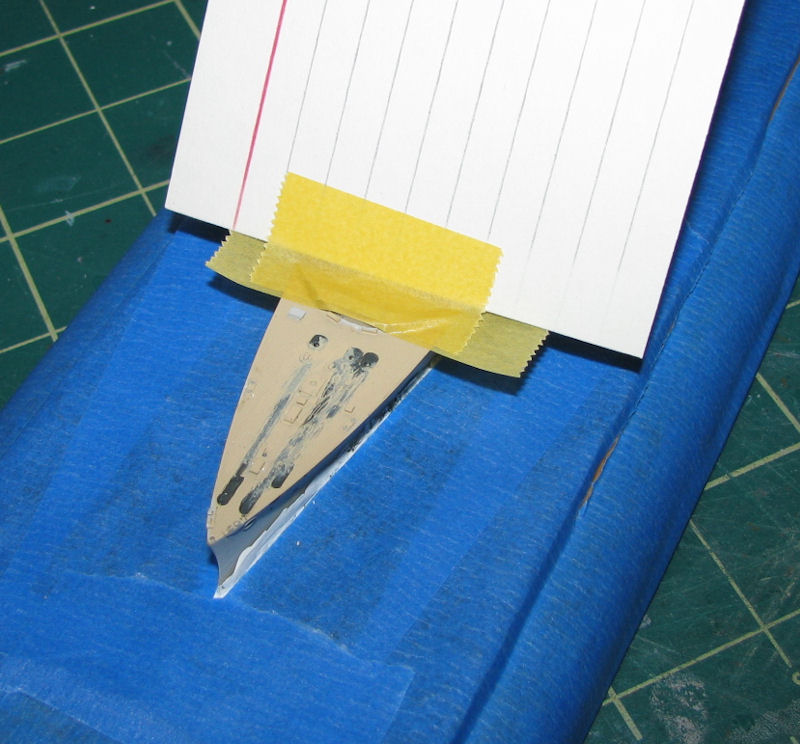
One thing I've been wanting to add to my builds
are the straps that keep the boat in place. After picking Dan
Kaplan's brain for how he made his, I gave it a shot.
I stiffened some white copy paper by lightly brushing on acrylic gel medium
onto it. Once dried, I cut the paper into long, thin strips, then
cut those strips down to smaller lengths and glued them to the hull.
It was, as with other parts of the build, a bit of trial and error.
The first straps I made were definitely too wide, so I removed them and
cut a new set, only thinner. These looked much better.
While not perfect, I like the look and will do this on future builds.
Again, it's adds to the busy look of the ship.
 |
 |
 |
 |
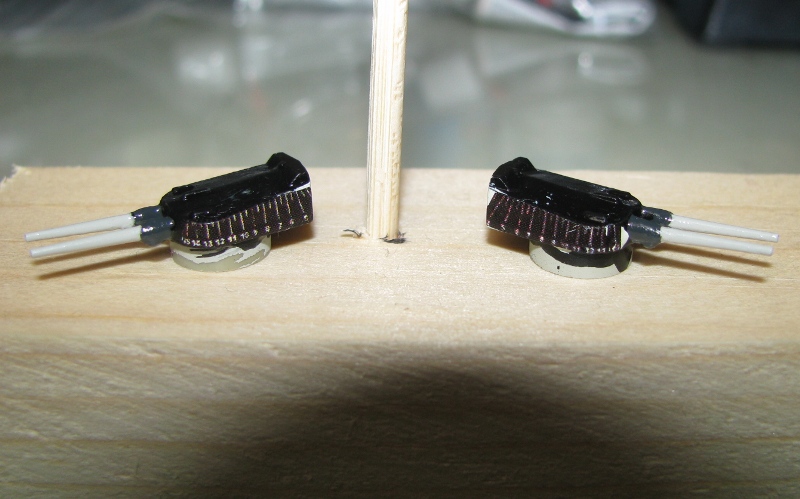
With all this done, I turned my attention back
to the turrets, which were gloss coated. When the was dry,
the first decal - cut to size - put on. That's when I discovered
that the deflection scales were clear and not colored. So laying
them on a black turret made them all disappear. Ugh.
After removing the decal, I gently removed the paint from the sides of
the turrets, and repainted them yet again. Once dried, I repeated
the process of gloss coating and applying the decals. This
time, with the light undercoat, the deflection scale stood out and really
looked sharp.
 |
 |
 |
 |
 |
 |
 |
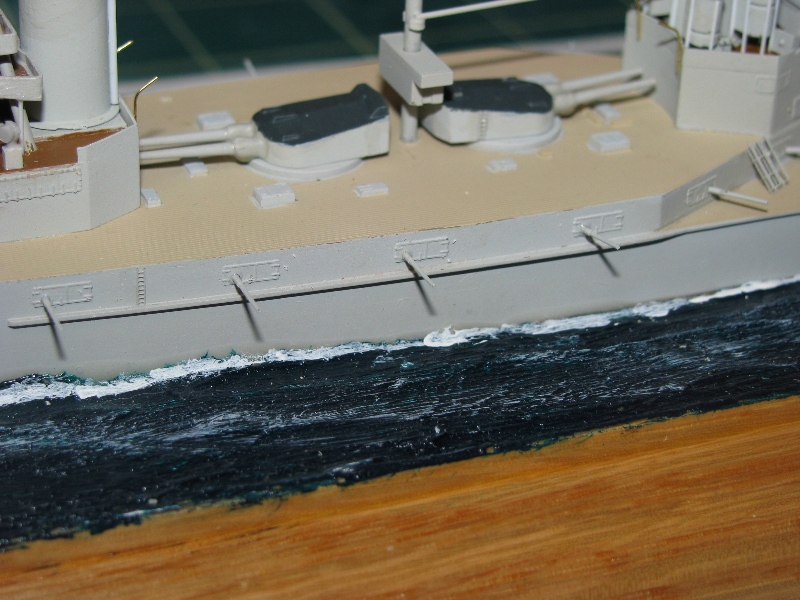
At this point, the model was pretty much done, save weathering & rigging. I sprayed a few light coats of Future on the model to act as a barrier, then weathered the deck with a wash of burnt umber oils. When this was dry, I weatherd the superstructure and hull with a wash of Payne's grey. I let this dry for several days, then airbrush several light coats of Xtra-crylic dull coat. The model was rigged with Caenis line, then given several more light coats of flat. I dry-brushed the model with Warpigs pigments - using rust and an off-white on the entire ship.
I had wanted to add the White Ensign to the model before the final flat coat, but I had mangled my last 1/700 copy during the attempt. After posting that I was in need of a 1/700 Royal Navy White Ensign, a multitude of modelers offered to help me out. It's why Modelwarships is the best online ship forum on the internet. Thanks to Carl Mussleman for shipping me all his left over RN/IJN/KM/etc. ensigns left over from two Gold Medal Model decal sets. Much appreciated Carl!
So, the White Ensign was "raised" the night before our local IPMS club's annual show on April 2, 2011, where The Gin Palace took a 2nd place in her category. After the show, I did go back and touch up a few spots the judges had pointed out, then gave her a few final coats of flat to even out the finish one last time. With that, the Gin Palace was complete.
I'd like to thank the following people for their help, advice, input, and encouragement along the way: George Hargreaves, Peter Fulgoney, Rob Kernaghan, Jim Baumann and Mark Tutton from Starfighter Decals.
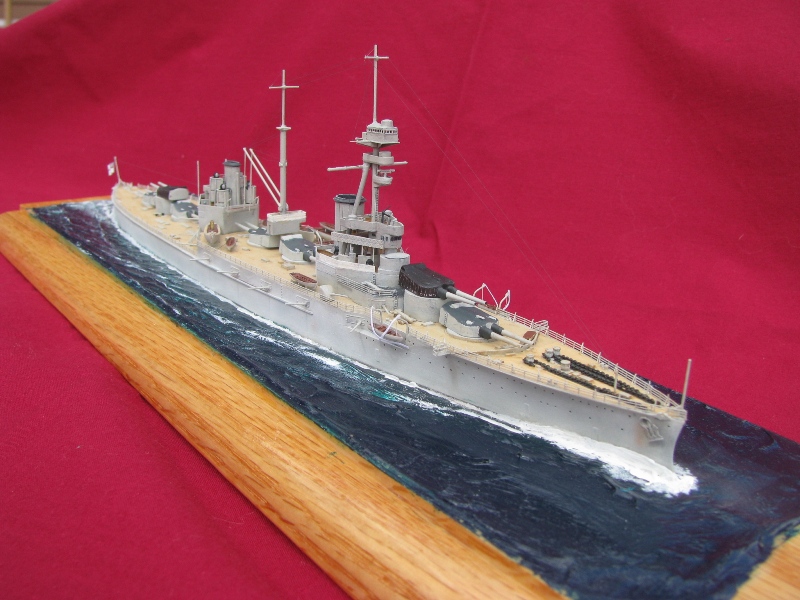
| Conclusion: |
|
| While I may have gone
a little overboard adding details, this is a crisply cast model with sharp
details that will build into a very nice model right out of the box.
The only thing needing improvement would be the instructions, which were
a little simplified. All in all, I loved this kit and really enjoyed
building it, even if it took me longer to build the model than it took
to build the real thing. If you are looking for a small
scale model of "The World's Greatest Dreadnought" to include in your miniature
navy, you can't go wrong with this kit. Many thanks to Pacific Front
Hobbies for the review sample.
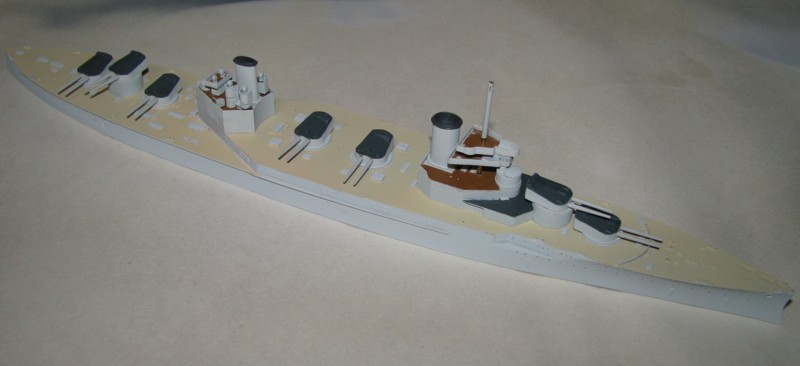
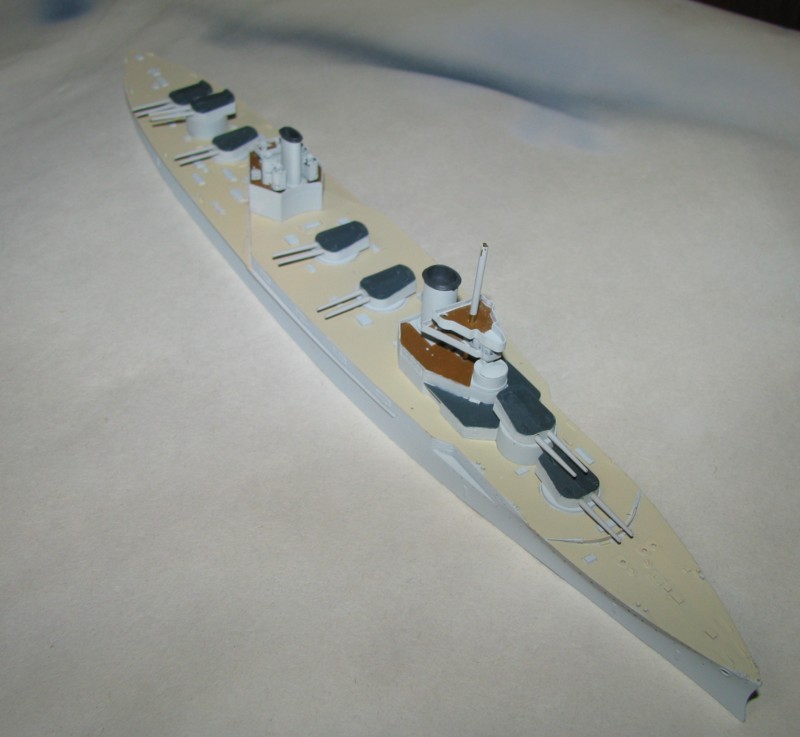
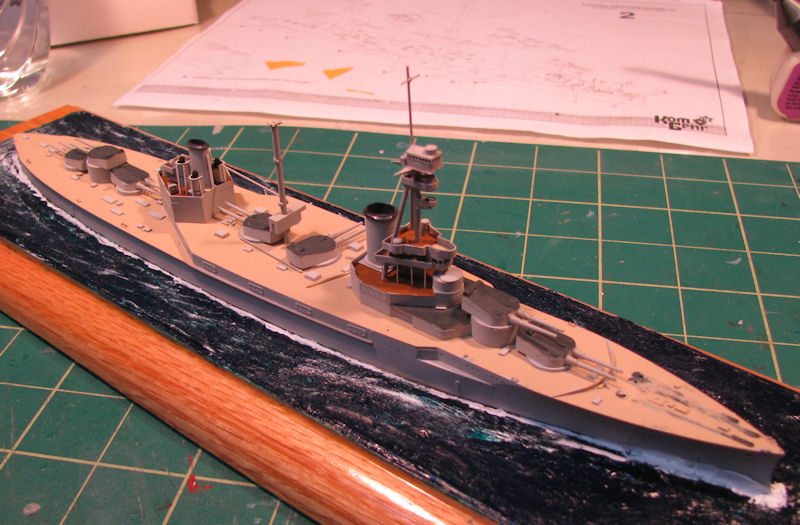
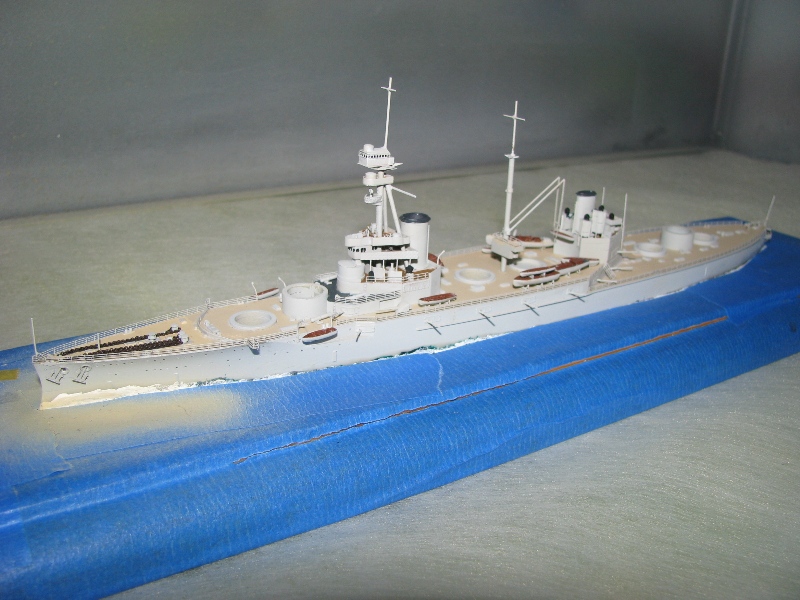
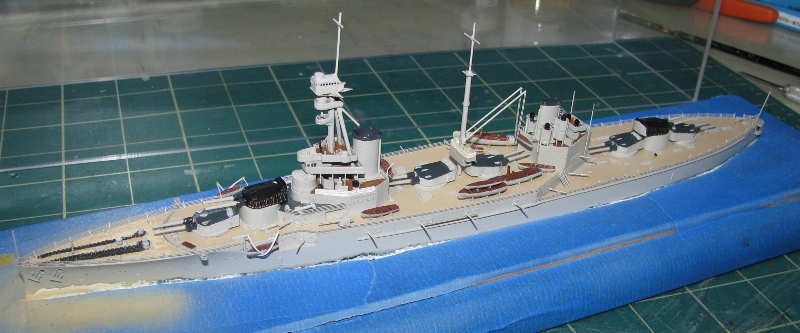
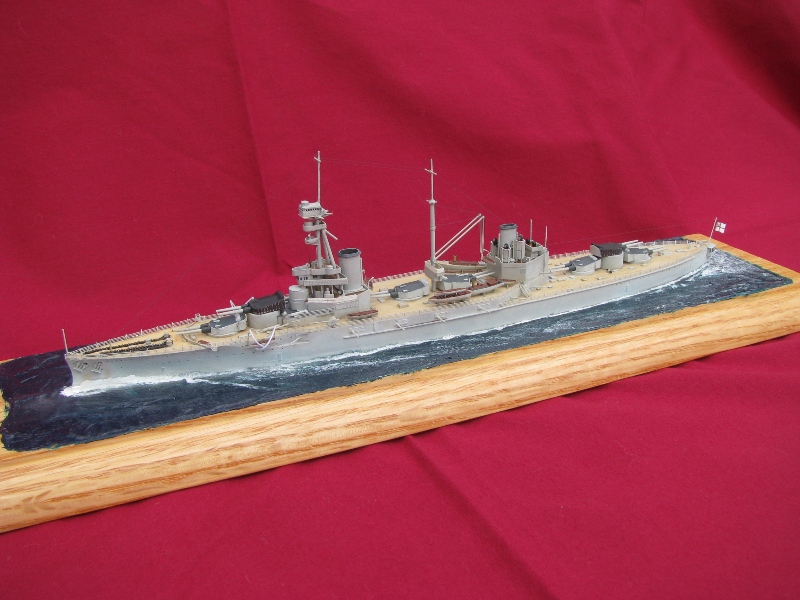
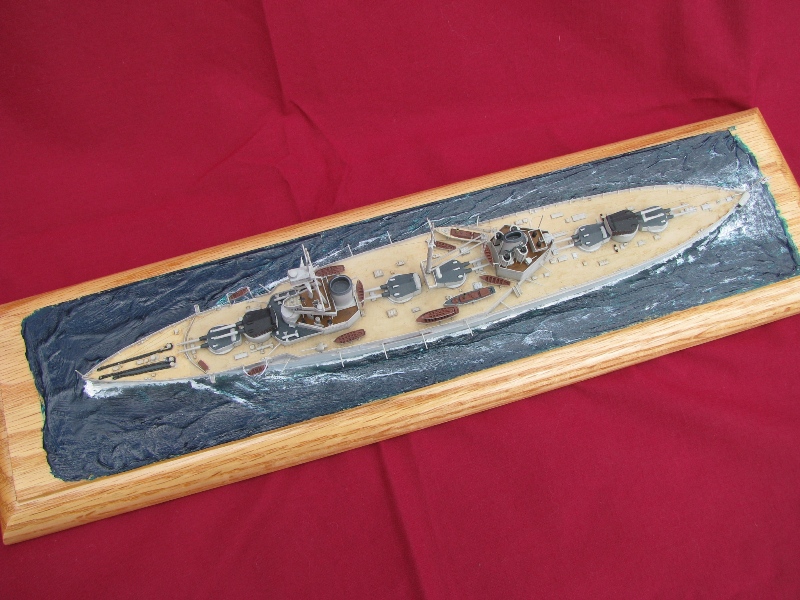
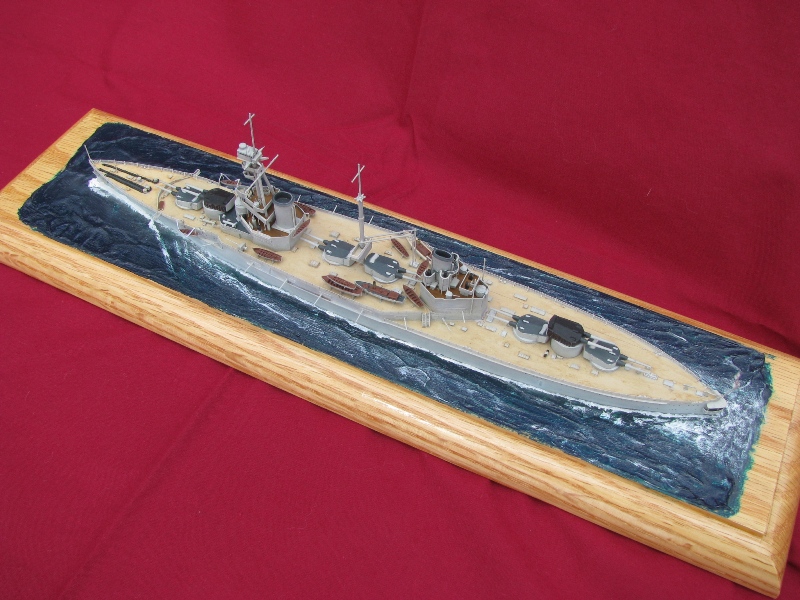
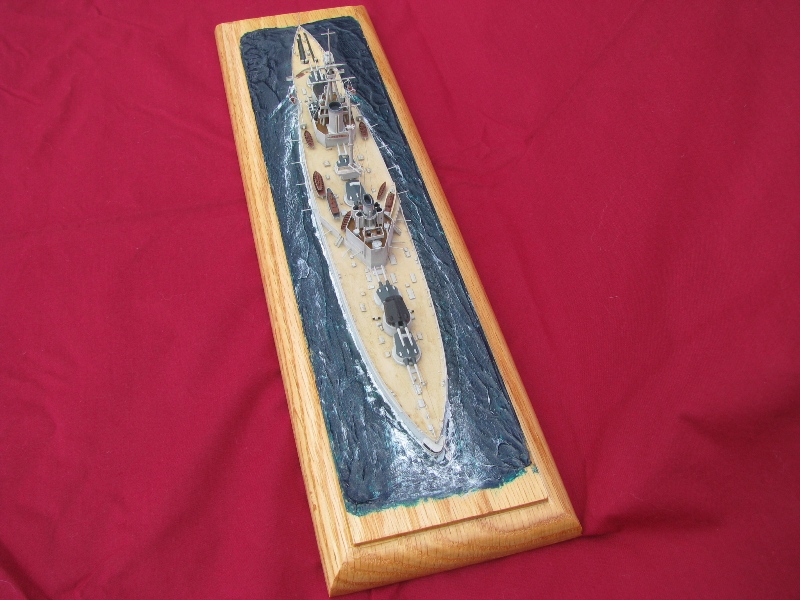
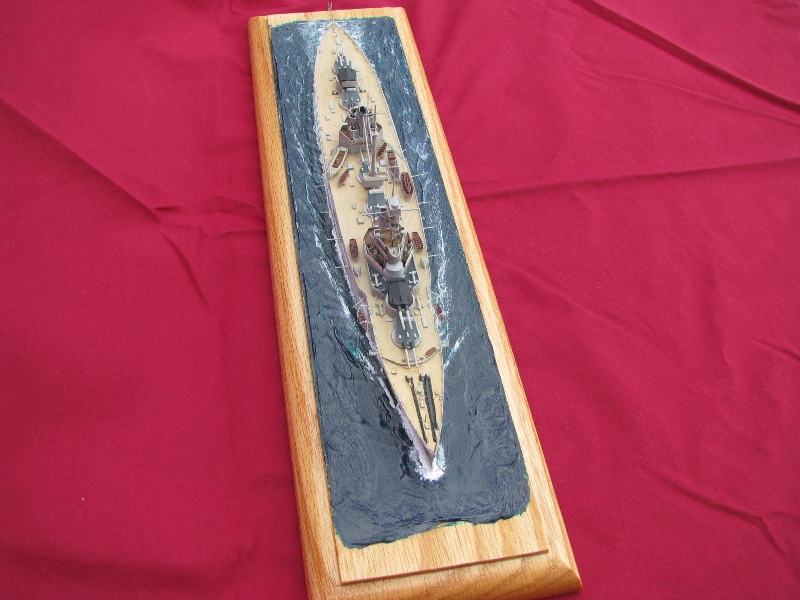
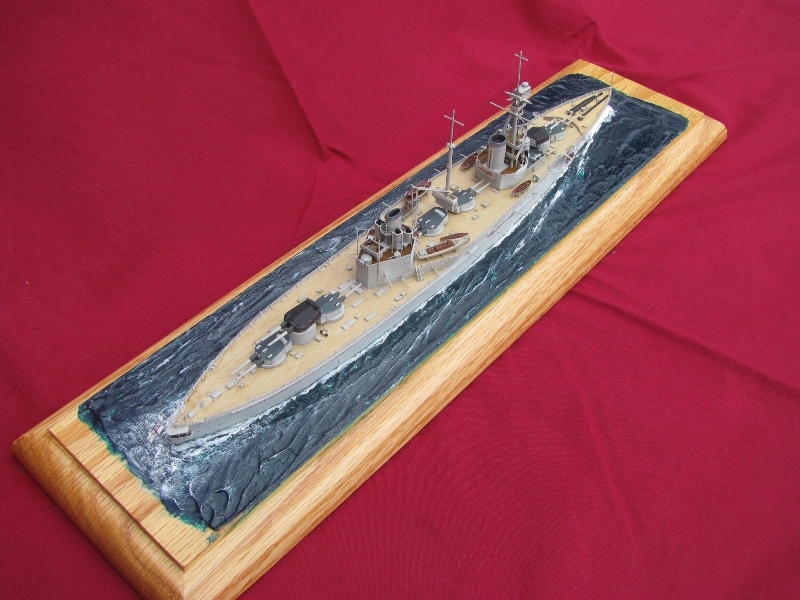
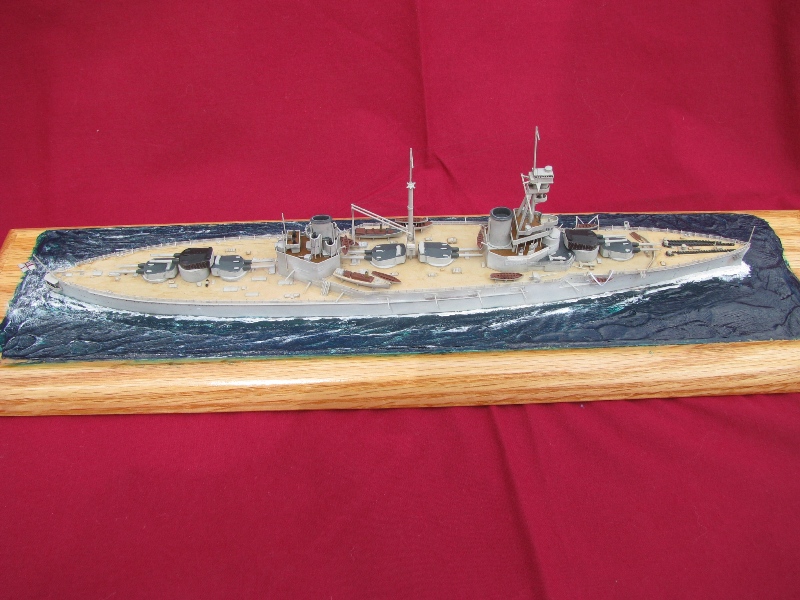
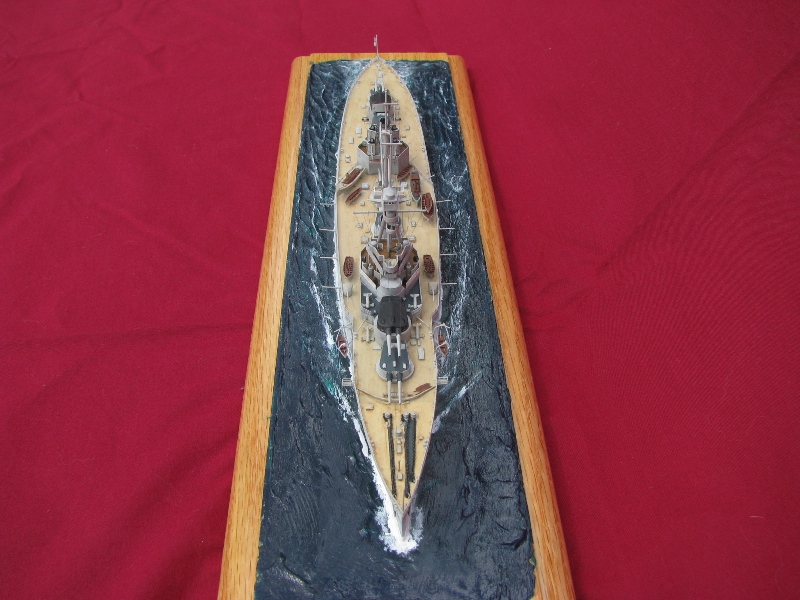
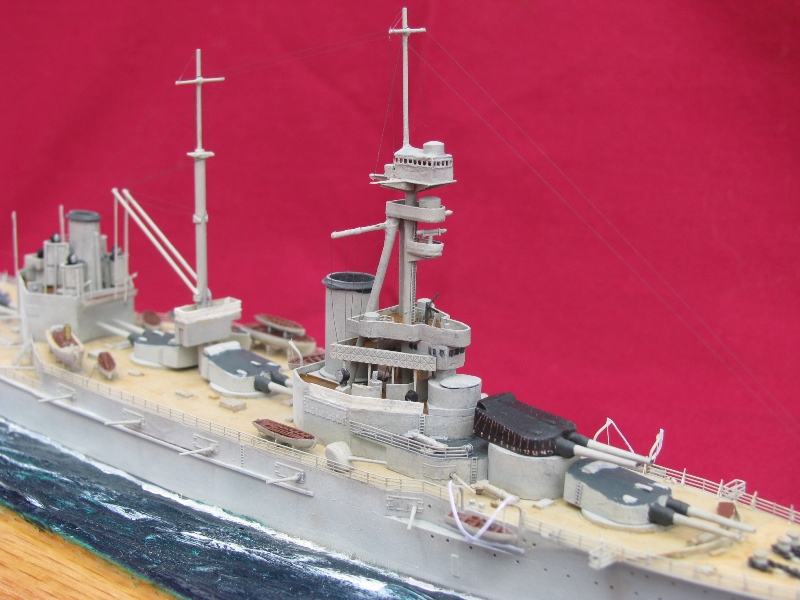
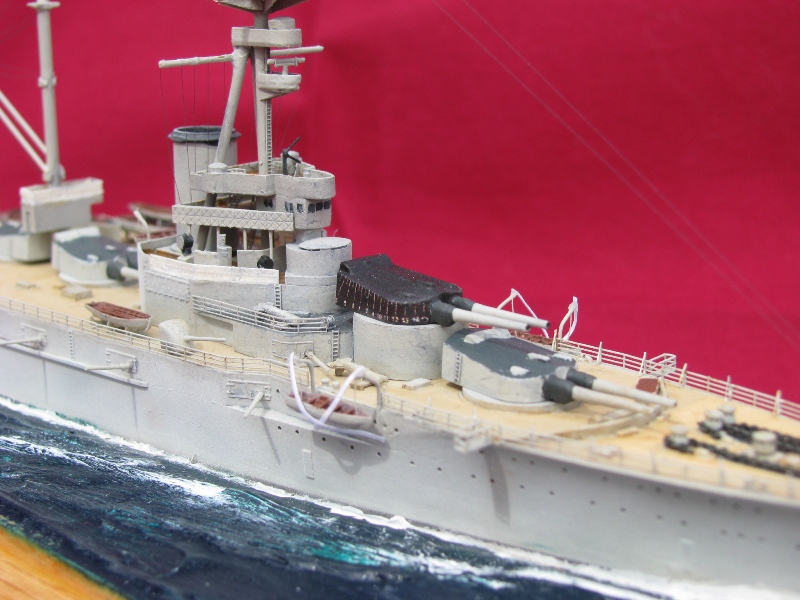
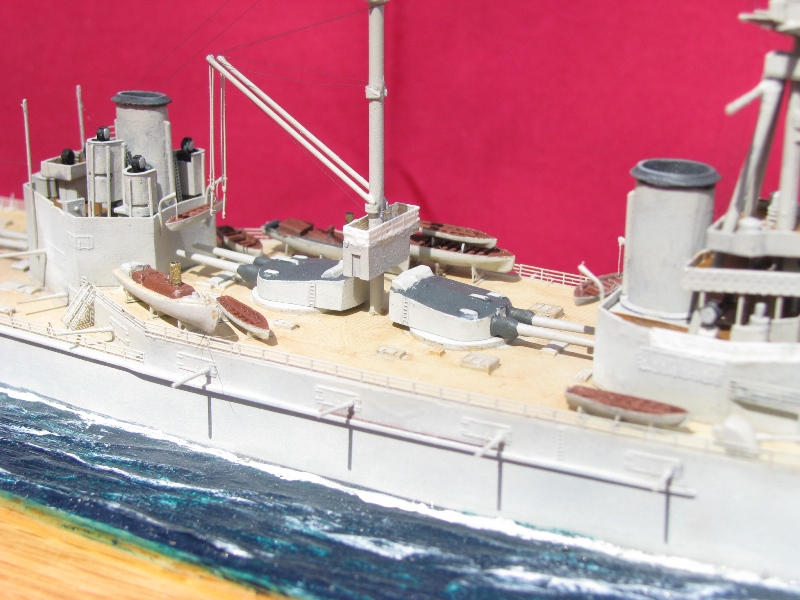
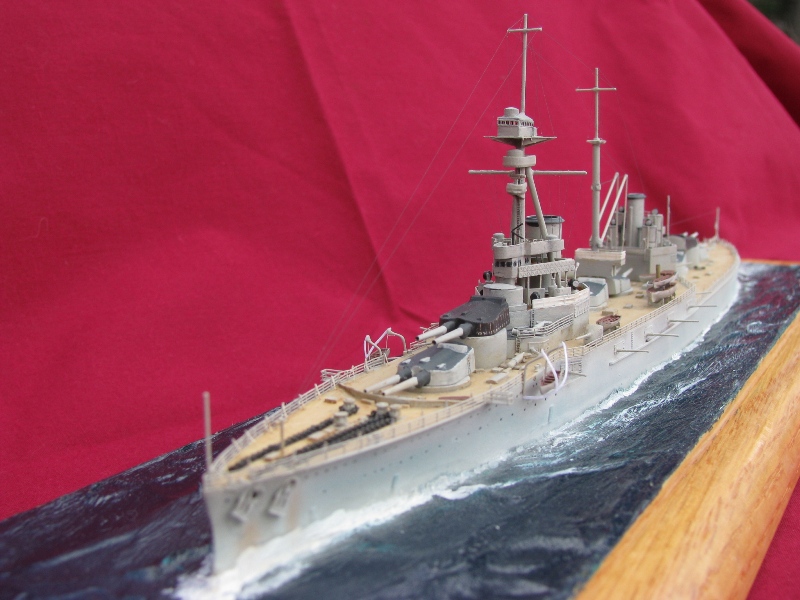
Here are some pictures of my completed 1/700 Combrig HMS Agincourt: |
|
 |
 |
 |
 |
 |
 |
 |
 |
 |
 |
 |
 |
 |
 |
 |
 |
 |
 |
 |
 |
 |
 |
||
