1/350 SMS Konig
Part 2
|
In this part of building the SMS Konig I am going to describe the painting of the deck and the masking of the forward super-structure and barbettes. The deck painting is a technique that has been pretty well described by Loren Perry and Rusty White. So this may not be new to you, but here is my variation on it. |
|
| Starting with the deck I wanted a newer looking planked deck, so I sprayed the first base color using Humbrol 121, Let that that coat dry completely, then plank width strips of tape about 1 inch long and apply them to the deck in no general pattern. I like to use Pacta brand tape it leaves a good sharp edge. I then give the deck a second coat of paint, this time I use Humbrol 71. Cut more tape and apply to the deck in the same manner as described above, the more tape you use the more contrast their will be in the planking. I then spray the last coating of paint using Polly S manicora tan. When dry I remove all tape this will show the three different colors of planking and dose a fairly good job of breaking up the deck coloring as seen in figure (1) and (4) keep in mind you can use any combination of paint colors in any number of colored planks, not just three it could be more or only two. | 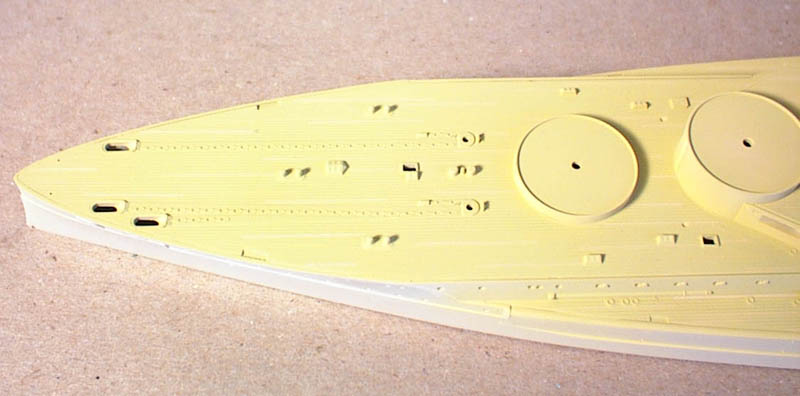
Figure 1. |
| In figure (2) and (3) I am using an NT circle cutter (c-1500 ) to cut
painting masks. You can purchase these from most any hobby or craft store.
These are handy for cutting perfect circles in masking tape
or sheet styrene. |
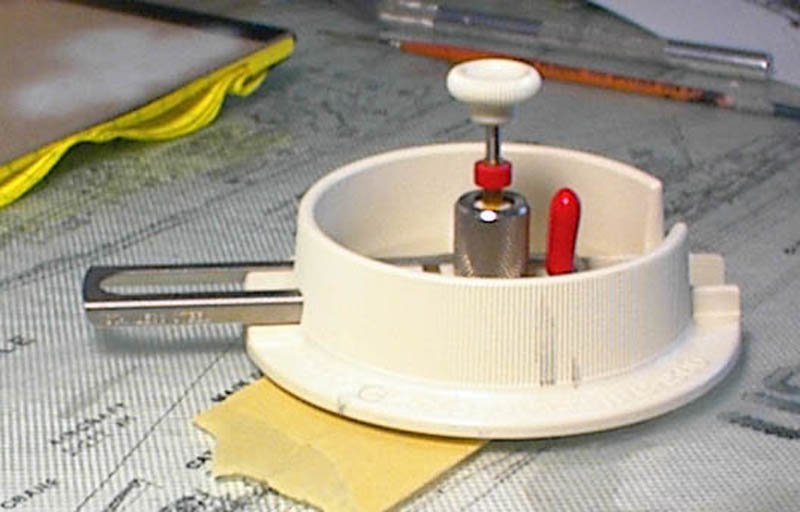
Figure 2. |
| I usually lay two strips of tape (regular painter grade 1 and 7/8" wide 3m brand masking tape) on a piece of glass that I use as a working surface. I set the cutter so that cut is the same size as the turret barbettes. | 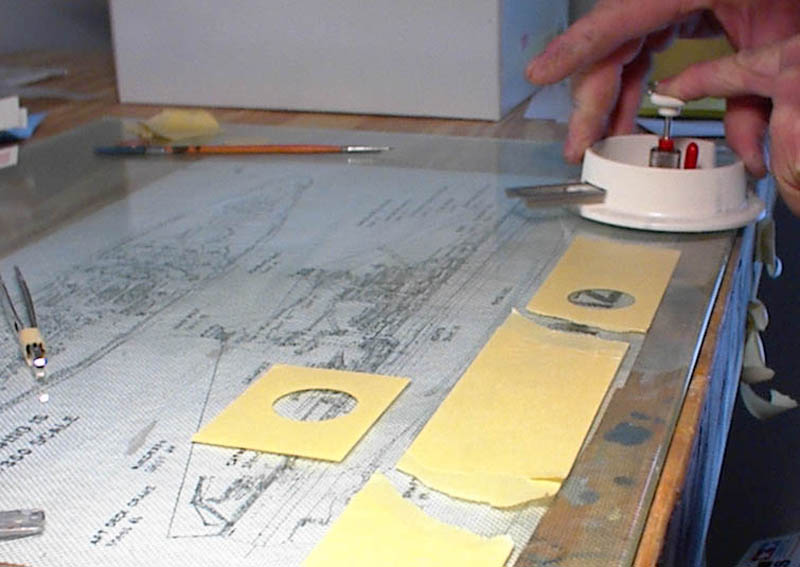
Figure 3. |
| In figure (4) I have cut the tape into quarters. It is easier to apply this way as you have to carefully work it around the edge of the surface you are masking. Take your time as any gaps will show up like a sore thumb. | 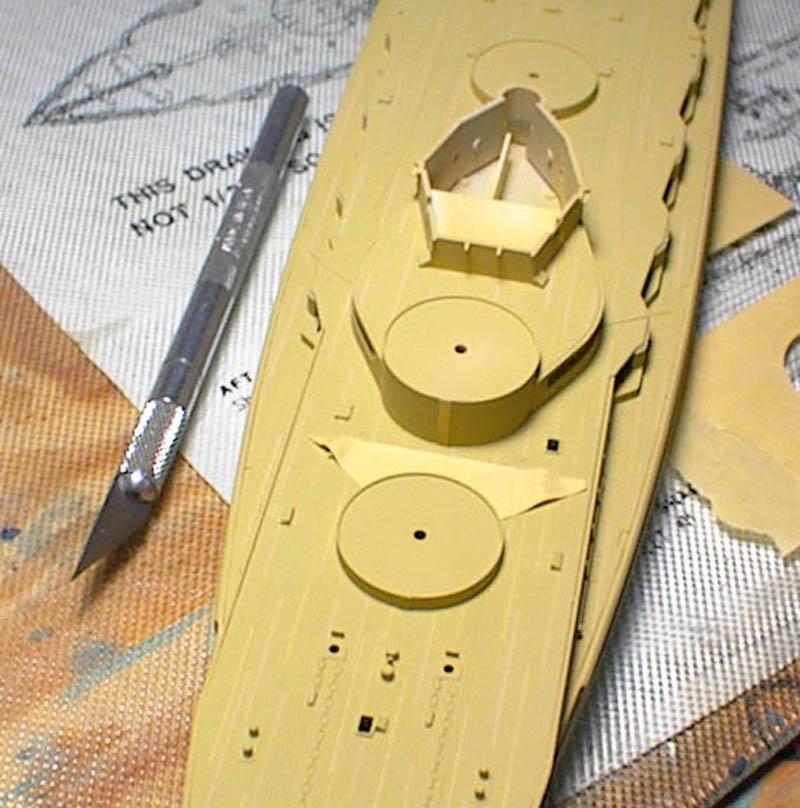
Figure 4. |
| I have applied the second peace of tape in figure (5). I like to butt the two piece's of tape up together and over lap with a third peace of tape. This keeps the spray paint from infiltrating between the joints. | Figure 5. |
| Figure (6) shows the completed masking of one of the barbettes. Finish masking the others and begin masking the superstructure parts. It is better to cut several small pieces than to try to run one long one. You can overlap the smaller ones as you go. | 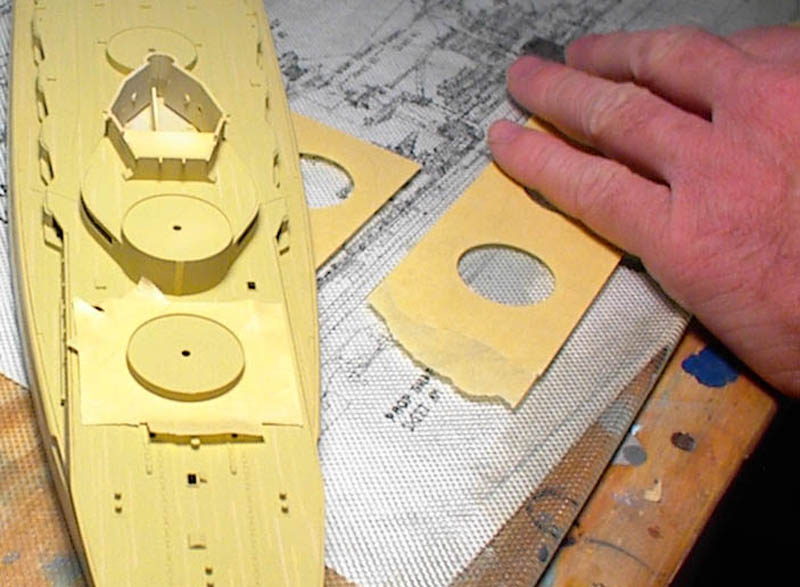
Figure 6. |
| Figure (7) shows the first and third barbettes masked off. The 88 mm
gun deck structure which includes the number two gun barbette was masked
with a combination of straight and curved
piece's of tape, butted up against the structures sides. Repeat this process on the wood decking above the 88 mm gun deck. I then extend the tape out over the sides of the deck so no over spray will end up on the rest of the ship. |
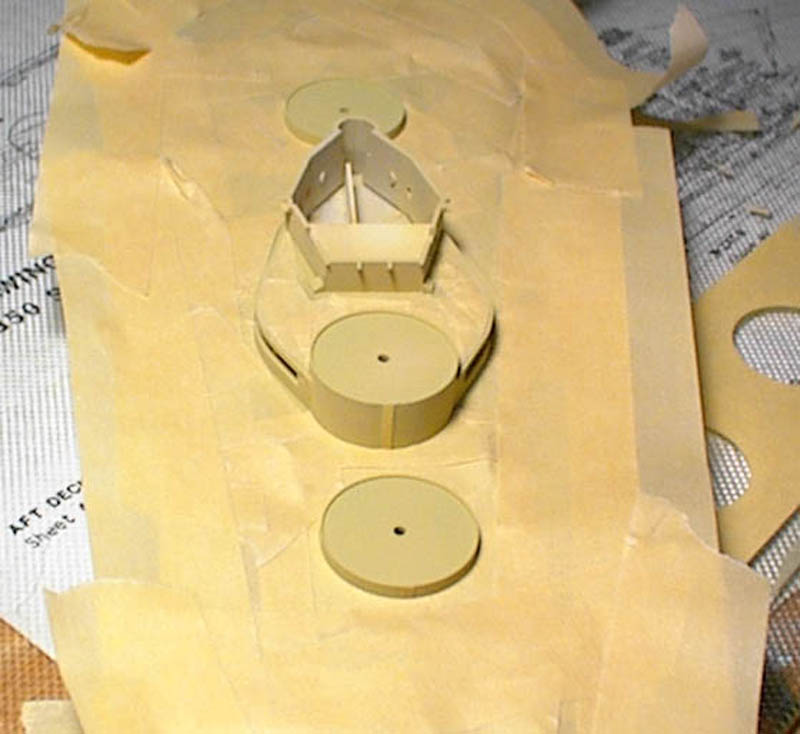
Figure 7. |
| With the masking complete begin spaying the paint on, keeping the gun
pointed and angled so the
paint will not get under the edges of the tape. Apply the paint sparingly, using several short burst to keep the paint from building up to much in any one area. |
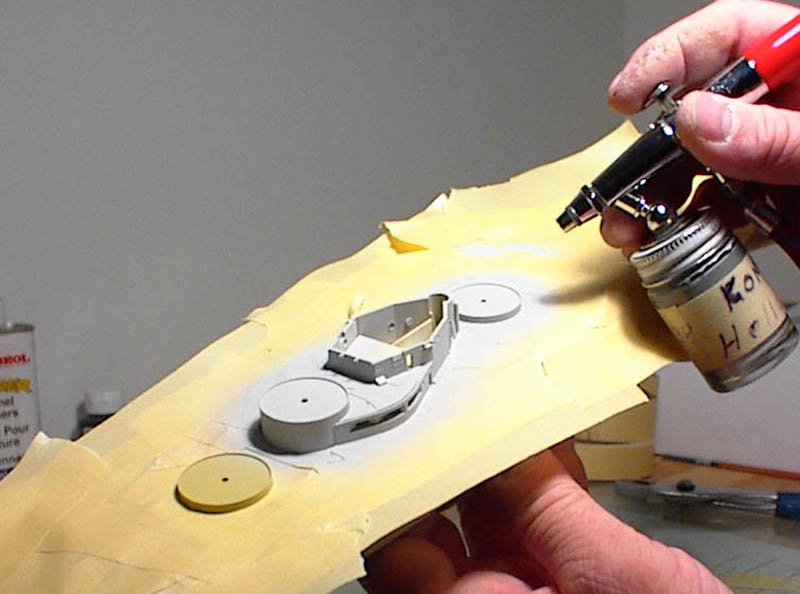
Figure 8. |
| You can use a blow dryer to speed up the drying time. When it is completely dry, carefully remove the tape. Take your time and pull the tape up slowly. | 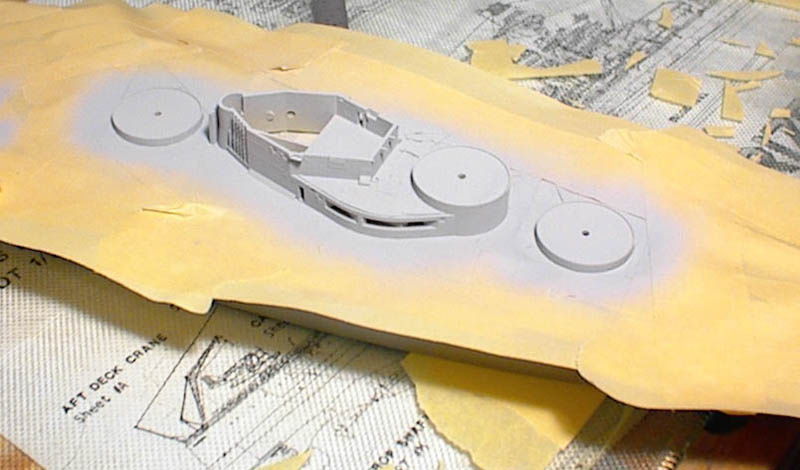
Figure 9. |
| This finishes the deck painting process, I hope I have given
some good advise, and that some, or all can be used.
Thank you, good luck and have fun. Andy Elwood. |
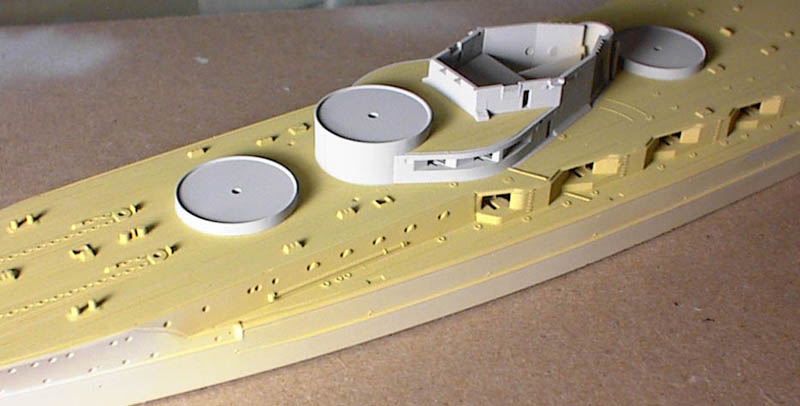
Figure 10. |
| Webmaster's Note: Andy is not online at this time. Please post your questions on the message board. | |
