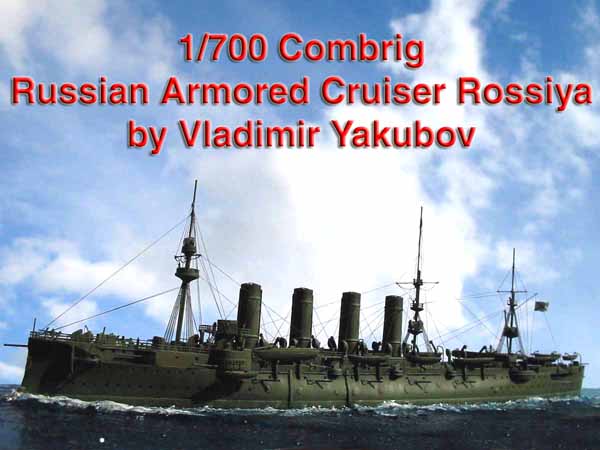
by Vladimir Yakubov
| For historical information about this ship see the in-box review. | |||||
| Hull and Superstructure
As mentioned in the in-box review the hull sides had a very rough texture and required a lot of sanding to get rid of it. The cleanup was further complicated by the presence of many small hatches, ledges and casemate covers on the sides of the hull. To get rid of the pits and dimples I used Gunze Sangyo Mr. Surfacer and superglue where appropriate. At first I tried to sand around the hatches on the hull and to be fair it did get rid of most of the deficiencies, but when I put on a coat of paint to check it, there were still some irregularities mostly because I was using an X-Acto knife to scrape the sides hull in order not to damage the detail, which left flat planes and scratches in the tumblehome. |
to enlarge |
||||
| Seeing how I couldnt successfully work around the hatches, I went ahead and sanded them off. I didnt touch the casemate covers, because they were detailed, but the cargo hatches were simply bumps on the hull and would be easy to rebuild. After I took them off, the cleanup went much faster and was pretty easy to accomplish. When I was satisfied with the hull, I went back and rebuilt all of the hatches on the sides, using the provided plan for reference. The very tip of the bow was broken off, and I went a head and rebuilt it, but it kept breaking off, so I just left it broken, since it will be hidden by the bow wave anyway once I mount the ship on the base. | |||||
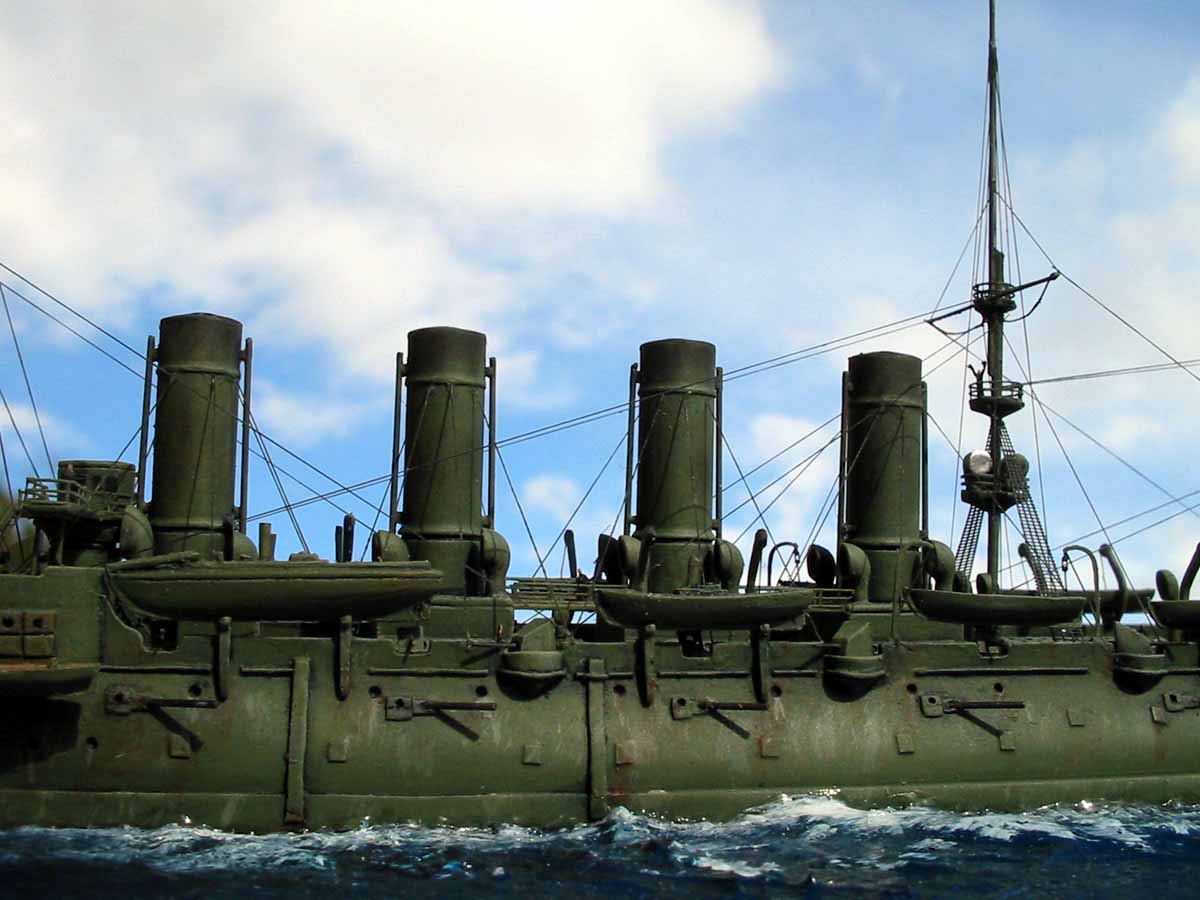
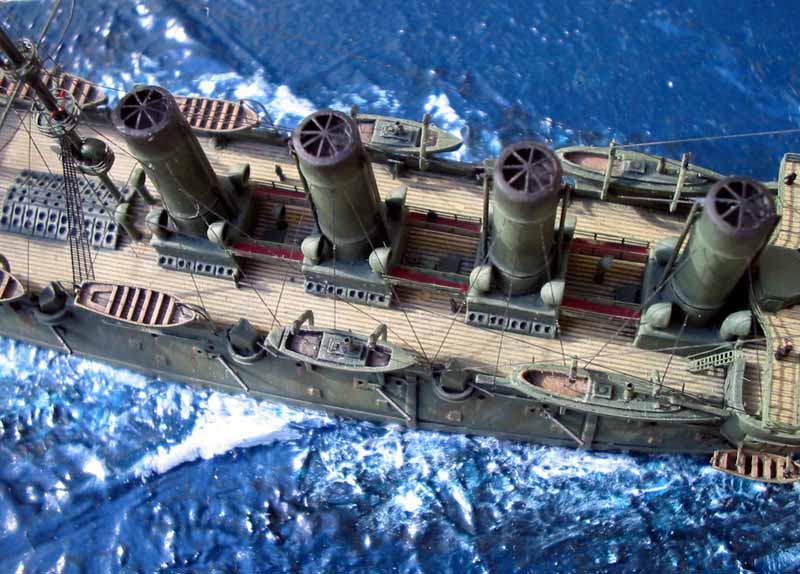
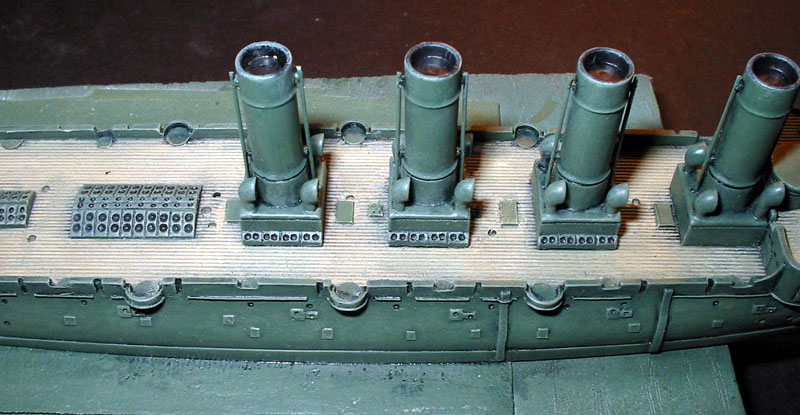
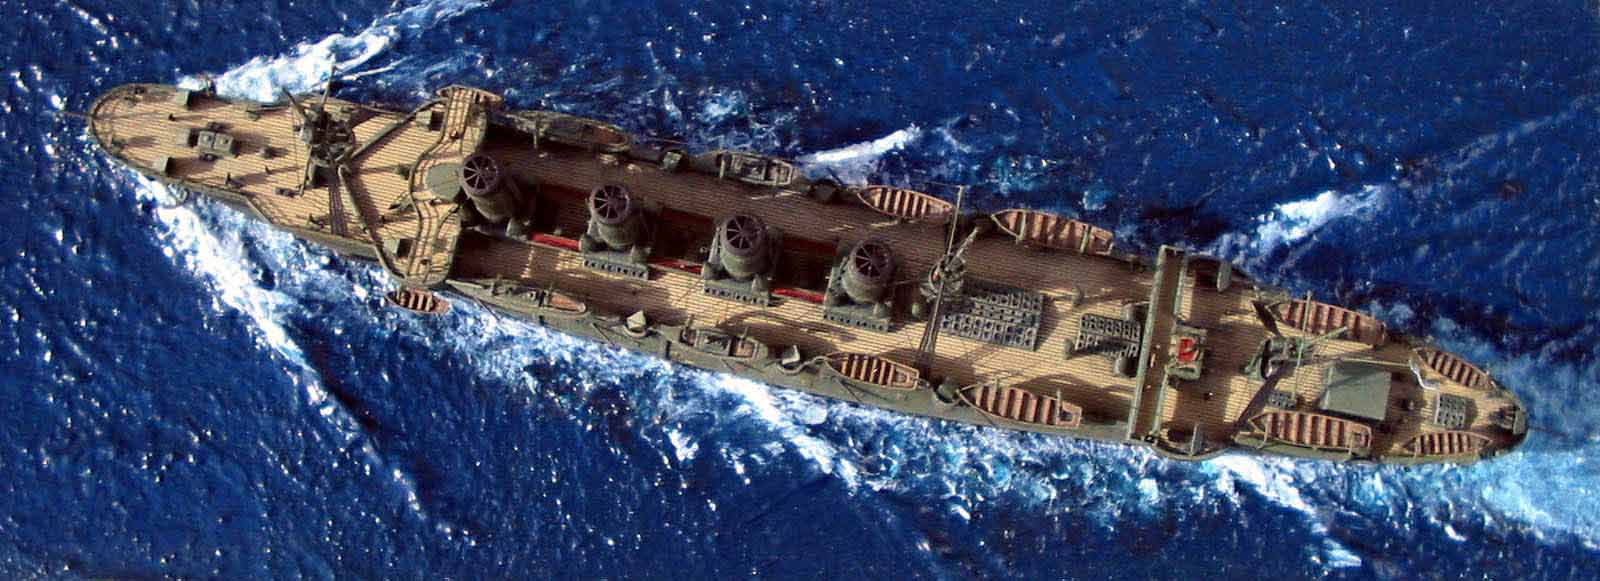
| It this point I usually install the smokestacks and other large superstructure details that will not interfere with the painting of the deck. The boiler room tops were very easy to install, due to the presence of the shallow locator pins on the deck. The ease of alignment was furthered by the deck planking which was an easy way to make sure that they are all parallel. After they were done, I installed the smoke stacks. With 4 of them the alignment is critical. There were locator pins on the smoke stacks, so it was relatively easy to align them all. The biggest challenge in building resin kits is that you have to use superglue, which sets very fast and doesnt give you too much time to fiddle around with alignment, so you have to get it right the first time. To accomplish that I usually glue the first smoke stack and make sure that it is centered and then glue in the rest of them one at a time, aligning them on the first one. | 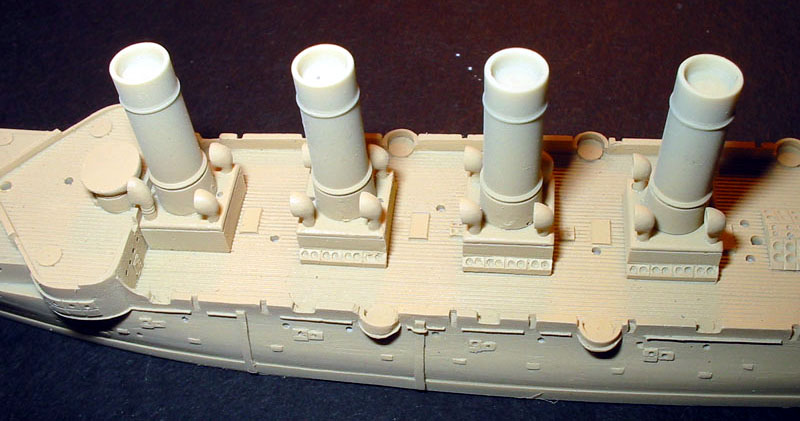 |
||||
| At this point the deck was ready to be painted, so I went head and painted the deck. I also used that coat of paint to check for any other deficiencies, so I covered the whole ship with it. The paint revealed that the joint between smoke stacks and boiler room tops was very rough and needs to be cleaned up further. It also revealed the irregularities in the hull sides mentioned above. The cleanup around the base of the smoke stacks was greatly complicated by the fact that the ventilator heads were integral to the boiler room tops and there was hardly any room between them and the smoke stacks. That made sanding the joint (without breaking the ventilators) extremely difficult and time consuming. After it was done to my satisfaction, I added two small stacks to the front and back of each smoke stack made from brass rod. At this moment the ship was ready for painting. | |||||
| Painting
As the deck was already painted I masked off the deck leaving major parts of the superstructure uncovered and went ahead and pained the hull using airbrush. There are two colors that would be appropriate to use with the model. First color is the overall white hull with yellow stacks used in peacetime and the second color overall dark green used during Russo-Japanese War. I decided to paint it dark green for two reasons, I like to depict the ships that I build in action (i.e. in their wartime schemes and fits) and I hate working with white color, since they are very hard to get to look right (in my opinion). There are no reliable references as to the true shade of green that was used by the Russian navy. Ive seen various representations of that color ranging from pale green to dark green. I want to the local hobby shop and chose several shades of green that looked about right to me based on the references that Ive seen. When I came home I sprayed one of the green shades on the model and to my horror realized that it looked much darker on the ship that it did in the can. Then in panic I made a second mistake and without giving that coat of paint adequate time to dry I went ahead and over sprayed it with another shade of green. That shade of green was German RLM 62 Green from Polly S. This shade was much more to my liking, but then after a couple of hours I discovered that while the top coat has dried the undercoat was still soft and could be easily dented by a fingernail. I started thinking that Ill have to strip all of the paint from the ship and start all over again (a though that didnt appeal to me in the slightest), but I decided to give it chance and left it alone for about 24 hours. Fortunately for me the undercoat finally dried and I didnt have to repaint the ship. |
 |
||||
 |
|||||
| It this point in the construction I usually use the wash to bring out deck and side details. I usually use stuff called Black-It-Out which is basically like a black ink. I liberally smeared it all over the ship and after it dried, I used a Q-tip and a stiff brush to clean off the excess. After that was done, I dry brushed the deck with a lighter shade of tan and then after touching up the deck details, dry brushed all of the dark green parts with the lighter shade for green (added a few drops of white into the base green color). It looked very good and I was ready to add small details. | 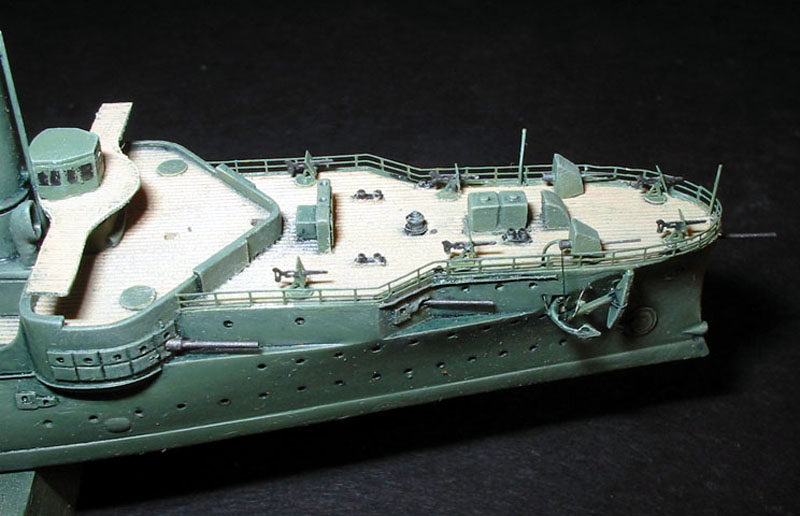 |
||||
| Detailing
First things I added were the rest of the superstructure details, which consisted of two bridges - forward and aft. Both bridges came with solid shielding around the sides, which I cut off to replace with railings as it seemed my references indicated. Of course as soon as I did it, I realized that I made a mistake. While the forward bridge did have railings, which were uncovered at the period that I was modeling, aft bridge was supposed to have thick borders which were represented by Kombrig. Of course I only discovered that after I cut them off, but as they say in Russia: Stupid head makes legs hurt Since both bridges were cast with the railings integral to them, when I cut them off the edges of the bridges came off looking ragged, so I decided to scratchbuild them using the kit parts as templates. I scribed the planking onto a sheet of styrene and then cut out the bridges. Due to scribing both bridges heavily drooped to the sides and to prevent that I glued a thin brass rod under them, which solved the problem. I built up the sides on the aft bridge and cut off the pilot house from the kit bridge and glued it to the forward bridge. Ive also scratchbuilt the catwalks between the smoke stacks since the ones in the kit also had solid shielding. After all bridges were glued in place I started to detail the ship with small details starting from the bow and going aft. |
|||||
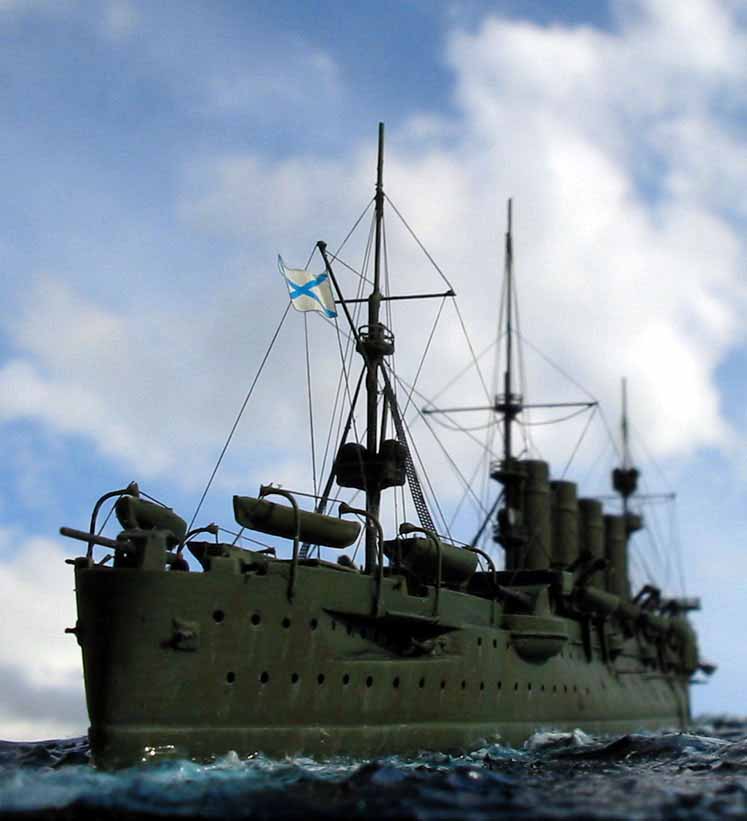
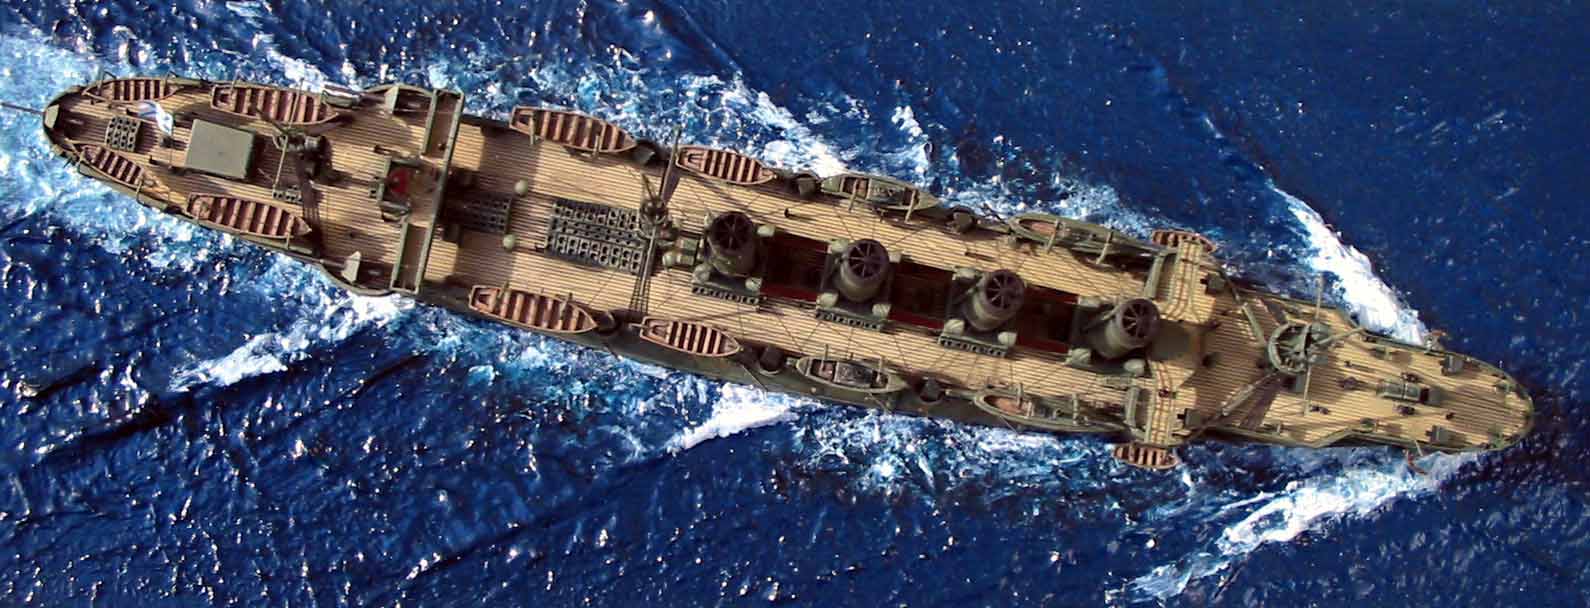
| As with any ship of that era, Rossiya bristled with guns. As there were no casemate guns provided in the kit (and if there were I would have still replaced them) I used hypodermic tubing of appropriate sizes to make gun barrels for the 8 and 6 guns in the casemates. Please note that the 6 guns in the midship casemates were placed in a counterclockwise manner, starboard guns facing forward and port guns facing aft. Since I was using scale tubing for the bigger runs, the 3 and 47mm guns on deck were looking grossly oversize, so I replaced them as well. I used the kit gun shields for the 3 guns replacing the barrel with tubing. For the 47 mm guns I used the guns from WEM Askold PE set. They are beautiful, but unfortunately there are only 10 per fret. Since the kit needed 20, I used up 2 frets worth of guns, which gets expensive ($16 or so per fret). I really wish that some manufacturer comes out with 47mm and 37mm guns as a separate fret as they do for WWII AA weapons. I really believe that there is a marked for them. But, I digress As aft 8 guns and the 6 gun on the stern are behind open gun shields I decided to experiment and scratchbuild them. Each gun had 11 parts and the results were excellent in my opinion. | 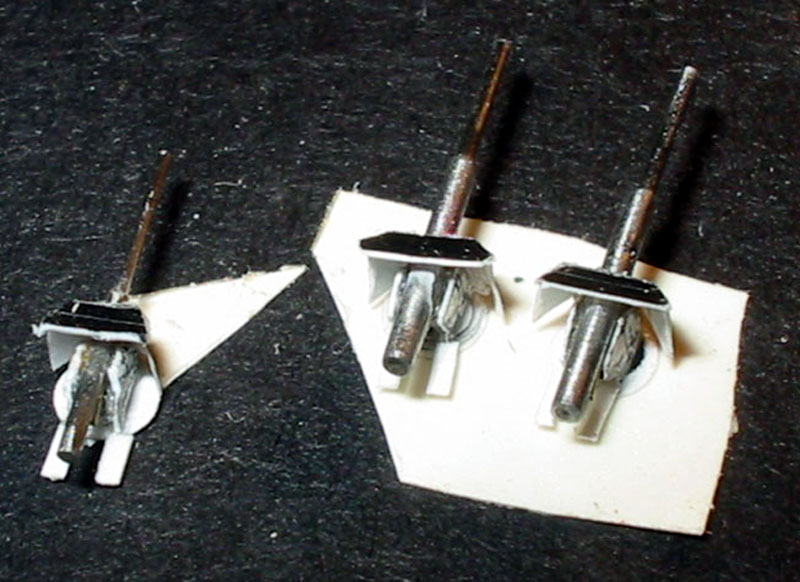 |
||||
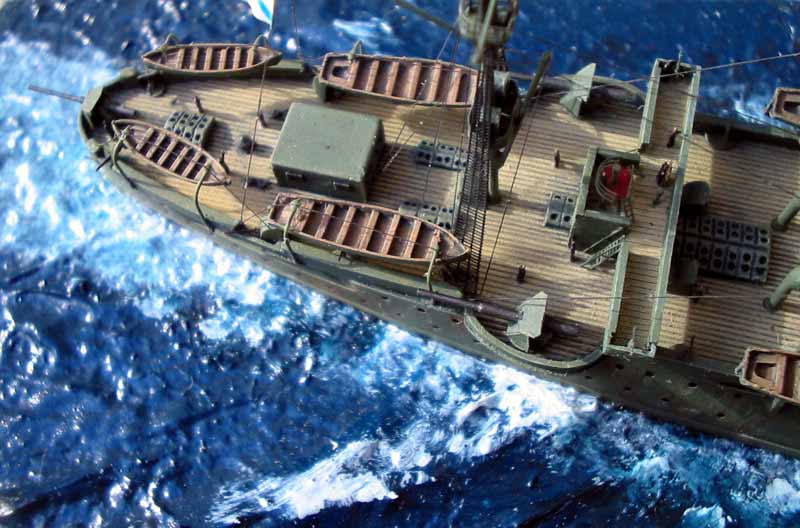
| All of the boats used came with the kit. I used the
complex boat davits from the kit in the middle of the ship, but davits
provided for the stern were way too big (9 mm tall when they were supposed
to be 5mm tall) , so I went ahead and scratchbuilt them. Ive replaced
the stacks on the steam launches with tubing as well.
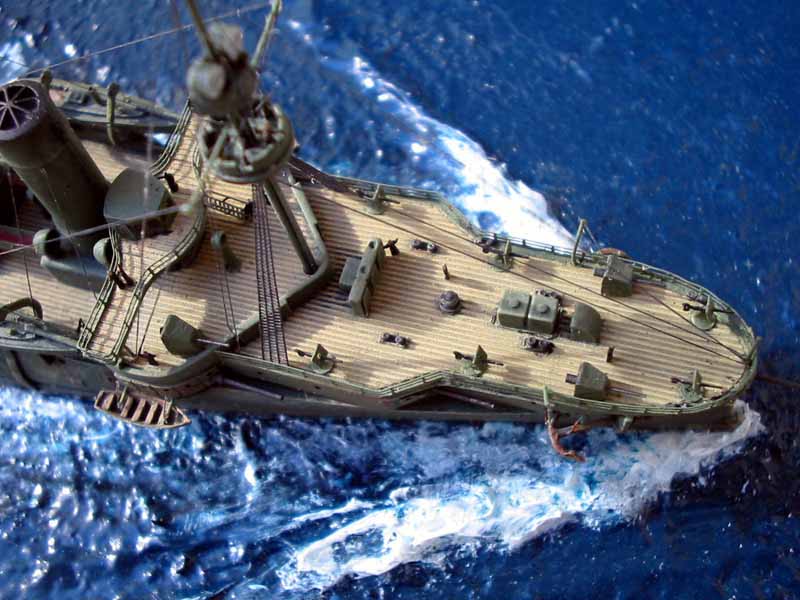
In the plan the anchors were shown to be flush with the hull (which would require part of the anchor to be cut off on the kit), but looking at the photographs of the real ship, they were sticking out and were supported by a complex system of chains and platforms, so I built them like that. Ive made the chain, link by link, from the chain in WEM Askold set and scratchbuilt anchor davits. Aft compass platform is represented in the kit as a solid pedestal, but in reality it was supported by 4 legs, so I scratchbuilt them. The ships crest in the bow is made from golden foil, with a decal of the Imperial Eagle on it. Railings and ladders are from Toms Modelworks set. |
|||||
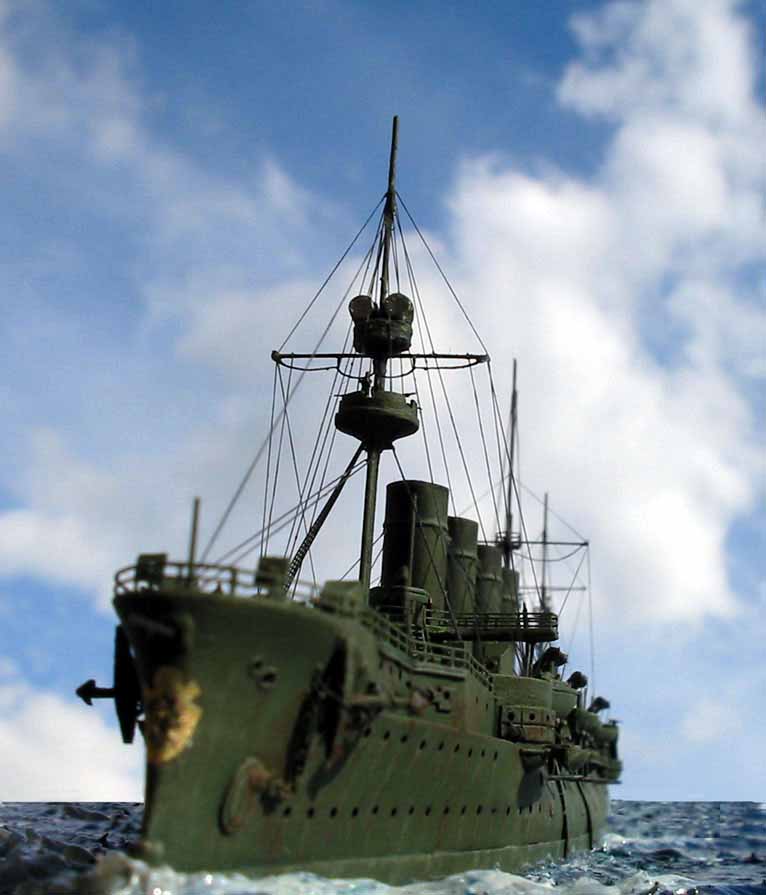
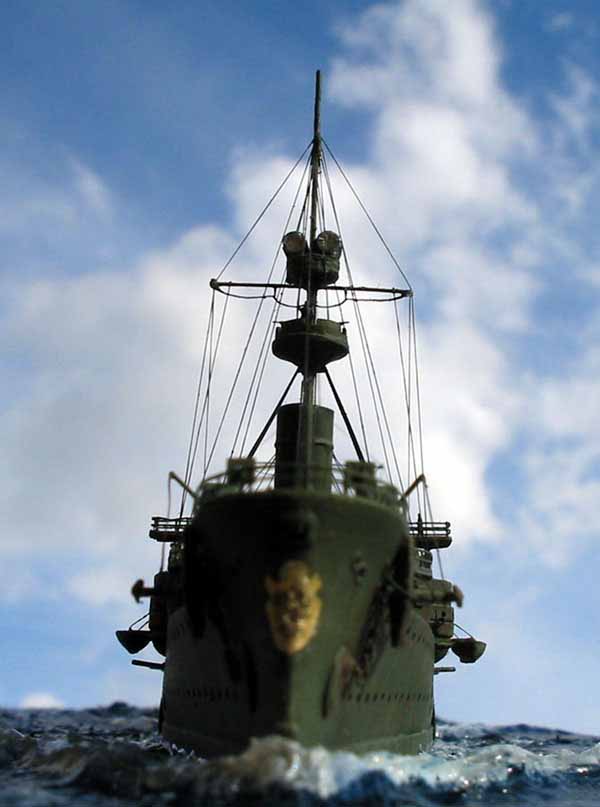
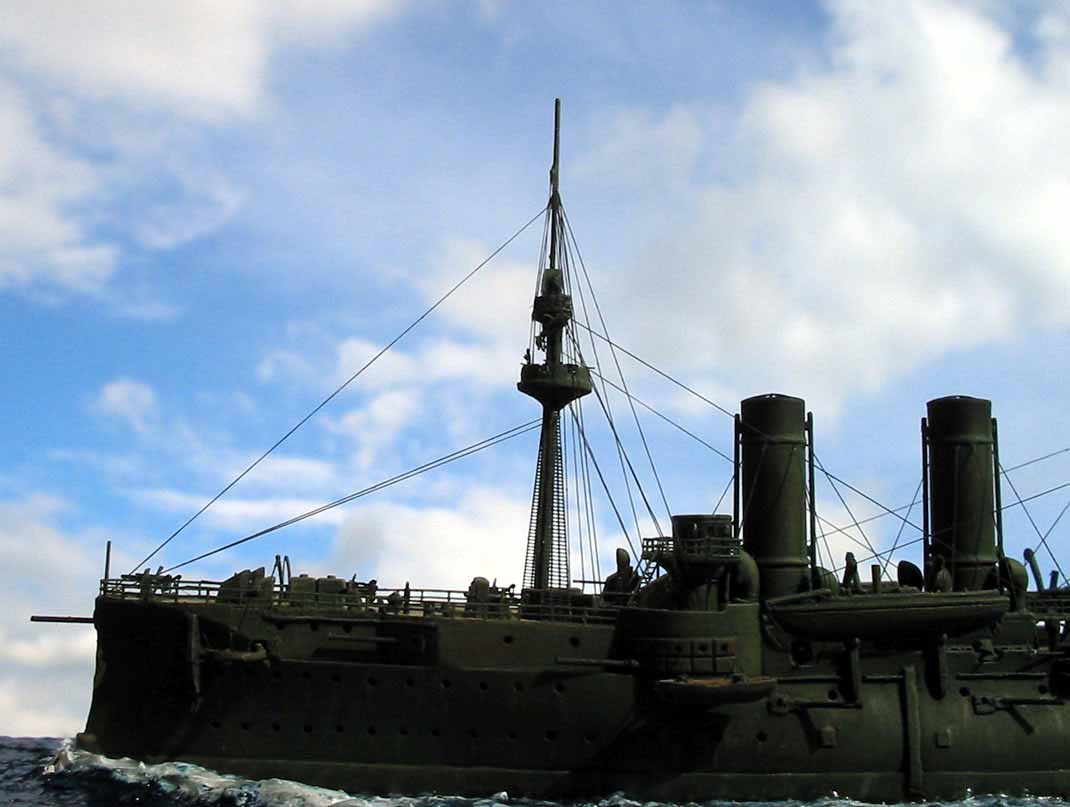
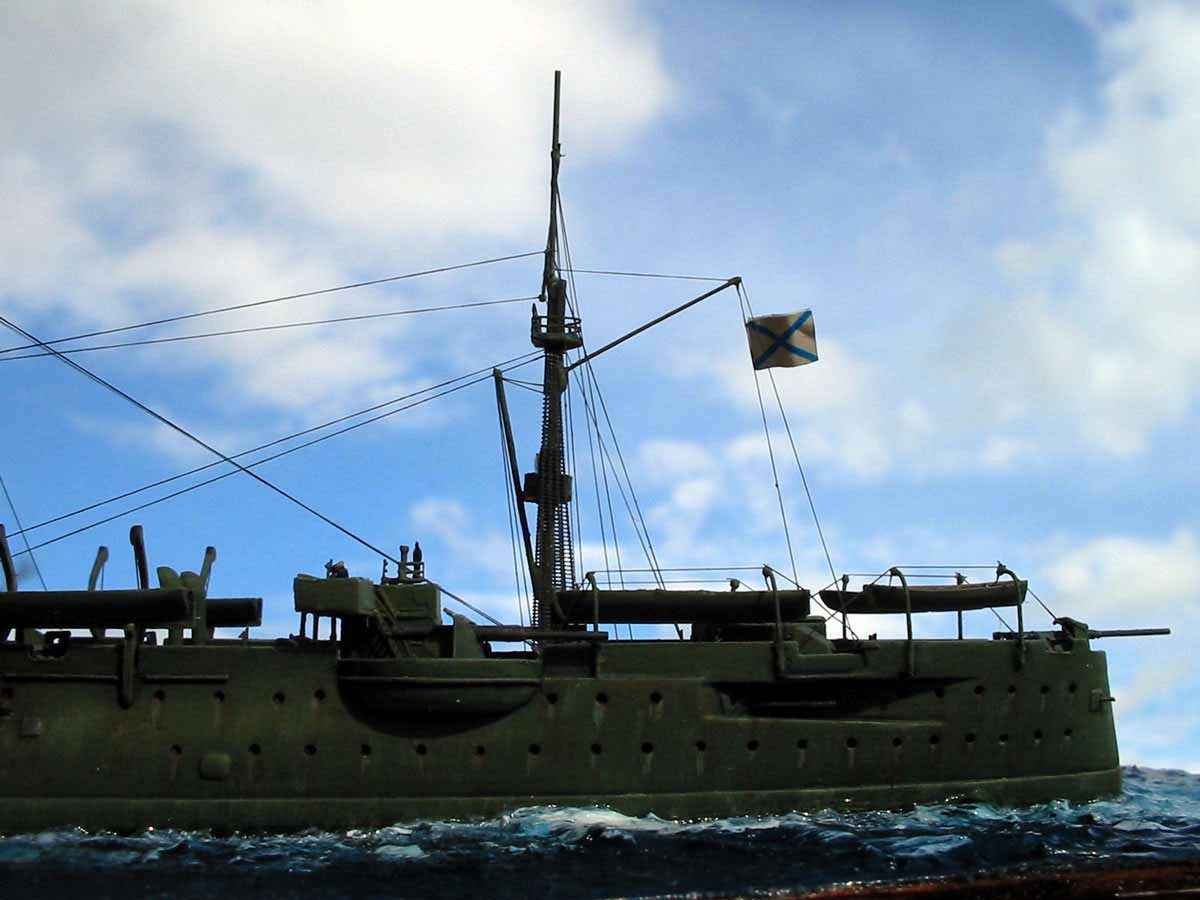
| Masts and Rigging
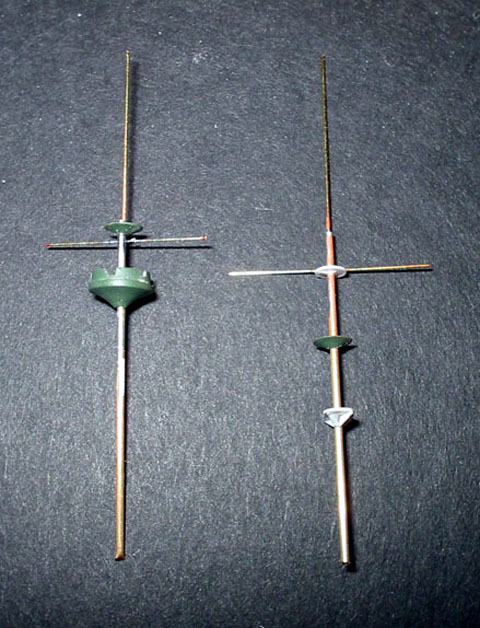
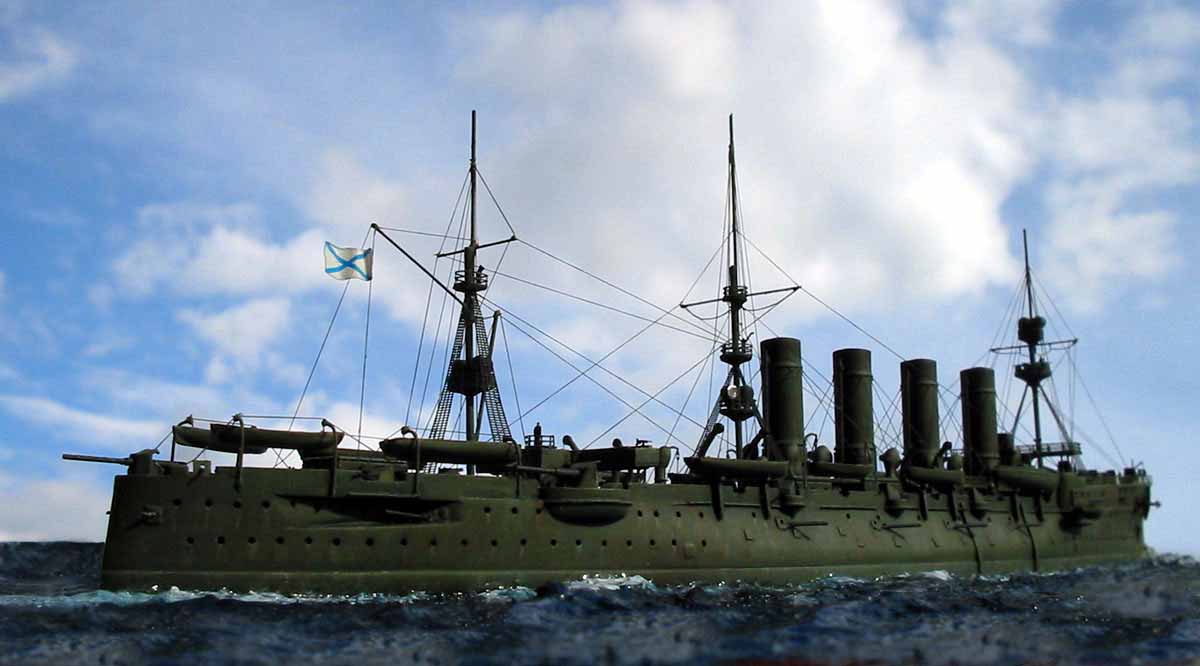
Masts were scratchbuilt. You should look closely at the photographs of the ship in the period that you are building, since the configuration of masts and platforms was always changing. I chose to model the ship as it looked right before the Battle of Ulsan, since I had several very good photos of the damage that the ship received during that battle. There were rectangular (with rounded edges) searchlight platforms on each mast, which are not represented in the kit and have to be scratchbuilt. There were only 4 searchlights instead of 6 needed in the kit and I broke 1 of them, so I decided to use WEM searchlights for all 3 platforms so that they all look uniform. Several other platforms were also scratchbuilt and the holes for the guns were added on the kits fighting top. The photos showed that 2 of the platforms were covered with canvas, so I desided to simulate that. I placed PE railings around the platforms as normal. Then I took regular tissue (Kleenex or any other brand), separated a single ply out of it and cut it into narrow strips the width of the railings. Then I took white glue thinned 50% with water and dipped the strips of tissue into it and carefully glued them to the installed railings. The result is a convincing covering of the railings that has the same rough texture of canvas and is also irregular like real canvas covering. |
 |
||||
| I installed the mast last, to prevent them from being damaged by handling the kit. I used PE ratlines from Navalis Models. I rigged the model with nylon thread taken from black pantyhose. Flag was printed on Alps Printer. | 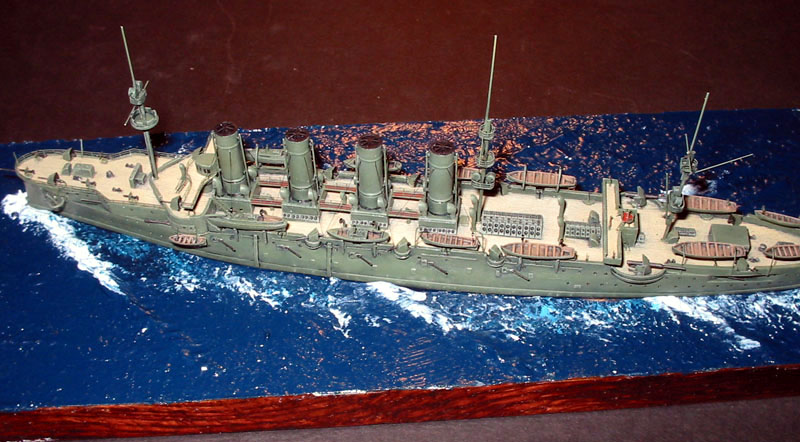 |
||||
|
|||||
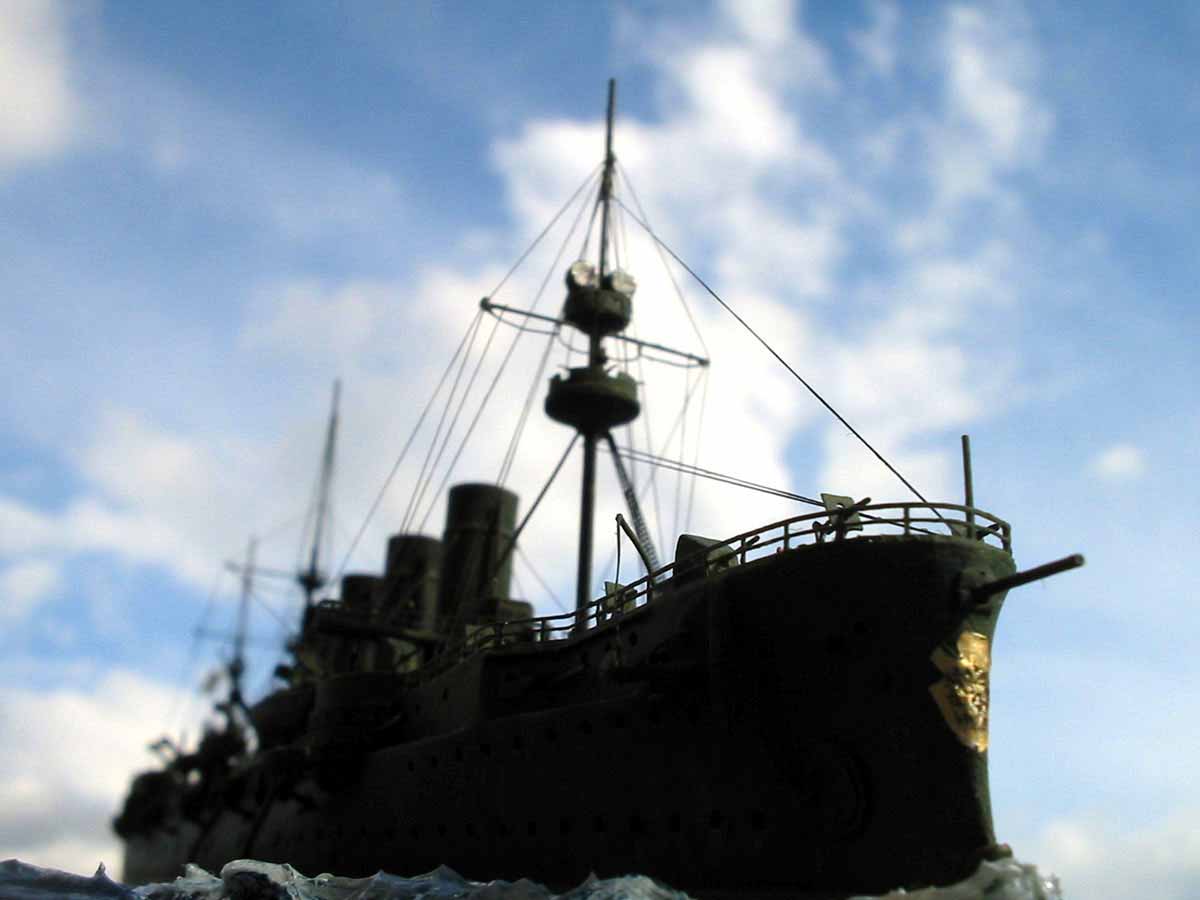
| Weathering
I weathered the ship using both paint and pastels. The photos from the war, show Russian ships to be heavily weathered, with white streaks visible on the dark paint, so I went ahead and liberally applied light green streaks down the sides of the ship. Then I used black pastels to darken the tops of the smoke stacks and also made dark streaks down the side of the stacks. Ive darkened the mid portions of the mid and aft masts to represent the soot from the stacks settling on them. Then I liberally applied rust streaks on the hull using rust colored pastels and wet brush. Finally I tried using white pastels to add some more white streaks to the sides of the hull and while they looked great right after application, they almost disappeared after the application of the final dull coat. |
 |
||||
|
|||||
 |
|||||
|
|||||
 |
|||||
 Conclusions: Conclusions:
Overall this is an excellent representation of Rossiya. There are several flaws in the kit, but most of them are mere annoyances and none of them present a large obstacle. Once built the kit looks excellent and in the dark green camouflage it really stands out next to the grey warships on the table. It is possible to build up this model into an excellent show peace. My model took first place at the ReCon 7 - IPMS Seattle Spring Show 2003. |
|||||
 I
highly recommend this model to any one with resin and minor scratchbuilding
experience who is interested in the warships of that era. I
highly recommend this model to any one with resin and minor scratchbuilding
experience who is interested in the warships of that era.
For a detailed look at the kit contents click the image on the right. |
|||||