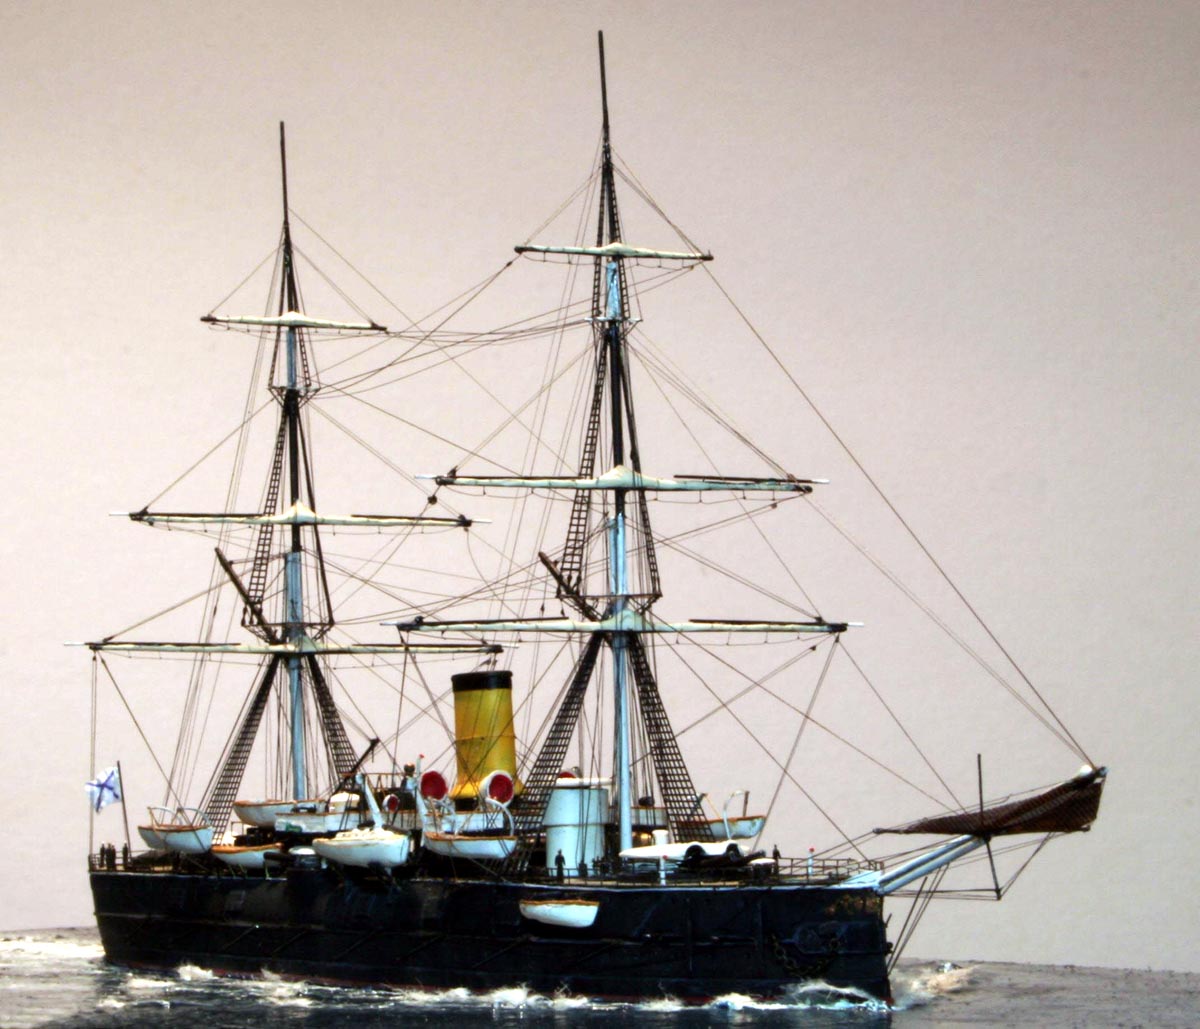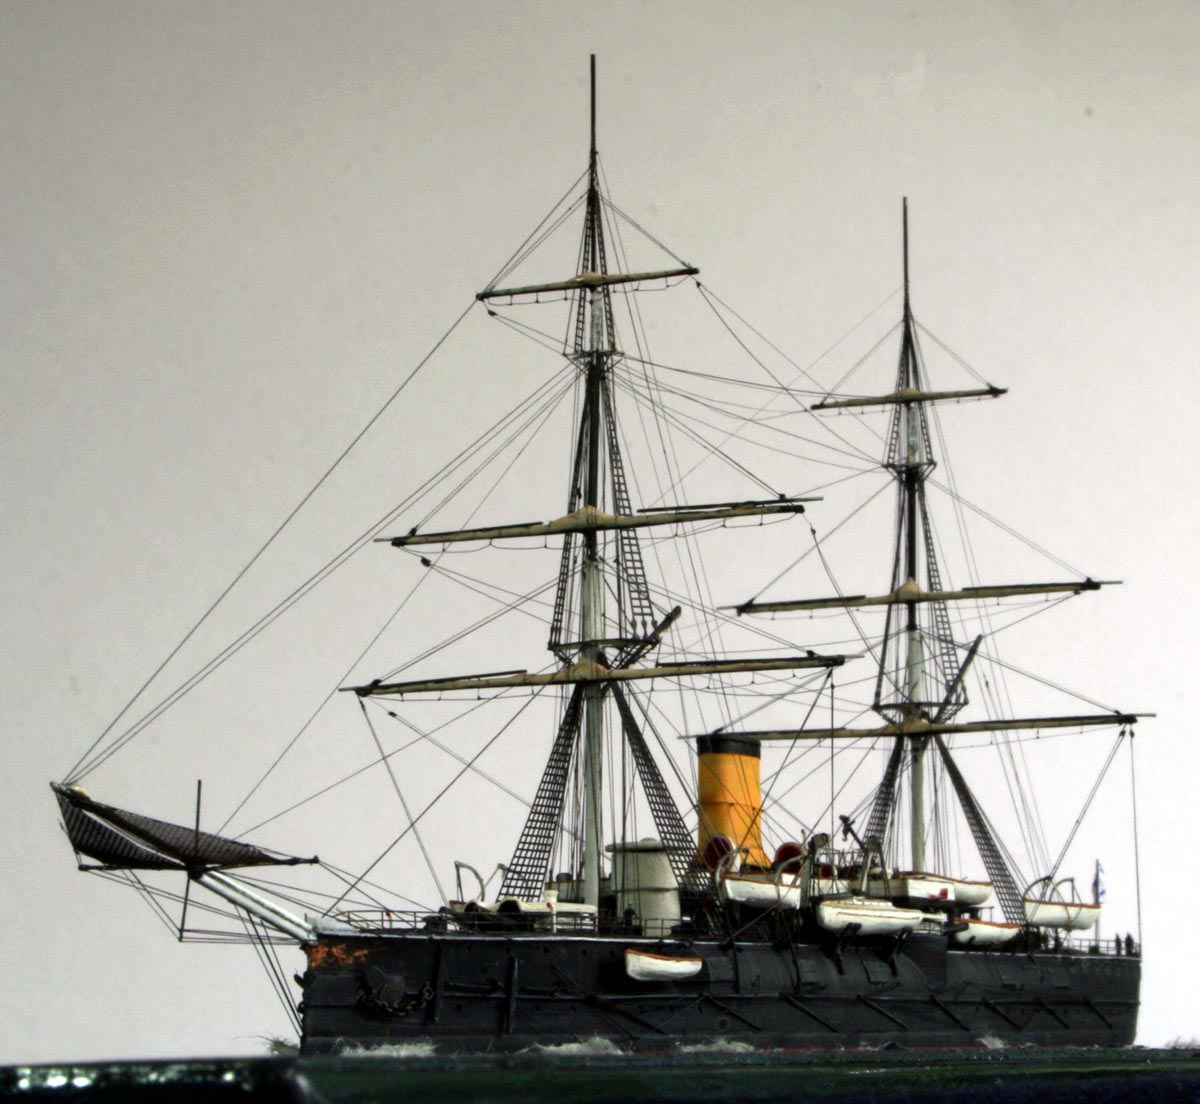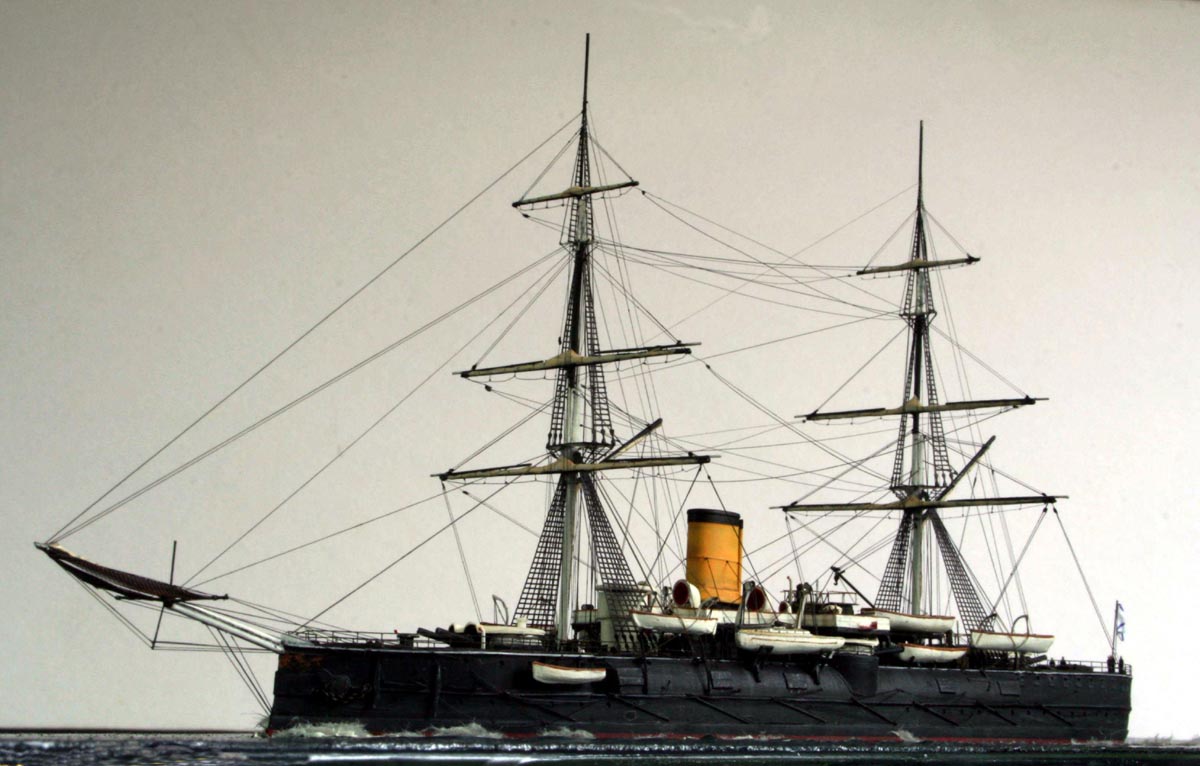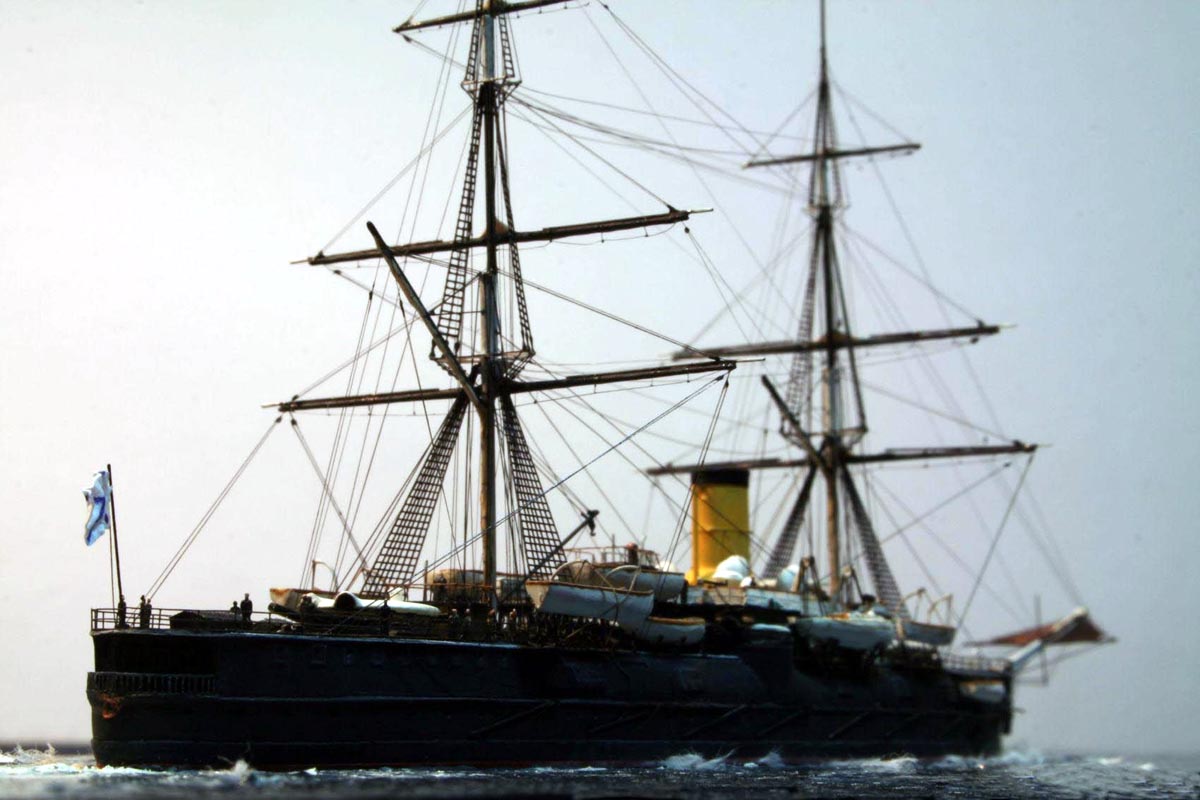
| Building the Admiral Nahkimov in 1/700 scale as in 1889
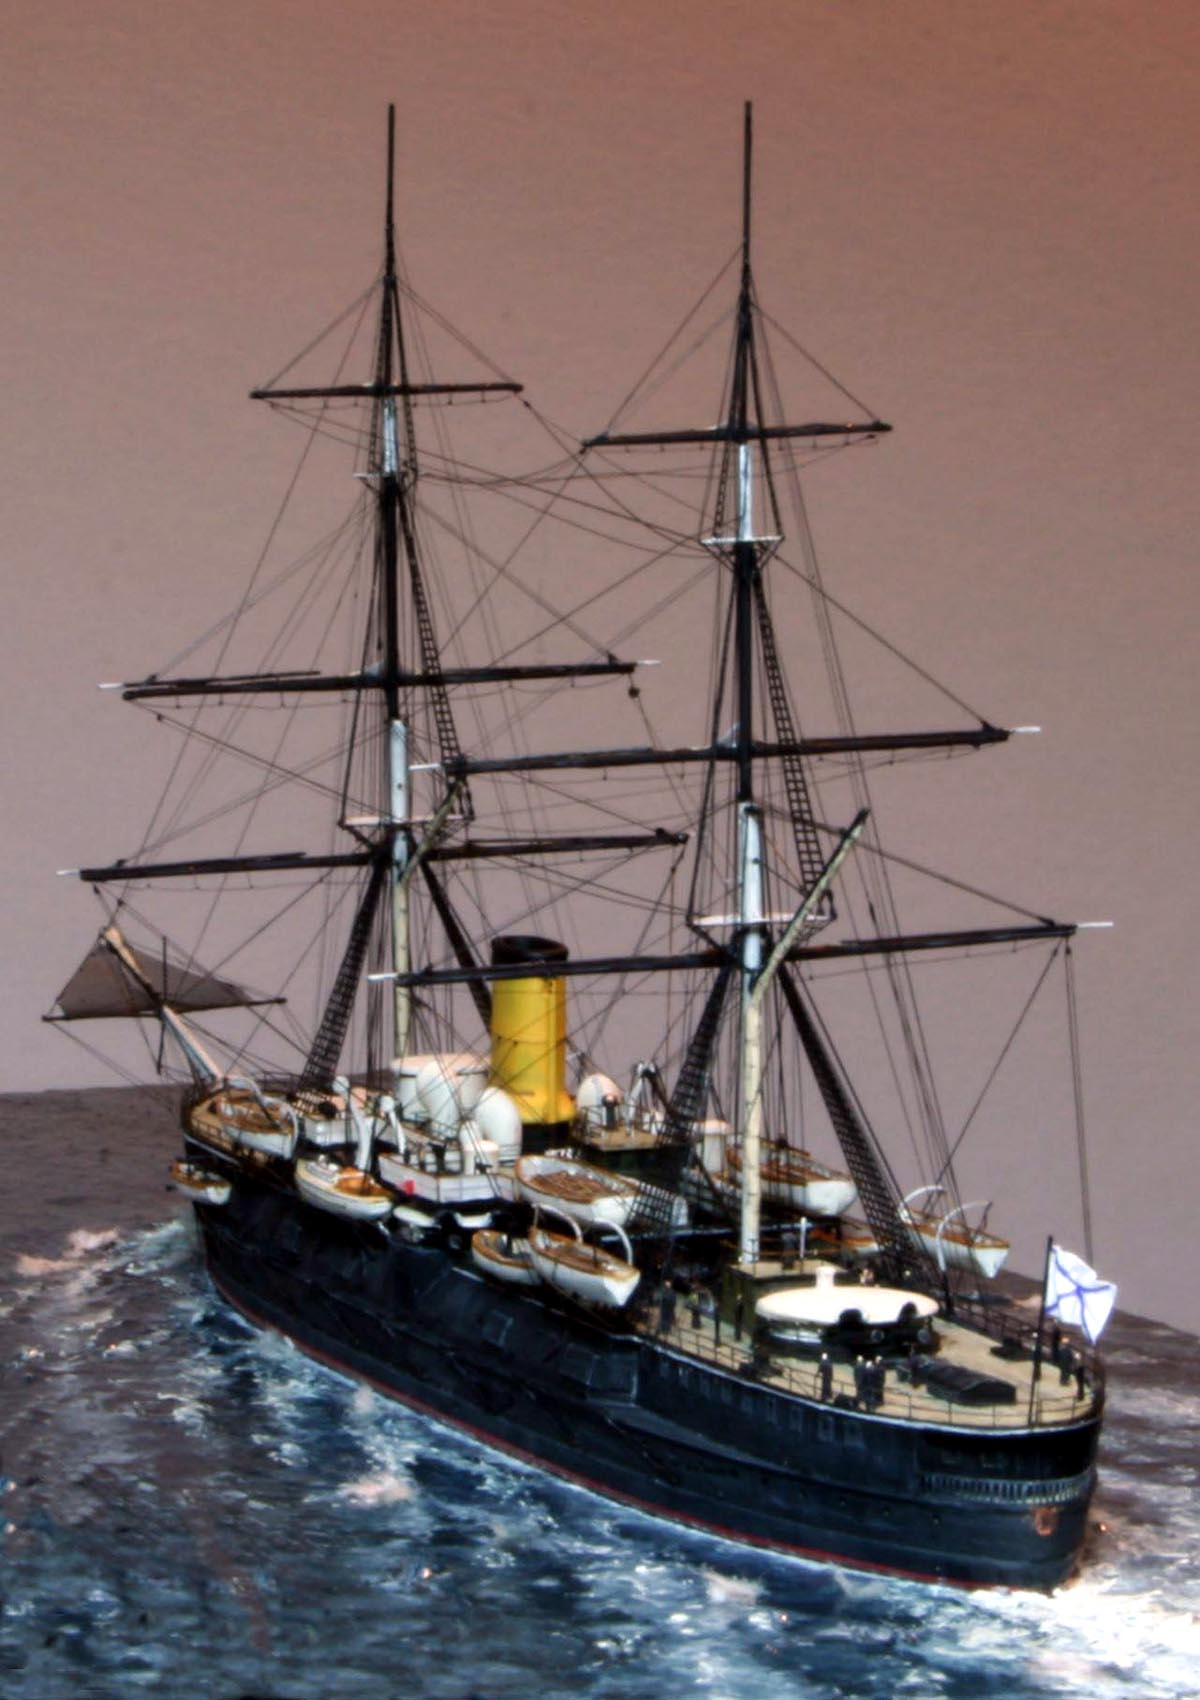
Construction started on 7 December 1883 at Baltic Works in Sankt Petersburg . She was launched on 21 October 1885 and entered service in October 1888 Admiral Nakhimov was one of the first armoured cruisers; the design being inspired by the the British Imperieuse and Warpite cruiser designs of the time. Armed with four turrets of twin 8 in guns in a diamond layout. "Admiral Nakhimov" had perhaps the heaviest broadside of all armoured cruisers built in the 19th century. She was extensively refitted, re-boilered re-armed and re-rigged in 1899, despite this she was an obsolete vessel in 1905. She was the first Russian vessel to introduce anti-torpedo nets. Upon entering service in May 1889 she became flagship of the Pacific
Fleet. In September 1891 she returned to the Baltic Sea for a refit.. In
July 1893 she visited New York City , then Toulon prior to her return to
Vladivostock, serving there for the next four years and taking part in
seizing Port Arthur
At the outbreak of the Russo-Japanese war 1904-1905, Admiral Nakhimov was included into the 2nd Pacific fleet assembled in the Baltic Sea to assist the 1st fleet in Port Arthur . October 1904 saw her set out for the Far East. After an epic journey circumnavigating half the globe she took part in the battle of Tsushima; despite receiving around 30 hits, mainly from Japanese armoured cruisers she remained in fighting trim .During the night the remaining Russian ships were attacked by torpedo boats and destroyer; Admiral Nakhimov being hit by a torpedo in the bow. Despite a valiant attempt by the crew to save the ship she was inevitably going to sink and was abandoned next morning close to Tsushima. 523 crewmen were captured by the IJN auxiliary cruiser Sado Maru. 103 crewmen escaped in boats and were captured later, 18 crewmen were lsot with the ship The wreck was found and examined in the 1980s by divers, the only ship
sunk at Tsushima to be accorded this treatment.
|
|||||||||||||||||||||||||||||||||||||
| BUILDING THE MODEL | |||||||||||||||||||||||||||||||||||||
| Having bought the W W Arbuzov ship monograph on the Admiral
Nahkimov sometime ago and pored over the pictures for a number of years;
despite not being able to read a word of Cyrillic; I decided that having
had the Kombrig resin kit of this ship in my stash for a number of years
that the time was ripe to have the photo captions translated and do some
further research on this interesting looking ship!
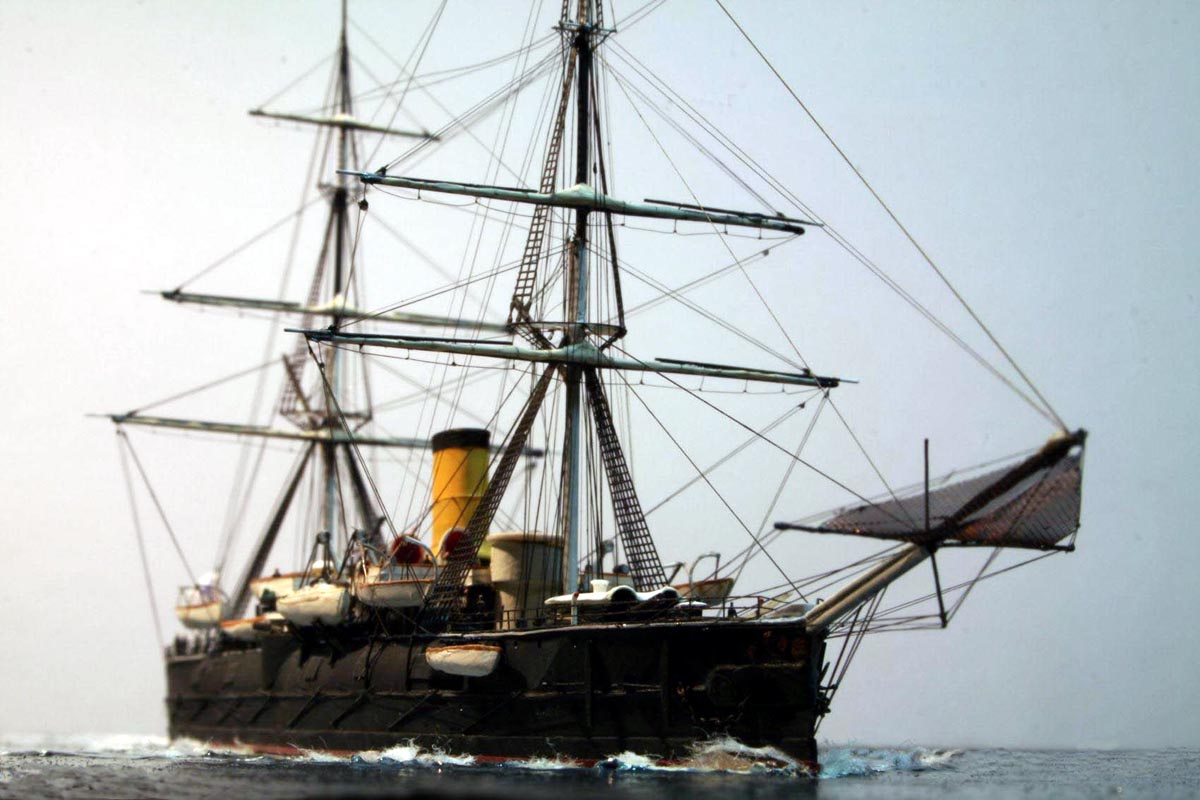
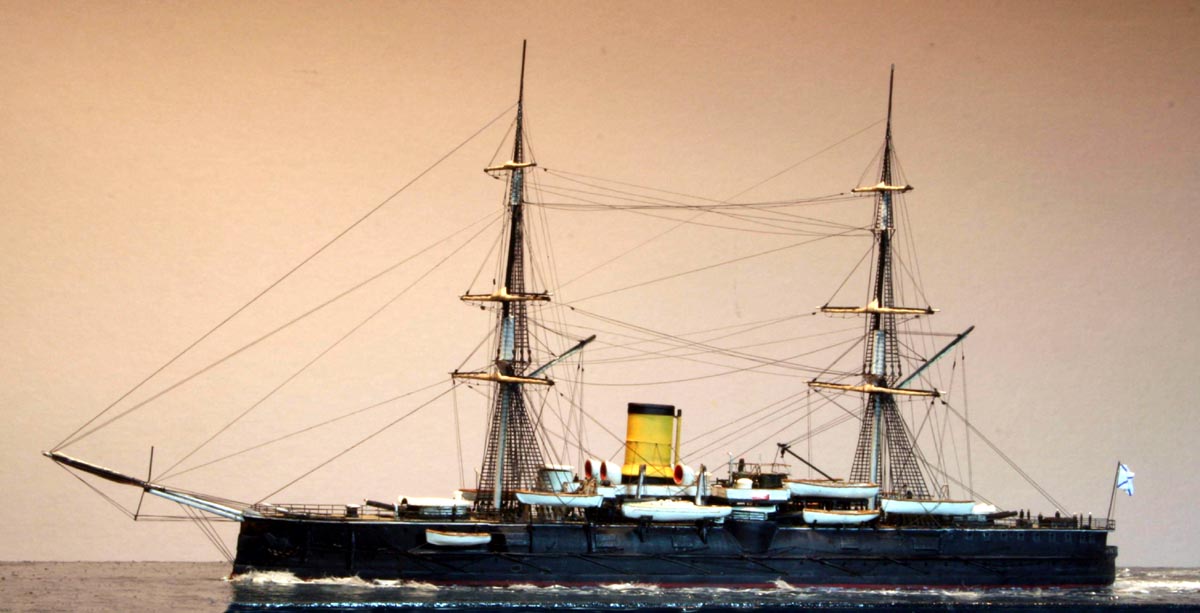
The hull is very distinctive with its rolled topsides, symmetrical gun disposition, rambow coupled with (as fitted originally) full sailing rig, she embodied the ultimate phase of the transitional era. Despite being armed with the Arbuzov book as well as the Morskaya Kollektsia plans and perspective drawings, having studied the photos extensively and made numerous sketches to ensure feasibility of the deck layout...I still wanted yet more info!! |
|||||||||||||||||||||||||||||||||||||
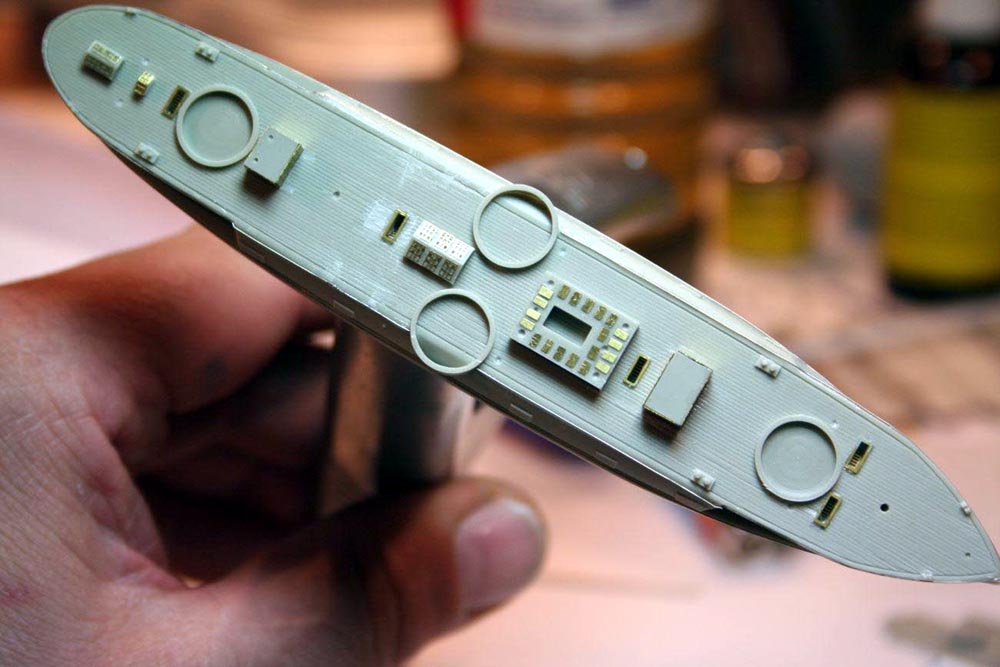
| The difficulties of my build of this model were compounded
further by my wishing to build the ship as first commissioned with full
Brig sailing rig; the kit represents the ship at a later stage of her career.
To this end the first major modification was the removal of the cast block
of resin which simulates the later fitted light gun platform and making
good the deck thereunder ; builders of this kit who wish to represent the
ship later in her career need to do this anyhow -this gun- platform was
actually not solid based but supported on a number of columns.
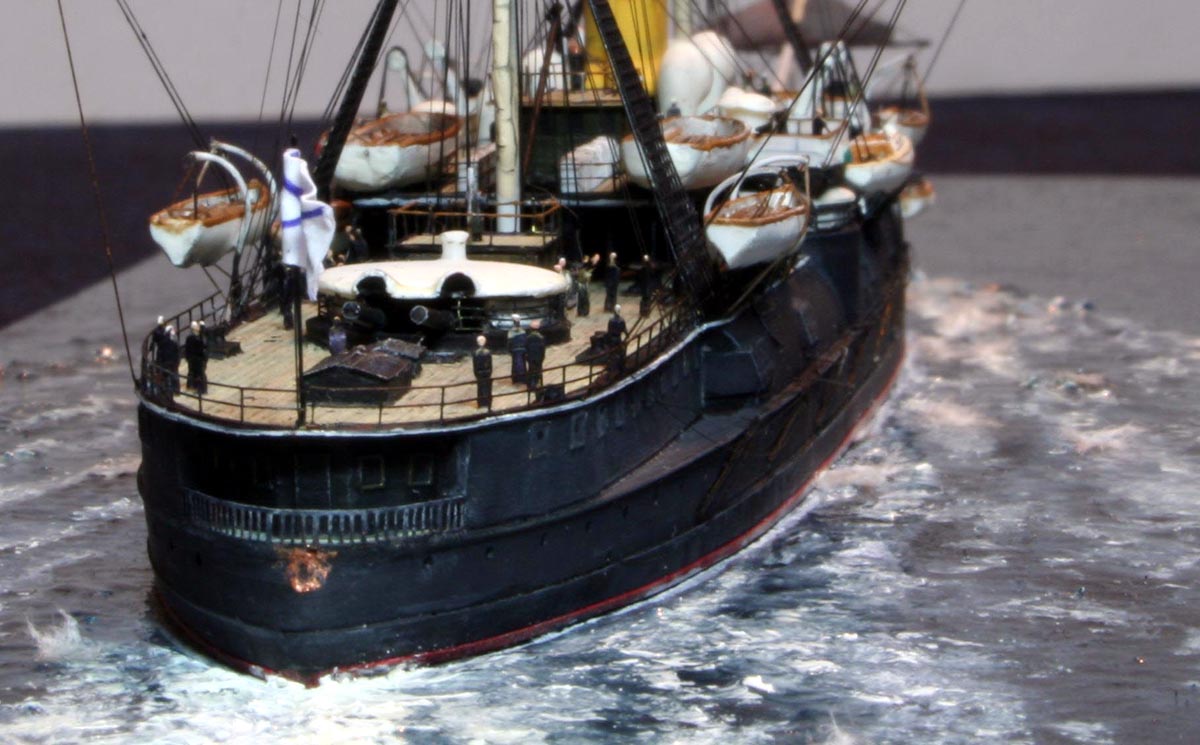
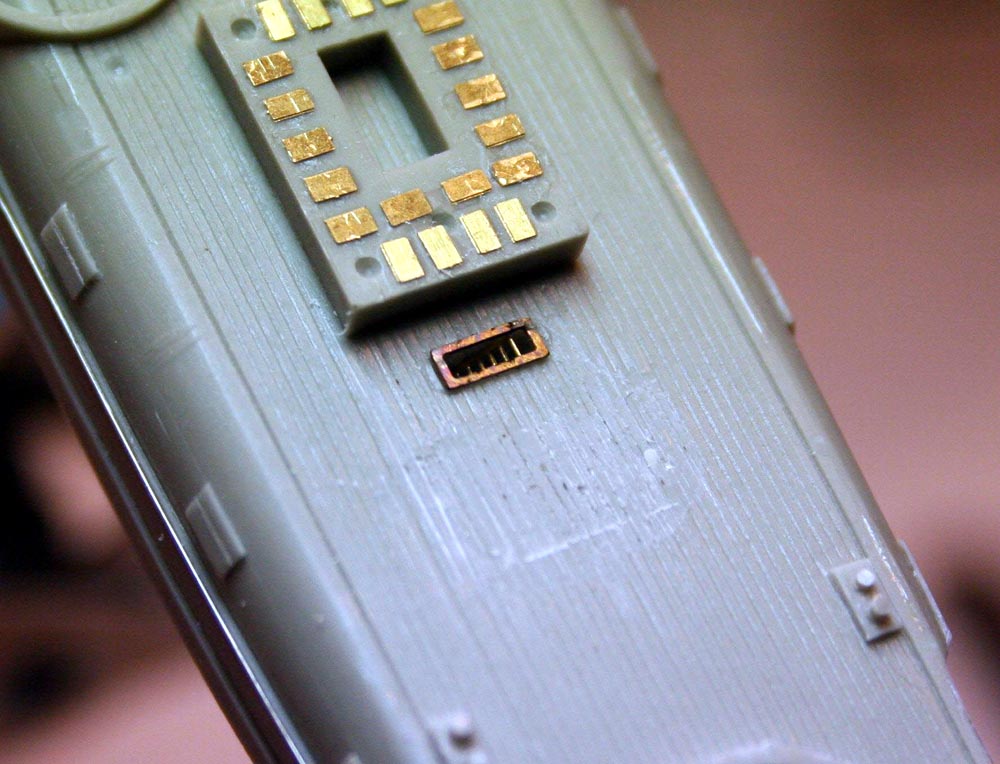
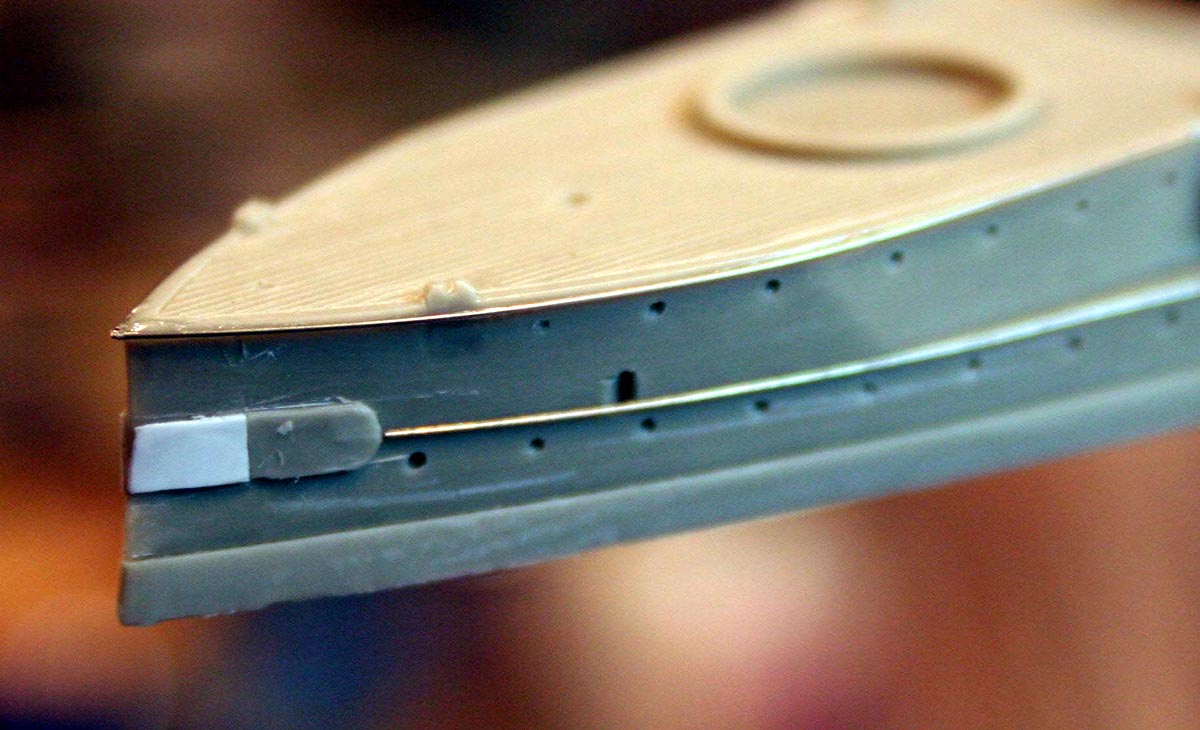
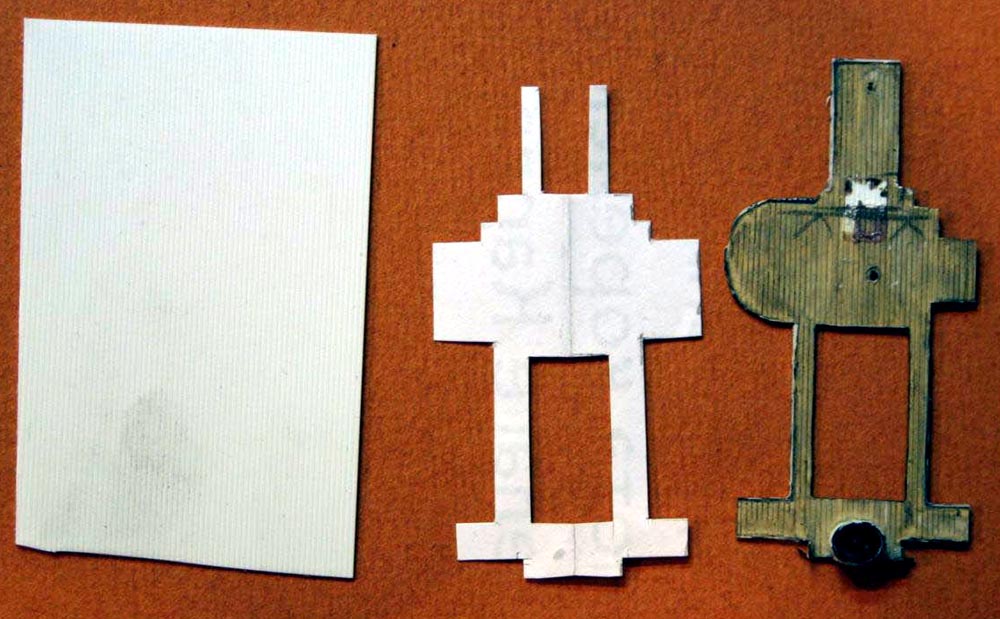
I had based on the plans I had cut the stairway apertures and lined them with brass and stairs applied skylight detail and carved away various cast stairs and parts that appeared to be incorrectly placed or sized ; then applied the funnel base vent coverplates, as well as clad the aft deckhouse in brass " wood" panelling'--these were actually WEM PE Askold gun embrasure plates . I had blindly fitted these to the fwd lump of resin also-further examination of photos soon showed me the error of my ways. The second photo shows the now removed block with the decking re-scored with the tip of a sharp blade The bow area had the hawsepipe areas reinforced and the bow area had some sheer added by the simple expedient of bending the fwd hull!! |
Click image
to enlarge |
||||||||||||||||||||||||||||||||||||
 |
|||||||||||||||||||||||||||||||||||||
 |
|||||||||||||||||||||||||||||||||||||
 |
|||||||||||||||||||||||||||||||||||||
| The hull needed the distinctive strakes fitting at the mid hull height as well as the main deck-edge, along with the admirals walk area needing hollowing out more, the overhanging deck required thinning and the round scuttle openings whilst being the correct number and in the right place- were on the real ship set within square edged lift-up openable lids. These were made using pieces of suitable ladderstock cut and applied with clear varnish . | 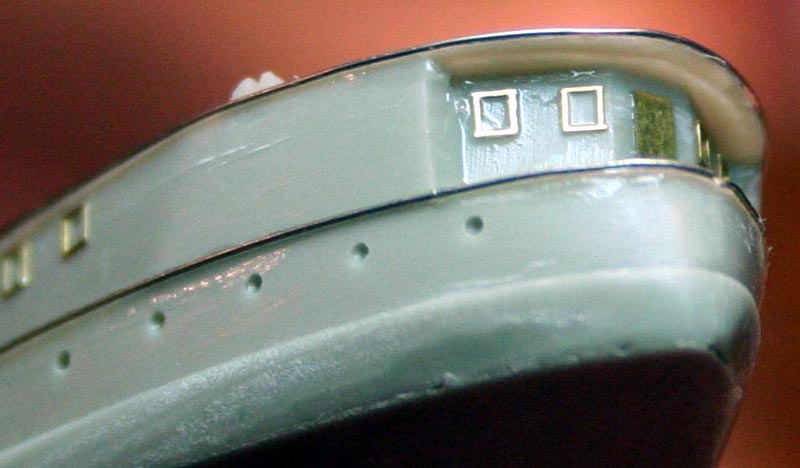 |
||||||||||||||||||||||||||||||||||||
| The extensive flying bridge area was too thick and had some odd shapes within the outline, the integral conning tower was too small and the 'splintershields' were on the real ship actually canvas covered railing. | |||||||||||||||||||||||||||||||||||||
| Here I gloriously mis-interpreted some photos,-- and made a very nice
flying deck very much the wrong shape..!! Having glued it in place with
all its supports... doubt started to creep in--More info was required!
Luckily both my e-chums Sergey Myagkov and Jean-Paul Binot immediately came to the rescue, supplying scans and plans from their respective collections Thank you Gentlemen! |
 |
||||||||||||||||||||||||||||||||||||
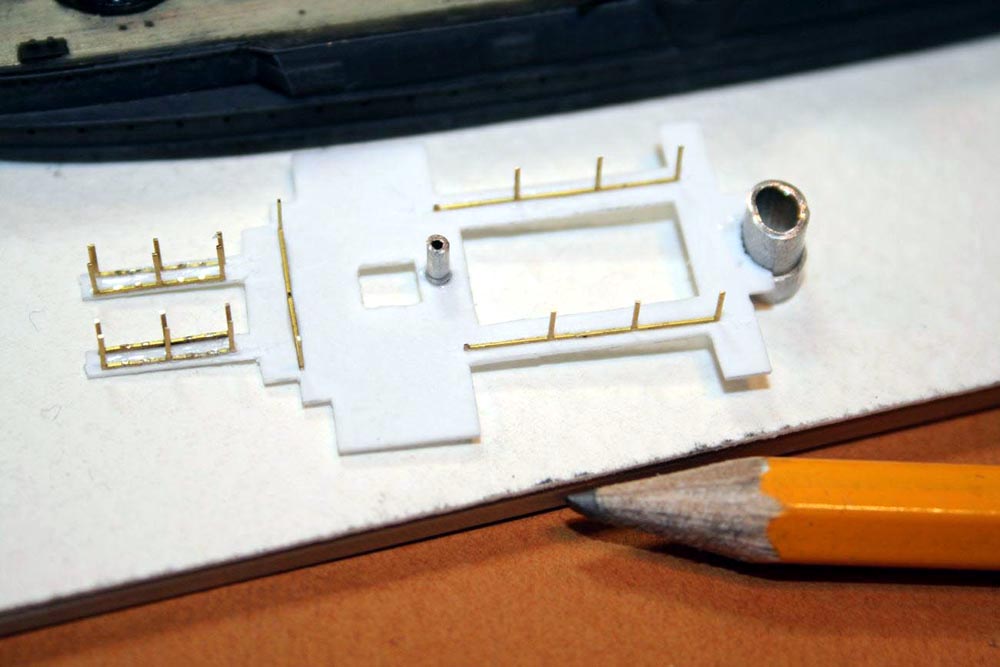
| I was now armed with better information and was therefore able to cut a new deck of the correct outline of Evergreen N-car siding having made a number of paper patterns to check symmetry and fit, a new conning tower of aluminum tubes and supports of brass scrap PE, this latter item has a roof made of paper with a rolled edge. | 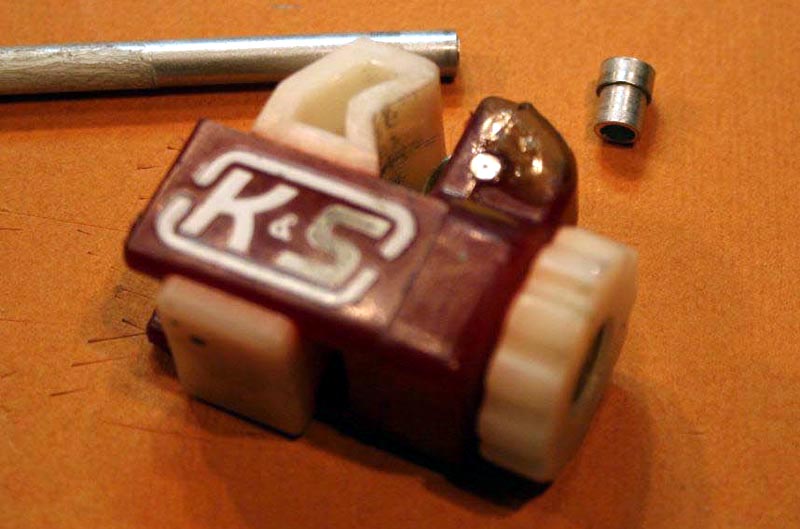 |
||||||||||||||||||||||||||||||||||||
 |
|||||||||||||||||||||||||||||||||||||
 |
|||||||||||||||||||||||||||||||||||||
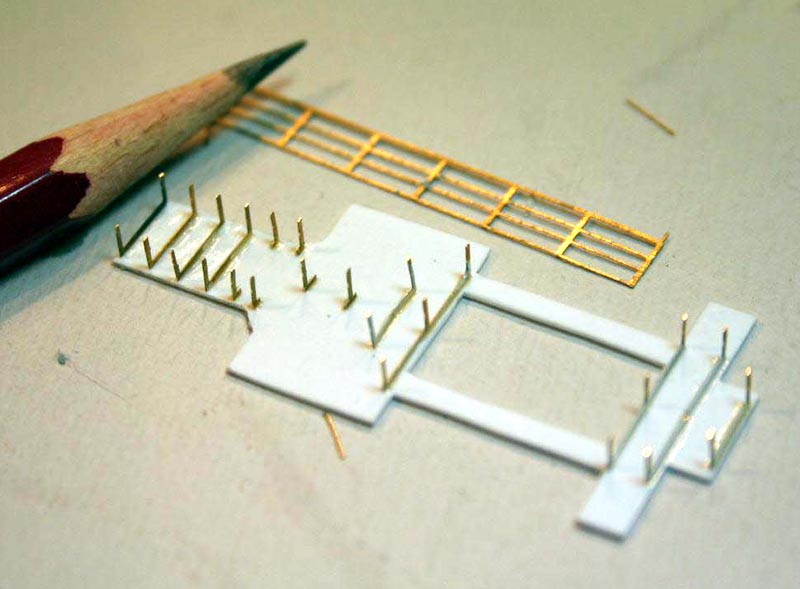
| This deck was duly installed and the boat support cradles were built from small pieces of PE scrap--these would be almost entirely hidden by the ships boats. | 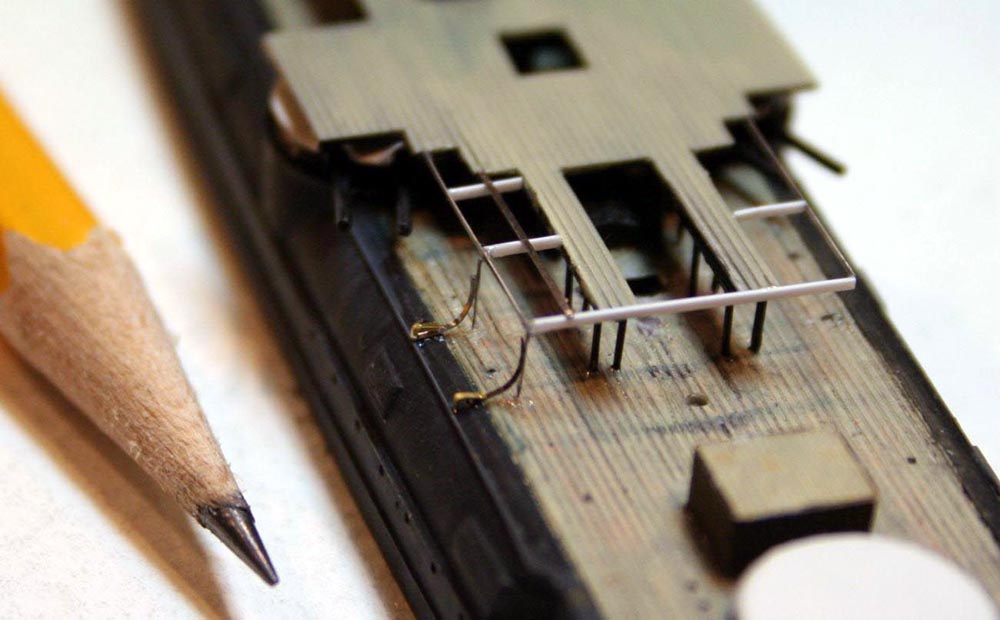 |
||||||||||||||||||||||||||||||||||||
|
According to the plans and photos this had a skylight underneath not present on the kit casting-this was made of styrene strip and a brass PE ( ex radar!) . |
 |
||||||||||||||||||||||||||||||||||||
| Creating the curved but flat anchor crane track (race) on the foredeck was a bit of a challenge; I elected to form some very thin solder wire into a circle and then flattening it by clamping between two steel plates in a small vice-after cutting to shape the effect was pretty good! | 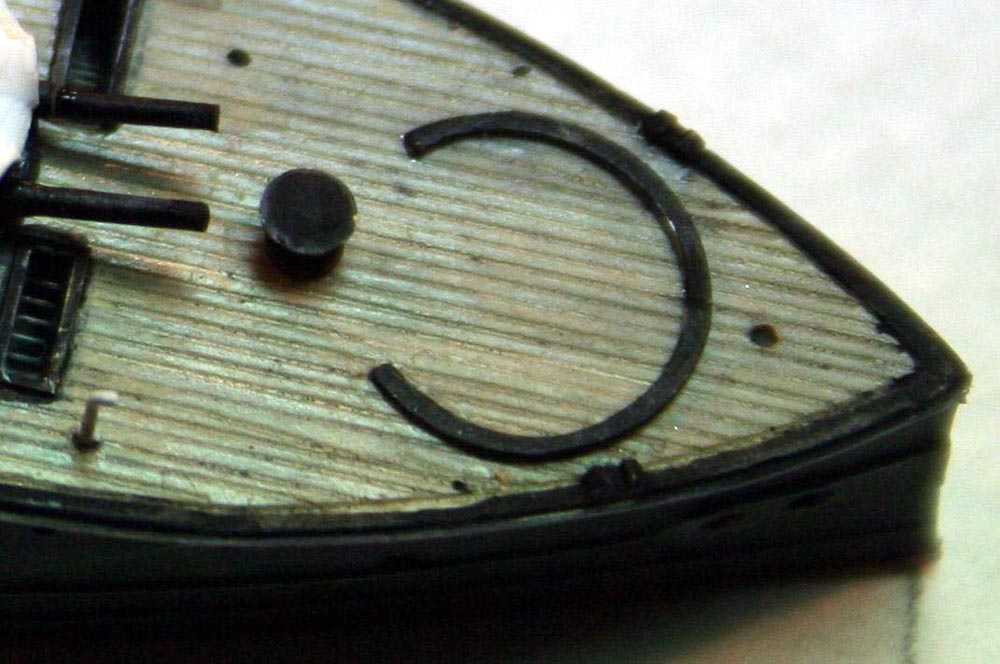 |
||||||||||||||||||||||||||||||||||||
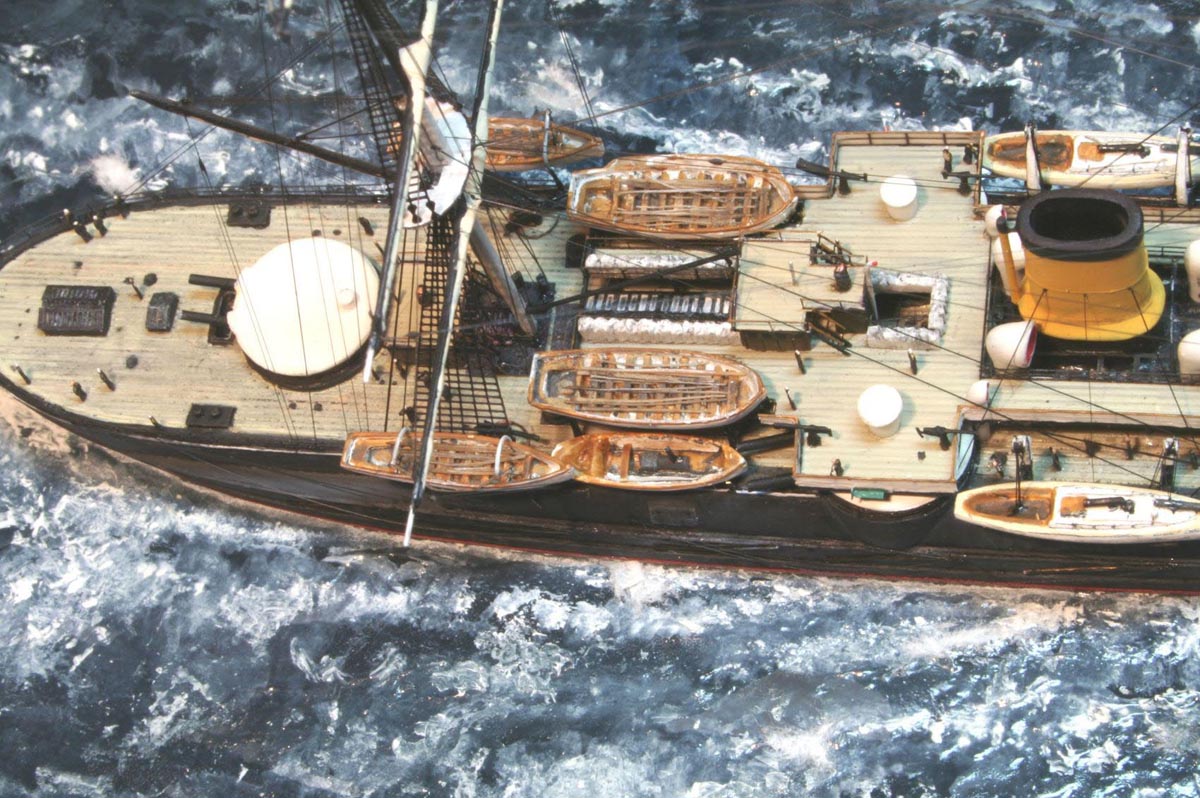
| The turrets were a model in themselves; the parts as supplied in the
kit give the impression of an enclosed turret; in actual fact these were
effectively open barbettes, which were surrounded by a metal frame within
which were stowed hammocks as splinter protection. The 'roof' was also
made of canvas tensioned over a frame. Around the perimeter of the roof
were rolled up drop screens of canvas.
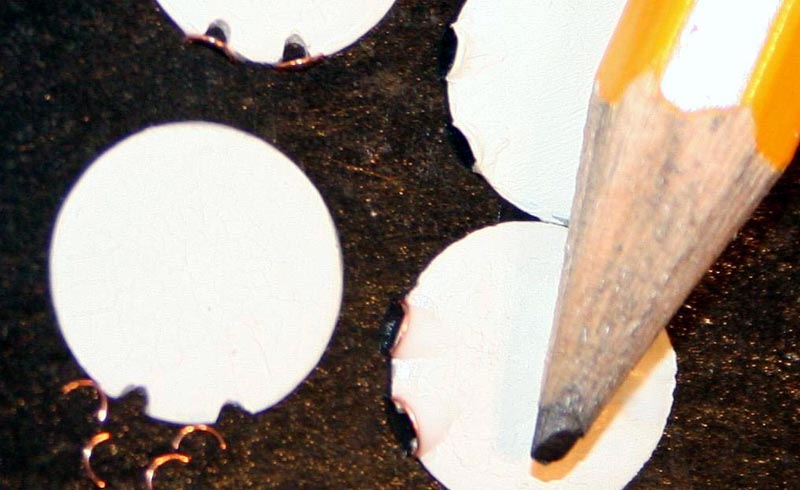
I elected to simulate the rolled up hammocks by forming circles of slightly irregularly squashed solder painted white and shaded with pencil and then surrounding them by 1/600 handrail. |
 |
||||||||||||||||||||||||||||||||||||
| The nicely shaped domed turret roofs required massively thinning down-I
lost my fingerprints on the sandpaper!-- They had the tapered cast vents
removed, these was later replaced with a parallel styrene rod with a flared
lid formed by placing the square cut end onto a pre heated knife-blade-this
gave a regular and repeatable overhang.
The domed 'roofs' required cutouts at their fwd edge to allow the guns to train to maximum elevation-these were made by cutting an aperture, framing with thin copper wire and backfilling with white glue. |
 |
||||||||||||||||||||||||||||||||||||
| The scratchbuilt wood/brass paneled deckhouses on the flying deck had their slightly overhanging roofs made of brass PE planking( l'Arsenal). | 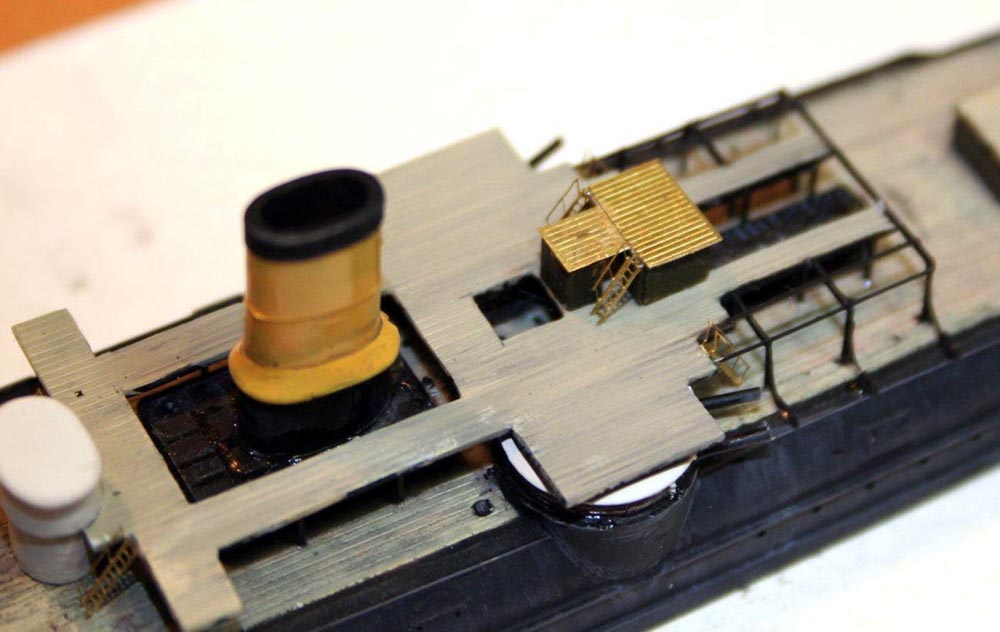 |
||||||||||||||||||||||||||||||||||||
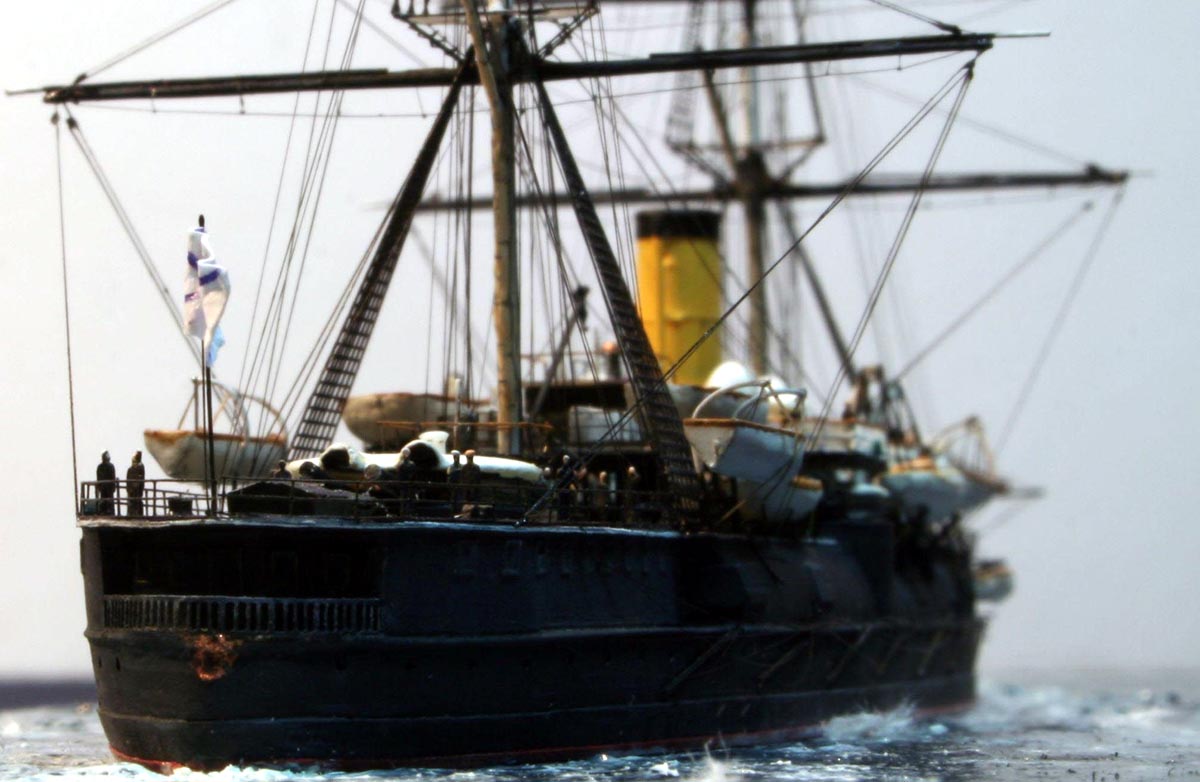
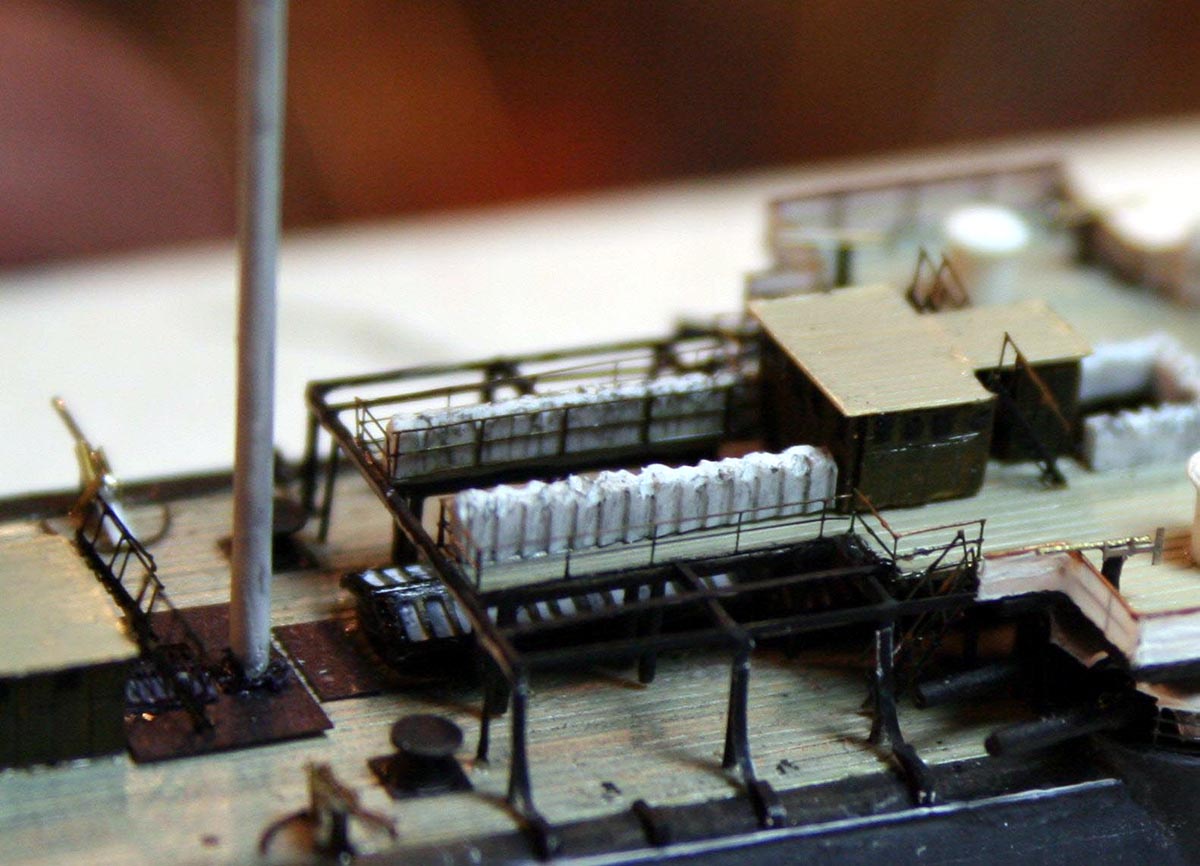
| Many of the deck-edges had vertically stowed hammocks installed adjacent to the railings-these were simulated using thick v-grooved styrene sheet for repeatable spacing and then carved in a slightly irregular fashion and finally shaded using pencil--I experimented with a variety of sizes of the v-groove material-finally settling on the smallest! | 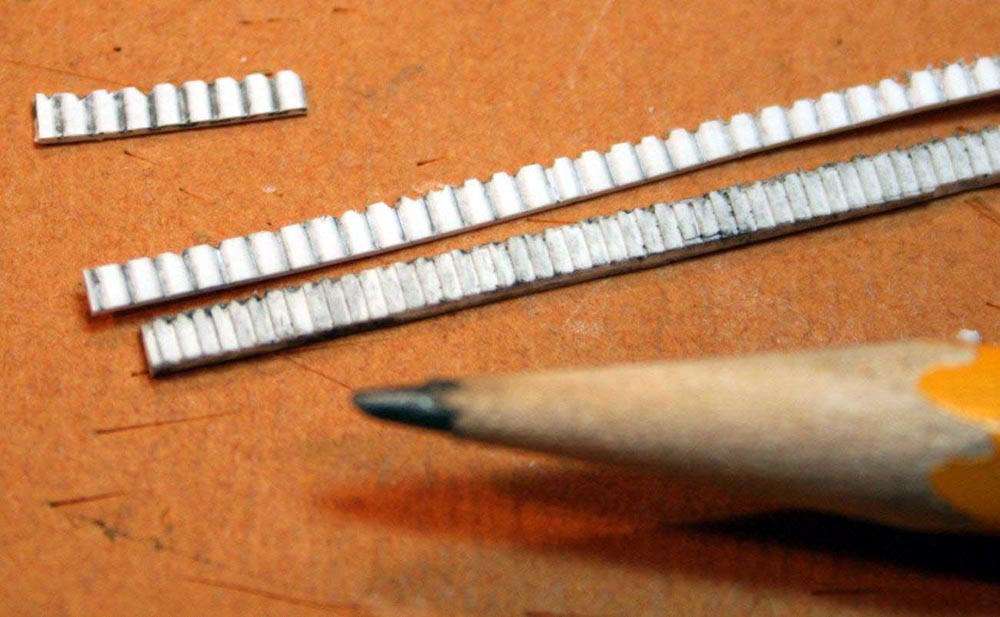 |
||||||||||||||||||||||||||||||||||||
 |
|||||||||||||||||||||||||||||||||||||
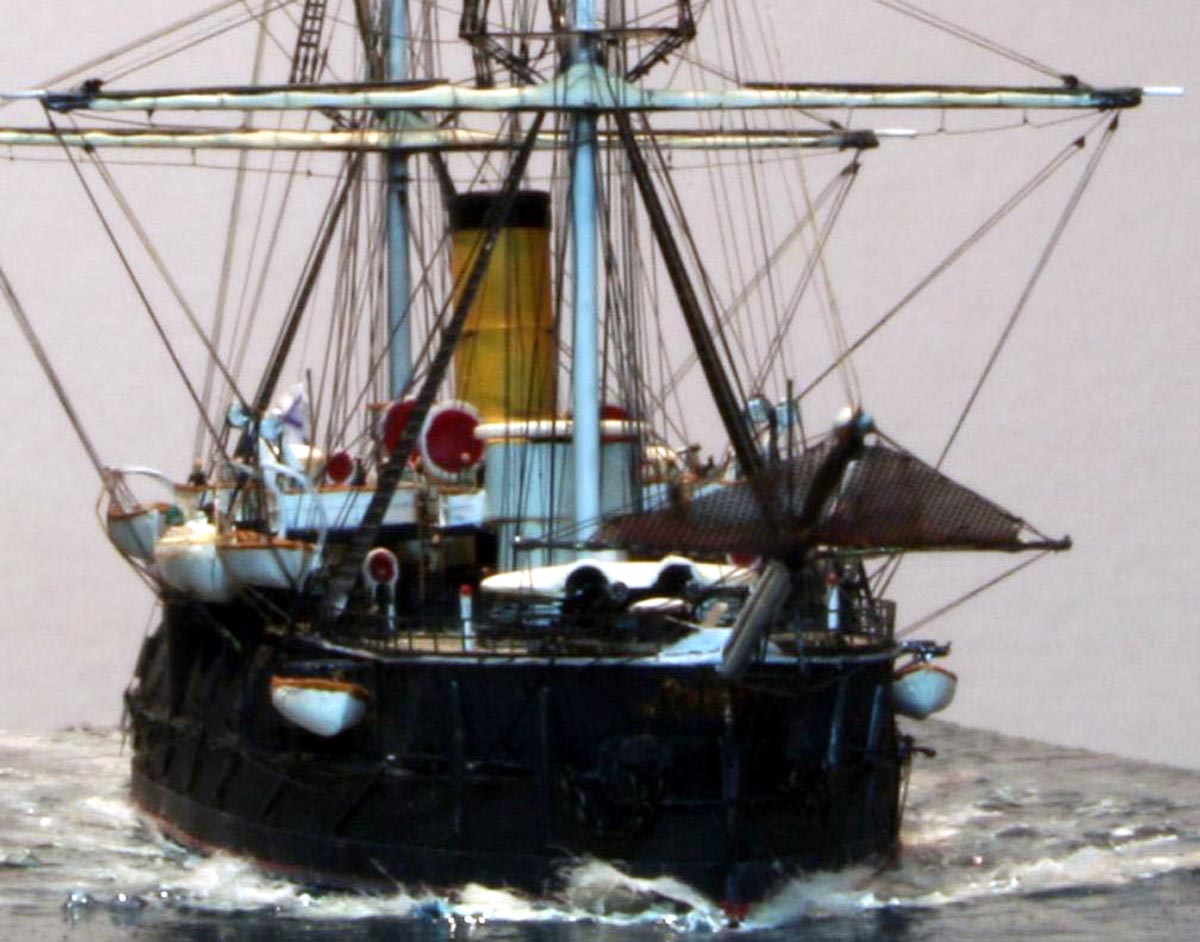
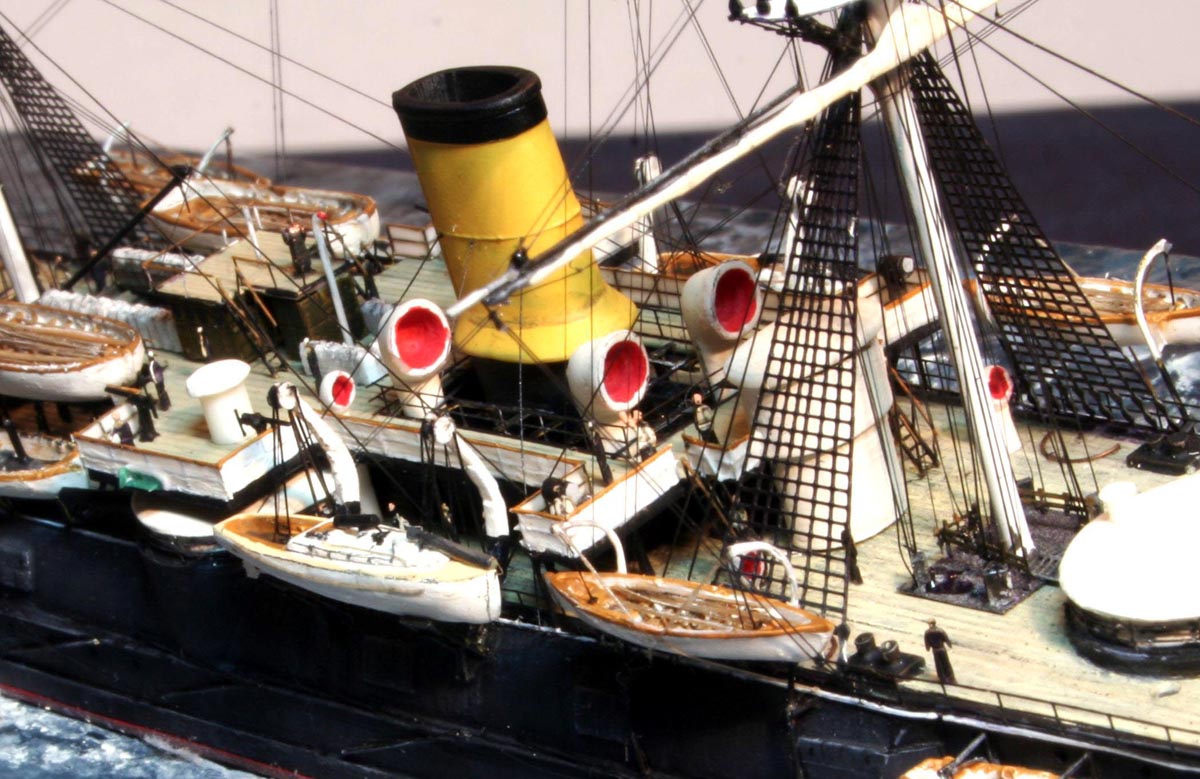
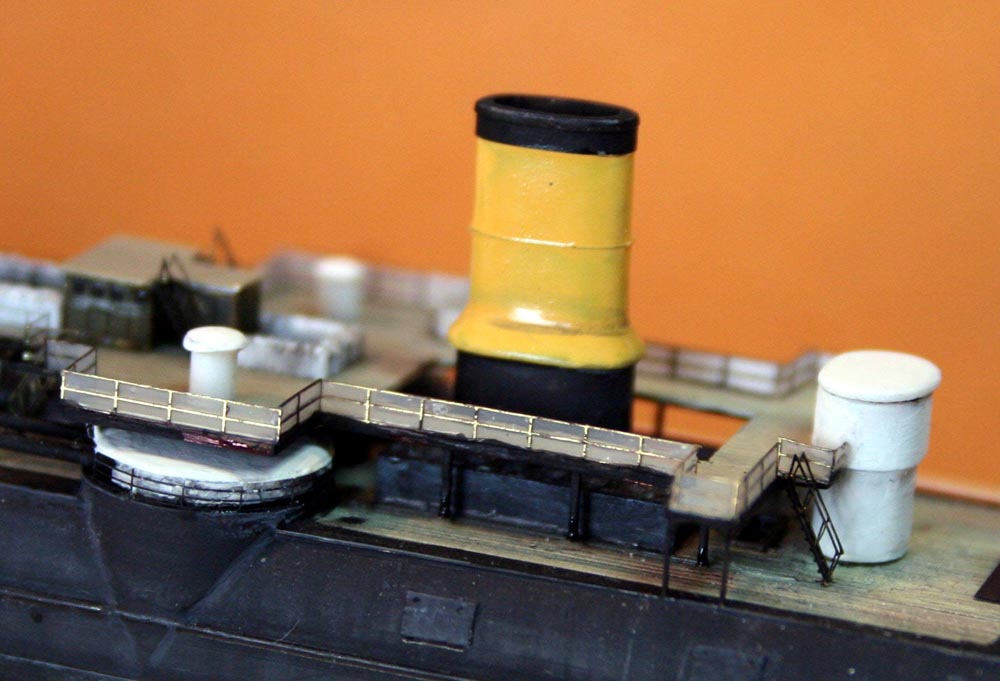
| The numerous cowl vents all had their mouths drilled out
and the vertical hole drilled as far as possible...!
The flying deck edge railings-covered-in-canvas were simulated by applying the railings , then painting them black, thereafter applying white-glue-which dries clear. The clear glue is then painted on the outside only in white-allowing the black railings to be seen through the clear white glue in contrast to the white dodgers. |
 |
||||||||||||||||||||||||||||||||||||
 |
|||||||||||||||||||||||||||||||||||||
| For the fwd capstan I had hoped to use the excellent WEM Pro series resin items-alas they were too small for the purpose. I made my own using a N-gauge brass domed buffer head and a brass stepped rivet. | 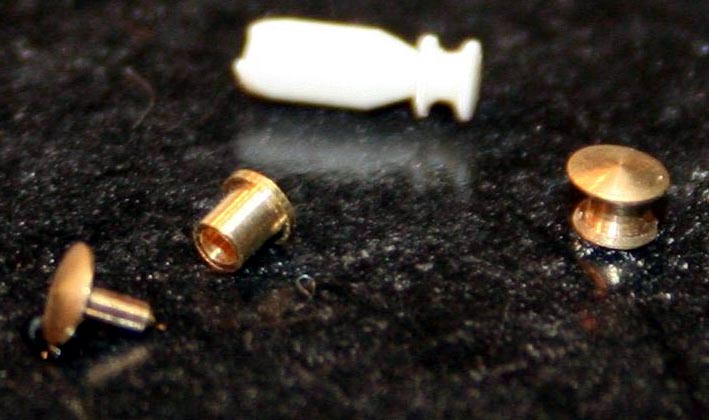 |
||||||||||||||||||||||||||||||||||||
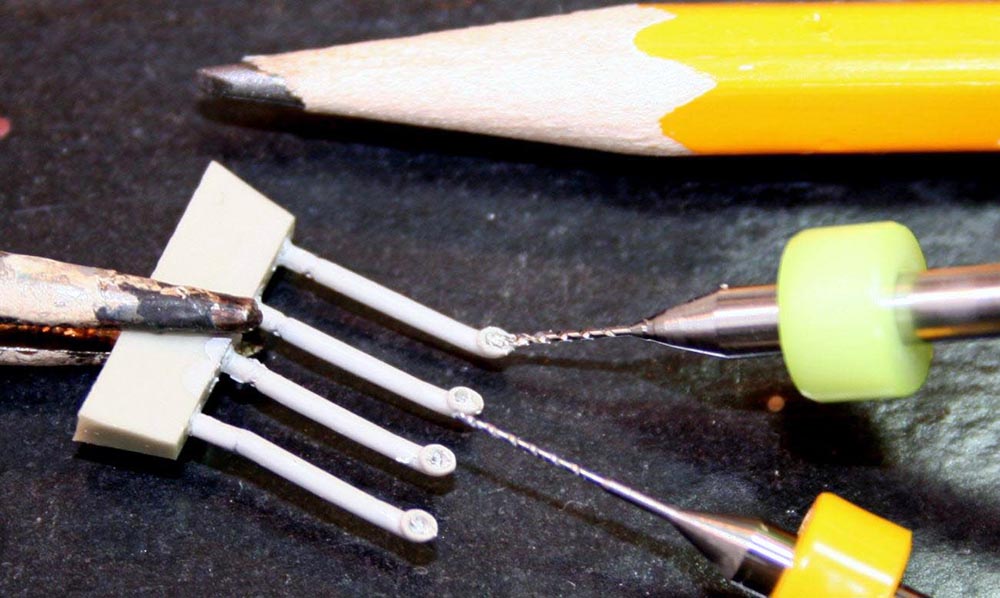
| Small machine guns x 4 were made of wooden toothpick ends infused with CA glue for the tapered pedestals, white glue, brass wire and pieces of old over-scale stainless handrail. | 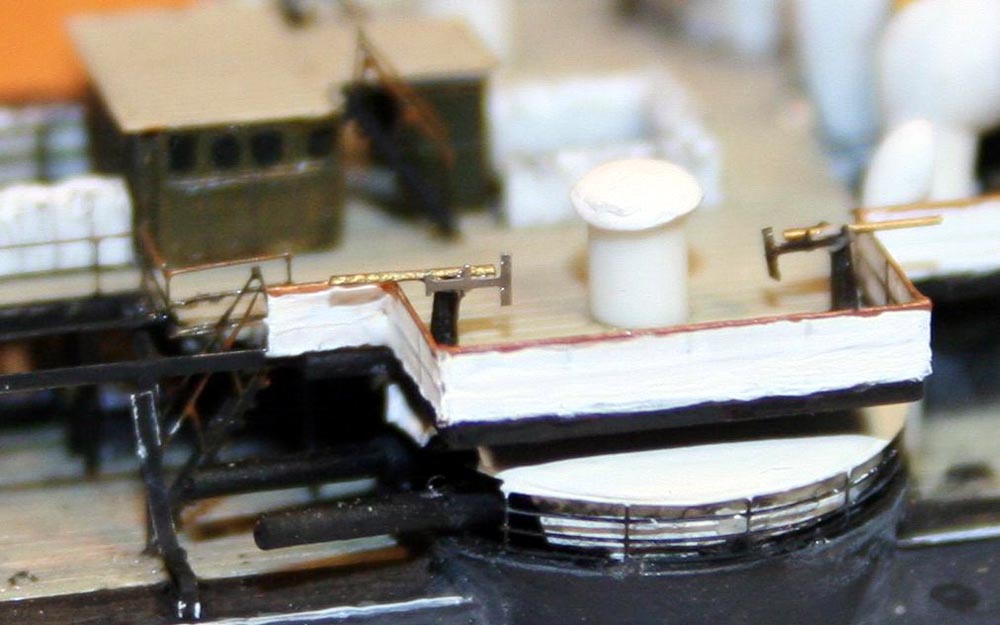 |
||||||||||||||||||||||||||||||||||||
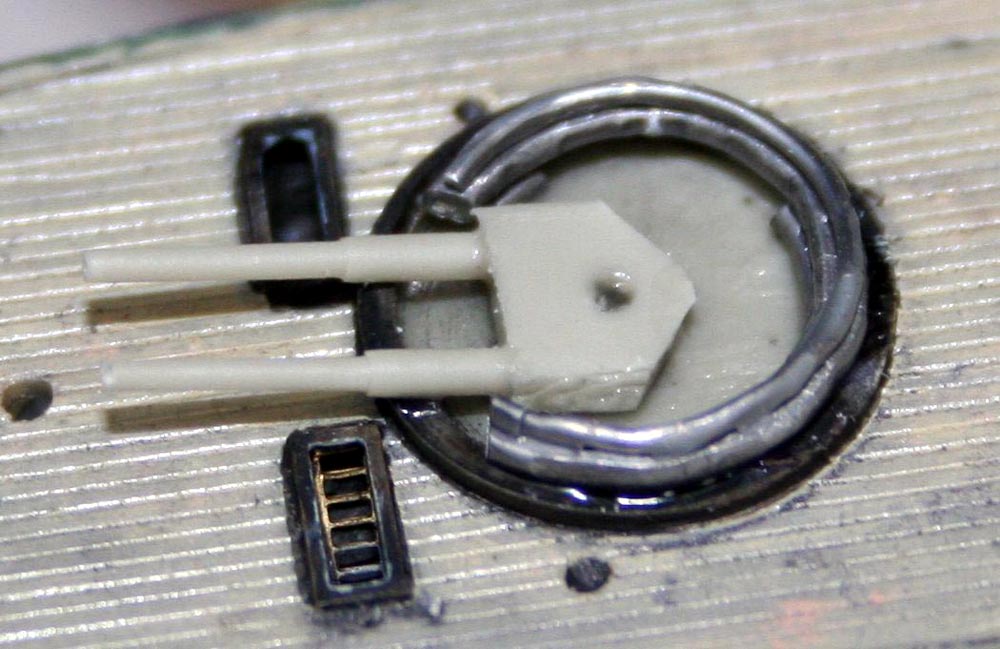
| 3.4 in main deck guns had the races made of flattened wire and the guns were made of thick brass wire barrels, PE and styrene for the carriages. | |||||||||||||||||||||||||||||||||||||
| At this stage 2 x mastbase-plates were fitted-made of painted paper-, belaying pin rails made of old stainless steel handrail and turning block sheave posts of styrene strip. | 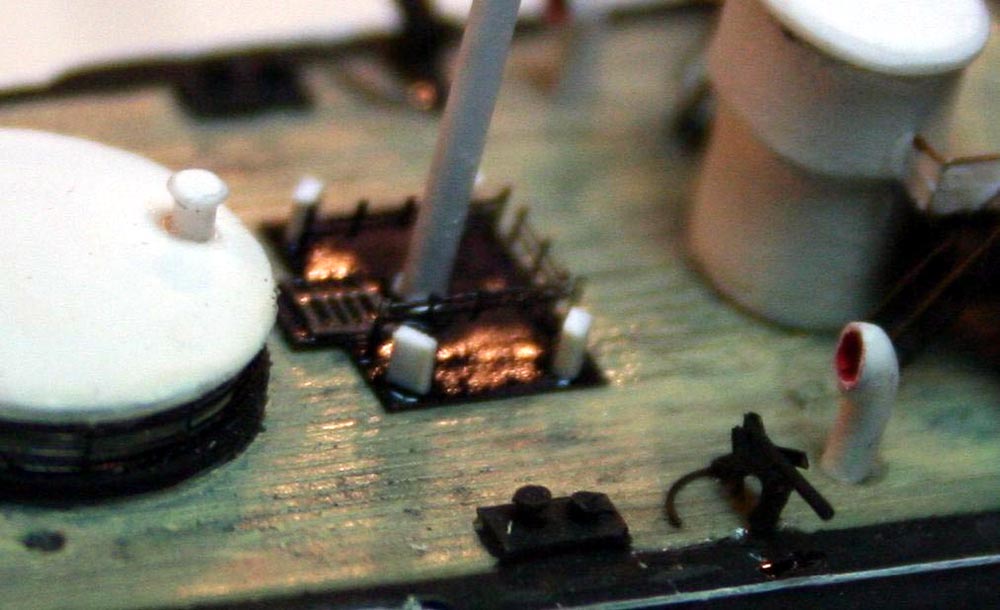 |
||||||||||||||||||||||||||||||||||||
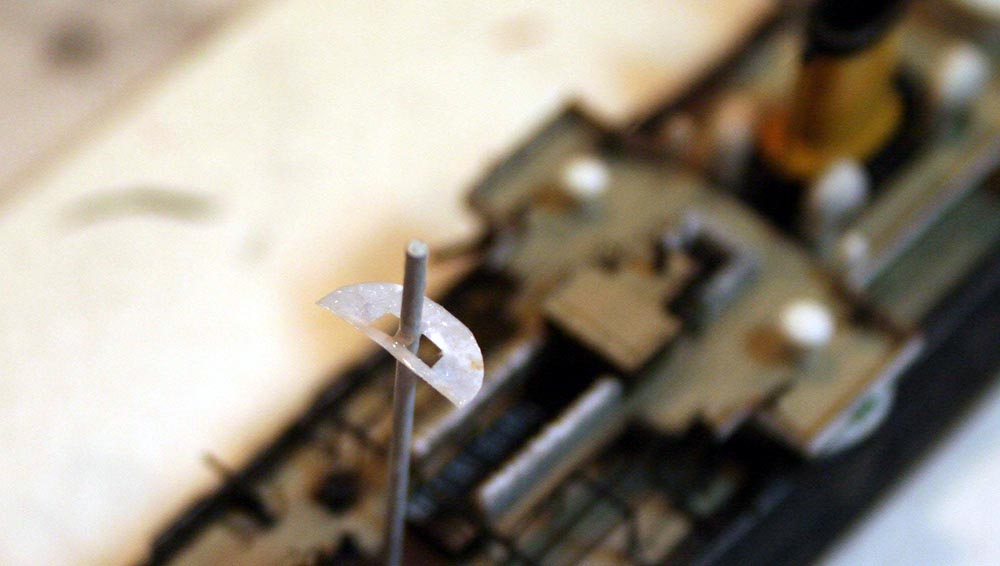
| Holes for the masts were drilled all the way through the
hull-the masts would be required to carry significant rigging loads later-even
in stretched sprue there is considerable tension build-up.
The lower masts were then furnished with paper platforms infused with CA glue and had ratlines rigged on using the excellent PE brass ratlines from Atlantic Models available from WEM. |
 |
||||||||||||||||||||||||||||||||||||
 |
|||||||||||||||||||||||||||||||||||||
| Small searchlights on the bridgewings were scratchbuilt
on tapered ends of CA infused toothpicks-they were so tiny that nothing
I had came even close in my scrap-box.
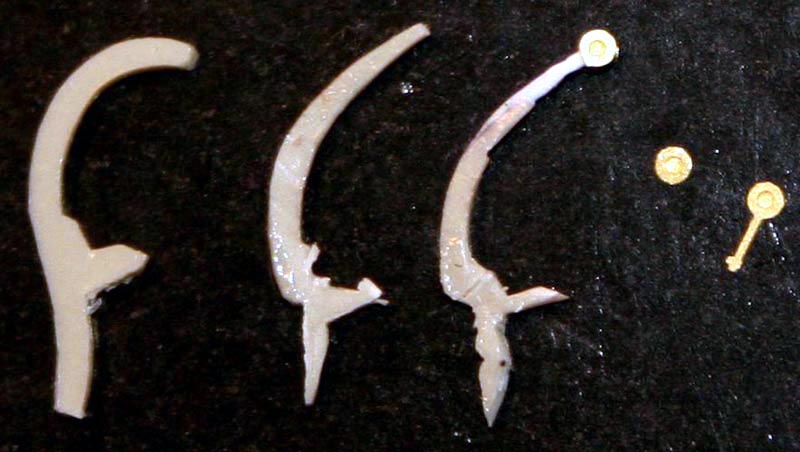
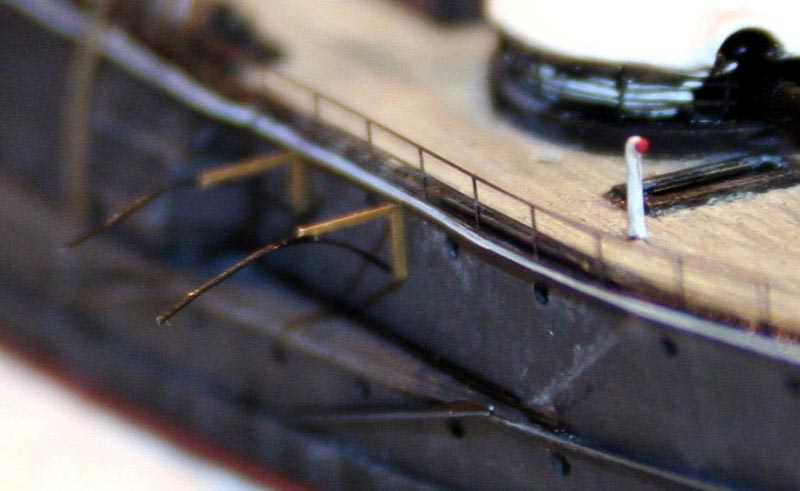
The davits supplied in the kit did not resemble any on the ship..... I made all-new davits using fine fusewire, with the exception of the large swinging types for the large steamboats- these were cut down and thinned in all dimensions from the existing resin supplied items, had styrene fine ends grafted on and finally fitted with brass aircraft wheels as pulleys. The fwd beam type davits were made of brass handrail with stretched sprue for the curved supports. |
 |
||||||||||||||||||||||||||||||||||||
 |
|||||||||||||||||||||||||||||||||||||
| Not a single boat from the kit was used- the boats came from a variety of scrap-box sources; WSW, Kombrig, WEM, even some Modelkrak. The small steam launches were hollowed out and a small boiler, engine and funnel fitted f styrene rod. Some of the boats were the right beam and outline They were shortened by cutting off the stern and adding a fresh transom of paper. | 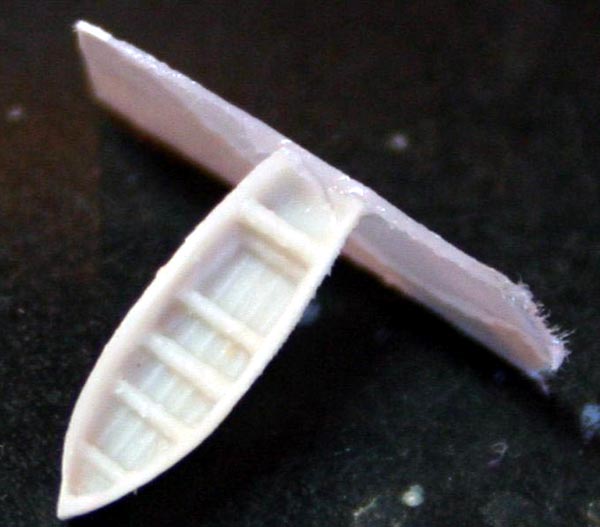 |
||||||||||||||||||||||||||||||||||||
| Small metal anchor chain was fitted coming out of the drilled hawsepipes, anchors were a combination of PE flukes and styrene made stock, unusually these anchors had a recess in the hull sides for the inboard flukes. The hawse-pipe covers were filed to shape from scrap brass PE fret surround. | 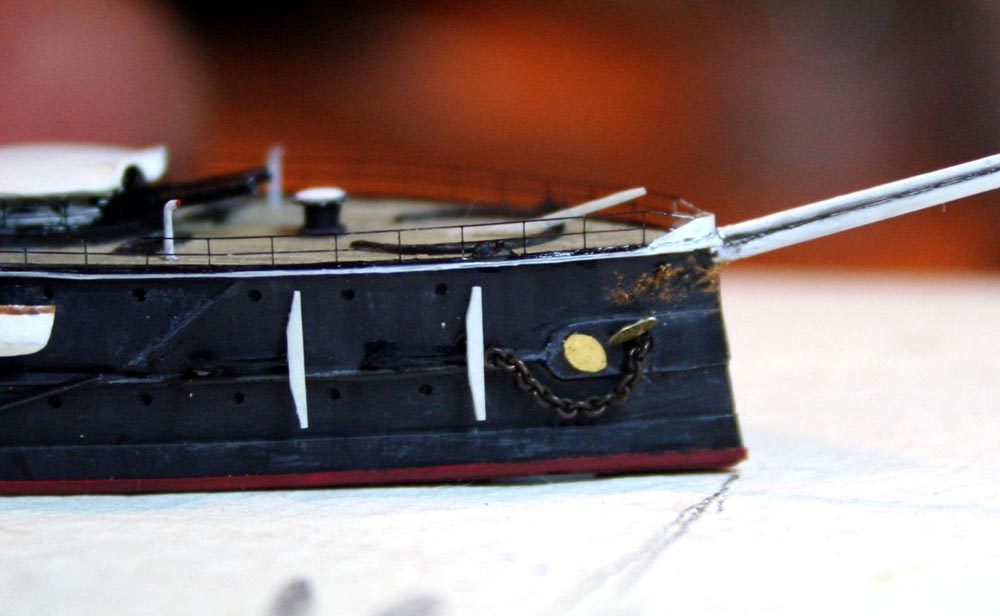 |
||||||||||||||||||||||||||||||||||||
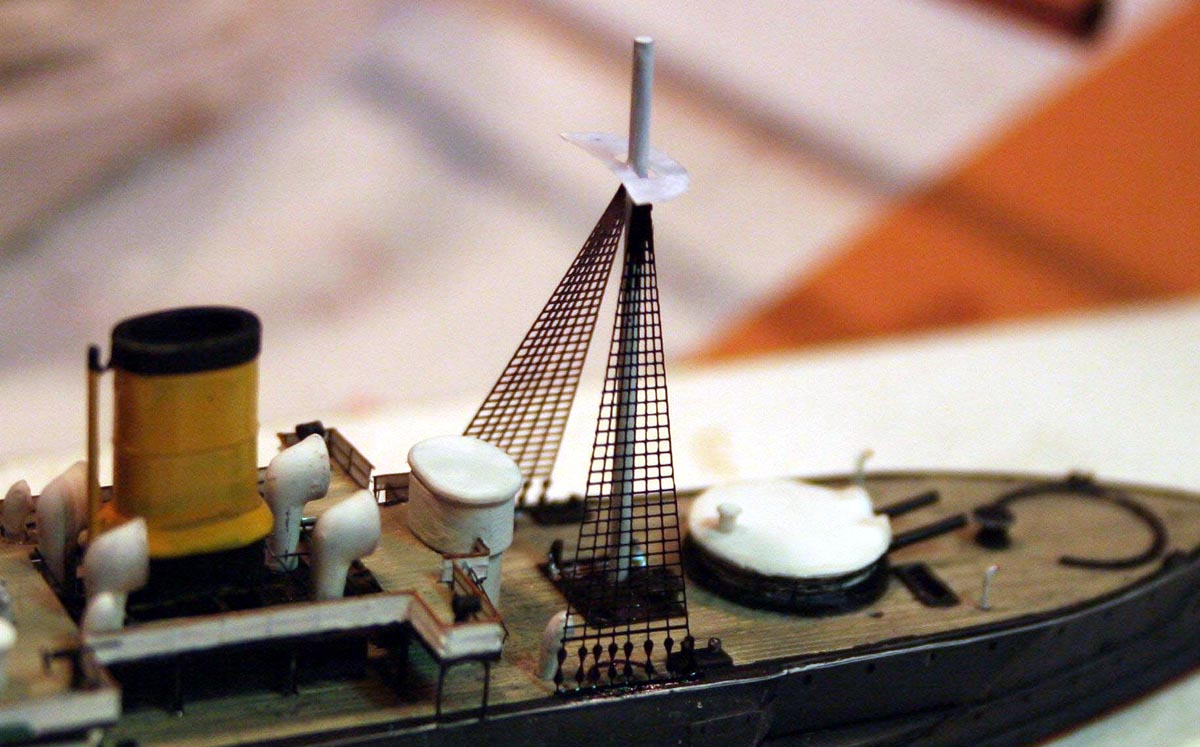
| At this juncture it was time to erect the upper masts and yards. Previous sail/steam transitional models I have made have suffered in my view from having parallel wire yards; I wanted to avoid this at all costs for this model!! I therefore commissioned my friend Steve Foulkes to make a set of tapered stainless steel yards-I lacked both the time, tools, know-how or patience The results made his efforts and my expense worthwhile...! | 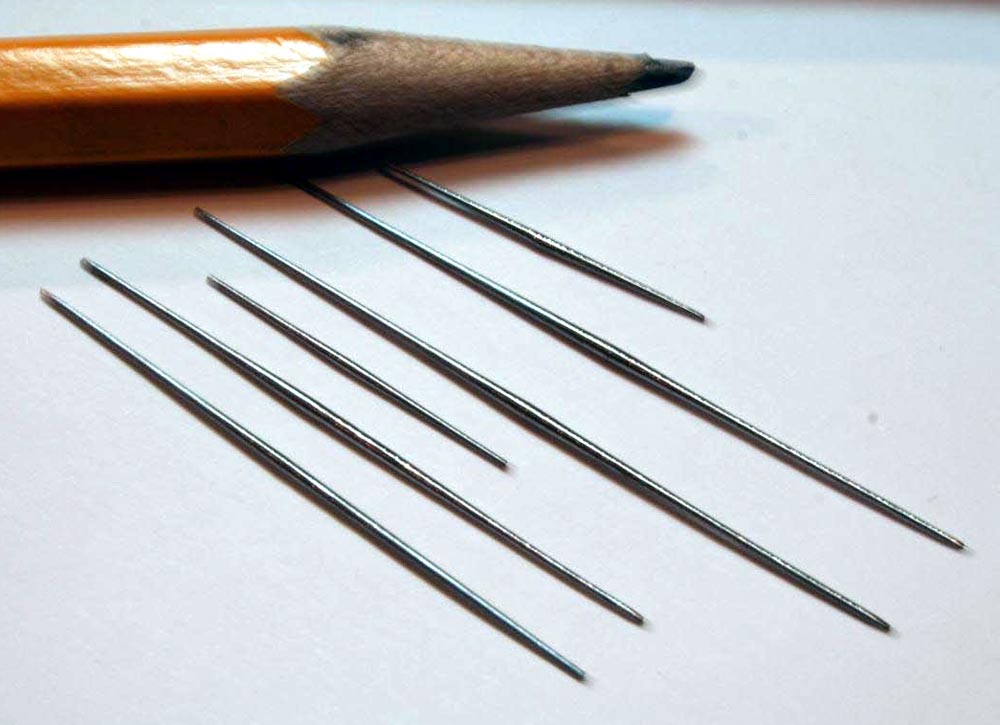 |
||||||||||||||||||||||||||||||||||||
| The erecting of the masts was effected with a great deal
of careful checking for alignment-as errors now would be impossible to
correct later.
Admiral Nahkimov carried sails on her yards furled in a (to my eyes) unconventional manner... The furled sail was packed very neatly indeed onto the yards with the clews of the square sails being brailed to the centre-line. I made the stowed clews from a triangle of paper glued to the center of the yard and the backfilled these with white glue and spread the white glue along the yard to simulate the very neatly and tightly packed sails. The footropes along the yards were made of stretched sprue. First a loop is spanned twixt the mast and the yard arm being cemented with liquid poly cement( revell professional). When the glue has set I bi-sect the center with a small vertical piece of thinner sprue with liquid cement on the end. This causes the loop to 'kink' --by melting a bond --thereby forming two smaller loops. The vertical is attached to the backside of the yard with liquid cement. The process is repeated until sufficient small loops have been formed. It is very fiddly and time-consuming. Once the footropes were in place I added the sky sail booms. |
|||||||||||||||||||||||||||||||||||||
| Thereafter I spent a very long time indeed adding as many
halyards and other vertical hoistropes etc as I could ; most are probably
correct and functional; ..-I hope
.
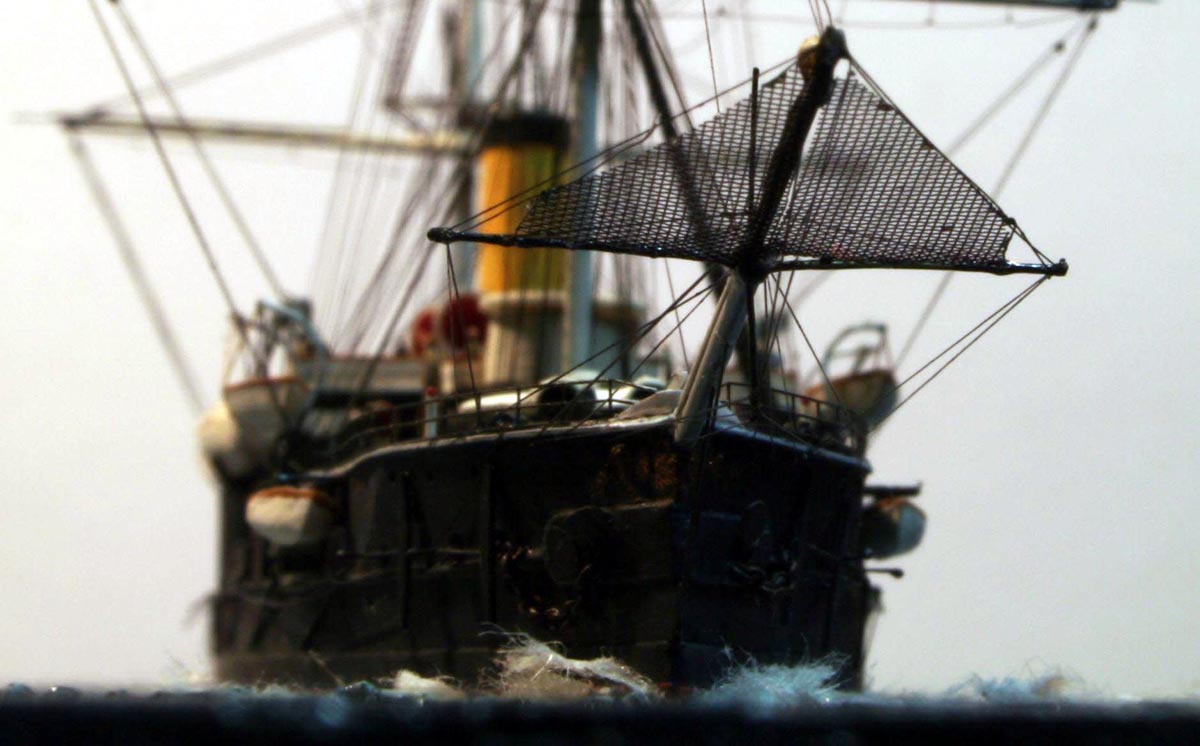
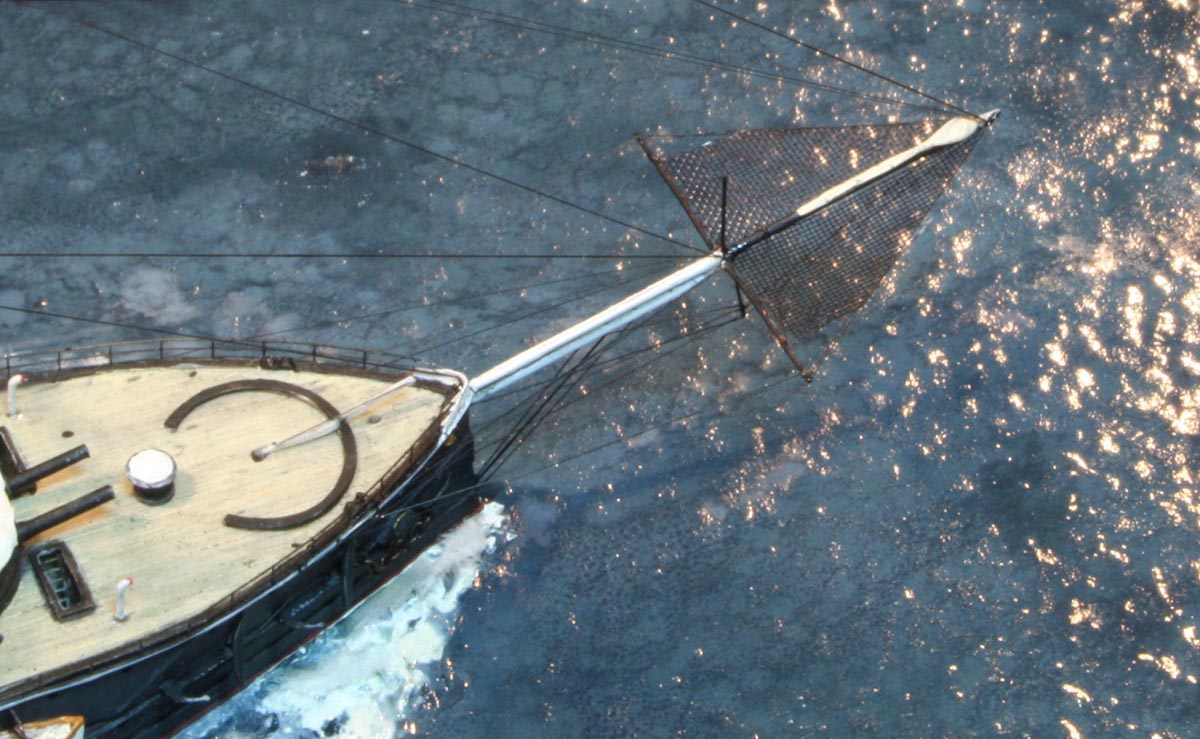
This process was followed by adding all the lower, mid and topmast shrouds and upper ratlines. Lastly the yard braces were added-these were all on a 2:1 purchase via a pulley. The pulley's were made of a small dollop of white glue applied to the already installed piece of stretched sprue; when dry the second brace was attached carefully with liquid cement.--I broke a few...! The hardest part was to attempt to achieve a reasonable amount of 'sag' on the upper braces; the lower braces in photos were set up fairly taut. The bowsprit safety net was a piece of fine mesh edged with stretched sprue. |
|
||||||||||||||||||||||||||||||||||||
 |
|||||||||||||||||||||||||||||||||||||
|
|||||||||||||||||||||||||||||||||||||
| Where appropriate the standing rigging was tightened by
shrinking with my usual incense- smoke method see the HOW-TO
section here at www.modelwarships.com. I spent over 40 hours rigging
the model...!!
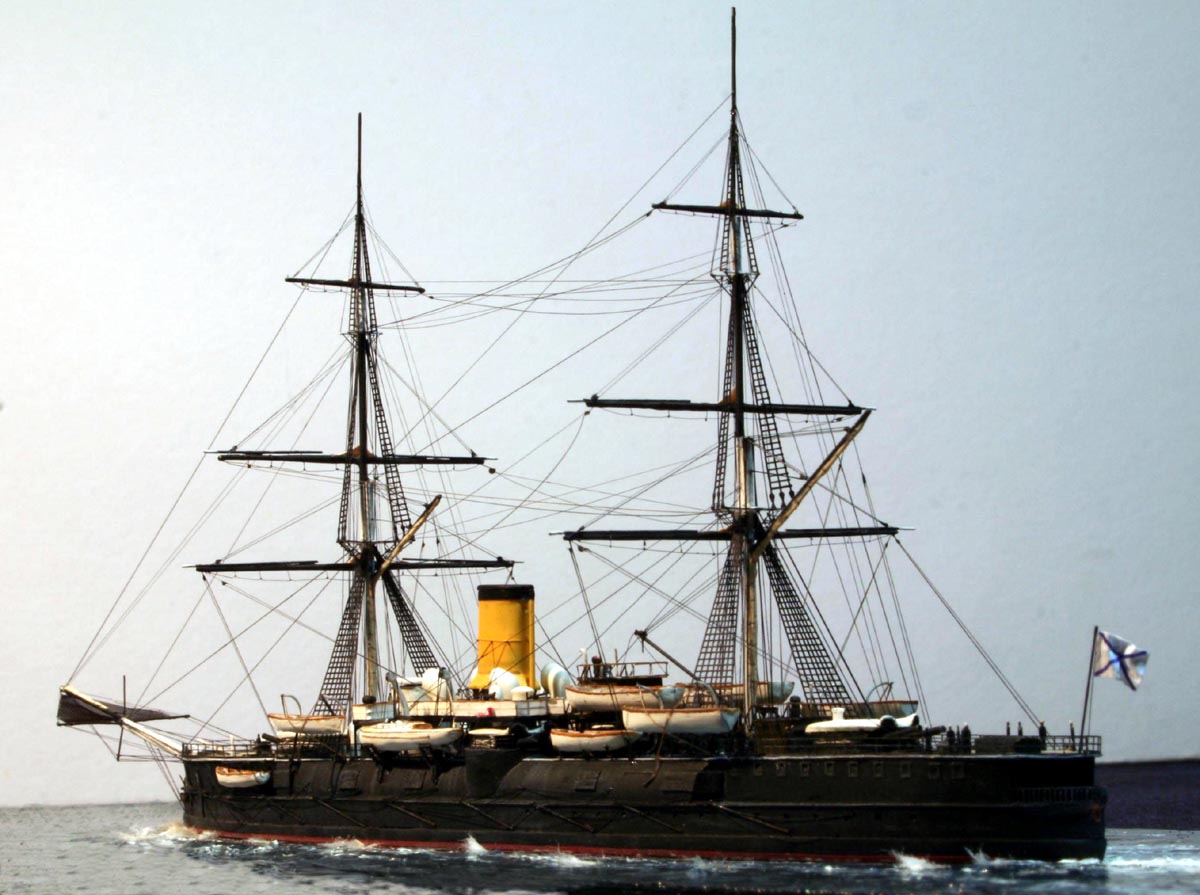
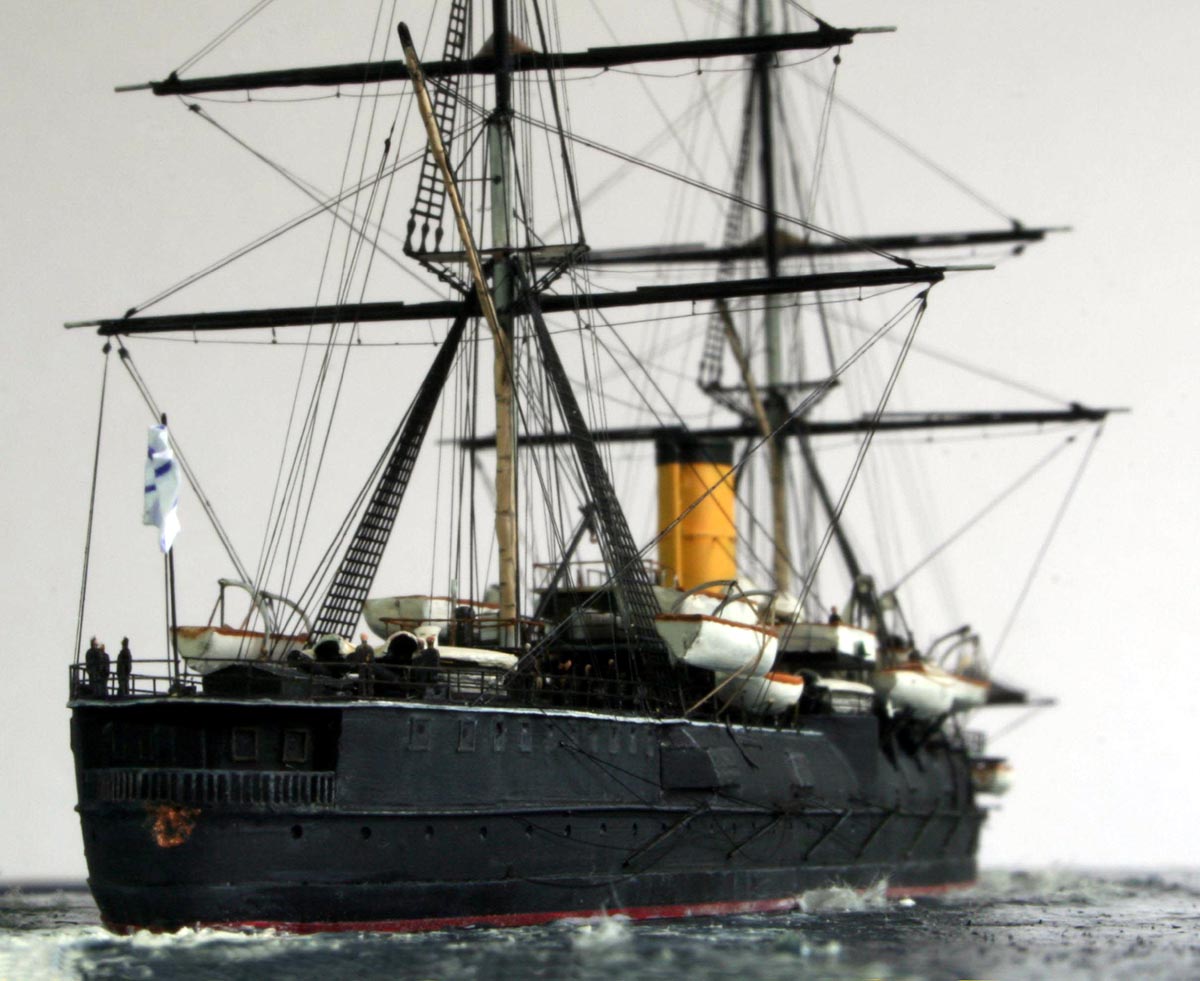
I was very tempted to rig some sails however the photos I have show the sails only deployed whilst at anchor perhaps for drying or training..? The Tsarist Naval ensign was made using a piece of light cartridge paper and a blue ball-point pen, crumpled to simulate the flag fluttering in the breeze. The ship was mounted on a stainless steel plate covered in artists watercolor textured paper. I used Humbrol paints throughout, Black and White- except for the Funnel--Revell Matt 19, the deck was radome tan, covered with a light coat of Humbrol Oak satin and drybrushed over with WEM Teak I mounted the model at a very early stage so as to minimize handling and thereby consequent damage to rigging. All in all a tricky but ultimately satisfactory model to build. The Kombrig kit is an earlier effort from that firm, yet despite its vintage and simplifications it is still a valid starting point, moreso if one where to build a later version. |
 |
||||||||||||||||||||||||||||||||||||
 |
|||||||||||||||||||||||||||||||||||||
| Useful images for a later fit can be found here:
essential printed references: Modeliska Kolektsia no 2 1995 essential to understanding the ship-useful photos but very helpful perspective views. Admiral Nahkimov by W W Arbuzov ship monograph packed with drawings and photos There is some debate she may have had a light grey funnel early in her career-- The colour scheme of my model was decided for me by a contemporary colour
illustration painted by a naval officer of the time from life.
|
|||||||||||||||||||||||||||||||||||||
| .More of Jim Baumann's work. | |||||||||||||||||||||||||||||||||||||