
Jim Baumann's Tips and Techniques
![]()
Weathering Ship Models
by Jim Baumann
Jim Baumann's Tips and Techniques
![]()
Weathering Ship Models
by Jim Baumann
Most of my weathering/shading is actually done with wet washes of various colours. For example; If I have a light grey/white ship it is often difficult to give the ship a real 3-dimensional feel, as the various planes tend to blind/blend and as a result 3-D structures can appear very flat.To alleviate this on an angular turret for example, I brush down the appex of the angle the side of a PENCIL lead... This physically seperates the planes and provides a sense of visual depth!
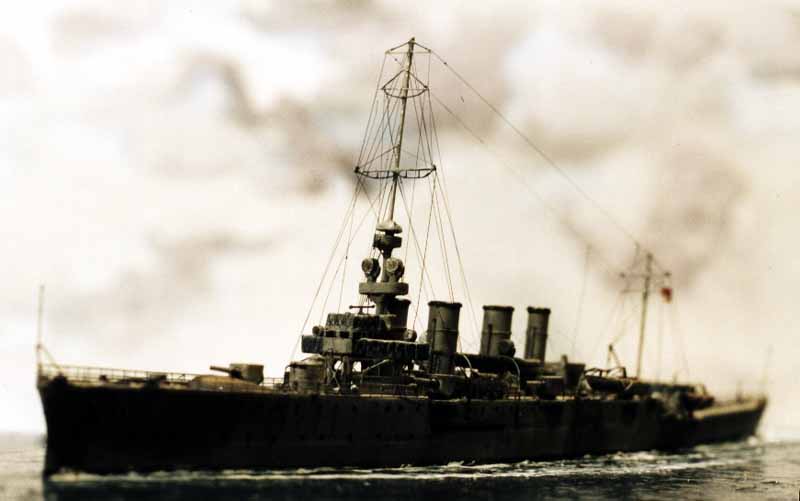
Most early ships were coal fired and as soon as they were at sea will have produced copious quantities of soot, which deposits just about everywhere, when ship was hosed down or shipped spray/green water, this soot would have been carried along to scuppers/drains and would in short time have produced streaking down hull sides, this I simulate with dark grey wash streaked down slightly aft of vertical(apparent wind created by ships speed..!)
For darker grey ships I actually paint adjacent planes in different shades of the same colour to create depth and false shading, still using the pencil trick to differentiate planes. Streaking off portholes and scuppers is often done by sticking pencil in porthole recess,twisting slightly to create carbon deposit along the lower edge and the smudging down with finger; if the effect is too much paint with drybrush in vertical streak pattern using hull colour.
I personallly HATE the dark/light VERLINDEN method of drybrushing, it creates TOO much depth and makes the ship look like an AFV model or a TANK!!! I always wash the decks with watercolours, if I dont like the effect I can just wash away with good 'ol water. Putting the slighest hint of dish soap in the paint wash breaks up the surface tension and the wash flows more evenly. When I first paint the deck I use thinners and dark grey wash to create the caulking simulation, at the outset the condition of the deck needs to be considered when the build commences...
![]()
Realistic Water in 1/700 and 1/350 Scale
In 1/700 scale I use Artists Watercolour paper which has a regular indented texture(try Winsor & Newton); firstly I cut the waterline profile out of the paper 0.5mm larger,this is done by placing the hull on paper and drawing round the hull with a sharp pencil ( before I even think about building the ship) then I stick to the base with eiter white glue or doublesided sticky tape. Build ship to the stage at which you are no longer happy to handle the ship,I ususally nount the ship in her sea before put on funnels or masts or photoetch. The ship is placed in the prepared cutout and screwed thru the base so that if it is a resin ship it prevents her warping. I then paint the sea in chosen base colour I add ships wake and bow-wave for (slow speed ) from white/PVA glue and build it up in stages. For medium speed I use Artists Acrylic gel/texture agent and shape it as it is drying. For a ship at high speed I use autobodyfiller for big wake and waves because it sets quickly (30-45 minutes!) so that I can carry on modelling!
In 1/350 scale if the ship is being shown in bigger waves I again use all the above techniques but glue the paper over bits of scrap wood to give the shape of the waves (remember to keep the wood bits clear of where the ship will go....) when the ship is finished ready for varnishing then I paint and drybrush the wakes and bow-waves, this is best left till last as the handling of the base will otherwise make the white go yellow....
I have also used succesfully white toothpaste(!) to really highlight white wavetops etc. cotton wool can be sued but do not use too much or the ship will look as if she is on a cloud....
![]()
Painting Decks on Ship Models
Painting White Ships, Painting Black Ships
For White hulled ships I have painted the base coats with revell matt white as this has VERY good covering power in one coat; unfortunately it is a little creamy and therefore not crisp enough. I overcoat two thinned coats of Humbrol to give a crisp "brilliant" white without too much paintbuildup obscuring fine detail.Most ships of this era were coal burners and even sitting at anchor with a small heaad of steam they were (in my opinion) producing sooty smoke, particles of which would land on the decks etc and even with regular scrubbing and hosing down would streak off from scupppers etc. As a result I streak the hull gently allover with a light shade of grey wash in a vertical plane, accentuating near anchors and natural water collection points.If I feel I have overdone it I "restreak" in white in shade of choice to lighten the picture; as I do not build "Dockyard " models the above is only from my experience of building ship models in an underway situation( when there are presumably more funnel emissions...!)
For Black Hulled ships(inc liners) I have always used a matt true black and then washed down( often) with watercolours in shades of grey(use distilled water to prevent limescale stains in hard water areas!!) with localized drybrushing in light grey or if the area has been highlighted already(around door/armour plate etc) to give sense of depth I use a very sharp very soft pencil to gain a crisp dark line to seperate the highlight from base structure(essential to overcoat with clear flat!)
I think I should mention that I do all my painting (except the flat varnish coats) with a brush by hand......
This is only a short summation of what I do to produce the effect that I BELIEVE to look lifelike and convincing and that I BELIEVE is borne out by contemporary photographs of the period.....( this is my disclaimer!!)
![]()
Rigging and Masts
I use ONLY scratchbuilt masts made of Steel/brass wire. For tall masts in 1/350 I use syringe needles, as a tube structure will not bend under tension in the sameway as a rod structure. When you make cage arials (Panay and Dreadnought etc) out of Ladies stocking lycra thread the cumulative tension is large and will pull masts out of line; even the shrinking of sprue with smoke will pull wire masts out of shape, always attach shrouds well, in model form they actually have a function even in sprue!!!
For all of my rigging (see some other ships of mine posted in the Modelwarships.com gallery) I use stretched sprue; the trick is to use the RIGHT kind of sprue. I have always found great success with AIRFIX CLASSIC SHIPS (sailboats,old,large..) in particular an HMS VICTORY that I have been melting down the sprue runners on for years; when I run out I will start on the yard arms, by my retirement I may start melting the masts... The main feature of this plastic is that it is BLACK, it requires no painting, hence keeping it thin and light.
Here is my method:
Light end of sprue runner until it just catches flame, blow out and dab one end onto piece of paper/card on workbench and slowly but firmly pull until the desired line thickness is achieved.The trick is to pull initially real fast to get it thin, then as the plastic cools, slow down the speed of pulling
If you are going to need LOTS, set up two paint tinlets on bench, and follow the procedure above but when you run out of space simply bend it around the paint tinlet and continue on till plastic cools and your thread breaks. You will need to practice a little to get consistently thin sprue. Black sprue is THE cheapest modelling material we will ever use pro rata, so if you are not satisfied with result simply discard it and start again.
To rig, use a small pool of liquid cement on bench, dab the end of chosen rigging piece in cement and with tweezers attach to ship/yard let set for 5-10 seconds and draw the other end to your chosen attachment point. Dab on a minute amount of liquid cement and draw the sprue piece thru the cement and let set. With liquid cement on the end of a toothpick, melt the plastic of the spruee and voila you have a neat attachment with no furry ends or scissors etc
Having rigged some shrouds for example you may wish to tighten them. Hold model over a consistent smoke source such as inscence or cigarette (I gave up, hence joss sticks) and the hot smoke will tighteen the rigging like magic.My advice is take a very old/scrap model and practice as it is very easy to completely rig a model and then at the tightening stage get too close to heat source and completely UNRIG the model.... with resultant fury, frustration and vulgar language...!!