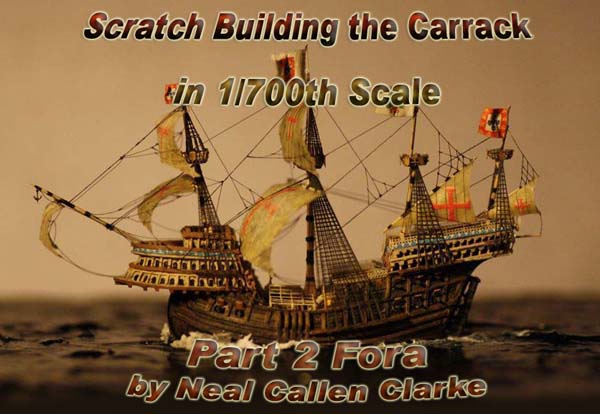
| Entering the world of Scratch Building completely changed
my perspective on Ship Modeling. I had always thought Scratch Building
was for 'Serious' modelers, the guys with the Skills that are beyond the
reach of ordinary mortals like myself. Scratch Building the Beja (See Part
1) turned my experience of the Hobby inside out. I discovered both
that I was a better modeler than I realized, and that many of the skills
of Scratch-Building were not as difficult as I had first imagined. Most
of all, the excitement of creating My Own Subject fueled my drive to press
on and overcome any difficulties I encountered. I'd gone from being a consumer
waiting on the model companies to being a producer choosing my own subjects
and then going after them. That in itself was exciting enough. But there
was another result as well the interest and input of other modelers. That
was the magic of Blogging. There were guys out there who were interested
in what I was doing, and who wanted carracks of their own. I could easily
understand this. It was a lot of hard work to scratch build a detailed
hull in 700th scale, much more appealing to let someone else do the hard
work. For myself I found hull making rather fun, the real hard work comes
in the rigging and fitting out. Rusty White's suggestion that I make a
casting master when I showed him the Beja opened up a whole new dimension
to my hobby.
At the same time Bruno Gire, a master modeler and Photo-Etch Artist
from France offered his assistance with the creation of the new carracks.
While he began designing the PE, I began in earnest on two new hulls. The
first one I named after my friend Bruno, who, to this day, I have never
met, calling it the Sao Bruno ("Saint Bruno" in Portuguese) though this
is only a 'pet name' for the hull, not an actual name for the model. For
the second hull I wanted to create a contrast, something really generous
in proportions, which I named 'Fatty'. Rusty offered to cast whatever I
created in his studio which meant suddenly I had all sorts of options available
to me. Using these two hulls, in combination with various superstructure
modules, I would be able to create a whole range of carracks, naos, and
argosies of various configurations. Suddenly the sky was the limit! |
The photos from Part 1 actually
show the construction of the Bruno hull. Here is the final result:
'New Bruno' refers to the 2nd attempt. |
 |
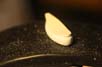
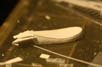
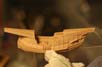
| The first try at a new Carrack hull produced an effort that did not
have the correct shape. I was learning a lot about carracks as I went along
and decided to restart the Bruno hull. |
 |
|
|
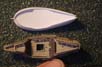
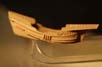
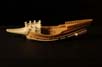
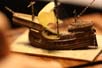
| Here is a comparison shot with the Beja in progress. I thought that
the Bruno would be a good deal smaller than the Beja once completed, but,
as it turned out, this hull will produce approximately the same sized ship.
Finally we have a correctly styled stern. Note the angled planking on the
Stern. I actually got this backwards, the transom planks should go diagonally
down from the sternpost... oh well, next time. Fatty is born. |
 |
|
|
| Family Portrait, with the Beja in progress. I quickly realized that
the Fatty hull was too high. The solution was to hollow out the midships
and then cut down the waist, creating a raised base for both the fore and
after castles. This meant I had to remove the waist part of the main deck,
which was now at upper deck level, and create a new 'false' main deck one
level down. |
 |
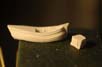
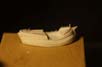
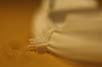
| Tricky surgery and not much fun. Fatty's stern planks in progress. |
 |
| This time I got them right. |
 |
| Fatty cut down with ribbing in progress. |
 |
| Creating the waist 'bumpers', a common feature on ships of the
era. |
 |
| Note the curving plank detail on the forecastle. |
 |
| This is an authentic detail of ships of this type from the period. |
 |
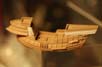
| Fatty's chain-plates installed. Bow on. |
 |
| It seemed to have the right look. I realized that Fatty, despite all
the headaches, was probably my best effort so far. |
 |
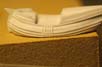
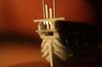
| A quick look at the Yard. Superstructure modules under construction.
Note the use of IJN perforated bar! |
 |
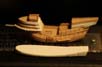
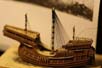
| Completed Bruno and Fatty with various superstructure modules. |
 |
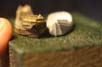
| Inside Rusty White's Studio; masters are glued to the base and ready
for casting. This was an exciting moment! (Carrack-79) |
 |
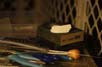
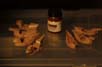
| Creating the Moulds... The smaller box held the armament casting
masters. |
 |
| First casts emerge from their moulds... Suddenly I've got lots of little
tan ships on my hands! |
 |
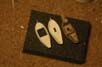
| Back home where the fun really begins. Various configurations, from
right to left, a Small Carrack based on the Bruno hull, (in the back and
a bit blurry) a large 15th Century Flemish Carrack based on Fatty, a Medium
Carrack based on Fatty, an extra-large 'Econo-Carrack', also based on Fatty.
On the right a Bruno-based Nao, a Fatty-based Venetian Carrack, and a smaller
Bruno-based Nao. |
 |
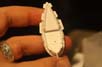
| Close up of the small Bruno-based Nao. |
 |
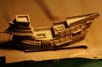
| The Venetian Argosy. |
 |
| The Econo-Carrack. |
 |
| This was an attempt at a Spanish Galleon based on the Bruno Hull. My
research into ships of this era seems to support the view that Galleons
could be created on Carrack hulls. |
 |
| I decided the first carrack I would build would be the Econo-Carrack.
Here you can see work has begun facing the forecastle. |
 |
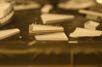
| Strut supports underneath the Forecastle overhang. |
 |
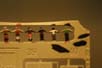
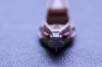
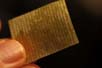
| Bruno's PE arrived from France! Two suites for each hull. I was ecstatic. |
 |
| Painting figures. They must be in the tropics because some of these
fellows are not wearing shirts. |
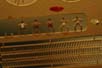 |
| Officers, no standard uniform in this era, of course. Some of these
fellows have cloth of gold sleeves and vests... or are they armor? Very
different from XX Century Naval fashions. ?? |
 |
| Bruno Gire's custom made PE Shroud/Ratline sets primed, painted and
ready for install. Thank God! No more freehand ratlines! |
 |
| Close up of the Medium Carrack based on Fatty. |
 |
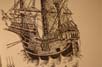
| The famous 'W.A.' Carrack engraving dated to circa 1450. This is a
late Medieval Carrack from the heyday of the type and before the use of
shipboard cannon had begun to affect warship design. I had been intrigued
by this illustration for several years, and decided maybe I could adapt
a Fatty hull cast to approximate the ship depicted. Since the engraving
is Flemish, I decided to call it the 'Flemish Carrack.' |
 |
| First off we would need a round stern. That meant cutting off the transom
and doing some scratch reshaping. |
 |
| Flemish Carrack stern taking shape. |
 |
 |
| The curious and possibly unique stern gallery of the Flemish
Carrack taking shape. ?? |
 |
 |
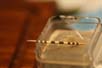
| Bruno Gire had several sets of turned brass masts made for the Sao
Bruno and Fatty hulls, but I wanted to see if I could scratch my own from
materials at hand, so for the massive mainsail yard of the Flemish Carrack
(see engraving) I attempted a new technique: two needle shanks glued end
to end, with the joint reinforced by CA impregnated paper. I then painted
the yard heavily, making sure to give the center section the heaviest coat
of paint. The result was a satisfactorily tapered yard. |
 |
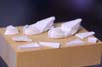
| How to make Sails? I had deliberately avoided sails on the Beja so
that I could concentrate on other issues, but in the meantime I began experimenting
with various materials. Painted shrink wrap? No go. How about Plastic Bags?
Nope. Tin foil? Didn't work for me. Then I began to experiment with paper
towel, toilet paper, napkins, etc. The best material turned out to be the
fancy paper dinner napkins you sometimes get at catered events. Separate
into single plys, wet each ply and lay them out on a clear piece of plastic.
With your fingers work in some Tite-Bond Carpenter's glue and allow to
dry. The result is a parchment-like material that is both flexible, fairly
stiff (so that it can be shaped) and has the right color. |
 |
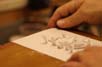
| If there are colors to be added to the sails, you can use decals and
lay them in on top of the first ply, then sandwich the decal with a second
layer of paper ply. The decal will show through and at the same time the
paper will give the color a somewhat 'faded' look. For sails with colors
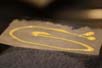
on both sides, three plys will be needed. The same materials and techniques
can be used to make flags (see below.) |
 |
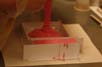
| I also wanted to suggest the stitching lines between the different
runs of sail cloth, so I created a jig and ran black nylon monofilament
in parallel rows through the sail material as I made it. When cut to shape,
the result looks like this: There's not enough space to properly document
the Flemish Carrack build here, but here she is at about 50%. |
 |
| If you look at the original engraving you will see that the shrouds
have no ratlines. Instead, access to the Crow's Nests are by 'Jacob's Ladders'
inboard and parallel to the masts. This appealed to me as it meant that
I got a 'free' carrack without having to use my precious custom PE shroud/Ratline
sets. Notice the double-decked fighting stages and the long overhang of
the forecastle. This acted as a sort of siege tower to be put over the
waist of an opposing carrack. The soldiers would then jump onto the main
deck of the enemy ship (and on top of the defending soldiers) and attempt
to capture it. A more daring and dangerous method of naval warfare is hard
to imagine. This is the reason carracks were built so high, and why their
design was perfectly suited to Medieval Naval Warfare, but unworkable once
shipboard cannons had become effective weapons. |
 |
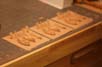
| To create the 'full bellied' effect of the sails I first trimmed the
edges, then cut along the lower edge at regular intervals. I then re-glued
the sail together with the edges overlapping, to create a three-dimensional
shape. |
 |
| The 3-D Sail installed on the Flemish Carrack. The after castle net
canopy (Bruno Gire's PE) Is installed, as is the PE rudder (note simulated
pintles and gudgeons) |
 |
| There is a similar canopy on the forecastle, but it is out of focus
here. |
 |