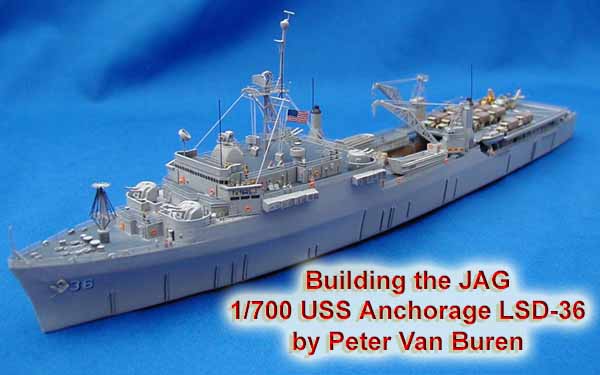
by Peter Van Buren
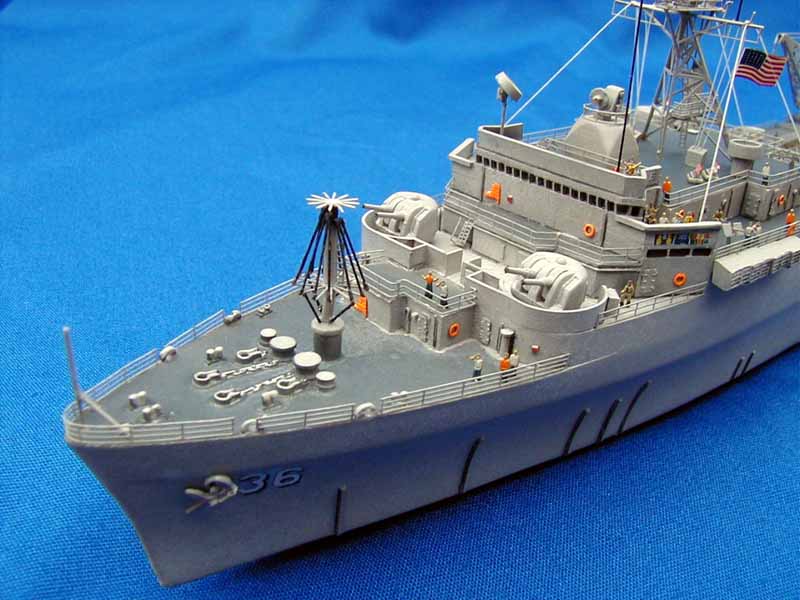
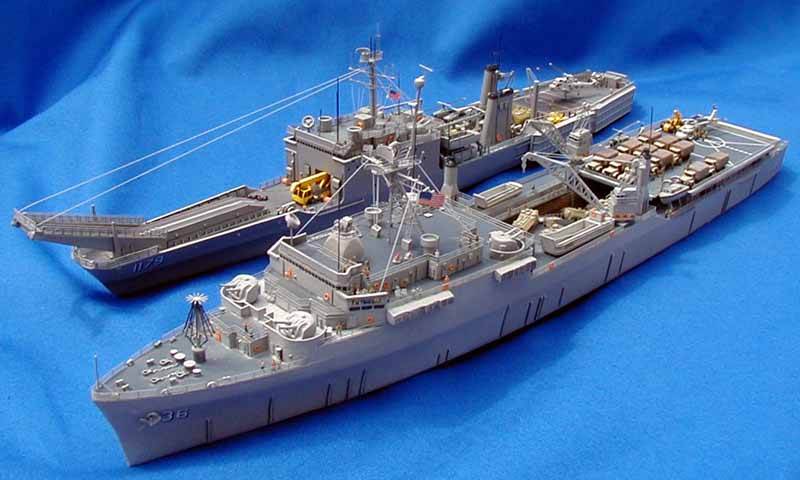
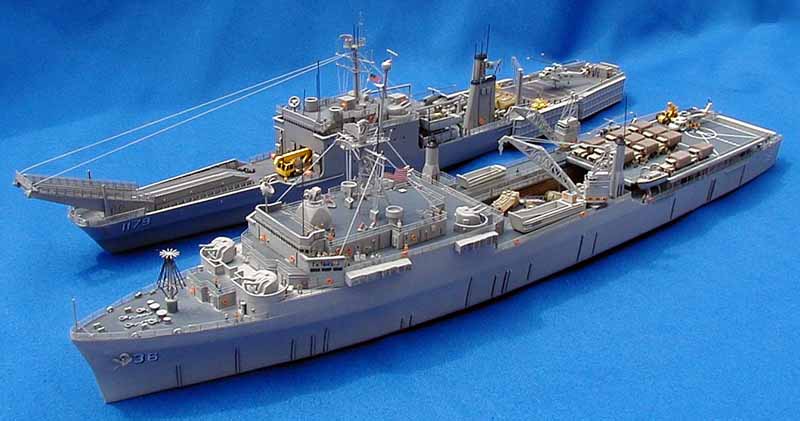
| This kit builds into another fine example from the USNs amphibious fleet. The kit is easy on the modeler with little flash, slight mold lines and a dead flat bottomed hull. Refer to the Out-of-the-tube review of this kit for a look at the parts. The photoetch (PE) is a pleasant challenge for a modeler with some PE experience, and the diorama and detailing possibilities will reward the person willing to put the time in with a beautiful finished piece (though Im not sure if I got there or not!). | |||||
| --------- Some Component Building Tips ---------
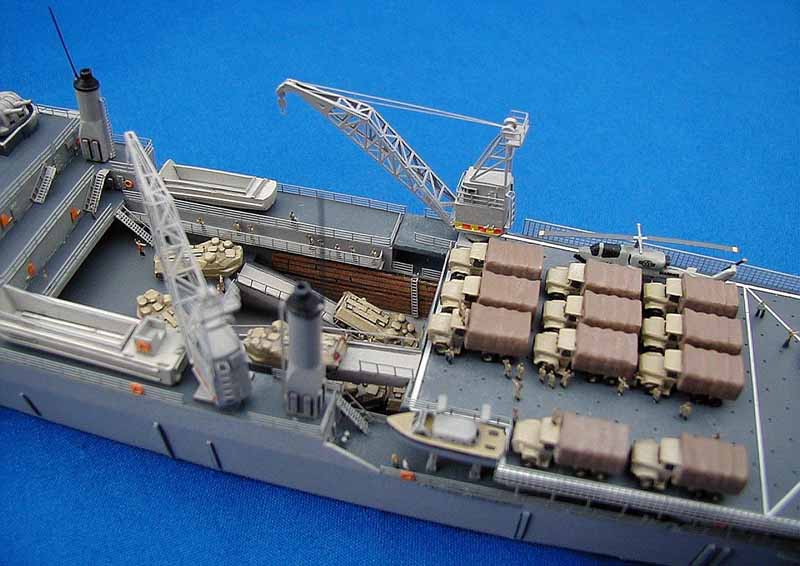
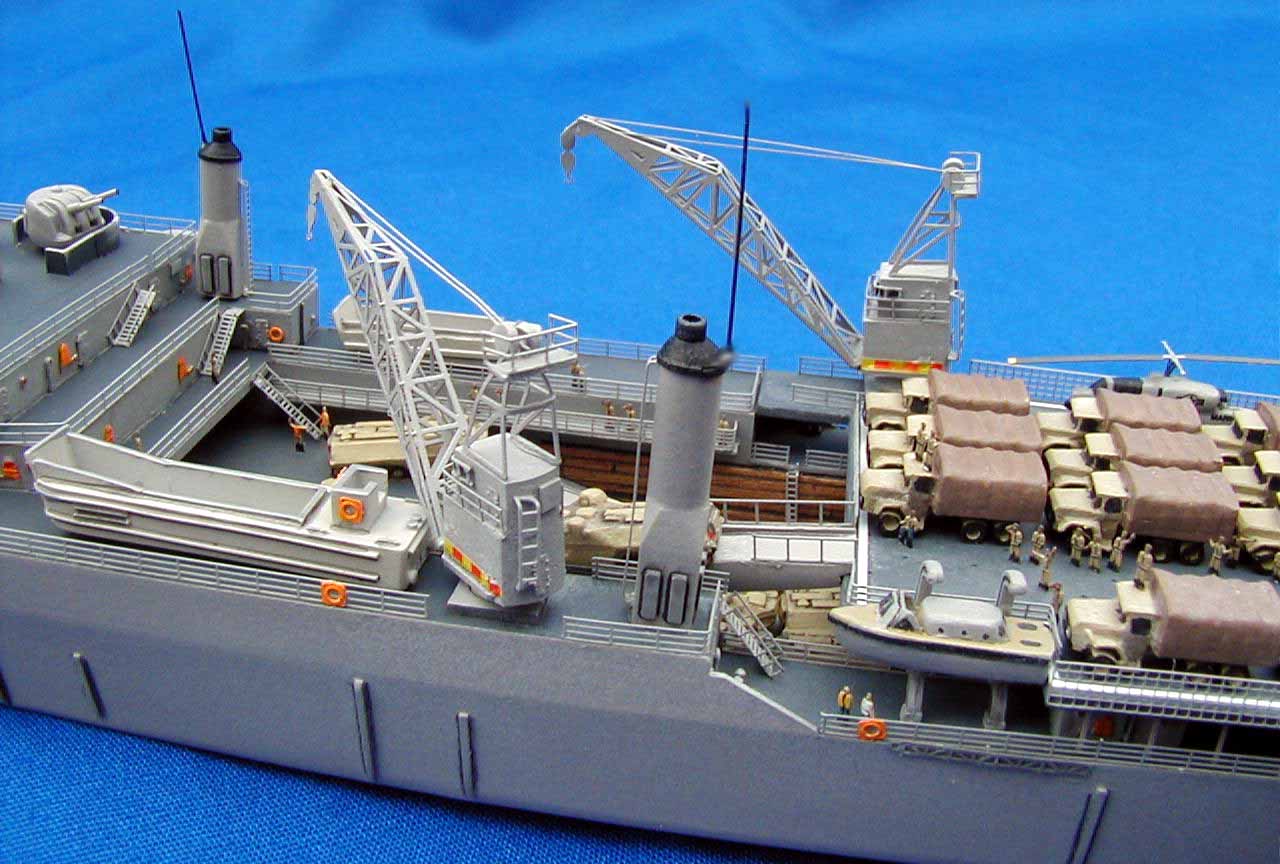
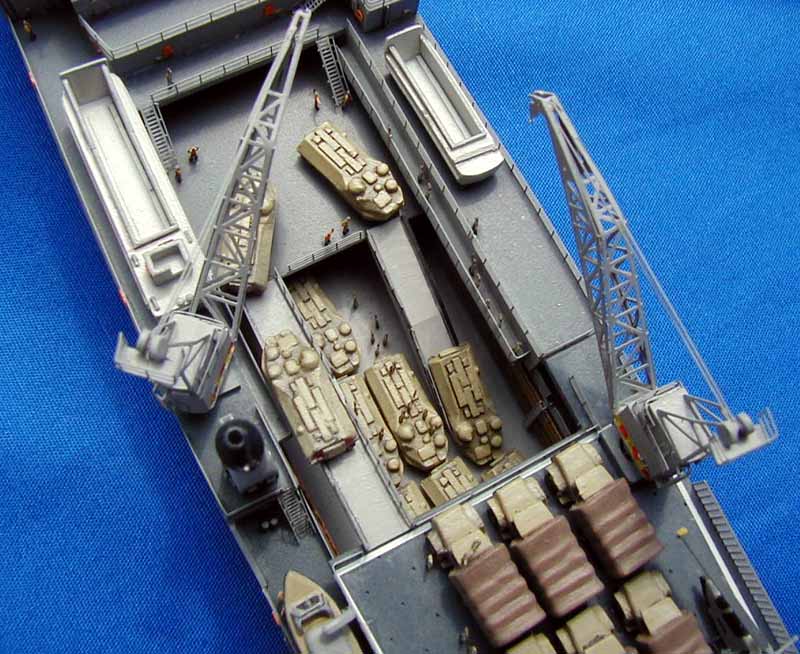
The delicate yet massive cranes are a focal point on this ship, and build up out of a four-fold piece of PE, followed by another folded piece of PE for the framework atop the resin crane cab. An included PE hook completes the scene. As suggested in the instructions, **do** build these as separate sub units and make them one of the last things you add to the model. The cranes, if installed early on, will block you from working in the well deck and youll likely end up with bent PE and the use of foul language such that a sailor would blush. The same goes for the mast, with its PE radars and multiple folds. JAG has correctly provided both an overhead and side view drawing of the mast and its components, and I found myself moving between those drawings and the assembly instructions to get the mast right. |
Click images
to enlarge |
||||
 |
|||||
 |
|||||
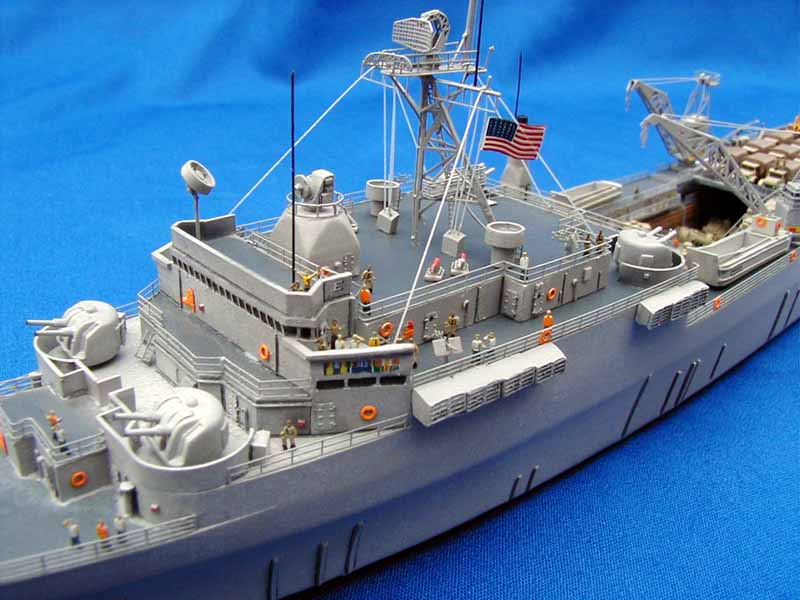
| One last component to build off the ship is the NTDS antenna
near the bow. JAG gives you the top and middle pieces as PE, and
supplies a short length of plastic rod to use. The wires on the antenna
are very fine, and there are a lot of them. I used very thin brass
wire on mine, as it was easy to handle while being a bit thick. Modelers
with smaller fingers and better eyes might consider using stretched sprue
or fine fishing line instead. For some, leaving the wires off entirely
is a livable compromise in this scale
For both the cranes and the mast I used a little dab of white glue (Elmers) to attach the main parts to a square of cardboard. This gave me a stable base on which to build and then paint the components separate from the ship. The cardboard also allows you to handle the work without bending or breaking anything. Once completed, I ran a sharp blade through the glue to separate the component from the cardboard. --------- More Building Tips --------- The action on ships like this is in the well deck, where Marines would
be preparing to launch their LVTs towards a hostile shore. I used
Gold Medal Models 1/700 Naval Figures (US$ 5.00) to depict the Marines
getting ready below.
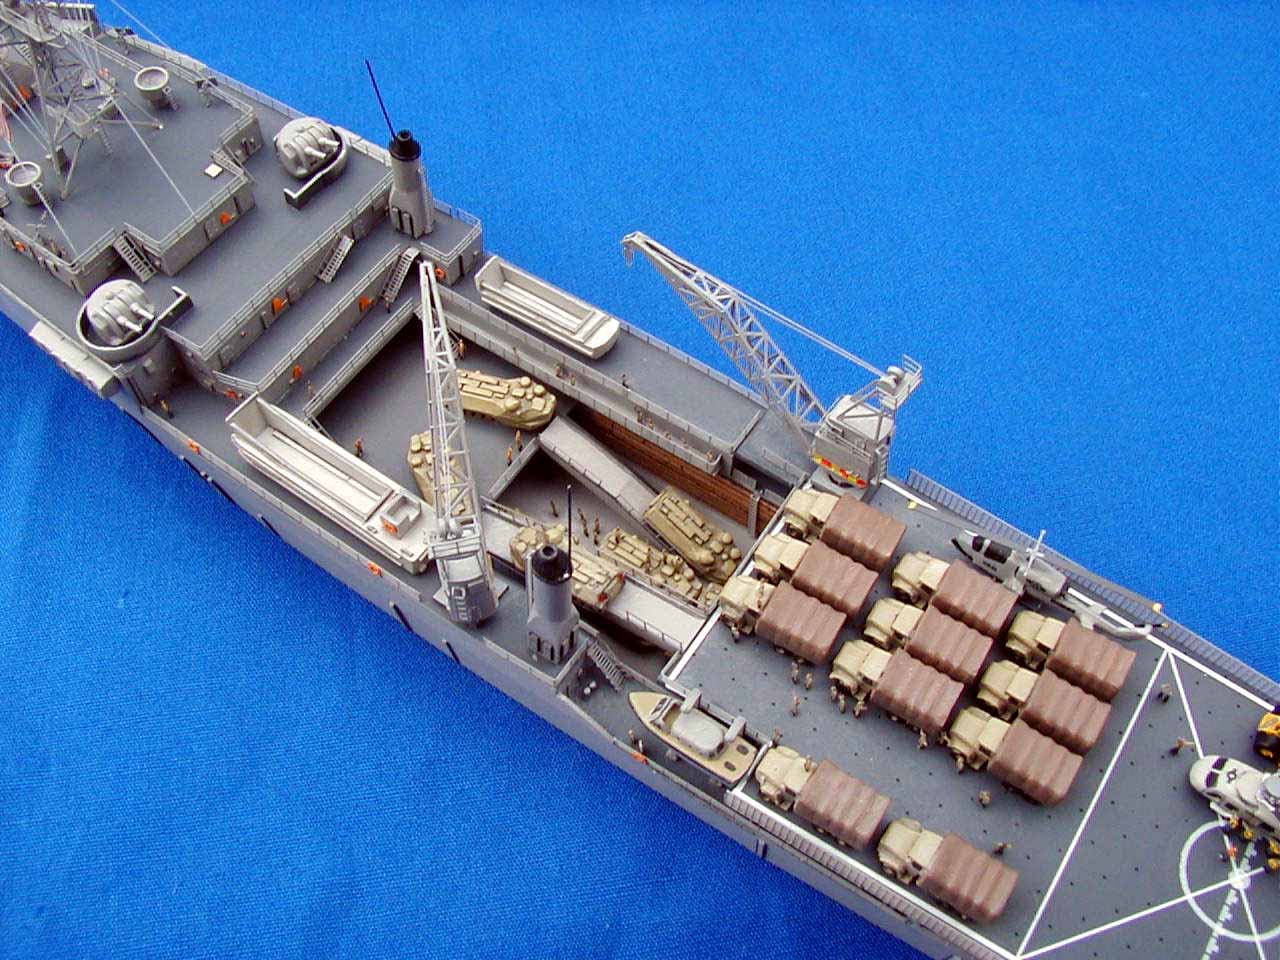
The mezzanine area at the forward part of the well deck is optional, both in the kit and in real life. It can be removed to allow the ship to handle more LCACs, or left in to aid in loading. I left it in, as it allowed me to use the full ramp system to show vehicles moving into position below. |
|||||
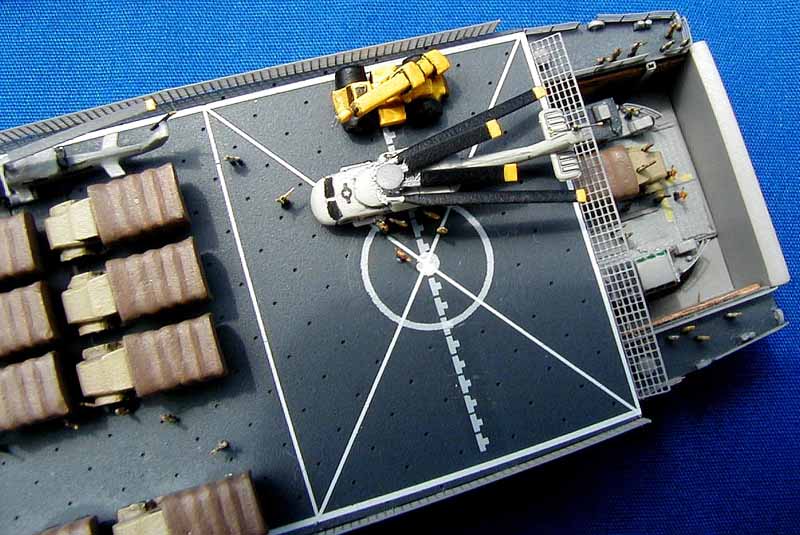
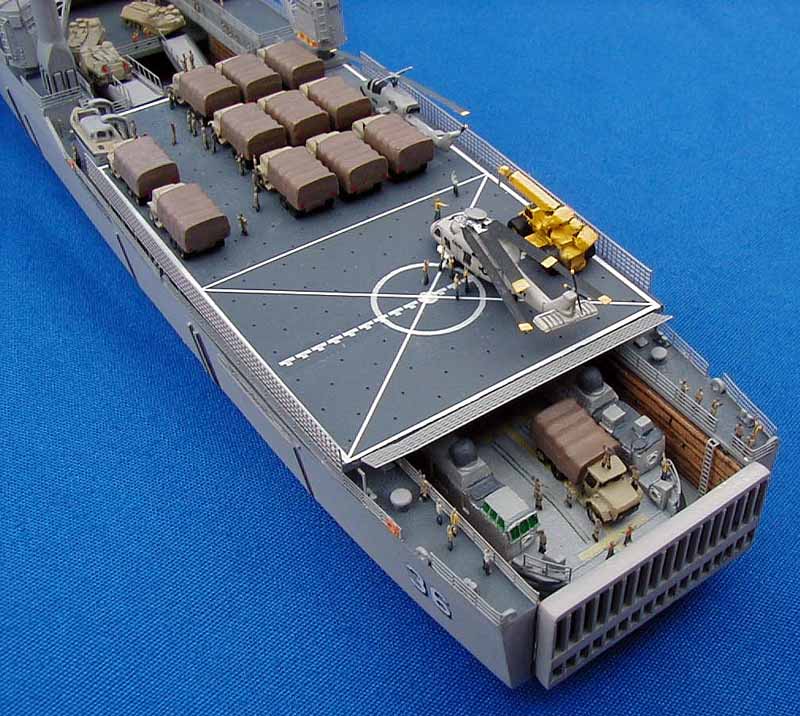
| The helo deck is a clear plastic, laser cut piece, with beautiful etched
tie downs. I wasnt happy with my attempts to color these, but if
you pull it off right the look would be spectactcular. The instructions
provide no guidance on the where to put the helo deck warning lines, supplied
as decals. Go to www.globalsecurity.org/military/systems/ship/lsd-36-schem.htm
and youll find a nice drawing of the deck, with all lines shown, and with the actual dimensions listed. |
 |
||||
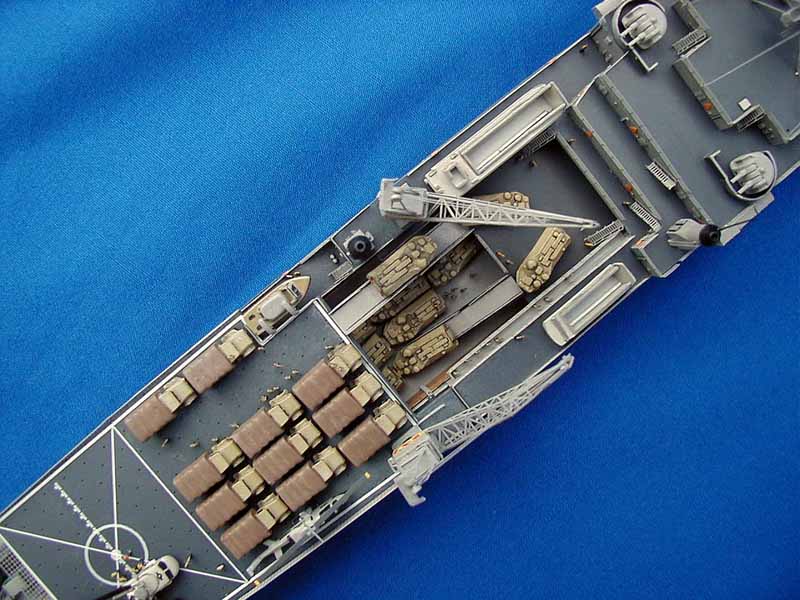
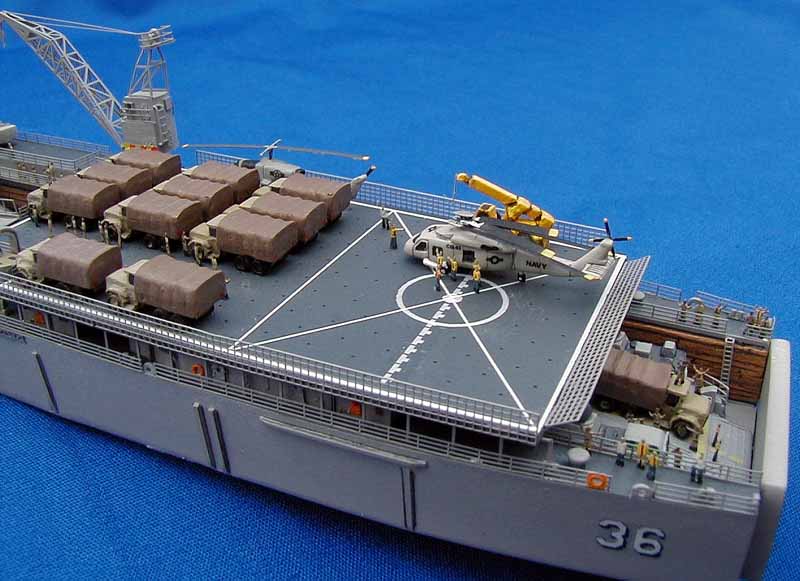
| The LVTs shown come with the kit (you get 12), and are
cleanly cast in soft metal. I air brushed mine with acrylics without
first priming and had no problems with the paint sticking. I added
a touch of black wash for depth. The trucks shown come from a separate
accessory kit JAG sells (you get 12 LVTs and 12 trucks in metal as
a set for US$8.00).
Parts 20 as listed on the instructions are life raft bundles. You get a bunch of these, though the instructions do not offer any advice on where to place them. Consult some of the web resources below for the particular ship and era you wish to model and use these or lose these as appropriate. You will need to install the PE supports for the helo deck before you add the deck. But, before you add the deck you need to finish inside the well area. Once installed, the helo deck blocks your ability to see fully inside the well-- do some careful dry fitting to see which areas of the well will be visible and which will be hidden to save yourself some trouble. With the PE supports in place, I found that the deck piece would be supported only by the PE. While perhaps accurate, it did not make for a strong model and so I added some thin plastic strip shims to allow the deck to rest on/be glued onto the deck houses on the sides of the well. One idea: the fact that the helo deck is made out of clear plastic offers up the potential to leave it unpainted and clear so as to expose the workings below. I preferred to model mine the way the actual ship looks, but the clear deck might make an interesting model. Note also that two smaller clear plastic pieces, the mezzanine deck and a crane base, were inadvertently left out of the photos of the kits parts through my mistake. You get decals for the entire class, along with the fruit salad shown on the bridge. |
 |
||||
 |
|||||
 |
|||||
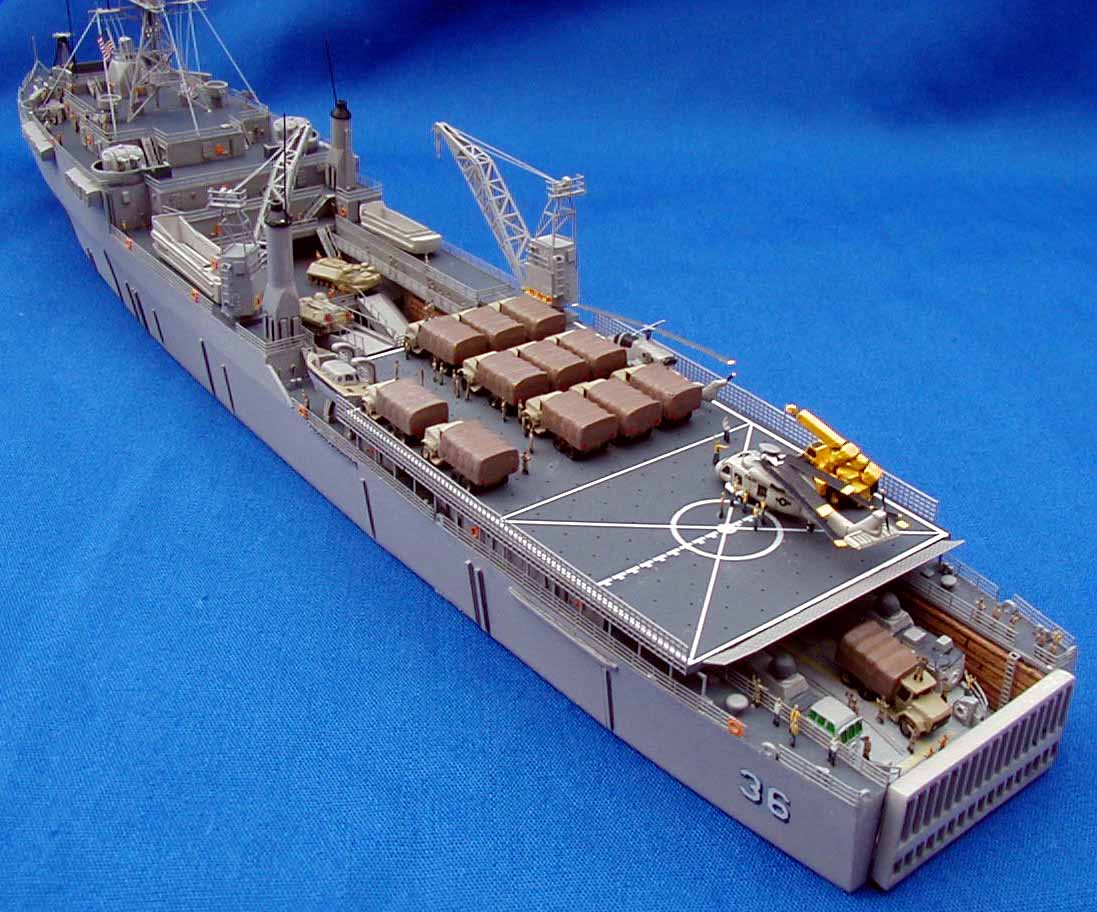
| --------- Stuff I Added to the Basic Kit ---------
The LCAC just visible at the stern is from Tamiyas Shimokita/Ohsumi kit. I lined the well deck walls with real wood (bass wood strips) to simulate the heavy wooden padding seen on the real ships. The helo and deck yellow gear came from my scrap box. I added antennas and some mast components from my scrap box as well. The PE supplied with the kit does not include railing or ladders. I used Gold Medal Models PE for these parts. I added galleries/walkways to the forward part of the well, and built small additional platforms on the tops of the deck cranes. |
 |
||||
 |
|||||
| --------- Some Editorializing ---------
As I get older (sigh) I find myself less and less interested in sanding seams, filling voids and sucking up resin dust while scalding myself trying to re-shape a warped hull, never mind explaining to the kids why instead of helping with homework Daddy is boiling water for his models. I have been working my way through the JAG line in large part because their kits dont show these problems (plus I am quite the fan of amphibious ships and JAG makes ones no one else does). By contrast, I have a true garage resin kit in my drawer, a big 1/700 container ship made by a guy in Japan literally in his apartment, one at a time. I really want to model this type of ship, but the thought of hacking off the flash, filling in the bubbles, working without instructions and washing the greasy crap off the parts has kept me from starting that kit and staying with these JAG ships and others that challenge me as a modeler more than they challenge my patience. |
 |
||||
 |
|||||
Links and References:
http://www.globalsecurity.org/military/systems/ship/lsd-36-gallery.htm Excellent resource on LSD's in general, with photos of all classes:
Links to Ships' (LSD's) Home Pages:
Drawing with dimensions of helo deck markings:
General Info, some photos, links to actual ships' web sites:
Anchorage Home Page (limited photos):
General Photos:
Out of the tube review of the JAG Anchorage |
|||||

© ModelWarships.com