 |
|
|
| Back to Menu | |
|
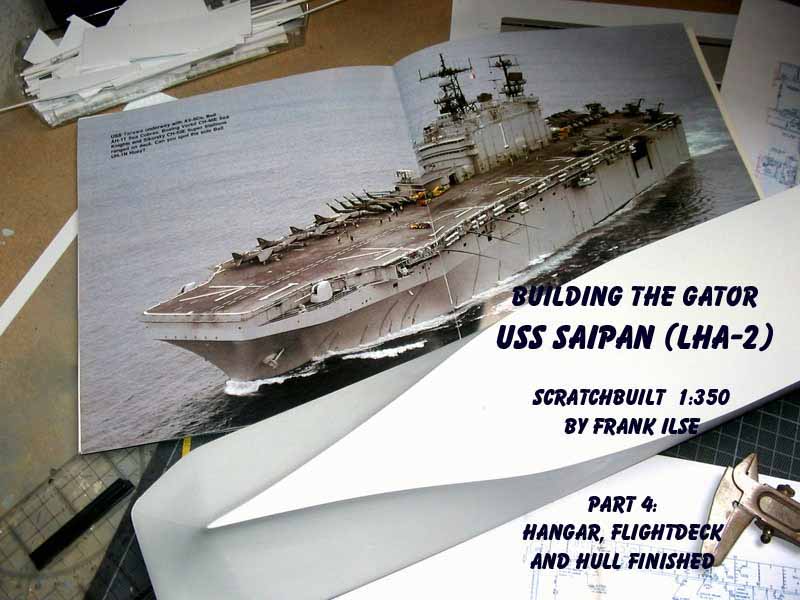
Dear modelling friends, It has been a while since the last part I wrote in this seemingly endless buildup feature of my USS Saipan in 1/350 scale. I apologize for it, but my job kept me very busy last year and it took a long time until I found the time to continue with the project and moreover writing about it. So here we go again. |
|
|
Having finished the well-deck at the beginning of 2007 I continued with this project by constructing the hangar deck. First I had to make a decision: against my early intention of making the flight deck removable as well as the hangar I decided to install a fix hangar and to glue on the flight deck to give the whole construction more stability. It was the right decision! So I built a hangar deck according to the plans I had from the floating drydock by glueing a floor plate of 1mm styrene onto the ceiling of my well deck. I added walls of the same thickness and used 0,5 mm round for the piping along the walls. Thanks to Charles Landrums phototour of USS Saipan over on the other site I had at least some pics from inside the hangar. According to this reference material I added various doors, hatches and platforms to my hangar. |
click images
to enlarge |
 |
|
|
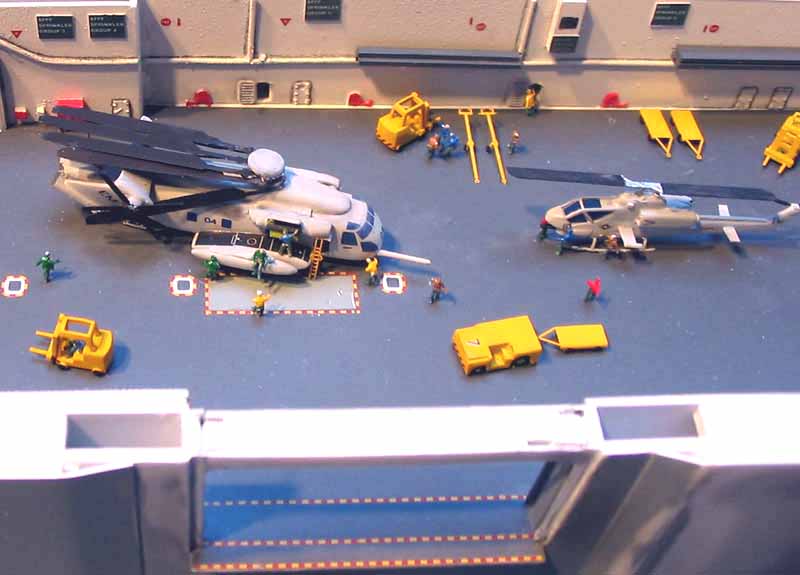
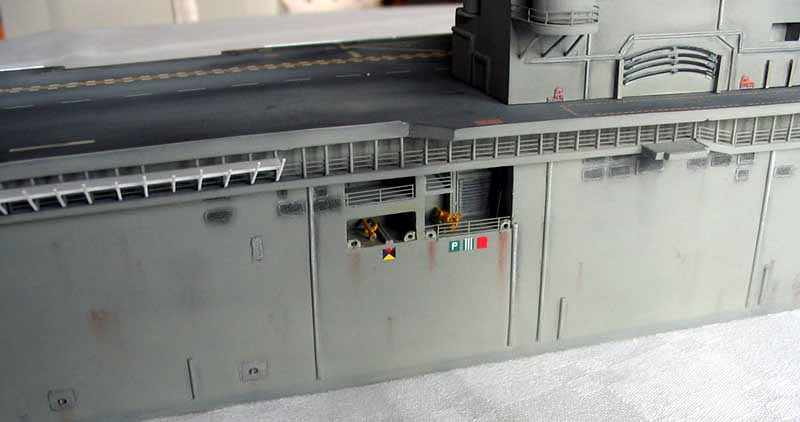
The floor then got a coat of US flight deck grey (White Ensign colorcoats) and the walls were shot with white, toned down to a very light grey. I added decals to mark the walls with warning signs, the floor with outlines for the weapon elevators and warning lines around the two flight deck elevator areas. Yellow gear and clutter is taken from various sources: first is the excellent WEM-photoetch fret for modern aircraft. You can get one for the USS Enterprise Airwing and one for the USS Nimitz Airwing. I used the Nimitz-fret. From my Trumpeter Nimitz-kit (yes, still sitting on the shelf) I took one or two tractors and forklifts to add life to the hangar. A Sea Stallion and a Cobra come from White Ensign and Commander models, but please read some more about these models in the airwing-section below. |
 |
|
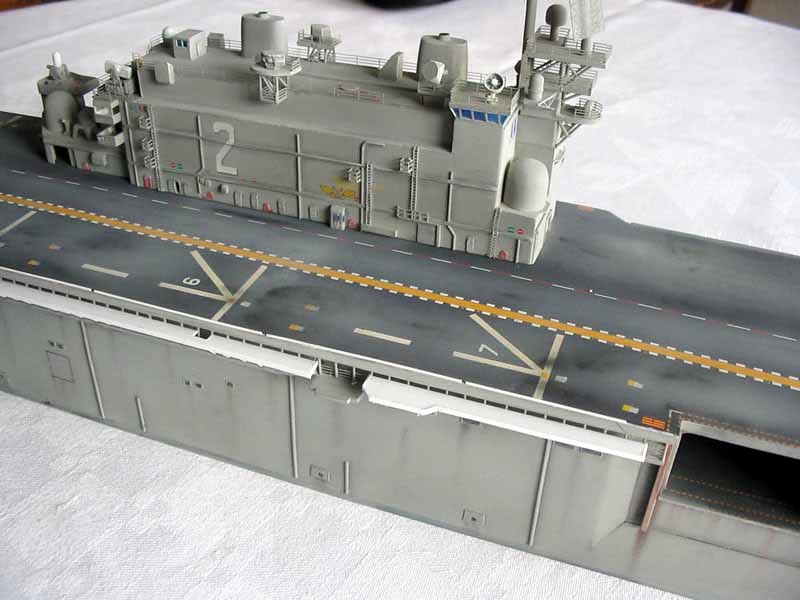
Finally I added a dozen Preiser figures painted in the appropriate multicolored shirts the maintainance and deck crews wear aboard modern US-carriers. Everything got a coat of matte varnish from the WEM colorcoat brand and was thus sealed. The hangar deck was shut with a ceiling of 1mm styrene sheet. Before this ceiling was glued into place I added various 1mmx1,5mm strips to give the ceiling its typical structure. The complete interior construktion was then shut with the flightdeck, three solid pieces of styrene sheet, 2mm thick. They were glued into place and the seams were filled with super glue and sanded. Done! You can still take a good look at the well deck and the hangar through the big openings, especially when you use a maglite. |
 |
|
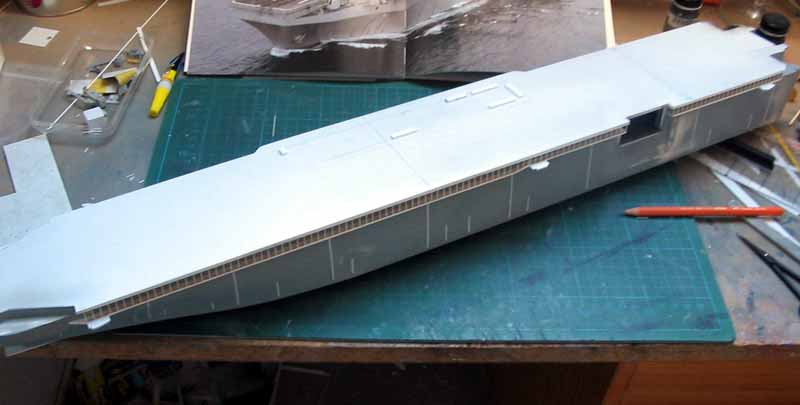
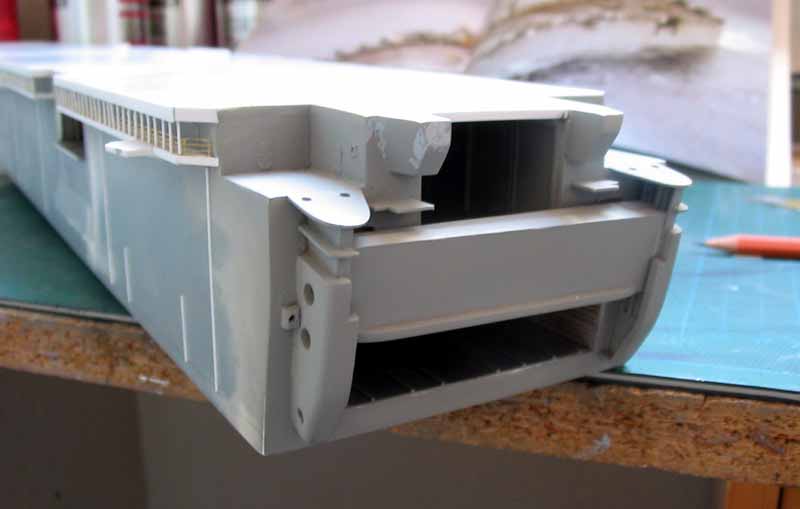
Up to this point construction was fairly straightforward. But once the hull was closed the fiddly part began. First I had to add the prominent construction that holds the well deck doors. This was done by glueing three parts of 2mm styrene sheet together in a 90 degree angle and sanding them to shape. I added I-beams inside as conductors for the doors. They were made from 1,5mm styrene sheet. Everything was adjusted, test fitted and finally glued into place. I added platforms and various styrene strips and even the elevation motors and axis for the well deck doors only to see it disappear behind the doors later on! |
 |
|
Construction went on with detailing the elevator wells and adding the elevator rails angled styrene 1,5mm to the hulls port side. The hull was further detailed with ventilation grills that I purchased from LArsenal. They are excellent photoetch parts that fit this project as if they were made for it. I added hull piping made from 1mm half round strips and gave the hull a final sanding with 1200 grain at this time. |
 |
|
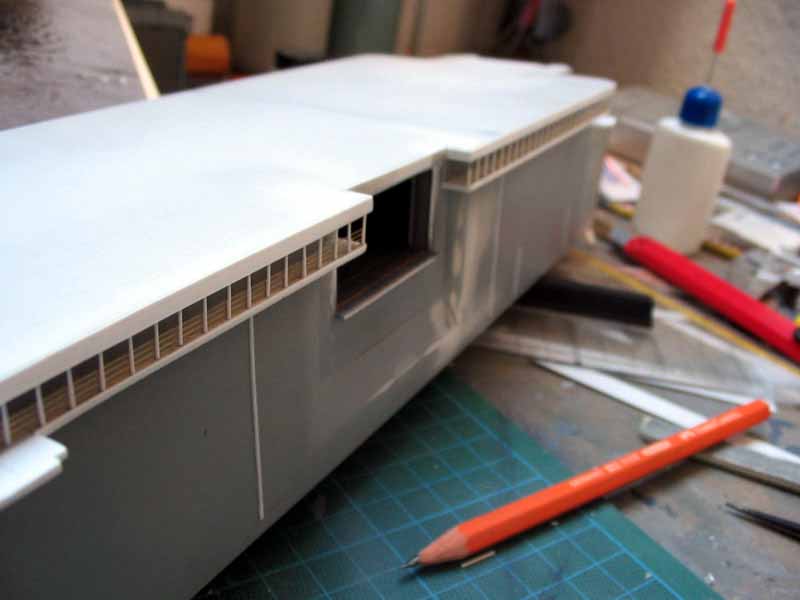
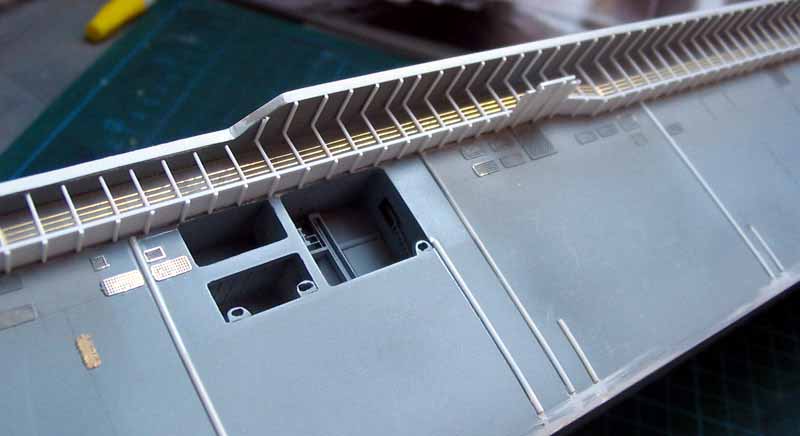
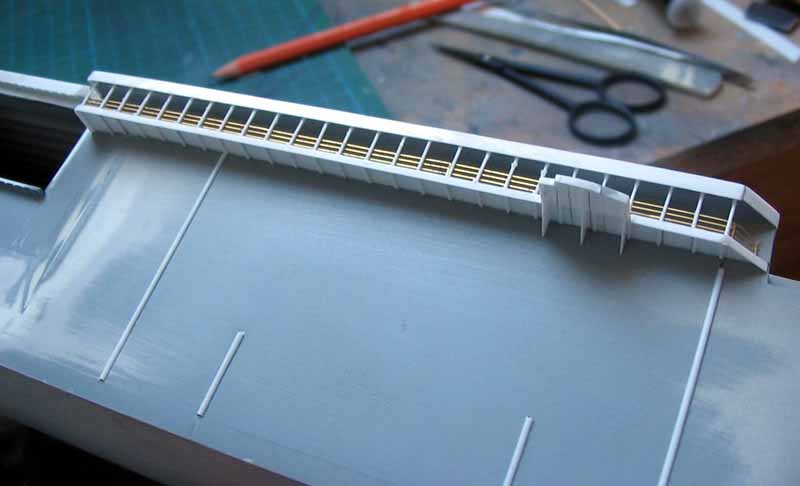
Then I took a long breath and break before tackling one of the typical eyecatchers of this ship class: The gallery under the flight deck, that will carry the catwalks. I took me several sleepless nights of thinking and several try and error sessions including swears you will never want to hear until I finally had found my way of constructing this fragile stuff: |
 |
|
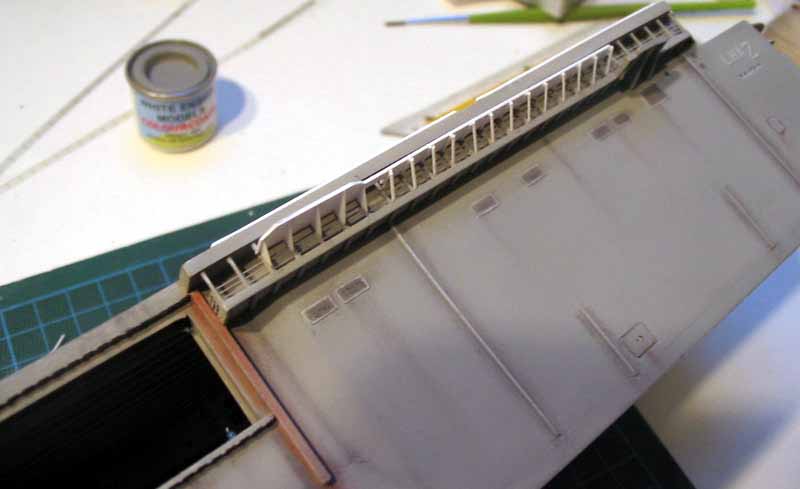
I started with a piece of 0,5mm styrene cut to shape and added small parts of railing (photoetch WEM from their Enterprise-set), no more than six sections of railing at a time. The railing is fixed with superglue 0,5mm from the platform edge. Then the posts between the railing sections are glued on 0,5mm round. Leave the a bit longer than necessary and cut everathing to the right size after all is thoroughly cured using a strip of styrene as a template. These pieces of gallery were glued to the flightdeck overhang and got beams of 0,5mm x 0,25mm styrene strip. Yes, everything was cut and glued part by part. The gallery and catwalks are made up of about 1100 individual parts. The gallery was secured and sealed with styrene strips along the flight deck. |
 |
|
I was early summer when this work was finished. And I thought the easier part lies ahead now: painting. What a mistake! |
 |
|
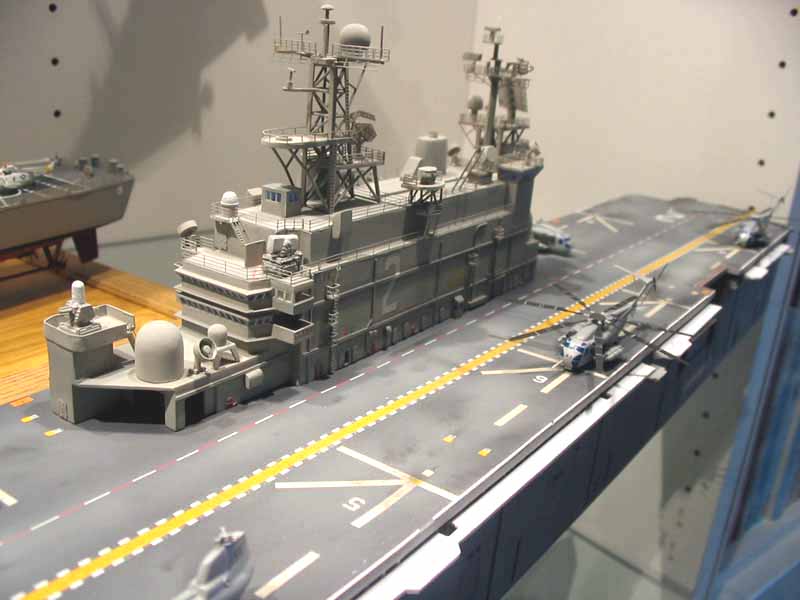
I started painting the flight deck first. The first color that hit this model was yellow for the prominent stripe running along the flight deck. This was masked and next to follow was white for marking the landing points. They were masked and the deck got a solid coat of flightdeck grey (WEM colorcoats). I removed the masks and everything was ok. So I thought of painting the hull and island next and disaster struck: Having used a thinner with acetone the WEM paint already dried in the spraying process and reached the hull in a sandlike texture. Guido Hopp, who happed to come by in these days, laconically stated that my hull looked like a 1943 Russian tank turret. The island looked the same. Moreover, I dropped it and had to remove several details to build them up again. This gave me the opportunity to rework the island and bring it to the post 2000 outfit as I wanted to present Saipan in her last configuration now. |
 |
|
Some crisis management of my fellow German Gamblers and good advise from John at WEM helped me along so I brought out the sanding paper and removed the sandlike structure. Using a different thinner solved the problem and brought out a smooth and even surface. |
 |
|
Having solved that problem I went on weathering the hull and flightdeck. I always use pastel chalks in various shades for this process. You can get them as pencils as well. They are very helpful in shading corners and highlighting small parts to bring out an three dimensional appearance. Weathering done everything gets another coat of matte varnish to seal it off and blend the colours. So much for this time, Part V will deal with the airwing. Happy modelling! |
 |

© ModelWarships.com