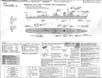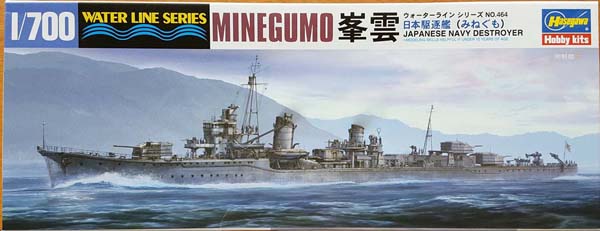
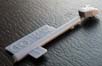
| Hasegawa 1/700 Asashio Class Destroyer
Minegumo 1943
|
| (Reviewers note: I am reprising the background and
design of the class as posted in the March, 2018 review of the Hasegawa
1-700 Asashio kit, as this kit covers much of the same ground. The same
is true for many of the sprue descriptions. I will highlight the new sprues
as well as add any new comments regarding the common ones.)
Background The Imperial Japanese Navy regarded their destroyers as a key component of a strategy that looked to maximize the impact of lighter forces upon an enemy battle line prior to engagement by the main fleet. By the late 1920s, Japanese destroyer design had evolved from what had been the core of their destroyer corps - the Minekaze, Kamikaze, and Mutsuki classes - into the larger, longer-ranged, more heavily armed, and far more modern Fubuki Special Type, a destroyer that typically outclassed many existing light cruisers. Introduced in 1928, the class went on to revolutionize worldwide destroyer design. Eventually, 24 such ships were commissioned. Their existence helped to spur on an escalating response by other nations to this type and, eventually, to a tightening of existing naval limitation treaties. As a signatory of the various naval disarmament and limitation treaties of the 1920s and 1930s, Japan was forced to tailor its battle doctrine within the boundaries of the treaties. The London Naval Treaty of 1930 led to reductions in both individual destroyer size and overall destroyer tonnage for all the signees. Japanese compliance with the treaty meant two things: 1) a cancellation of the last 12 planned units of the Fubuki types, and 2) new destroyers that could only be had by shrinking the successful Fubuki hull form. The result was the subsequent Hatsuharu class ships. However, the size restrictions also meant a corresponding reduction in power, range, speed and firepower. Attempts to maximize firepower on the smaller hull led to a top-heavy design which subsequently required a redesign (and rebuild of the first two ships) in the wake of the tragic Tomozuru torpedo boat incident. The revised Hatsuharu design was reworked again with the following Shiratsuyu class ships, resulting in a more stable ship with an increase in the torpedo broadside. Despite earning a reputation as both good and powerful ships, the Japanese were still dissatisfied with the overall shortcomings of the Shiratsuyu design when compared to their ideal of the Fubuki type. For a variety of reasons, the Japanese chose to let their participation in the naval disarmament treaties to lapse while the last of the Shiratsuyus were under construction. Doing so permitted a return to a larger destroyer. The first IJN destroyer class to emerge under these new conditions was the Asashio class. Design The final four vessels of a projected 14 destroyers in the Shiratsuyu class were cancelled, and ten ships of the new, larger Asashio class vessels were authorized under the Circle 2 (Maru 2) Supplementary Naval Expansion budget of 1934. Their construction to commissioning spanned the years 1935-1939. These new ships were designated Type A (Koh) cruiser-type destroyers, the first of several new classes of such large, powerful vessels. The Asashios were given an improved hull form that reverted in size to that of the Fubukis. The new class was approximately the same length as the Fubukis, with subtle changes in width and draft, but on a larger displacement of over 2000 tons. These were the first Japanese destroyers to surpass that displacement mark. The hull form provided for greater stability, which allowed a return to three twin mountings of the 12.7cm 50 cal. main gun in new Type C turrets. It also enabled the retention of the two quadruple 61cm torpedo tube mounts of the Shiratsuyu class, along with a full set of torpedo reloads. Essentially, the Shiratsuyu hull was enlarged by inserting additional length to accommodate the superimposed #2 turret atop a full deckhouse aft, along with somewhat greater draft. The hull also showed a little less freeboard than the earlier Fubukis. The bridge form of the last batch of Shiratsuyus was also carried over to the new class. The power plant used three steam boilers and Kampon geared turbines to drive two shafts, with a rise in total shaft horsepower from the 42,000 shp of the prior two classes up to 50,000 shp, the same as the earlier Fubukis. Speed rose by one knot, and most importantly, the range increased by 20%, to 5700nm at 15 knots. Initially, two twin 13mm AA mounts were installed on a platform to either side of funnel number two. Some ships may have been upgraded to twin 25mm AA mounts by the start of the Pacific War in 1941, with all the ships changing over to the larger mounts within the first year of the war. All ships received six single rack roll off depth charges placed at the extreme stern and an athwartships depth charge rack feeding a Y thrower aft of number three turret. Unfortunately, the new class was not problem free. The first four ships were completed with a stern shape that utilized a slightly rounded knuckle at the waterline at the extreme stern end of the ship. Unexpectedly, the turn radius of the ship was much larger than expected at trials, and wholly unsatisfactory. The knuckle had to be reshaped with a much sharper crease at the waterline. Further, the rudder shape was revised, the propeller blades shortened slightly, and engine rpm upped slightly. The changes gave positive results. The turning circle shrank, and top speed rose by over half a knot. The last six ships of the class were completed to the revised set of specifications without further trouble. There were also unexpected problems with the turbines. An inspection
shortly after trials revealed that several turbine blades had cracks in
them. A series of tests were run, ultimately revealing issues with blade
resonance within the intermediate pressure (IP) turbines. The blade
design was changed, the blades rebuilt, and the problem eliminated in all
class members by 1940.
Ship History Minegumo was the eighth ship of her class, laid down at the Fujinagata Shipyards on March 22, 1937. She was launched on November 4, 1937 and commissioned on April 1, 1938. She was initially assigned to the 41st Destroyer Division after trials. The issues with the turbines afflicting the class were known by then, and she conducted several months of training within the limitation of those defects. Eventually, she was designated a reserve ship and entered Yokosuka Navy Yard in mid- December, 1938 for turbine modifications. Its not clear how long the modifications took; it seems she returned to active service before the end of 1939. In the meantime, DesDiv 41 was re-designated DesDiv 9 (Asagumo, Yamagumo, Natsugumo, Minegumo). The division engaged in training and in some operations off the Chinese coast through 1940. The tempo of training picked up in 1941 as the Imperial Fleet shifted over to a wartime footing. In late June, DesDivs 9 and 15 (composed of Kagero class ships) were maneuvering in close quarters off southeastern Kyushu, the southernmost Japanese main island. In the fading evening light, several of the ships were involved in a chain reaction collision. Minegumo ran into the stern of Natsushio, a DesDiv 15 ship. Then, while backing up to extricate herself, another DesDiv 15 ship, Kurushio, ran into Minegumos stern. All three ships required repairs; Minegumo being the worst off with both a badly rent bow, stern and dislocated main turret number three. All ships were repaired in time for the start of hostilities in early December, though Minegumo took almost five months to complete hers at the Kure Navy Yard. At the start of the Pacific War in December, 1941, Minegumo and DesDiv 9 accompanied the Japanese Southern Force in a series of invasion operations that resulted in the conquest of the Philippines and Malaya. By February, 1942, the Japanese had reached the Dutch East Indies and successfully taken much of the territory. Minegumo was an escort to the convoys for the landings at Lingayen (Philippines), Tarakan (Borneo), Balikpapan (Borneo) and Makassar (Sulawesi). By the end of February, the Japanese were poised to strike southward across the Java Sea towards Java, the next piece of the Dutch possessions. The Allied naval forces under the ABDA command had already unsuccessfully contested the Japanese takeover of the Dutch East Indies with losses at the Battles of Palembang and Badung Strait earlier in the month. On February 27th, they attempted to disrupt Japanese invasion plans again at the Battle of the Java Sea. Unsuccessful, the Allies suffered serious losses there, as well as on the subsequent night at Sunda Straight, and then, finally, the following day in the Java Sea. As part of the Japanese escort force, Minegumo exchanged gunfire with the British destroyer HMS Encounter (in which she sustained some light damage and casualties), then assisted Asagumo in sinking another British destroyer, HMS Electra. Afterwards, she escorted the damaged Asagumo out of the area for repairs. A few days later, Minegumo and division mate Natsugumo damaged the submarine USS Perch in a depth charge attack. They then escorted the Japanese invasion force that captured Christmas Island, then escorted the torpedoed light cruiser Naka to Singapore for repairs. From there, both ships returned to Yokosuka Naval Base, Japan for repairs and refit. (Yamagumo and Asagumo were already back in a Japan for lengthy repairs; the former had been mined at Lingayen at the end of December and Asagumo had suffered moderate damage at the Battle of the Java Sea.) Out of drydock at the beginning of May, the month was spent patrolling off Japan, then accompanying the Midway invasion force in early June. Late June through early August was spent on escort duty to support Japanese operations following the landings in the Aleutians. Asagumo rejoined the division after repairs and all three ships traveled to Truk in mid-August to support new operations around Guadalcanal. After escorting the tanker Nippon Maru as it refueled Japanese forces during the Battle for the Eastern Solomons, Minegumo and DesDiv 9 spent more time as escorts, then participating as troop transports to Guadalcanal. On October 5th during another transport run, Minegumo was near missed off both her bows by air attack, incurring medium damage with serious flooding. Unable to steam at more than 14 knots, she eventually made her way back to Yokosuka by late November. Repairs were completed by mid-February, 1943. While in dock, she received an AA upgrade that included a new twin 25mm AA mount on a bandstand in front of the bridge and triple 25mm AA mounts replacing the twin mounts to either side of funnel # two. She also received likely repairs to her bridge face. Minegumo then returned to Truk by end of February and then steamed on to Rabaul for her next assignment. Along with destroyer Murasame, she was tasked to a troop transport run southeast to Kolambangara from Rabaul via the Shortland Islands for early March. Enroute on the evening of March 4th, it is thought that the two destroyers may have encountered the submarine USS Grampus on picket duty and sank her. The destroyers subsequently unloaded their troops at Vila on the southern tip of Kolambangara without further incident. Unbeknownst to the Japanese, American Task Force 68 (consisting of three new Cleveland class light cruisers and three destroyers) were entering the Kula Gulf on the east side of the island, enroute to bombarding those same Japanese positions at Vila. Minegumo and Murusame had chosen to return to the Shortland Islands by continuing on counterclockwise around Kolambangara, thereby entering Kula Gulf from the other direction at the same time as TF 68. The Americans detected the Japanese destroyers first via radar and surprised them with overwhelming gunfire and torpedoes. Both destroyers were quickly sunk. Of Minegumos crew, her captain and 46 died while 122 survived by landing near Japanese positions on Kolambangara. |
|||||||||||||||||||
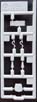
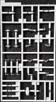
| The kit | |||||||||||||||||||
| This is the third generation 1/700 offering of the class.
The initial Asashio class kits came from Hasegawa as part of the original
Waterline Consortium range of kits introduced in the early 1970s. Those
models were fairly typical of the original waterline kits in that they
were relatively simplistic in appearance, with a mix of positive and negative
features. Those Asashios had a good, basic hull shape, and generally correct
bridge and superstructures in terms of size and scale. The kits were woefully
short on all details, excepting linoleum tie-down strips, while weapons
and boats were comparatively crude and generic.
The second-generation kits were issued by Pit-Road in the early 1990s, during the years 1993-94. The first of the IJN Type A destroyer class kits (Asashio, Kagero, Yugumo) that Pit-Road released, these remain the best of those types from them, in my opinion. They came with a good amount of small details, an accurate bow profile, and generally fine shapes all around. Accuracy-wise, these kits fall short in one glaring regard, the shape of their torpedo tube mount shields. Both the Asashio and proceeding Shiratsuyu class ships had new quadruple torpedo mounts (Type 92 Mod 2) covered with a weather/splinter/gas covering shield that had a squared off rear end when viewed in profile. The Pit-Road kit provides the more commonly known type of quadruple shield mount utilized by later classes, the Type 92 Mod 4, which was a longer shield whose rear end sloped down towards the tube ends. There is no replacement option for the earlier type torpedo mount currently on the market, unless one strips the Fujimi Shiratsuyu class destroyer kits of theirs. Other details, like doors and hatches, are a bit simplistic when compared to what todays kits now offer. Now, Hasegawa has freshened its 1/700 kit line with updated Asashio class offerings. These kits are brand new, utilizing more extensive research and modern injection molding technology to create vastly improved models of extremely high detail, all properly scaled. The kits are molded in the typical Hasegawa light grey styrene. The plastic is hard and clean, with no soft or greasy aspects, nor any flash. Eighty-eight pieces are used for assembly. More subtle details are molded on than ever before. This kit depicts Minegumo at the time of her sinking in early March,
1943. It comes with the upgraded AA fit typical for Japanese destroyers
for the first half of 1943, that of a new twin 25mm AA mount on a bandstand
in front of the bridge, and triple 25mm AA mounts replacing the earlier
twins 25mm AA mounts on either side of funnel number two. The platform
on which they rested was also revised and expanded slightly. This fit is
also likely true for the eight remaining ships in her class during that
timeframe.
|
|||||||||||||||||||
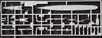
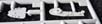
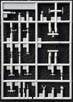
| Sprue A - Hull | |||||||||||||||||||
| This hull is a one-piece waterline hull, cleanly molded
with extremely sharp and properly scaled details including metal deck treading,
hatches, deck level skylights for the engineering spaces, linoleum tie
downs strips on the main deck, portholes, porthole eyebrows, properly shaped
anchor recesses, a degaussing cable with brackets, spurnwaters (with runoff
outlets) all around the perimeter edge of the decks, bollards, turret base,
and hawser reels. There are no lines or strakes to depict any hull plating.
The bow profile is excellent, with a hint of a curve as it approaches the waterline. Its also very fine and sharp when viewed from ahead. (The photo of the hull sprue from the underside shows off just how fine the bow is, on the left.) Unlike the hull from initial Asashio kit, this sample did not have any hint of a sinkhole to either side of the bow at the waterline. The deck edges on the rear half of the forecastle are properly shaped with rounded edges that begin forward of the aft set of bollards. The degaussing cable is sharp and wonderfully scaled, with brackets. (It follows the only documented pattern, that of Arare.) Also included is a pair of small, tertiary air intakes mounted on the engine housing just aft of number one funnel. While the size is correct, the shapes are simplified and not fully formed. While most folks will be content to leave these as is, they could be replaced with brass rod in order to be reasonably accurate. The deck is nearly free of superstructures, excepting the engine case housings at the base of both funnels. Nor is there any deck equipment molded on, aside from the hatches, vents, and some hawser reels at the stern. The reels are properly sized, and do have tiny, individual cable lines molded in. The forecastle deck and the treaded portion of the stern have been molded as separate pieces. The bullnose at the top of the bow has been separated and is a separately molded piece. This is the same hull as introduced with the Asashio kit. Unfortunately, like that kit, my review hull bowed upward ever so slightly at the bow and stern. However, its not quite as pronounced as that first one, nor as pronounced as those of the new Hasegawa Yugumo kits. The hull has been engineered to fit more closely with the waterline plate, with more attachment points along the centerline axis of the hull. Its possible that by inserting the forecastle deck piece, and by gluing the waterline plate to the hull, that the bowing at the ends will be eliminated. While likely, its is not a certainty. If need be, the bowing can be mitigated with temporary weights at the bow and stern when glued, or by using the hot water immersion method. Obviously, if one attaches the hull to a fixed base, this is not going to be an issue. Theres no weighted metal plate to help keep the hull upright. The hull scales out amazingly well. Asashios particulars versus the
scale and kit:
*This is an estimate. The separation of the bullnose from the hull makes it impossible to take a true measurement without gluing the bullnose onto the hull. The OA of the hull without the bullnose is 168.5mm, so it seems reasonable to assume that the OA length is accurate. (Note: A photo comparison of this kit hull to that of the Pit-Road Asashio kit is posted on the CASF Asashio class thread.) |
 |
||||||||||||||||||
 |
|||||||||||||||||||
 |
|||||||||||||||||||
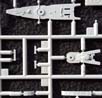
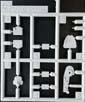
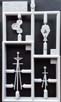
| Sprue B | |||||||||||||||||||
| This is the largest sprue of the kit and is carried over
from the Asashio kit. It holds: the forecastle deck, the waterline plate,
funnel halves for both funnels, funnel grills, both halves of the
emergency steering/RDF compartment, most of the components to the aft deck
house, the primary engine intake that sits immediately aft the forecastle
break, the engine air intake that sits at the base of funnel number 1,
the upright portions of the fore and aft torpedo reload gantries, the galley
pipe, auxiliary piping for the funnels, and last but not least, a complex
substructure that combines a) the housing and base of funnel number 2,
b) the platform upon which sits torpedo mount number one, and c) the two
horizontal torpedo storage bays that sit astride funnel number two.
As with the hull, everything is beautifully scaled, detailed and sharply molded. The detailing on all surfaces of the aft deckhouse is superior, though perhaps not as detailed as Hasegawas recent Yugumo class kits. The deck treading is incredibly fine, yet sharp, for the forecastle deck and other horizontal surfaces. It would have been nice to have seen Hasegawa dispense with the molded-on hawser reels on the forecastle deck (and the main deck), but at least the reels are properly small, and show separation between the coiled lines. The ancillary funnel pipes have the properly shaped exhaust tips on top. The grill for funnel number one has been divided into two pieces as befits the actual appearance, but solid plastic can never appear as nice as a photo etch version. My one nitpick, a minor one at that, has to do with the breakwater on the forecastle in front of the base for turret number one. Its thickness is significantly overstated. Hasegawa appears to have used each end as an injection point, or maybe an excess runoff point. Regardless, it probably made sense from a production standpoint, and most folks wont notice, but it does seem a little heavy handed. Also noticed is that the waterline plate has raised ridges that could hold a waterline weight in place. Im guessing that was the original intent, but the weight was subsequently omitted. |
 |
||||||||||||||||||
 |
|||||||||||||||||||
| Sprue D | |||||||||||||||||||
| This is a new sprue meant for kits with mid to late war
fits. On it: the AA platform mounted in front of the bridge, the enlarged
AA platform mounted in front of funnel number two, a radar compartment,
a revised stern deck insert that carries two roll off depth charge racks,
the revised, late war foremast with separate foreleg, and a late war compass
bridge deck. All parts are sharply molded. The AA platforms wisely comes
without solid rails or siding, which too often misrepresents the open railings
and canvas that typically ringed them.
For this kits particular timeframe and fit, only the AA bandstands are used. |
 |
||||||||||||||||||
 |
|||||||||||||||||||
| Sprue E x 2 | |||||||||||||||||||
| Also common to the Asashio kit, this is a small sprue that
holds the quadruple Type 94 Mod 2 torpedo mount and separate shield, two
davits for a 7m cutter, and two uprights that support the torpedo reload
girders.
Unlike the new, one-piece quadruple Type 94 Mod 4 torpedo mount that comes with the new Hasegawa Yugumo kits (and is also included in this kit on a separate sprue), the Mod 2 mount comes with a separate shield. The mount is nicely detailed and properly scaled. It may not have the degree of detail that some of the Mod 4 mounts that are out there do (i.e. FineMolds NanoDread and Pit-Road NE series versions), or even the Hasegawa Mod 4, but it is more than adequate. The torpedo warheads are molded into the bottom of the tubes. |
 |
||||||||||||||||||
 |
|||||||||||||||||||
 |
|||||||||||||||||||
.jpg) |
|||||||||||||||||||
| Sprue F | |||||||||||||||||||
| Yet another small sprue common with the Asashio kit, this
one holds all four sides of the bridge base, the compass bridge deck roof,
an early war stern deck insert, the roof of the aft deckhouse, and what
maybe two small vents or 30cm signal lights (Part F9).
Again, everything is beautifully molded, detailed and scaled. Two bridge faces are provided; the one labeled F5 is apparently specific to Minegumo and used here. The original bridge face, F4, could be used to represent another sister in this fit. The parts labeled F9 are not to be used, either. My one nitpick here has to do with the way the depth charges are detailed. They sit nicely in individual roll-off racks as befits an early to mid-war ship. Viewed from the inside looking outward, one can even see the delineation between the rack and depth charge. Strangely, the same fidelity is not offered on the outside of the depth charges sitting in their racks. I do think that the charges can be delineated with a scribe tool and a little care. |
 |
||||||||||||||||||
 |
|||||||||||||||||||
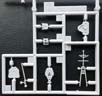
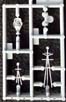
| Sprue G | |||||||||||||||||||
| Also a common sprue, this small sprue contains an early
war foremast and main mast, the early war version of the platform that
supports the twin 25mm AA mounts to either side of funnel number two, and
the compass bridge deck.
Much is commendable here. As with the other sprues, detailing is sharp. The compass bridge deck has a properly recessed deck, suitable for additional detailing. Theres actually a chart table molded next to the central support housing, and tiny, raised circles indicating the placement position of lookout binoculars and a compass binnacle. The foremast is molded as one piece, with the rear legs integrated with the foreleg. It observes the correct angles of the tripod legs, particularly where the rear legs are 90* vertical to the ships axis. Integration also eases the proper placement of the mast on the ship. A set of light yardarms are properly swept outward and back. As far as I know, this one-piece setup is a relatively new innovation for an IJN tripod mast, having been introduced by Hasegawa with the recent 1/700 Yugumo class kits and the new Asashio kit. I find this rendition superior to that of the Yugumo kits, as the tripod legs are slightly thinner. The uppermost set of yardarms might be a little low and too close to the set of yardarms under it, but overall, it looks really nice. The same configuration and stance is true for the smaller main mast that sits atop the aft deckhouse. |
 |
||||||||||||||||||
 |
|||||||||||||||||||
 |
|||||||||||||||||||
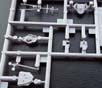
| Sprue M x 3 | |||||||||||||||||||
| This sprue is shared with the new Hasegawa Yugumo kits and the Asashio
class kits, and holds: a 6m launch, a 7m cutter, a 7.5m motor launch and
canvas cover, a twin 13mm AA mount, two twin 25mm AA mounts, two triple
25mm AA mounts, six single 25mm AA mounts, a twin set of 12.7cm barrels
and canvas boot assembly for one of the 12.7cm main mounts, two davits
for the cutters, two more davits for the motor launches, a crowsnest,an
anchor, a small hawser reel, the quad 61cm torpedo tube mount with shield,
all torpedo reload girder supports and an overhead girder for the rear
torpedo reload station (Kagero & Yugumo classes only), and a support
for a late war AA bandstand.
Only a few items are used for this kit, those being the 7m and 7.5m boats with cover, a 25mm twin mount, the twin 25mm AA mounts, the twin set of 12.7cm barrels with boot coverings, the rear boat davits, the crows nest, anchor and small hawser reel. Everything else goes into the spares box. If one choses to do so, it might be best to look at some of the other twin 25mm mounts on the market in accessory sets as an alternative. The kit supplied guns are certainly better than what has typically supplied the Waterline Consortium kits, but there are superior versions available. The ships boats may not contain quite as much detail as some aftermarket versions, but they are very nicely shaped and sized, particularly the motor launch. |
 |
||||||||||||||||||
| Sprue N | |||||||||||||||||||
| This is another equipment sprue that is carried over from the new Yugumo
class (H) and Asashio (H) kits. Included are the bullnoses set at
both the bow and stern, both paravanes,a paravane winch, the athwartship
depth charge rack and Y-thrower,a couple of vents for the aft deckhouse,
a 12.7cm practice loader, bow and stern jackstaffs, a 90cm searchlight,
an RDF antenna, a deck winch, a 2m direction finder for aiming the torpedo
tubes, the main gun director, early and late war versions of the cupola
for atop the main director, a small sea anchor for the rear deck, a Type
13 radar antenna, the port and starboard torpedo reload housings that are
placed to either side of funnel # one for Kagero and Yugumo class ships,
and some supports for mid/late war 25mm AA bandstands.
As with the M sprue, several items are not used for this kit. These would include the Type 13mm radar, the AA bandstand supports, the late war cupola, the torpedo reload housings, the supports for the AA bandstands, the stern bullnose, and (supposedly) the anchor and deck winch. I say supposedly because these items were standard equipment on board IJN destroyers. The detailing is particularly sharp on many of the little pieces that are used. The cupola, the paravane and deck winches, and the Y-thrower are most notable. Even the depth charge rack, solid as it is, has more depth than usual to the outline of the latticework of the rack. The biggest issue here, and probably with the kit, is that the main gun director (part N24) is not appropriate for these vessels. The model of director included on this sprue was specific to the Yugumos and Shimakaze. For whatever the reason, Hasegawa neglected to include an earlier type housing that was used. It certainly could have been accommodated on one of the Asashio class specific sprues. The earlier directors were fully more round in circumference shape. The differences would be very noticeable in a side by side comparison, though it is not a deal stopper here. There are alternatives; the best being part B27 from the original Pit-Road accessory set E-10, one of which is still included with every one of their Akatsuki, Hatsuharu, Asashio, Kagero & Yugumo class kits. Barring that, the director from the Aoshima or Fujimi Kagero class kits could be used as well. |
 |
||||||||||||||||||
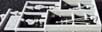
| Sprue R x 3 | |||||||||||||||||||
| These are one-piece sprues, with a Type C/D turret attached.
These are also carried over from the new Hasegawa Yugumo class and Asashio
kits. They are particularly well done with regards to details which are
almost as comprehensive as the C/D turrets from the Pit-Road NE05 set.
Those versions include the grab rails atop the turret, which these Hasegawa
versions dont have, but the Hasegawa versions do properly have three protected
air vents on their port side; the NE set only sports two.
Sizing appears correct, and the scaling of the details appears a bit more accurate than the NE version. Stiffening bars along all the sides of the turret are included. However, note that for the Asashio class ships, only number one mount would carry these bars. To be completely accurate, one would have to remove the bars for turrets two and three. |
 |
||||||||||||||||||
 |
|||||||||||||||||||
 |
|||||||||||||||||||
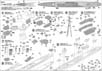
| Decals | |||||||||||||||||||
| The kit comes with a small, beautifully registered decal sheet. Minegumos name is rendered in both Japanese and English, in two formats, which are good for a small nameplate or even the bottom of the waterline plate. Her name is also rendered in Katakana characters for the sides of the hull. (Note: Such an application, in conjunction with the presence of a degaussing cable, would only be applicable to the latter half of 1941.) There are several Imperial Japanese navy ensigns with the Rising Son, and the ships name in several sizes. These are meant for both the stern of the ship and, in a nice, accurate touch, the ships boats. Draft markings are also included. | 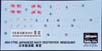 |
||||||||||||||||||
| Instructions | |||||||||||||||||||
| These consist of one large format sheet printed front and back, then
folded several times. The front portrays the usual blackand white reprint
of the cover art, a brief ships history in Japanese and English, plan
and line drawing views with color callouts for painting, and some guidelines
to assembly. The color callout and fit illustration is specific to Minegumo
in February, 1943, with DesDiv 9.
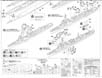
The back has a step-by-step progression of assembly using exploded, three-point perspective illustrations. Theres also an illustrated parts guide, with block outs denoting equipment not used in this fit. |
 |
||||||||||||||||||
|
|||||||||||||||||||
| Final Thoughts | |||||||||||||||||||
 Ive
always liked the Asashios. While not quite as well known as the following
Type A Kagero and Yugumo class ships, they generally gave good service
and a very good accounting of themselves. The timing of the new kits is
quite fortuitous for Hasegawa, as the sunken wrecks of class members Asagumo,
Yamagumo and Michishio were discovered late last year in Surigao Strait
by the Paul Allen expeditionary ship R/V Petrel, and interest in the class
has risen. Ive
always liked the Asashios. While not quite as well known as the following
Type A Kagero and Yugumo class ships, they generally gave good service
and a very good accounting of themselves. The timing of the new kits is
quite fortuitous for Hasegawa, as the sunken wrecks of class members Asagumo,
Yamagumo and Michishio were discovered late last year in Surigao Strait
by the Paul Allen expeditionary ship R/V Petrel, and interest in the class
has risen.
Yes, there are a few nitpicks, and the absence of a proper main gun director is a bit surprising, but none of these make the kit less desirable. Nor am I as dismayed about the bowed hull for these ships as I was with the new Hasegawa Yugumos, as the flaw here is less obvious or even the initial Asashio kit. So, hopefully, Hasegawa has already moved to correct this problem, perhaps with harder styrene. And, as I wrote before, this is not going to be an issue for anyone who mounts the hull to a solid base. The rest of the kit is extremely well done, and a welcome freshening of the available class kits. Thanks to Hobbico Model Distributors for the review sample. They are your US distributors for Hasegawa. MSRP for the US is $25.99. |
|||||||||||||||||||
| This is an in-box review showing the kit contents. We welcome your input and comments in the review section of the forum especially if you can share details about fit, ease of assembly and accuracy. Click the logo on the right to join in the discussion. |  |