 |
|
| Yamato is Japan's oldest poetic name. It is the name of the territory on which the 1st seed of state was sown, and later became the name of the province on the Kii peninsula, In southwestern Honshu, Whose capital is Nara. This mystic and especially potent name was given to the largest and most powerful battleship ever built, which entered service in the Pacific War at the beginning of 1942. Throughout the Second World War, YAMATO was not only Japan's modern ,new generation battleship but also the pride and symbol of its Imperial Navy. With the greatest displacement, biggest guns and heaviest armor of all time, YAMATO and her sister ship MUSASHI were the ultimate battleships and they proved to be a formidable opponent to the US Fleet. 1 | |
| Well I am back again. After a short respite from building CVE-73 in 1/72 scale I was ready for a new project. I had purchased the Yamato kit by Nichimo a while back and it has been in the box waiting. I decided it was a good time to start construction. After all it is winter. A great time of year to model. No yard work, etc.!!!! Upon opening the box and examining the contents I knew this kit would be a challenge. First of all, it is an old mold and getting older. There is flash on the parts, not real bad but in the worst places. Mostly around smaller parts that are difficult to clean up due to the fact that they are very delicate. Second, the majority of the kit, if not all, is molded from ABS Plastic. ABS differs from polystyrene in that it is a softer material and is difficult to tool. It tends to burr allot and clean up of parts can be time-consuming. I found that wet sanding with automotive paper is the best bet. 220 to 320 works well. Third, the parts do not fit very well. They require a lot of patient work and fitting. A little word of advice if you are thinking about this kit as your next build. 1st is the cost. The kit ranges from $280.00 to as high as $500.00. YOU WILL NEED TO ADD A PHOTO ETCH KIT. This is a must. Gold Medal Models kit is the best bet. About $80.00. Then, if you want to get serious, get J. Skulskis book, Anatomy Of The Scale, Battleship Yamato. The book is out of print but I was able to find it on-line relatively easily. About $30.00. In addition, you may want to pick up some more small parts from HR Products. Cast metal fittings in 1/192 scale. Close enough to 1/200. Watertight doors, deck hatches and louvers is what I used, about $35.00. So all in all, you are looking at shelling out about 500 bucks. As I proceed with the build I can say that it is worth it!!!! Yamato is a little over 51" long when completed and makes an impressive display piece, either waterline or full hull. I chose to do the latter. AS with all Japanese kits there a some motorized goodies you can include and I decided to do that. Turrets move 90 degrees as does the main range finder and 4 searchlights. Pretty cool when done although it requires more work. The kit is just as good without them. So, If you are up to spend some bucks and are up for a challenge, lets have at it!! Now, lets get to the photo's!! | |
| A shot of the stern view. Note that I have added the hanger bay for the a/c. White areas are sheet styrene. This is relatively easy to do. Cut out the molded portion on the deck, add the walls and floor, add an overhead door and some trolley rails and you got it!! | click images
below to enlarge 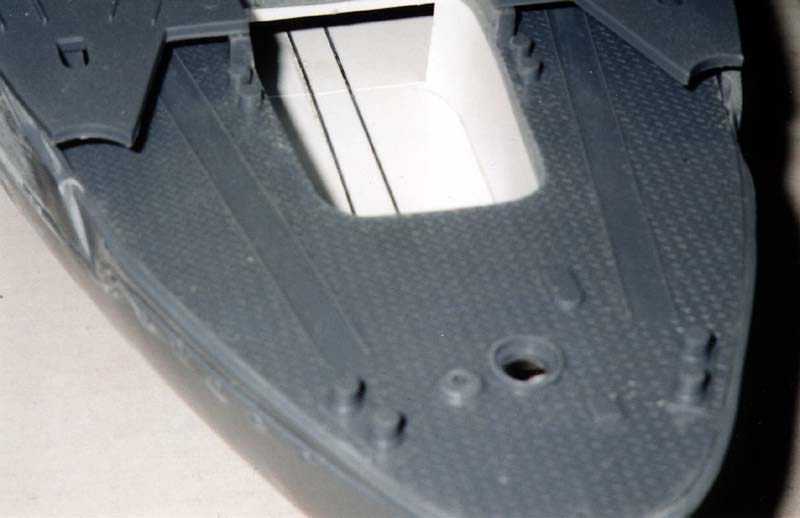 |
| A close -up of the stern/hanger deck area almost completed. Compare this shot with photo above it. | 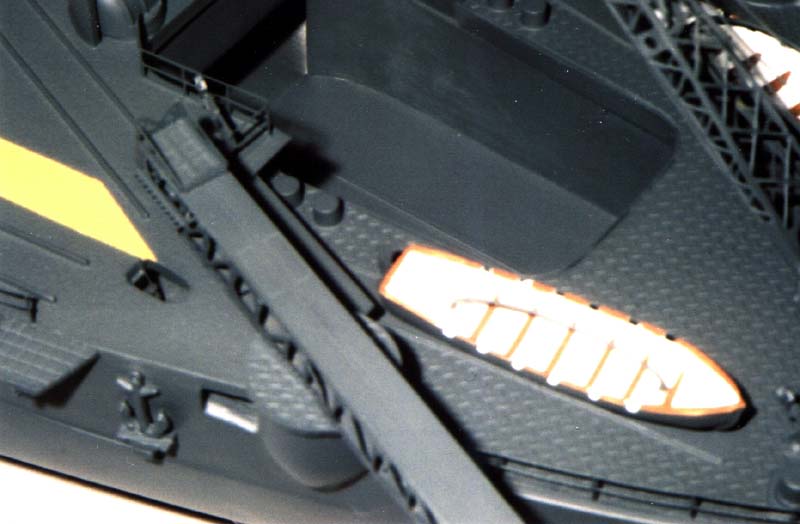 |
| Another view of the stern deck area. Note the opened hanger area and the p/e parts. The arched frame inside the lifeboats is to hold the canvas weather covering when boats are in storage. | 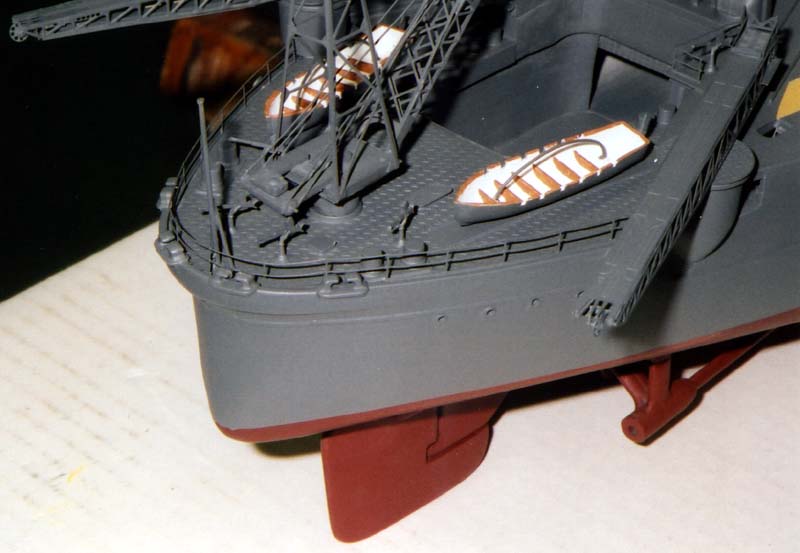 |
| Starboard side view of the boat hanger deck opening. Note that I have opened it up. Later I'll add other details and a boat hanging from the crane girder on each side of the ship. This assembly is in 2 pieces out of the box and is one of the areas that need fine tuning due to the poor fit. You can see in the photo the rough sanding marks. Due to the fact that the kit is mostly molded from ABS Plastic I chose to use Model Master Liquid cement for models rather than super glue (CA). The liquid cement actually welds the plastic together so that when dry you can file and sand without the need for a lot of filler. | 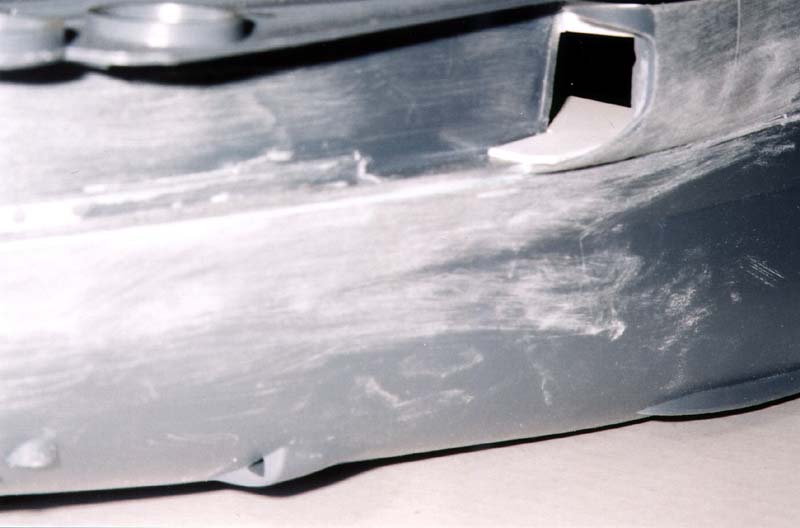 |
| Here is a shot of the bottom of the 2 piece plastic wood deck in the kit. You can see the main turret holes. Notice that I have cut out all the molded in details on this deck in preparation for the new real wood deck. I then sanded the plastic wood deck totally smooth saving what parts were large enough to clean up and re-attach after the real wooden deck is installed. After smoothing things out I glued 1/16" thick scribed basswood, scribing spaced at 3/32", directly on top of the plastic deck. I then cut out the holes for the main gun turrets and whatever other openings need to be there. Next step is to lightly sand the wood with 600 grit sandpaper. Do this lightly or you'll sand out the scribed lines in the wood. I then stained the deck, 2 coats and painted and re-attached all the parts I had previously removed. | 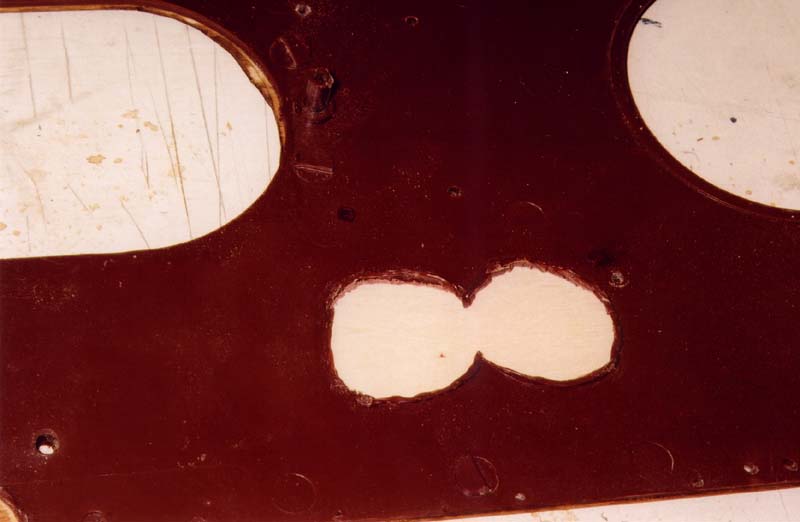 |
| In this photo you can see that I have attached the new wood deck to the hull and have re-attached some of the parts that were previously removed from the plastic deck. I'll get into a brief description on attaching the decks to the hull. In the kit the deck comes in 5 pieces. The bow deck, then the 2 piece plastic wood deck, the catapult deck, and finally the stern deck. Since I glued the new wood deck directly on top of the old plastic one, when attached to the hull it will stick up 1/16". Therefore you must also raise the bow deck by the same amount, to keep everything the same height. I did this by gluing a 1/16" thick piece of sheet balsa to the BOTTOM of the bow deck. The catapult deck and the stern deck doesn't need to be raised in this manner. By adding the aft breakwater at the joint between the wood deck and the catapult deck you won't see the slight difference in height. | 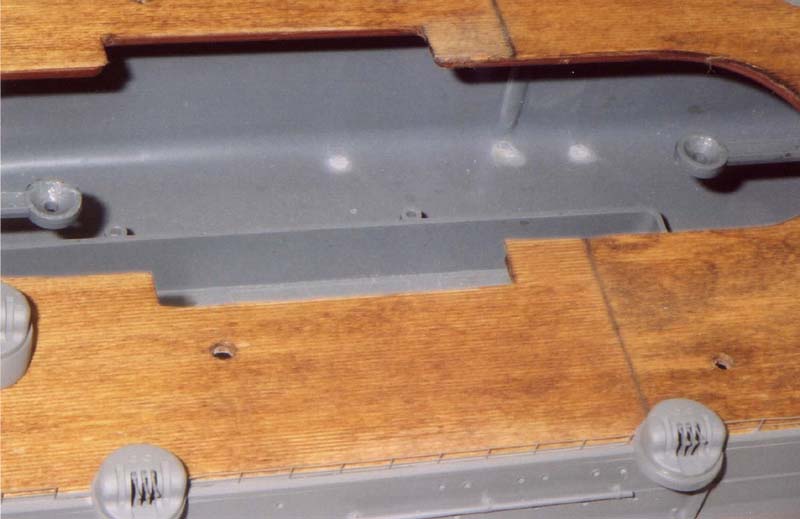 |
| The stern deck is one whole different level too so no need to raise it. This sequence of assembly worked well for me; fit and glue the bow deck first. Then attach the wood deck. Work slowly and cement things a little at a time and clamp as you go. Add the stern deck next then finally attach the catapult deck, which is the most difficult to line up. As I mentioned before the fit of the kit is poor so the more time you take the better end result you will get. After all the decks were attached to the hull, I then added 1/16" strip styrene around all of them, the whole length of the hull. You'll see a very fine gap between the strip and the decks 1, 2, and 3. This works out perfectly to attach the photo etch railings. The railings fit rite into the small gap and makes them easy to attach. Also in the photo you will notice the two arms beneath the deck. These are the push rods that move the turrets. More on that later. | |
| Here is a couple of shots of the bow area. If you look close you can see the strip styrene that I mentioned earlier. Notice that the fit is pretty good now after the above procedure. Also notice the p/e parts. These are a must if you are going to do a good display piece. I have also added a few scratchbuilt items as well. The anchor chains have not yet been added. | 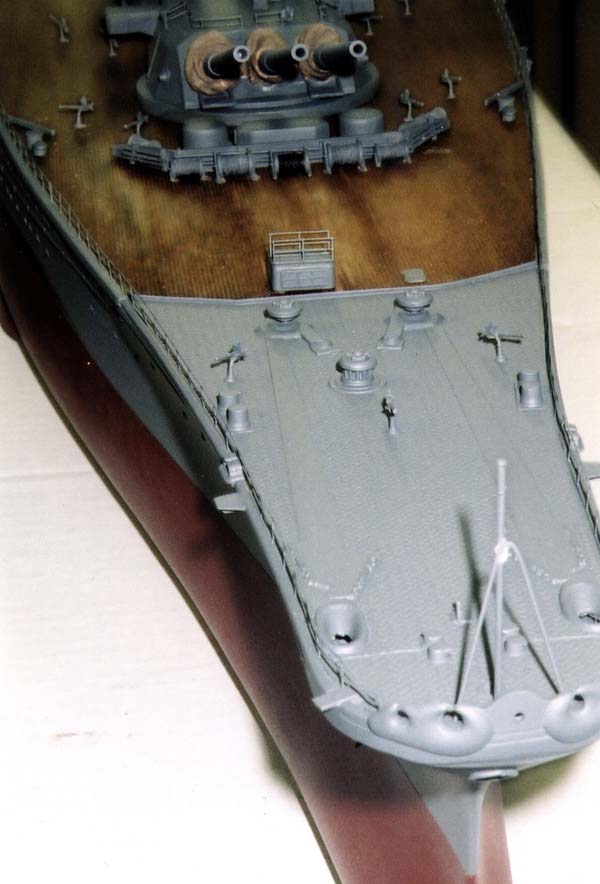 |
| .A note on painting and finishing. I stained the wood deck before attaching it to the hull. All other areas were left unpainted until most of the other small parts were attached including the railings etc. I then carefully taped off the wood deck and airbrushed the entire structure at one time. This makes for a better job. Any parts that were removed from the plastic wood deck were then painted and attached to the decks. |  |
| Lets get on to the turrets! Type 94 46 cm 45 caliber guns. The 46 cm (18.1") guns with which Yamato and Musashi were supplied were the only modern guns of this caliber ever mounted in a ship and represented quite an achievement for the IJN. Up to that time, 16" guns were the largest in general use. The maximum weight of one of these triple turrets was 2774 tons, about as heavy as a big destroyer! Each gun could fire a projectile weighing 1360 kg a distance of 42,000 meters at an angle of 45 degrees. Three different types of projectiles were used for these massive guns. 1.- Armor piercing, Type 91, 2.- 46 cm Type common 'San Shiki' Model 3., and 3, Type HE (high explosive). | |
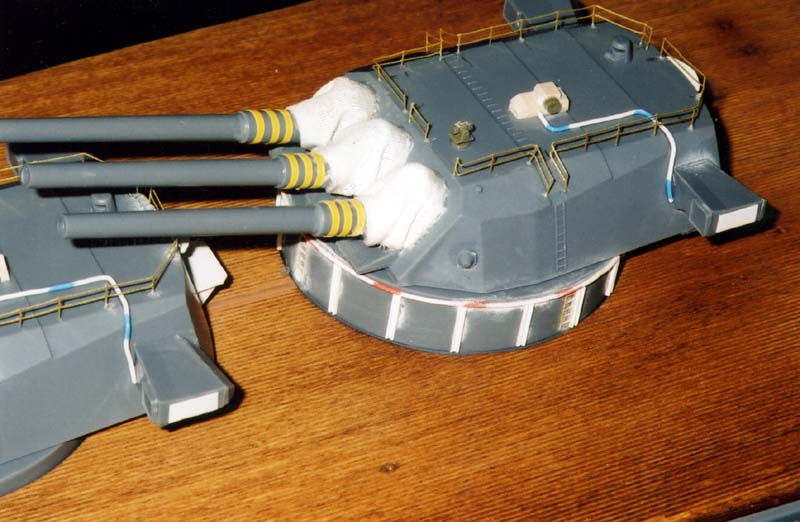
| The photo's on the right show the #1 and #2 main gun turret. All 3 turrets are the same as far as the details are concerned. Note that it is still unpainted. Also notice the details that have been added. Some are photo etch while the others are scratchbuilt. Also note the blast bags. I used white bed sheet cloth to make these. I'm not sure how accurate they are as there are not a lot of original photos. I figure they have to be pretty close. I assembled and painted all 3 main turrets first before adding them the the deck. I then installed the turning linkages. The turrets only move in one direction and only 90 degrees. (unfortunately) Turrets 1 and 2 move to port, while the aft turret, #3, Moves to stb. The main gun director also moves at the same time as #1 and #2 turrets, and in the same direction. It is moved via a vertical shaft turned by the gearbox assy. mounted beneath the superstructure, which also actuates the turrets. Lindbergh did the same set-up on their Blue Devil Destroyer kit. Theirs moves 180 degrees and is an improved version than the one in the Nichimo kit. I wonder where they got the idea???? You don't have to install all the motorized gizmos that are included with the kit. You don't get the motor by the way, you must purchase that separately. I did it just for fun! I have tested all this stuff and it really works pretty cool! Make sure you follow the instructions and diagrams closely if you add this feature as it is real easy to screw up. This shows the #1 18.1" turret. | 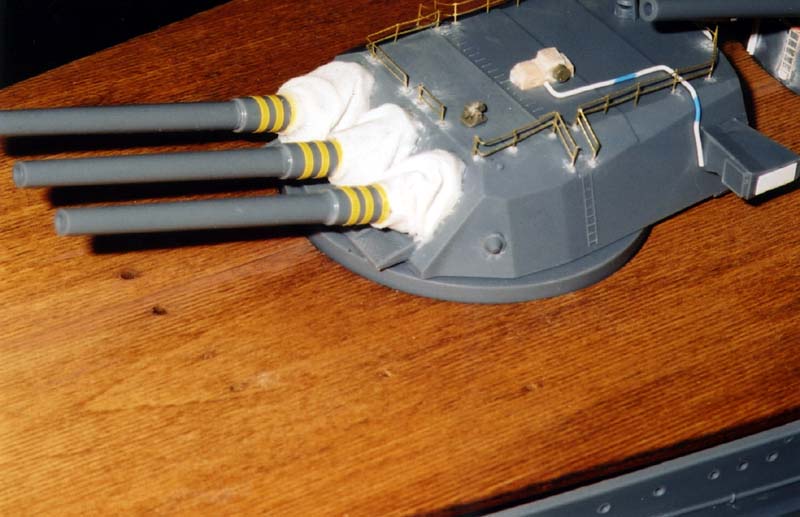 |
 |
|
| Here we have the secondary turret, a 15.5 cm 60 caliber 3 "Nendo Shiki "Gun. These guns were the finest in use during the 2nd World War. Yamato originally carried 4 of the turrets, but only 2 remained after her 1940 re-fit. One fwd. and one aft. The weight of these shells was about 56 kg and had a range of 27,000 m. at 45 degrees elevation. These guns were also used allot on IJN Cruisers as their main armament. Note that in this photo the turret is painted and given the same detail treatment as the main guns. I did not add blast bags to these as I couldn't figure out a good way to do it! Too small of an area to work with. | 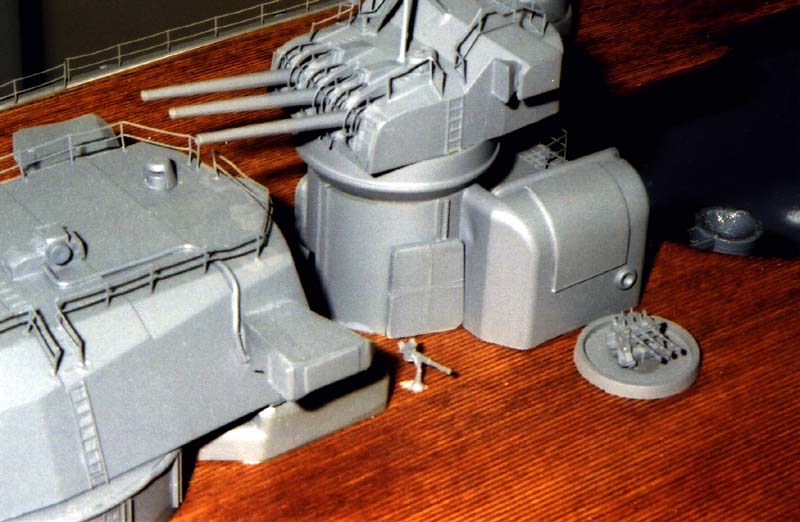 |
| Here is the aft main turret and secondary turret. Both are finish painted and installed. Note that I need to do a little touch up yet! Also note they are turned to 90 degree firing position. | 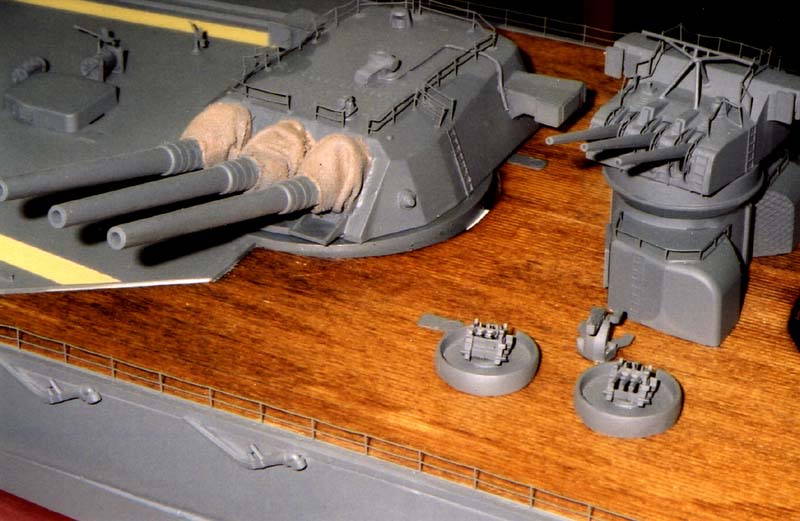 |
| Here again is the #2 main turret, finish painted and mounted. Compare this with photo's above. | 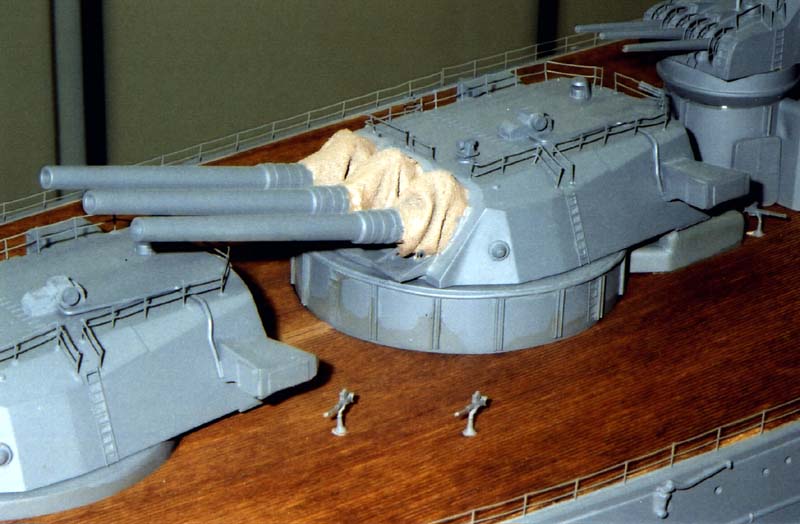 |
| Main # 3 turret looking fwd. from the stern deck. Note the aft. breakwater I spoke of earlier mounted between #3 deck and catapult deck. | 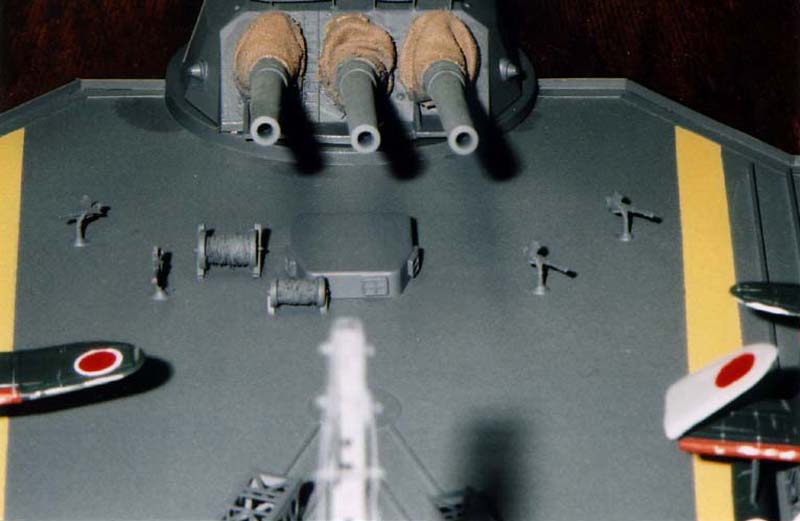 |
| On to the stern deck areas. In this photo you can see one of the Aichi E13A 'Jake' Float planes. These are a small kit in themselves. Each one has 10-12 pieces. I folded the wings on this one. Note the p/e trolley that the a/c sits on. Also visible is the crane girder for the boat hanger deck. Also note the Type 96 'Shiki' Triple 25 mm AA Guns with shield Adopted at the end of 1941 with a crew of 9. Note that I have not attached propellers yet. | 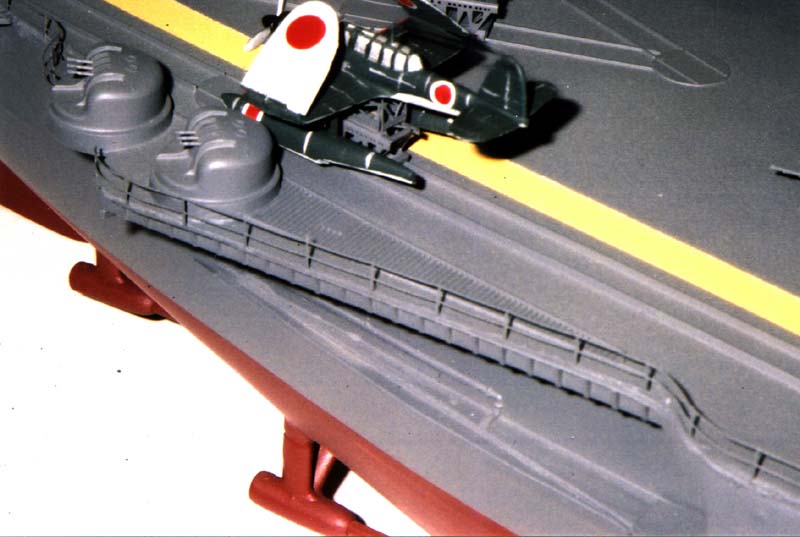 |
| Another shot of the crane girder which leads into the boat hanger deck, port side. I will add a lifeboat suspended on cables from the crane girder soon. | 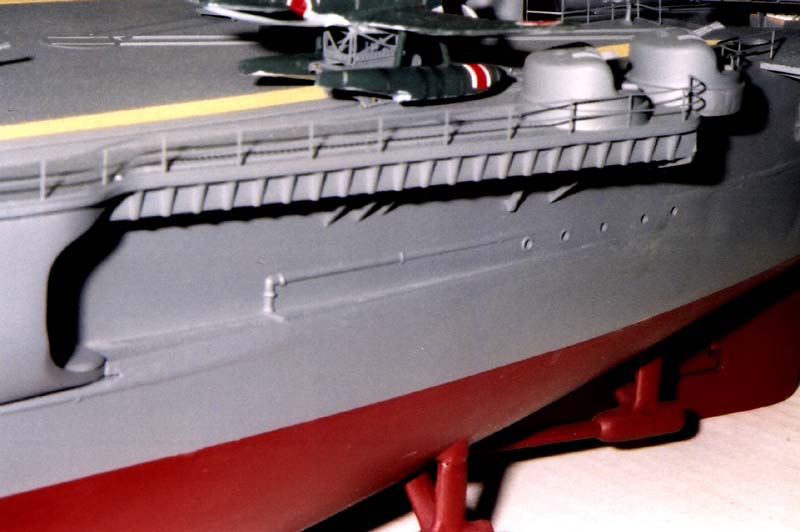 |
| Here again we can see the Jake float plane and the catapult deck area, Starboard side. I made the decals for the a/c out of other decals I had in my grab box. The ones in the kit are no good, so toss 'em. Again notice the a/c trolleys. a nice little item in the p/e kit from GMM. | 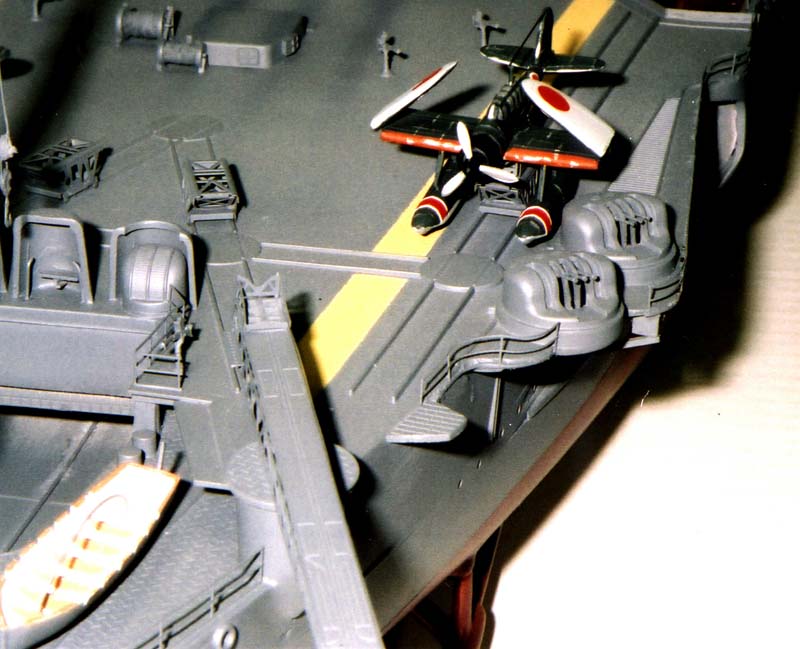 |
| Here's a good shot of the boat hanger deck door area, port side. Note the supports by the crane girder. These come in the kit and are tricky to install. The are flashed up pretty good too. Note that I have opened the boat hanger door also. This is a solid piece in the kit so you must cut it out. ( If you want ) Take your time on this area. | 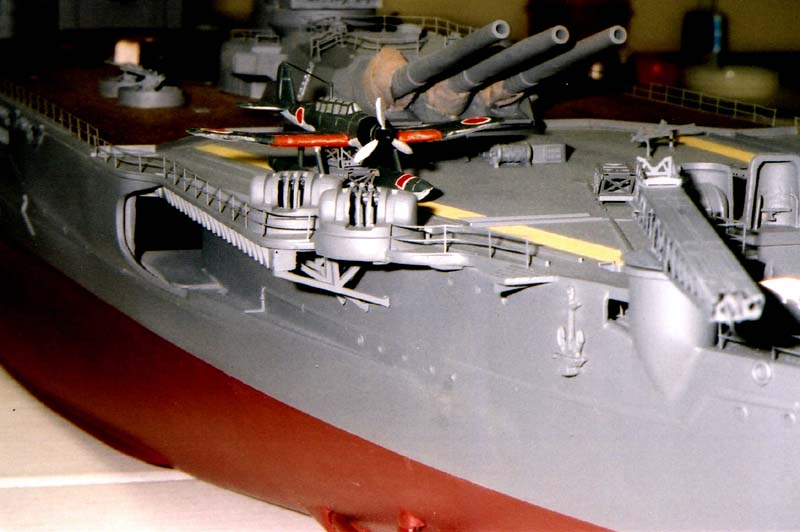 |
| Port side catapult. A little blurry but you can get the idea. I did not use the p/e props for the a/c as I could not figure out a good way to mount them. The ones in the kit are OK, and are in one piece, prop and spinner. Note that this aircraft has wings extended, locked and ready! | 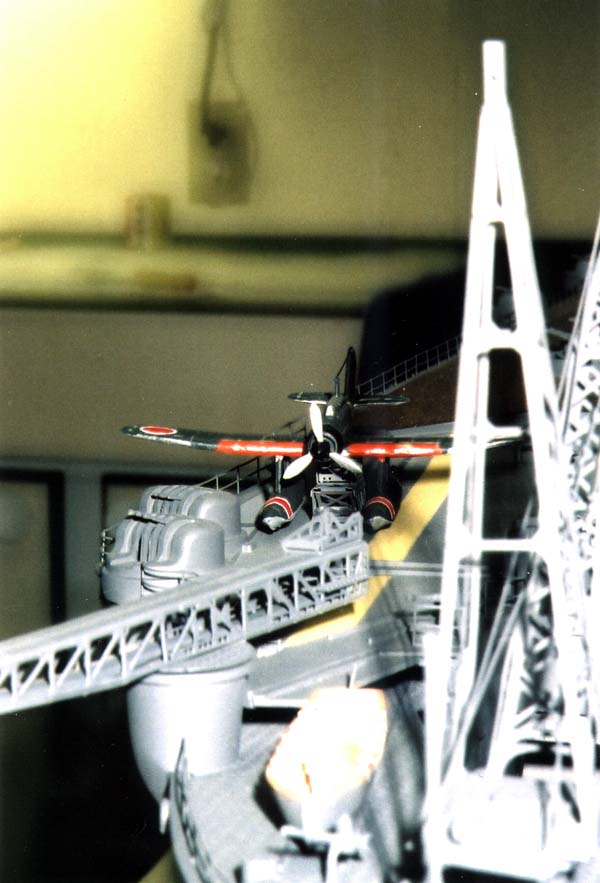 |
| Here is a dead on view of the stern deck. You can really see the advantage of the Photoetched parts. The catapults, crane, and the aft antenna assy. are all p/e. I'll add some more aircraft also. A Mitsubishi F1M2 'Pete' float plane (biplane) will be added to each catapult. | 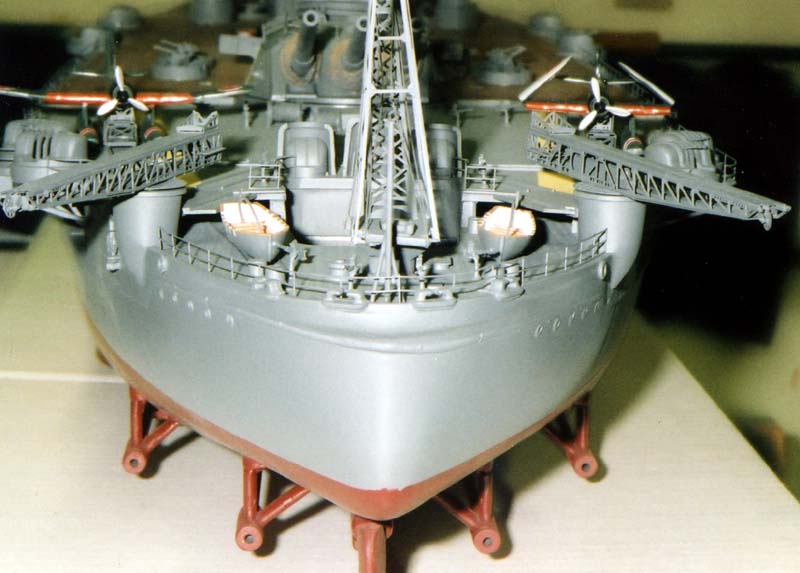 |
| Port side shot of the whole ship. Not a great picture but it will give you an idea of the size | 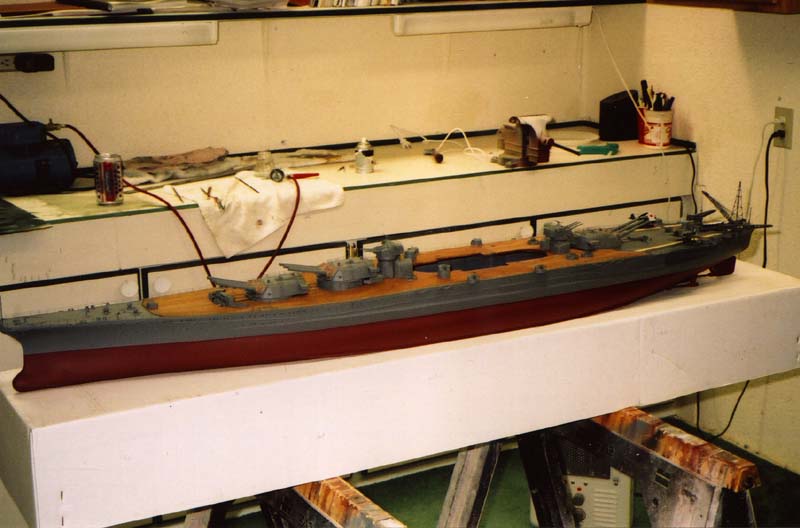 |
| Stay tuned for part 2 of Bill's 1/200 buildup coming soon. Bill will be checking in on the message board for any questions you may have. | |
|
On to Part 2 |
|

© ModelWarships.com