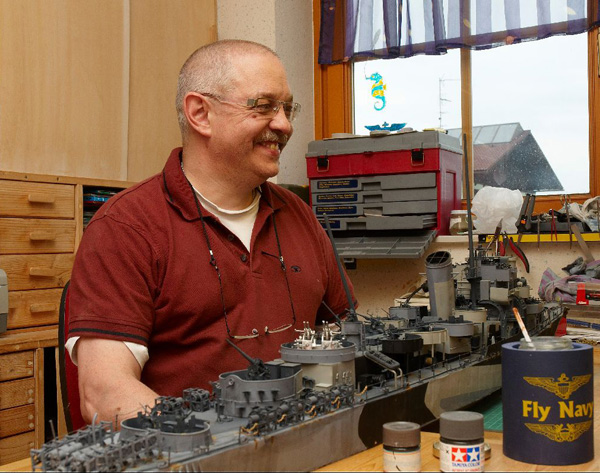
| USS Brister DE-327 « Trim but
deadly »
by René Hieronymus |
| page 2 of 2 |
| Continued from Page
1
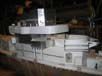
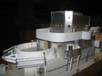
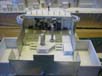
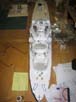
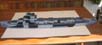
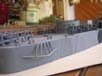
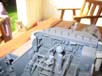
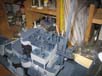
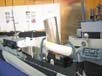
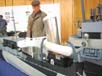
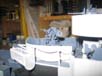
Contrary to my last project this hull was a nice and most of all easy piece of work and as soon as the main deck was installed I could start the detail work. I started with the forecastle deck, the anchor winch and the hawse pipes. The forward 350 calibre deck gun station and some other small details were build and assembled pretty easy and fast. Most of these parts were made of plastic sheet and wood. I really like to work with wood and so I made all those chocks and bitts of solid wood and after some trial and error this work went pretty fast and those parts looked as good as the one you can buy! All these parts were already fixed to the entire hull and the next step was to start the work on the superstructure itself. For this I used the plans which I had got from Floating Drydock as well as other plans which I was able to find on the Internet. The first level of the superstructure was made entirely of plastic sheet, details like handrails were made of solder wire, doors were casted from a master and various pipes were made of solder wire again. Some self made PE parts were used for vents and other details. Little storage racks, vegetable lockers and ladders were added and several other details like fire hoses, cable reels and hatches were made of plastic sheet and some other materials. |
||||
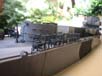
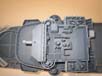
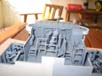
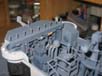
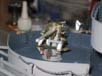
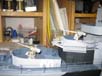
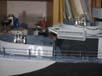
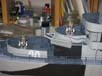
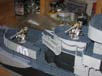
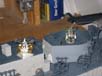
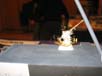
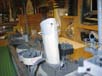
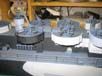
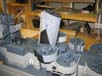
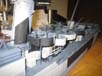
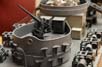
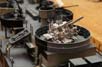
| The aft gun station was made of plastic sheet as well as some PE parts and finally fixed to the deck. After that I turned my attention to some smaller details. First came those arbors, I had to make over 50 of them which were later added to their racks. These tiny bits are made of only 2 parts but they took a full week to be made. Significantly more pieces were used to make those 2 depth charge roller-racks which are mounted at the stern of this ship. Both of them were made of plastic profiles which had to carefully lengthened and glued to look absolutely identical. As soon as I had them finished I made the 2 smoke dispensers from wood and a small plastic basement to which they were mounted. After that I had to build another 8 sets of the depth charge racks which are mounted beside the K-guns on both sides. The construction of these little racks was once again very time consuming and sometimes nerve shattering, not only because these racks contained about 36 parts each but most of all they all had to look trim and identical! A single K-gun was self made and casted in the appropriate number and finally fixed to the deck. The small depth charges were made of solid wood with some small details made of styrene. | 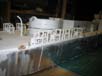 |
|||
 |
 |
 |
 |
 |
 |
 |
 |
 |
 |
 |
 |
 |
 |
 |
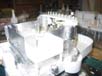
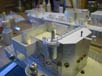
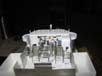
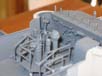
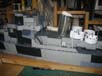
| Next came the superstructure again. This time I added the
next level and I had some of the aluminium left which I used for the hull
plating so I decided that I could use this one to for the bridge structure
as well. Once again I tried to add all details to each platform as soon
as this was finished. This way to build is quite some fun for me, cause
as anyone can see in the pictures this way the ship is really growing with
each level and everything which can be seen the finished model, except
the colour is already in place. By doing it this way I get some feeling
about the model and sometimes I get some good ideas for the final touches
on such a model.
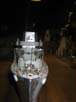
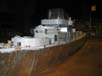
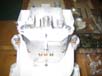
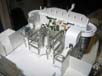
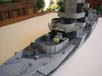
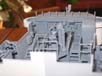
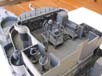
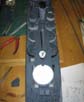
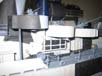
It is not unusual for me to jump from one part of a ship to another totally different part. So after finishing this level of the bridge, I made the prop guards and some final arrangements to some other details at the stern of the ship. But once again I had to go back to the superstructure so I started the work on the so called Navigational bridge which is 1 level beneath the open bridge on this kind of ship. Actually this is a pretty simple structure and was pretty easy to make. On top of this comes the perhaps most interesting but also most demanding part of the entire ship, the open bridge! I was able to find some good pictures of this part and it soon turned out that this would require a lot of attention to make the open bridge a real eye catcher. I started with the raised platform made of PE parts as well as some plastic sheet. In front of that is the dash-board with several instruments, phone boxes and other equipment. This is a separate part which was entirely build with the help of several photos and finally attached and fixed inside the bridge. Even without any colour it looked already pretty interesting. The number of details on this bridge level was simply overwhelming the target designator, a Pelorus, a capstan, 2 deck chairs with foot rails and several other things like the sky-lookouts on the wings at both sides were added and there were still a few more details to add. Finally the whole thing started to look exactly the way I wanted it! |
||||
 |
 |
 |
 |
 |
 |
 |
 |
 |
 |
 |
 |
 |
 |
 |
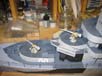
| Then it was time for some colour! For my last project I
had used the White Ensign Colour Coats with great success, so I decided
to use them again. Colouring the hull was straightforward and no problem
at all. The superstructure was quite different because of all the details
which I had already added. A lot of Tamiya tape was used to make sure that
only the parts I really wanted to colour were coated, in some cases this
turned out to be more work then the actual colouring but at the end the
entire ship look pretty good to me.
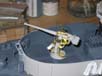
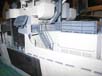
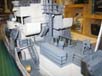
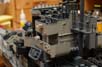
Another thing which I got from WEM were the 3 50 calibre deck guns as well as the 40mm Bofors. The Hedgehog came from Sirmar. The 20mm Oerlikons came from Sirmar as well, but I finally decided against them, because I thought (and I could) do them somewhat better. The 3 deck gun from WEM is a pretty good resin kit with some PE parts but it is the version which was used on submarines. The DEs used a version which could be trained by electrical motors and looked somewhat different. So I had to add a few more details and once again it turned out that some of my self made PE parts are simply better than the already pretty good one from WEM so I used them too! The same is for the Bofor guns which were enhanced with a few more details and some of my PE parts. |
||||
 |
 |
 |
 |
 |
 |
 |
 |
 |
 |
 |
 |
 |
 |
 |
 |
 |
 |
 |
 |
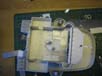
| Next came the smoke stack and the gun stations amidships on the deckhouse. The smoke stack was made of a simple skeleton over which I wrapped some lead foil and some small details like the sirens. The gun stations for the Oerlikons and Bofors were once again made of Plastic sheet and some PE parts. Several small details like phone boxes, loudspeakers and helmets were added and finally everything was coloured. On the backside of the bridge the signal bags were installed and the main mast was erected. With every additional hour of working on this model the number of such details increased. 3 inch practise loader, fuel oil hoses, vents, stanchions, davits, ladders, first aid kits, loudspeaker, electrical wiring, ready ammunition lockers and so on. To be honest, even so I have build all those tiny bits and pieces whenever I take a look at the finished model, I can see a few details which I do not even remember that I have build them! | ||||
 |
 |
 |
 |
 |
 |
 |
 |
 |
 |
 |
 |
 |
 |
 |
| To be continued | ||||
More
of René Hieronymus's work.
Updated 1/14/2009

© ModelWarships.com