| USS Brister DE-327 « Trim but
deadly »
by René Hieronymus |
| page 1 of 2 |
| At work since September 2007
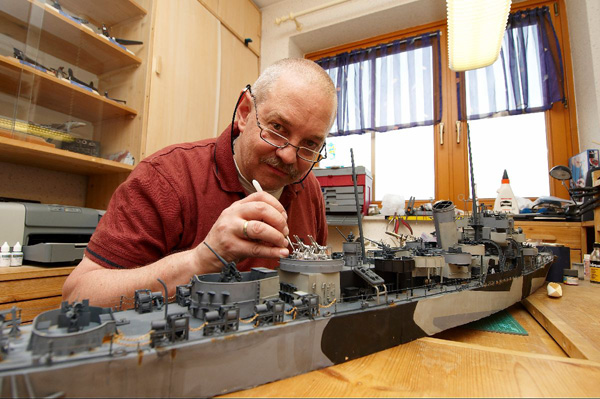
Scale 1:72 Scratch Build, total hrs. until today: approx. 700hrs. Flag Hoist/Radio Call Sign: N H S E
CLASS: Edsall TYPE: FMR (geared diesel, Fairbanks-Morse reverse gear
drive)
Operational and Building Data
Fate: Sources Differ
|
||||||||||||||||||||||||||||||||||||||||||||||
| Right after I had finished my escort carrier model I wanted to start my next ship model project and of course in the same scale 1:72. The only question at this time was. Which ship will it be this time? |  |
|||||||||||||||||||||||||||||||||||||||||||||
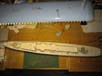
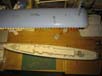
| Since quite a few years I was thinking about the idea of a heavy seaplane tender like the Curtiss or Currituck class. The reason for this was, once again the fact, that I would like to build something unusual or less well known. So its no wonder that during the research for this project I encountered the same problem as with my escort carrier model, that there are not much informations available. The biggest problem was the fact that I was not able to find any useful plans for these ships so at the end I had to accept the fact that I would not be able to start such a project. So I started to take a look at various other ship types which could be interesting for me and such a project. Due to the fact that I wanted to build this new model in the same scale, the size of the model is something you always have to keep in mind. Sure a battleship or a cruiser would be great but that is the problem if you like to build models in a rather large scale like I do, they are simply to big. And unless I get lucky and win in the lottery to buy myself a really large house such a model will always remain a dream. | ||||||||||||||||||||||||||||||||||||||||||||||
 |
 |
 |
 |
 |
||||||||||||||||||||||||||||||||||||||||||
 |
 |
 |
 |
 |
||||||||||||||||||||||||||||||||||||||||||
 |
 |
 |
 |
 |
||||||||||||||||||||||||||||||||||||||||||
| Somewhere during this time I got in contact with a friend
of mine and we discussed about some ideas which model to build next. He
came up with the idea of recreating a famous picture as a diorama. The
picture he was talking about shows the U-505 being captured by the crew
of a US Navy Destroyer Escort the USS Pillsbury DE-133. The idea was that
my friend (Hi Othmar) would build the German submarine and the DE would
by my responsibility. Sure enough Floating Drydock had the plans available
so I ordered them together with something even more helpful an e-book about
Edsall class DEs. This CD covers almost any detail you need to know on
these ships if you are planning to build one of those.
A few weeks later I had most of the things I was looking for, including the plans and some books and I would have been finally able to start the project. But before I really started to work on this model my friend Othmar, whos job it was do build that U-Boat, encountered some problems. He did not get the plans for his model and it finally became clear that would be a bigger problem than we both anticipated. Additional during my research I stumbled across a picture which got my attention. It was an Edsall class DE in one of those pretty good looking dazzle paint schemes which I like so much. Compared to that the Pillsbury in here ordinary navy grey camouflage looked rather boring and I started to get in temptation . A few weeks later it became clear that those plans for the U-Boat would be a real problem and the very next moment I took the bait and decided for the USS Brister and against the Pillsbury! |
||||||||||||||||||||||||||||||||||||||||||||||
 |
 |
 |
 |
 |
||||||||||||||||||||||||||||||||||||||||||
 |
 |
 |
 |
 |
||||||||||||||||||||||||||||||||||||||||||
 |
 |
 |
 |
 |
||||||||||||||||||||||||||||||||||||||||||
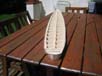
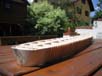
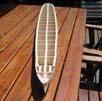
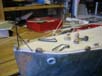
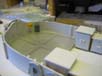
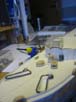
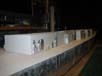
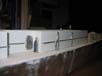
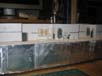
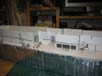
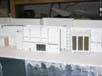
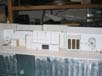
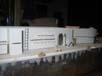
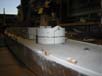
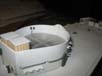
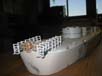
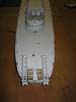
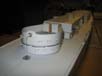
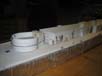
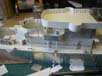
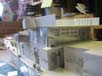
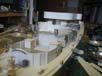
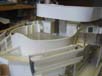
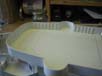
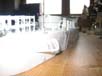
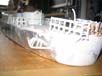
| Once again I wanted to build a waterline lifelike model, that is including a crew and a water base. Another feature that I always wanted to add in one of my models is the so called dishing on the hull sides. Whenever you see a picture of a ship with an un-armoured hull you will notice that the hull looks bent and battered between the frames, The hull plating is simply not as smooth and even as one might expect and that was something which I really wanted to show, the only problem at this time was how on earth should I do that? I made a few attempts with small samples but pretty soon the perhaps most simple way turned out to be the best way to simulate this effect. The hull framework was made of small wooden beams which were glued onto the frames which were cut and sanded from plywood. Onto this I added a first layer of stiff cardboard. As soon as this construction was finished I simply glued several small square wooden sticks of 1mm across in a certain pattern on the outer hull. The next thing I did was that I bought myself some expendable aluminium dishes at a hardware store for a few cents. I took them home, cut out the bottom and flattened them with a large and heavy wooden log. After that I simply had to cut the hull sides from this material and glued it to the small wooden sticks. As soon as this construction had dried for some hours I only had to use my fingertips to bent the hull sides in the wished manner, simple and very effective! | ||||||||||||||||||||||||||||||||||||||||||||||
 |
 |
 |
 |
 |
||||||||||||||||||||||||||||||||||||||||||
 |
 |
 |
 |
 |
||||||||||||||||||||||||||||||||||||||||||
 |
 |
 |
 |
 |
||||||||||||||||||||||||||||||||||||||||||
 |
 |
 |
 |
 |
||||||||||||||||||||||||||||||||||||||||||
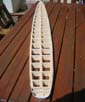
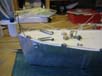
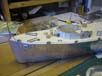
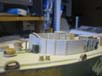
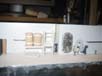
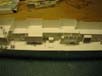
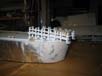
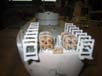
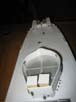
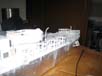
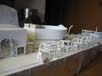
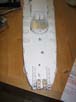
| So far I had spend only 25 hrs. on the entire model, maybe I should have spend a few minutes more, cause as soon as I started to add the upper deck, I discovered that something was wrong, very wrong! I had drawn the entire superstructure on a piece of paper, to be transferred to the upper deck of the model but as soon as I started to take some measurements, somehow this drawing seemed to be much to small! A thoroughly examination turned up the fact that I had mistakenkly added one frame two times and due to this my entire hull had become 40mm to long. What a disaster! The result for this were some nasty headaches for the next 2 3 hours during which I developed some quite interesting and ambitious ways how to solve this problem or should I say how to fling that damn hull into orbit! At the end I decided to do it the hard way and put the entire hull right on my circular saw bench. At least this way it would be over in an instant! But to my greatest surprise, it worked! I cut a piece 40mm wide, right out of the middle of the hull and glued the ends together again, only two hours later the glue had dried and the hull not only looked like brand-new, most of all it had the exact length! | ||||||||||||||||||||||||||||||||||||||||||||||
 |
 |
 |
 |
 |
||||||||||||||||||||||||||||||||||||||||||
 |
 |
 |
 |
 |
||||||||||||||||||||||||||||||||||||||||||
 |
 |
 |
 |
 |
||||||||||||||||||||||||||||||||||||||||||
| Continued on Page 2 | ||||||||||||||||||||||||||||||||||||||||||||||
More
of René Hieronymus's work.
Updated 1/14/2009

© ModelWarships.com