USS North Carolina BB 55

by Ron Horabin, Cheshire England
back to menu Part 8 Float Planes, Directors, and Accessories. |
|||||||
| Its been a long time since we had an update on our project
build two resounds
1. It was winter in the UK and I do not build in my shed, its too cold,
even with a heater.
So on with the build |
click images
to enlarge  |
||||||
 |
|||||||
 |
|||||||
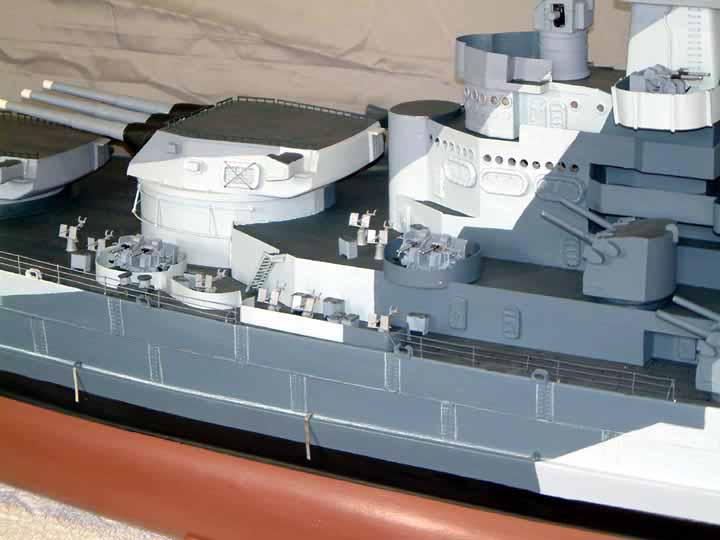
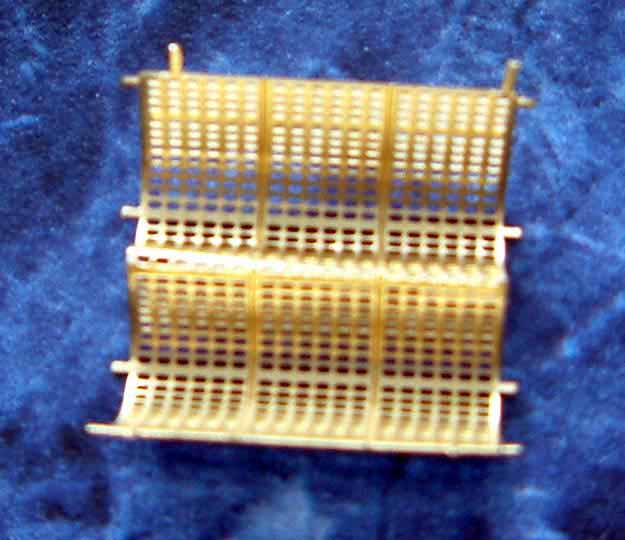
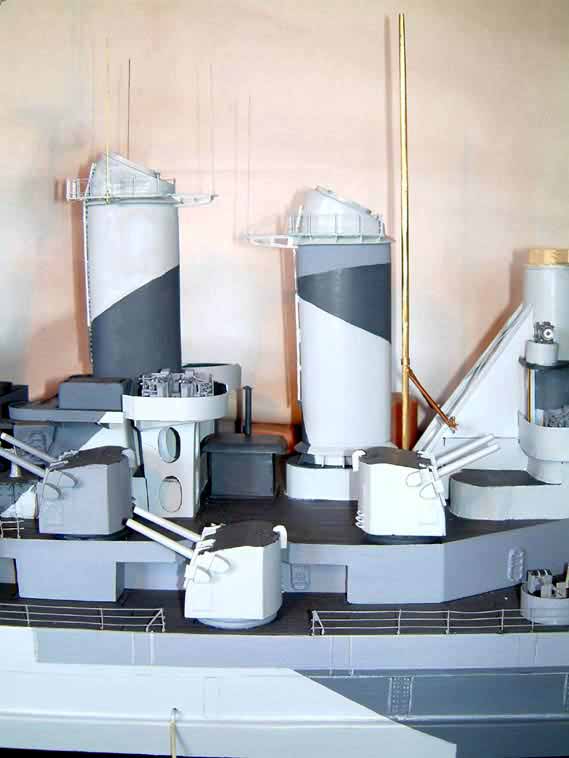
| In the last build we built the orlicons and the twin 40 mm, we were at the point where they needed to be sprayed, most of he ship has been hand painted but with so many small parts to do, its a job for my Letraset spray gun, having mounted everything on boards and polystyrene, I mixed my paints to a milk like substance and sprayed away, mostly 5H Haze grey, the finishing touches where with a small paint brush. After I cut and shaped some thin brass, I fixed the splinter shields around the orlicons and 40mm guns. | |||||||
 |
|||||||
 |
|||||||
|
|||||||
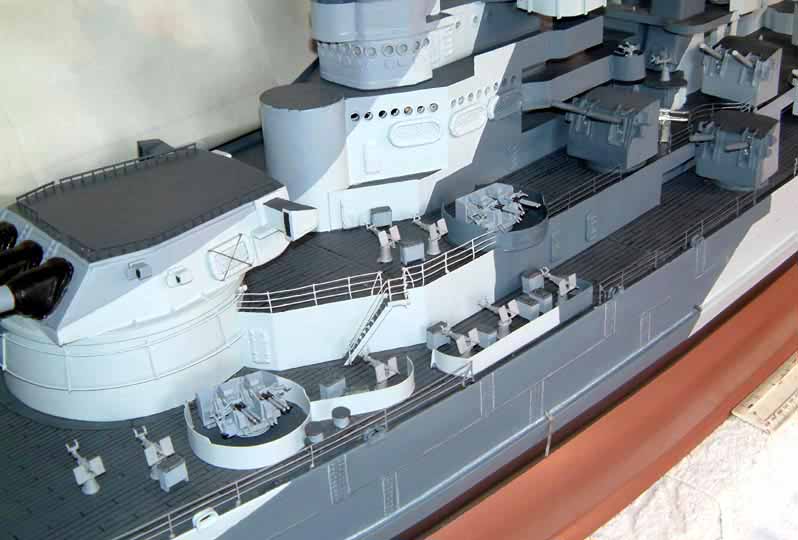
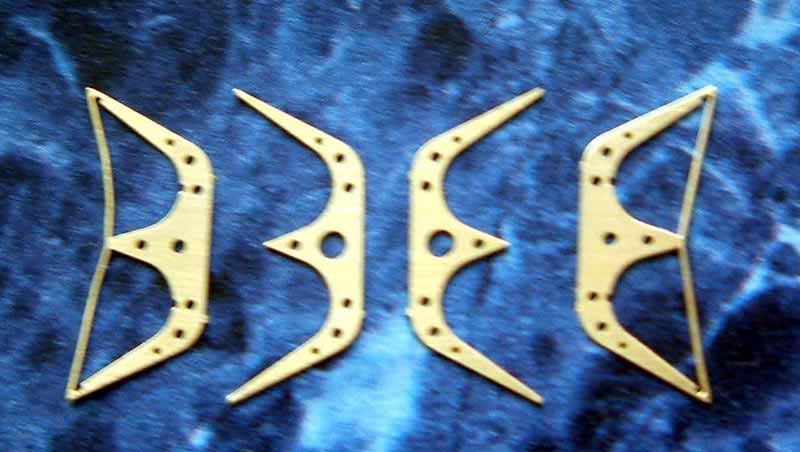
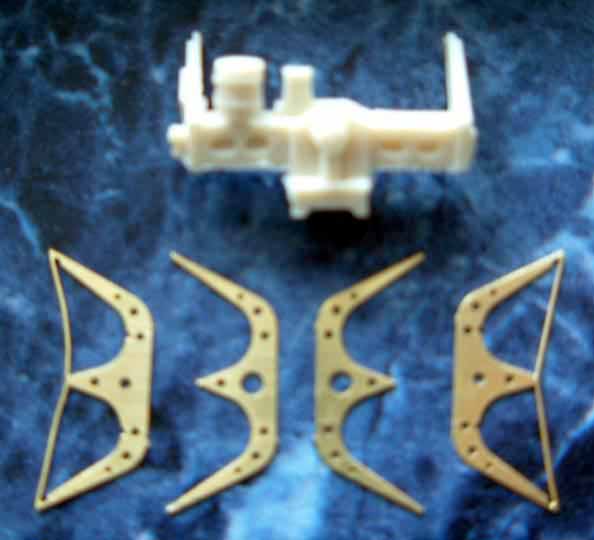
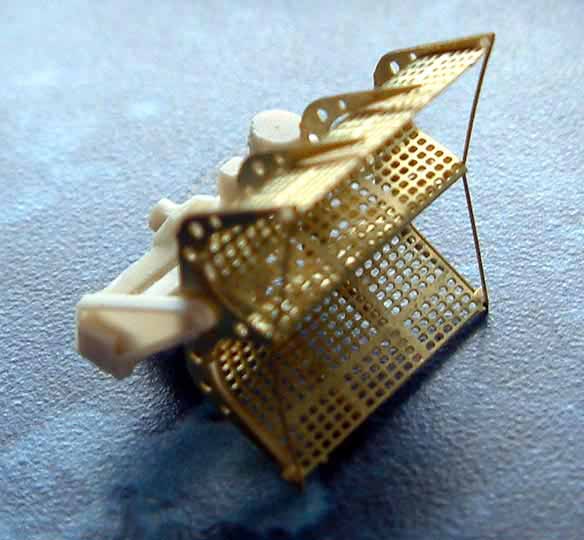
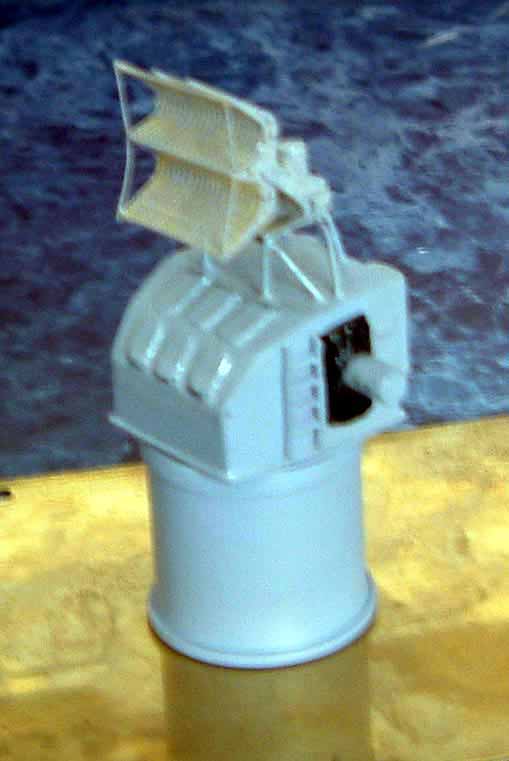
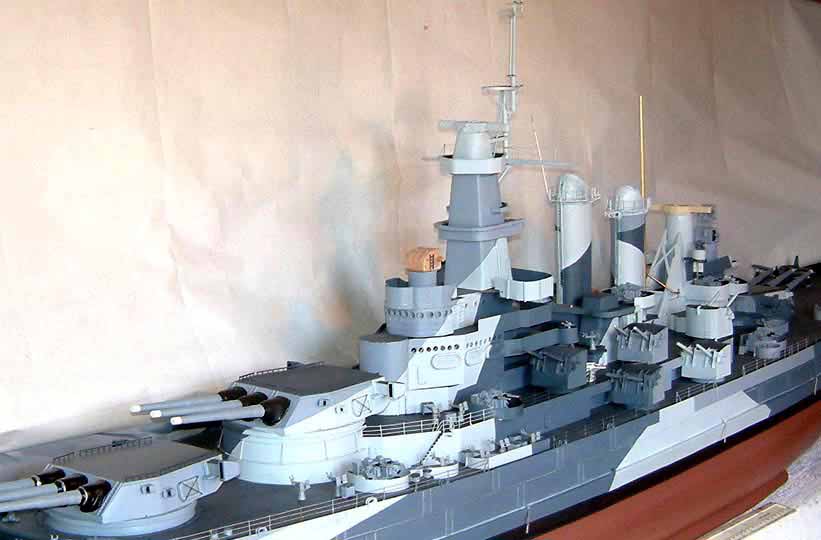
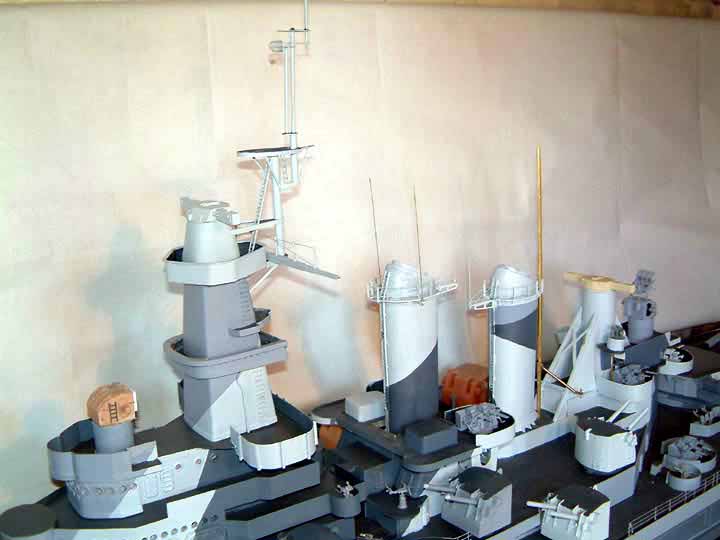
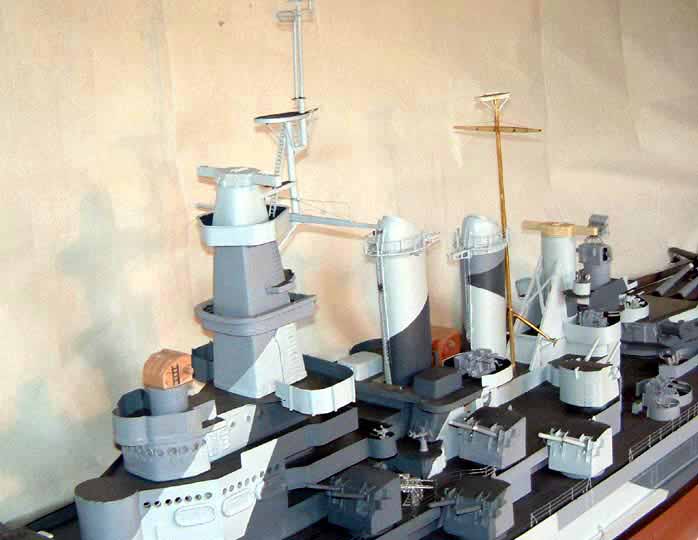
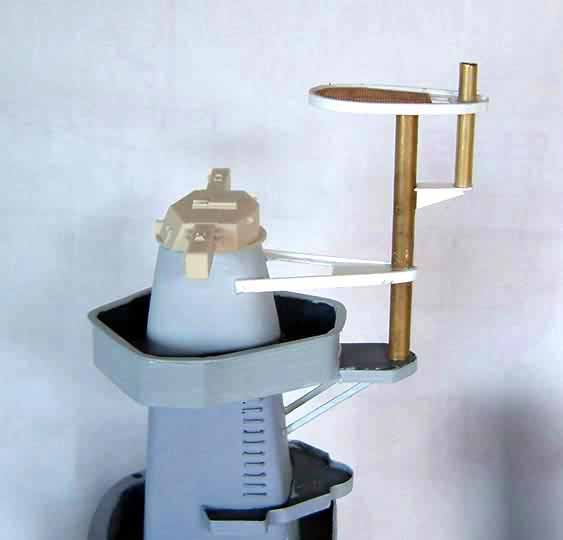
| MK37 Directors.
I made my usual mould to make the bottom part of the director and cast
it in resin, and then I fit small wires for hand rails around the bottom
edge ,also fitted to both sides were a set of ladders. The main part of
the build was the PE or photo etching in brass, for the radar, this is
a John Haynes product in 1/96 scale, it consists of the 4 frame works ,
1 square checker radar, 2 set of ladders, 1 resin cast mounting , I had
to roll the square checker plate to shape and then super glue it to the
4 frame works, when set this was glued to the resin mounting, from brass
wire I made a set of legs to position it on top of my director housing.
This was then sprayed the correct colour, and mounted on top of rear superstructure.
|
|||||||
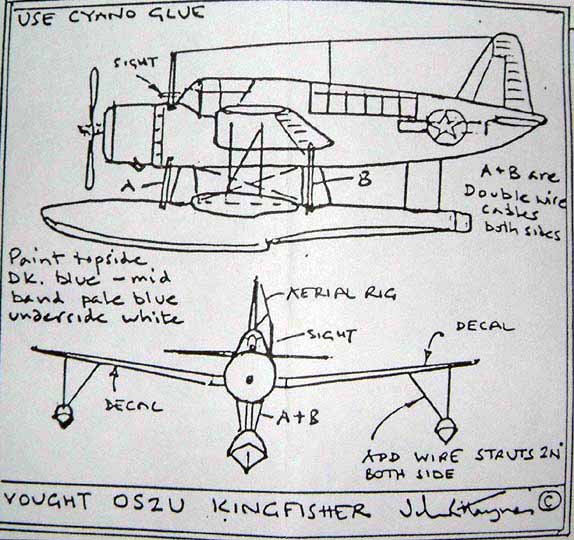
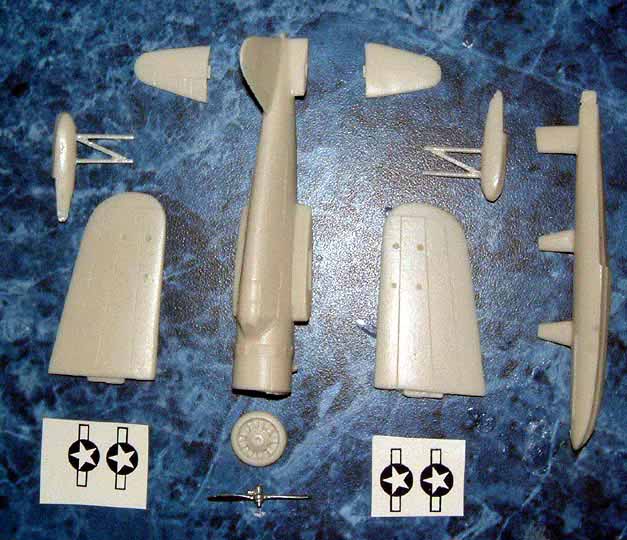
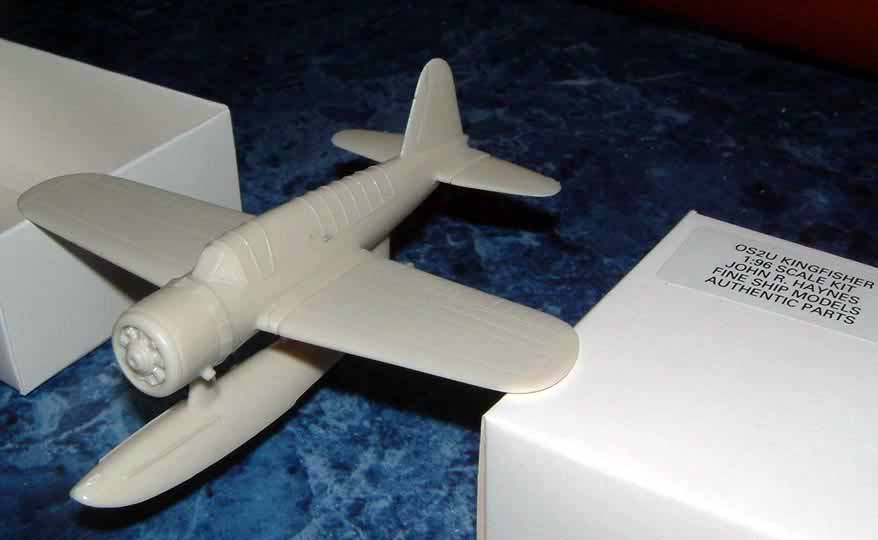
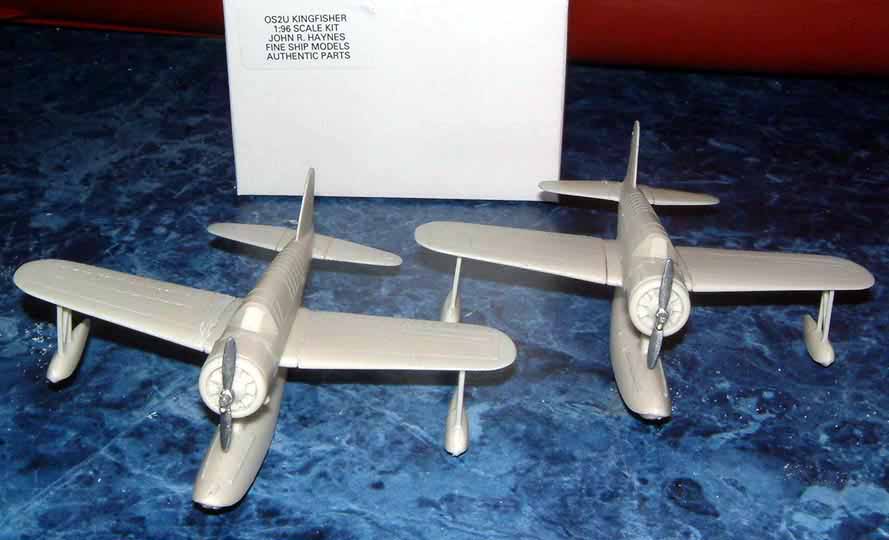
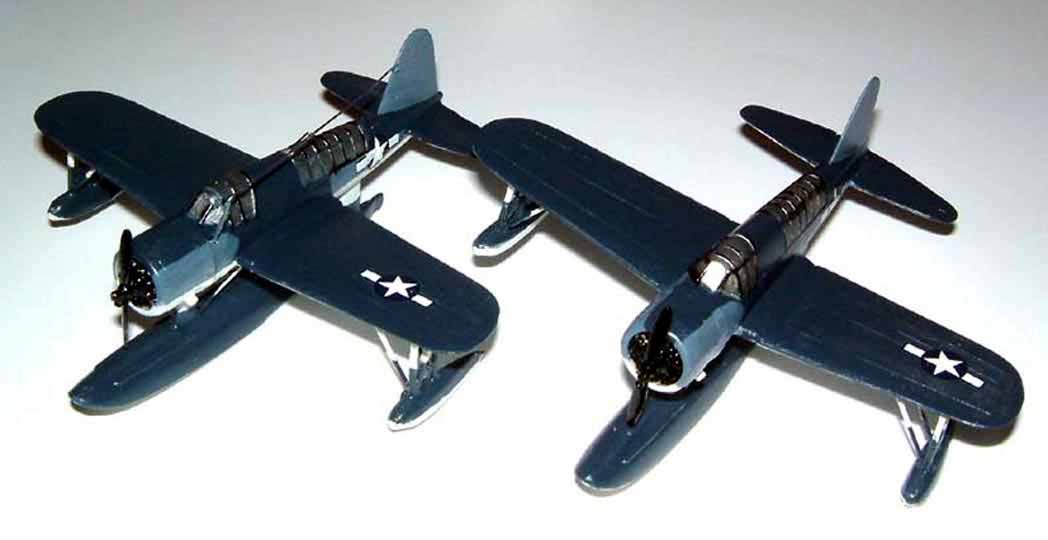
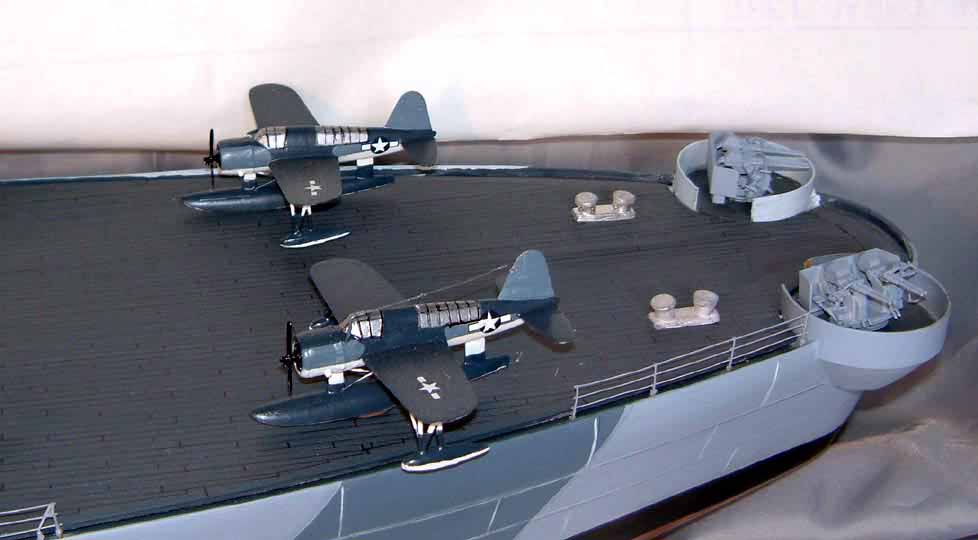
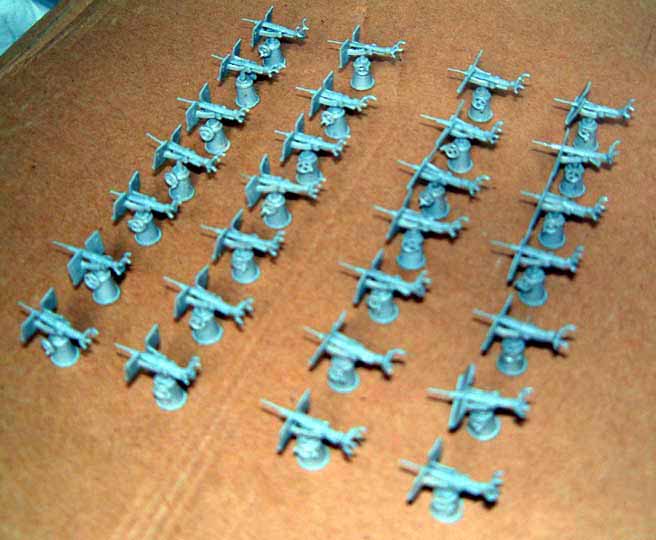
| OS2U Kingfisher Float Planes.
The project is getting longer and longer so I have to compromise with
the build, to speed things up a little this is another time cutting section.
I purchased two Kingfishers from Floating Drydock, they are 1/96 scale
by John Haynes, for the price of $25 each I would have expected see through
canopies or a little PE, the quality is not brilliant but will do the job.
|
|||||||
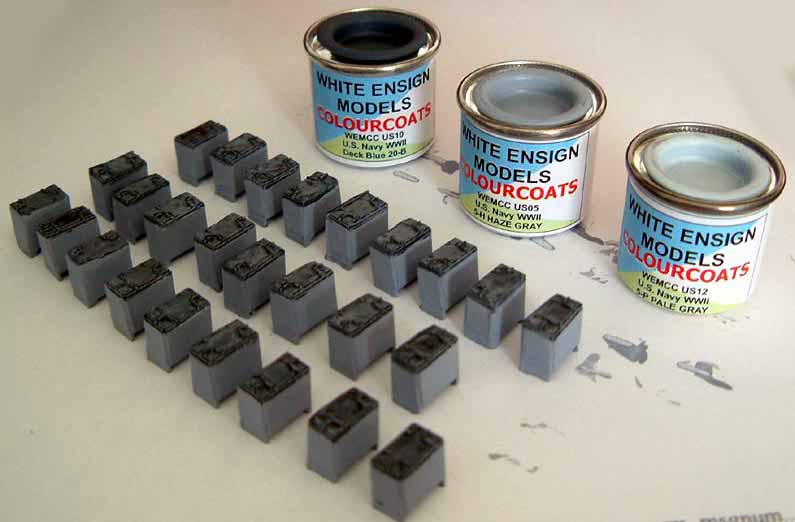
| Ammunition Boxes.
While at a trade show at Ellesmere Port Steamboat Museum I met Paul
from Sirmar and ordered 48 boxes, they arrived 2 days later in a small
parcel, they needed a little clean up before I could get down to paint
them, in the photo you can see the first 26, also WEMs colour coat paints
for the ship.
|
 |
||||||
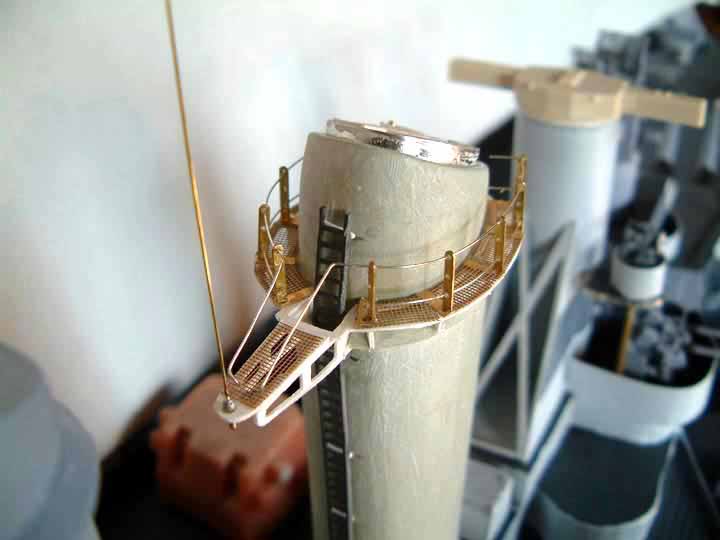
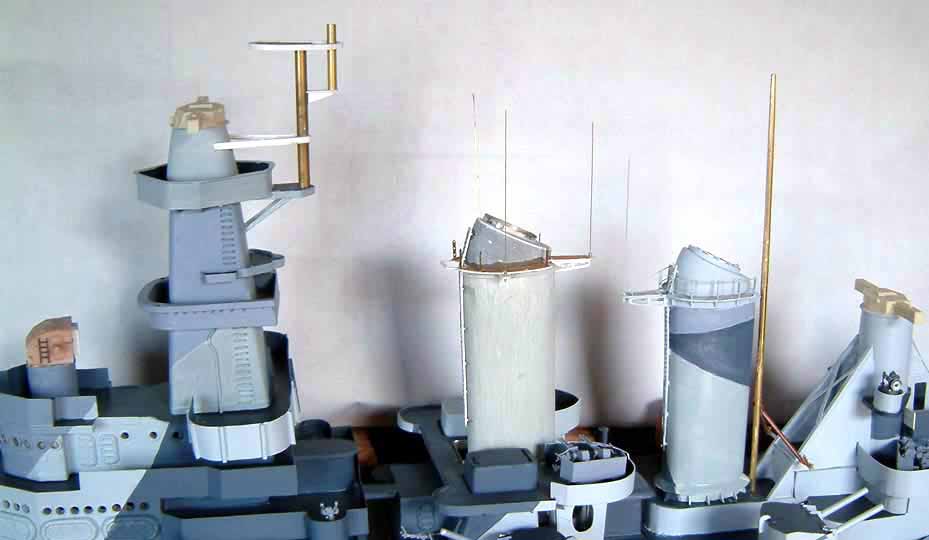
| For some time now theres been one stack nearly finished
and one just started, I decided to complete the second stack, it is built
plank on frame from balsa wood and covered with fibre paste, then a moulding
made top and bottom and sanded to shape.
I made a walkway round the top out of some PE open mesh plating, to this I added some stanchions and handrails also whip aerials and ladders, after painting and seeing the results I redid the first stack to match. |
|||||||
 |
|||||||
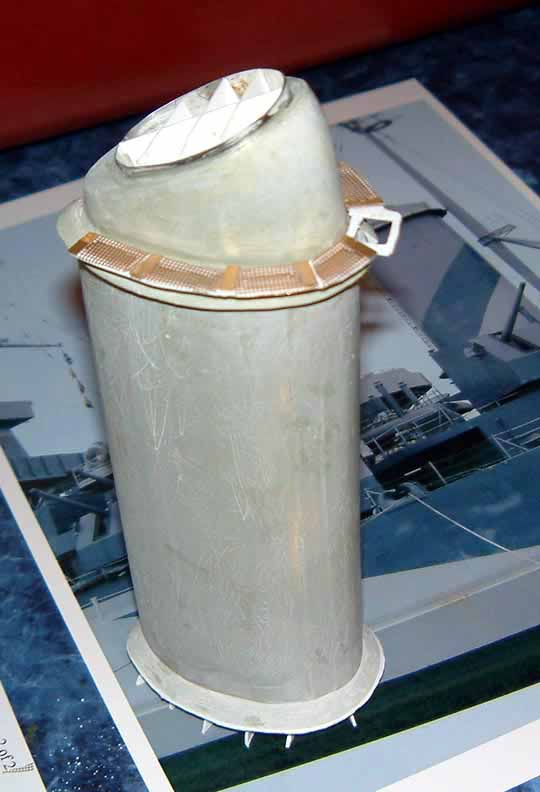
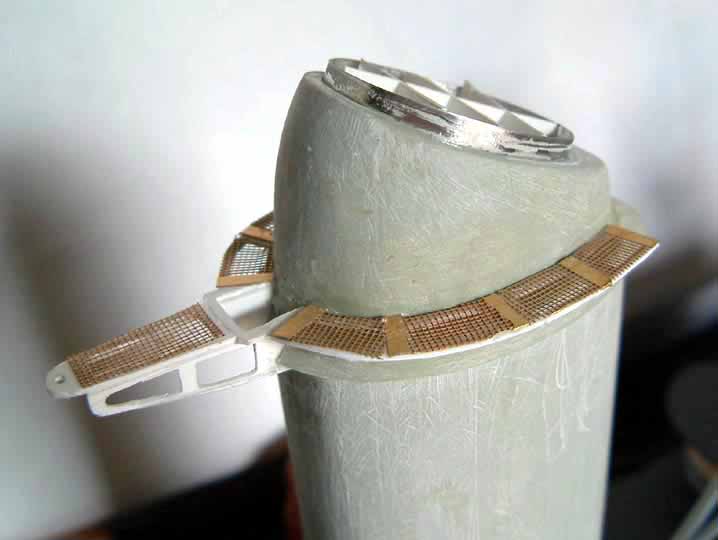
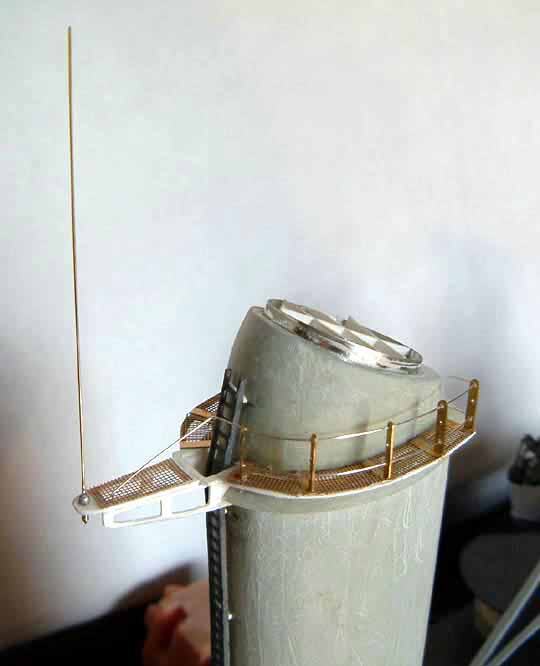
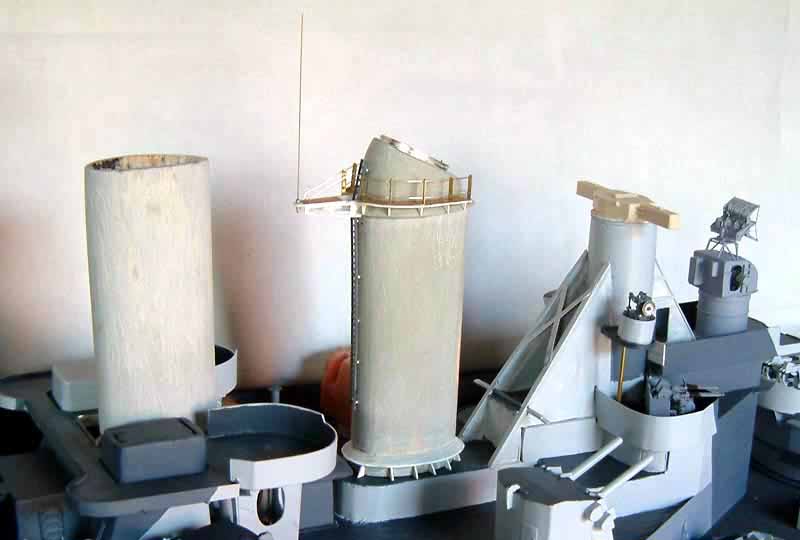
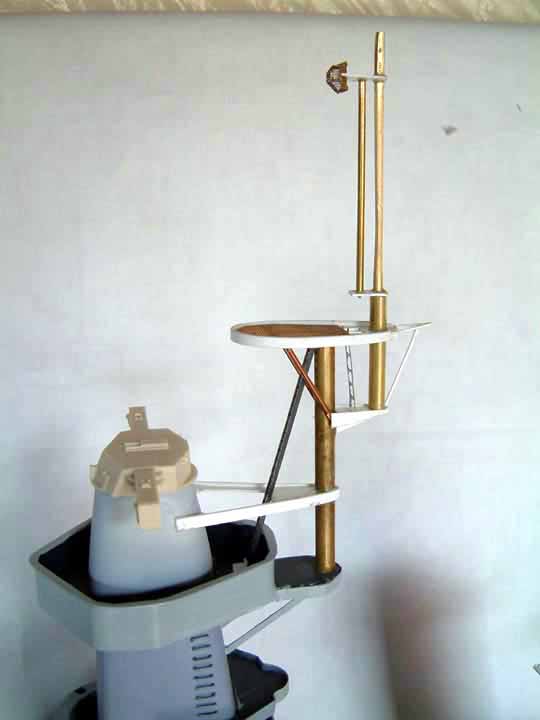
| SK Radar Platform.
The first thing to do was to measure the main upright and cut a piece
of round copper tube, then in the vice squeeze it till it becomes oval,
then the first support bracket can be made out of plastic card .
The top platform again is made out of plastic card but this time it has
open mesh gratings and a hole for a ladder, coming through the platform
is another upright this is made from copper tubing and holds another radar
and Ariel, it was glued in to position with super glue, and the ladder
fitted.
|
 |
||||||
 |
|||||||
 |
|||||||
|
|||||||
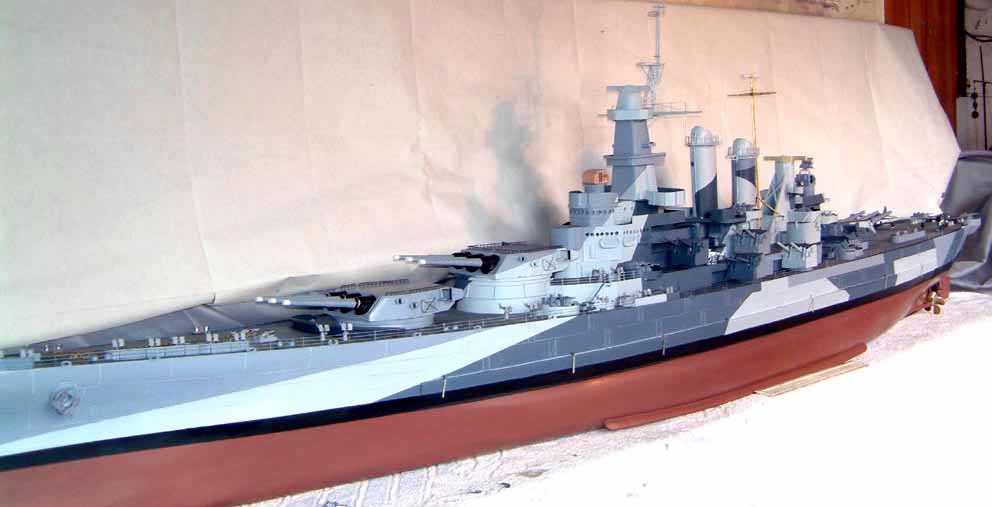
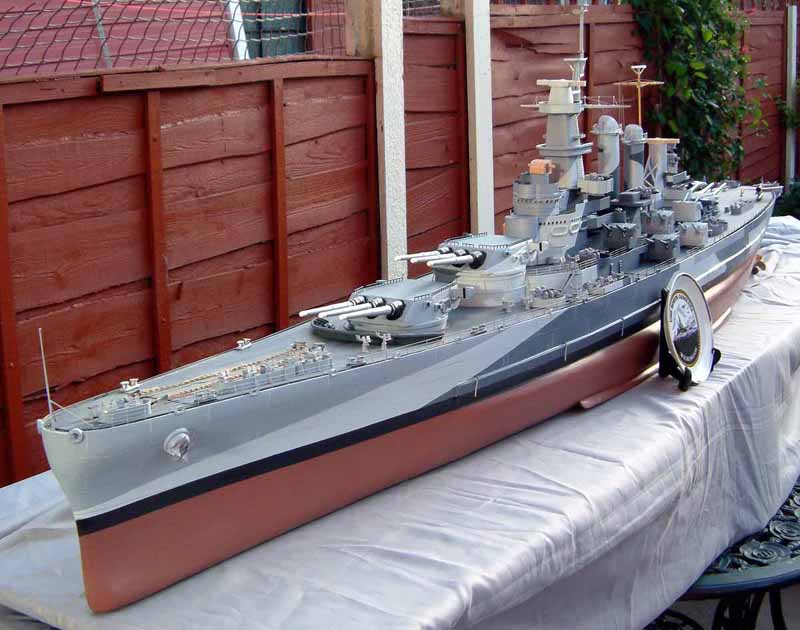
| Pen Set.
This is something I picked up on E-BAY theres not many around and at $30.00 I thought it a bargain, it should go nice with my plate .I hope you like the two overall pictures, taken in my garden while the sun was shining . |
|||||||
| Happy modelling. Ron H. | |||||||
|
on to part 9 |
|||||||