USS North Carolina BB 55

by Ron Horabin, Cheshire England
|
Part 7 B Deck Fittings and Accessories. |
||||||||||
| In the last chapter I promised to show some close ups of
the small armourments, I think we can start first with the;
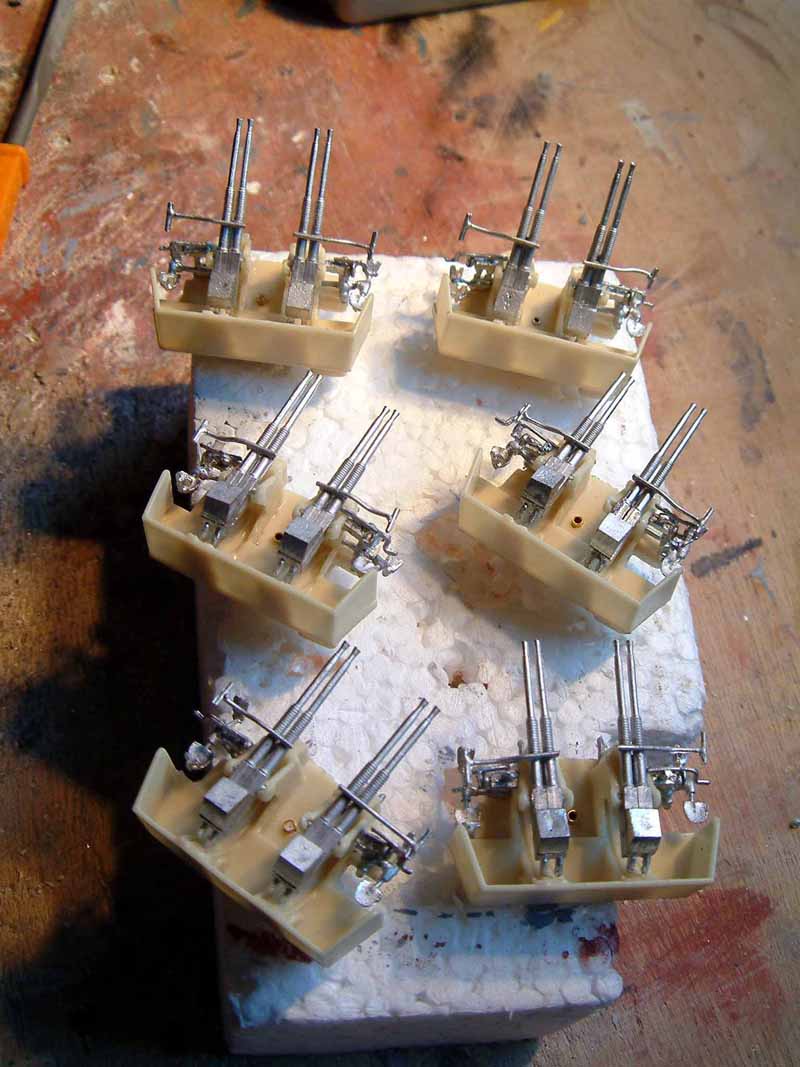
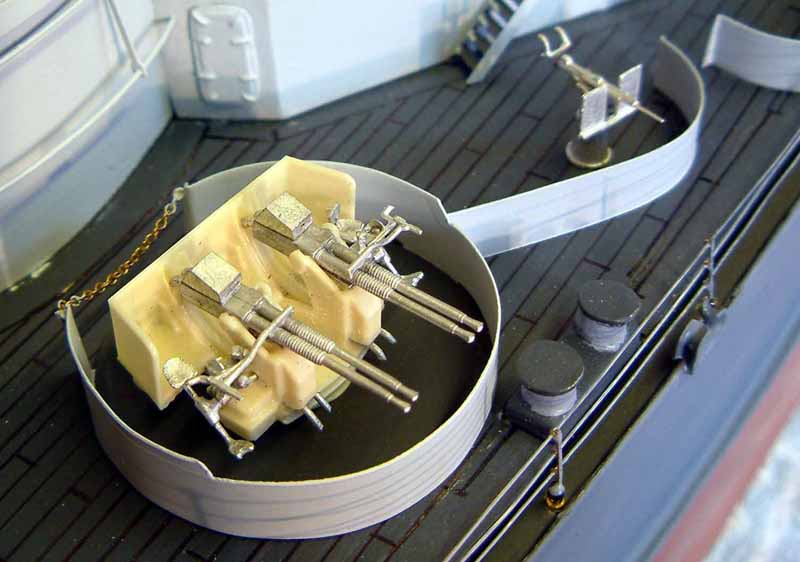
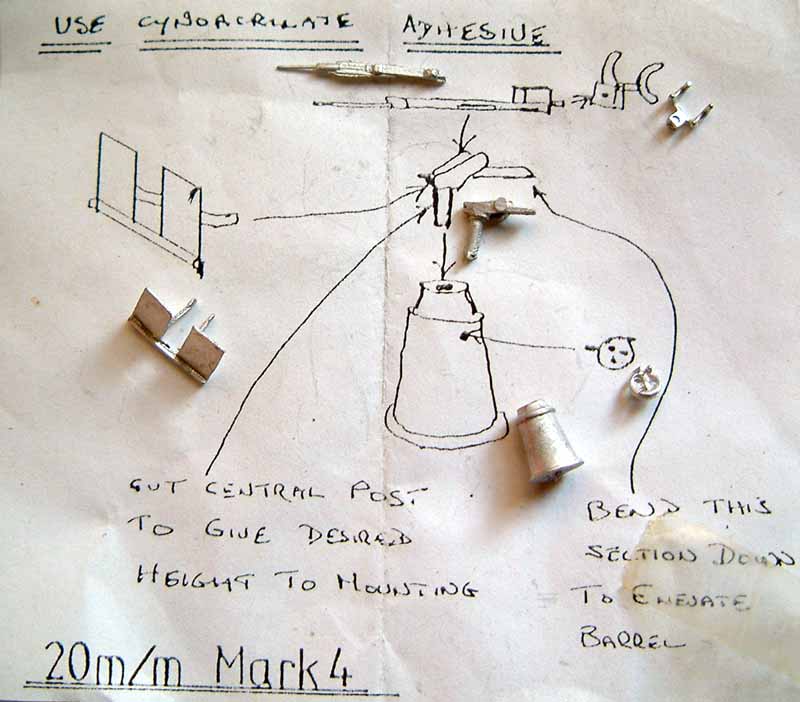
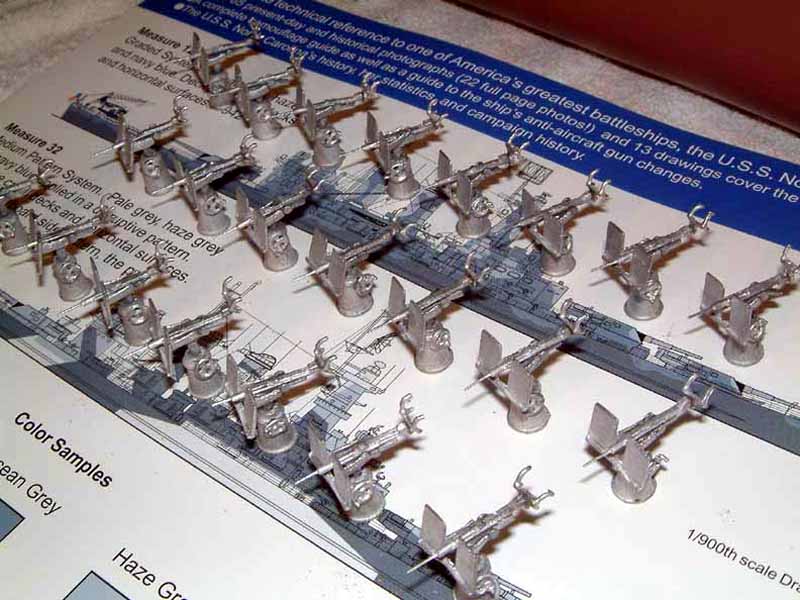
Oerlikon MRK/4, These are 1/96 scale white metal, made by
SIRMAR in the u/k, they come with a small sheet of instructions and a diagram
to help with the build. There are six parts to each gun, all in separate
little bags, just a small amount of flash, for North Carolina you have
to purchase 48 in number.
|
click images to enlarge | |||||||||
 |
 |
|||||||||
 |
 |
|||||||||
 |
 |
|||||||||
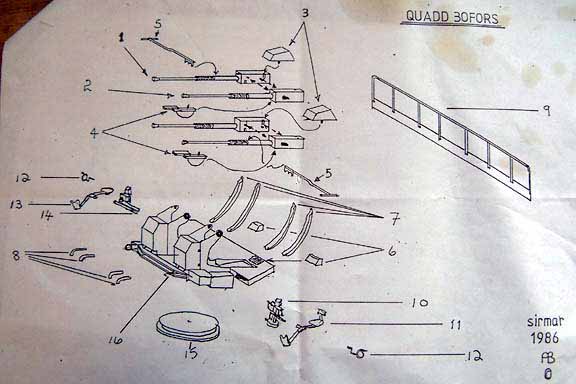
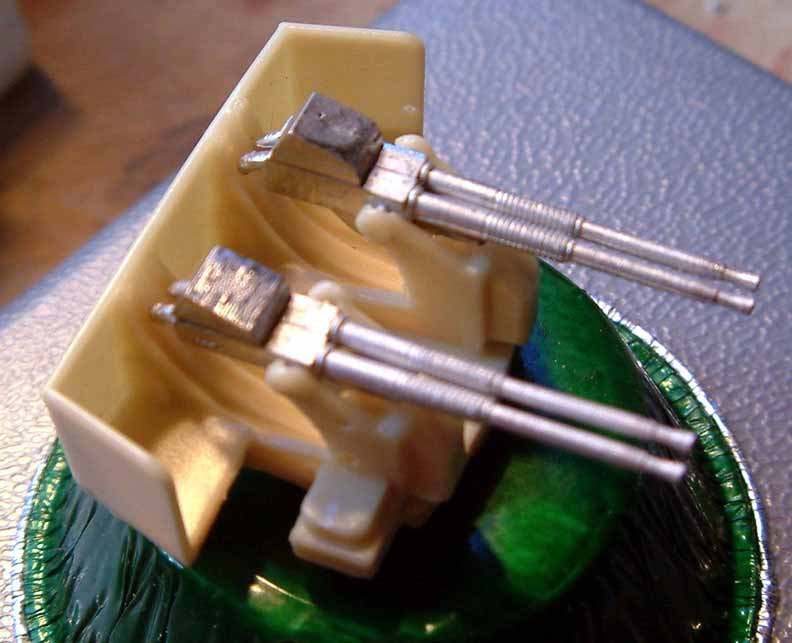
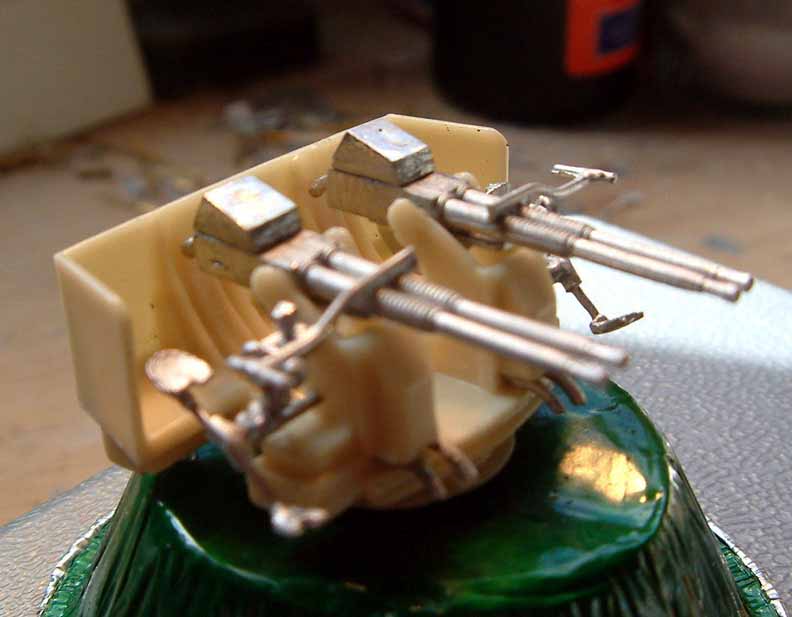
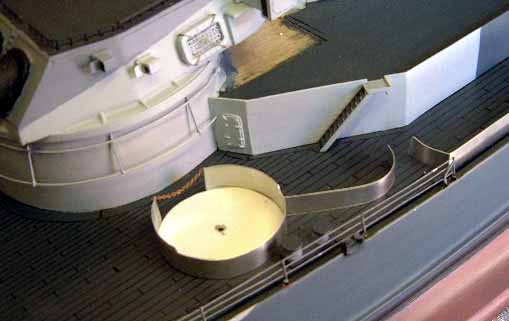
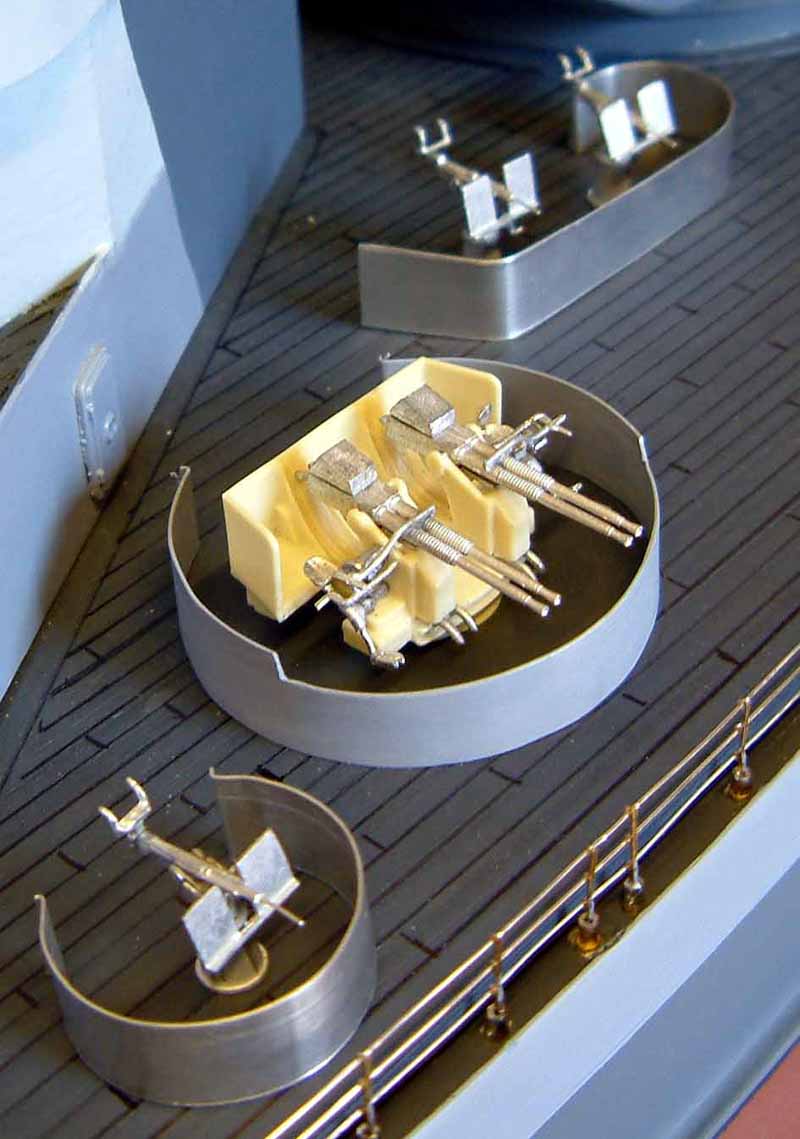
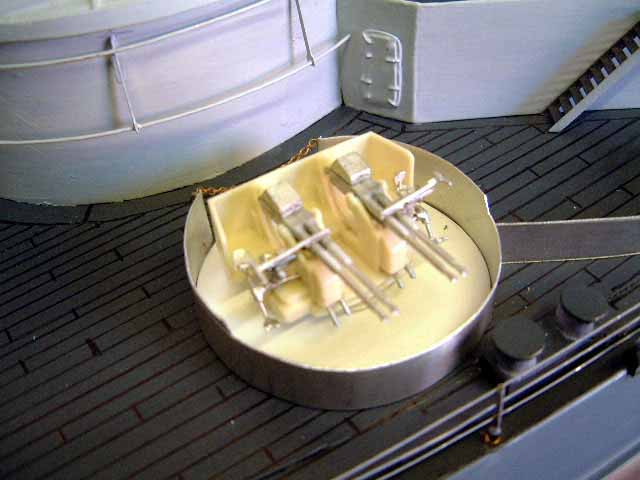
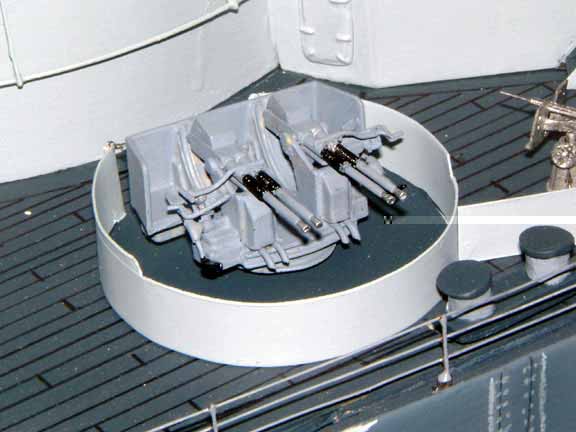
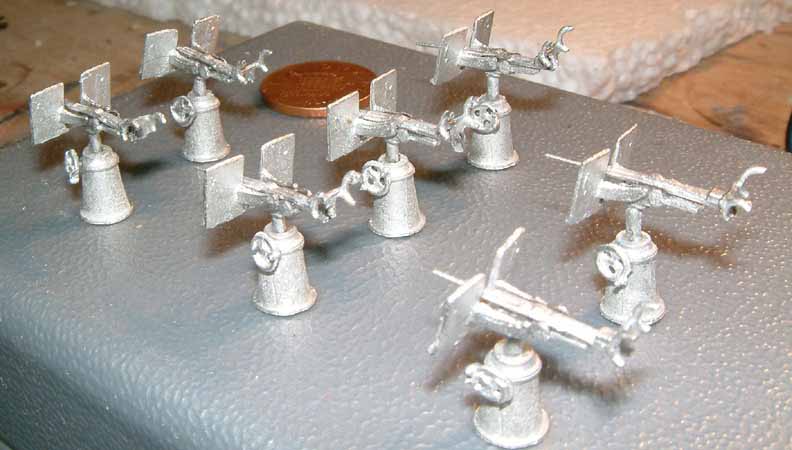
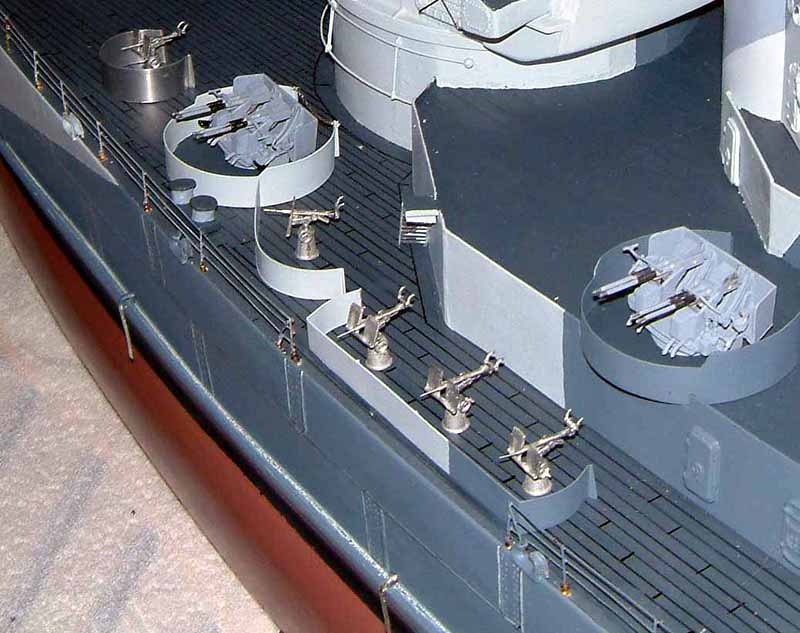
Quad 40 mm Bofors, These again are 1/96 scale and white
metal made by Sirmar, there are 15 quads on NC. In the plastic bag there
are 19 small parts, the main and largest part is made of resign, its the
main structure of the gun. My first job was to drill a small hole in to
the base of the mount and fit a small pin, so it would turn when fitted
to the deck.
|
||||||||||
|
||||||||||
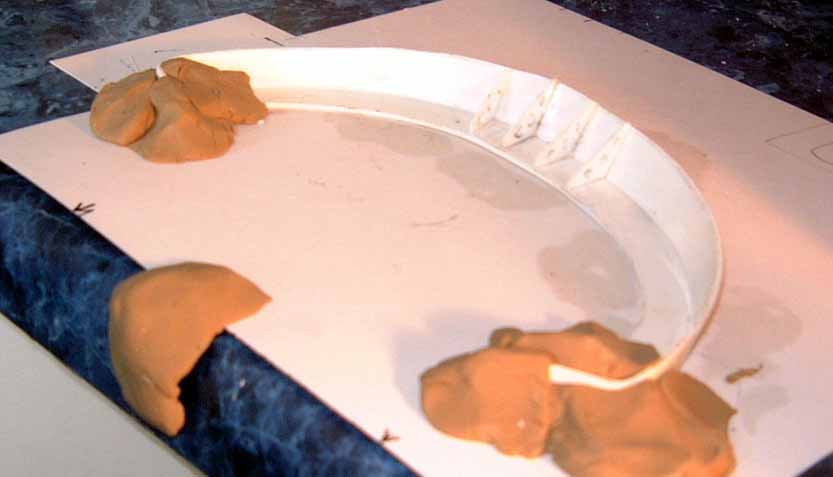
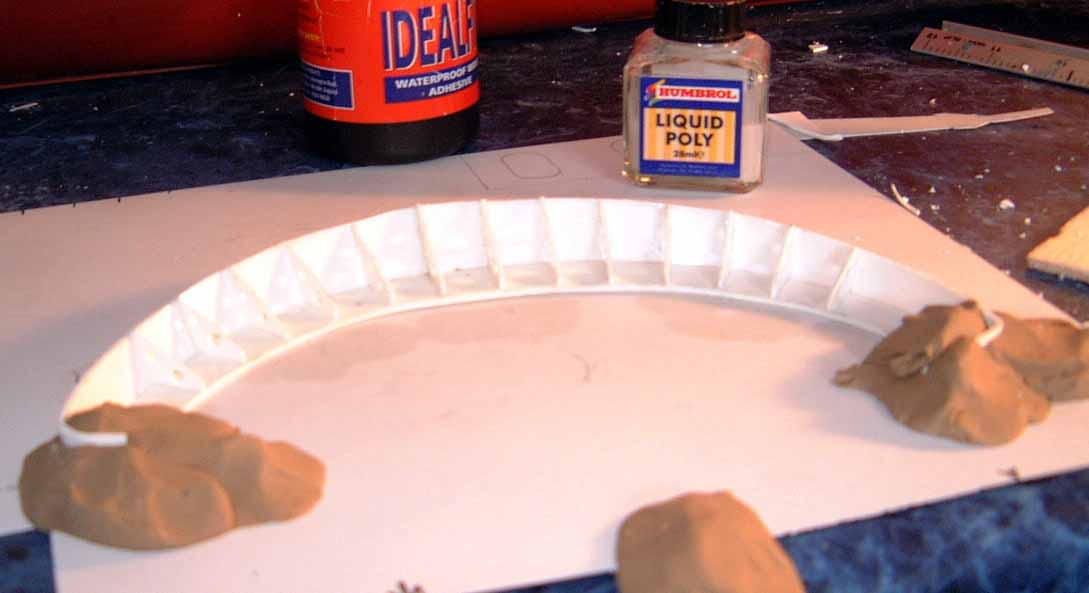
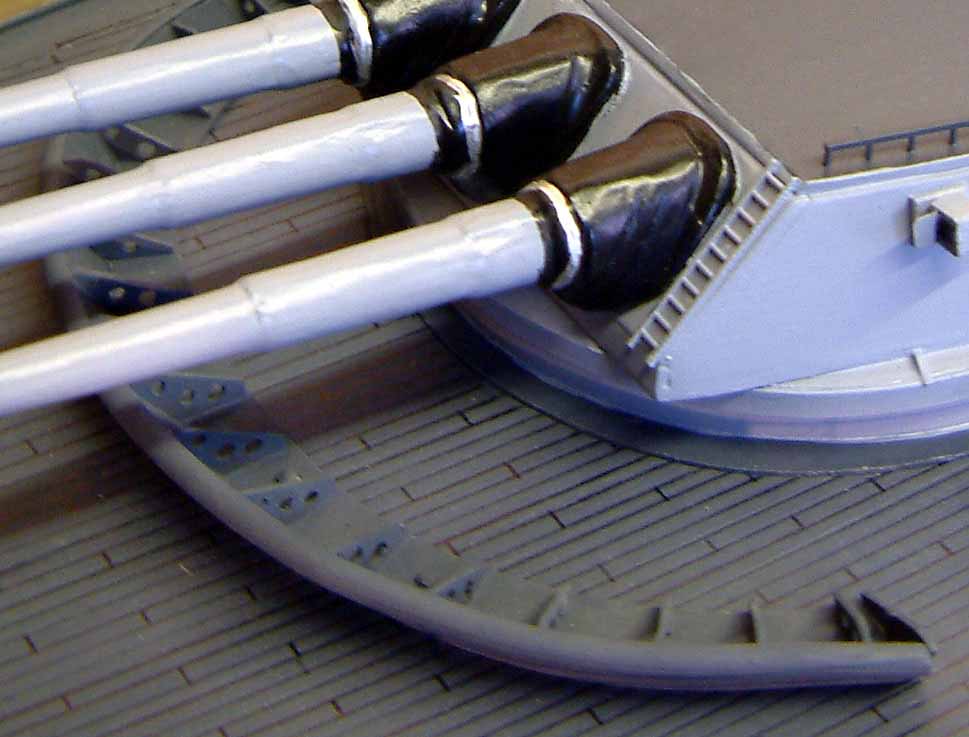
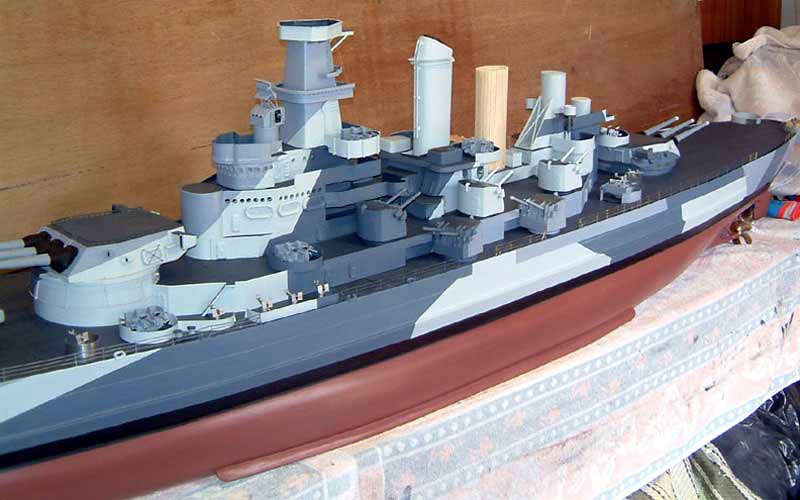
| The Breakwater, this is located just in front of turret #1, I made a template out of card the shape of the base of the breakwater on the deck, and then I cut the shape out of plastic card, this way you do not waste your plastic, the upright section was cut to shape and bent and glued into potion with liquid poly cement. The next step was to cut out all the reinforcing sections that fit behind, they are large in the middle and reduce to either end, on the top I fit a half round channel, this, was warmed and bent to shape and glued into position. The breakwater its self is drilled and fitted with pins through the deck, this way I can remove it when I need to. I painted it the same colour as the deck. | 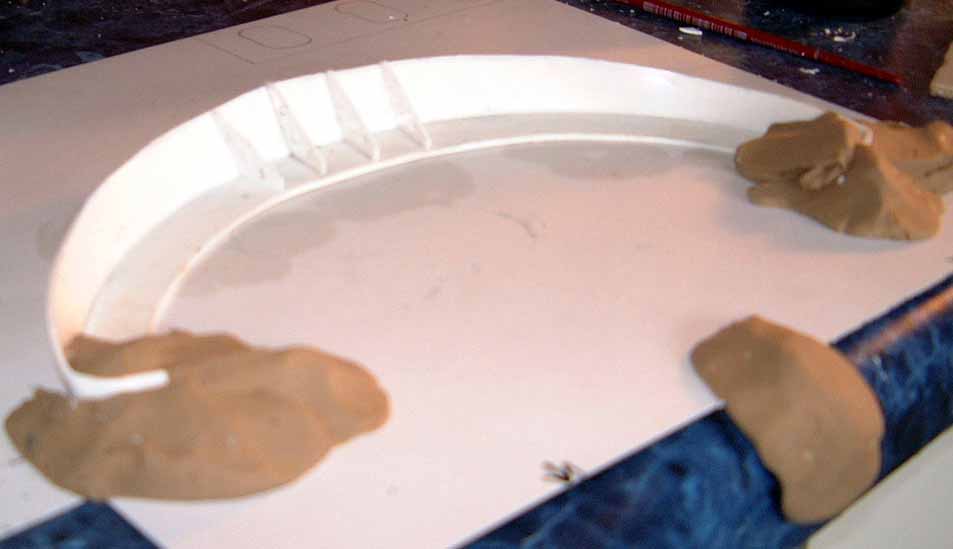 |
 |
||||||||
 |
 |
|||||||||
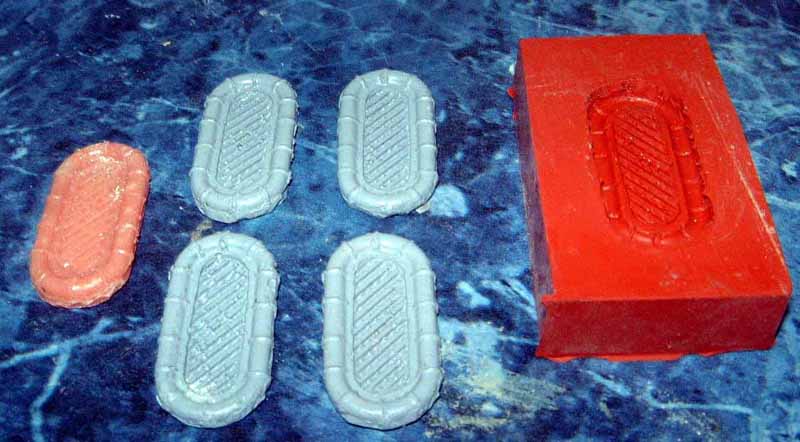
| Life rafts, I made two small life raft, one round ended, one square ended, and then I made a mould from each of them from my rubber compound, after 24hrs I could start casting the rafts out of resign. They do not take long to set, I would wait about 1 hour and then cast two more. They need to be painted the same as the section they are fitted on. | 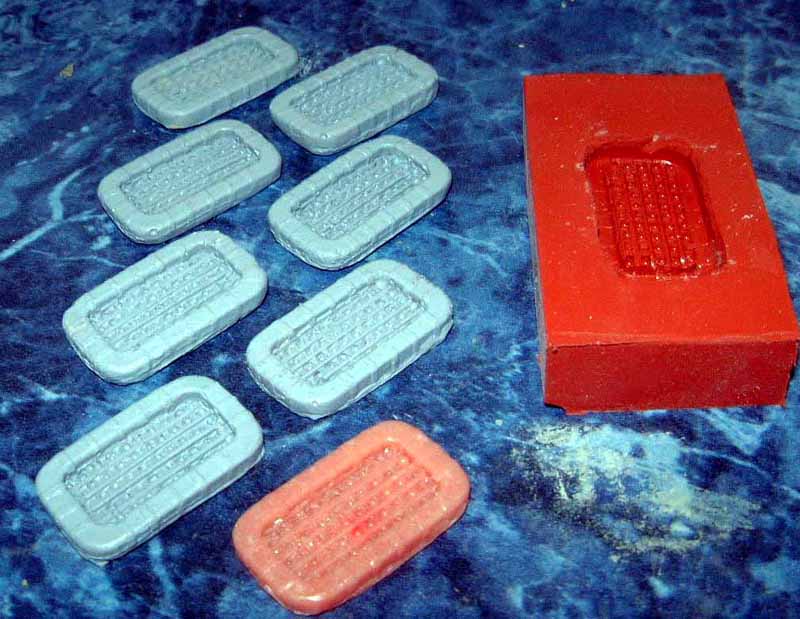 |
 |
||||||||
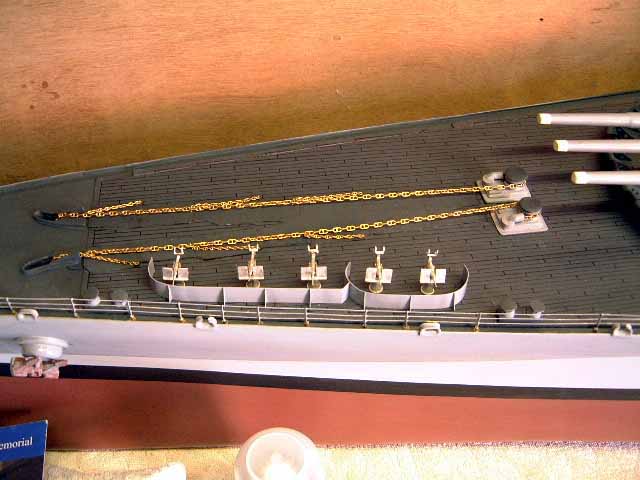
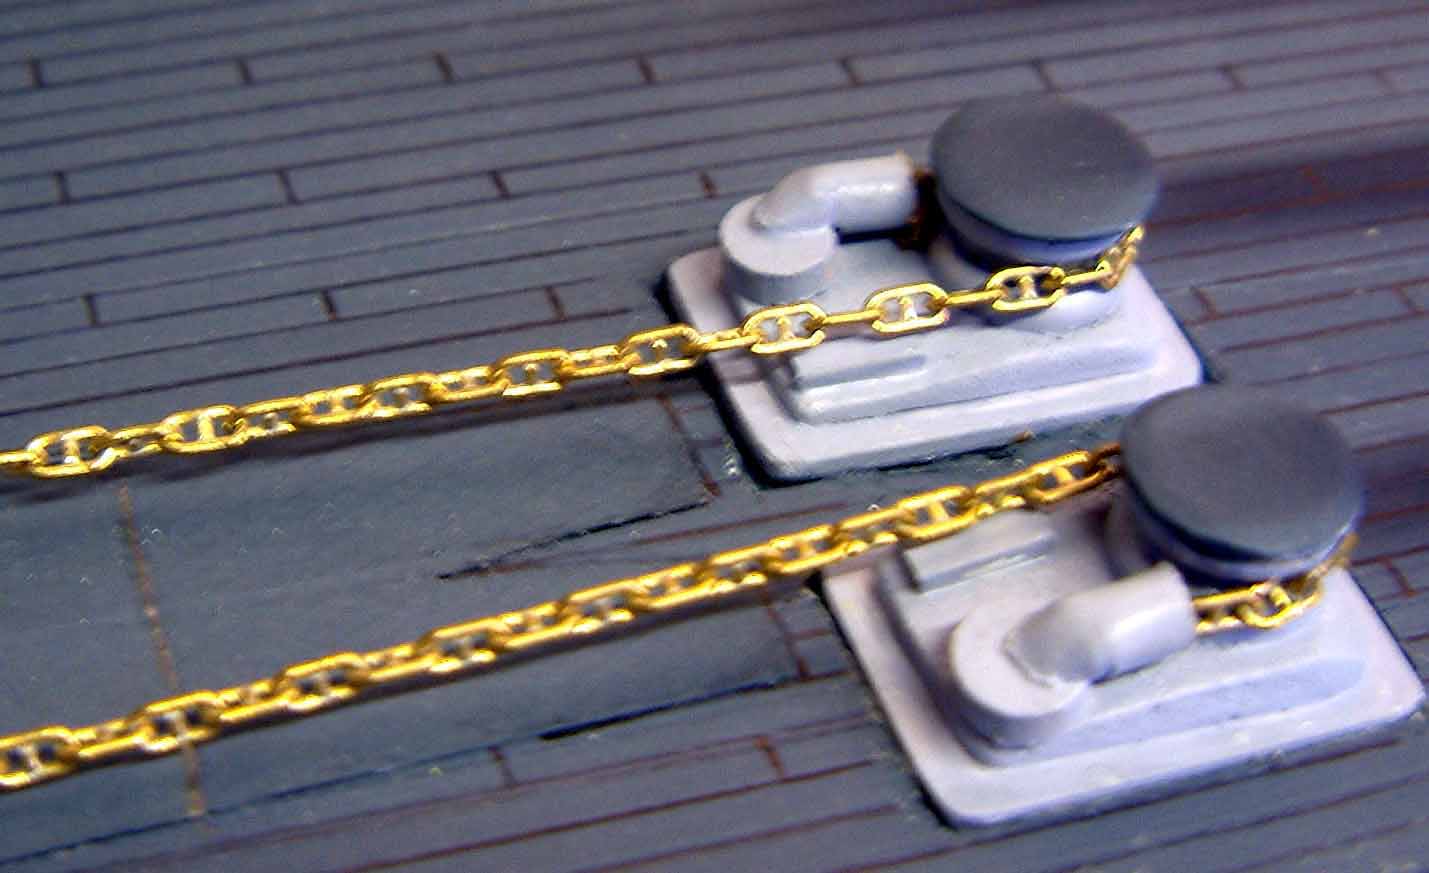
| Wildcats, Anchors and Chain, the wildcats or capstans as
we call them are made out of plastic cart with brass dome screw covers,
one placed down and the other turned upside down and glued in position,
a small round piece of plastic glued on top and sanded a little at the
edges, the chain guides are made from brass tube and cut to shape and fitted.
The chain comes from a company in the U/K called Jotika, it measures 6 links to the inch, looks right on the model, the chain securing points are a smaller chain, 12 links to1 inch, all this runs down to the anchor run offs, on top of sections of chequered plate. The anchors are made from plastic and brass rod, the housing protecting the hull is made from fibre paste, drilled, sanded and glued in position. |
 |
|||||||||
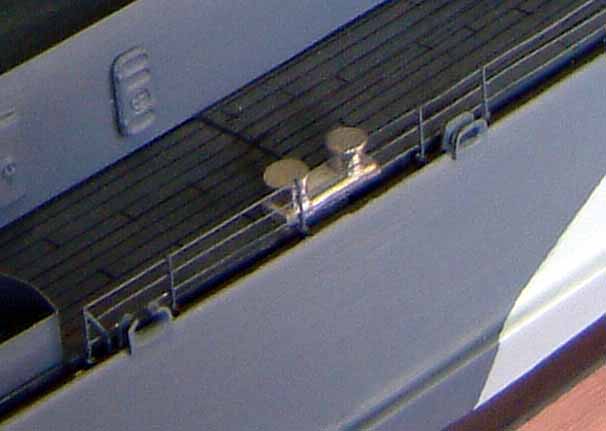
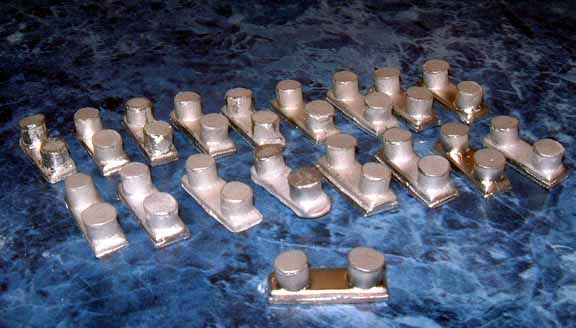
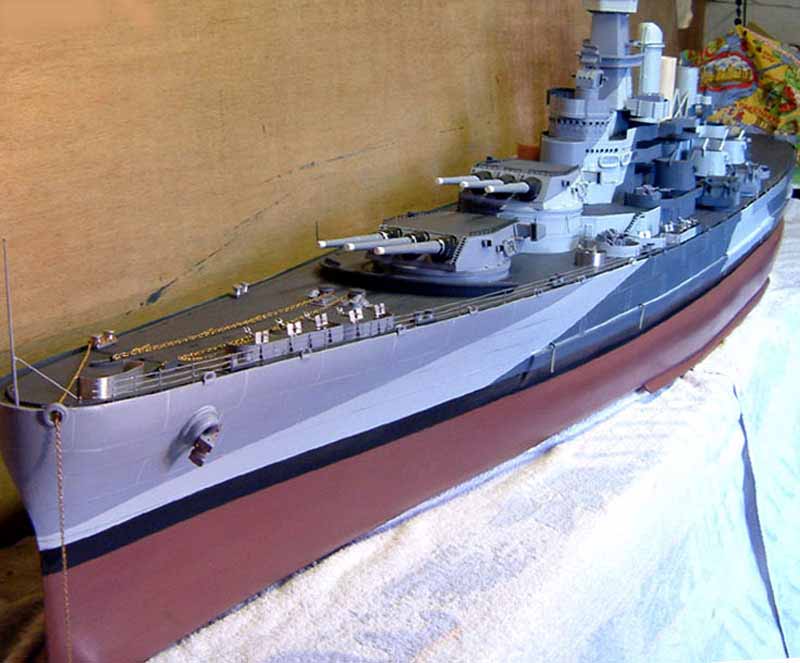
| Handrail stanchions, Large Bits, (Bollards) the handrail stanchions are John Haines 1/96scale p/e set, there are 200 in a set they where purchased from FLOATING DRYDOCK in the USA, because this is a working model I had to solder an extra piece on to the bottom so they would be more secure in to the deck. When one section of rails were drill and fixed into the deck I passed silver coated wire though the holes to make the three rails, they where then super glued at every stanchion, at the last stanchion I put in one that had a bracing piece, this helps to keep the rails tighter and a little more even. The large bits as they say in the USA are made from cast metal, I made my usual master and cast a rubber mould, then with the hot metal I cast another 18 bollards as we call them, so as they fit secure I drilled a hole in the bottom of each bit and inserted two brass pins, I then drill the deck and push the two pins home though the deck, you now have a bit that you can tie any ropes to and will not pull away from the deck. | 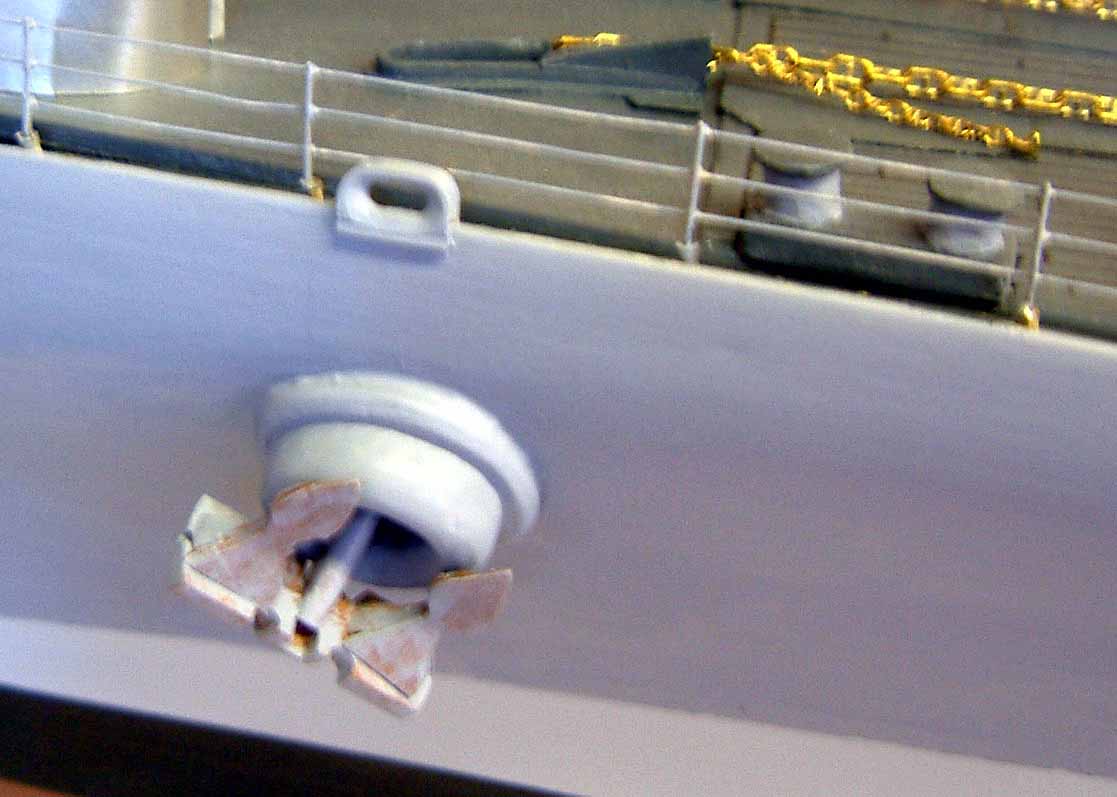 |
|||||||||
 |
||||||||||
 |
||||||||||
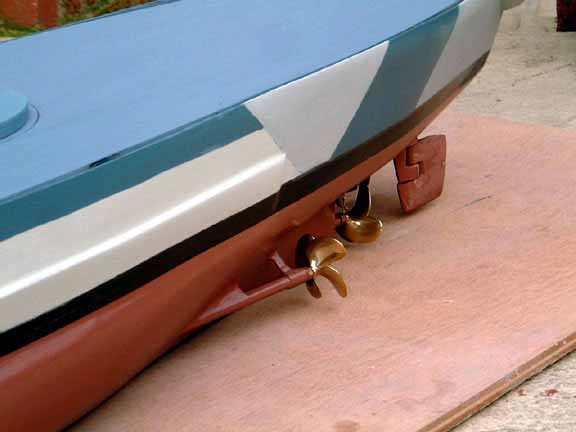
| Propellers. These where purchased from Prop Shop in the u/k, in my opinion they are one of the best type on the market, they are not cheap but if you have spent so much on a model, its not worth spoiling it for a few cents, I think they are made by the lost wax method, they are cast bronze, and come in various sizes, two, three, four and five blades, also different thread sizes to fit shafts. | 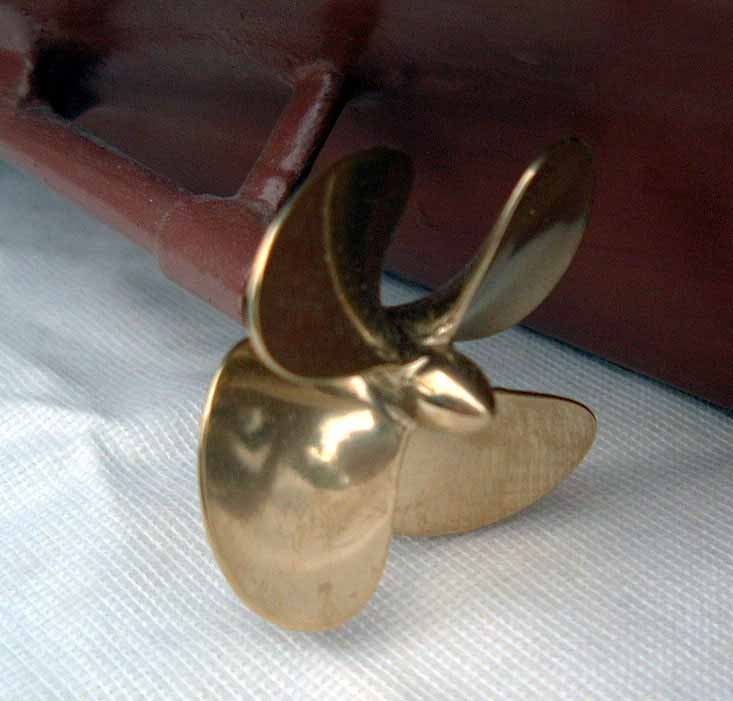 |
|||||||||
|
||||||||||
| Plate. The plate I purchased on e-bay, when I saw it I thought that will make a nice plaque for in front of the model, I usually have one made, but at $3.99 could not resist, the colours are the same as the ship, and the same photo as the one on the front of the ships data 1 book. | 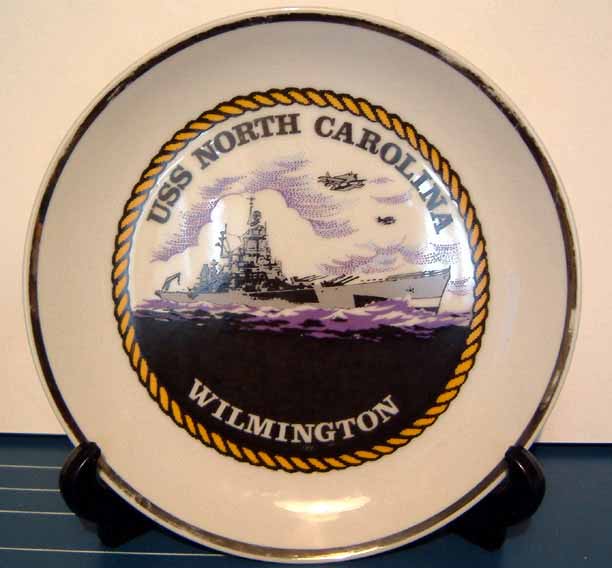 |
|||||||||
| Overboard Discharge Chutes. These are made from white metal and where round in shape at first, then I filed them flat and placed a rough file on top of them, and with a wooden hammer I hit the file to make like a webbing imprint into the soft metal, the hull was drilled and each were glued in place, at this time period N C had webbing discharge chutes, I have since painted them a tan colour. | ||||||||||
| At the moment we are getting ready for Christmas, theres not a lot of modelling being done, I have ordered quite a few parts from Floating Drydock, mainly radar, and directors, aircraft, plans for the aircraft catapults, small peep holes in the bridge, paravenes, these are things I can build in my small computer room till it warms up again in my shed. So its happy modelling and a merry Christmas and a prosperous new year, to all who view these pages. Ron h | 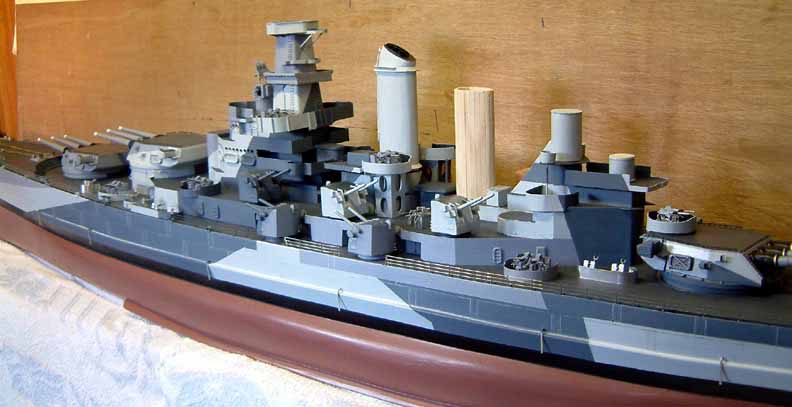 |
|||||||||
 |
||||||||||
 |
||||||||||
|
on to part 8 |
||||||||||