USS North Carolina BB 55

by Ron Horabin, Cheshire England
|
16-INCH GUN TURRETS AND MOUNTS. |
||
| This part of the build is not as messy, theres not as
much sanding down as there was in the first few chapters and we are changing
materials, we are going to use plastic card to begin with.
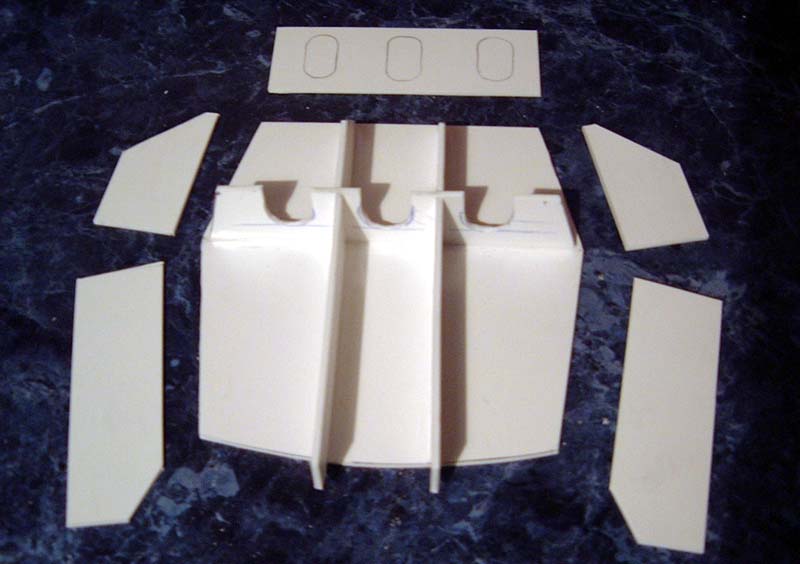
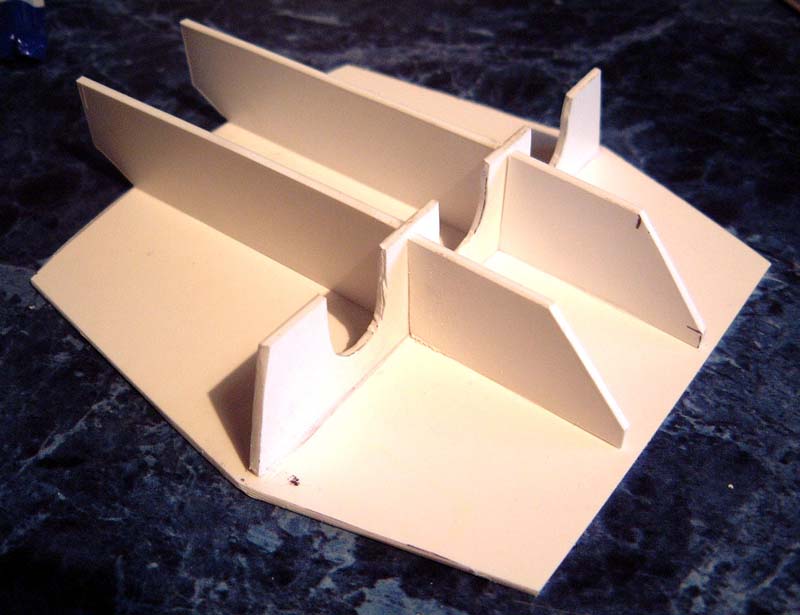
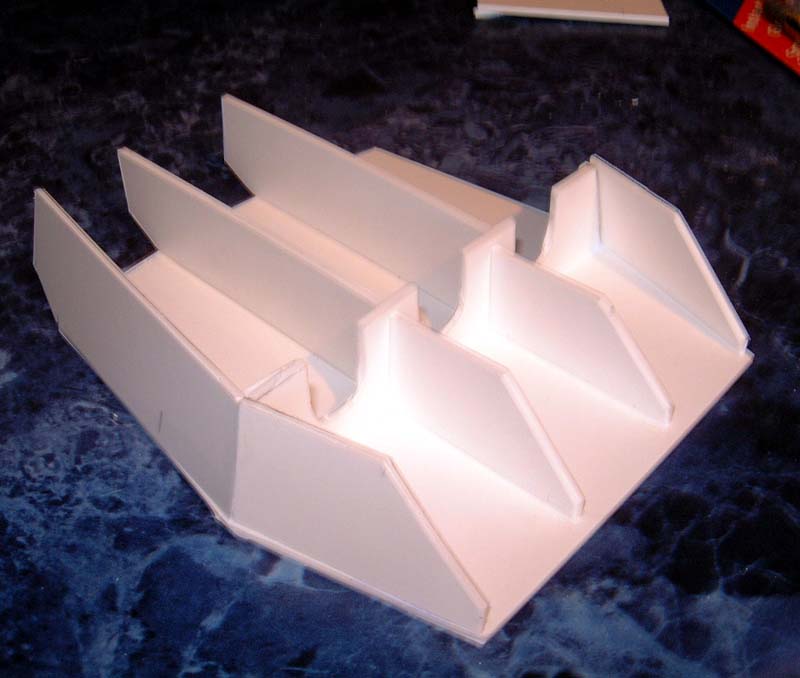
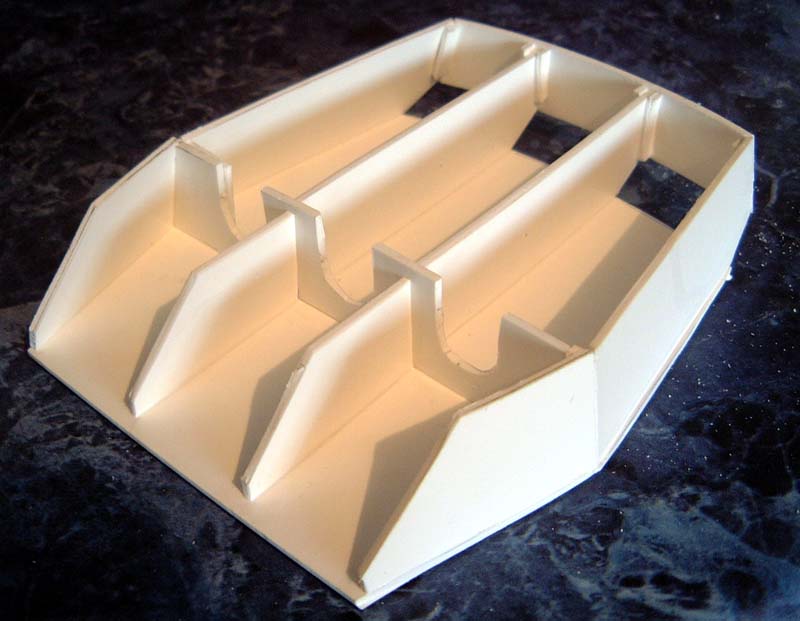
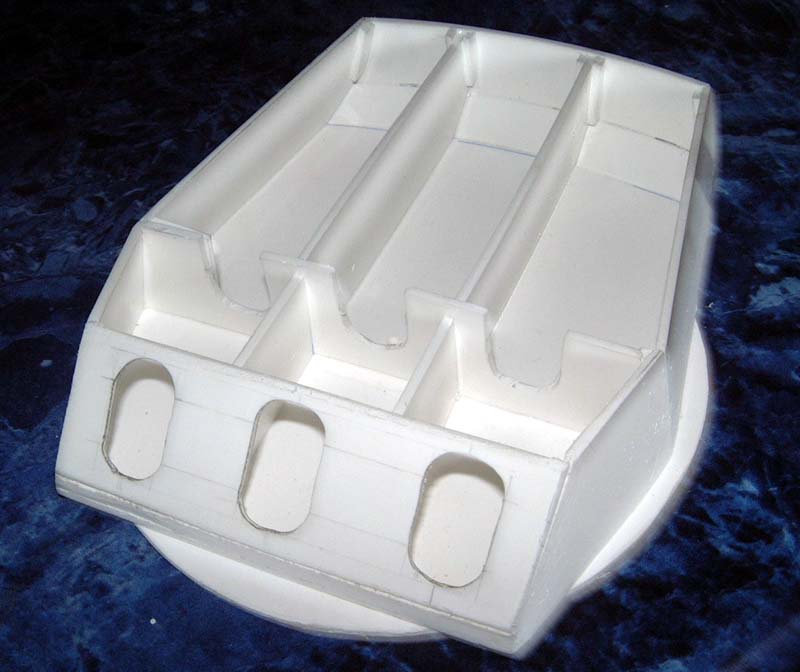
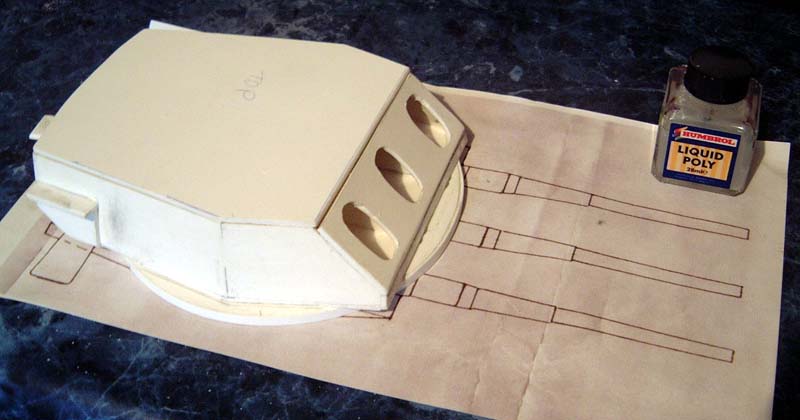
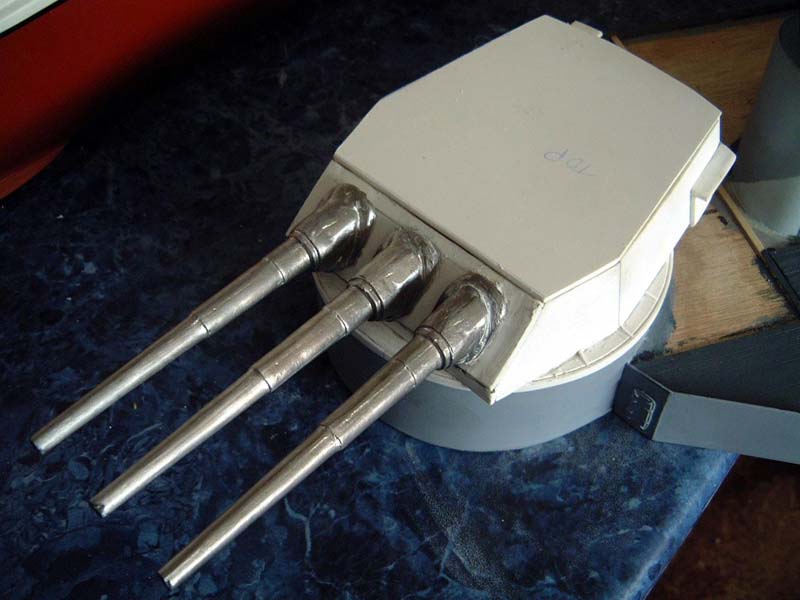
First we make some templates out of card from the drawings, then we transfer them on to our 80 thou plastic card, then with a sharp blade and straight edge we cut them out and lay them in position for assembly. The first thing to check is the base of the gun, this is the round section, make certain it is slightly larger than the mount it sits on, otherwise it will not turn when you want to rotate the guns for display purposes. Having checked that every thing is ok we can start to assemble the base of the gun and the armour plating. I first glued the inside piece in position with Humbrol Liquid Poly, then I glued the two front side pieces, then the rear two sections, from there I glued the curved section on the back of the structure. Then at the front where the 16 gun barrels protrude. I had to cut the three holes in to the plastic card and glue into position, next divide each section off with more plastic card so each gun barrel has its own compartment, at this stage the top remains open. |
 |
 |
 |
 |
|
 |
||
|
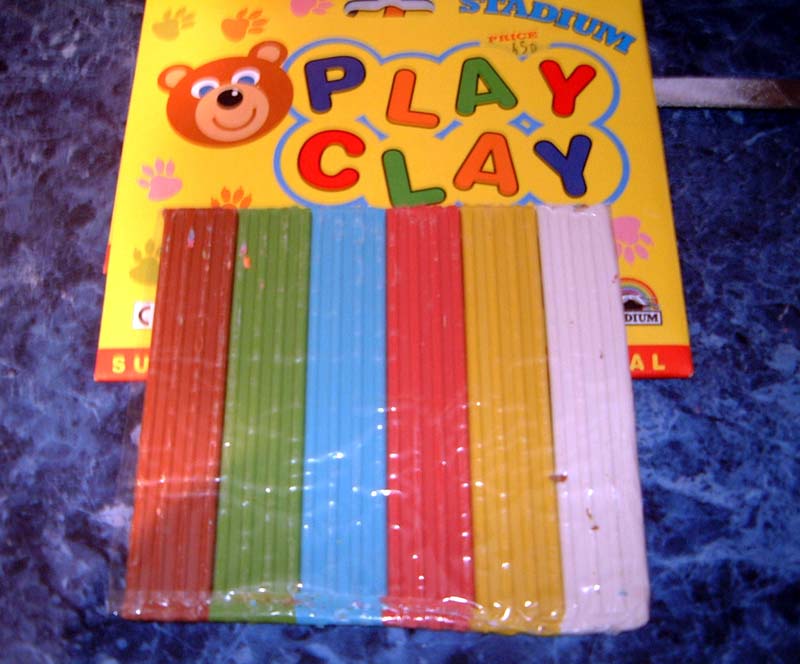
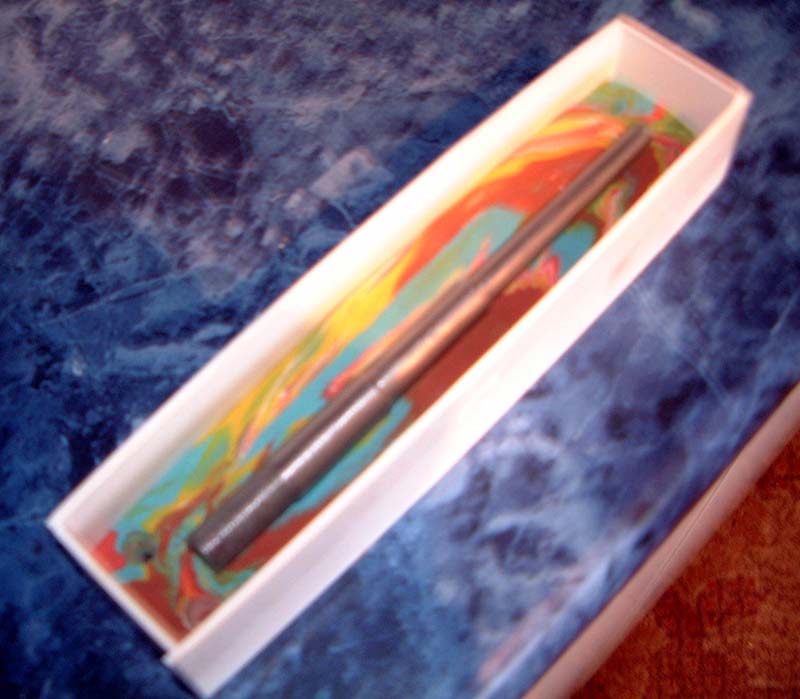
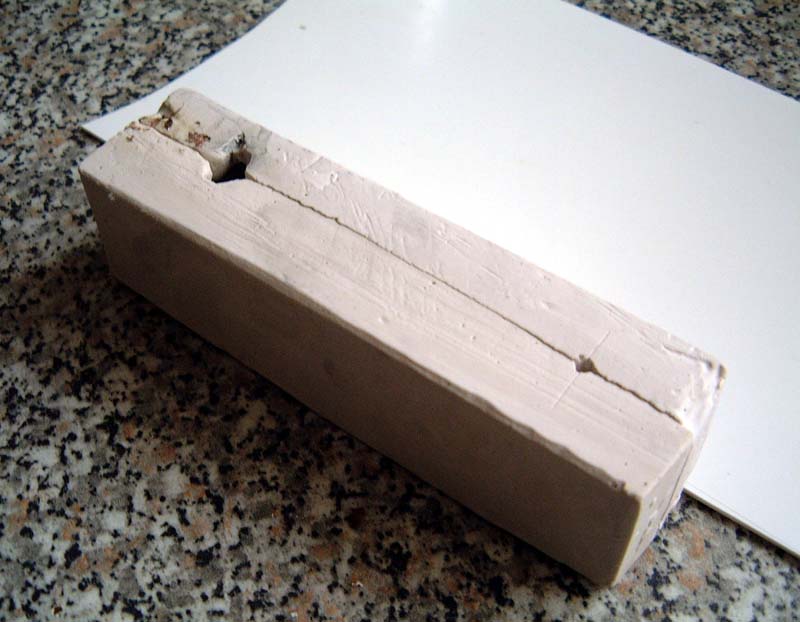
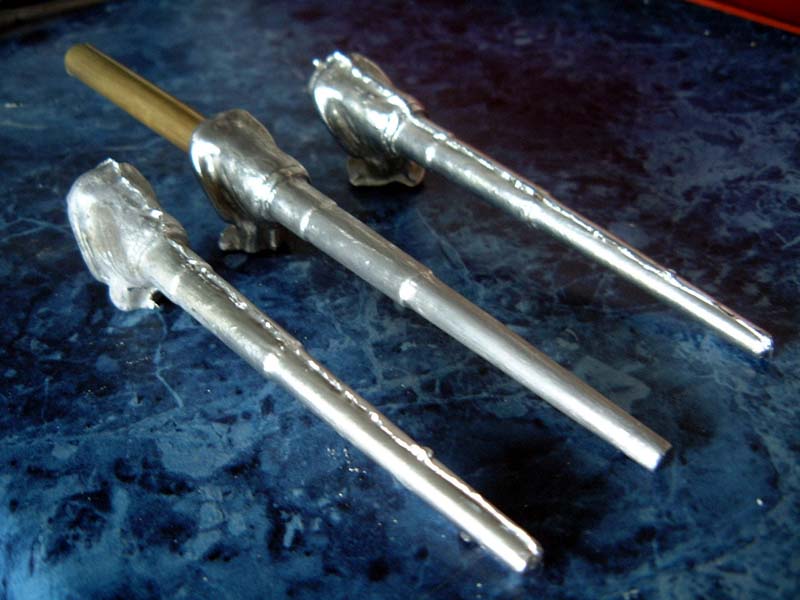
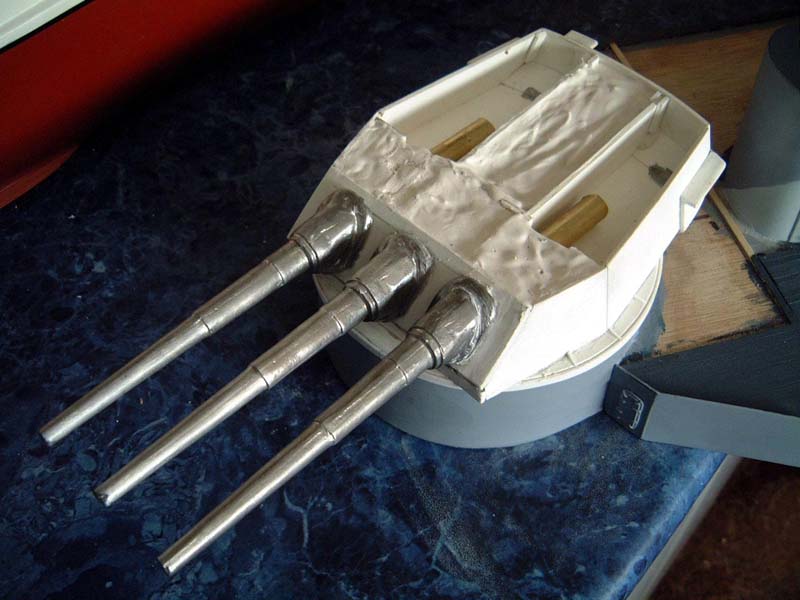
Next we add a little detail on to the side of the gun housing, when this is done we put all three sections to one side, because now we have to make the gun barrels. The first job was to warm up my shed where I keep my lathe, a Myford ML 7, I am still learning, but get by, with a nice piece of metal in the chuck and rolling stock, I begin to taper the gun barrel, a quick job and its back inside to the warmth of the house. Now we have to attach the blast bag to the barrel of the gun because we are going to make a cast so we can have all 9 barrels the same, the blast bag is moulded from Milliput, this is a two part putty, when mixed together will go hard at room temperature in 2-3 hours. We now have to make the mould; taking some scrap plastic card we make a long 4-sided box, at least ½longer than each end of the barrel, with some play clay we make a bed to sit the barrel into, then we put the box around it and mix plaster of Paris and pour it into the mould. There are other materials you can use such as silicon moulding compound, this is especially good for soft metal moulding but is a lot dearer, we now leave the plaster over night to harden, then in the morning take away the box and remove the play clay and release the barrel from the cast, if you put some wax or some thing of that nature on to the barrel it will release a lot easer. Now we do it all again, turn the mould over with the moulded section facing you, replace the barrel, replace the box around it, wax every thing and mix your plaster, pore into mould, leave to set, when completely dry we can take everything apart and we should be left with a mould for our barrels. Taking the two moulds apart we cut two channels in the mould so we can pour in the metal and let the air out at the same time. The next stage is to purchase some low melt metal, you can do them in resin but I wonder if they will stand the test of time, so I plumb for the soft metal. What you have to do is warm the mould up a little, not to hot, then melt the soft metal and pour it in to the mould, let it cool natural, do not cool off in water, then you clean off the excess flash, and you should have a nice gun barrel, now we only have to cast another eight. I did not make the barrels too long because the mould would be too long for casting, instead I decided to add brass tub on to the end that fits into gun housing. To fix them into position I used plaster of Paris poured into the first three compartments, them fit a screw into the middle of the gun housing and filled this again with plaster, we can now put on the top, gluing down with liquid poly. |
 |
 |
 |
 |
|
 |
 |
|
 |
 |
|
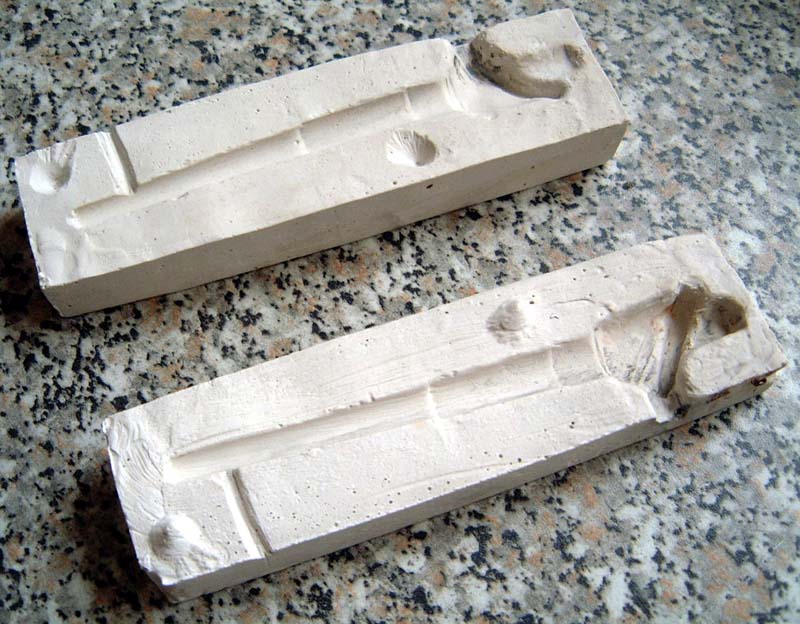
| The photo on the right is the mold for the sites on the 16" guns, ready for moulding, | 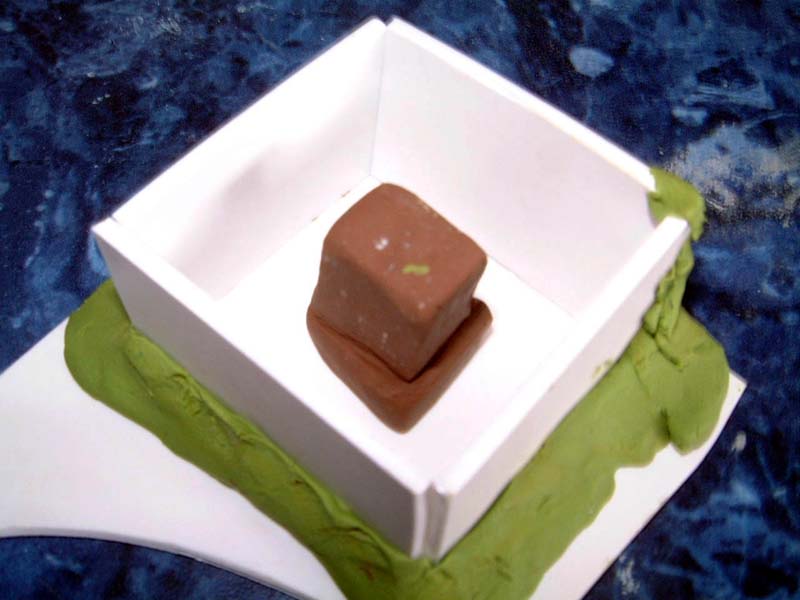 |
|
| The next job is to add the small details to the 16 gun housing, such as, ladders, handrails, gun sites and range finders, also extra armour plating. When all this is done we can undercoat and when dry add the finished camouflage. We have three to build, the forward two are the same, and the stern one has a 40mm bofor on the top, so we need to build the splinter shield ready to take the bofor when they are made. | 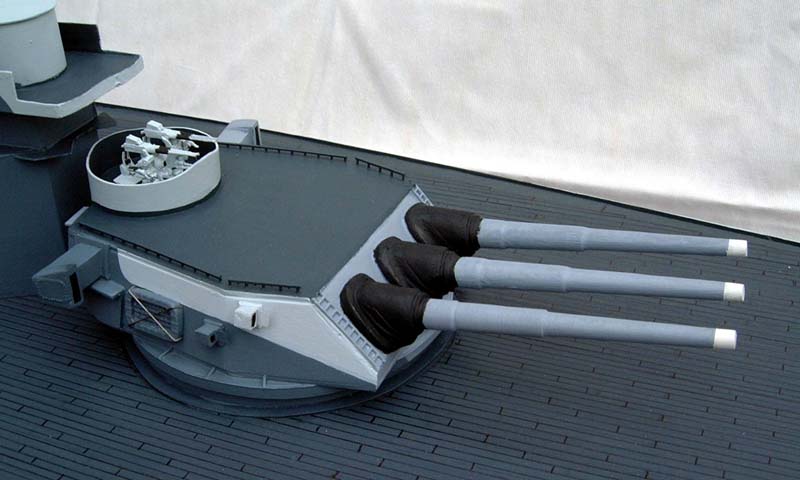 |
 |
| Now its on to part 6, happy modelling.. | ||
| . | ||
|
on to part 6 |
||
