By George Elder and Bruce Gordon
|
|
||||
| Photo-Etch Parts | ||||
| We are now near the end of this series, and our attention turns to an area that is becoming increasingly popular amongst 1/1250 model collectors, that of photoetched parts. I must say here that the use of photoetch can be expensive and labor-intensive, and thus not all collectors or producers think the cost is worth the gains. However, there are some parts, such as cranes, radars, etc., that are nearly impossible to cast using conventional techniques. We ran into such a problem with the cranes, spotter plane wings, and davits on the Lion project. Dave put his designing skills to work, and laid out the first step in making PE parts. This consists of developing a PE layout plan wherein the material to be removed via an acid bath from a thin brass or stainless steel plate is described by blank (white) areas. Shown here is the actual layout that Dave used. | 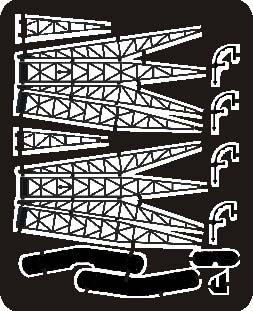 |
|||
| Once the layout has been made, a photo-like process takes place, in which the resultant layout image is transcribed onto the surface of a very thin brass or stainless steel plate. This differs from usual photographic copying processes because a material is laid down on certain areas of the metal substrate that protects it from being dissolved in a subsequent acid bath. The protective material varies greatly depending on the process being used, but several PE sets, or frets, can be laid out on a single plate. For a long time, the parts made were strictly 2D, but now sequential PE stages can be done that allow 3D scribing. We need not get into that process here, but the photograph shows what the plates look like after they leave the acid bath. | 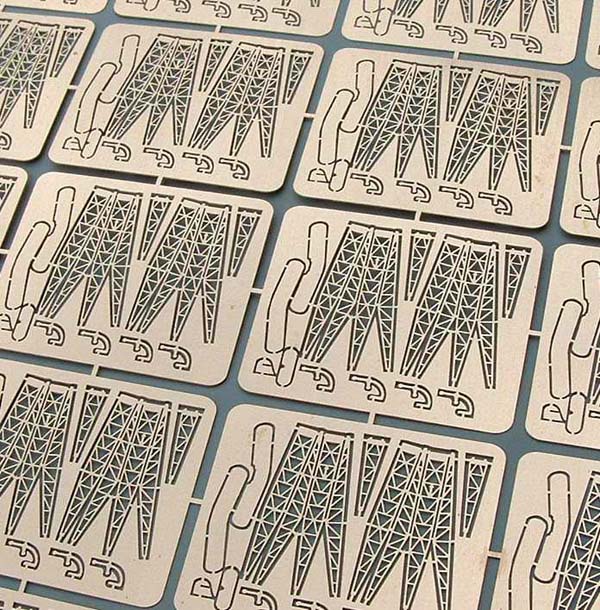 |
|||
| Assembling Photo-Etch Parts | ||||
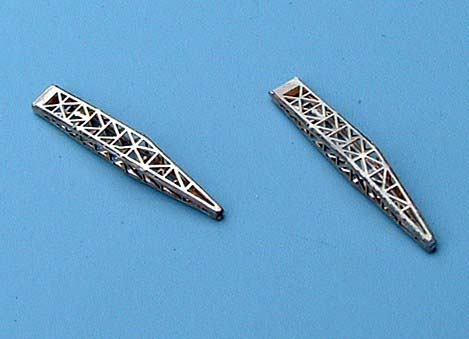
| The parts must be removed from the fret, which can be easily
done via kitchen scissors or hobby knives. The tricky bit is folding the
parts into shape and or placing them on objects -- which is why a careful
PE layout is of great importance. Anyone who has tangled with multi-piece
PE radars will rapidly attest to the fact that they can take a lot of time
and skill to construct -- especially when super-glue is involved. In this
case, the parts were optimized for very easy production. Nonetheless, the
final result speaks for itself.
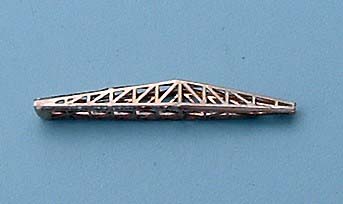
This crane is less than 2 cm long, and comes with a lower segment that can be articulated to show the crane at work. I will post pictures of the plane and davits when they are completed and fitted. At this stage, we want to complete the project, and there isn't much time for anything else! The plane is going to be a gem all by its lonesome. I can't wait to see how the PE parts work out. One plane will come with every model, both the regular and camo versions. As for now, the models have been completed, the final paints have been chosen and applied, and now comes the fitting of the PE bits. Then comes the packaging, which is very unusual. |
 |
|||
 |
||||
|
|
||||
![]()
© ModelWarships.com