By George Elder and Bruce Gordon
|
|
||||
| Basic Materials and Making the Hull | ||||
| There has been considerable interest in the types of material
that are used to make a master. This project all began with a block of
plastic that Dave milled to shape via using templates. These templates
were made by reducing actual plans to 1/1250 scale. The better the plans,
the better the final outcome and in this case Dave had the advantage
of working with both British Admiralty plans and a range of secondary sources
(e.g., Roberts, Parks, etc.). But let him explain the process in his own
words:
I've attached a photo showing the two types of material we commonly use, high impact polystyrene sheet in a variety of thicknesses from 0.25mm to 6.00mm and a modern composite modeling material which comes as a plank 5' long 2' wide and 2" deep and is pretty expensive. The great advantage with this material is it can be machined, drilled, sanded, etc., very easily, and does not leave a grain. It can also be filled and painted without any problems. Pictures of both these materials used for masters can be found here. The Lions hull was constructed by laminating [layers of] the HIPS sheet to the required depth, then overlaying the weather deck and the waterline profile onto the top and bottom. With careful reference to the hull sections and constant measuring, the hull was sanded to shape. The side armour plate was sanded with the body of the hull instead of being added later, either way is just as good. Once the hull has been shaped the portholes are added with a milling machine to ensure alignment. |
 |
|||
 |
||||
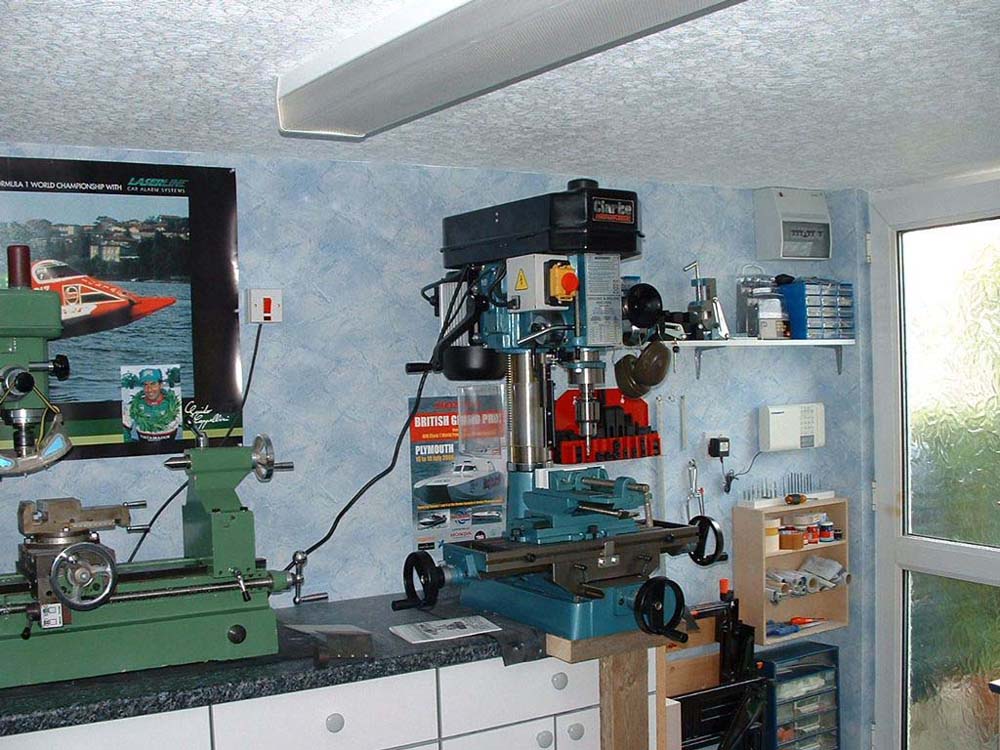
| Shown are the actual templates Dave affixed to the top
and bottom of the plastic box he made. Power tools make sanding the
block to the templates form much faster. The blue device is the milling
machine. If you look closely, a plastic block can be seen locked in place.
The end result of all the milling and shaping work is a blank piece
of plastic in the basic shape of the hull. Dave then affixes the templates
again and pencils in the centerline and the exact location of barbettes,
anchor chains, superstructures, etc. This is evident in the pictures from
other parts of this series.
|
||||
| Refining the hull and adding parts | ||||
| The direction we're going in with regard to making the
master is sort of a marriage of traditional model-making methods and modern
milling techniques -- some of which are computer driven. The output in
terms of numbers may decline relative to what was possible using our former
techniques, but we shall soon see if this is the case. Currently, we're
considering PE parts, and this involves CAD work. The use of metal for
various structures is also being considered, but it all depends on the
resolution that can be achieved and where the parts are located.
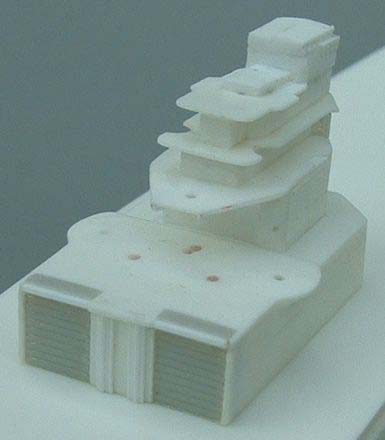
With regards to casting material, types of flexible resins are being used for various fine parts (masts, guns, etc.). But whatever the casting material selected is, it must be capable of reproducing even the finest details. Here are some extreme close-ups of the master Dave is making in its early stages of construction, which provide some idea of the detail Dave is seeking. Please note the engraving on the hangar doors. |
 |
|||
 |
||||
 |
||||
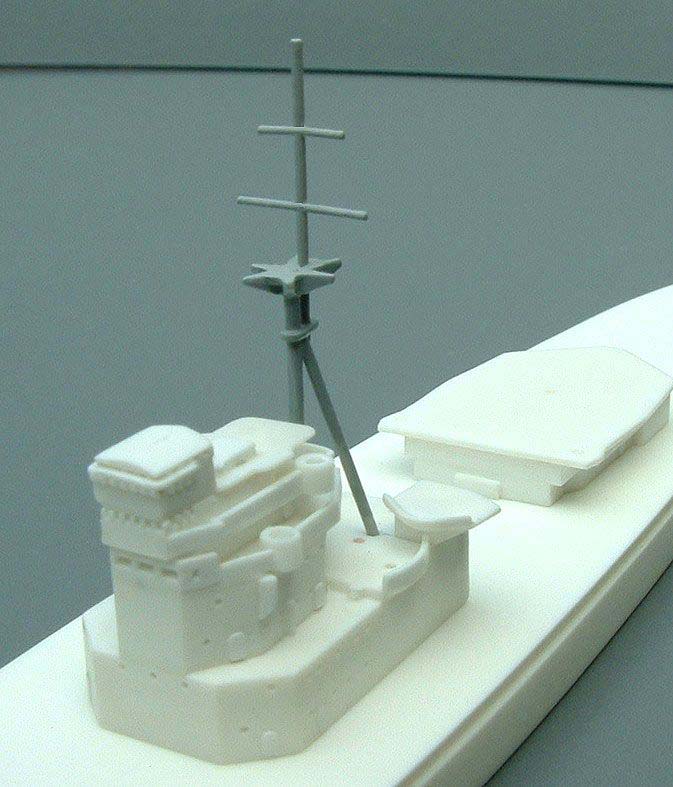
| Dave has been able to work in doors, and even tiny steps that are impossible to photograph, as in those that lead from the Pom-Pom platform to the deck below. The mast material is a bit of an adventure. On one hand, we want to avoid the problem of masts that easily bend. On the other hand, we want to use a resilient material that will not display brittle behavior and break when subjected to bending forces. Some types of styrene can do this -- as can some resins. We want the material to be resilient up to 30-40 degrees deflection, and early experiments have met this goal. As can be seen, the bridge details are coming along very well. | ||||
|
|
||||
![]()
© ModelWarships.com