Building the Spanish navy Battleship
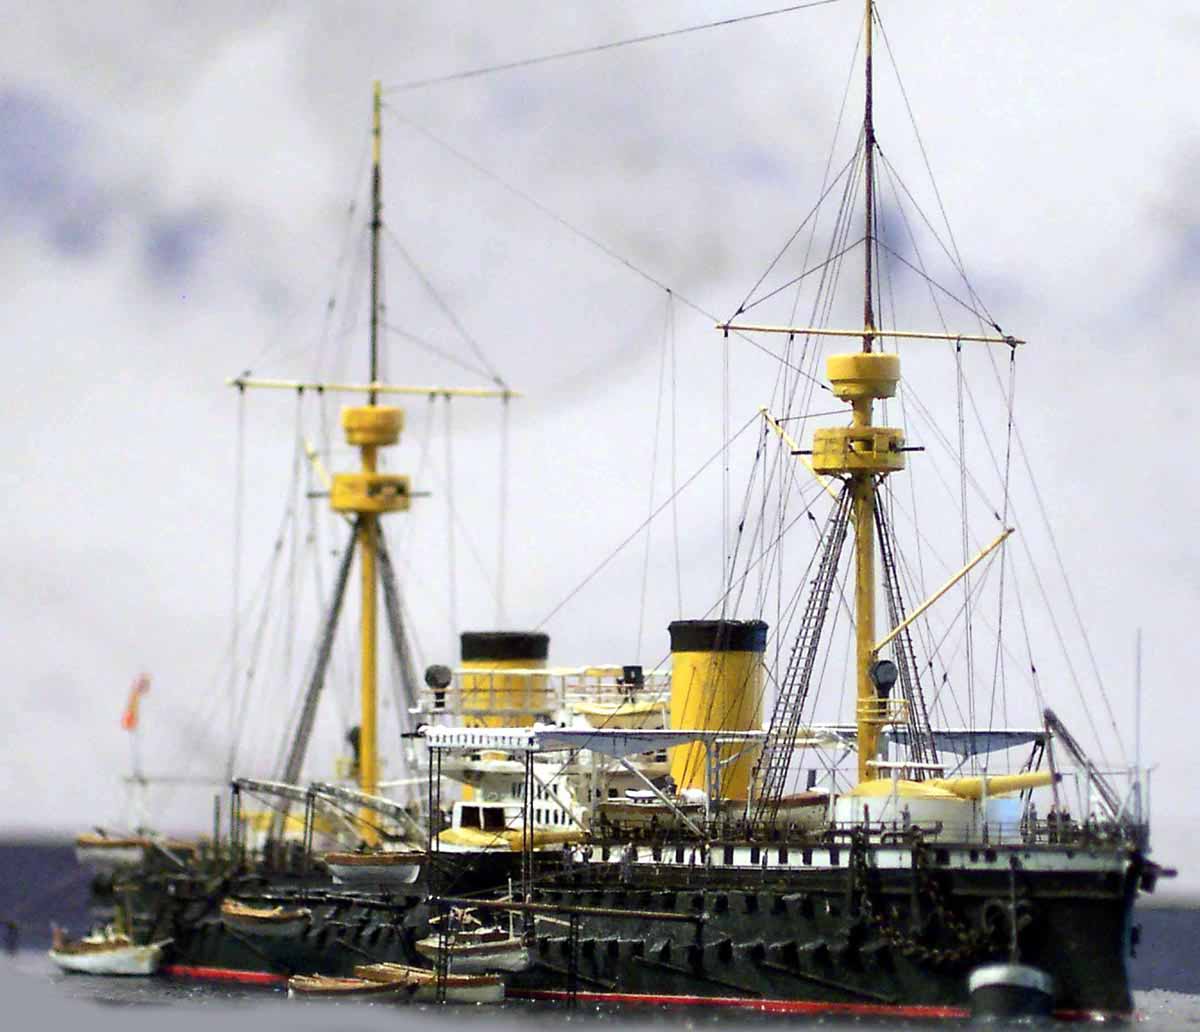
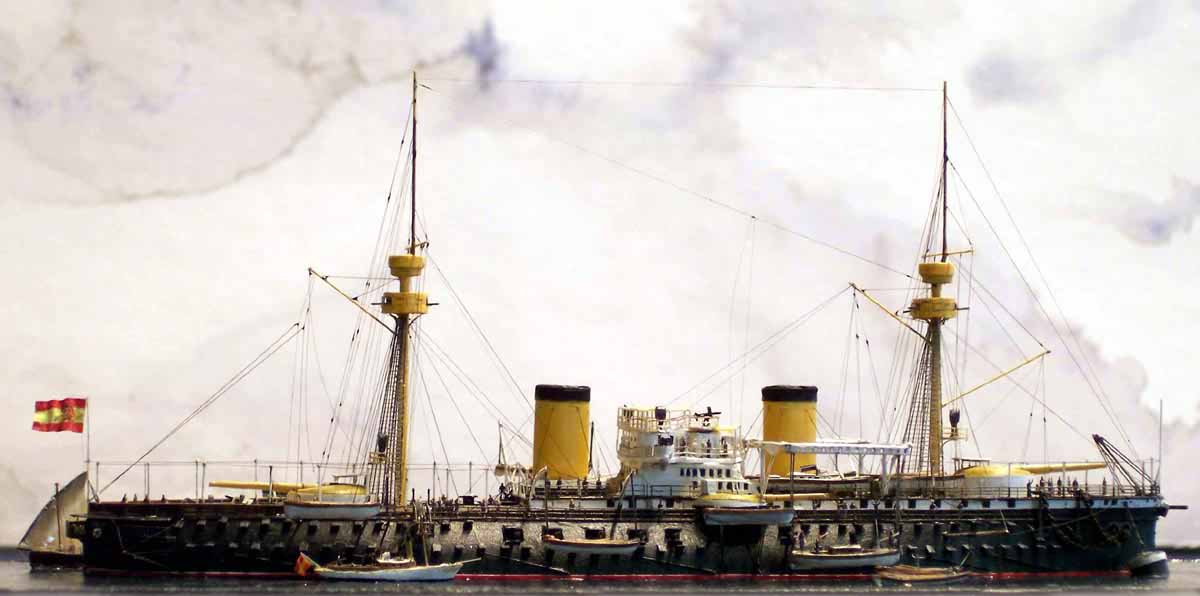
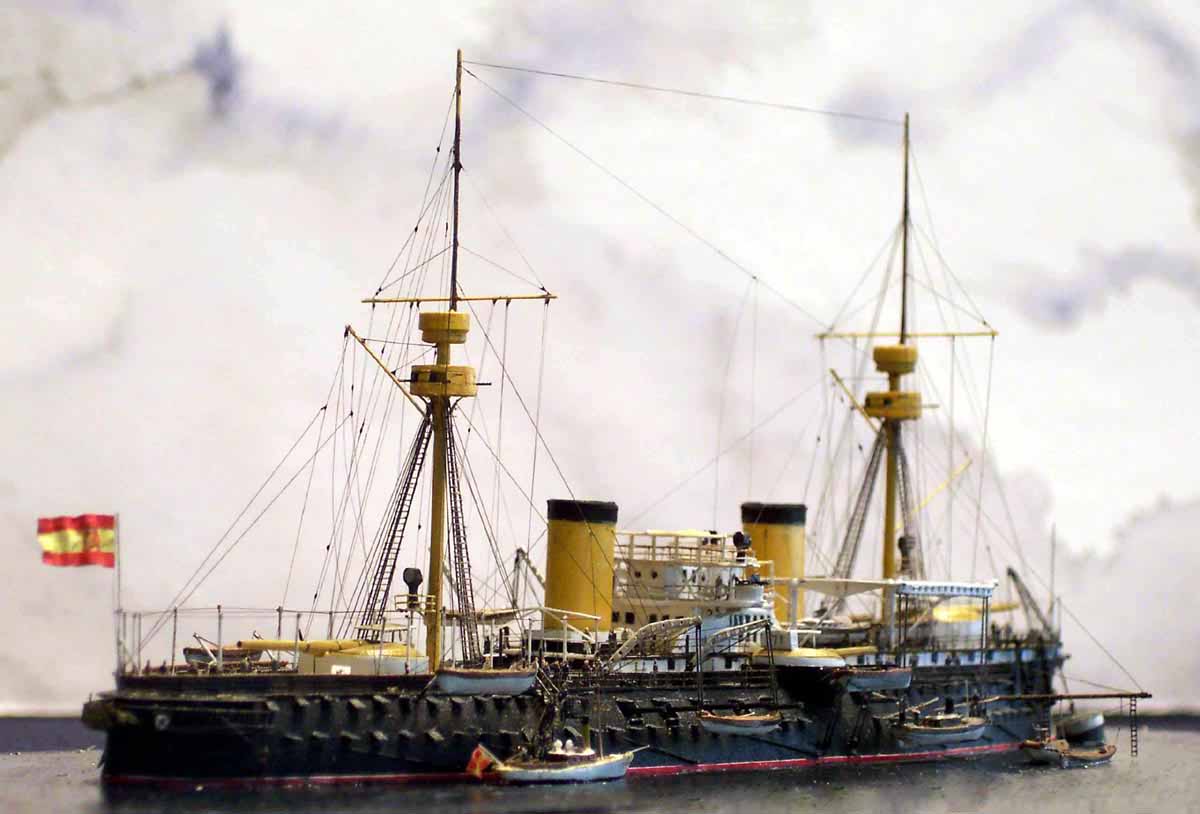
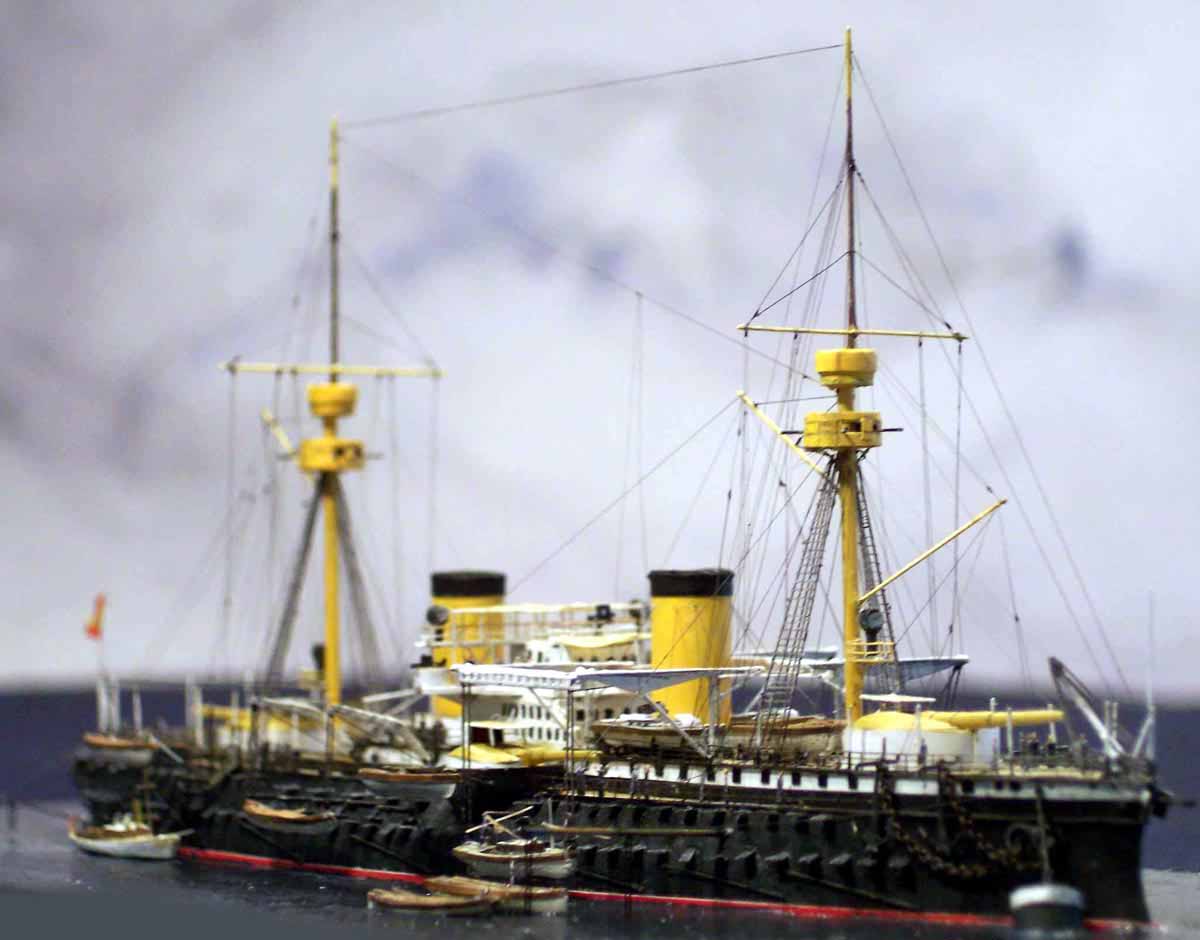
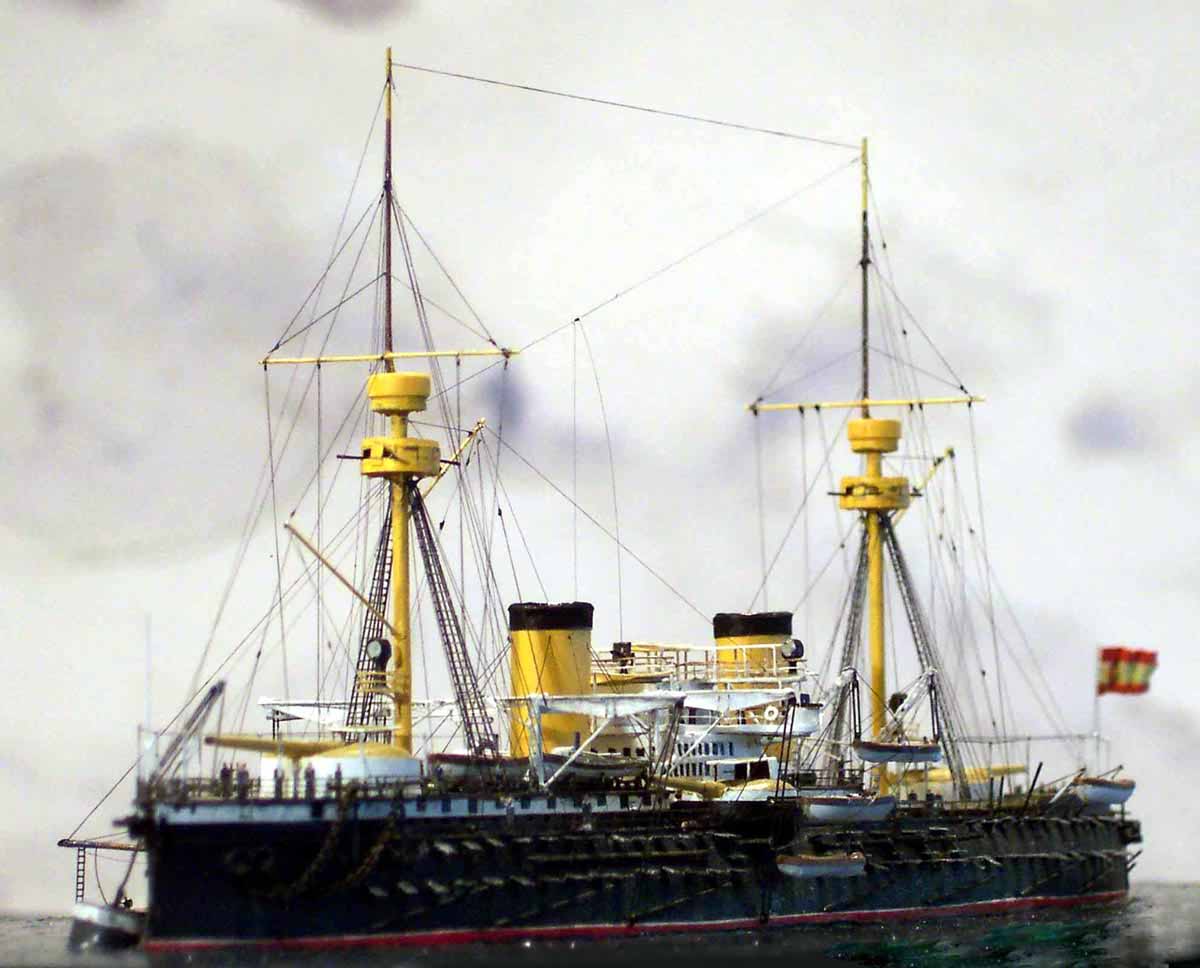
PELAYO as in 1895
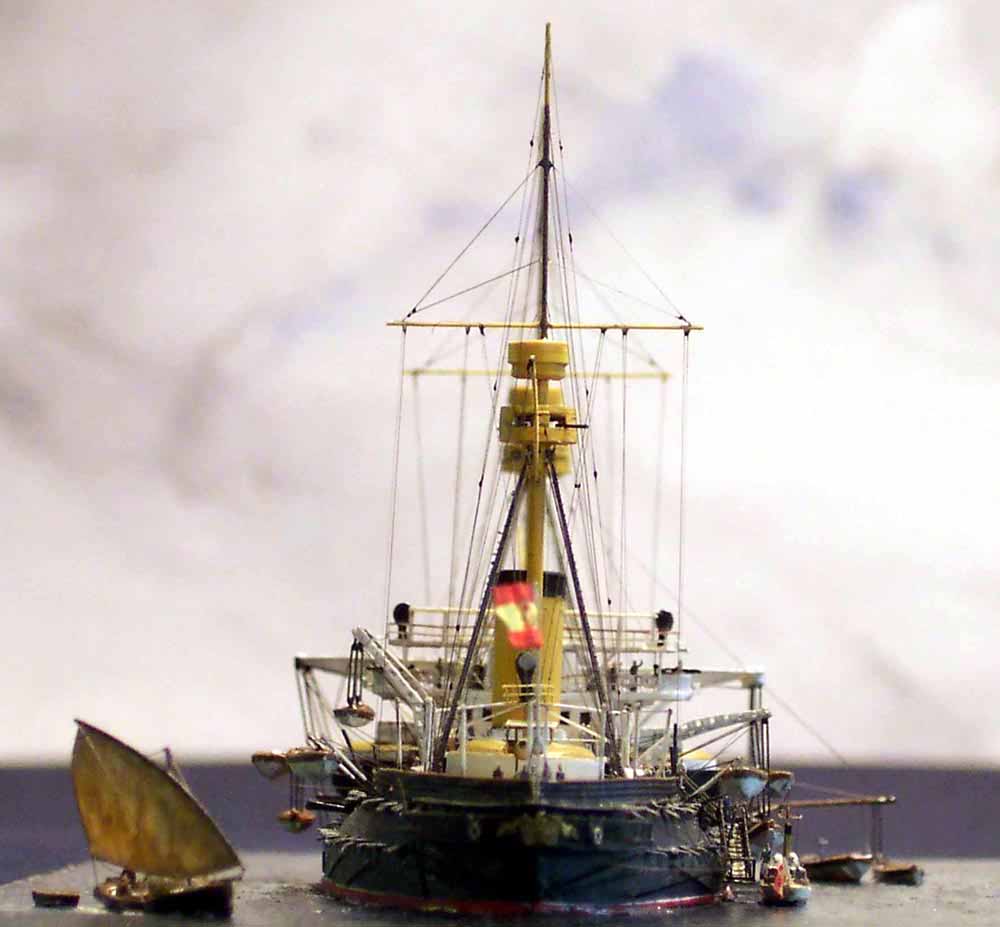
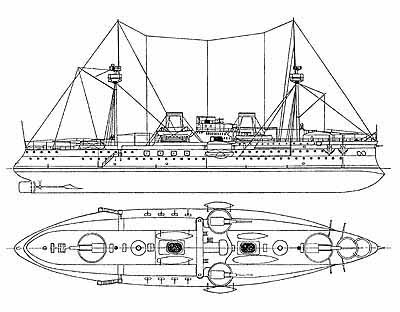
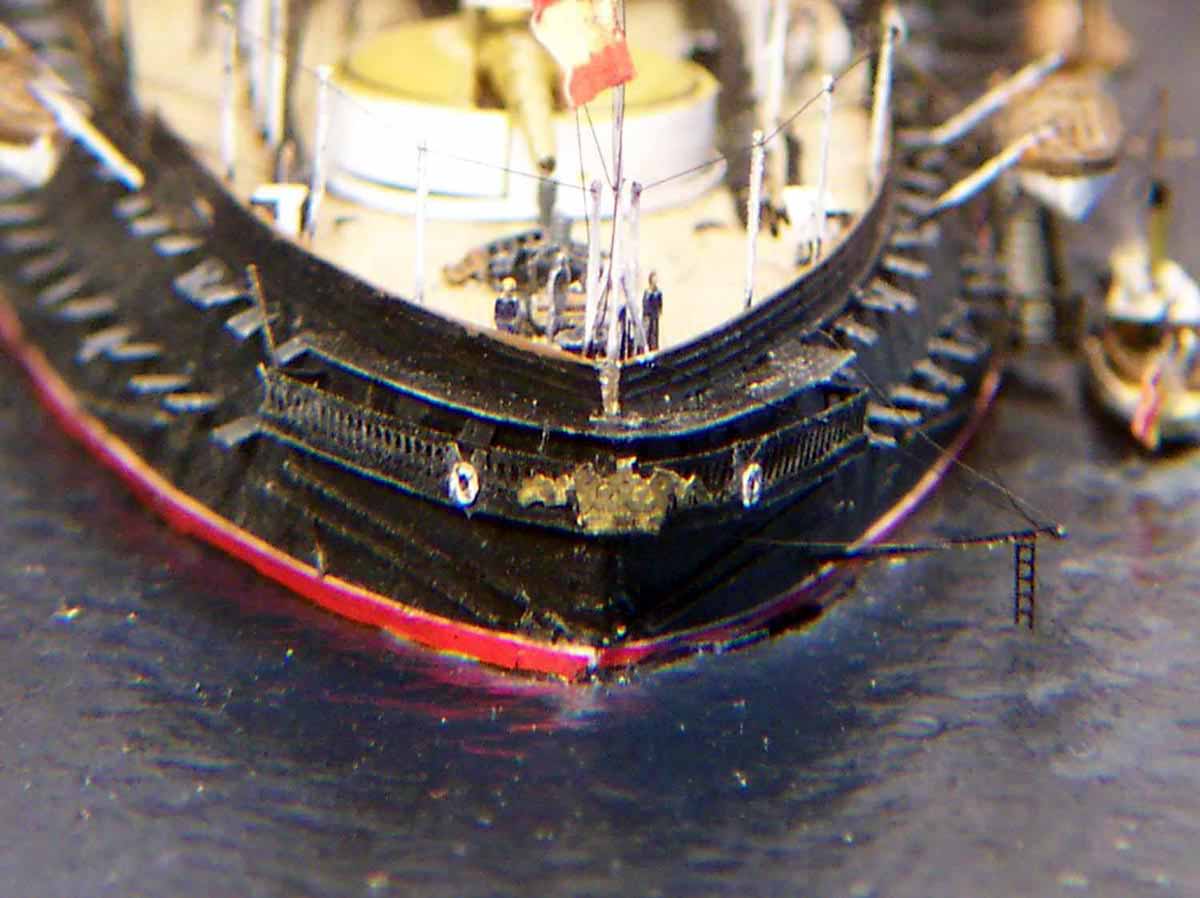
Pelayo was completed in 1888 at the French Yard of La Seyne, there being no Spanish yards large enough at the time to undertake the work. She was based on the French design of the Marceau but with less draft so as to allow her to negotiate the Suez canal fully loaded. Fitted originally with an auxiliary sailing rig of 4000 sq. ft she was soon reduced to military masts . The main Hontoria guns were mounted in barbettes on the Canet system which permitted loading in any position, 8000 ihp gave her a top speed of 16.2 knots on trials. She had a rebuild at La Seyne in 1897 where she was re-boilered and partially re-armed , the 4.7" being replaced by 5.5". She therefore missed the Spanish -American war by being yard-bound which resulted in her never seeing action with an enemy vessel. She did however fire her guns in anger bombarding the Moroccan shore in 1909. She was the flagship of the Spanish Navy and attended many International Naval reviews and Regattas In 1912 she was badly damaged after running aground and thereafter was only used for training purposes. She was eventually relegated to an accommodation , disarmed in 1923 and broken up in 1925 |
||||||||||||||||||||||||||
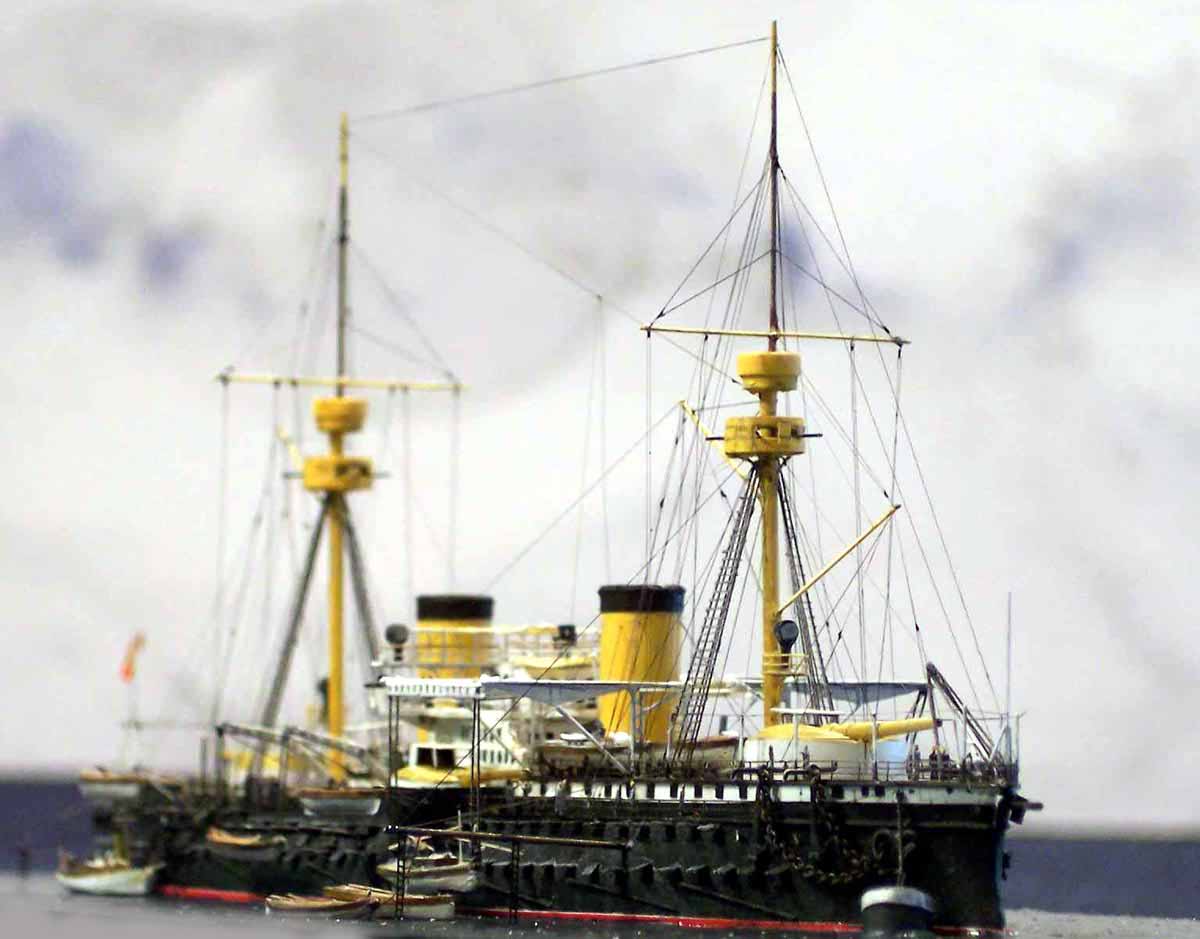
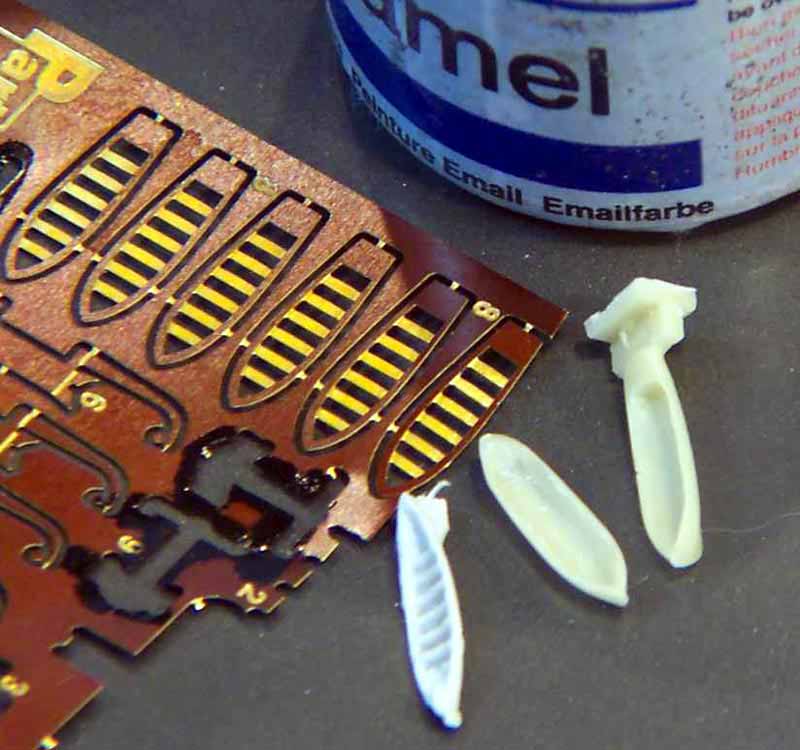
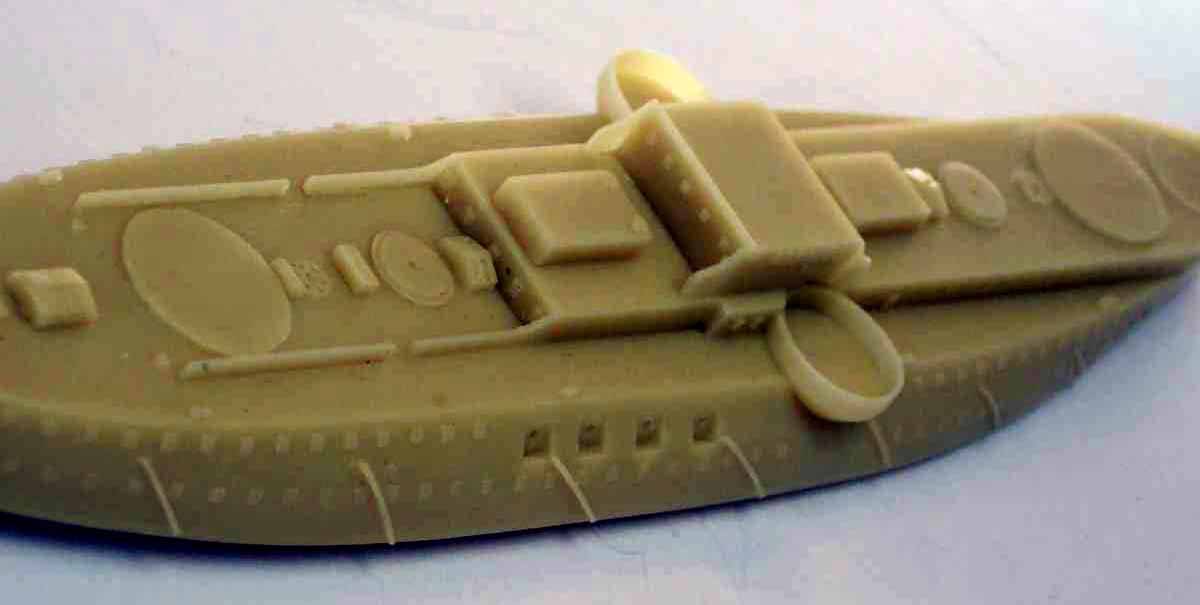
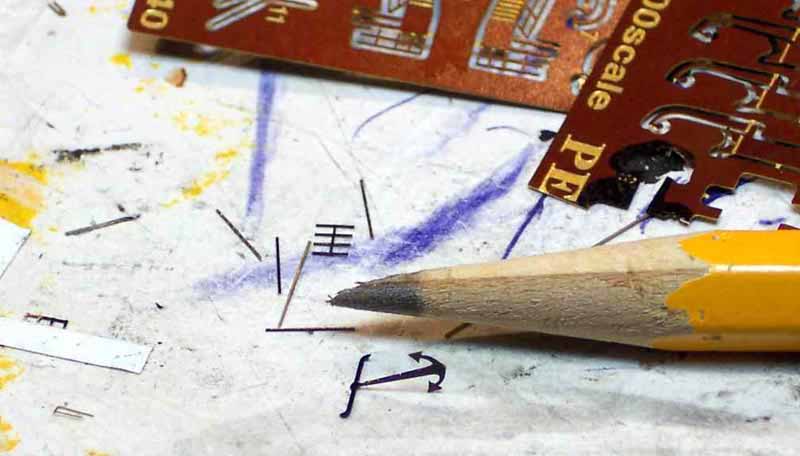
| The Spanish Pelayo was an unusual choice of subject as a first attempt into the resin ship model market, nevertheless that is exactly what Jadar Models of Poland did. Quality wise for a first attempt it is a credible effort, fairly crisp casting and containing within the kit a small Photoetch fret with ladders, railings, boat seats, davits and gunhouse roofs. | ||||||||||||||||||||||||||
| Unfortunately they appear to have used a single,
somewhat flawed(!) drawing as their primary source of information
on which they based the master. It shows PELAYO with a rounded sloping
cruiser stern, as well as missing out 4 x 4.7" guns and apertures
from the broadside battery.
The neat little PE boat launching davits were absolutely incorrect as well as the boat fit consisting of far too few and all of them wrong. although those supplied had neat PE boat thwarts. |
click images
to enlarge |
|||||||||||||||||||||||||
 |
||||||||||||||||||||||||||
 |
||||||||||||||||||||||||||
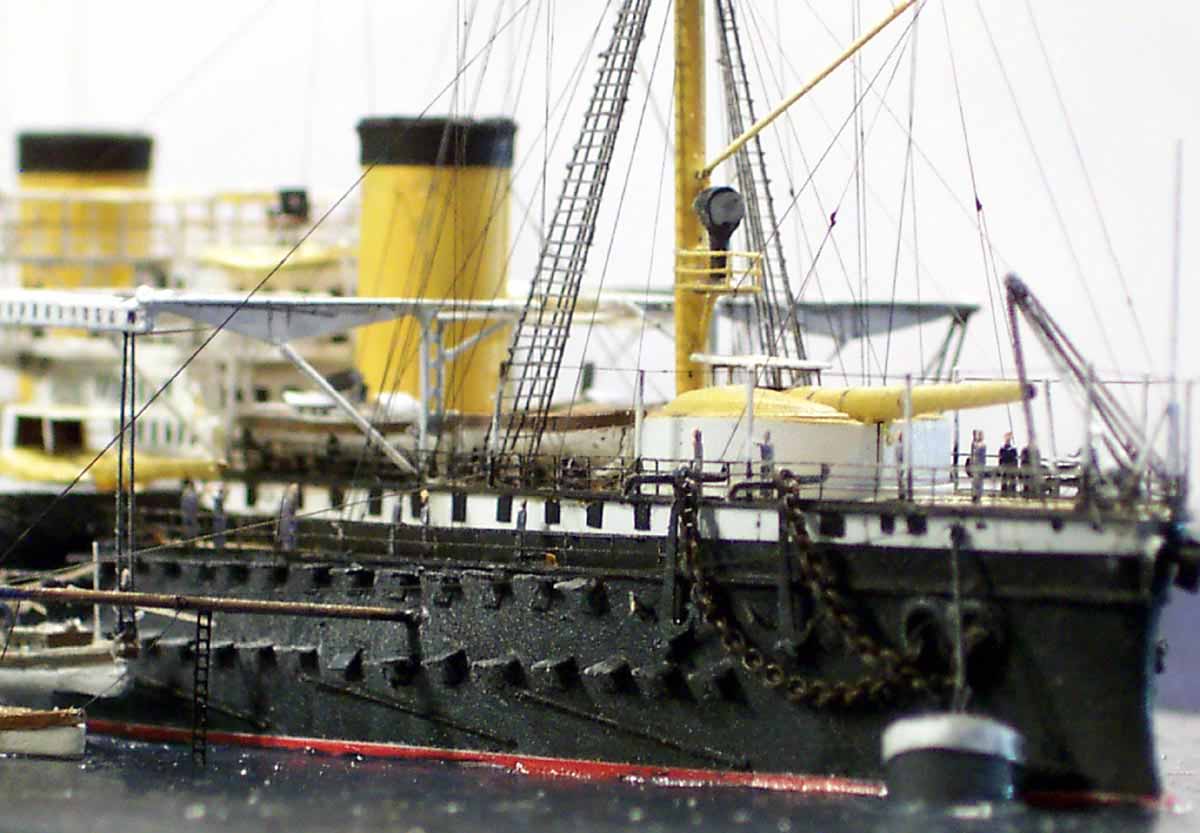
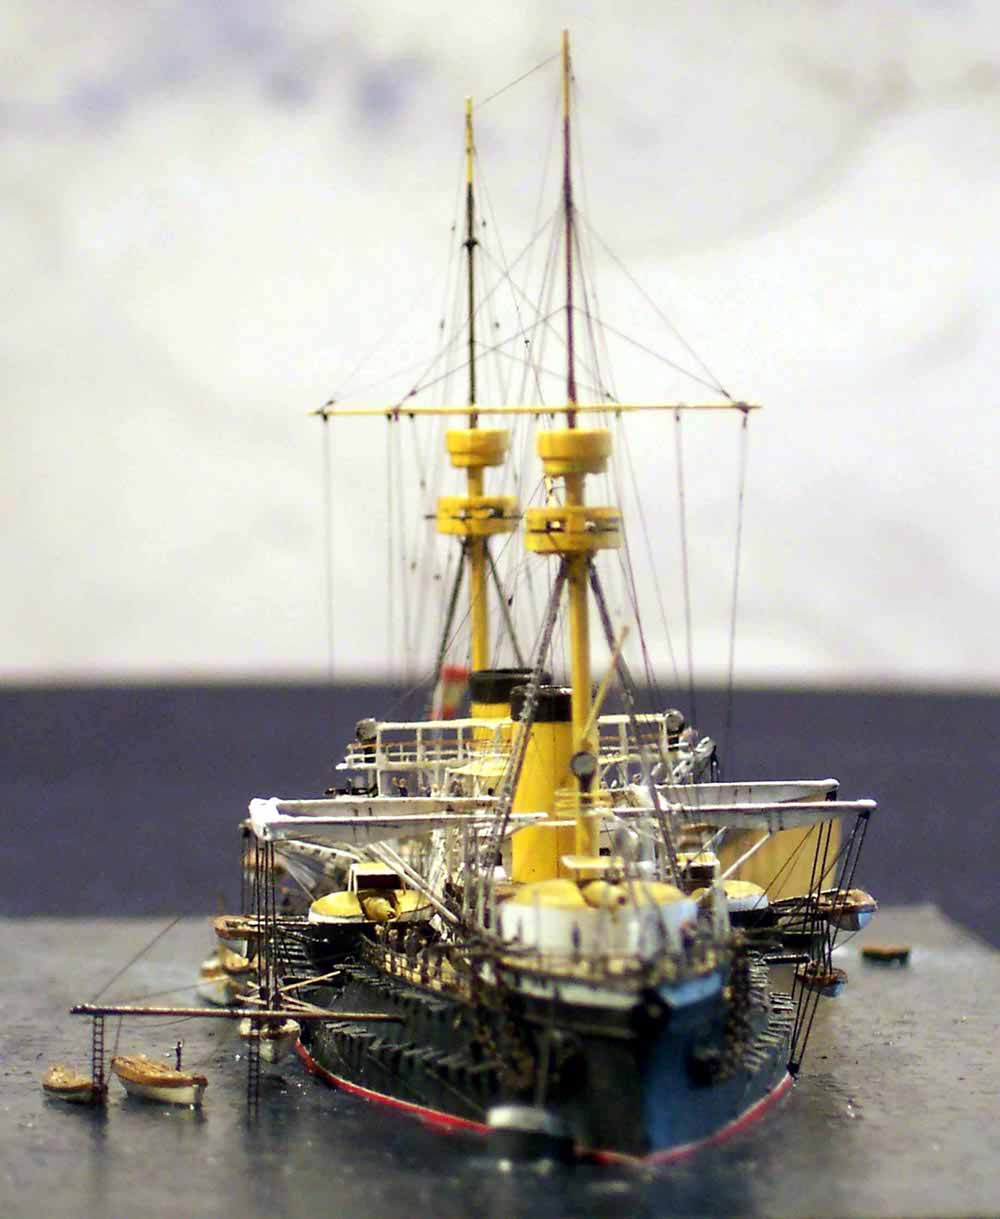
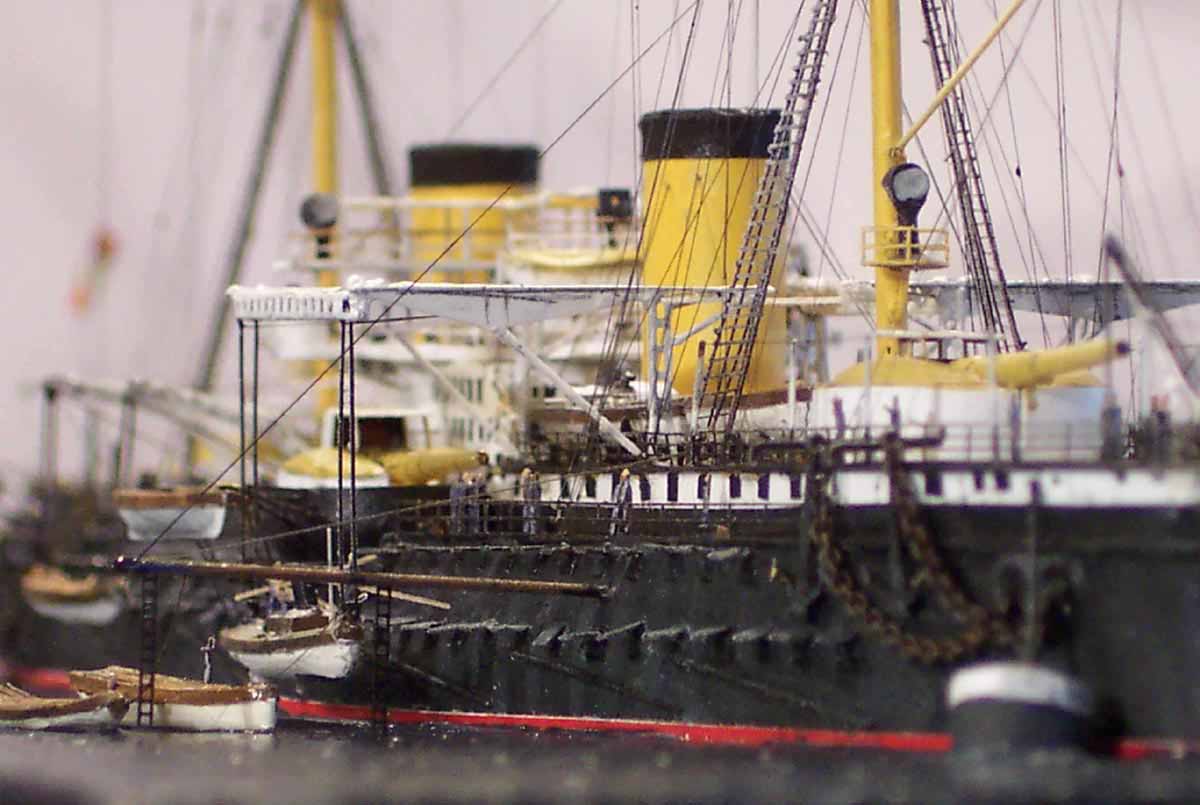
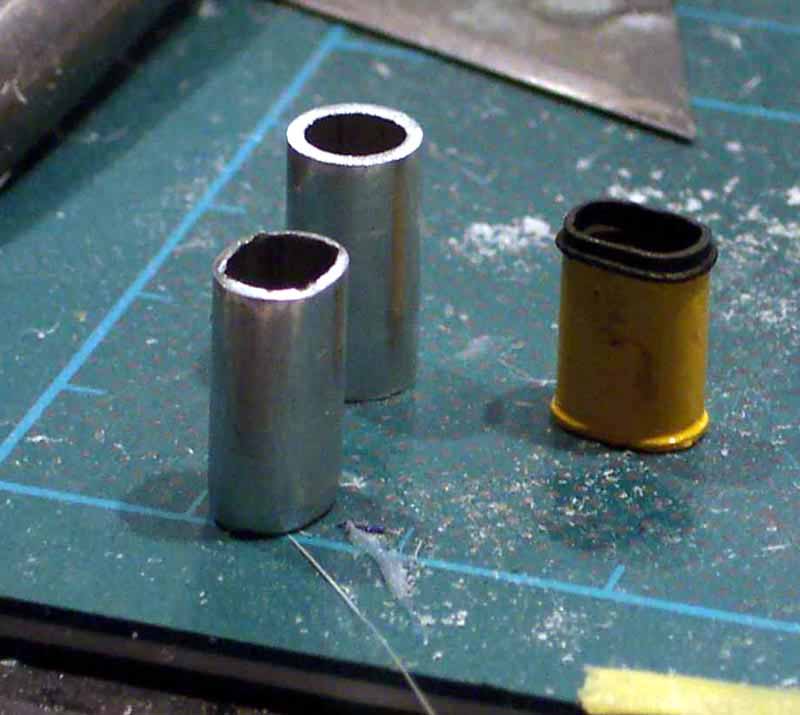
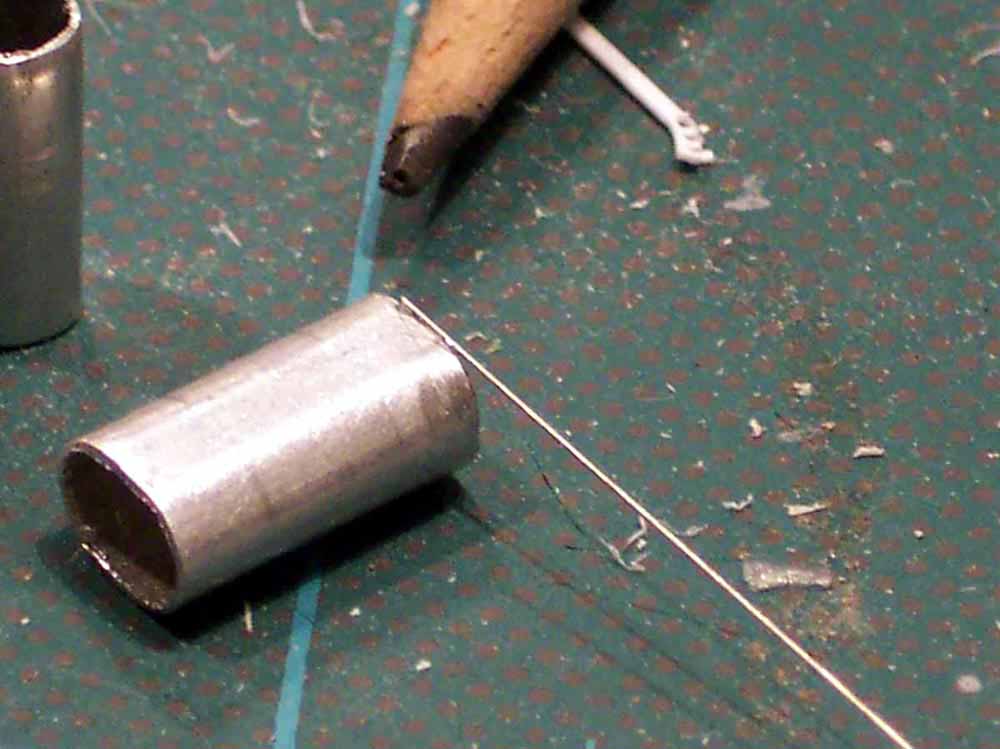
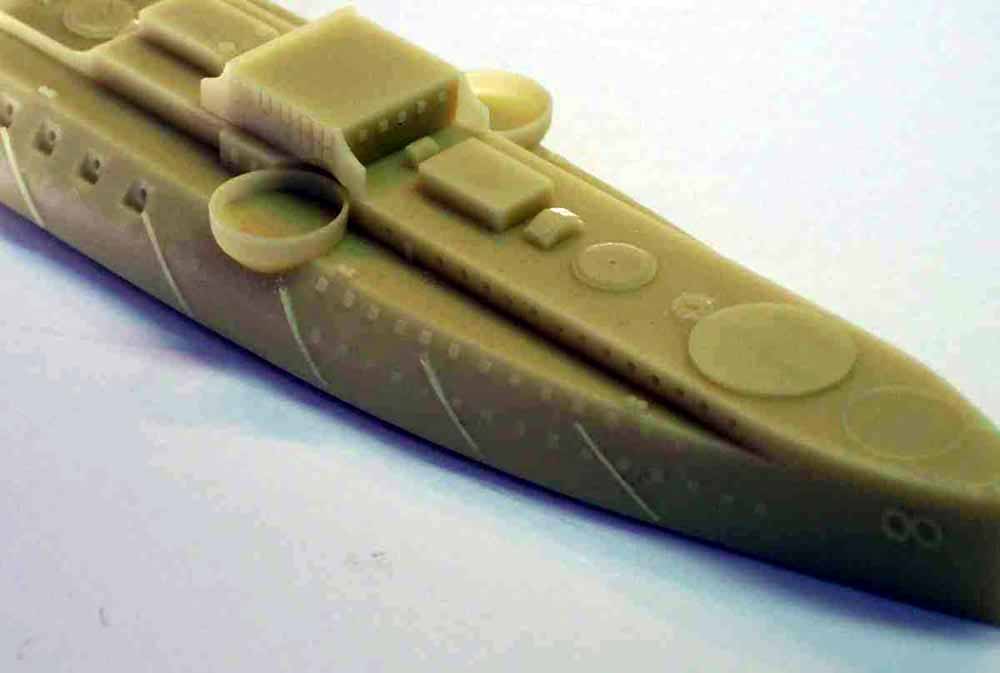
| Scaling off photos showed the funnels to be somewhat
short so these were replaced with new squashed alloy tube versions.
There was a deckhouse that was too high and too far aft
on the quarterdeck, the superstructure bridge levels and window
layout as well as scuttles on the foredeck hull sides
were either incorrect or totally absent. . The torpedo net booms were part
of the casting and curved to the profile of the hull.....
so much for the negatives. |
 |
|||||||||||||||||||||||||
 |
||||||||||||||||||||||||||
 |
||||||||||||||||||||||||||
 |
||||||||||||||||||||||||||
 |
||||||||||||||||||||||||||
| On the plus side it is a very esoteric subject, unlikely
to made by anyone else and it did scale out dimensionally ok fore and aft
as well as athwartships according to my sources. So the challenge
was on; this certainly would be no quick out-of- the-box build!
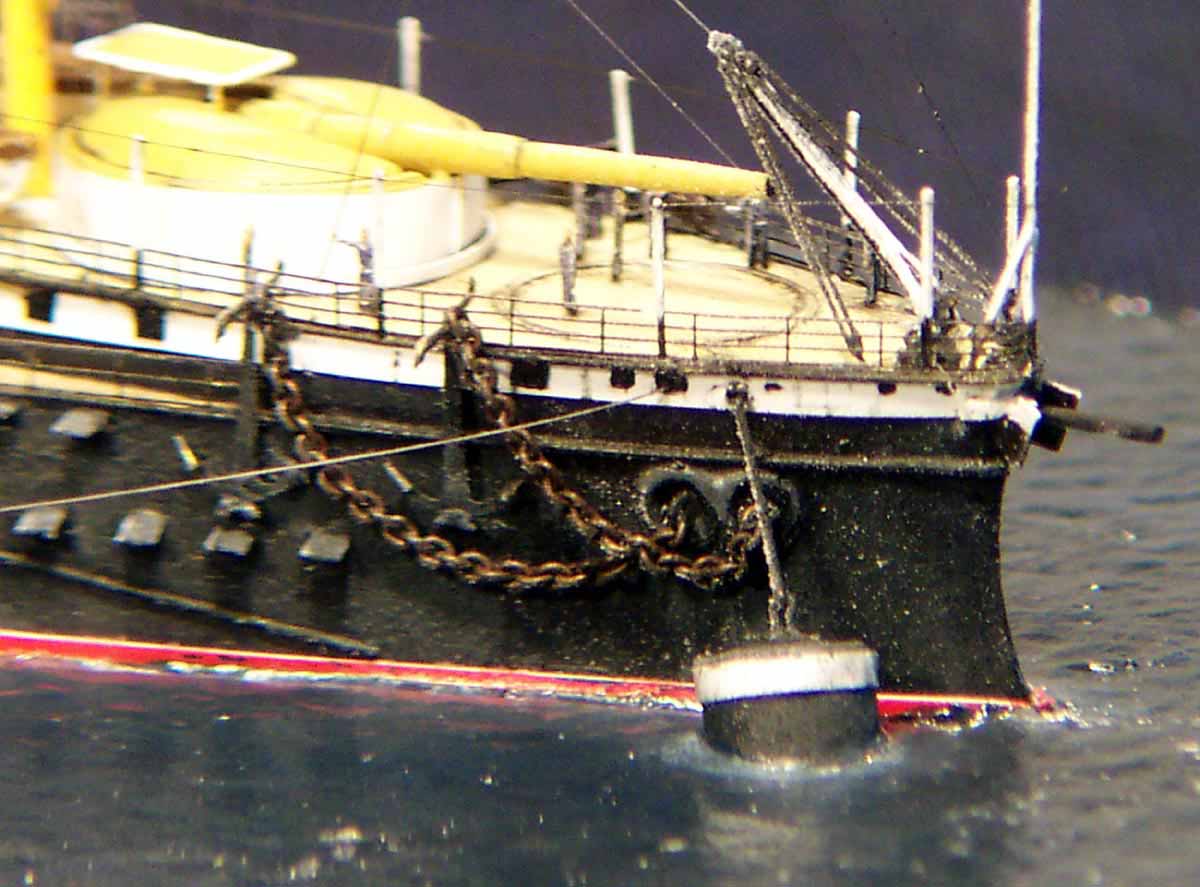
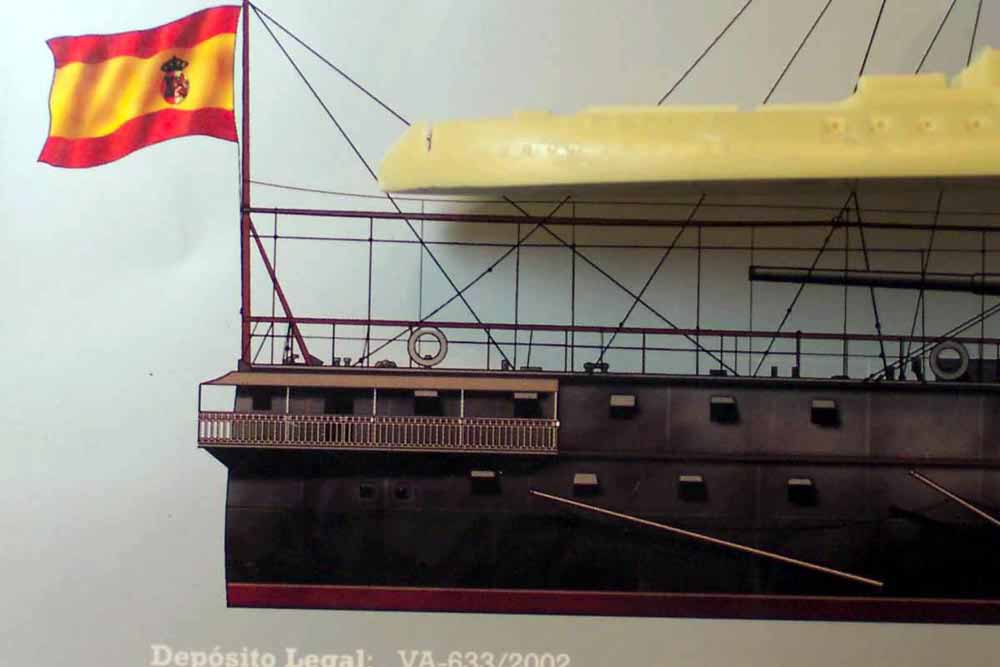
The first major surgery to be taken in hand was the erroneous stern shape. So as to be able to sand and file and grind without getting the inevitable cracking of fillers on a feather edge I decided to cut away a major section of the stern and glue in a lump of resin; this was part of a discarded 1/350 WEM Hood resin turret.. So as to prevent the glue cracking under the stresses of grinding I drilled and pinned the grafted section for belt and braces security. |
 |
|||||||||||||||||||||||||
 |
||||||||||||||||||||||||||
 |
||||||||||||||||||||||||||
 |
||||||||||||||||||||||||||
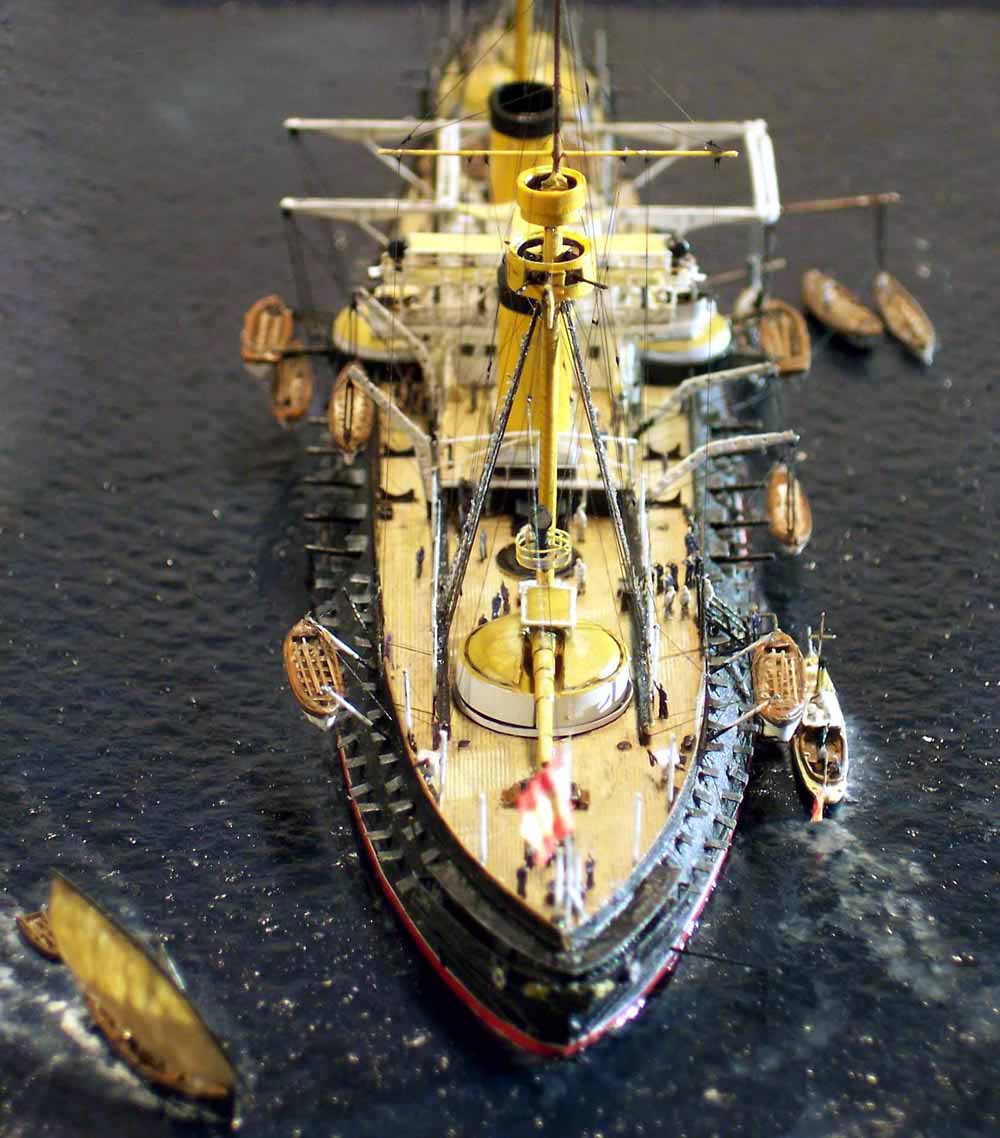
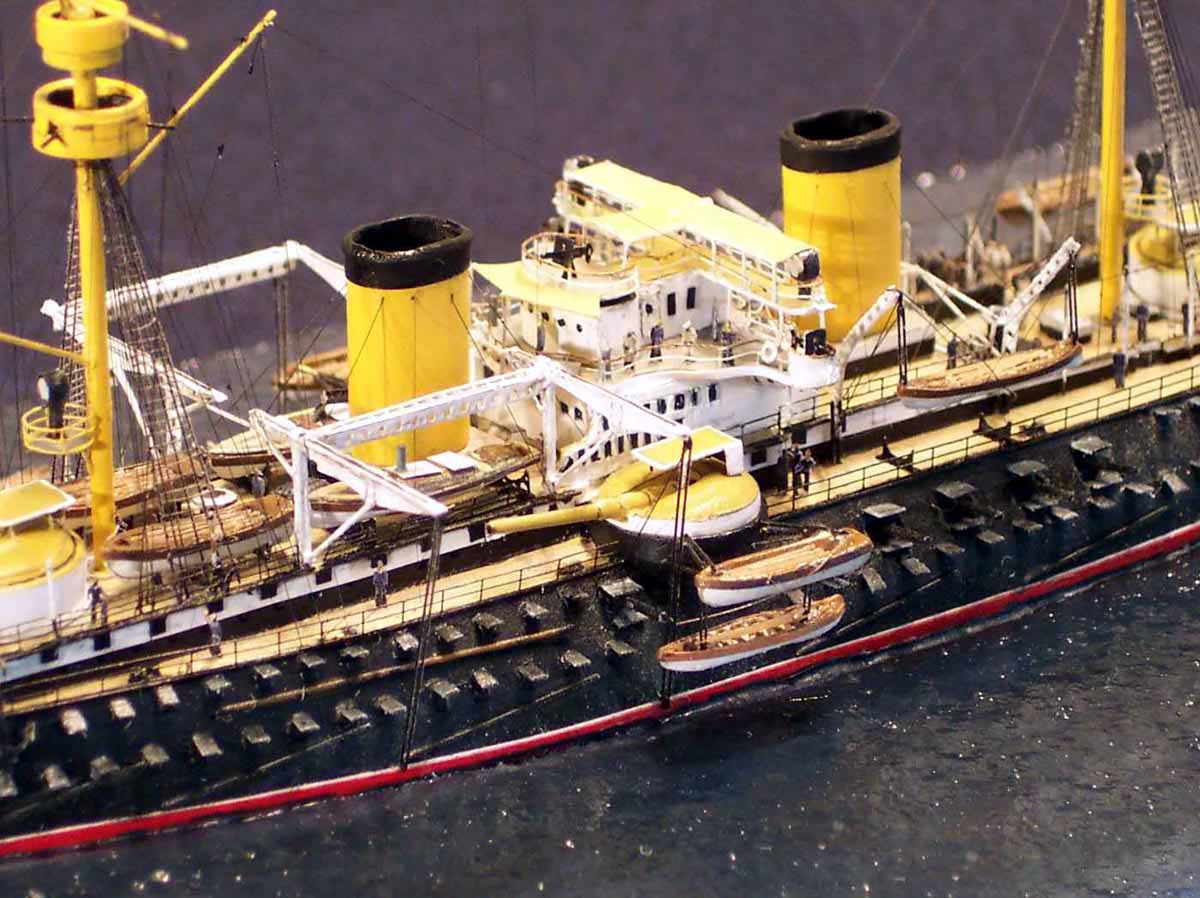
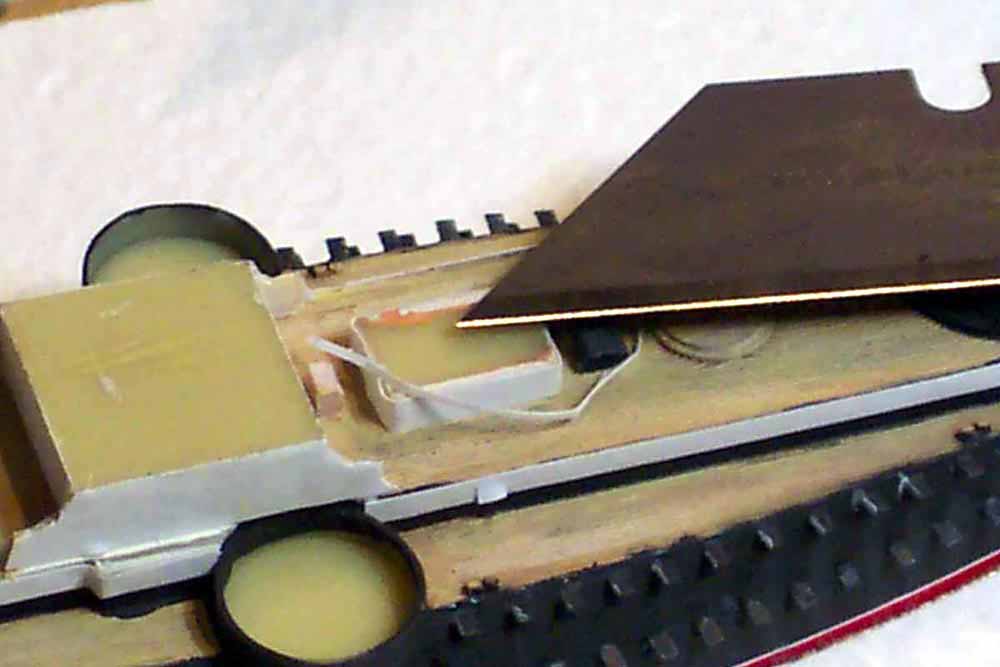
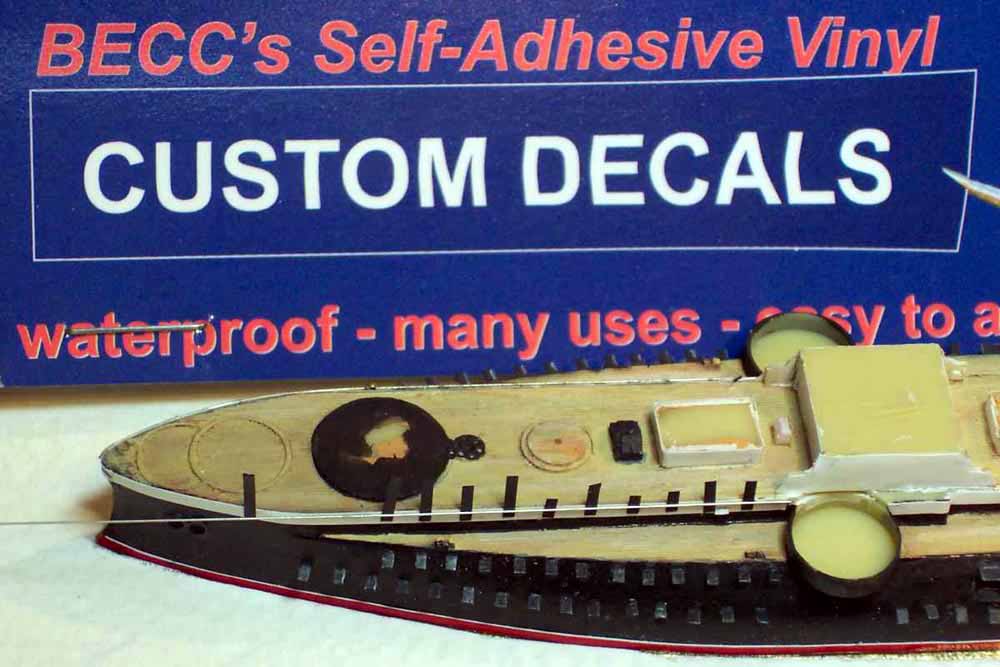
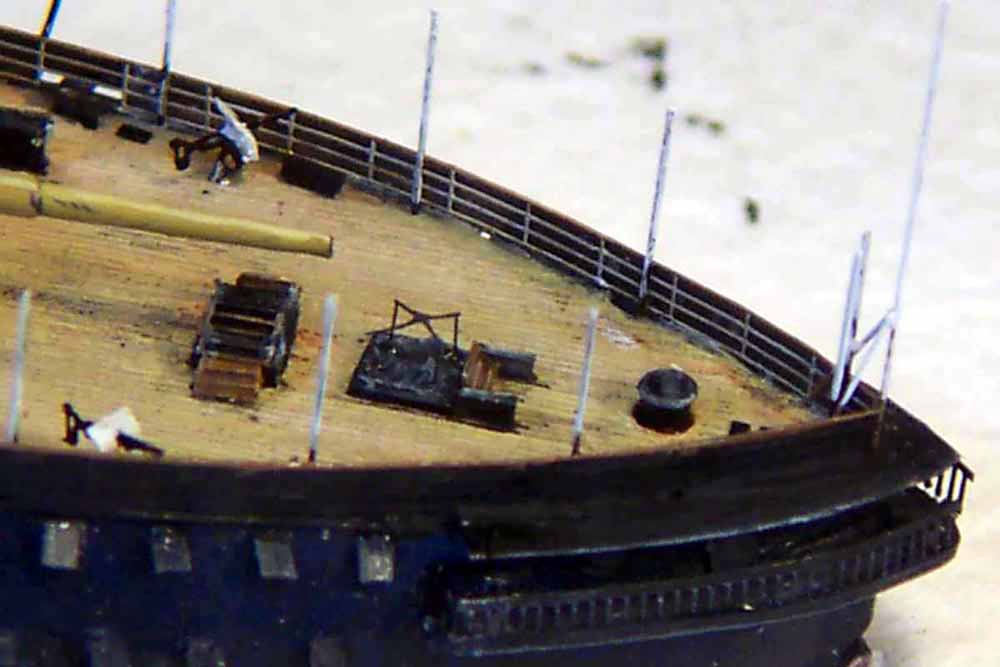
| After the correct profile was achieved I turned my attention creating the missing gunports. As most photos of Pelayo show her static in harbor with all the square scuttle lids open I decided early on to portray her in a mini-diorama setting so as to use this feature to show of her tumblehomed hull shape. I used parts of the ever-useful WEM Askold PE set, the gun embrasure lids furnishing me with perfect little brass squares in a variety of sizes; in the event I needed over 150 little brass squares.... | ||||||||||||||||||||||||||
| These scuttles when opened in harbor often did not
have the lids at an exact uniform level of opening; I
replicated this feature in miniature.
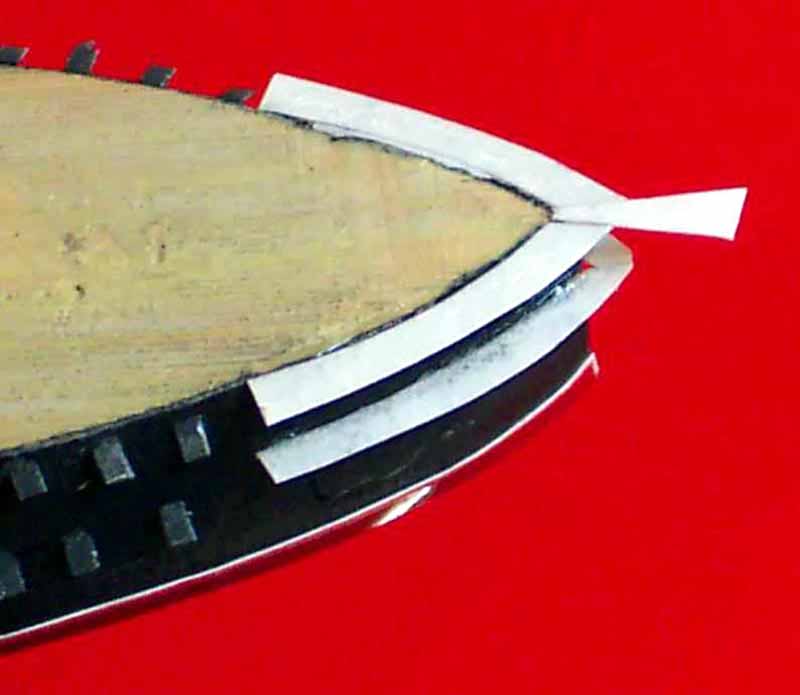
The sternwalk and its roof was fashioned from ordinary printer paper, once tacked in place using white glue it was soaked in CA glue which made it rigid and gave excellent adhesion all around the edges. |
 |
|||||||||||||||||||||||||
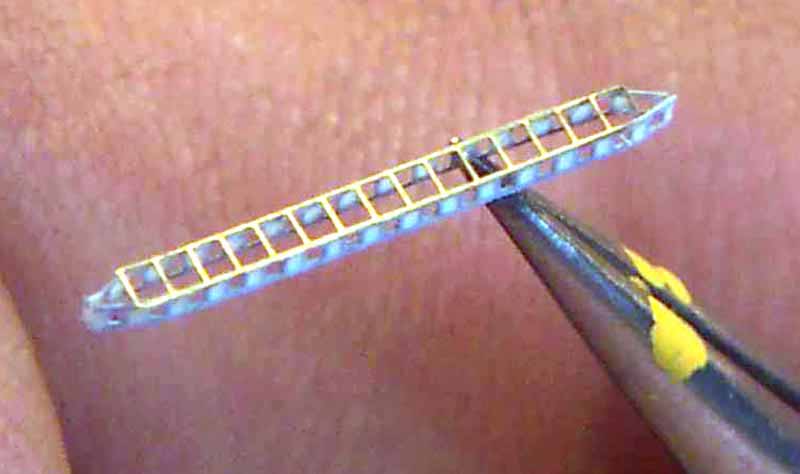
| The railing of the sternwalk was actually PE
ratline footrope, this was cut from an old GMM 1/700 Titanic set it gave
the correct appearance of close-space vertical railing, the lower
edge was tidied with some self adhesive RC Cammet vinyl tape.
I used this type of tape extensively for all aspects of construction
on this model.
White is a problem color when brushed onto very small areas in my experience, so a smooth surface that can easily be achieved with consistency in tone and finish is an attractive proposition, especially when edges can be trimmed back with a sharp blade. |
 |
|||||||||||||||||||||||||
 |
||||||||||||||||||||||||||
 |
||||||||||||||||||||||||||
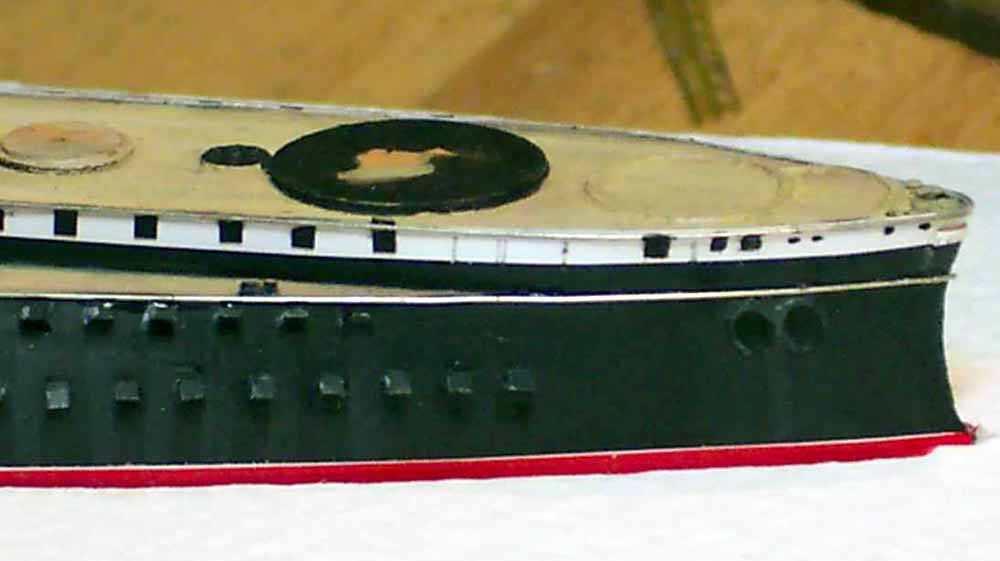
| Using a combination of various widths of the aforementioned
tape I was able to easily achieve the fiddly color separation lines
on much of the superstructure, as well as make crisp scuttle lids
and windows.
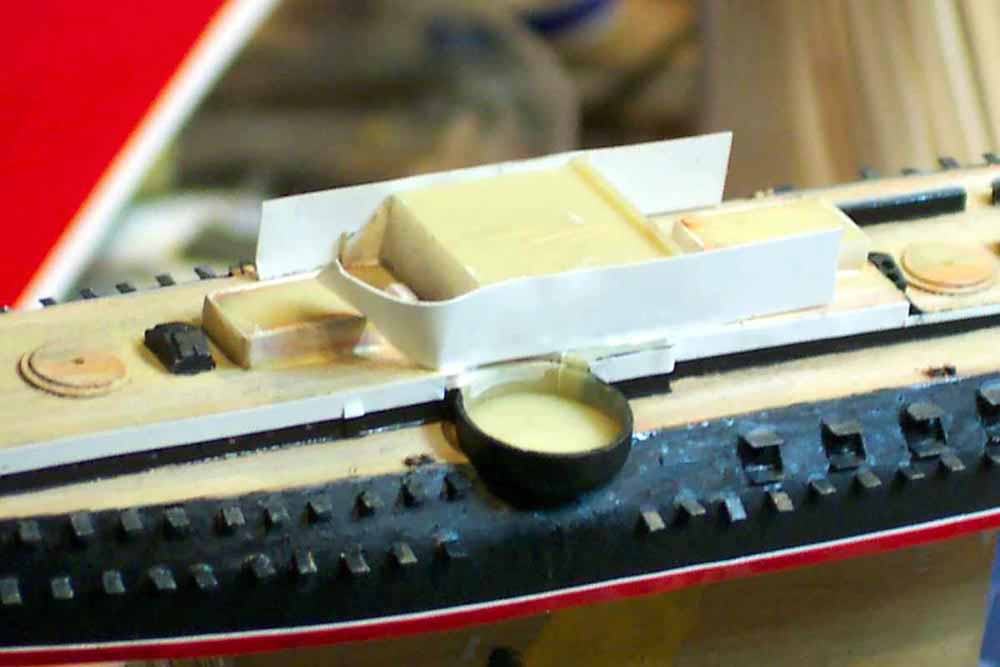
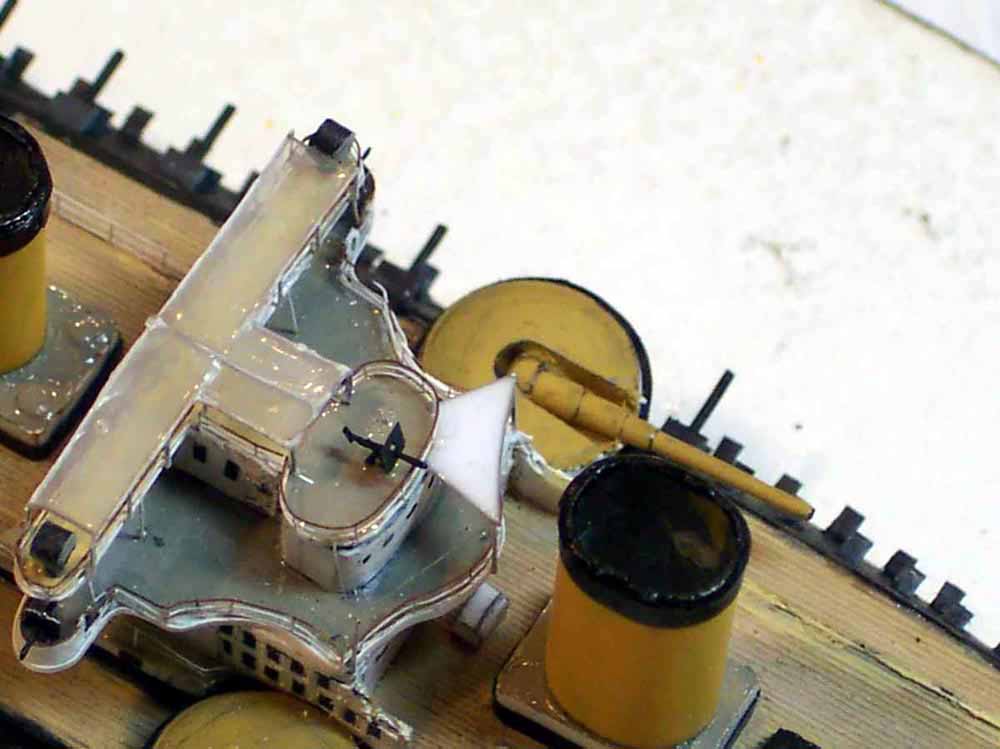
The main central superstructure had the windows made by laying down a strip of black tape and painting the window divisions in as appropriate. The conning position had a new roof made of paper, which gave the correct step up from the main bridge wings. The lower bridge had the walkway added aft along with the the girder supports made of sprue and PE scrap. this was finished off with life-rings fitted according to photos. Flagboxes, small rope reels and telegraphs were applied to the fwd lower bridge. By overlaying a thin red vinyl band onto a pre-fitted white band a crisp white boot top demarcation line was easily achieved. I added the deck-edge strakes made from thin fusewire as can be seen in the photos. |
 |
|||||||||||||||||||||||||
 |
||||||||||||||||||||||||||
| I had realized that the profile drawing in the
Spanish Pelayo monograph was not entirely telling the truth,
and I would need far more information. I scoured the
internet and ended with placing help-needed requests on the
message boards; these quickly yielded an avalanche of
photos and even better still , scans of builders drawings!
I was able to contact the well known Pelayo
authority Nick Mitiuckov who had just had published a new monograph
of Pelayo; the book was rushed to me from Russia by Sergey .
I was now better armed to be able make sense of the grey areas as I now had cross-sections as well as some deck photos which went some way to clearing up some of the queries that had surfaced through the build. I made two capstans using small tube and N-scale railway buffers. |
 |
|||||||||||||||||||||||||
 |
||||||||||||||||||||||||||
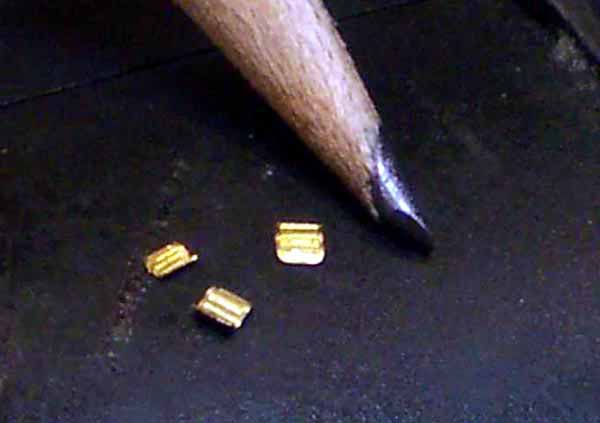
| I was able now to see the exact positions of the
deck hatches and companionways, as well as the positions of the ornate
'leisure' seat benches on the quarter deck. These items I bent up
from very small bits of corrugated PE;
I have never seen such items of civilized non-military equipment on any other capital ship! |
 |
|||||||||||||||||||||||||
 |
||||||||||||||||||||||||||
 |
||||||||||||||||||||||||||
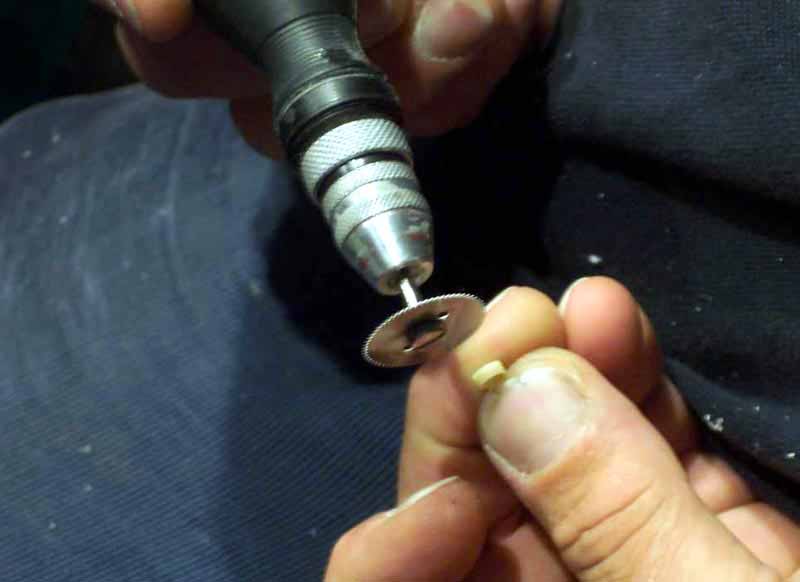
| In the meantime I had masted the ship using stainless steel tubing to give rigidity . The fighting tops used were those supplied in the kit, they appeared to be about the right diameter, however I wanted to have the apertures open, this I achieved by cutting out a slice using a rotary saw blade. Thereafter the 'step' was given more definition again using the vinyl tape. | 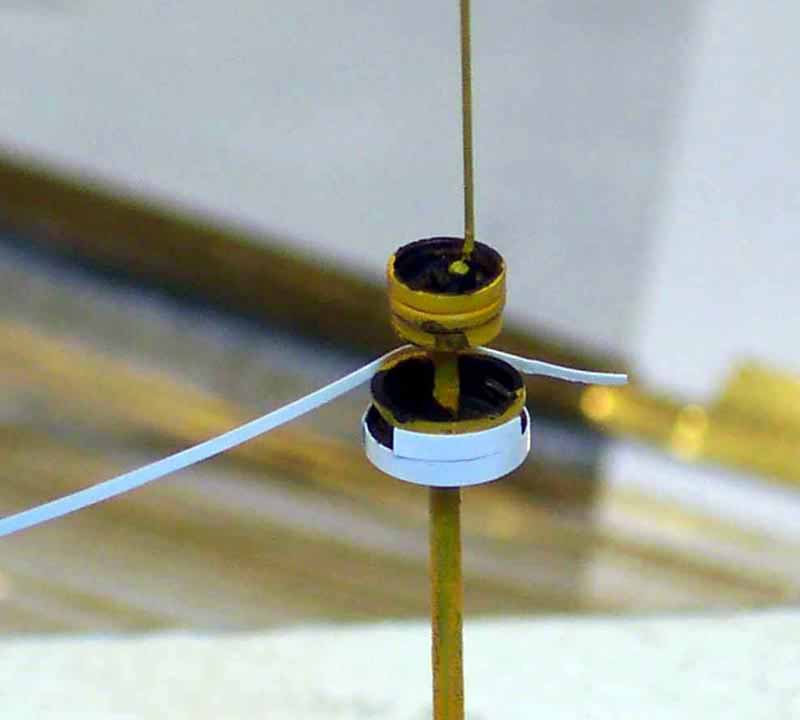 |
|||||||||||||||||||||||||
 |
||||||||||||||||||||||||||
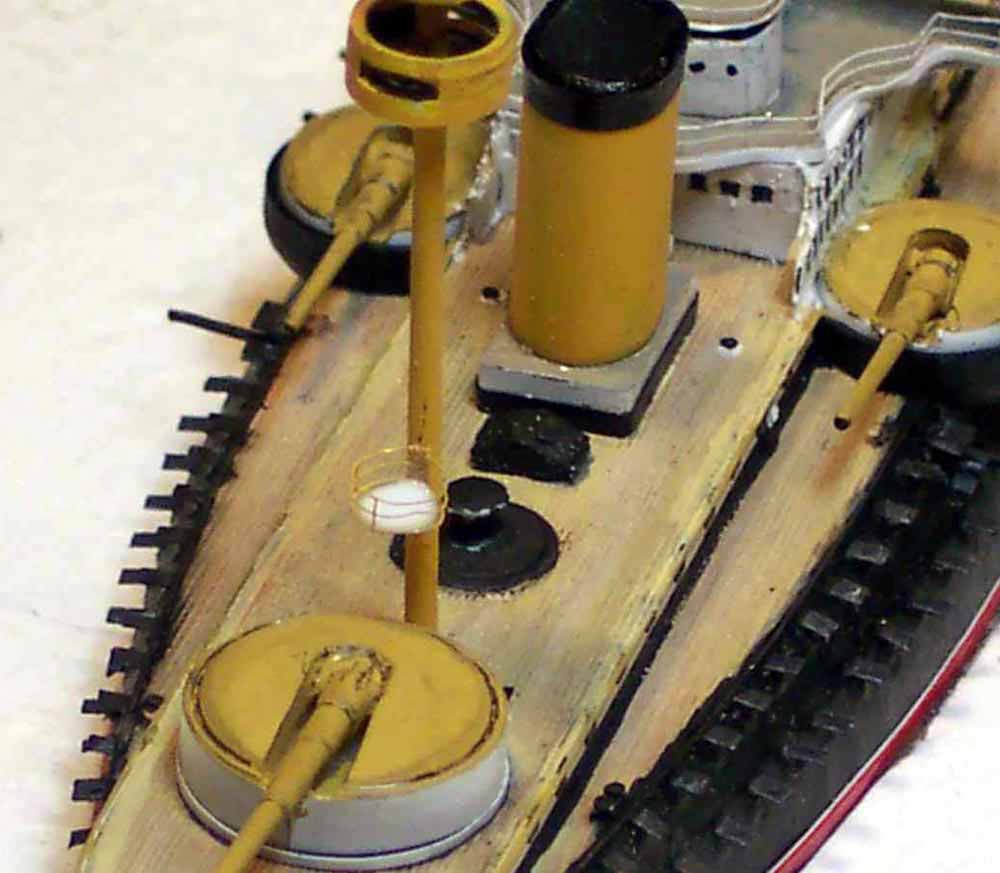
| The lower searchlight platforms were made by forming a
circle of PE handrail, affixing to the mast and painting
.The open bottom of the PE rail was infilled with white glue, when dry
it was painted from underneath; this has a twofold advantage: keeping the
rail and platform floor demarcation line perfect as well as keeping
the platform thickness to the absolute minimum.
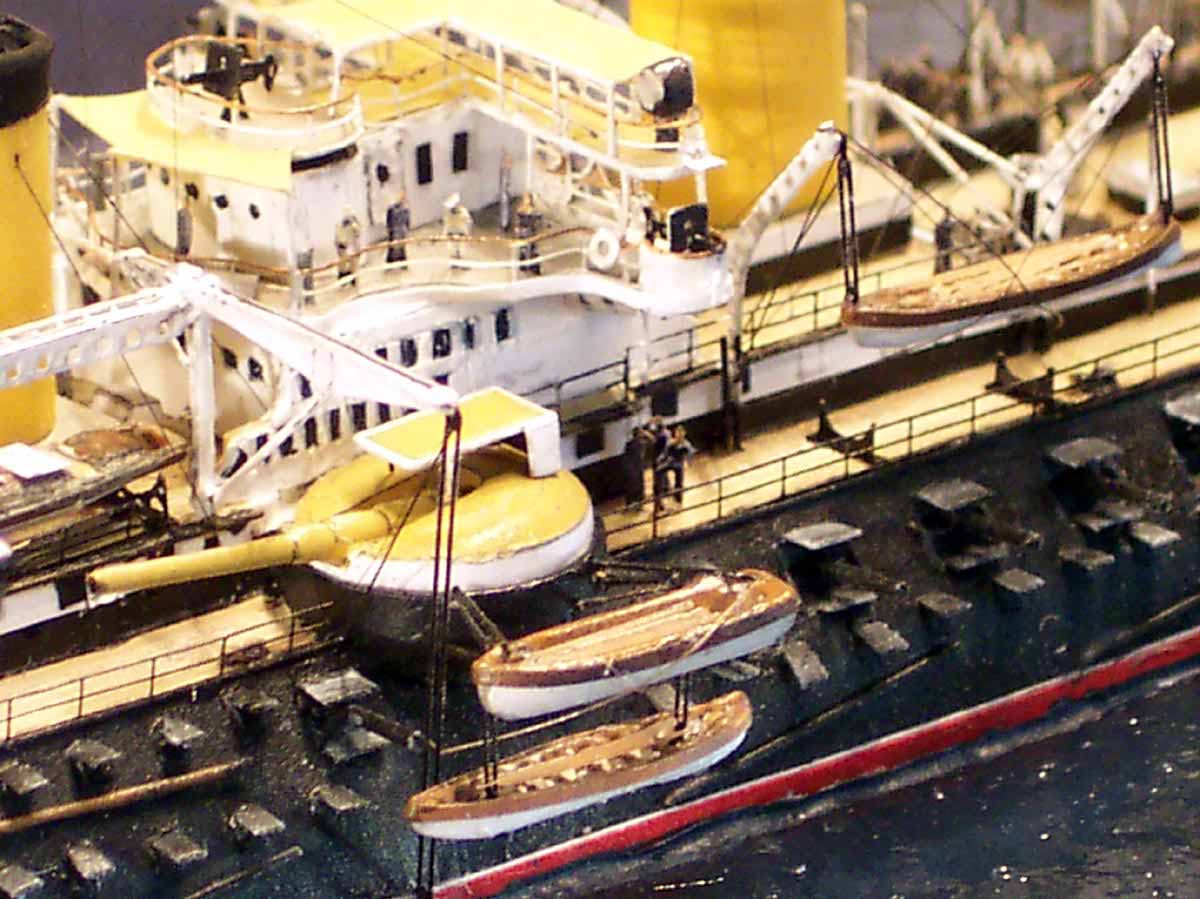
I had been steadfastly avoiding the problem of replicating the complex boat launching mechanism , it consisting of a variety of tapering pierced girder structures with slide guides on top. Fundamentally it was an athwartships sliding traveling hoist for the steam-boats, the outer arms when the vessel was underway were capable of being folded fore and aft. |
 |
|||||||||||||||||||||||||
 |
||||||||||||||||||||||||||
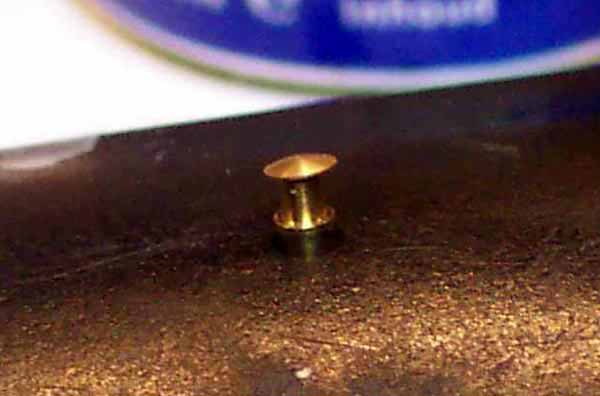
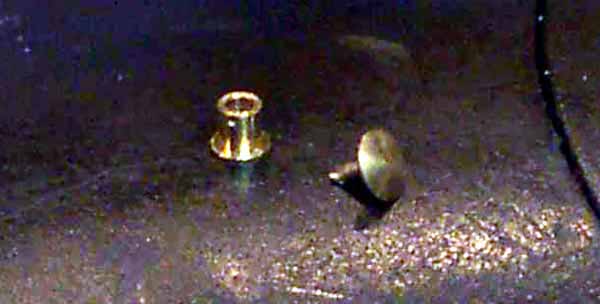
| The uprights I made of GMM IJN Chiyoda parts, which had a hole spacing and taper that gave the right effect . I then added fine brass strip to each side to give depth to the PE and make it appear the massive structure that photos suggest it to have been.. I needed a number of pieces of small pierced girder for the fwd boat crane as well as the aft swing davits. Unable to locate any PE sections remotely suitable I resorted to making my own; having selected some ladderstock of the appropriate width with rung spacing about right for my hole spacing I infilled every other 'hole' with white glue. When this had set I painted it with a thick coat of white paint The thick paint had the effect of settling in the 'corners' of the holes between the infilled apertures, thereby giving a passable rendition of very small roundhole pierced girder. These were cut to length, bent about and the married up with a piece of 1/350 ladderstock to complete the box structure assembly . The outboard solid arms were cut from paper doubled over so that I ended up with symmetrical pairs, this paper again was infused with CA to make rigid. Stretched sprue and scraps of PE completed the fwd boat crane assembly. | 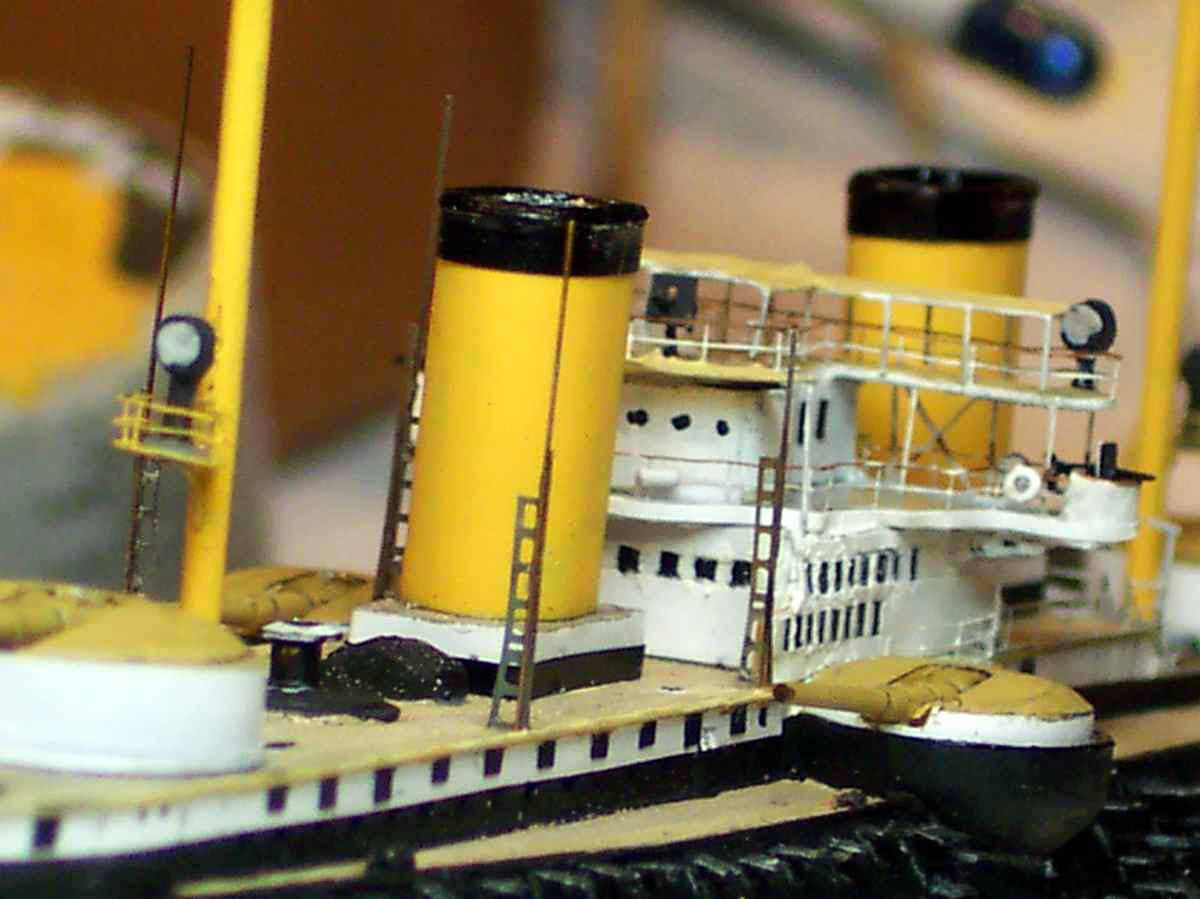 |
|||||||||||||||||||||||||
 |
||||||||||||||||||||||||||
| For the aft swing davits which needed considerable 'reach' to clear the tumblehome when lowering boats I again used my home-made pierced girders, but this time cut them to a tapered section with sharp scissors, bent them across a hole and then using stretched sprue added the upper part onto the davit. The final effect is quite pleasing and gives a good impression of the tapered davits. | 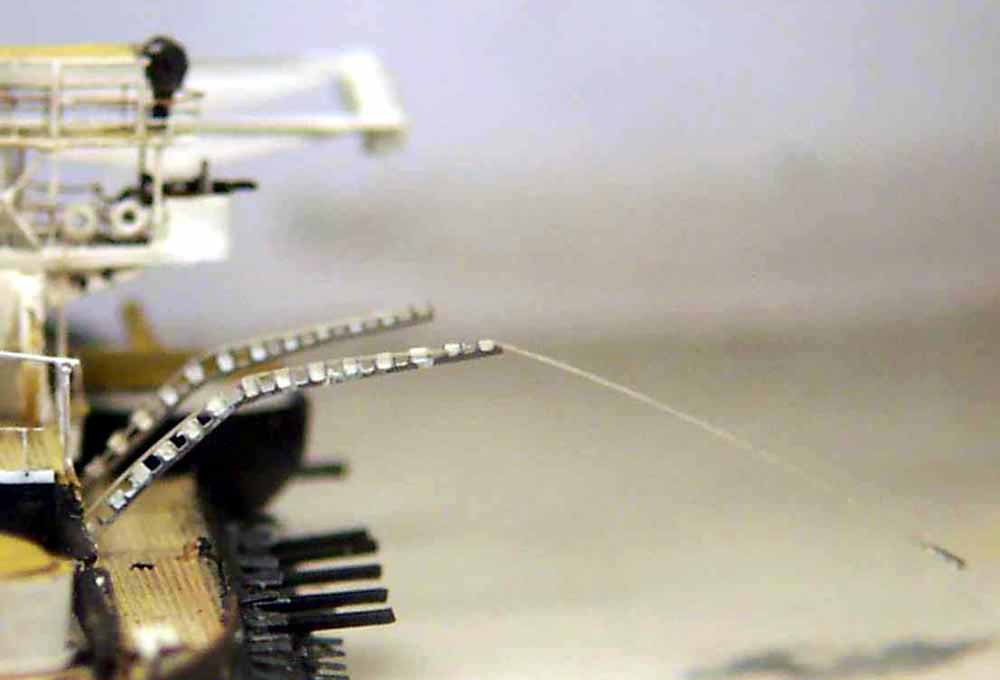 |
|||||||||||||||||||||||||
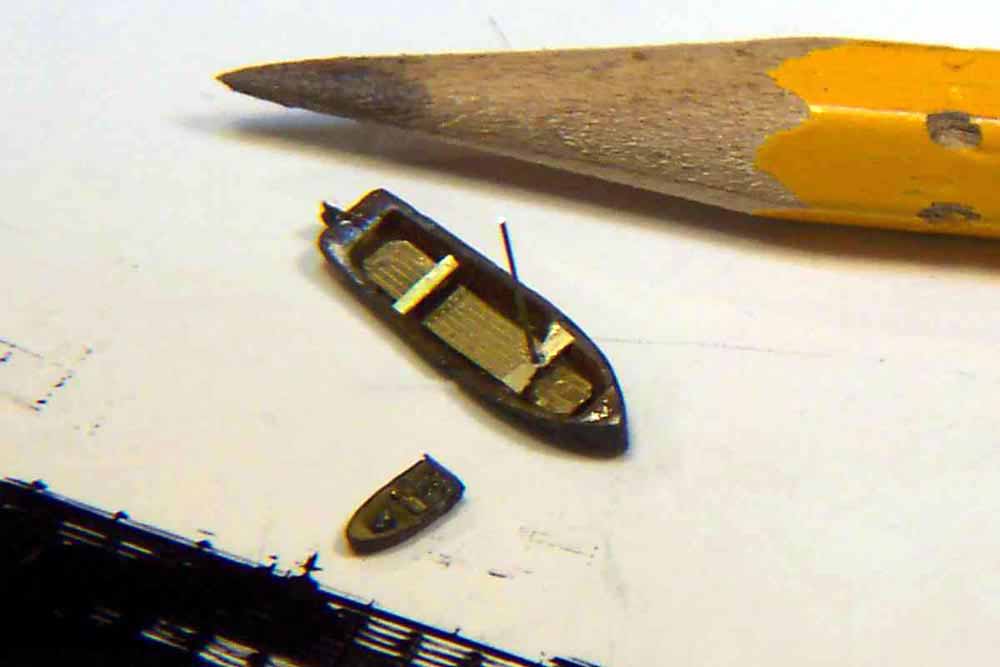
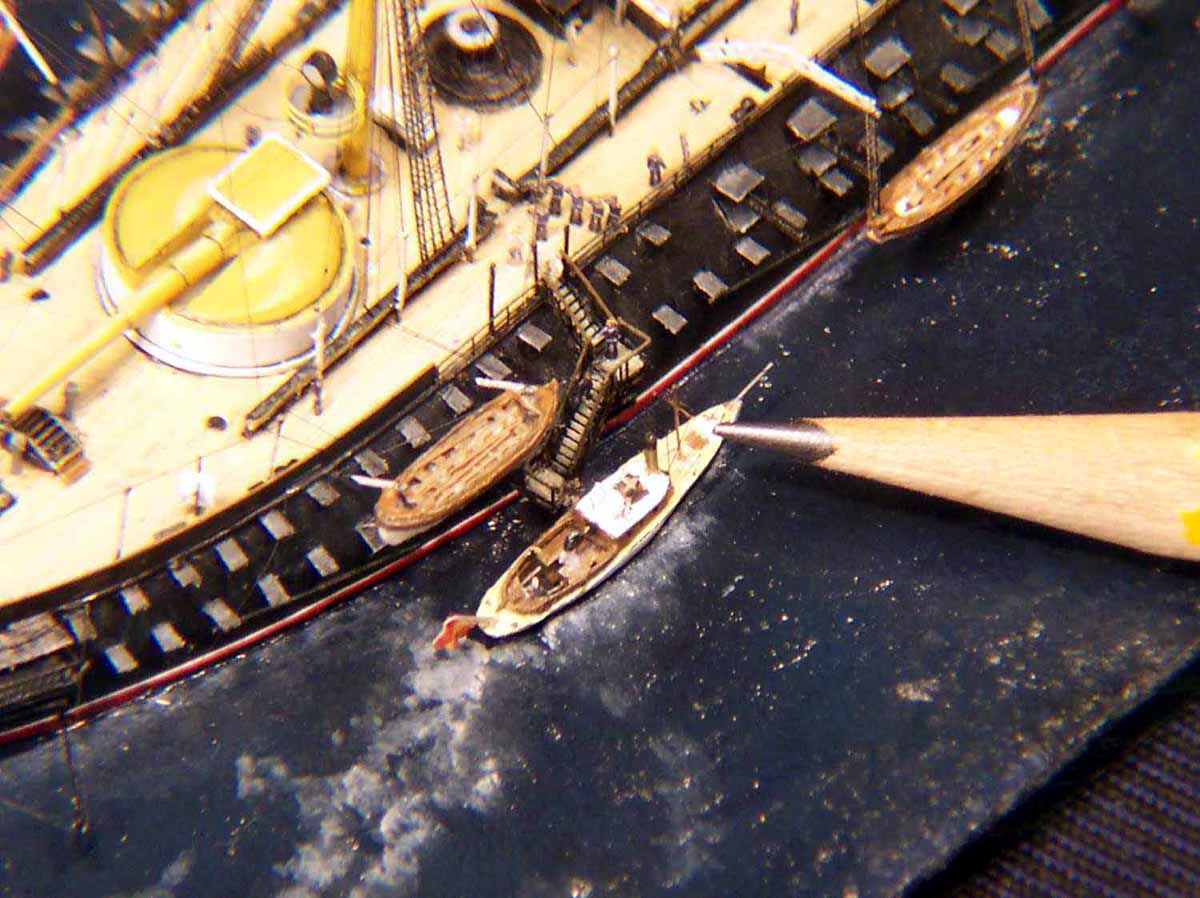
| The steam boats were adapted from spare WEM
resin items, they were given different deckhouse and cockpit layouts
as well as a more wineglass shape stern. The remaining boats
are a mix of double-ended whalers from WEM, spare Combrig and Modelkrak;
all boats carved about to give the wineglass stern and straight stem.
Oars were added made of stretched brown sprue.
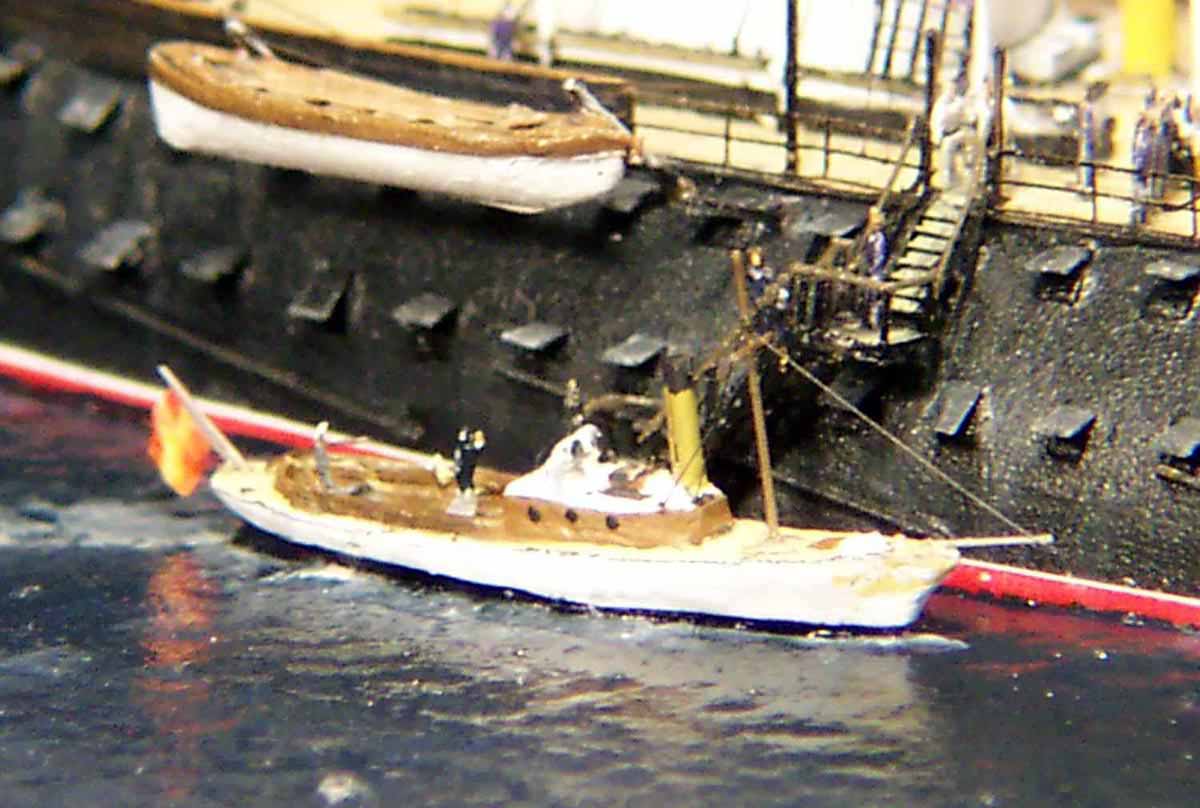
The small clipper-bow steam yacht , based loosely on an ex-yacht-now- houseboat called 'Romance' locally to me is seen here delivering some important dignitaries to the accommodation ladder.... She was carved from a large piece of scrap resin overpour, cockpit was hollowed out, brass coamings and seating added as well as a slender tall funnel. |
 |
|||||||||||||||||||||||||
 |
||||||||||||||||||||||||||
 |
||||||||||||||||||||||||||
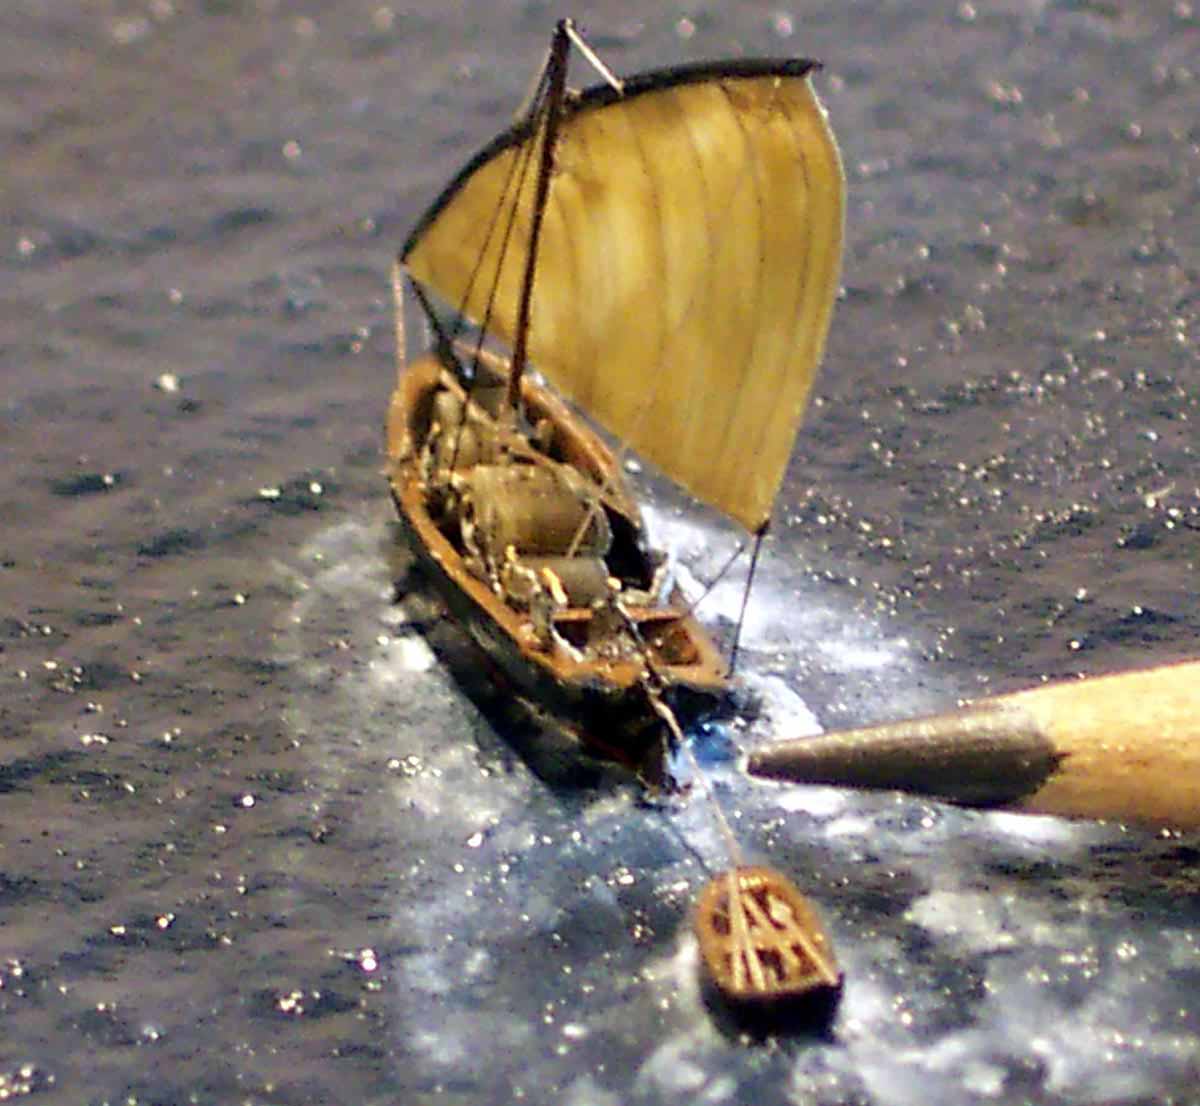
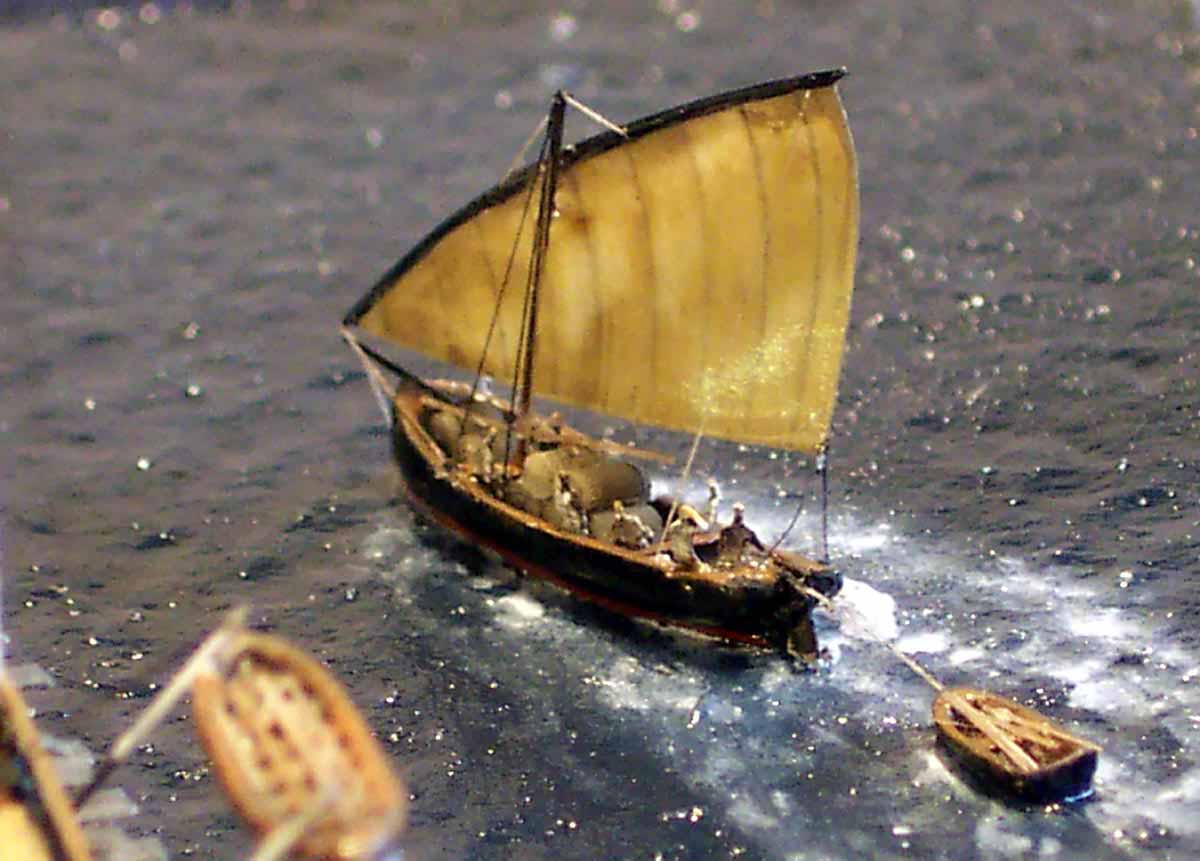
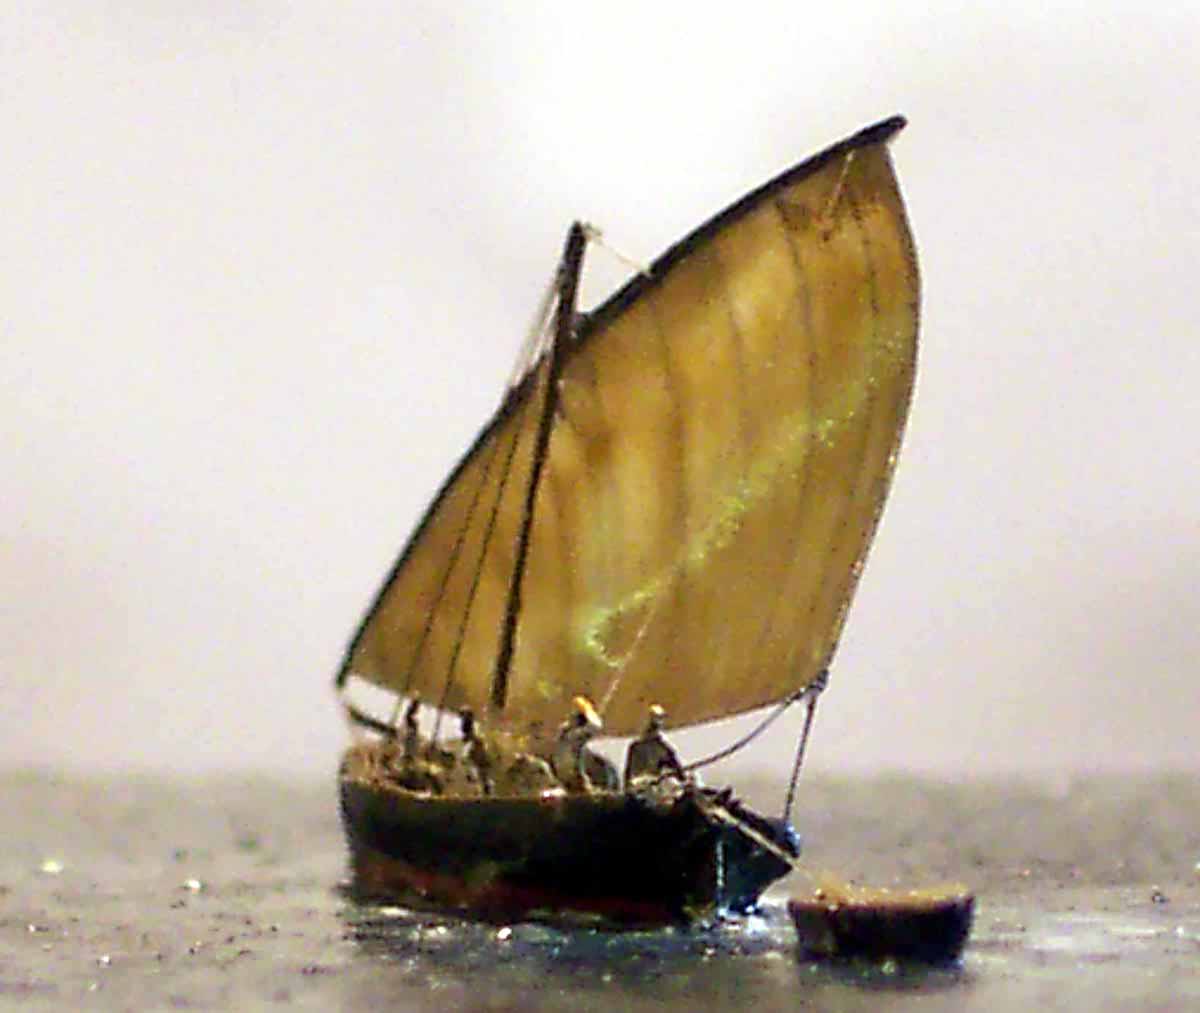
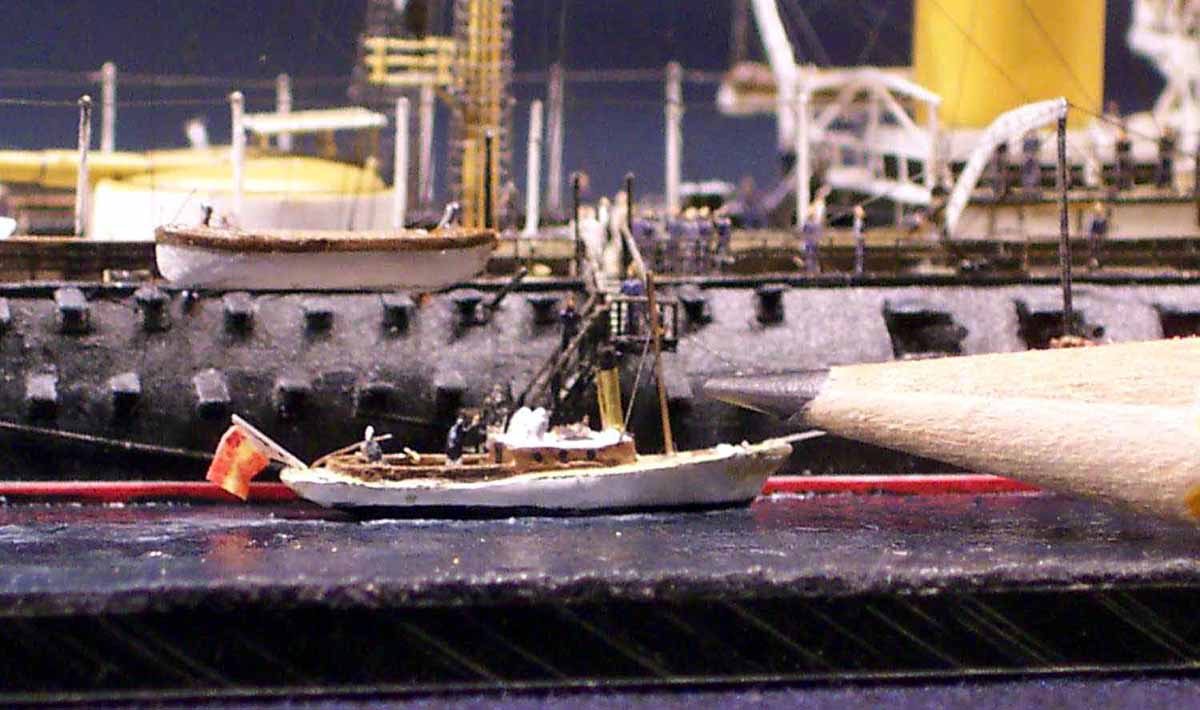
The sailing workboat with the lateen-rig was inspired by
photos, this interesting vessel was adapted from a hull from the
scrapbox, floorboards were made of 'plank' PE , thwarts added
and the stubmast installed. The sail was made of pencil line paneled
paper, bent into shape and infused with CA before painting and
mounted onto a wire spar. The crew are perched around the windward side
as there is very little space midships because of her cargo of barrels
of water (wine?)... The rowing dinghy being towed astern was made
from another spare boat that I shortened by cutting in half and adding
a new paper transom.
|
||||||||||||||||||||||||||
|
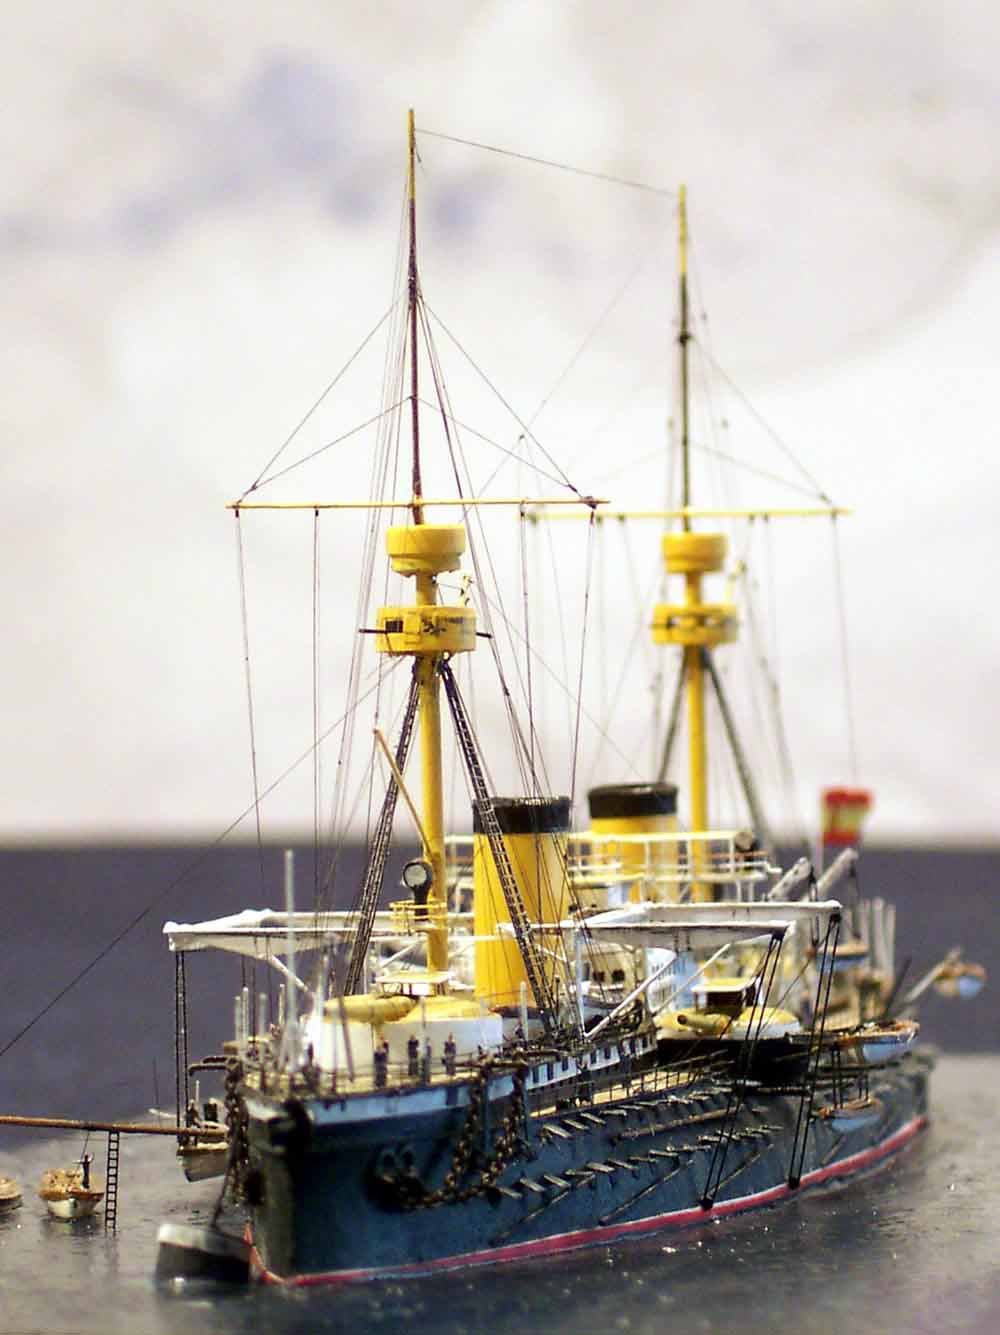
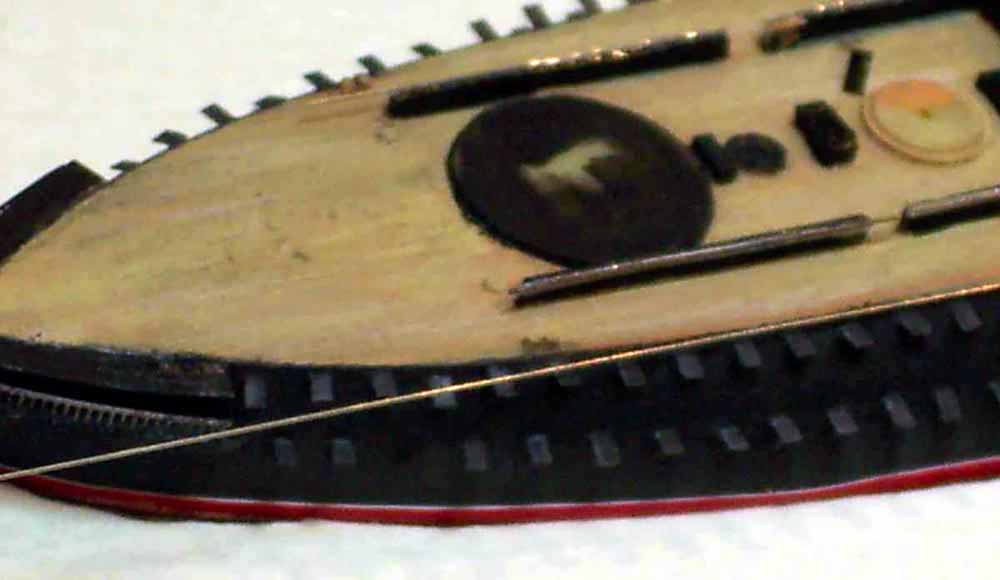
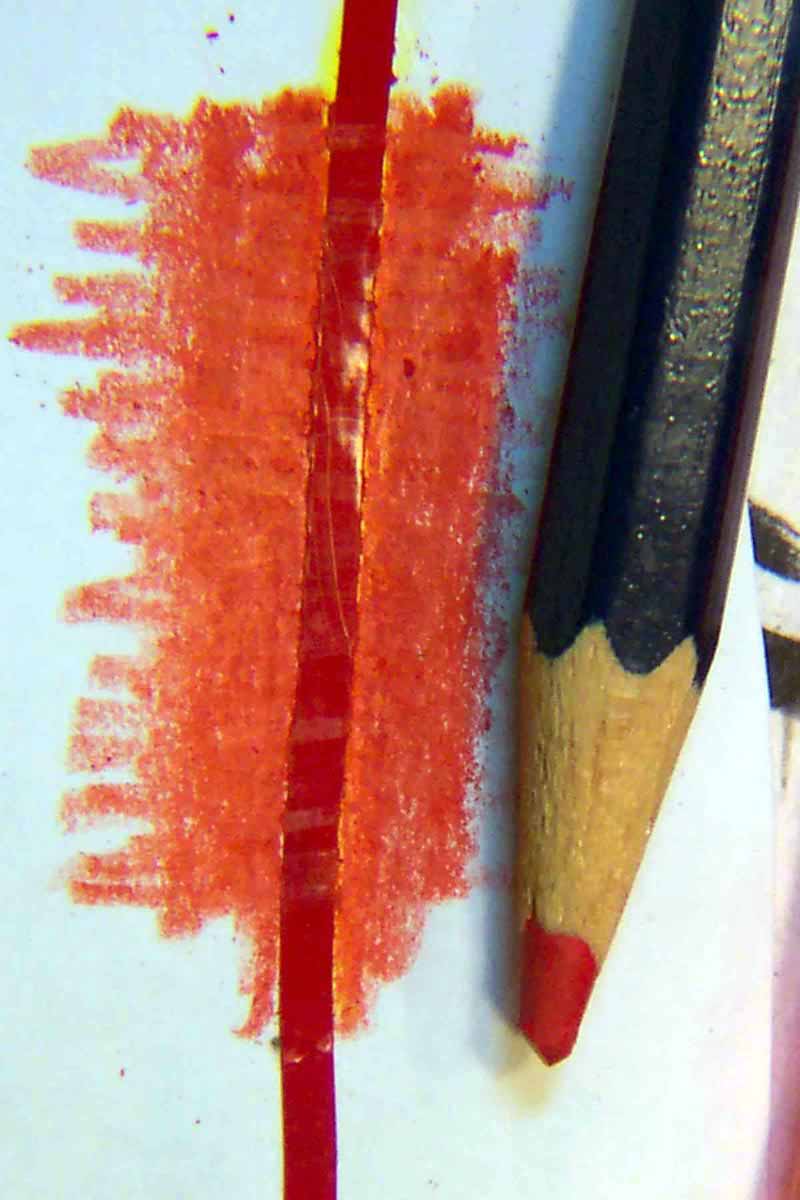
The Spanish Naval Ensign was made of printer paper colored with artists colored pencils, these can be retropainted with using a brush with water. I applied a yellow stripe, then a piece of masking was stuck on, red pencil added and washed, the above process was repeated holding the paper against a window for correct alignment to the other side, thereafter remove tape and cut out, resulting in a custom flag. It only remained to add the crest, crease up and apply. I made a very small version indeed for the steam yacht also minus the crest. |
 |
|||||||||||||||||||||||||
 |
||||||||||||||||||||||||||
| I had no really sharp and clear photos the
large crest at the stern, so I made a crest resembling the real one
as far as I could discern from scrap PE bits.
The four large admiralty pattern anchors used were the PE kit items which I was very impressed with! |
 |
|||||||||||||||||||||||||
 |
||||||||||||||||||||||||||
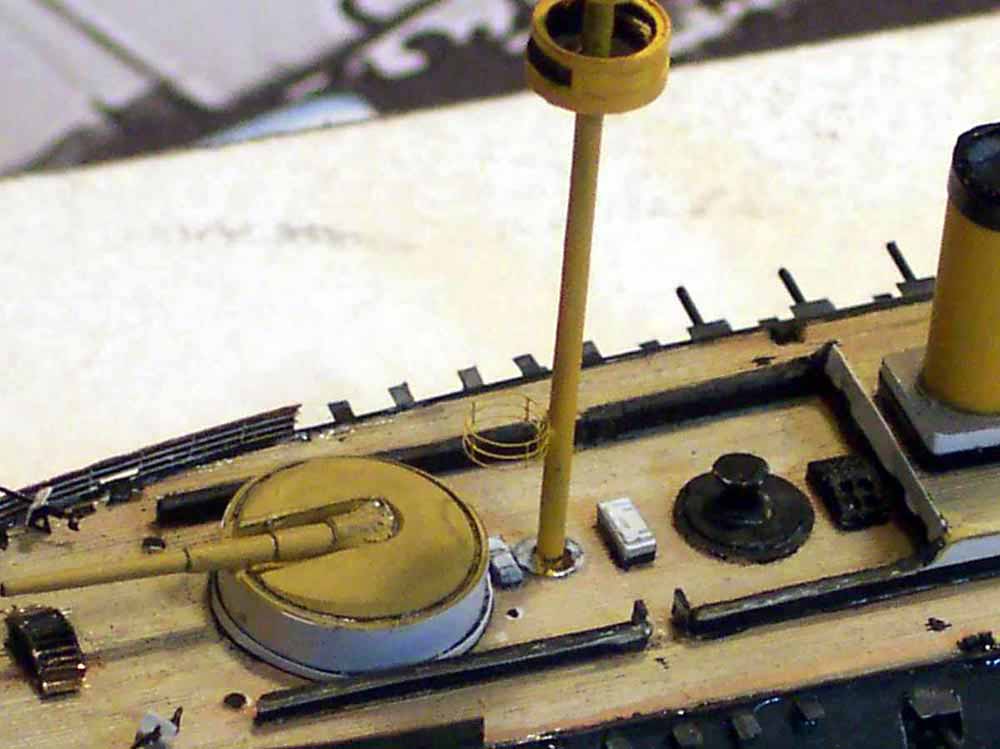
| The ship was mounted on my usual artists watercolor paper base. The large mooring buoy was made of alloy tube and furnished with a small PE ring according to photos. Virtually all railings were GMM superfine gold plus colored with an indelible pen. The small awnings on the bridge were made of thinned white glue dragged across the frame edged prior with sprue. |  |
|||||||||||||||||||||||||
 |
||||||||||||||||||||||||||
| All rigging was stretched sprue applied with patience and a steady
hand. The ratlines and shrouds were originally intended to be the
new WEM items, alas the fighting tops were too high so I resorted
to making them from wire shrouds and and sprue foot-ropes.
A mention must be made of the Vinyl Tape used throughout
the build of this model;
|
||||||||||||||||||||||||||
|
||||||||||||||||||||||||||
|
The PELAYO was a most challenging subject to research, there being much erroneous information around. I would not have been able to complete this model without the gracious and speedy help of the following people: Santi Caro for supplying me with numerous books and kindly translating
great swathes of text as well as ALL the picture captions.
THANK YOU ALL! essential resources and references when attempting to build the Pelayo! Busques de la Armada Espanola 1849-1900
Spanish Ministry of defense
|
||||||||||||||||||||||||||
|
|
||||||||||||||||||||||||||