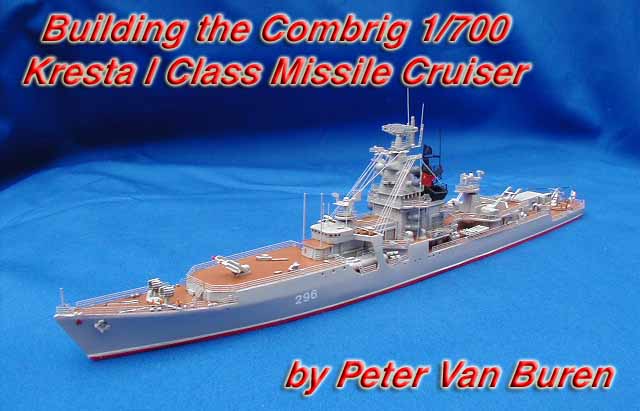
Reviewed by Peter Van Buren
| The Ship
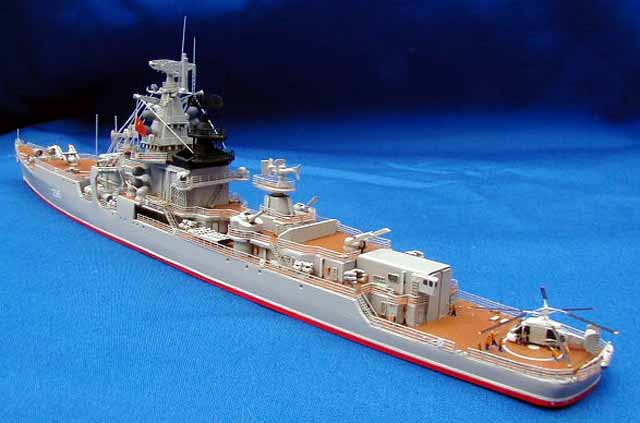
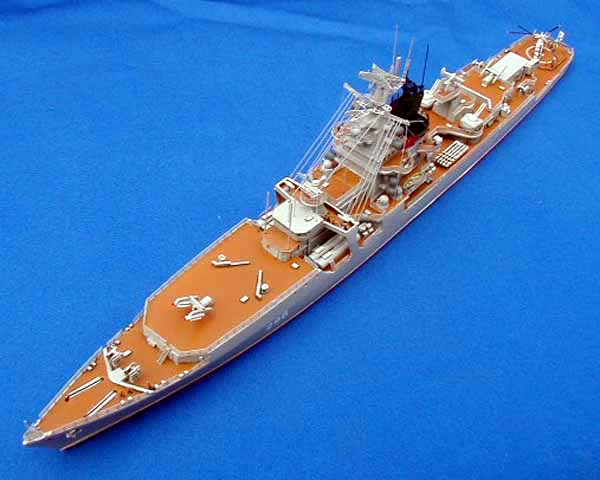
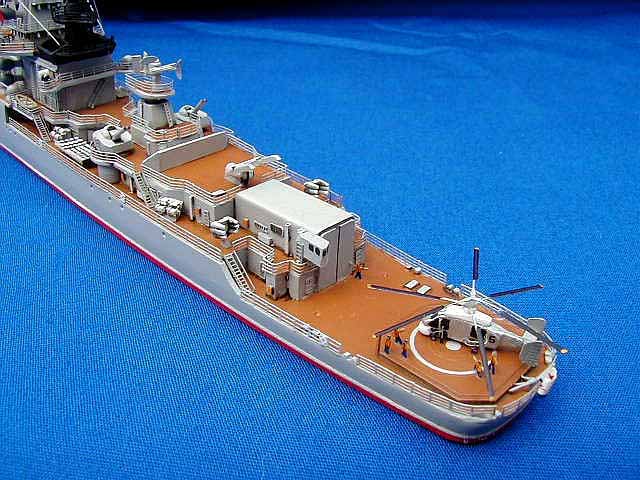
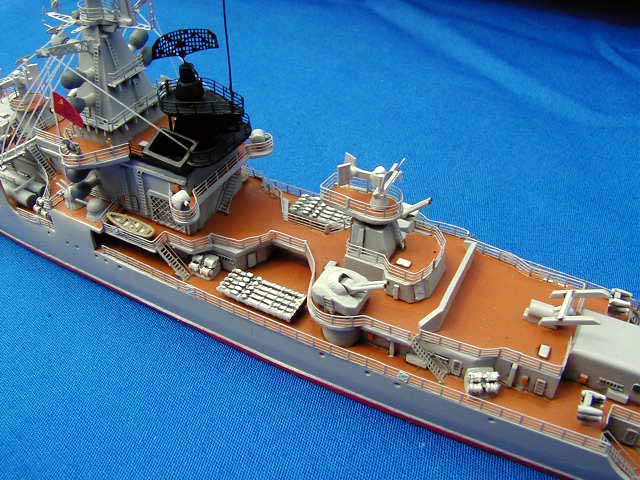
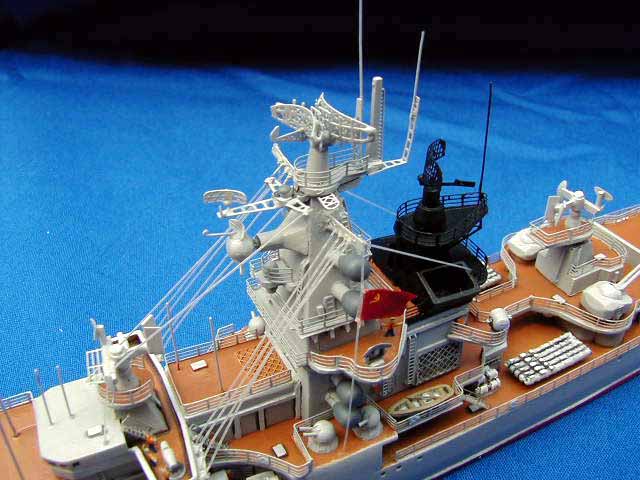
For the first chunk of the Cold War, and to a certain extent even after that, a large portion of the Soviet Navy was designed to counter the power of the USNs carrier battle groupsspecifically, to sink the carriers themselves. The Kresta class was a mid-term version of how the Soviets designed a ship to take down an aircraft carrier. Although the major weapons systems on Kresta I were identical to the Kynda class vessels, the Kresta I was a much more versatile design, including with its anti-surface capability some not-insignificant anti-aircraft (including SA-N-1 missile launchers) and anti-submarine weaponry. There were four ships in the class, Admiral Zozulya, Vladivostok, Vitse Admiral Drozd, and Sevastopol, which saw service from the 1960s through the 1990s. Of the four ships in this class, I chose to build mine as the Vitze Admiral Drozd, the only one outfitted with the four anti-air weapons (AK-630 gatling-type guns) abreast of the main superstructure. The weapons are similar in function to the USN CIWS and added some extra visual interest to the model for me. |
|||||
| General Build Notes
Youd think for a guy who fell in love at first sight with the woman
he later married Id be better at judging first impressions. Actually,
to be fair (to the model kit, my wife and I will work out our side of things),
my comments in my earlier first impressions/out-of-box review still hold:
this is a generally well-done kit that most modelers with a bit of experience
will enjoy. In the course of actually building the thing, however,
I noticed that the negatives for this kit are mostly sins of omission,
details left out as opposed to problems with what is in the box.
|
to enlarge 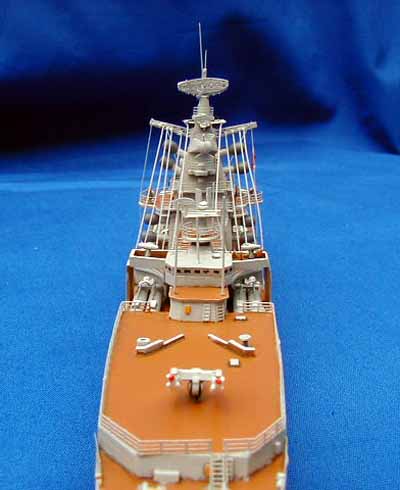 |
||||
| That said, a few words on the kit parts. The hull
and base superstructure are well-cast, needing only a light sanding on
the sides to smooth out the resin. The bottom is dead flat and there were
no pin holes or voids to be filled.
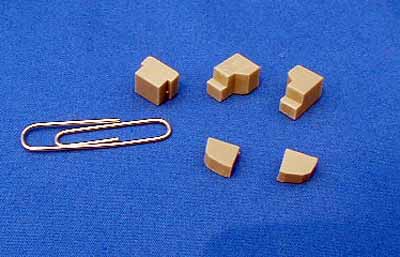
The resin used for the detail parts was quite brittle, so some care is needed when removing parts from their sprues. I used a knife to very lightly score each part where it joined the sprue, and then gently snapped it free. I found if I bore down with the knife to cut the part free, I often chipped or cracked it. Be careful also with the pieces cast on to a flat sheet of resin. Many are scale-thin, so sand with a gentle touch. The preferred method is to use wet and dry sandpaper, wet it, and slowly sand the flat carrier sheet down so that the parts cast on to it slip free. You can make things easier on yourself by sanding inside/on a cafeteria type tray, with raised sides. This keeps the goopy slurry of wet resin dust in one place. You must must must use wet and dry sandpaper, wet. Resin dust is harmful to your lungs and when you get it all over the room whoever helps clean the house will also do harm to you. If youre the cleaner yourself then youll suck in another couple of lungs full of resin dust and for sure will never finish all those kit sin the closet, dudelung cancer and modeling dont mix. Even with wet sandpaper use a proper mask and safety glasses. Wet paper also keeps the resin cool. Sand easy, let the abrasives
help you. If you sand too hard or too fast, the resin can start to
melt or deform, you will take off too much and/or sand through to your
fingertips, which will hurt. Save the risk taking for other venues.
|
|||||
| Parts Fit
Parts fit is generally good, with a few cautions. The superstructure is made up of several blocks; if any are molded out of square or if you align one wrong, the others will be off too. Careful. The 02 deck level is one thin piece of resin. Glue it down with
tape or weight on top to get it to lay flat. On my sample at least,
this piece left a gigantic gap at the aft end, maybe the width of a heavy
coin. I had to fill the gap with plastic strip and super glue, then
sand it flat.
|
 |
||||
|
The angled side supports under the bridge wings should have been brass, or depleted uranium, but instead are resin. They are tricky to separate from the flat resin carrier sheet without breaking. If you succeed, they have keyed ends on the hull sides that demand sanding and filling so the ship looks sleek. The resin, however, is very thin and thus easily broken while sanding. I suggest doing this as late in the build as possible, and also suggest reinforcing the supports on their backsides with brass or plastic strips. I still snapped them off twice while finishing this ship. Lastly, if you add the (AK-630 gatling-type guns) Russian CIWS, you must also add their support platforms. These too must ultimately end up flush with the hull sides and thus require some careful filling and sanding. Some modelers pressed for time or more comfortable as beginners with resin may choose to build one of the other ships in the class to bypass this hassle altogether. Instructions As noted in the first impressions/out-of-box review, the instructions are sparse. While this will affect primarily those who want to go beyond the basic kit, those new to resin may have a few problems knowing what to glue where as they tackle the detail parts. In addition to the usual research photos that always help, I also suggest taking a close look at my photos and any others you find on line of this kit, not so much for whatever I did right and wrong, but as an aid to parts placement (see this link for a mostly out-of-the-box build). While an actual photo of the real ship will show you detail, a photo
of this actual model will help with basic parts placement, which is tough
in a few places with just the one exploded parts view you get with the
kit instructions.
Additions and Changes Like I said, whats wrong here is whats missing. The kit comes with no photo etch, a big omission on a ship with as many radars as this one offers. I replaced all the molded resin radars with photo etch. Gold Medal Models (GMM) makes a Russian PE set, which covers many of your needs here, but I had to improvise with bits and pieces of PE scrap to fill out the radar set. The GMM set is also sorely in need of upgrading, as it was designed in the old days without relief etching and is a bit thick compared to current PE standards. Perhaps is Pitroad releases its planned Soviet kits this year GMM will update the set.. Also added were yard arms, to allow for the prominent rigging this ship
sports. I added PE supports and bracing on the superstructure, and
added the walkways around the main mack.
|
|||||
The look of Cold War Soviet ships is what Ill call Early
Astro Boy after the cartoon character (though we call him Atomu here
in Japan). The ships look more gadgety to me than their USN or RN
contemporaries, with touches like the angled bridge wings that maybe once
looked modern and hip to the Komosol crowd but now look a bit odd, like
the clothes in Austin Powers. My point is this: that look really
needs PE railings and lots of them, to give the busy feel these ships have.
Same for antennas and bracings; gotta have them for the right look and
feel, even if you end up omitting some for simplicitys sake.
Conclusions This is a good kit of an interesting ship, though not without its challenges. While the kit built out of the box may lack some pop and snap, it assembles pretty easily and would still make a reasonable first resin product as long as the modeler was comfortable with sparse instructions and some basic gap filling. OK, to be fair, maybe a better second or third resin project. For the serious Cold War fan, this kit can be built into a very nice finished product if you spend the time and photo etch money it requires to upgrade the basic kit. There are not too many Soviet ships currently on the market, and no other kits of this class that I aware of, so in some respects if you want this class in this scale you have to be willing to work a bit harder. Ill leave others to judge how well I did, but hope that regardless of how well I did, you can see the potential here even if I fell short. |
|||||

Learning More Berkut Class Rocket Cruisers, Project #1134, NATO Codename 'Kresta I' with a Ka-25 "Hormone B" helicopter embarked. FAS has a decent selection of photos. Some useful links but limited
tech data at http://www.fas.org/man/dod-101/sys/ship/row/rus/1134.htm
|
|||||
|
|||||