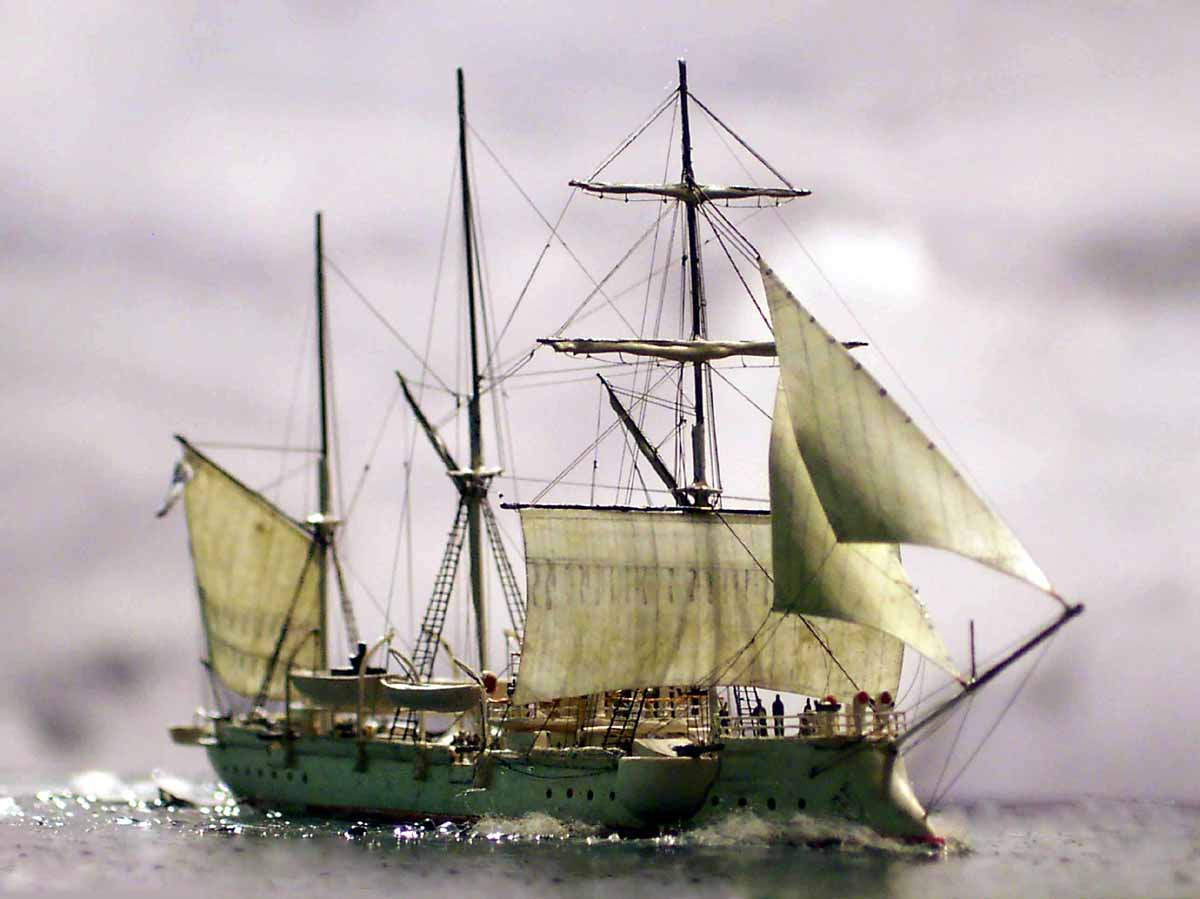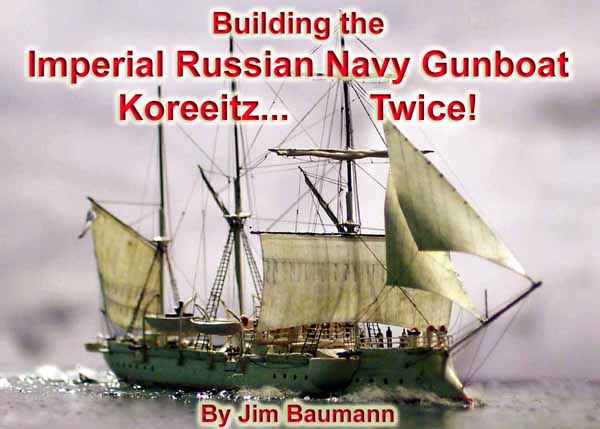
| It was my love of the reverse sheer shape of the ramming bow that inspired me to build this ship. So much so that after aquiring the Combrig kit in 1/700 from WEM I knew I just had to have the Box 261 1/350 variant as well! This was supplied by NNT of Germany. Knowing I would be unlikely to repeat-build two models of the same subject after each other, even seperated by another project the decision was taken to build them simultaneously, which was an instructive and interesting process. I performed most tasks and functions on the 1/350 version first ,then repeated them on the 1/700 model forearmed by knowing how to cope with the pitfalls but having to miniaturise the processes for everything. | |||||||||||||||||||||
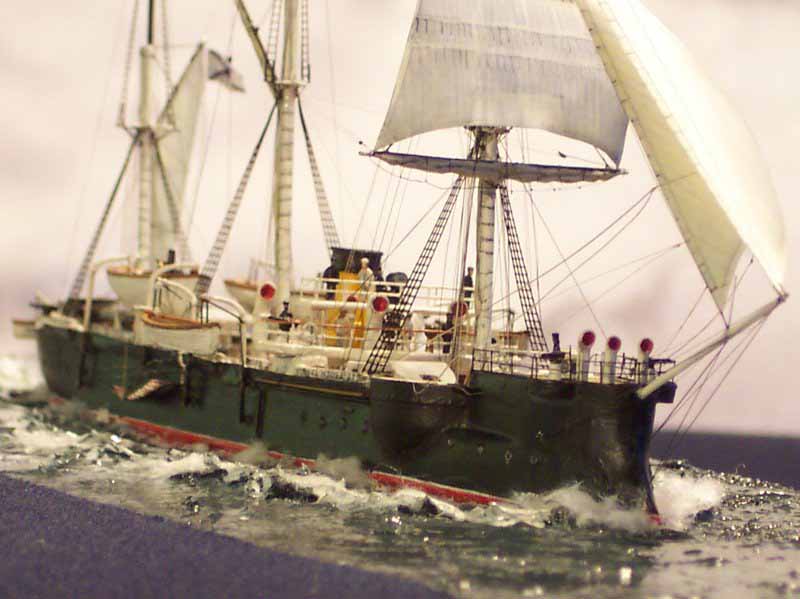
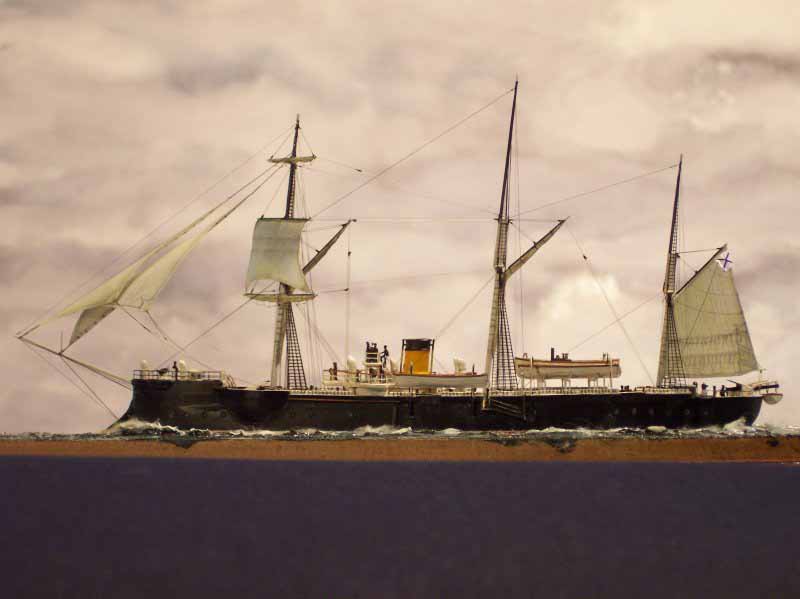
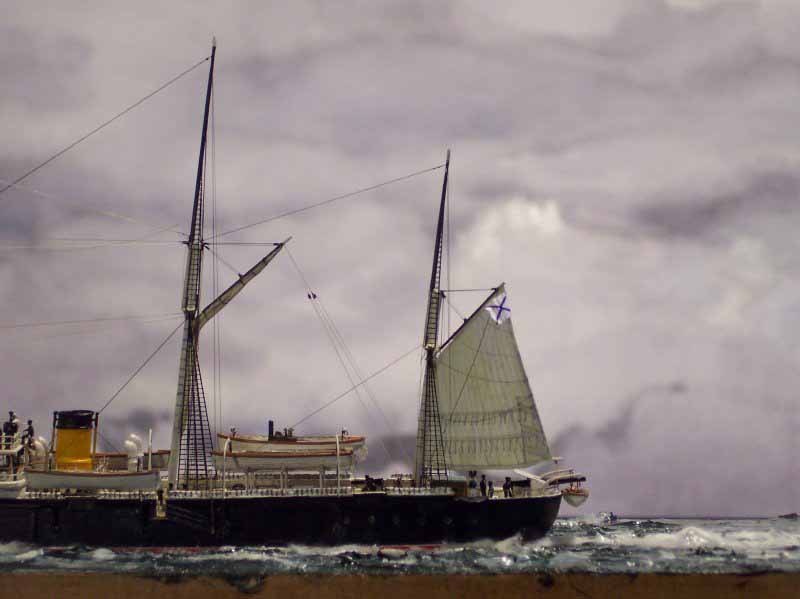
| Koreeitz and her sister Mandjur were not large ships, at 219' loa , she was armed with 2 x 8" guns in the fwd sponsons and 1 x 6" in a turret aft along with 4 x 4.2" , 2 x 3pdr and 4 x 1pdr revolvers as well as a 15" TT . Two shafts coupled to reciprocating steam plant pushed her along at a maximum of 13.3 knots. Koreeitz was completed in 1887 at Bergsund , Stockholm Sweden.. In 1/700 model form this resulted in a hull 3 1/4" long, which coupled with a Barquentine rig made for a very intricate fiddly build, especially with the huge amount of lines and ratlines and my wish to present her with some sails set and drawing. In the later stages of her career and the height of her fame( she fired the first shot in the Russo-Japanese war prior to scuttling herself in shallow water at Chemulpo in 1904) the sailing rig was cut down to stump masts at first platform level, this would have been the easy and quick way out.... | 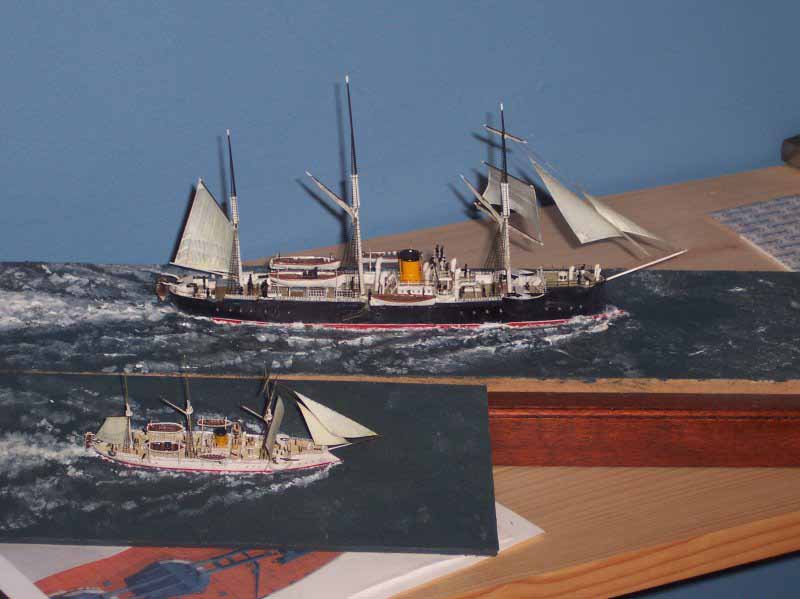 |
||||||||||||||||||||
 |
|||||||||||||||||||||
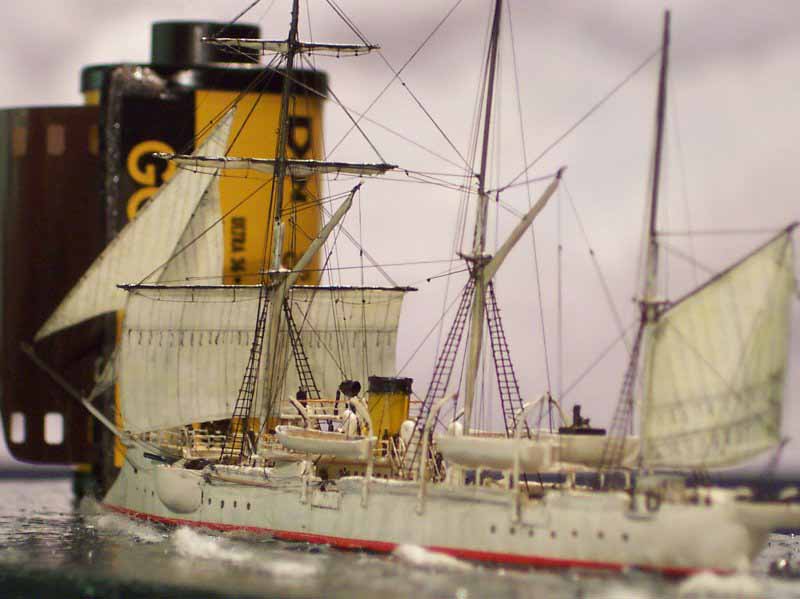
| Both kits abound with detail and character, the Combrig 1/700 model bristles with crisp skylight detail, which in the Box 261 1/350 kit is replicated and achieved in the main with PE brass overlays which allows for a sharp look. The most easily accessible (and reputable) drawings are to be found in that most useful publication' Morskaya Kollektyia' issue 1 1990, photos of Koreeitz and Mandjur are not common on the net or in books as far as I could ascertain. | 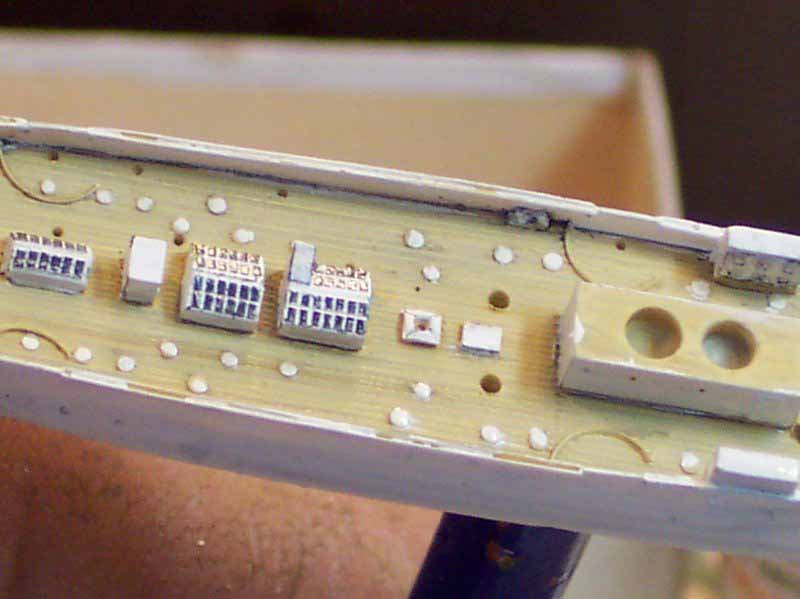 |
||||||||||||||||||||
|
|||||||||||||||||||||
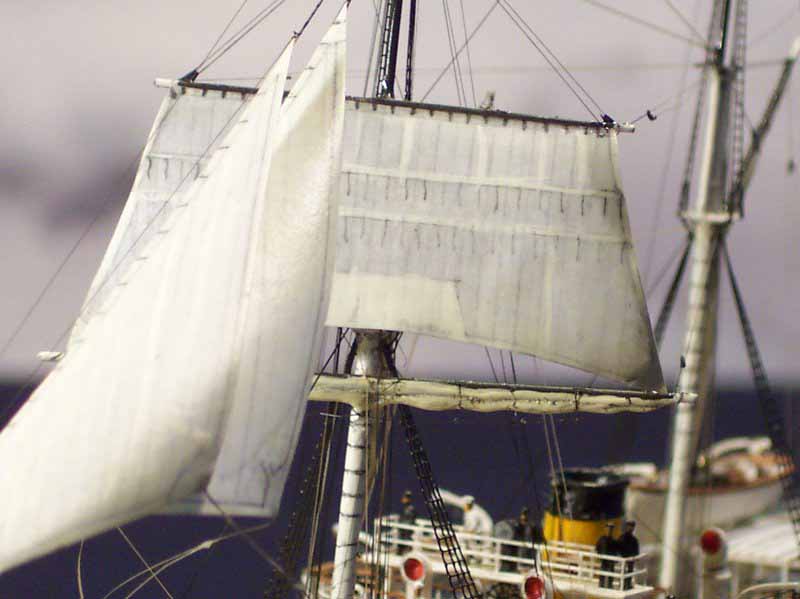
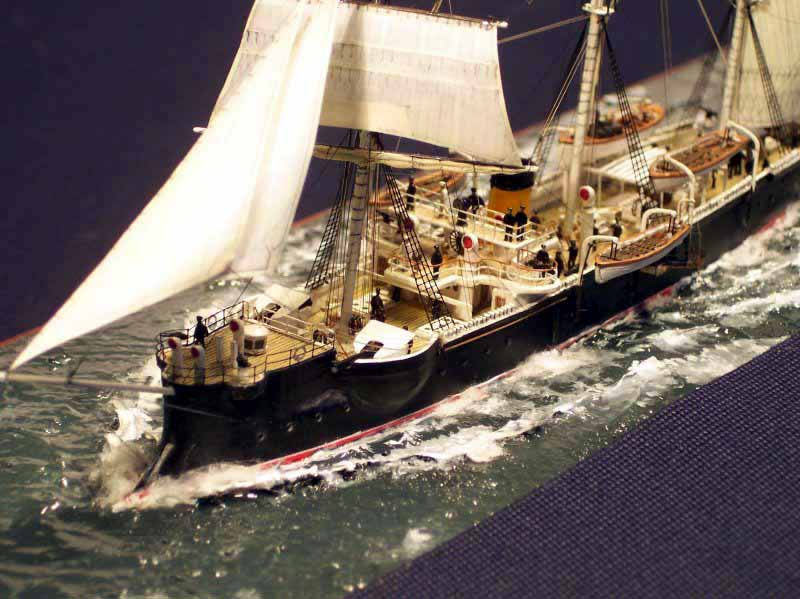
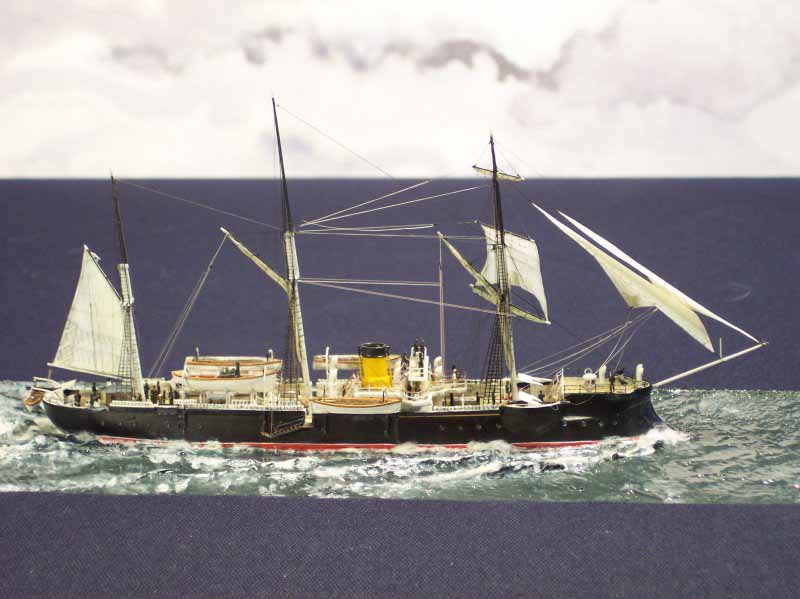
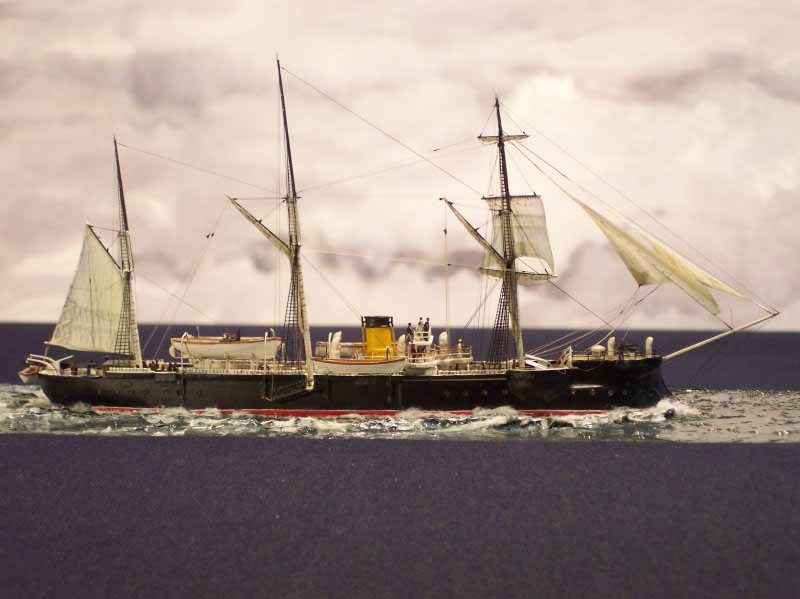
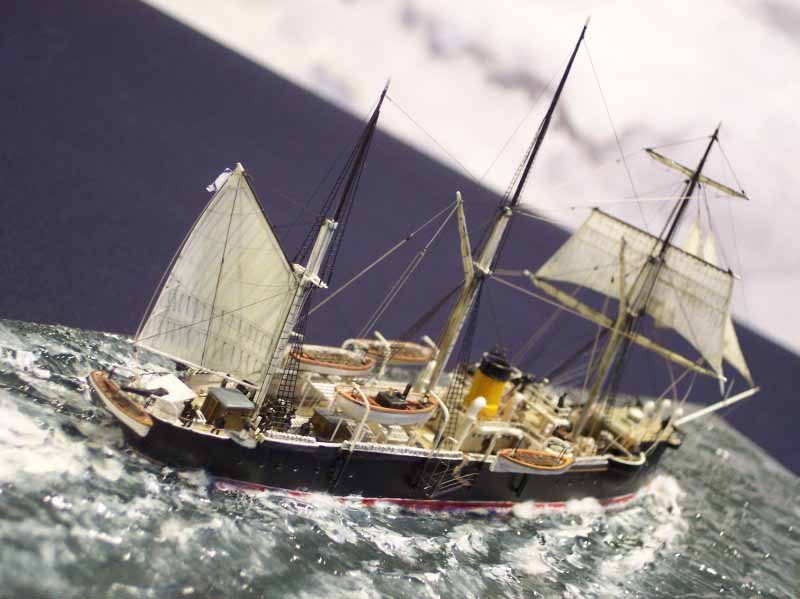
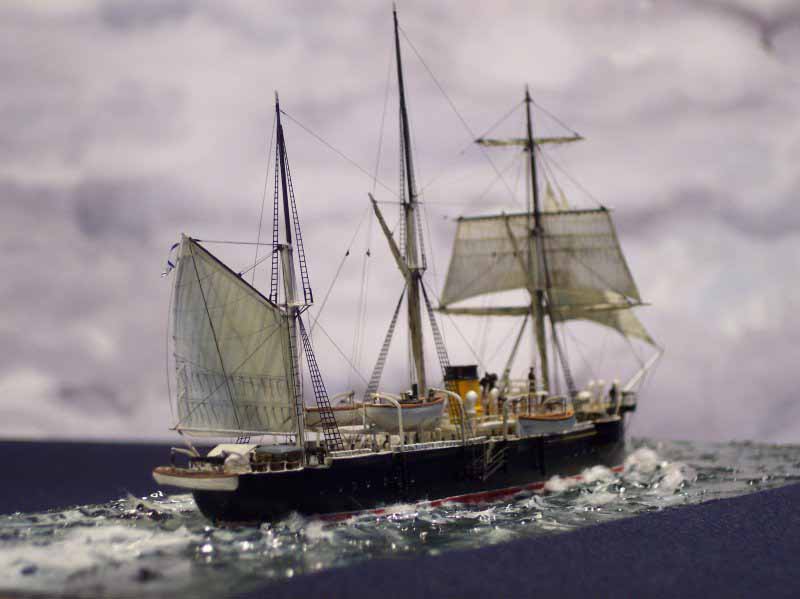
| I decided early on to present one model in white and the
other in blackhulled livery, both with some sails set (on opposing tacks!)
as this would make them visually more interesting. Paradoxically it would
appear that both ships were poor performers under sail, so I modelled them
using the sails as auxillary power to the steam plant.
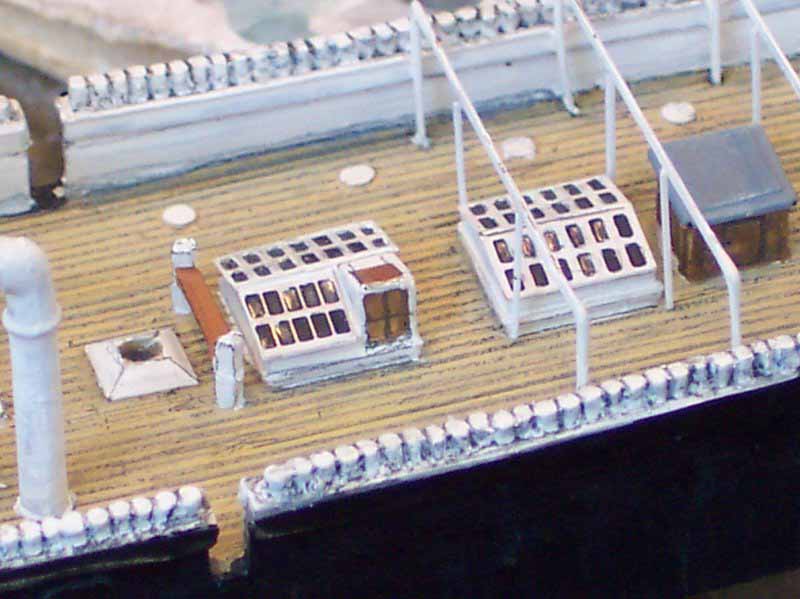
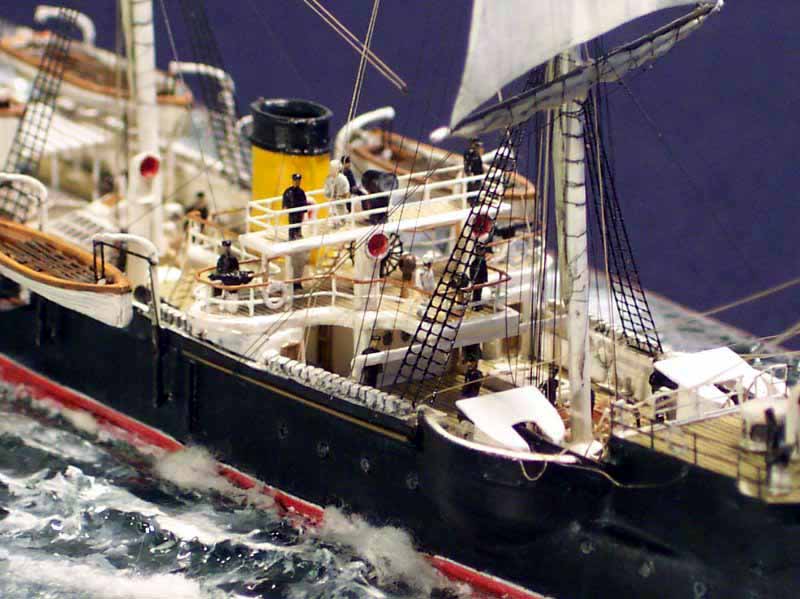
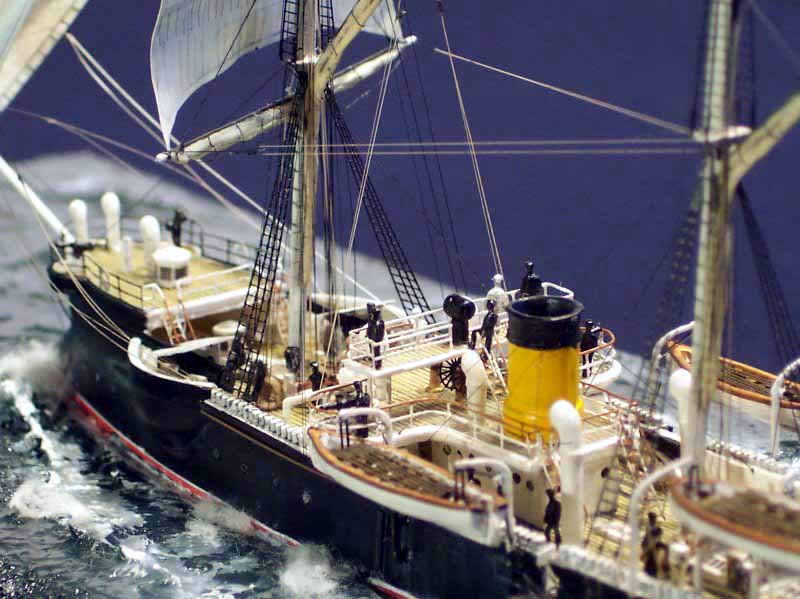
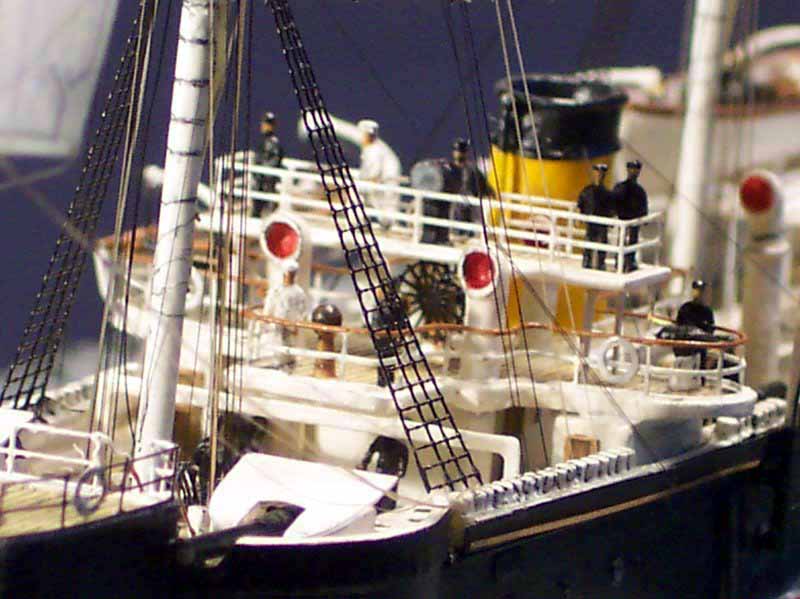
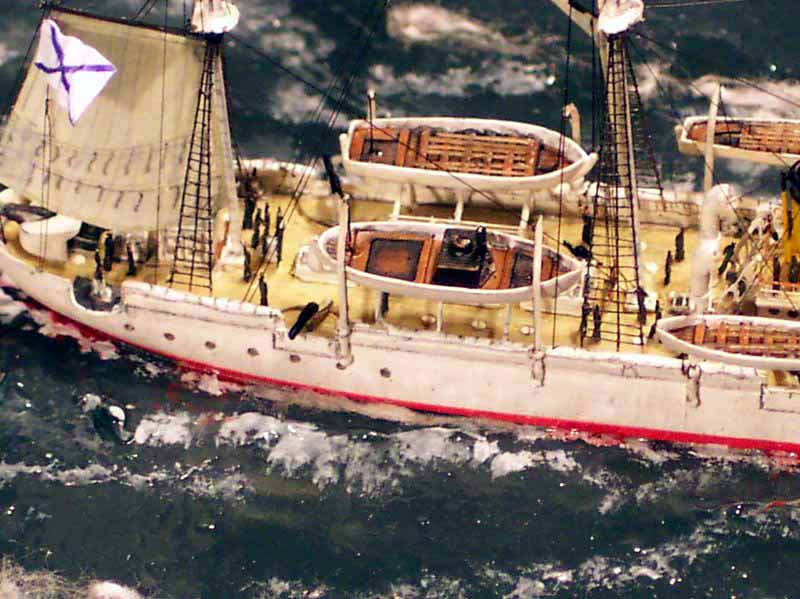
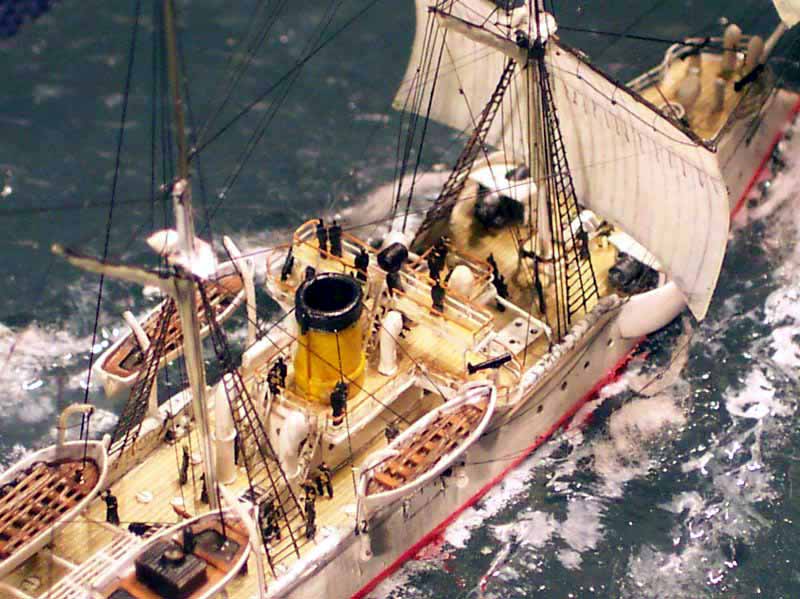
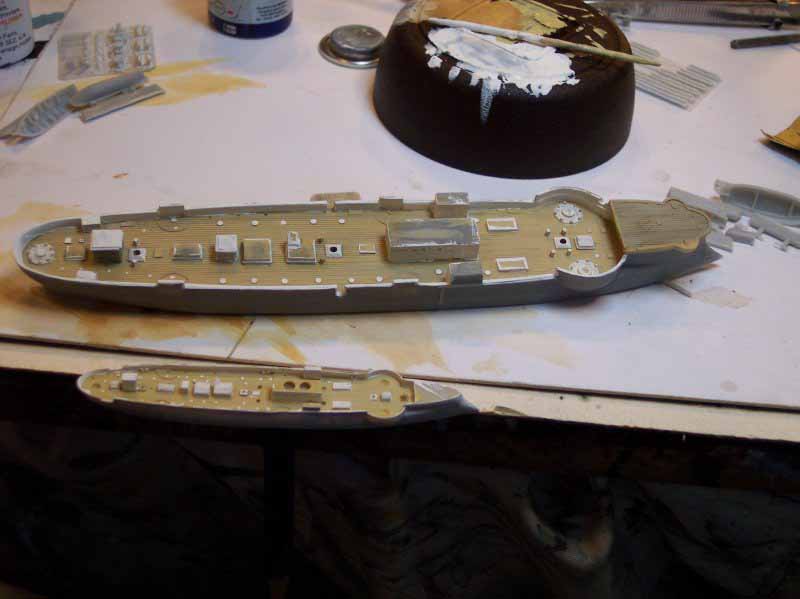
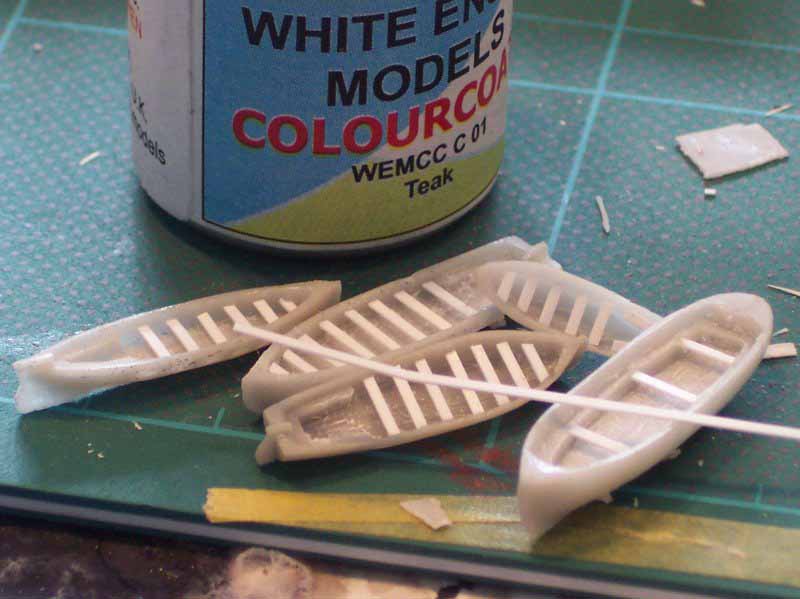
Koreeitz in 1/350 is a full hull model which was waterlined on my trusty beltsander in minutes. The kit supplies the stowed hammocks as a casting to be applied to the bulwarks, this needs careful painting and shading to give a convincing effect . In the 1/700 version I built up the tops of the bulwarks with white glue to give them bulk, then pencilled in carefully the hammock 'shadow gaps'. On both models I applied the selfadhesive tape from RC Cammet to crisp up the shape of the stowage rails. Boat stowage racks were scratchbuilt in fine wire on the 1/700 model then thickened with white paint, the 1/350 version has these as PE items, both were augmented with the fore and aft planks which the crew would have used to service the boats. One of the high points of the 1/350 kit has to be the steering wheels, rendered beautifully in PE, this inspired me to do the same in 1/700, I used WEM items for this from their dedicated wheel fret. The 1/350 kit low point was the boat interiors, solid moulded thwarts, so much nice PE on the supplied fret, why not thwarts? So I proceeded to cut all seats and replace them with new styrene strip items for a lighter effect, once furnished with oars the contrast in shades and the light playing though the seats made the effort worthwhile I think.... |
 |
||||||||||||||||||||
 |
|||||||||||||||||||||
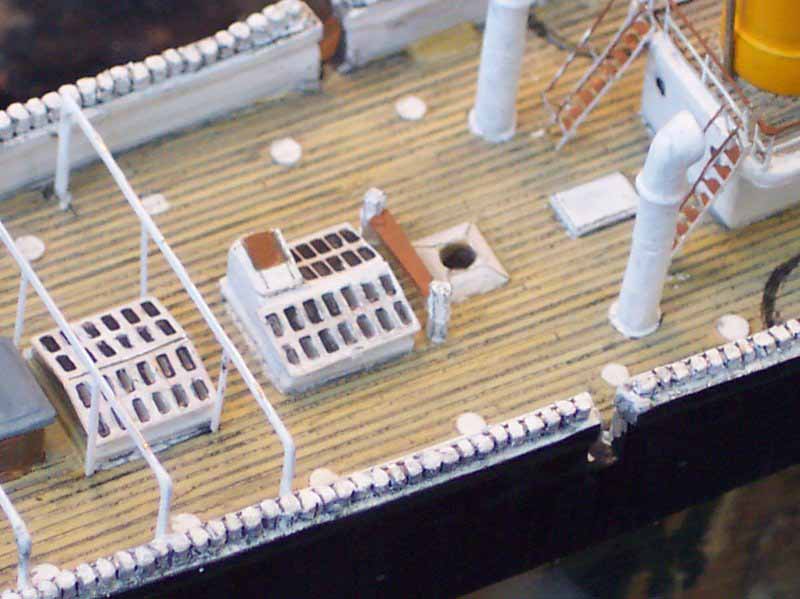
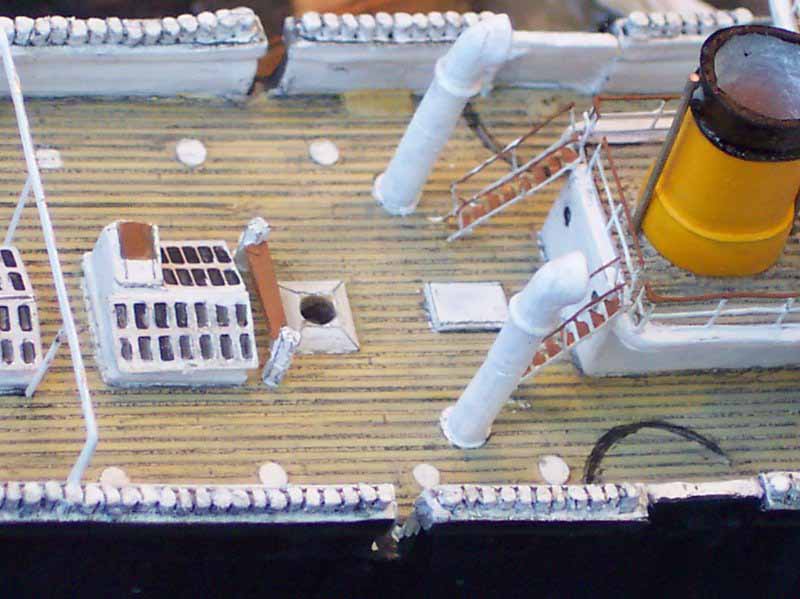
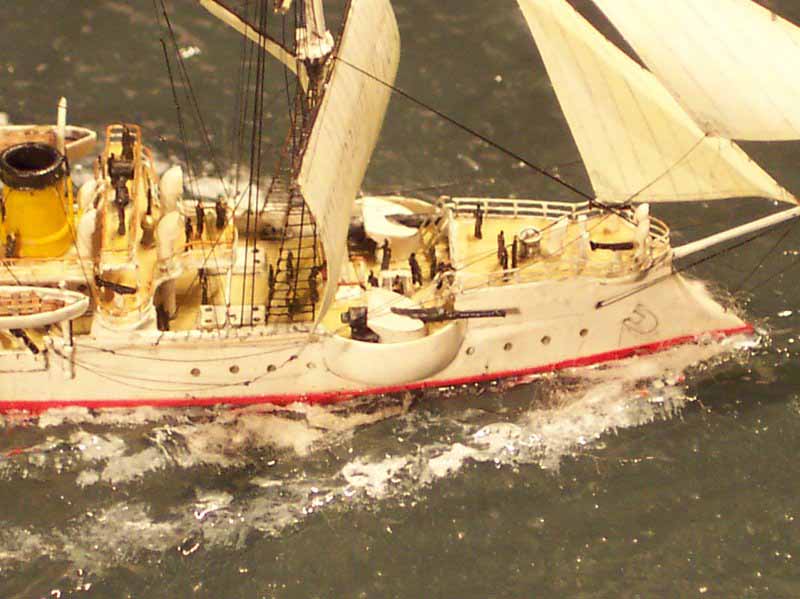
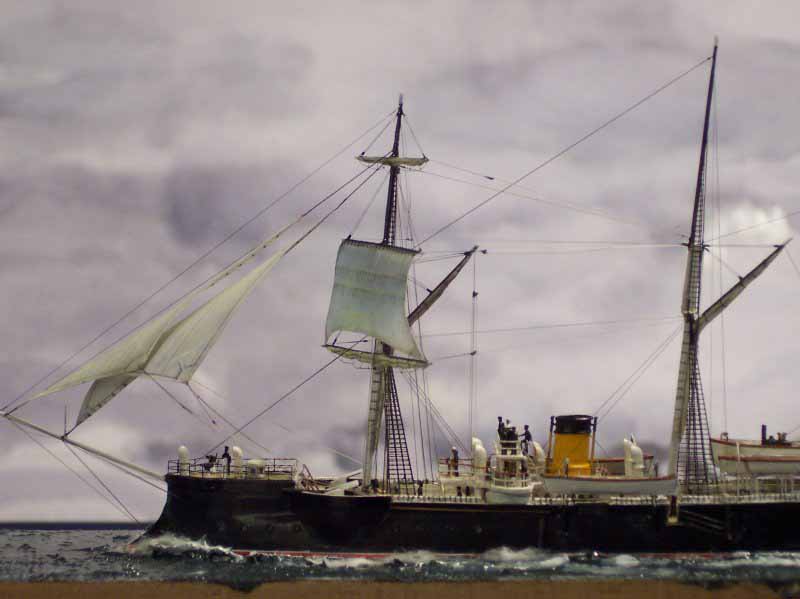
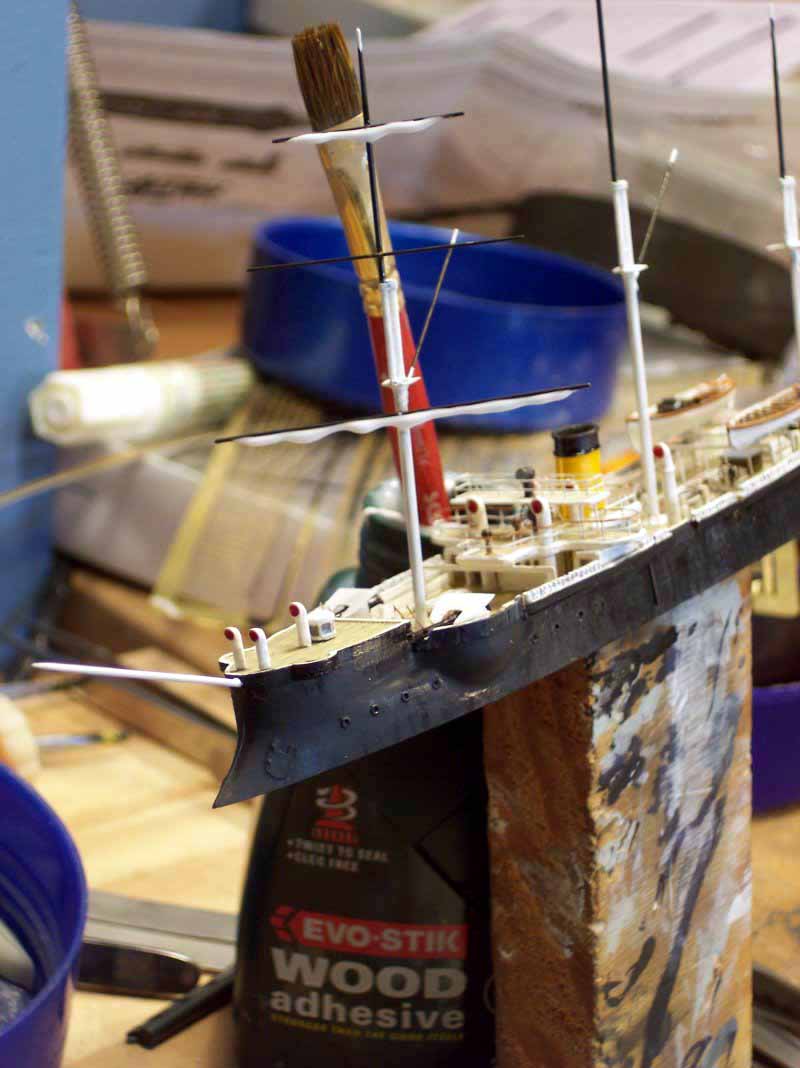
| The funnels on both kits were hollowed out with a motor-tool, the steam pipes made of brass wire and attached to the funnel usng a small dab of white glue as in the photo . | 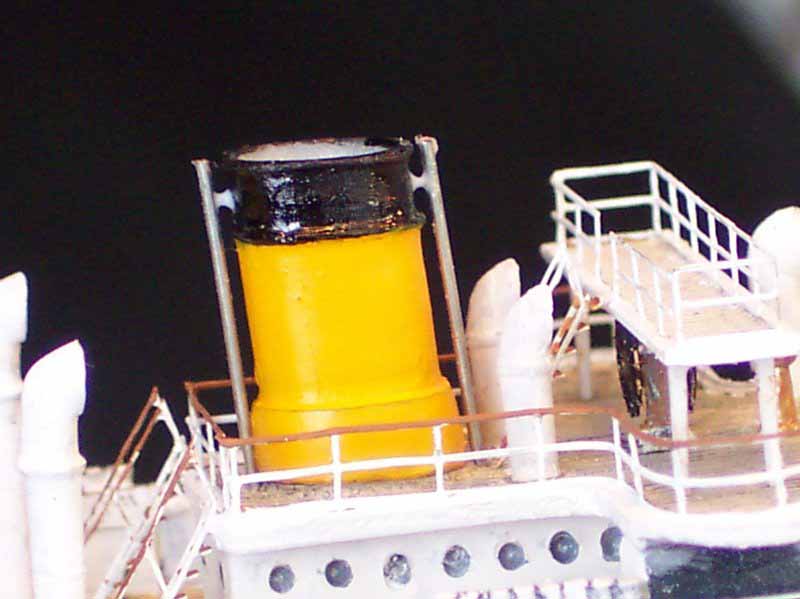 |
||||||||||||||||||||
| The 8" and 6" gun splintershields in the 1/350 model are
bent up from thick Photetch parts, I heated these over a candleflame to
make the brass more pliable to allow me to achieve the double curvature(
they taper inwards at the top slighly!) in the 1/700 version they are a
one-piece casting, which I carefully painted to give the impression of
depth.
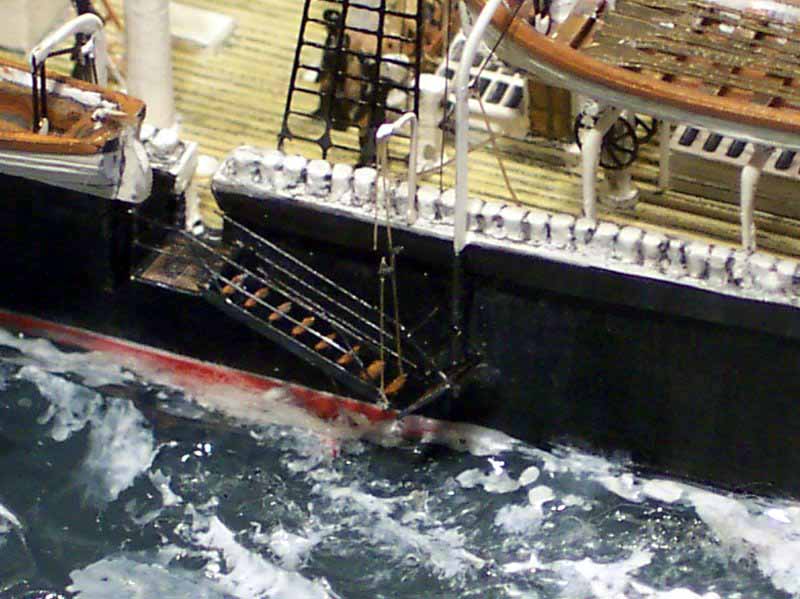
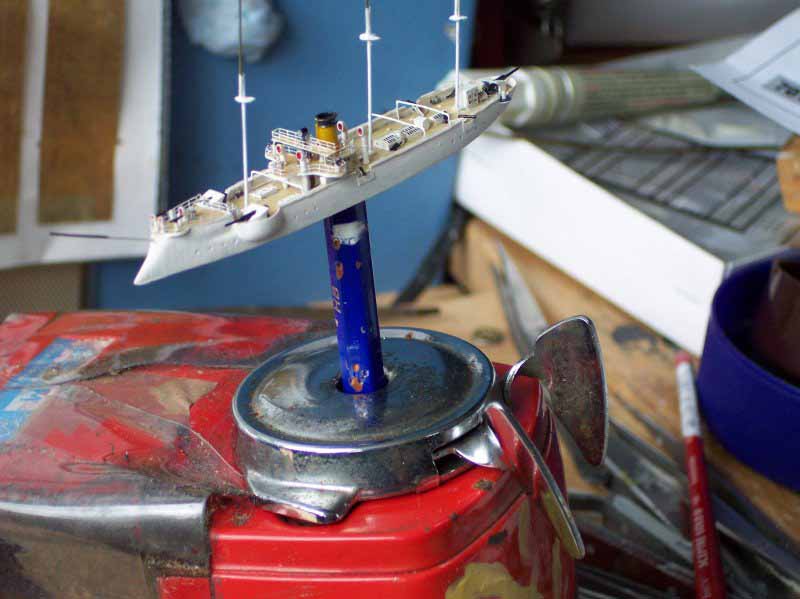
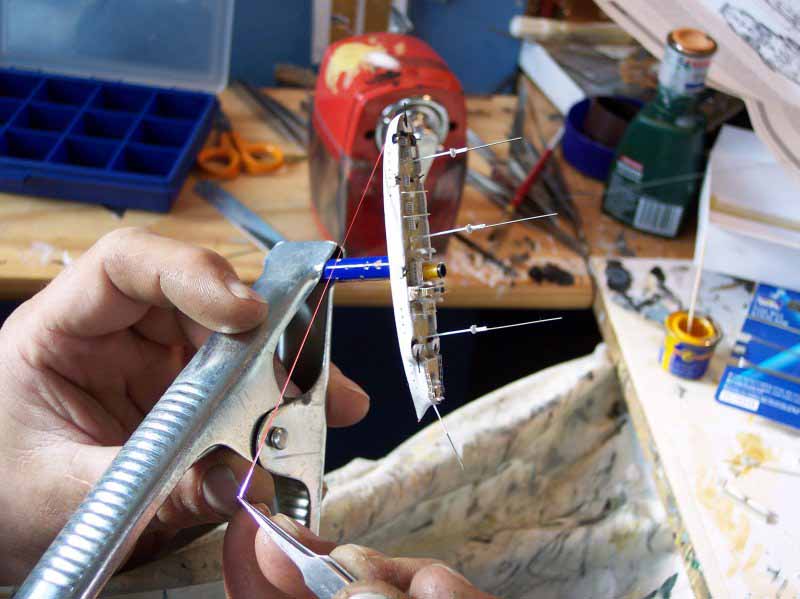
The two kits were basically identical and agreed with the plans in MK, which avoided much headscratching! The clinker effect of the ships boats in the 1/350 kit is subtly rendered, with a little careful pencil accentuation it is apparent without being too obvious; this fell by the wayside in 1/700! At an early stage I glued the hulls to 'holders', as I like to be able to move the hulls around to allow me to gain access to all the undercuts prior to mounting on the seascape; I used a small block of wood for the 1/350 version and the top of a pencil in 1/700, this has the added advantage that the model can be secured in a pencil sharpener! The removal of the models from the holders prior to putting them 'afloat' is always a fraught business, utilising a sharp chisel, a small hammer and an assistant with nerves of steel; thanks Katrin! I applied the boot-topping whilst still on the pencil, for the blackhulled version I applied first a white decal stripe then the red boot-top striping. |
 |
||||||||||||||||||||
 |
|||||||||||||||||||||
 |
|||||||||||||||||||||
| On the 1/700 version I cut out the 4.2" gun embrasures and represented the dropped plates with paper items glued on in the down position to help break up the otherwise dull sheerline. I applied the supplied PE doors to the superstructure on the 1/350 version and used WEM items on the smaller sister. The 1/350 railings supplied were without the waterway, these I would have used but they were just a bit too clunky so I used GMM two bar for the bridge and painted the teak capping rail on, and used WEM (Koenig) items for the bow, in 1/700 I used GMM superfine. The main issue was that the bridge decks had a lot of curvature around the edges, holding the deck was a problem, the photo shows the solution, I heated the brass railing with a lighter, this made it very pliable and easy to bend in situ whilst simultaneously gluing. For symetry I cut and joined the rails on the centre front. | 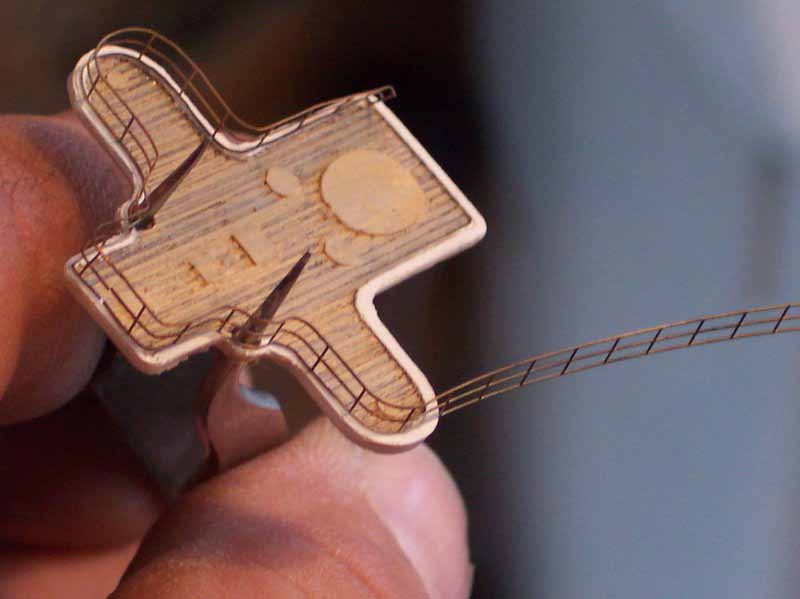 |
||||||||||||||||||||
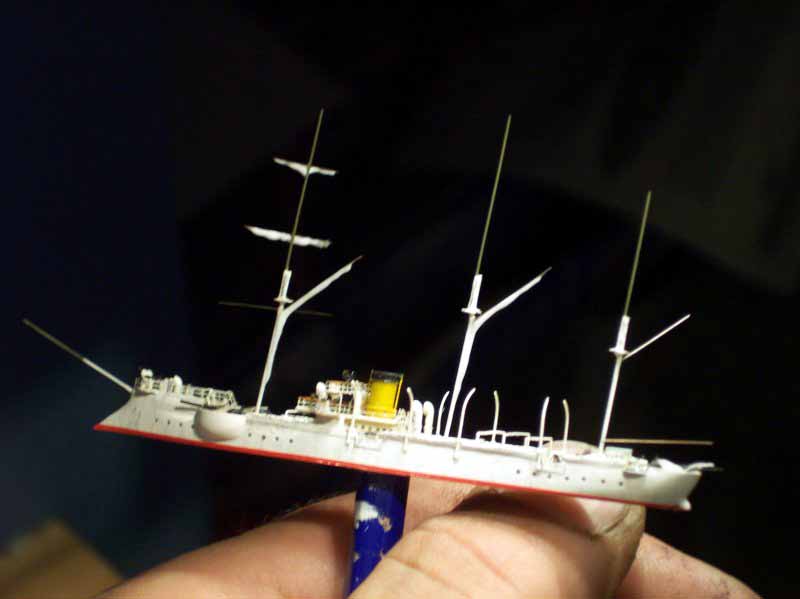
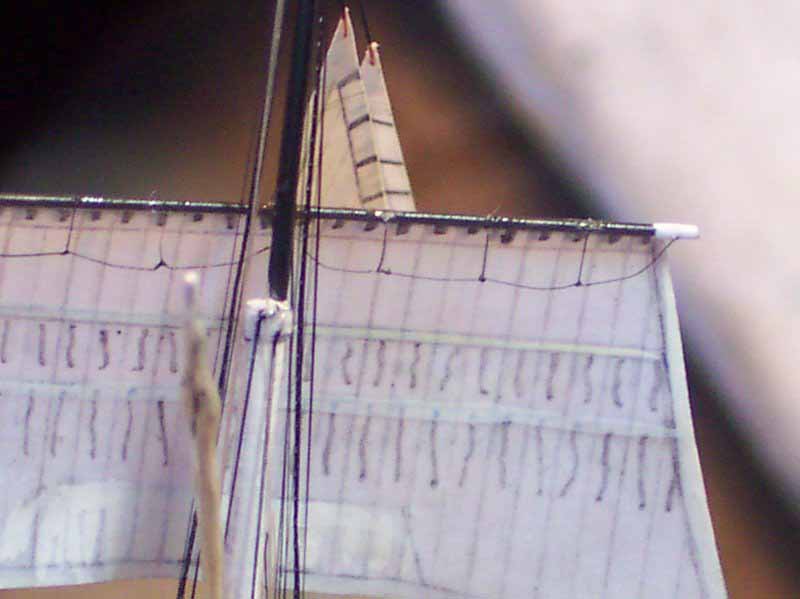
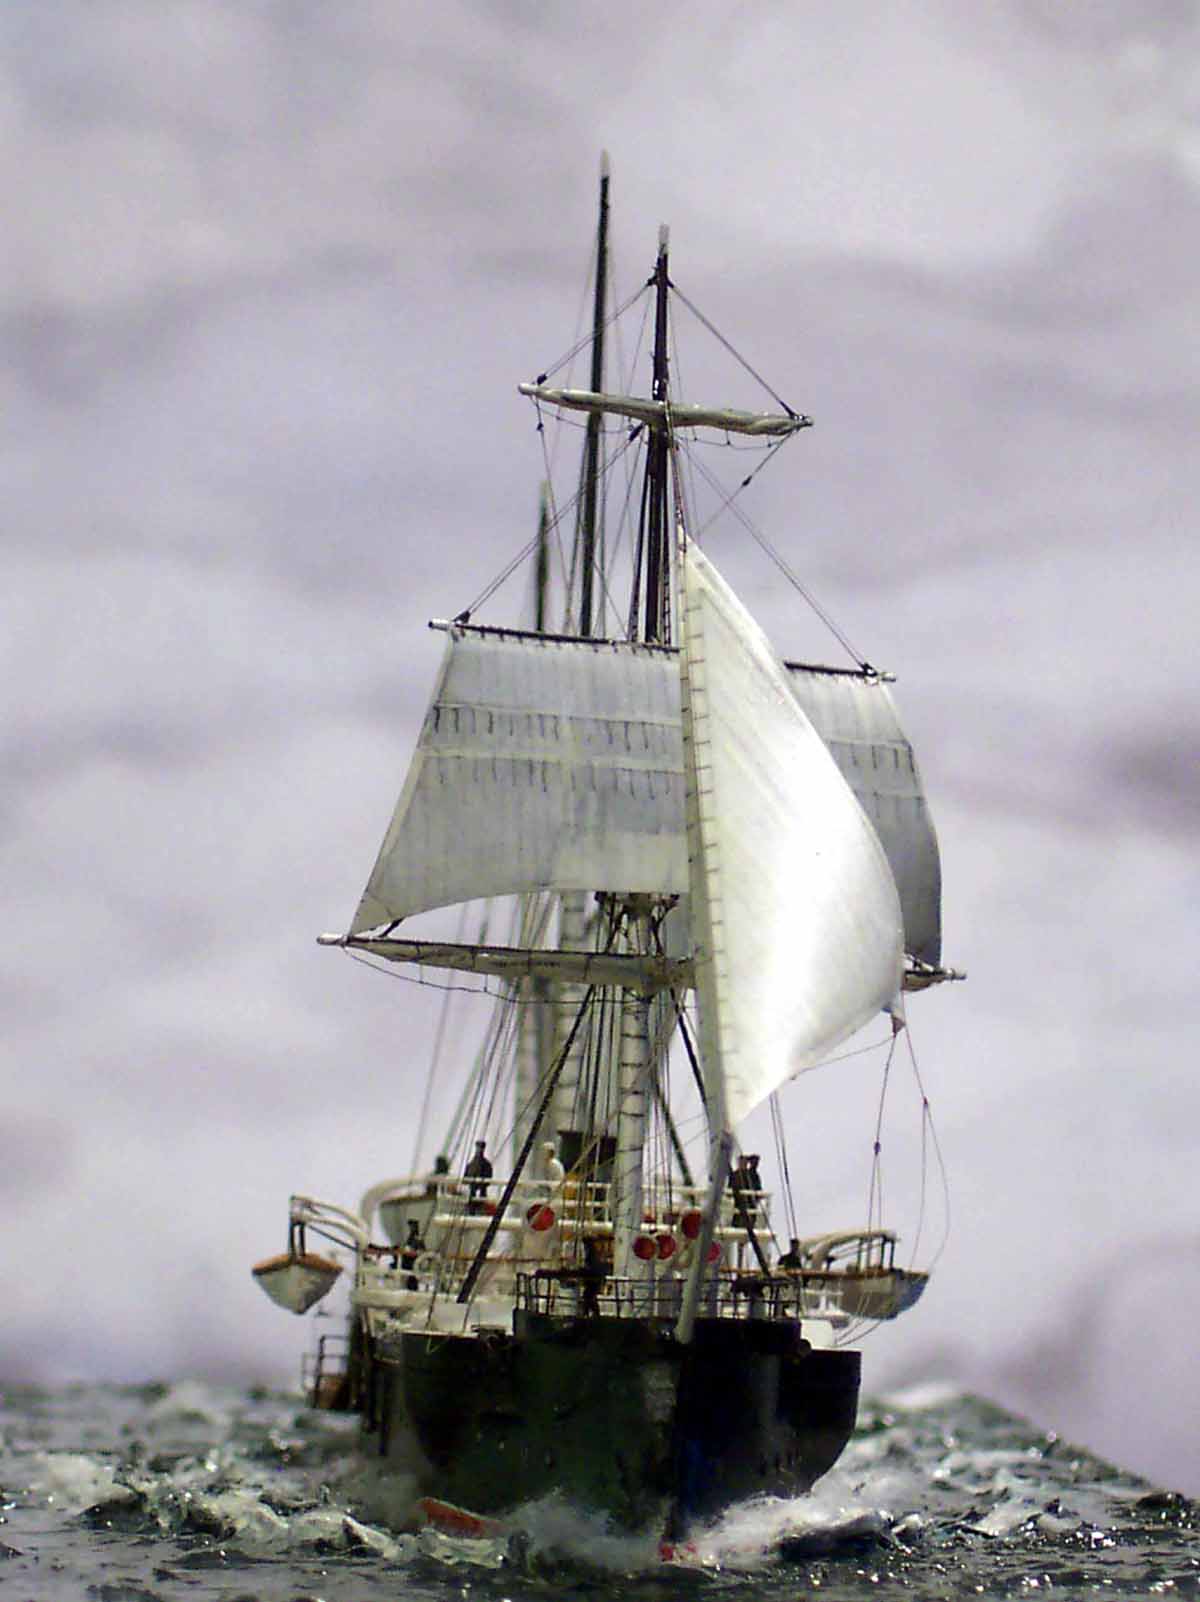
| By far the most interesting aspect of this project was
the rig, this being a major part of the models appearance. I made all the
masts from brass and stainless steel tube/rod according to the plans in
MK, to include correct platforms, these were made of paper, after installation
soaked in Cyano glue, this results in a thin but strong structure cut out
with scissors! The ratlines(shrouds) are a major feature of a ship such
as Koreeitz, for the 1/350 version I availed myself to the excellent version
in Photoetch from the German firm of Saemanns , who have in their range
ratlines with and without deadeyes, with the footropes being half size
of the shroud, relief etched and relatively sturdy they are really very
useful indeed!
For the Combrig 1/700 model I resorted to wire and sprue with crossed eyes; I am hopeful of receiving some custom-made 1/700 items soon in the near future to obviate this torture! At the base of the masts I installed the belaying-pinrails to take the vast amount of halyard cordage aft of the masts, I installed some very small coils of rope to represet the tails of the halyards . The headsail sheets were along with most of the running rigging of a 2-1 system whereby the load effort was halved by using a block to give the purchase, the windward sheets being unloaded simply hang.... |
|||||||||||||||||||||
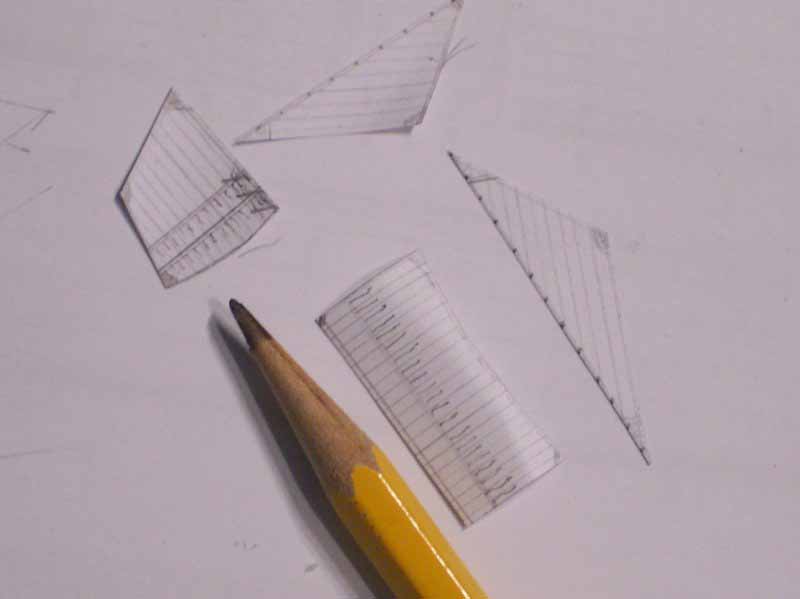
| I made little paper templates for the sails which were made of paper on which I had previously drawn in the panel lines, reef points and corner re-einforcing (on both sides!). I had experimented with a photocopier as well as my PC printers( alps) for the panel lines, but they were either to fuzzy, too harsh and black or too irregular in texture, leave alone try and get them aligned with the reverse side... so I drew them on by eye in pencil, then taped the paper to the window and drew them again on the reverse side. I then painted the panels with watercolours, soaking the paper. These were then shaped to the desired profile and placed on the radiator to dry out; when fully dry I soaked them in Cyano glue to make the impervious to moisture in the atmosphere as well as strong. I then highlighted some of the tabling and clew corners in whitish watercolour as well as the reeinforcing for where the sail would chafe against the fore top platform. | 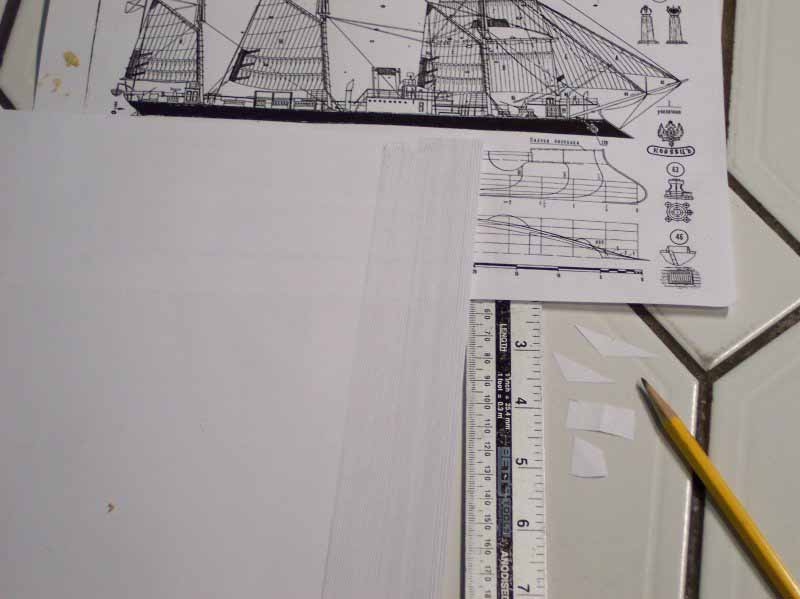 |
||||||||||||||||||||
 |
|||||||||||||||||||||
|
After I had done the 1/350 version I felt able to tackle the 1/700 variants.... The box 261 1/350 kit supplies furled resin sails which alas look more akin to a breadroll, so I resorted to using white glue as shown in the photo; this has the advantage that more can be added easily whilst the underlying layer is still not set, thereby creating a crease and or a sag... |
 |
||||||||||||||||||||
|
|||||||||||||||||||||
 |
|||||||||||||||||||||
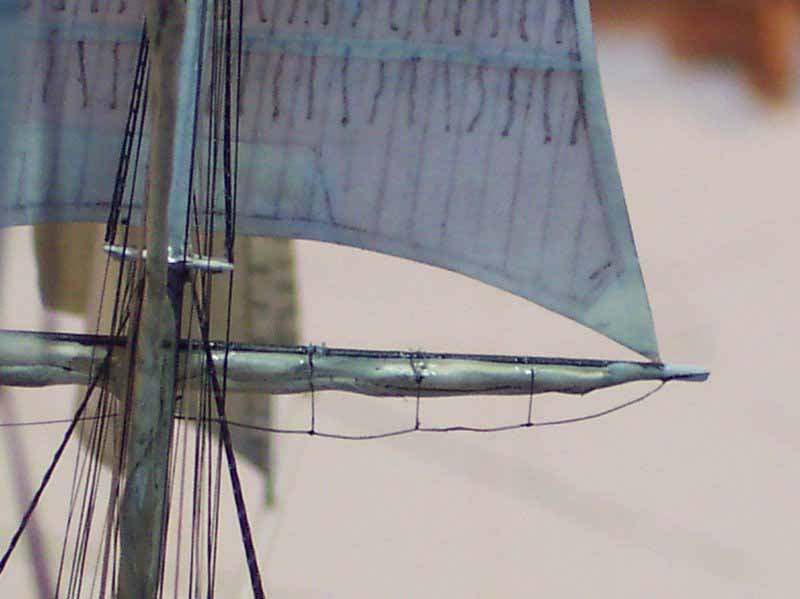
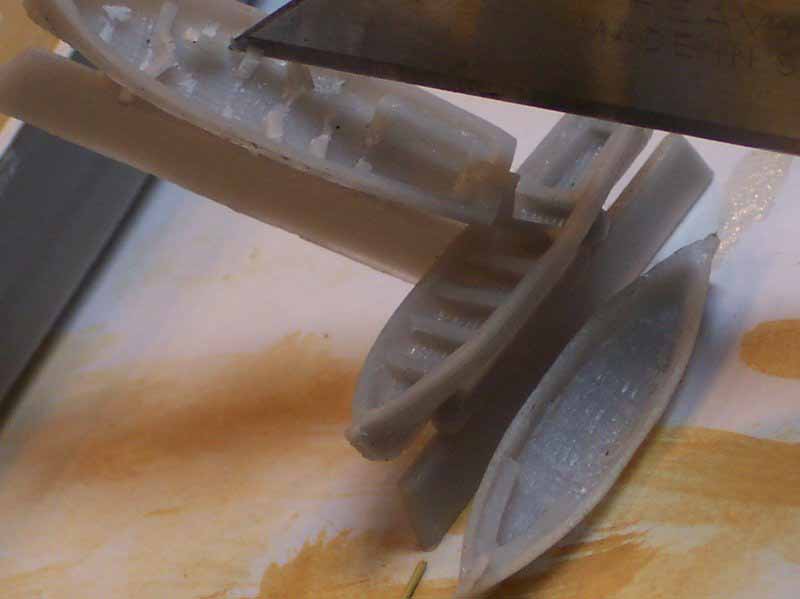
One of the hardest parts was making the footropes upon
which the sailors would have stood whilst brailing the sails up, next time
I will use wire and sprue as a combo, but in this instance I ended up using
all sprue, tacking the vertical supports with liquid cement then using
the weakness created to form the 'kink' between the ' sags', the photos
illustrate the method.
|
|||||||||||||||||||||
|
|||||||||||||||||||||
| All in all an amusing little project, paralell building the same ship in two scales illustrated to me the relative merits of the large and small, what is and is not feasible in 1/700!! The models are visually more appealing by the use of the sails, however the sheer amount of sprue cordage applied to both models has sent me hunting through my kit stash for something without a mast.....!! K-class submarine?? | |||||||||||||||||||||