Building the Russian Battleship
Kniaz Suvorov in 1/700
by Norm Koger
|
The Combrig 1/700 Kniaz Suvorov kit is described
in a Combrig vs. Modelkrak comparison article here.
I assume youve read it, so this picks up where that article leaves off. |
|
|
|
Hull
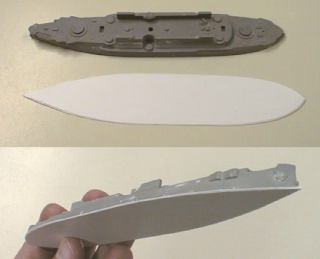
Heres something you dont see every day: adding
height to the hull of a resin waterline ship model. I dont believe Ive
ever heard of anyone having to do this before. One of the first things
you usually you have to do with resin kits is the removal of a thick casting
plug. But the Combrig hull isnt tall enough, so you need to add at least
1/2 millimeter of material to the bottom. I used a sole of two layers of
.25mm Evergreen sheet styrene.
|
Click images
below to enlarge
 |
|
|
| At the same time, I applied putty to the many pits, dents, scratches,
and bubble holes along the sides. Fortunately, there isnt much detail
anywhere on the hull, so it isnt difficult to sand everything down to
a nice surface. |
 |
|
|
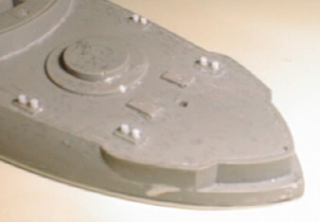
| A bit of similar work is also necessary to restore damaged surface
details on the upper (deck) surface of the piece. Short lengths of Evergreen
.025 rod work well for replacing the tieoffs along the edges of the deck. |
 |
|
|
| Once the hull casting has been thickened and repaired,
its time to decide how much detail to add to the sides. There isnt enough
information available with the kit instructions to provide much guidance,
and digging around on the web will quickly convince you that the information
you need is only available from Russian sources many of which were printed
in the Soviet era and are out of print now even in Russia. Oh joy. It helps
a lot if you can find someone who knows where the information is, and how
to get copies of it. Fortunately, I ran across Sergey Myagkovs
Warships
site. Mr. Myagkovs help was invaluable. |
| He was able to provide a number of obscure, out of print drawings and
photos in addition to finding copies of Suligas Ships of the Russo-Japanese
War, Volumes I (Russian Fleet) and II (Japanese Fleet), Warships of Russia
Battleship Borodino, and several other Russian language books. If you
need information on Russian warships, Sergey Myagkovs site is a good place
to start. |
 |
|
|
| This line drawing from Sergei Suliga's Ships of the Russo-Japanese
War, Volume I (Russian Fleet) shows just how valuable these Russian language
references can be. It is possible to find some drawings and photos of ships
of this class on the web - mostly on Russian language sites that aren't
particularly easy to locate using the usual search engines (Yahoo, etc.).
But nowhere outside of Suliga was I able to find the proper layout for
the hull mounted guns. |
| Look closely at the line drawing and you will see that the guns
are arranged in a counter-clockwise fashion, with the port battery facing
aft (except for the two nearest the bow) and the starboard battery facing
forward. The guns were mounted behind flush hatches that wouldn't be prominent
at this scale if closed. |
 |
| I drilled holes at the appropriate angles (generally about
30 degrees from the current hull tangent) and attached short lengths of
0.015" brass rod for the guns. The same brass rod was also used to construct
the torpedo netting. |
|
|
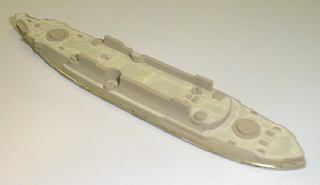
| Once the hull guns and torpedo netting were attached, the hull was
airbrushed overall in a guess-mixed deck tan. A number of rough spots I
hadn't completely fixed earlier got another putty and sanding treatment.
Then the deck was masked off with about a million tiny strips of tape and
airbrushed using Testor's Aircraft Interior Black. I had mixed results
the last time I did this with a resin kit, so I breathed a huge sigh of
relief when everything looked OK after I removed the mask. Suvorov was
painted black overall, with yellow funnels. Aircraft Interior Black is
a nice, dark grey color that probably represents the original black finish
pretty well. |
 |
|
|
|
Superstructure
At this point, I tackled the superstructure assemblies. The superstructure
pieces included with the kit are cast with what looks like splinter shielding.
It's not. This is actually canvas covered railing as in this
painting of Borodino. I used a light gray canvas color on the covered
railings, and the results weren't entirely satisfactory. The more I look
at this, the less I like it. If I had it to do over again, I would trim
the covered railing off and replace it with brass. For some reason, the
highest level of the forward superstructure wasn't cast this way and the
2 rail brass railing looks sooooo much better there. Twenty quickfire guns
with shields were not included in the kit and had to be built from scratch
(brass guns and plastic pedastles and shields). These were attached to
the superstructure, along with the searchlights and other small detail
pieces.
|
|
|
| Midship
The midship area presents a different set of problems. The kit provides
no guidance on how to deal with boat supports and walkways. Fortunately,
this clip of a drawing from Mr. Myagkov's collection shows both the boat
supports and walkway detail. |
 |
|
|
| I used lengths of 0.015" brass to make the boat supports, attaching
it as shown above. The walkway / midship bridge structure was cut from
sheet styrene with posts underneath to support it at the correct height.
Ships boats were painted aircraft interior black exterior with white interiors
as in one of the very few photographs taken from a high enough angle to
show interior detail. More 0.015" brass was attached along the fore and
aft edges of the funnels. |
 |
|
|
| Details
Once the superstructure assemblies and midship detail were complete,
I used Tom's Modelworks 2 Rail railings around the edges of the decks,
superstructure, and walkways. This is appropriate for the Kniaz Suvorov,
but was not standard for all ships of the class. Kit supplied anchor cranes
and scratch built boat davits were attached, and 1/700 chain was run from
the anchors to the appropriate locations on the hull. The kit supplied
gun turrets were assembled and attached per instructions. |
|
|
| Masts and crane booms were constructed from a variety of
brass rod sizes and a bit of sheet styrene for the odd cruciform structure
near the middle of the masts. Flags were created using PhotoPaint, printed
from an ink-jet printer at 600 dpi, "waved" a bit and saturated in CA glue
before being attached to masts and jackstaffs. |
|
Finally, sheet styrene was used to create
the imperial crest, which was painted in brass and attached to the bow
just above the torpedo tube. Making the crest is tricky business. Sure
would be nice if someone were to make up a set of photoeched 1/700 imperial
crests...
|
 |
|
|
|
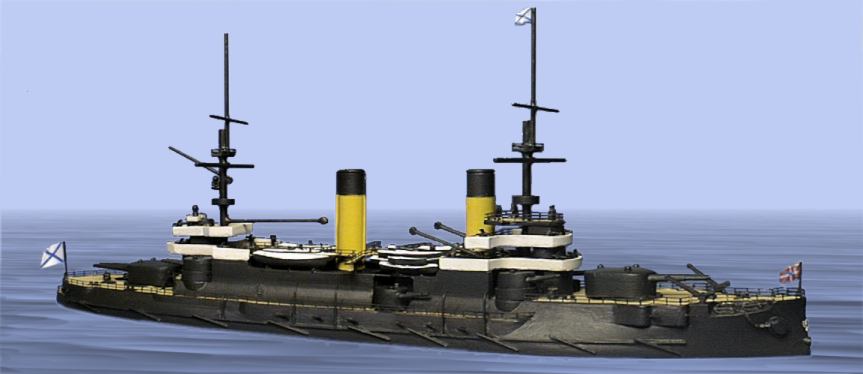
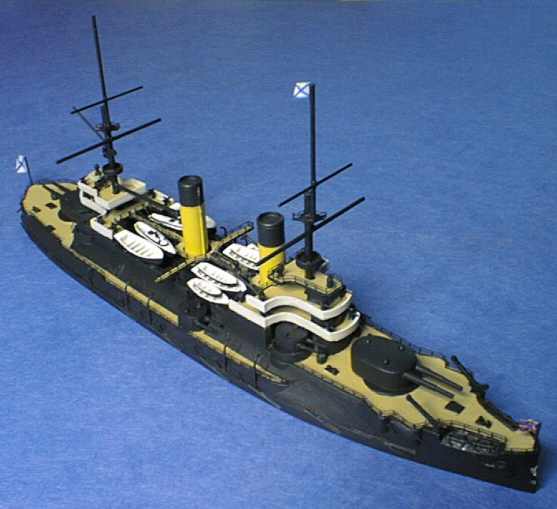
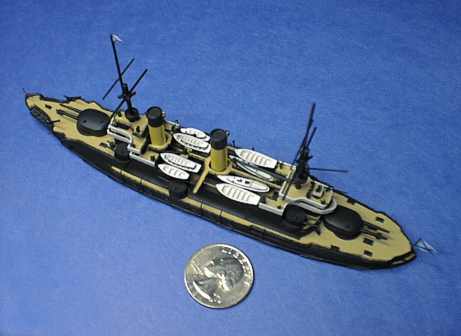
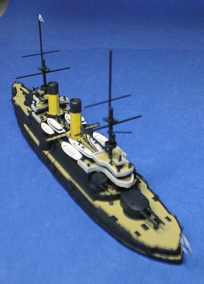
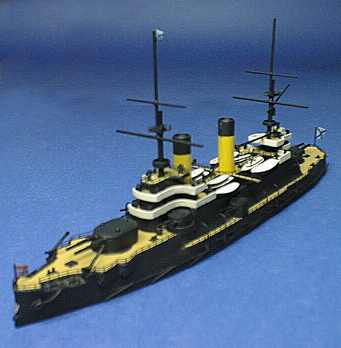
Pictures of the finished product
|
| Links:
|


