USS Constitution
by Len Roberto
| THE SHIP:
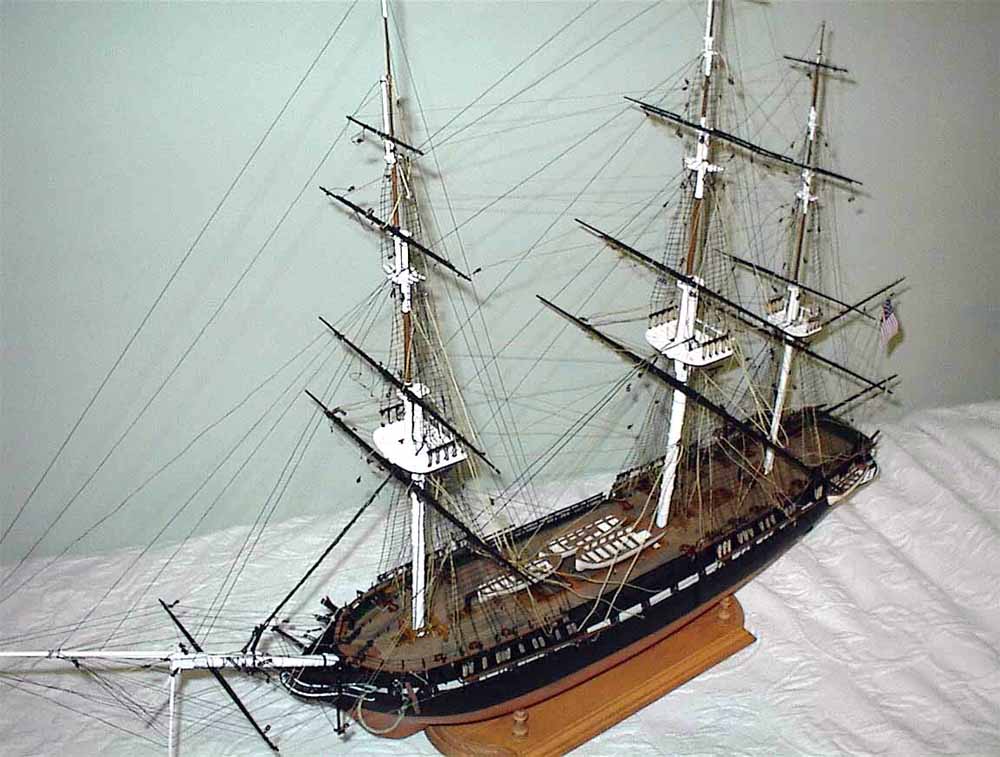
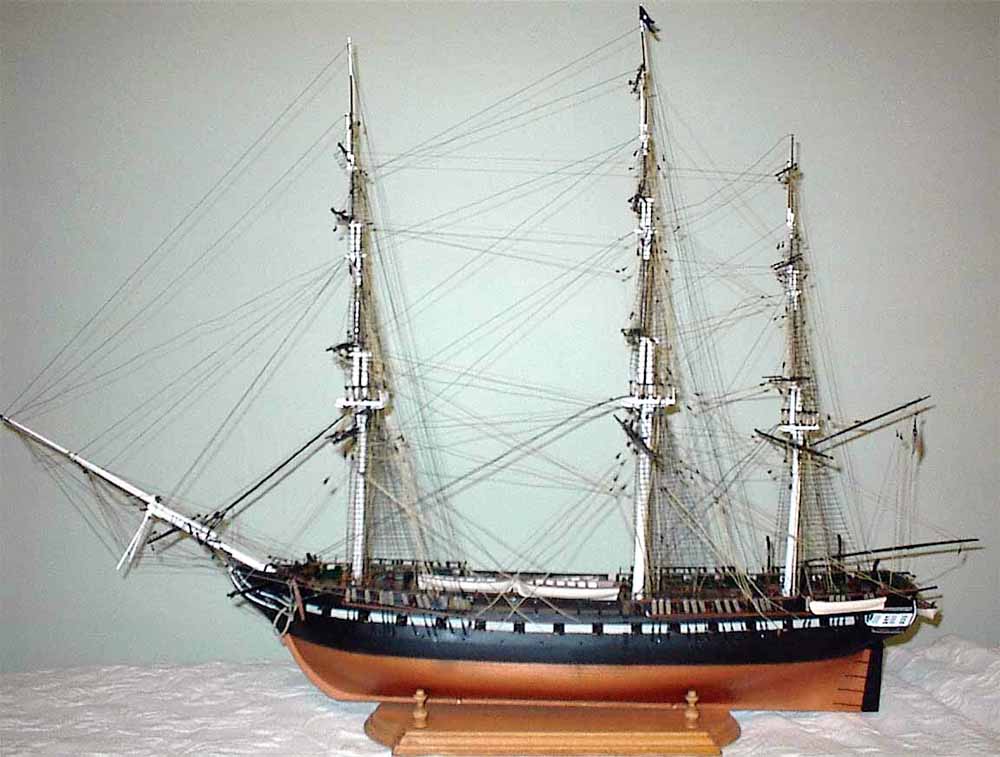
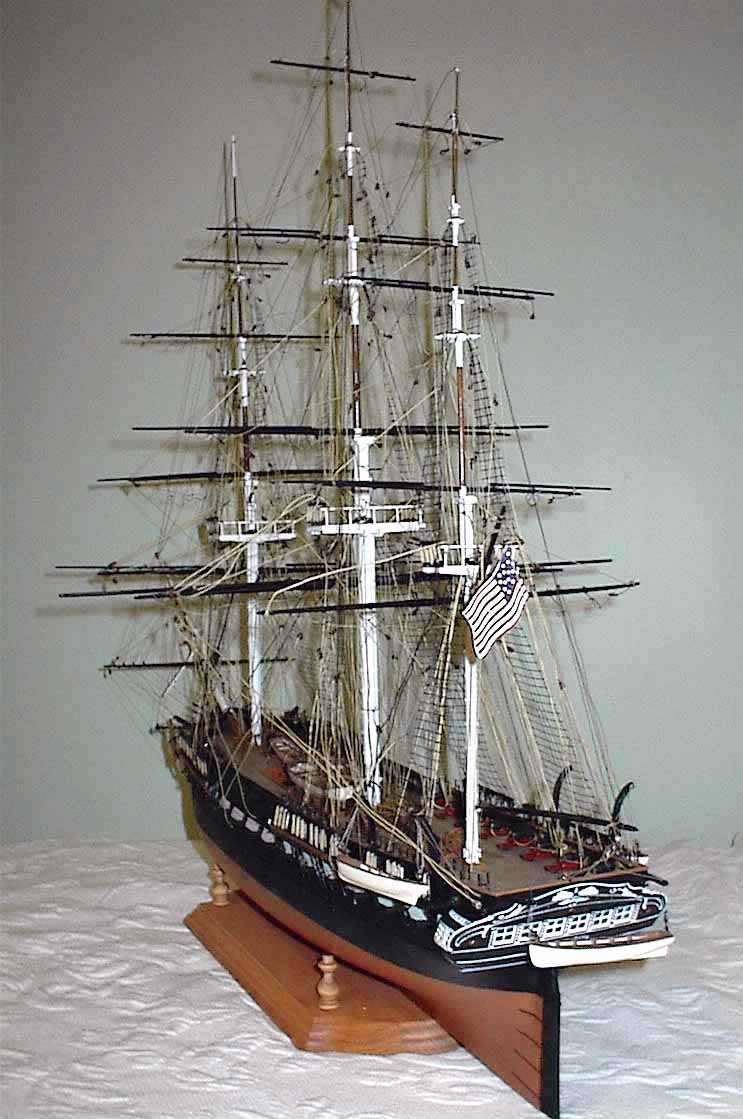
The USS Constitution is Americas most famous warship. Launched in 1797, she was part of the birth of our Navy and constructed to combat the Tripolitan pirates and to prepare to defend our fledgling nation from European aggression. She was a frigate rated at 44 guns (though she carried around 50 most of her fighting days.) I will refer you to the Reference section for more history. To summarize, in her heyday of the War of 1812, the ship was undefeated in 3 major engagements with the British and this earned her lasting fame. In her 200+ years, she has been refurbished and restored a number of times and very little of her structure is original. She rests now in Boston and is the oldest commissioned warship in the world. For the modeler, the ship presents difficulties. Her appearance changed many times. Each captain made modifications to suit his whim including repainting, adding cannon, etc. There are no photos of course so we have to rely on written accounts and paintings by artists of the time. In reading the book, A MOST FORTUNATE SHIP, by Tyrone Martin- you see that even from week to week, the ships appearance changed to disguise and cloak her identity as well as the effects of battle damage altered her look. And the worst part is that, as she appears now looks nothing like she was in her fighting days. I had to make decisions from the start on how to portray her. I wanted a representation of her War of 1812 look so decided on the following: Copper bottom
I decided to record the build in a day-by-day diary format- something
I have never done but thought for this complex model it would be a good
way to show progress.
|
|||||||||||
| THE KIT:
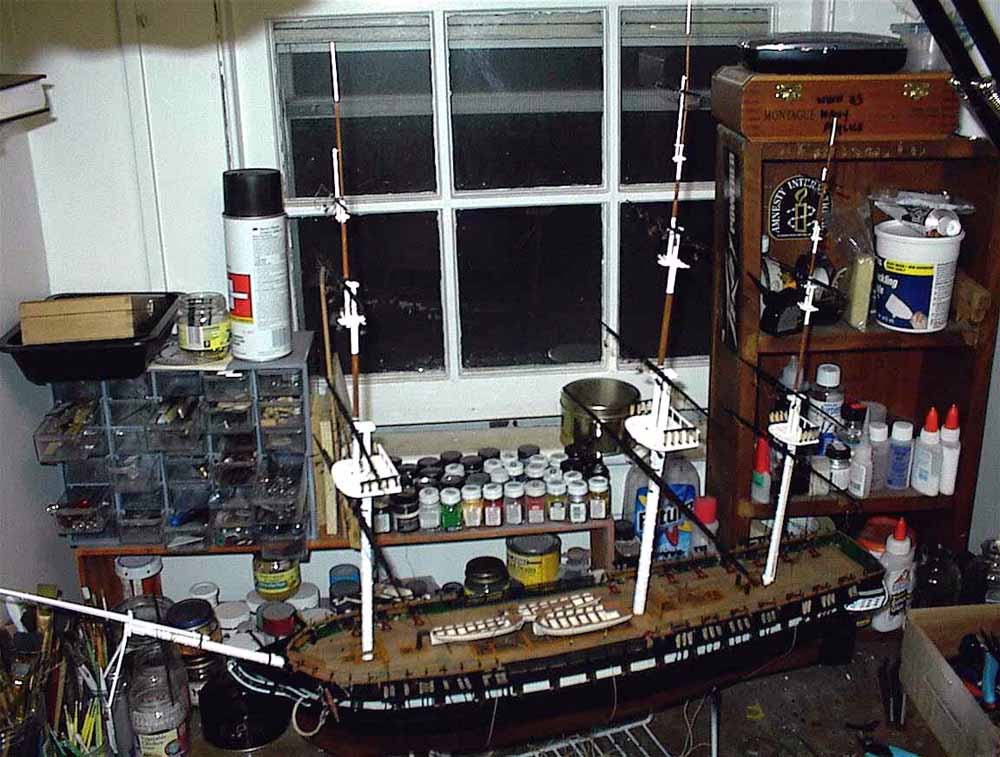
Revells big Old Ironsides kit has been in production and continuously sold for over 40 years. The kit was designed from a detailed model built by the crew of the ship and presented to legendary captain Isaac Hull after his tour as commander was over. It now resides in the Smithsonian. The kit contains over 1600 parts and includes vac formed sails, 6 different rigging lines in black and tan, a foot long anchor rope, and pre-formed shroud/ ratlines. My kit was a newer boxing and it really shows its age. Some parts were short shot like the hoops on the lower main yards leaving me a smaller and more fragile attachment point. Many of the blocks were completely unusable due to being molded over their openings! If you have an older release- you should be fine. If you get a newer kit, be prepared to clean up and sand every single part. Still, the kit is a masterpiece and when done is in museum scale 1/96 (1/8 inch = 1 foot) measuring around 38 inches from bowsprit to stern and about 26 inches tall to the top of the mainmast. The main yard with stunsail booms is about 15 inches wide. |
|||||||||||
| THE BUILD:
Feb 17:
Feb 18:
|
 |
||||||||||
 |
|||||||||||
| Feb 19:
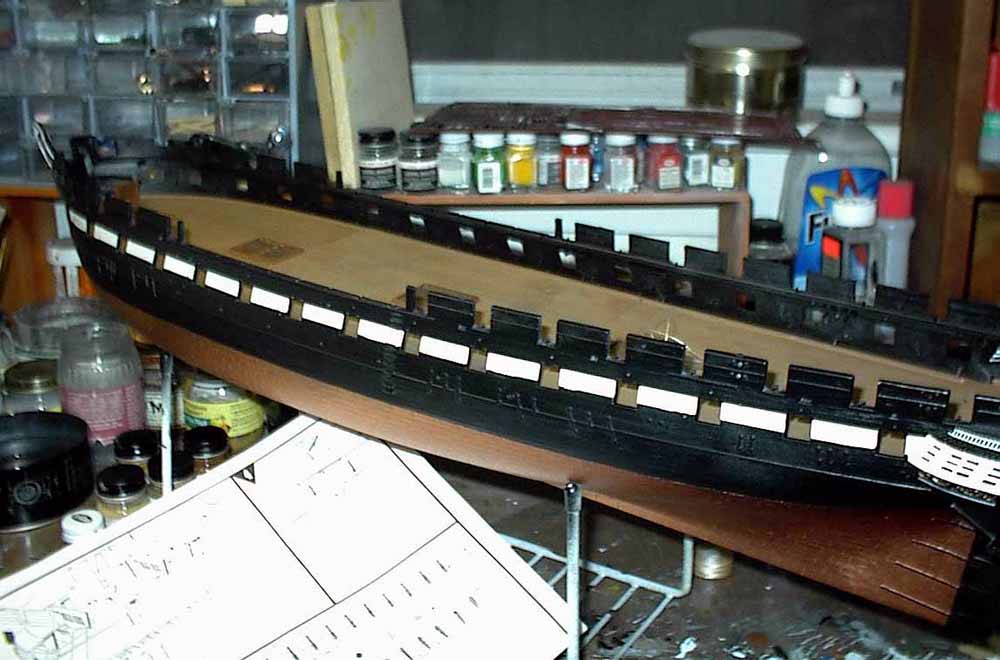
Carronades were drilled out and sanded. Painted same as above. Painted the carriages red/ brown mix as above and when dry attached the carronades to their mounts. Used a black Sharpie marker to accent the front decoration on each mount. I also took the two hull halves and after cleanup of the parts- I clamped them together (see pic) and placed the hull in my homemade hull holder- and upside down dish drying thingie I stole from my Mom years ago I ran a lot of cement down inside the hull to ensure a strong bond |
 |
||||||||||
| Feb 20:
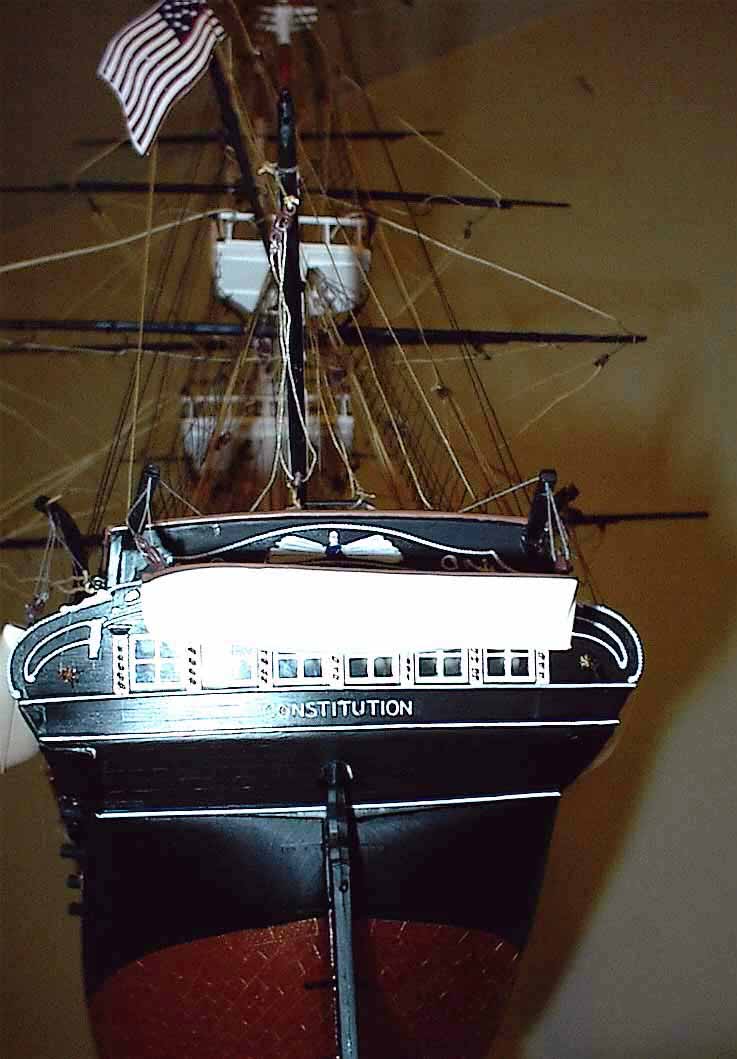
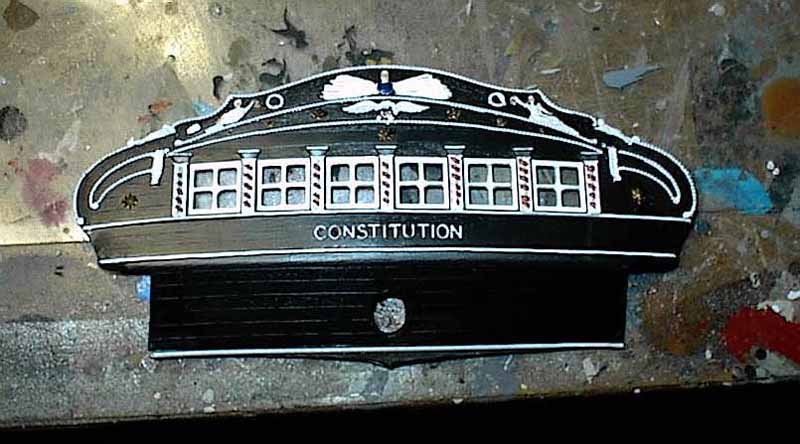
Two rudder halves attached to hull Stern Decorations- The very ornate decoration of the stern was accomplished with various paint pens bought at the art supply store. These are very good for thin lines. The raised lines would have been very hard to paint with a brush. This worked great with no masking needed- just a steady hand! Gold accents were added with a brush and other highlights added. Kit supplied clear acetate for windows was attached with Elmers glue. |
 |
||||||||||
|
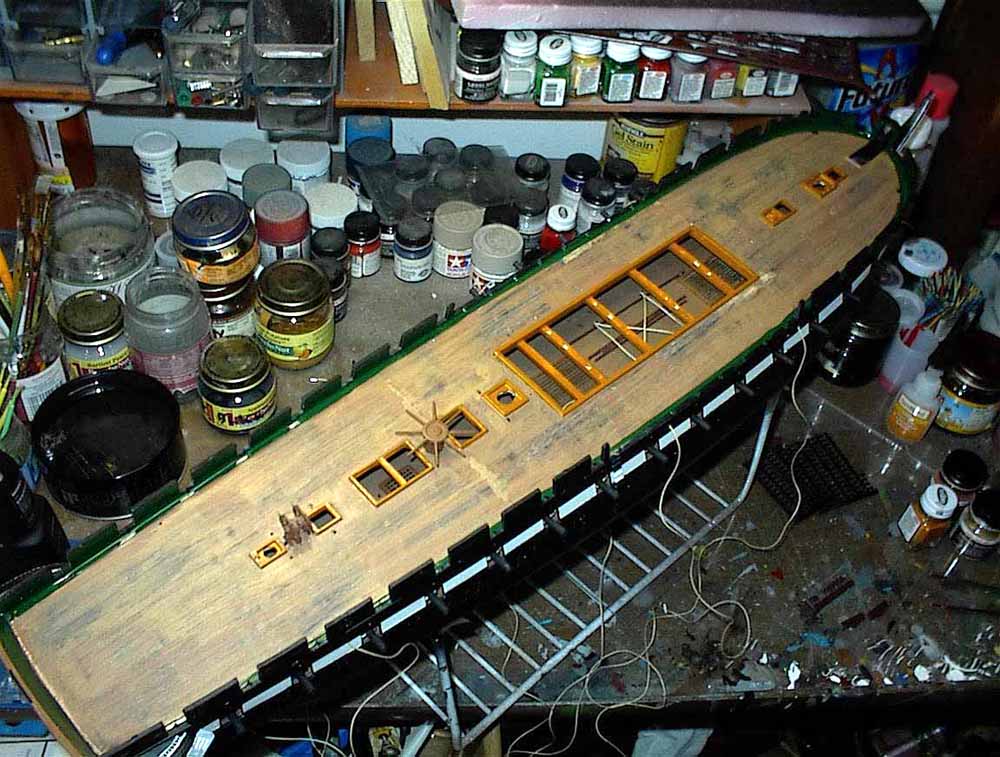
Saturday Feb 21: Time to paint the hull! After a long cleanup session of flash, painting proceeded this way: Using spray can- gun port stripe was painted Camo Grey rather than white-
This stripe weathered a lot due to the salt water - the pale grey looks
just right.
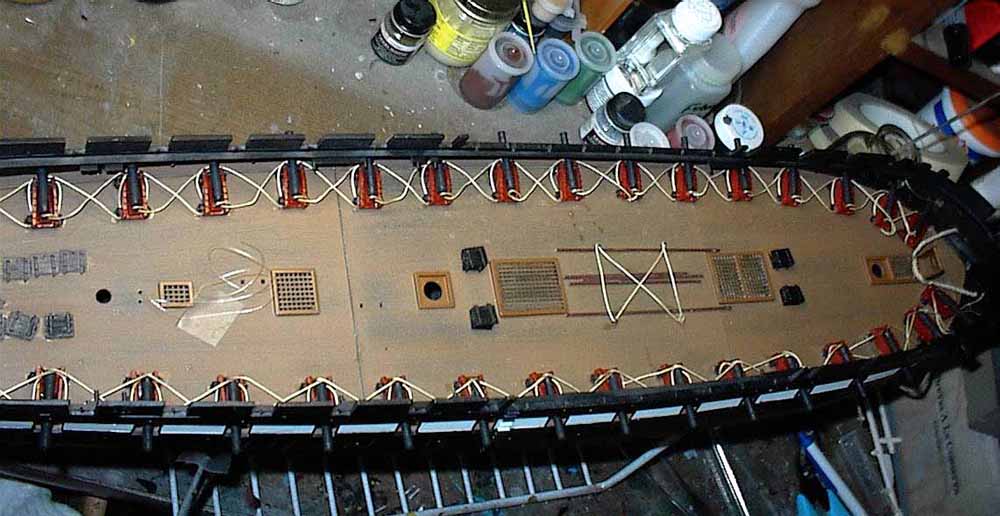
Also painted the lower gun deck (3 pieces) with flat black, then when dry sprayed Dark Tan. When this coat was dry I misted on top a Sand coat. When all was dry, I used various sandpaper grits to bring out the undercolors and replicate a worn wood deck. The grates on this deck were painted flat brown with black screens. When dry the gun decks were glued into the hull. I did not worry about these deck seams because they would not be visible enough for me to deal with them. Finally, I used the paint pens to detail the bow with gold for the inlays. Sunday Feb 22:
Last step for today was to scuff the wheels of the long gun carriages on sandpaper and then CA glue them to the gun deck. Feb 23:
Feb 24:
Feb 25:
Feb 26:
|
|||||||||||
Carronades CA glued onto deck edge pins. Carronades rigged as per instructions. Each gun is tied to eyebolts (replaced with Micromark brass pins- kit plastic eyebolts are too fragile under strain) Deck edge pinrails installed and painted flat brown. 3 ships boats on deck assembled and tops painted military brown. Boats attached to cradles and then rigged and tied down as per instructions. Sunday Feb 29:
Mar 1:
Mar 2:
Mar 3:
Mar 4:
Mar 5:
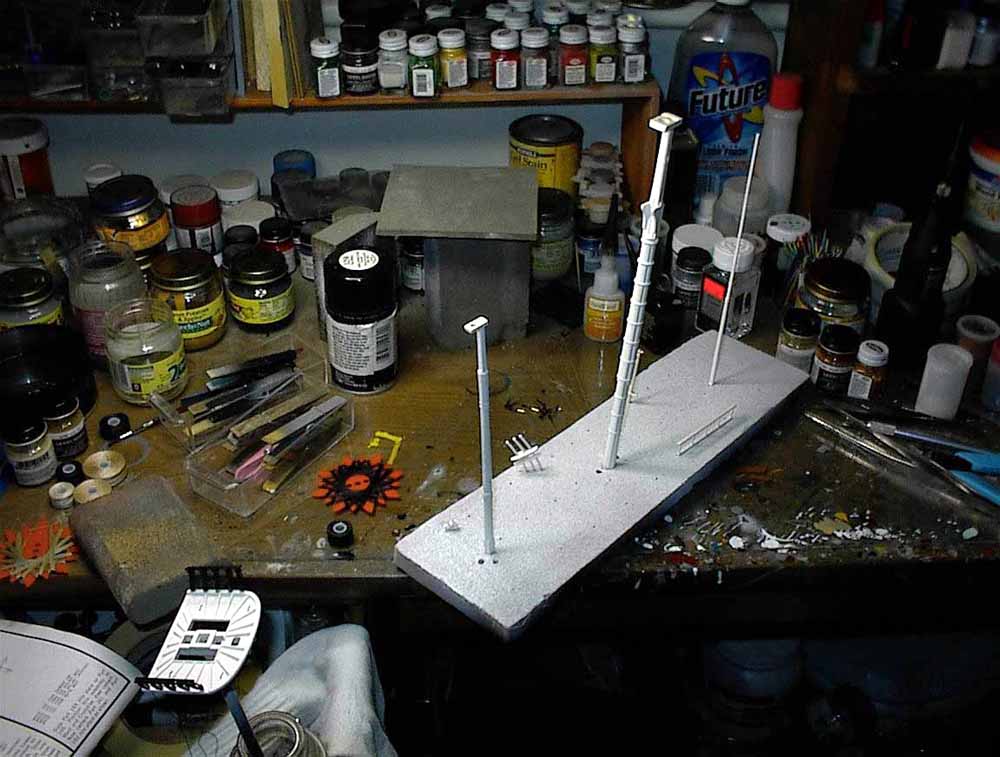
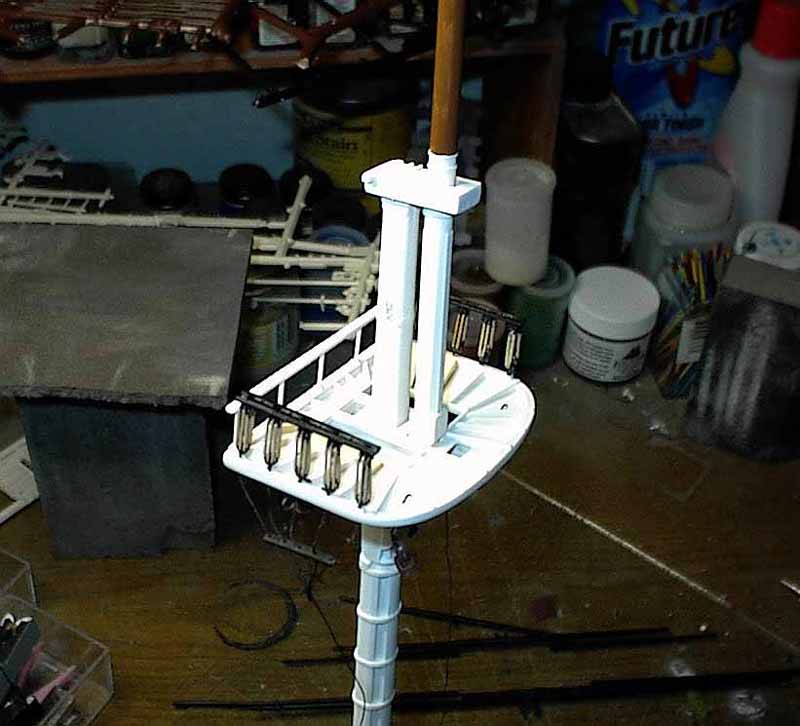
Assemble foremast with brass rod trapped between halves for added support. Clean up all foremast parts including fighting top and crosstrees. Spray all flat white. Assemble and paint tan rope on top deadeyes. Rig futtock shrouds
and lash. The middle long line will tie off at opposite hull side
eyebolt later after ratlines are added. Had to look ahead to see
where these would tie!
|
|||||||||||
| Saturday Mar 6:
Spent a lot of time at the bench today. Assemble and clean up foremast yards. Lots of sanding required. Installing stirrups and footropes was a tedious and aggravating exercise. I am not too happy with the way they look but I did my best. Then tied blocks as noted to each yard. Sunday Mar 7:
Mar 9:
Mar 10:
Mar 11:
Mar 12:
Saturday Mar 13:
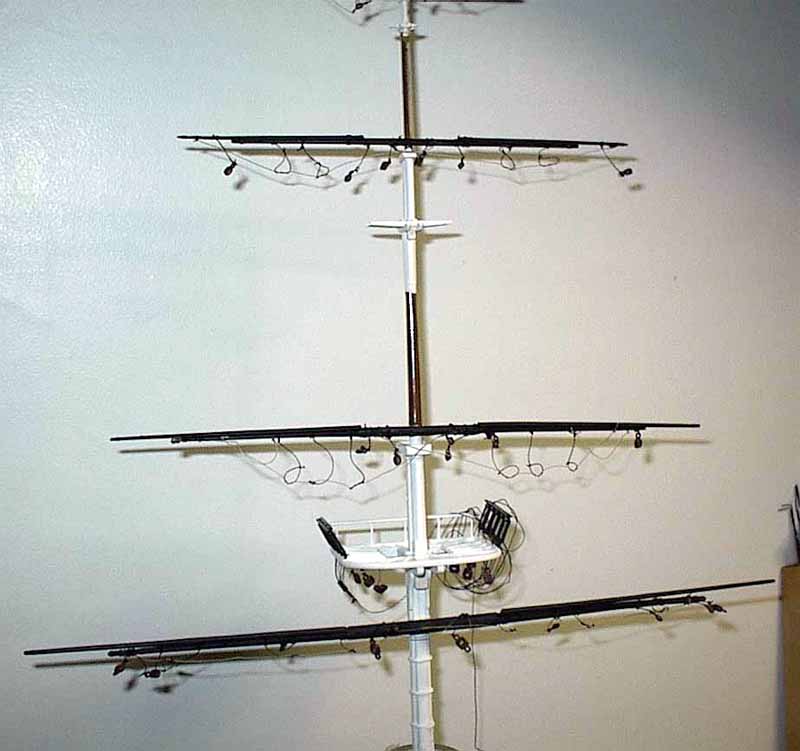
Saturday night I finished the main yards, glued them to the mainmast and then installed the mainmast into the ship. Sunday Mar 14:
Late Sunday the mizzen was done and installed into the ship.
|
|||||||||||
| Mar 15:
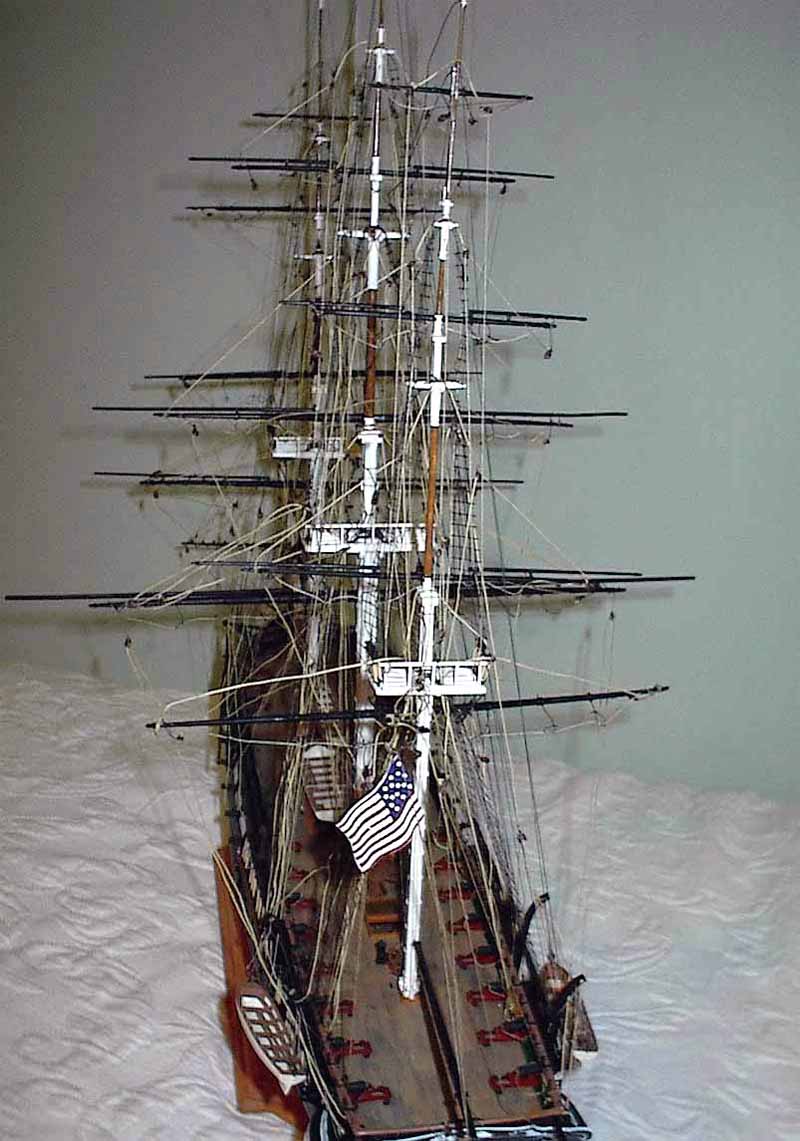
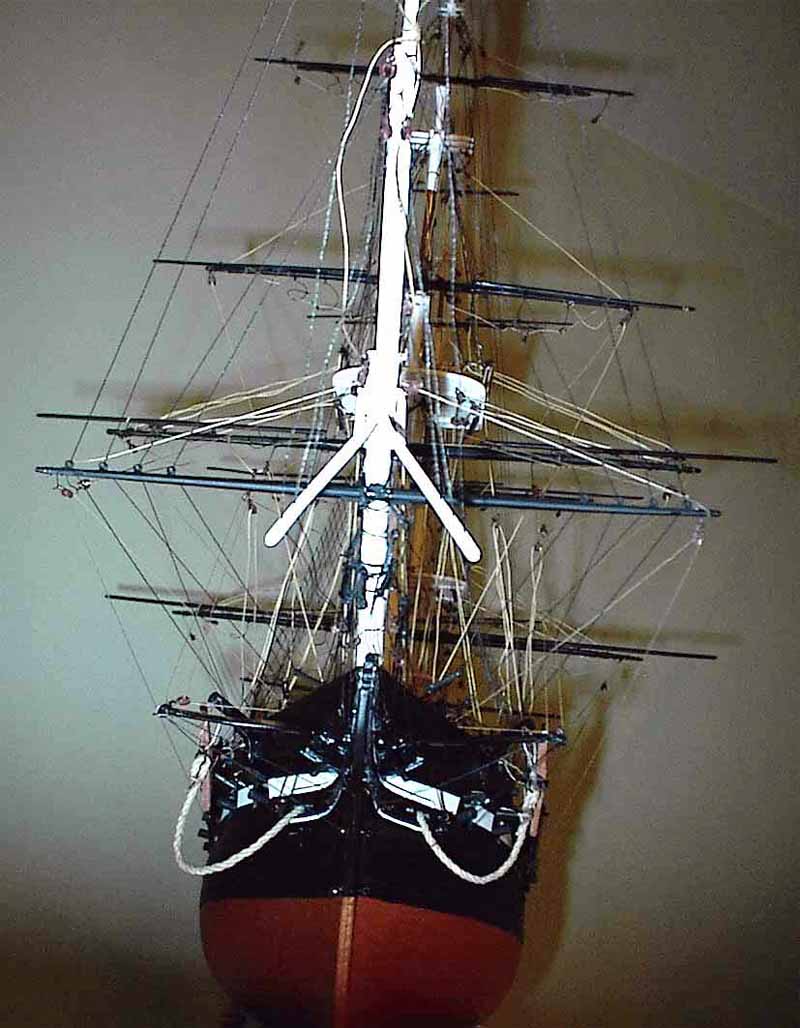
Spent some time touching up all masts and yards- especially the yards had to be touched up with black where some CA left frosty marks. I cut out the lower ratlines and tied them to the mast tops. The ends thread through the open, unglued deadeyes and are tied individually then secured with a drop of CA. The futtock shrouds were threaded through the ratlines and tied off on opposite sides of the hull to eyebolts on the deadeye braces. Mar 16:
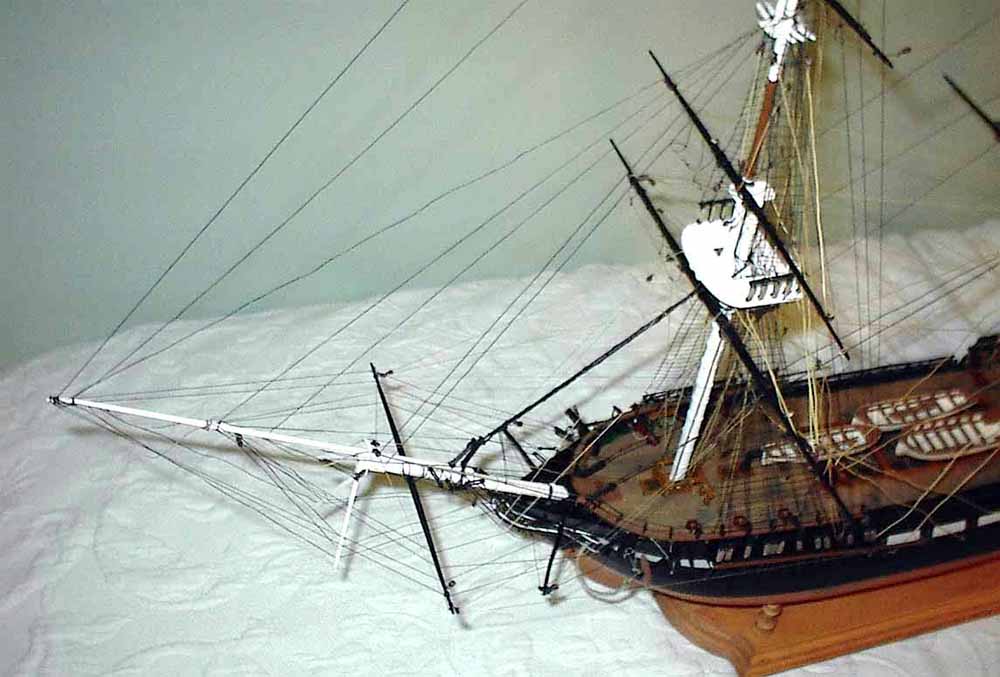
The rest of the ratlines were installed - these do not tie at the crosstrees but are just threaded through. They tie as the others do at the deadeyes on the masttops. Next it was on to the standing rigging starting with the bowsprit and head gear rigging. 12 small A blocks were tied to the jibboom, bowsprit and yard. Also tied the pulley contraptions to the knighthead and bowsprit. Mar 17:
Mar 18:
Mar 19: SNOW DAY!
Also rigged the jibboom stays and boomkin guys. Saturday Mar 20:
Fore and Main jeers and halyards are done. Sunday Mar 21:
DISASTER: snapped off the tip of the jibboom along with 2 stays not too hard to CA glue the tip back in place- no other damage- expletives start to fill the air along with a crazed laughter I decided to skip sheets and clew lines since these were related to sails- I felt I could skip these. Looking ahead to ALL the rigging left to do- I felt these lines would not be missed. I moved on to what are called lifts- these are used to move the yards up or down and all are tied to yard ends through blocks on mast then down to masttop deadeyes and pinrails on the deck. I finished the royal and top gallant yards on fore and main. These are not too hard since they tie off at the mast top deadeye rail and not to the deck. The main yards need some looping and blocks added so I will try these over the next few days. ANOTHER DISASTER: snapped off the top ½ inch of the mizzen mast crap- no lines affected- repair commenced. This lets me mention another point when into this rigging. The kit mast parts, especially the tops of the masts, are very fragile and bend too easily. With all of the tension that is to be mounted on the masts and yards, I have to be very careful when tightening a line. It is too easy to overtighten and pull something out of alignment or snap a piece. I have to resign myself to the fact that the lines are not all going to be nice and taut. Some will look better than others and some will just be a little slack- I dont see how there is a way around this so I have to accept it . Mar 22:
Also started to build a display case tonight. To have a fully made case of these proportions costs $450.00 that was my minimum quote. Too big and too heavy to ship through UPS- so I decided to try making my own. From Modern Plastics in my hometown of Bridgeport, CT I ordered 5 sheets of acrylic plastic at ¼ inch thick: 2 sheets of 40 inches x 28 inches
They also supply a bonding agent and a needle applicator. I laid the first piece flat on a table against a wall to give me a 90 degree angle, laid a smaller 16x28 piece against the wall and taped it flush. Using the needle applicator, you run a bead of this powerful cement on the inner joint- the initial bond is instant and then it takes about 3 hours to fully cure. Before I went to bed, I swung it around and put the other small side against the wall. So I have the U- shape ready for the other big side tonight looks good! Mar 23:
Lower sheets and tack lines also rigged. These lines were knotted inside the hull way back in the beginning of construction and have been hanging out for quite a while. I wondered when and where these would be used! These tie up to the fore and main lower yard through blocks and tie back to eyebolts on the sides of the hull. Also cemented another side to my display case- just have to put the top on and it will be ready for service. Also ordered a large piece of red oak for a base. My friend and highly skilled friend Doug Hamilton is helping me prepare a proper base. He convinced me to use screws to fix the case to the base and to permanently attach the ship to the base. We have not decided on a course of action but I am thinking of using the left over oak to make keel blocks and attach the hull to the blocks Mar 24:
Also, flipped over the display case and cemented the top of the case. One of my corners is not flush it must have not been secured tightly enough during setting. Oh well- that side will I guess be the back! Mar 25:
Fore and Main mast leech and bunt lines rigged- not to hard- they knot thru the blocks already attached to yards and then up to blocks under crosstrees- down to pinrails. Another tip: drill out all the blocks while they are on the sprues! Profanity reigns when you are ready to thread a line and you realize the block opening is flashed over or is just too small to get the line through. Drill them out before you rig them! Makes threading a whole lot easier and faster. Also attached studding sail booms to forward deadeye racks. Rigged the spritsail yard lift and brace on port side. Mar 26:
Saturday Mar 27:
Also completed all stern rigging. Glued davits to each side as well as supports for Captains gig. These need to dry solidly before rigging the boats tomorrow. Sunday Mar 28:
Then I spent an hour of touch up painting- repainting where CA glue was used a little to generously, covering areas where paint may have been scraped away on eyebolts, etc. I may go back and coat the heavier lines with water/ glue mix - I tested it on scrap line and want to see if it will tighten up the lines. |
|||||||||||
My odyssey is done
until I decide how best to mount the
ship to its oak base and attach the massive display case to the base
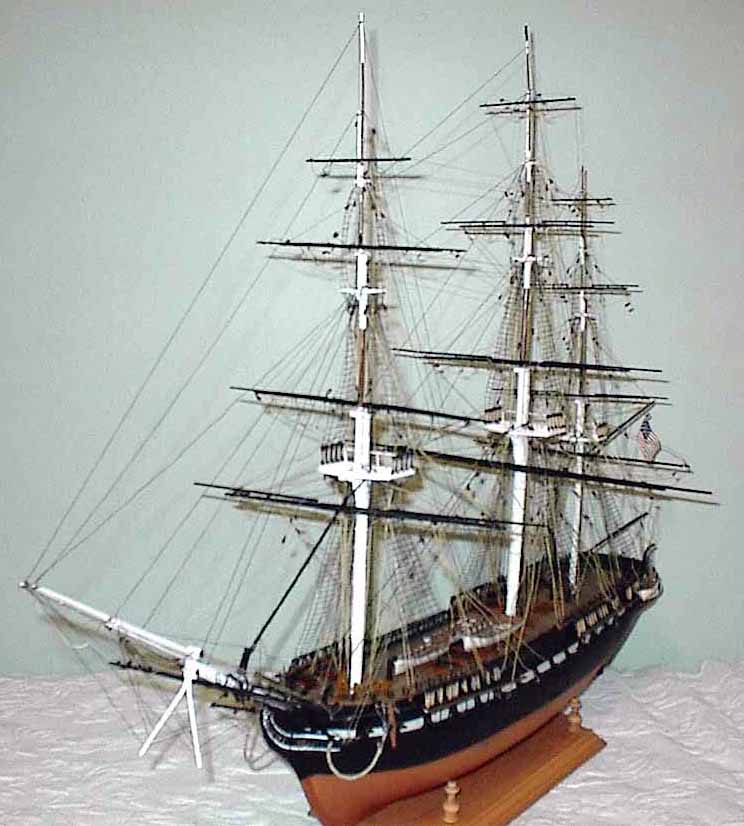
CONCLUSION What a journey- the kit is so detailed and the rigging so complicated (at least for me) it really makes you learn a bit about how a sailing warship operated. The kit is old and takes a lot of work- no putty needed but lots of sanding and shaping of kit parts. I know lots of people who have this kit in the stash. It is huge and will take a long time to plan, build and decide where to display but what a feeling of accomplishment! I hope I can take it to my club meeting soon and maybe a show or two It certainly will occupy the highest place of honor in my collection. I hope my ramblings can help out anyone from making the same mistakes and help you along when you decide to build this classic kit. Kit: Revell 1/96 USS Constitution
REFERENCES: www.ussconstitutionmuseum.org/index.html www.photovault.com/Link/Military/Navy/Ships/USSConstitution.html |
|||||||||||