by Peter Plattner
| Building the Bireme a Roman Warship
by Peter Plattner |
| It was on our November meeting of IPMS Austria when I bought
this already started small kit. Seems to be for trash some friends mentioned.
But I already fell in love wit this little item. The Heller Cadet series
of the 1960 provided some one-to-box scale kits of several sailing ships.
Amongst them this Roman Bireme. The scale of this piece seems to be arround
1/265.
The biggest challenge was removing the already applied thick colour coat without damaging the crisp surface details. This took me several hours brushing with more or less poison liquids. At least I only used the hull halves of the kit and the provided sails as moulds for my scratch experiments. Finally I had a lot of fun with this little gem and it took me only 10 months to finish. Pretty fast, as I usually need years for finalizing a model. |
|||||||||
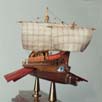
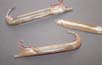
| The parts need a lot of scrubbing to remove the already applied paint. | Click images
to enlarge |
||||||||
 |
|||||||||
| Detailing the interior structure. | 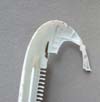 |
||||||||
| The hull needs to be reshaped inside and out. | 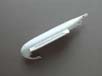 |
||||||||
 |
|||||||||
| I decided to replace the decks with a wooden one. For this purpose thin stripes of veneer from birch wood pastels and white glue was used. | 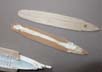 |
||||||||
| The tower was scratch built from plastic card. Primary color was applied with airbrush. The finish was made with artist oils. This tiny part was a lot of work. |  |
||||||||
 |
|||||||||
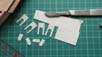
| You will need some patience for the rebuilding of the side rails with plastic strips. | 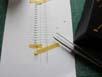 |
||||||||
| Some parts shown prepared for assembling | 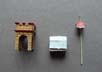 |
||||||||
| Other parts could not be added until the standing rigging was done | 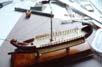 |
||||||||
| The Roman shields have been printed out on paper a coat of clear dope strengthened them. Small metal plates enhanced detail and artist oils gave them their final finish. | 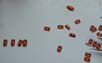 |
||||||||
| The side rails are slowly disappearing behind the shields. | 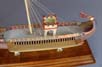 |
||||||||
| Paper tissue, white glue and thin copper wire served as raw materials for producing sails. | 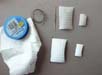 |
||||||||
| with copper wire the sails have been sewn to the yards. |  |
||||||||
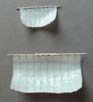
| Sails are finished. Now for the paintjob. I began with an airbrush and then several coats of artists oil. This let them appear like real fabric. | 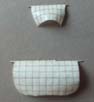 |
||||||||
 |
|||||||||
| Once again masking for applying paint. This piece is closer to a painting than a model. | 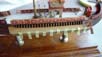 |
||||||||
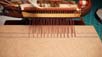
| Here are a huge number of oars awaiting prepared for painting | 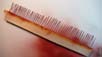 |
||||||||
| To align the oars a jig was required. | 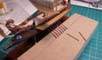 |
||||||||
 |
|||||||||
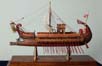
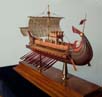
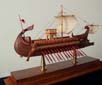
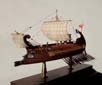
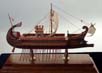
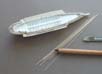
The finished model in different light conditions.
|
|||||||||
| Hopefully it gives a nice impression | |||||||||
More
of Peter Plattner 's work.
Updated 2012

© ModelWarships.com