Reviewed by David Waples
December 2012
| Before I get started I think it's important for you to know that I have vested interest in this kit. Ever since the Italeri PT-596 kit came out myself and others hoped that Italeri would release an earlier PT-103 class version of this boat. Back in April 2012 I saw the PT-109 prototype that Italeri displayed at the Nuremberg Toy Fair. I knew right away that I wanted to reach out to Italeri and see if we could assist them with this project. Who are "we"? We are a group of PT Boats enthusiasts who communicate and share information regularly on the PTBOATS.ORG web site. Specifically people who have published important information about the boat and really knew the subject. | 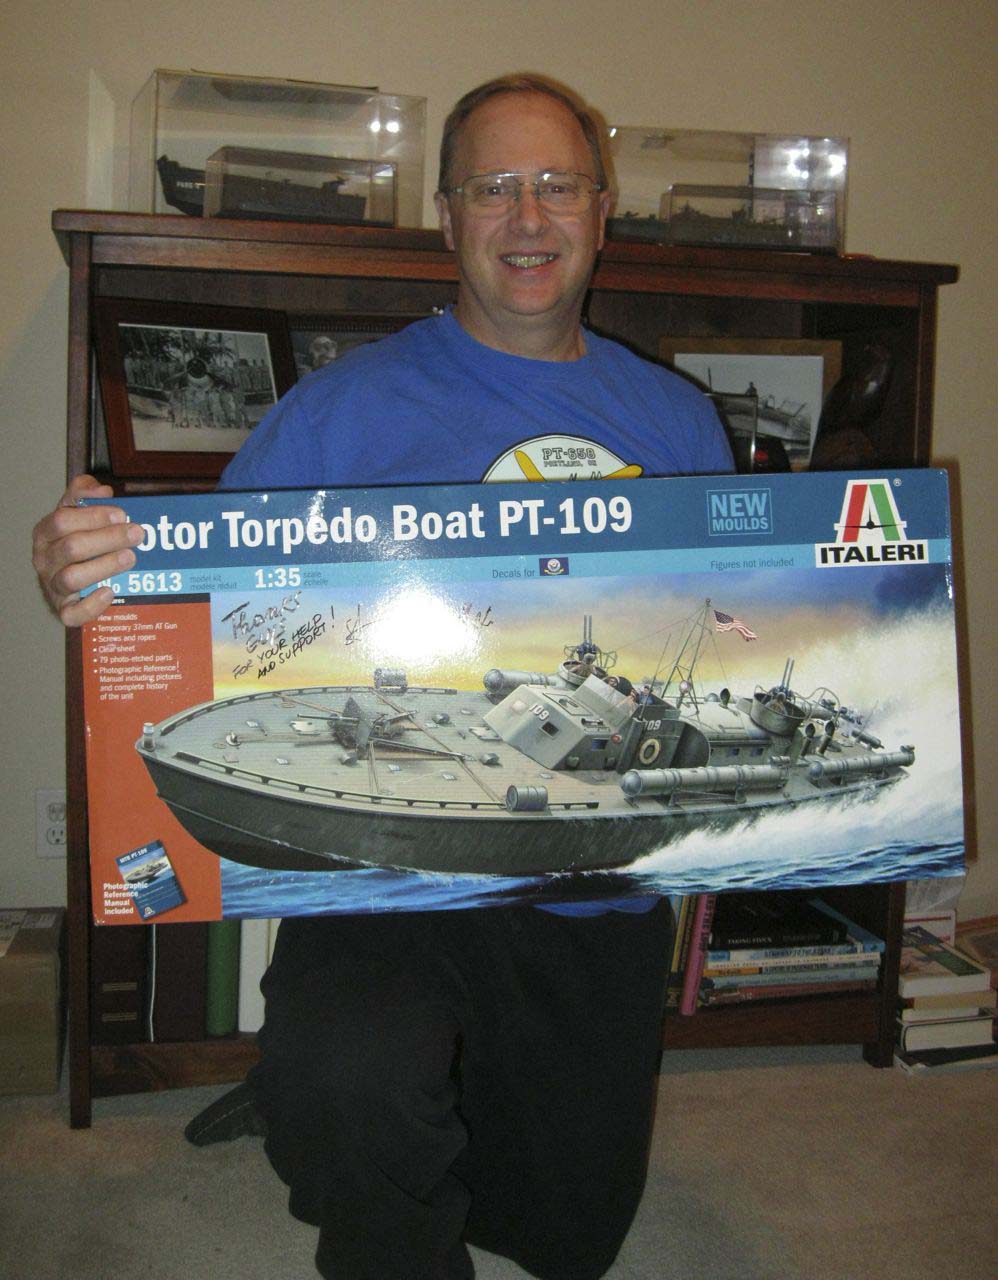 |
||||
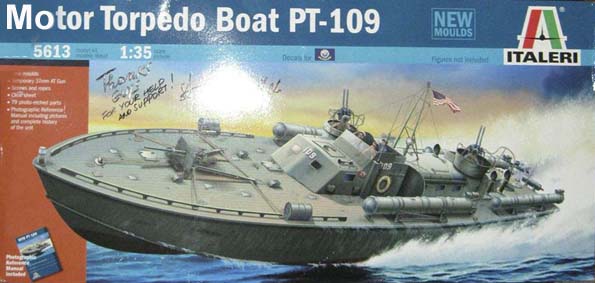
| I reached out to Italeri and was very pleased when they wrote back to me and said that they would appreciate our help. I am fairly knowledgeable about these boats and the story of PT-109 but I knew that we had some people in our group that could really do justice to this kit. We sent Italeri drawings from Al Ross of Coastal Forces noted PT Boat historian, and Dick Washichek keeper of the PTBOATS.ORG web site and Elco parts manuals, as well as CAD drawings created from these documents by Jeff Davidson who operates the PT-103 web site. To cap it off we solicited the assistance of Frank Andruss Sr. who maintains a PT Boat exhibit and Gene Kirkland who operates the the PT-King web site to share the history of this class of boat, John F. Kennedy, and PT-109. We provided Italeri with all the ammunition they would need to create an accurate and detailed 103 class PT Boat. With not much time to complete the project Italeri embraced the material and worked their tails off to get this kit completed by their deadline of October. With that in mind let's get on to the kit. Italeri was kind enough to supply me with a kit to write this review with. I'll use this photo as the box art. As you can see I can't get the stupid grin off my face. It's still there. The guys signed the box and booklet for me as well. The instructions do not call for the rigging scheme shown on the box. "New Moulds" is a very true statement. While some of the parts were from previous CAD drawings almost everything about this kit is new. | |||||
| HULL | |||||
|
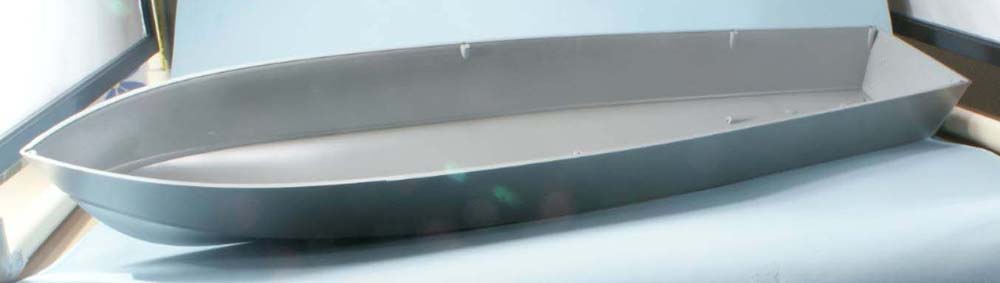
On to the kit. Let's start with the hull. At 1:35 scale this model is massive. As you can see it doesn't fit into my photo booth well. The plastic is thick and rigid with no signs of defects. |
 |
||||
| As you can see from this bow section the hull chines are separate pieces that glue into position. The bow has the correct down angle on the deck that you can see in the provided drawing as well as seen on the prototype. | 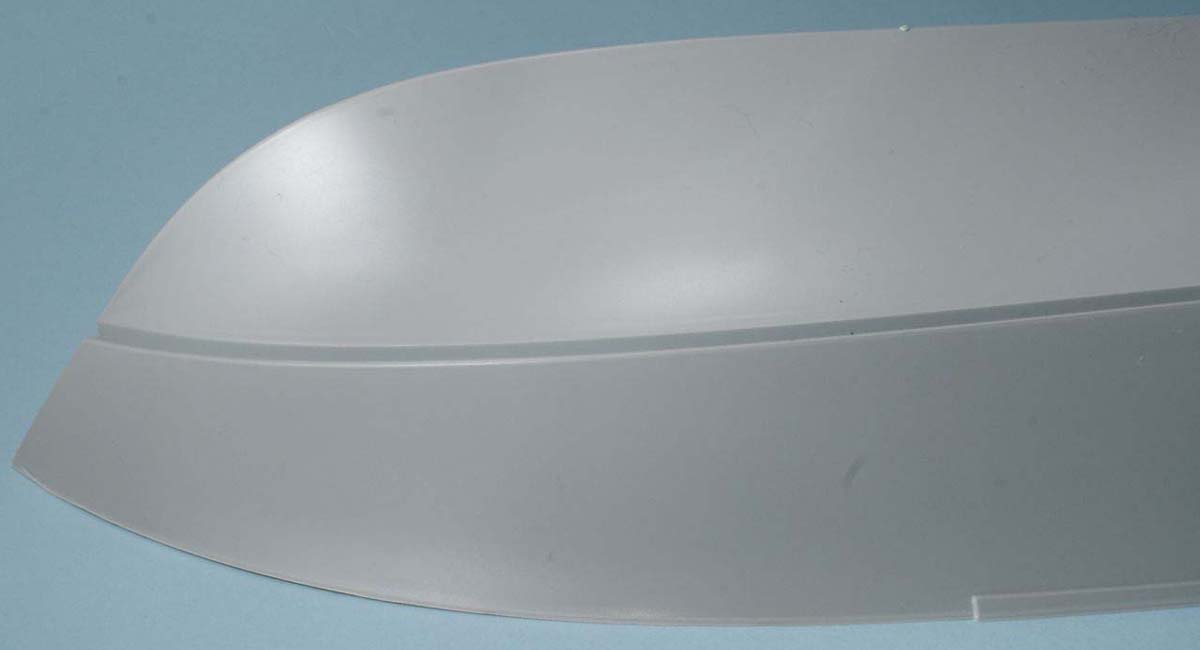 |
||||
| The stern though is missing the the slight up angle in the last 10 feet or so as shown in the drawing and visible on the prototype. This should be an easy correction to make with some after market styrene. I placed the hull deck side down on a perfectly flat surface and that's what it is, perfectly flat. Refer to the provided drawings and photographs to correct. | 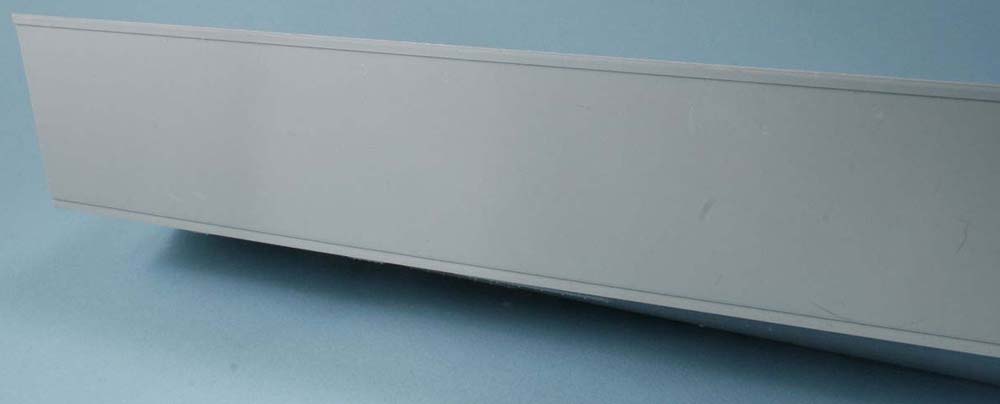 |
||||
| Here's a stern shot showing how nicely the hull is molded. | 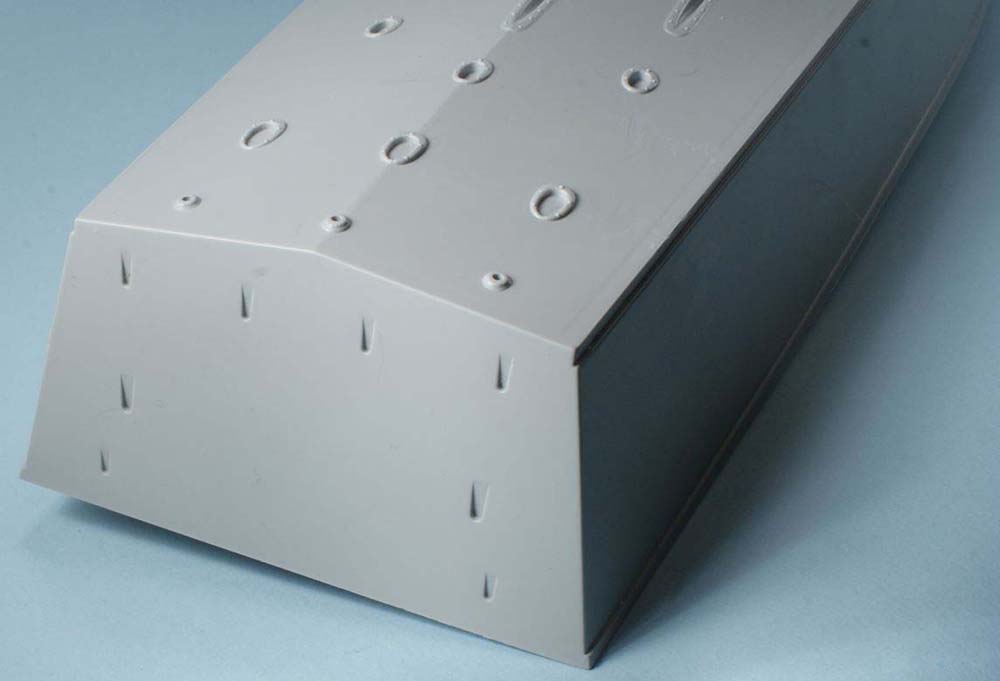 |
||||
| This is a view of the stern area where all the drive gear is installed. Very cleanly molded and true to the factory drawings. | 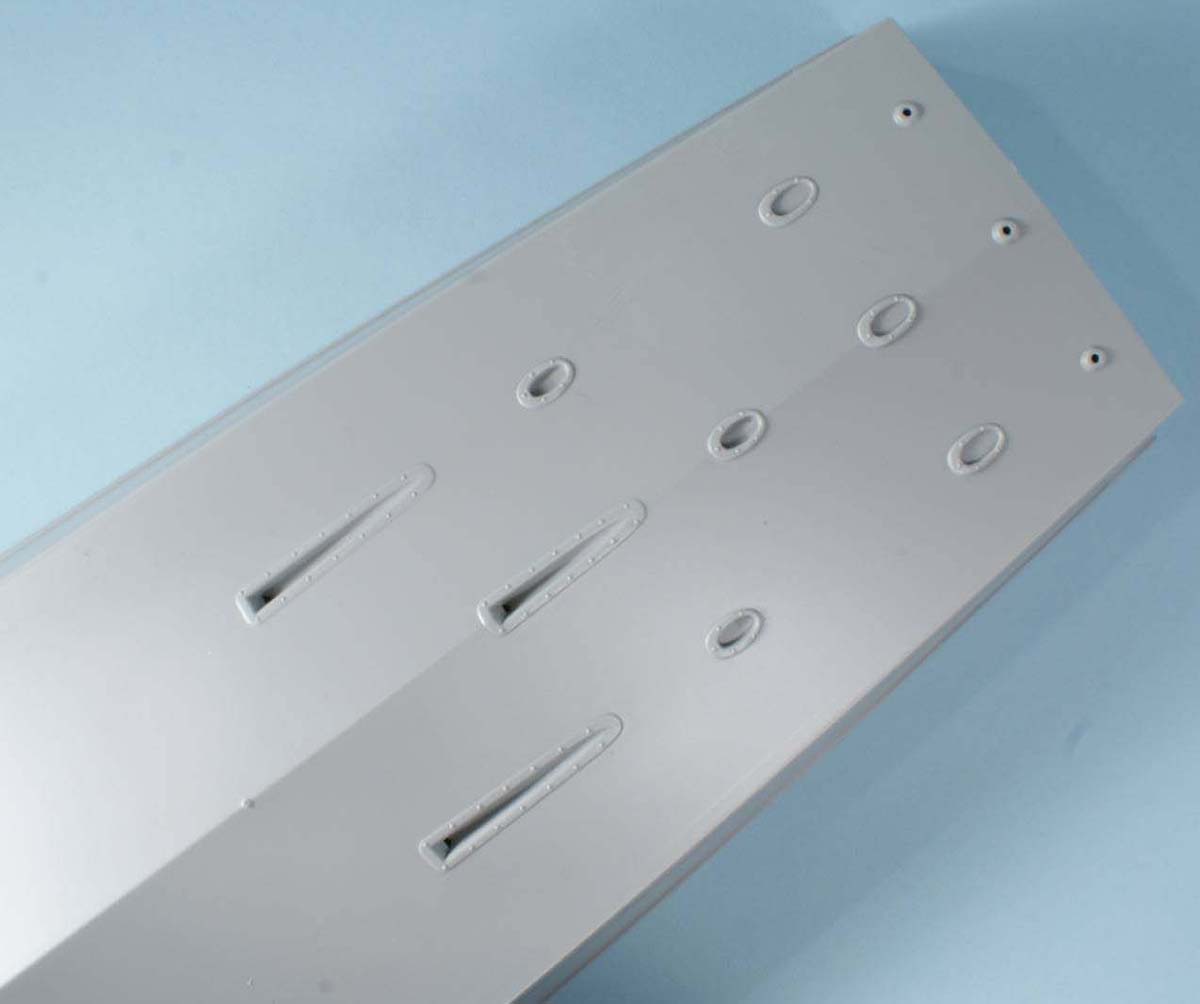 |
||||
| DECK | |||||
| As we go through the details in this kit keep in mind that we asked Italeri to include items consistent with 103 class boats that might not be present on the 109 at the time of her sinking. Examples of this are the horn mounting for the search light on the port side of the cockpit, the mast, etc. The following two shots show the deck which is all one piece which is Sprue B in the instructions. I hope that you are able to see the finely created deck plank scribing. The 103 class boats had all had planked decks which when viewed on pictures are very visible. Italeri has done an excellent job with this feature and it's something you'll want to preserve while building the kit. The rivets along the deck edge are a little over done. The modeler may want to consider sanding these off. The transom on the stern is not quite right. It should be one piece running side to side. The modeler may want to carefully remove the molded transom detail and re scribe. Italeri uses the same system for the deadlights as they did on their PT-596 kit. They use brass covering clear plastic. Note the mushroom vents and fuel caps all nicely and accurately molded as is the throttle linkage covers. | 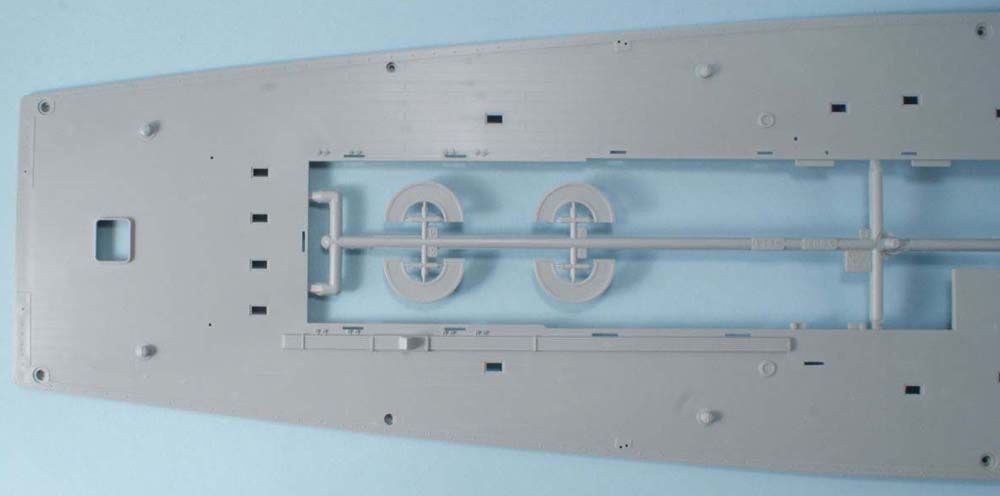 |
||||
| The bow section is also nicely molded. Note that with the exception of the small anchor rope locker hatch, the hatches can be molded in the open position without major surgery which is a plus if you wish to model some of the boat's interior. No interior parts are supplied with this kit. You will also notice the four mounting for the stanchions which are not included in this kit. But this is an important detail item and will be useful if you wish to model the boat as it came out of the factory. PT crews in the field almost never used these stanchions. What is missing is the location for the bow jackstaff bracket. PT crews in the field would occasionally mount their Union Jack (white stars on a blue field) on this jackstaff. The jackstaff bracket would be just behind the bit and the first large hatch. When adding this try to make it look like the stanchion brackets. The plans call for the deck to be screwed to the hull and caps are provided to cover the screw holes. | 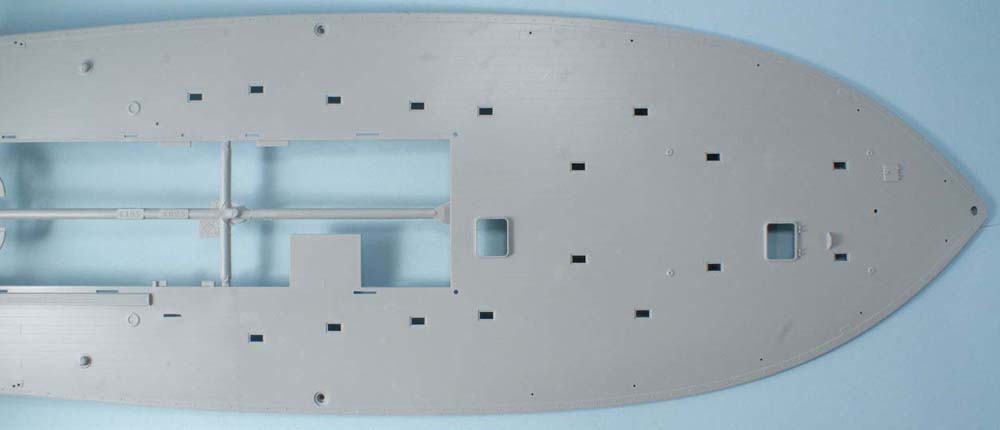 |
||||
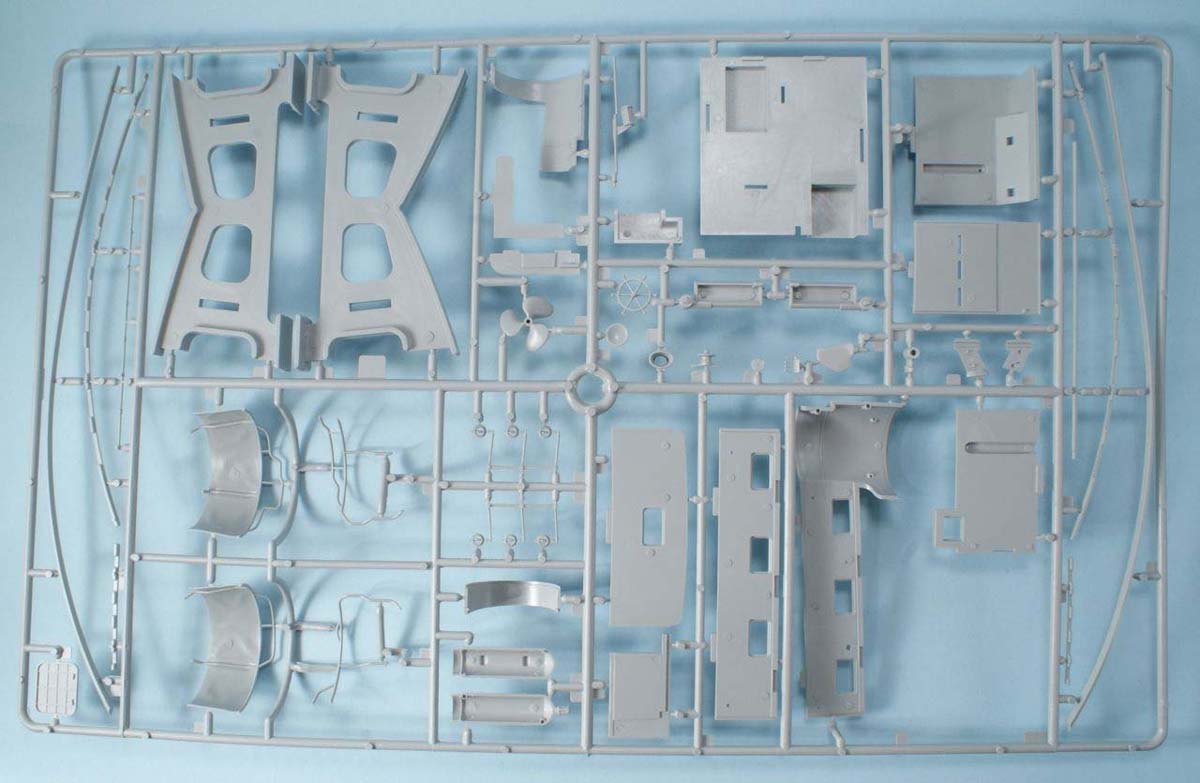
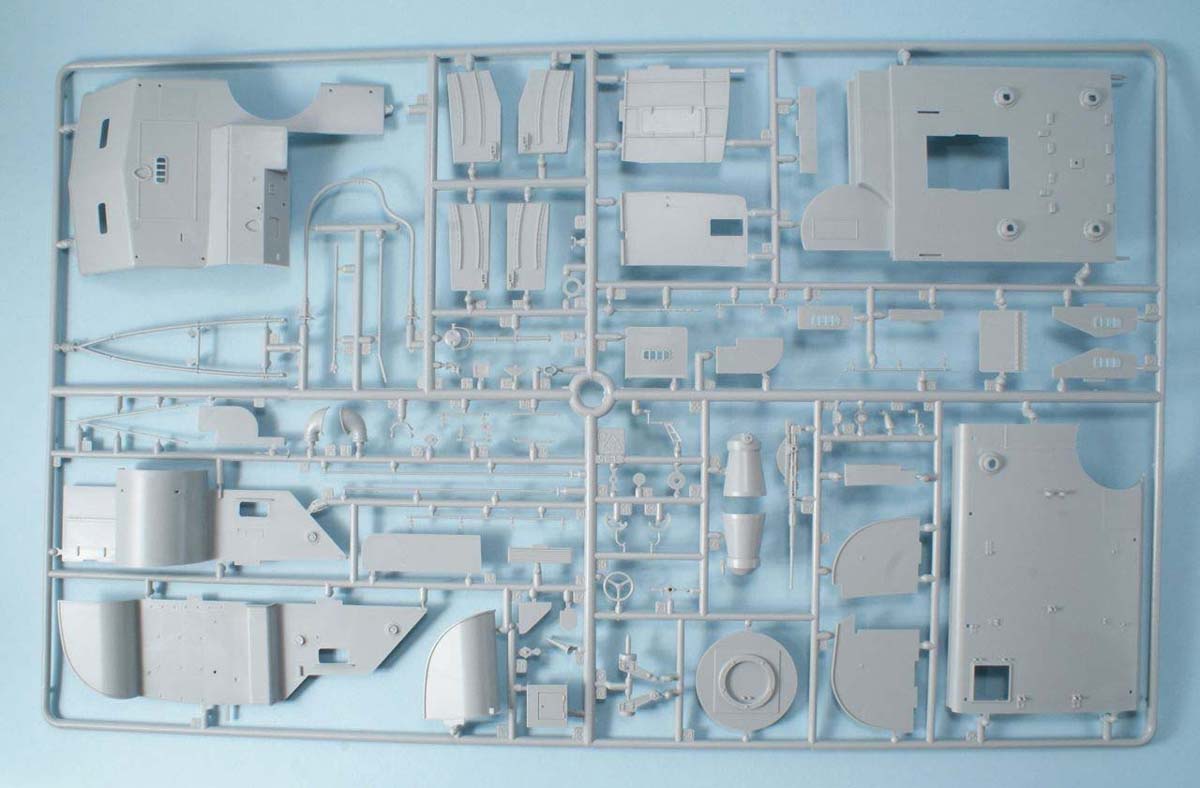
| SPRUE C | |||||
| Let's look at the individual Sprue's Sprue C contains the stand and a variety of different parts. There are two items that are not to be used with this kit and are grayed out in the instructions, one of which is the flag staff for the stern with the lantern. That is for later model PT boats. Again, all new tooling from the original kit. Notice that Italeri has provided with two different cockpit faces which is a hint of things to come with this kit. The correct piece for the 109 is the one with the window. All the parts are very nicely molded with no flash at all. I'll point out some important details later. | 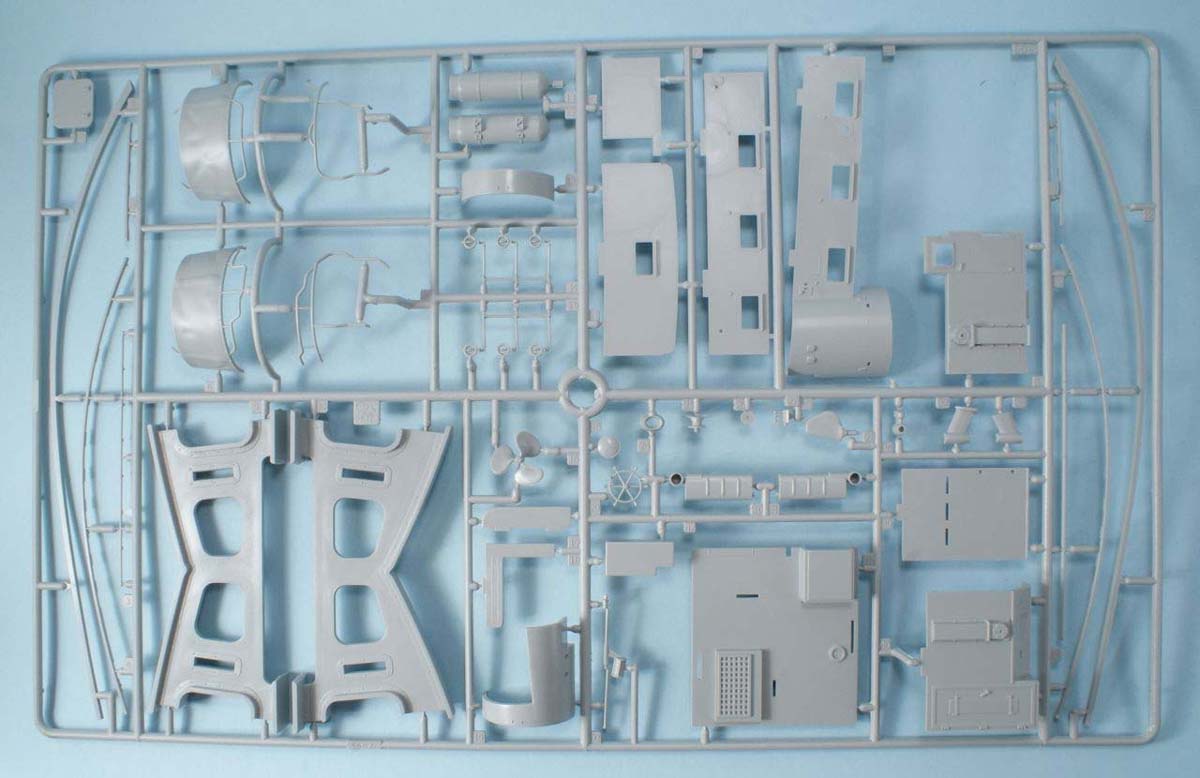 |
||||
 |
|||||
| Here's a nice view of the cockpit deck. Notice that Italeri has included the wood lattice in the decking. Also here is a nice view of the mufflers and spare cockpit. Take a look at part No. 27 which is the throttle quadrant. This was something I remember pointing out to Italeri. There is a locking mechanism which looks to me like a ratchet handle. Italeri made sure to include this detail. | 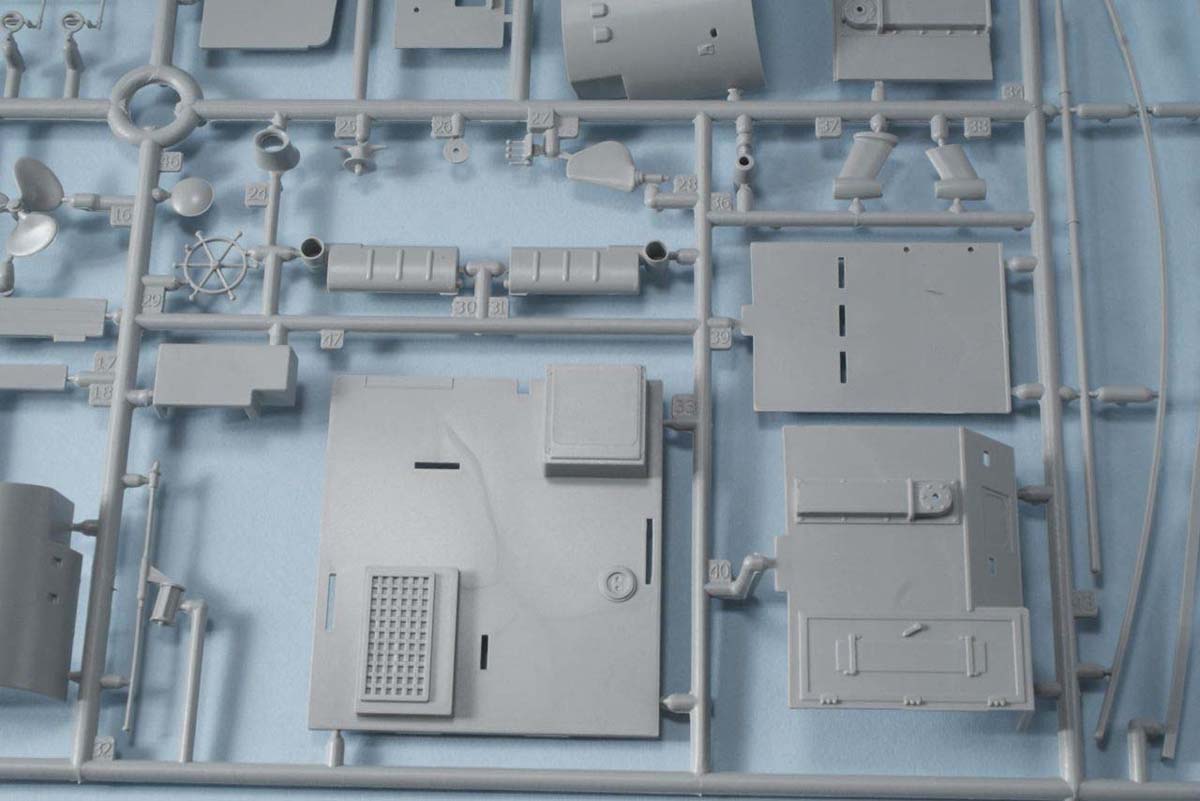 |
||||
| Here's a nice view of aft cockpit railing and spray shield. Note the ejector pin marks that will need to be removed. Here's a nice view of the exhaust valves. There's a little flash on the actuator rods so be careful when you clean those up. Up in the top right corner is a nice look at the hatch interiors. If you want to model the hatch in the open position all the detail is there for you. | 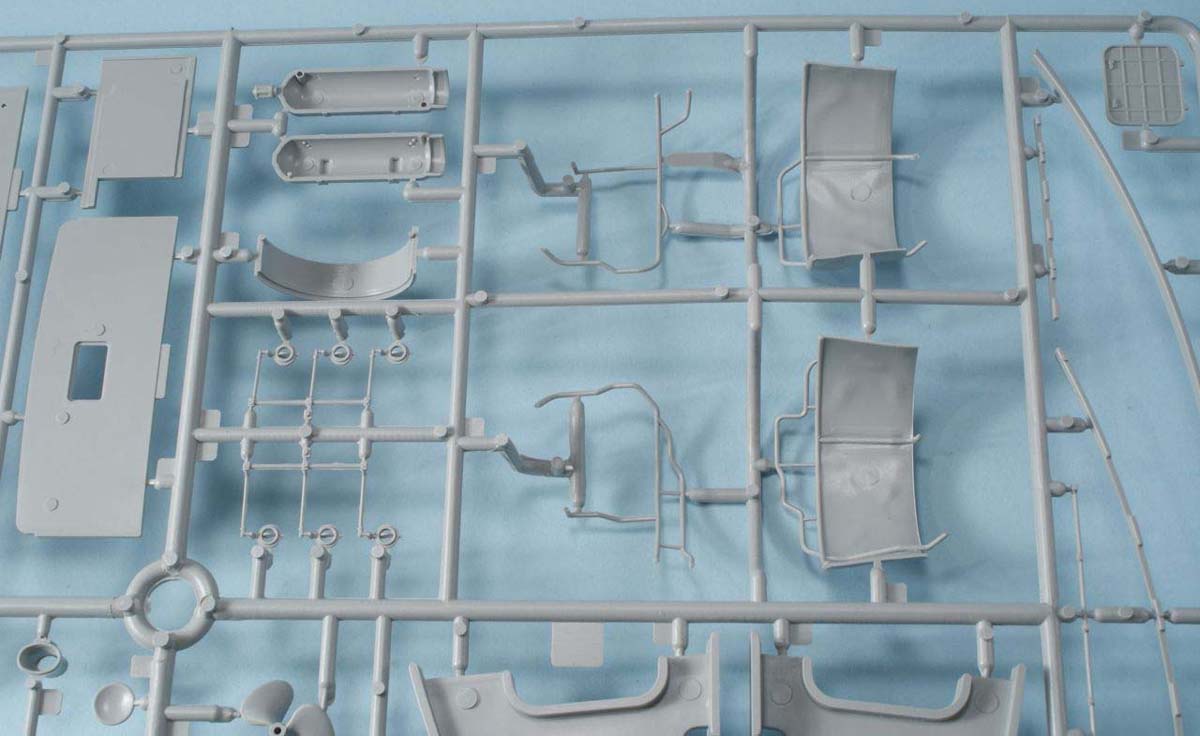 |
||||
| SPRUE D | |||||
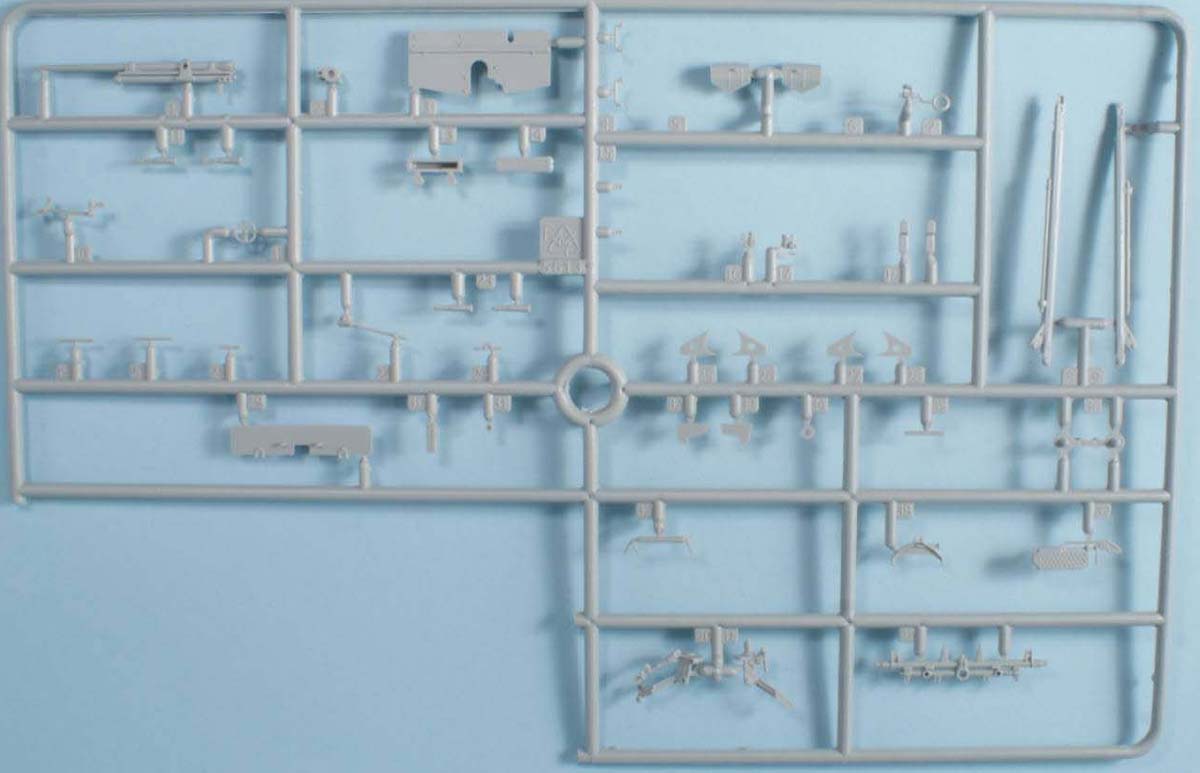
| Sprue D contains a mix of various parts including the Chart House, Engine cover, and an improved .20mm Oerlikon and mount that are exquisite. More later. | 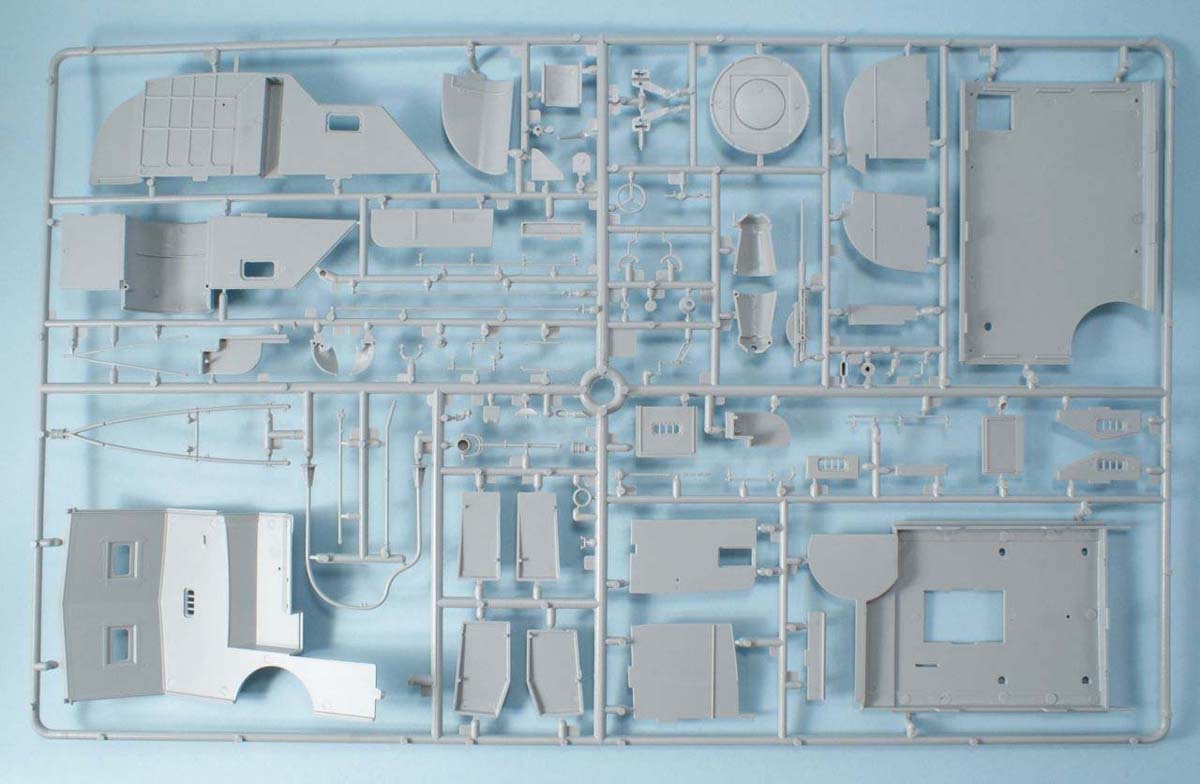 |
||||
 |
|||||
| Here's a close up of Sprue D. You can see the improved 20mm Oerlikon gun and pedestal mount. Looking at this sprue I see lots of little details brought to life from the parts manual and Jeff Davidson's wonderful CAD drawings. The grab bars are beautifully rendered as are the windows in the various deck fixtures. Another detail I see that I believe all manufacturers overlook is the aft horn (part 14). The search light mount is beautifully rendered. Look at part 70 (cockpit search light mount) and 71 cockpit light. These details have never been included in PT Boat kits before and they are true to the factory drawings and photographic evidence. | 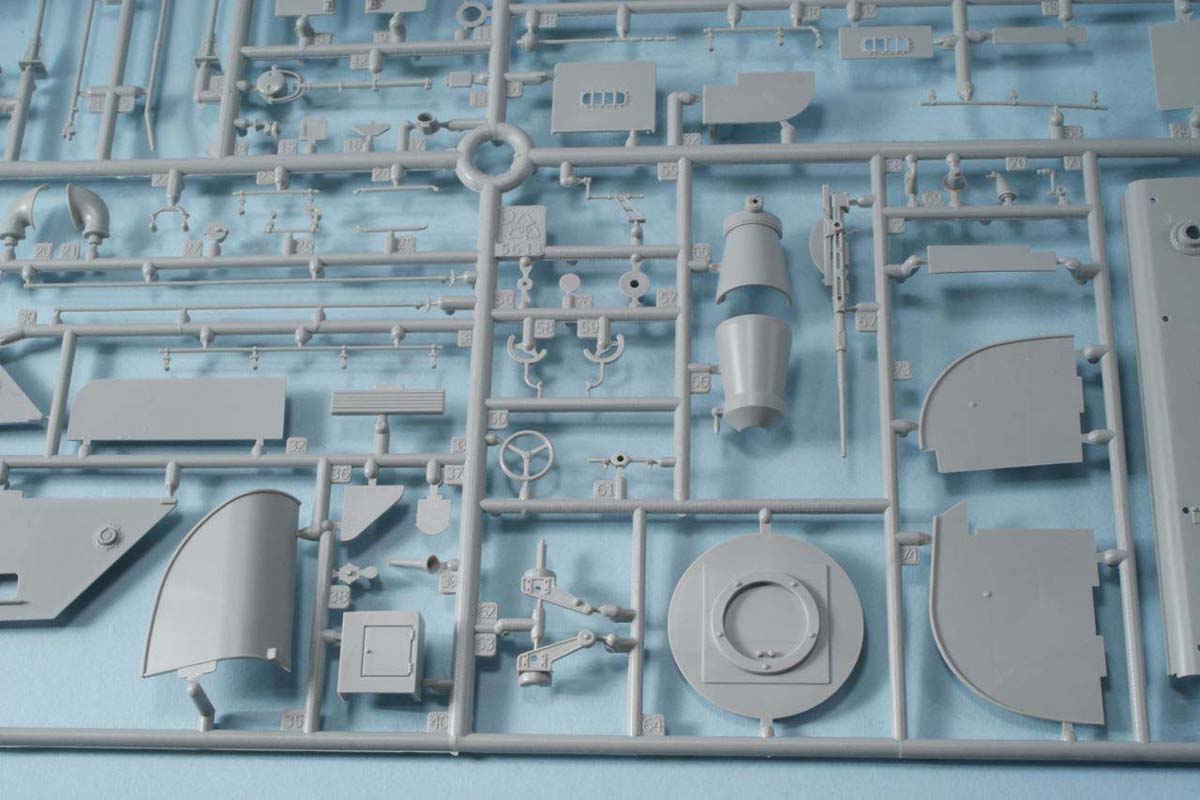 |
||||
| Check out the chart house detail. Improved on this kit from the 596 are the subtle curves of the chart house edges. Also notice the trip piece where it mounts to the deck. Another example of attention to detail. They also included the armor plate mounted to the face of the cockpit. Part 5 is the correct flagstaff for this model. There's no evidence that PT-109 had her classic A frame mast but Italeri included it. You can also see the nice detail in the torpedo tube mounts. They look just like the prototype. As you can see very little sign of flash. | 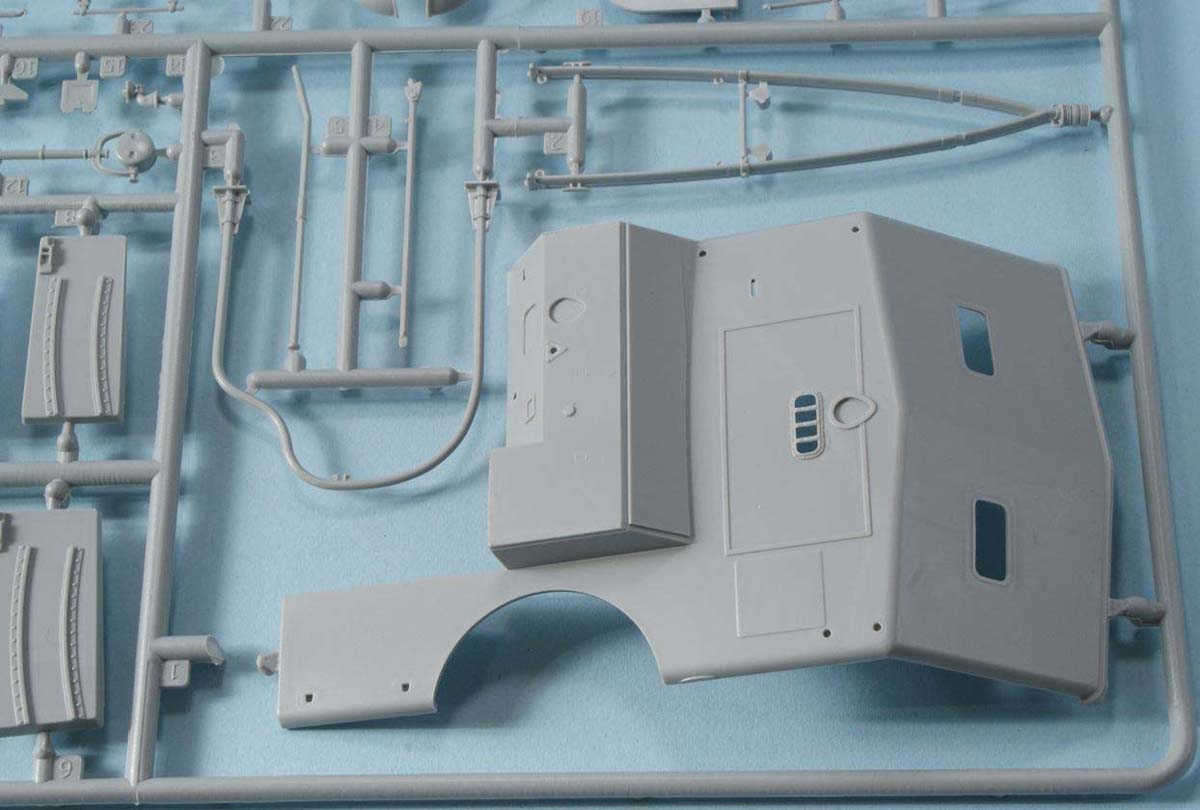 |
||||
| Here's a good look at the sides of the Chart House. Also beautifully rendered including the mounts for the vents. The port side of the cockpit has the hardware in place which secured the armor plating (more on this later). Notice the locker on the left side of the turret. Also notice the LUX pull (part 27) which mounts to the side of the Day Cabin. | 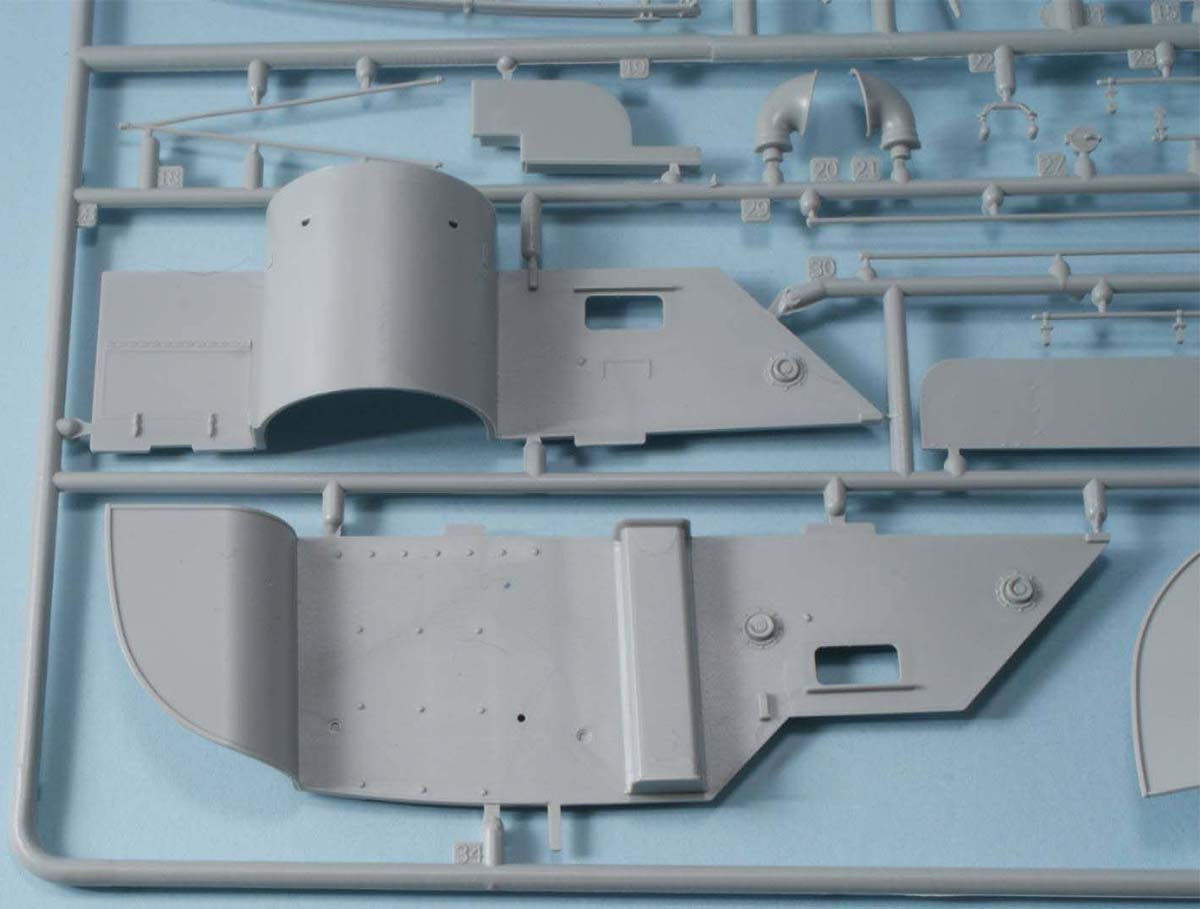 |
||||
| I threw this photo in to show you the search light mount for the port side of the helm. I don't believe that PT-109 had this installed but I could be wrong. A photo of the 109 cockpit shows one of the mounting holes but it doesn't appear to have a screw in it and there's no sign of the mount on the outside of the cockpit. But if you want it, it's there. | 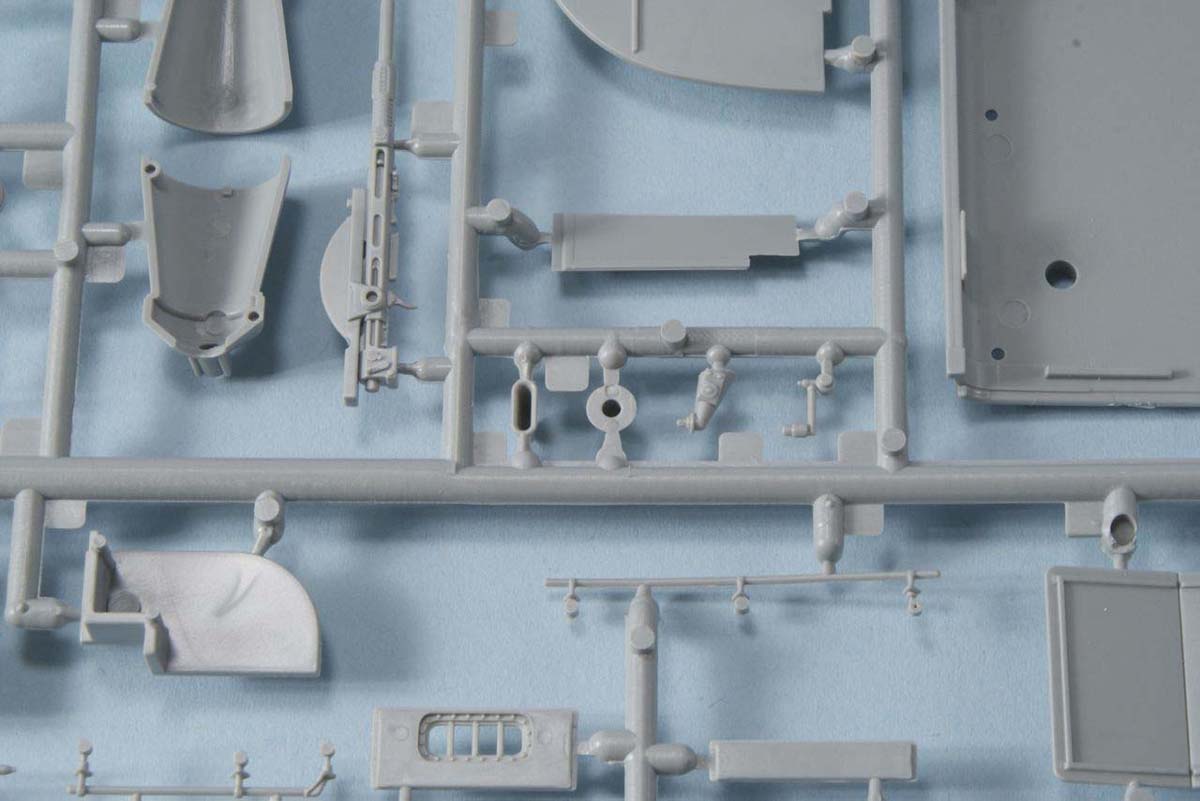 |
||||
| A couple of things here. Again another good look at the forward torpedo tube mounts and locations for the training hardware. You can see the telescoping antenna in the lowered position. Here's something I wanted to point out. Take a look at part 41 which is the aft side of the cockpit interior. Notice the correct frame work that Italeri molded in. | 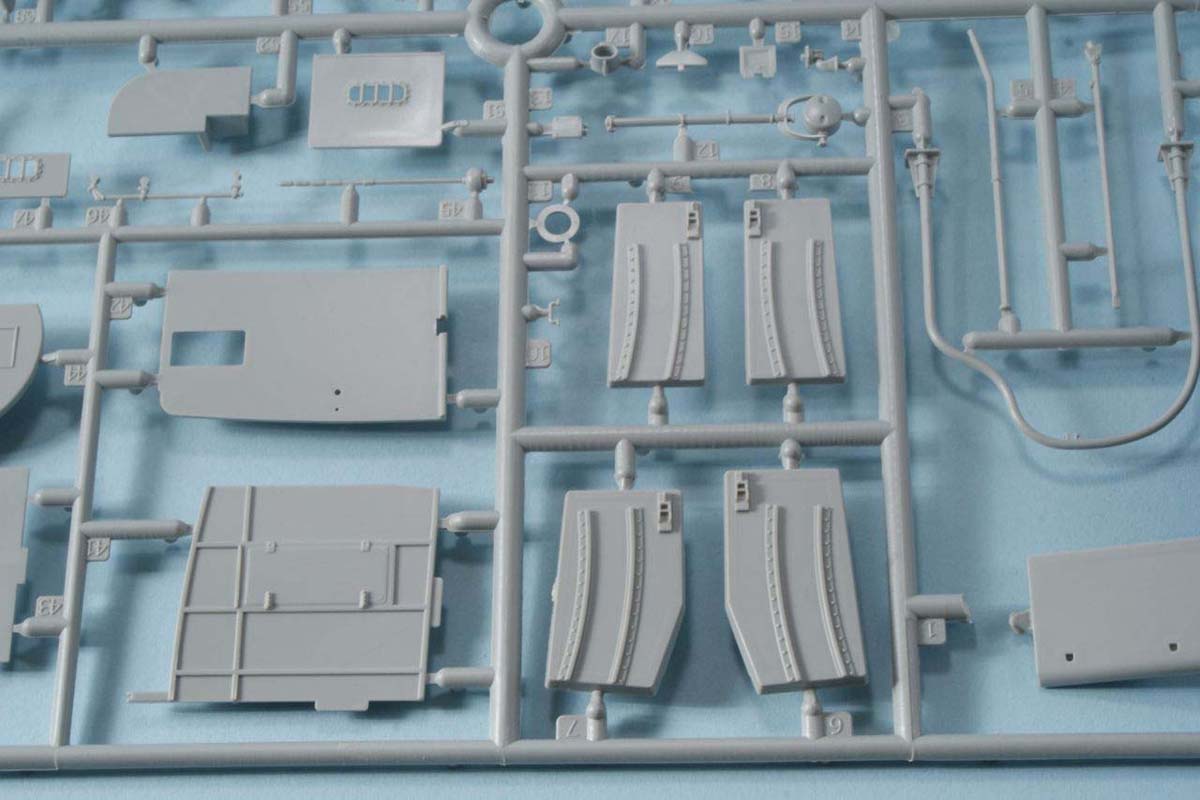 |
||||
| Okay, here's an error I wanted to point out to you. We didn't catch this until it was too late. The kit provides a small piece of photoetch to represent the armor on the port side of the cockpit. You can see the framework that Italeri molded in as described earlier. However for PT-109 armor plating should cover all this frame work and include the PE piece Italeri provides. Jeff Davidson has added new views of the armor plating on his PT-103 web site. All you will need to fix this is some thin sheet styrene cut to cover this area and replicate the armor plating. Add some rivets and you're good to go. Italeri is aware and will correct on future releases. |  |
||||
| I wanted to show you the close up of the 20mm Oerlikon. This is different from the 596 model in that they included the ribbing on the barrel. Some 20mm's had this ribbing and others did not. I'm not certain about the 109 but this is a nice detail. | 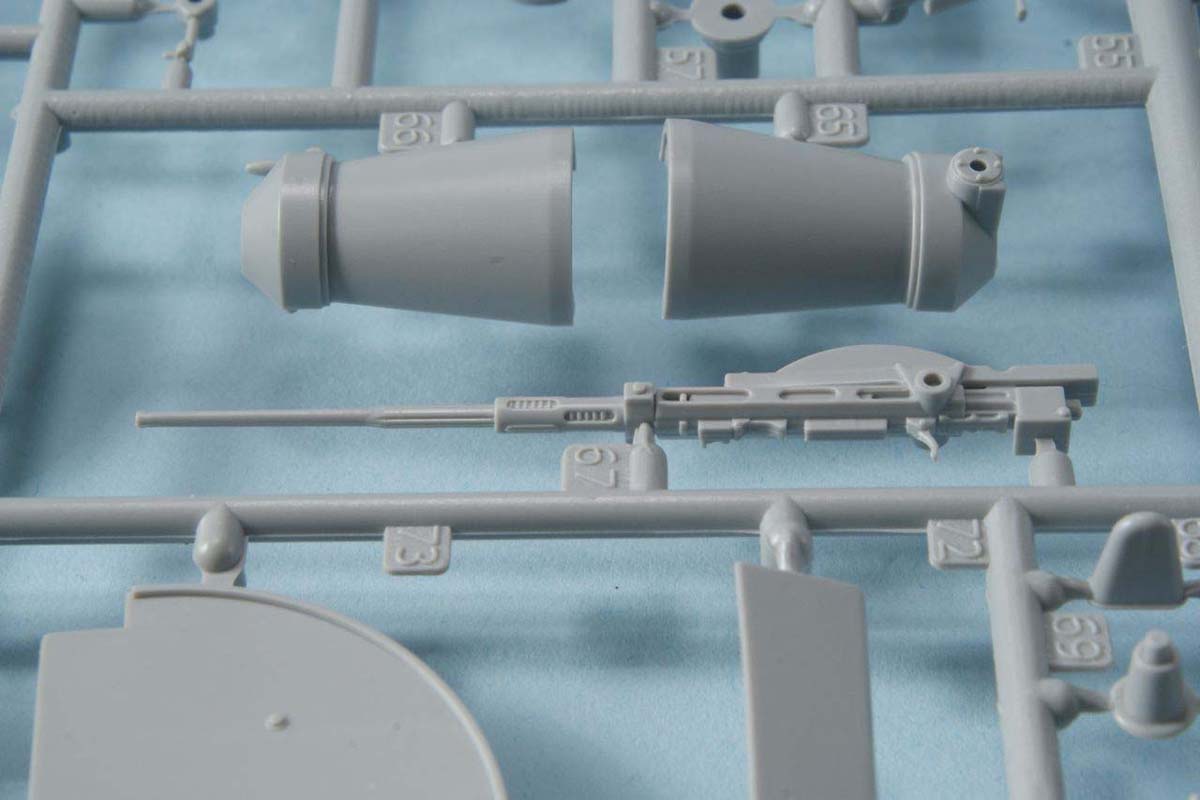 |
||||
| SPRUE E | |||||
| There are actually two of Sprue E. This contains the major features of the torpedo tubes including correct cross bracing and choices of torpedo covers. This is the only place on the kit where I found any sink holes. There is some minor sink on the .50 cal pedestals. A little filler will take care of that without any problem or loss of detail. | 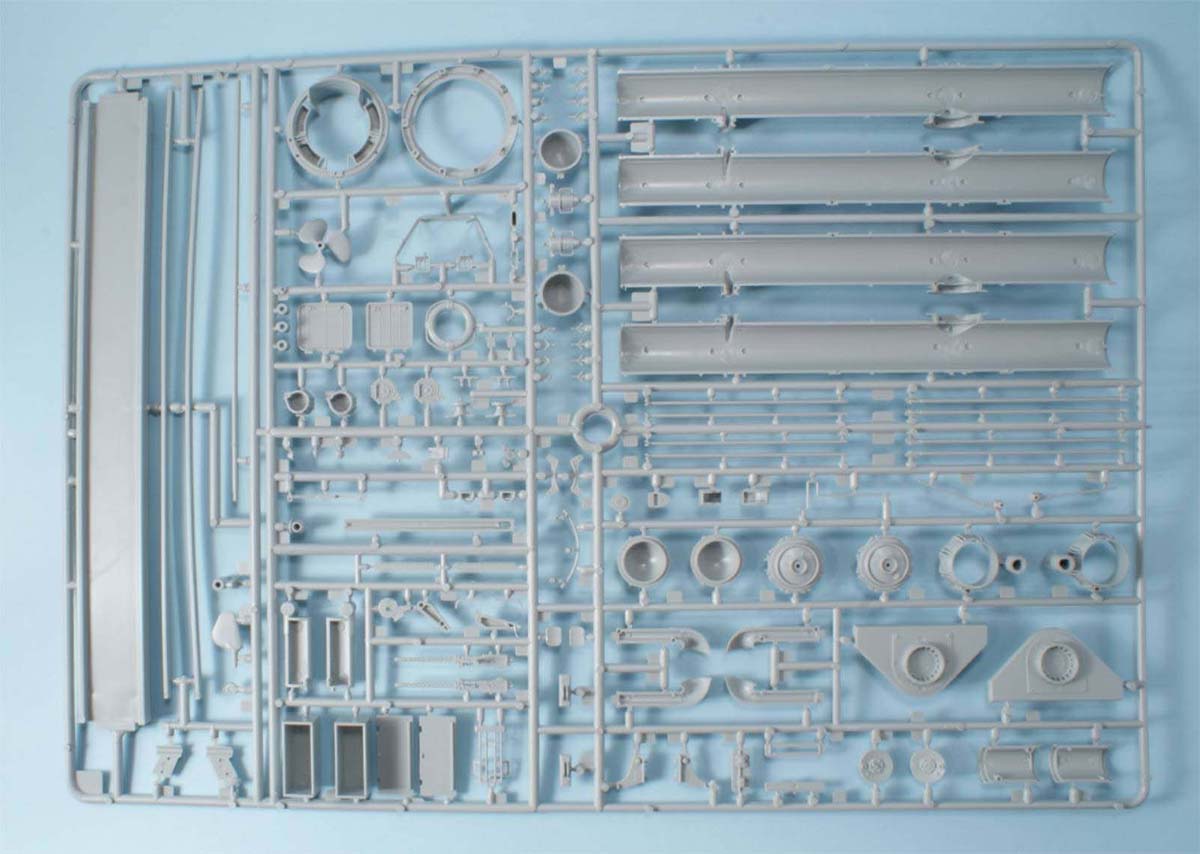 |
||||
 |
|||||
| Now let's take a good look at those marvelous torpedo tubes. This is a nice view. At the top you can see the breach pieces and half of the expansion chamber which is perfectly detailed. You can see the torpedo tube stabilizer rods as well. The tubes themselves are beautifully rendered. There are some photoetch pieces that are also added. | 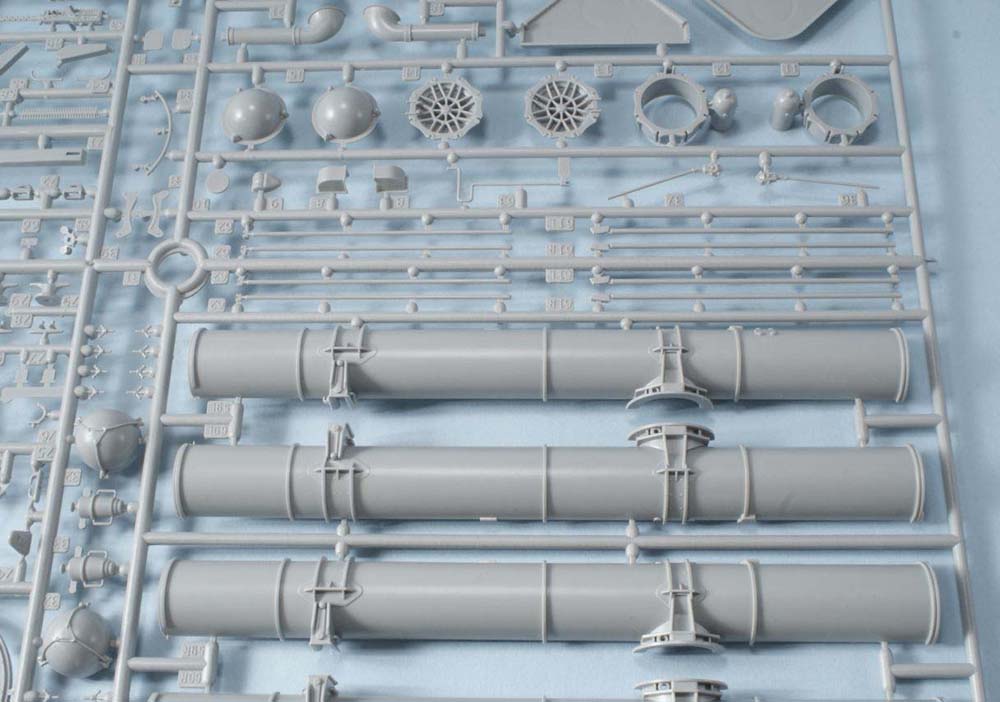 |
||||
| Here is a close up view of the mounts which are perfectly cast. Very nice rivet detail also. |  |
||||
| Here's a view of where the torpedo pivots. | 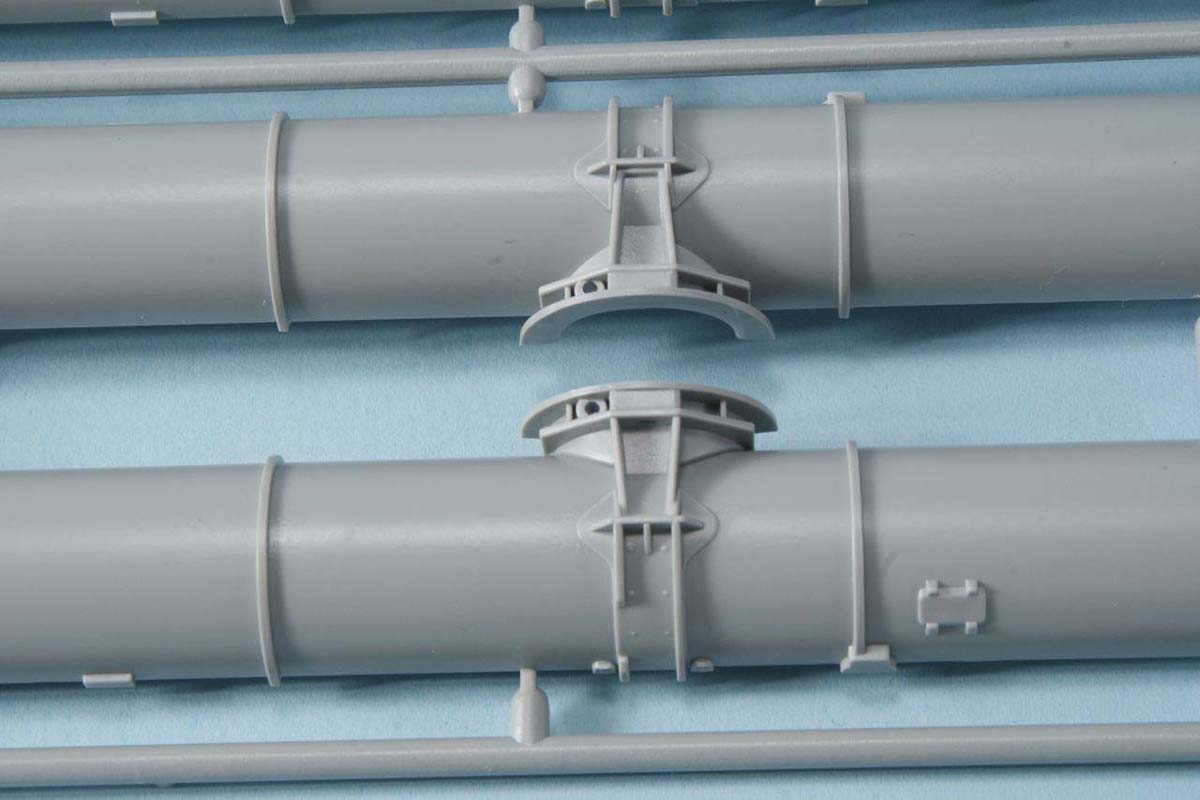 |
||||
| Here's a close up view of the training hardware for the torpedo tubes. Beautifully detailed with u joints. You are provided with option of having two tubes in the stowed position and two in the firing position. If you want them all stowed or all in the firing position you will need to bend two of the rods and that's identified in the instructions. Another nice view of the beautifully detailed expansion chambers mounted to the breach. By the way, this is where the black powder charge goes for forcing the torpedo out of the tube. Also notice on the breach is a hinge point. You have the option of having the breach door open. Note that there's no after end of the torpedo included with the kit. |  |
||||
| This was an unexpected bonus. The pivot mounts for the tubes are fully detailed. If for some reason you want the tube removed you have all the detail ready for you. At the bottom are the depth charges which are very nicely detailed and one for each side. Consult reference photos because crews moved these depth charges all around their boats. | 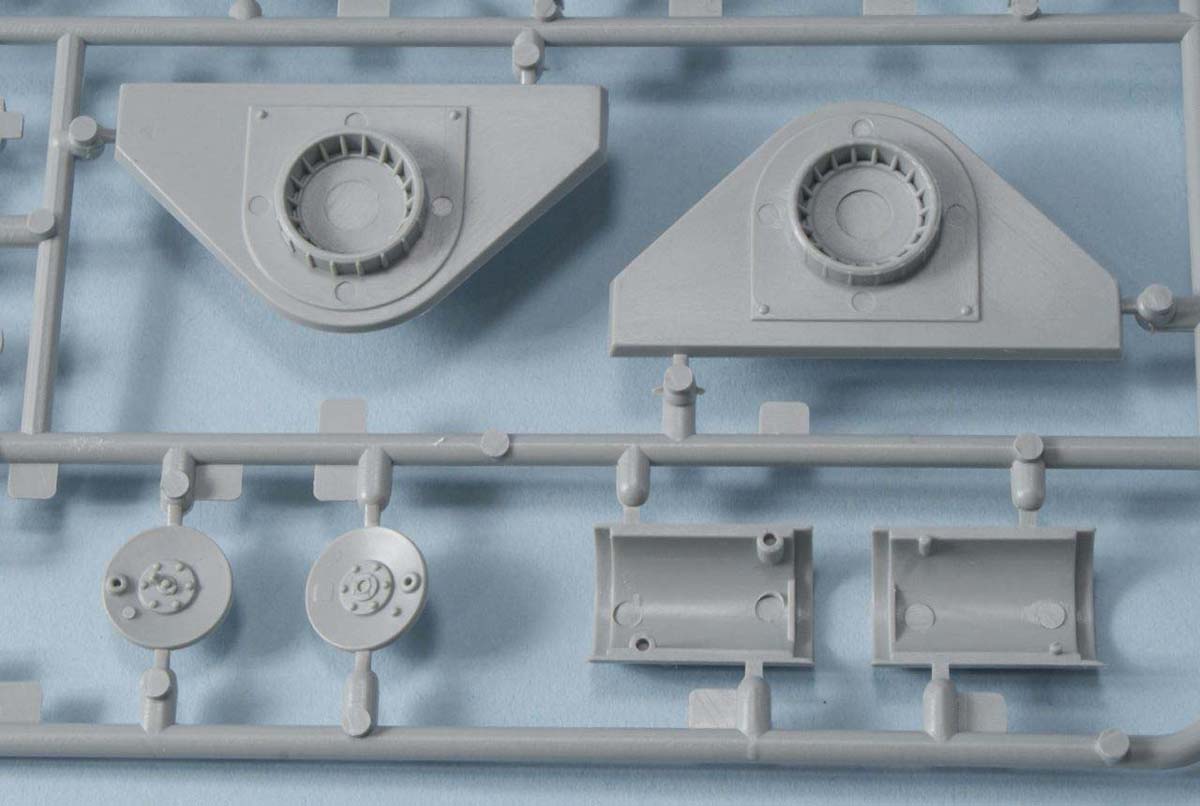 |
||||
| If you do decide to model the tubes with the breach open, note the ejector pins you will need to clean up. Above those is one of the two tools used to crank out the tubes into firing position and back. | 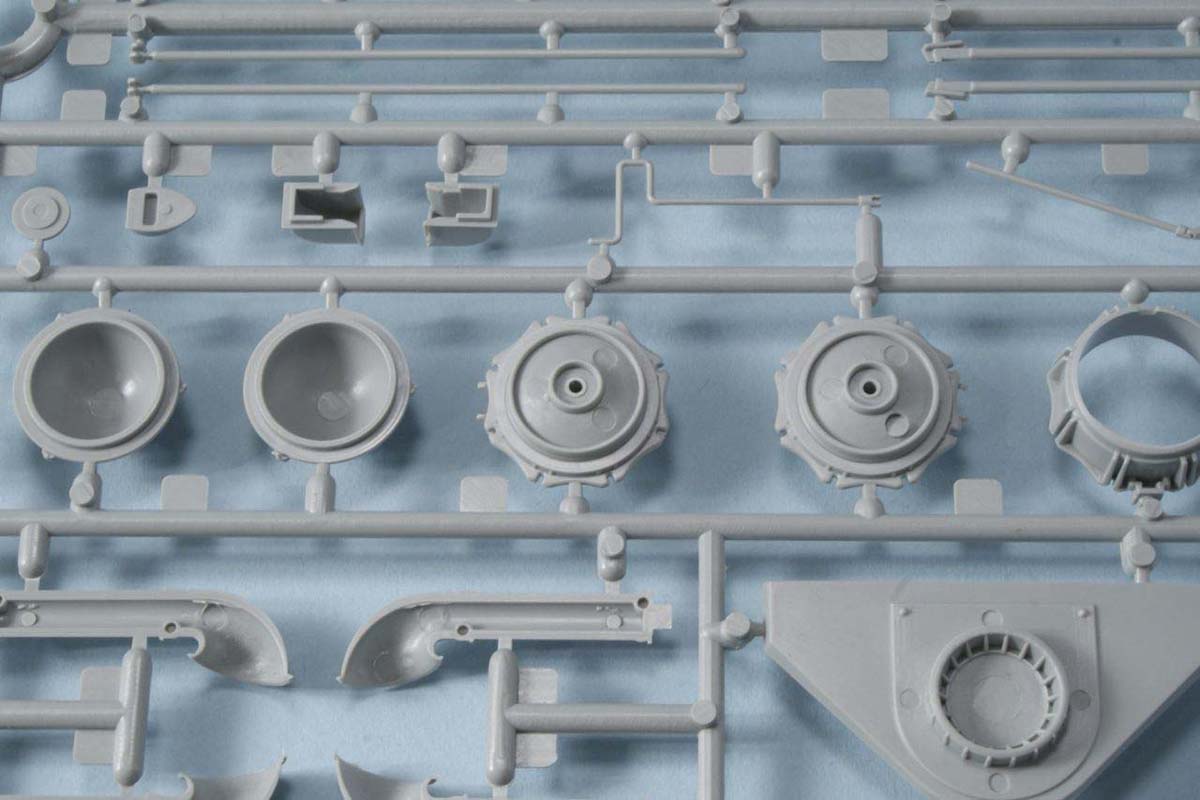 |
||||
| In this photo I want to show you three things. First the other part of the expansion chamber which has the two handles molded in. Next note that Italeri has provided two different restraints for the torpedo tubes. One has the triangular shaped piece held in place with wire. The other is a tube cover held in place with screws. Neither were used on the 109 but were used on other 103 class boats with tubes. For the 109 remove the detail to the warhead and paint it bronze. But, if you like the covers that's okay too. Finally note the wing nuts that secure the breach door to the breach. This is exactly how these looked. Straight arms with round balls on the ends. Excellent attention to detail once again. Oops! It looks like I'm about to lose one! | 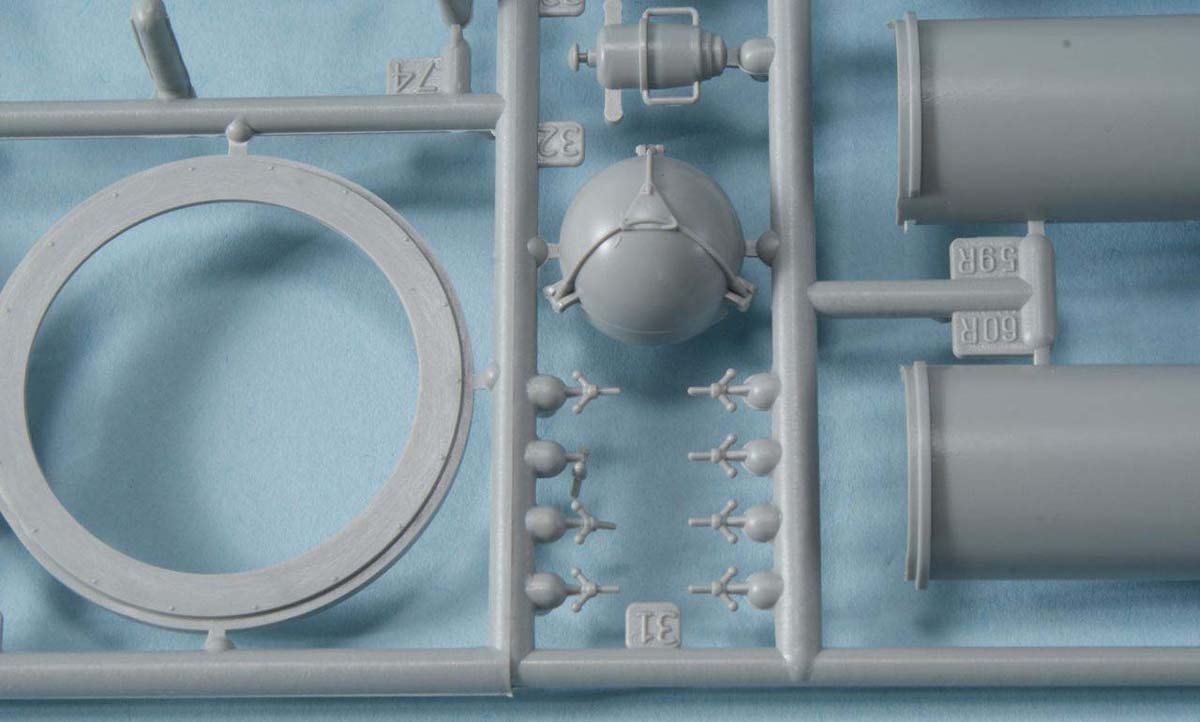 |
||||
| SPRUE F | |||||
| Sprue F contains the parts for the infamous 37mm anti tank gun that was temporarily mounted to the deck when she was sunk. Again very nicely molded. I wouldn't be surprised to see this released as a separate kit someday. Italeri even provides a few rounds. | 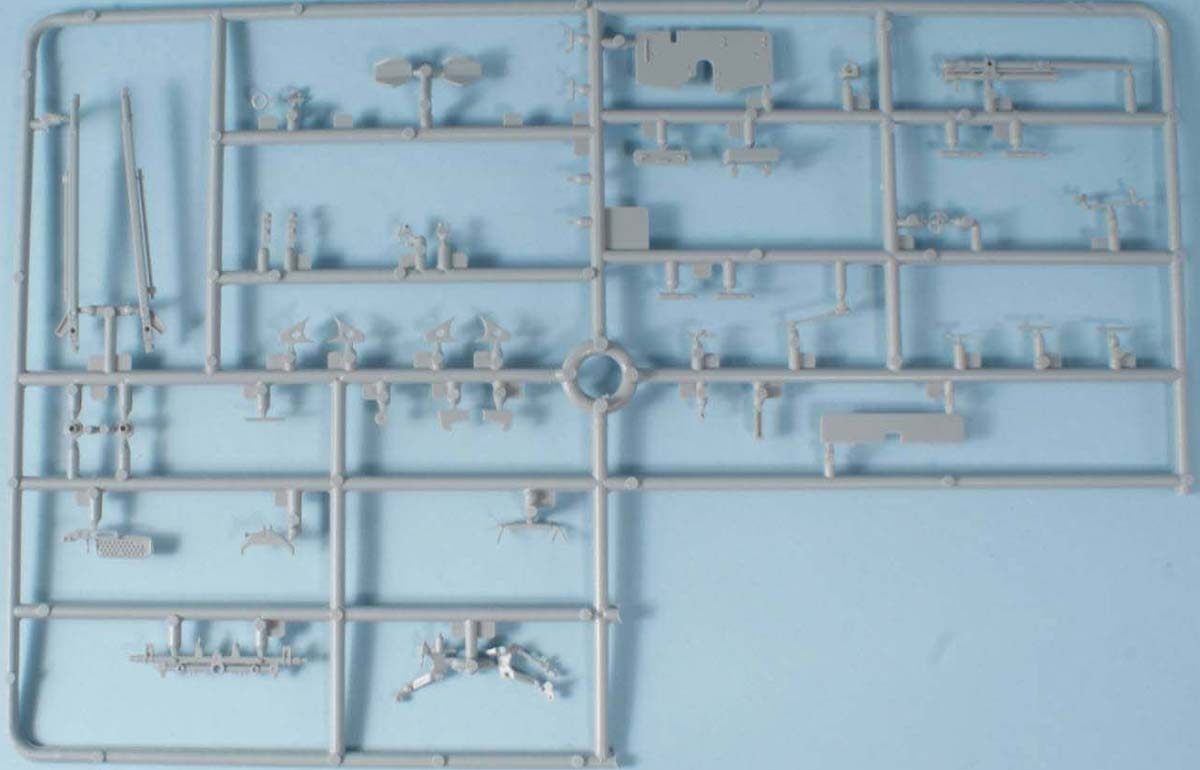 |
||||
 |
|||||
| PHOTOETCH | |||||
| Here is the Photoetched fret. It includes the deadlights, instrument panel, torpedo tube, and windscreen details. | 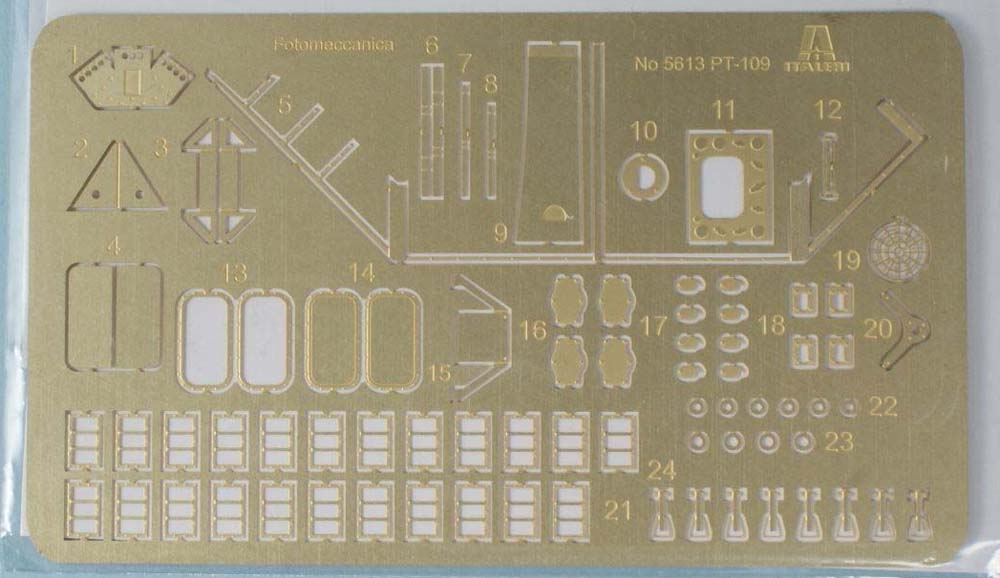 |
||||
| MANUFACTURES CAD | |||||
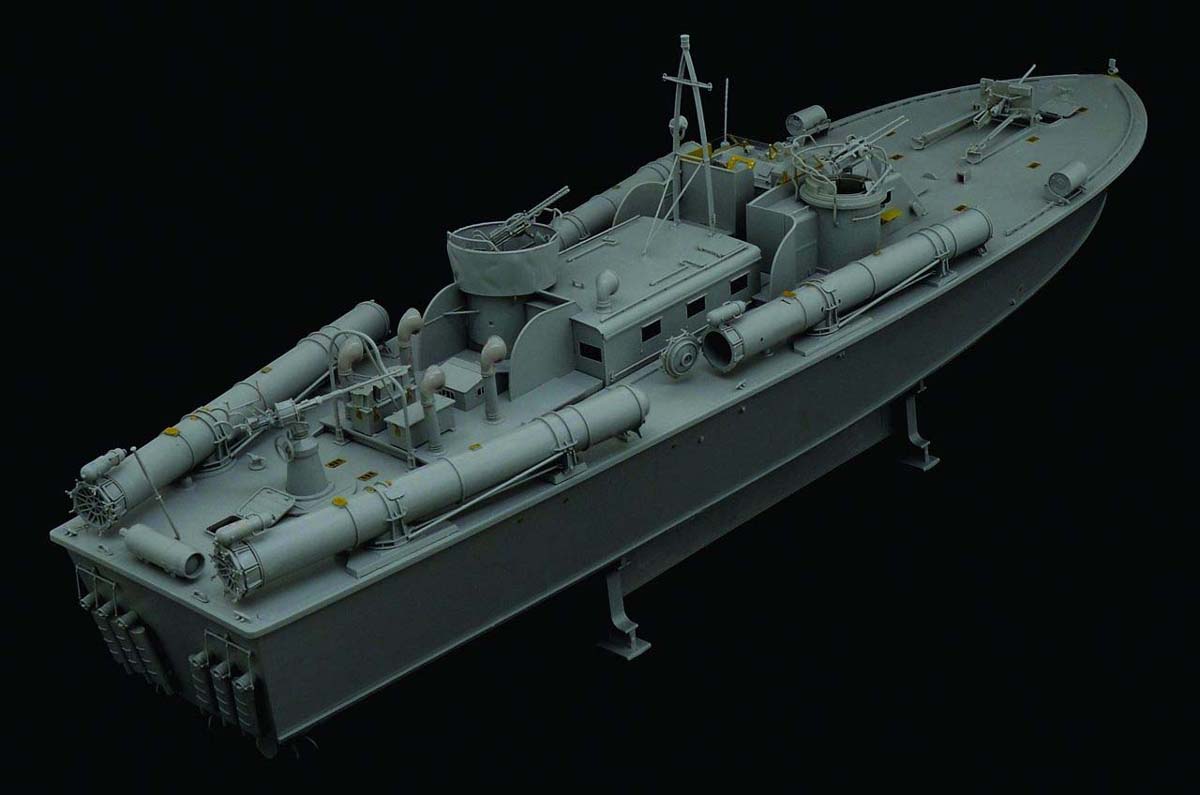
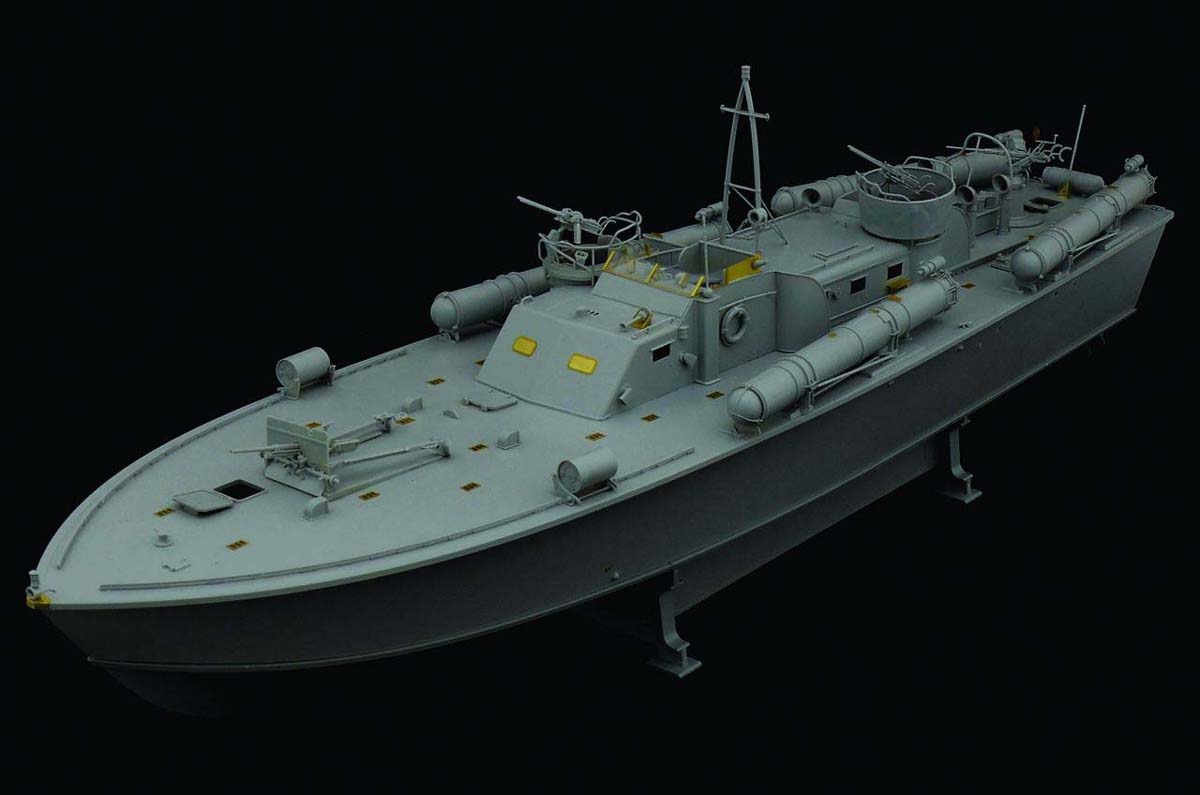
Here are Italeri's test build photos. Note the handles
for the .50 cal are on backwards but the instructions are correct.
|
|||||
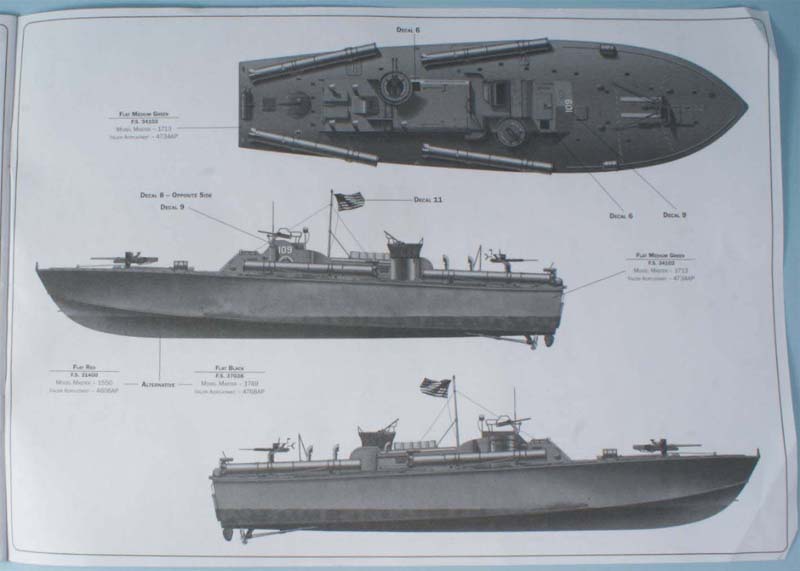
| DECALS | |||||
| Decals and clear parts for deadlights, instrument panel, etc. Uh oh! Did you catch it! They used the 50 star flag instead of a 48 star. Italeri is aware of the error and will correct it in future releases. The black squares are the rubber anti skid mats on the Chart House and Day Cabin next to the turrets. Note the instrument dials that you will use to construct the compass. A very nice detail! The numbers are how the 109 would have appeared coming out of the factory. On the 109 when she sunk the numbers were hand painted on and all white. You should be able to find some dry transfers or aftermarket decals that will do the trick. | |||||
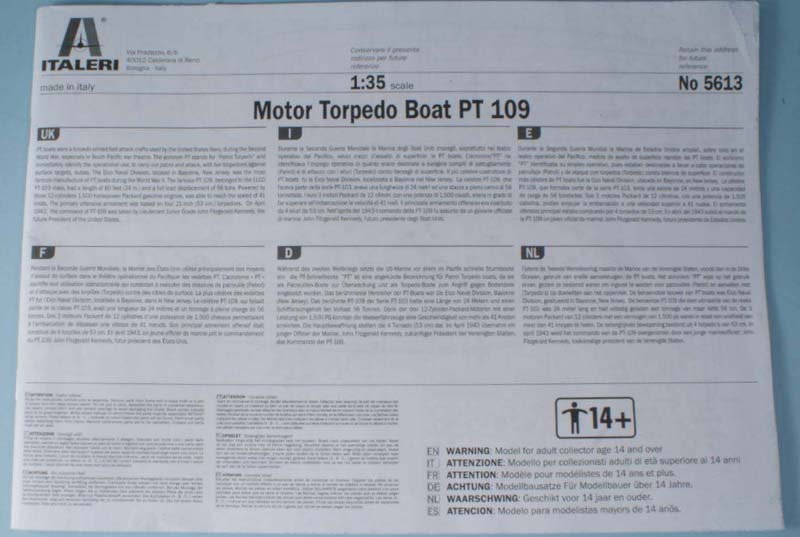
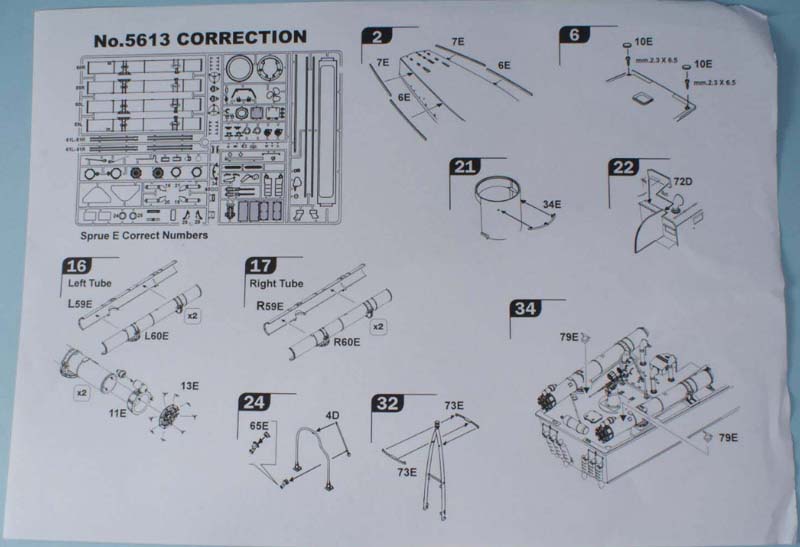
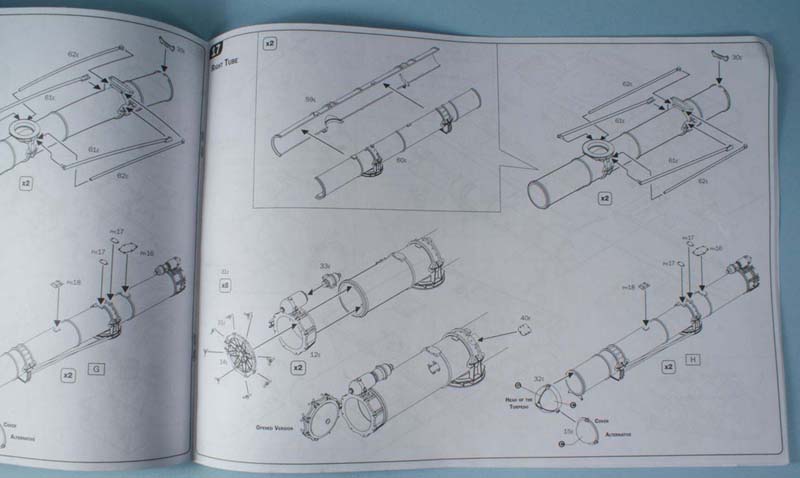
| INSTRUCTIONS | |||||
|
The kit comes with instructions you've come to expect from Italeri. They are very clear and easy to understand. There is one page of corrections included with the instruction book. The last page has painting suggestions. Again, pay no attention to the rigging diagram. It's actually different in the assembly instructions. Here are some example pages including the correction page.
|
|||||
| Italeri solicited our help to organize a booklet about PT-109 and this class of Elco boats. Frank Andruss and Gene Kirkland provided excellent historical information about Elco, JFK and PT-109. |  |
||||
|
I would encourage you to visit the following internet sites which will help you with your build.
ptboats.org This is the site operated by PT Boats Inc. They have wonderful volunteers who will help you with research They have an extensive selection reference material you might need and can send you copies of photos and documents donated by PT Boat crew members over the years. It is also where you will find the PT Boats forum where we discuss the boats, the crews, and how they operated during WWII. |
|||||
| Conclusion | |||||
 This
kit is highly recommended. On a personal level, this is the kit I've
dreamed of since my dad took me to see the movie, PT-109 with Cliff Robertson.
My friends and I know this boat intimately. The detail and accuracy
of the kit eclipse few errors with this kit which I've pointed out to you
in this review. Out of this box this kit will give you the
finest and most accurate 103 class PT Boat on the market ever and contains
parts to make many different boats of this class. I am so pleased
that Italeri was receptive to us assisting them with this project.
They were absolutely wonderful to work with and I hope we are able to assist
them on future projects. This
kit is highly recommended. On a personal level, this is the kit I've
dreamed of since my dad took me to see the movie, PT-109 with Cliff Robertson.
My friends and I know this boat intimately. The detail and accuracy
of the kit eclipse few errors with this kit which I've pointed out to you
in this review. Out of this box this kit will give you the
finest and most accurate 103 class PT Boat on the market ever and contains
parts to make many different boats of this class. I am so pleased
that Italeri was receptive to us assisting them with this project.
They were absolutely wonderful to work with and I hope we are able to assist
them on future projects.
MRC is the North American distributor for Italeri model kits. Check out the other new releases on their website. |
|||||
| . | |||||

© ModelWarships.com