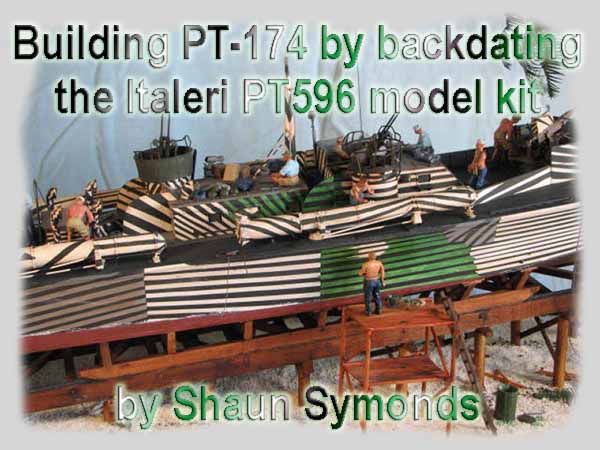
| This is my backdating of the Italeri PT596 model kit to
the Earlier PT174. I decided years ago that I wanted to build a model of
a Zebra striped boat after seeing a couple of photo's in an old book that
I had, But until the Italeri kit came about this idea was put on hold as
I just didn't want to build it in a smaller scale than 1/35th.
When the kit came out I started researching on the internet about PT Boats and found that there were only a few boats painted in this pattern, they all were of an earlier version of the PT boat. So the next thing I had to do was find out what was required to backdate the model kit. I managed to find a set of plans in 1/35th scale from Coastal Force Plans in the United States. These paid for over the internet were with me in a week. I also managed to find so very interesting wartime photographs which I printed off so that I could use as well as the plans. Then I had to start going through the instructions that came with the model making notes & alterations as required so that when the build started Hopefully I wouldn't go to wrong. I decided that I wanted to build something that was also a little different
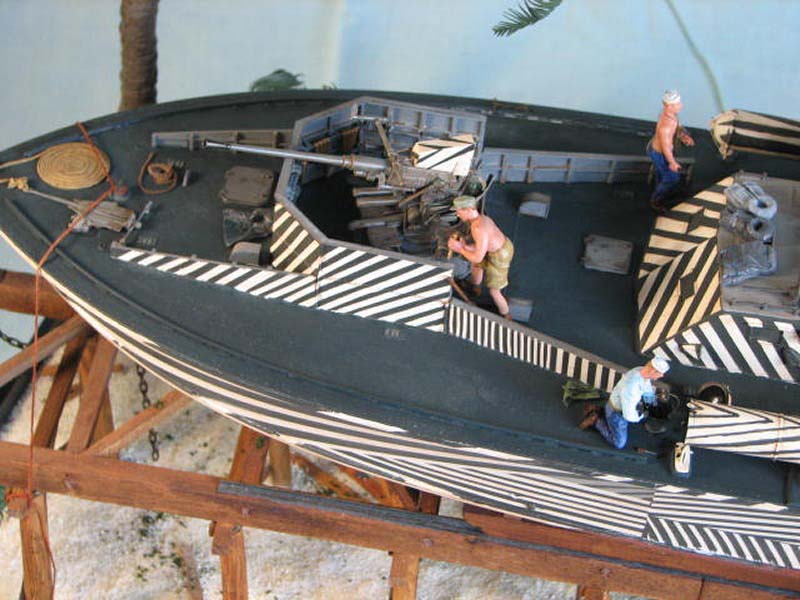
from the other earlier boats by doing the PT174 as this boat was supposed
to be the only known example of one being fitted with a 40mm Bofors gun
on the Bow of the boat.
|
|||||||||||||
|
|
|||||||||||||
|
Section 2 Had to make 3 new deck vents. Made 5 Deadlights in the deck . Also extended the Toe Rail by 3cm. Section 3 Door to the Chart Room was changed. Had to change the Instrument panel around & change the dials. Throttle levers had to be moved. Cabin / Cockpit sides had to be lowered by 4mm & replaced with clear
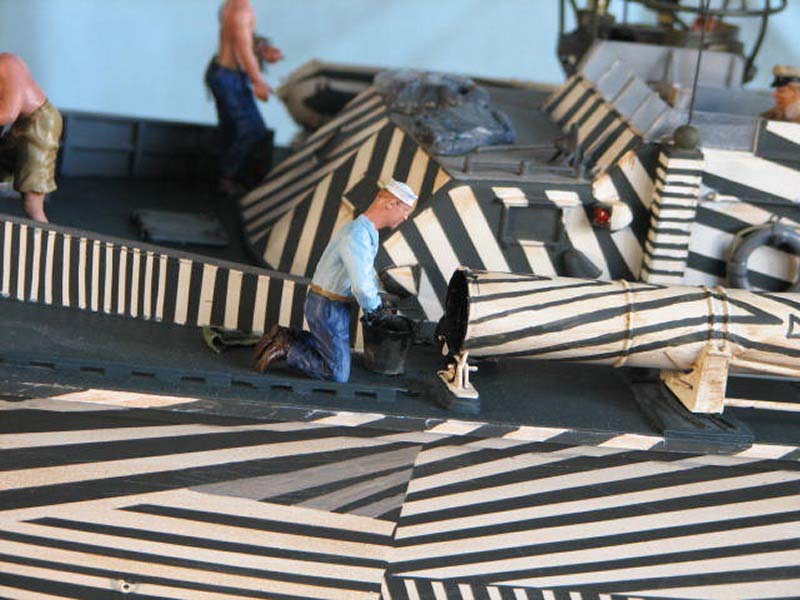
Forward gun tub had to be moved by 14mm . Also had to remove all the moulded on fixings on the cabin roof. New Gun tub made from an old deodorant can (pinched from my Wife ).
the later versions. Section 4 Moulded out of resin 3 new Tall Cowl Air vents for the Engine room roof. Large Air vent from kit not used. Section 5 Removed all fixings from Day Cabin roof & end near rear Gun tub. Moved Non slip pad near rear gun tub. New pad made with wet & dry.
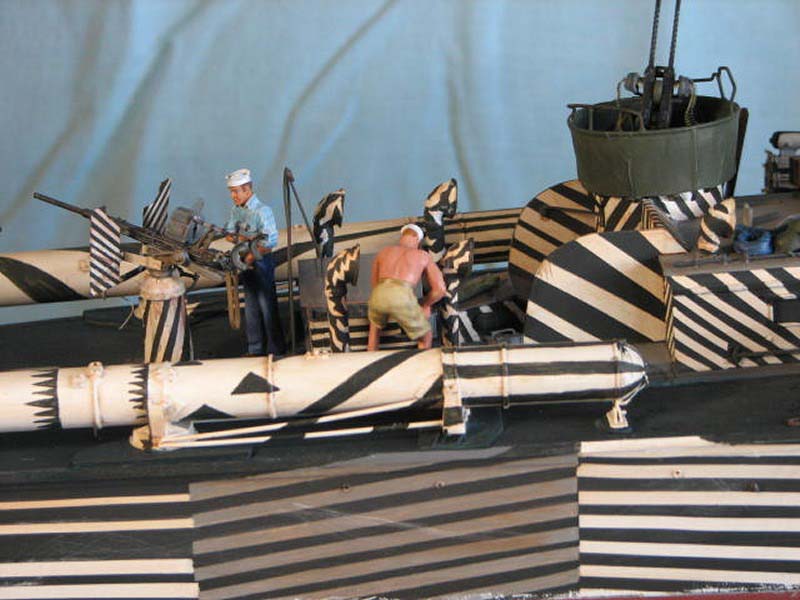
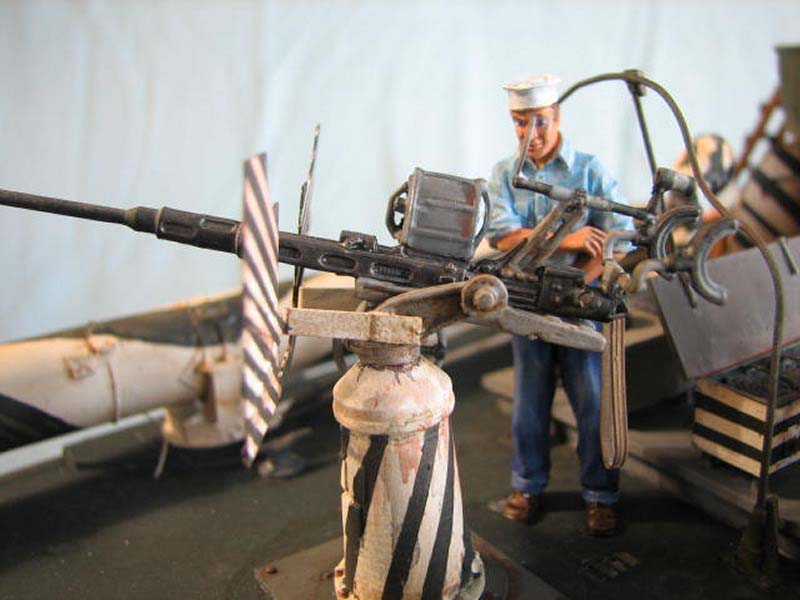
New Grab rails made for top of Day cabin from brass rod. Section 6 New windows to the front cabin no anti glare shields. New Engine room access hatch made. Changed the way the hatches in the deck open. Section 7 Made 2 new rotating Air vents for the cabin wall. Used the original to cast Moved the step forward to go under the non slip pad. Made a Locker to go under bench behind cockpit wall. Armoured walls had to be reshaped & curved more using thin sheet metal. The original kit ones were the wrong shape. Section 8 Search Light altered & new lead made. All fixings for lifeboat removed. Bulkhead lights remodelled & moved to side of chart room. Section 9 Relocated step further forward to under Non slip pad. Section 10 Smoke generator moved to the stern of the boat. New hatch fittings made so hatch opens other way. Reshaped Depression Gun rail for the 20mm Oerlikon out of thin wire. Section 11 No Alterations done except not fitting the towing hook. Section 12 Added a small pipe to the top of each Exhaust stack plus a sealing ring. Section 13 No Alterations done. The Hull was scratched very heavily. Section 14 20mm Oerlikon mounting plate made smaller & moved to
the Stern of
Replaced the Ammo belts with Brass etch. Opened up the bottoms of the Ammo trays. Section 16 Reused part of the rear of the torpedo & fins to make earlier version. The earlier torpedos were longer, so I made mine from a piece of Balsa Which I sanded until it fitted the fin section from the kit. Section 17 Not Used. Section 18 Not Used. Section 19 Not Used. Section 20 2 Larger Ammo ready lockers made for the 20mm Oerlikon. Wanted
to
Rest of section not used.
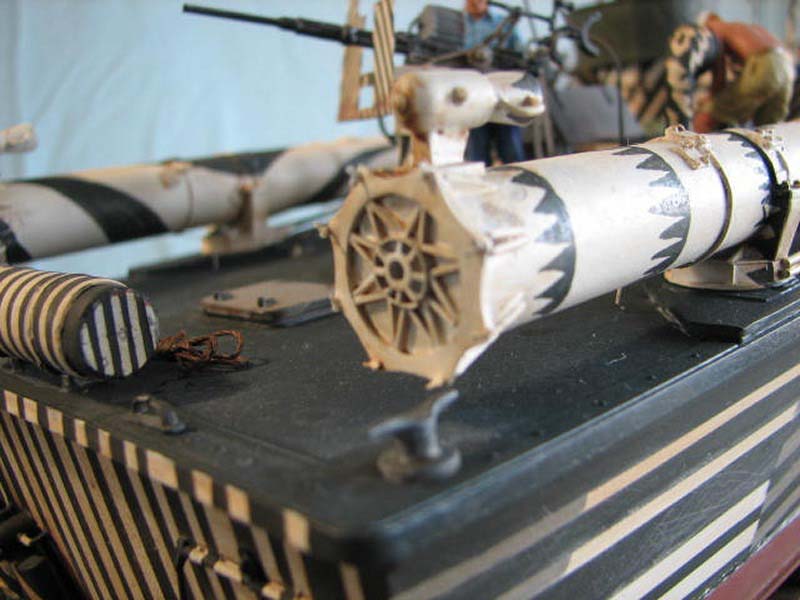
37mm Cannon not used. Section 22 20mm Oerlikon moved to the stern of boat. Rear gun tub covered in tissue to represent canvas cover. New Aerial mount & Aerial made for side of cabin. Section 23 New Depression rail made from thin wire for .50cal machine gun tubs. Section 24 No changes other than a weatherproof cover for the Ammo feed tray. Section 25 New Earlier style of base made for the 40mm Bofors gun & the rear rack Was not needed. Section 26 40mm Bofors gun was moved to the Bow of the boat. Section 27 Only part that was used was the bottom of the mast brackets
for the
Section 28 Not used.
New Experimental Spray / Armoured gun shield for the 40mm Bofors
New Armoured shields behind the day Cabin. Life Belts relocated.
4 Torpedo tubes & mounting brackets. Made from Flexible Cold water
Most of the work done on the backdating was scratch built, I did use
some after market items in the build . They were
Accurate Armour 20mm Oerlikon Mk4. Gradt Line Nuts & Bolt Heads. Aber Brass Ammo Belts for the .50mm Machine Guns. Brass Wing nuts (Torpedo
Hornet US Naval Heads. Plus Model Rats. Etch brass Tool Box & tools. Verlinden Ammo Boxes & Crates.
|
|||||||||||||
| Photos | |||||||||||||
| This is the original idea for the model this is of PT174 back in the States before she was shipped off to the Pacific. | |||||||||||||
| This shows the new Bulk Head Air vents & the extension to the Tow Rail. Also the Cabin has been cut down ready for the new plexiglas windscreen. | 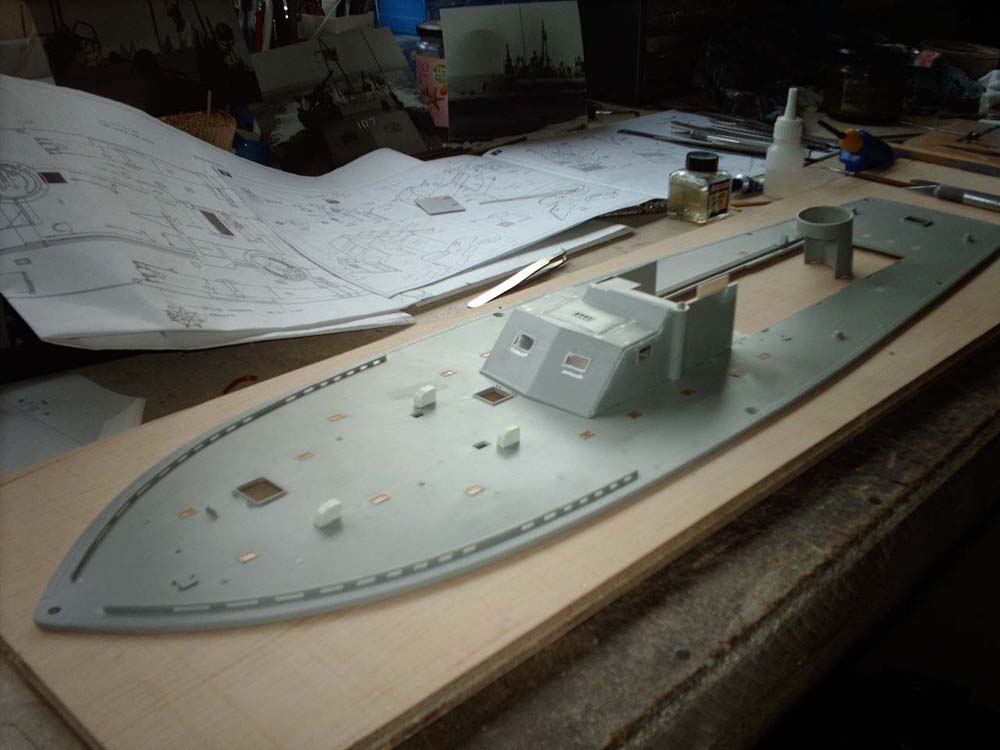 |
||||||||||||
| The new Forward Gun Tub is now in position, made from an empty deodorant can the kit mounting fixing fitted this perfectly. | 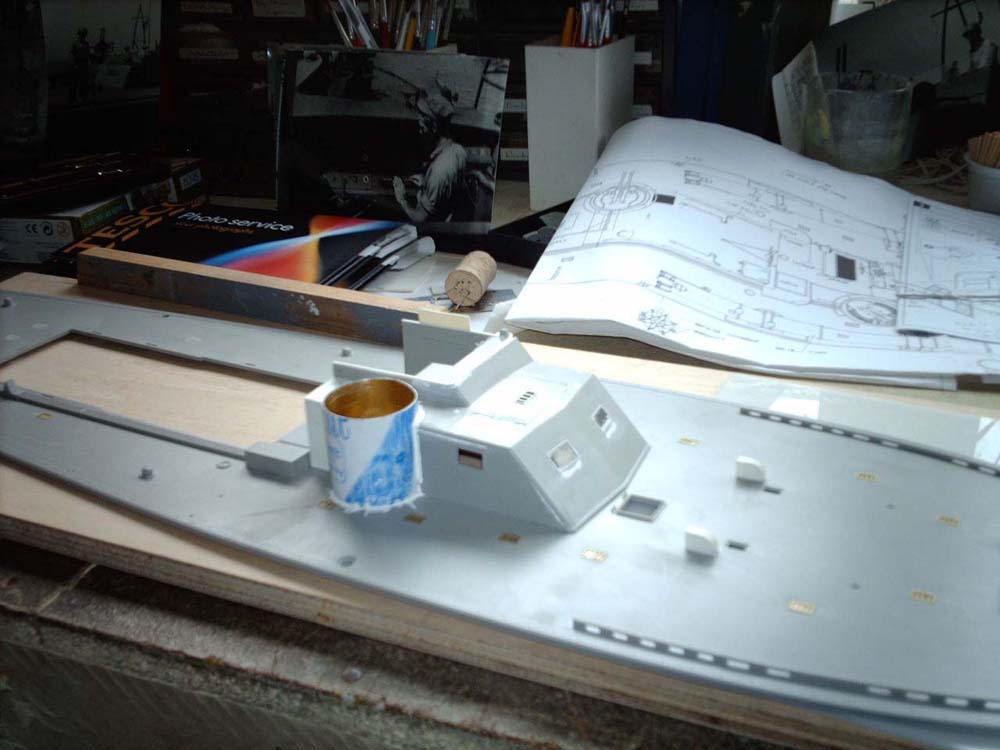 |
||||||||||||
| This picture shows the near curved Armoured shields that go behind the cabin & the older style of Engine Room hatch. Plus the Rear Gun Tub has been placed in location. | 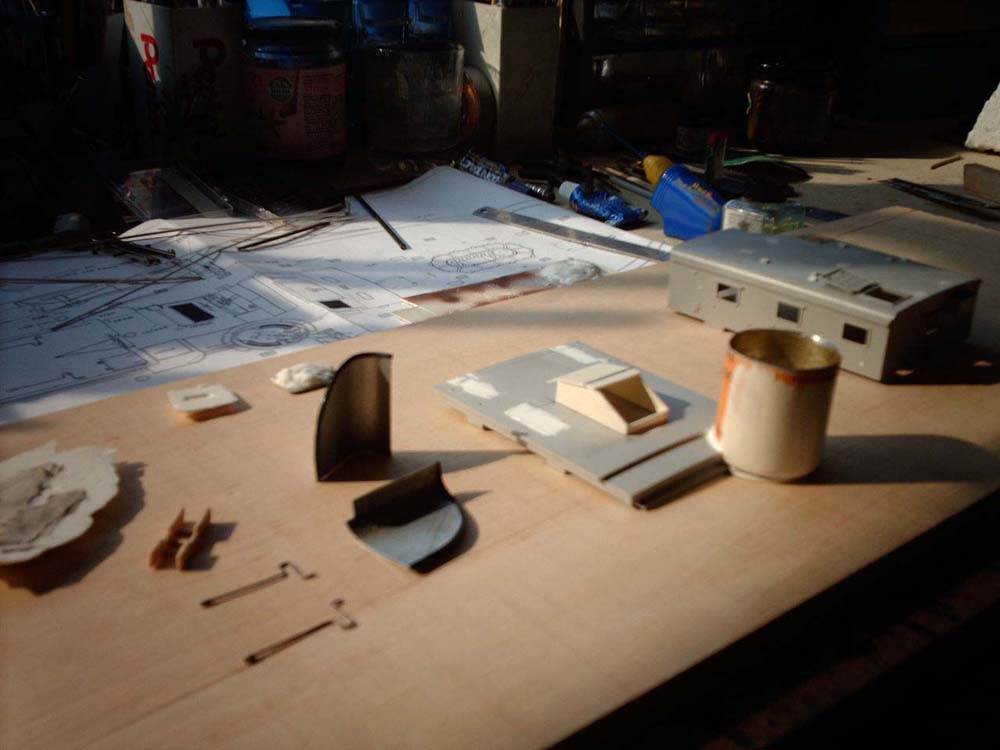 |
||||||||||||
| Photo 5 Shows the new Engine room hatch in place. | 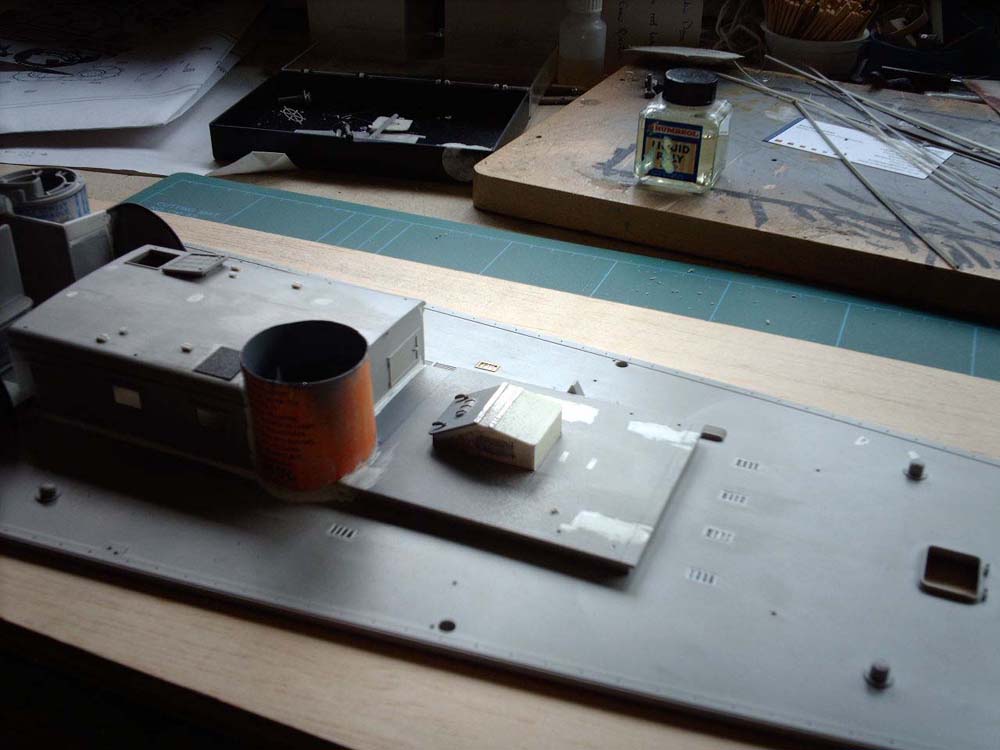 |
||||||||||||
| Photo 6 The new Armoured shields for behind the engine room have been made. The new Floor Mounting Plate for the Oerlikon 20mm gun is place as well. |  |
||||||||||||
| New Locker behind Cabin Armoured wall. Plus new Cockpit Instruments. | 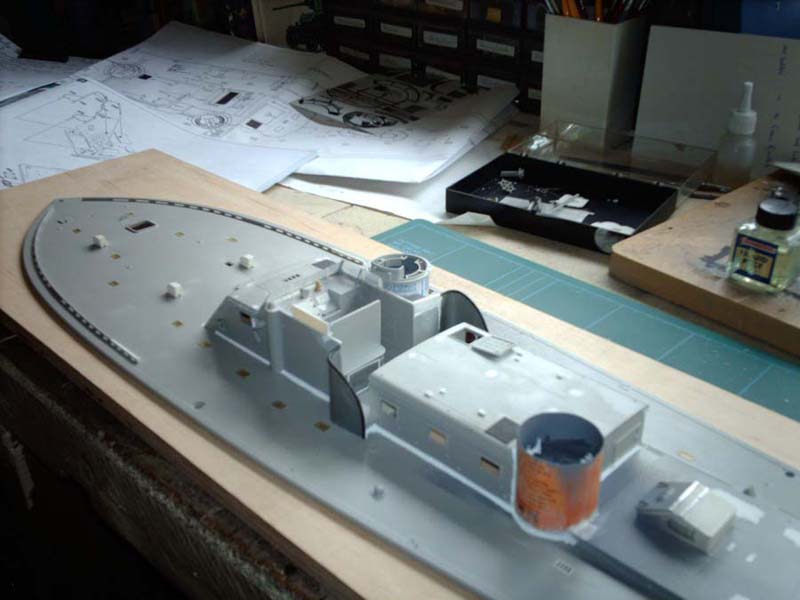 |
||||||||||||
| Parts for the Torpedo Tubes. | |
||||||||||||
| The new Armoured shield for the 40mm Bofors gun has been started checking fit before adding the ribs & rails to the inside. | |
||||||||||||
| Ribs added. These were used to hook the Ammo on. | 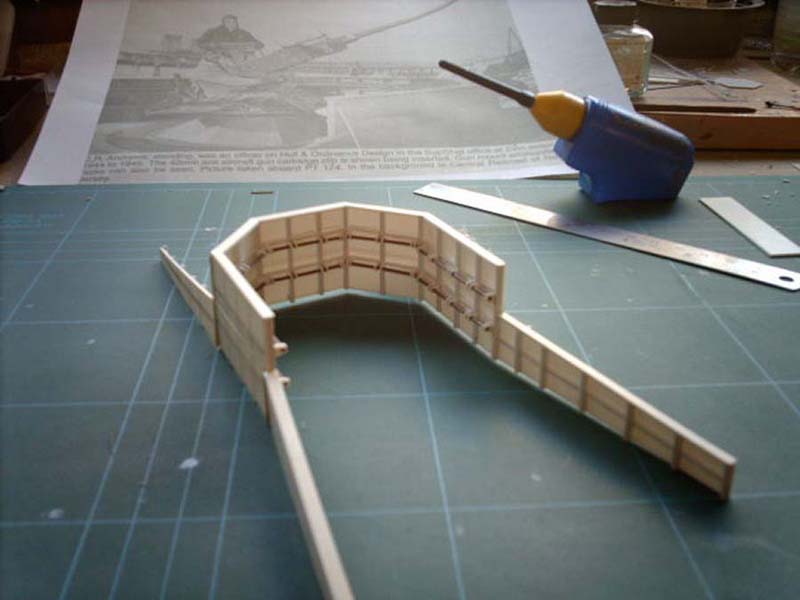 |
||||||||||||
| Torpedo tubes nearly finished. | 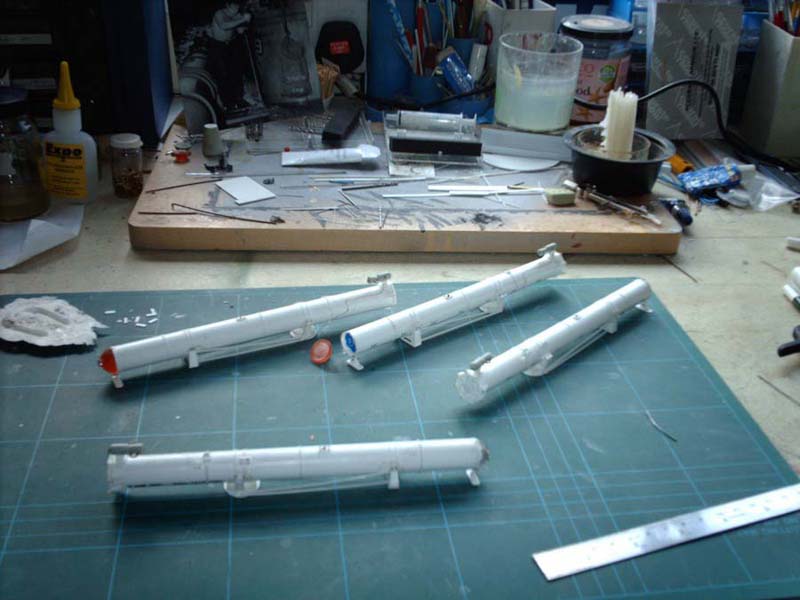 |
||||||||||||
| Hull sprayed with White Ensigns Anti Fouling Red Paint. | 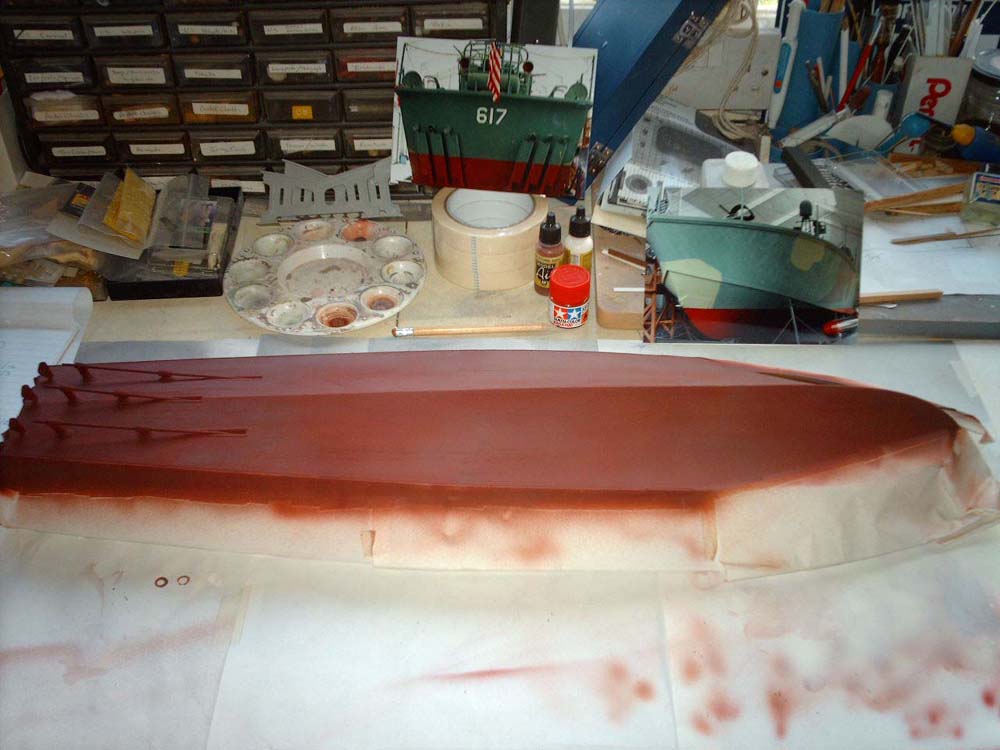 |
||||||||||||
| Test fitting of the Deck fittings vefore priming. | 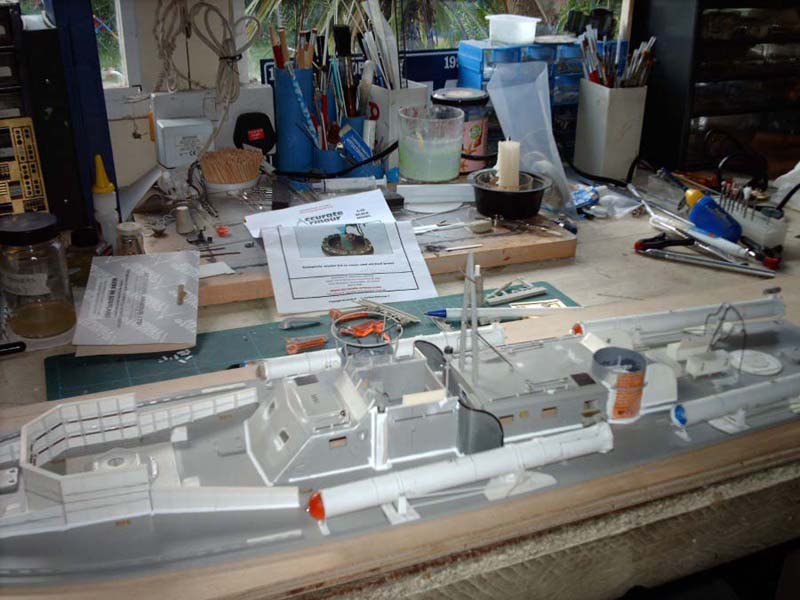 |
||||||||||||
| Hull on the wooden ramp. | 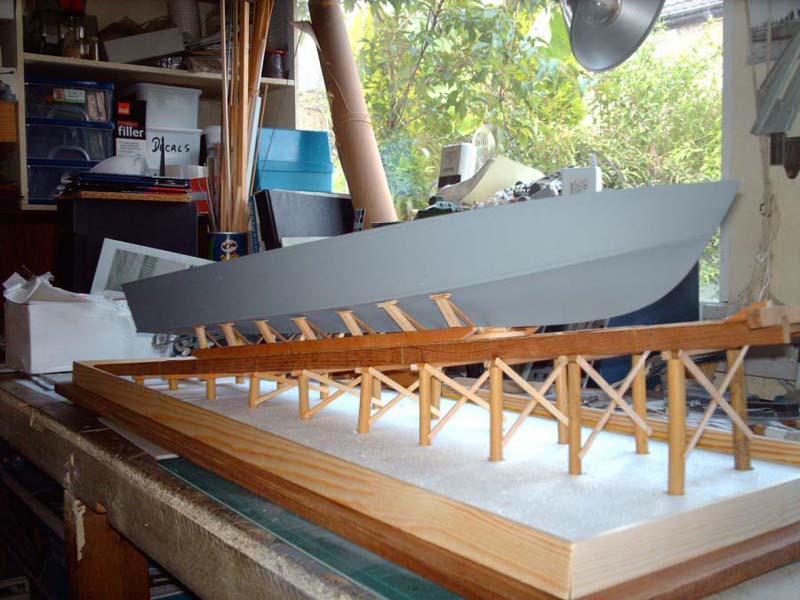 |
||||||||||||
| Ramp & Jetty area ready waiting to be painted. | 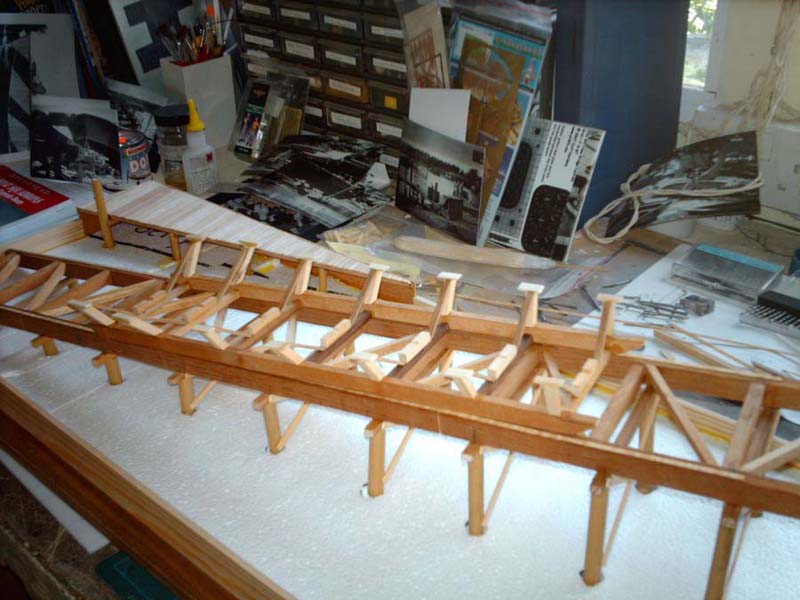 |
||||||||||||
| Upper Hull masked ready for painting. | 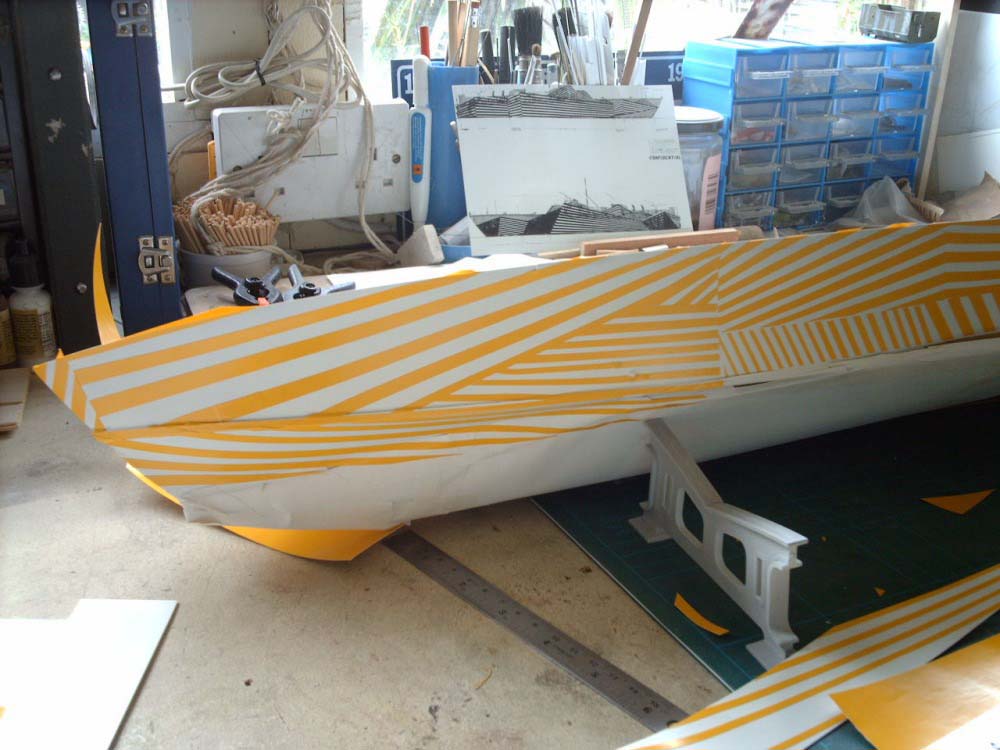 |
||||||||||||
| Stripes after spraying the Blackish Grey colour. |  |
||||||||||||
| Palm Tree leaves made from tin foil. | 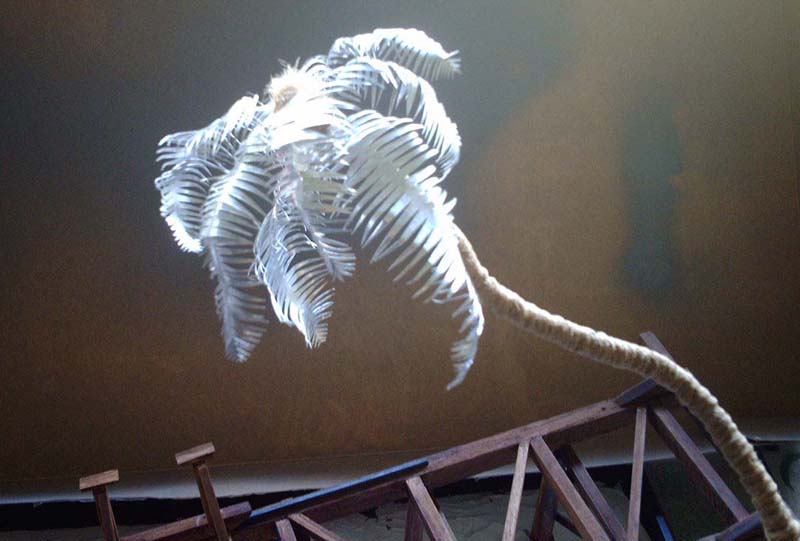 |
||||||||||||
| Painting | |||||||||||||
|
I started the painting as I would with any build, a good wash to remove any grease etc, then it was primed with car primer. I then sprayed almost the whole of the boat with White paint ready for the stripes. The Hull was painted by hand with White Ensign models Anti Fouling Red paint. The stripes were masked off using a set that was adapted from the masks made by Gators masks in the United states. Once these were applied ( about 3 days ) I sprayed over them with a
mixture of Black & Smoke Grey to give a faded black. This was left
for a day before removing
I them hand painted the deck in a Dark Sea Blue from the Vallejo range . With the hand painting of the deck it gave the deck a varied colour effect similar to what would of happened from the sun fading the paint. Once everything had dried for a couple of days I sealed it with a couple of coats of Varnish ready for the weathering process. I used a mixture of Enamel & Oil paints for the weathering. With
a light dusting with a sand coloured oil pastel to finish.
|
|||||||||||||
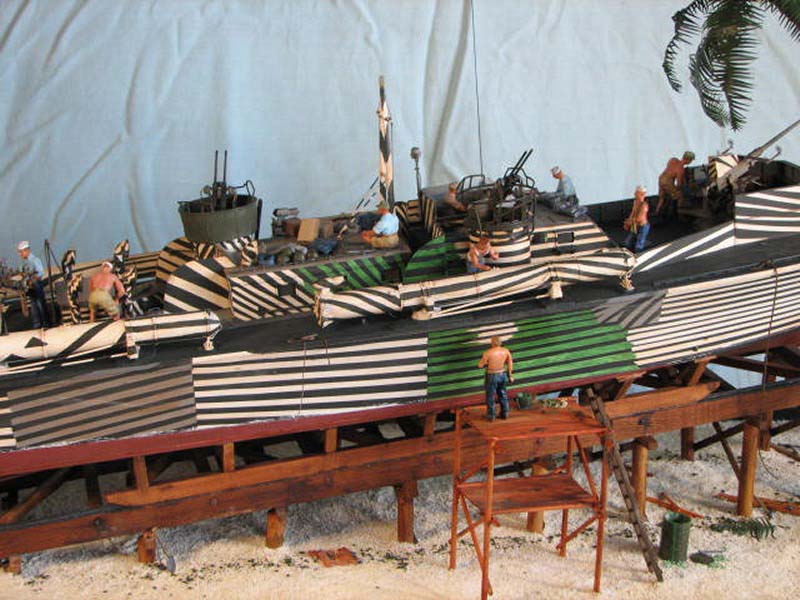
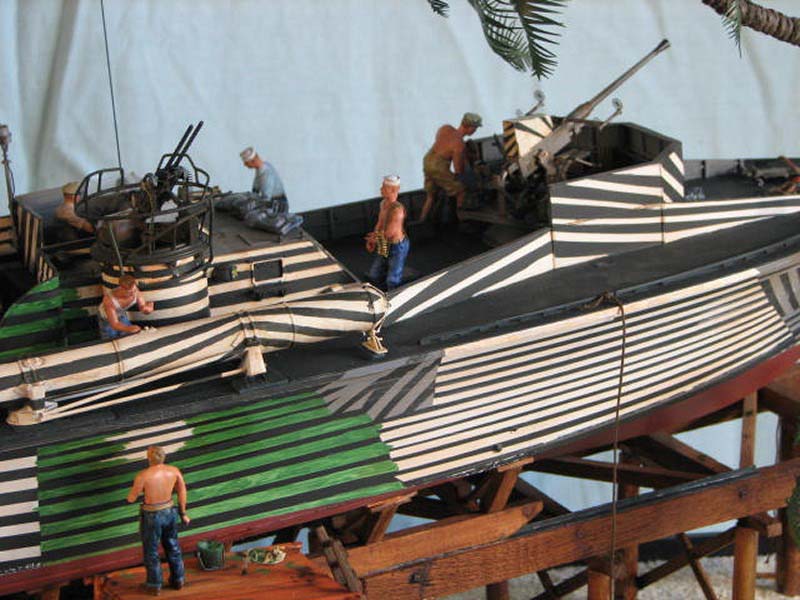
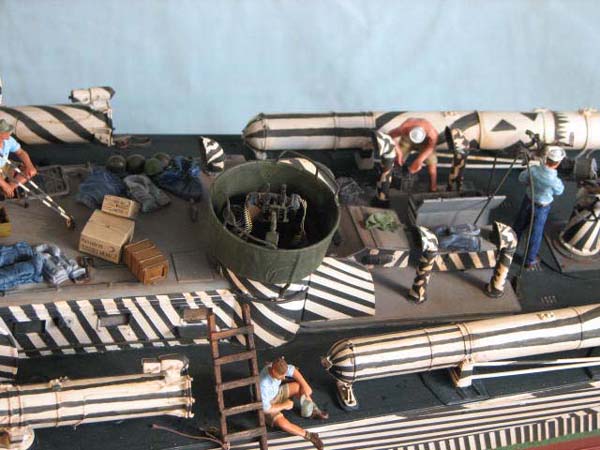
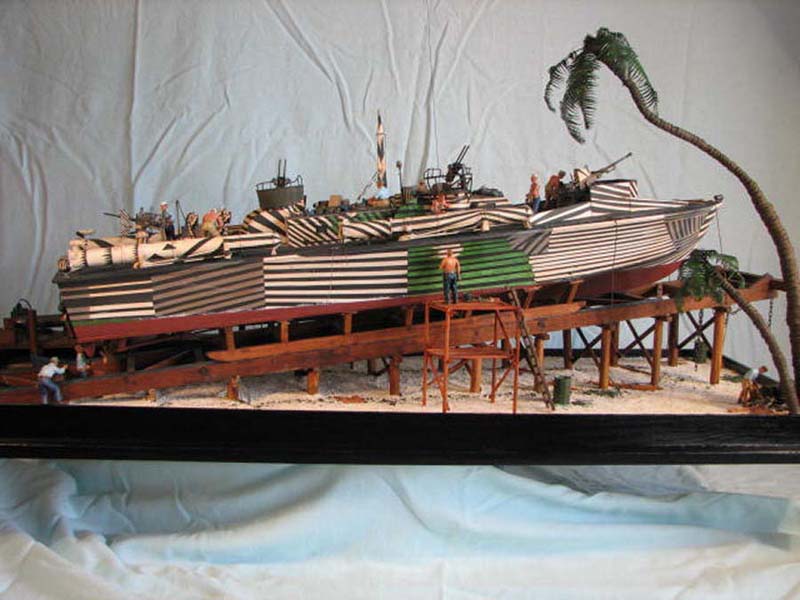
| Finished Diorama. | |||||||||||||
|
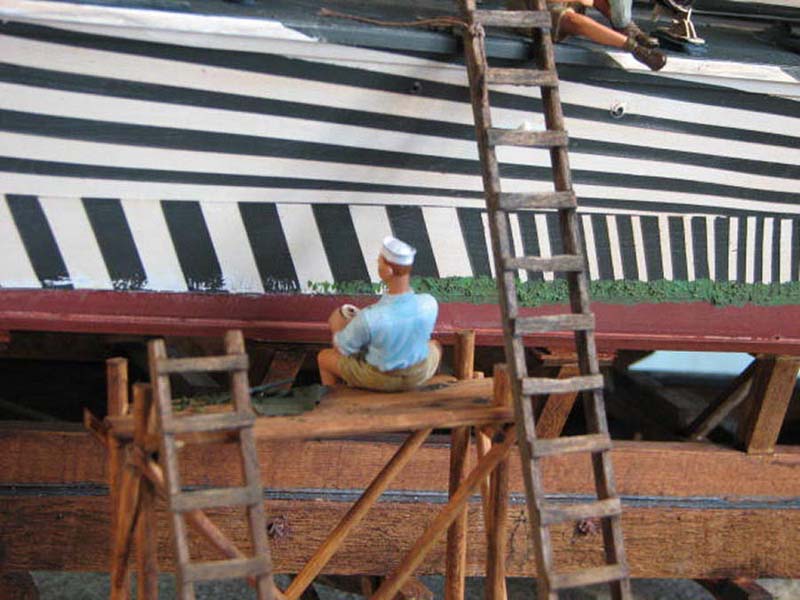
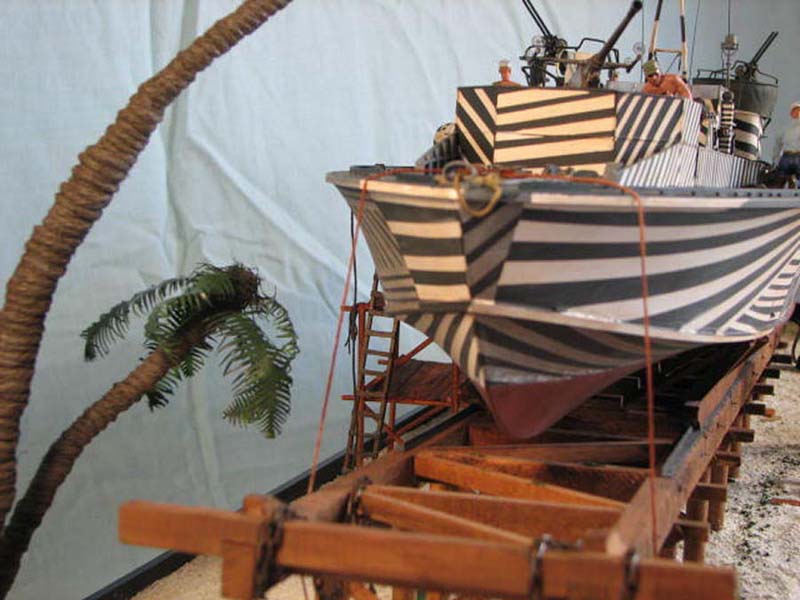
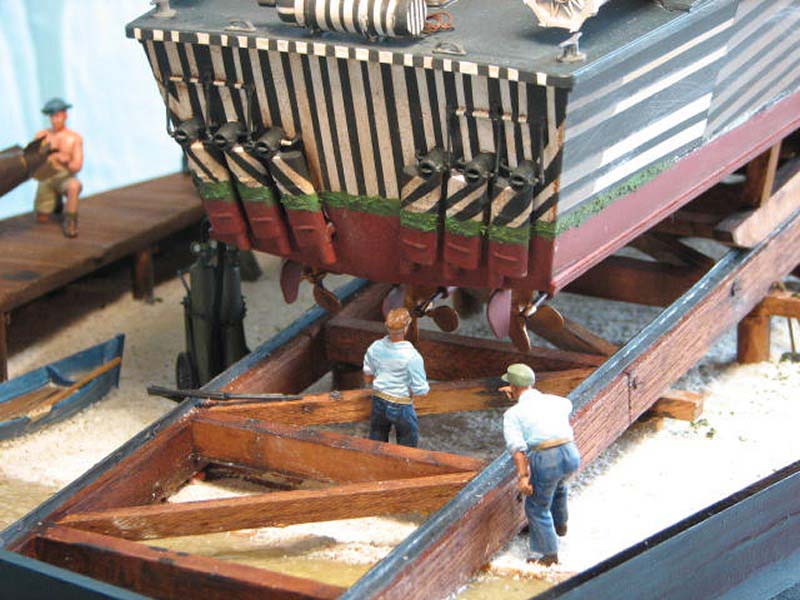
The diorama idea came about because I wanted to show the whole of the boat & I wanted to show the boat being repainted. The idea for the ramp came from the film They Were Expendable staring John Wayne. The ramp was completely scratch built using real wood as was the jetty area. |
 |
||||||||||||
The Sand comes from crushed rock. The palm tree was made using a piece
of wire covered in garden twine , the leaves are cut from old takeaway
meal containers.
|
|||||||||||||
| The Crew | |||||||||||||
|
The Crew is made up from a wide variety of suppliers. There are Tamiya, Verlinden, ADV, U-Models & Dragon. Most were altered so that there poses suited what I wanted better. Most had there heads changed with heads from the Hornet range. I painted them in Oil paints.
|
|||||||||||||
| References | |||||||||||||
|
|||||||||||||
| . | |||||||||||||