|
| The ship | |||||||||
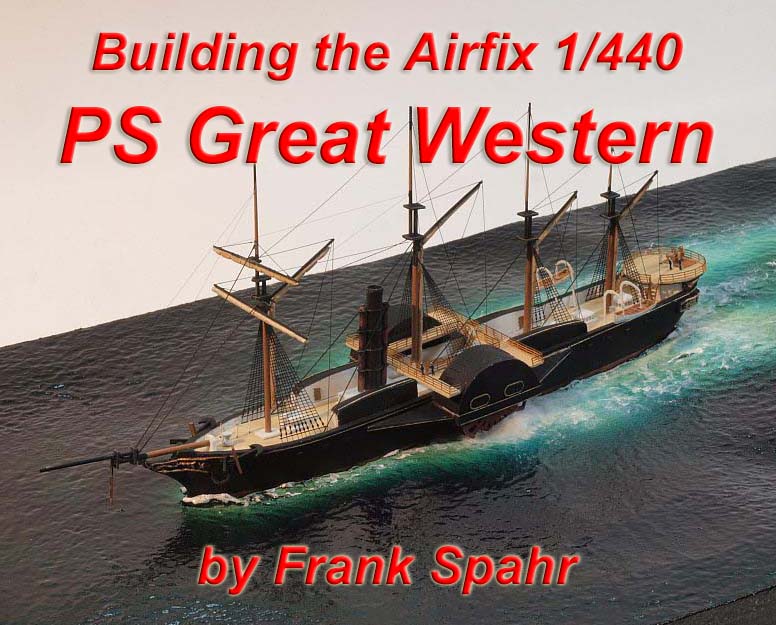
| P.S. Great Western was the first steamer purpose-built
to cross the Atlantic. It was the first of three vessels designed by I.K.
Brunel, a true engineering legend of the Victorian era. Each of the three
vessels would set new standards and push the envelope, with the last one
quite boldly overstretching it indeed.
Great Western was built traditionally from oak and had side paddle wheels. Her two-cylinder Maudslay engine of 750 hp gave her a top speed of 8.6 knots. A four-masted sailing rig augmented the steam engine. The vessel was laid down in 1836 and had her maiden voyage in April, 1838. She successfully operated in trans-atlantic service until 1846, when
her parent company got bankrupt. After several years of service to the
West Indies and a stranding, she was used as a troop transport in the Crimean
War, to be broken up in 1856.
From Wiki page. |
|||||||||
| The kit | |||||||||
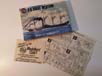
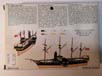
| I happened upon this kit in its 1976 boxing at a vintage kit booth
at the 2018 Scale Model Challenge at Veldhoven, the Netherlands. They had
oodles of ye aulde Airfix kittes, but this one took my fancy. I had the
feeling I would have fun building it, and that is what counts for me these
days.
Laters I found out that the kit was first produced in 1957. It had been in the company´s program on and off, and also been marketed by Heller under the name Atlantic Star. It has been out of production for a long while now. Given the kit´s origin, it is rather basic, and much of it looks rather clunky. Comparing it to images of the very nice model of Great Western formerly on display at the Science Museum in London, I found the small model held up quite nicely, though. I can but recommend a visit to S.S. Great Britain in Bristol, a most impressive and enjoyable museum. Looking through the images I took there and into the guidebook I bought also helped me to get a feeling for how the vessel had looked like. |
 |
||||||||
| Construction begins | |||||||||
|
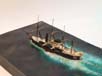
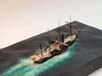
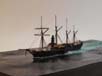
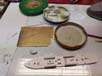
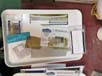
Building started with deciding on how to display the model, and how
to modify the kit. I wanted to show the vessel underway on a seascape,
giving me ample opportunity of playing around with water disturbed not
only by the hull, but also by the two paddle wheels.
|
 |
||||||||
 |
|||||||||
 |
|||||||||
 |
|||||||||
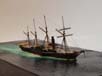
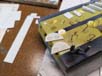
| The base was prepared in my usual method. I started with an oversize
piece of insulating board. Upon determining the position of the vessel,
I made a cutout for the hull, to make it fit as snug as possible. As I
never get that quite right, I mask the hull with tape and then fill any
remaining gaps with acrylic caulking. But only after I have shaped my wave
pattern with a gas burner (very carefully, and under proper ventilation!!).
The shaping done, I cut the piece to its final size, as that leaves neater
edges. Having filled the gaps, let the caulking cure for two days, and
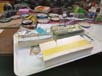
having removed the model, I trim any excesses and then stipple white wall
paint onto the base, as that leaves a surface texture that quite closely
resembles that of the sea. The paint dried, I use a shade of green acrylic
paint in my airbrush, applied away from the hull, followed by one or two
shades of blue, to bring the desired shade to the seascape. I tend to stop
at some point, sleep on it and revisit the day after. Any further wave
effects are made from clear gloss acrylic gel, drybrushed where necessary
with white artist´s oil paint. Working in two layers adds more depth.
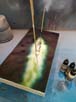
So I add some gel after bringing in the colour, do some drybrushing, and
then let everything cure well. I mean at least a week, better two. I need
to avoid residual moisture from my water-based paints, as it would lead
to bubbles in the surface of the gloss clear coat. I use solvent-based
clear gloss from a rattlecan from the hardware supermarket. That also needs
ample drying time, as it´s sticky much longer than you might believe.
Now, further wave effects may be added using clear gloss acrylic gel, highlighted with white artist´s oil paint. |
 |
||||||||
| Painting | |||||||||
| The model was primed with Stynylrez primer, black for the
hull and masts, white for the rest. The waterline was then masked and the
lower hull painted copper using AK Interactive´s TruMetal. The wooden
deck was sprayed a tan shade, the planking enhanced with a brown wash.
The paddle wheels were primed in black and then sprayed red, to achieve
a dark/rusty red shade. The masts and yardarms were painted black and a
wooden shade, followed by some drybrushing. The furled sails were sculpted
from Apoxie Sculpt, sprayed a light tan and also received a light brown
wash. Prior to mounting the masts to the ship, the sails were added to
the masts to ease work.
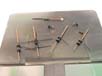
On the model, I contineud with the remaining subassemblies. A double steering wheel was fashioned out of some leftover PE cable reel assembly, the boats were sourced from a sprue of some 1:700 Hasegawa IJN ship kit, the davits |
 |
||||||||
 |
|||||||||
 |
|||||||||
 |
|||||||||
| I found in my spare PE folder. The anchors are a combination of the kit items with some styrene stock and PE rings. | 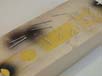 |
||||||||
| Final assembly | |||||||||
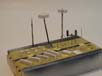
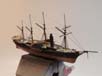
| Given the limited number of parts, that didn´t take overly long. After adding the deck and its limited superstructure, the flying bridge and the steering deck were added. Leftover 1:500 railing was used, which was pre-cut and shaped, and then mounted on tape and sprayed a wooden shade. After drying, it was added to the model. The funnel had been drilled out a bit, sprayed black and drybrushed in grey. The steampipes were brush-painted in copper. At this stage, I also added some PE figures, using GMM figures from their set for the box scale Revell US carriers. They were made a bit more 3D using CA glue and painted accordingly, using dark blue for officers and white for crew. | 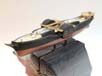 |
||||||||
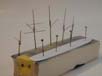
| The next step was to mount the bowsprit, followed by the masts, trying
to get things properly aligned and the masts at a correct angle. Despite
using CA glue, I rather let things cure overnight.
I really, really do not like rigging, neither does it like me. So I was ecstatic to have PE ratlines by Atlantic Models which are labeled 1:600-700, but luckily did also scale out here. They were sprayed with black Stynylrez primer on the fret, and then mounted. The ratlines on the two aft masts are one PE item cut in half per side. For rigging, I took the very simple way of using .2 mm brass wire for the larger stays, .1 mm nickel steel wire for intermediate lines, and Caenis monofilament only for the smaller stuff. That was surprisingly easy to do, and didn´t tax what remains of my sanity overly much. Yes, I am aware that even a simply rigged vessel like this has MUCH more rigging than I used. There you have it. |
 |
||||||||
| I then attached the davits and the boats, plus the anchors. That completed, the model received my usual final flat coat of forgiveness and obliteration, using Winsor & Newton´s Galleria acrylic clear flat. I was now able to mount the model on its base, closing some final gaps with cotton wool, especially below the paddle wheels, and around the stern. | 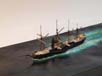 |
||||||||
|
|||||||||
| Conclusions | |||||||||
| From what I remember from the seventies, these small ship
kits cost about 2 Deutschmarks apiece. That would roughly equal one Euro
or a bit less than a Pound these days, nominally. I paid 10 Euros for the
vintage kit, which says all about getting some vintage stuff. Given that
I discarded most of the kit, it looks like a thoroughly bad deal. But to
me, it is not. I very much enjoyed the process of building. I love figuring
out what to do with old kits to bring them to a more detailed level, and
that experience was easily worth the money.
If stuff like this rocks your boat the kit is highly recommended. |
|||||||||
More
of Frank Spahr's work.
Updated 9/27/2019

© ModelWarships.com