CSS
Virginia II 1864-1865
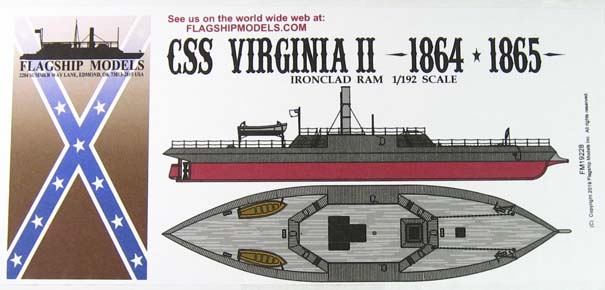
Flagship Models. 1/192nd
Scale. Resin
|
||||||||||||||
| Laid down in Richmond, VA, in early April 1862, the Virginia II was launched in late June of 1863. Due to various issues with iron and other material scarcity, she didn't commission until May of 1864. The flagship of the James River Squadron, Virginia II, patrolled the upper James River near Richmond, occasionally engaging Union warships of varying size, and fortifications further down river. Her major action came in January of 1865 at Trent's Reach. While firing on shore fortifications, the ship became grounded and had only just dislodged herself when the twin-turreted Union monitor USS Onondaga joined the battle. Two shots from Onandaga's 15" Dahlgrens smashed and punctured Virginia II's armor, forcing the ship to retire to the protection of the Richmond defenses before she could be further damaged. She remained in Richmond until April 4th, 1865, when the Confederacy abandoned the city to Union forces, when she was burned and sunk to avoid capture. | ||||||||||||||
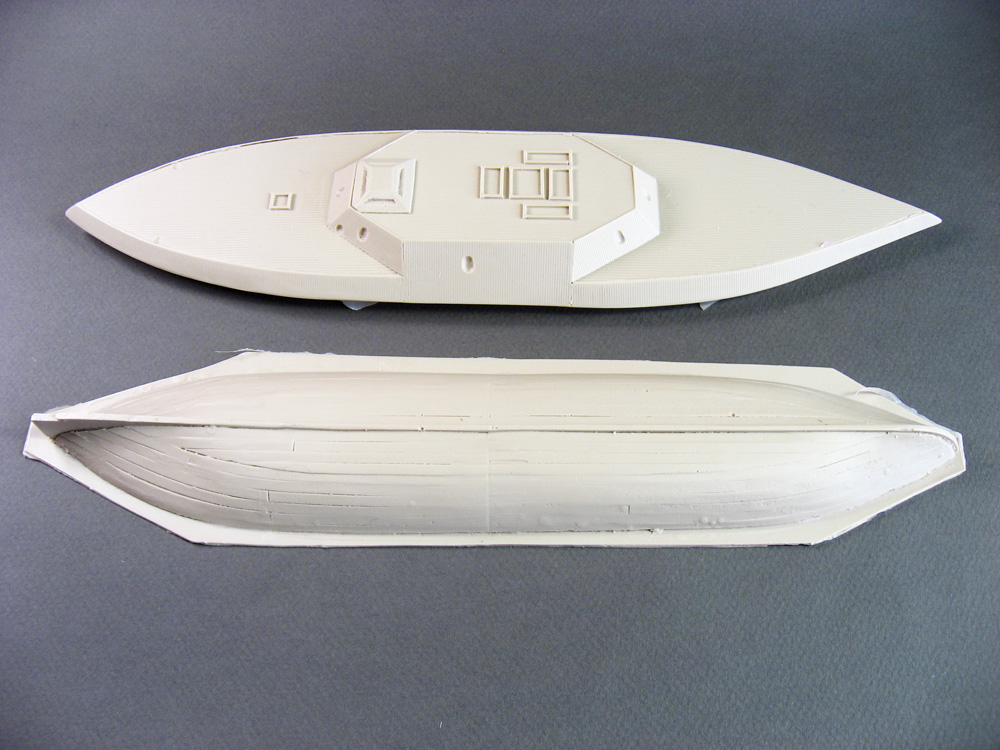
| THE HULL AND CASEMATE | ||||||||||||||
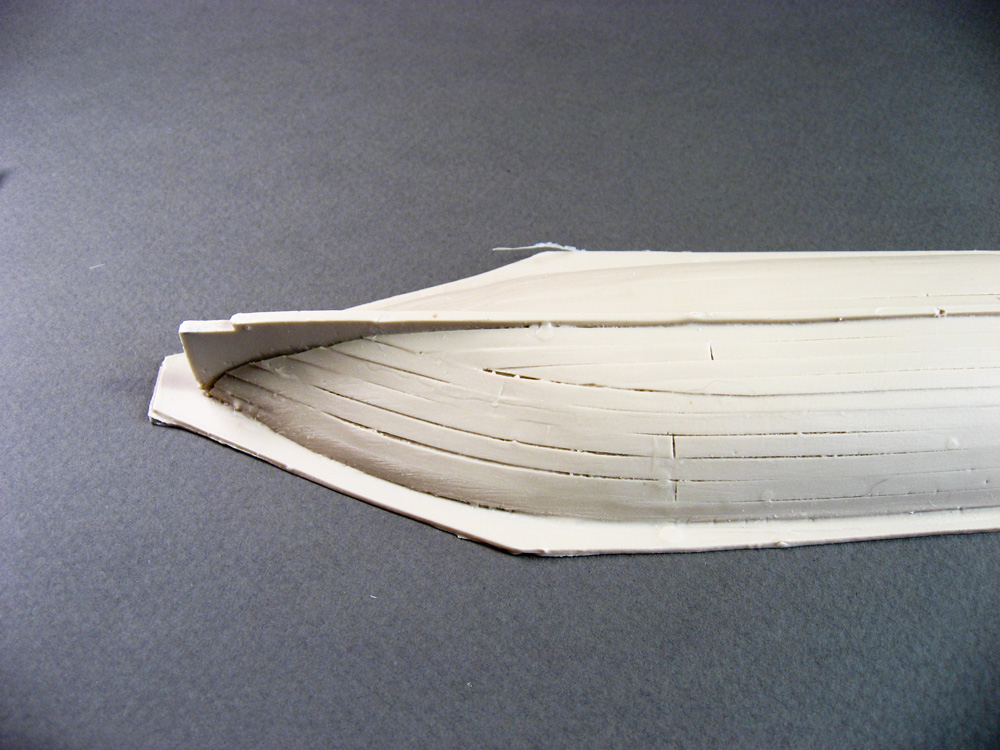
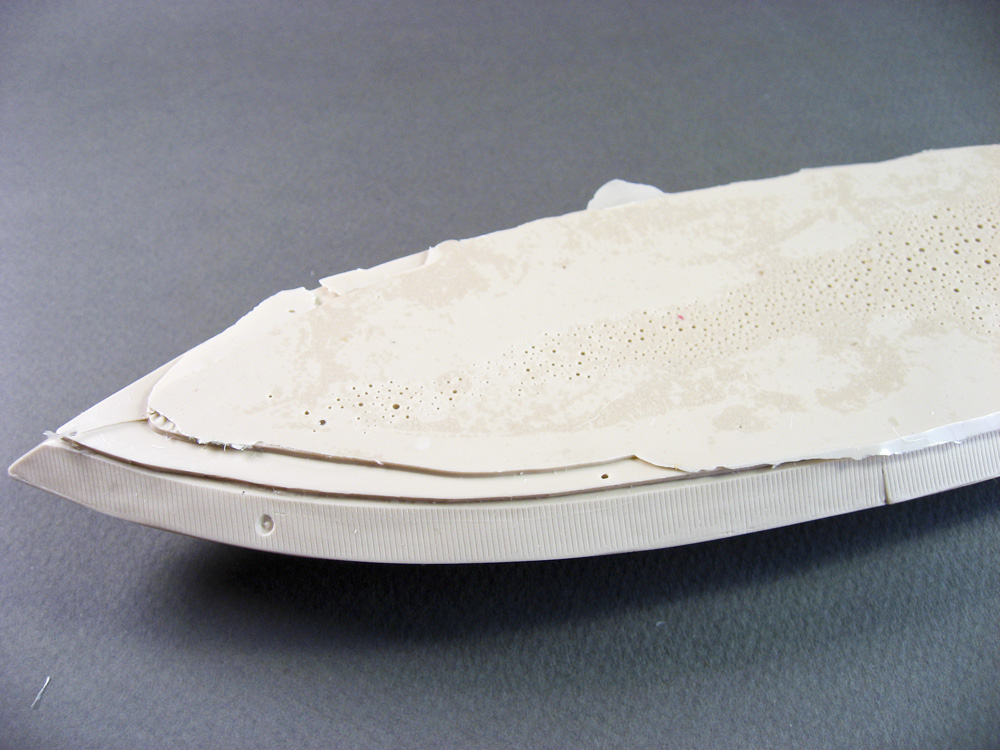
| Both lower and upper hulls are produced
in open-face molds, so there's a lot of flush sanding to be done to remove
the excess resin and get the two pieces to match up. The kit can be built
as either waterline or full-hull, with the two halves split near the waterline.
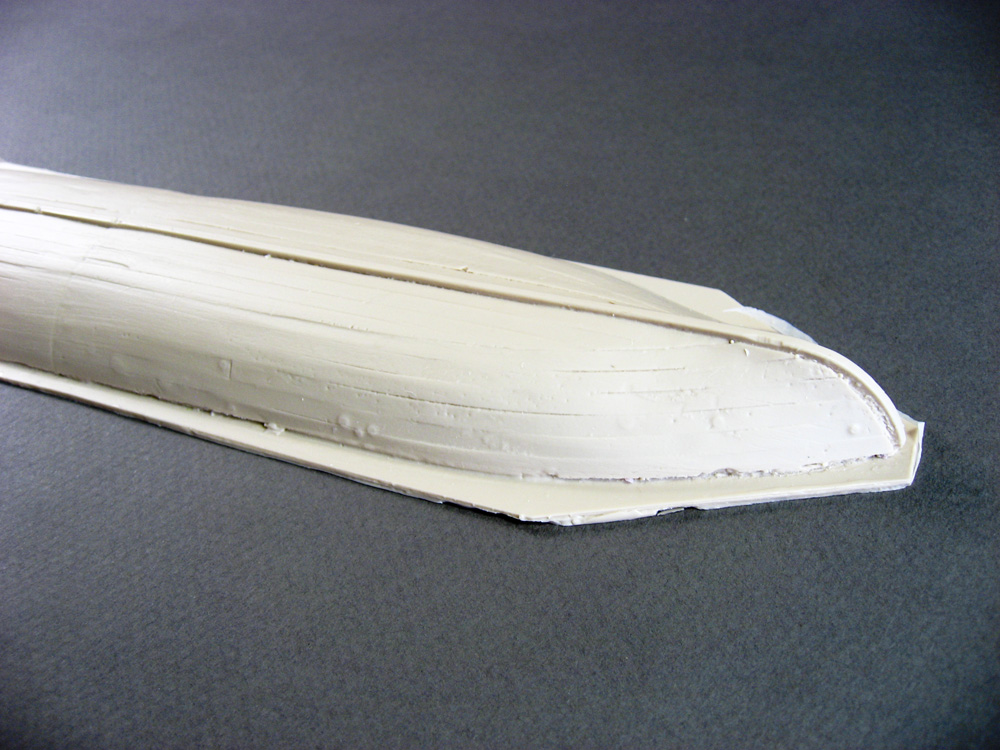
The turn of the upper hull, the knuckle, is well upon the upper portion
of the hull, and I believe this is where the waterline should run. This
is fine, though, as it's better to have too much material, rather than
too little, if you're going to do a waterline display. One note of caution:
the instructions show that the upper hull should be sanded to the level
of that knuckle, but that isn't correct. I believe the line drawing is
from another kit and was reused here -- it shows the lower part of the
knuckle as part of the lower hull. This isn't a huge deal, just be aware
so that if you want to build it full-hull, you don't sand away too much
material.
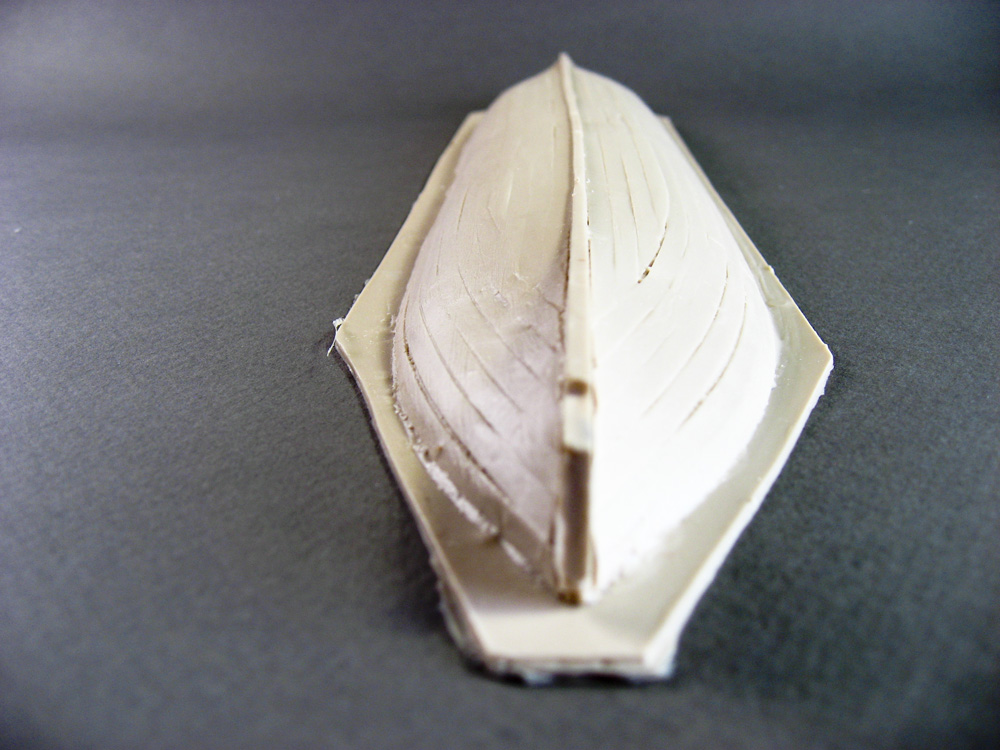
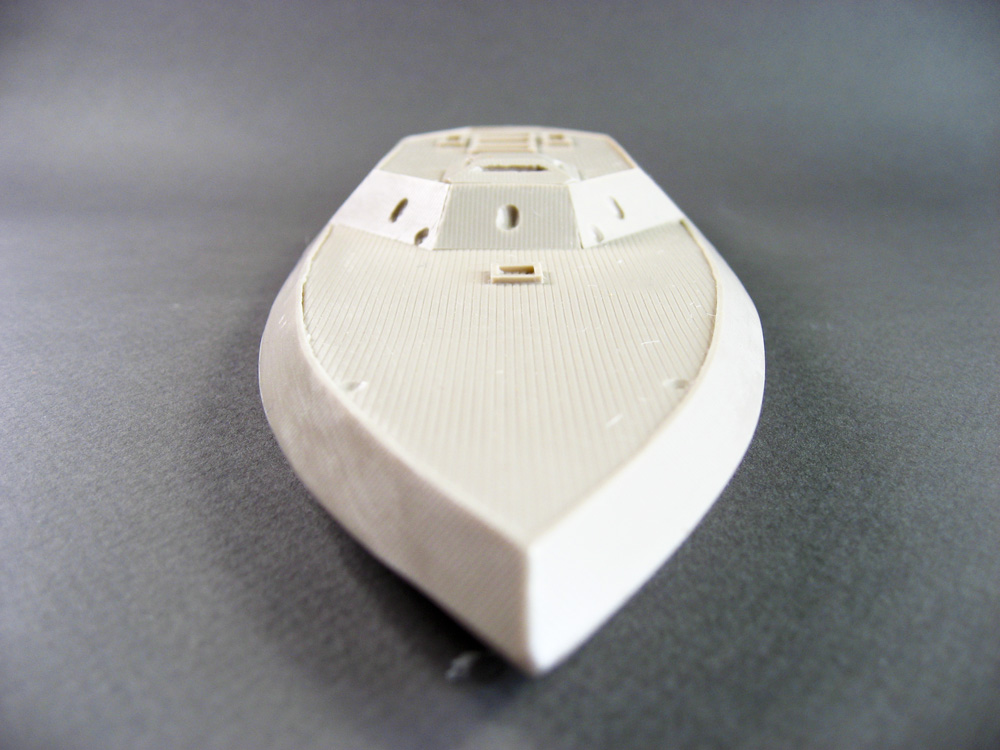
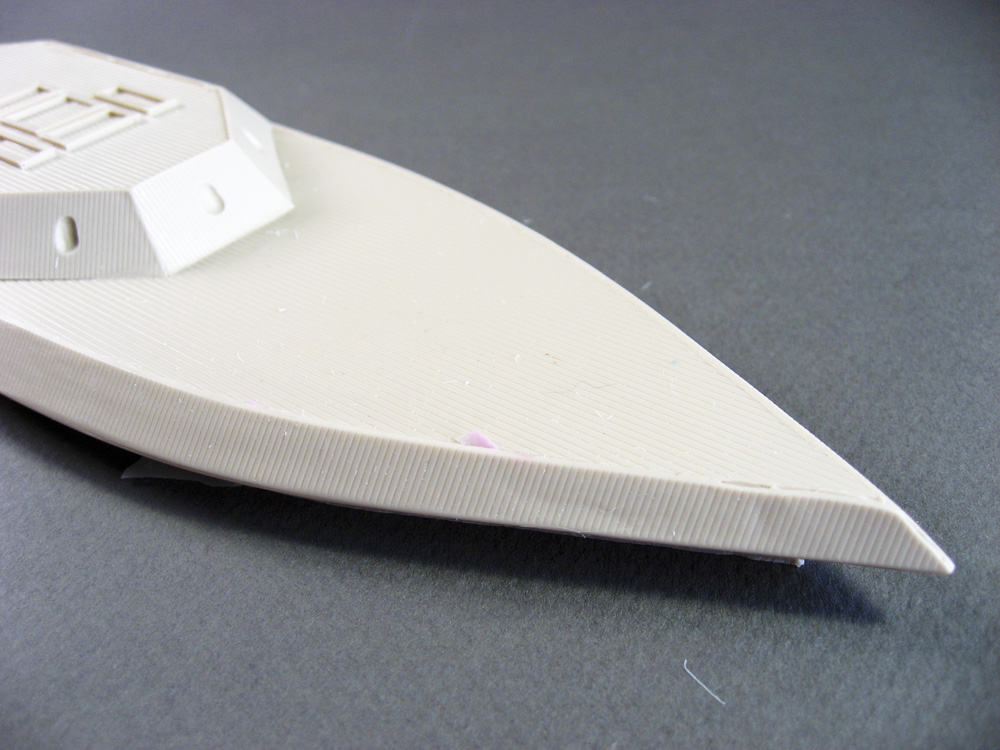
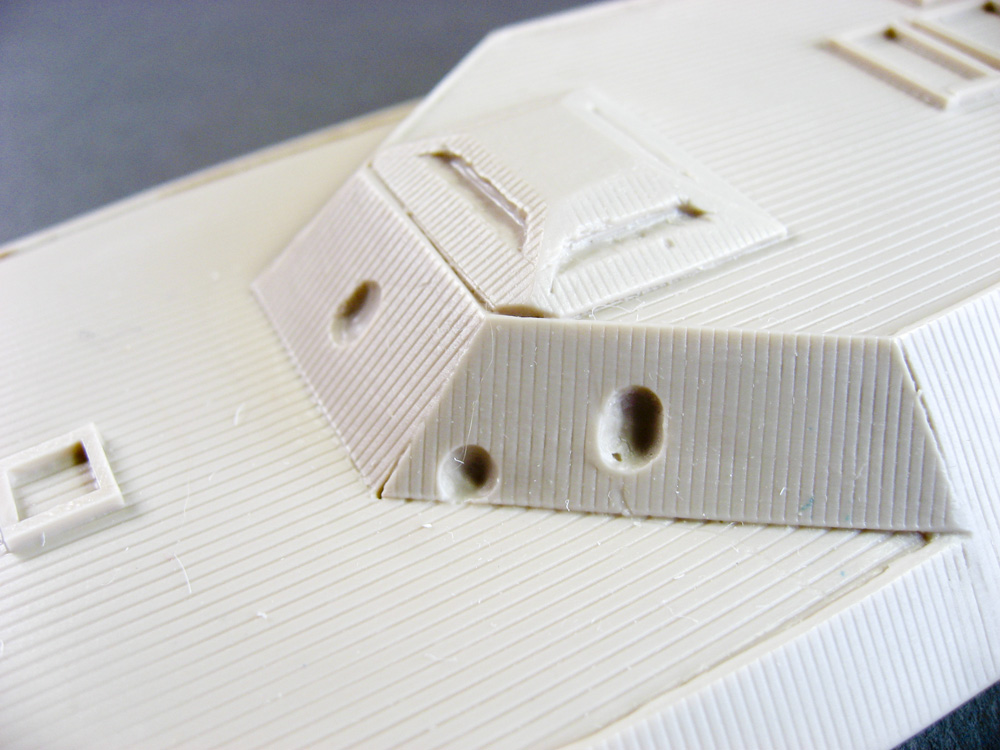
The upper hull and casemate casting has a few gaps here and there, but nothing that a little putty or primer won't fill. The decks have nice wood planking detail, but the starboard forward quarter has a separation gap between the hull armor and the planking. Special care will be required to fill that space without losing any planking detail, but it shouldn't be a huge chore. The observation slits on the pilot house will need to be cleaned a bit -- I'd have liked to see this a separate hollow piece -- and the gun ports will need to be drilled in order to clean them up. The pass-through for the anchor chains are indicated on the hull, but will have to be drilled through. The lower hull is a bit rough, but, again, nothing that can't be cleaned up. The planking detail is evident, but there are huge gaps between them in several places. A lot of people will say "these ships were quickly built with whatever materials are on hand, and should look a bit rough", which may be true, but the gaps between the planks, here, if taken to full-scale, would be inches wide and would put the ship on the bottom of the James in mere minutes. Again, some filler and sanding, with maybe re-scribing some of the joint detail,will resolve most issues. The biggest problem is the keel, though. Looking at the front-on photo, one can see that it's clearly curved to the side. This can be cut/sanded off and replaced with styrene stock, but it'd be nice if it weren't necessary. Exact size of the ship is hard to pin down. Virginia II and her sister, Charleston, were initially planned to be 180' long, but Virginia II's casemate was shortened from 100' to 70' in length to allow for thicker armor -- thanks to the pounding that CSS Atlanta took at the hands of USS Weehawken's 15" Dahlgren gun -- so who knows what modifications, if any, were made to the hull during the process. I keep finding the length of 197' for the ship online, but I can't locate that figure in any of my printed sources. Going with 197', however, at 1/192nd scale, that would be 12.3" overall length. The kit hull with the ram, measures just under 12.5", depending on how long one makes the ram, so it's spot-on. |
to enlarge |
|||||||||||||
 |
||||||||||||||
|
||||||||||||||
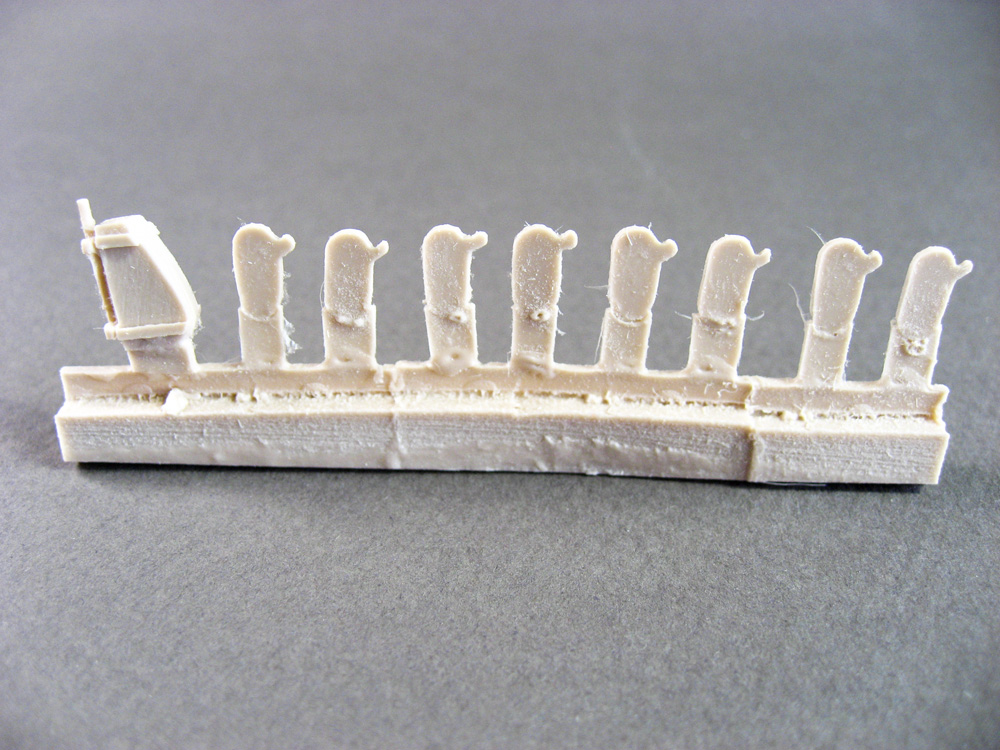
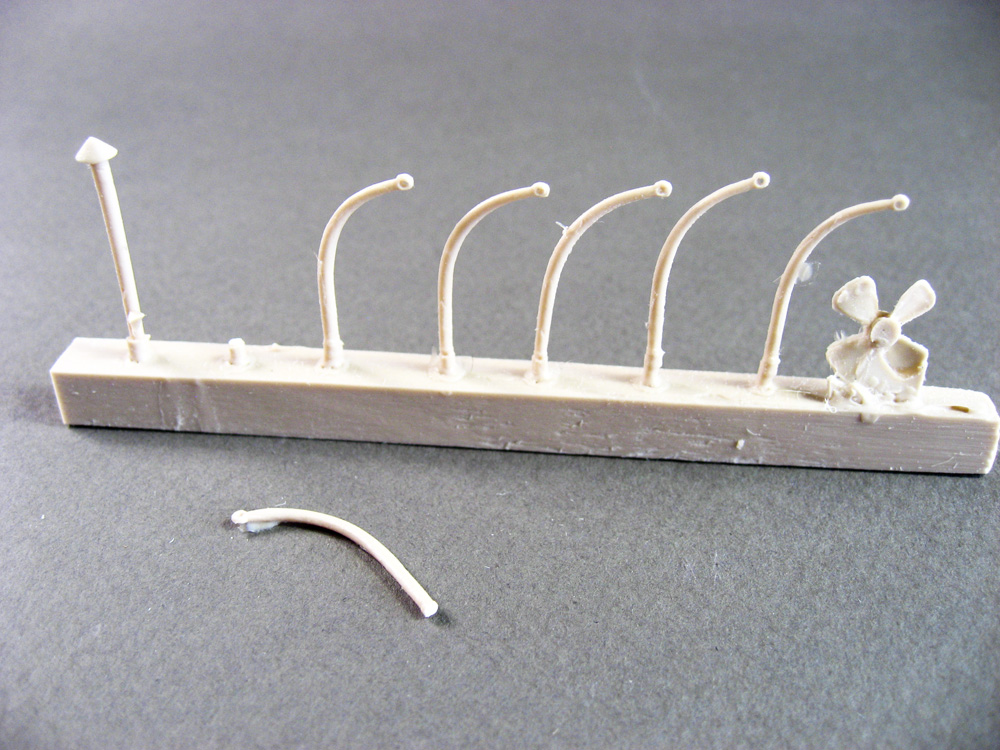
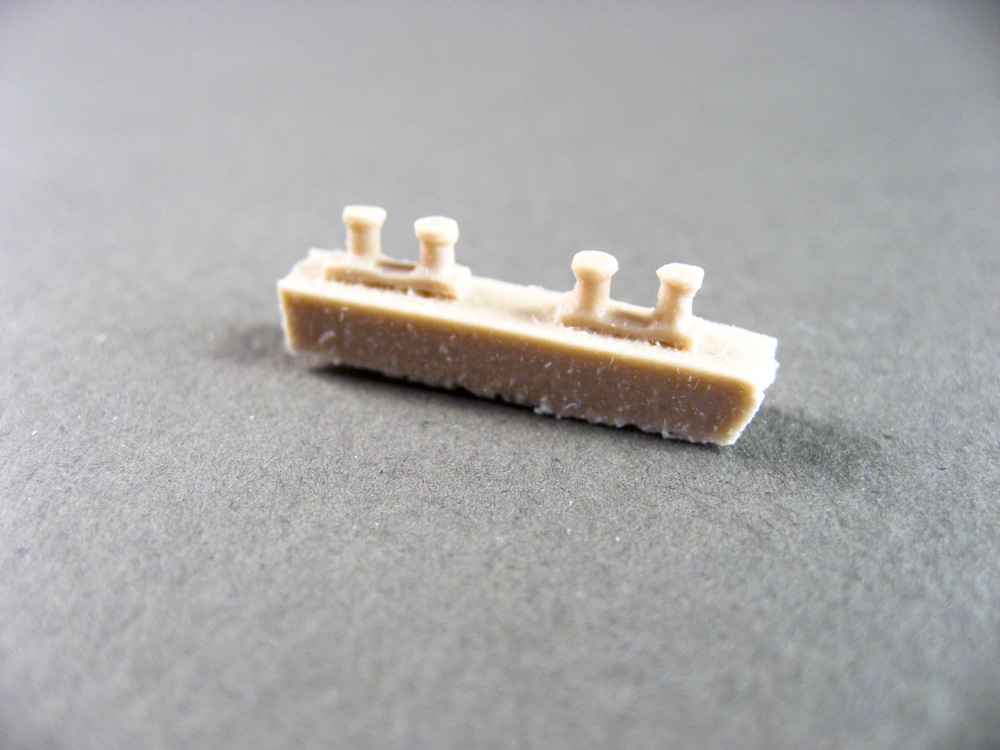
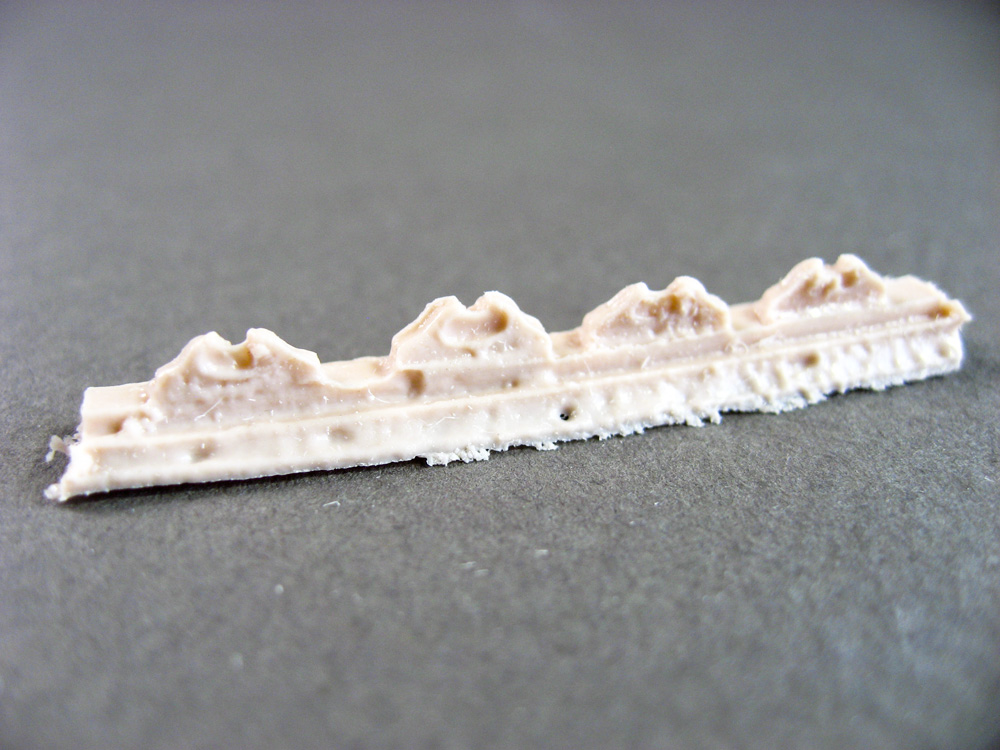
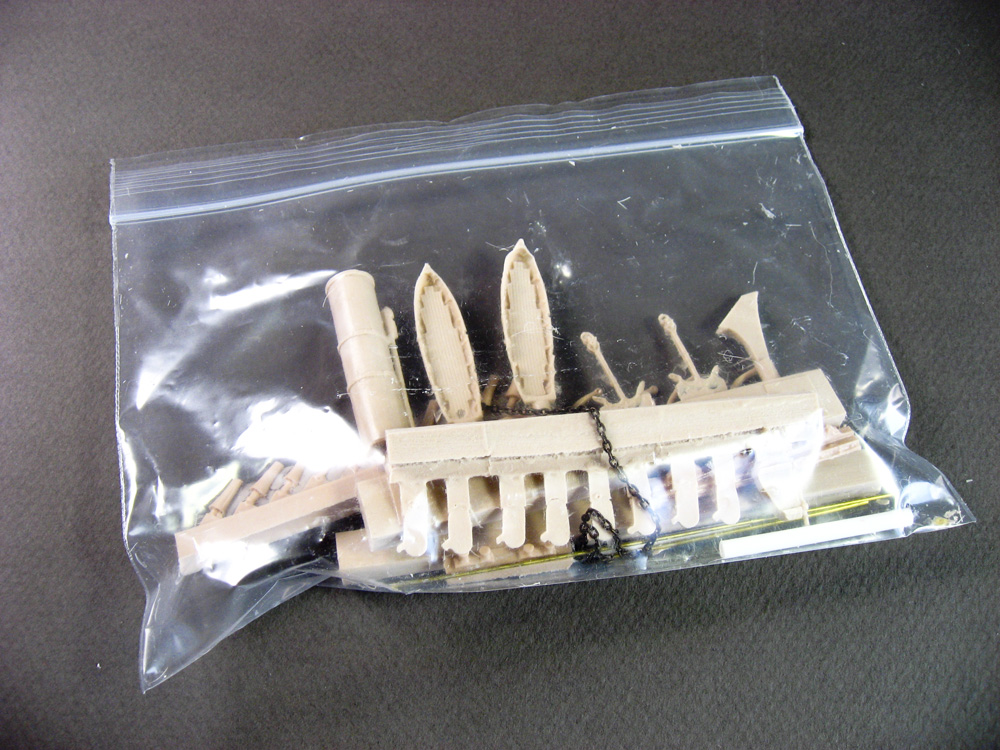
| SMALL RESIN PARTS AND OTHER | ||||||||||||||
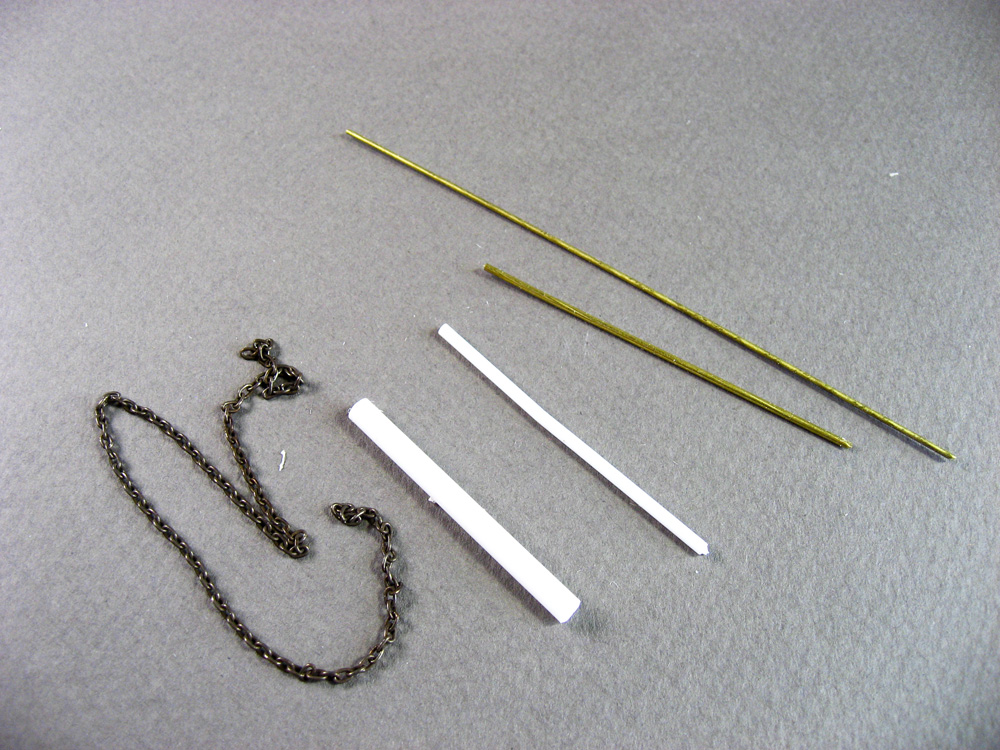
| A small Zip Lock bag contains the other cast-resin pieces,
along with brass rod and styrene tube for adding flagstaffs, masts, brass
propeller hub, and chain for the anchors.
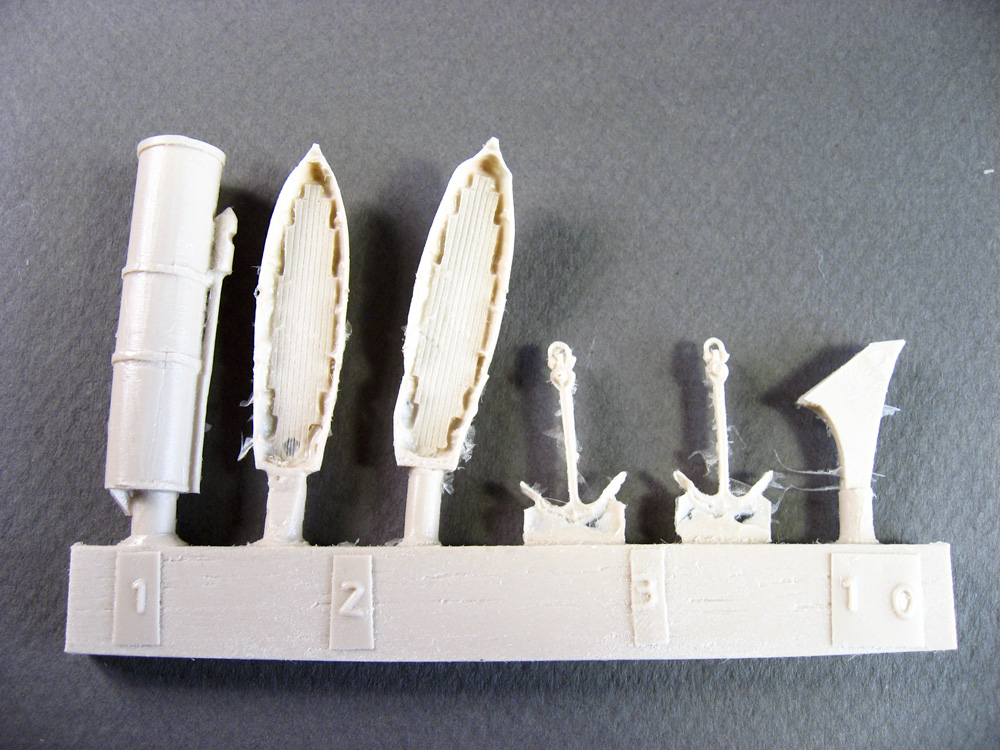
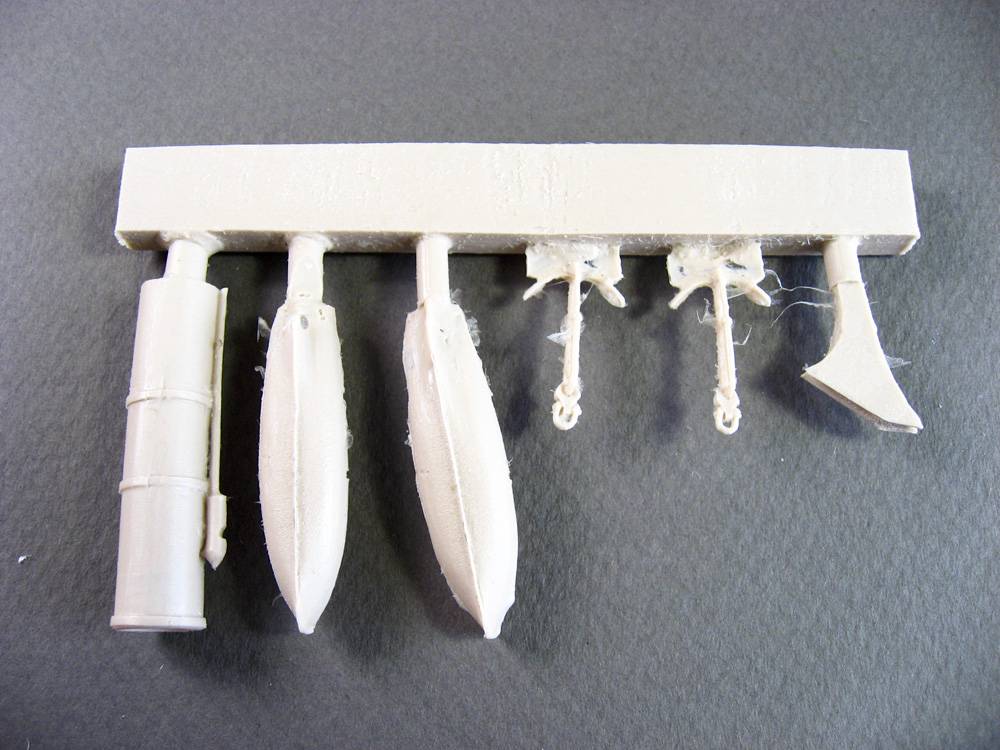
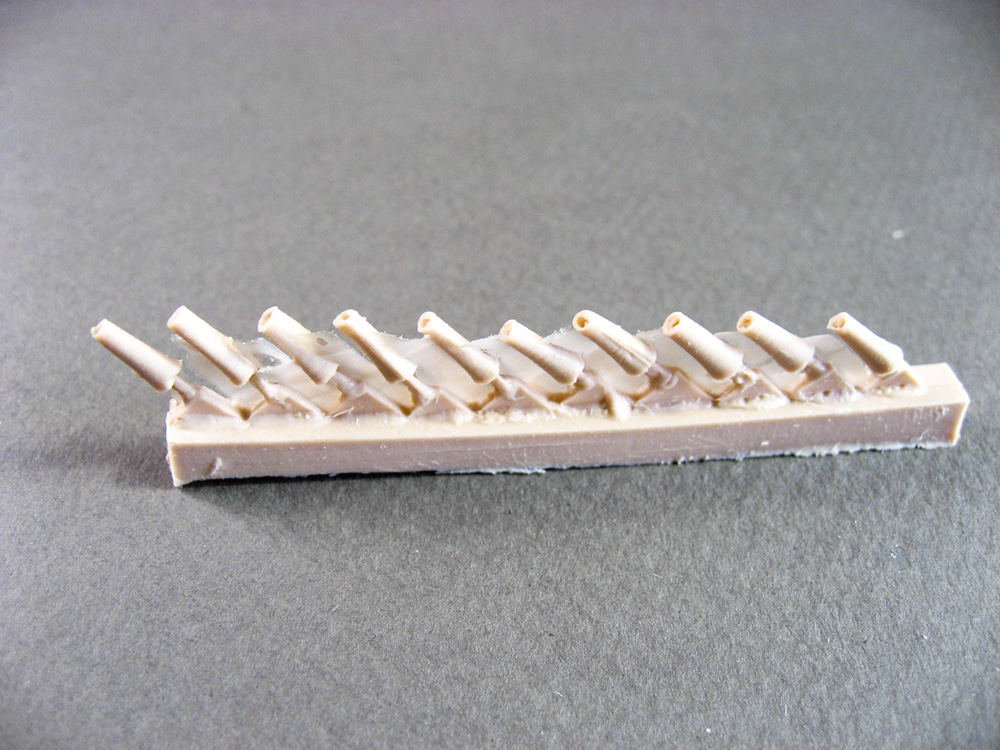
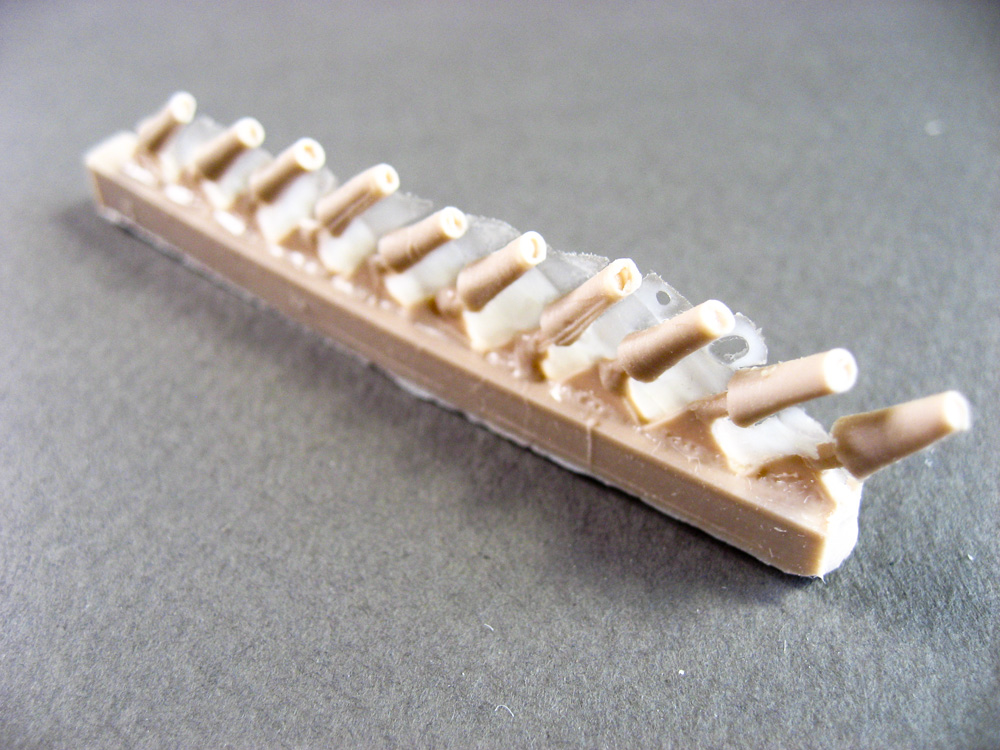
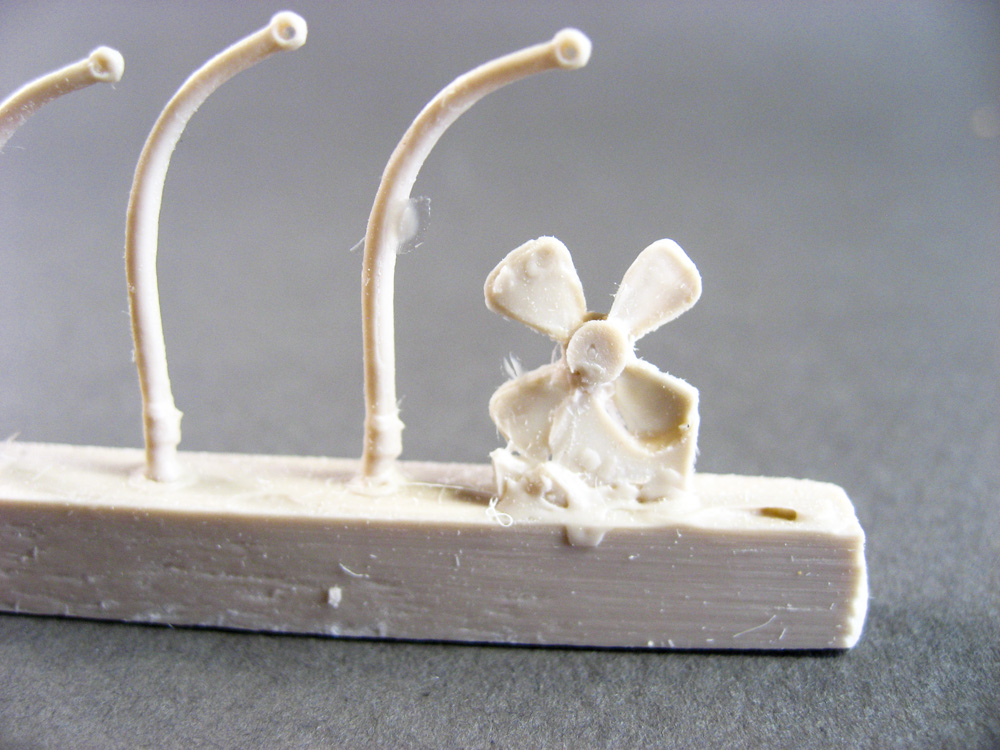
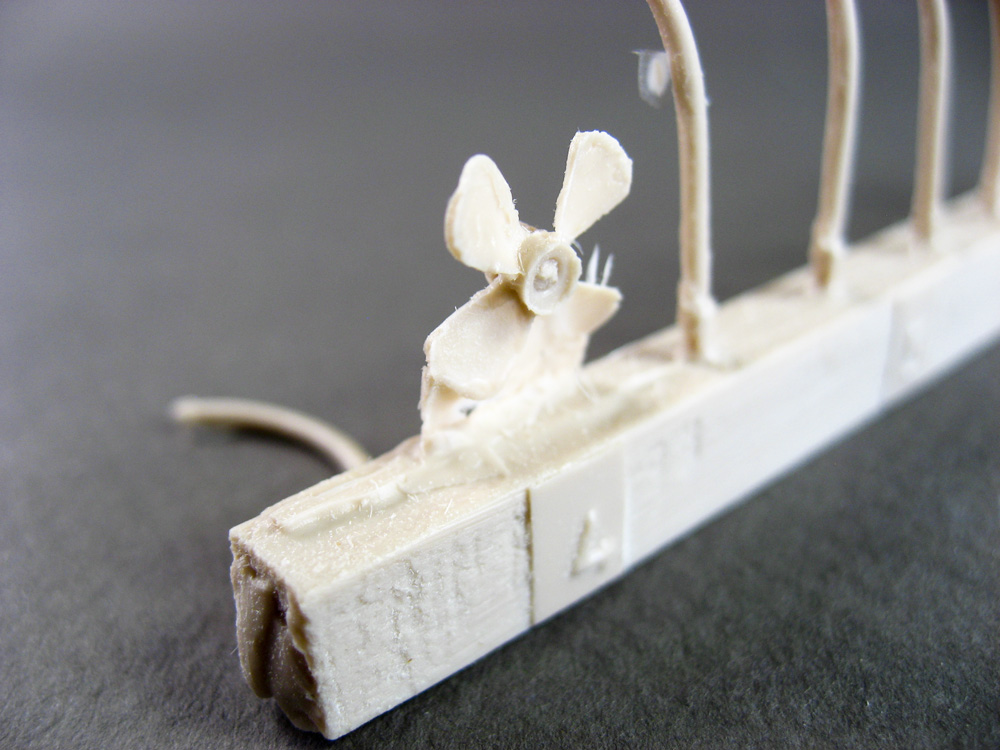
The first resin casting gate includes the ship's stack, boats, anchors, and ram. The stack is good, the detail a bit soft, and the steam whistle on it will need some extra care to clean up. The anchors have flash, but look to be solid under the excess. The ram is a solid bit of resin, with no holes or bubbles. Looks good. The boats in my sample are rough: one of them is misshapen, it looks as if it came out of the mold too early and got squished. Both boats have multiple small air bubbles, and larger holes in them. I'm sure they can be patched, but it'll require a lot of filling and sculpting, so I'd go for some aftermarket options. The next casting gate has the ship's guns. These are only the forward third of the tubes, as they only protrude out of the casemate ports. They have light flash, but should clean up nicely and look the part. There are 10 guns included, but don't use them all. Virginia II only mounted four cannon, one in each broadside, and a single canon both fore and aft, mounted on pivots, so that while the casemate ends have three gun ports, only one would be in use at any given time. Next up are the gun port covers and rudder. All of these look the part and should require little clean up after removing them from their casting gate. The boat davits, screw (propeller) and galley stove stack, are on the next casting gate. The stove stack and davits look fine, with typical resin part sanding needed to get them ready for primer. The screw looks to be okay, but there may be some warpage; the removal of the flash on it will tell the tale. Fortunately, if the screw does have issues, there's a photo-etched brass alternative included in the kit; a nice touch. Finally, for the resin parts, are the bitts and chocks. The bits look great, only need to be removed from their casting block. The chocks have excess resin in their inner surfaces, so a bit more care and cleanup will be required to get them ready for use. |
 |
|||||||||||||
|
||||||||||||||
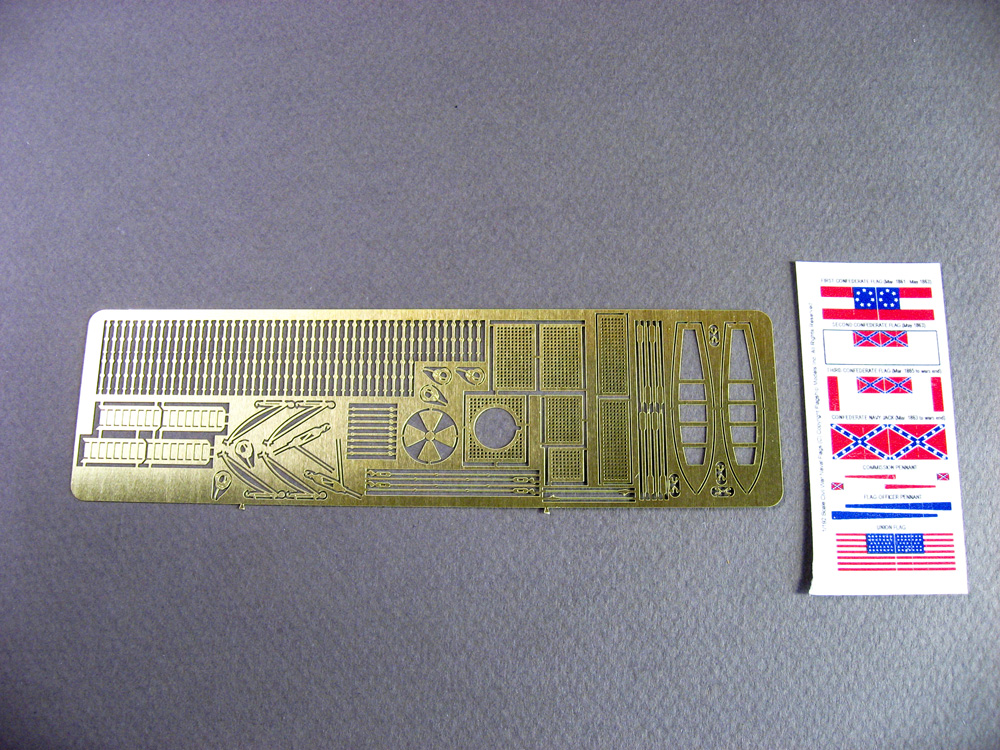
| BRASS AND DECALS | ||||||||||||||
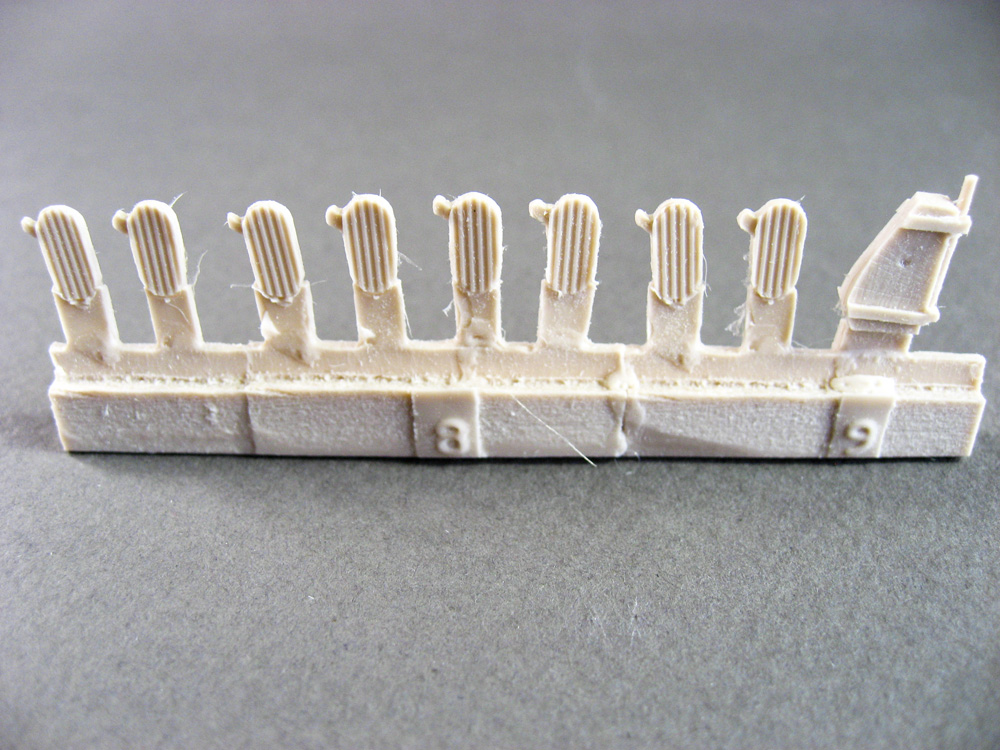
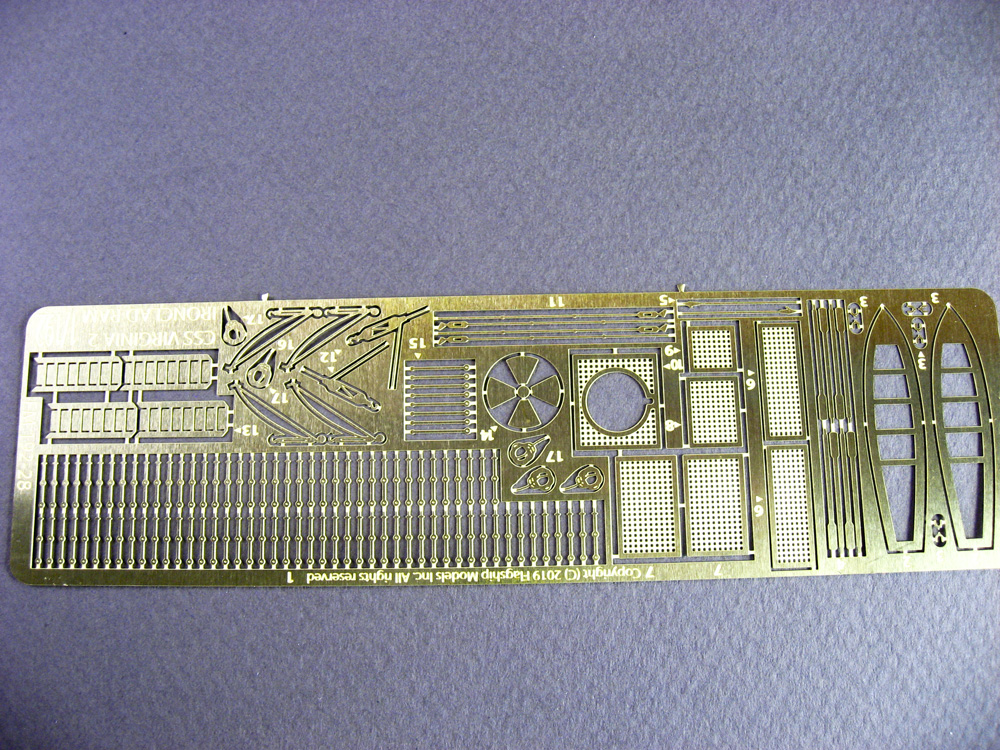
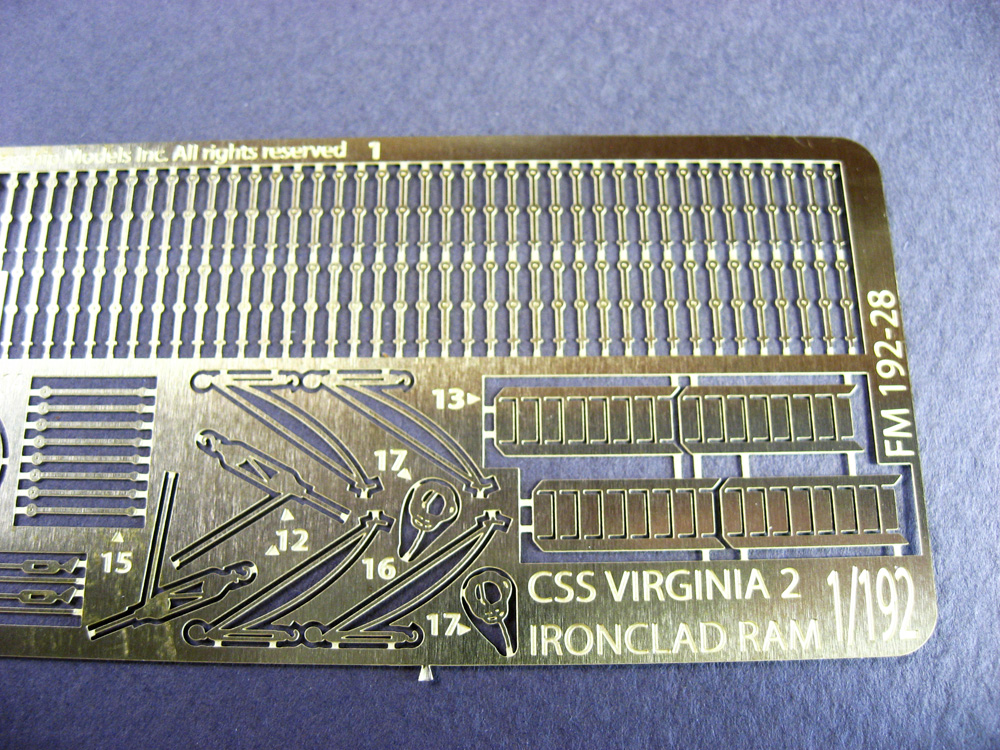
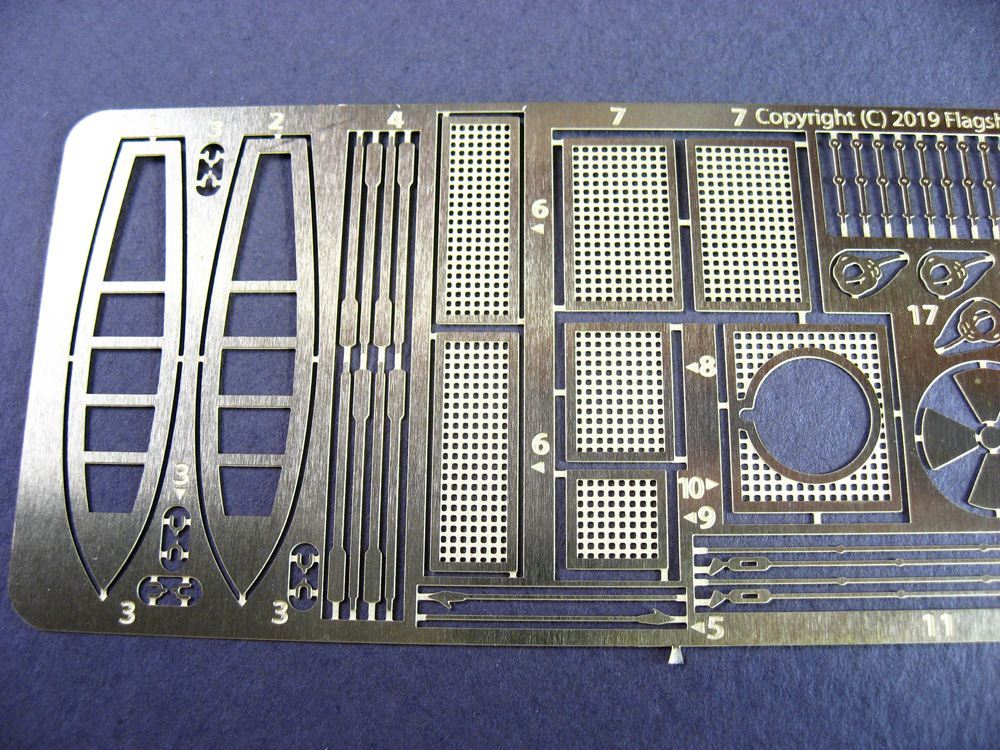
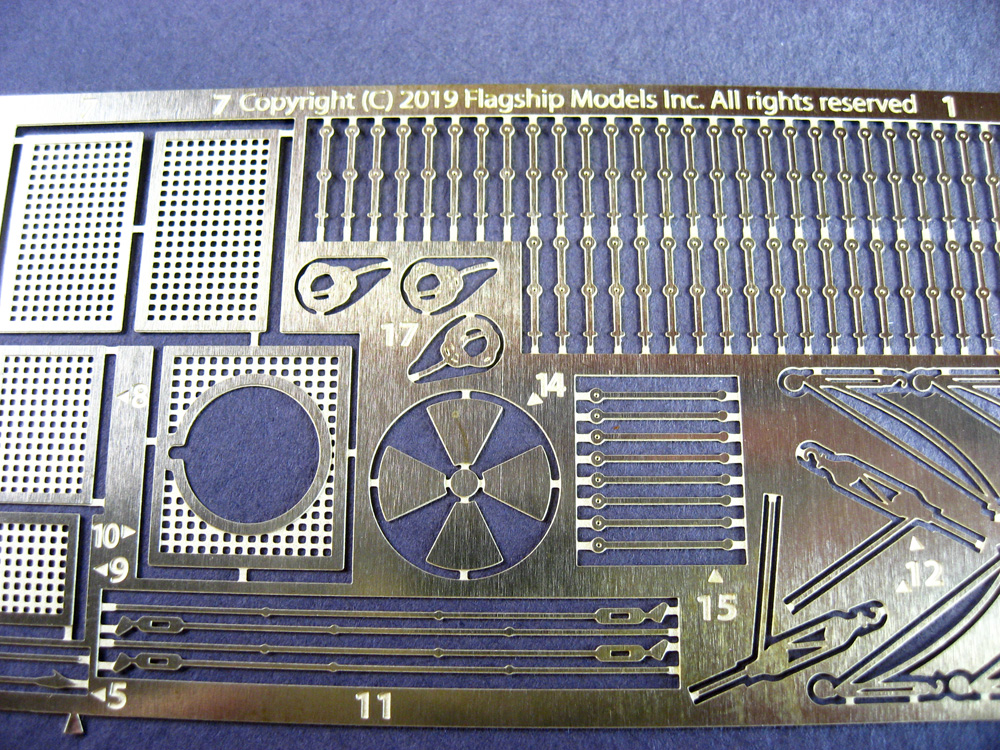
| The photoetched brass is where the kit really shines. Individual
lifeline stanchions, boat seats and oars, ladders, and lines with blocks
for the boat davits. Gratings and coiled ropes are also depicted. All of
it is cleanly, relief-etched for added detail, with small contact points,
making for easy removal.
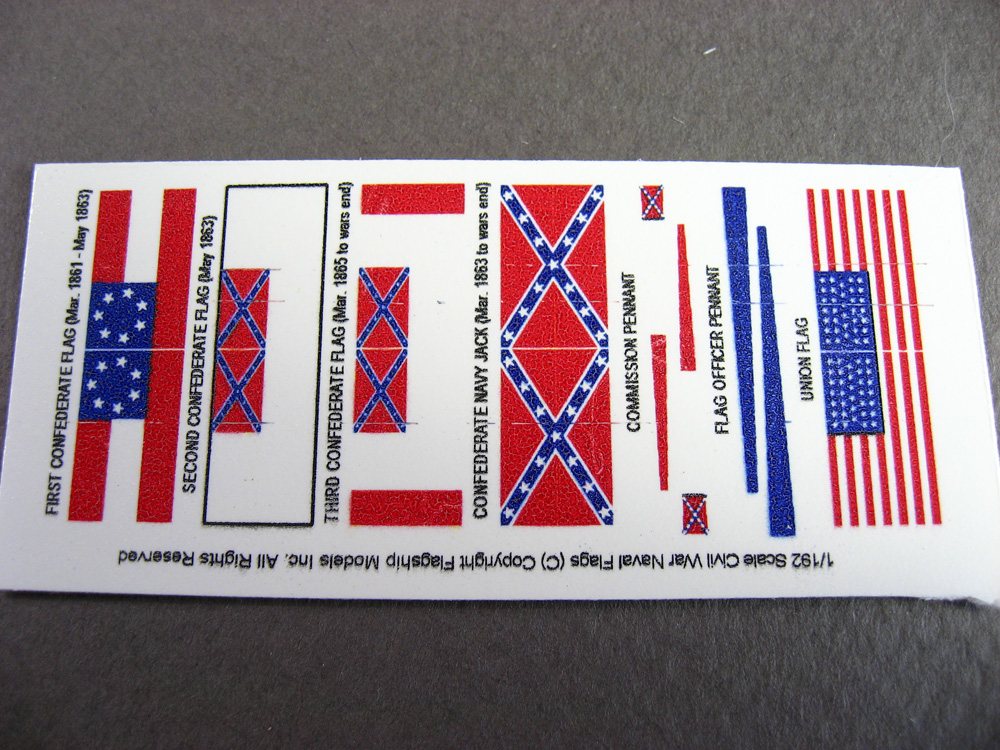
The decals are nice, as it's not easy to find Civil War era flags for either side. The decals in this copy, however, have a line artifact running through them, possibly due to a print head in need of cleaning. I think they're salvageable once applied to a backing material, formed, and touched up with a little paint. |
 |
|||||||||||||
 |
 |
 |
||||||||||||
 |
 |
|||||||||||||
| INSTRUCTIONS | ||||||||||||||
| The instructions are on a double-sided, single-sheet of paper. CAD designed, they are clear and easy to follow. An included inventory of all included parts is included, as well as overall views of all kit component placement, and detailed sub-assemblies where required. | 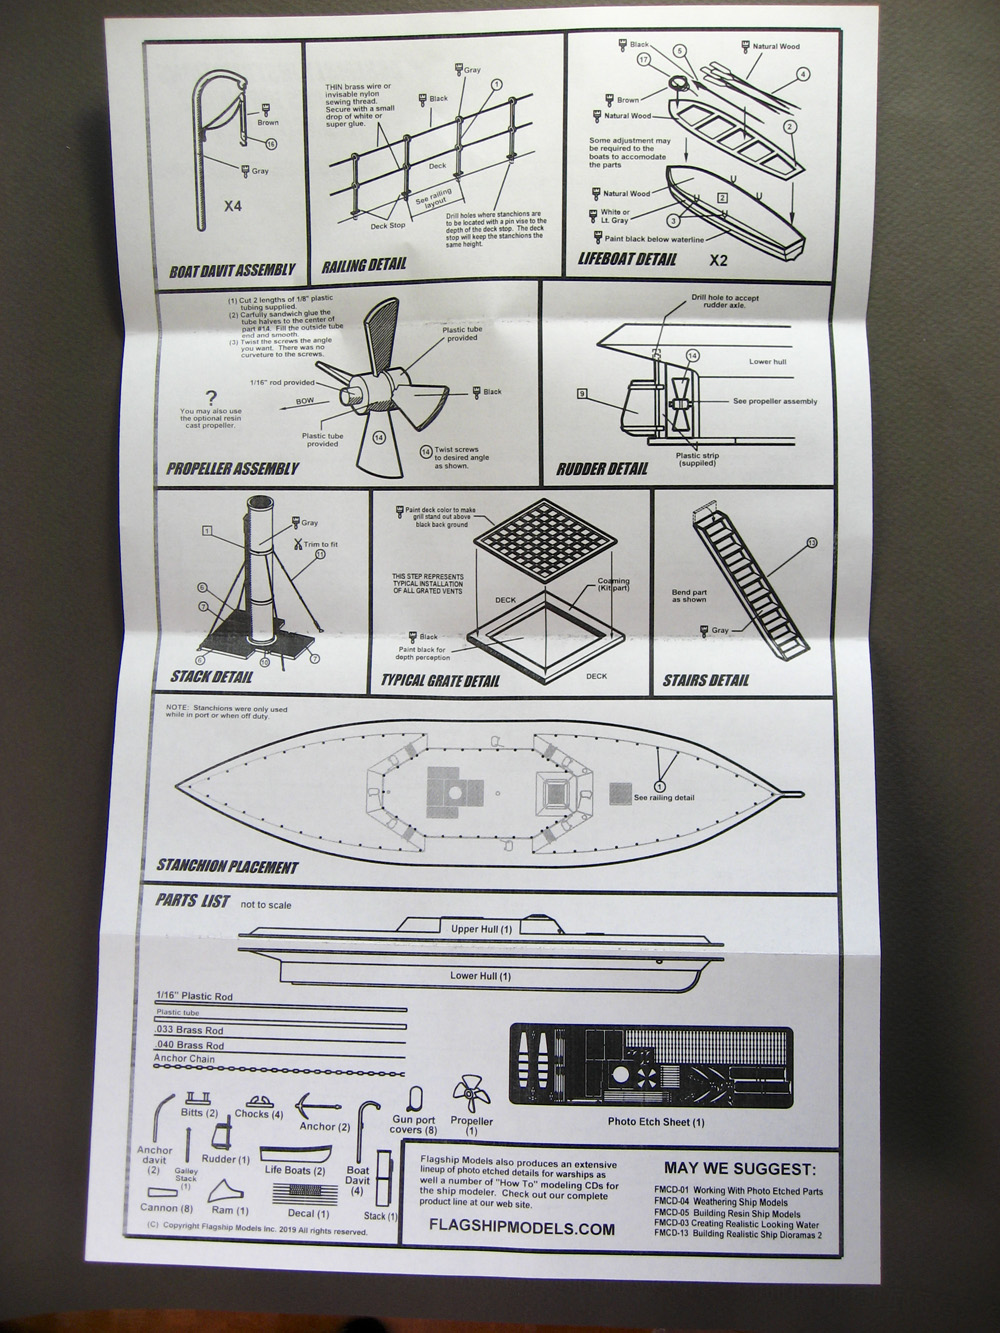 |
|||||||||||||
| CONCLUSIONS | ||||||||||||||

The Flagship Models' CSS Virginia II is a decent kit, that should build into a nice model with a bit of work. There are several components, such as the lower hull and the ship's boats, that will be a challenge to get to look right, but other parts such as the upper hull, guns, brass, etc. will come together with the application of basic resin kit building procedures. The Flagship Models' kits are unique, pretty much the only game in town anymore for 1/192nd (or 1/200th) scale American Civil War kits, and as such they fill a much-needed niche for the hobby. I do think that the aforementioned lower hull and ship's boats -- and indeed the entire kit -- would be better served with updated masters that are cleaner, CAD designed and printed, but for what you get in the box, you can turn out a decent replica. That being said, Flagship has recently announced that they have a USS Choctaw kit in the works, which is being CAD designed and the masters 3D printed, and I can't wait to see how that kit turns out. Recommended for those with prior resin kit experience. Thank you to Flagship Models for the review sample. |
||||||||||||||