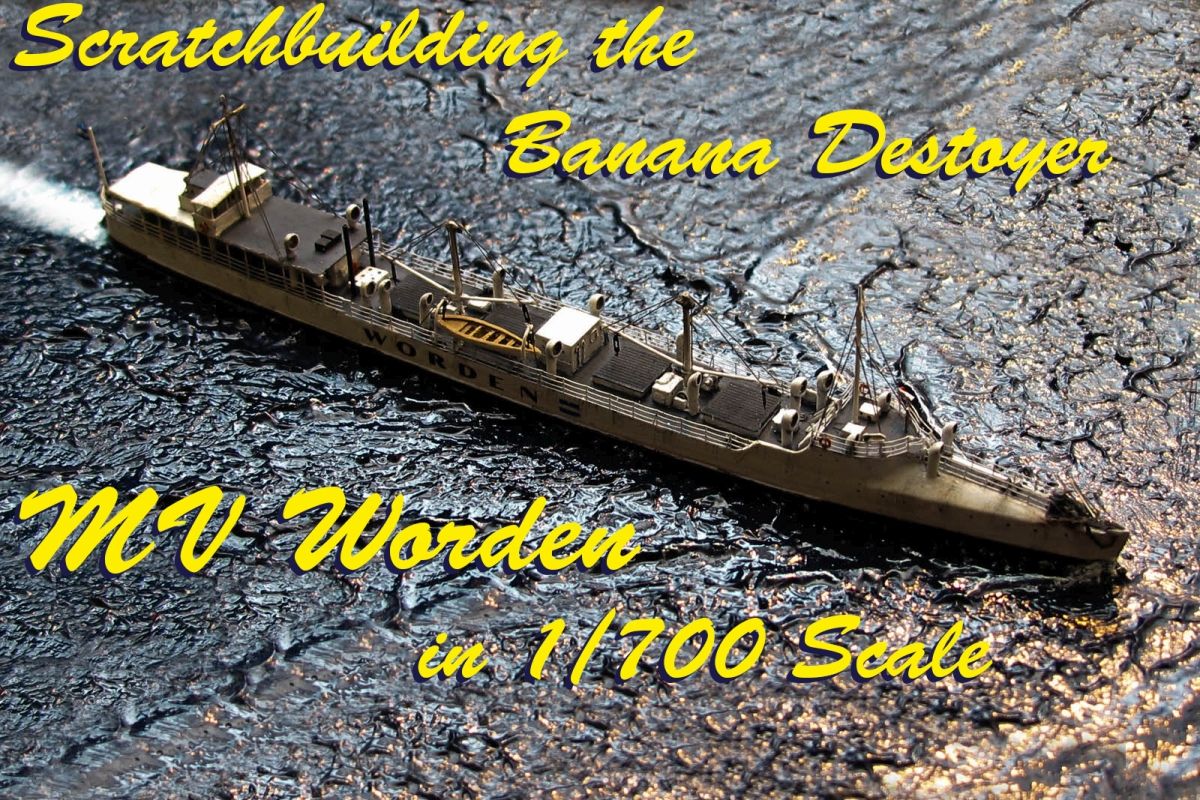
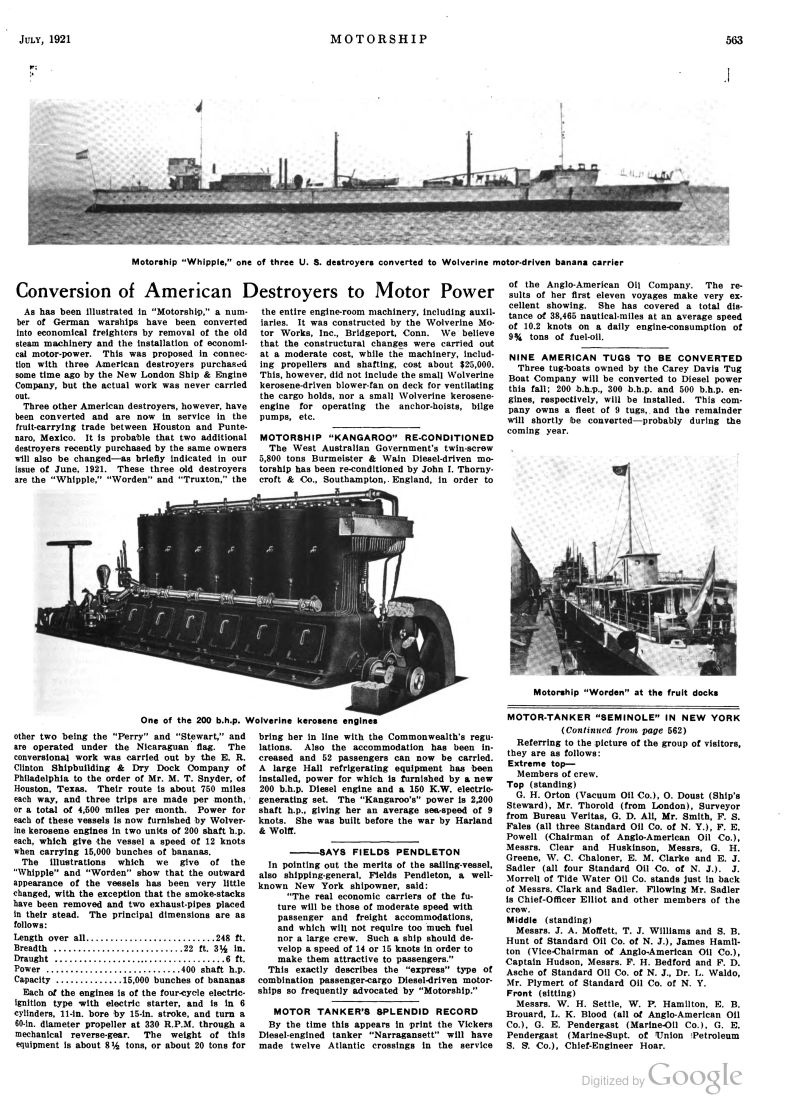
This project has started while doing a random search on the Wikipedia looking up the info on the USS Worden, a US Navy destroyer built in 1903, I was surprised by the line at the end of the article that the ship was sold in the 1920 and converted into the freighter. Ive always thought that if there were ships less suited to be freighters they were early destroyers. But it turned out that I was wrong and the Snyder Banana Company bought all three of the Truxtun class destroyers and converted them into the banana carriers. The steam engines were removed and their spaces were converted into the cargo holds for the bananas, while the propulsion was provided by two 200hp diesel engines. The ships could carry 15000 banana bunches. The ships retained their original names and were registered as MV Worden, MV Truxtun and MV Whipple. They were used on the Nicaragua-Houston run and carried Nicaraguan registration.
It seems that the conversions were successful as they were used on the banana runs in the 1920s and 30s. MV Truxtun got destroyed by fire in Haiti in 1938, and since it did not carry insurance it was nor repaired and was sold for scrap (though some other sources state that it was still carried in the Lloyds register as late as 1947 under Honduran flag). MV Whipple successfully carried bananas until 1956 when being completely worn out it was sold for scrap.
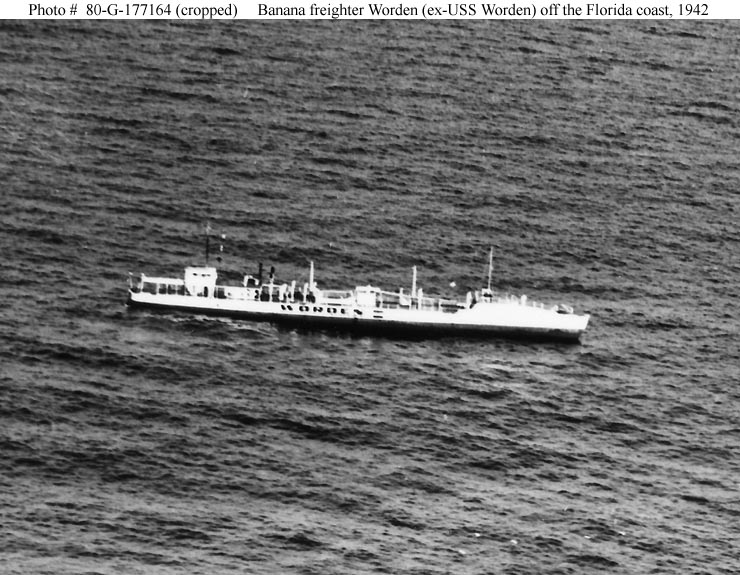
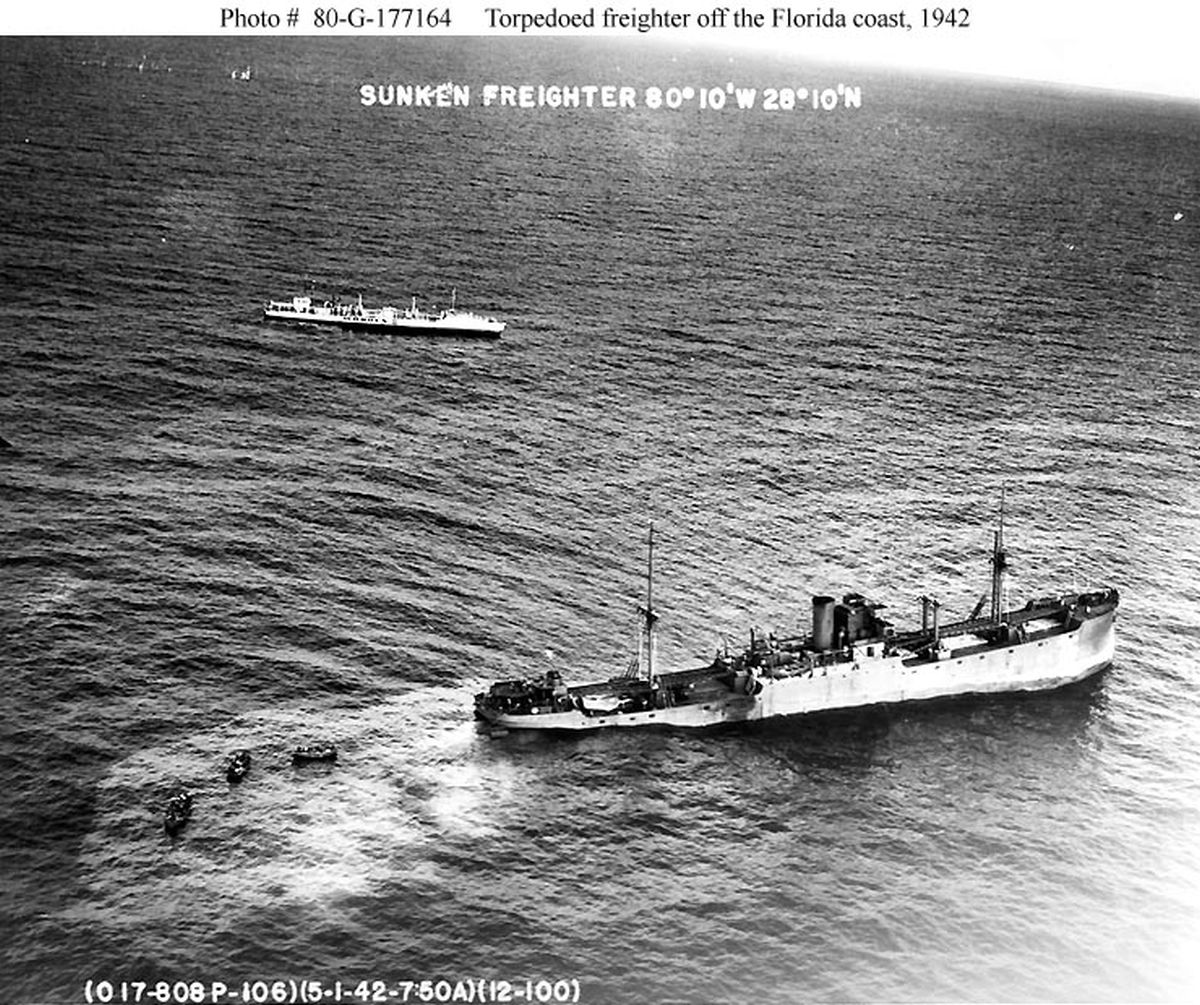
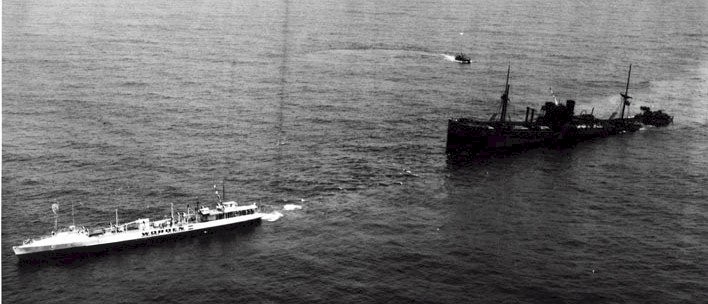
MV Worden on the other hand managed to take part in WWII. On May 1st, 1942 while on the standard run it picked up a distress call from the British freighter La Paz, which got torpedoed by the German U-boat U-109. Worden arrived on the scene and took La Paz under tow, but U-109 which was waiting around torpedoed Worden as well. Most of the sources state that it sank there, but some have it listed as belonging to Bahama Shipping Co and that sitting on the sand bar in the area in 1947, from which it was removed on May 3, 1947. So its possible that torpedo did not sink it, but rather just damaged it.
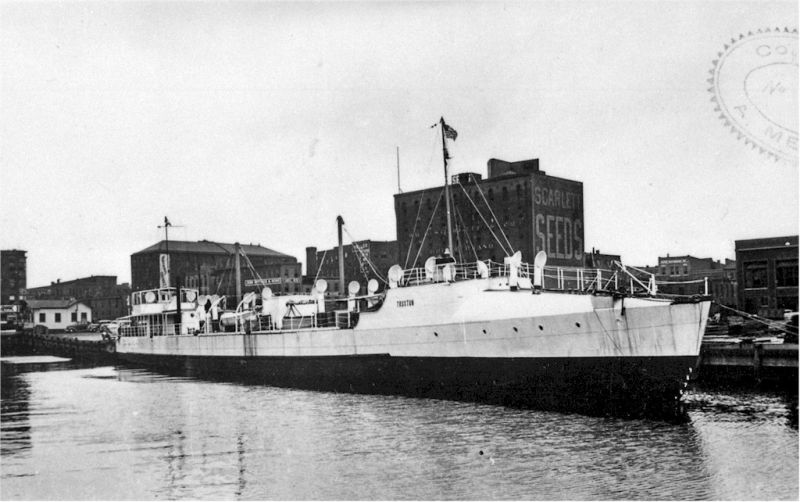
The original conversions were so successful that when US Navy was getting rid of the Clemson class destroyers in 1930 in accordance with the London Treaty, banana companies purchased four of the destroyers - USS Putnam DD287 (MV Teapa), USS Worden DD288 (MV Tabasco), USS Dale DD290 (MV Masaya) ? USS Osborne DD295 (MV Matagalpa) and also converted them to freighters as well. Once again the machinery was removed and diesels were installed. The converted ships could make 16 knots and carried 25000 bunches of bananas. MV Tabasco hit a reef in 1933 and was lost, but the other three worked the banana trade until WWII. In 1942 they were requisitioned by the US Army (not the Navy) and were designated USAT (US Army Transport) while retaining their original names. Army wanted to use them as fast transport to resupply Bataan and Corregidor, but they did not make it to the theatre before Corregidor fell. They were send to Australia instead. MV Masaya was sunk by Japanese aircraft in the New Guiney archipelago on March 28, 1943. MV Matagalpa was extensively damaged by fire in Sydney on June 29, 1943. Only MV Teapa survived the war it was also damaged by fire in Seattle in 1942, but was repaired and converted into artillery training ship in which capacity it served until 1945, when it was demobilized and returned to the original owners, who used it for banana runs until 1955. As far as I know it was the last of the flushdeckers to remain afloat.
The Model
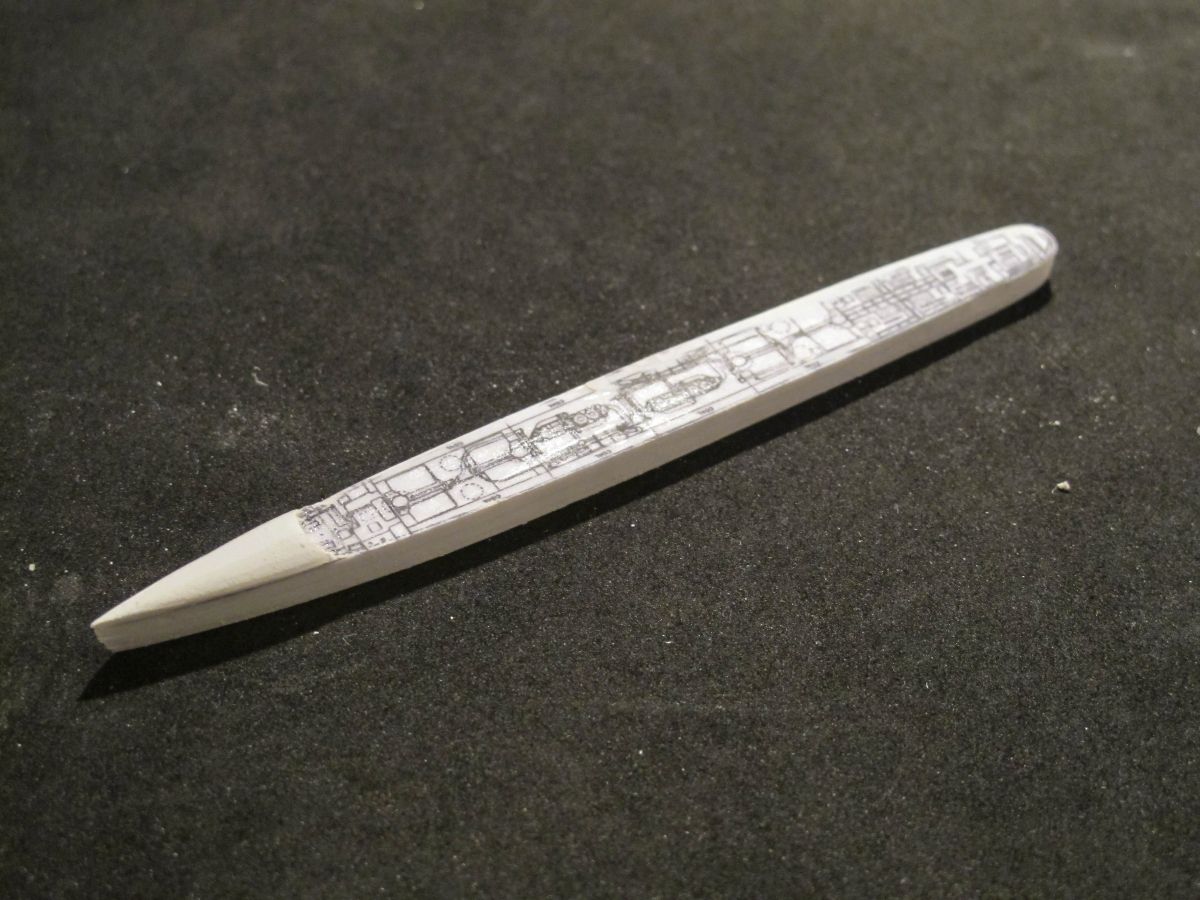
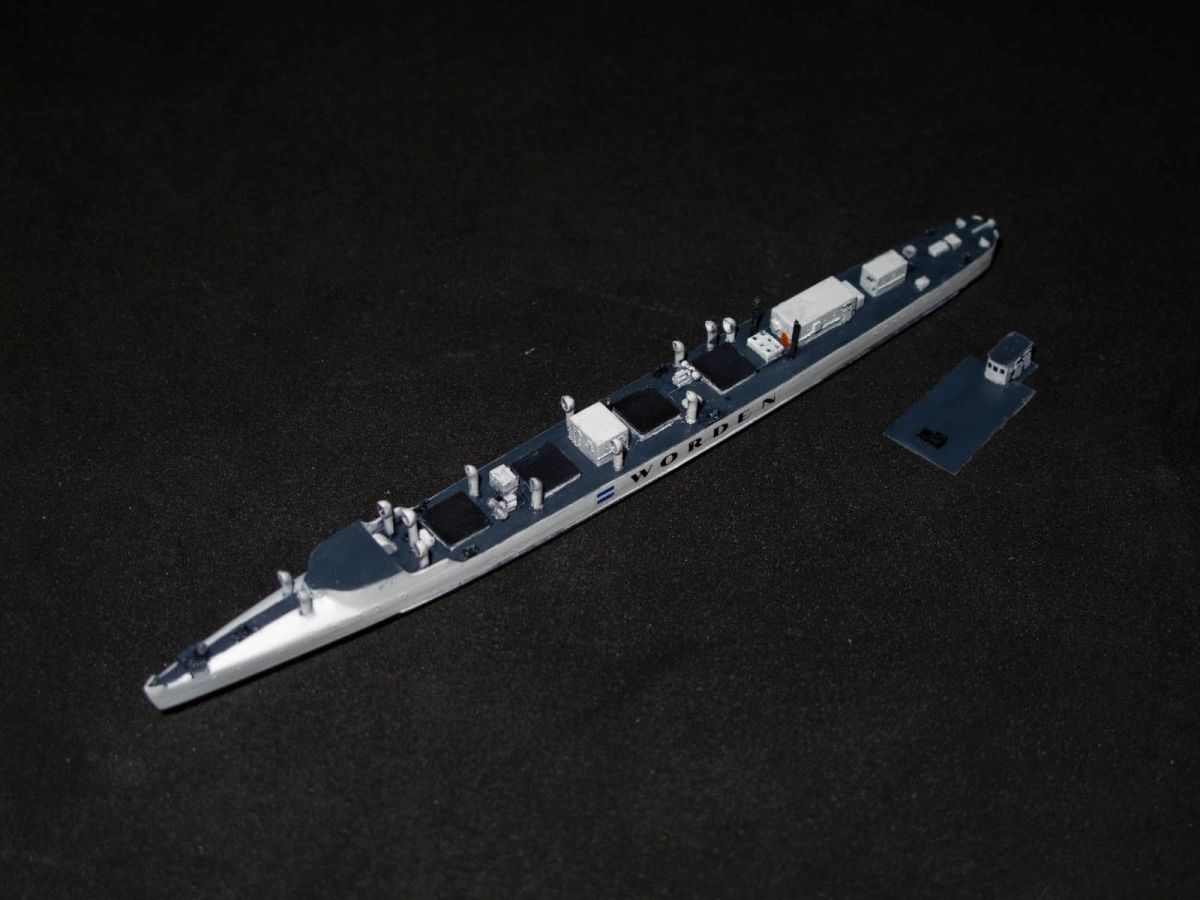
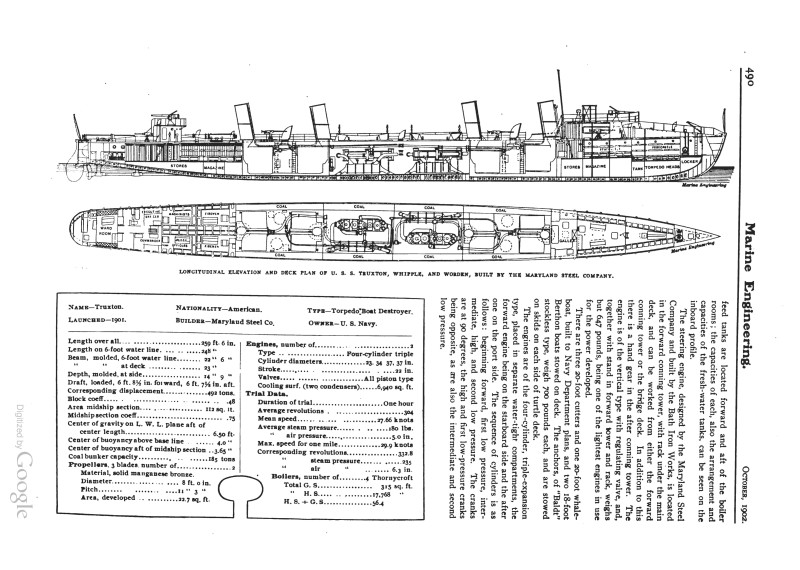
As a sucker for the unusual ships I was hooked and decided to build a model of the Worden. The main problem was the extremely limited amount of information available on these conversions. One of the great sources of information about the pre-dreadnought warships and pre-1922 ships in general are the old publications that are freely available on Google Books and various other online libraries. In this case I was able to find the line drawings for the USS Truxtun in its destroyer form and an article from 1921 about the conversion. This was enough to start working on the project.
to enlarge
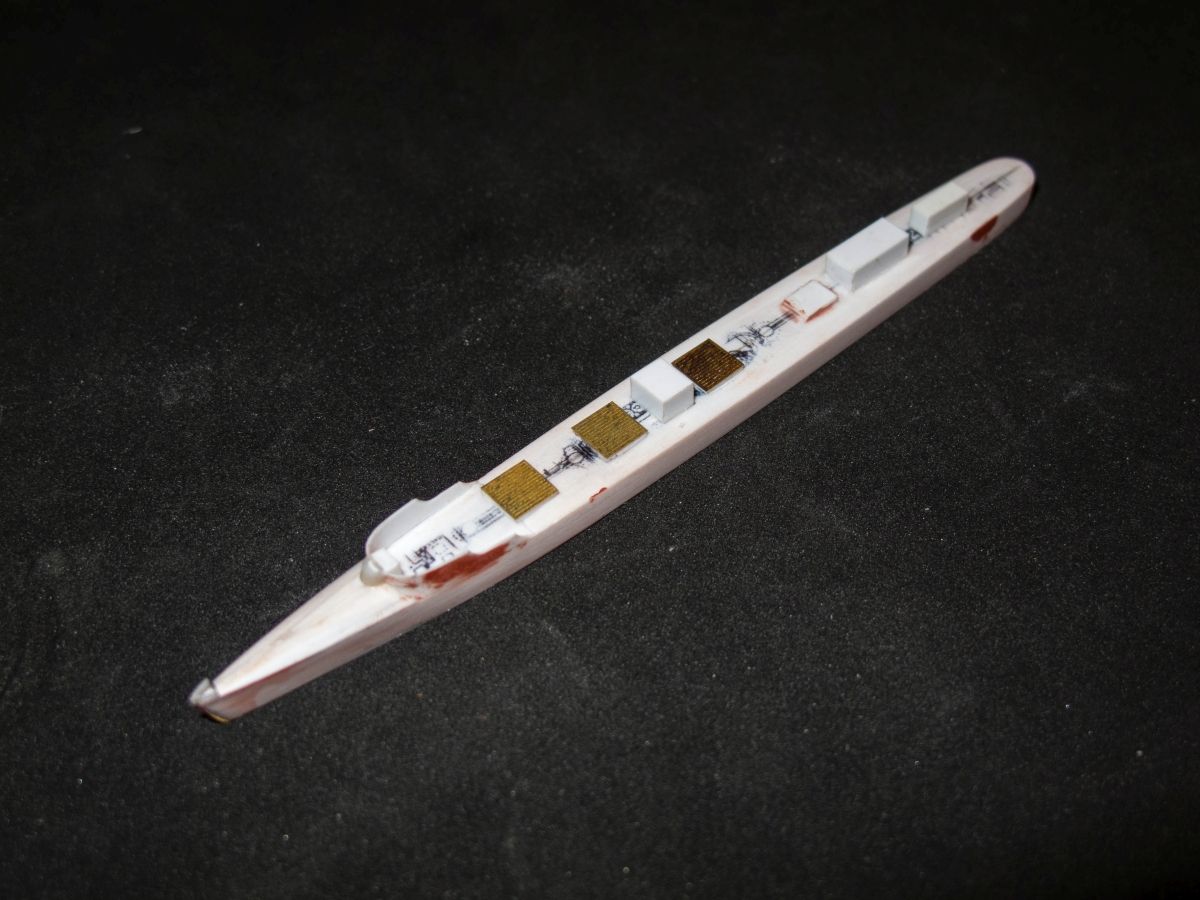
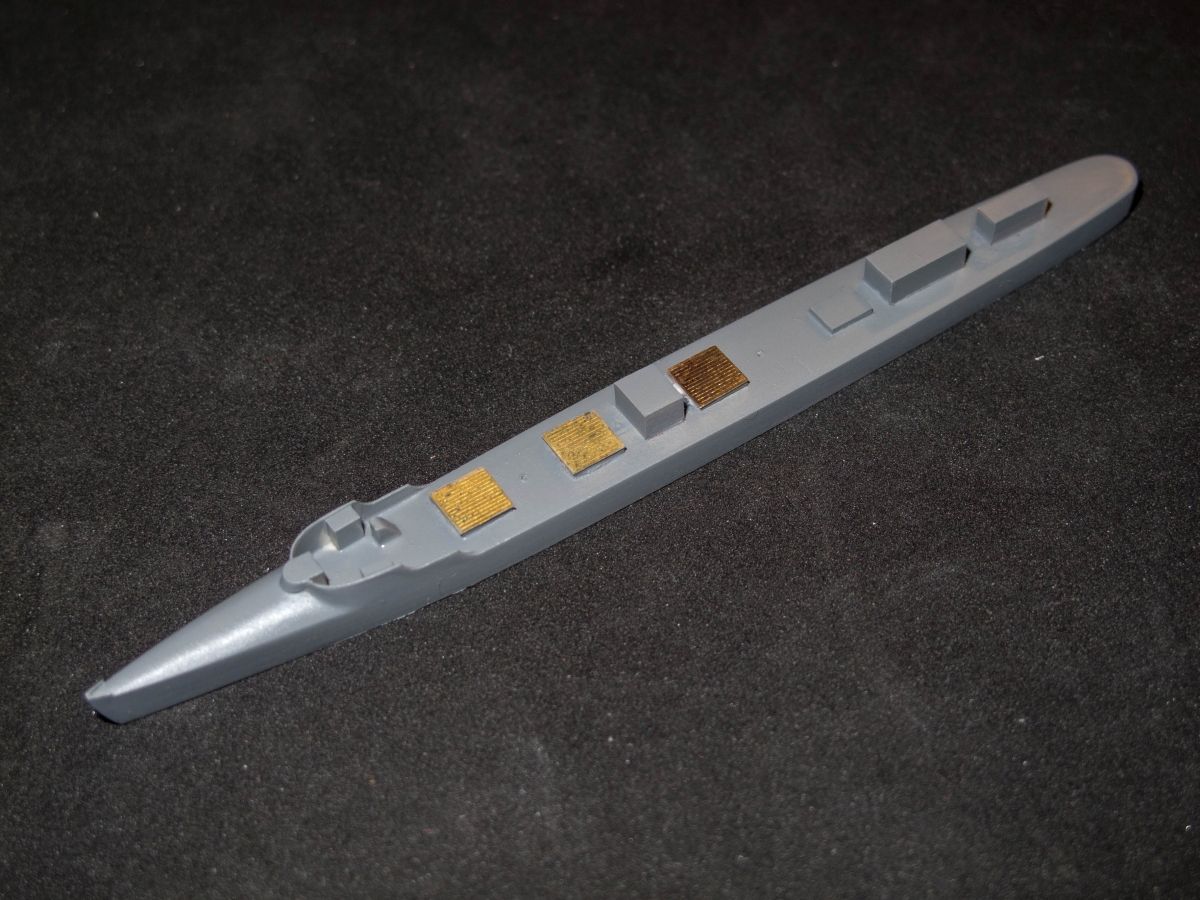
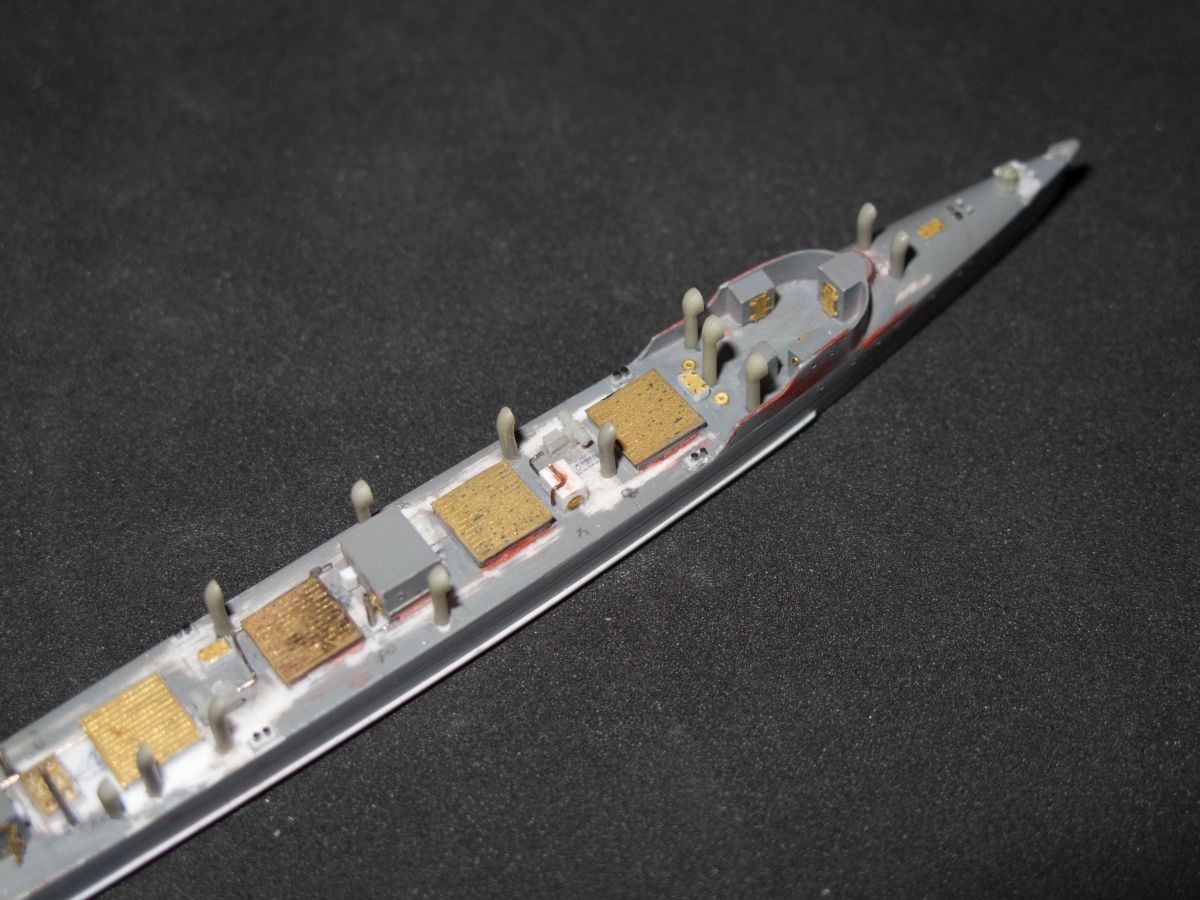
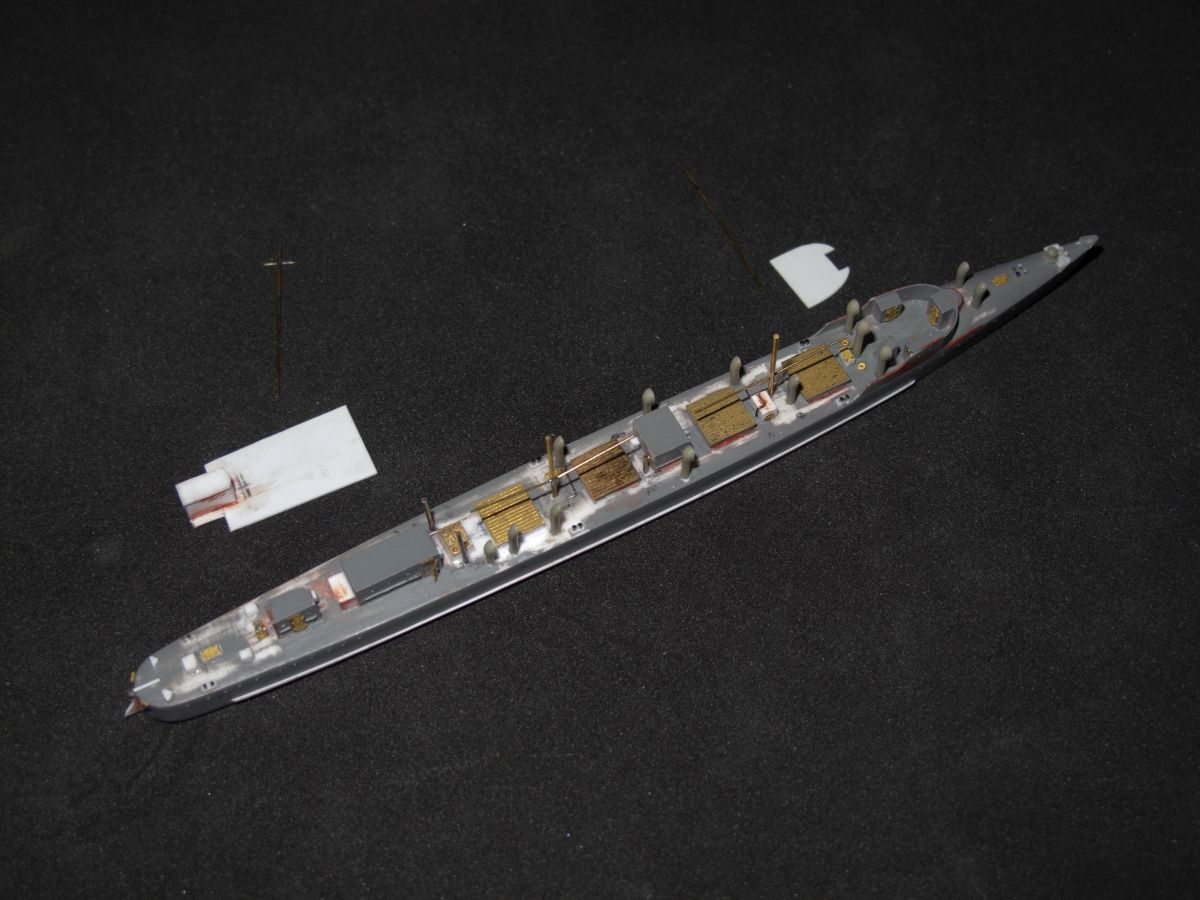
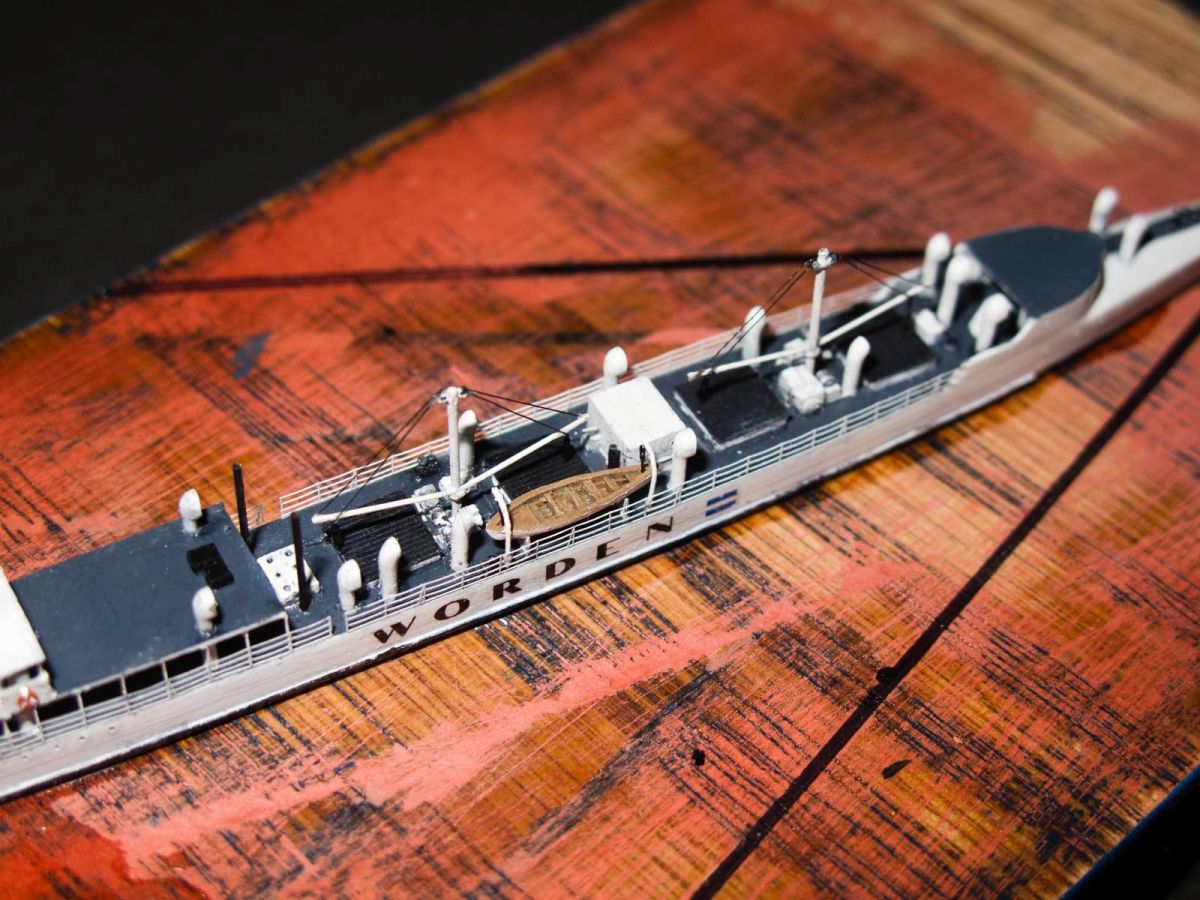
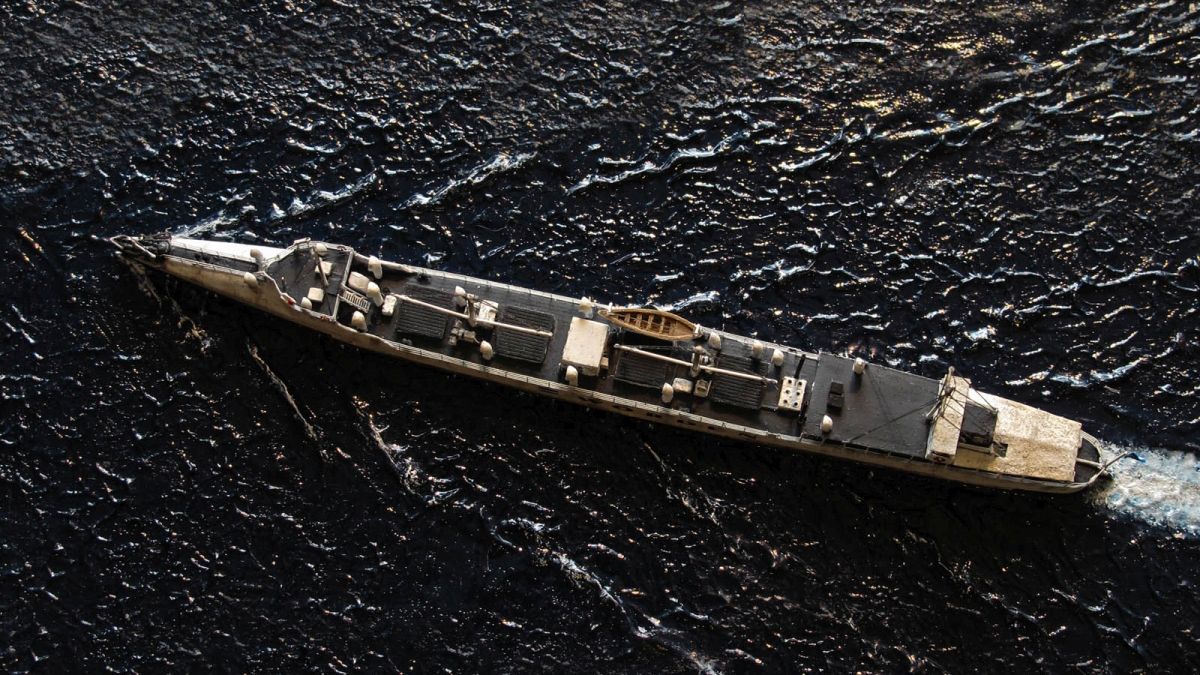
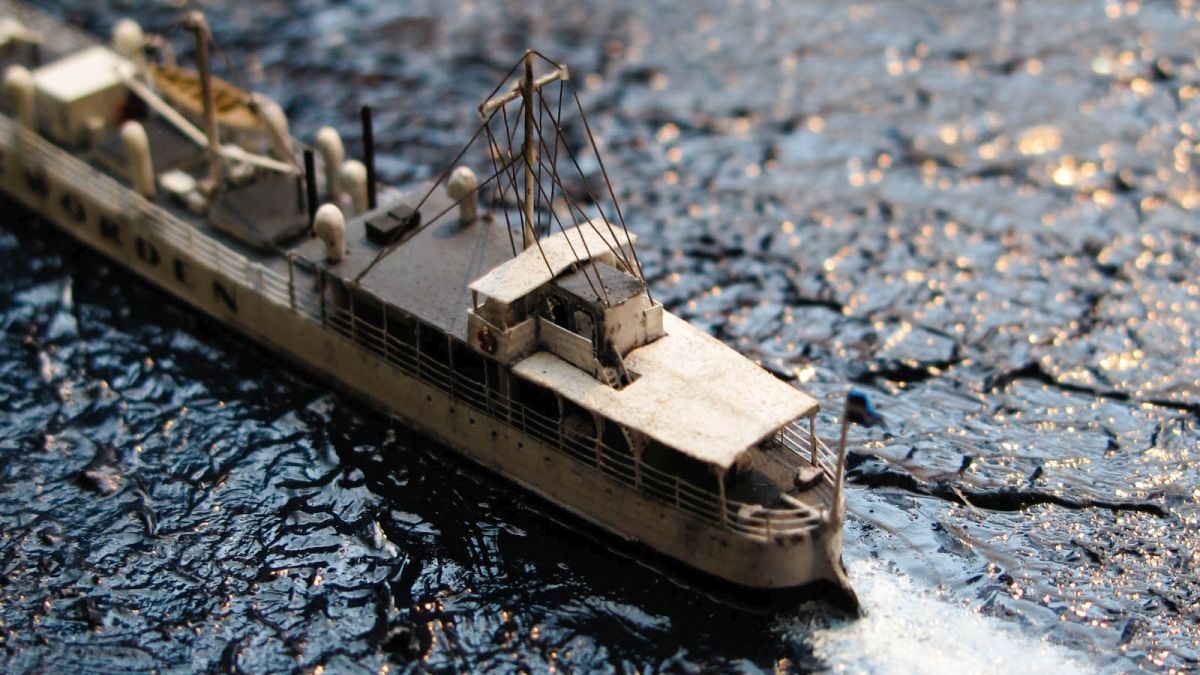
Ive started the construction of the hull using my usual method of sandwiching together several layers of plastic sheet until I get the necessary thickness. I usually glue the deck plan on the top layer, then roughly cut it out and glue that on top of the next layer and so on until the right thickness is reached. Once that is done I shape the hull with file and sandpaper until I get the desired shape. After that I attached the turtle deck on the front and rounded it into shape. After the shapes were to my satisfaction Ive added the major parts of the superstructure on deck including the open on the back front superstructure. The cargo hatches were added in place of the machinery spaces. It took me a while to figure out if there were three or four cargo bays and initially I added three of them, but them looking at the location of the cargo booms I decided that if there were four cargo booms, there should be four cargo bays and modified the hull.
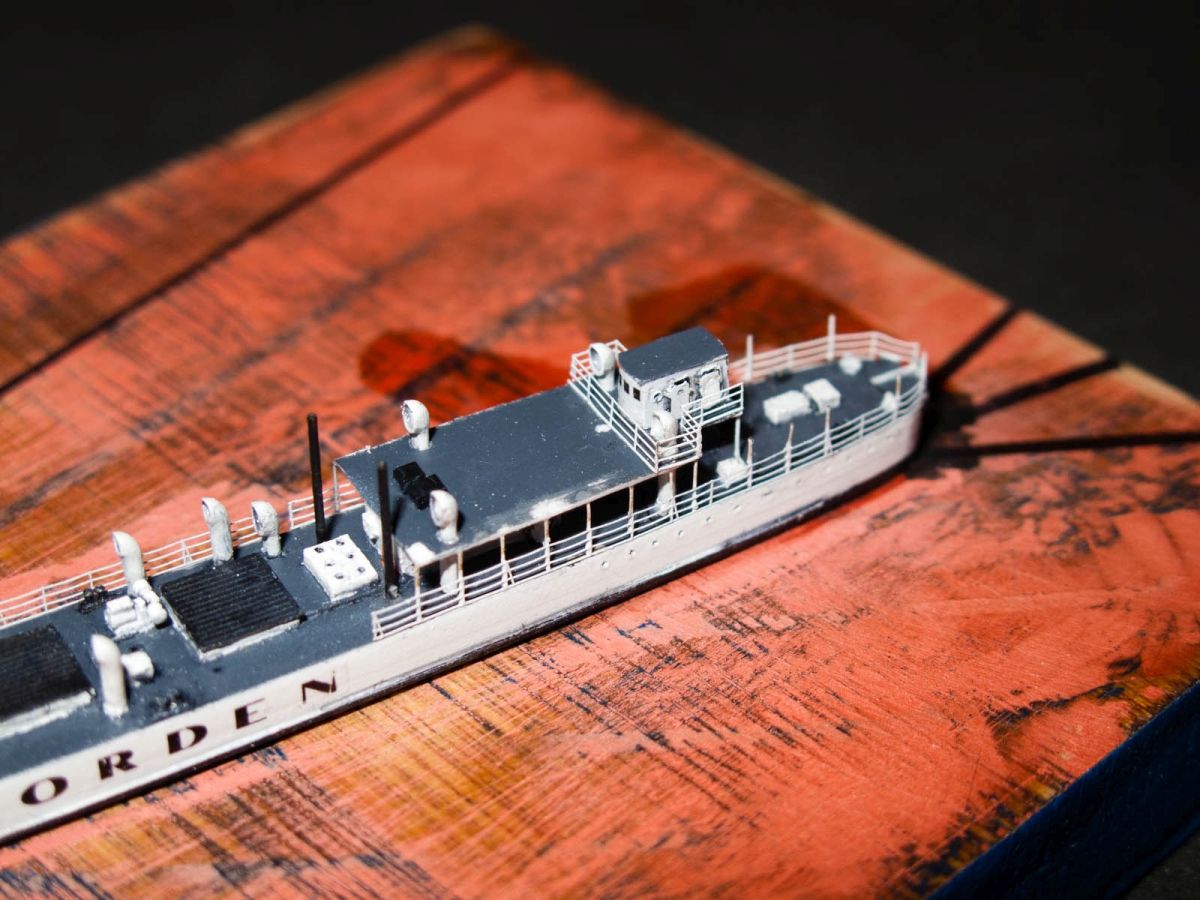
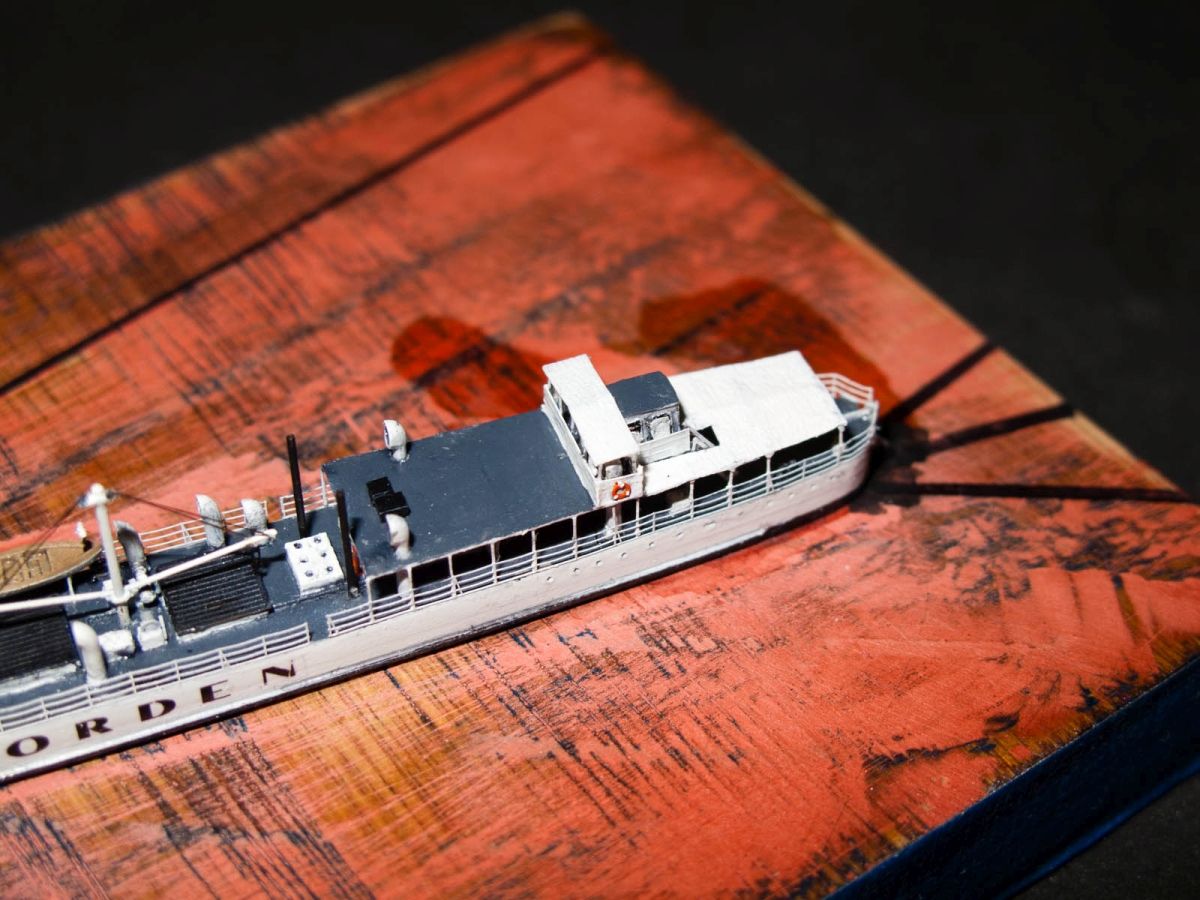
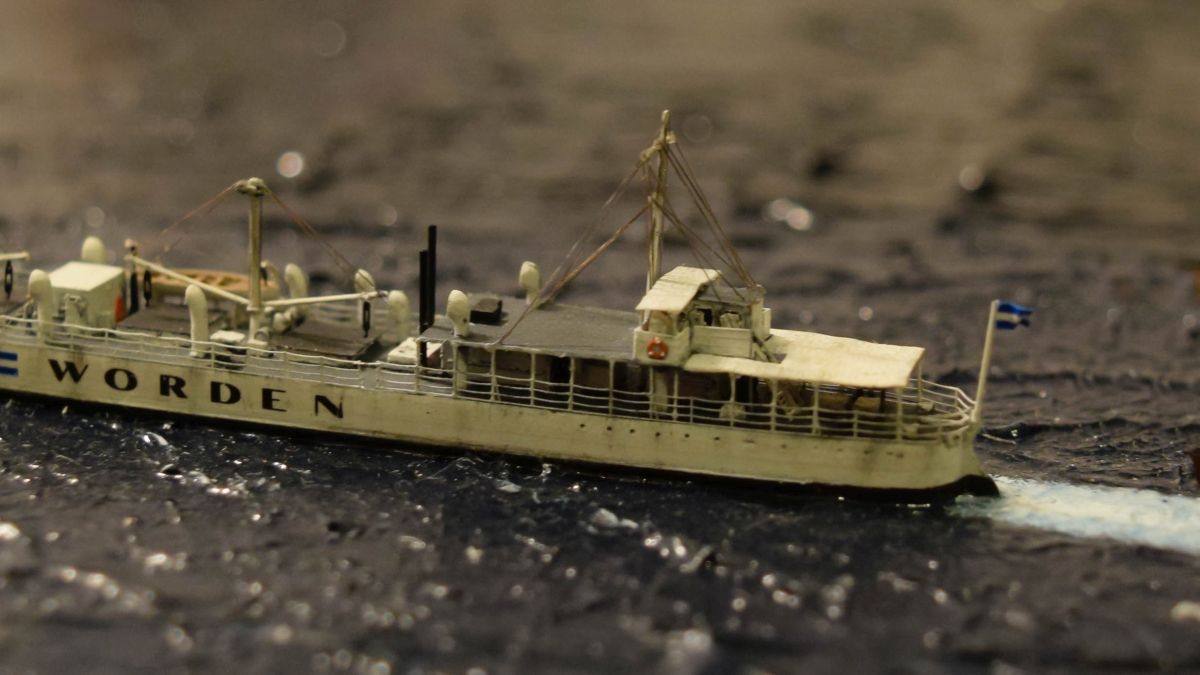
Once that was done I primed the hull to see if there were any imperfections and after taking care of them I started to add the details to the hull. For detailing I used various sized ventilator heads from the Combrig kits, as well as various photoetch pieces from the parts box. Cargo hatch covers were made from the boat deck pieces out of the WEM Askold PE set. Winches were also out of WEM detail set. Engine space light hatches were taken from the Northstar set.
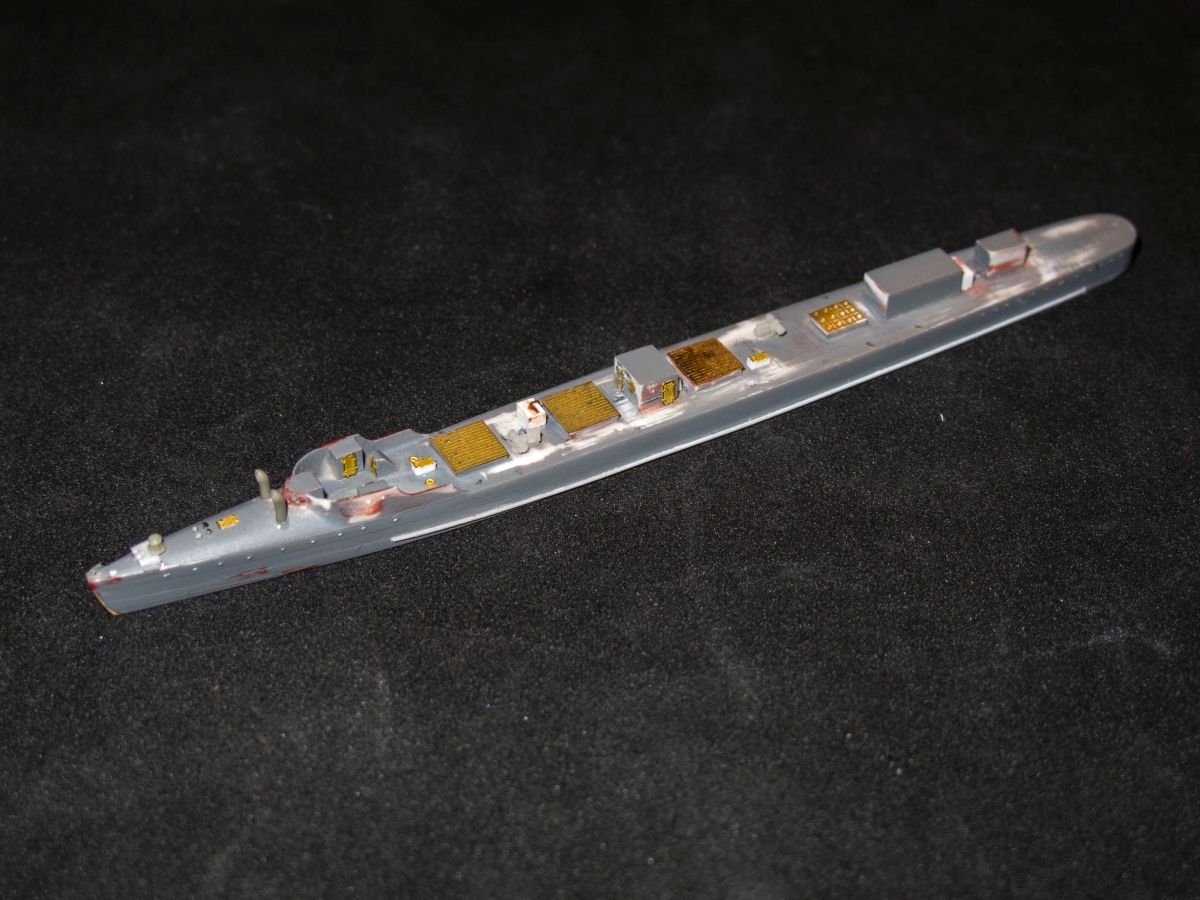
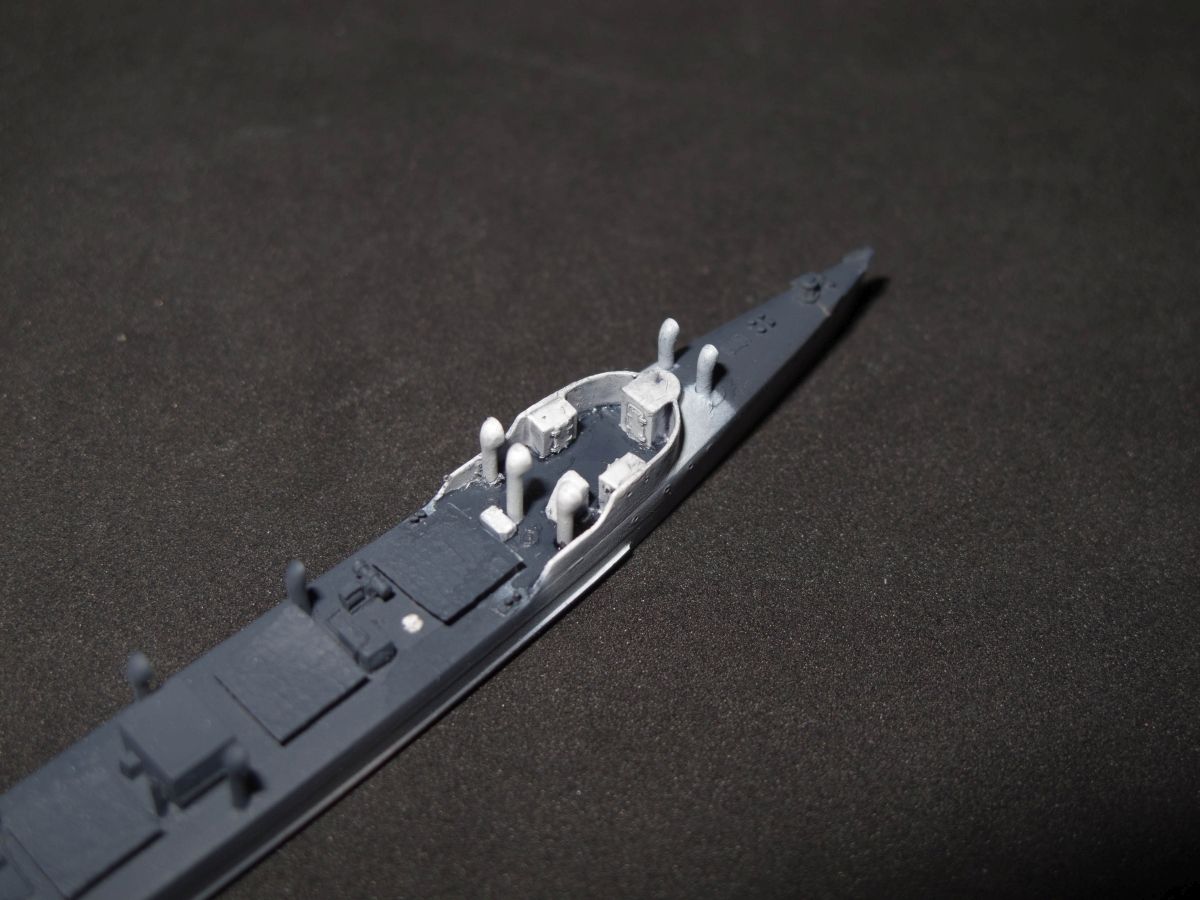
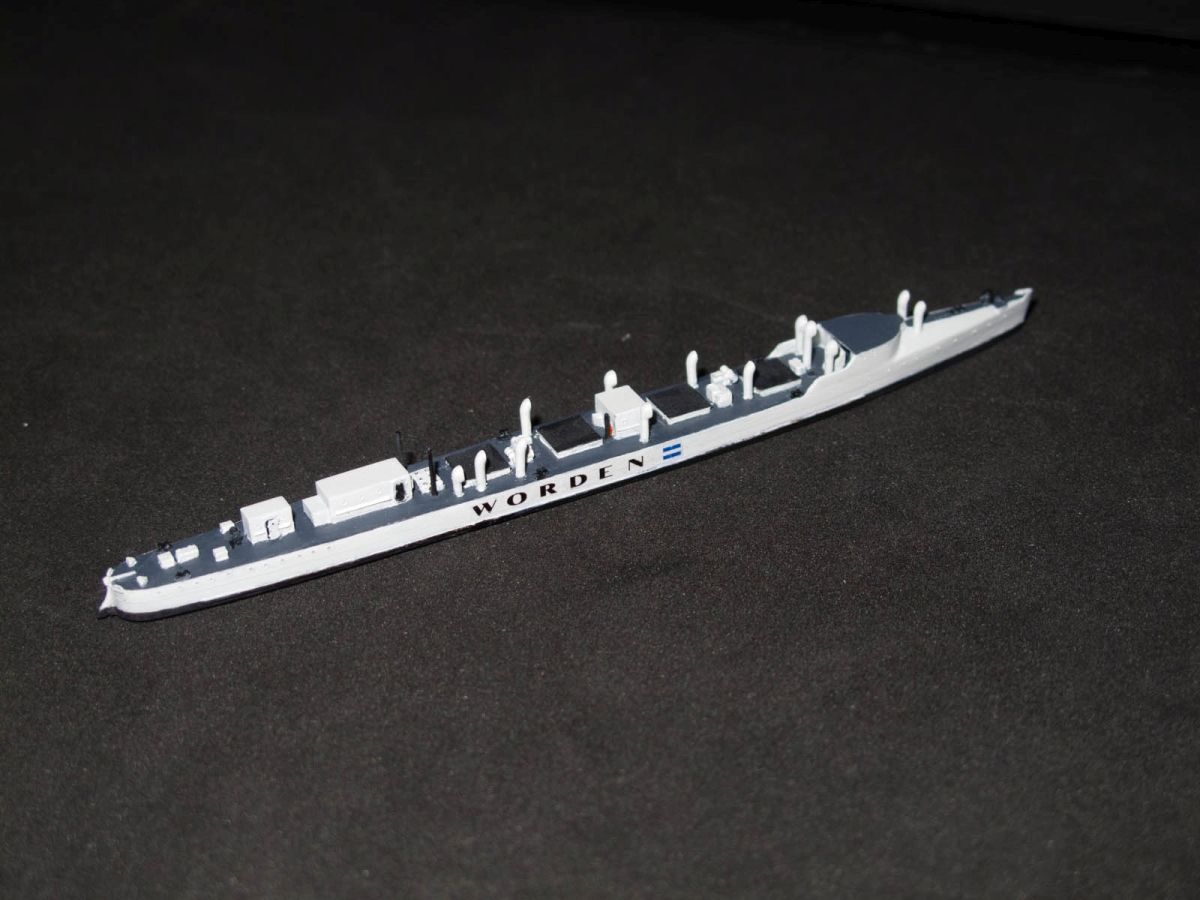
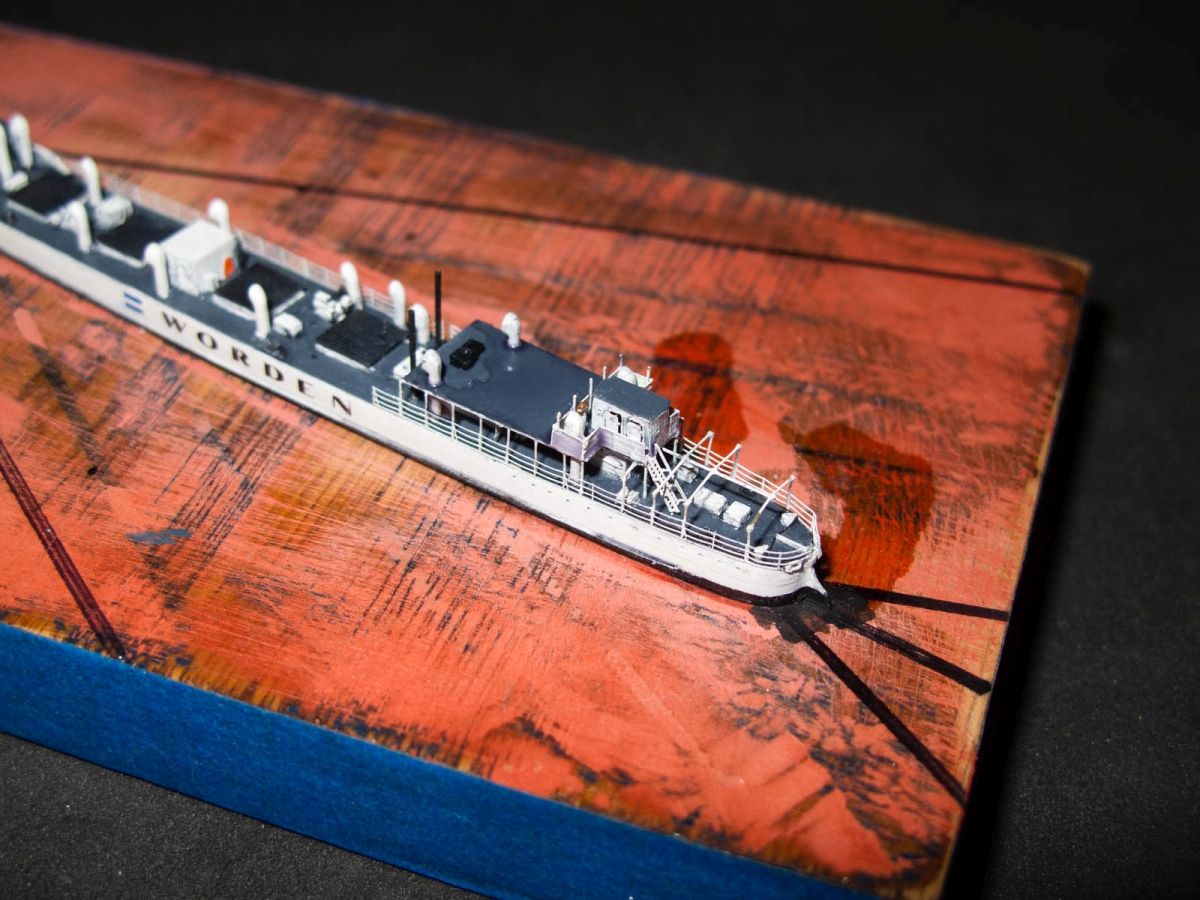
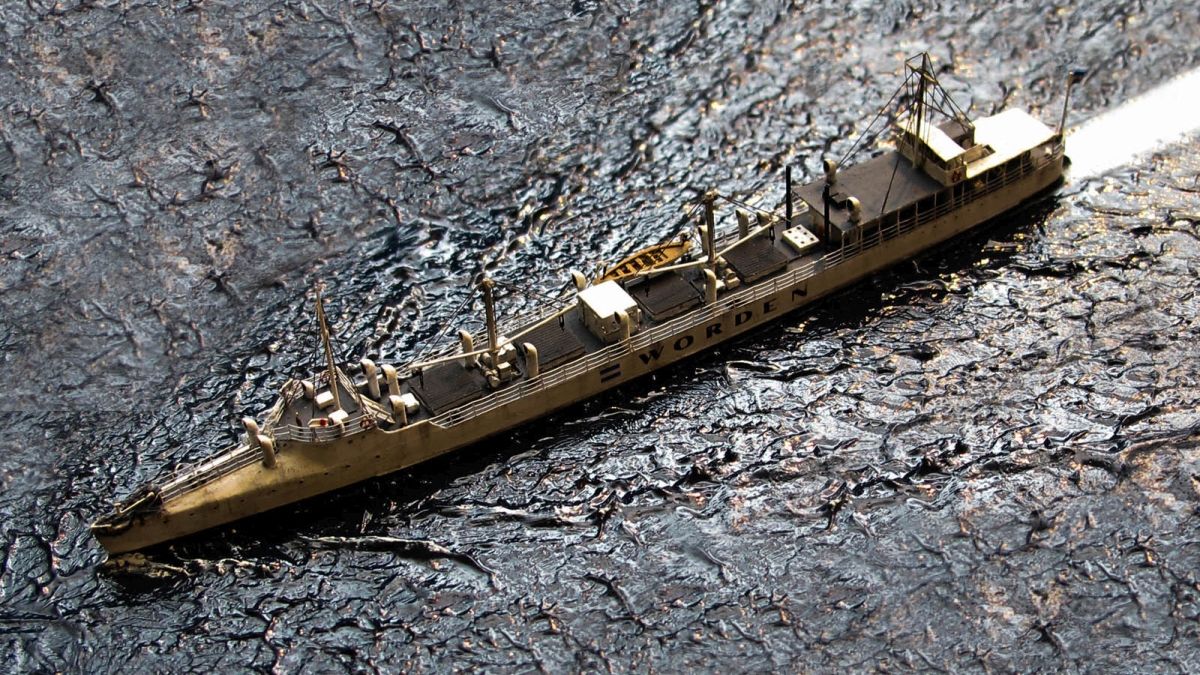
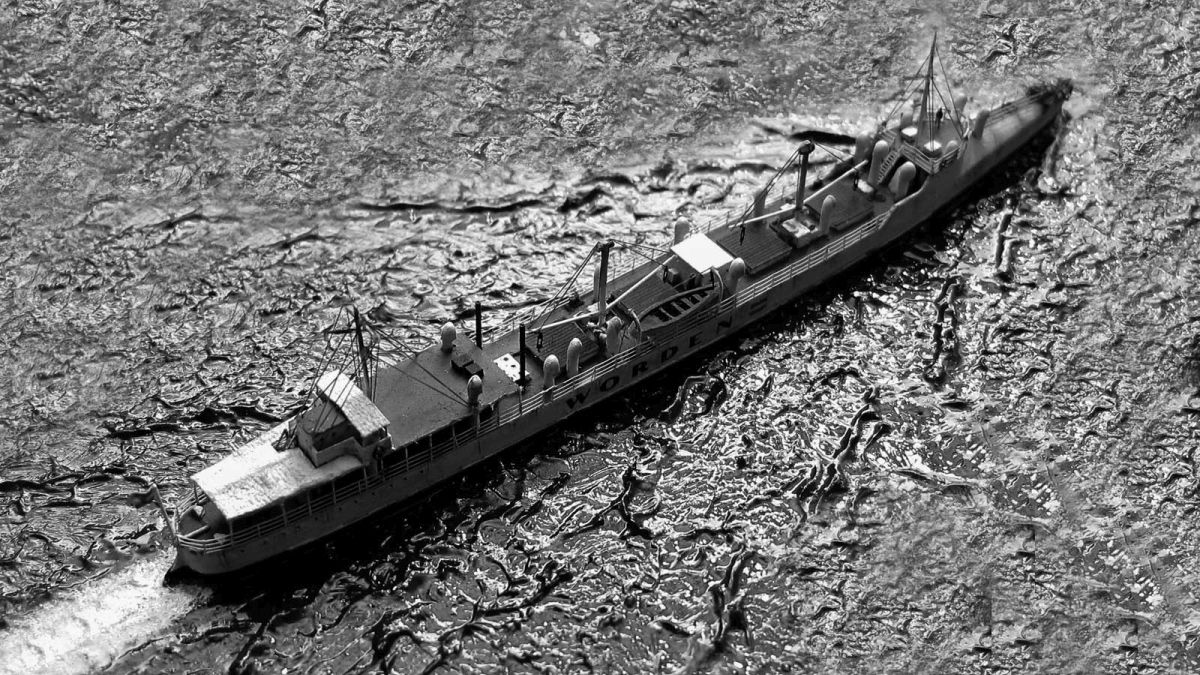
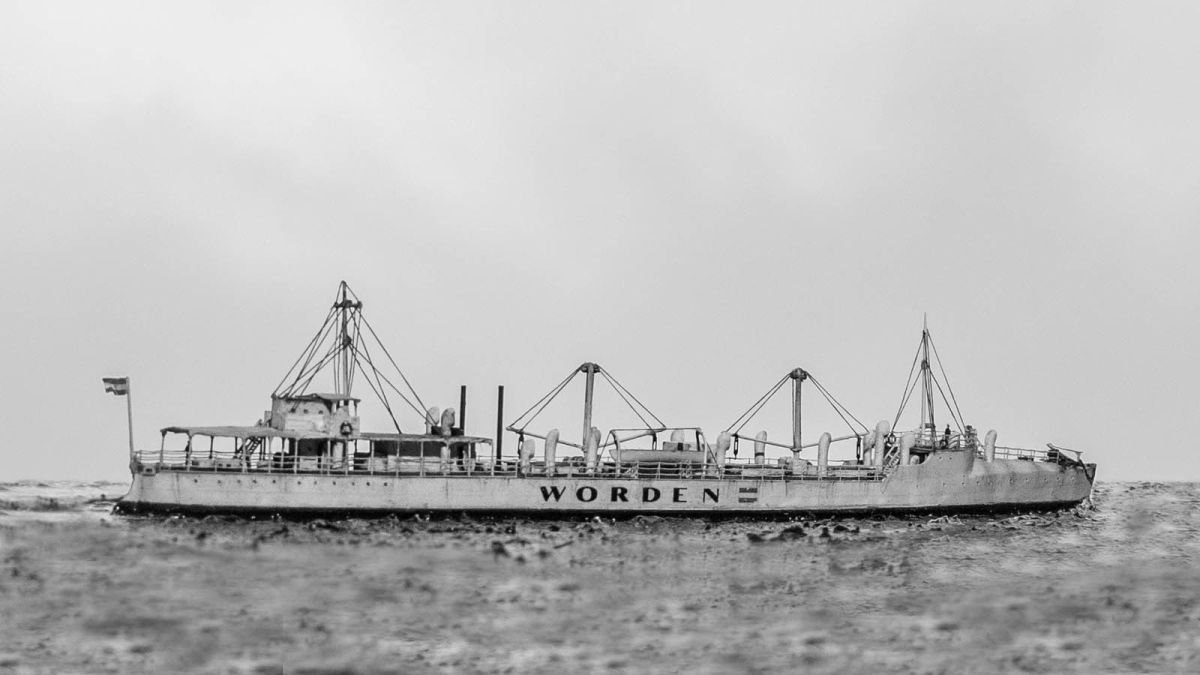
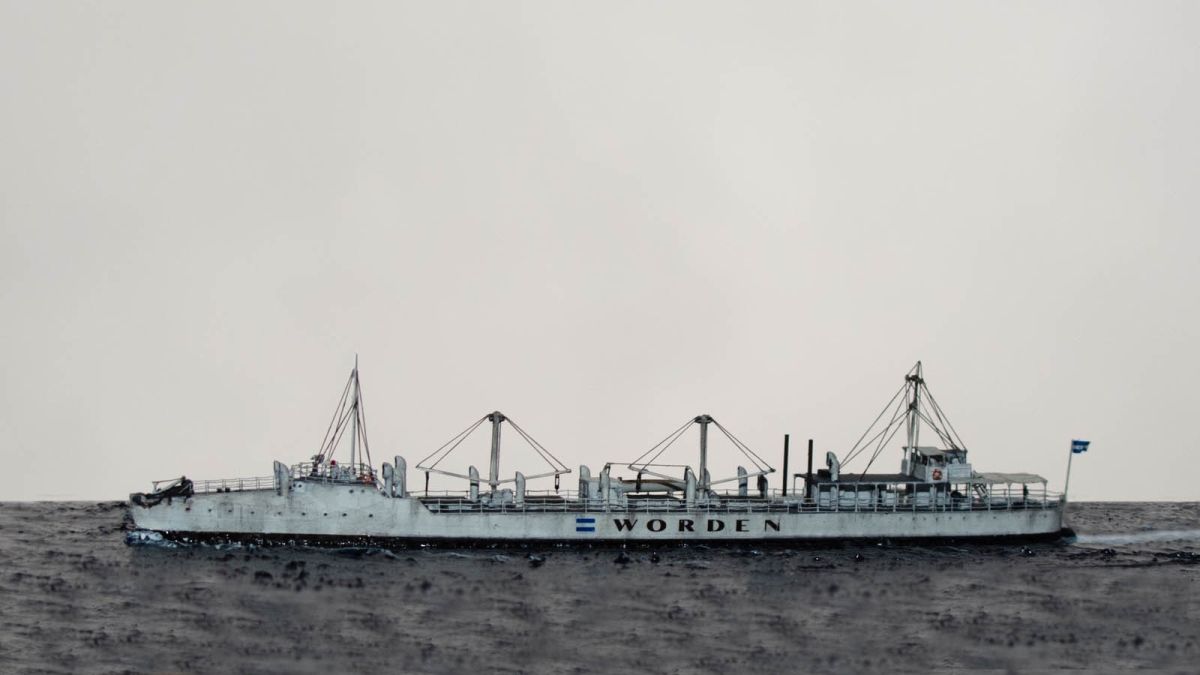
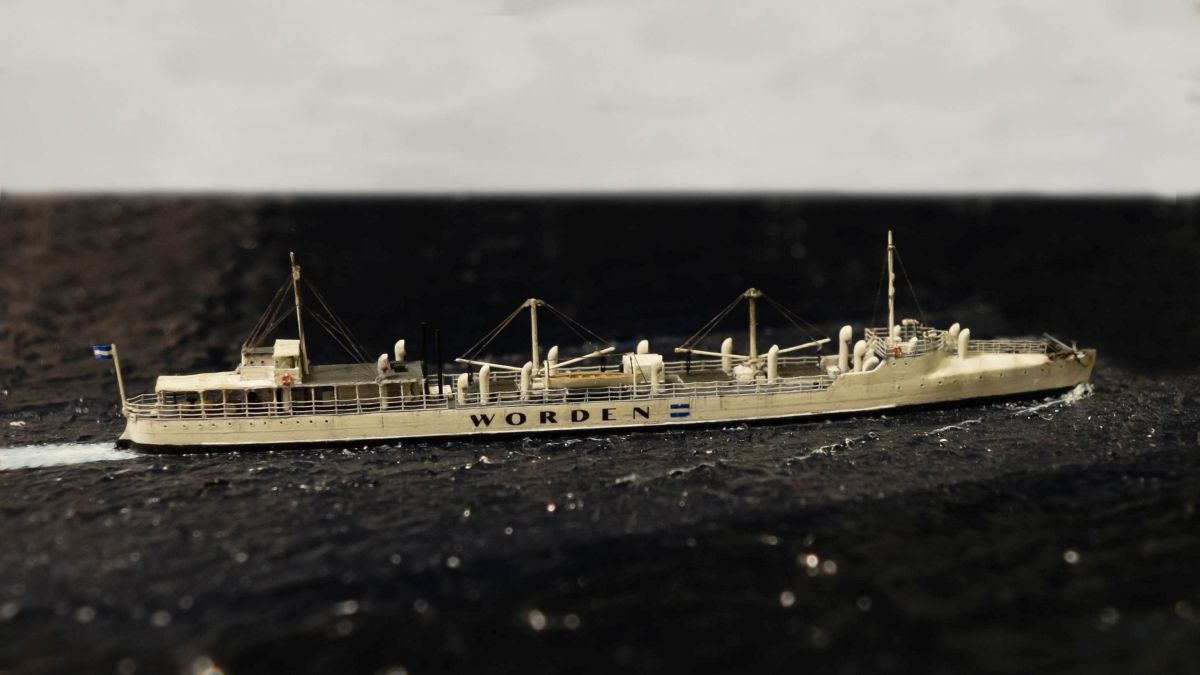
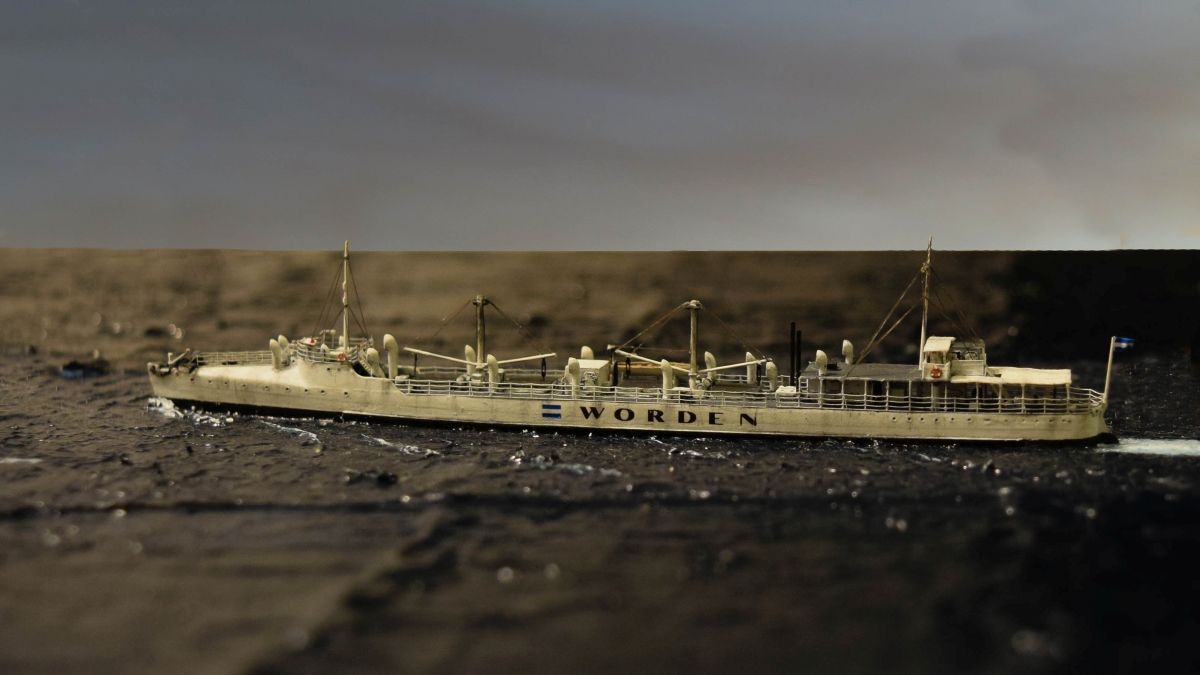
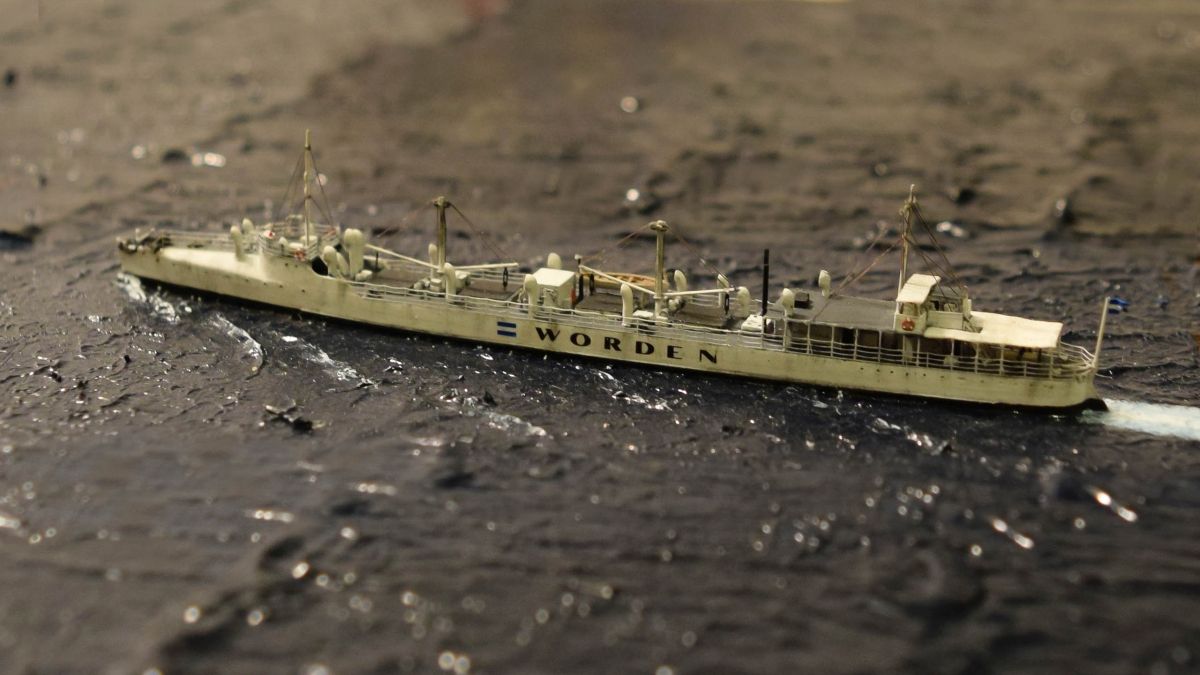
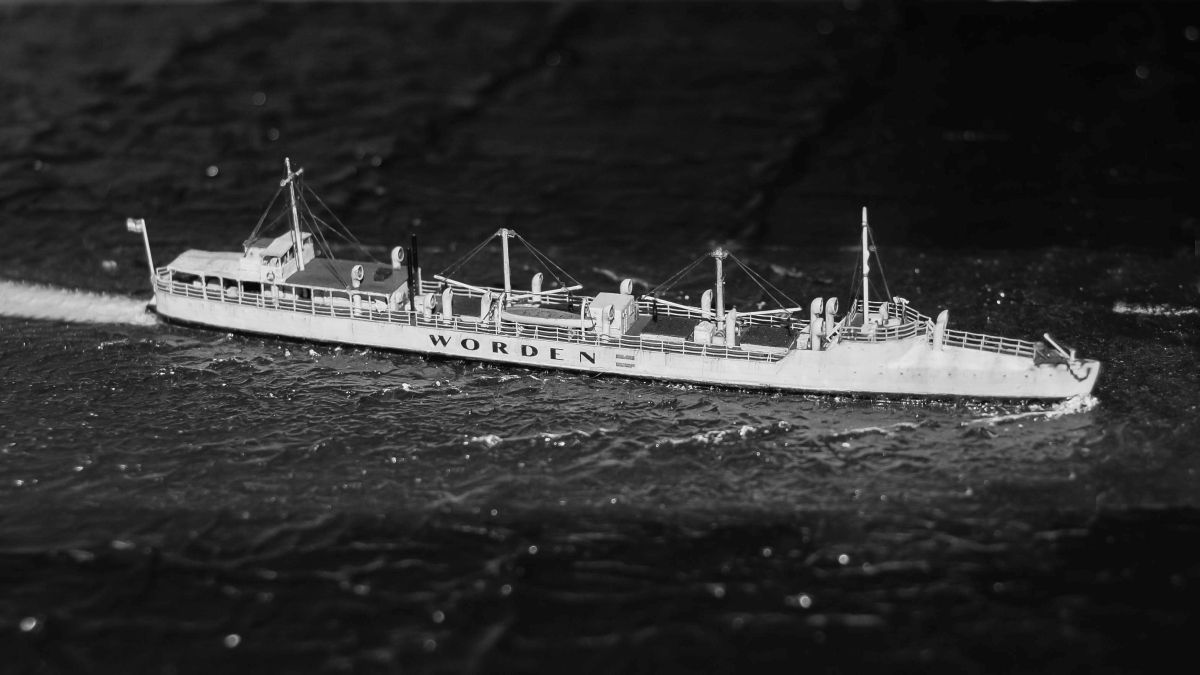
Once the detailing of the hull was done it was time to paint it. Ive decided to paint it the way it looked on the last day with the large neutrality markings on the sides. I dont know the color of the deck but on the photos it looks very dark, so I chose dark grey for the color and the sides were painted white. The small complication was in the fact that the back of the bow superstructure was open, so I had to paint that part first and then glue the deck on top of that and fare it in before painting the rest of the hull. Once the painting and the touch ups were done Ive applied the decals to the sides of the ship. The decals were printed on the home inkjet printer. Since they come out fragile I usually make 2-3 copies on one sheet, so that this way I dont have to worry if I damage one.
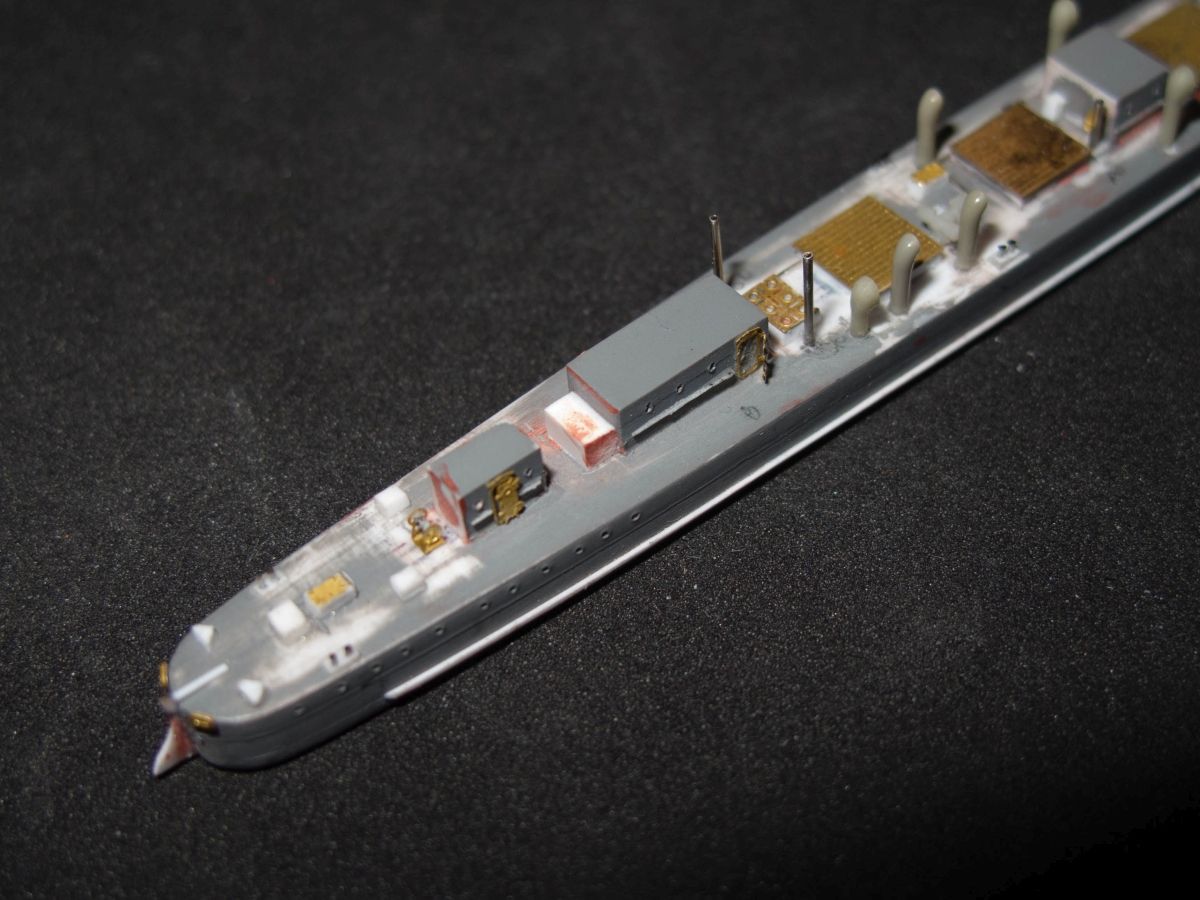
After decaling Ive did the wash using the stuff called "Black-It-Out". It's a water soluble ink-like stuff that once dry I remove with a Q-tip and a stiff brush. The final step was drybrushing, which is always challenging on an all-white hull. Ive used the light grey paint for dry brushing on the sides of the hull and lighted deck color for the deck.
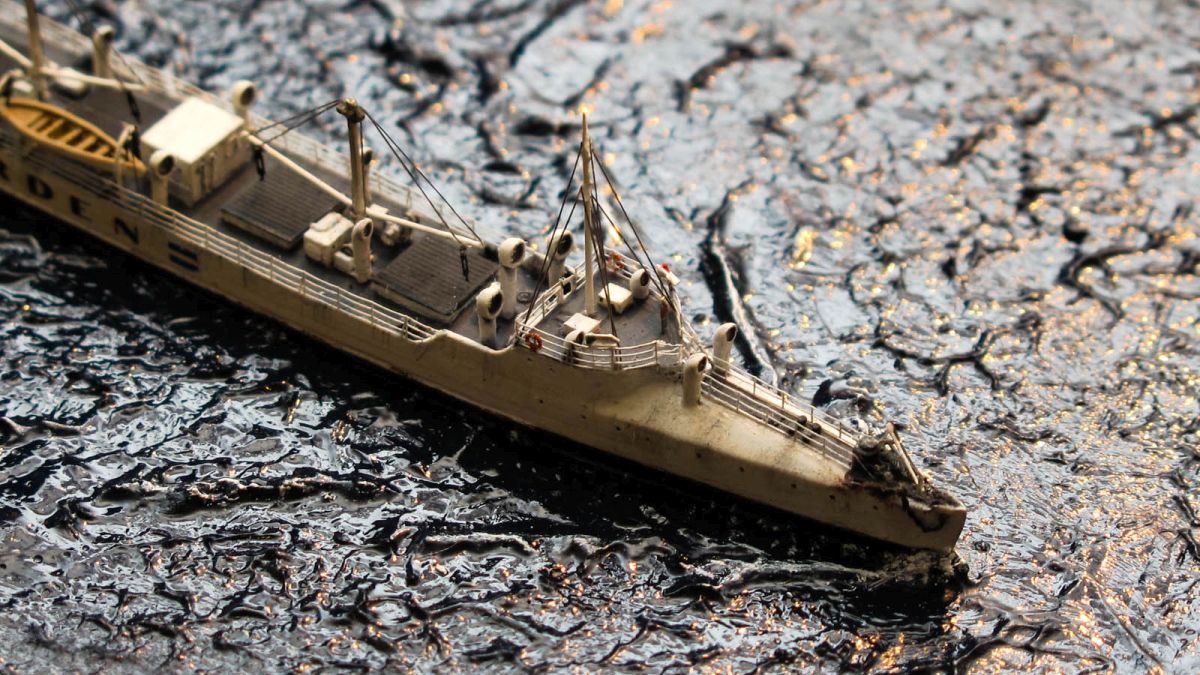
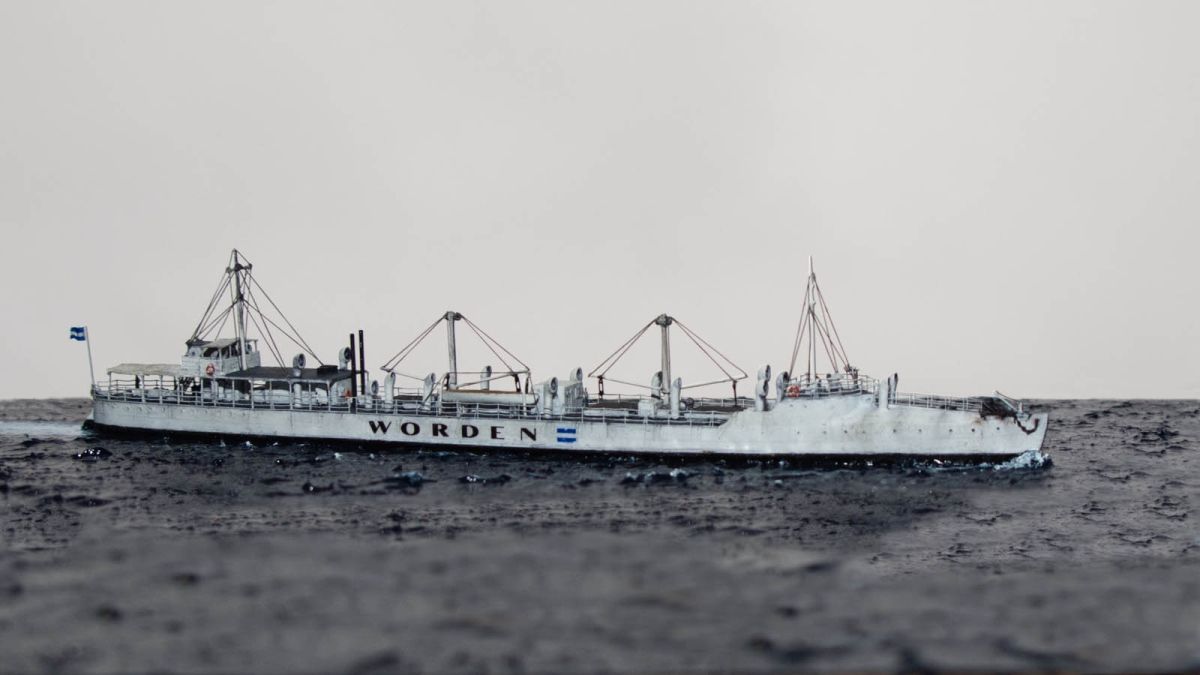
The detailing of the rest of the ship was fairly simple since most of the details were already attached to the hull. The main area of detail was on the stern where the main navigation bridge was located. Ive attached the bridge and added the railings around it. They were covered in canvas, so I used the diluted white glue to fill in the gaps and painted it white after it dried. The hull railings on the stern were complicated by the fact that they has built in supports for the upper deck and the canvas cover. Since I did not have the necessary photoetch for that I took the regular railings and glued individual supports to each stand by hand. It was a very tedious work, but it paid off well, as they look like they were there to begin with. The canvas cover on the stern was made from the paper tissue impregnated with superglue. Once the superglue dried I used a ball point pen to draw supports that would be seen under the cover.
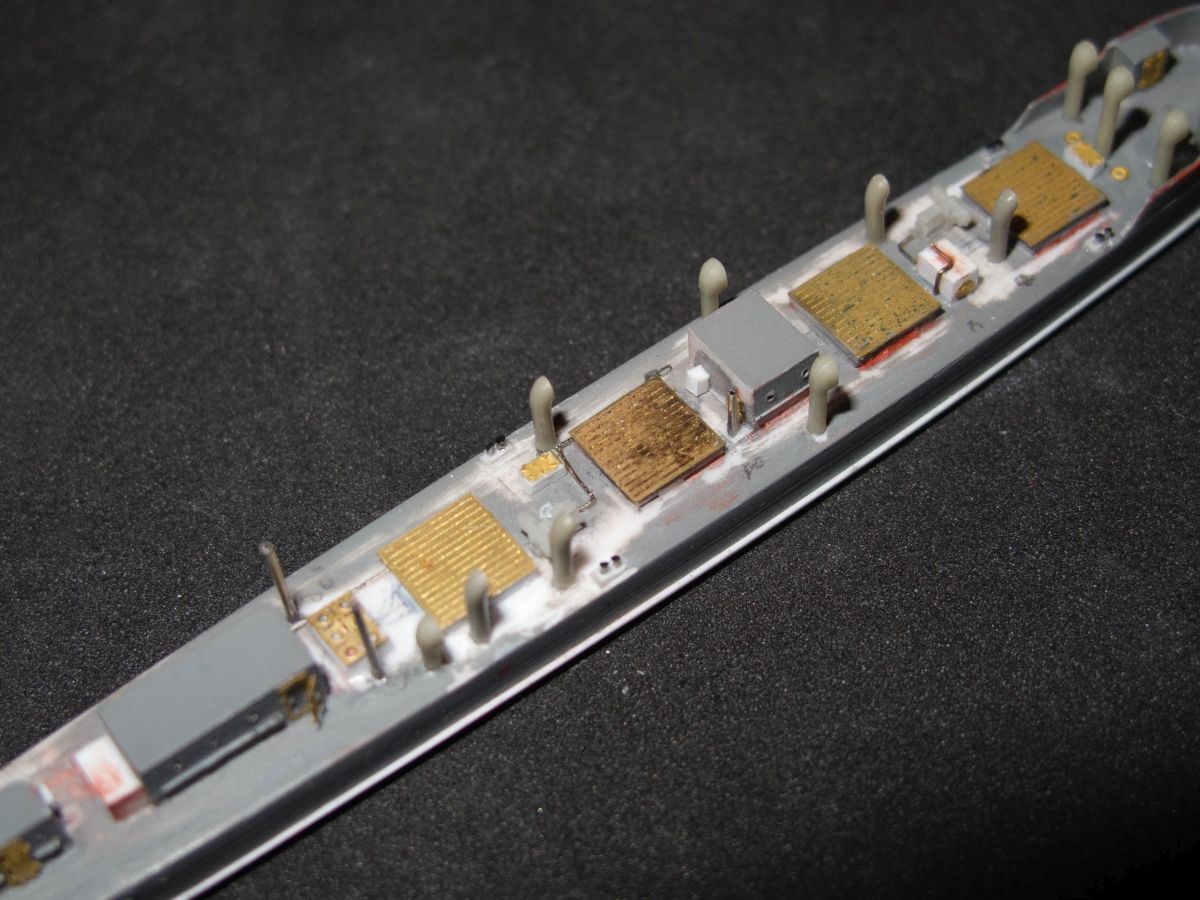
Last step was adding the cargo booms , boat and masts. Masts and the cargo booms were soldered from brass rod and the boat came from the spares box. Anchors on the bow were taken from one of the generic PE sets and the chain was done by taking stretched sprue and pressing on it by the back of the blade to squeeze the sprue to make it look like a chain. Finally the model was rigged by using the nylon thread from the pantyhose and weathered using pastels. Once everything was finished I covered it with DullCote to get rid of the glue spots. Finally the water was done using Acrylic Gel Medium, which was painted blue once dry and then drybrushed.


