| This is perhaps one of the best cast,
most detailed and complete resin 1/700 modern ship kits I have worked with,
and the only kit available for this class of ship. The kit provides a challenging,
intricate and enjoyable build for the experienced resin modeler, and fills
in a huge gap for those building a modern carrier battle group.
The Kit Your Sacramento arrives in the signature JAG black mailing tube. The
hull and full superstructure (all levels) are molded as one piece. A small
sprue of resin detail parts, including two CH-46 helos, is included. Almost
all of the other detail parts, including the awesome number of pumps and
winches on this ship, are cast in white metal. A large photo etched fret
includes everything you will need except ladders and deck-edge railings.
JAG includes a full decal sheet with hull numbers for the whole class of
three ships, fruit salad and "E" marks, helo deck markings and ship-specific
details. You get plastic rod for the masts and, a JAG first, real scale
chain for the anchors. Scale wire for the fuel lines is also provided.
Instructions are well-illustrated and run four large pages. You get a lot
of kit for your money.
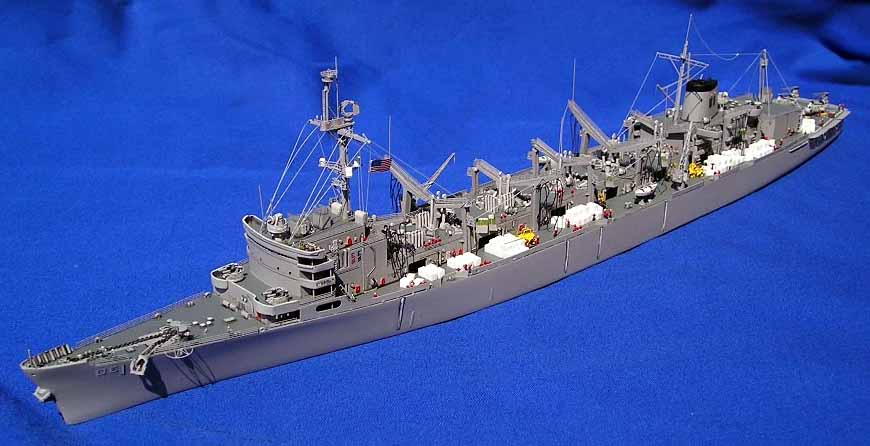
Quality The casting quality on this kit is the best I have ever worked with. Though the hull is close to 14 inches long (as long as a 1/700 carrier, longer than the Tamiya 1/350 Fletcher) and has the complete superstructure molded as one piece, my kit did not have a single air bubble or other defect. I did precisely no/no clean up work whatsoever. The resin sprue had tiny amounts of flash, a five minute task to fix. The metal castings were 90% useable without any clean up and those that did need a bit of work required little more than a few swipes with a sanding stick to remove a seam or file down a small pour stem. I absolutely hate spending hours preparing resin parts for use; after
laying out over US$100 for a kit, I hate the feeling that I first have
to finish manufacturing the product before I can start building it. Never
mind the problems of clouds of resin dust.
Cool Details Since they included real scale chain with the kit, there is no molded on anchor chain detail to scrape off. The helo deck has tiny holes drilled in it to simulate the tie-down points. Bulkheads have fire hoses, hatches and life rings molded on that match Gold Metal Models' sold-separately PE details so if you add more everything matches. Placement marks for all the winches are size-coded and laser etched onto the deck so now mistakes or ambiguities on where things go. The instructions include a 1:1 full-size parts map and almost a full page of notes and tips from the design team at JAG. |
||||
| Building the Sacramento
This is not a beginners kit, and will challenge even experienced modelers. The PE fret is very delicate, with soft brass used and a lot of parts to locate, bend and place. |
to enlarge  |
|||
|
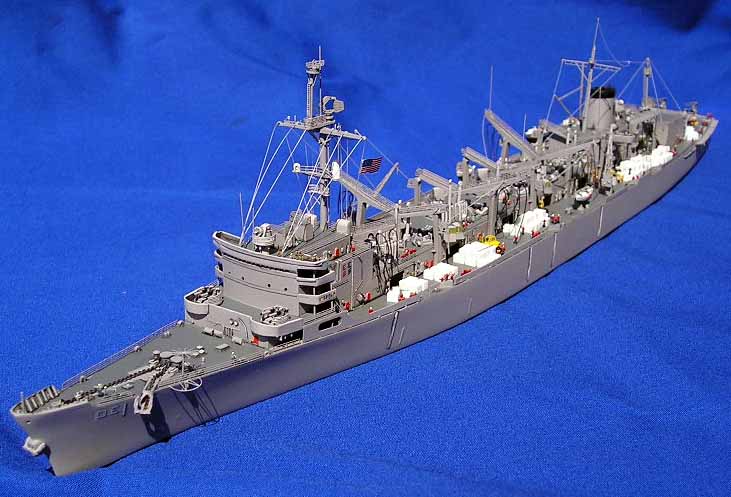
For those familiar with white metal castings, the texture and malleability of the JAG parts is very similar to GHQ products. I cut and trimmed the metal parts with a standard X-acto knife, and filed and sanded them with regular sanding sticks, just like resin. Standard super glue is fine. I did not prime the parts, used regular Tamiya Acrylics, and had no trouble with the paint sticking. The most significant challenge most modelers will face is deciding the
order of assembly and painting. Because there are so many fine details,
many overlapping one another, building in the "right" order means an easier
time and fewer broken parts or details snapped off by chubby fingers and
WMD-like tweezers. Your build order will vary with your style, level of
detail and painting preferences, but as a starter here is what I did:
|
||||
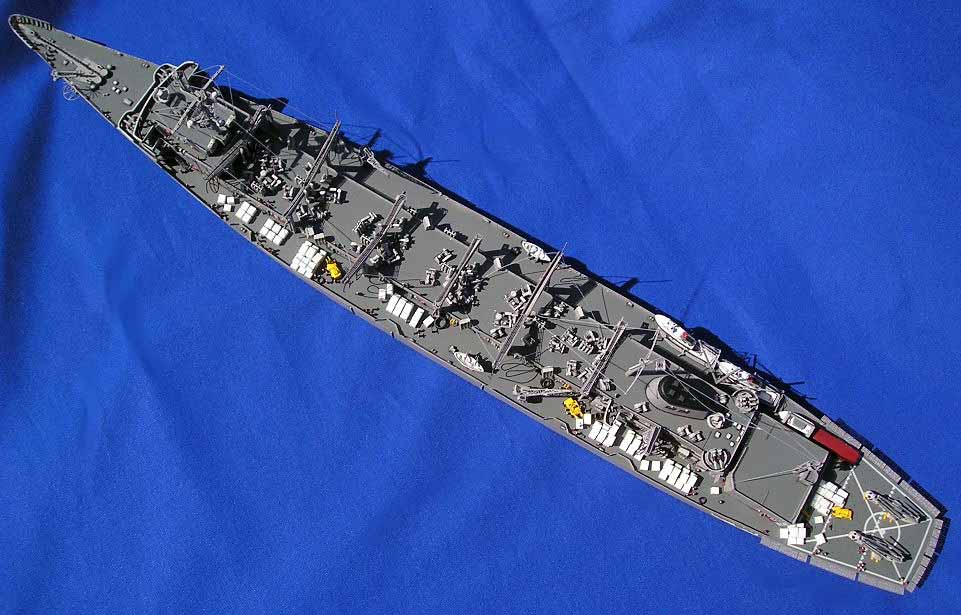
| Prep
-Wash all parts to remove mold release -Clean up metal parts as needed -Prime if desired -Add desired bulkhead details, ladders, etc -Drill out hawse pipes, antenna mounts Sub-Assemble -Build the masts (the main mast has parts per the instructions and I added many more in the form of bracing and the like) -Attach PE details to the derricks -Build and paint helos (extended and folded rotors included on PE sheet) Paint -Paint hull and superstructure haze gray -Mask and paint deck -Paint all detail parts separately by attaching them to cardboard handles with double-sided tape -Wash, dry brush, paint details, touch ups -Apply decals
-Attach all deck gear, anchor chain, pumps, winches but not the massive derricks -Add ladders and deck railings -Install masts and basic rigging -Add crew and other details -Install deck edge spray shields -Add main derricks as last step The derricks overlap or cover most parts of the ship one way or the other, so by adding them last I had the most room to work on the other areas. The spray shields are delicate, and have small areas of contact with the deck for gluing; adding them earlier in the process means you are likely to snap them back off when working on other areas of the ship. Again, my order of assembly is by no means the "correct" one. However, the complexity of this kit is such that you should think through your build in advance. I suspect that if you just started slapping parts on without advance planning, your experience will be more frustrating and way less fun. |
||||
|
||||
| Conclusion
This is an important class of ship, one long desired by many modern USN builders. JAG has produced an amazing kit, right at the top of the curve as to the state of the art in resin casting. While clearly not for the beginner, this kit is a worthy project for the experienced modeler. It challenges you intellectually as well as in the fine motor skills department, and yields a well-detailed replica with some work. You spend your time solving logic problems and creating details, and not sanding off pour plugs the size of Ohio corn dogs and making up for lame or missing detail work. Highly recommended. |
 |
|||
|
||||