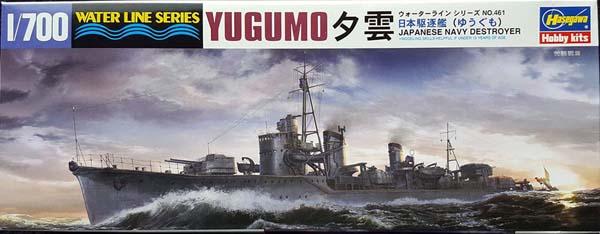
| Hasegawa 1/700 Yugumo Class Destroyer
Yugumo 1942
|
| Background | ||||||||||||||||||||||
| Japanese battle doctrine was focused on the concept of
the decisive battle, with lighter forces whittling down an approaching
enemy until the battle line could be engaged. As a signatory of the various
naval disarmament and limitation treaties of the 1920s and 1930s, Japan
had to tailor its doctrine within the boundaries of the treaties. Accordingly,
a greater emphasis was placed on maximizing the impact of the lighter forces
upon an approaching enemy.
Japanese destroyer design evolved from the late 1920s through the very early 1940s as a manifestation of the effort to diminish an enemy force by engaging them at night with superior, longer range, high speed, ships and weapons (i.e. torpedoes). The Yugumo class was the final production iteration of what began with the Fubuki Special Type destroyer. |
||||||||||||||||||||||
| Design | ||||||||||||||||||||||
| The Yugumos were a further refinement of the previous Kagero
class ships; the Kageros were themselves considered the perfect mix of
speed, range, and weaponry in a destroyer by the Japanese. Still,
they felt it worthwhile to hone the design with a mix of small enhancements.
To improve stability, the forward 12.7cm main mount was moved back 4.75ft/1.5meters.
To reduce the wake at high speeds, the extreme stern was extended 2.5 ft/0.8m
at the waterline, thereby presenting a slope to the aft end of the hull
from the main deck on down to the waterline. The change also produced
a pronounced waterline knuckle at the very stern.
The bridge was redesigned to lessen wind resistance and increase the internal space. The facing was inclined slightly aft, off the vertical, and the forward surfaces of the compass bridge deck faired within the structure to a greater degree. While the placement of the bridge began at the same frame number as the proceeding Kagero class, the bridge was extended aft of the forecastle break by 1.5m to provide more room. The entire aft end of the bridge sat upon a set of raised trestles over the main deck for support. The forecastle was extended aft slightly over the main deck to accommodate new type davits for the 7m cutters. Small changes were also given to shape of the main director, the cupola atop it (for the later batch of eight ships), and in the design and location of the aft mast. The main battery still consisted of three twin 12.7cm 50 cal. guns in fully shielded turrets, but the mount was improved to allow the barrels to elevate to 75* for better AA effectiveness. All the turrets were reinforced with two horizontal stiffener bars. The ships retained the same 52,000shp power plant of the previous class. Eleven units were planned and constructed under the 4th Naval Armaments
Supplement Program (also known as the Circle 4 program) of 1939. Another
eight units were completed out of sixteen planned under the 5th Naval Armaments
Supplemental Program (Circle 5). The rest of the units were canceled in
lieu of simpler destroyer construction. A further batch of eight ships
was also canceled on Nov 8, 1943.
|
||||||||||||||||||||||
| Ship History | ||||||||||||||||||||||
|
Yugumo was the lead ship of her class, laid down at the Maizuru Naval Arsenal on June 12, 1940. She was launched on March 16, 1941 and commissioned on December 5, 1941. She spent her first two months of duty working up and performing ASW duty in and around Yokosuka and Tokyo Bay. With the formation of Destroyer Division 10 in mid March, 1942, she joined the Kagero class ship Akigumo and the other newly completed Yugumo class ships Kazegumo and Makigumo as members. In April, the division was assigned to Destroyer Squadron 10, the escort squadron for the First Air Fleet (Kido Butai). The division sortied briefly as part of a larger force searching for American forces in the aftermath of the Doolittle Raid upon Japan on April 16th. Midway was their first true engagement, where they continued to screen the First Air fleet (though Akigumo was tasked with escorting the UNREP tanker group). In the wake of the dive bombing attacks on June 4th that fatally crippled Akagi, Kaga and Soryu, DesDiv 10 and Tanikaze closed ranks to screen Hiryu. After launching her retaliatory air strikes against Yorktown, Hiryu suffered the same fate as her companions from an afternoon dive bombing strike from Enterprise and Hornet. Yugumo, Makigumo, and Kazagumo all closed in tight on Hiryu to help fight the fires ravaging her. Yugumo even borrowed additional fire hoses from heavy cruiser Chikuma, but all to no avail. Ultimately, Hiryu was abandoned and scuttled by a torpedo from Makigumo. The division returned to Japan with the rest of the escorts. After Midway, Yugumo and the division spent some time on escort and fleet duty in and around the Aleutian Islands. Two and half months later, DesDiv 10 entered the fray at Guadalcanal as they resumed their role as escorts of there organized First Air Fleet at the Battle of the Eastern Solomons. At the subsequent Battle of Santa Cruz, Yugumo and her division mates escorted the Vanguard Force. The division was then tasked with several successful troop transport runs to Guadalcanal. On November 13-14, the division escorted the Bombardment Force heavy cruisers Maya and Suzuya as they shelled Henderson Field. Afterwards, DesDiv 10 escorted heavy cruiser Chokai to Rabaul, damaged by the Cactus Air Force that attacked the supporting body to the Bombardment Force. The division spent November and December on a series of troop transport runs to Buna as well as assorted escort duties. The division rotated back to Japan for a quick refit at the end of December. 1943 saw DesDiv 10 return to the Solomons,specifically participating with many other destroyers in the very successful evacuation of Guadalcanal over three evenings in early February. Division mate Makigumo was the only loss to the Japanese. She hit a mine in the Slot between Guadalcanal and Savo Island while maneuvering to avoid an attack by PT boats. Yugumo managed to take off 237 of Makigumos crew and then scuttled her with a torpedo. For the rest of the spring of 1943, Yugumo and her division sisters rotated out of Rabaul as participants in many troop transport missions and escort duties to bases throughout the upper Solomon Islands. On April 3rd, Kazagumo struck a mine returning from Buka to the Shortland Islands, necessitating her return to Japan for repairs. Yugumo took over her duties as division flagship. Still more escort and transport missions ensured, and then DesDiv10 returned to Japan in early May. Yugumo entered drydock at Yokosuka, where she likely gained a revised foremast and Type 22 radar, two new triple 25mm AA mounts in place of the older twin 25mmAA mounts to either side of funnel #2, and a new twin 25mm AA mount on a platform in front of her bridge. In mid June, the division stood out for the Aleutians for patrol and escort duty. Shortly thereafter, the decision was made to abandon the Aleutians. Yugumo and the division participated in their successful evacuation by a group of destroyers at the end of July. The DesDiv 10 returned to Japan in early August, and then headed out to Turk by the end of the month. Yet more escort and transport missions ensued, including several evacuation runs from Kolambangara, part of the New Georgia Islands chain in the Central Solomons. Yugumo also relinquished her division flagship status back to Kazagumo, that ship having returned from repairs. By early October, the decision had been made to evacuate yet another, smaller, garrison of troops from nearby Vella Lavella Island. On the evening of October 6-7, a small transport force of three older destroyers and a dozen smaller craftset out to pick up the troops from Vella Lavella. These were escorted by six regular destroyers, including DesDiv 10s Akigumo, Kazagumo and Yugumo. Close to midnight, the Japanese ran into a US force of six destroyers. There occurred much maneuvering by both forces, with confusion and several missed opportunities for a tactical advantage by both sides. Just before midnight, both sides opened fire and launched torpedoes. Yugumo, in fact, had jumped the gun, breaking formation and charging the American forces while launching torpedoes. One of her torpedoes hit USS Chevalier in her forward magazine, fatally crippling that ship. In turn, Yugumo had been hit several times by gunfire and then by a torpedo from either Chevalier or Selfridge. Meantime, OBannon rammed Chevalier, temporarily incapacitating that ship. Selfridge was then also hit by a torpedo, disabling her as well. Ultimately, both Yugumo and Chevalier sank, the latter being scuttled by torpedo from sister ships. The damaged American ships managed to withdraw from the scene. However, the Japanese were able to complete the evacuation with no further losses. Yugumo lost 138 of her crew, while 78 were rescued by American PT boats and another 25 men reached Japanese positions on some nearby islands. |
||||||||||||||||||||||
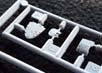
| The kit | ||||||||||||||||||||||
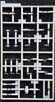
| This is the third generation 1/700 offering of the class.
The initial kits also came from Hasegawa, as part of the original Waterline
Consortium range of kits introduced in the early 1970s. Those models were
fairly typical of the original waterline kits in that they were relatively
simplistic in appearance, with a mix of positive and negative features.
Those Yugumos had a good, basic hull shape, and generally correct bridge
and structures in terms of size and scale. The kits were woefully short
on details, excepting linoleum tie-down strips, while weapons and boats
were somewhat crude and generic. The sterns were incorrect, with
no slope. Still, they may have been among the most accurate of the original
waterline destroyers.
The second generation kits were issued by Pit-Road in the mid 1990s. While these kits provided the much desired detail level of the typical Pit-Road kits of that period, the model itself was a bit of a disappointment when compared to the other Pit-Road issued Type A destroyers, namely their Asashio and Kagero class kits. Their Yugumo kits were rife with outright errors: poor bow profile, a bridge too short in length and improperly positioned on the forecastle, with a compromised shape that did not truly reflect either configuration of the early or late war bridges, and a stern that did not extend and slope down towards the waterline. Over time, some photo etch sets were issued by Five Star and Flyhawk to address some of these errors. Even PitRoad eventually issued a small PE fret (PE-196) to address some of the superstructure issues. However, these options still come down to more corrective efforts and work without necessarily satisfying all the problems. Fortunately, Hasegawa has chosen to update its Yugumo class offerings. These kits are brand new, utilizing more extensive research and modern injection molding technology to create vastly improved models of extremely high detail, all properly scaled. The kits are molded in the typical Hasegawa light grey styrene. The plastic is hard and clean, with no soft or greasy aspects, nor any flash. Eighty-five pieces are used for assembly. The fit of the kit is meant to depict Yugumo as built. Based on the style of the bridge and the specific parts that are included with the kit, those Yugumo class ships commissioned through January, 1943 (the first seven members of the class) could be built from this boxing in various early war fits. Strictly speaking with regard to accuracy (Im in rivet counting mode here), based on the degaussing cable pattern and shape of the mainmast, this kit best depicts those ships built by the Fujinagata shipyard, and possibly Makigumo in particular. These nuances will be covered below. |
||||||||||||||||||||||
| Sprue A - Hull | ||||||||||||||||||||||
| The hull is a one piece waterline hull, cleanly molded with extremely sharp and properly scaled details including metal deck treading, hatches, deck level skylights for the engineering spaces, linoleum tie downs strips on the main deck, portholes, porthole eyebrows, properly shaped anchor recesses, a degaussing cable with brackets, spurnwaters (with runoff outlets) all around the perimeter edge of the decks, bollards, turret base, and hawser reels. There are no lines or strakes to depict any hull plating. | ||||||||||||||||||||||
| The bow profile is very good, though just a hint more of
a curve as it approaches the waterline would have been nice. A slight
swipe of a sanding stick would solve that, though the edge of bow is very
sharply molded and one wouldnt want to lose that fineness. My sample has
a hint of a sinkhole to either side of the bow at the waterline, about
3mm back. It will probably not be noticeable when painted, though
a dab of putty would make sure of that.
Somewhat disappointing is that my review hull bowed upward ever so slightly at the bow and stern, more so at the stern. While the hull has been engineered to fit more closely with the waterline plate, with more attachment points along the centerline axis of the hull, Im a little doubtful that merely gluing the waterline plate to the hull will eliminate the bowing at the ends. Im far more hopeful that the bowing can be eliminated with temporary weights at the bow and stern when glued, or by using the hot water immersion method. Obviously, if one attaches the hull to a fixed base, this is not going to be an issue. Theres no weighted metal plate to help keep the hull upright. The deck is mostly free of superstructures, excepting the base housings for both funnels. Nor is there any deck equipment molded on, aside from hatches, vents, and hawser reels. The reels are properly sized, and do have tiny, individual cable lines molded in. The forecastle deck and the treaded portion of the stern have been molded as separate pieces. The bullnose at the top of the bow has been separated and is attached to the forecastle deck. Interestingly, the treaded deck at the very stern has been molded down to the degaussing cable. In other words, its not just a deck plate, but also includes the upper part of the hull in that area. I suppose that helps to eliminate unsightly seams in the deck. Perhaps most impressive to me is that some tertiary air intakes have
been reproduced, something previously seen on only the Fujimi Yukikaze
kit for a Japanese 1/700 destroyer. Here, they have been molded as part
of the hull, so while the overall shape is correct, the shapes are simplified
and not fully formed. The simplification applies mostly to the portion
of each that faces the bow; otherwise, the shapes are fine. These pieces
could be fully shaped with a little sanding and carving work, or replaced
with brass rod. Given that these are largely hidden once all the other
structures are in place, I think it likely that most modelers wont notice
the simplified shapes. I will say that Hasegawa did an excellent job on
the tiny pair of intakes at the front of the base of funnel number one.
Those should be left as is.
The hull scales out extremely well. Yugumos particulars versus the
scale and kit:
*The separation of the bullnose from the hull accounts for the difference between the calculated kit scale length and the actual kit length. (Rivet counter alert notes on the kit degaussing cable pattern.) The construction of the Yugumo class was evenly divided between three shipyards: Maizuru, Fujinagata and Uraga Dock. As these vessels were all completed just as or after the war began, each came out of its yard with an external degaussing cable already installed. Each shipyard produced its own pattern, though none were that dramatically dissimilar from one another. The biggest point of differentiation came over the last 50 feet of ships length at the stern, where the cable usually dipped in some fashion to accommodate the propeller guards. There were some other, subtle differences forward in the vicinity of the forecastle break as the cables rose one level above the main deck to the forecastle deck. For simplicitys sake, I will focus just on the stern. As mentioned, Yugumo was built by Maizuru. That yards stern pattern was the simplest, with the cable mounted horizontally around the stern at the same level below the main deck as the rest of the cable. The pattern from Fujinagata dipped downward in a gently slope along the last 50 feet of length to the very end of the stern. The pattern from Uraga was the most complicated, with the cable dipping down, running horizontally for about 20 feet, then angling back up and resuming a horizontal attitude back to the stern. This was the same pattern as was seen on the Kagero class ship Yukikaze, and is probably the most familiar to IJN destroyer fans. The degaussing cable on the kit hull follows the pattern set by the
Fujinagata Shipbuilding Yard. The cable is very well done, just not actually
reflective of Yugumo. (However, this is the pattern seen in the Miyukikai
plans for Yugumo, which I suspect were used as a reference for this new
kit.) Notable Yugumo class ships from the Fujinagata yard include Makigumo,
Naganami and Asashimo. Altering the pattern to reflect a ship from another
yard without completely removing the cable and replacing it would be difficult,
I think. At the very least, doing so will require a very delicate touch.
|
||||||||||||||||||||||
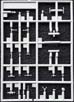
| Sprue B | ||||||||||||||||||||||
| The largest sprue, it holds the forecastle deck, waterline plate, funnel
halves for both funnels, funnel grills, both halves of the emergency
steering/RDF compartment, all the components to the aft deck house, a late
war version of the platform for the 25mm AA mounts to either side of funnel
# 2, the primary engine intake that sits immediately aft the forecastle
break, the engine air intake that sits at the base of funnel #1, the platform
upon which sits torpedo mount #1, the galley pipe, and auxiliary piping
for the funnels.
As with the hull, everything is beautifully scaled, detailed and sharply molded. The detailing on all surfaces of the aft deckhouse exceeds any that I have seen for any other previous IJN destroyer kit. Plus, most all the proper details are molded on its sides. The deck treading is incredibly fine, yet sharp, as it is for the forecastle deck and the AA platform. It would have been nice to have seen Hasegawa dispense with the molded on hawser reels on the forecastle deck (and the main deck), but at least the reels are properly small, and show separation between the coiled lines. The galley pipe has the proper number of auxiliary extensions, and the other ancilliary funnel pipes have the properly shaped exhaust tips on top. The grill for funnel # 1 has been divided into two pieces as befits the actual appearance, but solid plastic can never appear as nice as a photo etch version. Unlike any prior IJN destroyer kit, the upper portion of the forward torpedo reload gantry has been molded to the base of the air intake that sits under funnel #1. Doing so maintains the geometry of the angle to which the gantry sits, which I think is a very astute aspect to the kits design. The late war AA platform is not meant to be used for this particular
kit and fit, so it goes to the spares box.
|
||||||||||||||||||||||
|
||||||||||||||||||||||
| Sprue D | ||||||||||||||||||||||
| This is a small sprue containing an early war foremast
and main mast, the early war version of the platform that supports the
twin 25mm AA mounts to either side of funnel #2, the bridge facing, and
the compass bridge deck.
Much is commendable here. As with the other sprues, detailing is sharp. The AA platform wisely comes without solid rails or siding, which too often misrepresents the open railings and canvas that typically ringed them. The bridge face in properly inclined and sports the right amount of curvature used to help reduce wind resistance.The compass bridge deck has a properly recessed deck, suitable for additional detailing. Theres actually a chart table molded next to the central support housing, and tiny, raised circles indicating the placement position of lookout binoculars and a compass binnacle. The foremast is molded as one piece, with the rear legs integrated with the foreleg. (I dont think that this has been done before, at least for an IJN destroyer in this scale.) It observes the correct angles of the tripod legs, particularly where the rear legs are 90* vertical to the ships axis. Integration also eases the proper placement of the mast on the ship. A set of light yardarms are properly swept outward and back. The same configuration and stanceis true for the smaller, main mast that sits atop the aft deckhouse. My one nitpick is that all the mast legs are a hair on the thick side, at least when compared to other recent kits. (Rivet counter alert notes on the aft (main) mast.)
The remaining Yugumos had two sets of yardarms, placed in a horizontal X , much like Shimakaze and the Akizuki class ships. The open stance between the fore and trailing legs was shallower, and the masts placement was slightly further aft. Rendering these type refinements in 1/700 styrene is nigh well impossible as of the present time. However, the revised mainmast can be replicated with brass rod for those who wish to have it. (It also appears that Five Star includes it in both their early and late Yugumo Type upgrade sets for the Pit-Road Yugumo class kits.) Strictly speaking, the kit version of the mast limits the choice of ship to Yugumo, Kazagumo or possibly Makigumo. I say possibly for Makigumo because, despite claims that as lead ship from the Fujinagata yard, Makigumo would have carried the original aft mast configuration, a close examination of the existing photo of Makigumo at her commissioning seems to indicate otherwise. She did seem (to me) to sport the later aft mast configuration. If I am wrong about that, then in conjunction with the specific degaussing
cable pattern, Makigumo is the only member of the class that actually matches
the kit OOB.
|
||||||||||||||||||||||
| Sprue E | ||||||||||||||||||||||
| This is another small sprue holding the rear halves of
the bridge, the compass bridge deck roof, and an early war stern deck insert
Again, everything is beautifully molded, detailed and scaled. In addition to the usual features, the bridge pieces have some very small vents molded on, which is a deeper than usual detail. My one nitpick here has to do with the way the depth charges are detailed. They sit nicely in individual roll-off racks as befits an early war ship. Viewed from the inside looking outward, one can even see the delineation between the rack and depth charge. Strangely, the same fidelity is not offered on the outside of the depth charges sitting in their racks. I do think that the charges can be delineated with a scribe tool and a little care.
|
||||||||||||||||||||||
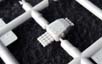
| Sprue M x 3 | ||||||||||||||||||||||
| This sprue holds a 6m launch, a 7m cutter, a 7.5m motor
launch and canvas cover, a twin 13mm AA mount, two twin 25mm AA mounts,
two triple 25mm AA mounts, six single 25mm AA mounts, a twin set of 12.7cm
barrels and canvas boot assembly for one of the 12.7cm main mounts, two
davits for the cutters, two more davits for the motor launches, a crowsnest,
an anchor, a small hawser reel, the quad 61cm torpedo tube mount with shield,
all torpedo reload girder supports and the overhead girder for the rear
torpedo reload station, and a support for a late war AA bandstand.
Not everything is used for the early war kit. Certainly not the 13mm, 25mm single and triple barreled AA mounts, the support for a late war AA platform, nor the 6m launch. These appear to be meant for yet to be released kits with a later fit, and perhaps destroyers of other classes. These extra pieces will also go nicely into the spares box for now. As does one of the torpedo mounts. While the 25mm AA singles appear very nice, Im not quite as enamored of the twins and triples. Though these are certainly better than what has been supplied with most Waterline Consortium kits, I dont think these twins quite as nice as what Hasegawa provides in its relatively new, retooled Tenryu/Tatsuta kits. In any event, there are superior aftermarket versions of both type mounts if one wishes. The Yugumos sported a new, simplified type of davit on the forecastle for the 7m cutters. Previously, the davits had pivoted around to move the cutters outboard to lower away. In the Yugumos, the pivot was limited to just tilting outward, perpendicular to the ships axis, similar to how the davits for the 7.5m motor launches worked. Seen from outboard, the davit resembled an upside down Y, with the legs splayed apart. The kit part captures the overall shape, much as did the earlier Pit-Road Yugumo version, but the base is solid instead of open. Admittedly, this is not easily corrected or modified. One can take a bi-folding PE davit and splay the legs apart, or use the versions from the aforementioned Five Star Yugumo sets. The torpedo mounts are very nicely detailed and properly scaled, with the slightest bit of asymmetry to the shield when viewed from overhead as befits the real thing. The Pit-Road NE series version and the FineMolds WA-20 version have a little more detail, but the FM version is clearly overwrought in terms of scale. The NE version has a bit more detail (and that being slightly more pronounced) with dogs on the watertight doors and side grab rails, but the Hasegawa version certainly holds its own. The torpedo warheads and body come integrated with the torpedo tube, unlike the FM version. The ships boats may not contain quite as much detail as some aftermarket
versions, but they are very nicely shaped and sized, particularly the motor
launch.
|
 |
|||||||||||||||||||||
 |
||||||||||||||||||||||
| Sprue N | ||||||||||||||||||||||
| This is another small equipment sprue. Included are
the bullnoses set at both the bow and stern, both paravanes, a paravane
winch, the athwartship depth charge rack and Y-thrower, a couple of vents
for the aft deckhouse, a 12.7cm practice loader, bow and stern jackstaffs,
a 90cm searchlight, an RDF antenna, a deck winch, a 2m direction finder
for aiming the torpedo tubes, the main gun director, early and late war
versions of the cupola for atop the main director, a small sea anchor for
the rear deck, a Type 13 radar antenna, the port and starboard torpedo
reload housings that are placed to either side of funnel #1, and some supports
for mid/late war 25mm AA bandstands.
As this is an early war kit, the Type 13mm radar, the AA bandstand supports,
and the late war cupola go into the spares box. The detailing is particularly
sharp on many of these little pieces. The director, both cupolas, the paravane
and deck winches, and the Y-thrower are most notable. Even the depth charge
rack, solid as it is, has more depth than usual to the outline of the latticework
of the rack. The torpedo reload housings have the proper aperture
upfront, and are not clunky in appearance. Interestingly, one side has
some molded storage compartments while the other side is mostly open. The
main gun director housing was slightly modified from earlier destroyer
classes, and here is properly shaped in front, something not achieved in
the past.
|
 |
|||||||||||||||||||||
 |
||||||||||||||||||||||
| Sprue R x 3 | ||||||||||||||||||||||
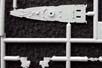
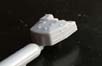
| These are one piece sprues, with a Type C/D turret attached. Like the torpedo mounts, these are particularly well done with regards to the details. Its almost as comprehensive as the C/D turrets from the Pit-Road NE05 set. Those include the grab rails atop the turret, where as the Hasegawa versions dont, but the Hasegawa versions properly have three protected air vents on their port side; the NE set only sports two. Sizing appears correct, and the scaling of the details appears a bit more true than the NE version. Stiffening bars along all the sides of the turret are included. | 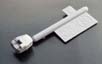 |
|||||||||||||||||||||
|
||||||||||||||||||||||
| Decals | ||||||||||||||||||||||
| The kit comes with a small, beautifully registered decal sheet. Yugumos name is rendered in both Japanese and English, in two formats, which are good for a small nameplate or even the bottom of the waterline plate. There are several Imperial Japanese navy ensigns with the Rising Son, and the ships name in several sizes. These are meant for both the stern of the ship and, in a nice, accurate touch, the ships boats. Draft markings are also included. Oddly, the instructions specify placement of the ships name on the boats, but there is no guide for placing the draft markings on the hull. |  |
|||||||||||||||||||||
| Instructions | ||||||||||||||||||||||
| These consist of one large format sheet printed front and
back, then folded several times. The front portrays the usual black and
white reprint of the cover art, a brief ships history in Japanese and
English, plan and line drawing views with color callouts for painting,
and some guidelines to assembly. The color callout and fit illustration
is specific to Yugumo 1942, with DesDiv 10.
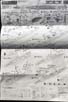
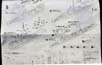
The back has a step-by-step progression of assembly using exploded,
three point perspective illustrations. Theres also an illustrated
parts guide, with block outs denoting equipment not used in this fit.
|
||||||||||||||||||||||
| Final Thoughts | ||||||||||||||||||||||
 I
admit to being somewhat eager in anticipation of this new release, and
for the most part, I am not disappointed. I have long lamented the inadequacy
of the available 1/700 kits, and was driven to kit-bash some Aoshima Kagero
hulls with some PitRoad Yugumo kit bridges in order to build something
approaching an accurate Yugumo class kit. I learned a lot in the process,
which I feel puts me in a good position to comment on this brand new kit. I
admit to being somewhat eager in anticipation of this new release, and
for the most part, I am not disappointed. I have long lamented the inadequacy
of the available 1/700 kits, and was driven to kit-bash some Aoshima Kagero
hulls with some PitRoad Yugumo kit bridges in order to build something
approaching an accurate Yugumo class kit. I learned a lot in the process,
which I feel puts me in a good position to comment on this brand new kit.
I will say that I am a bit dismayed about the bowed hull. I would have thought that this type of shortcoming is something that would have been tamed by now from the manufacturers, particularly Hasegawa. Given that this same problem has appeared with other recent destroyer kits such as the Fubuki Type I from Yamashita Hobby, I must concede that my presumption has been unrealistic. As I am aware that my review kit is not the only such example of this issue, I can only hope that Hasegawa moves to correct this problem in this kit in the near future. I dont mean to damn the kit because of the hulls tendency to bow at
the very ends. This is not going to be an issue for anyone who mounts the
hull to a solid base. The rest of the kit is extremely well done. Its
not perfect, as there have been understandable concessions to production
costs, but there are no obvious errors, the shapes and details are very
accurate, and Hasegawa has provided for a few extra details that have usually
been ignored in this scale, even if those details are sometimes a little
simplistic. Its good to see this kit on the market. I look forward
to building it.
Thanks to Hobbico Model Distributors for the review sample. They are your US distributors for Hasegawa. Suggested MSRP appears to be $25.99. |
| This is an in-box review showing the kit contents. We welcome your input and comments in the review section of the forum especially if you can share details about fit, ease of assembly and accuracy. Click the logo on the right to join in the discussion. |  |