| BACKGROUND |
|
|
Japanese
battle doctrine was focused on the concept of the
decisive battle, with lighter forces whittling down an
approaching enemy until the battle line could be
engaged. As a signatory of the various naval
disarmament and limitation treaties of the 1920s and
1930s, Japan had to tailor its doctrine within the
boundaries of the treaties. Accordingly, greater
emphasis was placed on maximizing the impact of the
lighter forces upon an approaching enemy.
Japanese destroyer design evolved from the late 1920s
through the very early 1940s as a manifestation of the
effort to diminish an enemy force by engaging them at
night with superior ships of longer range, high speed,
and weaponry (i.e. torpedoes). The Yugumo class was
the final production iteration of what began with the
Fubuki “Special Type” destroyer.
Design
The Yugumos were a further refinement of the
previous Kagero class ships; the Kageros were
themselves considered the perfect mix of speed, range,
and weaponry in a destroyer by the Japanese. The
design was honed with a mix of small enhancements. To
improve stability, the forward 12.7cm main mount was
moved back 4.75ft/1.5meters. To reduce the wake at
high speeds, the extreme stern was extended 2.5
ft/0.8m at the waterline, thereby presenting a slope
to the aft end of the hull from the main deck on down
to the waterline. The change also produced a
pronounced waterline knuckle at the very stern.
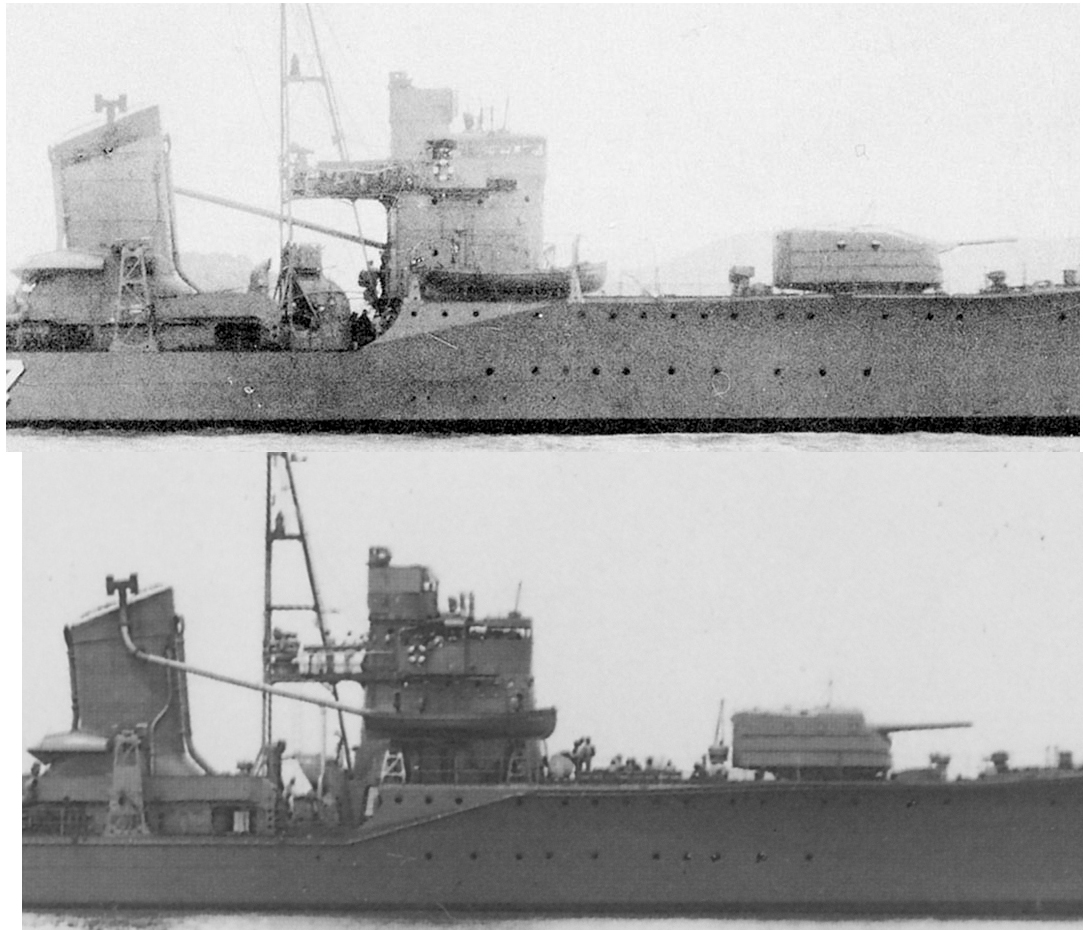
The bridge was redesigned to lessen wind resistance
and increase the internal space. The bridge facing was
inclined slightly aft, off the vertical, and the
forward surfaces of the compass bridge deck faired
within the structure to a greater degree. While the
placement of the bridge began at the same frame number
as the proceeding Kagero class, the bridge was
extended aft of the forecastle break by 1.5 meters to
provide more room. The entire aft end of the bridge
sat upon a set of raised trestles over the main deck
for support.
The forecastle deck was extended slightly further aft
over the main deck to accommodate new type davits for
the 7m cutters. Small changes were also given to shape
of the main director, the cupola atop it (for the
later batch of eight ships), and in the design and
location of the aft mast.
The main battery still consisted of three, twin 12.7cm
50 cal. guns in fully shielded turrets, but the mounts
were improved to allow the barrels to elevate to 75*
for better AA effectiveness. All the turrets were
reinforced with two horizontal stiffener bars. The
ships had improved stability over the previous class,
which allowed them to retain their full main battery
while accommodating the inclusion of several
additional 25mm AA mounts as the war progressed. The
ships retained the same 52,000shp power plant of the
previous class.
Eleven units were planned and constructed under the
4th Naval Armaments Supplement Program (also known as
the Circle 4 program) of 1939. Another eight units
were completed out of sixteen planned under the 5th
Naval Armaments Supplemental Program (Circle 5). The
rest of the units were cancelled in lieu of simpler
destroyer construction. A further batch of eight ships
was also cancelled on Nov 8, 1943.
Ship history
Namesake of her class, Yugumo, was laid down at the
Maizuru Naval Dockyard on June 12,1940 and
commissioned into service on December 5, 1941. After
training, she joined the newly formed DesDiv10
(Kazagumo, Makigumo, Yugumo, Akigumo), which was then
attached to Destroyer Squadron 10 and served as escort
to the First Air Fleet in April 1941. Yugumo escorted
the Kido Butai at Midway and later was a constant
participant during the Guadalcanal campaign in both
escort and troop transport roles. She also
participated in further operations in the mid and
Upper Solomons islands in those same roles. She
returned to Japan for a brief refit in late December.
Yugumo then returned to the Solomons in late January
1942 and joined in the evacuation of Guadalcanal in
early February. Afterwards, she continued in the
escort and troop transports roles throughout the
Solomons until again returning home. She underwent a
further refit at Yokosuka in May 1943, with improved
AA in the form of a new twin emplacement on a
bandstand in front of the bridge along with new triple
25mm mounts in place of the twin 25mm mounts placed to
either side of funnel number two.
During the subsequent evacuation of Kiska during late
July through early August, she acted as temporary
flagship of the division until sister Kazegumo’s
return from repairs. Ultimately, DesDiv 10 returned to
the Central Solomon Islands for more escort and troop
transport missions. At the Battle of Vella LaVella in
October 1943, she charged a line of US destroyers
seeking to intercept the Japanese mission. Yugumo was
sunk by concentrated gunfire and torpedoes after
torpedoing (and eventually sinking) USS Chevalier.
1/350
kit history
Only one Yugumo kit has previously appeared in this
scale and that was Pit-Road’s short-lived Yugumo,
which was released in 2009. That kit began life as a
1/350 Kagero class kit but was converted into a Yugumo
before its introduction. This is only my conjecture,
but it seems likely that Pit-Road had no desire to
compete head-to-head with Tamiya’s superb 1/350
Yukikaze kit when that kit was released in 2008. So,
they tried to salvage their effort by producing new
bridge parts for the kit while retaining the rest of
the Kagero parts. (The Pit-Road kit clearly has
“Kagero class” listed on most of its sprue trees.)
However, the actual Kagero and Yugumo hulls were not
identical. So, the Pit-Road kit lacked the sloped
stern, the forecastle deck extensions, the revised
position of #1 turret, the proper davits for the 7m
cutters, and several other small tweaks that are more
appropriate to a Yugumo class hull. Sales and reviews
must have reflected these shortfalls, because the kit
was pulled from circulation not long after its release
and it has never reappeared.
|
|
|
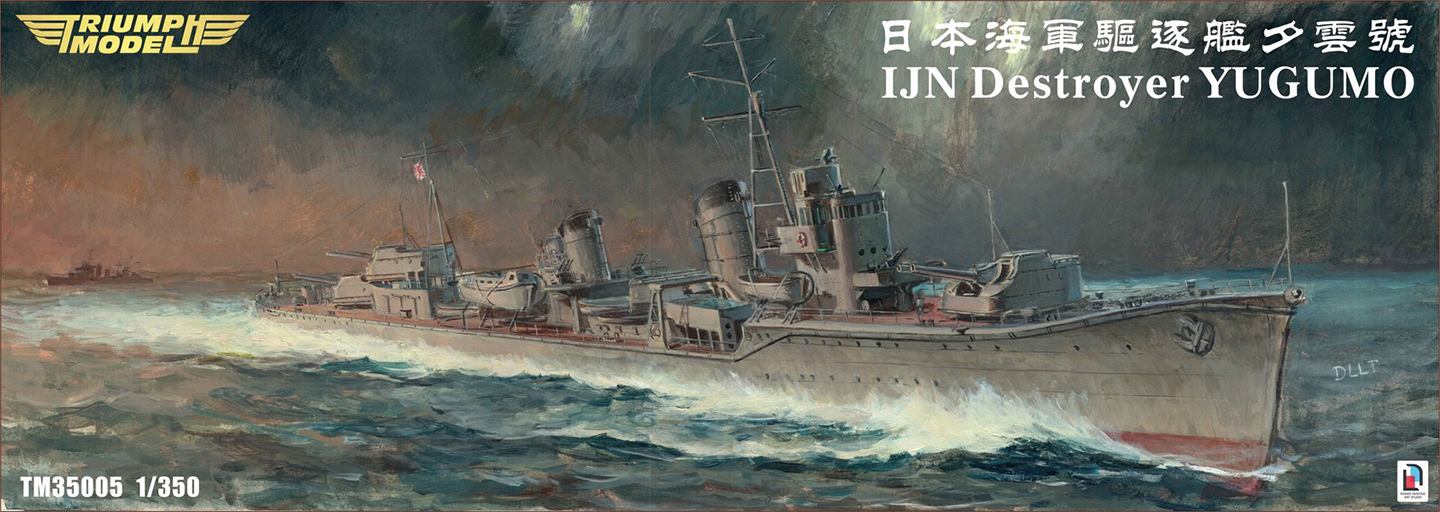
The Triumph Yagumo review kit
(released May 2026)
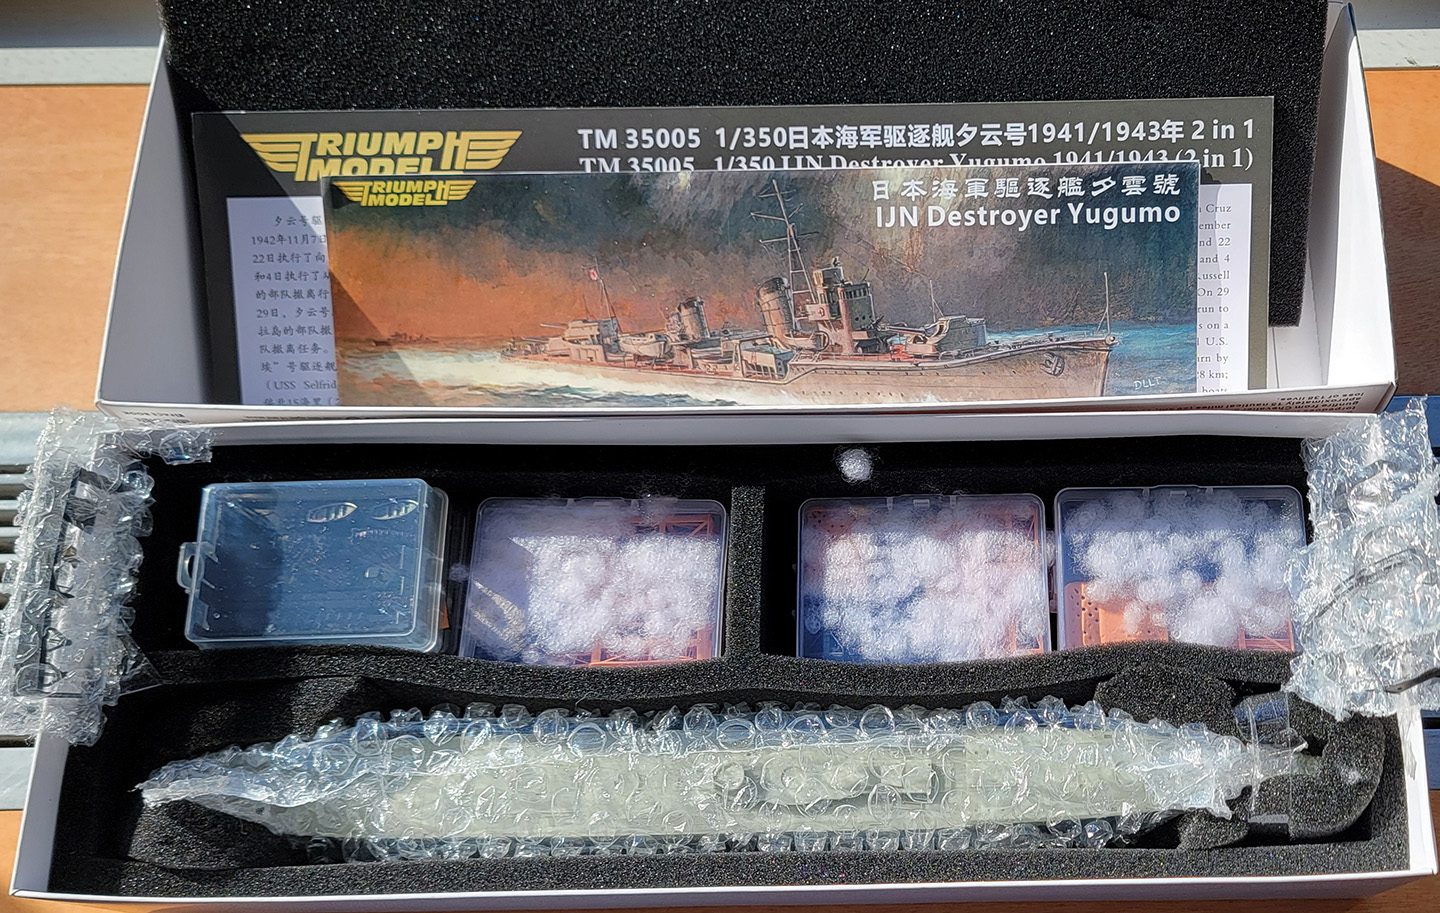
The new Yugumo kit is offered in waterline or full hull
versions. A deluxe upgrade package containing three
sheets of photo etch parts, turned brass barrels, brass
rod for masts and yardarms, and a deck mask for painting
is available for separate purchase and can be used with
either version. This review covers the full hull version
with a deluxe upgrade package.
The kit hull is cast in the now familiar very light grey
resin. Everything else in the standard kit is a 3D
printed part. The basic kit also comes with brass rods
for the auxiliary galley pipe and prop shafts for the
full hull version, plus flag decals. There are
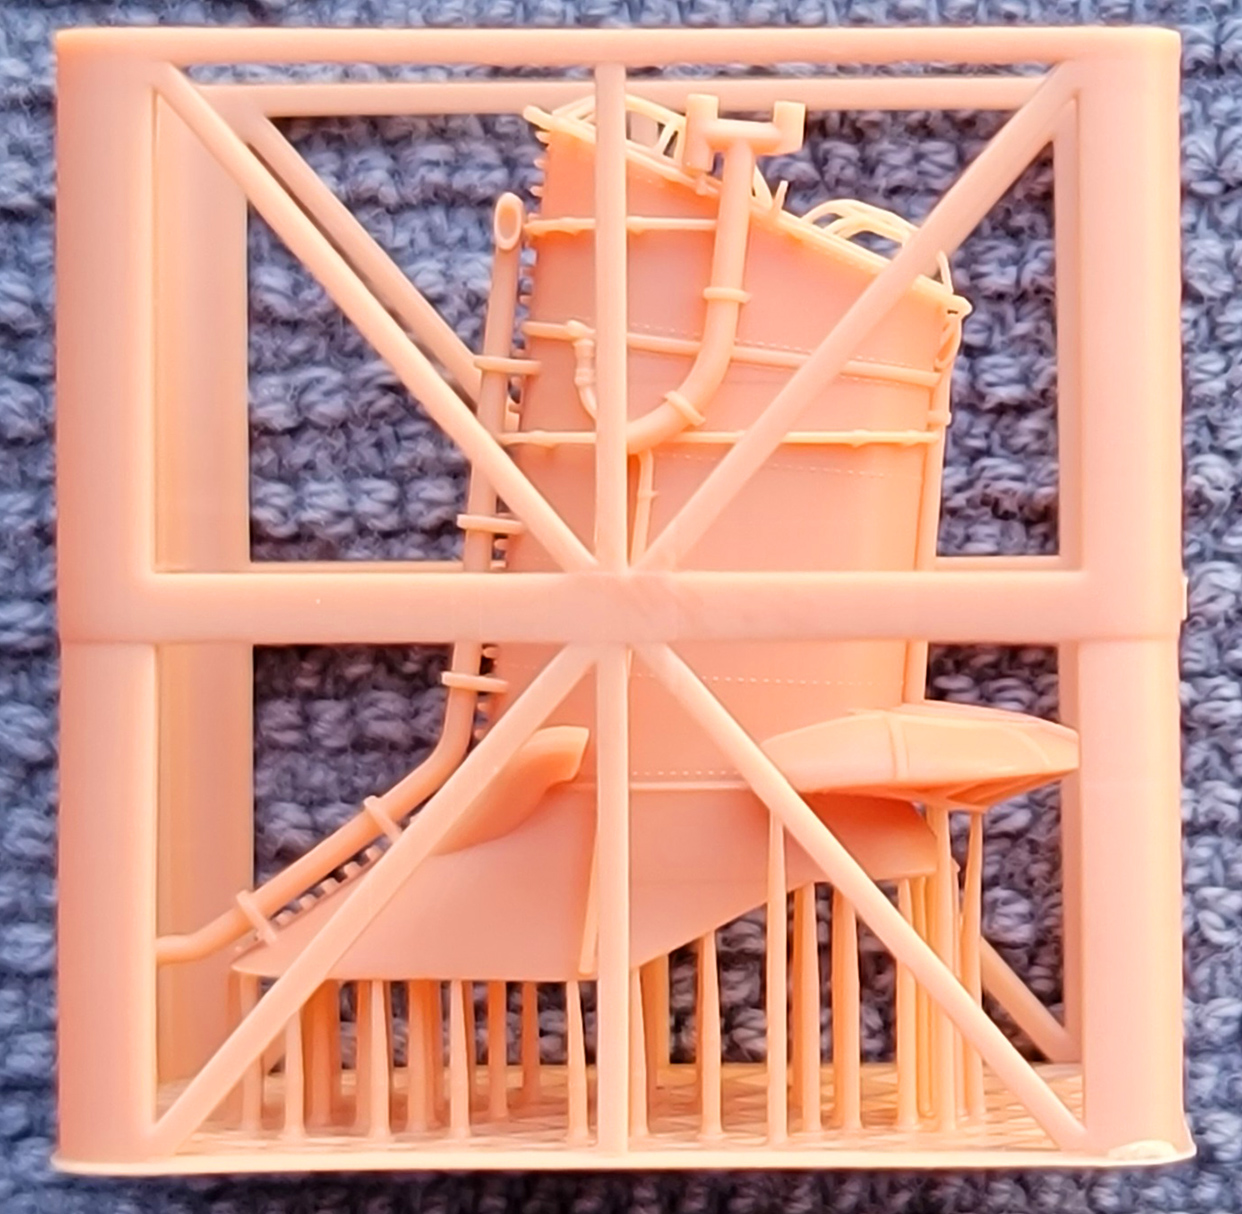
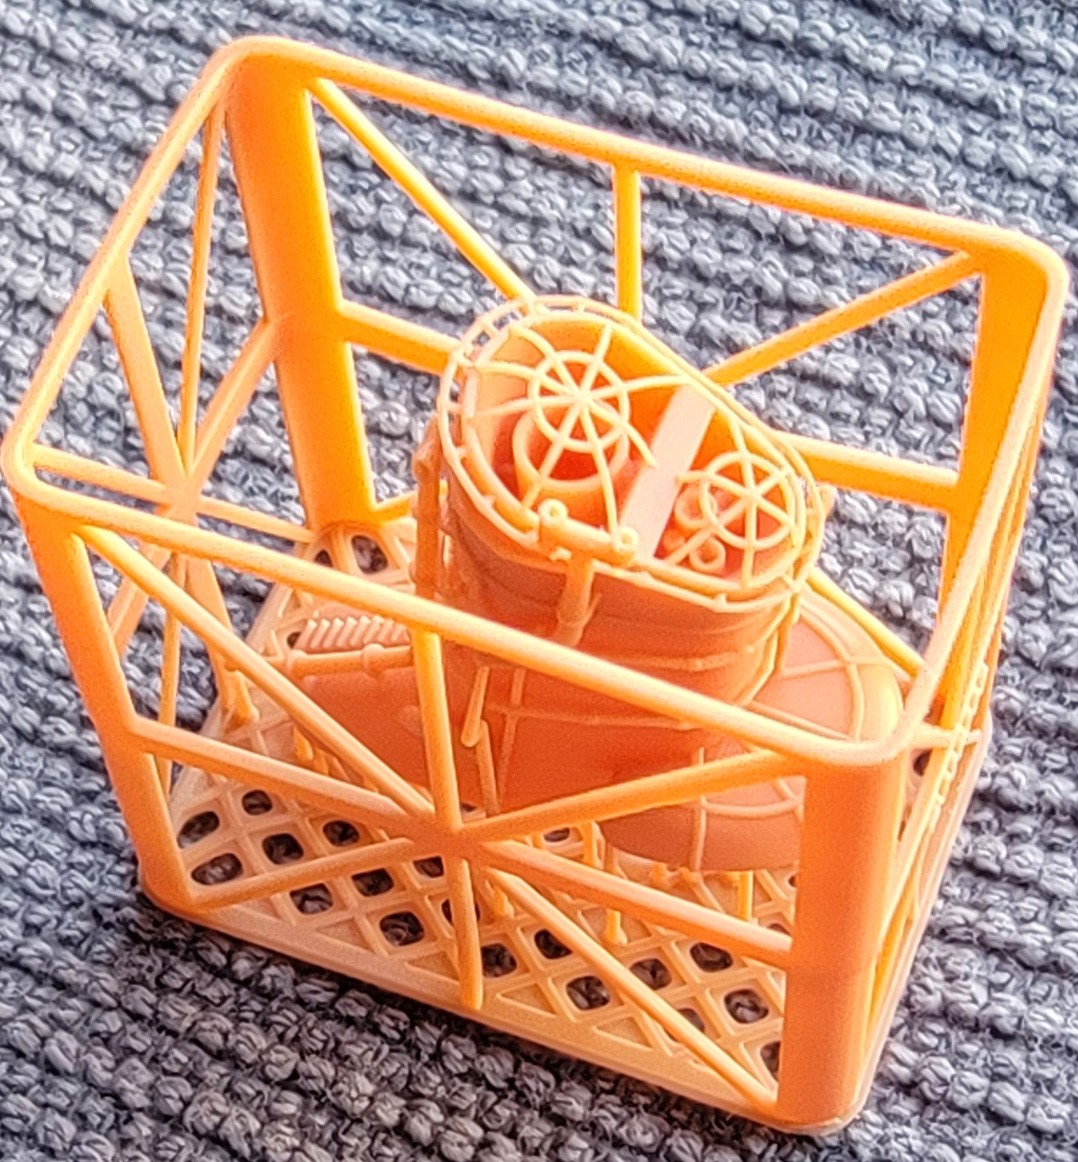
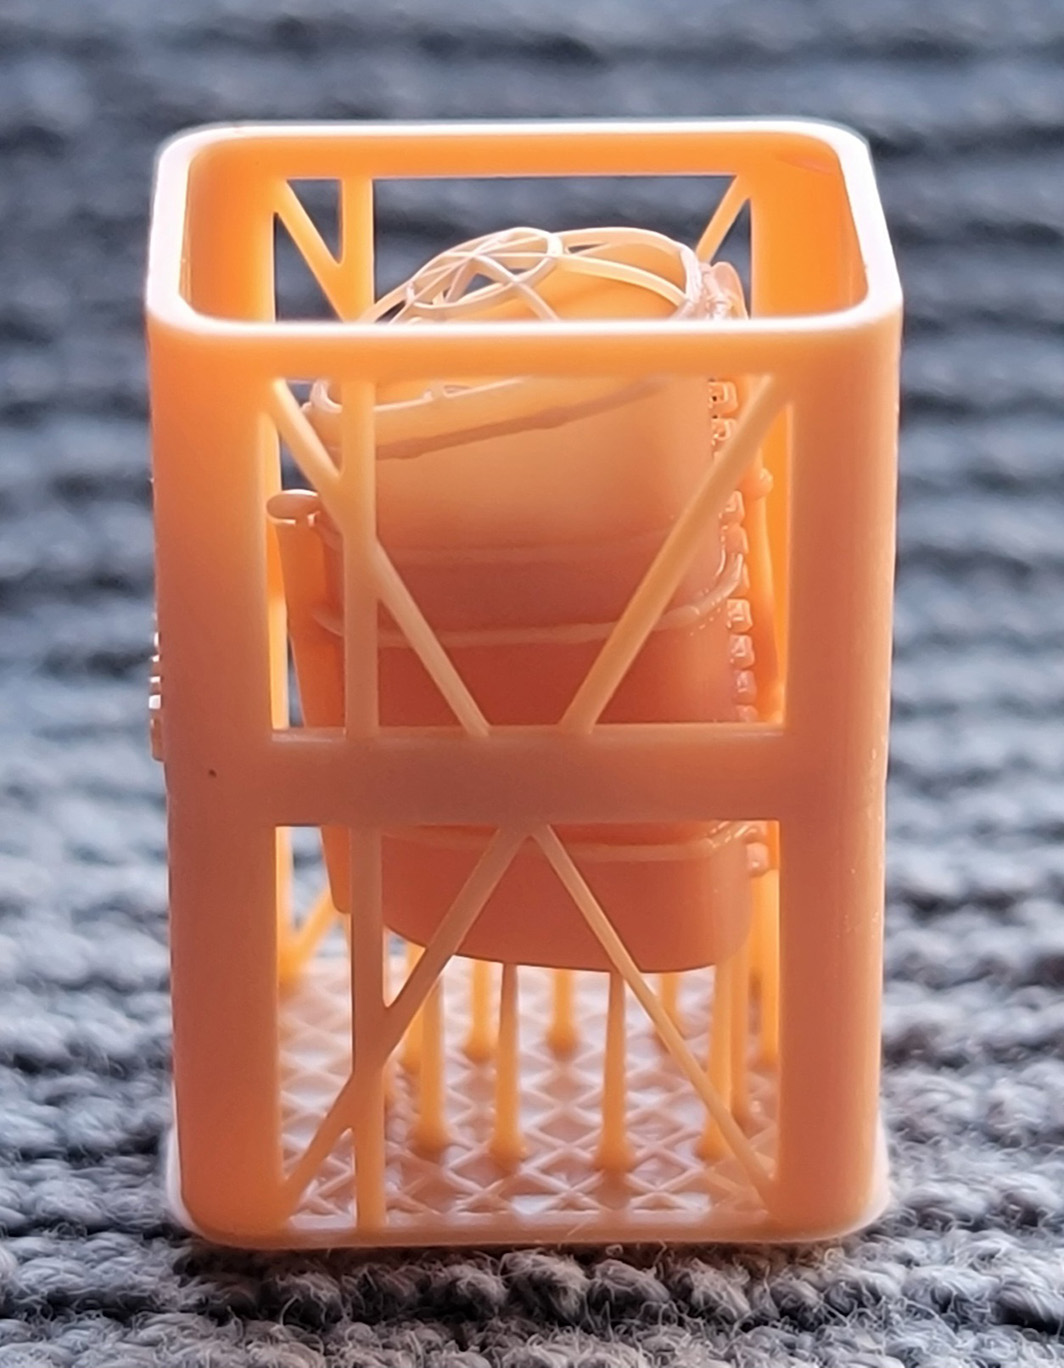
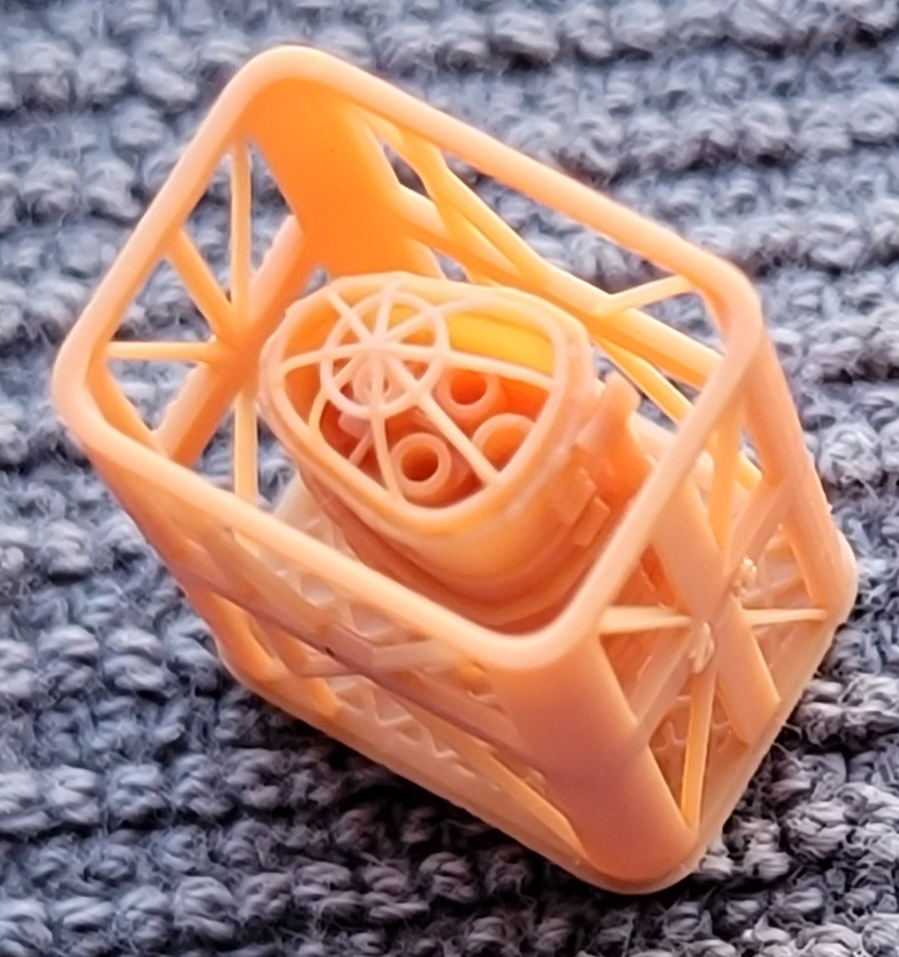
thirty-one print rafts; numerous smaller parts are
contained on sixteen rafts printed in black while
fifteen, mostly larger, rafts containing superstructure
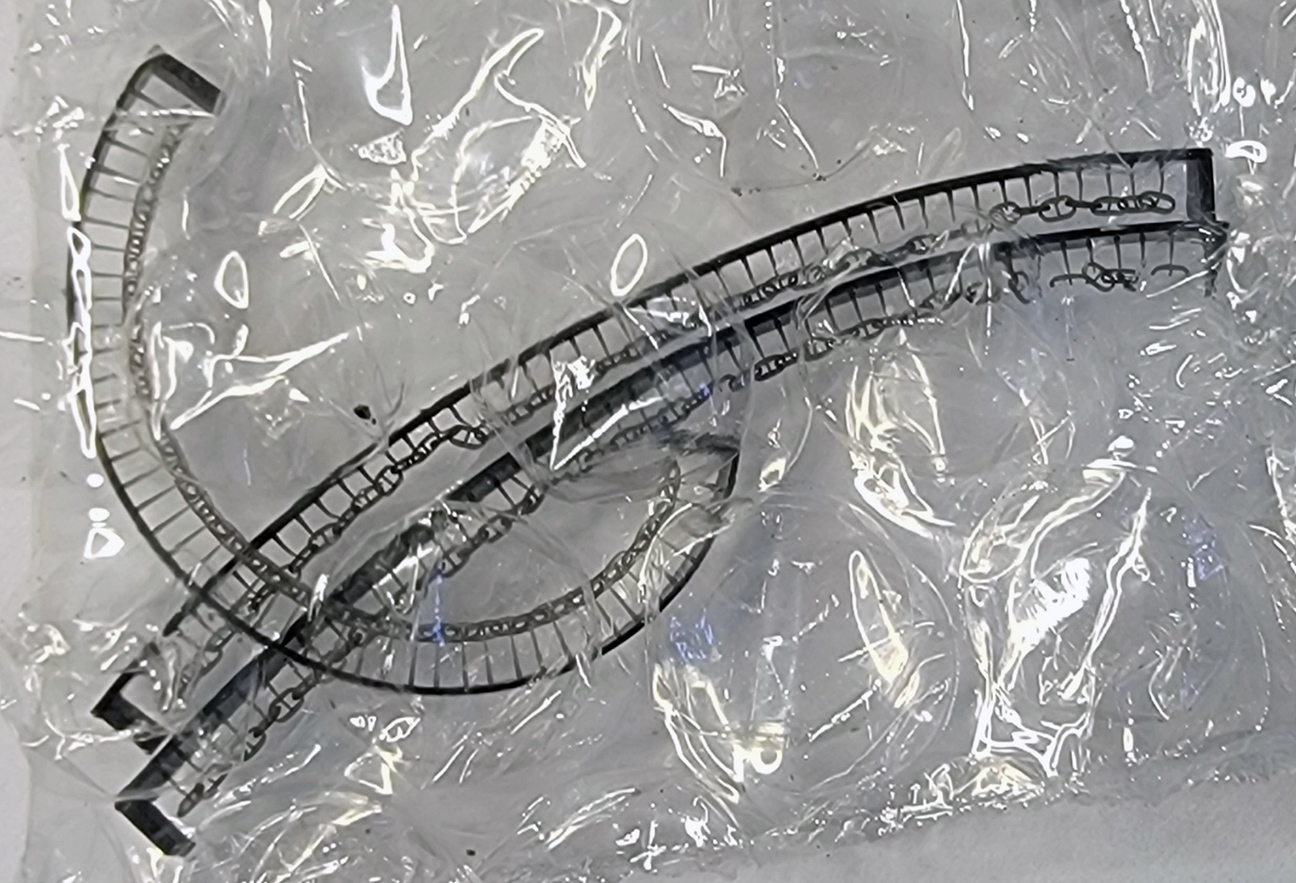
items are printed in orange or black. Two anchor chains
are printed separately
The kit is marketed as a 1941/1943 fit, but that
requires some parsing. In her original fit, Yugumo
carried two twin 25mm AA mounts to either side of funnel
number two. After a refit in May 1943, the twin mounts
were replaced by triple 25mm AA mounts, and she gained a
twin 25mm AA mount on a bandstand in front of the
bridge. This was her fit when she was sunk. The kit
provides guns and parts for both fits.
For the record, the two twin 25mm AA only configuration
would also apply to sisters Makigumo, Kazagumo and
Naganami as originally built. Substituting triple mounts
for the twins with no other changes would apply to
Takanami, Onami, and Kiyonami as built. Those same
triple mounts plus the twin mount in front of the bridge
could be used for Tamanami, Suzanami, and Fujinami as
built, as well as Kazegumo and Naganami after their
first 1943 refits. All these original configurations
retained the original tripod foremast before changes
were enacted to carry radar. The same can be said of the
mainmast.
Later sisters had different bridge structures as well as
fits to accommodate additional AA and radars, plus the
modified and reinforced foremast. There were also slight
differences in their degaussing cable layouts, depending
on their respective construction yards. Rivet counters
will find that information under the Deluxe Upgrade
portion of this review. |
|
|
| SPRUE A - THE HULL |
|
|
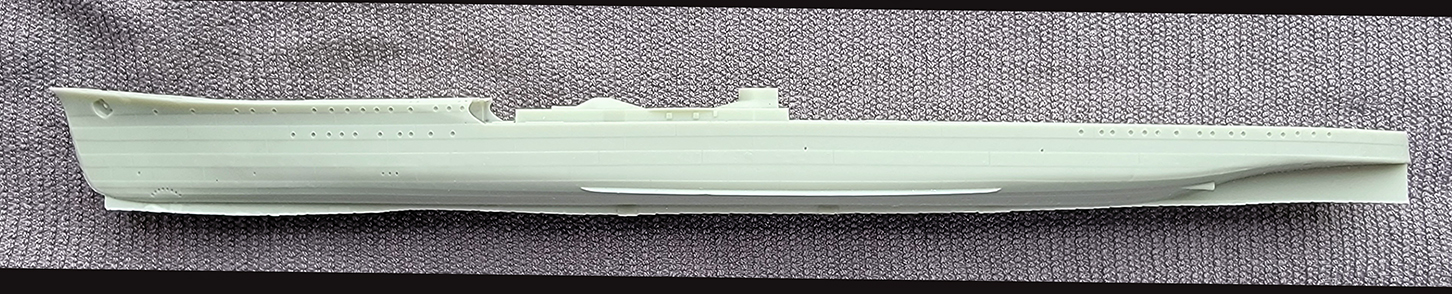
The
hull comes is cast as a full hull, one-piece hull.
There’s a resin pour plug along the length of the keel
that will have to cut off and sanded down. Some mold
release residue appeared on the hull, but this can
easily be removed with some warm water and soap.
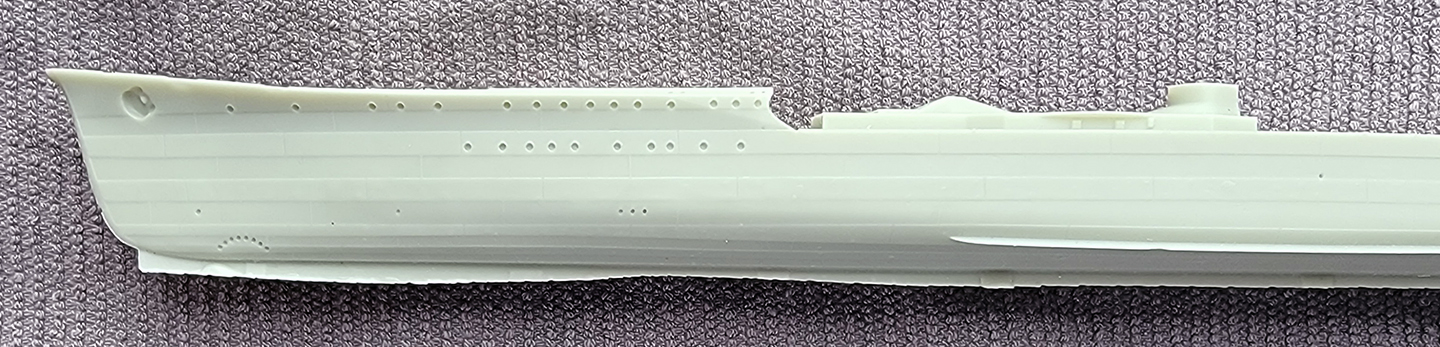
Like previous Triumph hulls, the casting details are
extremely sharp, with hawsepipes and recesses for the
anchors, hull plating, portholes and eyebrows, hull
mounted sonar, water intake grills, bilge keels,
propeller shaft glands, and placement recesses for the
prop shaft brackets and rudder.
The forecastle and main decks come with treading,
molded brass tie-down strips for the linoleum covered
areas, spurnwaters, torpedo trolley rails, space for
placement of individual depth charge roll off racks at
the stern, and both raised outlines and small recesses
for superstructure and equipment placements. The edges
of the forecastle deck are properly turtle-backed in
shape.
The bow profile is well done, and the hull shows
horizontal plating strakes. Most importantly, the
Triumph practice of depicting overstated plating has
been dialed back. The plating is still somewhat
exaggerated but looks much better than prior efforts.
Overall, the details are very well done, and, as with
their prior IJN destroyer kits, I’m very impressed by
the sharpness of the casting details.
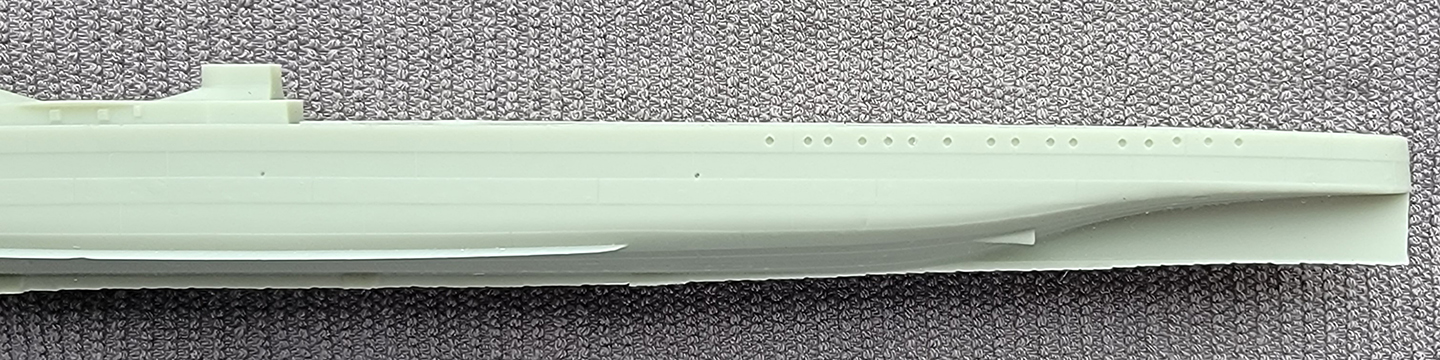
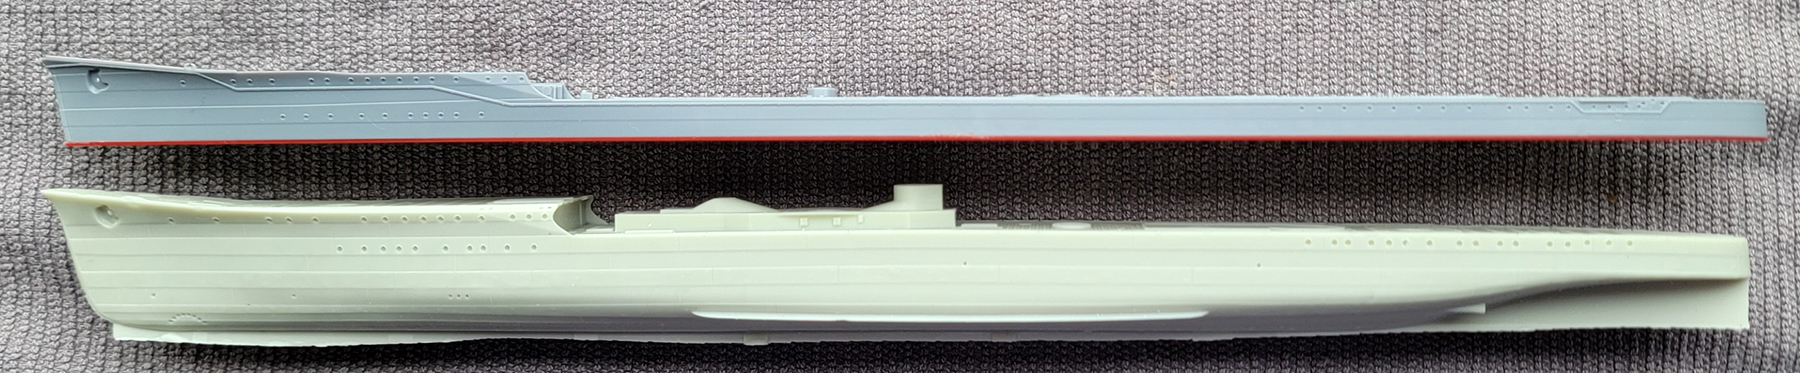
Unfortunately, the hull is not issue-free. This sample
kit has some noticeable sagging over the rear 25% of
the hull. The sag of this hull can probably be
corrected with a heat bath, but the modeler shouldn’t
need to do so to begin with. This is a bit of a
disappointment on its own and because this is the
second sample hull obtained for this kit review. The
original hull showed both sagging and serious
asymmetry when viewed from above, with the midsection
shifted to starboard over the centerline. It was
subtly banana-like in appearance.
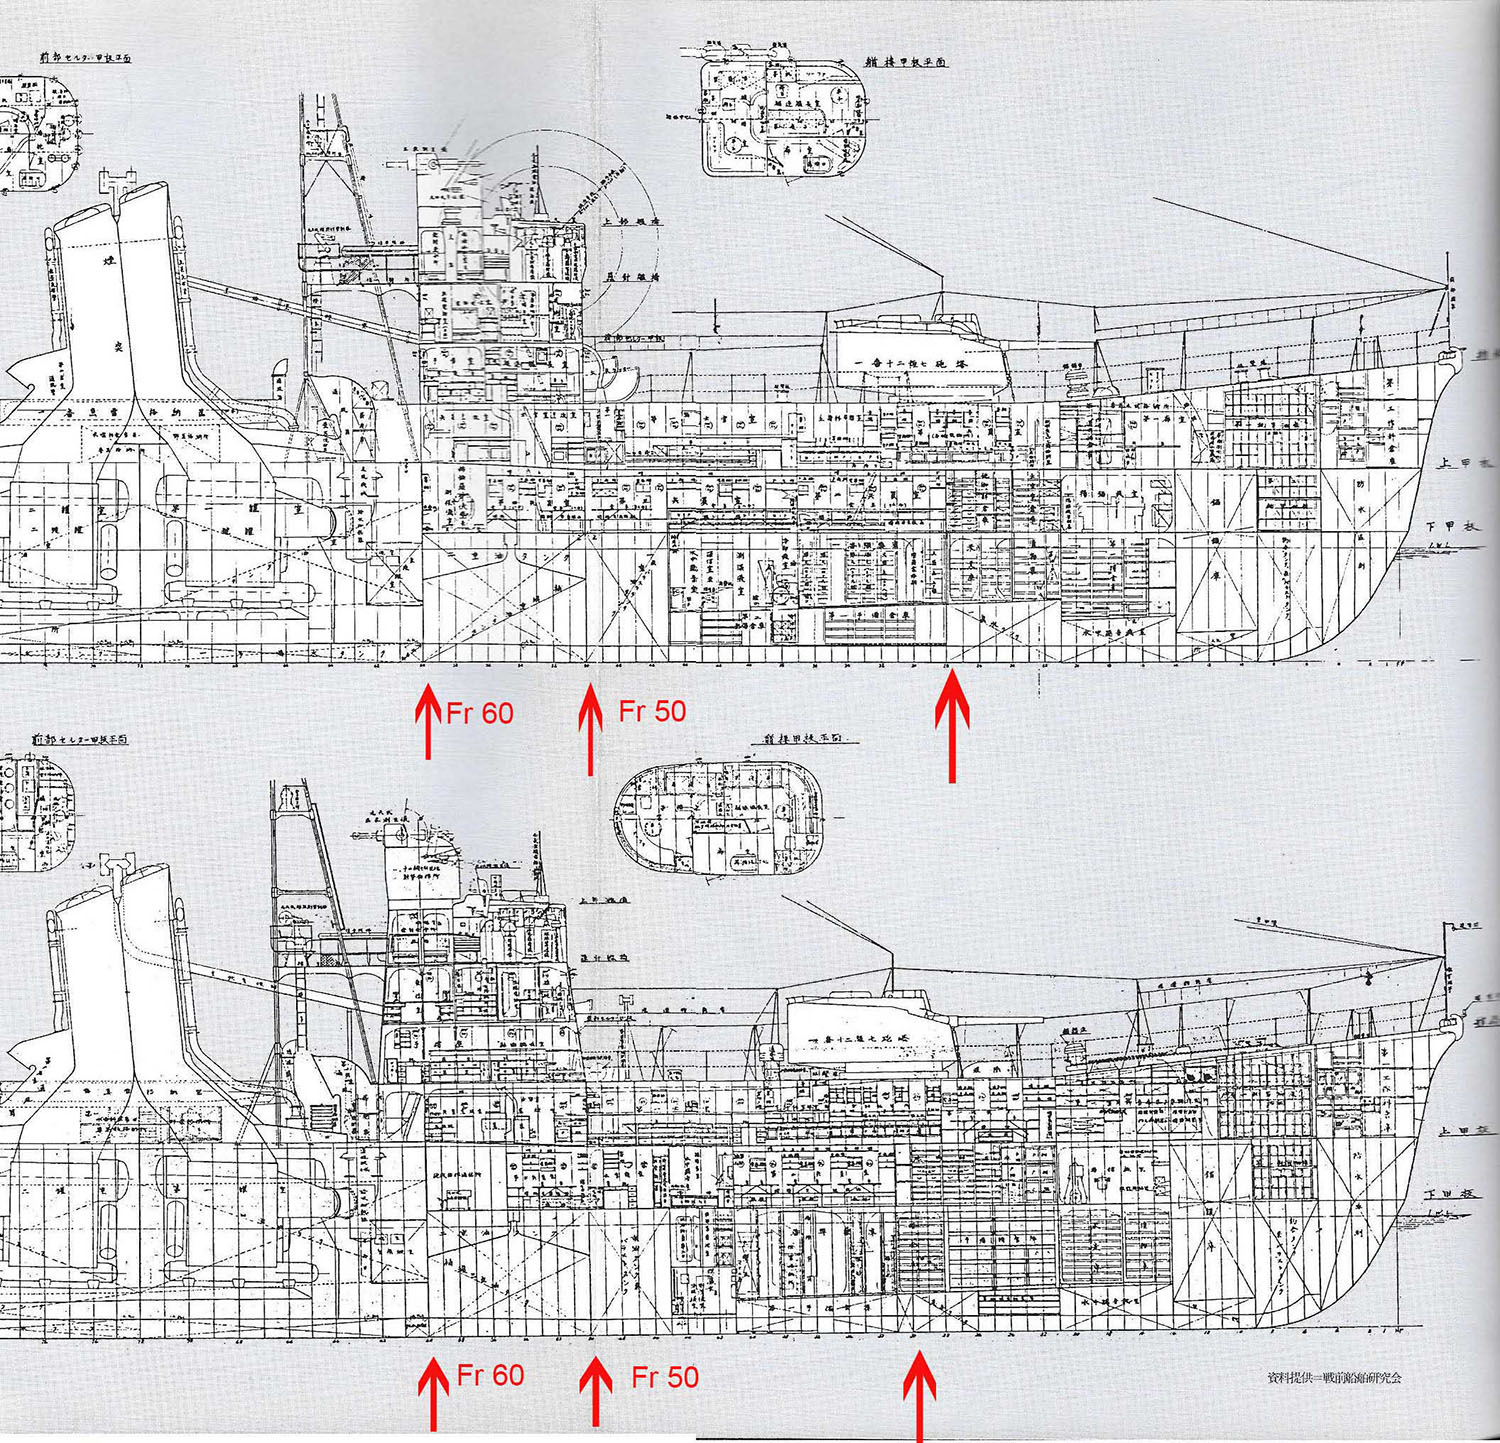
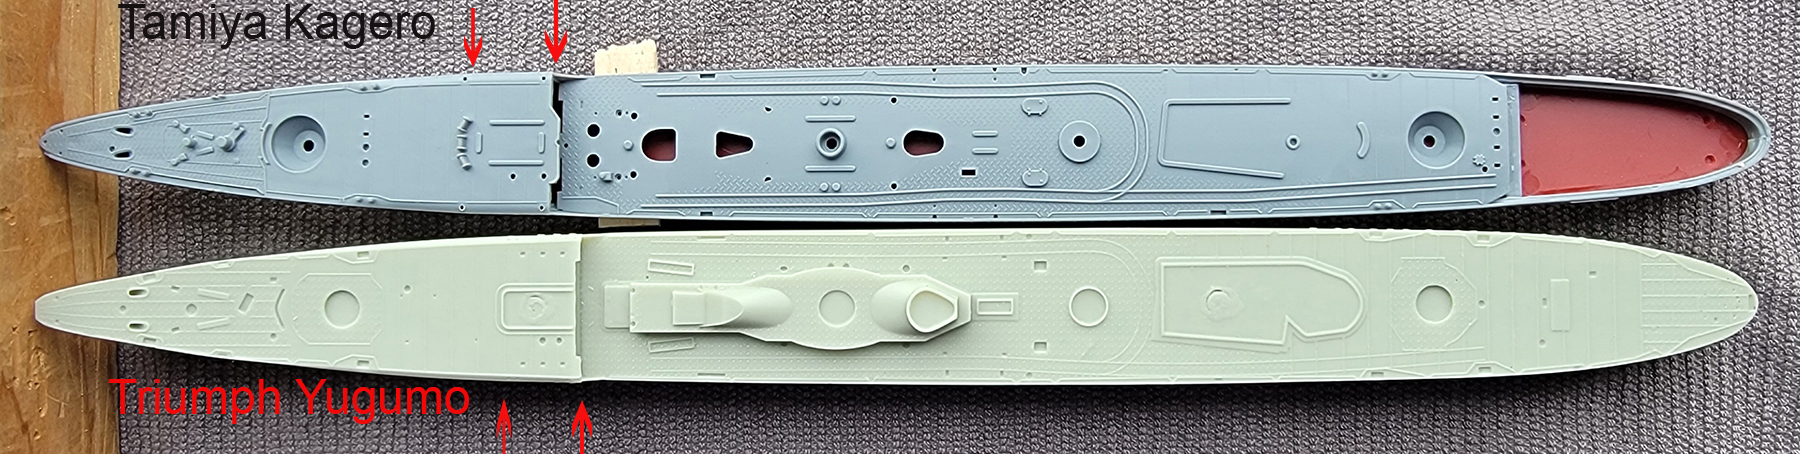
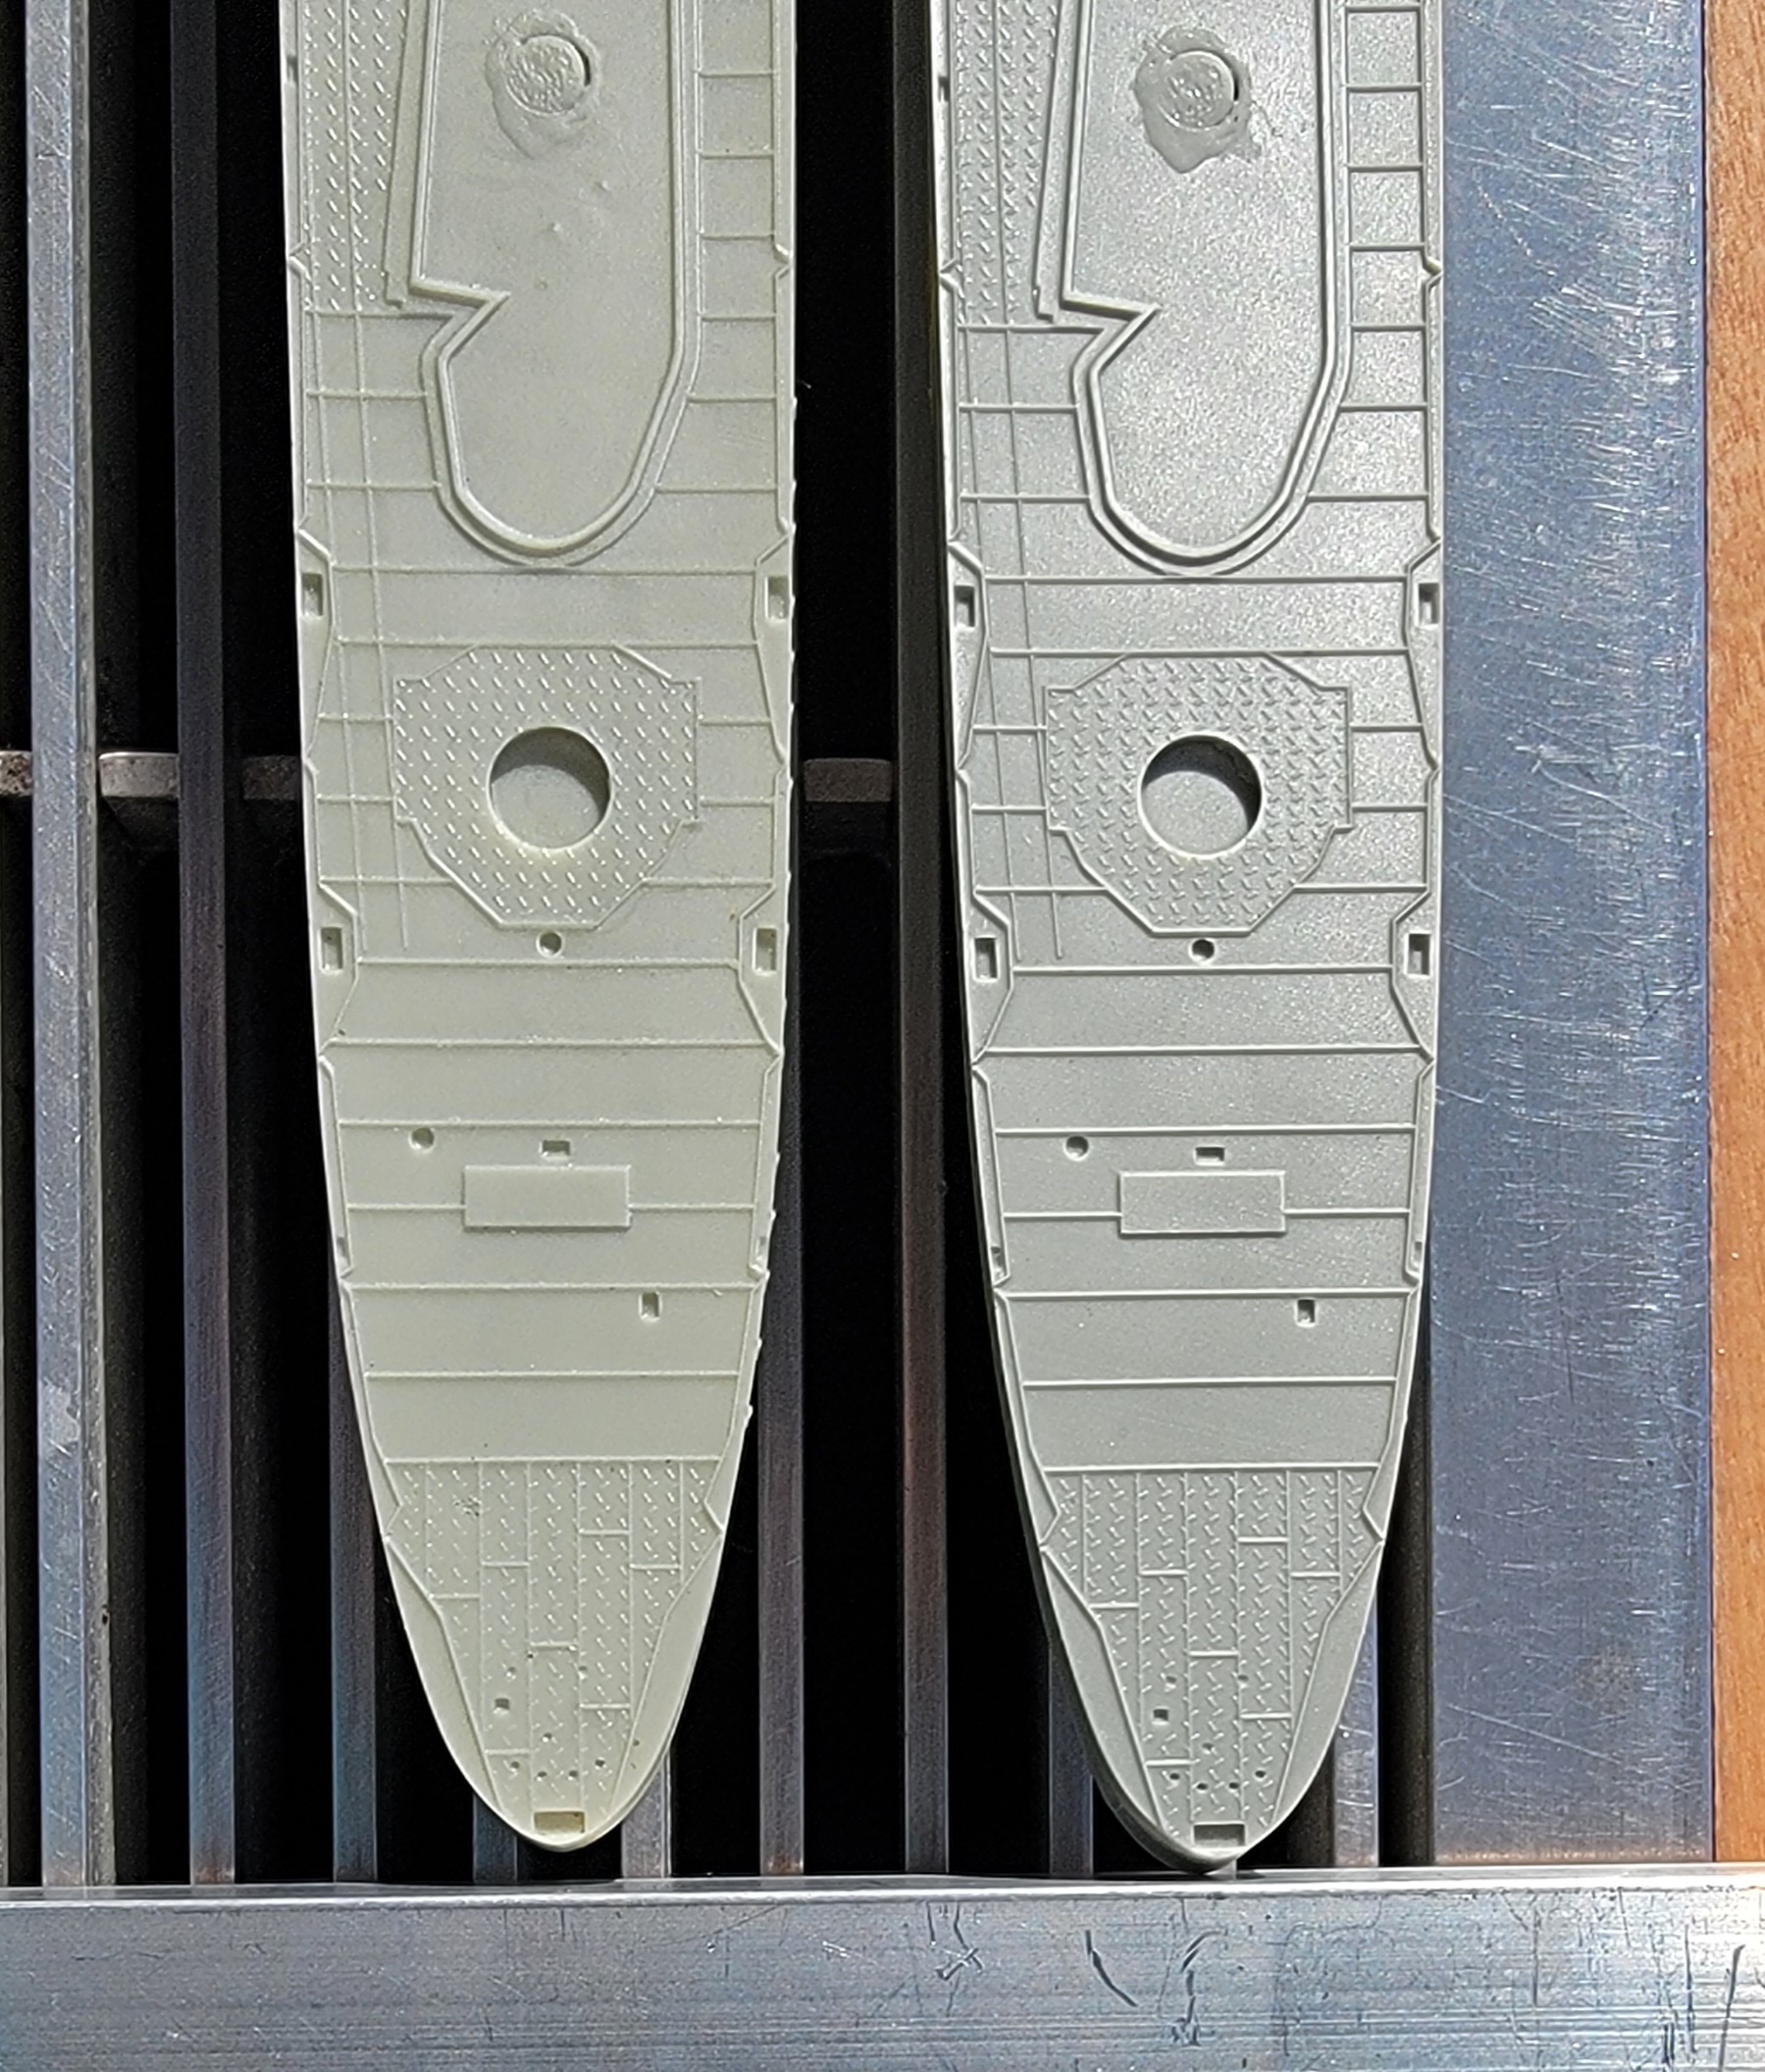
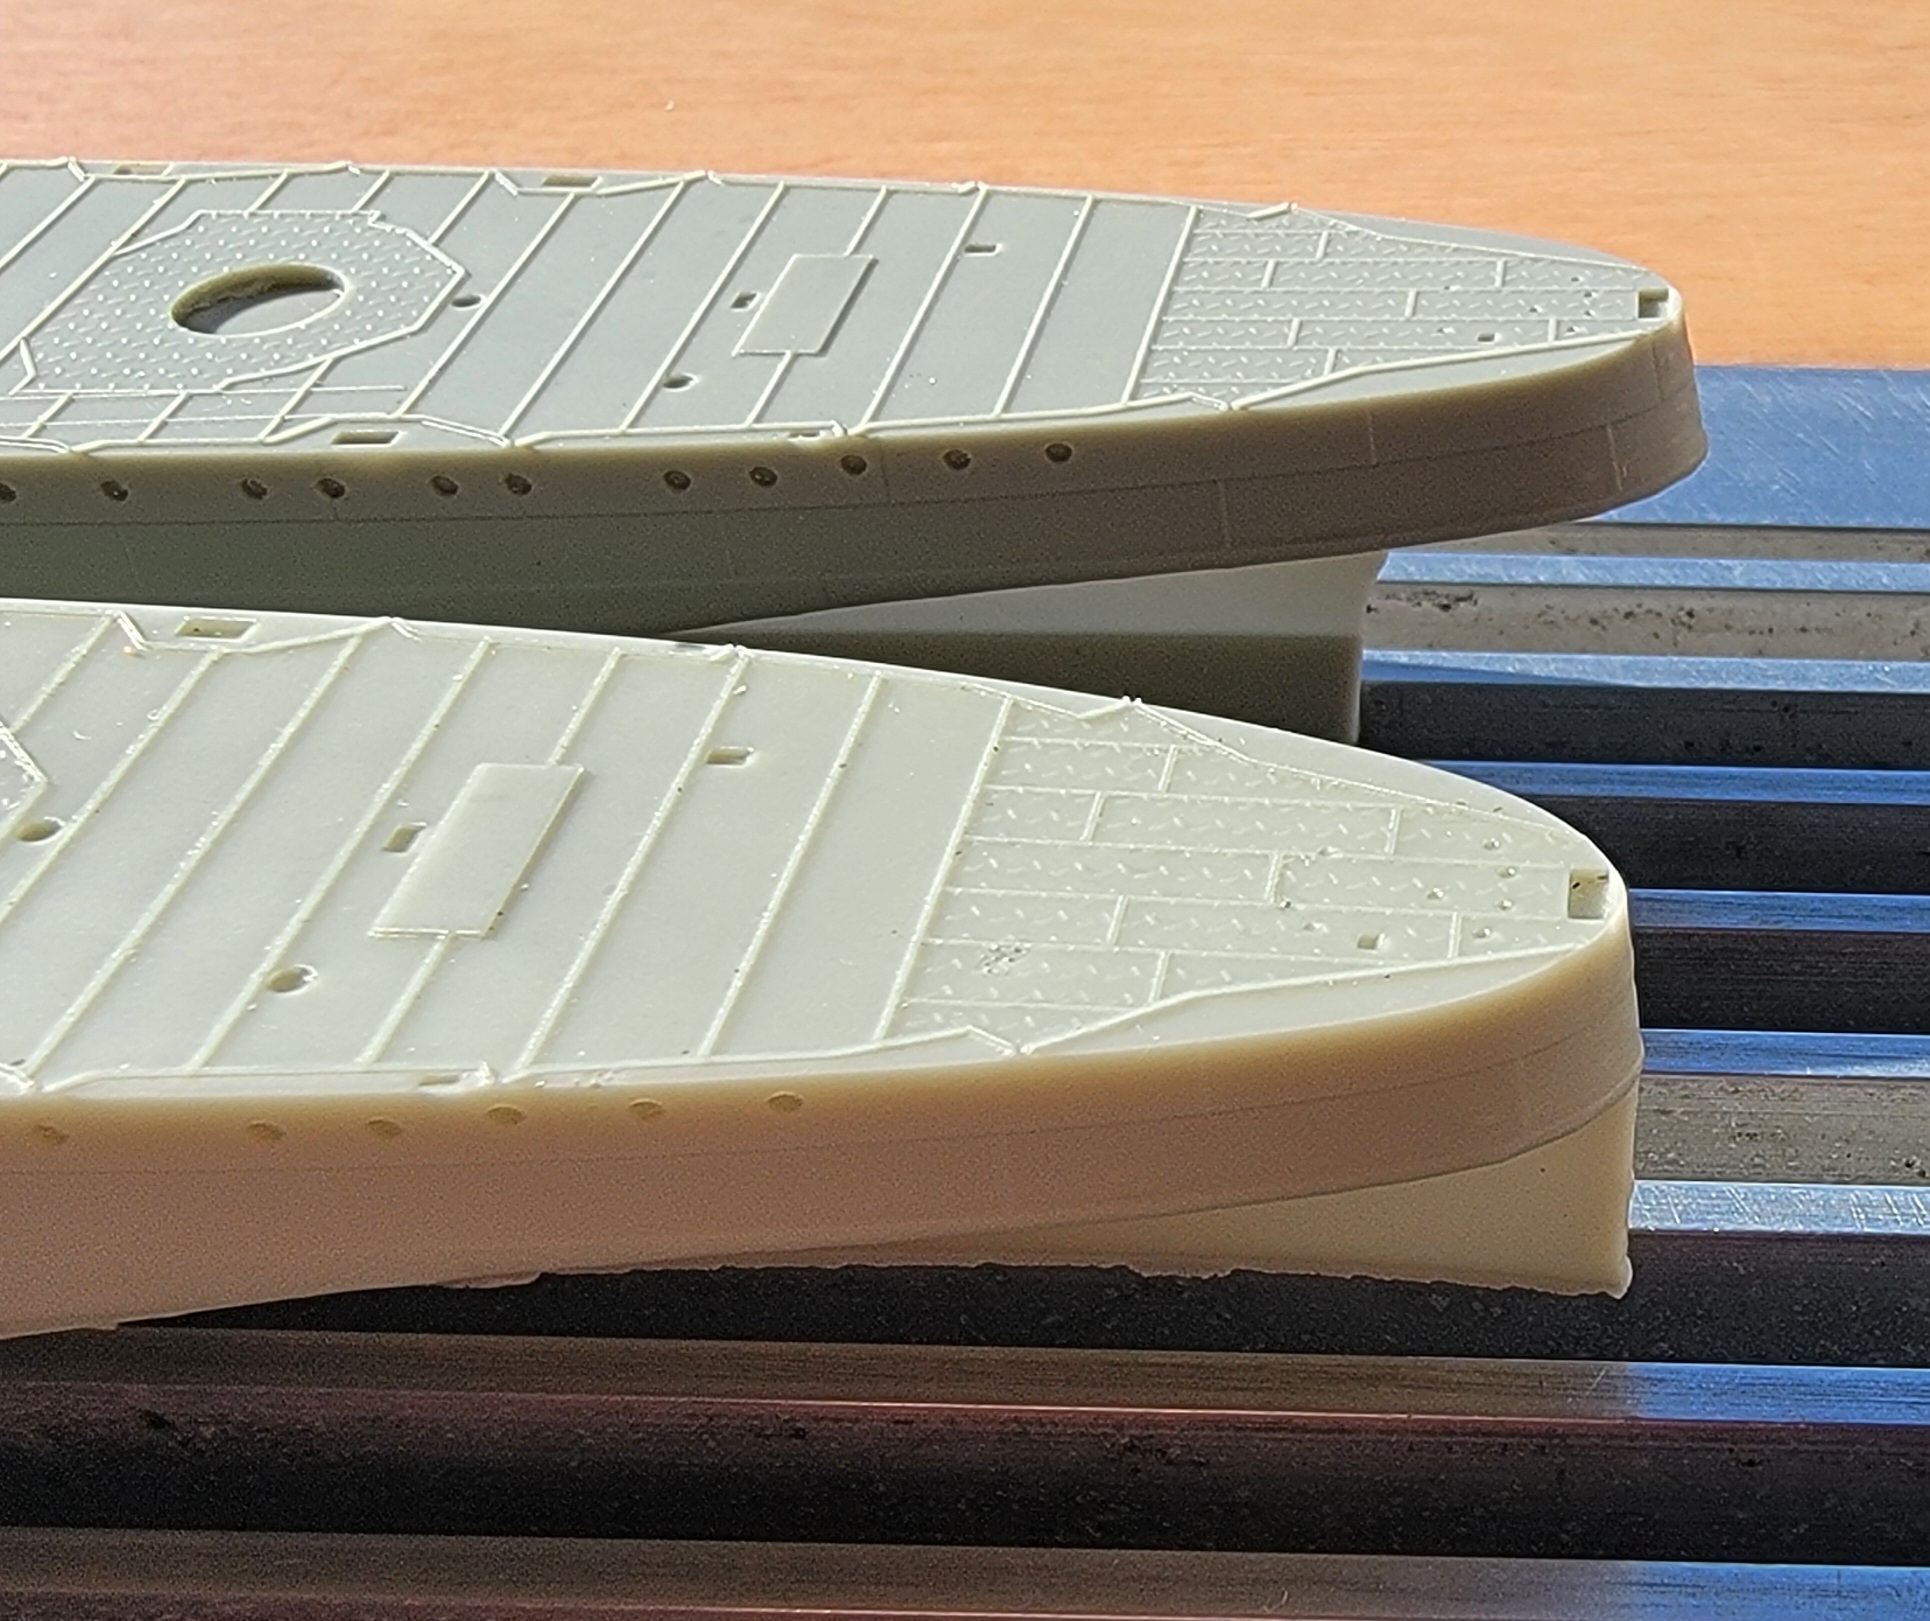
A second issue is the length of the forecastle deck;
it’s too long by almost 5mm. The Yugumo class
forecastle was the same length as that of the
proceeding Kagero class ships. Both classes’
forecastle ended at frame 60. The Yugumos’ forecastle
deck differed in that there were small extensions on
either side, less than a meter in length, past the
forecastle break to accommodate the wider base of new
davits for the ship’s 7m cutters. The hull sides were
extended and curved slightly upwards for additional
deck support.
Likewise, the front face of the bridge for both
classes was sited at frame 50. The Yugumo bridge was
longer and jutted out past the forecastle break,
supported by a trestle (which the kit nicely
provides). Regrettably, the kit bridge is situated the
same 4-5mm further aft than it should be to match the
increased length of the forecastle.
At the same time, number one turret has also been
moved back about 4mm. This, however, is not an error.
This turret in the Yugumo class was sited 1.5m further
aft compared to the Kagero class in order to improve
stability. So, the kit turret is properly placed on
the forecastle deck.
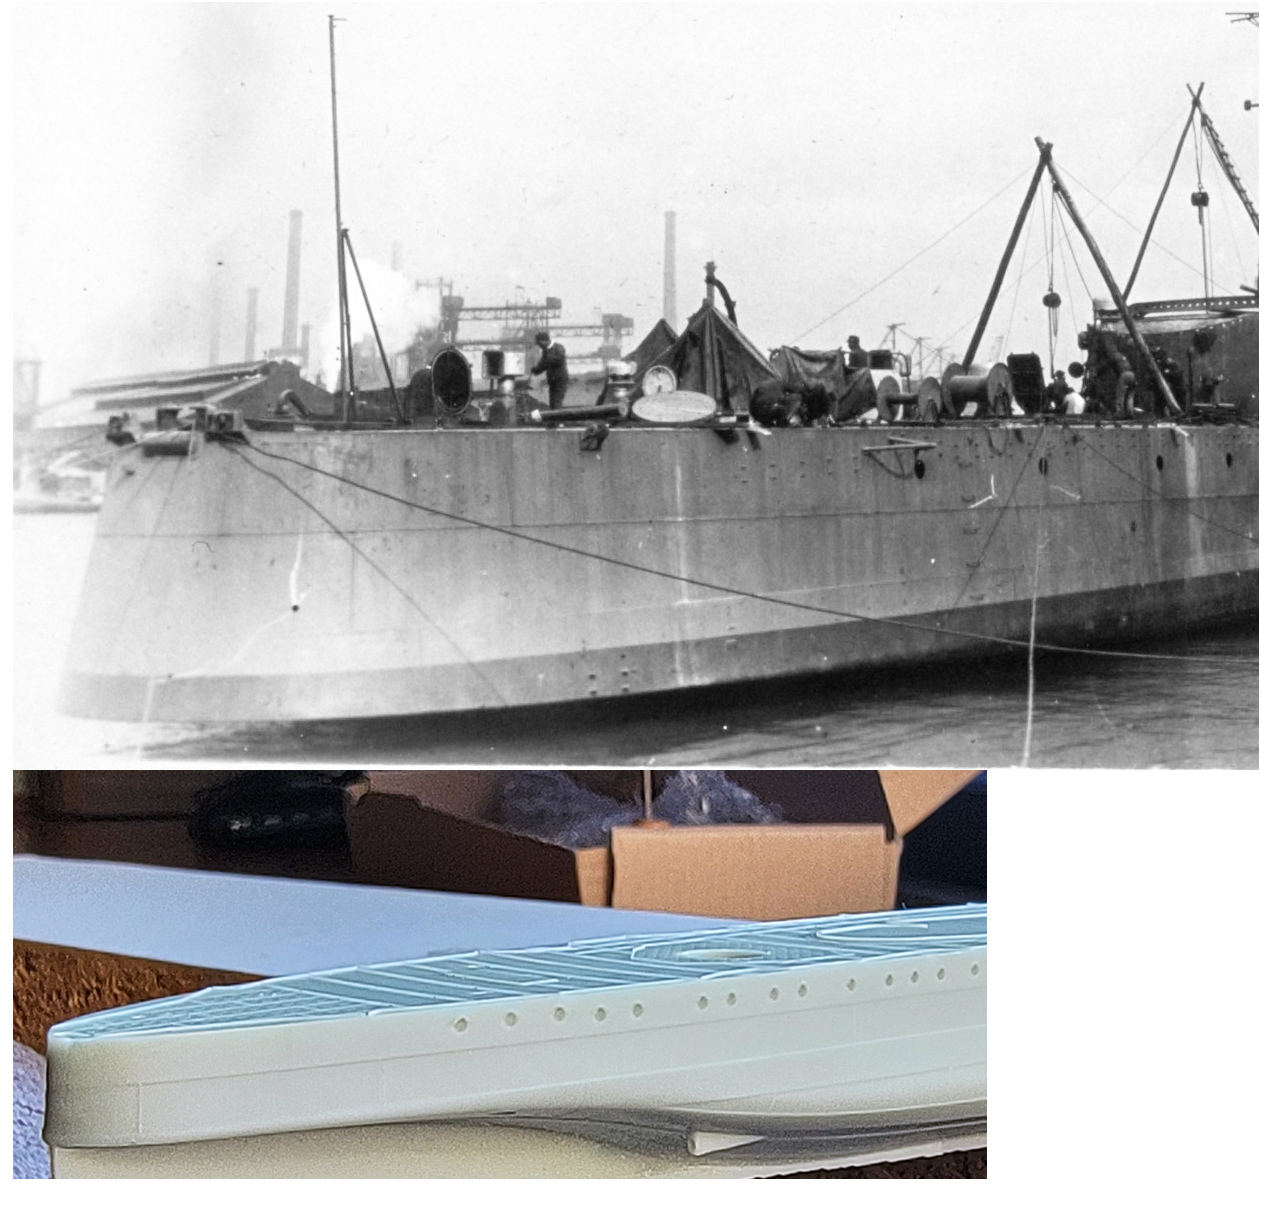
A side over side profile taken from plans shows the
position of each class’s bridge relative to each other
while a photo comparison with a Tamiya 1/350 Kagero
kit hull (which is highly accurate) clearly shows
these variances. Note that the positions of all the
other superstructure and weapons mount bases aft the
forecastle break in both kits are identical, as they
should be. Accordingly, all the accuracy issues lie
within the aft end of the forecastle deck.
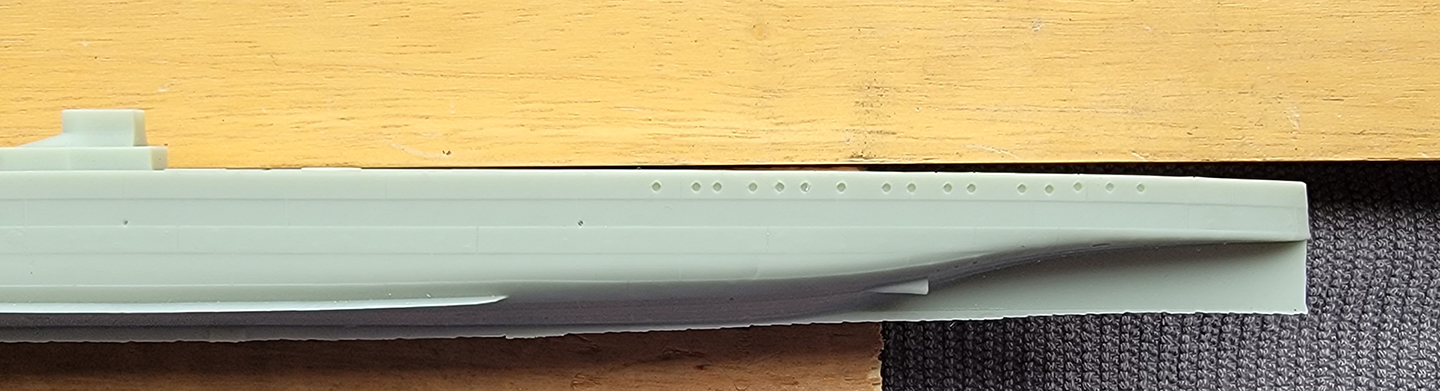
There is also an unexpected discrepancy of length
between the two sample hulls. The replacement hull is
2mm shorter than the original (27 inches by scale). I
also think that the rake of its sloped stern should be
a little more pronounced. For that matter, both sterns
could use more rake.
The hull scales out close to the class particulars.
Those particulars versus the scale and this kit:
| |
Actual
|
1/350
calculated |
1/350 actual |
| Overall Length: |
119.3m/391’4” |
1/350 OA
length: 340.85mm |
Kit OA
length: 337.5mm* |
| Waterline Length: |
117.0m/383’10" |
1/350 WL
length: 334.29mm |
Kit WL
length: 332.0 mm |
| Beam: |
11.2m/38’1” |
1/350
Beam:
32.0mm |
Kit
Beam: 31.0mm |
(*The bullnose is separated from the hull
and attaches to the bow. It adds 1.5mm to overall
length. Lengthening the stern slope by adding 2mm at
the waterline would have helped correct the stern
profile shape and kit OA length.)
|
|
|
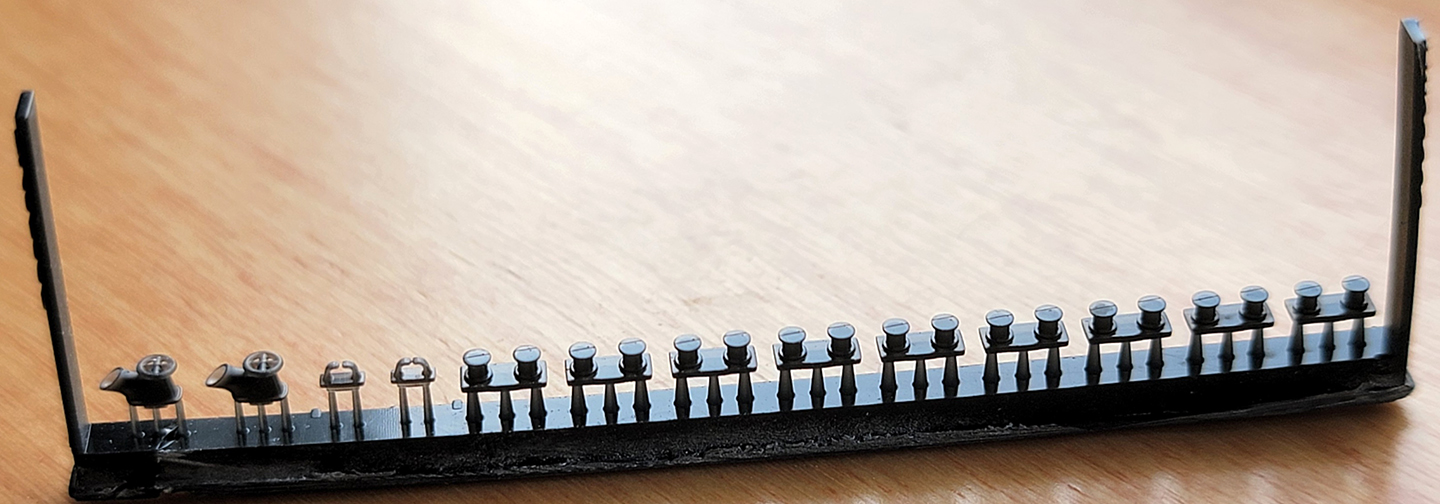
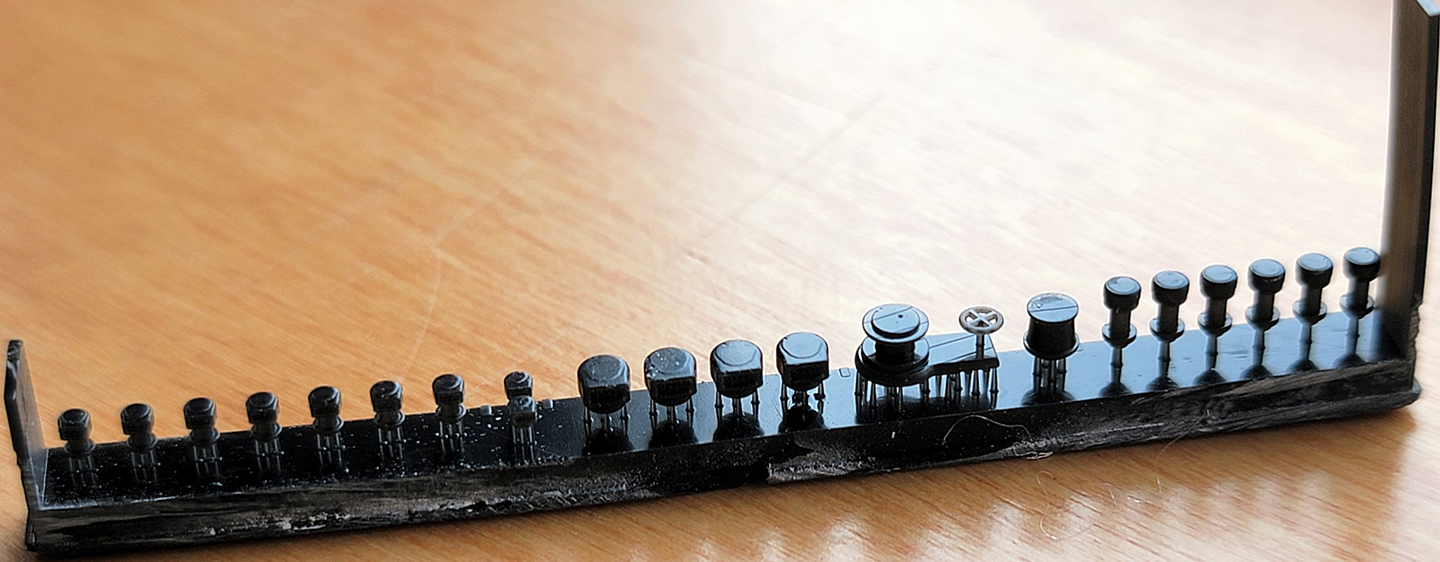
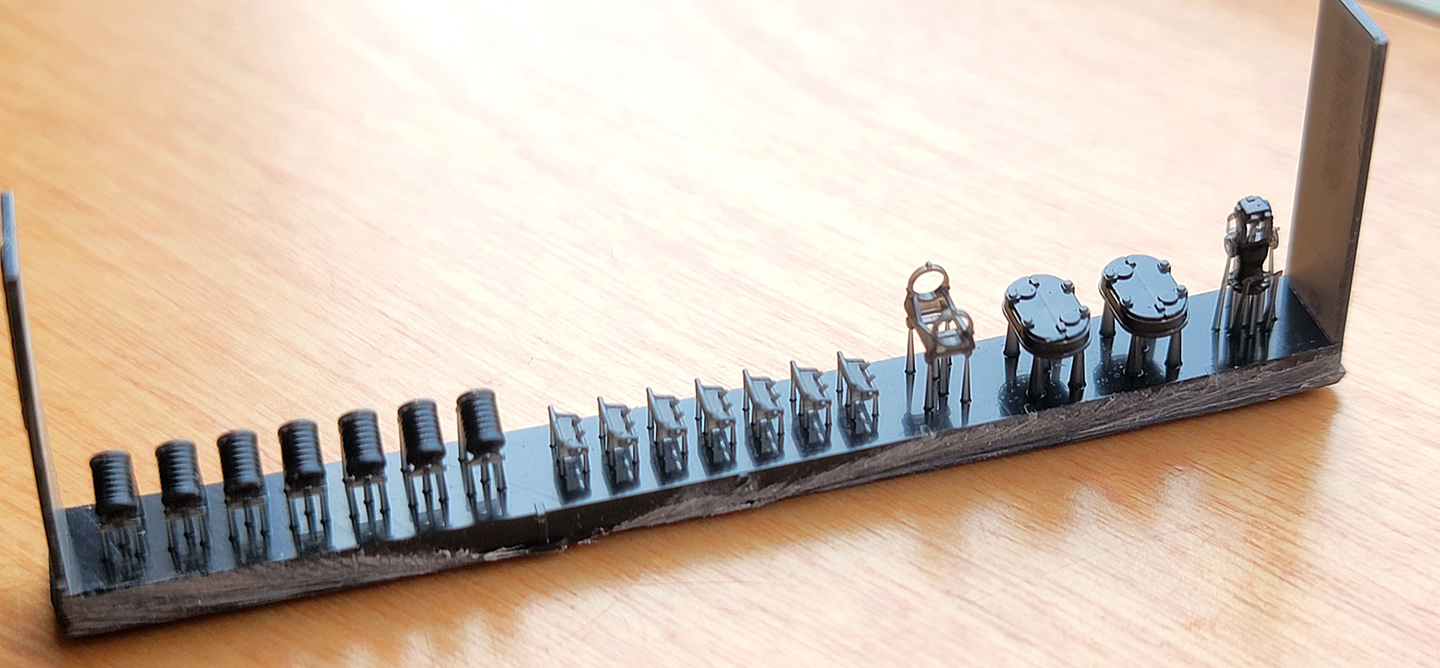
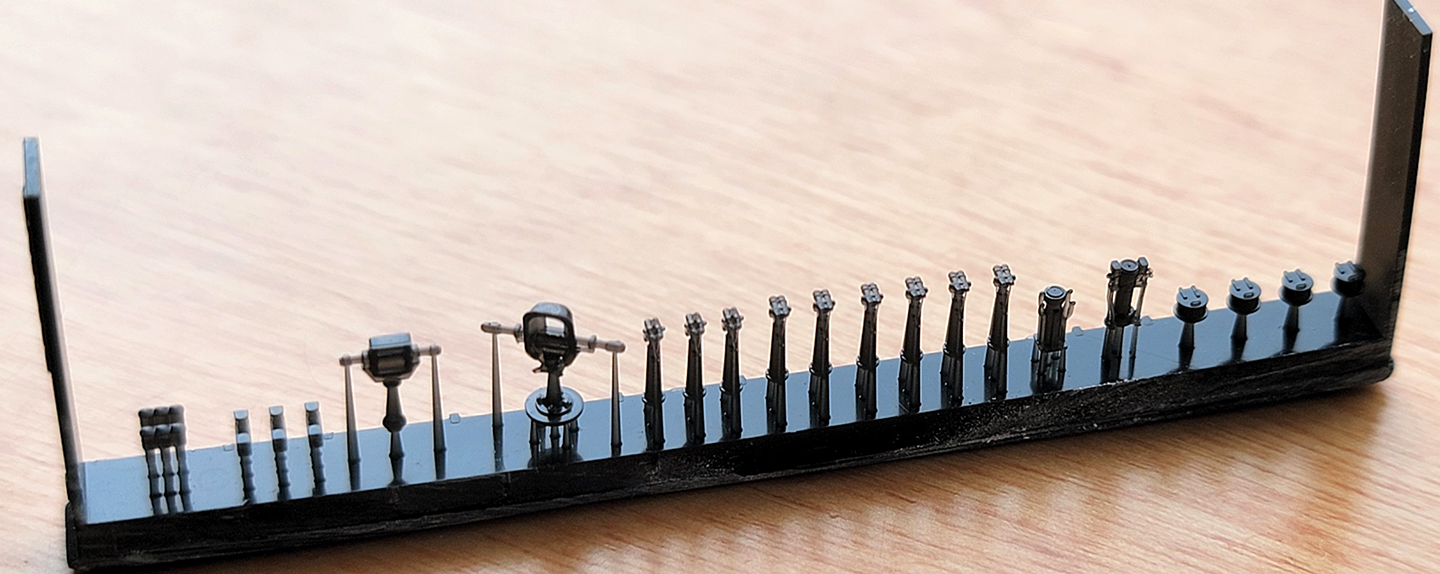
| PRINT RAFTS |
|
|
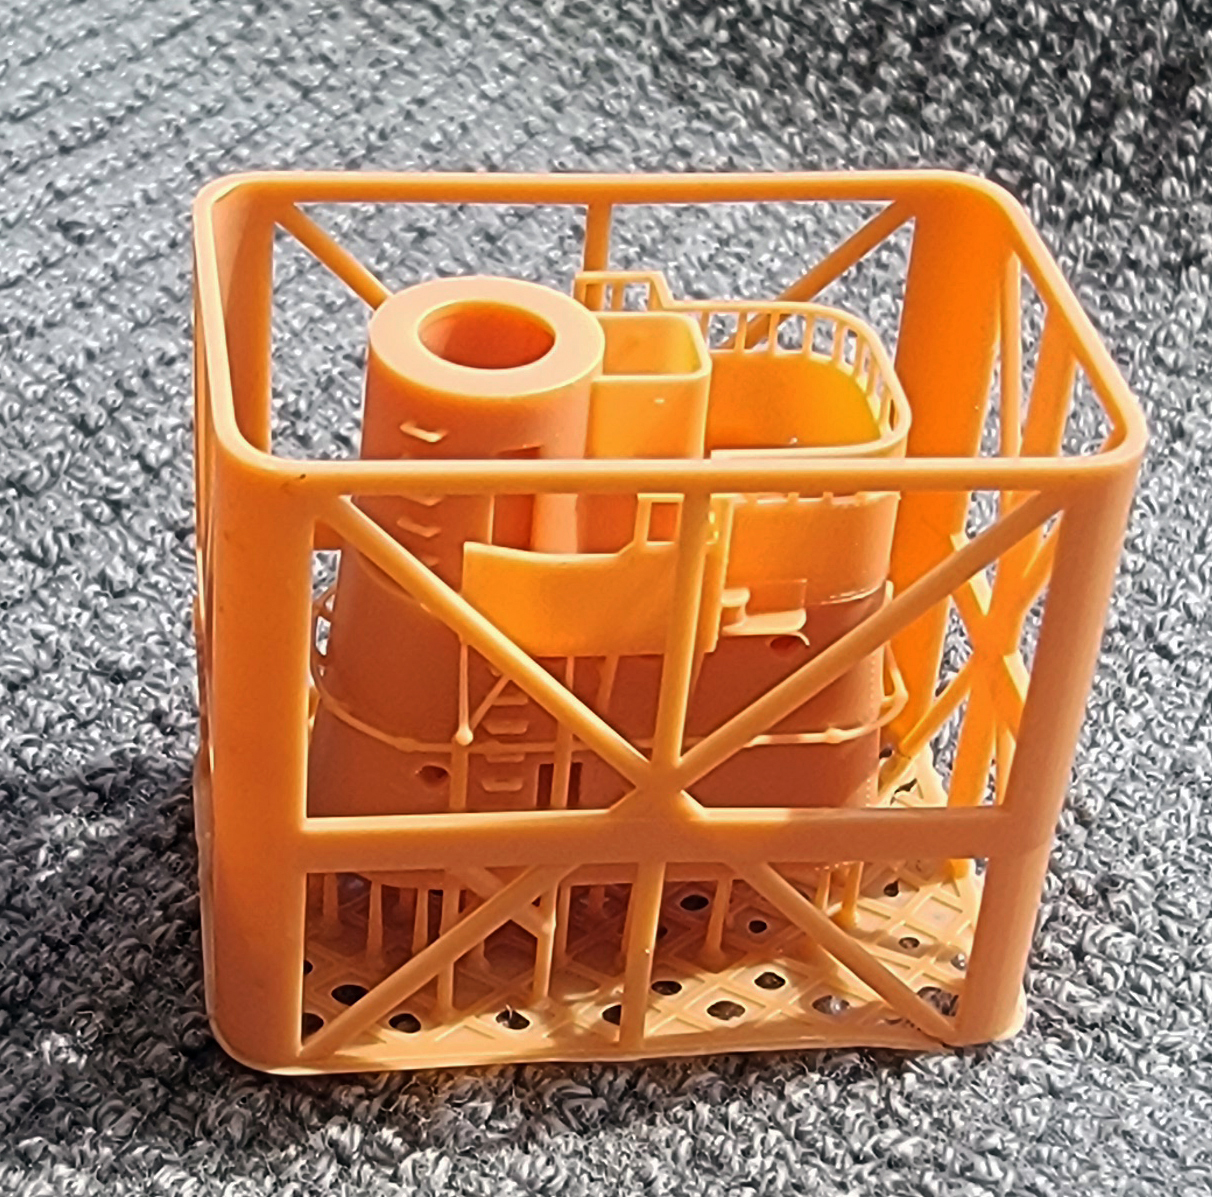
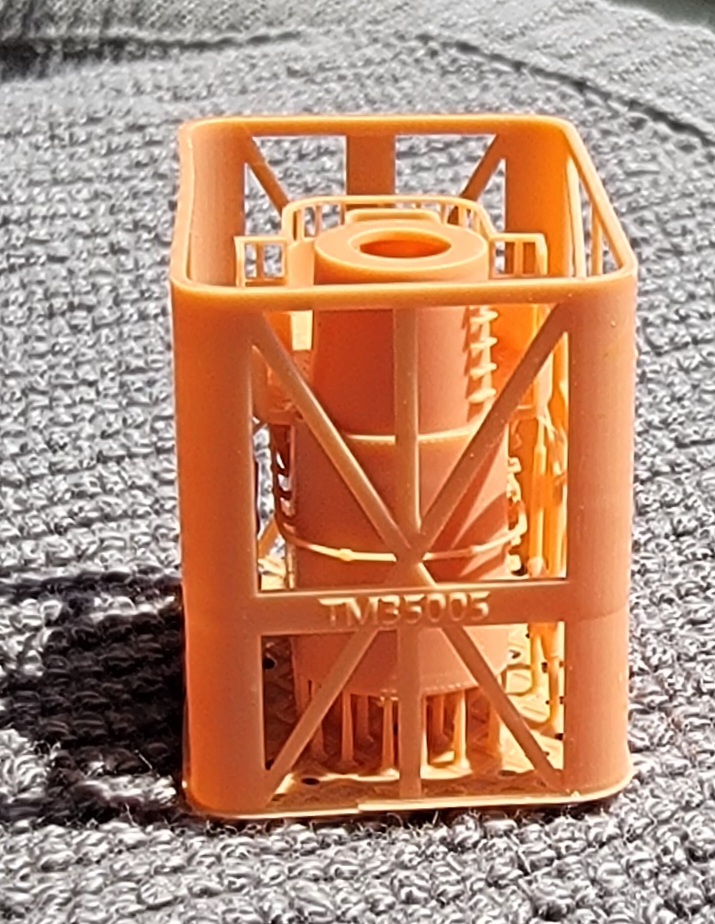
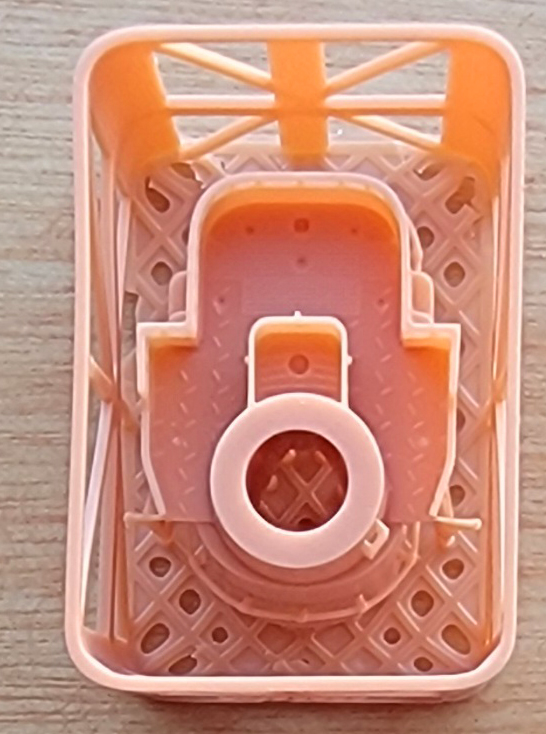
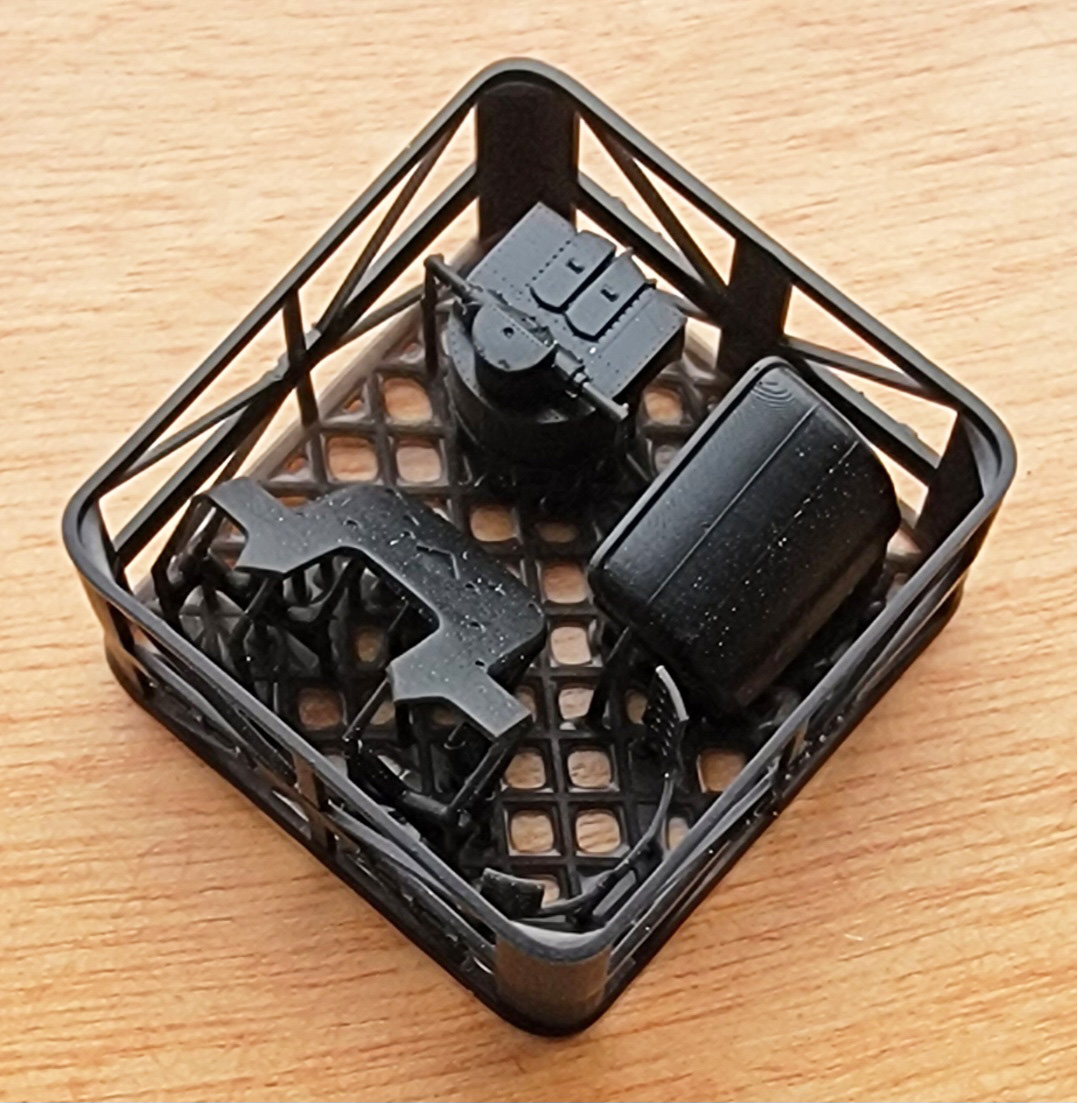
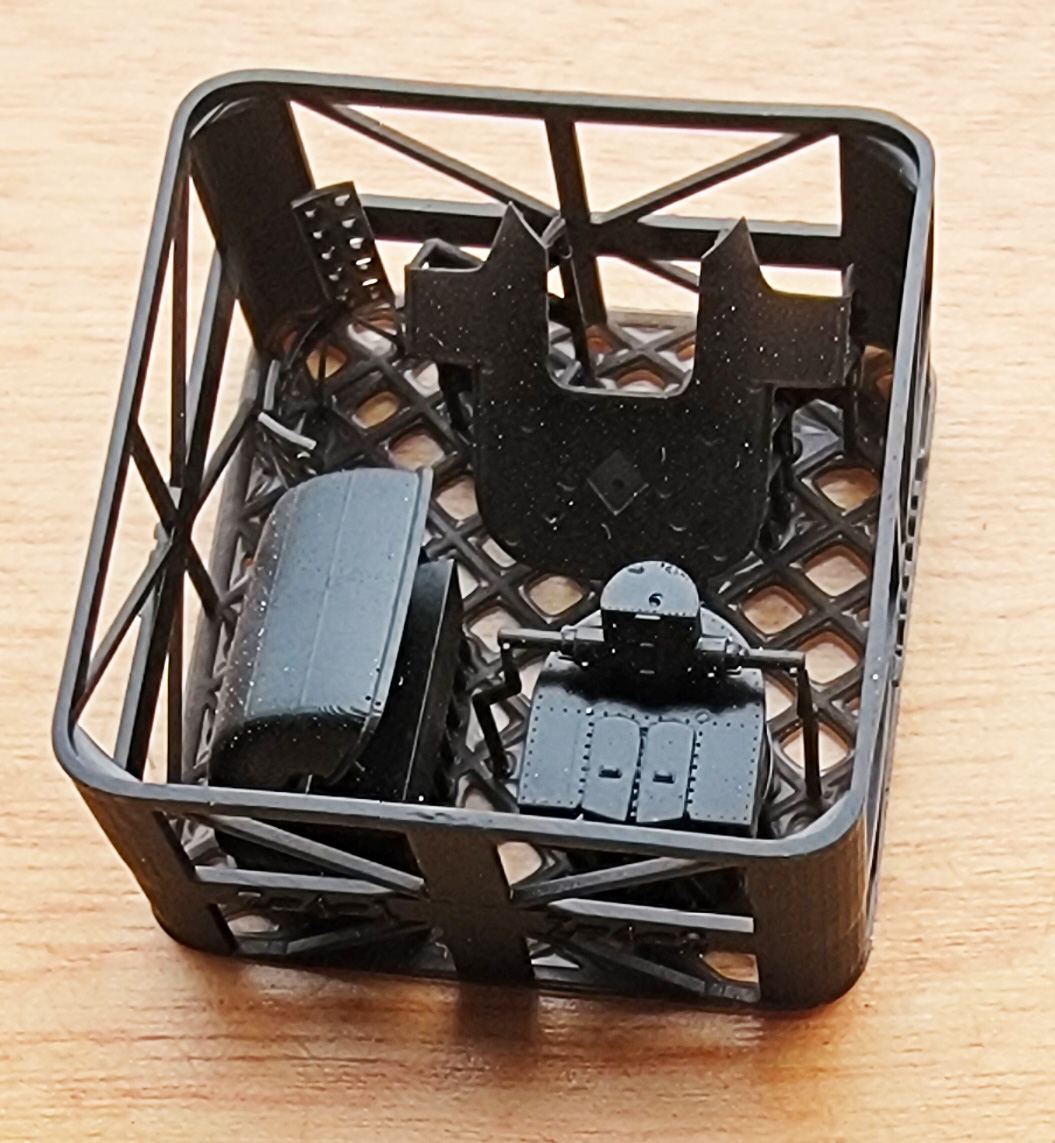
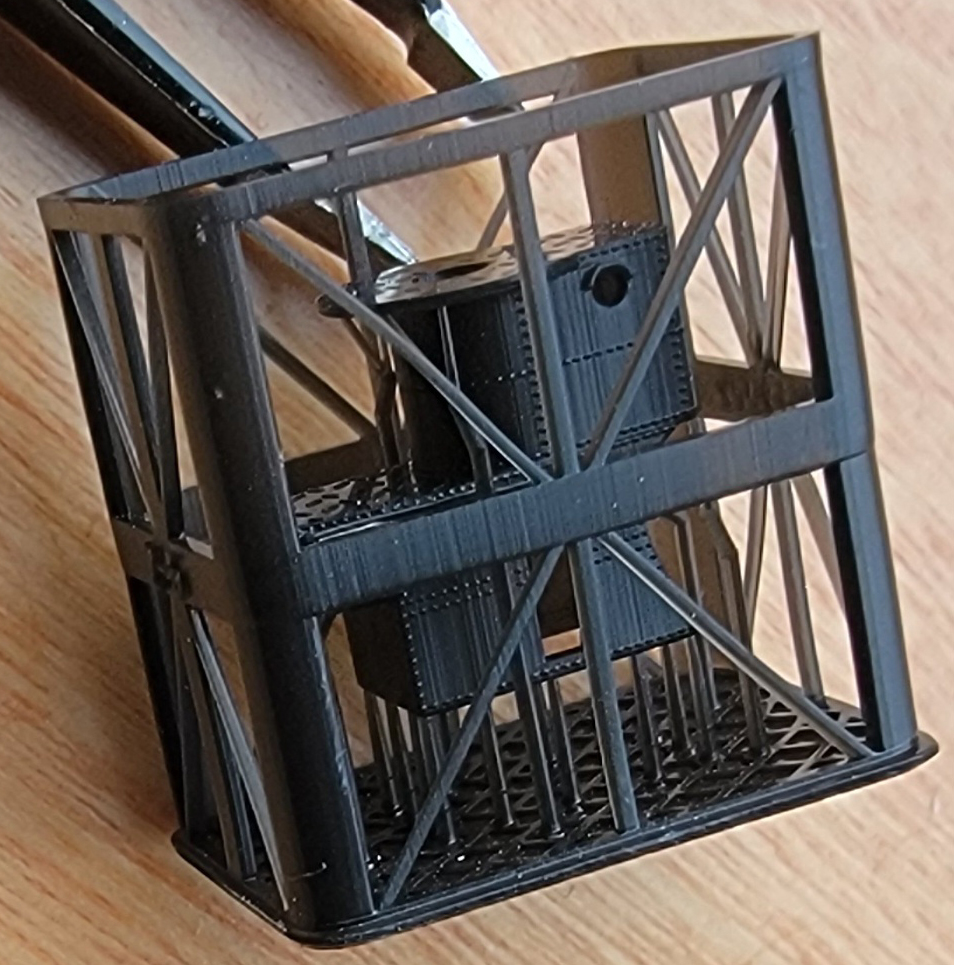
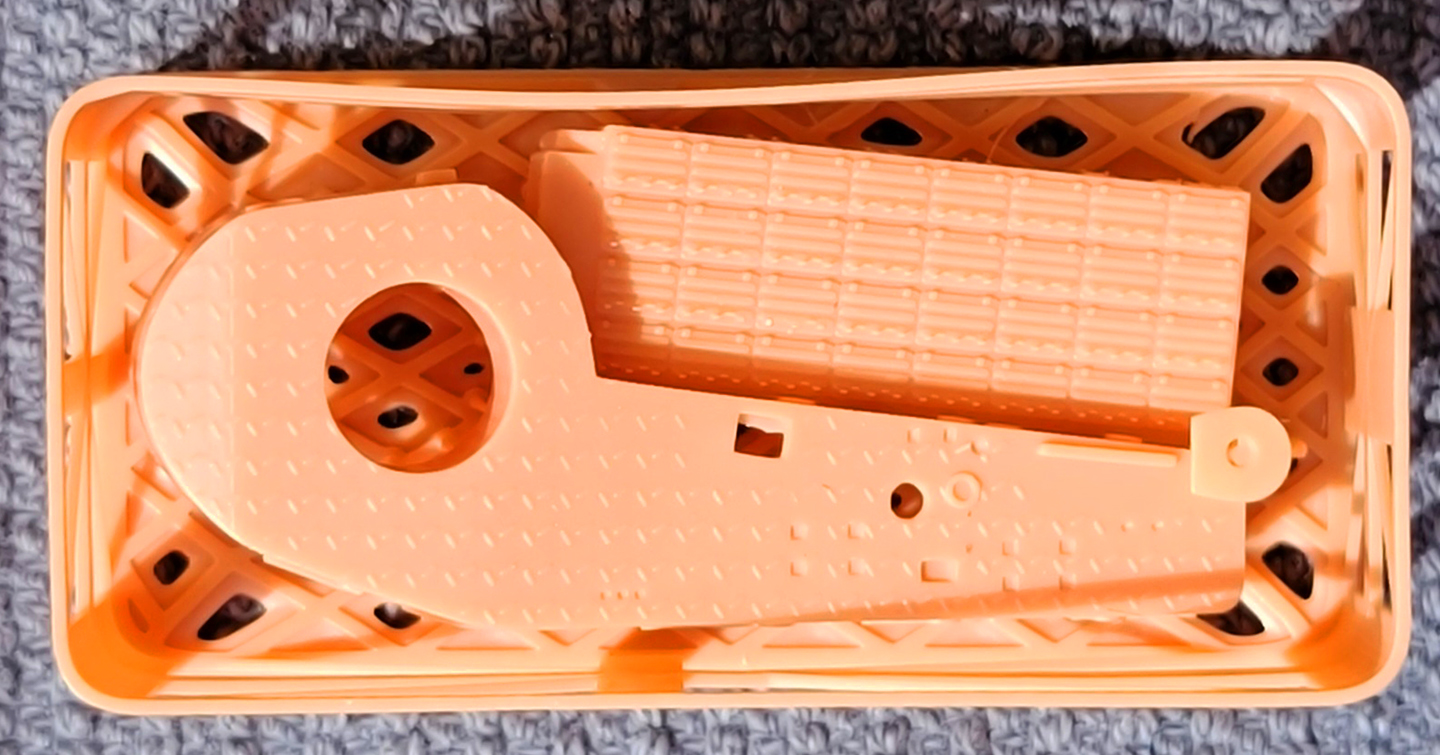
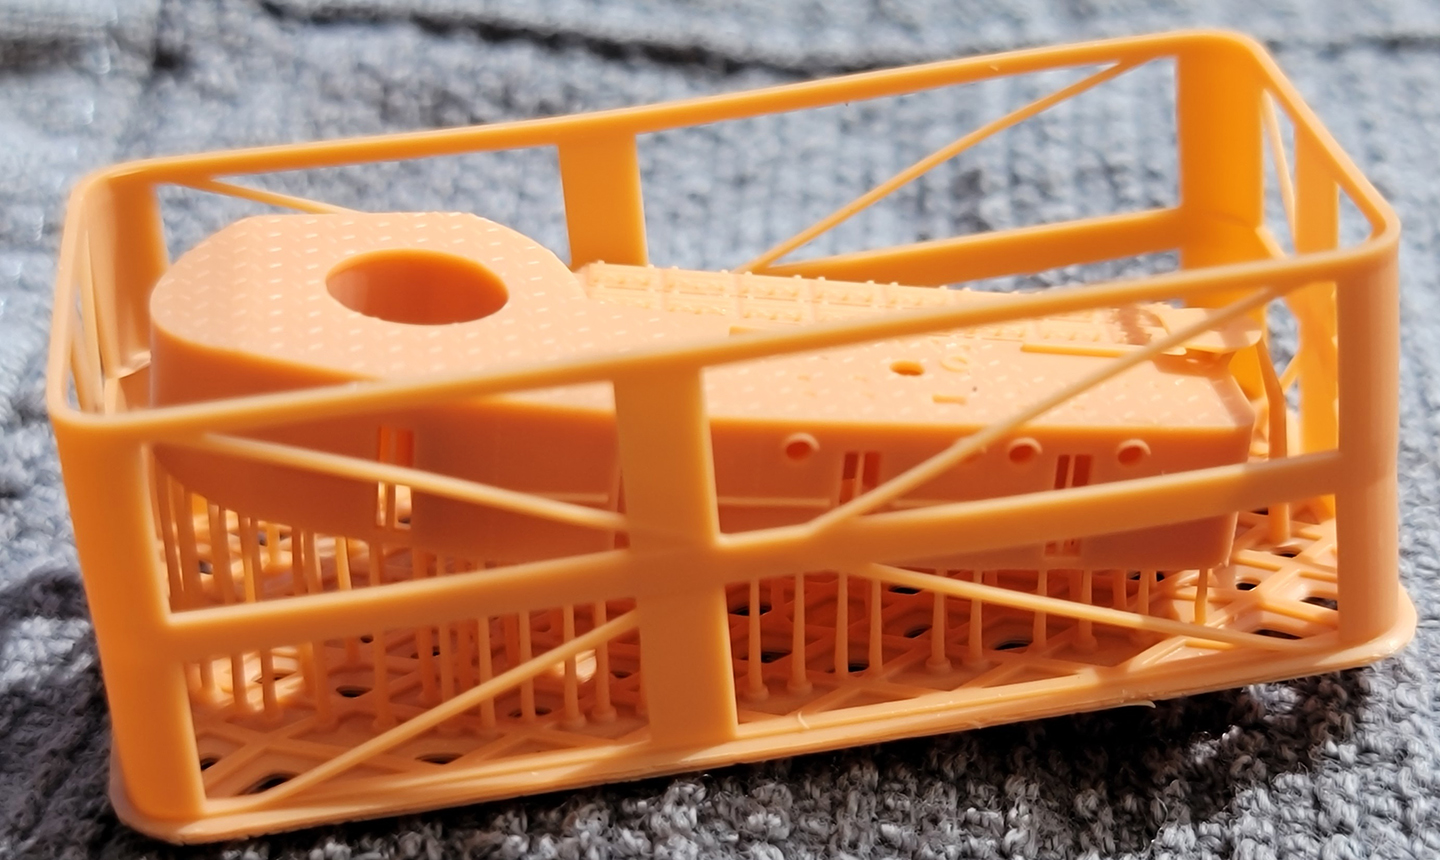
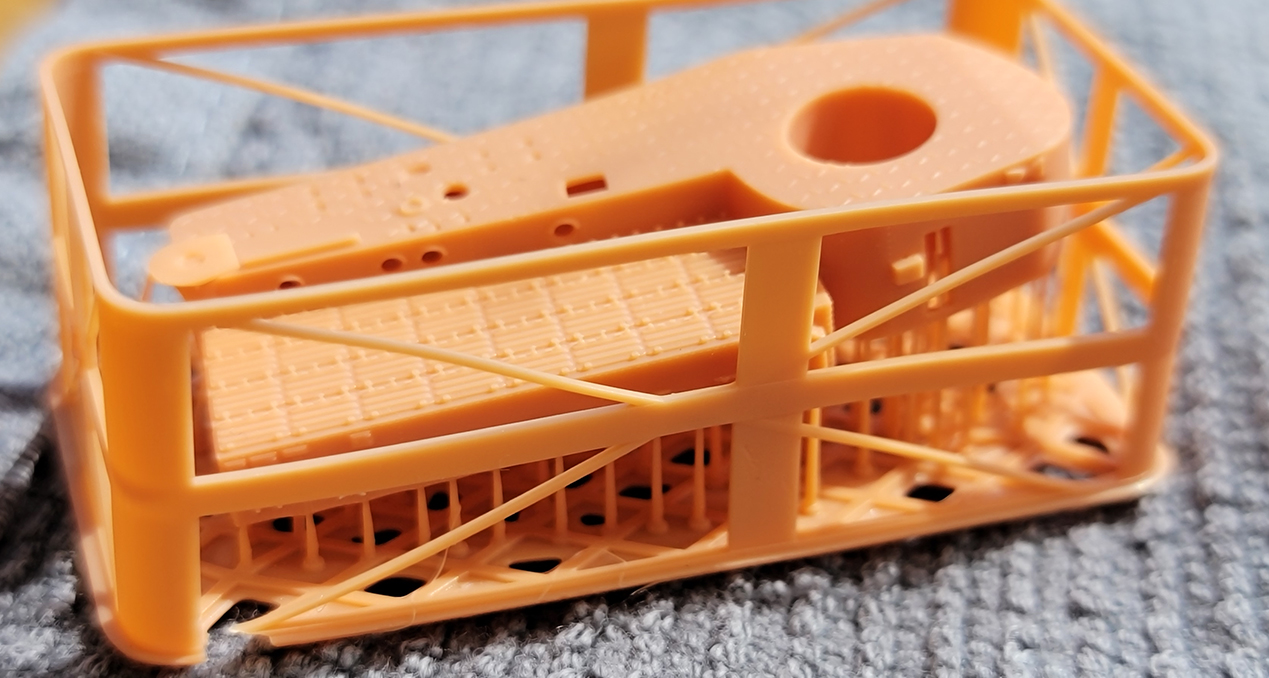
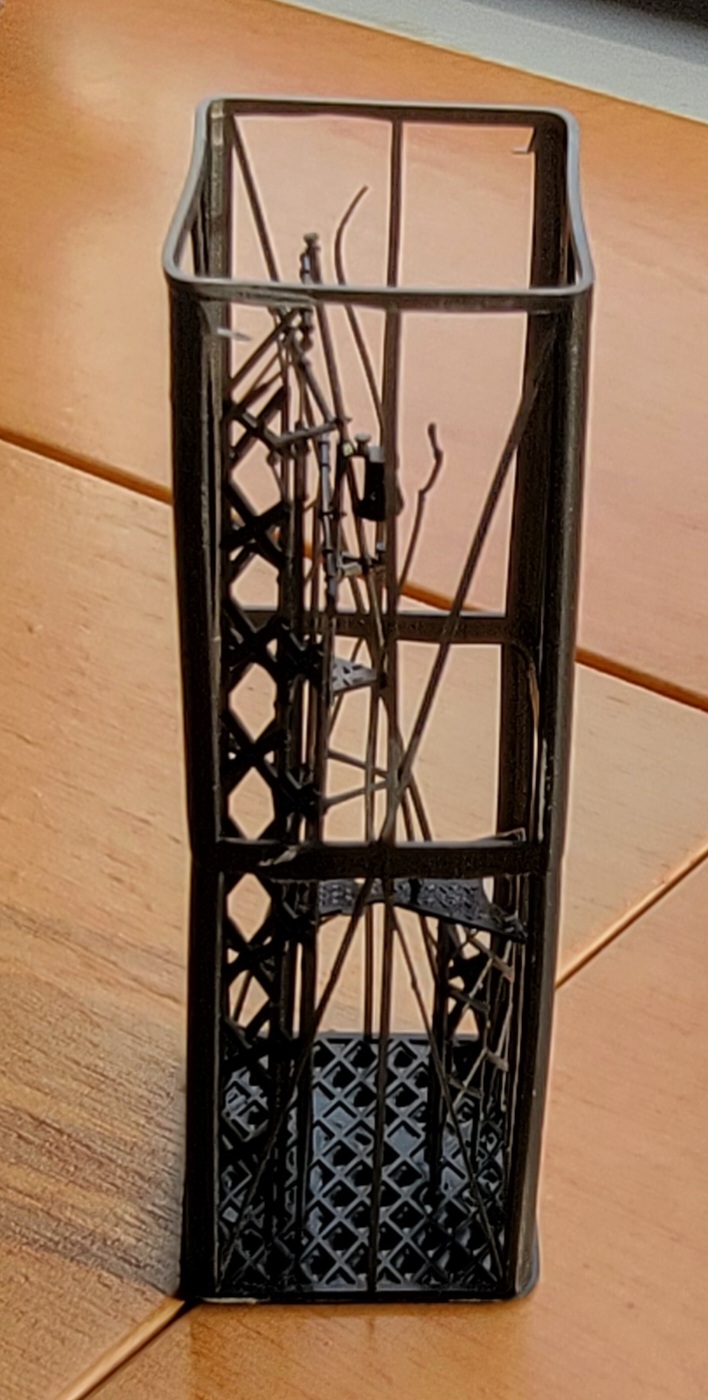
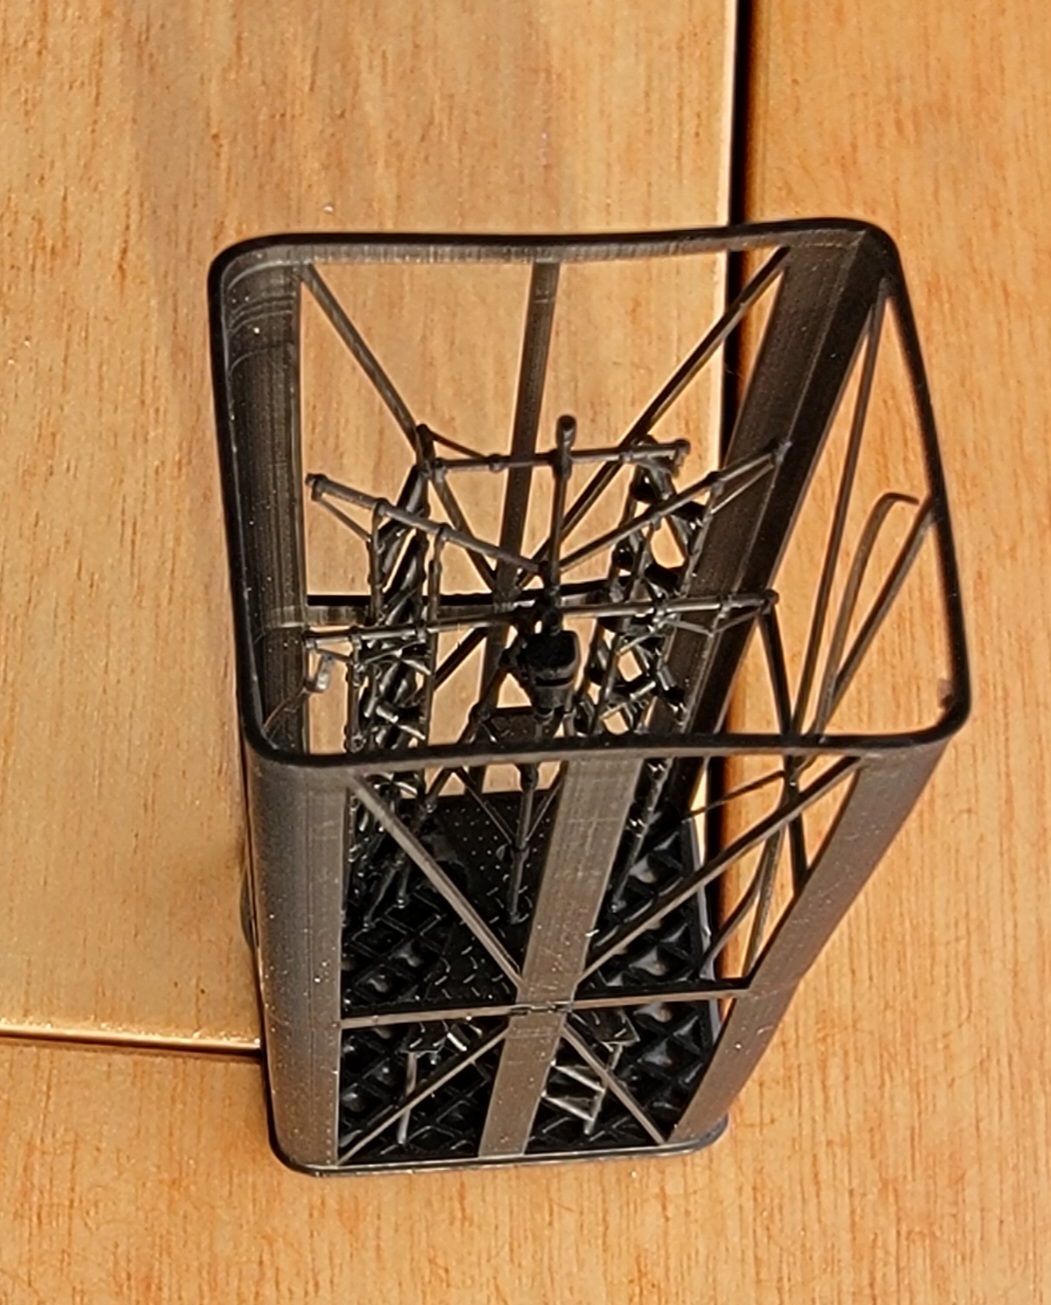
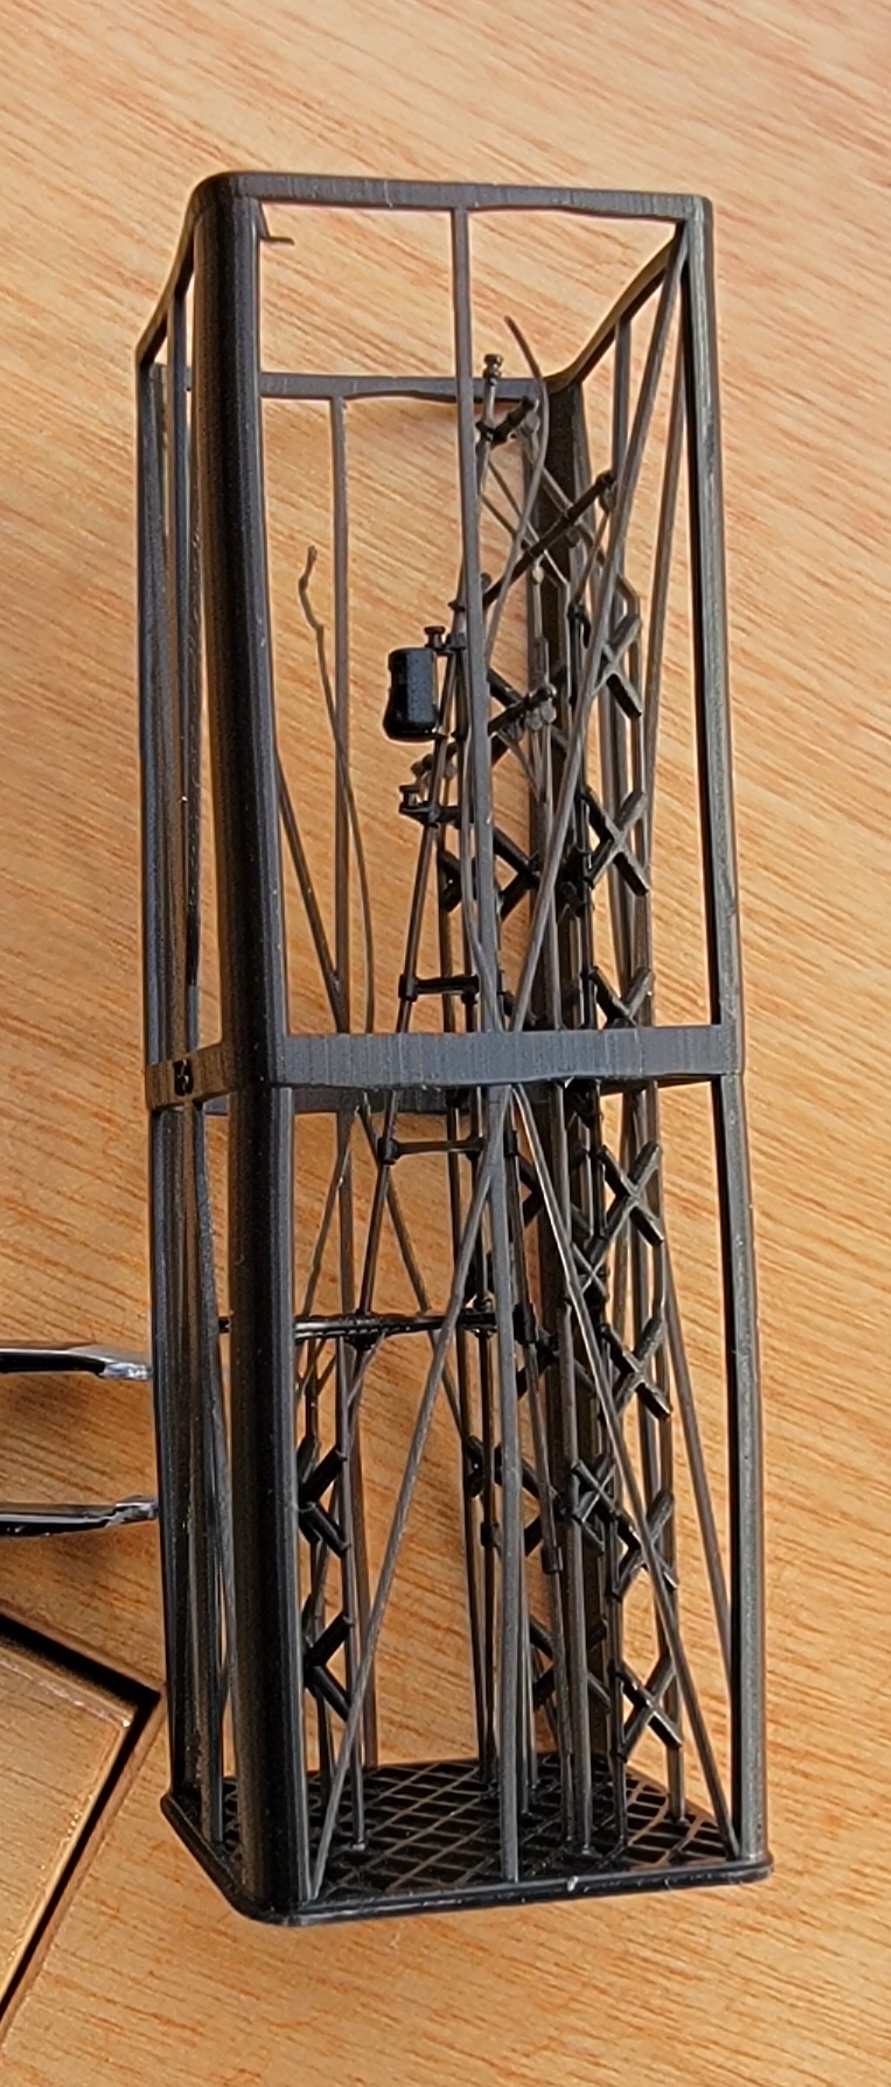
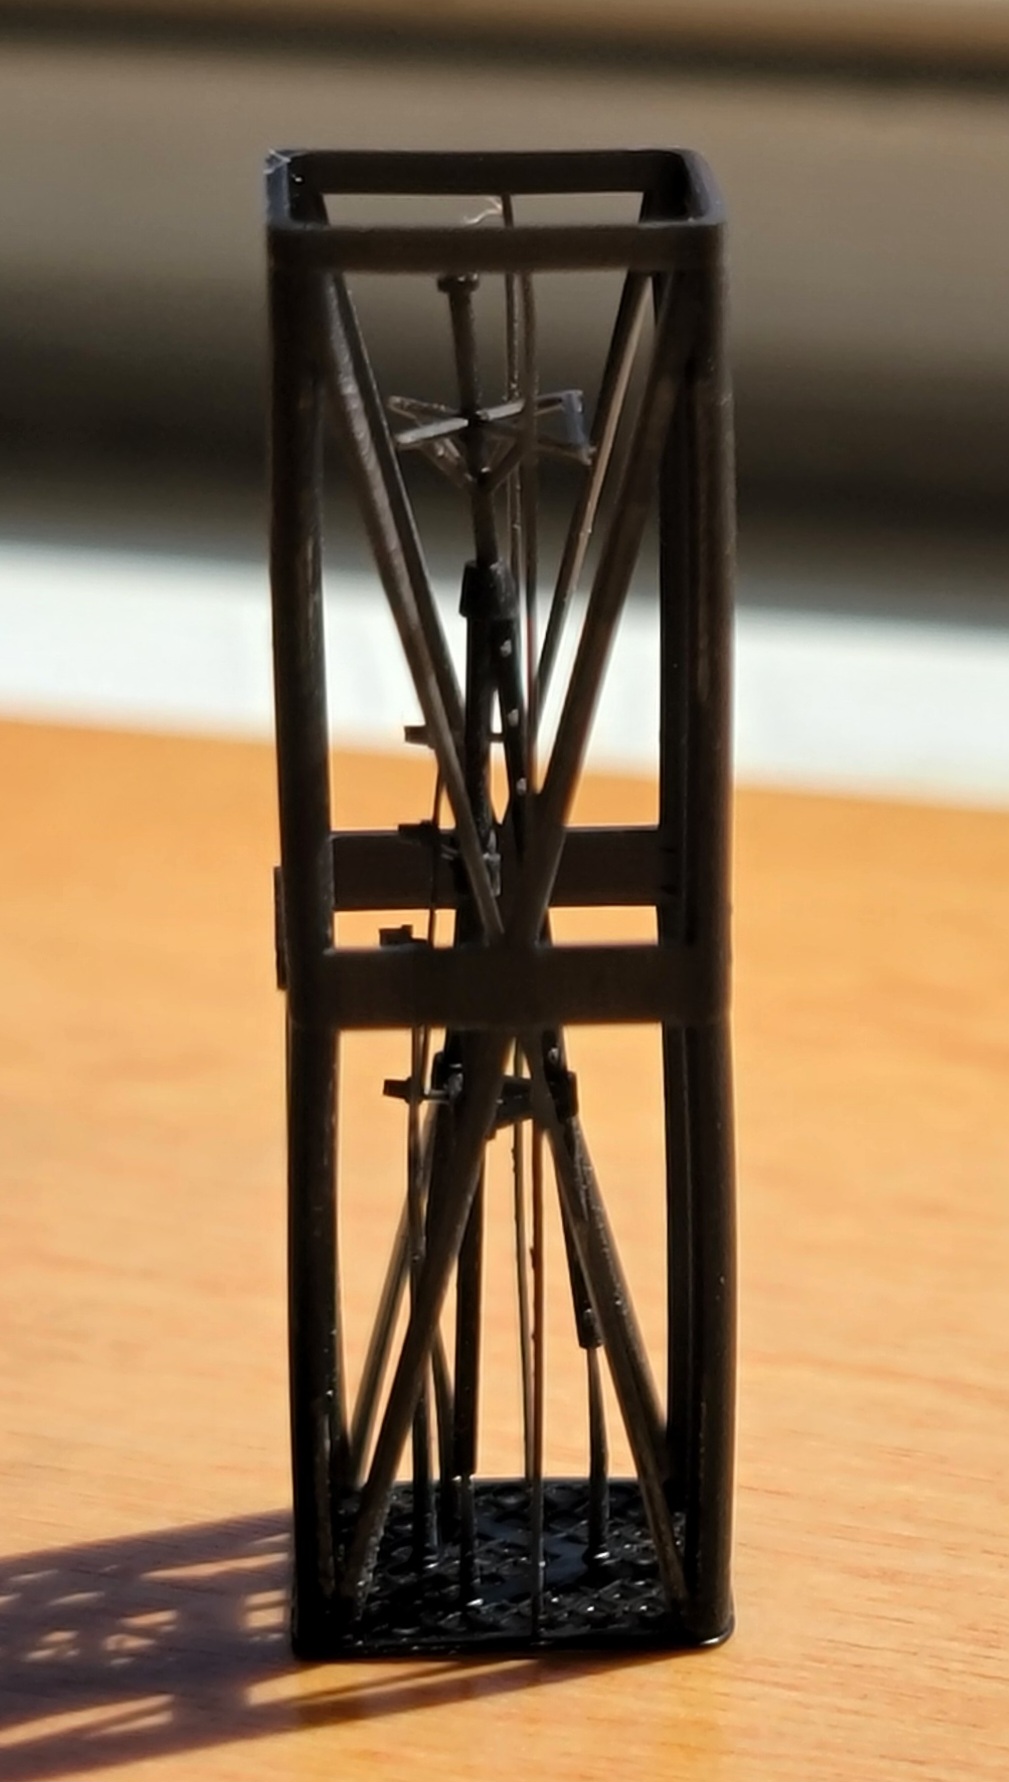
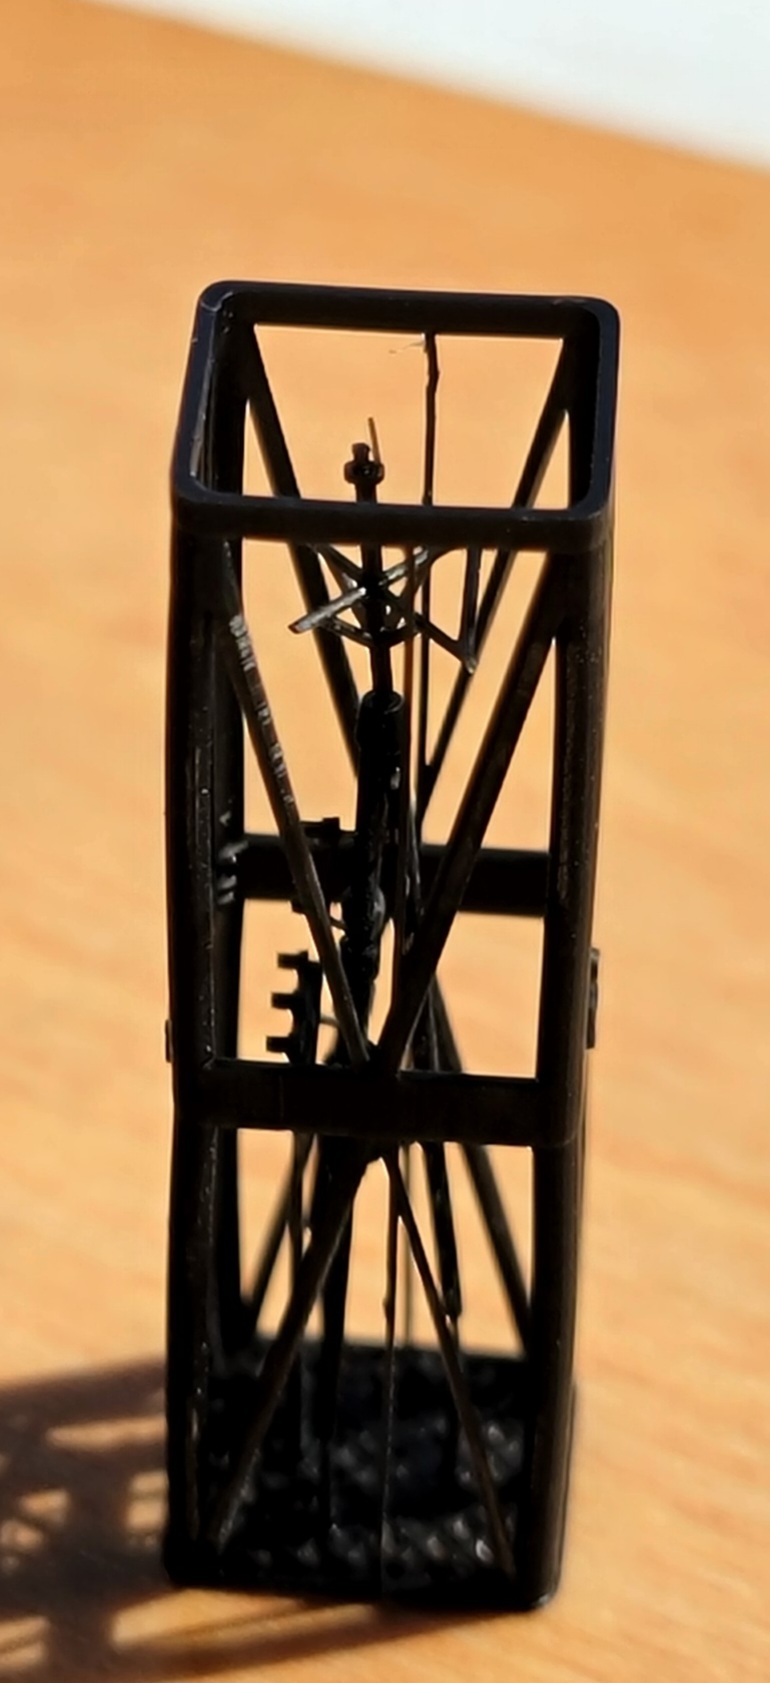
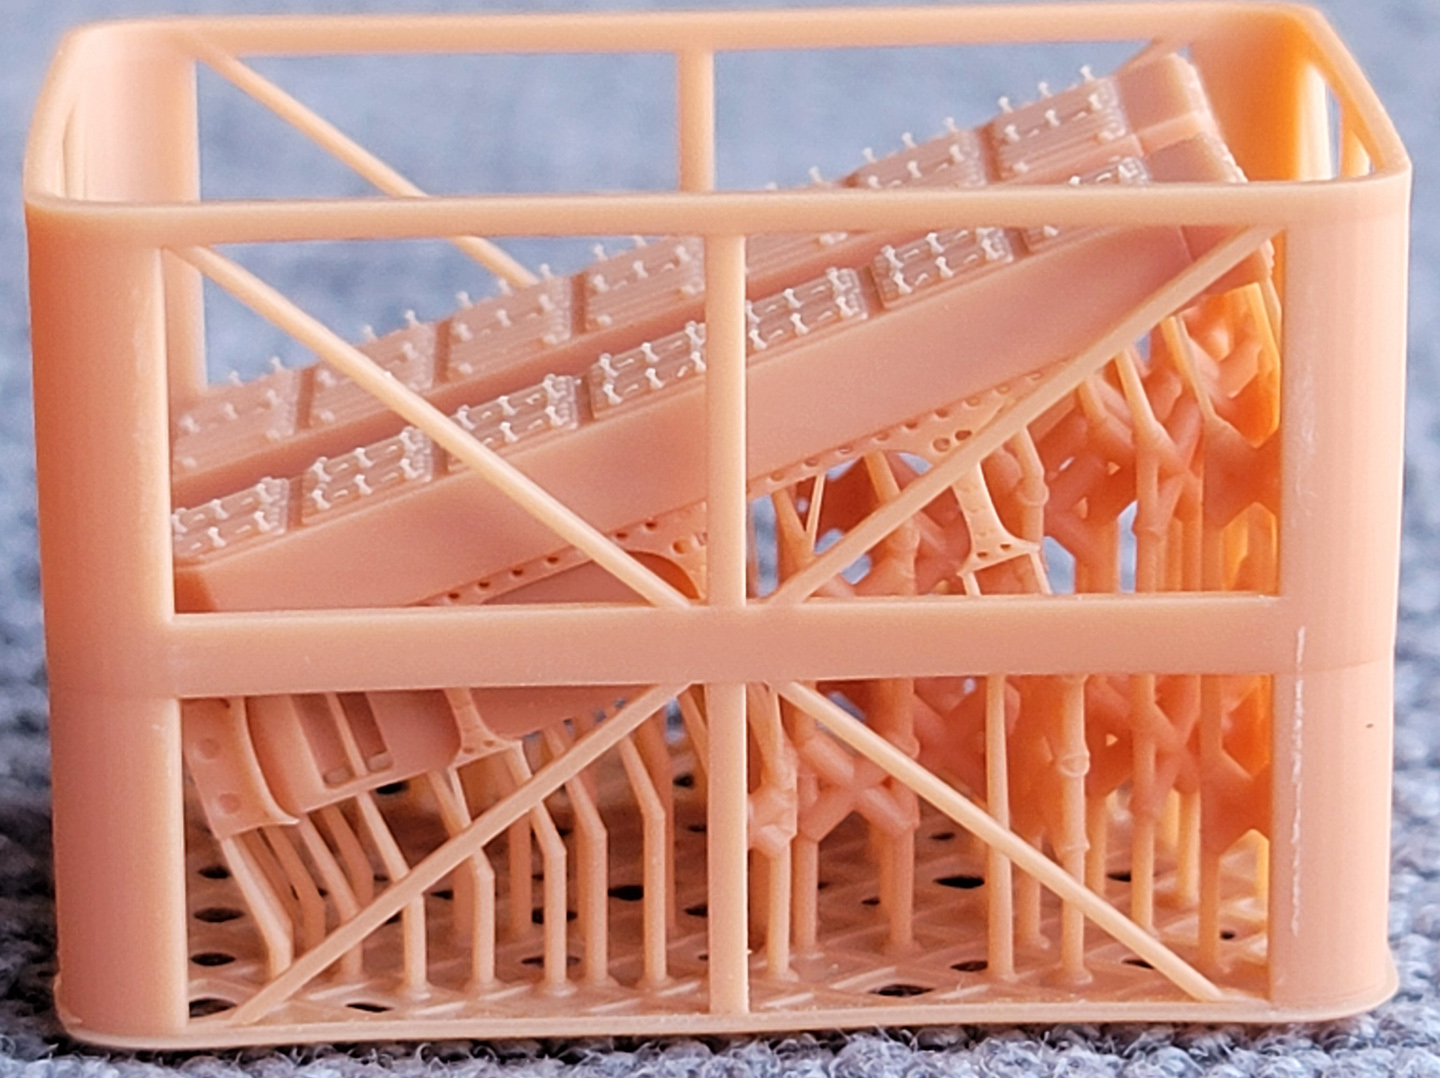
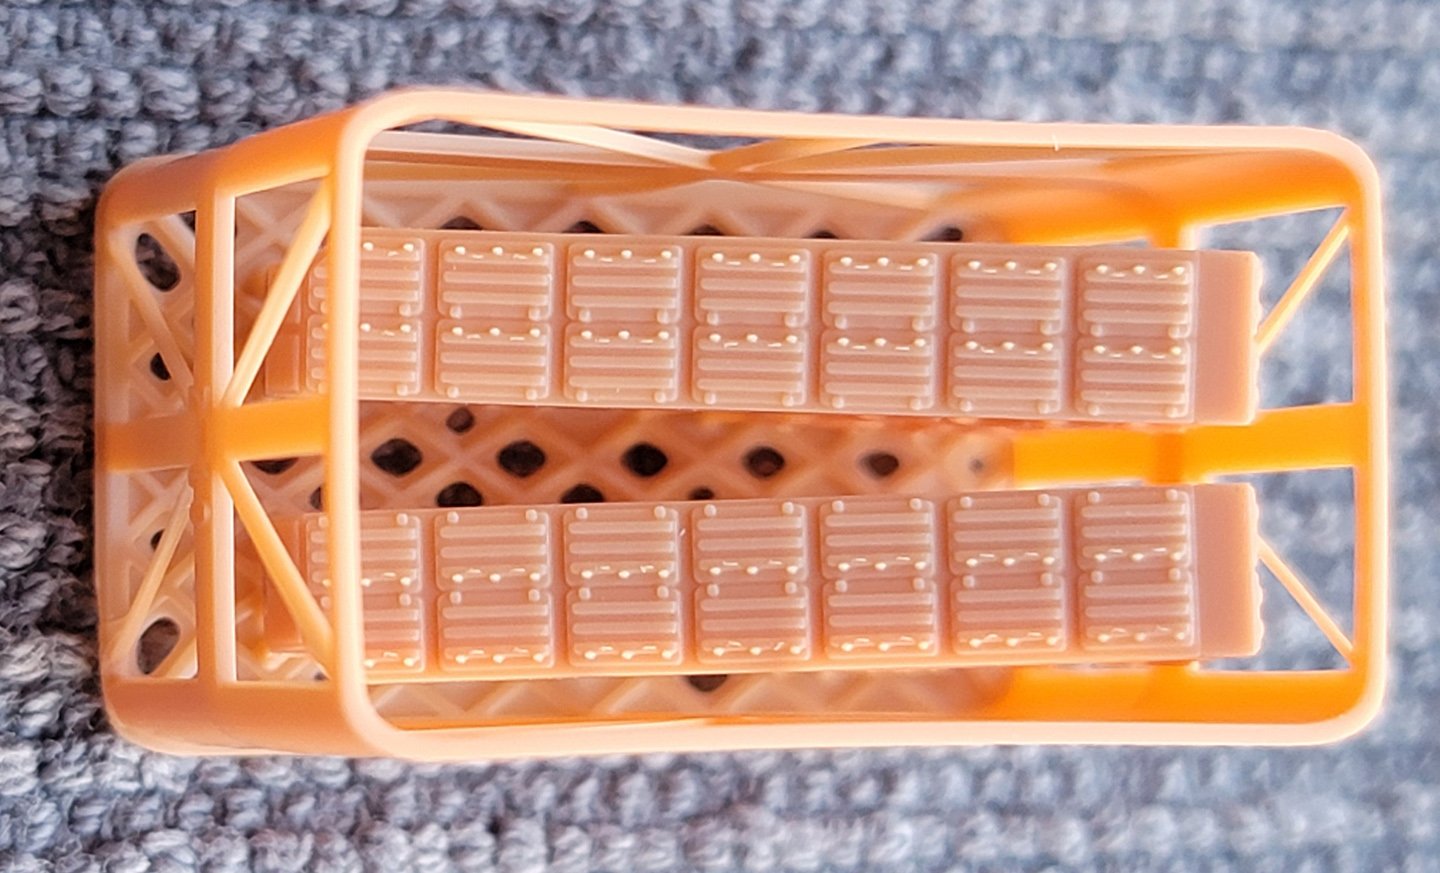
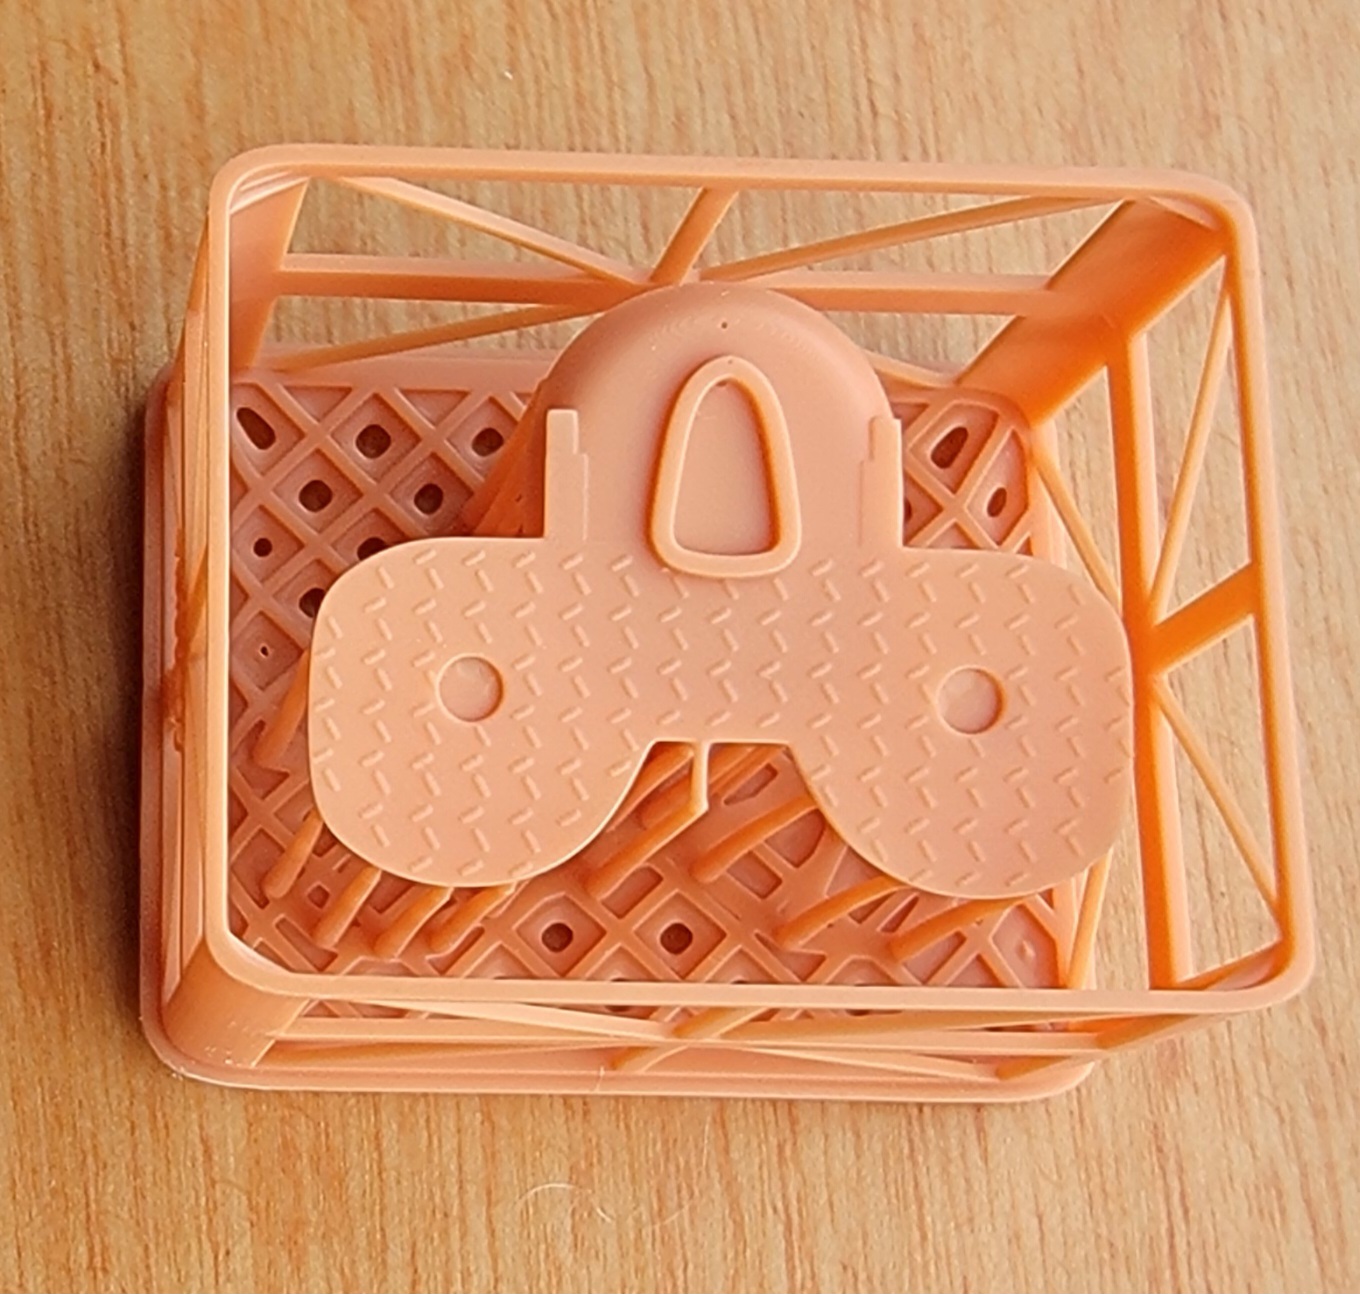
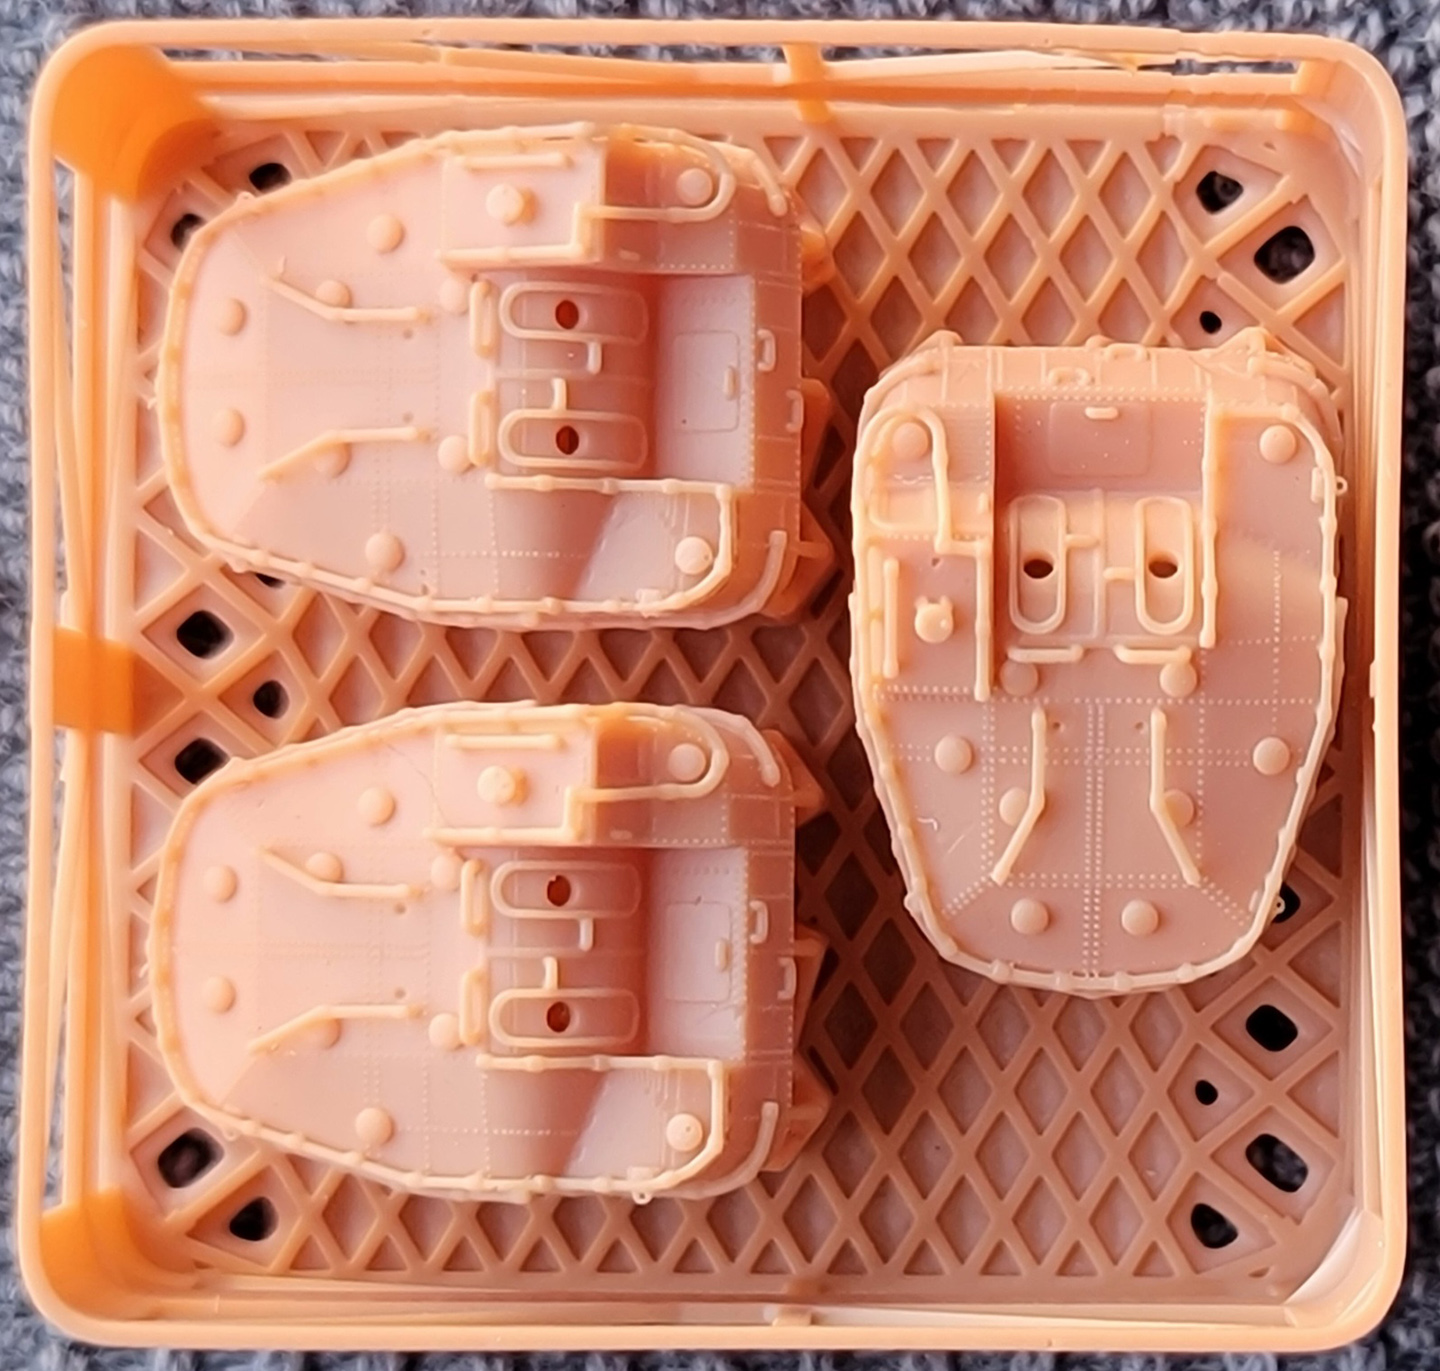
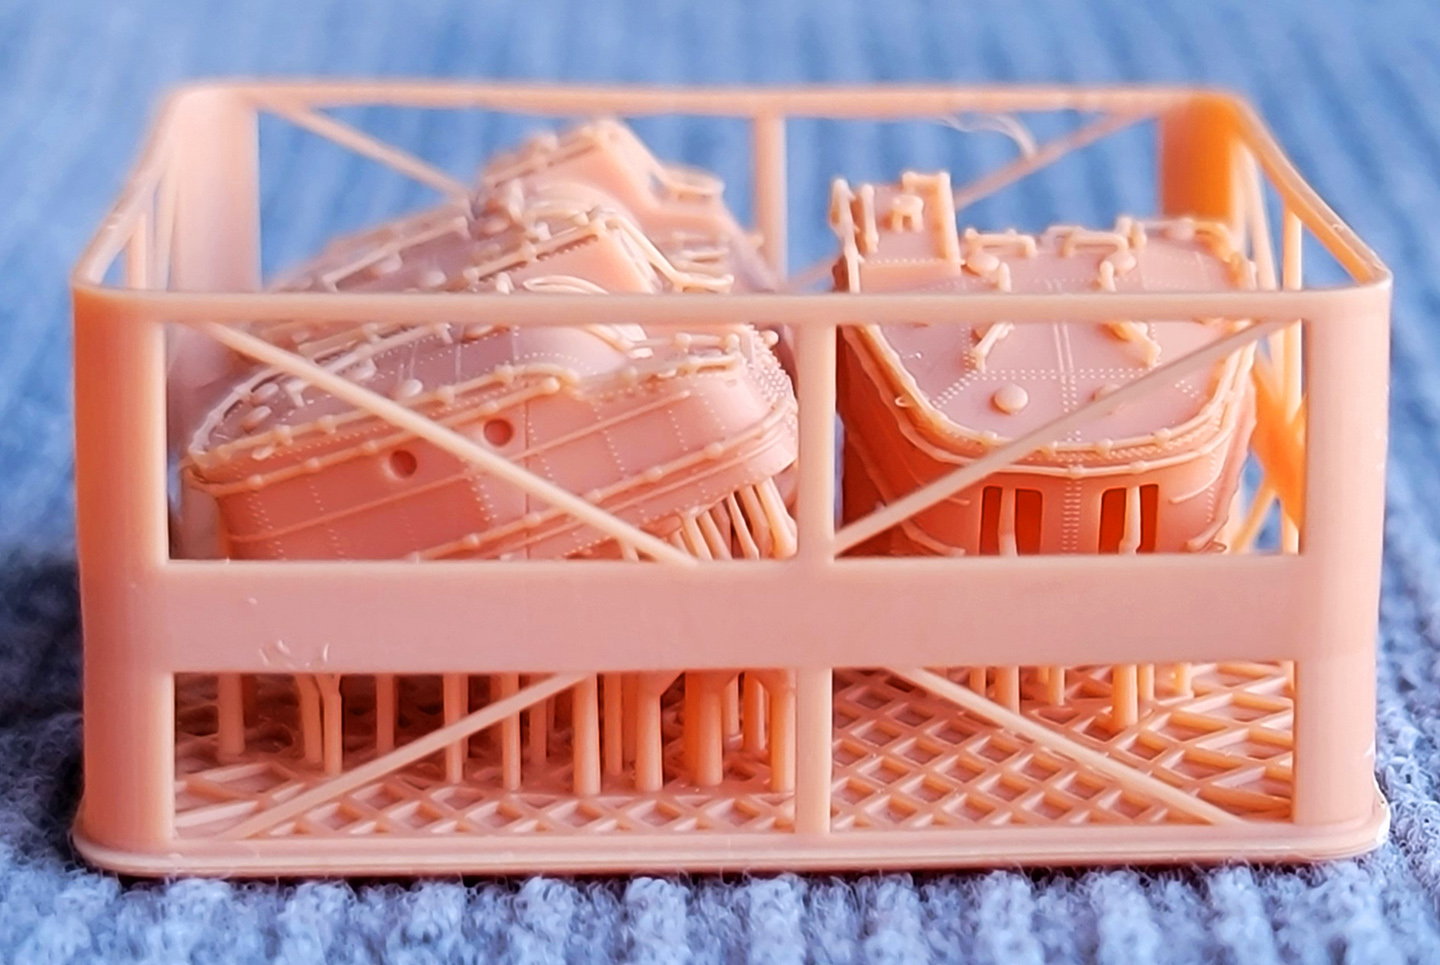
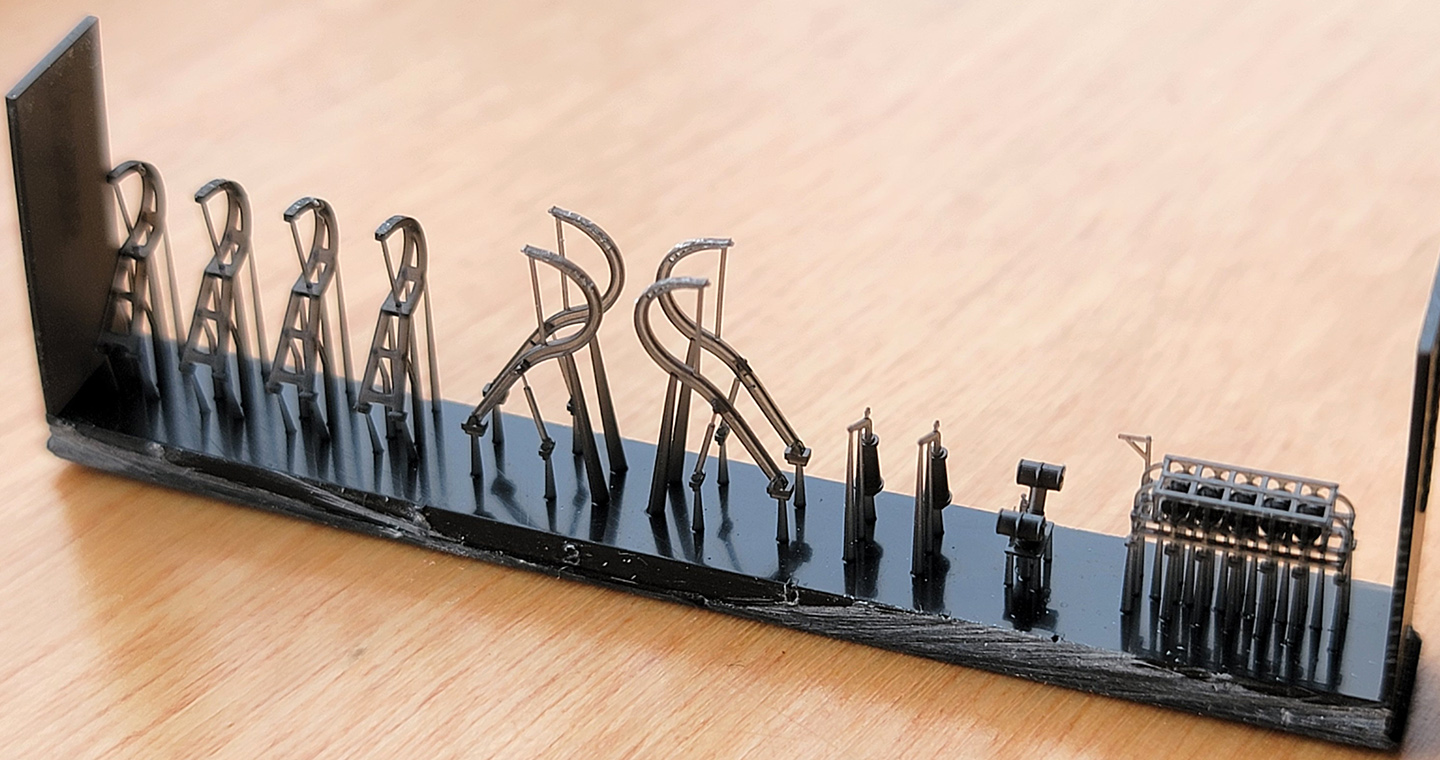
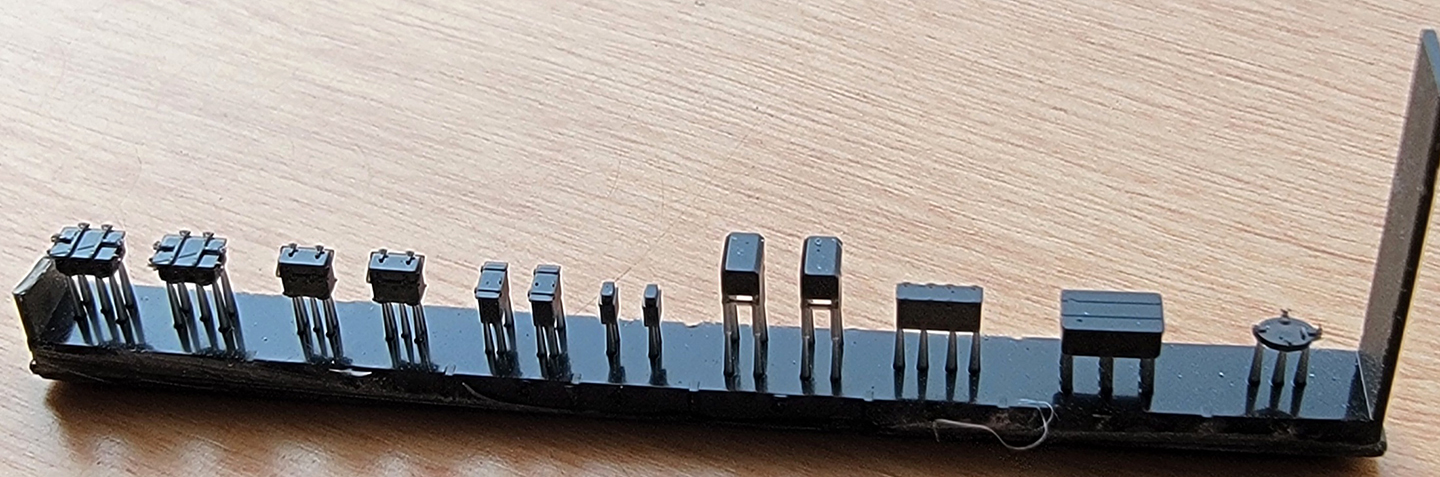
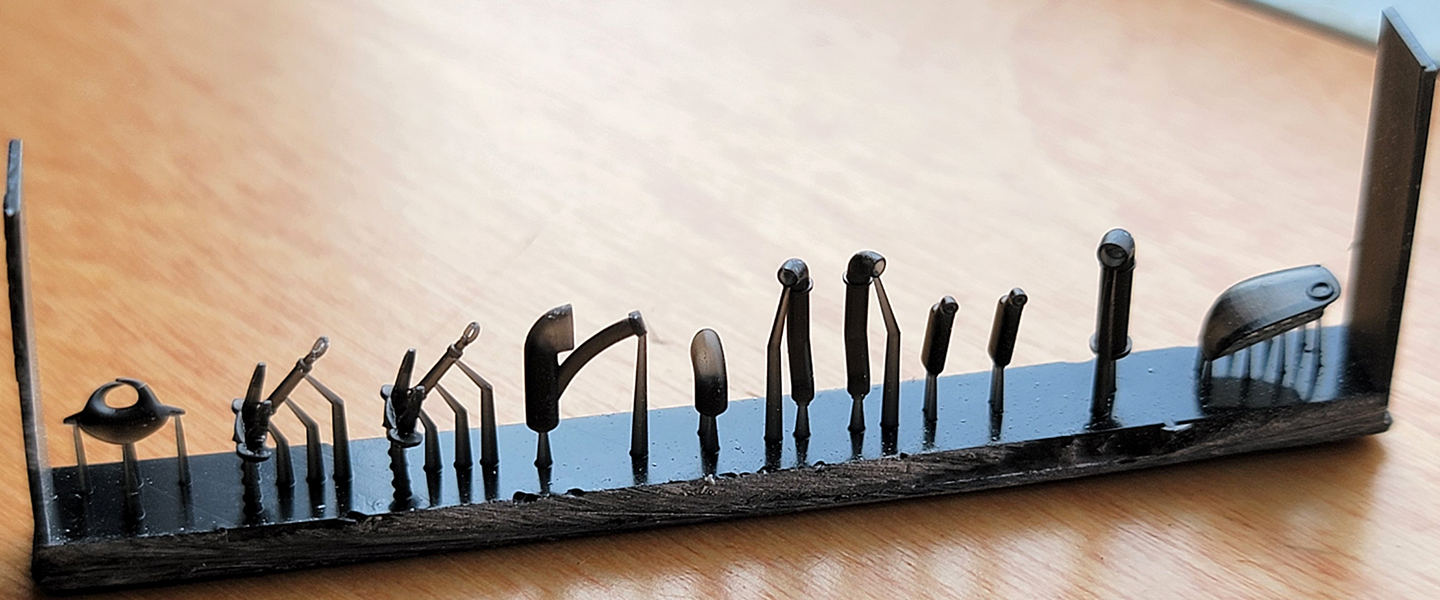
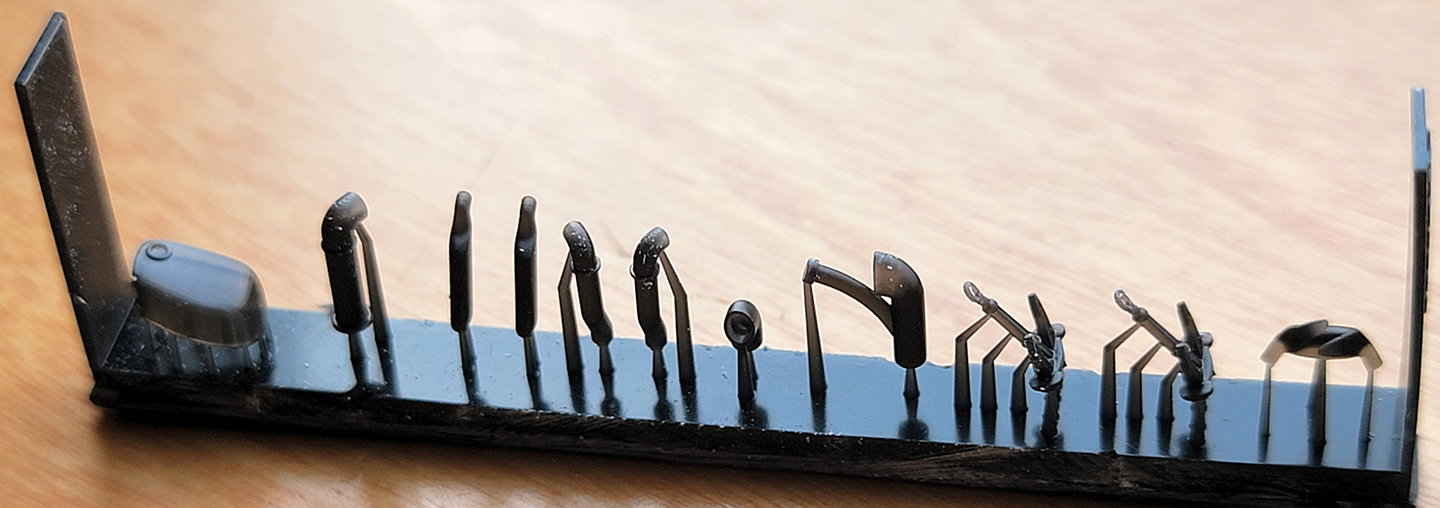
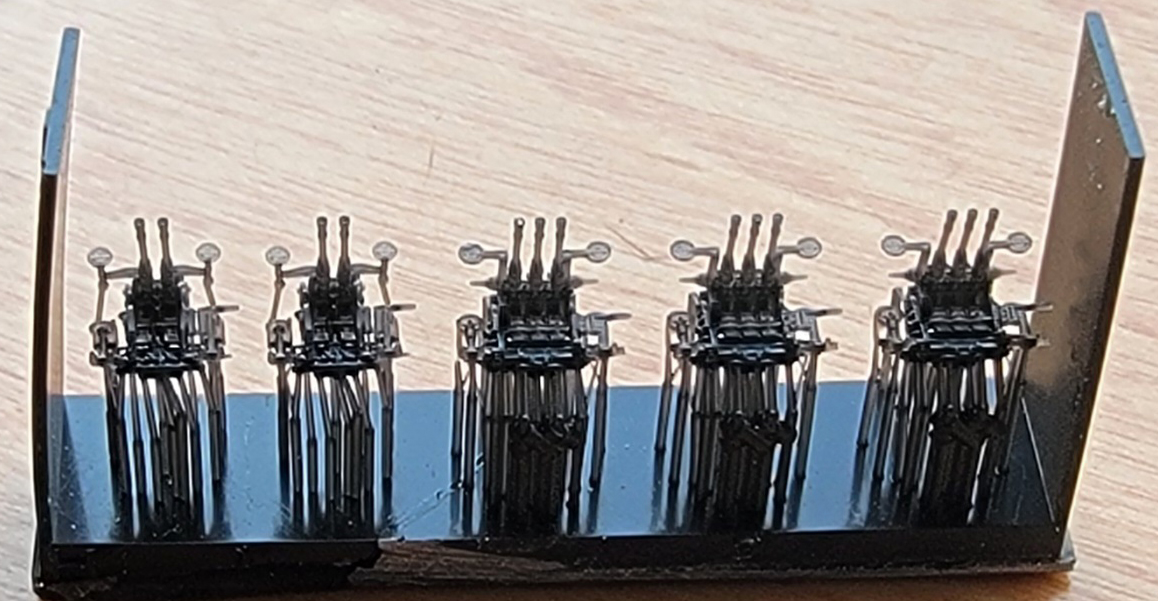
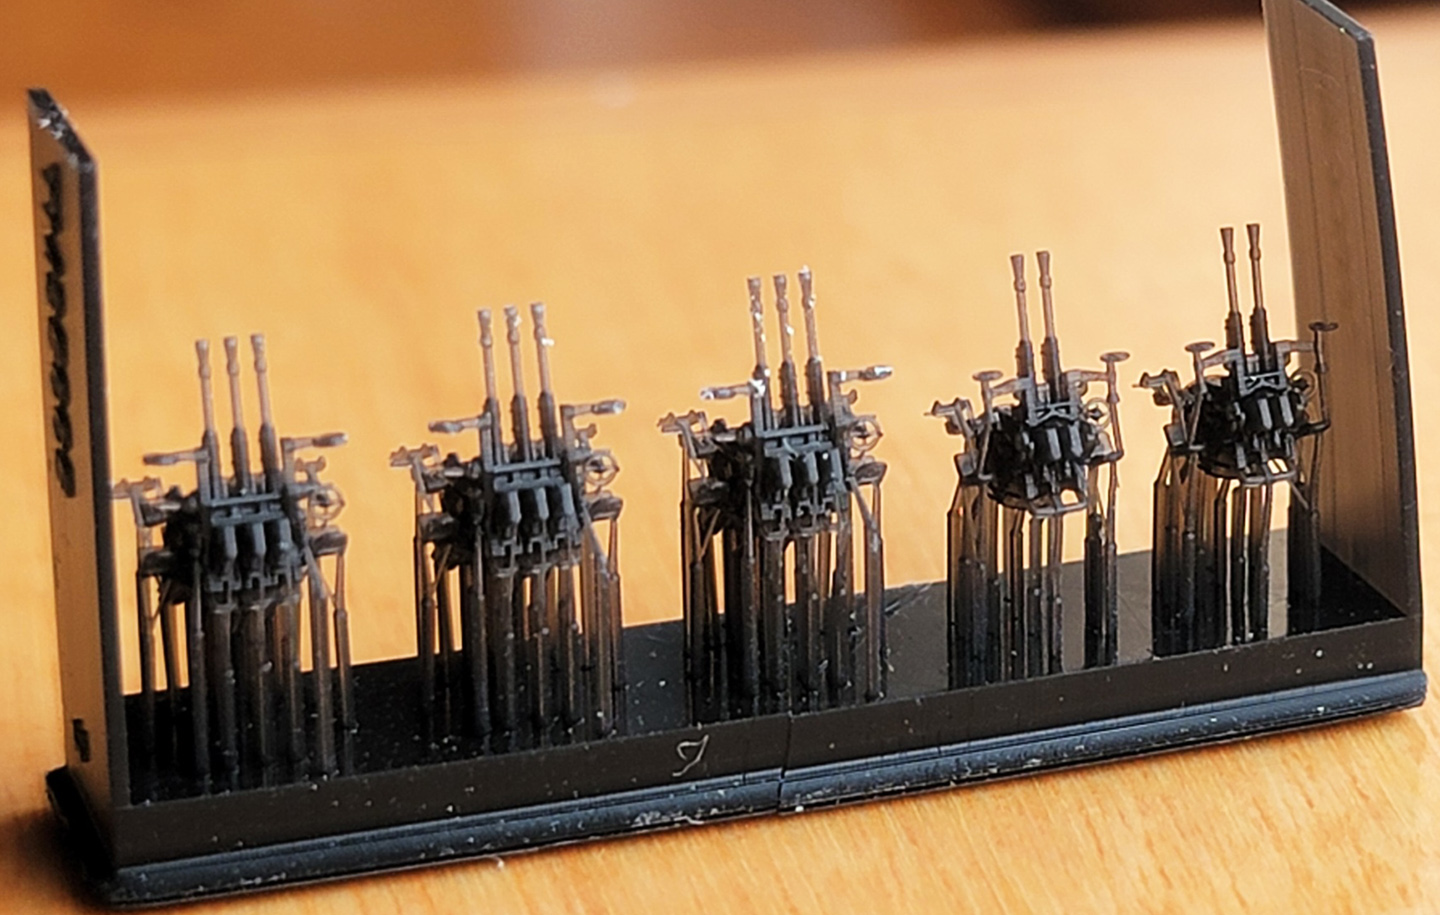
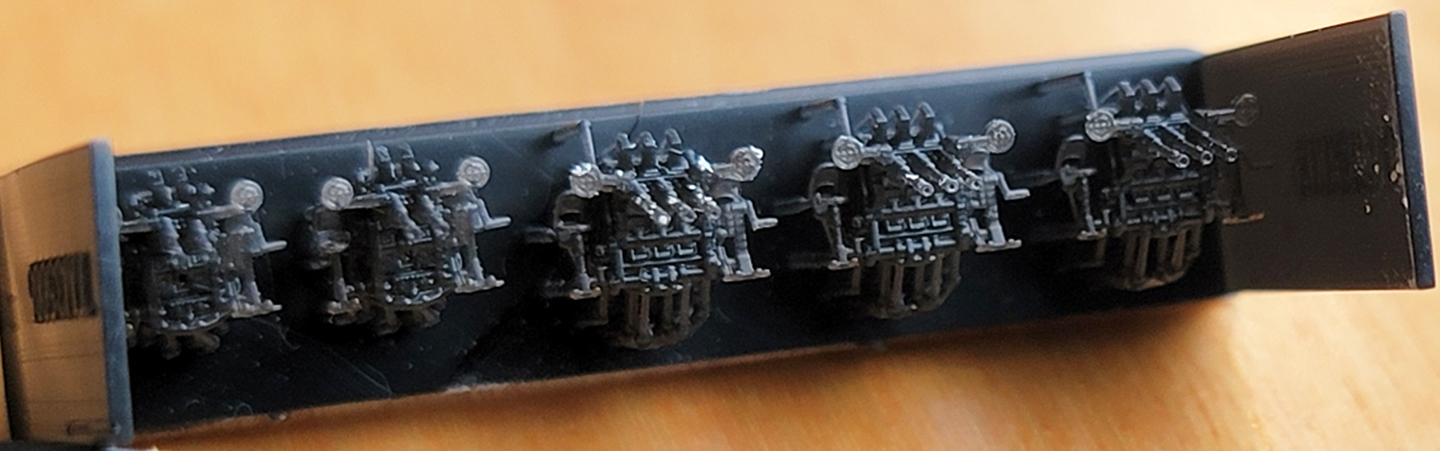
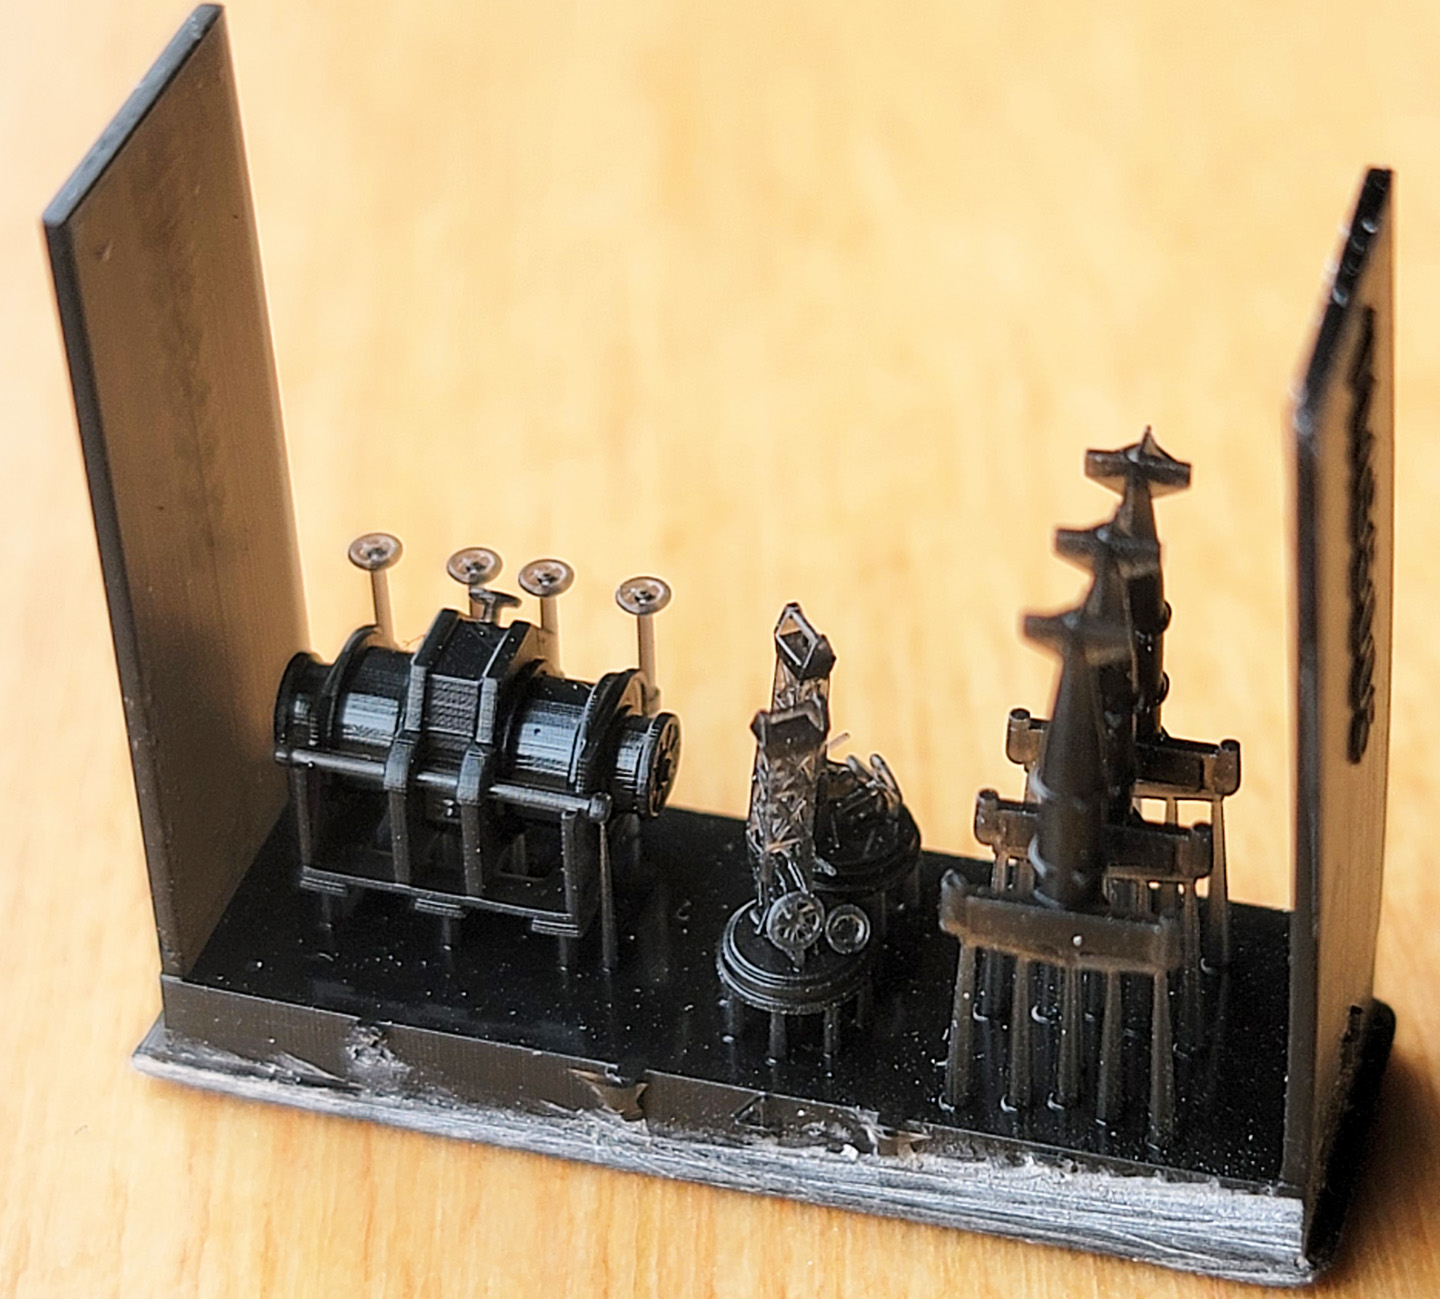
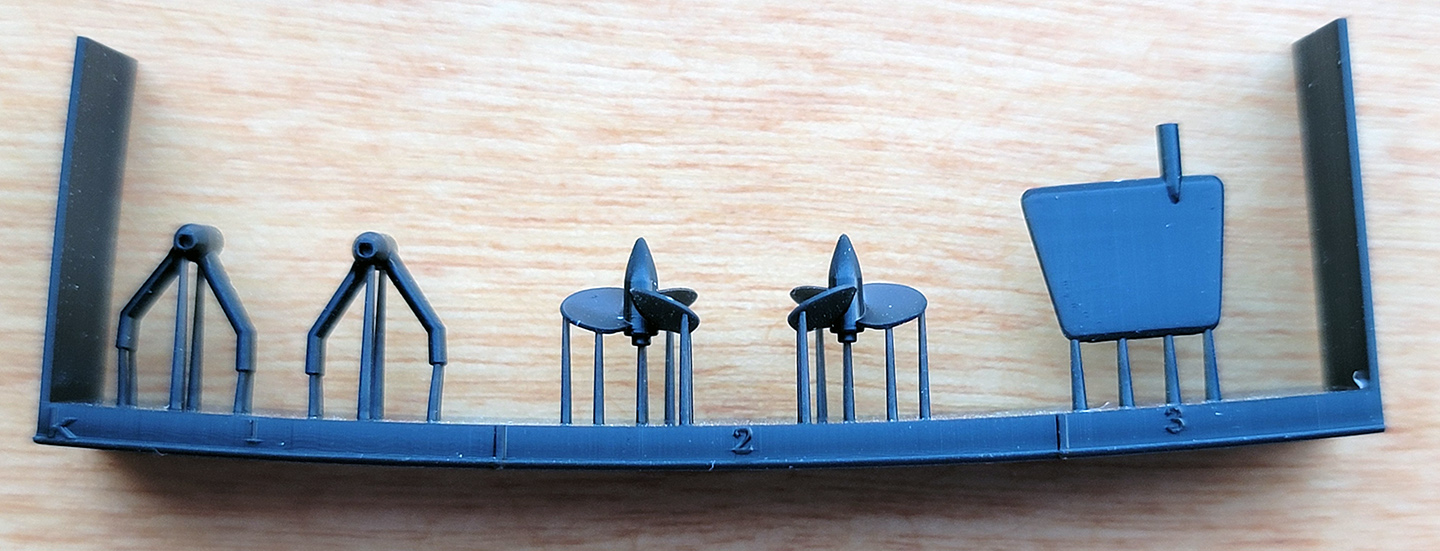
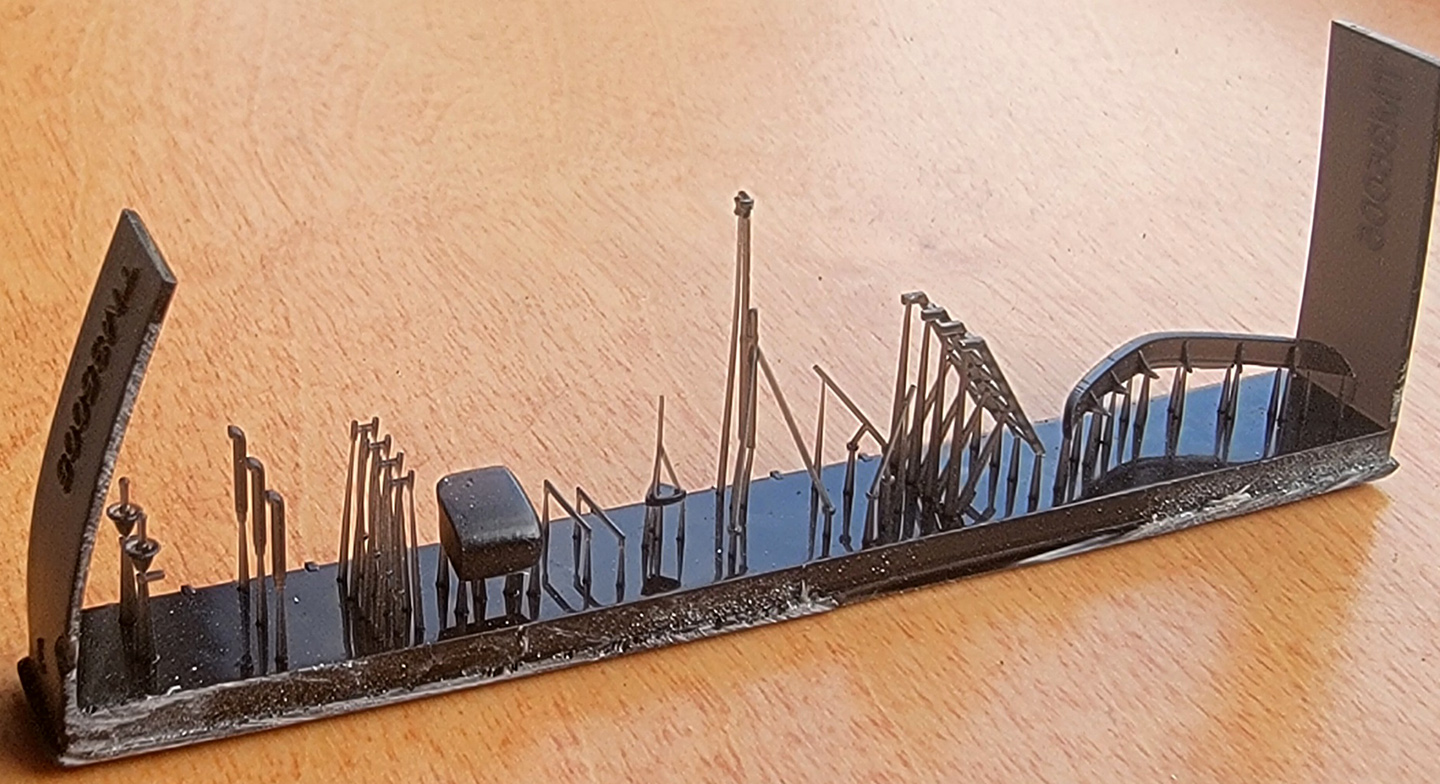
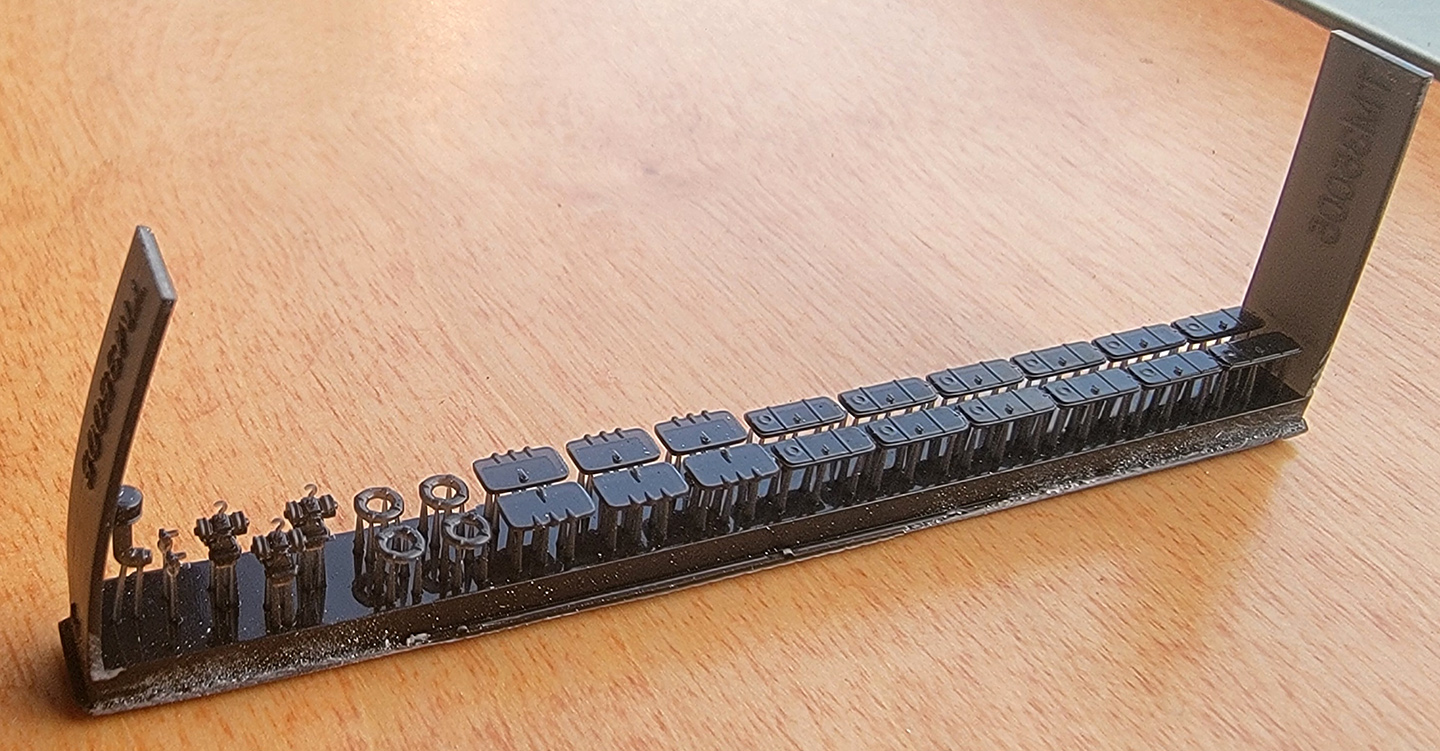
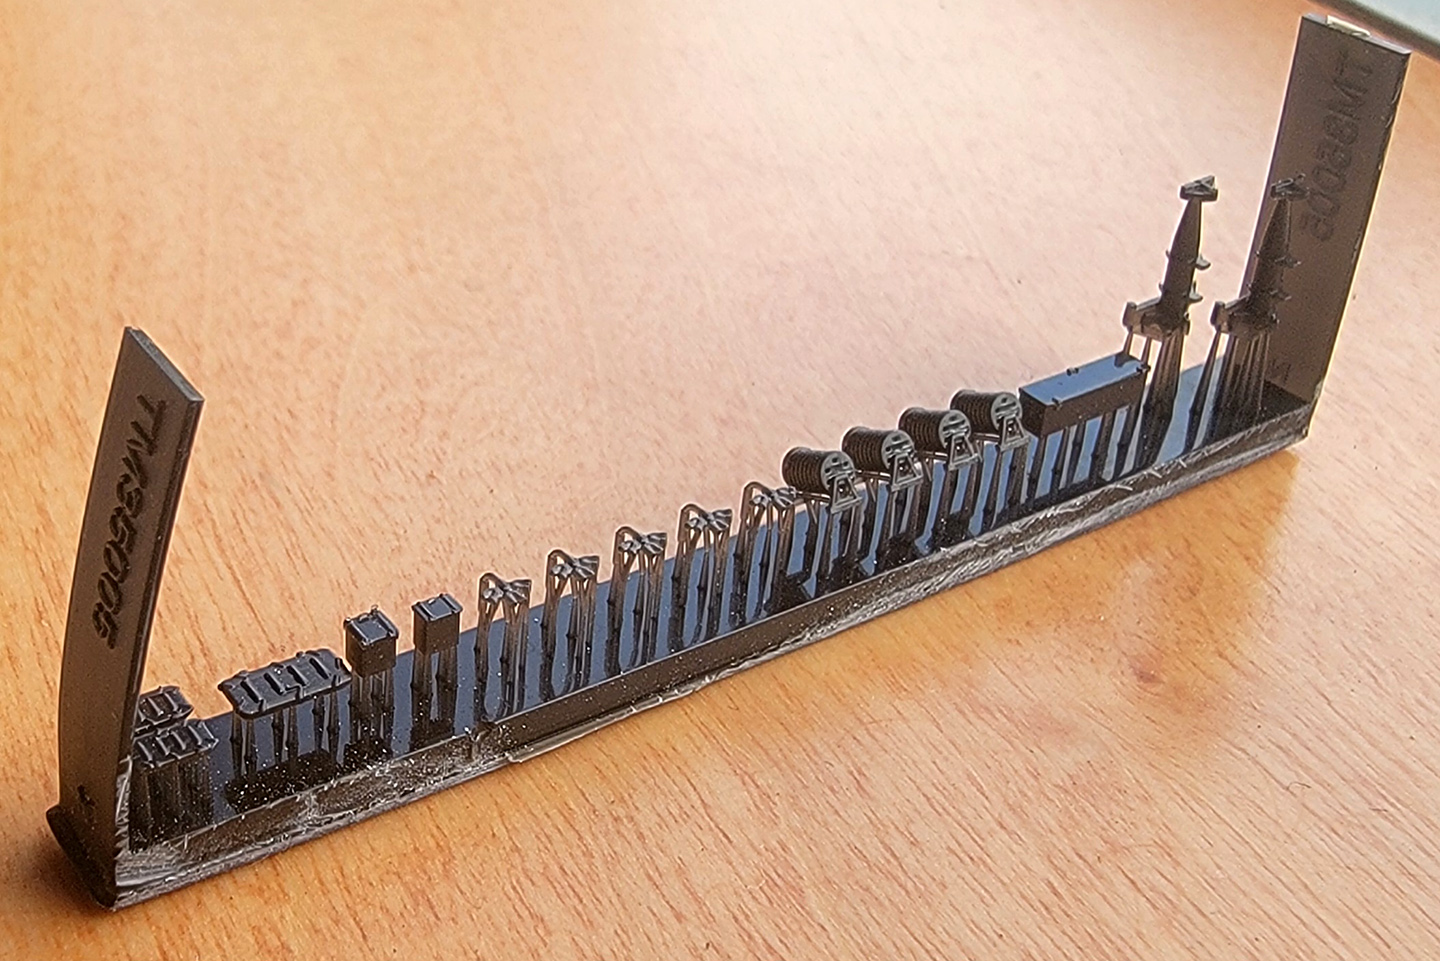
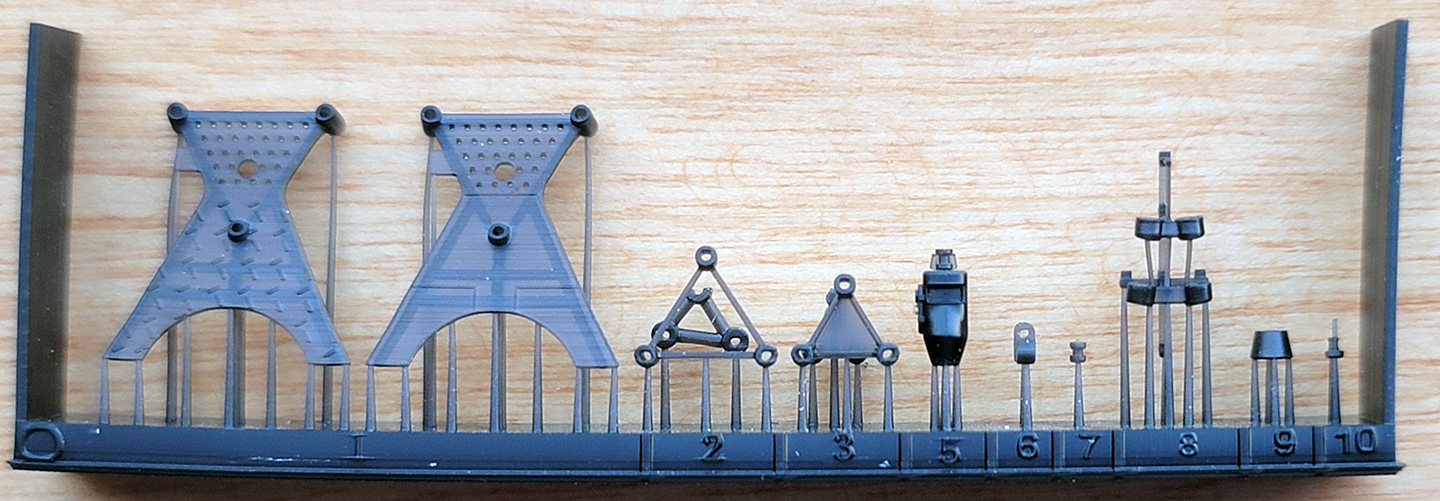
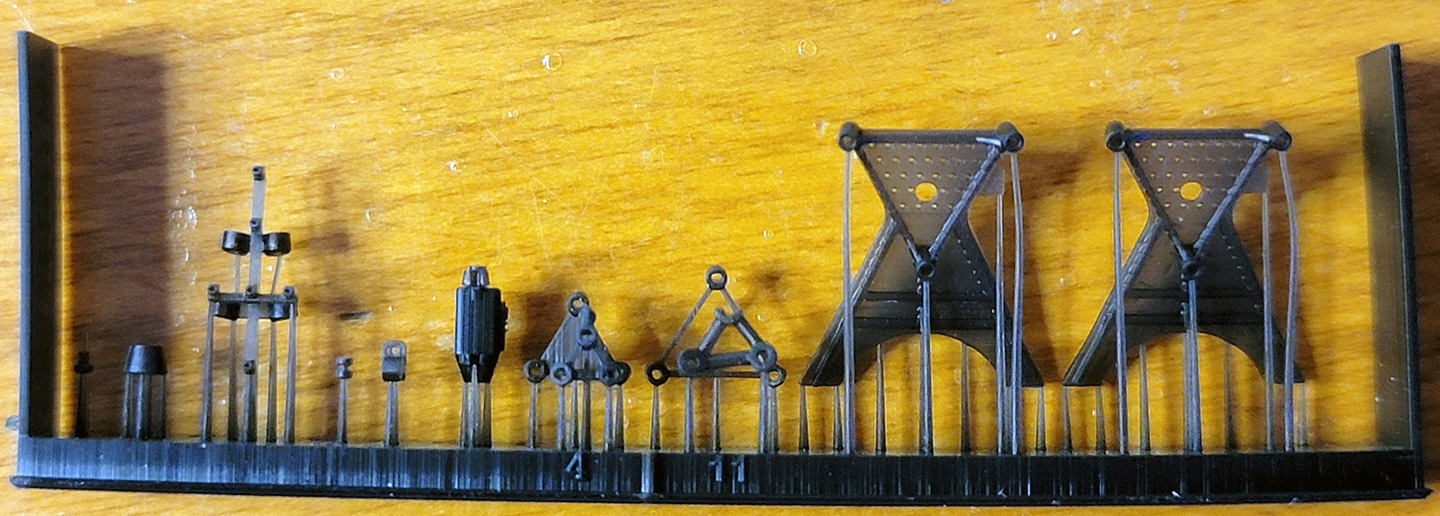
There is a mix of large
and small print rafts. Larger structural components
and weapons are printed in a mix of orange and black,
while all smaller parts are strictly printed in black.
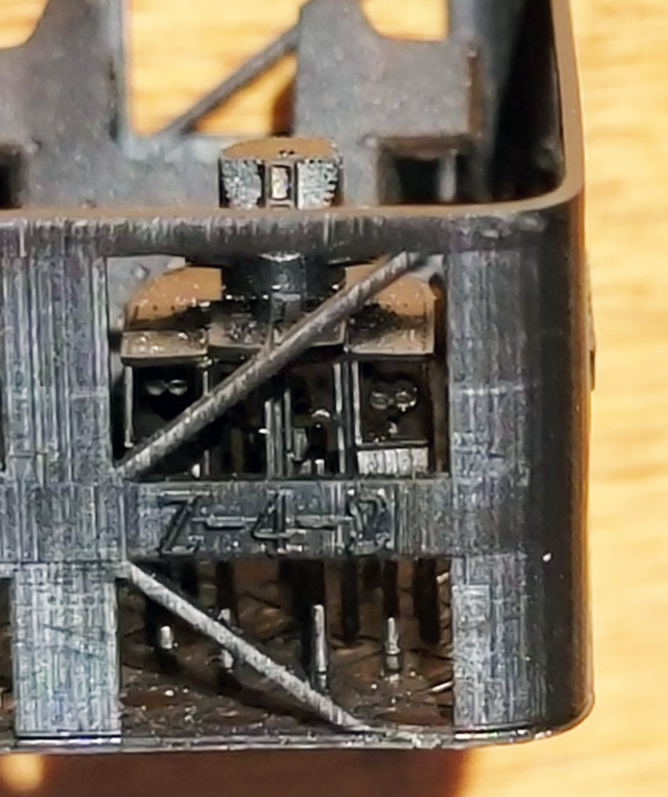
Each raft has an embossed letter and/or number for
identification and is listed below. The embossed
letters are tiny and can be hard to locate.
Quality-wise, as with previous Triumph kits, these are
superb printings. They are sharply printed and
extremely well-formed, with minimal print lines
visible to the naked eye. They also seem to be
uniformly correct in shape and scale.
Triumph also appears to have listened to earlier kit
criticisms about the extensive degree of riveting on
superstructure surfaces. Here, in many cases, the
riveting has been eliminated or toned down to a
considerable degree. It is another notable improvement
on scale effect.
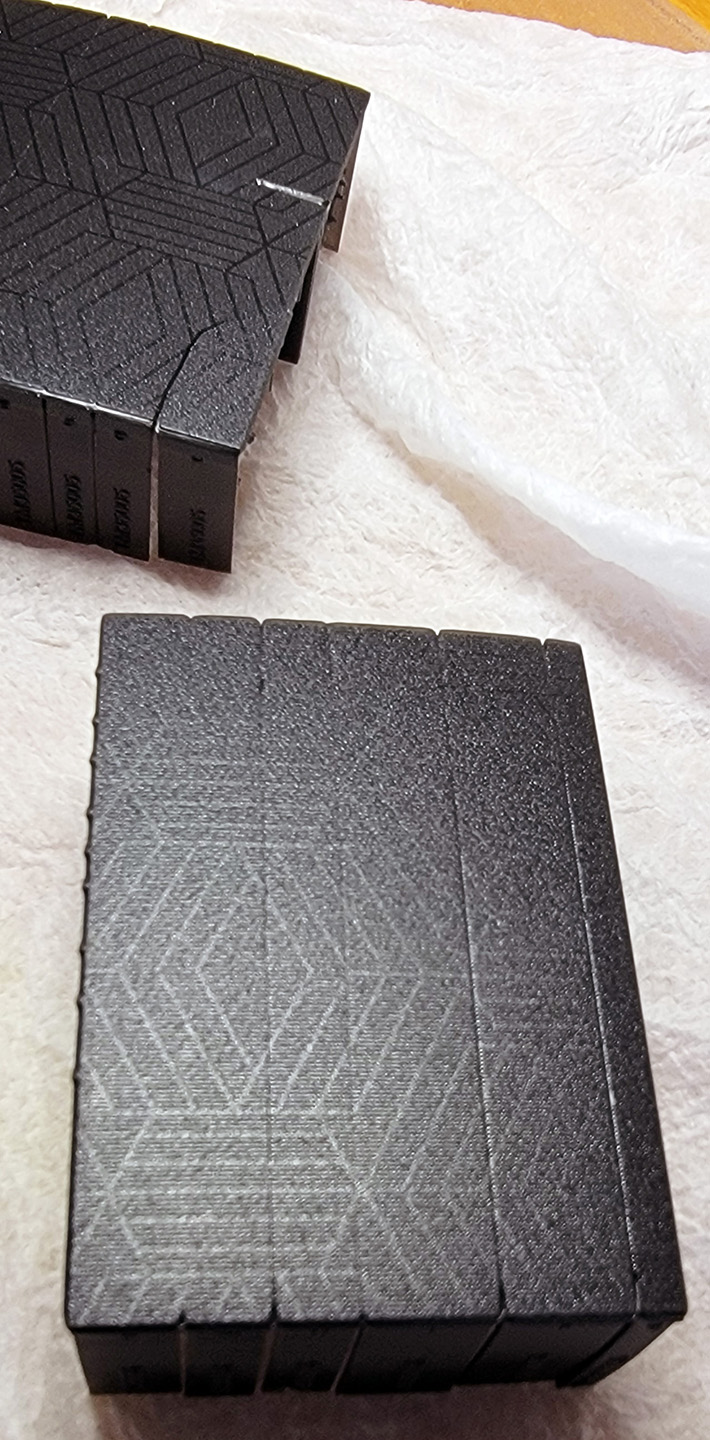
One word about the small part black raft packaging:
Unlike Triumph’s earlier Mutsuki and Akizuki kits,
where each black raft was physically separated from
its companion rafts, these black rafts are fused
together at the base. This makes for easier packaging
and less breakage during transit, but it does
complicate handling by the modeler.
I had hoped to separate each individual raft’s
attachment to its neighbor by using a razor blade on
the raft bottom. However, repeated scoring with the
blade was ineffective in most instances, so I had to
break out a hobby saw. When doing so, the rafts must
be handled with extreme care, lest the user
accidentally break a raft in two or dislodge some of
the pieces. Both these things happened to me while
prepping the rafts for photography. Fortunately, no
actual piece was broken. Another downside of
separating the rafts with a saw is the tendency to
obscure some of the identification numbers or letters
when doing so.
|
| ORANGE AND BLACK (LARGE PARTS) COLORED
PRINT RAFTS |
|
|
·
• Z1 – bridge base
• Z2 – Funnel #1
• Z3 – Funnel #2
• Z4 – Main gun director (with early type cupola),
bridge roof, main engine air intake, bridge support
trestle
• Z5 – Searchlight platform/RDF compartment
• Z6 – Torpedo reload gantries (forward port and
starboard, aft port)
• Z7 – Aft deckhouse and torpedo reload stowage
• Z8 – one piece printed foremast with platforms, aft
end compass bridge deck
• Z9 – one piece printed mainmast with braces
• Z10 – forward torpedo reloads stowage, port &
starboard
• Z11 - 25mm AA platforms at base of funnel #2
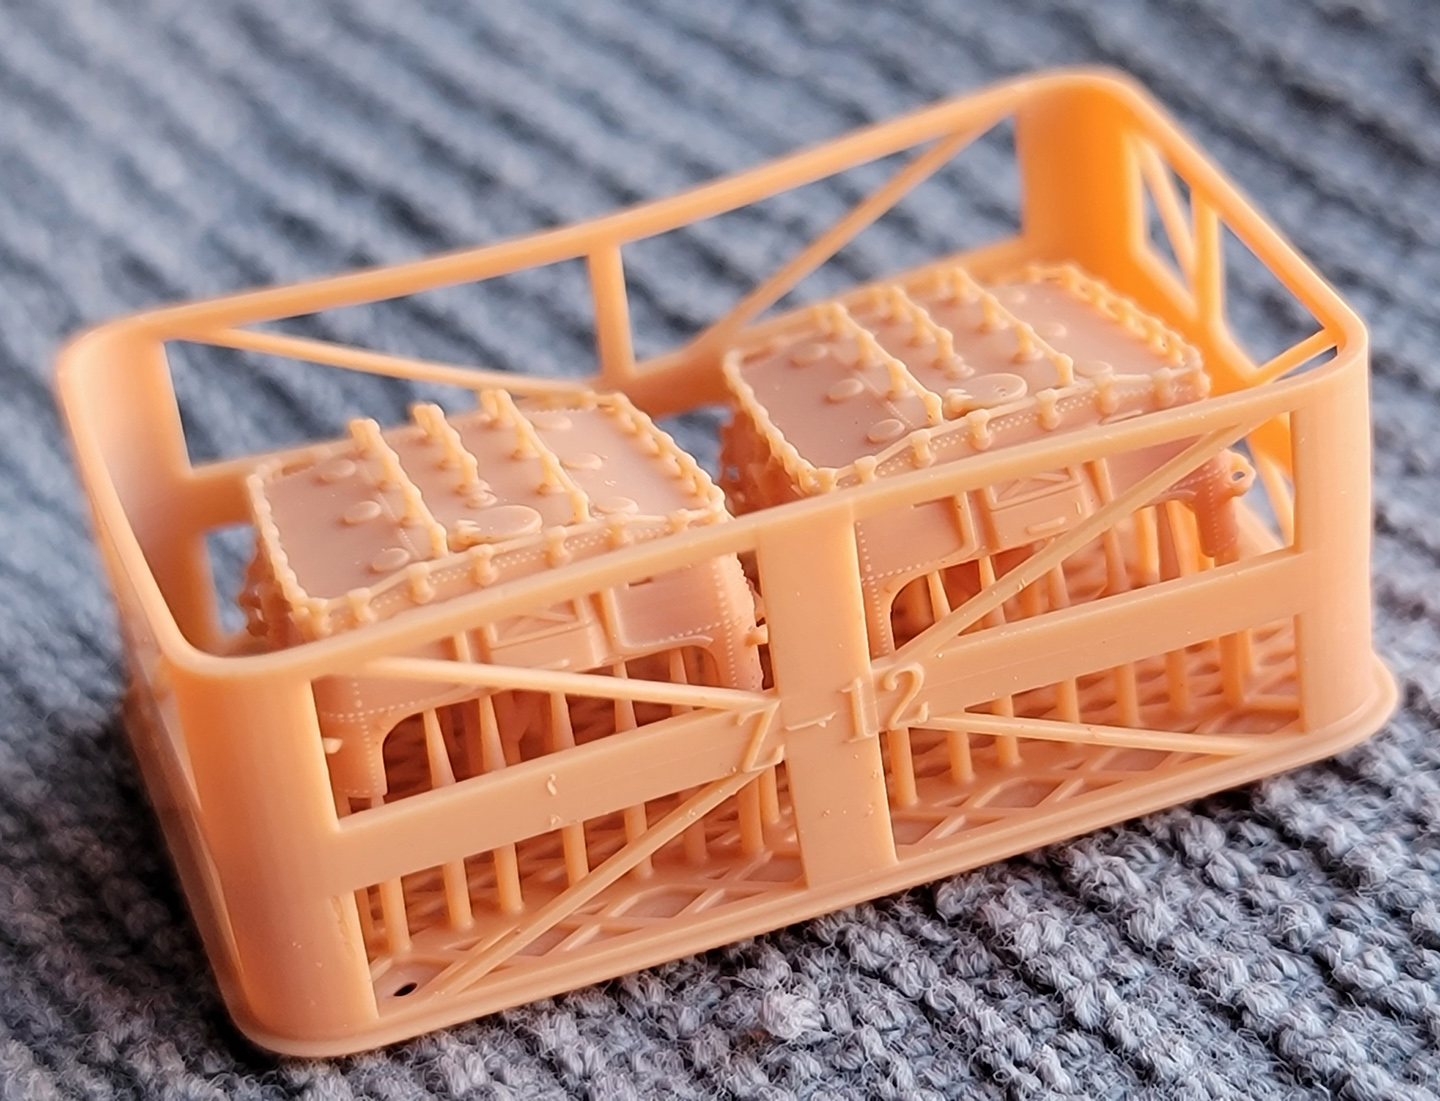
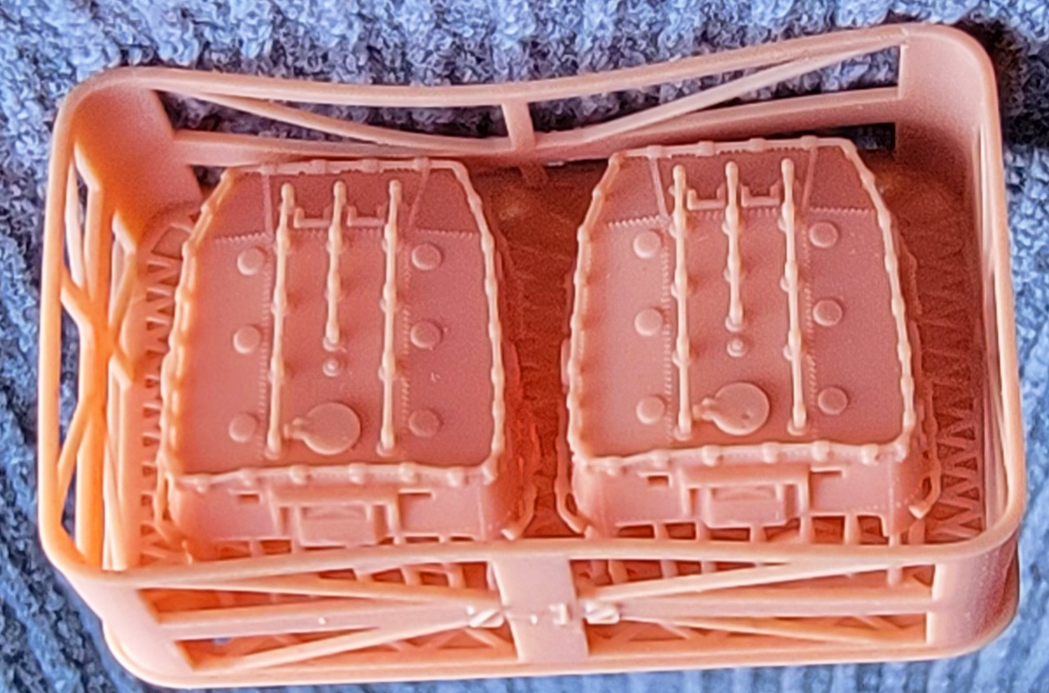
• Z12 - Type 92 mod 4 torpedo tube mount shield (two
units)
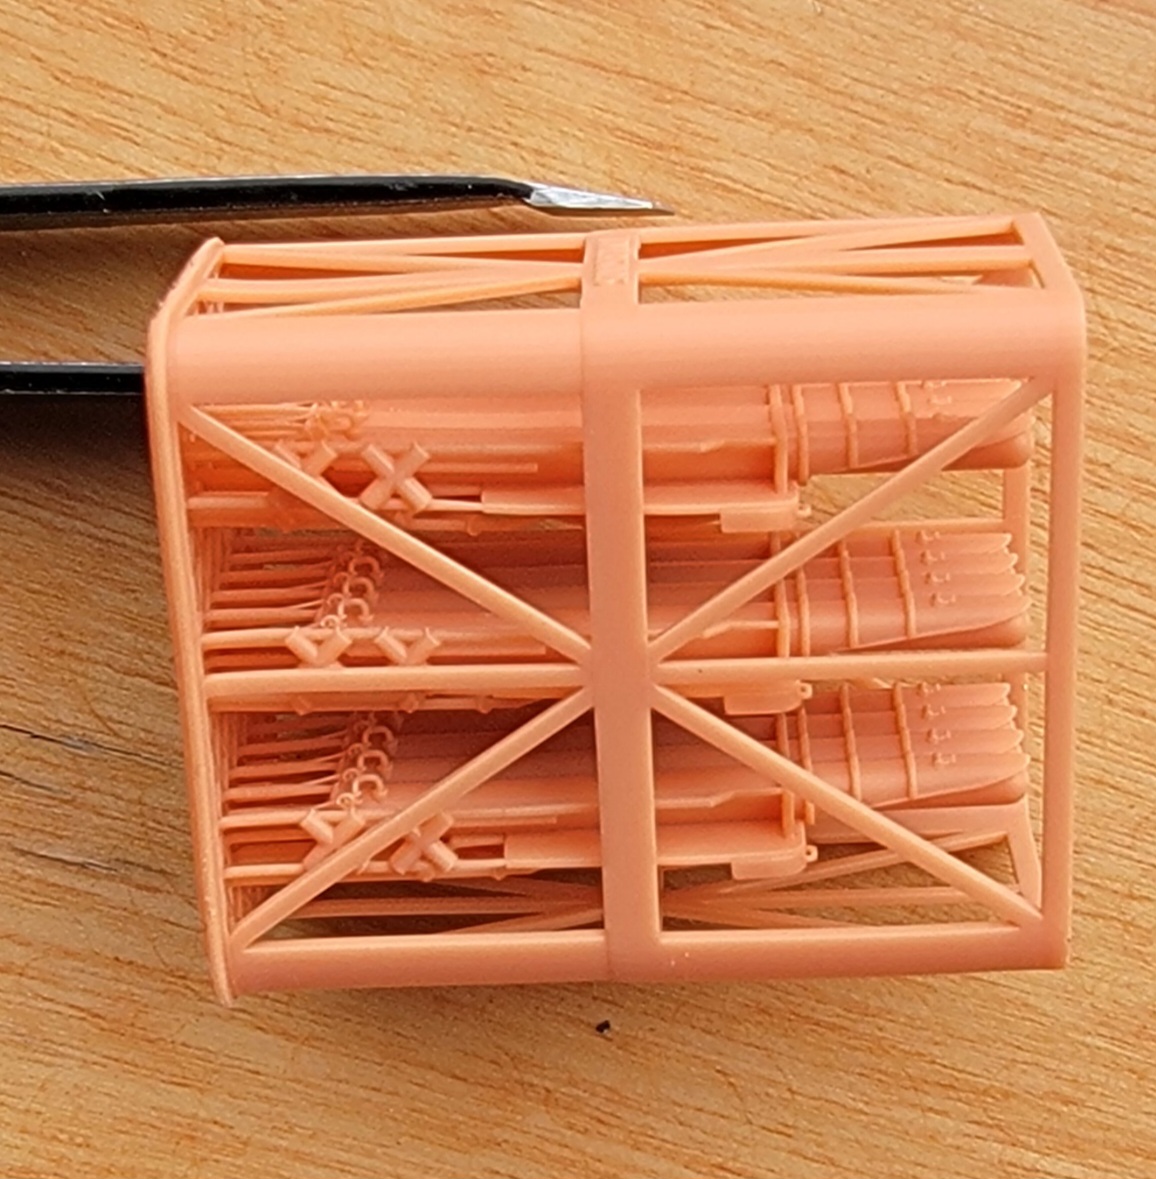
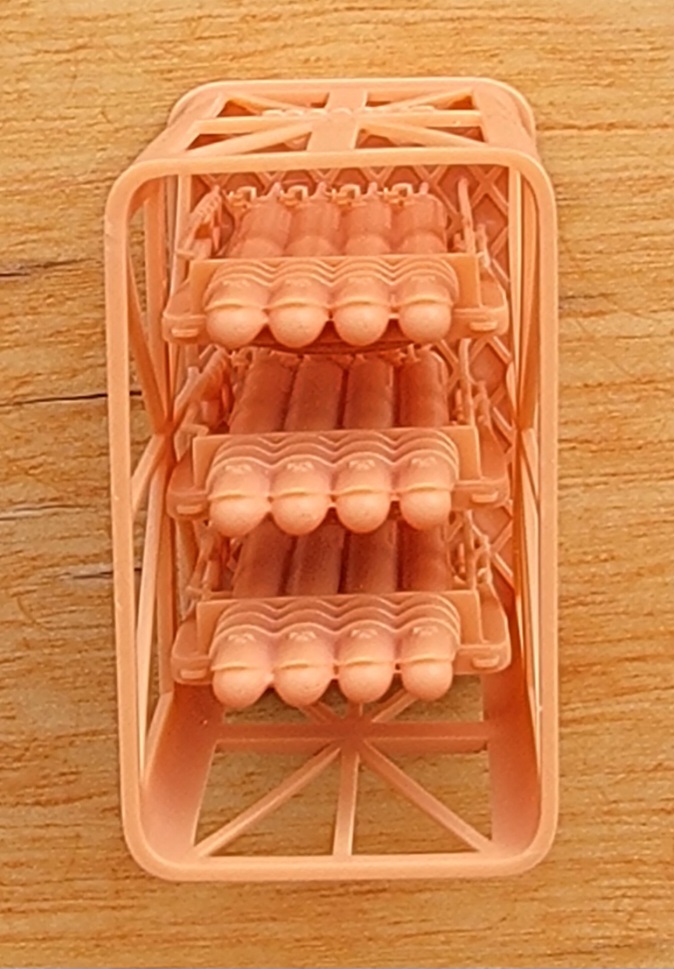
• Z13 – Quadruple Type 92 torpedo tube mount,
unshielded (three units)
• Z14 – Type D enclosed 12.7cm main battery turrets
(three units)
• Z15 – Forward 25mm AA bandstand (in front of bridge
for mid-1943 fit)
|
|
|
|
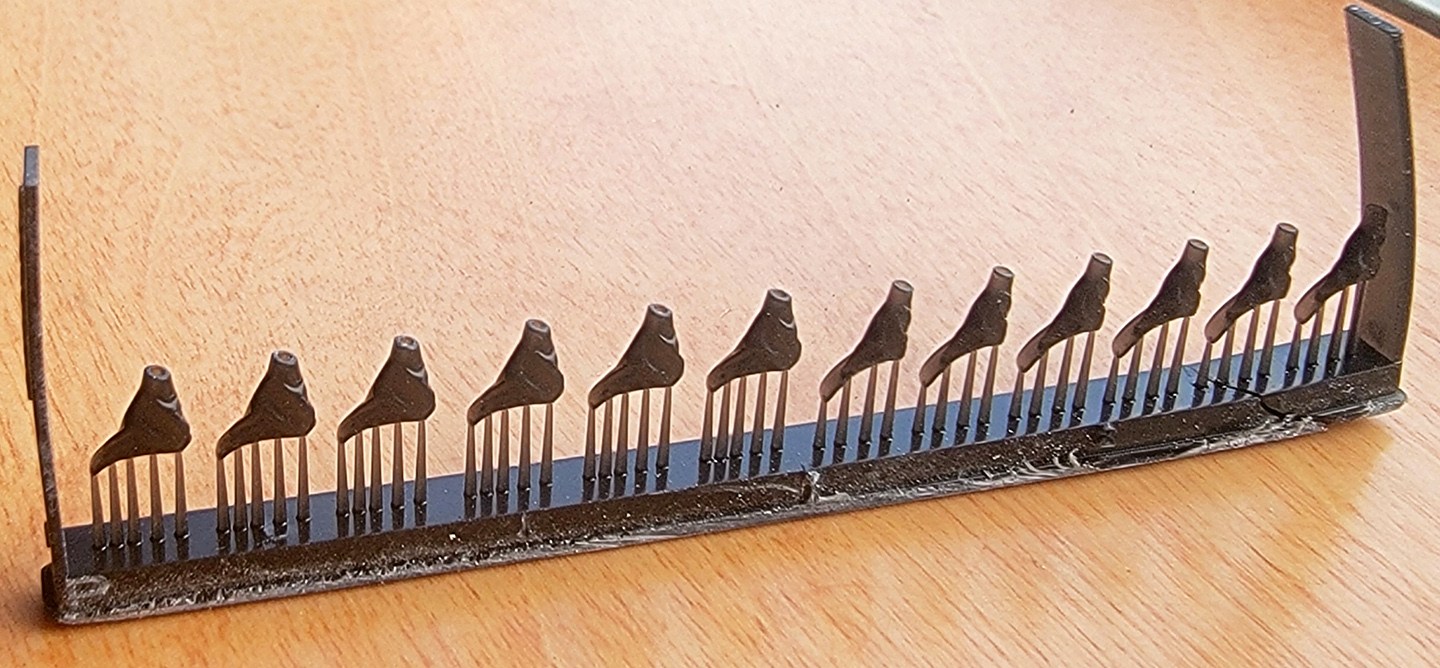
BLACK (SMALLER PARTS)
COLORED PRINT RAFTS
|
|
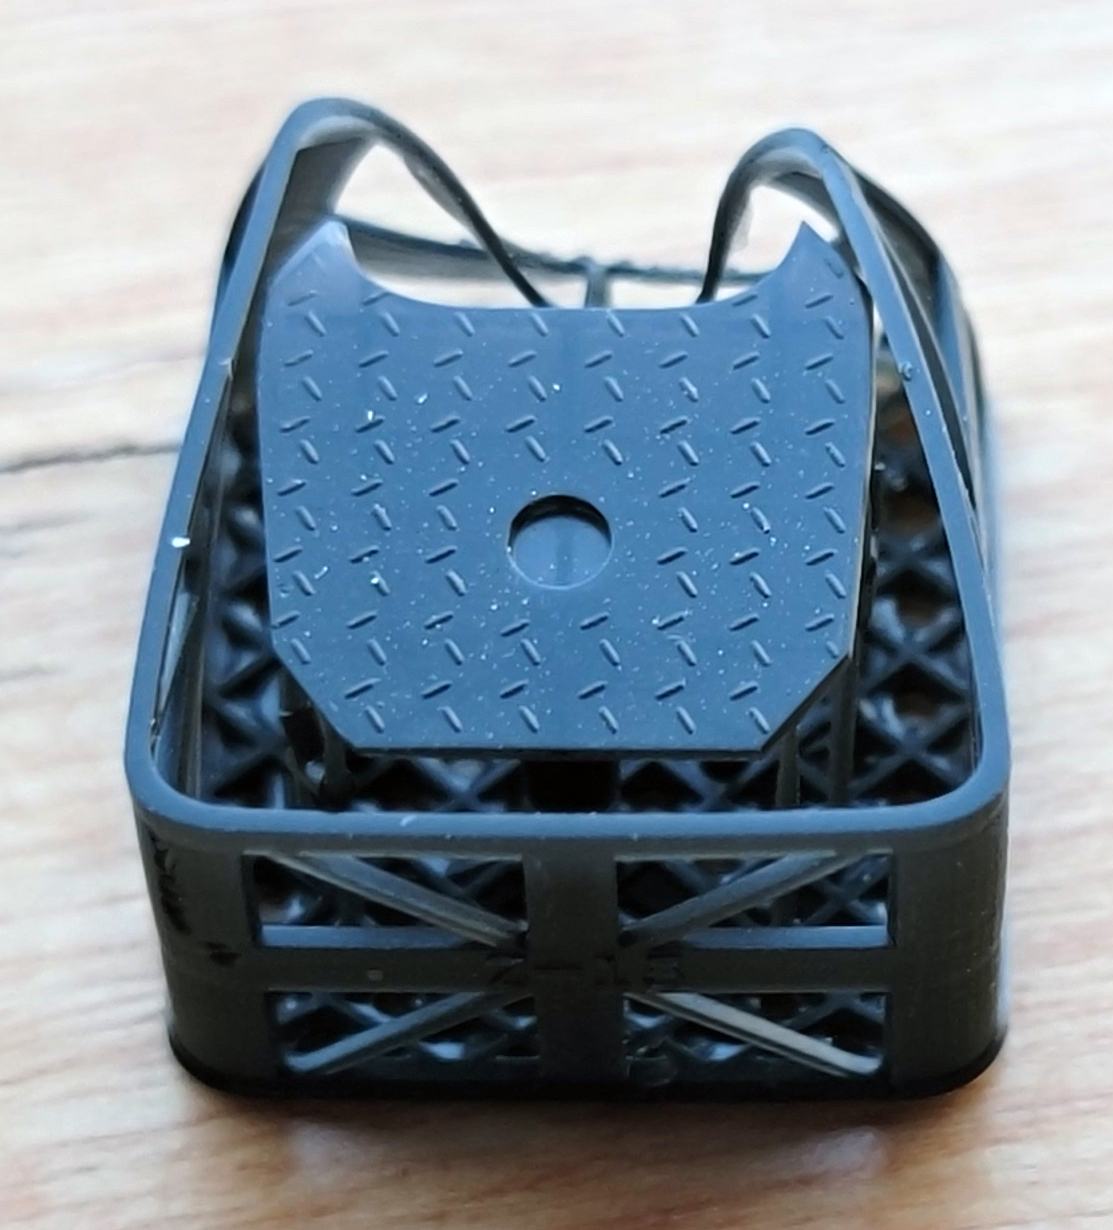
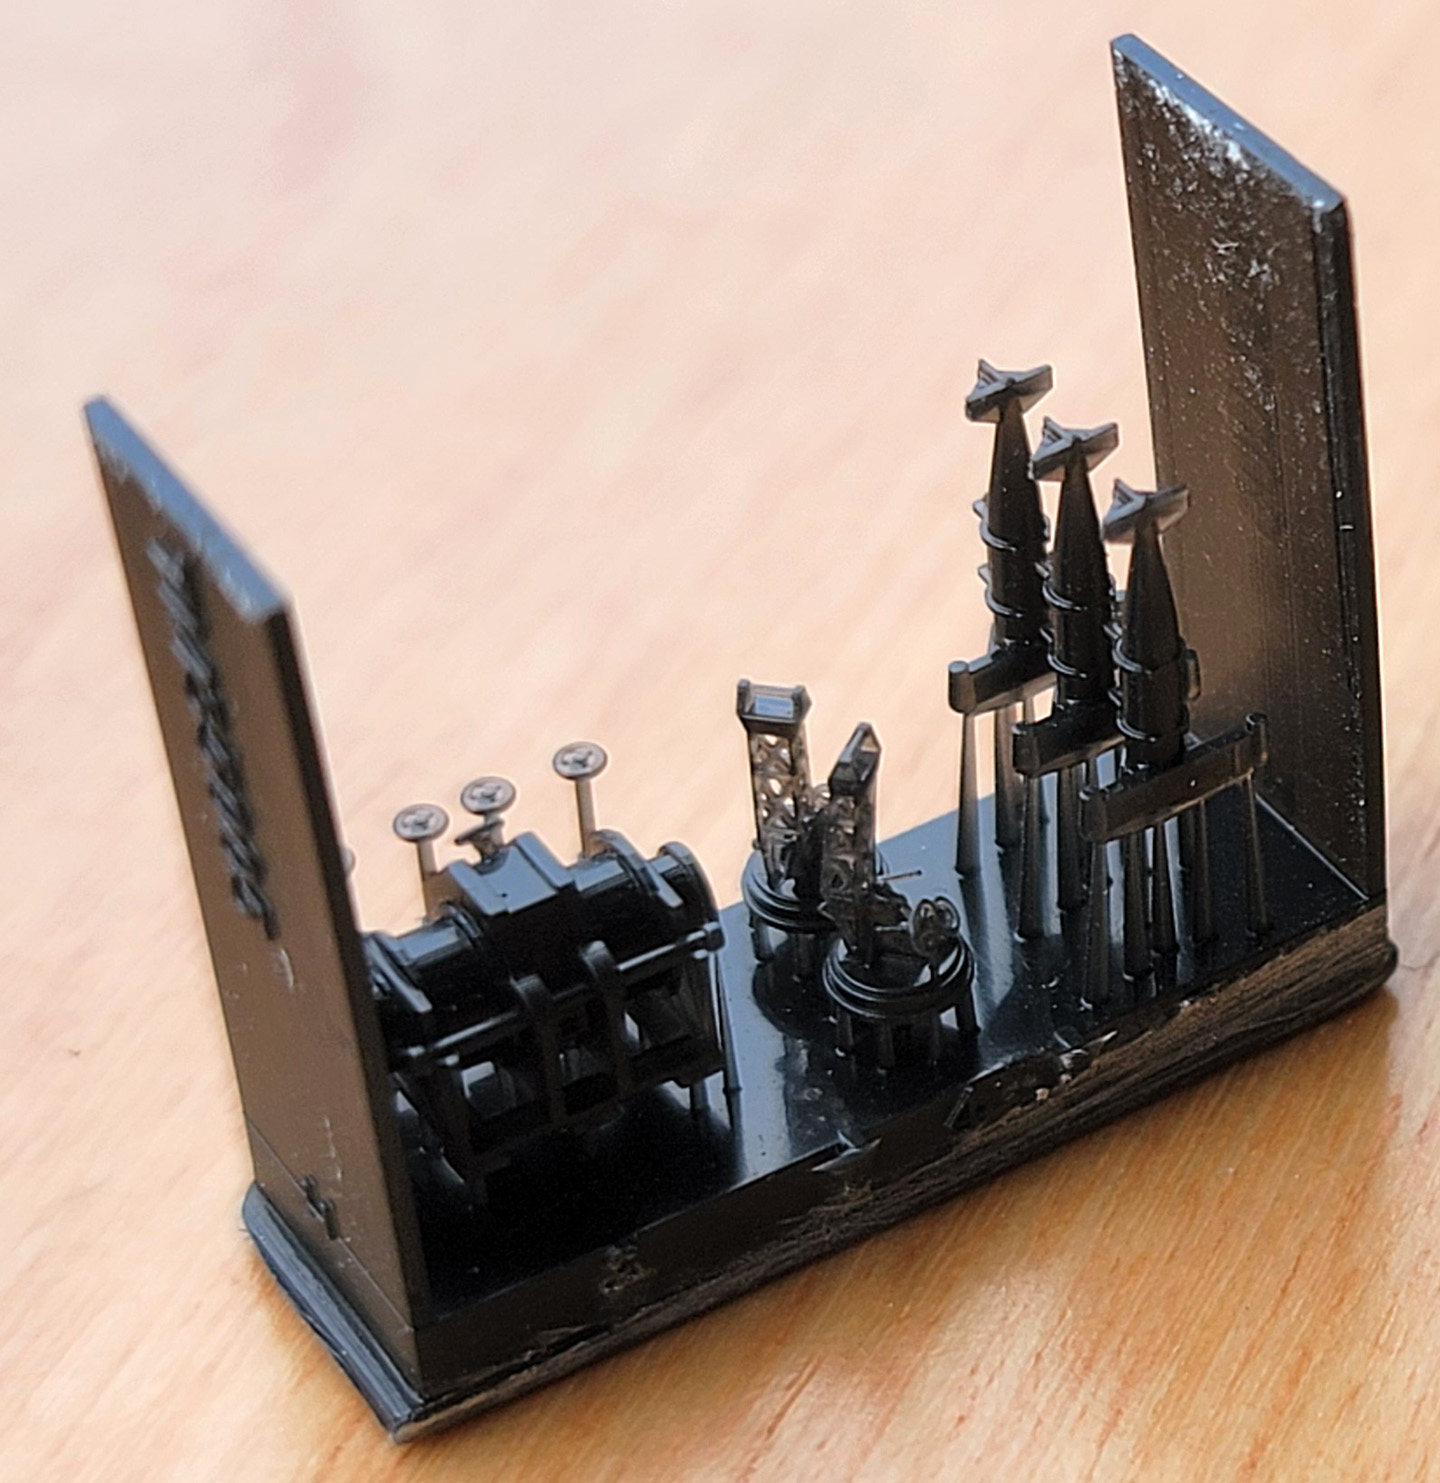
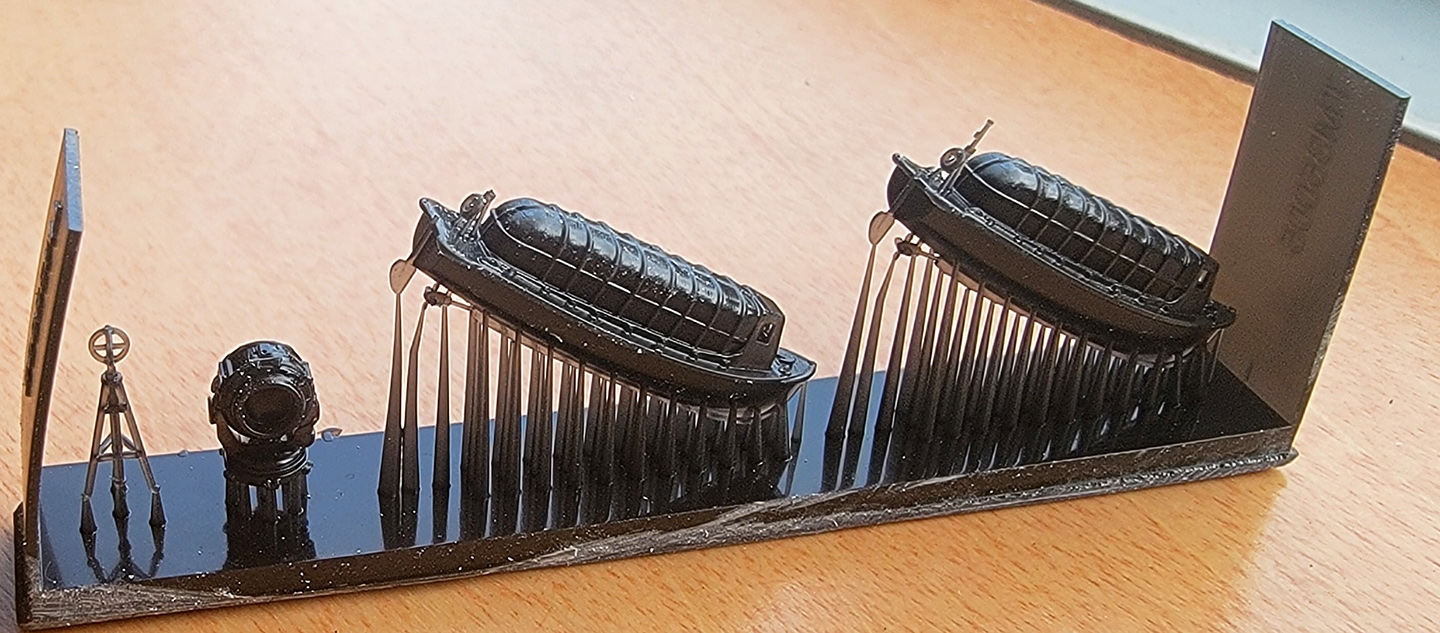
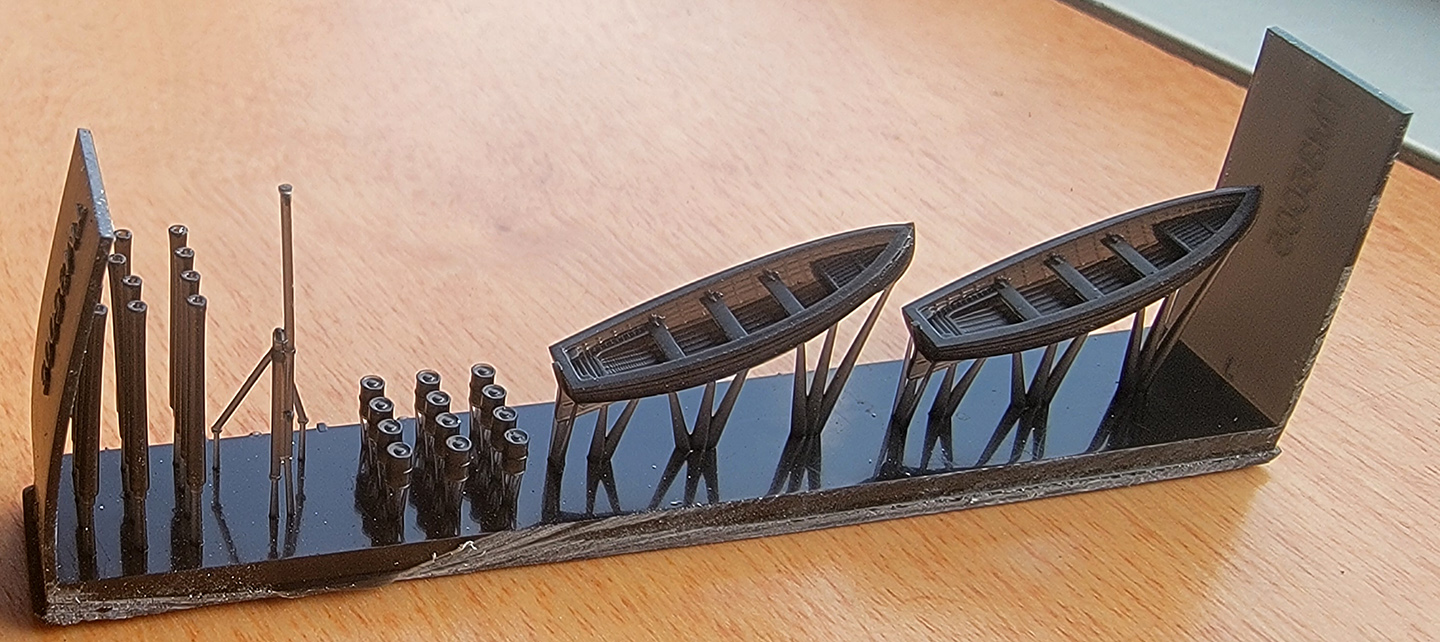
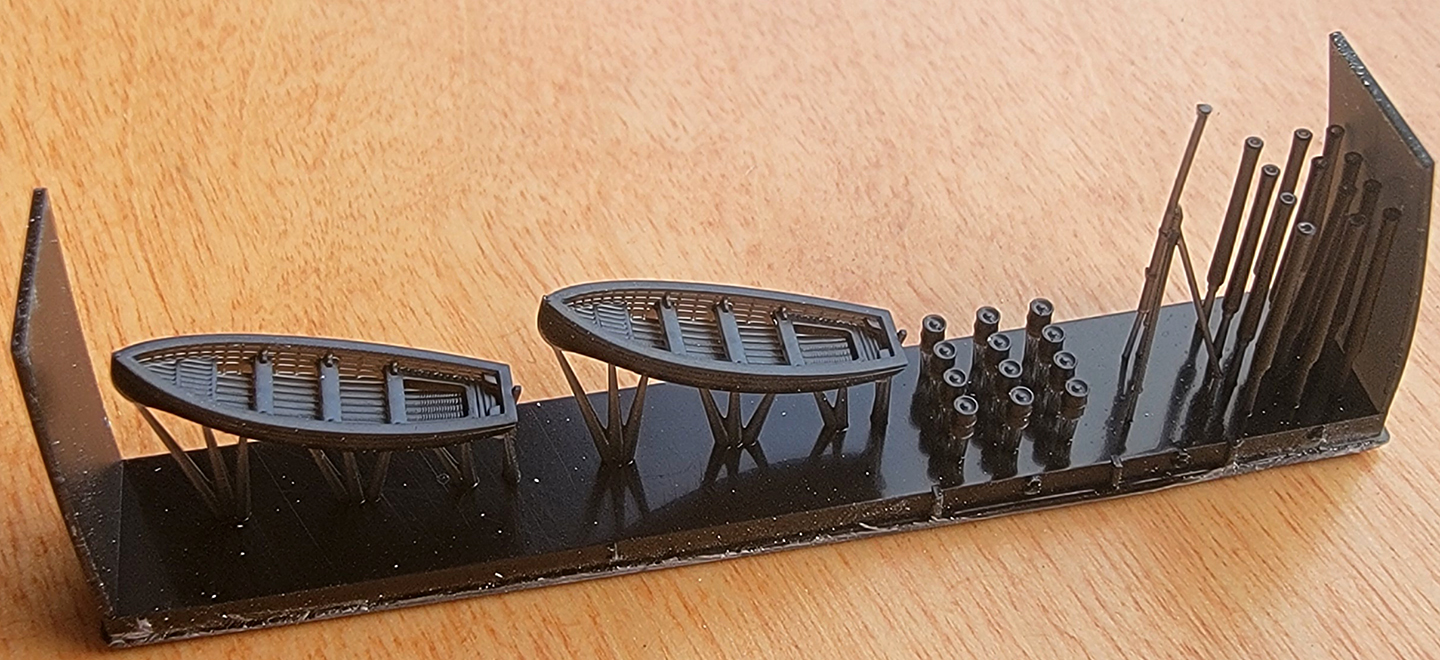
These
carry the smaller parts and fittings, usually in
multiples. As with the orange 3D printed parts, these
pieces seem uniformly sharp, properly shaped and
scaled. Some parts may be difficult to identify at
first, but most are readily identifiable. The rafts
have embossed letters and numbers for identification,
but these are also tiny in size and sometimes hard to
see.
·
• A – bollards, stern fairlead, two hawsepipe covers
with handwheel brakes
• B – capstan and handbrake wheel, small deck hatches,
and small mushroom deck vents
• C – Hawser reels, single depth charge racks (stern
mounted), engine room access hatches, torpedo trolley,
searchlight controller
• D – Bitts, round engine room skylights, search
binoculars, magnetic and repeater compass binnacles,
3m navigation and 2m torpedo rangefinders.
• E – cutter and motor launch boat davits, torpedo
loading davits, Y-depth charge thrower, athwartship
depth charge rack
• F – Two torpedo adjustment tables and air intake for
aft deckhouse, 25mm ammo boxes, equipment boxes, stern
deck hatch
• G – bow bullnose, anchors, galley pipe base,
gooseneck and aft deckhouse air intakes
• H –twin and triple 25mm AA mounts (two & three
units), paravane winch, davits and paravanes
• I – 7m motor launches, 90cm searchlight, RDF tripod
• J- 7m cutters, stern jackstaff, single depth
charges, twelve (12) 12.7cm barrels
• L – spray shield, main access ladders, bow
jackstaff, main ER air intake hood, bridge mounted
aerials and railings, small gooseneck exhausts
• M – watertight doors, life rings, pulley hooks for
torpedo reload gantries, air intake
• N – paravanes (2), equipment boxes, hawser reels,
smoke screen oil dispersion fans, (6), deck hatches
• P – blast bags (six each for level or raised
positions)
• Anchor chain – 2 lengths, one for each anchor
Notes
on selected Print Rafts
Bridge
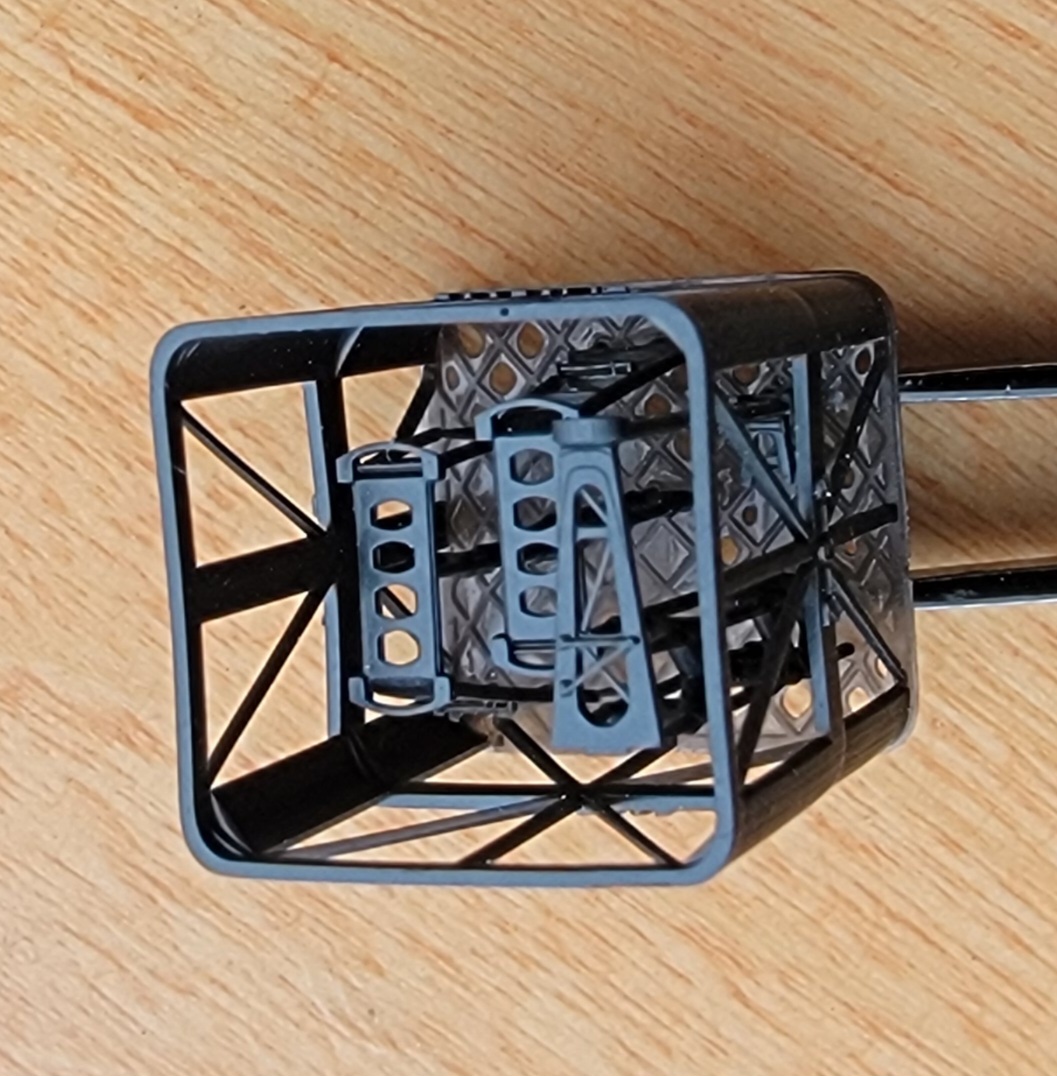
– overall, very well done with wing supports,
integrated ladders and navigation lights. Noteworthy
is the proper, though separate (part Z4 - 4) inclusion
of the support trestle that held up the rear of the
bridge over the main deck. It even has lightening
holes.
Main
gun director –beautifully printed and correct for a
Yugumo class, with a small cupola as befits the early,
original fit ships. Even better, all the shutter doors
are open, with printed internal binoculars and
sighting mechanisms. That’s a really nice touch. The
print raft doesn’t really allow for a good photo view
of those internal mechanisms.
Forward
Port and Starboard Torpedo reload stowage containers –
printed with lightening holes and open access hatches.
Gun
turrets – correct with stiffening bars on all three
turrets, plus grabrails.
Funnels
– impressive with steam pipe whistles, funnel grills
and grab rails
|
|
|
| BRASS ROD & DECALS |
|
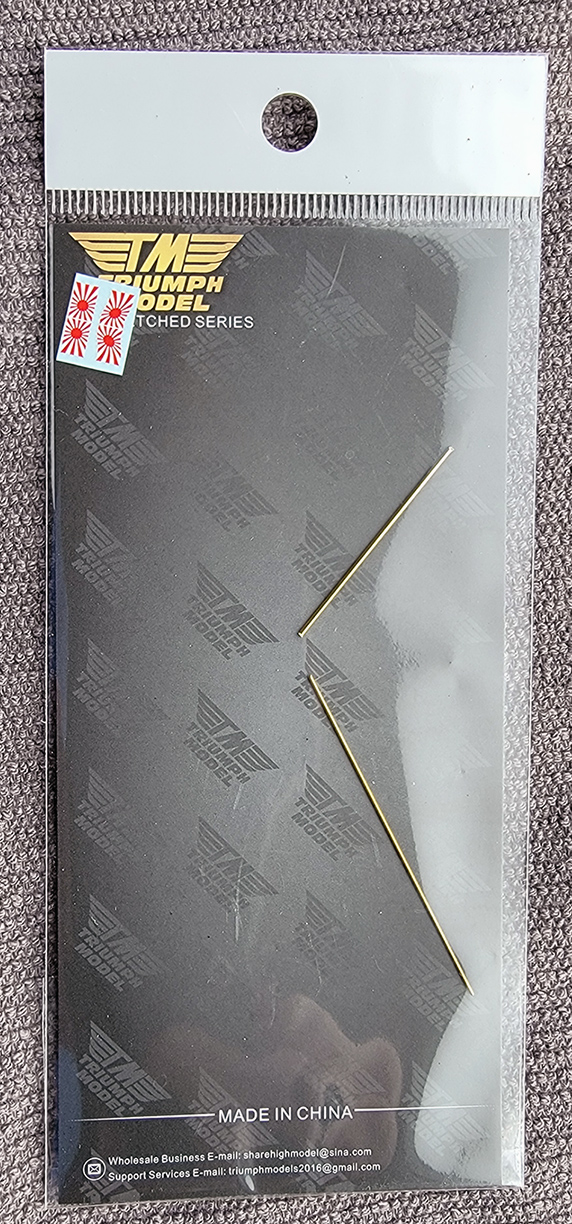
The full hull kit
comes with brass rods for the auxiliary galley pipe that
is mounted to number one funnel and for the two
propeller shafts. The rods must be cut to size based on
measurements listed in the instructions.
Two Japanese flags are included, one in “wave’ mode.
There are no registration issues. |
|
|
| INSTRUCTIONS |
|
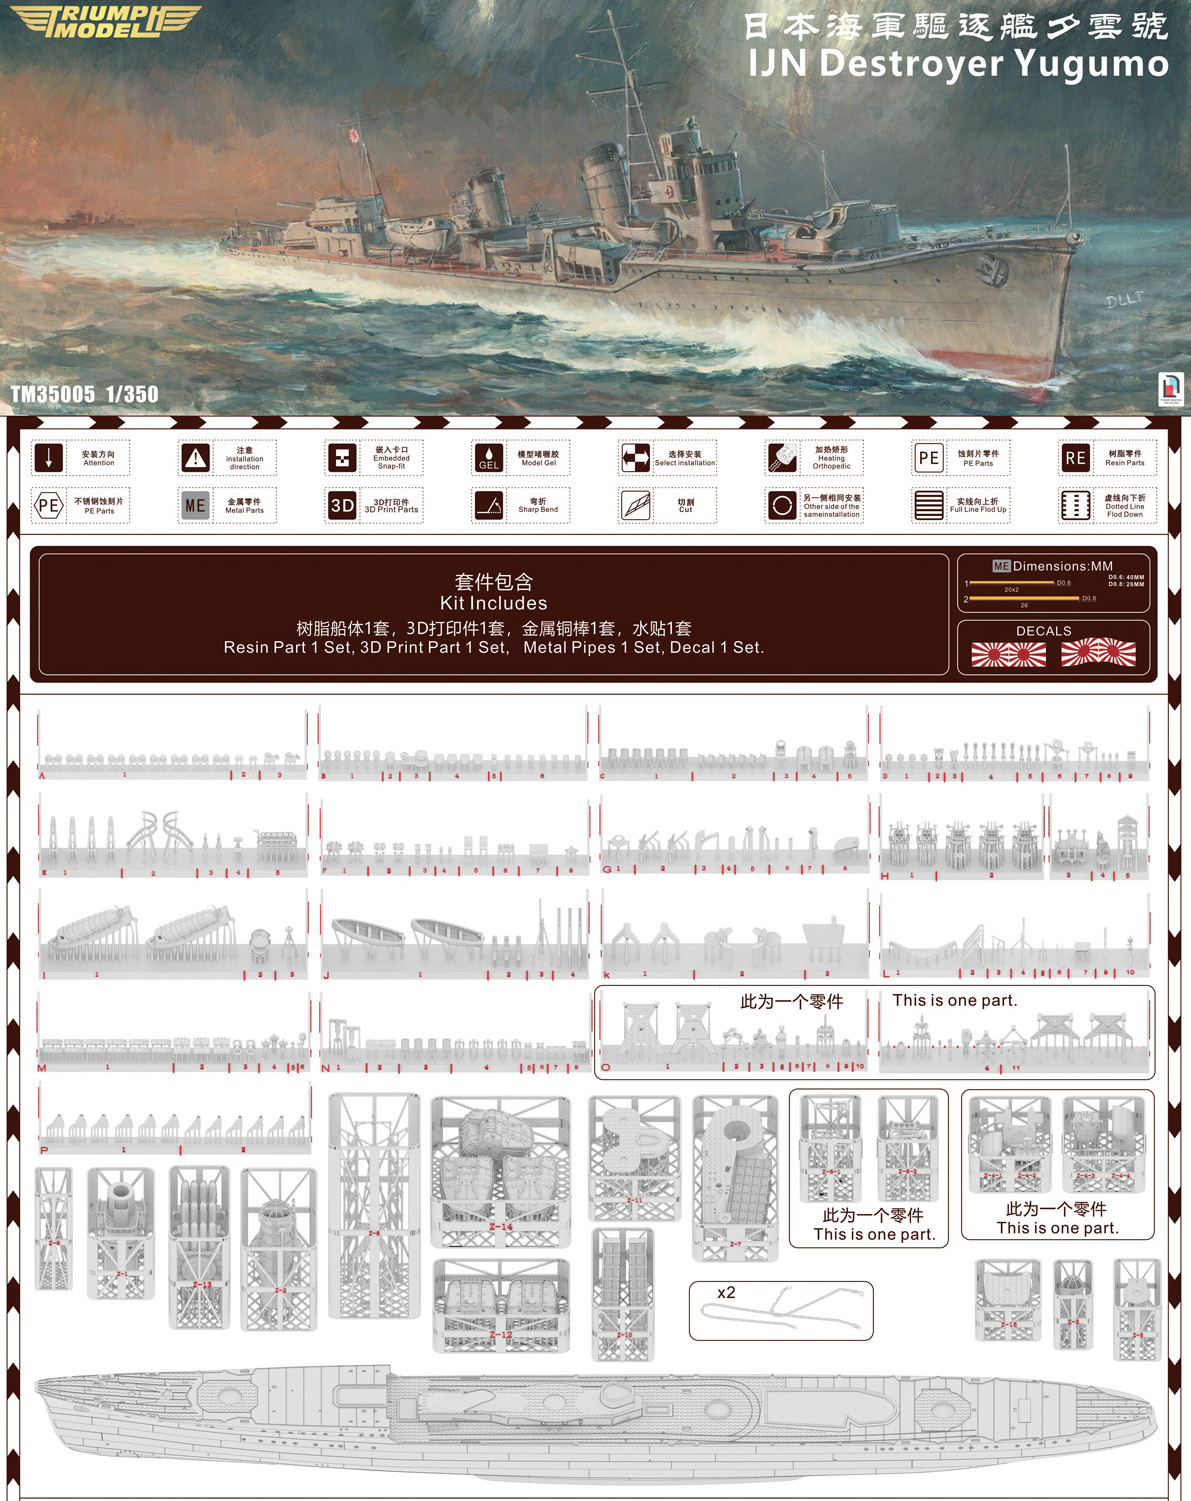
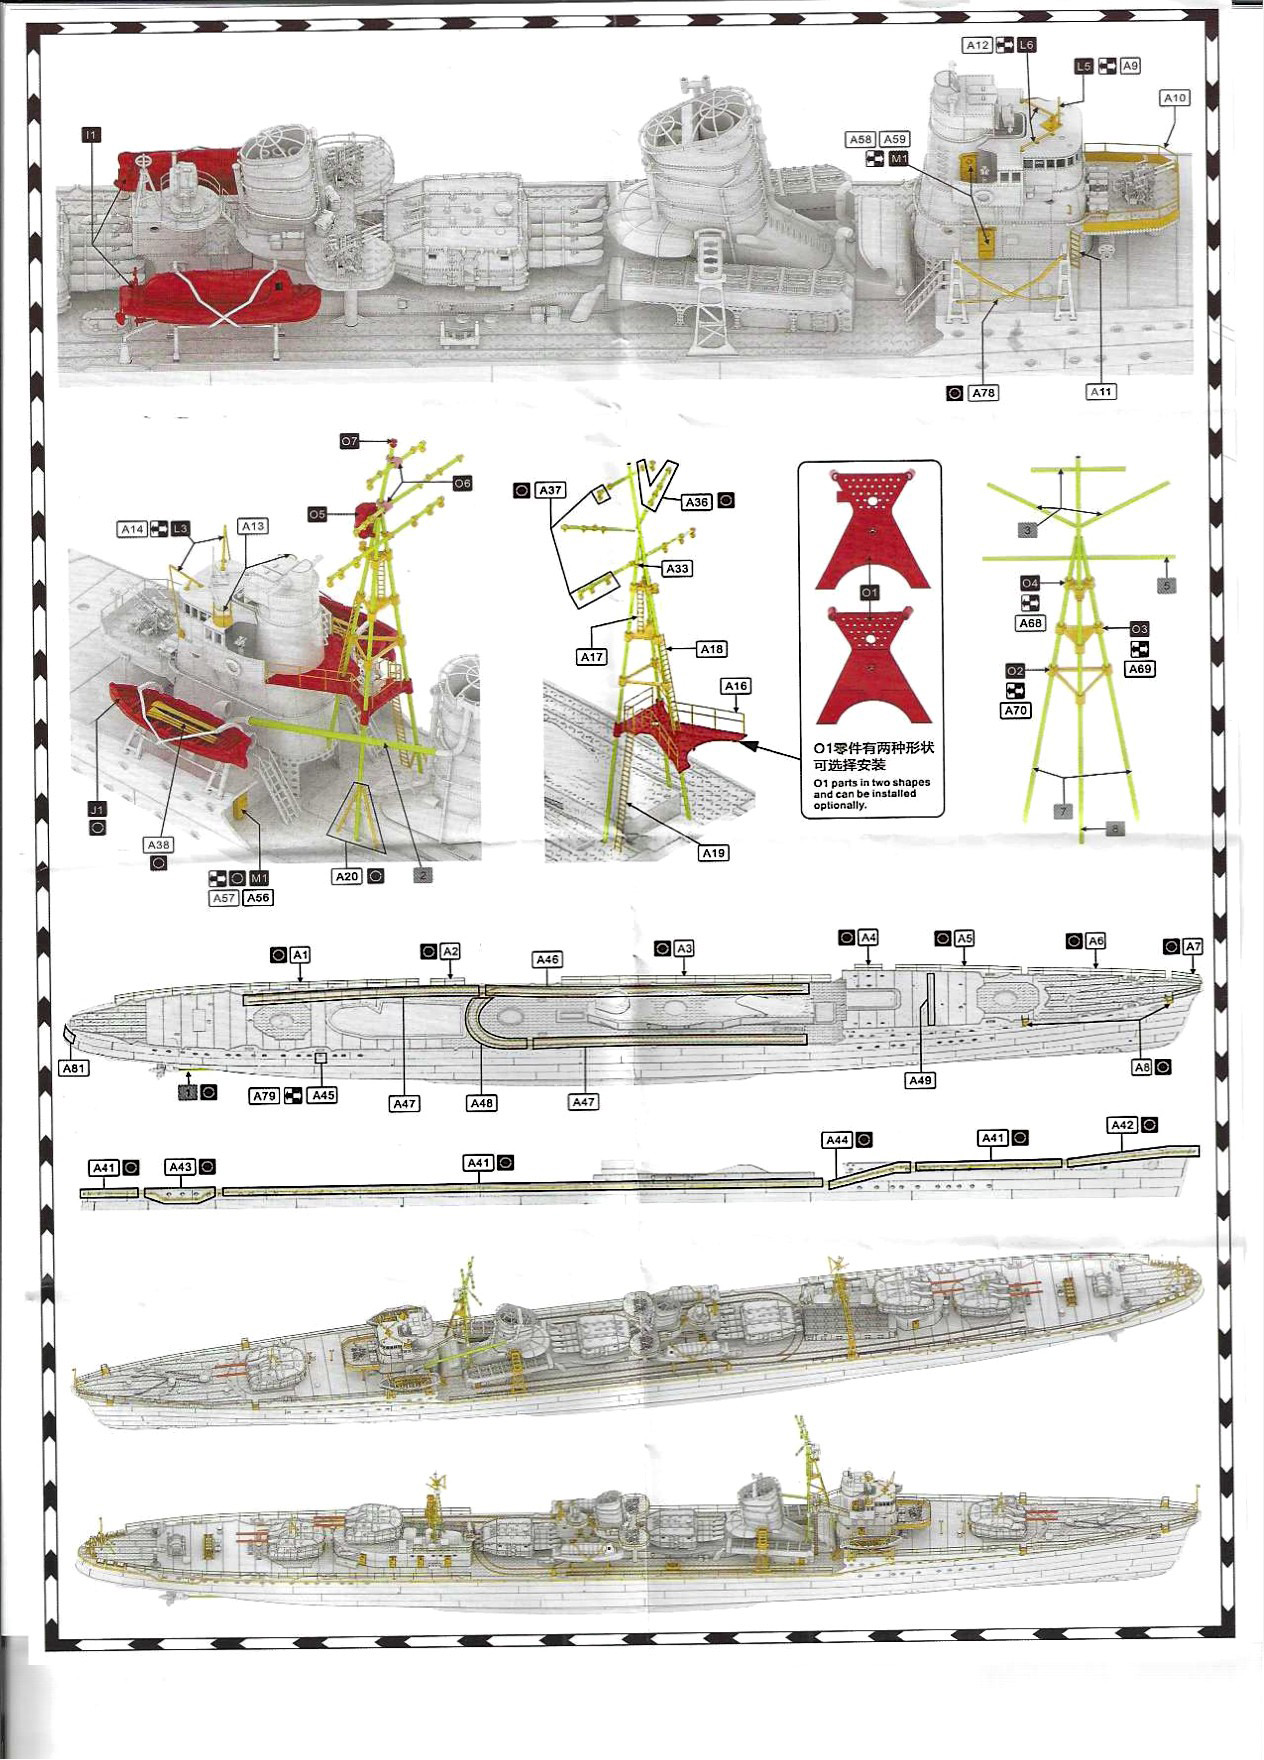
These are printed in
full color on one large, semi-glossy, multi-paneled
sheet, front and back. The wording is limited in both
English and Chinese, but the illustrated pictorial
layouts are both straightforward and informative. The
top of the front page displays a copy of the box art
plus a 3D rendered parts manifest.
The images of the print rafts on the parts manifest have
numbers and letters as identifiers, but the printing is
extremely small. Magnifiers will be helpful.
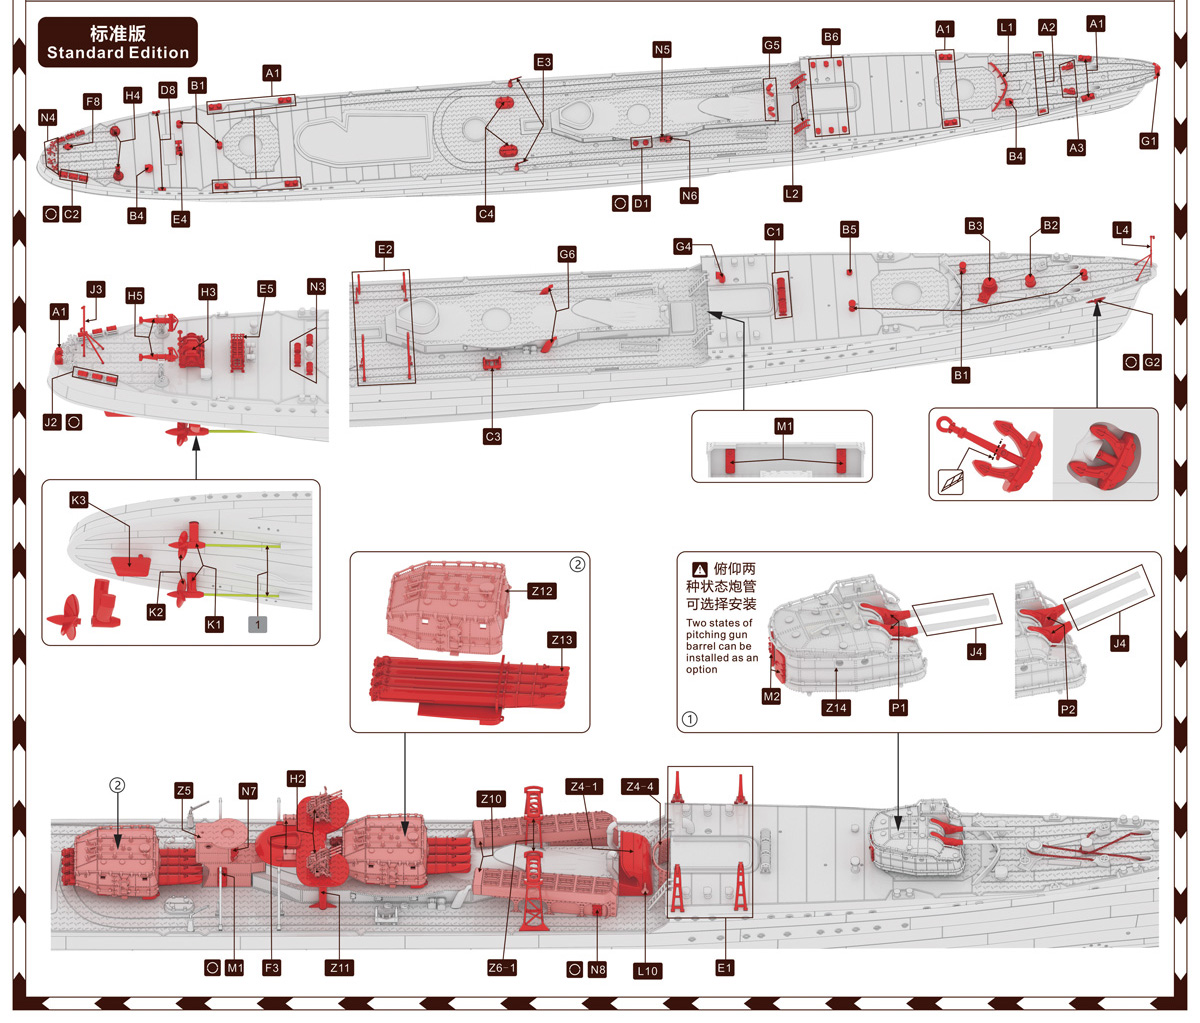
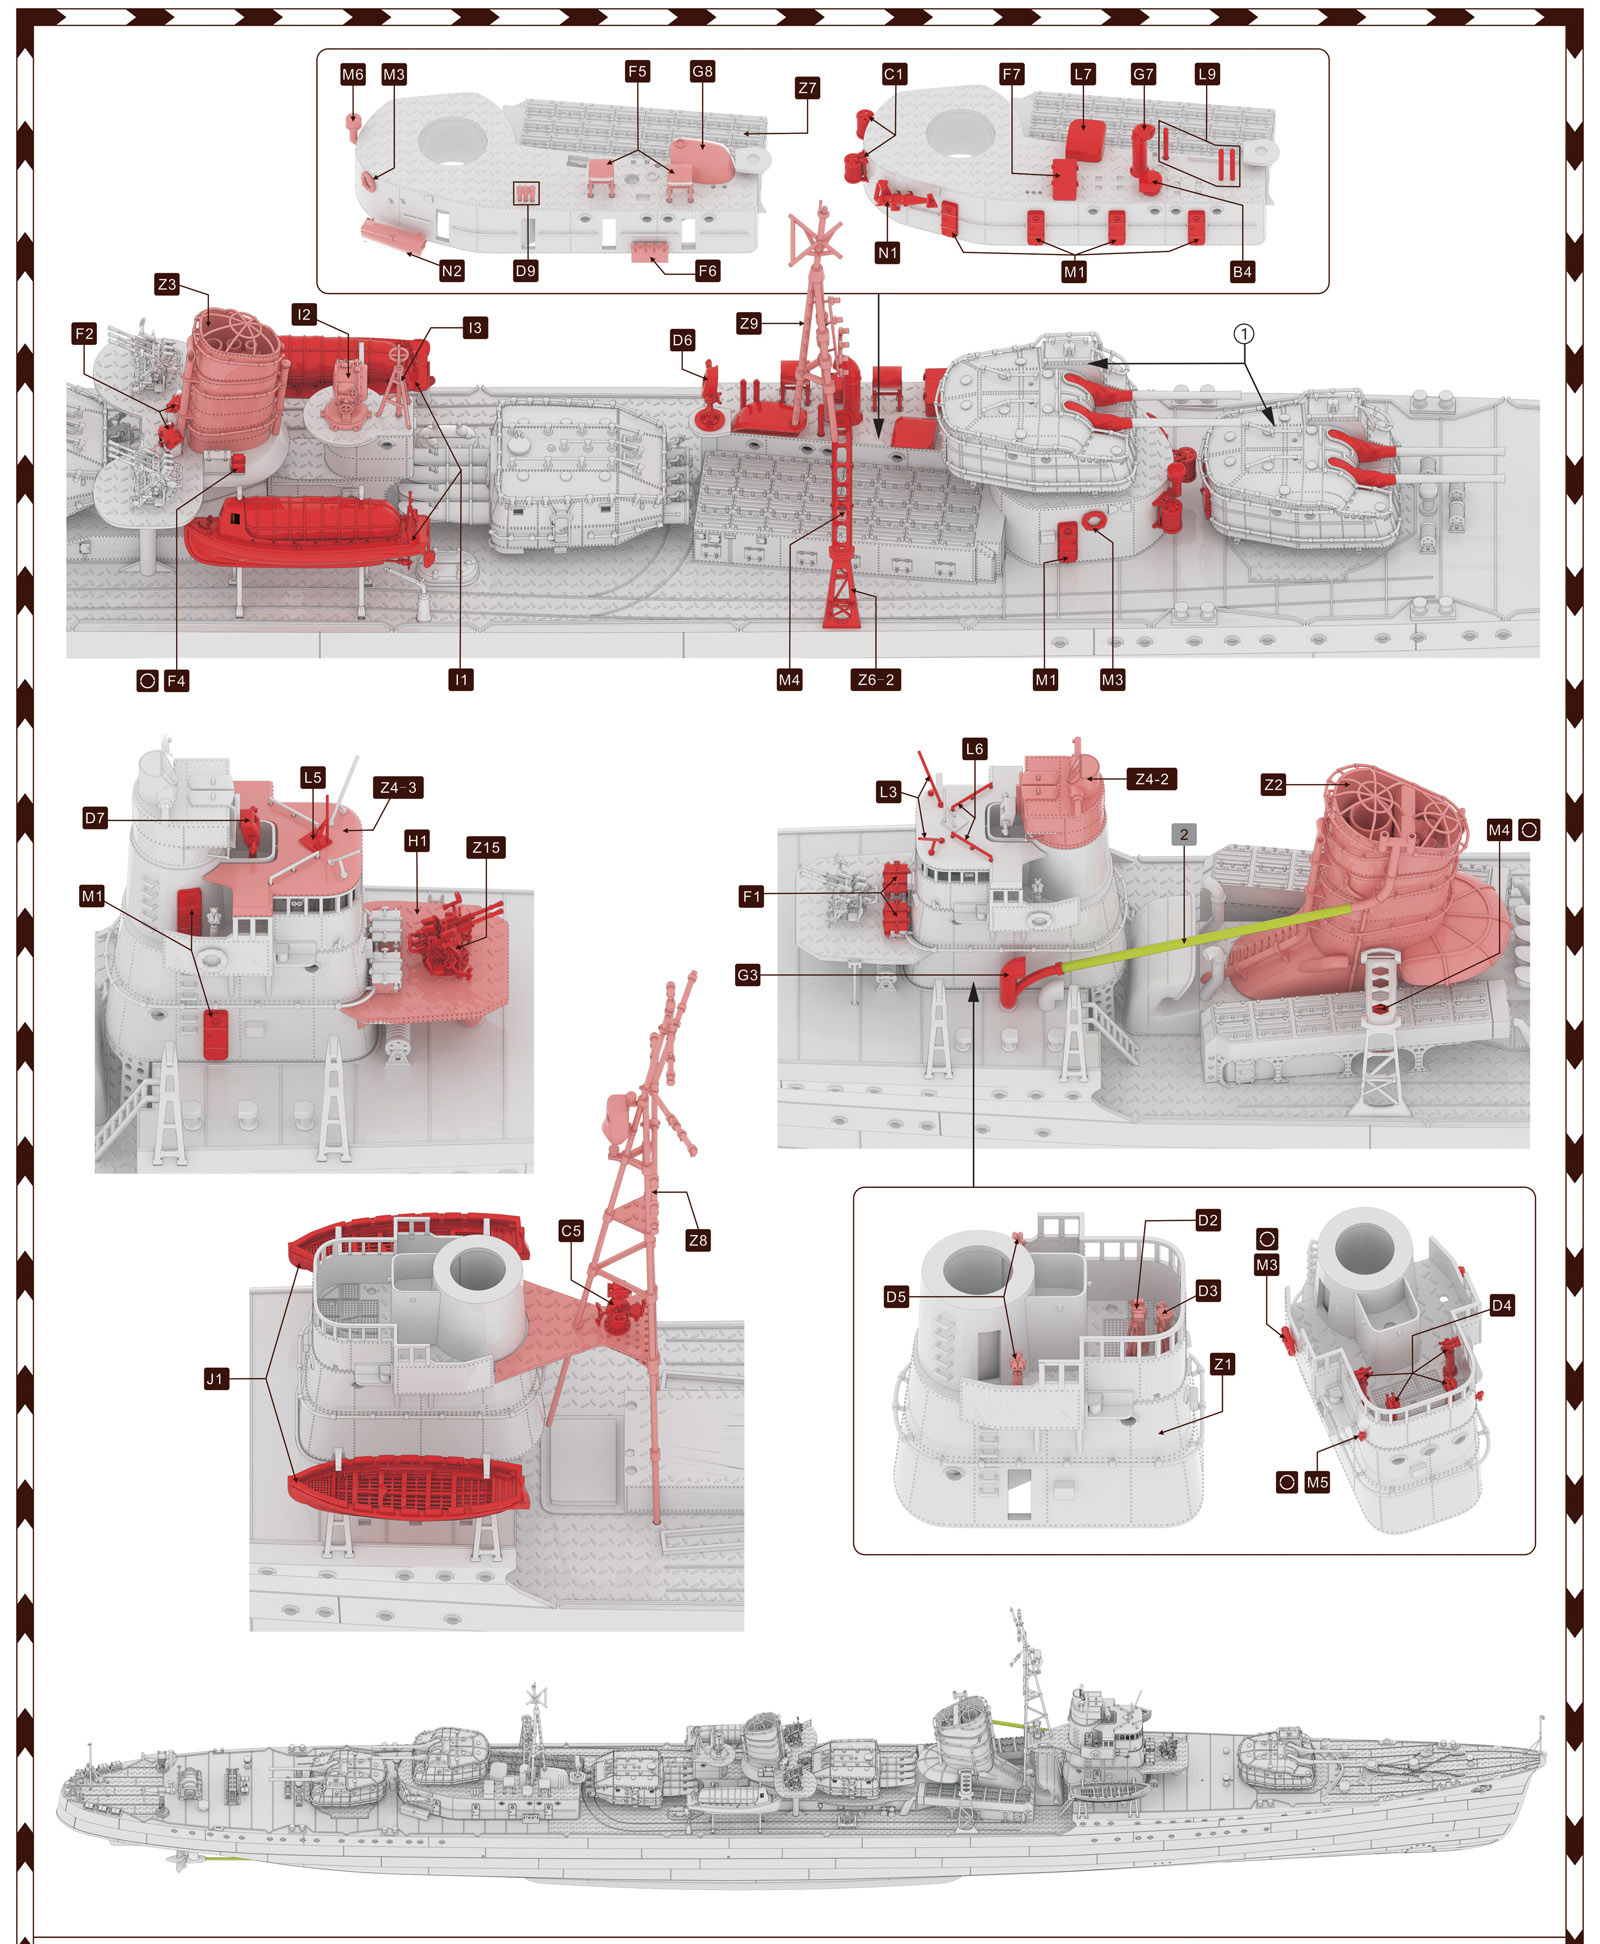
The bottom of the front sheet displays 3-point
perspective images of the standard kit, depicting
placement of all the various printed pieces in red color
against the gray hull. Additional steps are carried over
onto the back of the sheet. This applies to the
construction of substructures as well.
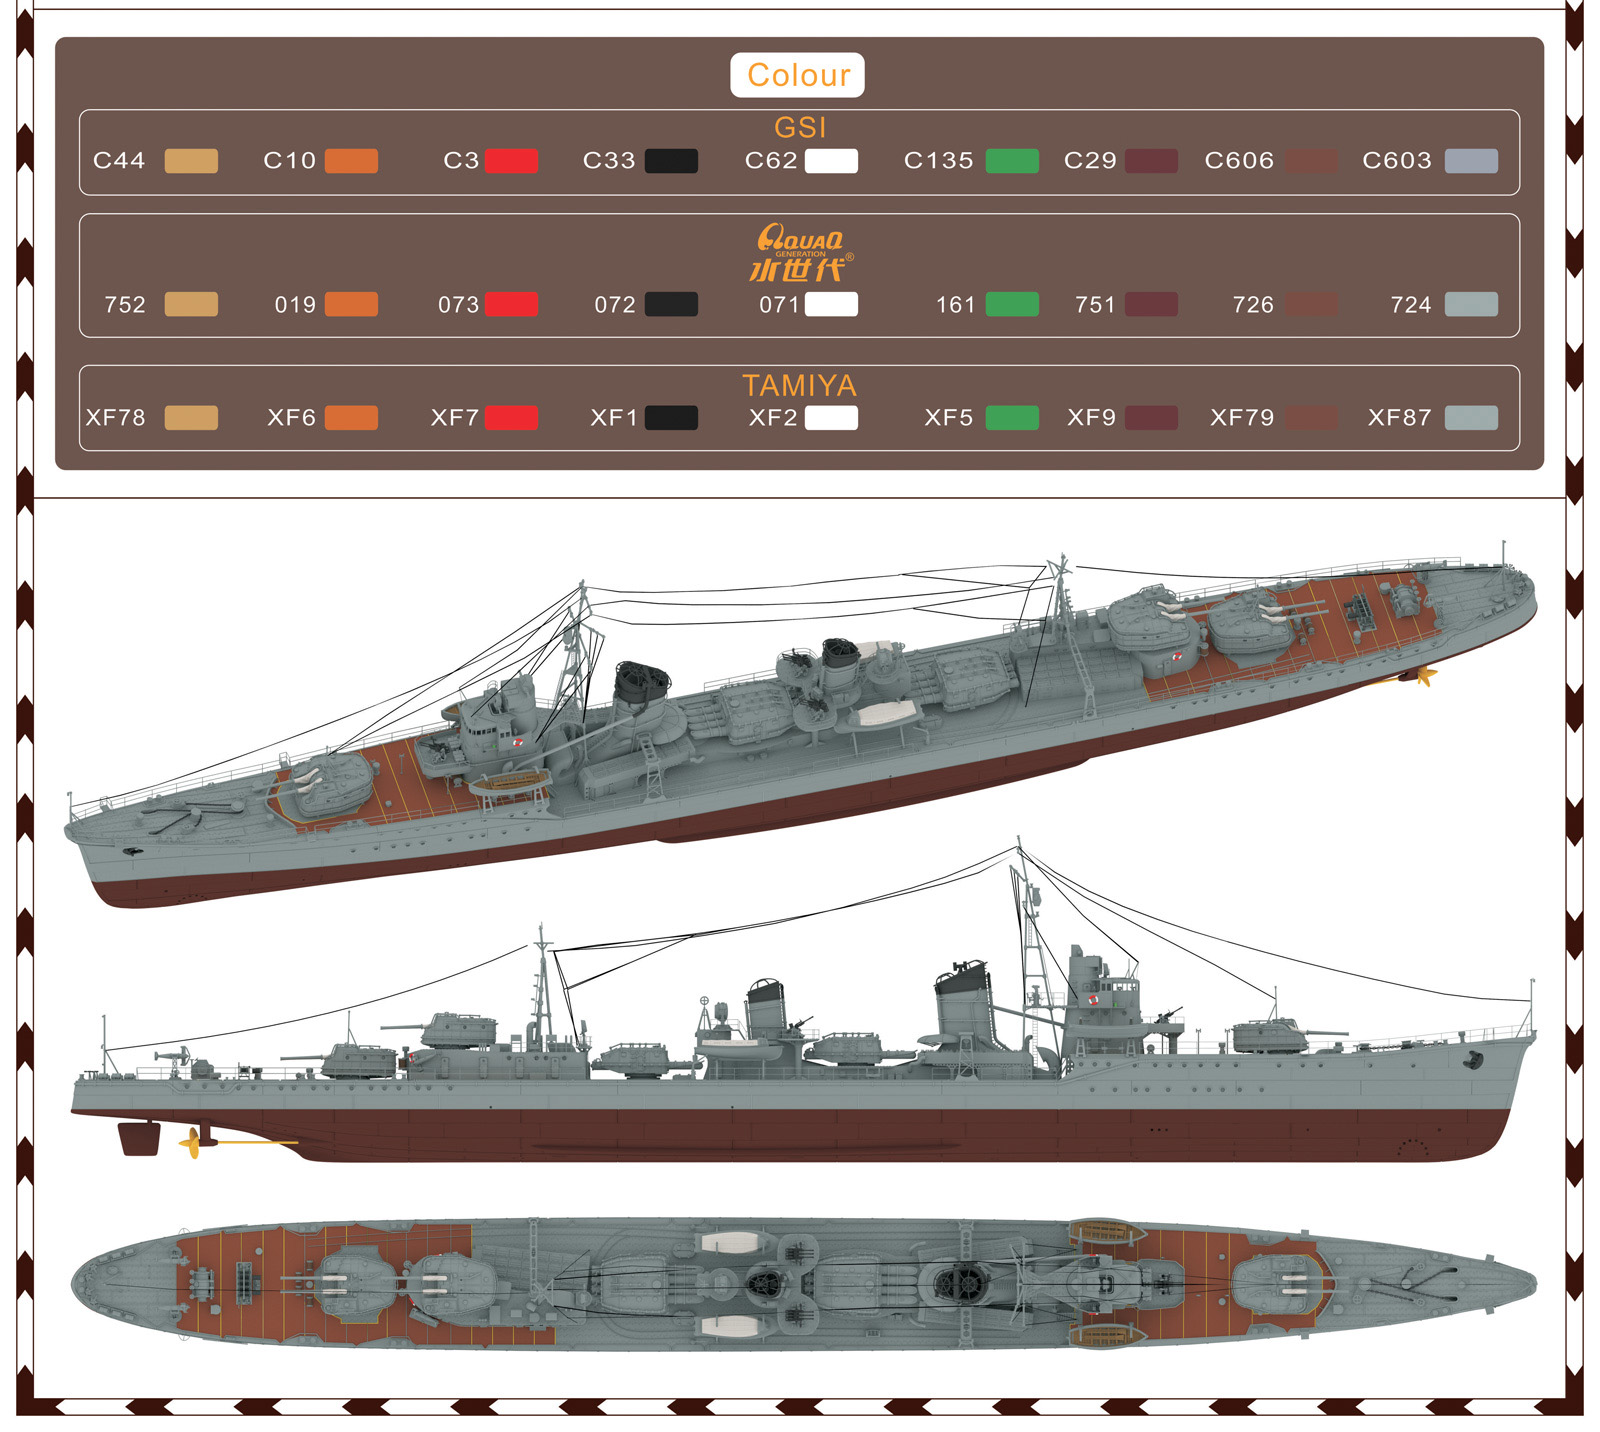
Also included on the back sheet is a color plate with
the ship’s color scheme in 1941-43. Colors are keyed to
three different paint suppliers, GSI, AquaQ and Tamiya,
but there is no direct linking of a paint color with a
specific ship color. The modeler is left to match colors
via the Mk. 1 eyeball. |
|
|
| DELUXE UPGRADE PACKAGE |
|
| These packages include photoetch,
brass barrels, and a paint mask. |
|
| PHOTOETCH |
|
|
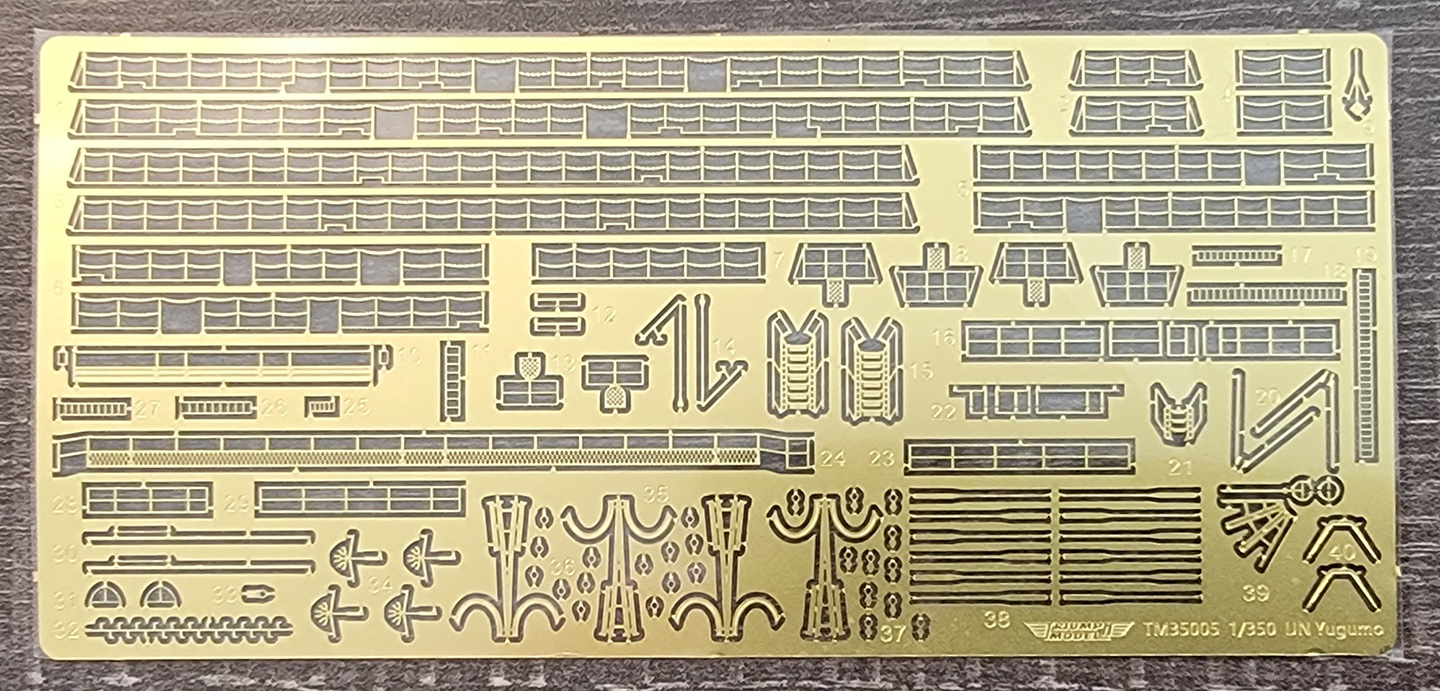
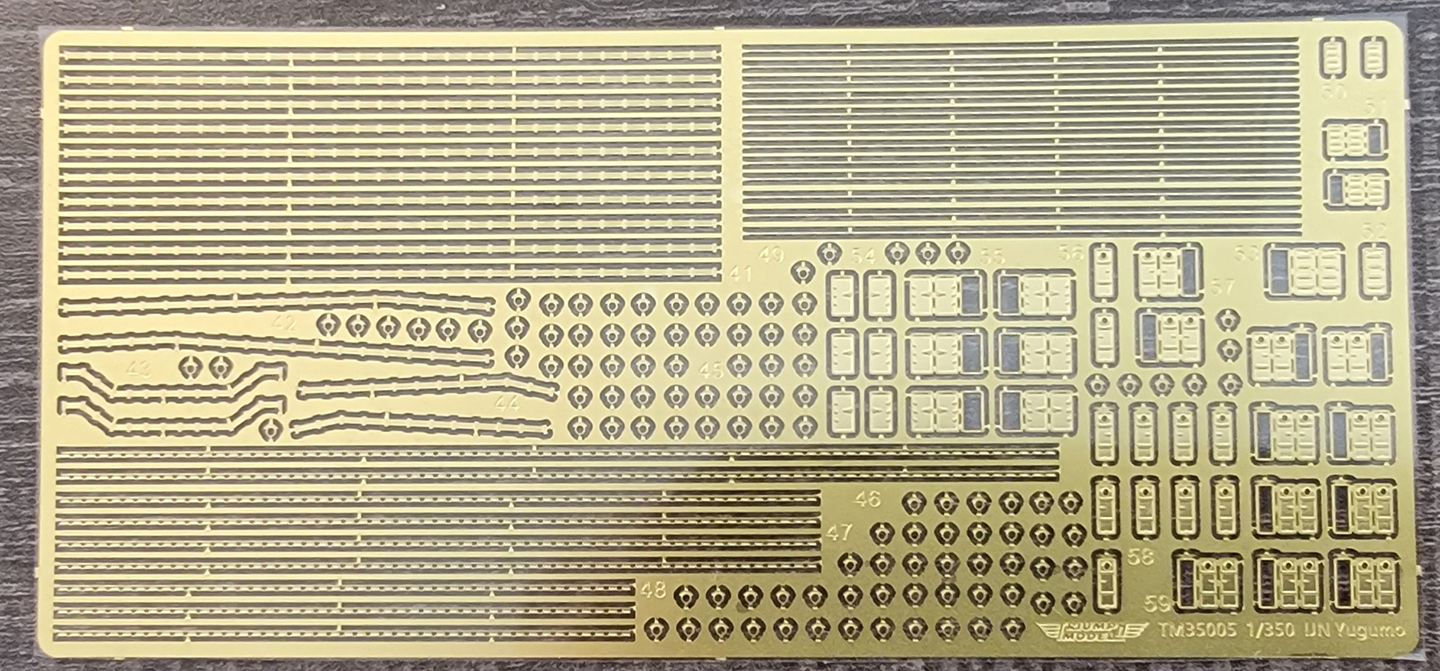
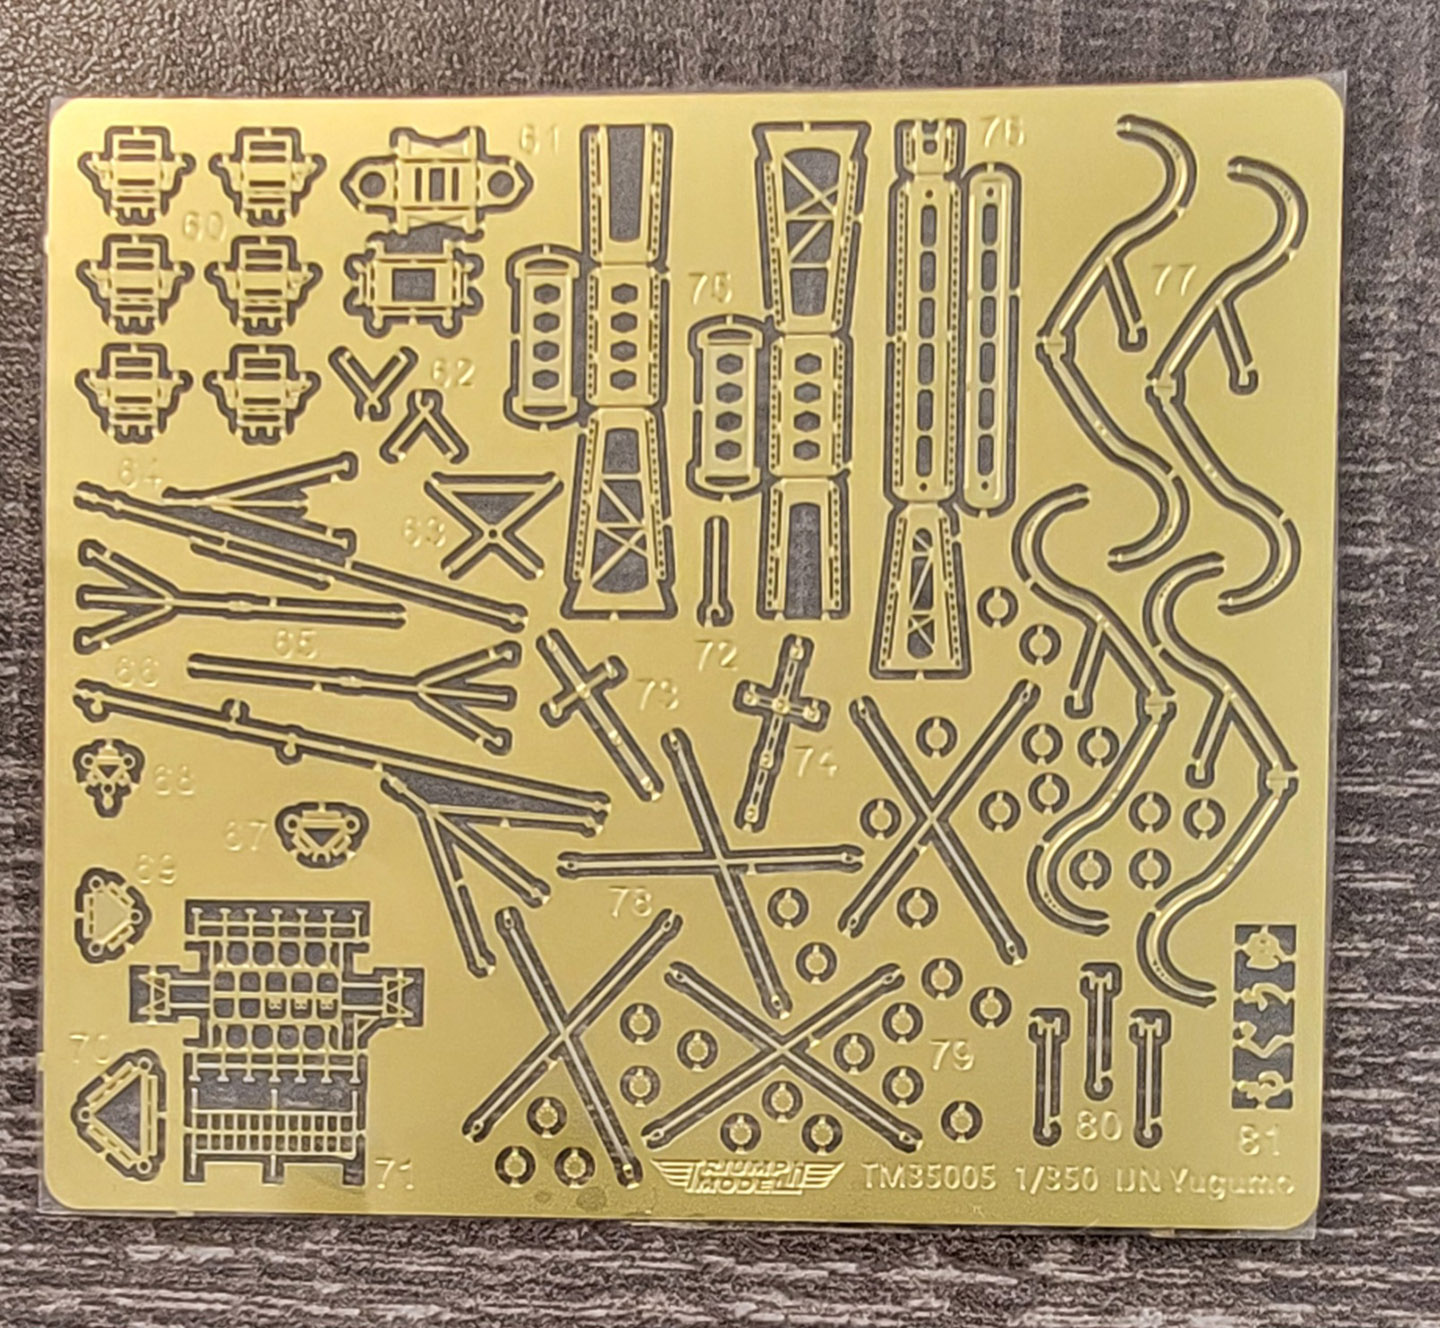
There are three comprehensive
frets of PE.
Fret 1 contains all the main deck railings for the
ship, access ladders, boat davits for the 7m cutters,
railing for the AA bandstand around funnel # 2, smoke
generator dispenser arrays, lookout cages, RDF
antenna, smaller access ladders and railings, oars, a
ladder meant for the foreleg of the mainmast, and
other small pieces. The main deck railings are
properly drooped chain configuration.
Fret 2 holds the numerous parts for the degaussing
cable, watertight doors and frames, porthole rims with
eyebrows and porthole covers, brass tie-down strips
(for the linoleum deck coverings) and torpedo trolley
rails. The trolley rails are properly arched.
Fret 3 holds jackstaffs, the aft boat davits for the
motor launches, single and athwartship depth charge
racks, the torpedo reload gantries, small and cross
braces for the foremast tripod, a torpedo trolley, the
maneuvering light array, some small deck exhausts,
some porthole covers, and a few smaller items.
Notes on the kit degaussing cable pattern
The construction of the Yugumo class was evenly
divided between three shipyards: Maizuru, Fujinagata
and Uraga Dock. As these vessels were all completed
just as or after the war began, each came out of its
yard with an external degaussing cable already
installed on the hull. Each shipyard produced its own
pattern, though none were that dramatically dissimilar
from one another. The biggest point of differentiation
occurred over the last 50 feet of ship’s length at the
stern, where the cable usually dipped in some fashion
to accommodate the propeller guards. There were some
other, subtle differences forward in the vicinity of
the forecastle break as the cables rose one level
above the main deck to the forecastle deck. For
simplicity’s sake, these notes focus just on the
stern.
The Maizuru yard’s stern pattern was the simplest,
with the cable mounted horizontally around the stern
at the same level below the main deck as the rest of
the cable. The pattern from Fujinagata dipped downward
in a gently slope along the last 50 feet of length to
the very end of the stern. The pattern from Uraga was
the most complicated, with the cable dipping down,
running horizontally for about 20 feet, then angling
back up and resuming a horizontal attitude back to the
stern. This was the same pattern as was seen on the
Kagero class ship Yukikaze and is probably the most
familiar to IJN destroyer fans.
There is no photo confirmation for Yugumo’s pattern,
but, theoretically, as Yugumo was built by Maizuru,
her pattern should have been the simple wraparound
layout. However, the Triumph kit appears to offer the
Uraga Yard pattern. Still, it’s a multipiece assembly,
so it’s quite possible to replicate the Maizuru
pattern with a little tweaking.
Any modeler seeking information on which sister was
built by which yard can easily access the class
article in Wikipedia.
|
|
|
|
|
|
|
| BRASS BARRELS |
|
| Six turned barrels
are included as befits the three, twin 12.7cm main
battery turrets. These barrels mate with 3D printed
blast bags which are, in turn, inserted into the 3D
printed turret faces. |
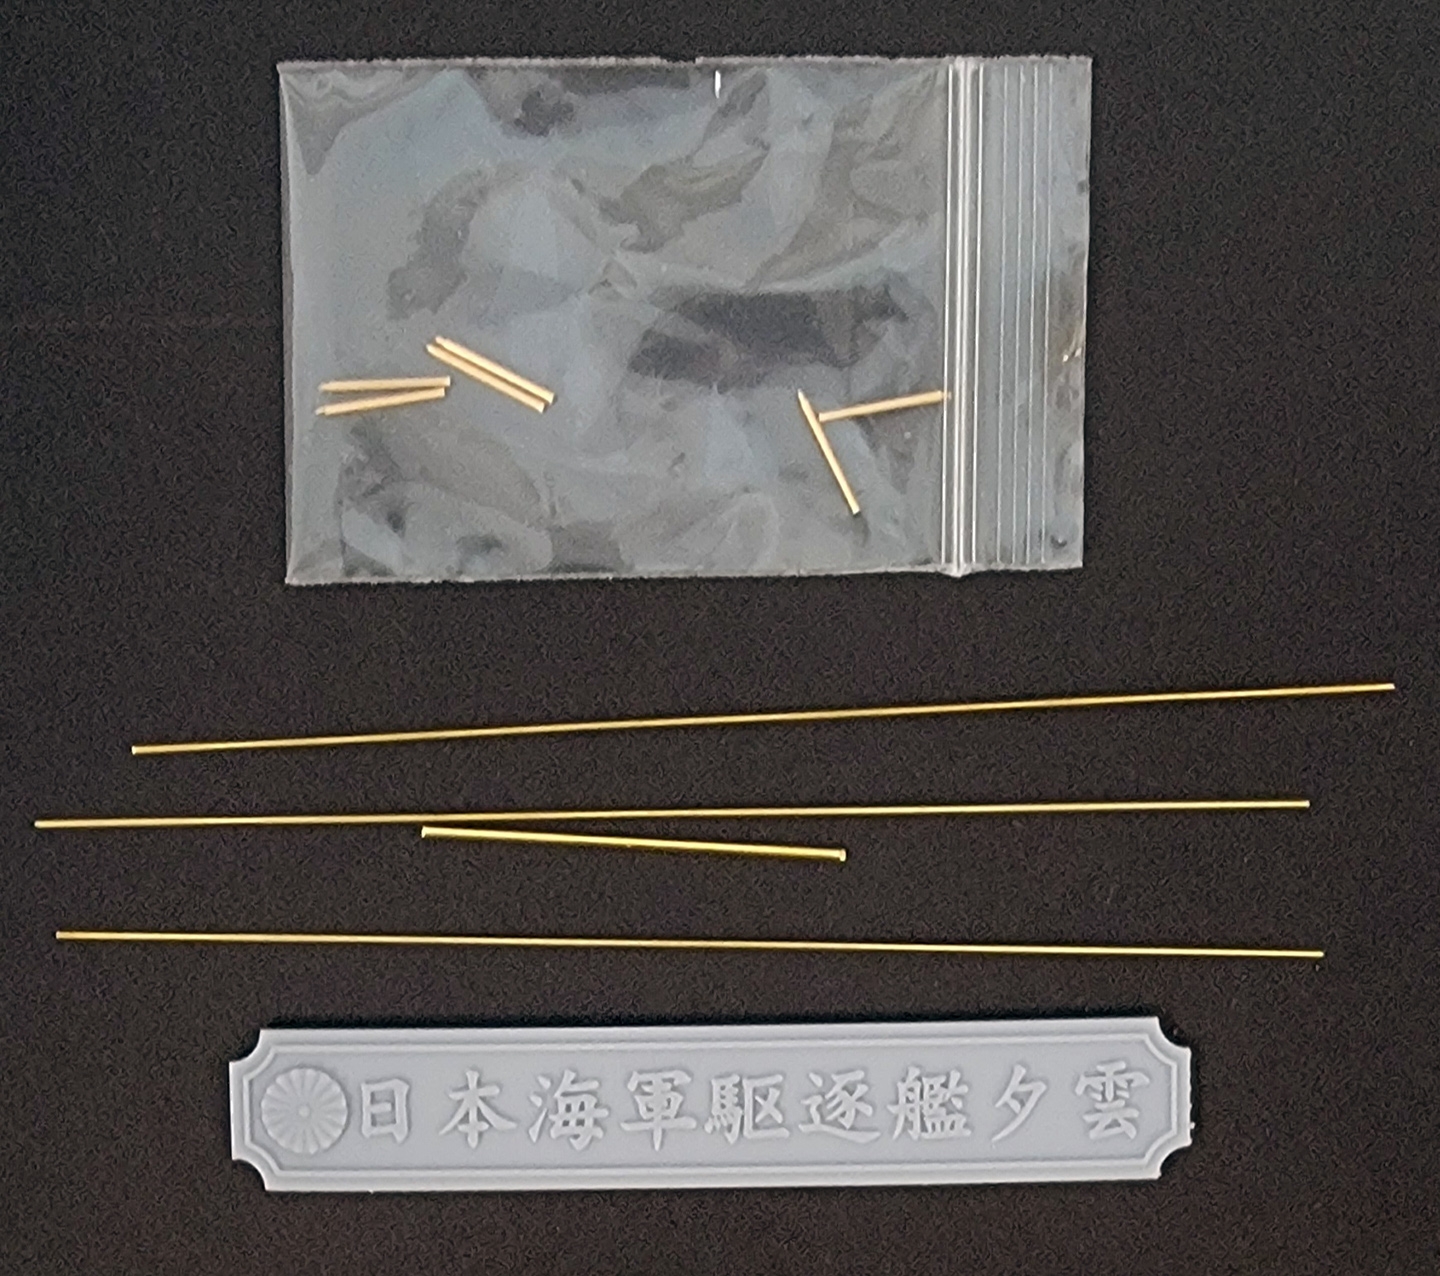
| BRASS ROD |
|
| Five lengths of brass
rod are included. The Upgrade set gives a modeler the
option of creating masts from brass rod and 3D printed
platforms, as opposed to just using the 3D printed mast
structures. |
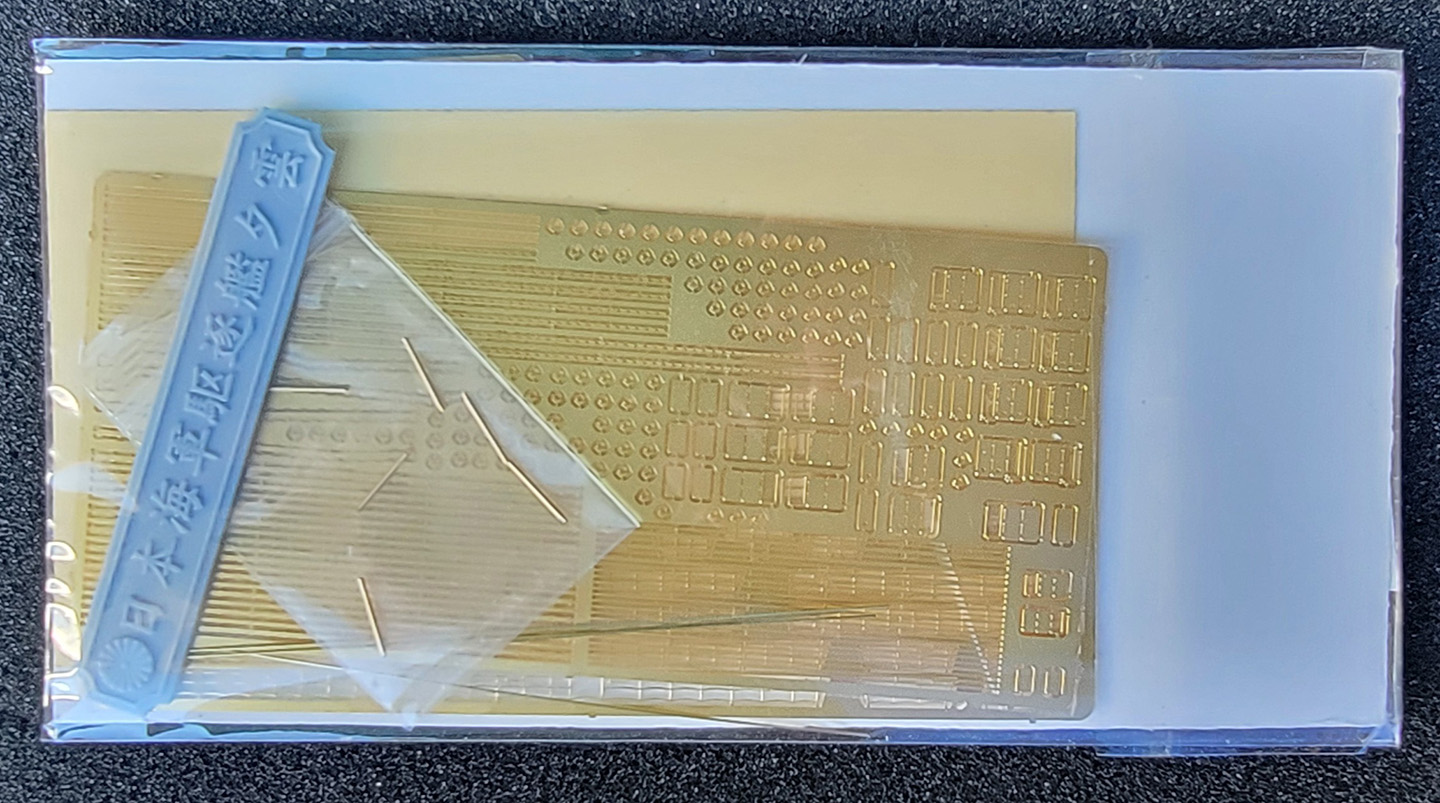
| NAMEPLATE |
|
| It is 3D printed in
light gray with Japanese lettering. The lettering
translates as: “Japanese Navy destroyer “Yugumo”.
Available in both kits. |
|
|
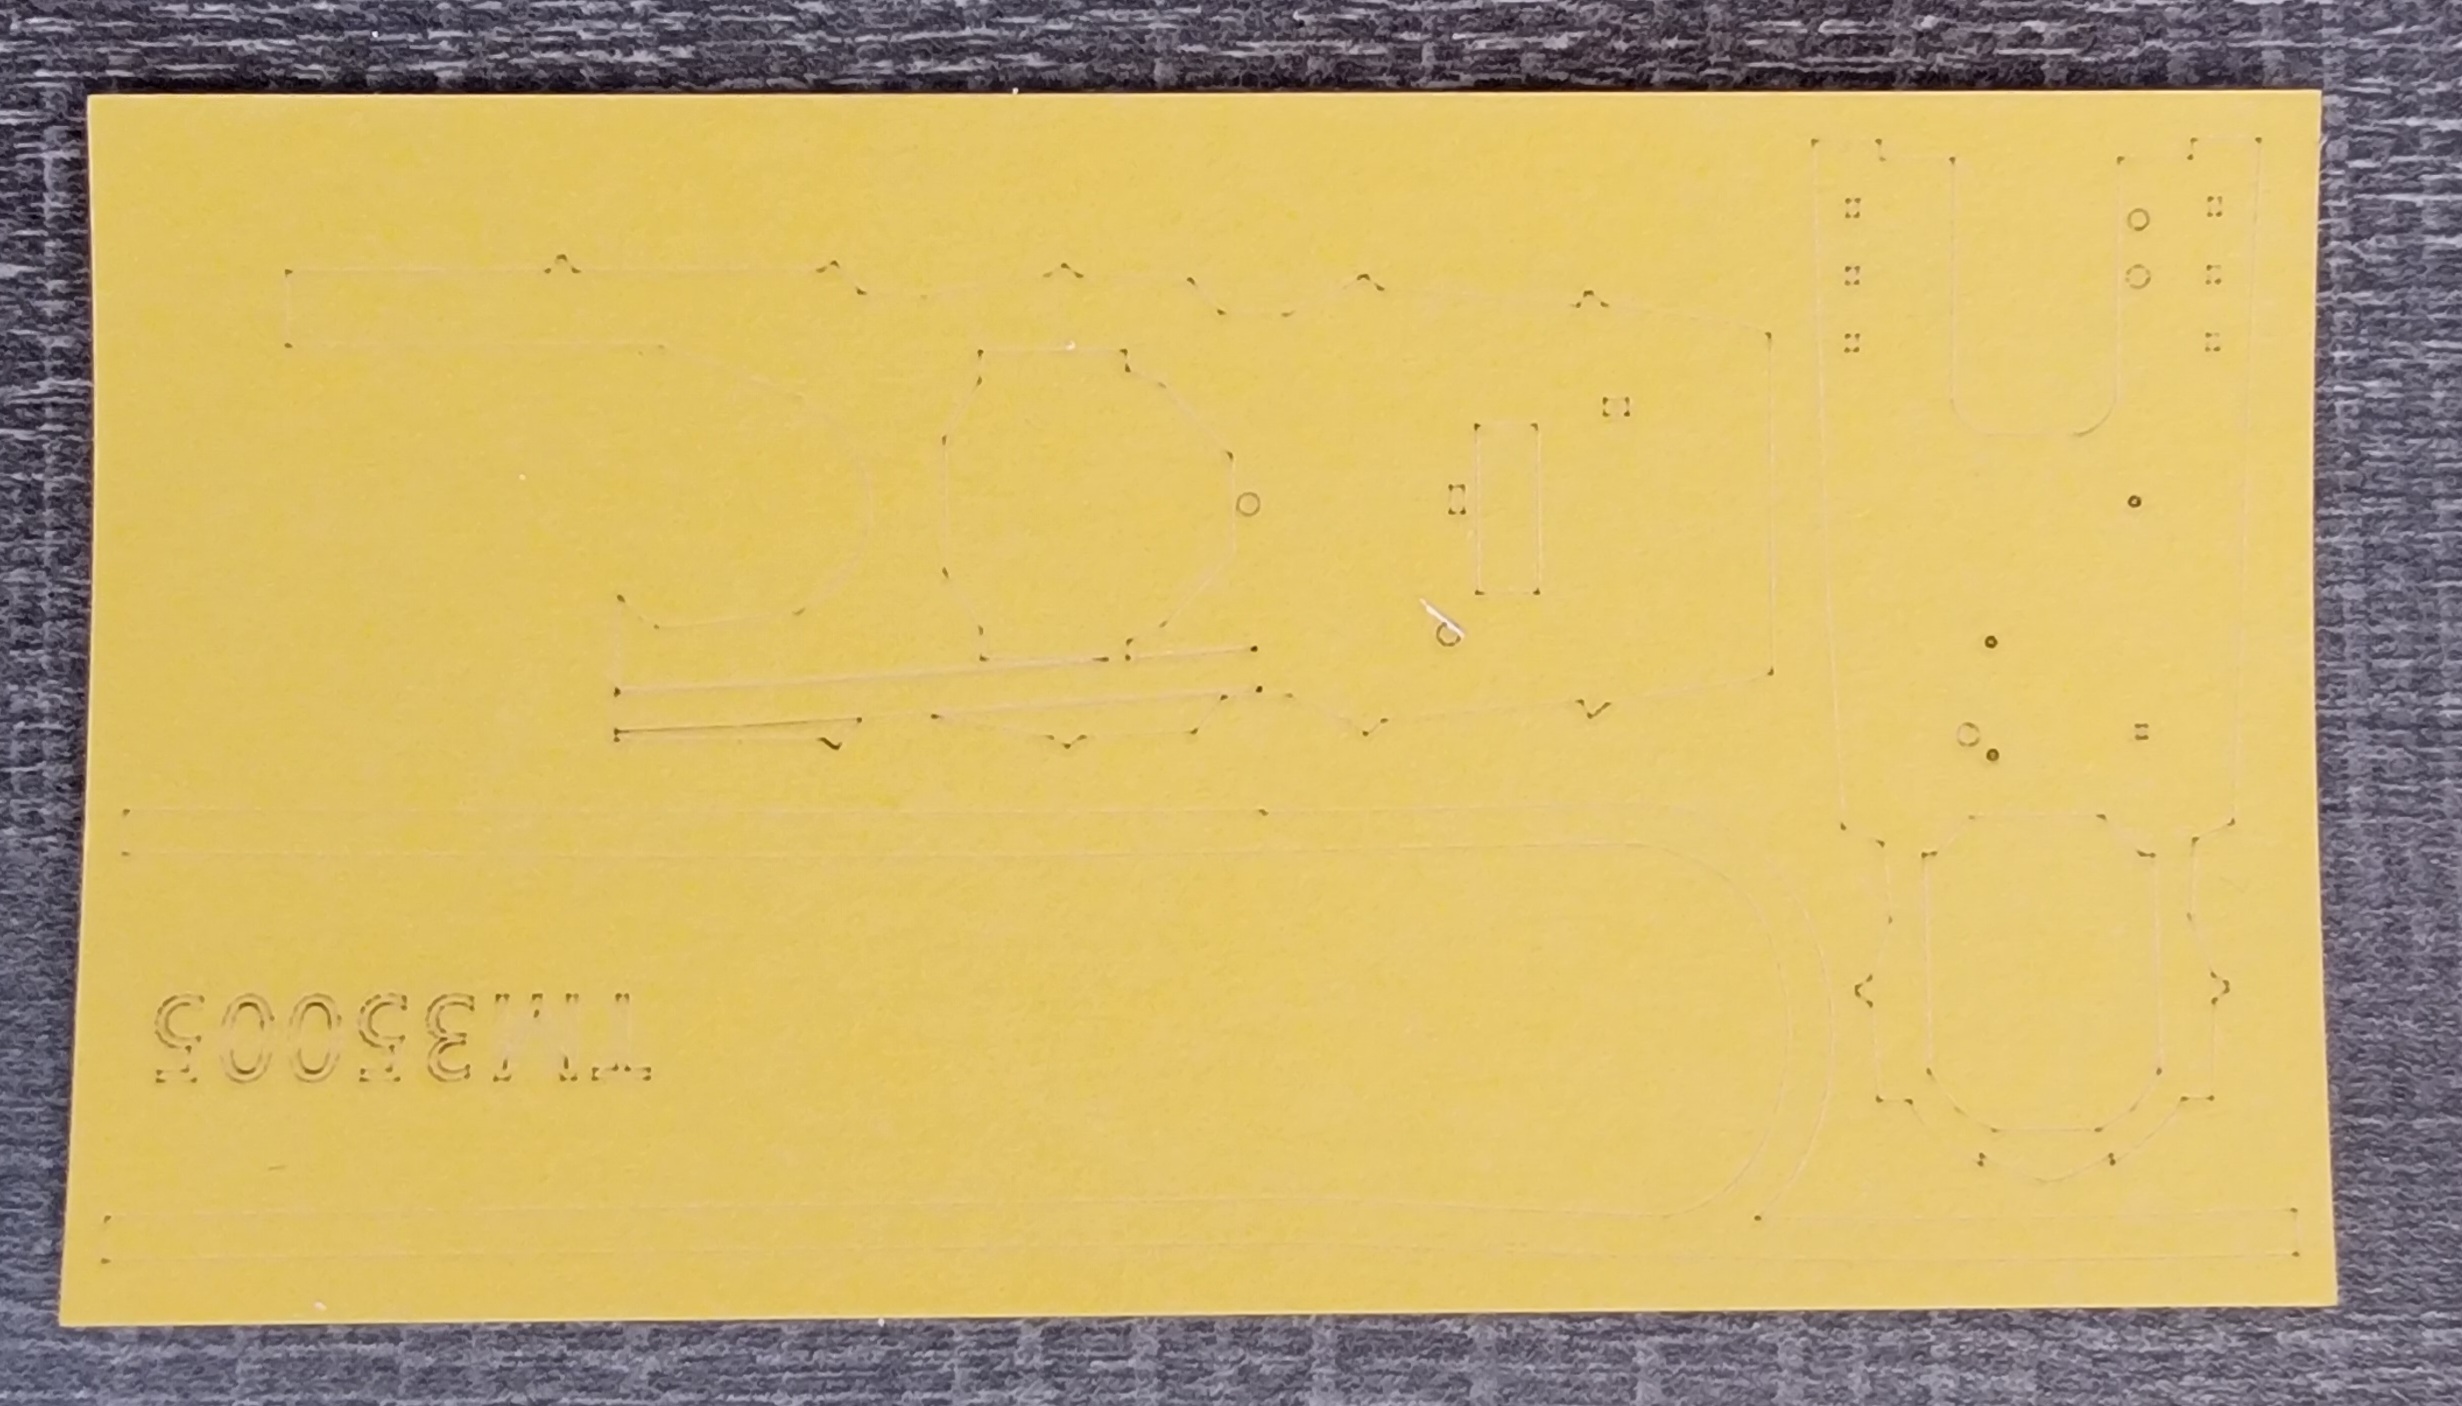
| PAINT MASK |
|
| Thoughtfully
included, this mask covers the linoleum decking fore and
aft. |
|
|
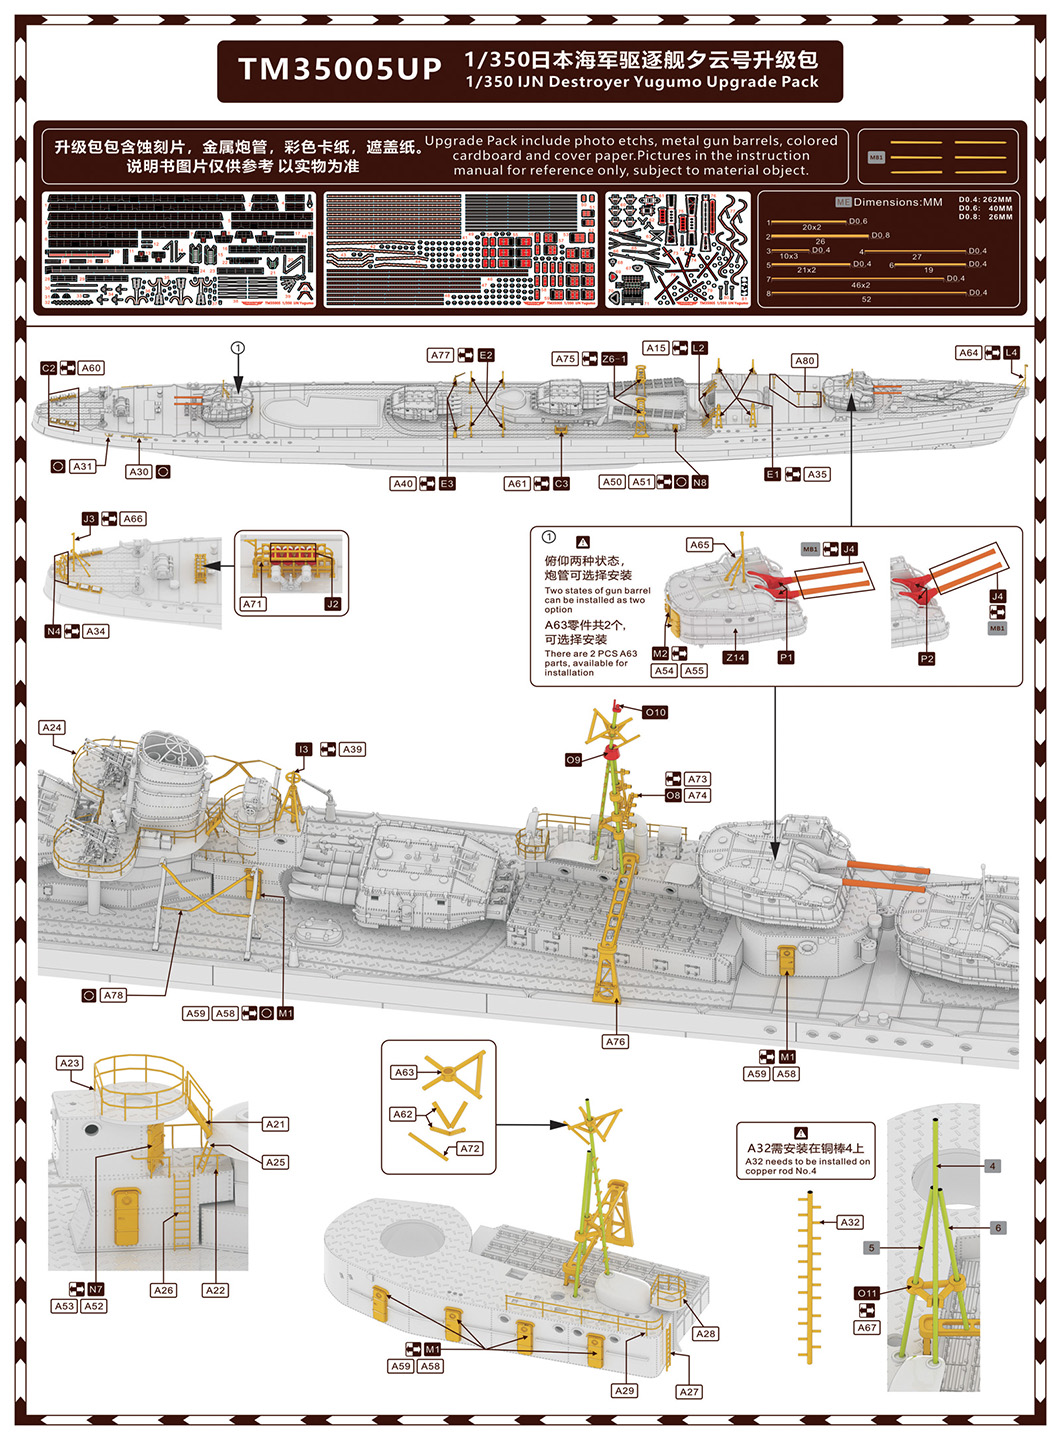
| DELUXE INSTRUCTIONS |
|
| These are in the same
format and composition as the regular instructions, just
on a smaller sheet, printed front and back. The sheet
lays out the photoetch fret and brass parts manifest.
Both sides of the sheet focus on the deluxe upgrade
additions, utilizing the same images from the standard
kit and kit pieces, and then layering on the photoetch
aspects using photoetch imagery in a different color. |
|
|
| FINAL THOUGHTS |
|
|
This
is Triumph’s fifth 1/350 mixed media IJN destroyer kit
released over the last thirteen months.
My
feelings remain mixed about the Triumph 1/350 line. I
applaud the appearance of 1/350 IJN destroyers not
released by other manufacturers. Triumph’s 3D printed
parts continue to impress me as being well detailed,
scaled, and accurate. Improvements have taken place;
the riveting on the superstructures appears to have
been toned down and, the overscale hull plating has
been dialed back considerably to an acceptable level.
Which means that Triumph has been taking its feedback
seriously.
However, there continues to be issues with their resin
hull casting quality control. From a casting
perspective, details are sharp, but the overall
consistency of hull shapes continues to vary. I
admittedly don’t know a lot about resin casting, but I
can’t help but suspect that the tight timing behind
the mass production of cast hulls may not allow for
the resin to cool down long enough before being pulled
from its mold. The result of which is the inconsistent
hull shapes.
Which leaves the modeler with an unexpected hurdle if
a purchased hull is substantially misshapen. Not every
modeler is prepared to straighten a resin cast hull,
nor should they be. Such a situation also runs counter
to Triumph’s own marketing strategy for this line of
kits, which is to provide a “museum quality, premium
feel” kit and a quick, two-day build. It can also
hamper any repeat business on the part of an aggrieved
modeler. So, I hope this situation is rectified soon.
The kit hull also has some accuracy issues, but
surprisingly, I’m less bothered by the overlong
forecastle and insufficient stern rake than I am by
the state of the cast hulls. Somehow, the kit seems to
preserve the overall silhouette of a Yugumo type,
however imperfect that may be. Rivet counters and
modelers concerned with precision will be bothered by
this, but most modelers won’t be. Particularly those
unfamiliar with the class.
I feel that I can neither recommend nor dismiss this
kit.
It’s more of a buyer beware scenario. If one receives
a kit with straight hull, then a very good, though not
fully accurate, model of the ship can be built.
Conversely, a kit with a poorly cast hull will daunt
all but the most determined and/or accomplished
modeler. Unknown is how easily a replacement hull
might be obtained, particularly if the kit was
purchased indirectly. As a review kit, I was able to
get a new hull through direct contact with Triumph.
Most buyers will be dealing with a retailer or an
online source. That might prove to be a high hurdle
for a replacement hull.
Again, just as I reflected upon the Triumph Akizuki
kit in that review, I’d hate to see an effort like
this wasted. A corrected hull, and more consistent
casting would give Triumph a first-class kit.
This is an in-box review only. The review kit came
courtesy of Triumph Models. I don’t see this kit
currently offered for sale by US distributors, but the
cost of the kit alone at Hobbylink Japan is
approximately US$66.00, plus shipping and tariffs. The
Deluxe Upgrade package is $52. Pricing can vary from
other online sites, but this does not account for
shipping or tariffs.
|

|