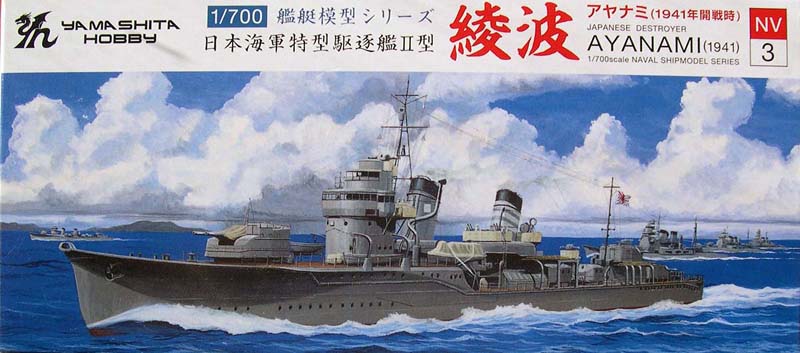
| Yamashita Hobby 1/700 IJN Fubuki Type II Destroyer
Ayanami 1941 Kit #NV3
|
| (Reviewers note: As this is the third review of a 1/700 Yamashita Hobby Fubuki Special Type Destroyer kit that Ive done over the last 15 months, and my fourth review overall of a Fubuki Type, I would think that some of this text will be repetitive to those who have read the prior reviews, particularly as I am reposting previous comments for many aspects of the kit. However, where applicable, I have added additional comments and observations. For those unfamiliar with these reviews, I am also reposting the background and design comments, tweaked accordingly for the Type IIs.) | |||||||||||||||||||||||||
| Background | |||||||||||||||||||||||||
| The Fubuki class of destroyers was a new, enlarged Japanese destroyer design that emerged in the wake of the naval disarmament treaties of the early 1920s. They were meant to be a key component of the Imperial Japanese Navys doctrine of whittling down an opposing navy (i.e. the USN), through long range engagement of massed torpedo attacks, particularly at night, prior to the engagement of the capital ships. | |||||||||||||||||||||||||
| Design | |||||||||||||||||||||||||
| To repeat what I wrote in the 2011 review of the 1/350
FineMolds Ayanami kit, the Fubuki type destroyer (known as the Toku-gata,
or Special Type, in Japanese naval parlance) was revolutionary in naval
design, given its greater size and armament versus other navies destroyers
at the time of its introduction in 1929. The design packaged three twin
5 inch mounts in enclosed turrets, a heavy battery of nine 24 torpedoes
with reloads, long range and a high speed in a powerful package whose destructive
broadside outmatched anything comparable of that time, including most navies
light cruisers. Ship specifications and a reasonably accurate background
on the entire class is available on our CASF
Fubuki thread.
There were three groupings, known as the Special Type I, Type II and Type III. (The groupings are also referred to by the name of the lead ship in each group, respectively: Fubuki, Ayanami & Akatsuki classes.) Each subsequent group saw incremental improvements in their main armament turrets, torpedo reload equipment, engine room arrangements, and command facilities. The Type IIs introduced a revised main turret, known as the Type B turret, an enlarged bridge with a vastly improved main gun director, revised air intakes placed at the base of the funnels, and adopted the lengthened forecastle that had appeared on several of the Type I ships. The new air intakes were actually introduced with the Type 1a ship Uranami, which was a transition ship between the two groups. All group members underwent reconstruction between 1935 and 1937as a
result of issues with hull strength and top heaviness. Hull plating was
reinforced with additional plating, and more ballast added.
It was in this revised configuration that all the Type IIs began the Pacific War. |
|||||||||||||||||||||||||
| Brief History | |||||||||||||||||||||||||
| Ayanami ( The Fourth Fleet incident, in which several ships suffered severe and unexpected damage while on maneuvers during a typhoon, occurred in 1935. Two Fubuki class destroyers lost their bows as a result. Accordingly, Ayanami and her sisters underwent hull strengthening with additional plating and modernization in the mid 1930s. Displacement went up by a few hundred tons, and top speed fell slightly as a result. Other changes included revising the main battery turrets and adding metal weather shields to the torpedo mounts. She and her division were participants in several operations off the Chinese coast from 1937 to 1941 as part of the Second Sino-Japanese War. These included covering the landings by Japanese forces at Shanghai and Hangzhou, as well as patrols off the Chinese coast. Prior to the start of the Pacific War in late 1941, the division was re-assigned to Destroyer Squadron 3 as part of the Japanese First Fleet. Along with her division mates, Ayanami spent the first few months of the war supporting operations throughout Southeast Asia, particularly in and around Malaya. This included sinking Dutch submarine O-20 in concert with Uranami in late December. The division sailed in support of the Japanese Main Body during the Midway Operation. They were then assigned to partake in another planned Indian Ocean operation that was cancelled when Guadalcanal was taken by American forces. Re-assigned, DesDiv 19 (less Isonami, which was undergoing repairs from a collision) transited east to Truk while escorting several tankers of the fleet UNREP force to, and during, the Battle of the Eastern Solomons. Over the next several weeks, Ayanami participated in a dozen troop transport and/or barge towing missions to Guadalcanal and other locations in the lower Solomons, not to mention various escort and guard duties. Come mid-November 1942, the Japanese Combined Fleet made an all out effort to oust American forces from Guadalcanal. An initial attempt at a bombardment of Henderson Field by Japanese battleships on November 13th was rebuffed by American naval forces, albeit with heavy losses. The Japanese regrouped for a second effort, with a reconstituted battle and bombardment force two nights later. The three ships of DesDiv 19, led by light cruiser Sendai, were tasked that night as part of the escort for the IJN bombardment force. This group was ordered to scout both sides of Savo Island ahead of the main body. The light cruiser Sendai (FL), Uranami and Shikanami swept along the east side of the island, while Ayanami was detached for a solo scouting sweep around the west coast of Savo Island. There, she ran into a US force comprised of battleships South Dakota and Washington, preceded by a four destroyer escort. In conjunction with other IJN ships attached to the bombardment force, Ayanamis gunfire and torpedoes contributed to heavy damage among all four of the American destroyers. It is likely that one of her torpedoes was the one that hit and doomed USS Walke. In turn, she was taken under fire by Washington and severely damaged.
Immobilized, she was later scuttled by a torpedo from her sister Uranami
after rescuing her crew. Her remains were discovered in 1992 by the famed
Ballard expedition while searching for warships sunk during the Guadalcanal
campaign.
|
|||||||||||||||||||||||||
| The Kit | |||||||||||||||||||||||||
| Yamashita has continued to expanded the Special Type offerings
in 1/700 with a release of a Type II kit, that of Ayanami. Just as with
both the Type I and Type III kits, neither Tamiya nor Pit-Road ever fully
hit the mark with their Type II kits. The Tamiya version incorrectly utilized
the same hull as its short forecastle Type I kit, resulting in a somewhat
deformed looking version. There was also an improperly shaped aft deck
house, excessive freeboard to the hull, and a lack of small details overall.
The Pit-Road Type II kit was better in most all regards, but relied on a deck configuration more appropriate for an earlier, as-built configuration. They also compromised on the shape of the funnel intakes to equip all of their Type II & Type III kits, but with a shape that serves none of them particularly well. And, the same as-built fit holds true for the main turrets supplied with those kits. Not to mention that those turrets are poorly shaped. This new Yamashita Hobby Type II kit successfully improves on all those points. Forecastle length and shape, funnel air intakes, decks, turrets, and bridge base appear all properly sized, scaled, and detailed for an early war Type II. The kit is molded in a light grey plastic with uniformly sharp detailing. It is a waterline version only; no full hull option is available. Though marketed as Ayanami, straight out of the box, this kit can be built as any of five early Type II ships after modernization Ayanami, Shikanami, Asagiri, Amagiri, and Sagiri. The fit out-of-the-box is immediate pre-war and early war fit through the end of 1942. The only missing component is a degaussing cable, which can be added with styrene strip, or with any number of PE offerings. There are some very minor details that differentiated the sisters. Accommodating these points of differentiation in a build would require only some minor modification of one or two kit parts. Additional modifications would be needed to build the kit into a late
war version of Shikanami, Asagiri or Amagiri. This would entail adding
additional AA and platforms, as well as deleting the superimposed #2 main
turret. If one were to go this route, it might be possible to kit-bash
a late war version of the aft deckhouse top from a Pit-Road Fubuki kit
to better accommodate a late war deckhouse with 25mm AA emplacements.
|
|||||||||||||||||||||||||
| Hull Sprue (YH700 TL) | |||||||||||||||||||||||||
| The main hull is carried over from the previous Type III kit with no
changes. Both types did share the same hull externally, though the machinery
spaces were re-arranged internally in the Type IIIs to accommodate a revised
boiler layout. All the pros and cons covered previously remain true. As
I wrote in that review, with some small degree of editing:
, it comes as a one piece hull, cleanly molded with very sharp details including portholes, porthole eyebrows, properly shaped anchor recesses, bull nose, and subtle raised seam lines for plating. While the eyebrows are still overscale (as are all kits with this detail), Id say the eyebrows are as subtle as can possibly be made. There is no degaussing cable, so the kit can be built in immediate pre-war mode, or one can add a degaussing cable for a wartime fit. Unlike the Fubuki Type I kit that I initially reviewed, this hull lies completely flat!!! This is a very, very welcome change, and eliminates my biggest disappointment with the early kit. The set-up of the hull upon the sprue is identical. All injection points come from underneath the hull from one sprue runner as before. The only difference that I can discern is that the plastic appears to be much more rigid in composition, making it easier to resist the hogging of the previous kit. (This is also likely the fix used for the newer Type I hulls.) Aside from the elimination of the hogging flaw, the other change is
the extension of the upper hull that supports the rear portion of the longer
forecastle deck typical of the Type IIs and IIIs. Whereas the Pit-Road
kits show obvious mold lines for the insertion of the additional length,
this kit shows no such seams. It appears that Yamashita has created a new
CAD and mold without changing anything else about the hull. Many
kudos to them for the extra effort. (Note: In this scale, the Type II/III
forecastle is approximately 4 mm longer than a Type I forecastle.)
|
|||||||||||||||||||||||||
| Carried over from the previous kit is a minor issue; that the lower
portion of the bow as it approaches the waterline is slightly erroneous
in profile. The kit profile line enters the water in near vertical fashion
when, in fact, it should show more of a curve as it enters the water. After
having had some time to think about it, I think the curvature as it enters
the waterline would have been better served by raising the onset of this
curve just a hair higher on the bow.
The profile can be easily corrected with some light sanding, but doing so would potentially create another problem, that of eliminating the raised hull plating lines that wraps around the bow, particularly the lowest one. (This would be technically more correct, as the plating at the bow wrapped around either side and showed no seam lines to either side for several inches on the real thing. However, replicating that sort of detail would require a very clean and carefully delineation between the raised seams and the area around the bow.) I believe it is possible to sand away just enough of bow to correct the lower profile, and to replicate the seam line with some small addition of putty. Or, just leave it alone, because it really is a miniscule flaw. Unfortunately, my kit also had the slightest touch of a sinkhole to either side of the bow. This flaw has also been reported by other modelers. It can be filled with putty, but again, filling the seam will require sanding away some of the hull plating seam, and then resurrecting it after the fix. The kit hull dimensions are unchanged, and again scales out exceptionally
well. The waterline length is now correct, as the profile issue is really
limited to the area just immediately above the waterline. Ayanamis particulars
versus the scale and kit:
|
|||||||||||||||||||||||||
| YH700H A Sprue | |||||||||||||||||||||||||
| This sprue is carried over exactly from the Type III kit:
This sprue holds the funnel halves for two identical funnels (only one set will be used for a Type III ship, for the # 2 funnel), funnel grills, RDF compartment and searchlight platform, support trestles for some of the larger platforms, the reload torpedo gantry girders set around funnel #2, and the auxiliary piping for #2 funnel. Unlike the Type I kit, which molded the funnels as part of the superstructure housing that sat upon the main deck, these funnels have been molded separately. They still sit atop hooded air intakes which are part of another sprue. Given that two identical funnel have been molded, its a near certainty that a Type II release is pending. The parts are sharply molded with good detail, including fine raised lines for grab rails and an incredibly small, tertiary vertical auxiliary pipe. I recall Fujimi having done the same thing for its 1/700 Kagero class kits, but these are more sharply rendered. Its a very nice detail. On the other hand, Yamashita has carried over the effect of a subtly widened upper 1/3 portion to the funnel from the Type I kits, and this is erroneous. However, unless one is planning to sand off all the grab rails for more detailed PE parts, its just not worth correcting. Another feature repeated for this kit is the molding of the rearmost auxiliary funnel pipe to the funnel itself. Its representation is not as toy-like as with the Type I version, because this pipe is located closer to the flat middle of the funnel and doesnt stick out as far. I still dont understand why Yamashita chose to do this, but at least here, its barely noticeable. In the same vein, the piping for the steam whistles, and the whistles themselves, are also molded onto the funnel. These were so small that I think it entirely appropriate to mold them this way. The molded funnel grills are solid, but again, very sharply done. These
are among the best looking of the solidly molded grills for a Japanese
destroyer that Ive come across in this scale. For those reluctant to install
PE replacement grills, youll be satisfied with these kit versions.
|
 |
||||||||||||||||||||||||
| YH700T4 Sprue for Main Deck | |||||||||||||||||||||||||
| This piece has been carried over unchanged from both the Type I and
Type III kits:
The deck is a well molded piece that fits nicely into the hull with two large locator pins. Two cutouts help place it forward into the aft end of the forecastle. Here, in this kit, the aft walls of the forecastle extend further aft and surround more of the bow end of the deck. The deck itself is unchanged. It is beautifully detailed and scaled. Metal treading and linoleum
tie-downs cover the deck, with assorted hatches and equipment boxes. Torpedo
trolley rails and mine rails are raised, but incredibly fine. The mine
rails at the stern are parallel to the axis of the hull, and not splayed
out as seen in the Pit-Road kits. There is a base for the aft deckhouse.
|
|||||||||||||||||||||||||
| YH700 T1-2 | |||||||||||||||||||||||||
| This sprue is drawn from the Type I kit, and replaces the YH700 J sprue
offered in the Type III kit. As the Type I and Type II versions had the
same bridge base and footprint, this makes perfect sense from Yamashitas
standpoint.
One detail worth noting has to do with the trailing legs of the foremast for the Type IIs. In actuality, these splayed out slightly wider towards the bottom, with a kink in the leg occurring at the same level as the compass bridge deck level. The kit part does not reflect this detail. Admittedly, this is not overly noticeable at the 1/700 scale level, which is most probably why Yamashita Hobby reused this sprue. (Diehard Fubuki Type aficionados can take heart that the 1/350 Ayanami kit by FineMolds certainly shows the splay of the legs.) Another small sprue, this one holds the two primary sides of the bridge
base, some bridge wing supports, the main director housing, and the foreleg
and rear legs that form the tripod of the foremast. The detailing is fine
and correctly scaled, making the details a little smaller and harder to
see than what one normally sees in 1/700. The bridge base halves have portholes,
a grab rail, a hatchway door, and assorted projections. The director had
detailed access doors. The foremast is true to scale, rendering it very
thin, with molded on pulley projects on the yardarms. In terms of rigging,
it would only be able to support stretched sprue.
|
 |
||||||||||||||||||||||||
| YH700 M | |||||||||||||||||||||||||
| This is an entirely new sprue, though very similar in content and layout
versus sprue YH700K of the prior Type III kit. It carries the right and
left housing that is the base structure for both of the funnels, the compass
bridge deck and roof (molded together with base of the upper lookout compartment),
and the right and left halves of the column support/inner compartment for
the main director housing (this support/compartment also happens to sit
upon the compass bridge deck). Other items are the forecastle deck, the
air intake hoods that act as the base of both funnels, the auxiliary piping
for the same, the galley pipe that attaches to #1 funnel, the platform
base for #1 torpedo mount, a torpedo reload girder and the platform base
for the RDF compartment (both of which sit aft funnel #2), and the AA platform
that is sited in front of funnel #2.
The forecastle deck is extremely well done, and unique to the Type IIs. There are subtle, but definite differences in the layout of the linoleum and treaded deck as compared to the earlier kits. The base for turret #1 s the same as seen in the Type III kit, though clearly different then the Type I kit. As with the forecastle decks of the earlier Type I and III kits, it shows the turtleback sides at the decks edge, the spurnwaters running along either side, treaded deck plate around the anchor deck, bollards, boat chocks, molded on anchor chain, and linoleum tie-down strips. The compass bridge deck has its interior molded with pedestals for binoculars and the compass binnacle. Like the previous Type III kit, these all sit on a subtle, raised area for the forepart of the bridge deck. However, its not a clearly delineated grating as was with the Type I kit. Thats probably because, practically speaking, the footprint of this level for this kit is smaller than that of the Type I. (Its a certainty that the real thing had a raised wooden grating in this area.) It will greatly aid anyone who looks to detail the interior of the bridge, particularly with open PE framing for bridge windows or, the clear plastic windows included with this kit. There are some additional small details I took note of with regard to fit and timing. For one, the compass bridge deck has a protruding lip right below the bridge windows. Im not sure what it is. I suspect it was a wind deflector of sorts, which was most prominent on Amagiri, Asagiri, Sagiri, and Yugiri as built, and somewhat less so on the other, earlier Type IIs. It also disappeared after modernization in the mid 1930s, so it is not appropriate for the kit as depicted. Above the compass bridge deck is an upper observation level. The kit provides a clear plastic piece so as to replicate another set of clear windows here. To the best of my knowledge, this was not so. Instead, canvas duffers and solid boards with lookout slits were raised to help cut wind and weather effects upon the lookouts inside. A third minor detail is that during modernization, the open 2m rangefinder atop the bridge was changed to a 3m version, and the platform supporting it slightly modified. The kit portrays this setup as originally built. A fourth point is that the aft, starboard side of the new funnel intake hood is correct for Ayanami only. Here, its cut with a right angle into it. For the other sisters, the starboard side should resemble the port side, with an angled transition between the front and the rear. And lastly, the AA platform that sits in front of #2 funnel is appropriate for pre and very early war versions only. Here, its meant for two, single 13mm AA mounts. It was enlarged later on to carry the twin 13mm AA mounts, and, for some ships, the twin 25mm AA. None of these detail exceptions is a deal breaker, by any means. Just
take note of them. Correct or not, theyre all very nicely rendered.
|
 |
||||||||||||||||||||||||
| YH700T-4 Sprue | |||||||||||||||||||||||||
| This is another sprue that has been carried over from both the Fubuki
Type I and Type III kits, as all three classes had near identical structures
and details as represented here. To repeat:
Contained are the top and sides to the aft deck house, the aft emergency conning position and engine room ventilators, the torpedo reload storage bays and access doors that sit on either side of the base of # 2 funnel, the forward face of the bridge base superstructure, jack staffs, some ships boats, the crows nest, and the mainmast. Again, everything is finely detailed and properly scaled. The torpedo
bay access hatches are clearly defined and shaped, an aspect that is clearly
lacking in the other companies kits. The mainmast is incredibly fine,
maybe the truest to scale that Ive seen in 1/700 for a Japanese destroyer,
with molded on detail representing the maneuvering signal lights.
Like the foremast, it could probably support stretched sprue, but nothing
more. The motor launches are also scaled nicely, though somewhat
devoid of detail.
|
 |
||||||||||||||||||||||||
| YH700-GB x 2 | |||||||||||||||||||||||||
|
This is the main armament sprue and it is carried over unchanged from the Type III kit. I finally obtained measurements for Type B turret, and have elaborated on how true to scale these are, at sections end: Its a small sprue that carries two Type B1 turrets and four 12.7cm barrels with blast bags. The B model turret was introduced with the Type II ships, and carried over to the Type IIIs. The original B turret had a high, sloped gun layers position, with a louvered aperture. Along with the other changes incorporated during the extensive 1936 refit, the top of this position was lowered and squared off, and a simple hatch cover placed over the viewport. The revised turret was known as the Type B1. These turrets are fully detailed and shaped, and are highly comparable to the newly released versions from Pit-Road on their NE-07 set. The same can be said of the barrels and blast bags. In fact, Id say that the Yamashita versions are a little sharper on the detailing than the Pit-Road versions. There are two small points that are admittedly nit-picking. Somewhat problematic is the shape of the covers to the side ventilation ports on the turret. Actually, thats not entirely correct. The shapes are fine for #s 2 and 3 mount, but not correct for # 1 mount for all of the Type II and III ships, dating from about 1939 onwards. Those covered ports should be round and not rectangular. In this regard, the NE-07 set has the edge because that set comes with two each of the number one turrets with circular ports, as well as two turrets with rectangular ports for the rear positions. Even more nit-picky is the inclusion of what appears to be a third stiffening bar on either side of the turret at the top. This should come off. Technically speaking, #s 2 and 3 turrets should not have stiffener bars at all, though I suppose you could argue the lines are possibly grab bars. They are really too thick for that, though. The Yamashita turret is also slightly larger than the NE-07 version. In fact, Id place it midway in size between the turrets of the NE-07 set, and those from the earlier Pit-Road equipment set #10, meant for IJN destroyers. Ive subsequently taken various 1/700 turret measurements and placed
them against the measurements for an actual turret rendered in 1/700 scale.
All measurements were taken with a digital caliper. I have also included
the B1 turret from the Small Vessel Ordinance set packaged with Waterline
Consortium destroyers:
Clearly, the Yamashita turret is the closest in scale to the real thing.
Admittedly, you really cant tell any difference between the Yamashita
and Pit-Road NE-07 versions unless the turrets are side by side. The few
nitpicks aside, it is a great looking and sized turret.
|
|||||||||||||||||||||||||
| YH700T4 x 2 | |||||||||||||||||||||||||
| This sprue is carried over and unchanged.
This is the torpedo battery sprue. These sprues are carried over from the Type I kit, as all the Fubuki Types carried the same model of torpedo tube mount and torpedo into the war. Included here are the triple torpedo tube housings, mounts, and tubes, boat davits, torpedo and depth charge davits, a depth charge rack, a Y-thrower for the depth charges, ships 7m cutters, single 13mm AAs, anchors, depth charge, a 12.7cm practice loader, and rangefinders. To repeat what I wrote in the Type I review, the breakdown and detail
of the torpedo tubes is on a par, if not superior, to the Fubuki class
version issued by Pit-Road in its NE07 equipment set. In fact, the relief
on the depth charge rack is superior to that of any of Pit-Roads versions.
However, replacement by a photo etch version is still preferable, in my
opinion.
|
 |
||||||||||||||||||||||||
| YH700P6 x2 | |||||||||||||||||||||||||
| This sprue is carried over and unchanged
This is a small sprue of deck accessories. Each includes three sizes of hawser reels, two deck winches, and several sizes of both regular and storm mushroom vents. It is also carried over from the previous kit. Repeating what I wrote for the Type I review: What is extremely notable is the scale and sizing of these parts; smaller and finer than anything previously offered in styrene, resin, or brass, save for some of the smallest mushroom vents available in brass. In some ways, for 1/700 IJN builders, this might be the most exciting sprue of all because it is also being sold separately. For anyone who ever chiseled off the molded-on deck reels on the waterline
kits and then wondered why all the better detailed replacements seemed
so much larger, the answer is, because, until now, no one was willing,
or able, to mold them small enough to be in scale with any reasonable detail.
The same can be said of the mushroom vents. I know it seems almost
ridiculous for me to gush over this small sprue but, these pieces are fantastic.
Be forewarned; the carpet monster is waiting!
|
 |
||||||||||||||||||||||||
| YH700P7, T2C, and T2C1 | |||||||||||||||||||||||||
| These are the clear sprues. YH700P7 is carried over and
unchanged.
This is a sprue of clear plastic that first appeared with the Type I kit. Included are port and starboard running lights, a 90cm searchlight and four 30cm signal lights (you only need two of them).Once again, everything is to scale, which means carpet monster eligible. I will say again that the FineMolds version of the 90cm searchlight is more detailed. T2C is the single clear piece for the compass bridge deck windows. This is an all new piece, with recessed window frames, which should make painting them in a little easier. T2C1 is the aforementioned clear window piece for the upper observation level. While inclusion of the windows is probably erroneous, the piece is molded together with the roof of the position, which is required. The windows portion can be notched out and removed with careful use of a blade, but the rear portion is required to glue the piece into place in front of the main director. It wouldnt hurt to save this link so as to look at a good image of this portion of the bridge in order to have a sense of how the piece would need to be fitted. Or, just Google IJN Sagiri images. My kit came with two more, small, clear sprues attached to YH700P7,
Y700C and Y700E. These appear to be more bridge windows, possibly
for a yet to be released, as-built Type III kit with the larger, multilevel
bridge. These are to be ignored for this build.
|
|||||||||||||||||||||||||
| Decals | |||||||||||||||||||||||||
| Unchanged.
None, just as with the Types I and III kits. I suppose it helps keep
the kits cost down. Fortunately, there are several aftermarket alternatives,
particularly for flags. Pit-Road also makes a decal sheet with katakana
lettering for sides of the hull, for those interested in detailing a pre-war
version.
|
|||||||||||||||||||||||||
| Instructions | |||||||||||||||||||||||||
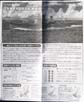
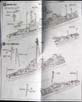
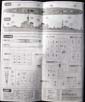
| The same format is carried over from the previous kits:
This consists of one large sheet printed front and back, then folded into several panels. The front portrays the usual b & w reprint of the cover art and a brief ships history in Japanese, plan and line drawing views with color callouts for painting, the sprue/parts breakdown, and some guidelines to assembly. The back has a step-by-step progression of assembly using exploded, three point perspective illustrations. The sprue marking system continues to a little confusing, as several
sprues are marked by the same letter. Yamashita did take care to list the
sprue number next to every part number, which helps greatly to eliminate
confusion. Cross-checking the sprues with the sprue/parts list in the instructions
will be helpful in keeping things straight. There are different prefixes
in Japanese marked on the instructions, but thats not particularly helpful
to those who dont read Japanese. Still, its not rocket science, and the
correct parts can be ascertained by paying close attention to the assembly
portion of the instructions.
|
|||||||||||||||||||||||||
| Final thoughts | |||||||||||||||||||||||||
| Yamashitas third Fubuki class iteration is pretty impressive
to me, at least in the box. Its parts, particularly the decking, are properly
specific to a modernized Type II, which is a clear improvement over Pit-Roads
Type II kit. Its not quite perfect, but it is a very worthy representation
of the class in its early war fit. This kit in particular does a much better
job representing Ayanami and the Type IIs than does Yamashita Hobbys competitors.
Details are sharp and scaled correctly.
Fit remains to be seen, but I suspect that most will be pleased by the kit. I would anticipate a really nice build right out of the box. Some small modifications are needed to render other Type II sisters with this kit, but no such modification is really out of reach for even a slightly experienced modeler. Comparatively speaking, its also a little less expensive than a Pit-Road Fubuki Type kit. Kit courtesy of fellow MW member Steve Guzy, and my wallet. I dont
think these are yet on sale in the US, but the cost at HLJ is approximately
US$11.25, plus shipping
|
|||||||||||||||||||||||||
| This is an in-box review showing the kit contents. We welcome your input and comments in the review section of the forum especially if you can share details about fit, ease of assembly and accuracy. Click the logo on the right to join in the discussion. |  |
