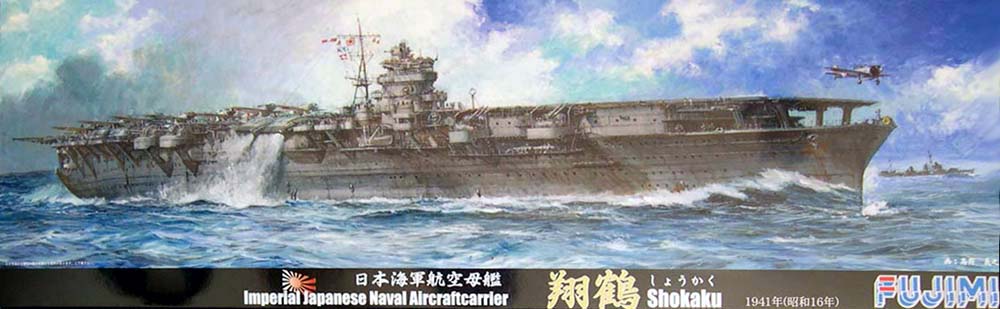
Imperial Japanese Aircraft Carrier Shōkaku 1941
Reviewed by Dan Kaplan
| HISTORY | ||||
|
Shōkaku (Flying Crane, pronounced show-kah-koo) and her sister ship, Zuikaku, were 4th generation aircraft carriers of the Imperial Japanese Navy, completed almost literally on the eve of the Pacific war in the fall of 1941. Their design incorporated all the prior lessons of Japanese aircraft carrier design and operational experience, and was unencumbered by any restrictions of the Washington Naval Treaties, as Japan had withdrawn her participation by the time of this carriers design. The result was a very large, purpose-built aircraft carrier of 32,000+ tons full load displacement, with a superior balance of high speed, large aircraft capacity, armor protection, heavy AA weaponry, and large radius of action. By almost any measure, the design can be considered highly successful and the sisters are considered the most effective of all the Imperial Japanese Navys aircraft carriers. Aesthetically, they are considered among the sleekest and handsomest of the Japanese CVs. At the time of completion, the sisters were deemed by the IJN as far superior to any other aircraft carrier then afloat. They were robust & durable ships, as demonstrated by Shōkakus twice surviving a major attack with considerable damage by multiple, heavy bomb hits. They were large enough to accommodate a substantially sized air wing, even as aircraft size and weight increased throughout the war. The same is true for accommodating large increases in antiaircraft defenses and the addition of radar, along with the requisite increase in crew size. The sisters were a critical component of the IJNs naval air arm and were a participant in virtually every major carrier clash in the Pacific, save Midway. After Midway, they were THE major aircraft carrier component of the IJN. Shōkaku was laid down at the Yokosuka Naval Arsenal dockyard on December 12, 1937, launched on June 1, 1939, and commissioned on August 8, 1941. She was joined that fall by Zuikaku to form Carrier Division 5 and embarked on a short period of intense training in preparation for the Pearl Harbor attack. As part of the Kido Butai (First Air Fleet), Shōkaku partook in the Pearl Harbor operation, the January 1942 raid on Rabaul and against airfields around New Guinea, the Indian Ocean Raid & the Battle of the Coral Sea, where she suffered heavy damage. Under repair, she missed the debacle at Midway. Rejoining Zuikaku as part of the reconstituted 1st Carrier Division, she and her sister became the backbone of the IJN carrier fleet. Her first actions after returning to the fleet in early July came in support of Japanese efforts at Guadalcanal. Initially, in late August, 1942 at the Battle of the Eastern Solomons and then again in October at the Battle of Santa Cruz, where she again suffered considerable damage from multiple bomb hits. Repairs took her through early 1943. Training occupied most of the spring of 1943 while the latter half of the year saw her join a series of fleet movements, feints and responses to American advances across the Pacific. Still part of the 1st Carrier Division with Zuikaku (and joined by Taiho), Shōkaku last engaged US forces as part of the First Mobile Fleet at the Battle of the Marianas in June, 1944. Late on morning of June 19th, she was sighted by the submarine USS Cavalla (SS-244), part of a large cordon of American submarines. Cavalla fired a full spread of torpedoes, three of which hit Shōkaku while she was recovering aircraft. Progressive flooding, coupled with internal fires and explosions, doomed the ship. Shōkaku sank by the head with a heavy loss of life, approximately 4 hours after being hit. A more detailed synopsis of Shōkakus design and history can be found at this Wikipedia article: http://en.wikipedia.org/wiki/Japanese_aircraft_carrier_Sh%C5%8Dkaku |
||||
| THE KIT | ||||
|
This is the third iteration of Shōkaku in 1/700 scale since the establishment of the original Waterline Consortium. The first, also by Fujimi, was part of the initial wave of offerings by the consortium back in the very late 1970s. That kit was nice for its time, though scale, detail and accuracy were questionable. Perhaps the nicest feature of that kit was that all three aircraft elevator surfaces were removable, each with an enclosed, though featureless, elevator well section beneath it. The second version was released by Tamiya in 1993, and is considered to be a sizeable leap in quality, correct scale and detail over its predecessor. That said, the Tamiya kit is not without its errors - the flight deck has some minor shape issues and too many molded on arrestor wires, no expansion joints, plus molded in elevators surfaces that have to be cut out to display any scratch-build hangar space underneath. Some of the smaller, deck edge sponsons have been omitted; others are incorrectly shaped and positioned, as are some connecting catwalks and walkways. The hulls porthole layout is also erroneous. Still, it can be built into a fine model and, over time, a great number of accessory and aftermarket improvement sets have been produced to support such efforts. Since its departure from the waterline consortium about a decade ago, Fujimi has been free to follow its own course. (I find this development quite ironic, as it strikes me as having a striking parallel with the Japanese withdrawal from the naval disarmament treaties.) As part of its recent surge to release new, up-to-date kits of IJN vessels in 1/700, Fujimi released its retooled version of Shōkaku in early 2011. With this kit, I feel that Fujimi has produced a worthy successor to the earlier versions. While there are still some bothersome accuracy issues, this kit corrects most of the previous errors and omissions of the otherwise fine Tamiya kits. It has a beautifully molded and detailed hull, bridge, flight deck, correct sponsons and deck edge compartment additions. Viewed side by side with the older Tamiya and Fujimi kits, the new kit clearly shows its improvements. Despite its issues, I would still consider it the best 1/700 IJN aircraft carrier kit currently on the market as of this review. This is not a scaled down version of Fujimis own 1/350 version of Shōkaku, which strangely retained some of the errors seen on the smaller Tamiya kit, probably due to the use of older, inaccurate references. This is an all new kit that benefits from excellent research and execution. The errors are few and mostly correctable. The out- of- the- box configuration is as she was commissioned in late 1941. Shōkaku retained this fit for the first six months of the war, until she was severely damaged by three or four 1000lb. bomb hits at the Coral Sea. That interval covers a lot of operational history the Pearl Harbor attack, the operation that included the invasion of Rabaul and attacks on New Guinea, the Indian Ocean raids, and the Battle of the Coral Sea, so the modeler need not feel shortchanged by the fit of the kit. Some scratch-building and additional AA would be required to depict Shōkaku after mid 1942. Truthfully, now that Fujimi has announced a late war Zuikaku kit, I would think that one would probably be better served by purchasing that particular kit and deleting some of the fit additions (depending on time frame) to create a mid to late war Shōkaku. However, this is just an assumption of mine and well have to see how well the trend toward accuracy is carried over to the actual Zuikaku kit. The kit is molded in light grey. Hull and deck details are very sharply molded. All the kit surfaces have a nice matt finish. On my kit, there was no flash, nor any sinkholes, though there are a few injection formation transition areas (for lack of a better term) within the plastic of a few pieces. No matter, as the effect is only visual and will be covered by paint. The sprue breakdown, along with some very subjective and at times, lengthy, commentary is as follows: |
||||
| SPRUE A | ||||
|
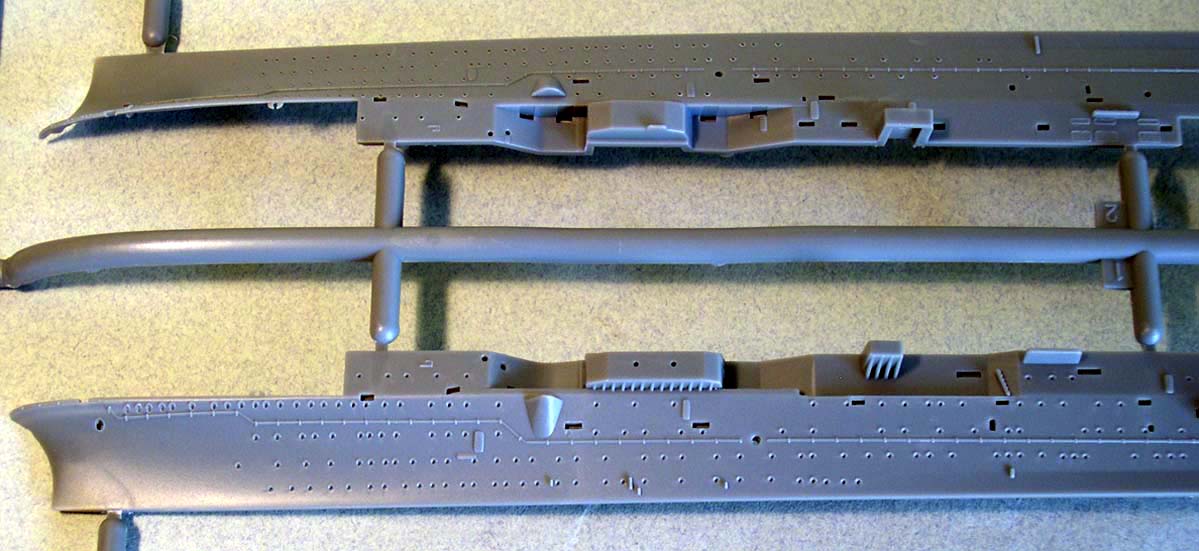
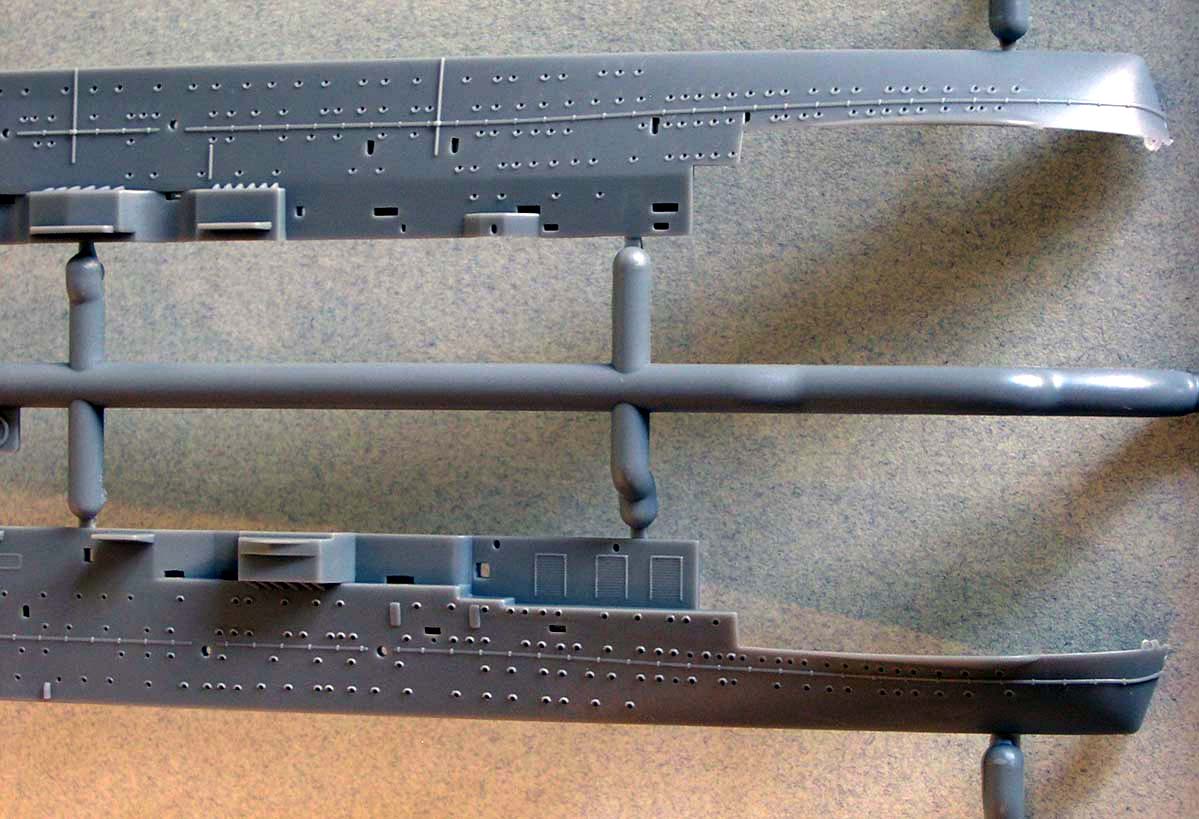
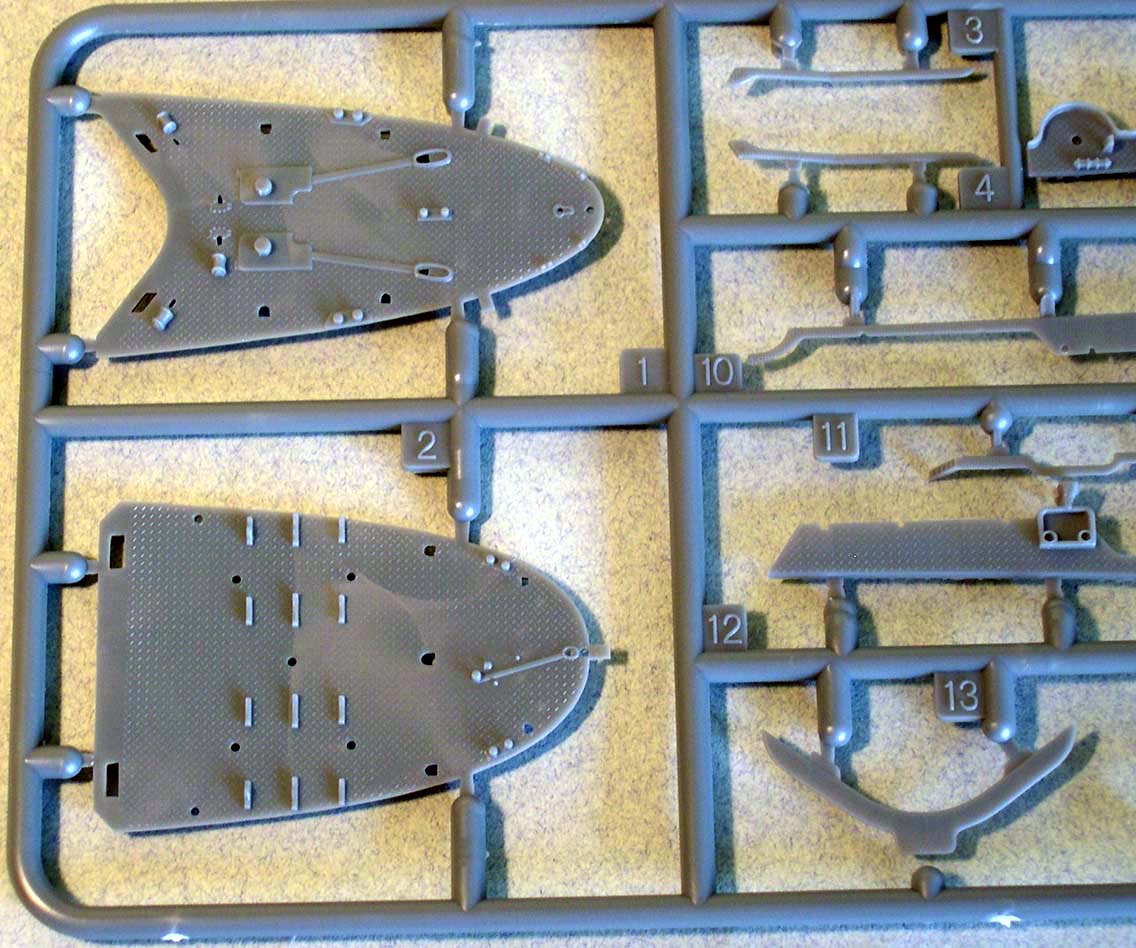
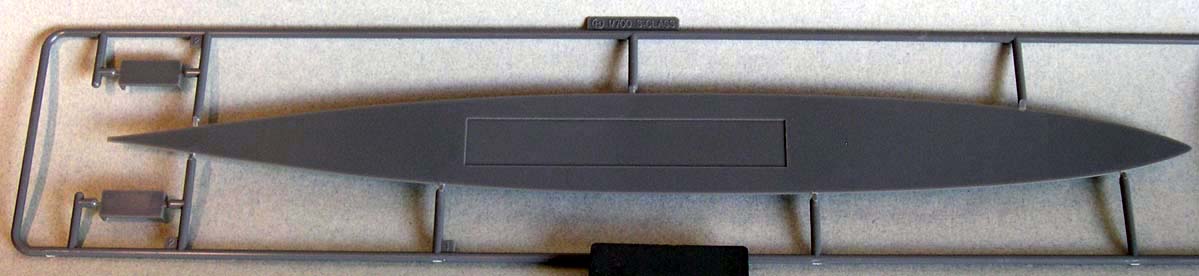
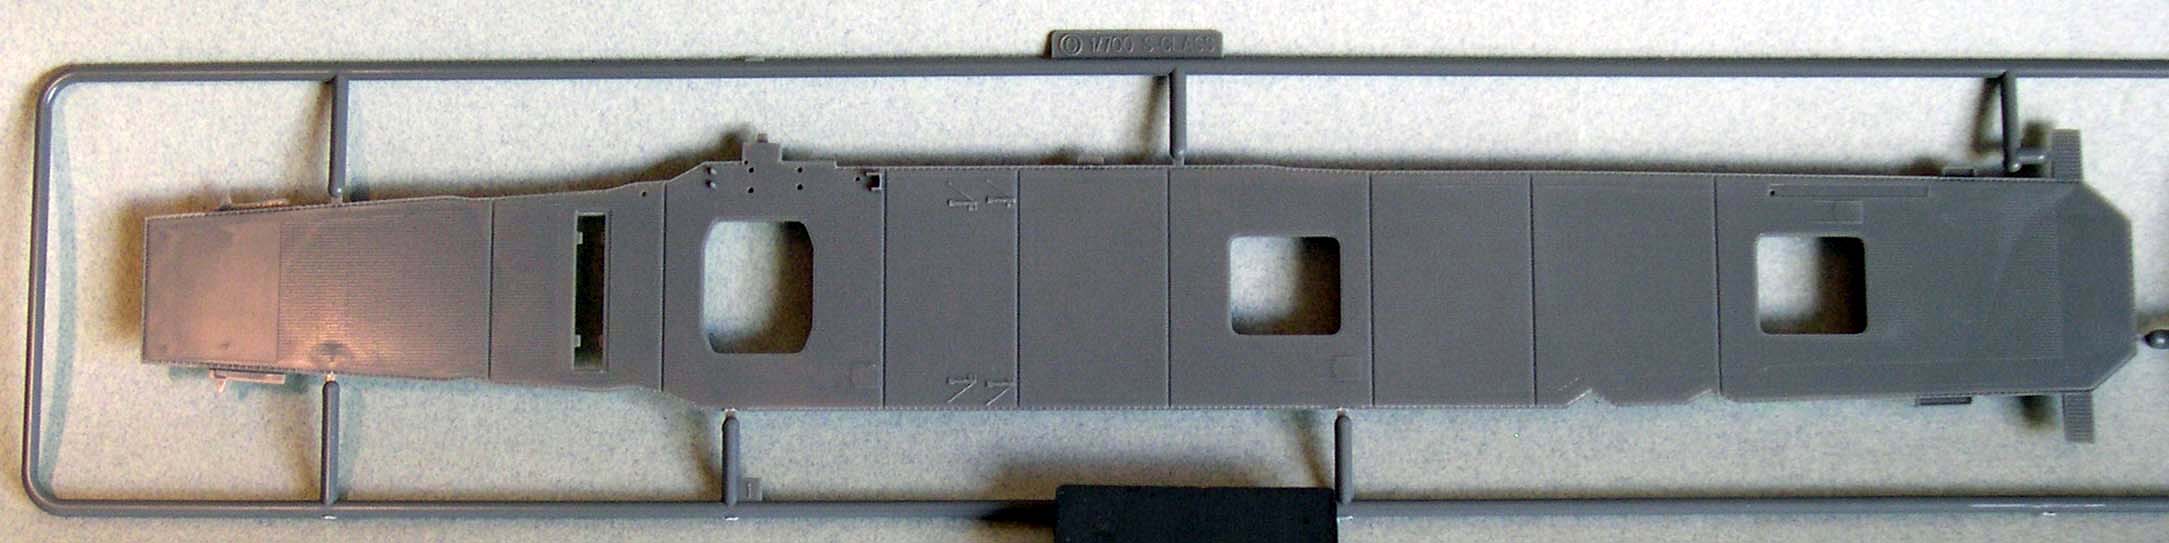
This sprue contains the two waterline hull halves. Each half is beautifully & sharply molded, with correctly sized and placed portholes with eyebrows, degaussing cable, ventilation apertures, some sponsons and deck edge walkways with supporting trusses underneath, and blister-type small sponsons at the very stern, used to broaden the boat deck area. (These are included for the first time on a 1/700 IJN CV kit. Note that while the addition of these extensions to the boat deck is appropriate, support via blister is probably not. Its very minor issue.) Also, nicely depicted on the port aft upper hangar deck bulkhead are the three louvered, wide, garage-style doors used for the aircraft engine test stand area. There is no attempt at replicating hull plating, which I think is smart in this scale. As we have seen with other, recent IJN aircraft carrier kits, the hull mounted supports for the sponsons have been molded separately. So, there are no hull mounted projections to cut off and replace with styrene rod, as with the earlier Shōkaku kits. Dimensionally, I measured the hulls overall length to be 366mm, which scales out to 256.2meters/840.4ft., versus the official OAL of 257.5m/844.83ft. I could not include the separate prow piece R52 (which has the chrysanthemum shield molded on; that does not count toward length) in the measurement so, its impossible for me to say if there is additional length or not without actually building the entire hull. Likewise, it was not possible to accurately measure the maximum hull width due to the split hull halves. I did measure the width of the waterline plate, which does not reflect true width (see notes for Sprue B). That measured out to 34mm and, looking at the hull, each hull half does expand slightly above the water line so, there could easily be another 2mm to add to each half. Assuming this is so, the total is close to 38mm, which scales out to 26.6meters/87.23ft., versus the official beam of 26m/85.34ft. The official height of the flight deck above the waterline at full load was 13.7m/44.52 ft. The measured height of the kit hull, without flight deck on top, was 19.5mm. That equates to 13.65m/4.36ft. Assuming my measurements and estimates are correct, the kit is very much on dimensional target. For comparisons sake, I did have a Tamiya Shōkaku kit handy. Overall length for that kit measured out to 364mm (scales up to 254.8m/835.75ft.). Overall hull width is 40mm (28m/91.85ft.). Hull height without the waterline plate is 19.5mm (13.65m/4.36ft). |
||||
 |
||||
|
||||
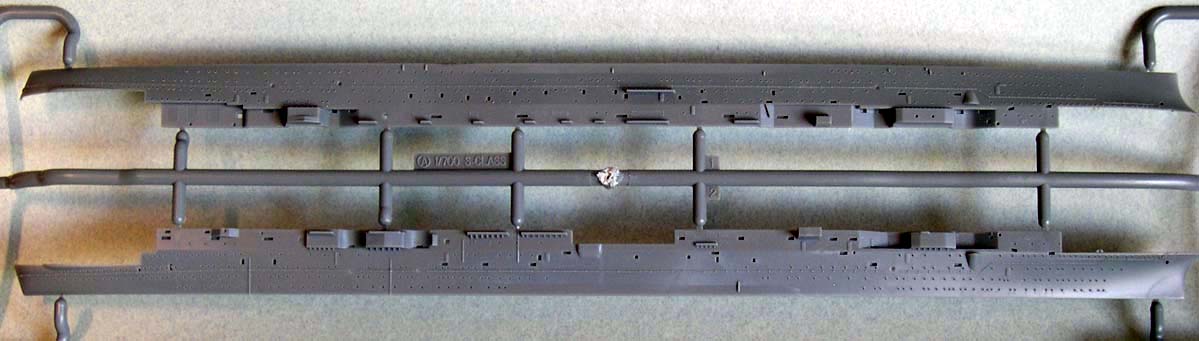
| SPRUE B | ||||
|
This holds a slightly abbreviated waterline plate plus clampdowns for a waterline type metal weight bar. The recent trend by Fujimi and Aoshima in waterline kits has been to eliminate the typical seam lines formed by the intersection of a full waterline plate mated to a hull. They have done so by molding the hull so it extends fully down to the waterline, then inserting a flat waterline plate within the contours of the hull at bottom for flat bottomed stability. With the plate hidden, theyve re-imagined a way to eliminate an exposed waterline plate. The Shōkakus hull is molded in this manner. The clear upside of this approach is the elimination of filling and sanding the contours of the plate to the hull to obviate instances of a poor fitting waterline plate. There really is no downside as: a) the bottom of the hull is still stabilized and, b) either application still requires taping off some portion of the bottom of the hull and painting it for those who like to show some red hull. The elimination of corrective work for the modeler is a big plus. |
||||
 |
||||
| SPRUE C | ||||
|
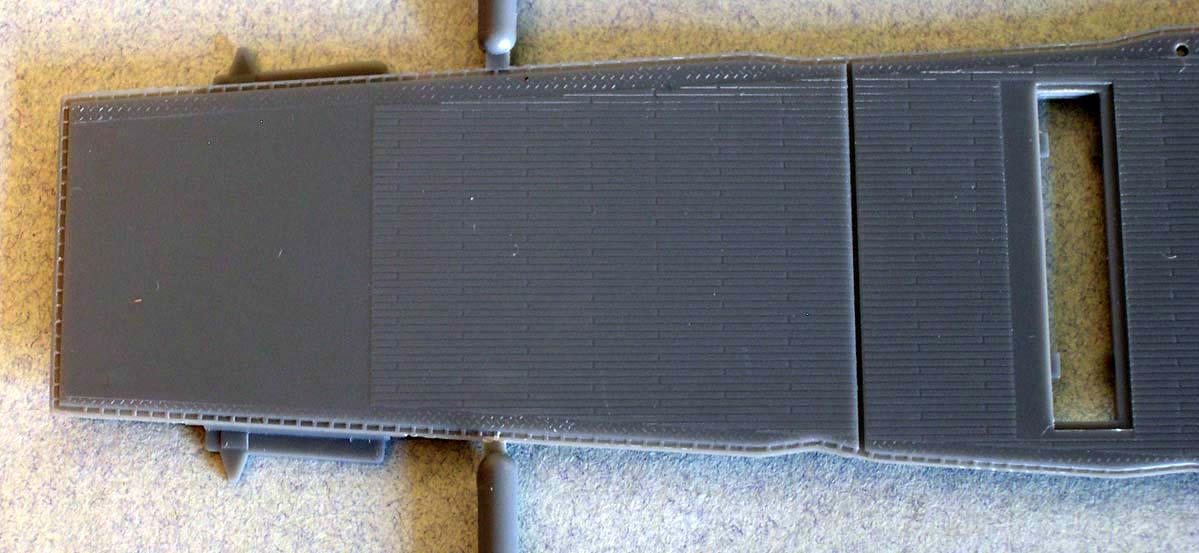
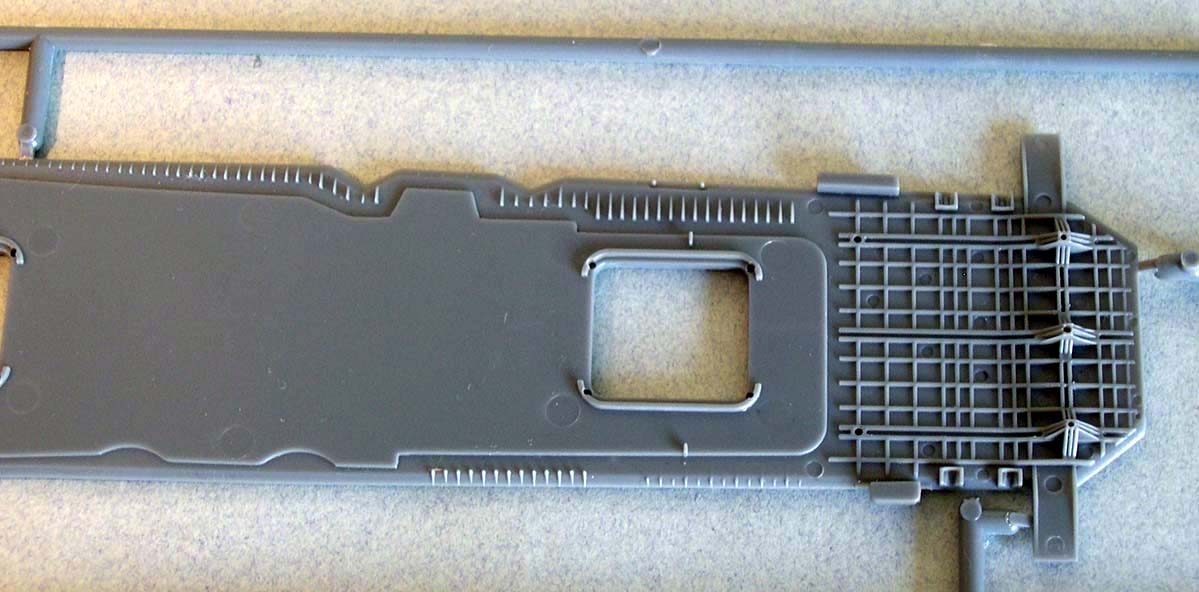
This sprue is solely occupied by the flight deck. In terms of size, the kit flight deck measures out to 346mm in length and 42.5mm in width. These measurements include molded on rain gutters, each side adding approximately 0.5mm of width to each end of the flight deck).This scales up to 242.2m/787.15ft. long x 29.75m/96.7ft. wide. Official values for Shōkakus flight deck are 242.2m/787.15ft. long x 29m/94.25ft. wide. If that figure includes the rain gutters, than Id say the Fujimi specs are essentially spot on. For comparisons sake, the Tamiya flight deck is the same length as the Fujimi version without the rain gutters. Conversely, the Tamiya deck is as wide as the Fujimi version with the rain gutters. As the flight deck typically gets much of the focus in an aircraft carrier model, I felt it appropriate that that this part receive a great deal of my attention. It must be pointed out that the few real issues that I have spotted in this kit do occur on the flight deck. Still, the deck is among the nicer 1/700 IJN CV flight decks that Ive seen, improving on the almost as nice new Fujimi Taiho flight deck. The deck has been molded mostly clean, without cross deck objects molded on, such as crash barriers, arrestor cables, or even the base plates for anchoring either side of an arrestor cable. Ill first note the many positive features:
|
||||
 |
|
|||
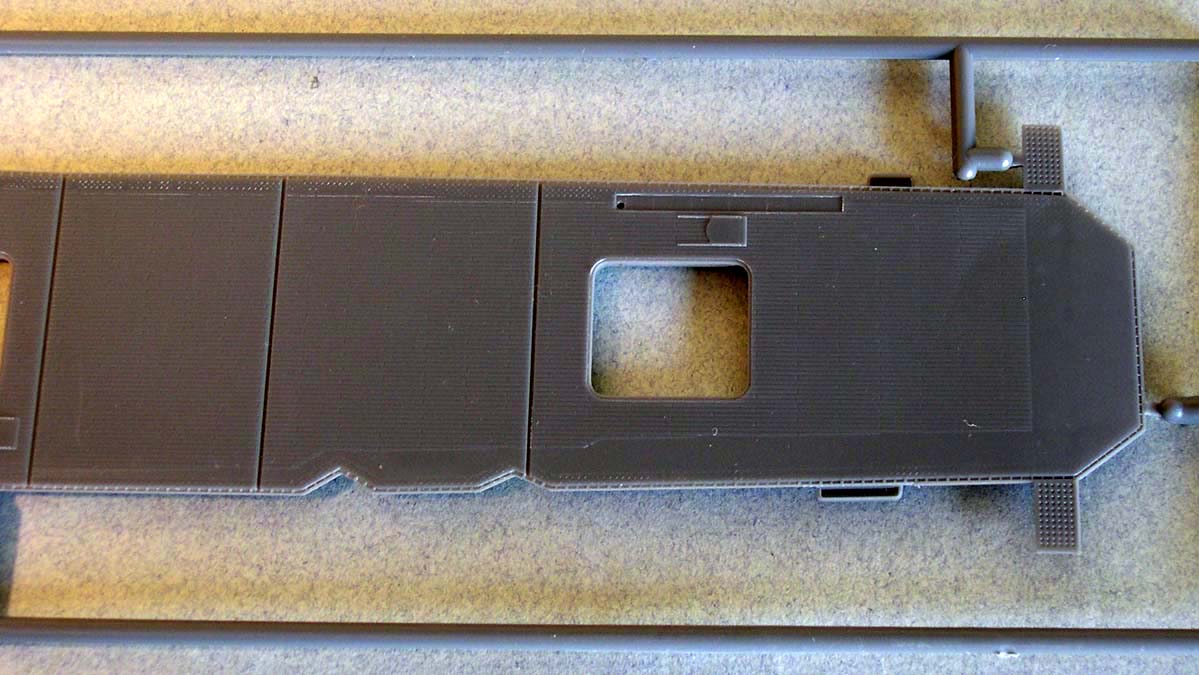
Flight Deck PlankingThe flight deck planking merits its own discussion. Some of you will have to bear with me on this as you may think me overly nit-picking, which I am. Feel free to skip to the next sprue. However, one of these nitpicks also has some bearing on a surprising anomaly of sorts on this kits flight deck. The planking is identical to that of the new Fujimi Akagi and Taiho kits, and the just released Kaga kit. I would imagine the same planking sizing and pattern was used on their just released Ryujo kits as well. The molded depiction of the planking is actually very similar to that of real IJN aircraft carriers, in which the planking was laid over thin metal plating. Here, the individual planks have been molded on top of a flat surface representing the metal plating, and the planking is differentiated by thin channels representing the seam lines. This particular depiction does play into the flight deck anomaly. Truthfully, the planking width is slightly overscale. The Fujimi planking is almost half again as wide as the older Tamiya kit. That kits planking was about 0.01 wide, which scales up to a 7 width. Scale-wise, Id put the Fujimi kit at around 10+ wide, which is still pretty good for this scale. For the record, planking width on IJN carriers ranged from 12cm to 15cm, roughly 4.5 to 6 inches. Actual planking length is unknown to me and may have varied from class to class. The channels separating the planks to mimic planking seams are wider than the raised seams of the older Tamiya Shōkaku. That older kits planking lines managed to evoke much thinner seams. Seen up very close through a magnifier, the Fujimi kits seams are almost a quarter as wide as the planks themselves, something clearly not accurate. The planking is butt ended. Each full plank is about 20mm long. I know some modelers prefer planking with butt ends even in 1/700 scale but, I think it overkill and overscale for 1/700. Its not a problem, just a personal aesthetic choice. What is problematic is that the resulting planking pattern is wrong. The kit pattern alternates evenly with every other line of planking ending midway compared to the one above it and below it. However, the IJN planked its deck in a progressively staggered pattern that repeated itself every 5 or 6 planks, not every other plank. (Note: Fujimi also sells a wood flight deck sticker for this kit. Judging from a photo close-up, the sticker appears to have a more random planking pattern, which would be more correct.) Now, having pointed out of all these issues, let me say that I still like the flight deck very much. My criticisms come with having put the flight deck under a magnifier, literally. Held further back, say at half an arms length, most of these nit-picks seem to disappear. What doesnt disappear is the regular, almost checker board pattern produced by the spacing between the butt ends of the planking, which are as wide as the planking seams. Its very subtle and very geometric, so much so that my initial impression of the flight deck was that Fujimi had actually gone ahead and added aircraft tie-down holes all over the deck. I was thrilled. It actually took me a while to realize that these were not tie down holes, and then, only when seen under a magnifier. In fact, it only became obvious when comparing the flight deck to the elevator surfaces, which do have properly spaced aircraft tie-down holes. The difference between pattern sizes becomes immediately apparent as the aircraft tie-down spacing is half the distance between points in both directions. I think most modelers really wont care about the spacing of planking butt ends. For those who do, it occurs to me that Fujimi has actually made it easier to transform those spaces to aircraft tie-down holes, as the patterns serve as a very exact template for doing so. All one needs to do is mark off additional holes half way between the existing spaces, along both X & Y axis, and then drill out those spaces with a fine mini drill bit. So, the pattern has a silver lining after all. Flight Deck AnomalyInterestingly, Fujimis much appreciated attention to recent research has also produced an unexpected, and unusual, asymmetrical rendering of the planking along the port aft end of the flight deck. A portion of the kit flight deck is devoid of planking, leaving a bare metal deck. This area begins next to the deck edge treaded metal around the port aft 12.7cm HA mounts and works all way back to the forward edge of the round down area at the stern. The missing planking covers an area approximately 3mm x 20mm long beside the mounts and another, larger area immediately aft that is 4.5mm x 60mm long. Scaled up, thats a strip of bare plating approximately 184 ft. long x 7 ft. wide forward, expanding to 10.5 ft. wide at the rear. Its going to be very noticeable once painted, particularly the asymmetry of the planked portion of the flight deck. (Note: The Fujimi wood flight deck sticker for this kit replicates this planking layout anomaly as well.) This new planking layout is almost certainly based on very recent research conducted by Toshifumi Kimoto of the Vanguard website in Japan, and some of his associates. To his credit, Mr. Kimoto has conducted a lot of very informative studies on the Shōkakus over the last few years, notably bringing attention to the fact that the island-topped Type 94 HA director was not deleted in these ships upon the addition of radar. Rather, it was moved to the portside forward boat deck, aft and in addition to, the original director located there. However, I believe this newest research to be only speculative in nature, as it mostly based on the interpretation of a single, overhead view of Zuikaku taken by an aircraft during training in mid 1943. There are no corroborative close-up views or descriptions of the flight deck to confirm this alleged configuration. The planking arrangement appears contrary to standard IJN practice for flight deck layouts, which were almost always completely symmetrical in layout at the aft end. Further, the speculative change may pertain only to Zuikaku, as there is no corresponding view of Shōkaku. It may also be only applicable to a mid to late war fit. Accordingly, I believe that the Fujimi depiction is in error. At best, it is very premature. A fix to fill in the missing planking will be challenging. Some very thin styrene strip, with considerably sanding to reduce height, may be the way to go. Using Mr. Surfacer might be another way to go. A third might be to use the wood deck sticker option, joined together with another of KAs more generic wood stickers. That would require some color and pattern matching between them. Some further thought must be put into this. I find the inclusion of this unconfirmed feature a very strange decision on Fujimis part, given their apparent reluctance to include more substantiated features. For instance, deck edge rain gutters are a known feature on all IJN carriers, yet Fujimi has seen fit to include them only on Akagi and Shōkaku to date. Likewise, aircraft tie-down holes are clearly present on every carrier. Yet, as far as I can tell, only the new latex deck version of Taiho carries them on its entirety. All the other IJN carrier kits limit the tie-downs to the elevator surfaces. The application of various features and details between new Fujimi aircraft carrier kits seems inconsistent to me. It also needs to be noted that Fujimi has neglected to contact, mention or credit Mr. Kimoto (nor anyone else) with regard to this new depiction of the flight deck. |
||||
| SPRUE D | ||||
|
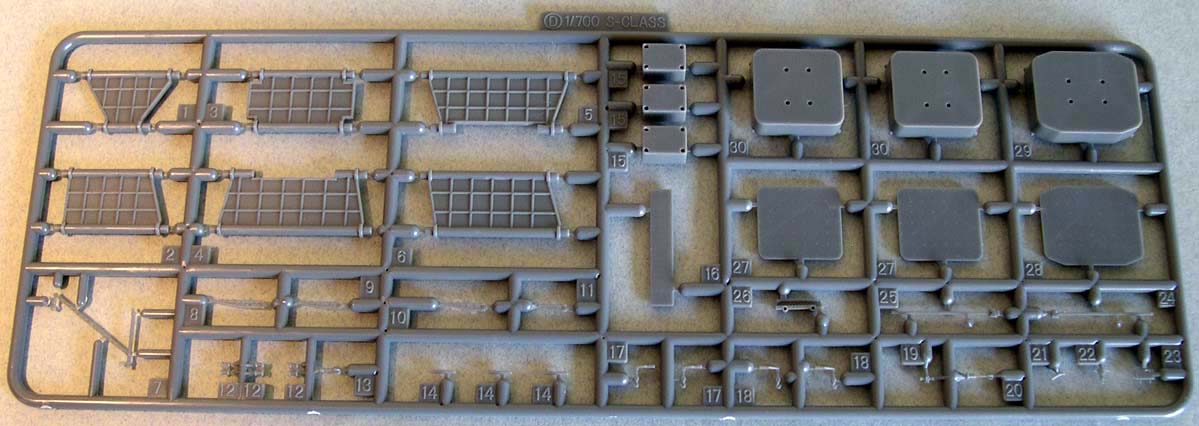
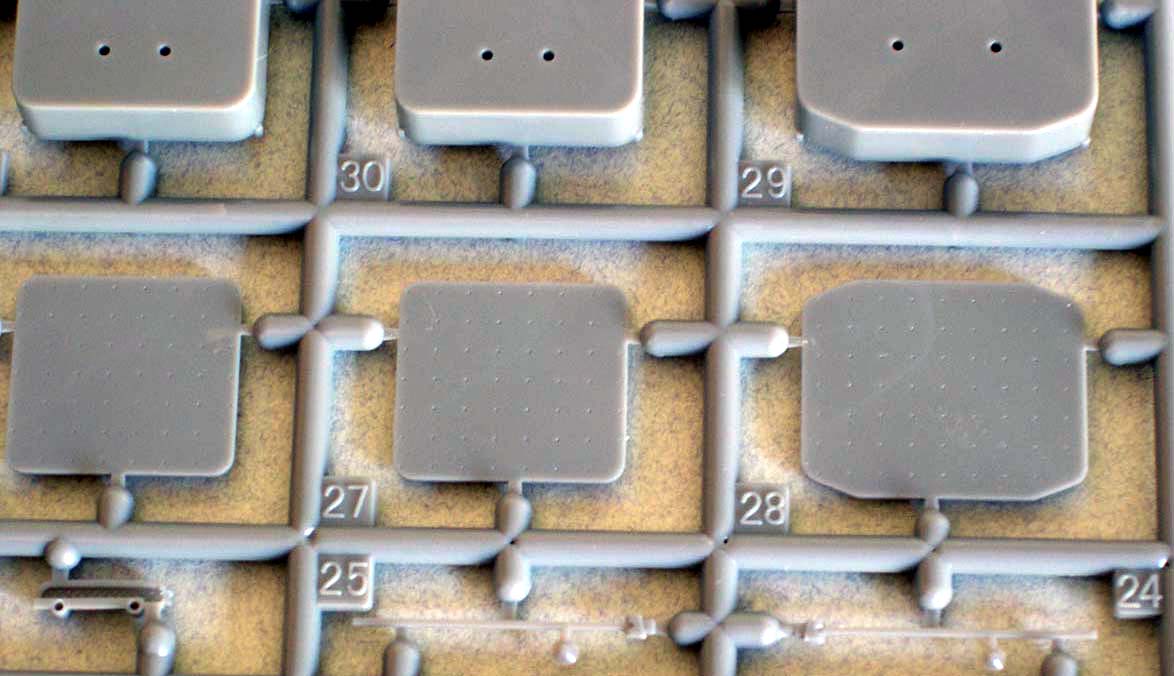
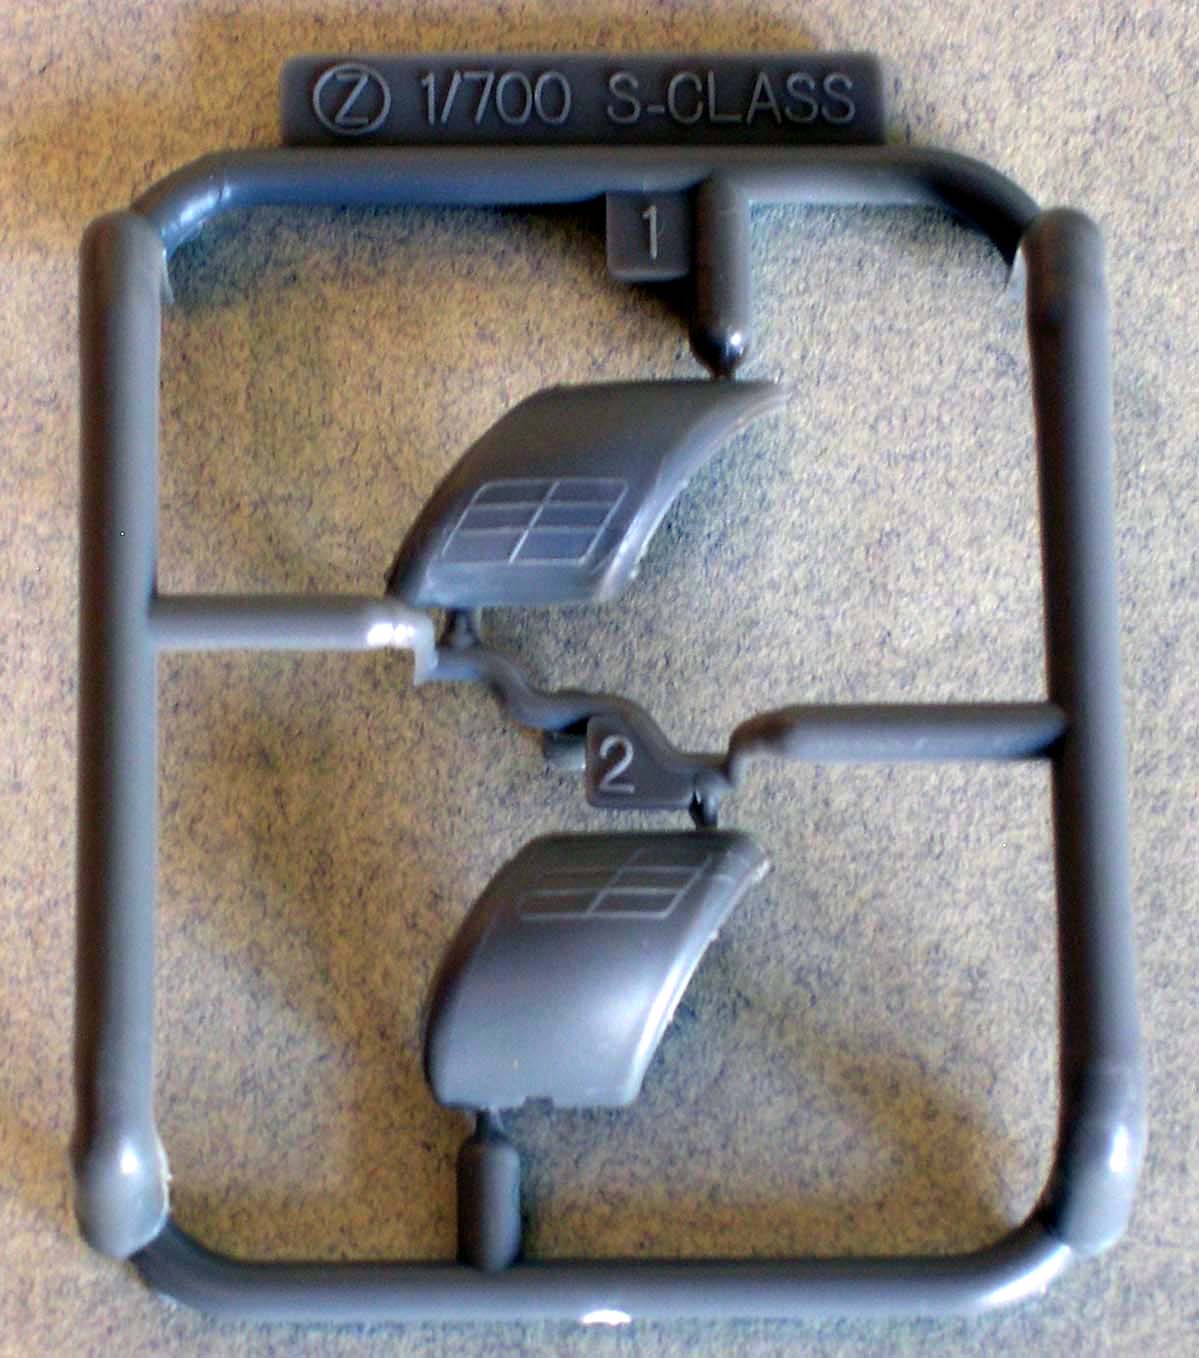
This sprue contains the six rigid, inner trusses that supply rigidity to the hull. the aircraft elevators with nice tie-down holes, molded elevator wells that are one storey deep (as opposed to the actual two storey hangar deck), support blocks for the elevators so they can be portrayed either at flight deck level or be removed to display the well (which would need much detailing), boat booms, crane hooks for the boat cranes, aircraft crane, some pieces for the island, some instrumentation for the bridge, aerial torpedoes and trolleys, and some other equipment, including some of the landing signal light arrays rendered here in plastic for the first time, though better served in by the same on the companion PE fret to this kit. The elevators are sharply finished, properly shaped (particularly #1 elevator) and have tiny, properly spaced aircraft tie-down holes. The elevators are also accurately sized; kit measurements for elevator #1 are 23mm x 18.75mm, which equates to 16.1m x 13.13m, vs. the actual size of 16m x 13m; for elevator #s 2 &3, the measurements are 18.5mm x 17mm, which equates to 12.95m x 11.9m, vs. the actual size of 13m x 12m. While there is no provision for a hangar deck, the open elevator wells would allow one to scratch-build that aspect. (While I know that FineMolds makes a very nicely detailed 1/700 PE IJN CV elevator shaft, I feel that lack of a nice plastic version remains a good opportunity for some aftermarket producer.) |
||||
|
||||
| SPRUE E X2 | ||||
|
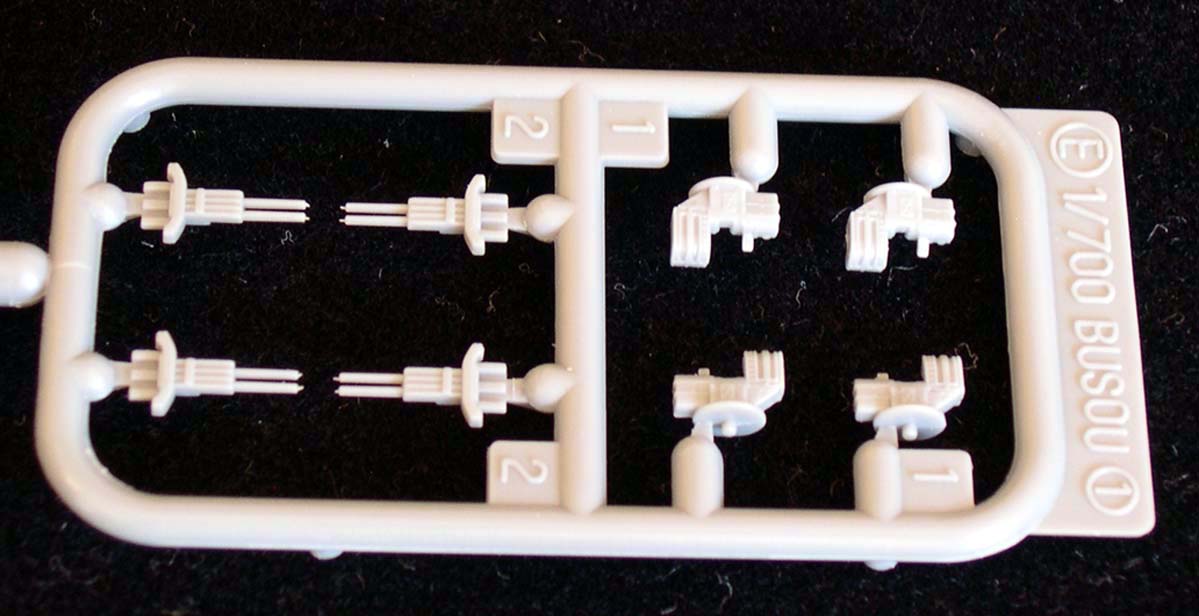
This is a small sprue that contains four of the twin 12.7cm40cal HA mounts. Its ok. The bases are a more detailed than whats been previously offered by the standard waterline consortium Large Vessel Equipment set or by PitRoad, though the twin barrels and recoil cylinder part is no better than either. In fact, I prefer that piece from the Large Vessel set. Perfectionists will opt for the far superior renditions available from the new PitRoad 1/700 slide molded accessory set, specifically, set NE01. These are the best available, even better than the resin Veteran Models version, in my opinion. |
||||
 |
||||
| SPRUE F | ||||
|
Contains the triple, unshielded 25mm AA mounts. This is Fujimis new standard 25mm AA weapons fret, as included with all their new 1/700 IJN kits. Ive said it before theyre ok, scale-wise and in detail. Someone building out-of-the box will be satisfied with them, no doubt. They are certainly better than what was issued on the older waterline equipment sets but these are not at all comparable to what is currently available from the FineMolds NanoDread line. |
||||
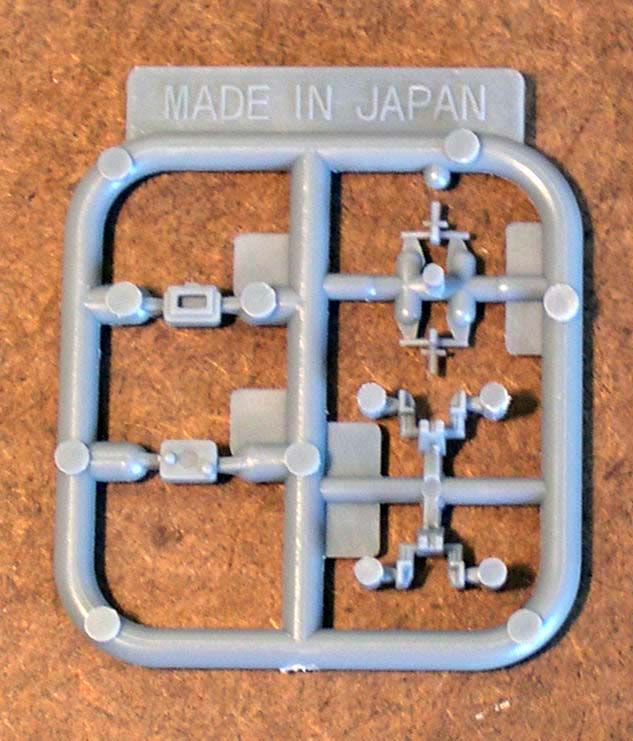
| No Image | ||||
| SPRUE G x2 | ||||
|
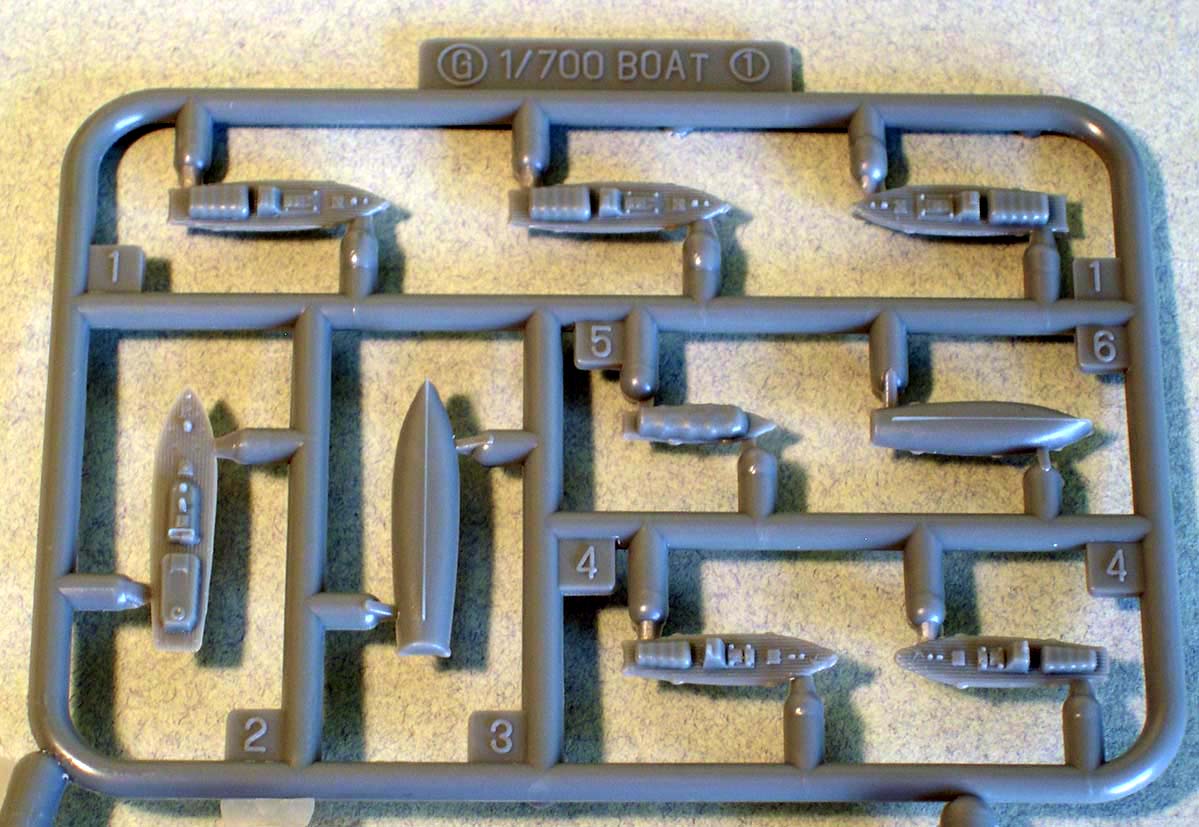
The first of three different sets of sprues devoted to ships boats, this sprue contains mostly larger motor launches. I believe this to be one of Fujimis standardized boat sprues as it appears in the new Taiho kit as well. The moldings are nice with subtle raised deck planking lines. The shapes and detail are better than those of the Large Vessel Equipment accessory set, probably as nice as some of PitRoads later equipment sets, but not nearly as sharply molded as PitRoads new NE02 set. Detail may be a moot point as these boats will be half hidden, visible mostly from the side, on the stern boat decks. |
||||
 |
||||
| SPRUE I | ||||
|
This sprue contains smaller ships boats, mainly 9m cutters. This is another of Fujimis standard boat sets. The same comments on appearance apply. |
||||
| No Image | ||||
| SPRUE J x2 | ||||
|
This is the third small sprue devoted to ships boats. Here, we have the 11m & 14m daihatsus, plus some very small cutters. The diahatsus are very well done, more detailed than on the Tamiya Shōkaku kit and as nice, or nicer, than whats seen on some of the PitRoad accessory sets. |
||||
 |
||||
| SPRUE PG x2 | ||||
|
A small sprue of clear plastic containing a 1/700 scale Mitsubishi A6M2 Zero fighter, with separate propeller, landing gear, canopy, drop tank and tail wheel. |
||||
 |
||||
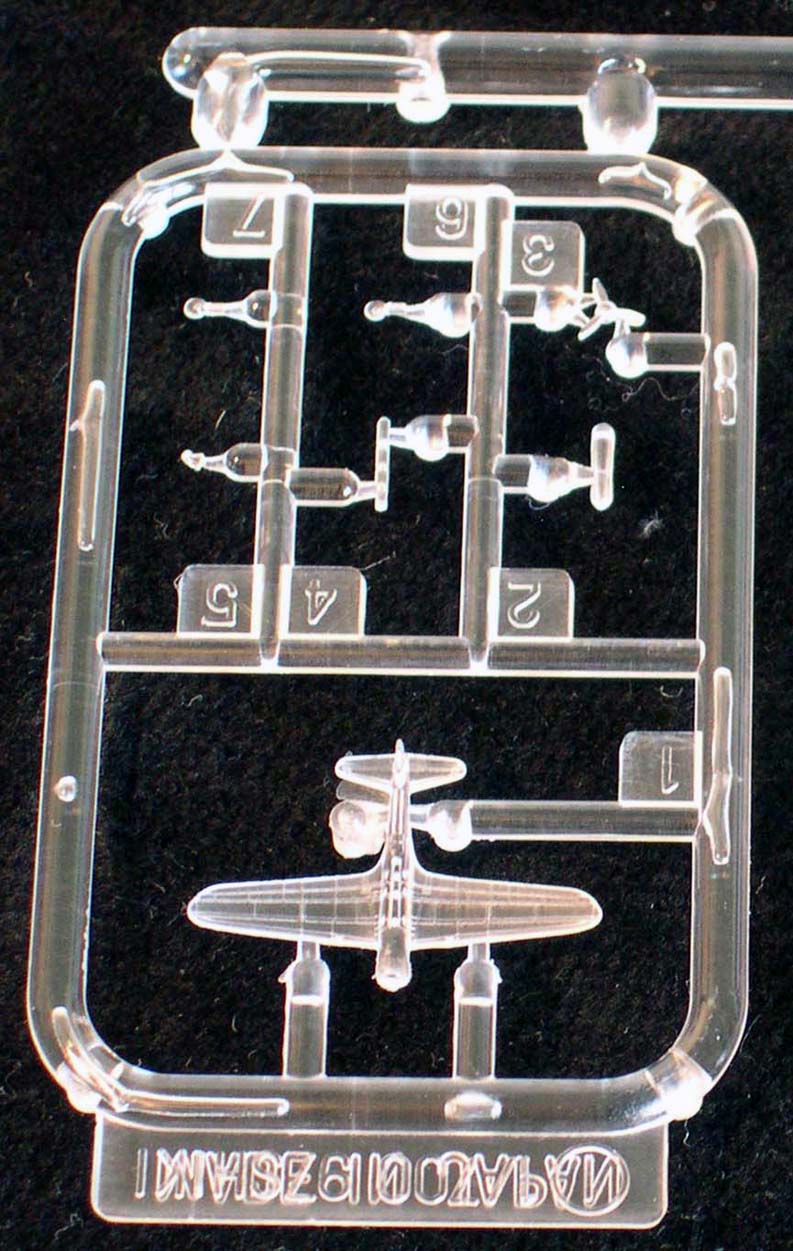
| SPRUE PH x2 | ||||
|
A small sprue of clear plastic containing a 1/700 scale Aichi D3Y2 Val dive-bomber, with separate propeller, landing gear, canopy, bomb and tail wheel. |
||||
 |
||||
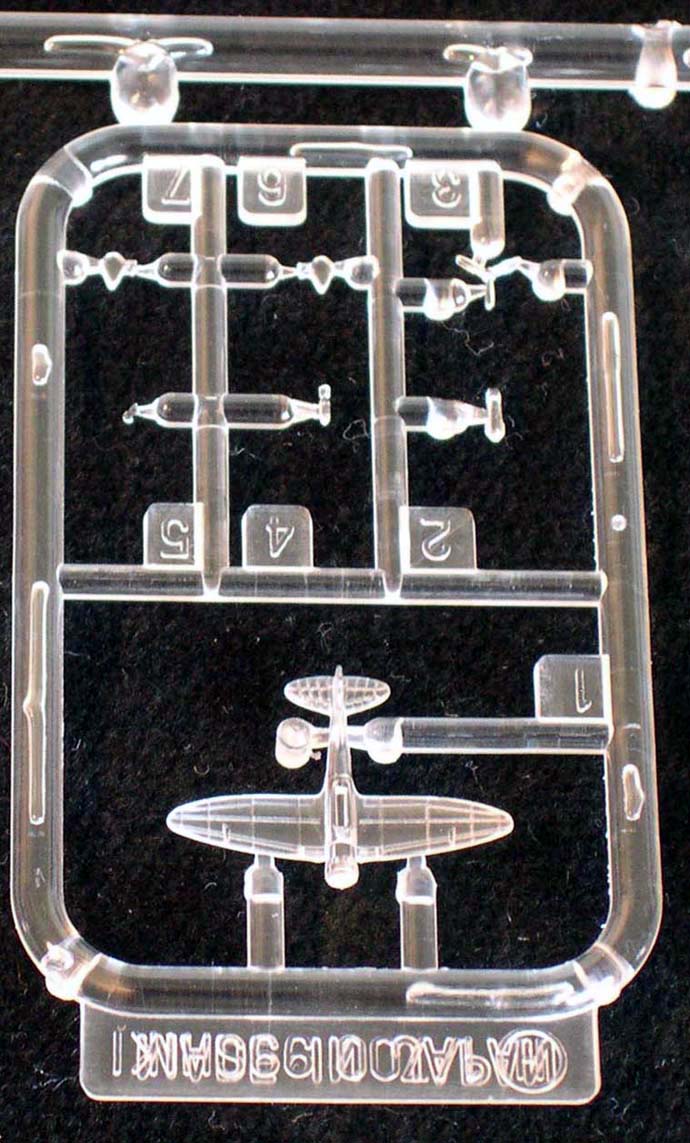
| SPRUE PI x2 | ||||
|
A small sprue of clear plastic containing a 1/700 scale Nakajima B5N2 Kate attack plane, with separate propeller, landing gear, canopy, bomb/aerial torpedo and tail wheel. All aircraft have recessed panel lines. |
||||
 |
||||
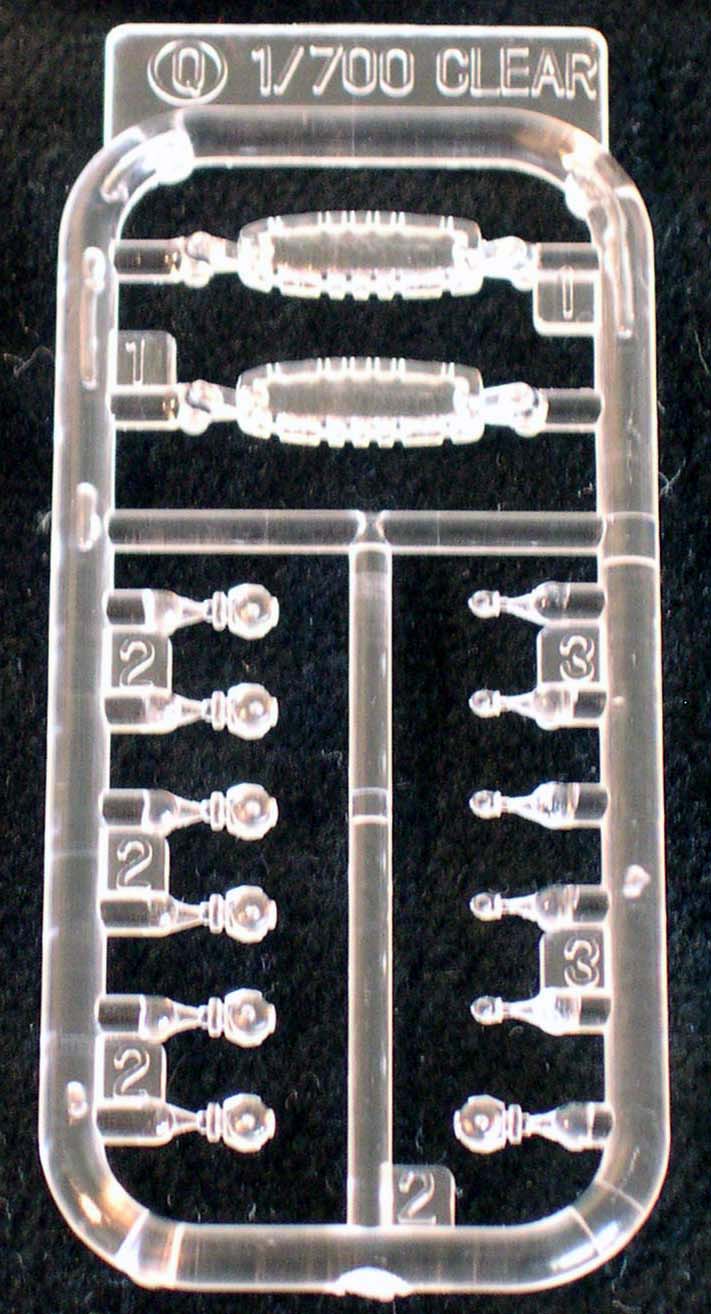
| SPRUE Q | ||||
|
This is another of Fujimis now standard accessory sprues. It contains searchlights and two canvas coverings for larger ships launches molded in clear plastic. Its nice touch, though the clear searchlights from the FineMolds NanoDread line are superior in detail and shape. |
||||
 |
||||
| SPRUE R | ||||
|
This sprue contains parts for the bridge, funnel area, funnel bottoms and grills, forward and aft hangar deck bulkheads and platforms, the stern boat deck mounted supports for the aft end of the flight deck, the bases and hull mounted sponsons for the eight twin 12.7cm HA AA mounts, and some molded small boat access ladders and platforms. Detail is mostly excellent; for example, the AA tubs have support ribs inside the splinter shielding. The bridge is molded in two halves with separate decking. There is fine treading on all decks and tiny truss supports under the decking. Unlike the Tamiya bridge, the Fujimi version is highly detailed with portholes and eyebrows, a windscreen for the uppermost AA command level, a pilots briefing blackboard mounted on the port side, and even the platform used by briefers to stand upon while chalking up the board. I do wish the outline of the board was a bit sharper but, overall, the bridge is rendered extremely well. The bridge windows can be removed for replacement by PE window frames. For comparisons sake, I did manage a side by side comparison of the new Fujimi bridge base with the older Tamiya version. They are the same dimension in length and width. Height has yet to be determined due to the more complicated construction of the Fujimi version. |
||||
 |
||||
|
||||
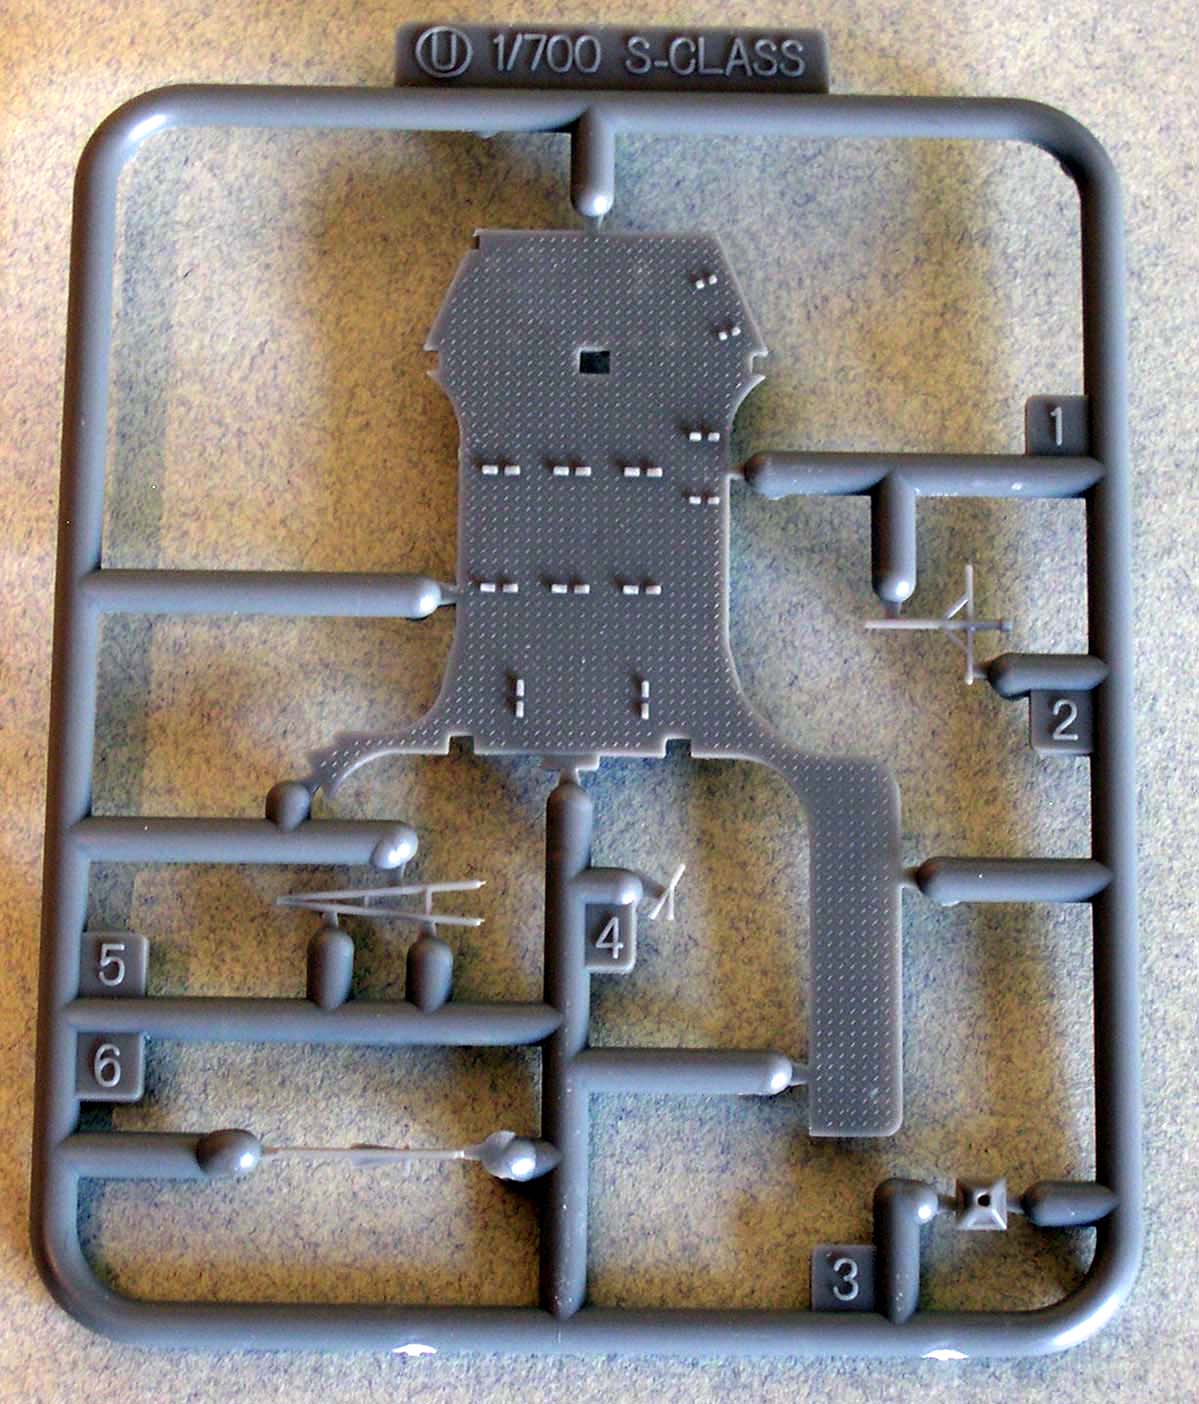
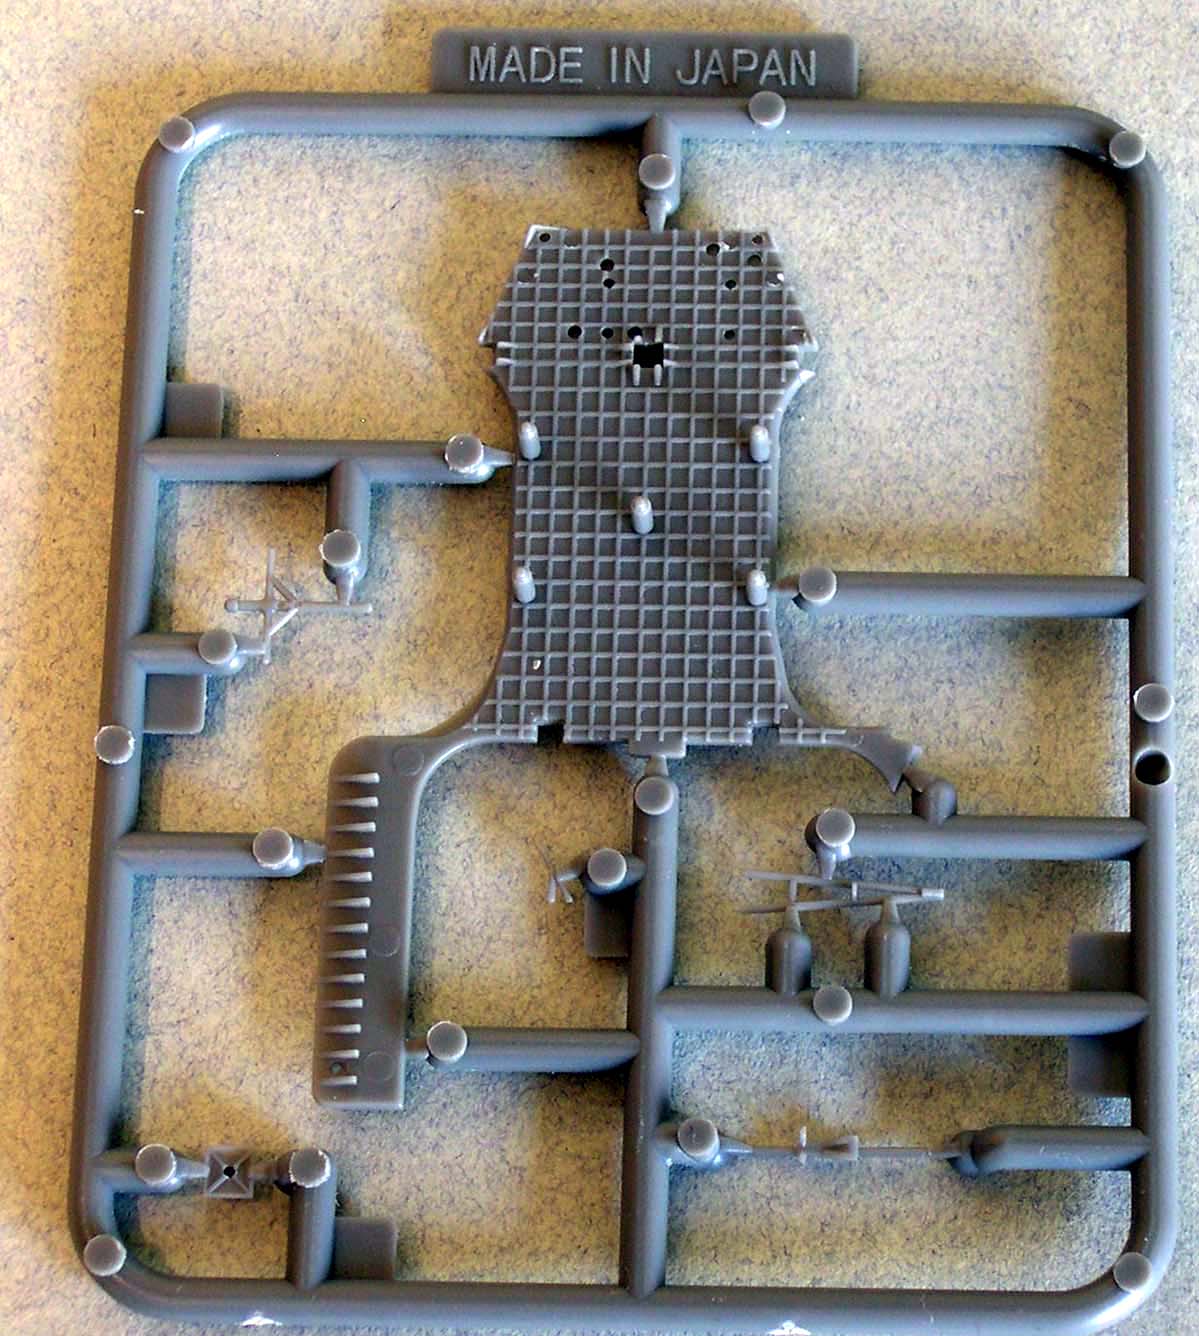
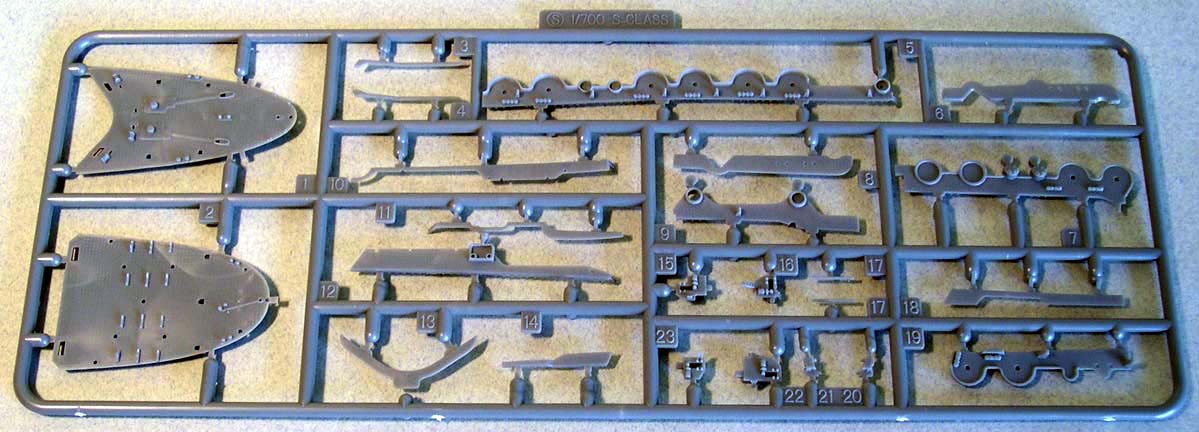
| SPRUE S | ||||
|
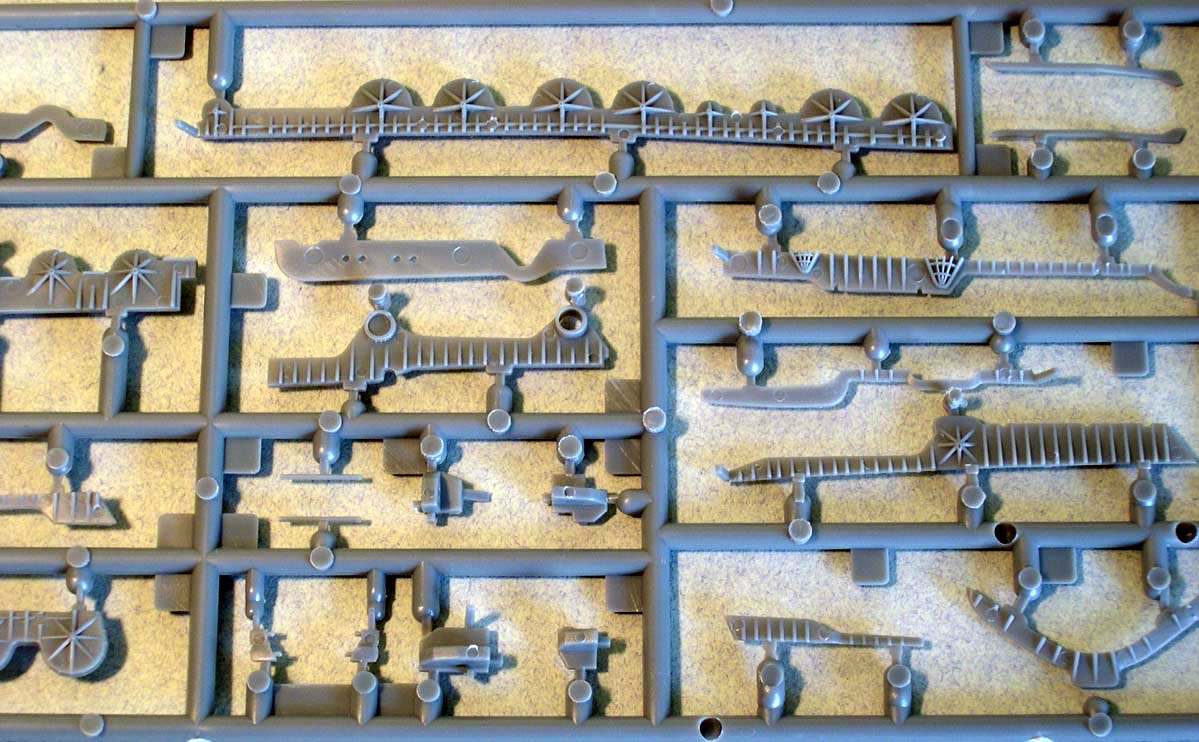
This sprue holds the forecastle deck, the main boat deck at the stern, all of the 25mm AA sponsons, most of the catwalks, director platforms and walkways that append the sides of the hull. All the decks are beautifully rendered with very fine treading. The forecastle deck even comes with tiny leadsman platforms to either side of the bow. I cant recall any previous kit so molded. The main boat deck has molded on boat chocks, and proper column support and girders underneath. All the AA sponsons have small support girders molded underneath and detailed 25mm ammo boxes for each 25mm AA emplacement; both these features are missing in the Tamiya kit. The many catwalks are a very nice inclusion as this is another feature not available with the Tamiya kit. |
||||
 |
||||
|
||||
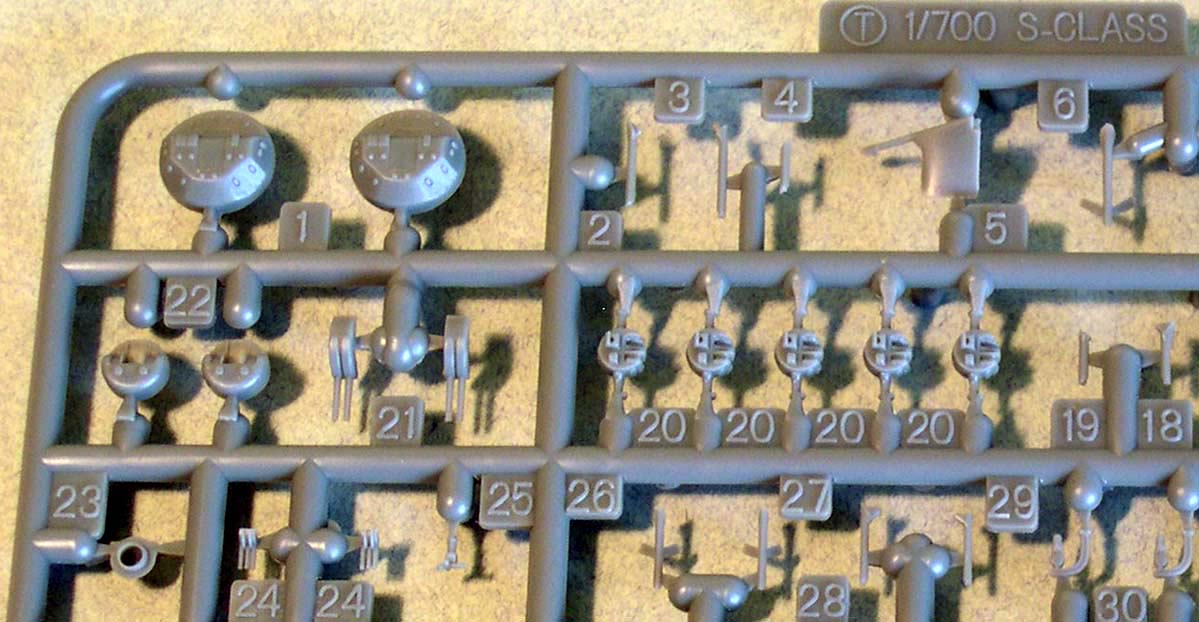
| SPRUE T | ||||
|
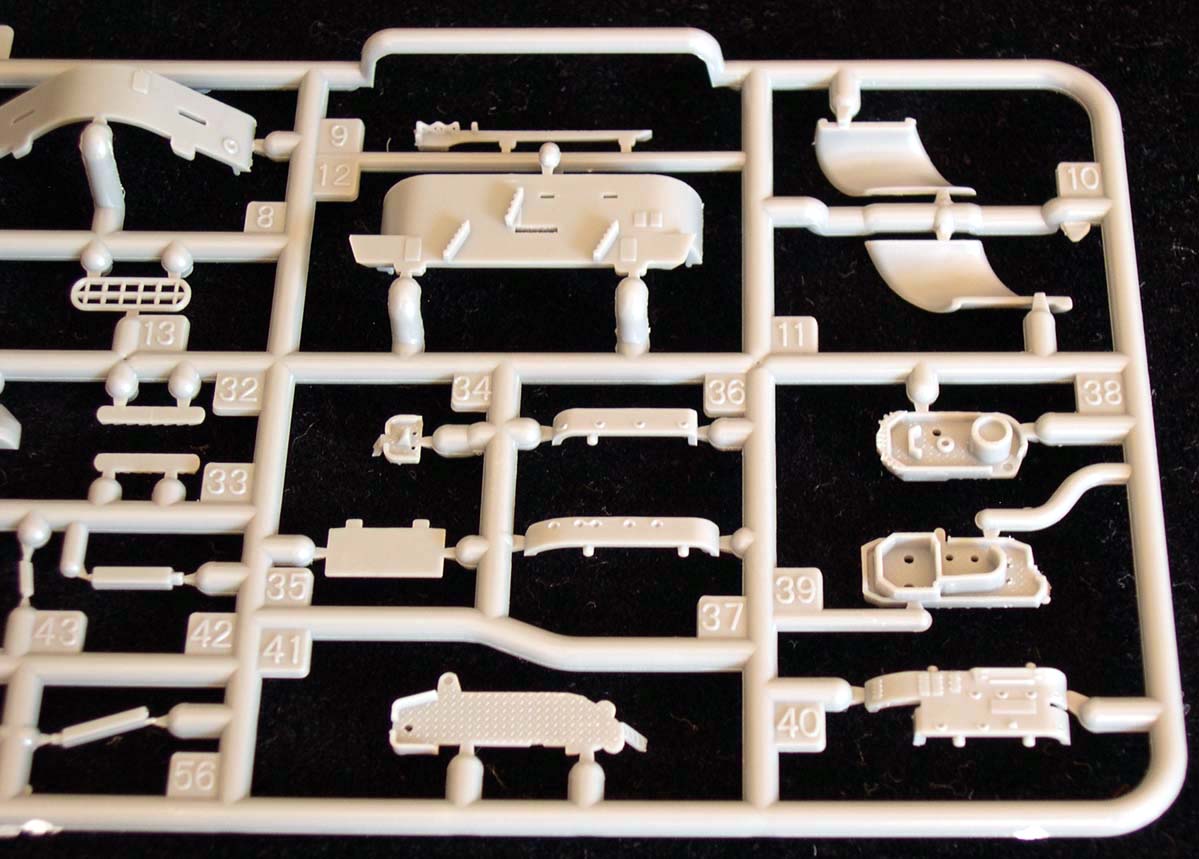
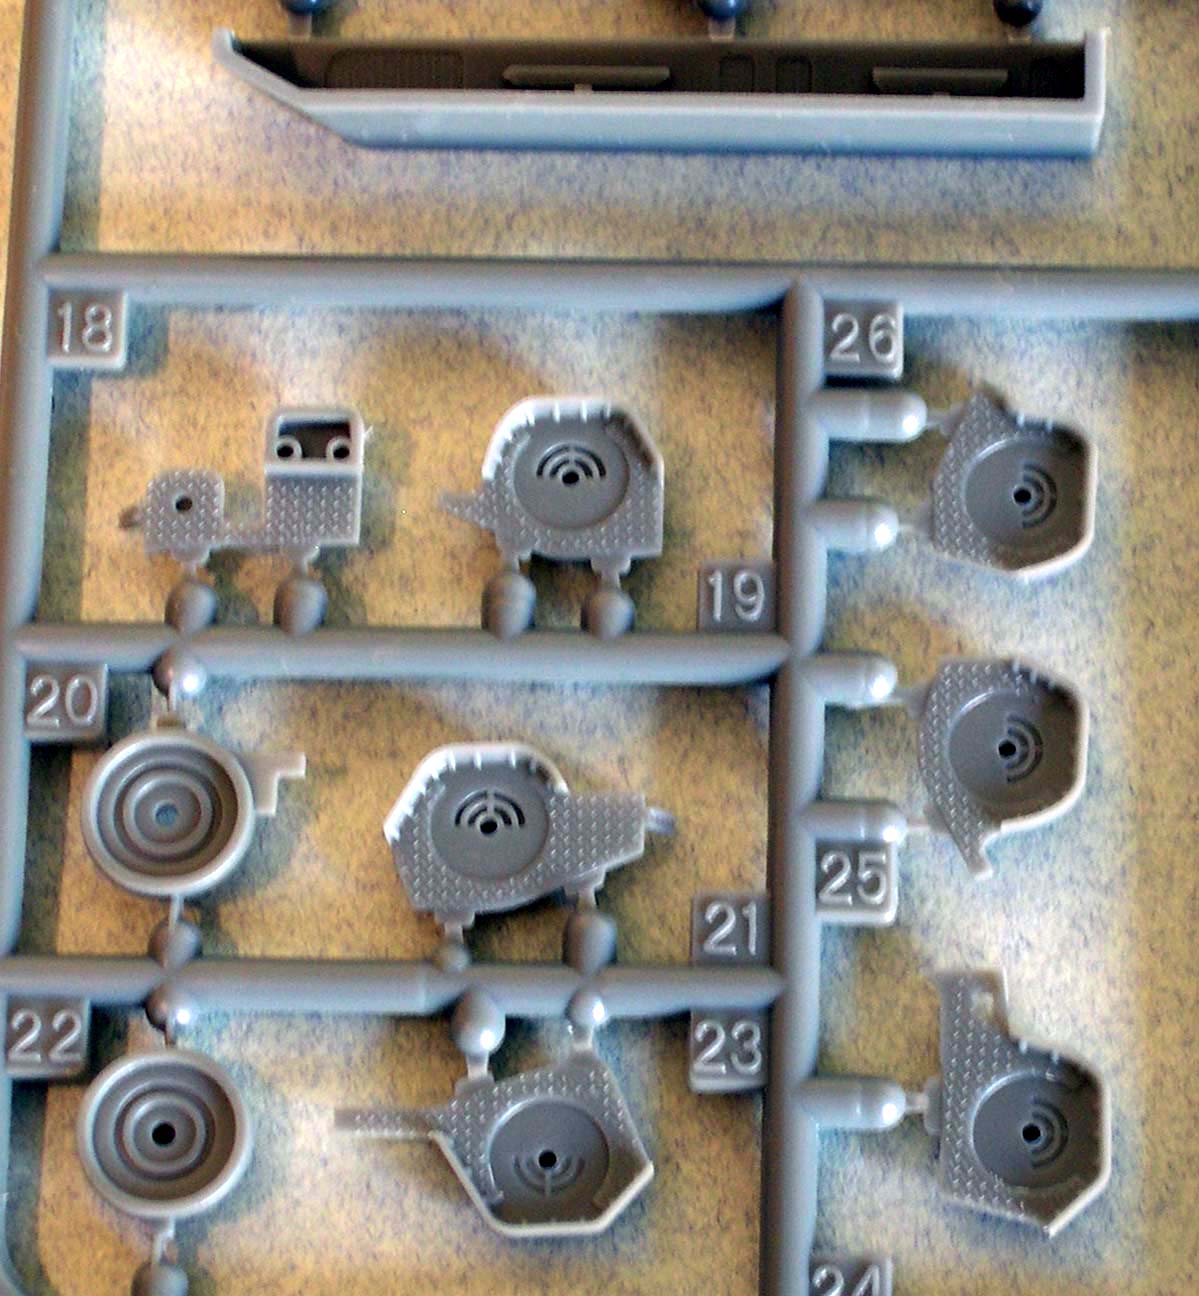
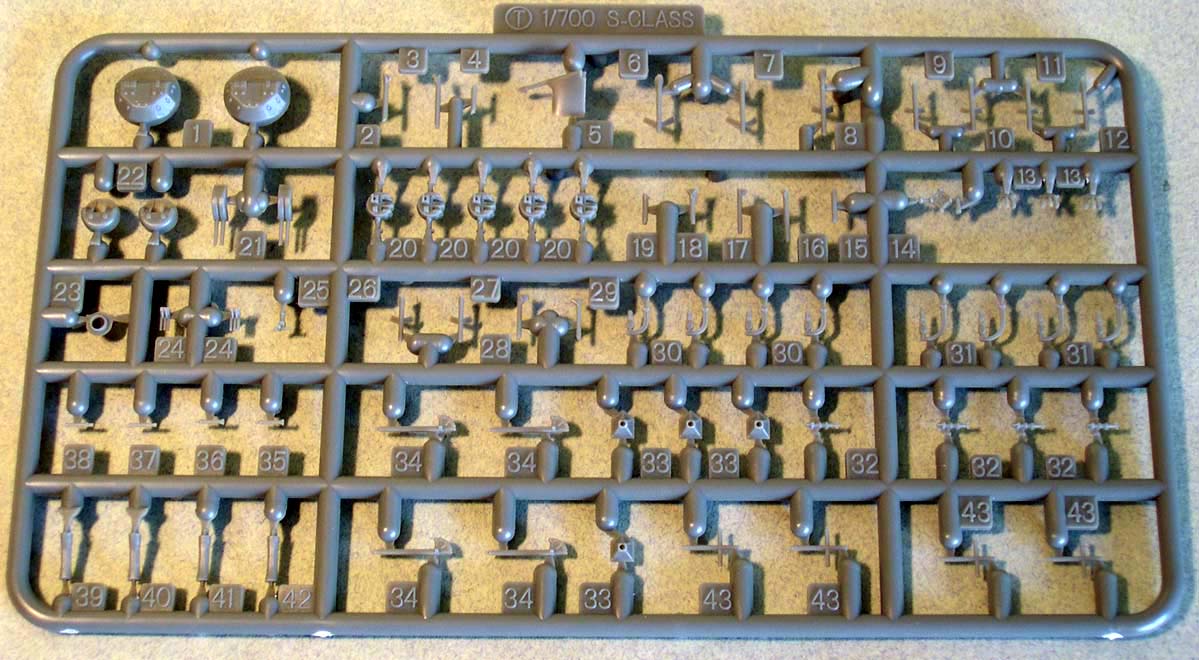
This sprue contains the enclosed turrets and barrels for all of the enclosed AA mounts that are mounted on the starboard aft quarter, the forecastle mounted supports for the forward end of the flight deck, supports for the smaller, hull mounted 25mm AA sponsons, davits, paravanes, all the components of the four aerial radio masts, the Type 94 HA directors, anchors, and some ancillary equipment. Detail on the two twin 12.7cm HA turrets is very nice, down to the louvered shutters over the gunlayers position. The 25mm turrets are less detailed. On the other hand, Im not that impressed by the Type 94 HA directors, at least as they appear on the sprue. They are very detailed, perhaps too much so in attempting to depict as open the slots of the louvered shutters over the optical sights. While I appreciate Fujimis effort here, I feel that it just doesnt do the director justice. To me, the director that comes with the Large Vessel Equipment accessory set expresses the overall shape better, and I note that PitRoad is set to release a new version of the director with the imminent release of its NE03 accessory set, so I feel there are other options. I suppose that one could also cover the open slots with styrene strip to minimize the open look. That way, one could preserve some of the nice surface detail while minimizing distractions. Im not that impressed with the radio aerials either, though they appear correctly sized. Details seem soft. There are better alternatives in plastic from some of the PitRoad accessory sets and, of course, in PE. Fujimis own Shokaku PE set comes with a very nice set. |
||||
|
||||
| SPRUE U | ||||
|
This is another very small sprue that contains the upper boat deck and parts for the mainmast. As with the other decks, the treading is finely rendered, and the deck is properly shaped. Boat chocks are molded on to the deck. The mast is divided into upper and lower halves, with bracing and platform. I welcome the attempt at extra detailing of the mast but I feel some aspects impossible to render successfully in plastic, such as the spreaders, thereby simplified to the point of just being a block of plastic. As with the radio aerials, I think that the corresponding Fujimi PE set for Shokaku provides a better option, as do various aftermarket PE offerings. Its either that or mast replacement by using brass rod. |
||||
|
||||
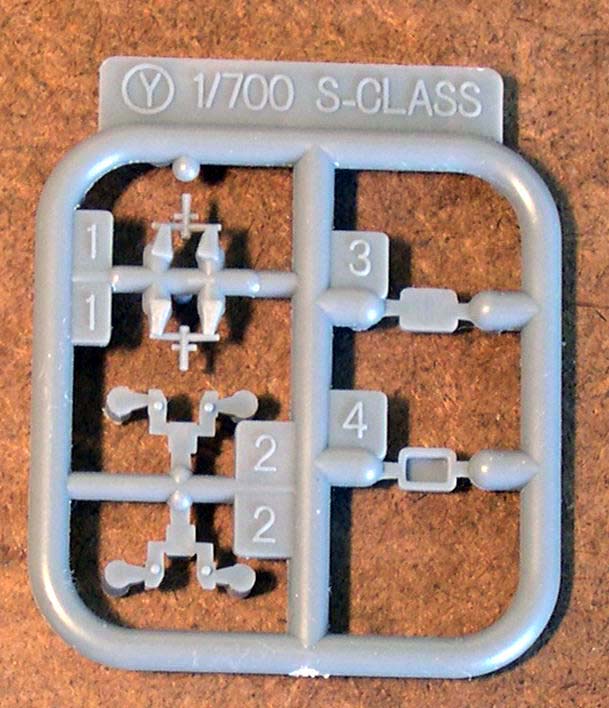
| SPRUE Y | ||||
|
Still another small sprue, this one holds parts for two 12.7cm HA practice guns and a maneuvering observation station. All are to be placed on the rear of the upper boat deck. Both are nicely done, though the window frame outlines on the station are a little feint. |
||||
|
||||
| SPRUE Z | ||||
|
Yet another very small sprue, this one is engineered to protect its contents. It contains the two curved, upper halves of the two funnels. The funnel surfaces have molded on grab rails. |
||||
 |
||||
| DECAL | ||||
|
Markings are for the 1941 to early 1942 flight deck. Colors appear correct. A nice inclusion to this decal sheet are the flight deck warning stripes that marked the position of each twin 12.7cm HA mount. | 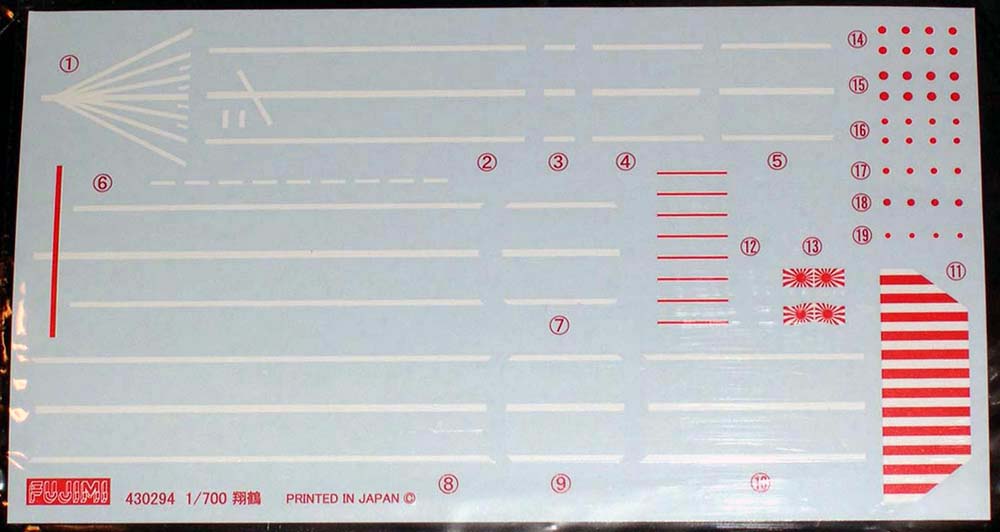
|
|||
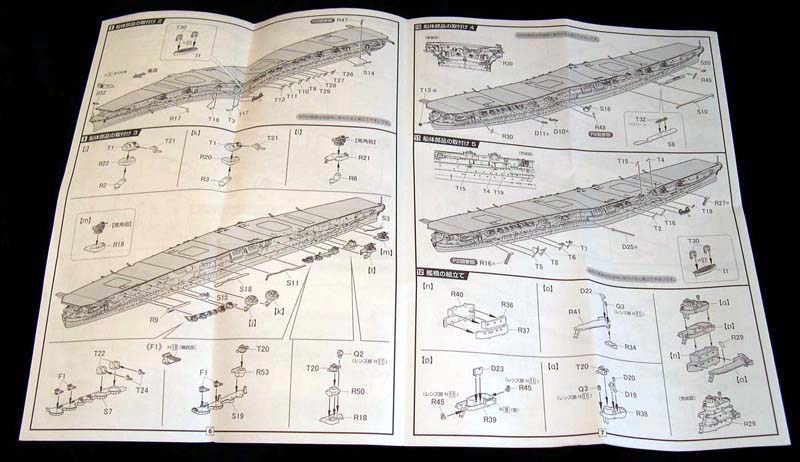
| INSTRUCTIONS | ||||
|
This consists of 8 bi-folded pages containing plan and elevation views, sprue layout, painting guide, plus several pages of exploded assembly views. |
||||
|
||||
| CONCLUSIONS | ||||
|
By making use of up-to date references and slide molding technology, Fujimi has produced a superb kit that is a welcome improvement over previous kits of this ship and class. The overall level of accuracy and execution is high. I cant comment on fit at this point but my gut feeling is that this kit will build into a great model right out of the box. I personally would replace Fujimis standard sprue sets of AA, boats, davits, mast, etc. with the superior FineMolds or PitRoad alternatives but, these are minor issues. Use of the smartly thought out Fujimi PE set developed in conjunction with this kit can only take the model to a finer level of detail and finish. As the Shōkakus are among my favorite ships, and having sweated through countless corrections of several builds using earlier kits, I make no apologies for my nitpicking, particularly of the flight deck. Most builders will not have an issue with any of the kit errors or the flight deck anomaly; only masochistic perfectionists like myself will care to any extent. The good news is that a modeler with average skills can handle most of the fixes if they so desire. For the most determined of modelers, the amount of time spent correcting this kits errors will certainly be less than those of previous versions, as the starting point is so much finer than before. |
||||