Reviewed by Tracy White
Special thanks to Skyway Model Shop for making this review possible!
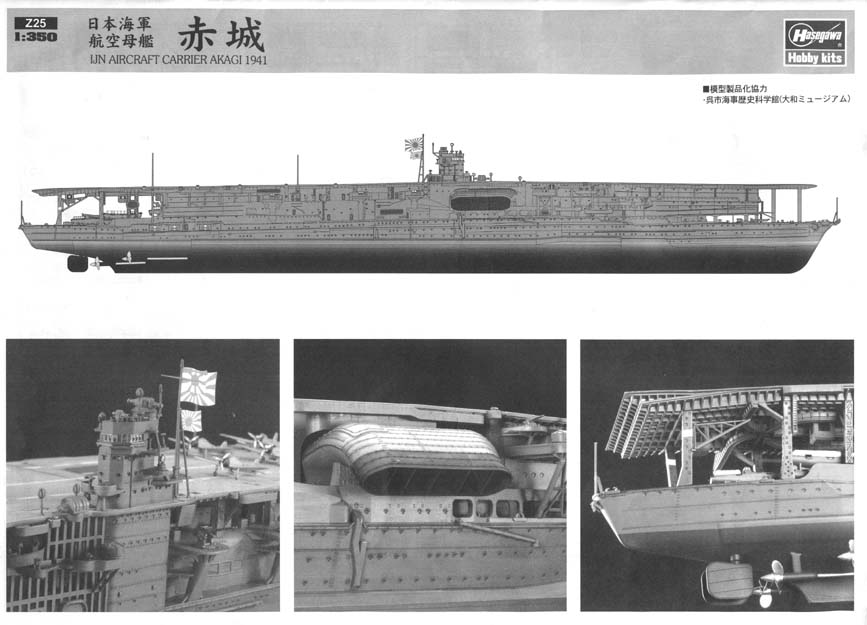
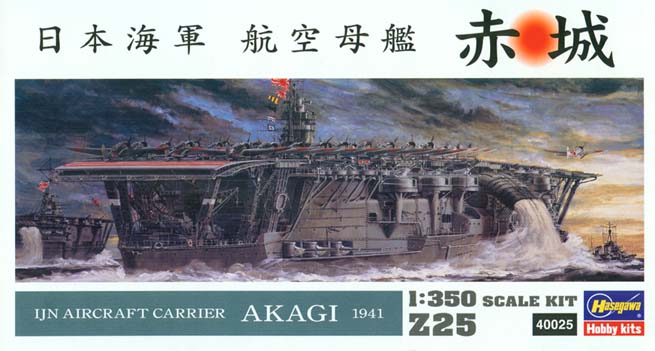
Hasegawa 1/350 IJN Aircraft Carrier "Akagi"
Reviewed by Tracy White
Special thanks to Skyway Model Shop for making this review possible!
|
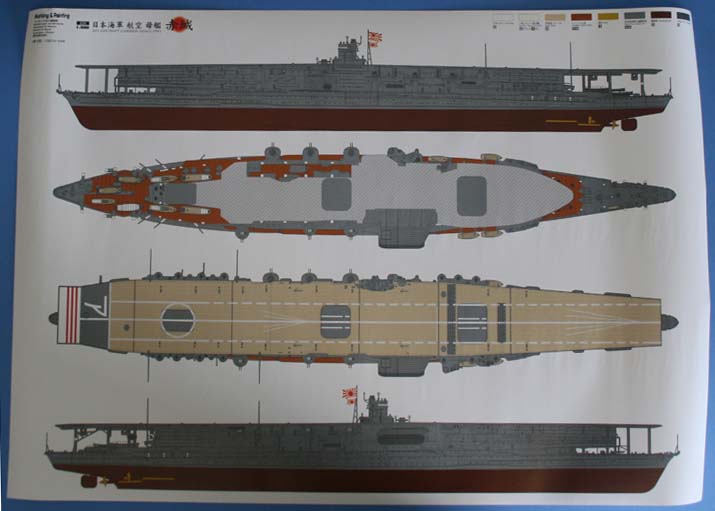
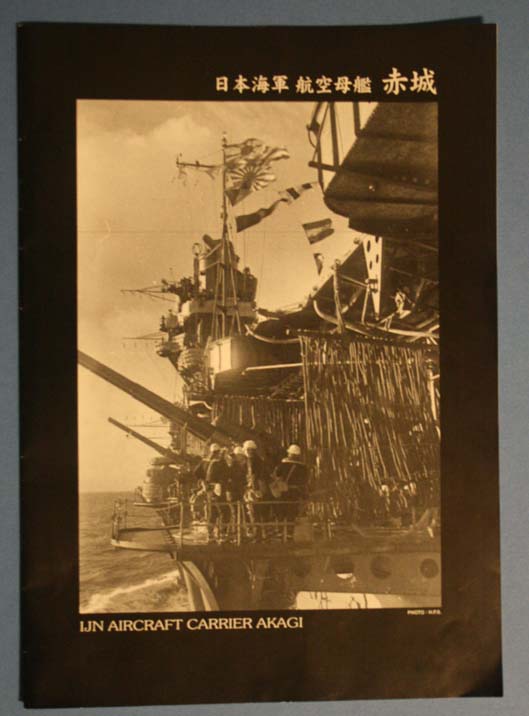
Few who have read about the pacific theater are unfamiliar with the name "Akagi." Akagi's combat career as an aircraft carrier was less than three quarters of a year, and yet, in that time she took part in three major battles in two oceans and served as flagship of the "Kido Butai;" the Imperial Japanese Navy's special attack force built around six fleet carriers. Named for a historic mountain in Japan, Akagi spearheaded the attack on Pearl Harbor, the invasion of Rabaul, attack on Port Darwin, raid on the Royal Navy in the Indian Ocean in which the carrier Hermes and Cruisers Cornwall and Dorsetshire were sunk, and was sank by a combination of one bomb hit and one near miss during the pivotal battle of midway. Modelers have been clamoring for a kit of Akagi in 1/350th scale for years, but had to make due with a few 1/700th scale kits or the oddly-scaled 1/450th Akagi. The new-tool 1/350th kit and accessories are now here and should prove to be a popular and sought-after kit for years to come. Twenty-one different parts trees (27 if you count the multiple copies) will get the modeler slightly over 800 parts. The kit is just over 29 inches long, 74.5cm, and just over six inches (15.7cm) wide if the radio antennas are dropped to depict the ship during air operations. The ship is designed to be depicted full-hull, with no aids given for making a waterline version. Attachment nubs on larger pieces are thick; I recommend using cutters to remove pieces as a regular knife is going to take some extra work. Smaller details have smaller nubs as well as blind sprue pieces to improve flow and part quality. While there are some mold seams on detail parts, there was no an ounce of flash on the kit. Parts trees are largely broken down by area (for example, most, if not all of the parts for the ship's island are located on Tree N). |
||||||||||||||||
| Tree A | ||||||||||||||||
 |
||||||||||||||||
|
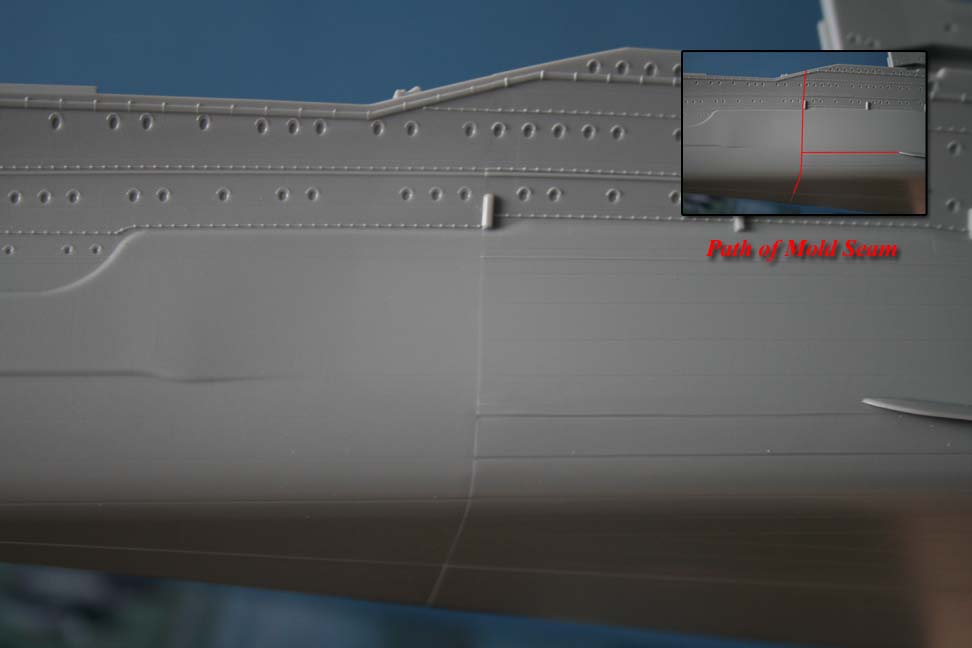
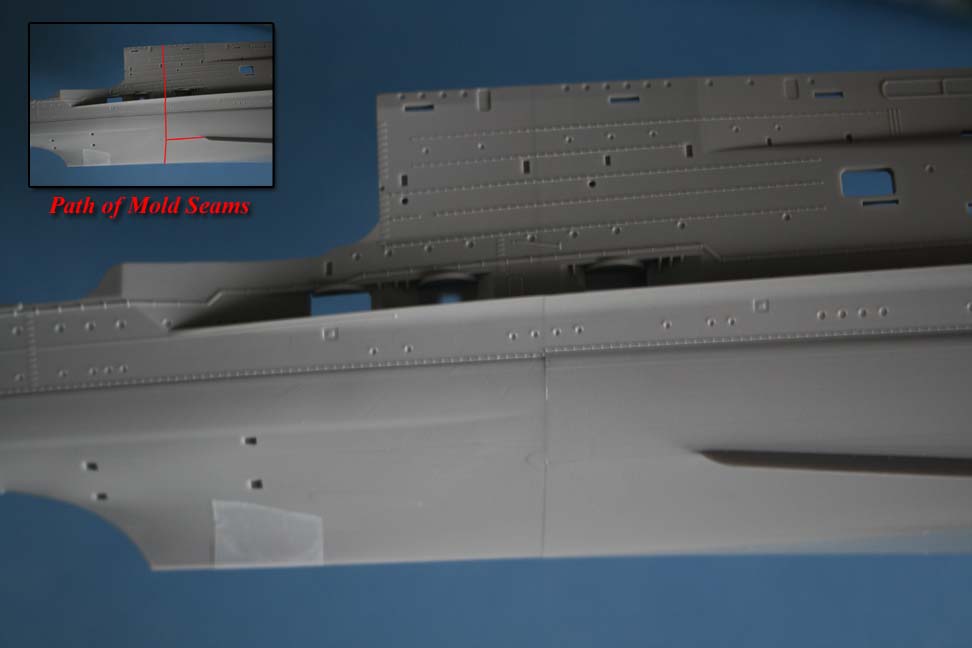
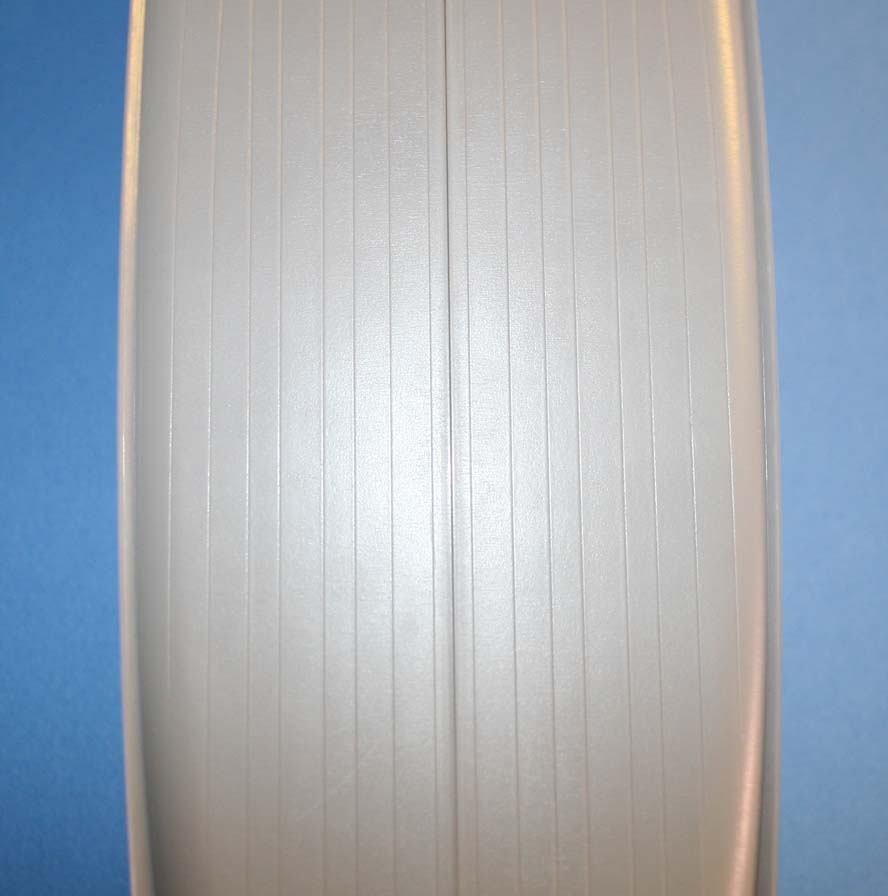
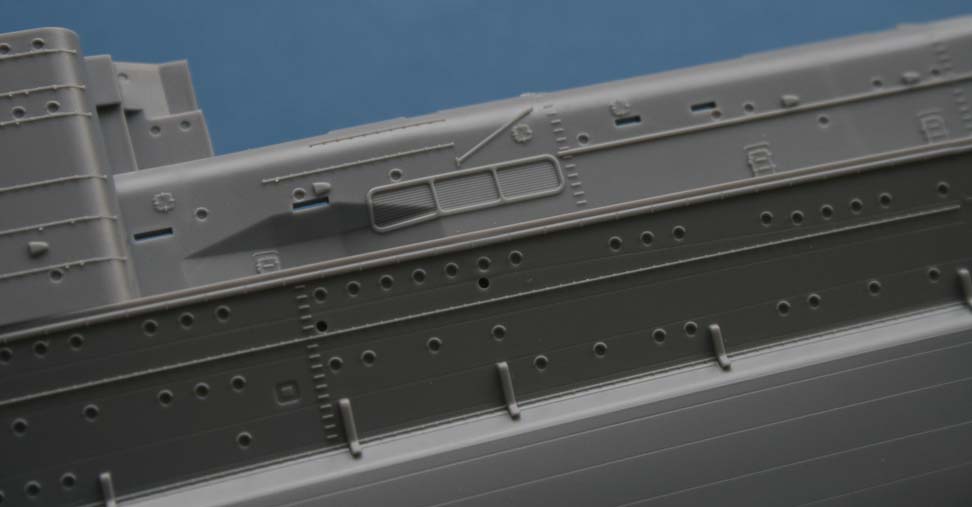
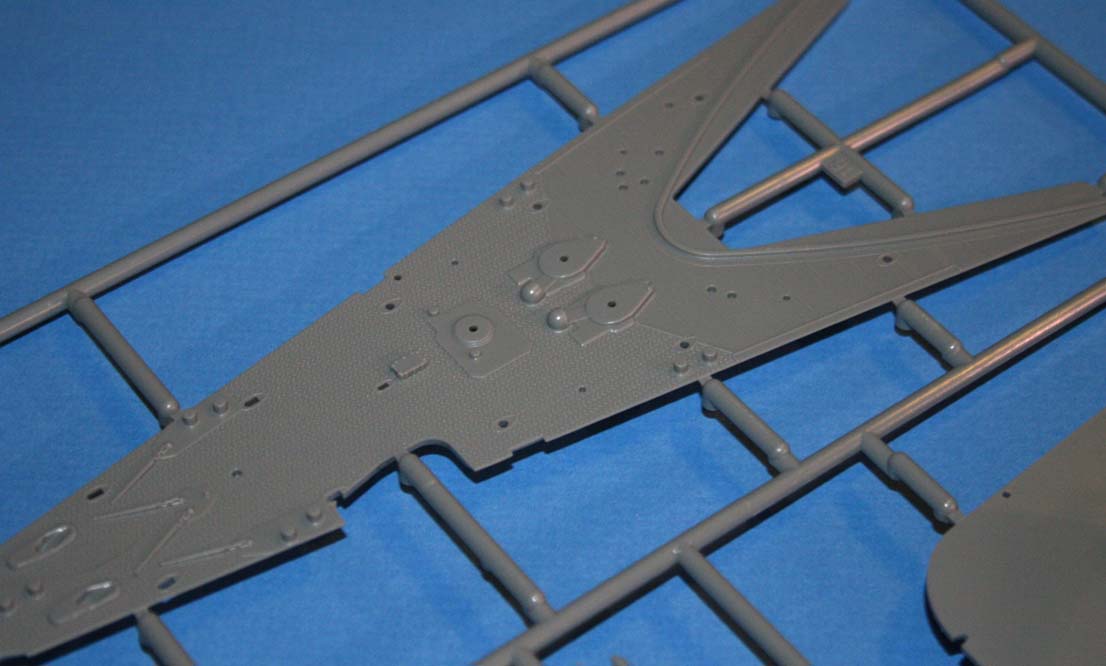
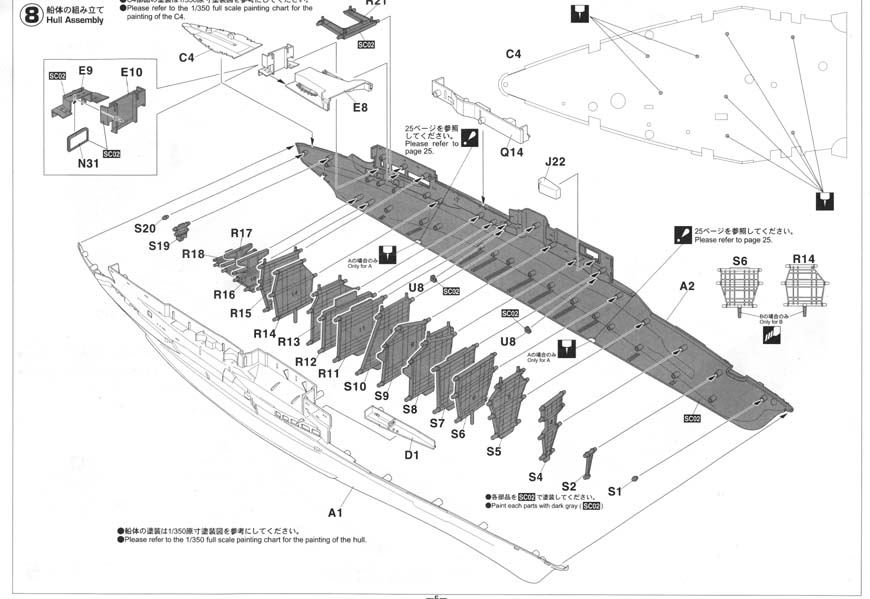
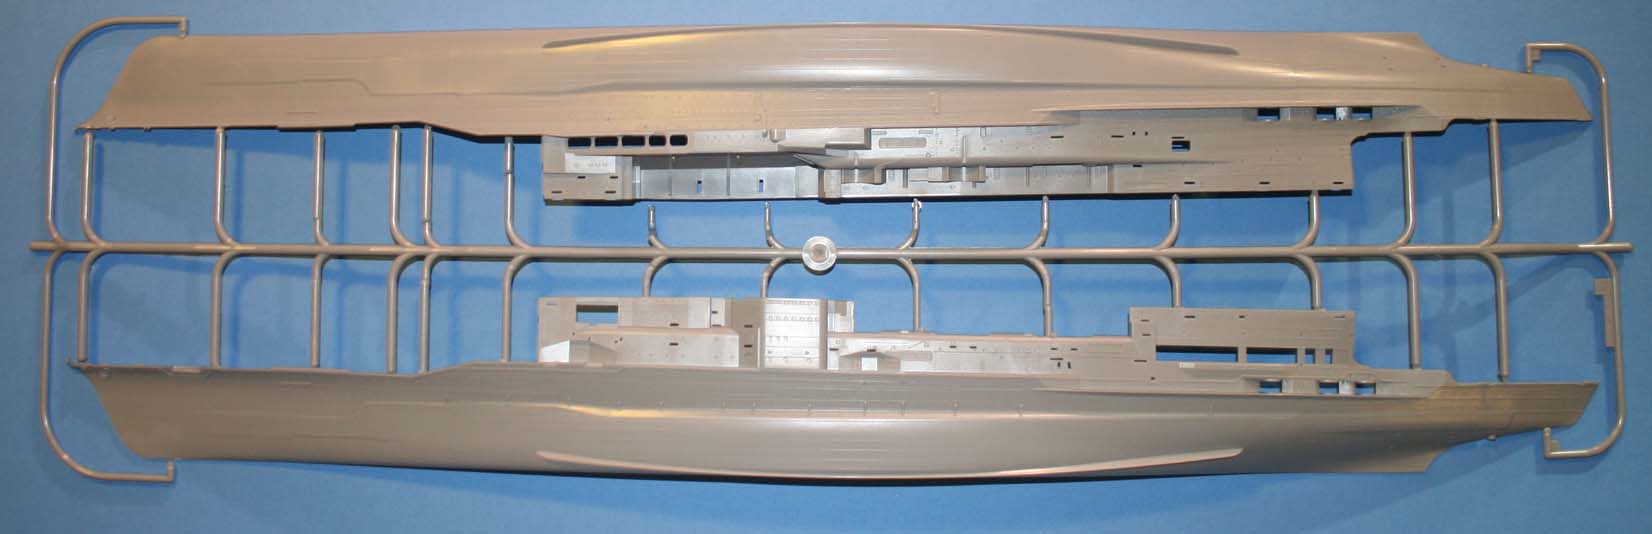
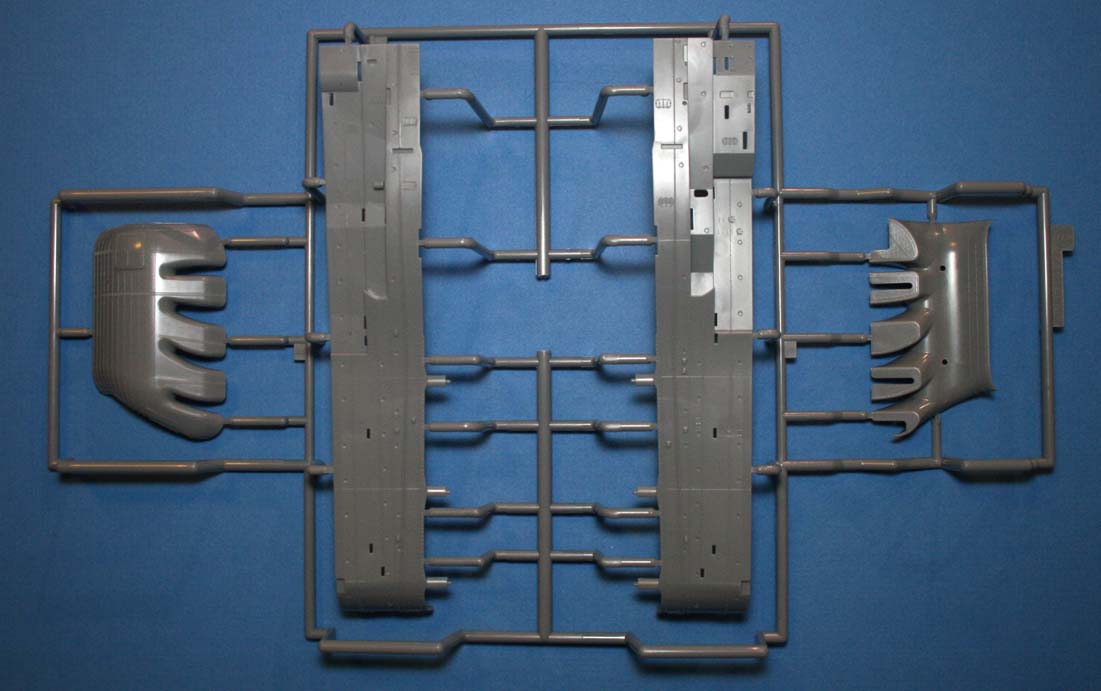
One thing is for sure, this is not a model where you will fear a weak structure with. The hull halves are made of thick, rigid plastic, and there are no less than 20 internal bracing pieces to stiffen the structure. Thick plastic can be a problem with warpage, but my hull halves were warp free. There is plenty of crisp detail in the hull laves, and parts layout was done such as to avoid soft detail. Hasegawa included hull plating below the main deck, a bit heavier than I would prefer, but not too excessive nor with the inconsistent raised/engraved status that their earlier Nagato displayed. I lack a shell plating diagram and so can't speak to the accuracy of the plating itself, but it certainly looks better than the inaccurate spreadsheet grid that Nagato was tooled with. It looks like no less than five separate mold pieces were used on the outside of the hull; leaving three mold lines on each hull half. Only two extend below the main deck; the third largely follows hull and deck joining edges and is imperceptible for 95% of its run. The mold seams below the waterline are easily taken care of with a sanding stick, although the hull plating around the mold seam changes in crispness and appearance, going somewhat soft in some areas and losing the fine definition and becoming more trench-like in others. It should be no problem to fill and re-scribe these lines, however, as the surface here is not complex or detailed.
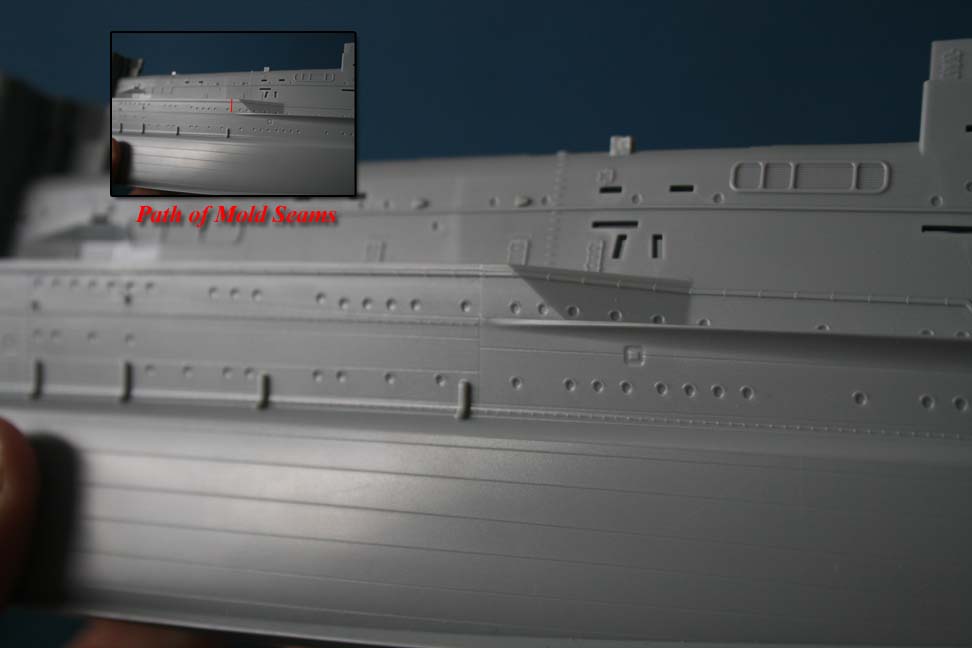
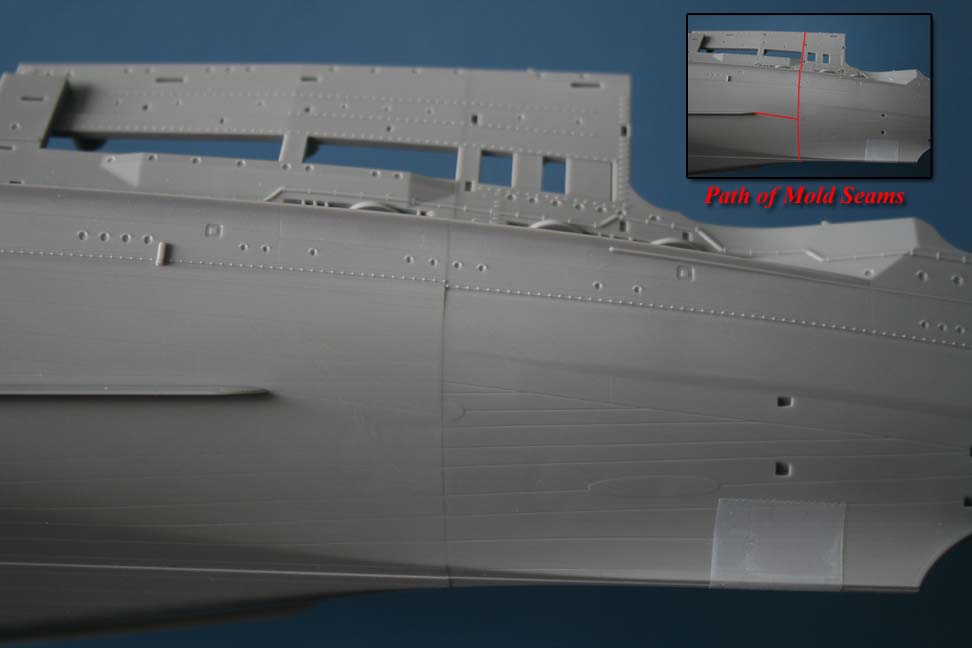
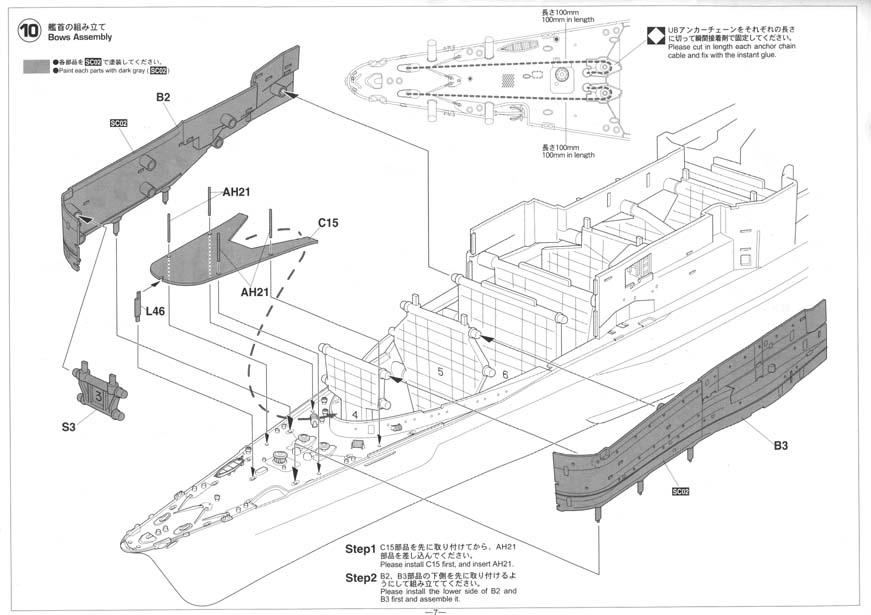
The stern mold lines are the ones the builder will be the most concerned with, I suspect. Hasegawa ran one underneath where one of the prop shaft fairings is located so that theoretically there would be less clean-up work required, but 80% of the raised section for mounting is in the soft detail section and I suspect cleaning up the mold line will take what's left of the locating plate down to zero. I would advise scribing what is visible before sanding so that you still have a bit of an outline to line the parts up with. I suspect that between what is left and the A post at the end of the shaft, it should not be too hard to align these parts correctly. Extra details molded in to the hull halves are rung ladders, watertight doors, vents, hand rails, and portholes; all are crisply represented. Hasegawa did a good job of breaking the parts down in such a way as to negate soft detail on these parts other than below the waterline. |
||||||||||||||||
|
||||||||||||||||
| Tree B | ||||||||||||||||
 |
||||||||||||||||
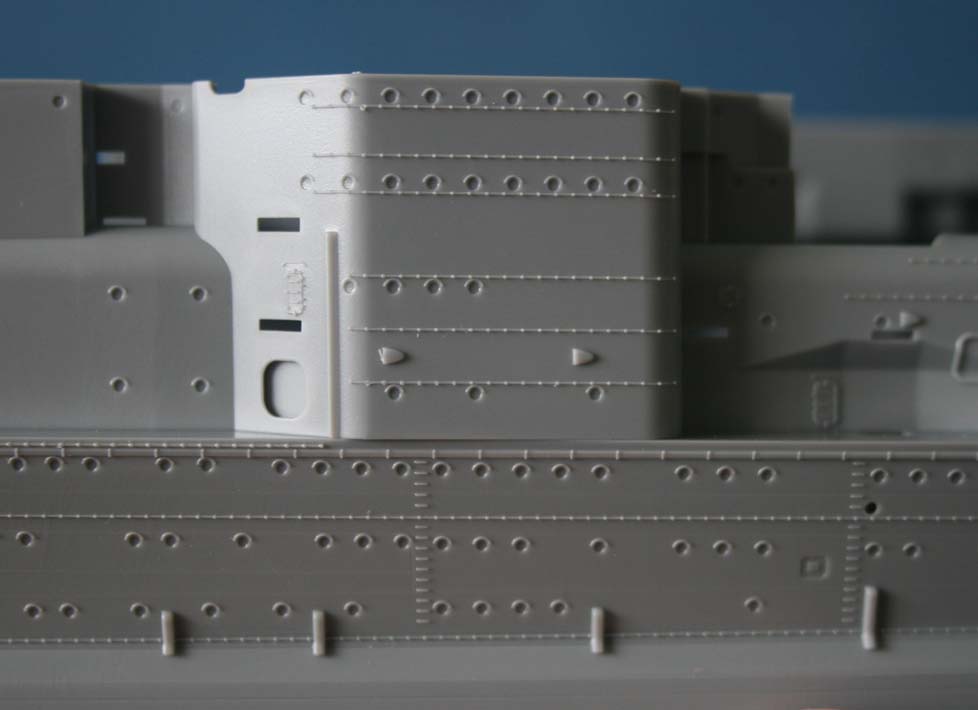
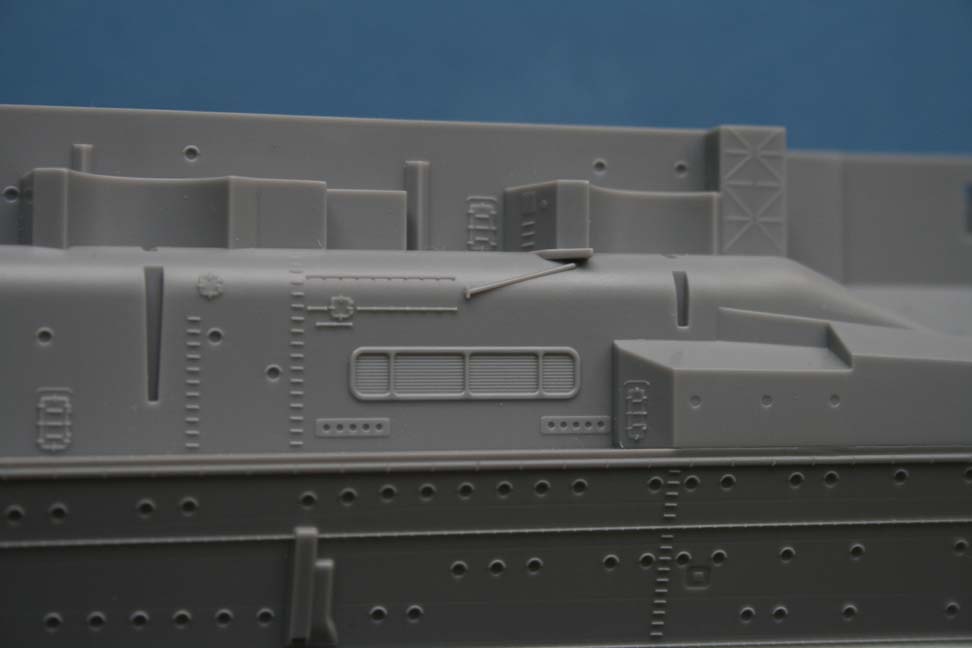
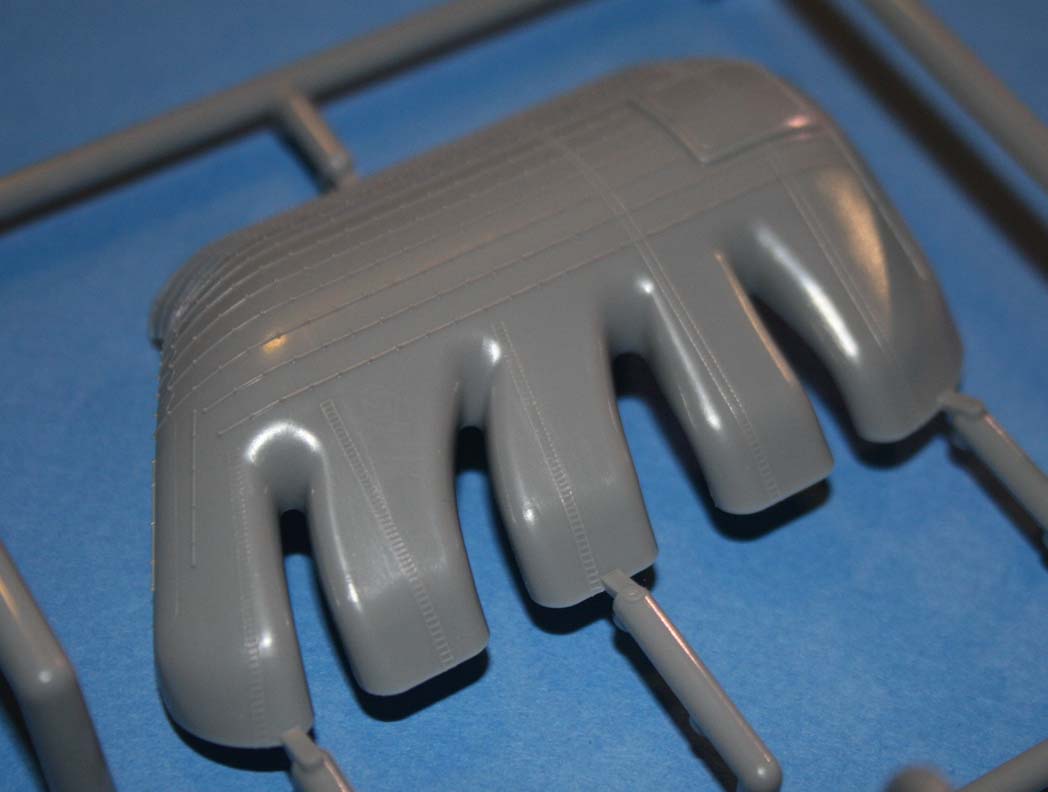
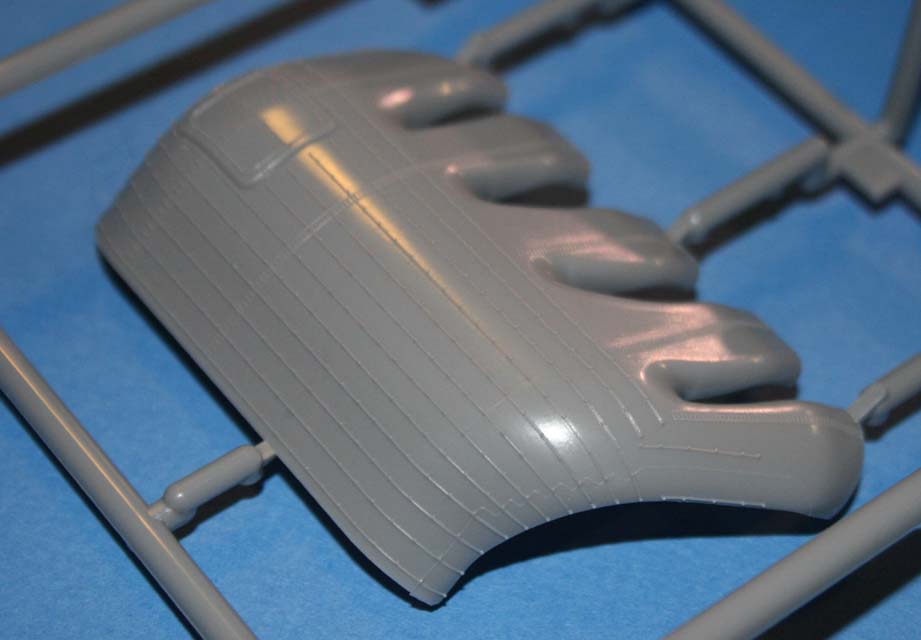
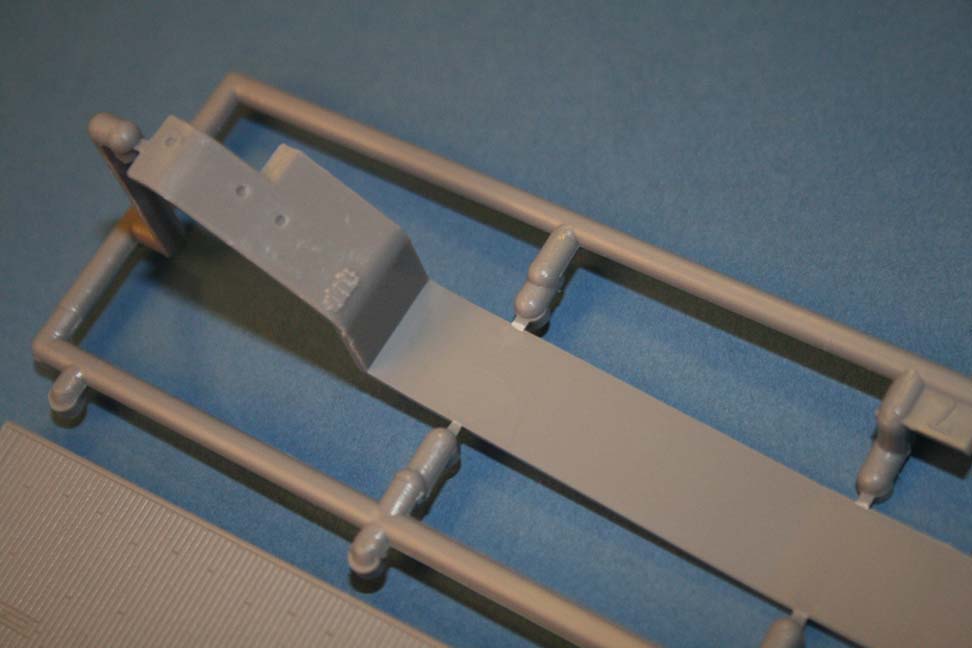
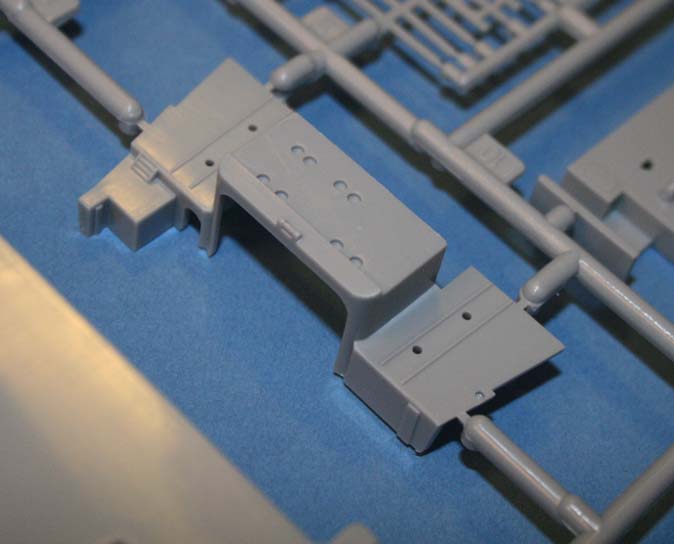
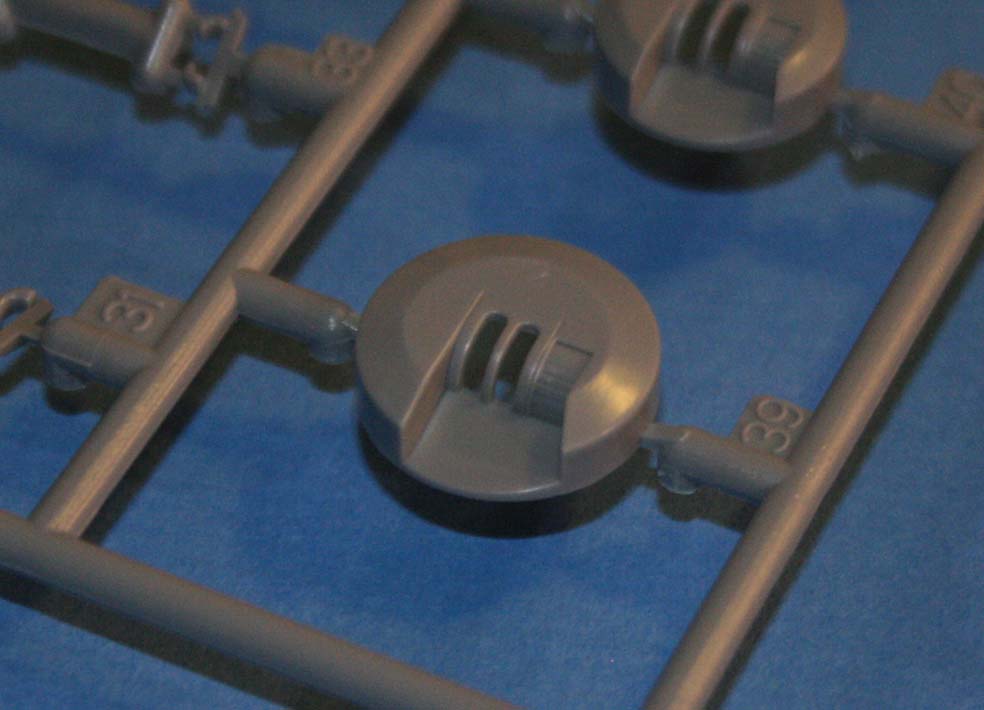
This contains the stack halves and forward section of the superstructure under the flight deck added when she was modernized from 1937 to 1938. Once again, detail is clear and crisp, with lots of solid nubs to be cut. The forward section of the superstructure pieces used slide molds to give the maximum crisp detail, and there is a very small mold seam that will need to be cleaned, but I was able to take care of mine with precisely three passes with a 320 grit sanding stick on the broader expanses and a couple of passes with a knife blade for the more narrow areas. Otherwise, there is very little that needs work here, the detail on Akagi's distinctive exhaust is nothing short of exquisite. Test fitting of pieces showed excellent fit of the two exhaust halves and superstructure pieces to the hull pieces. |
||||||||||||||||
|
||||||||||||||||
| Tree C | ||||||||||||||||
 |
||||||||||||||||
|
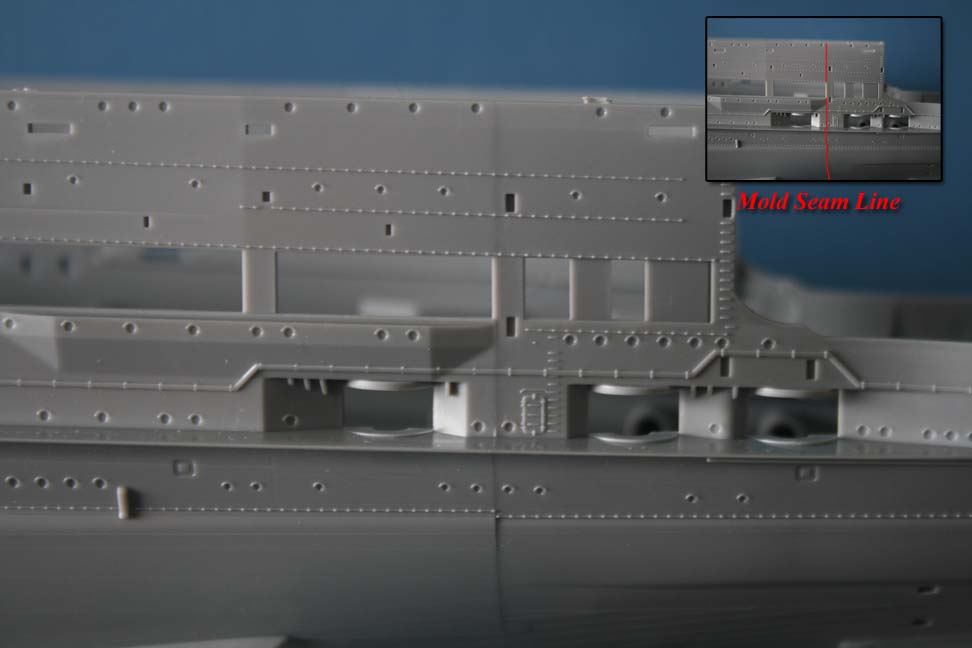
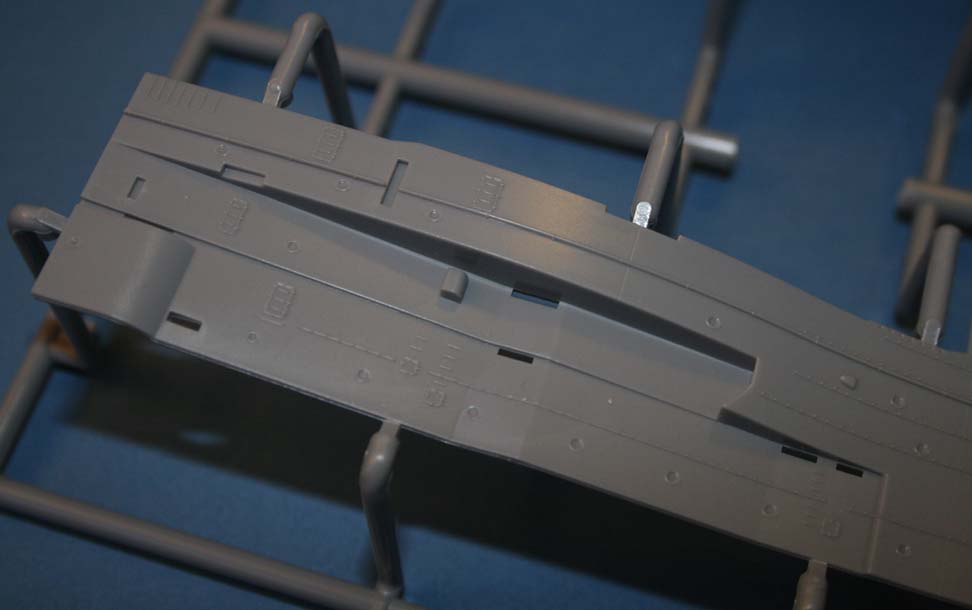
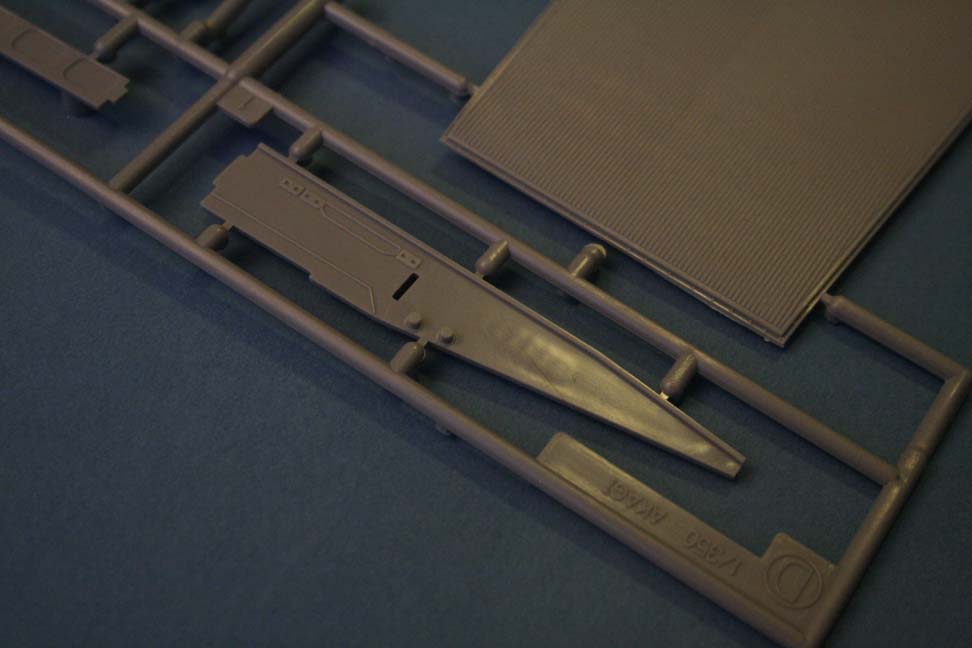
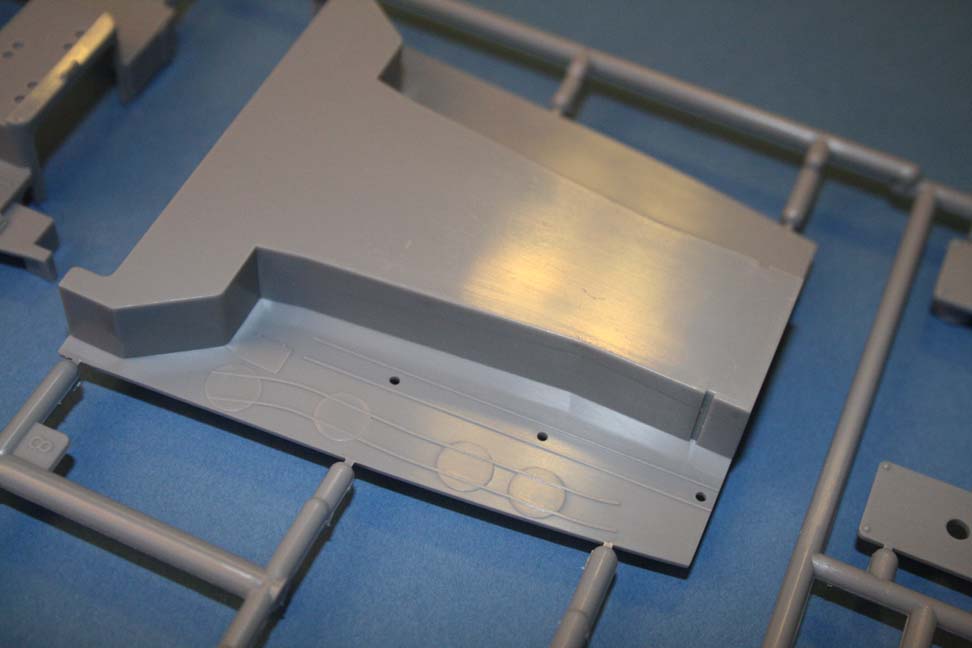
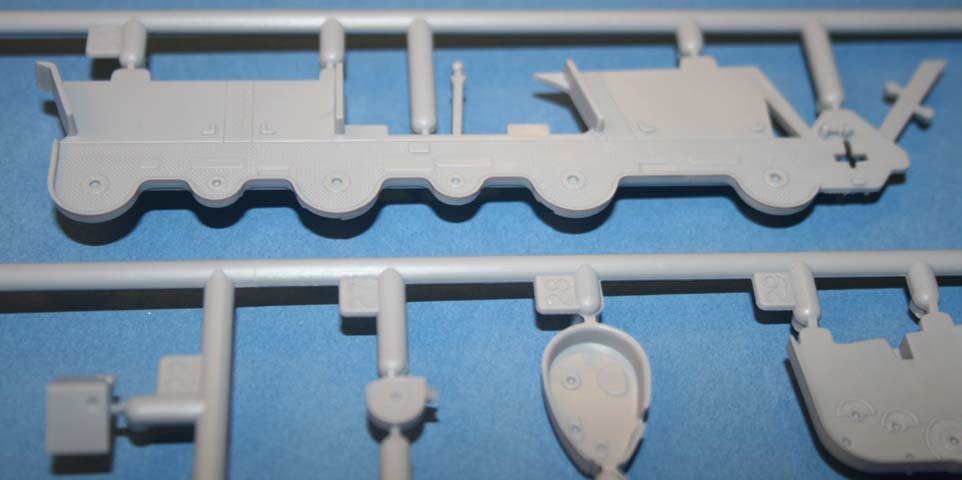
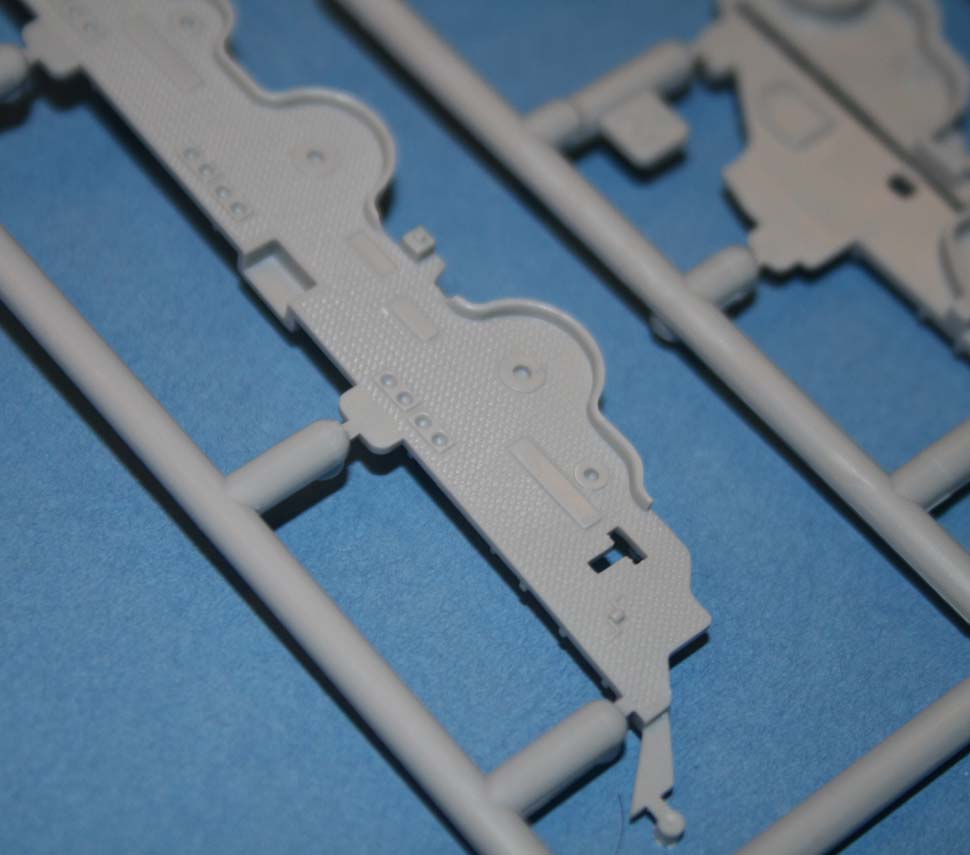
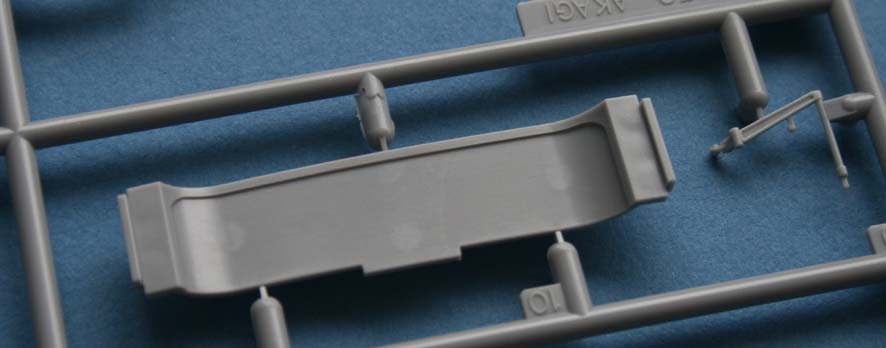
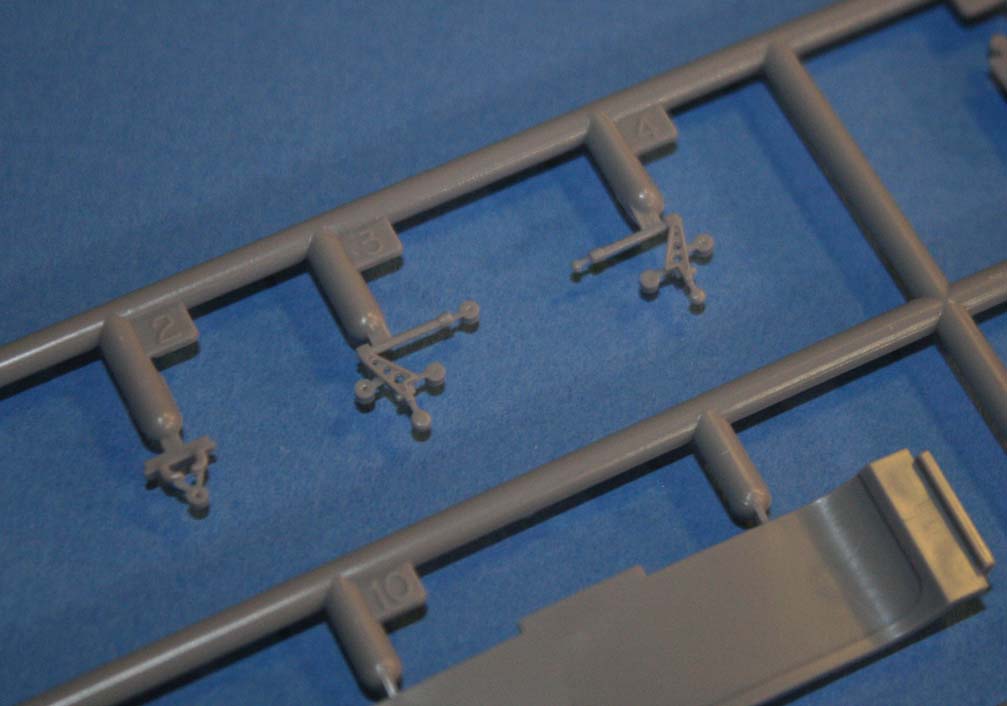
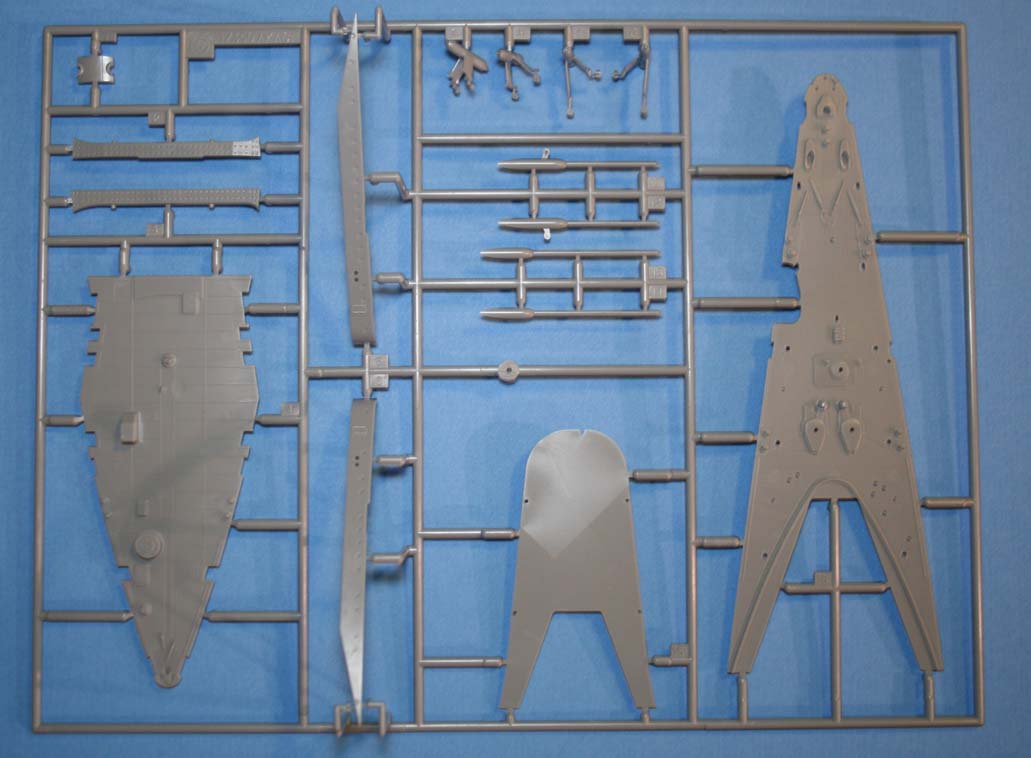
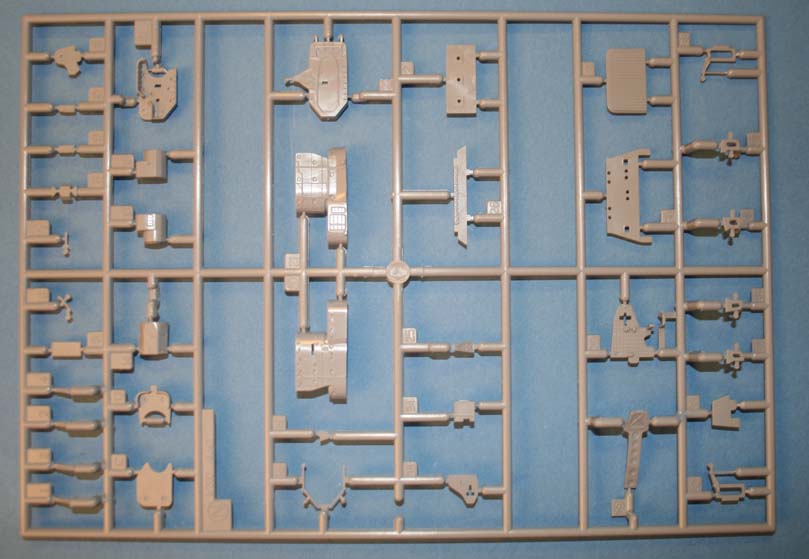
Tree C contains some of the fore and aft deck area structure as well as the propeller shafts and supports. The fore deck piece C16 is about 2/3 covered in diamond plate and I'm not sure how correct this is; my sources contradict each other. As it would not be easy to remove the texture without obliterating some other nearby detail I think I will leave well enough alone barring firmer evidence one way or the other. Curiously, parts C5 & C6 are missing most of the "eyebrows" to help prevent water from dripping down in front of the portholes. Other pieces of higher-level portholes have them, and photographs in AJ Press' Volume 49 "Akagi Volume 1 show them on higher decks in different areas, but I have no direct photographs in this area to say whether or not this is in error. Regardless, it is a minor detail and many of these portholes are underneath and overhang where they will be in shadow, so I don't think this little inconsistancy will be noticed. |
||||||||||||||||
|
||||||||||||||||
| Tree D | ||||||||||||||||
 |
||||||||||||||||
|
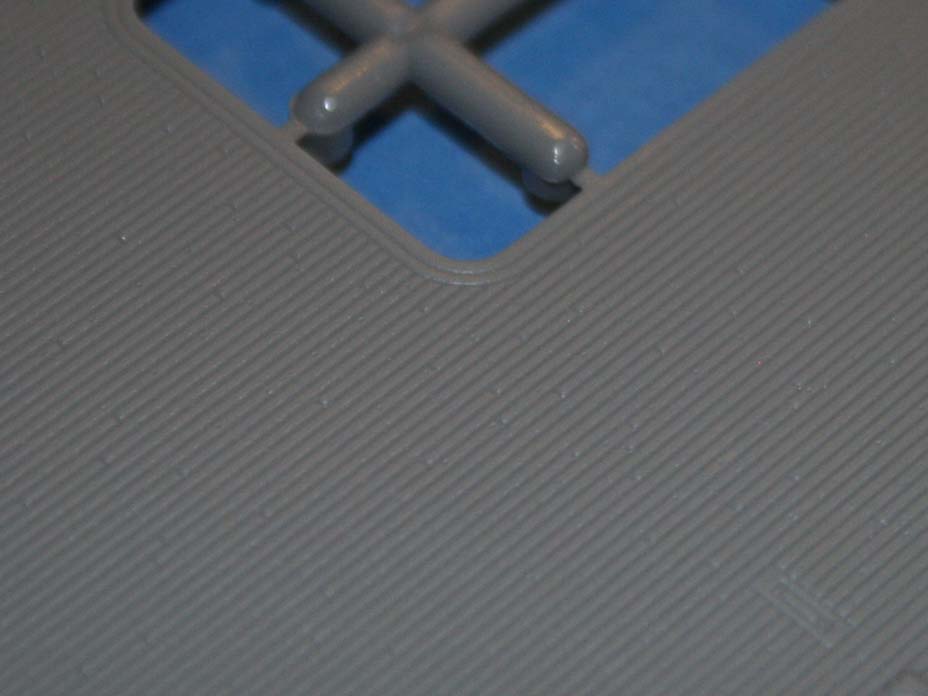
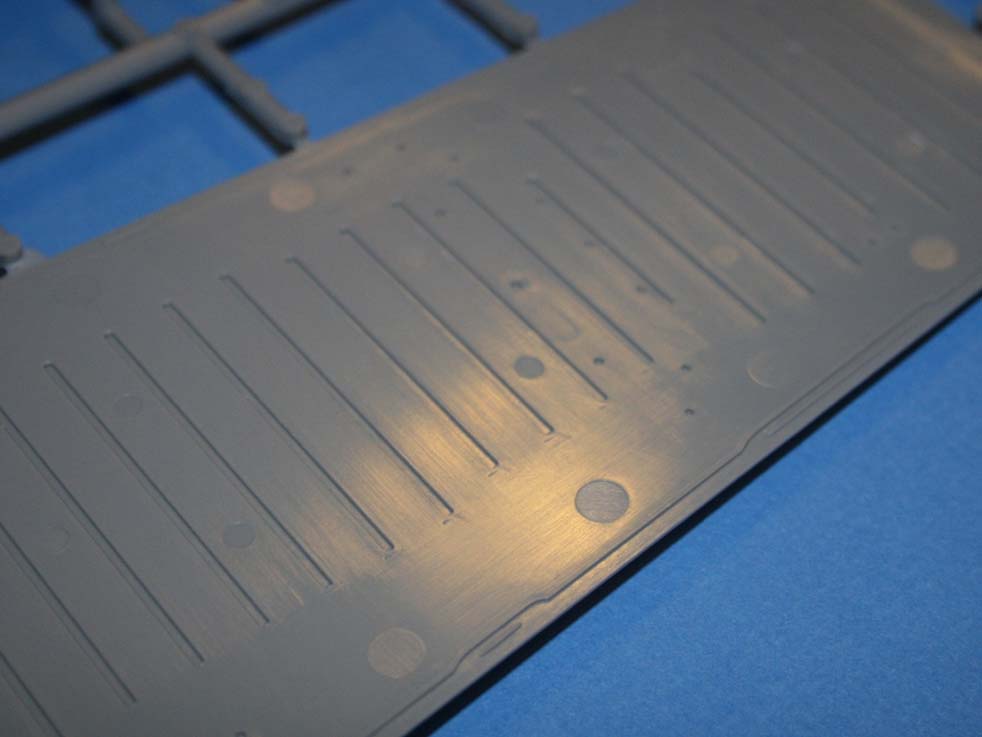
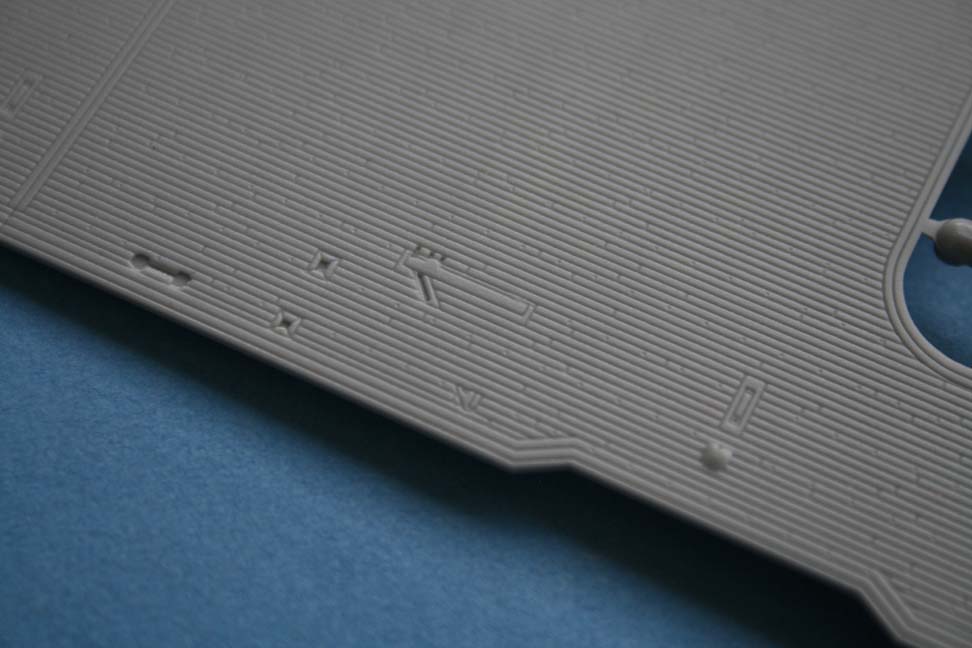
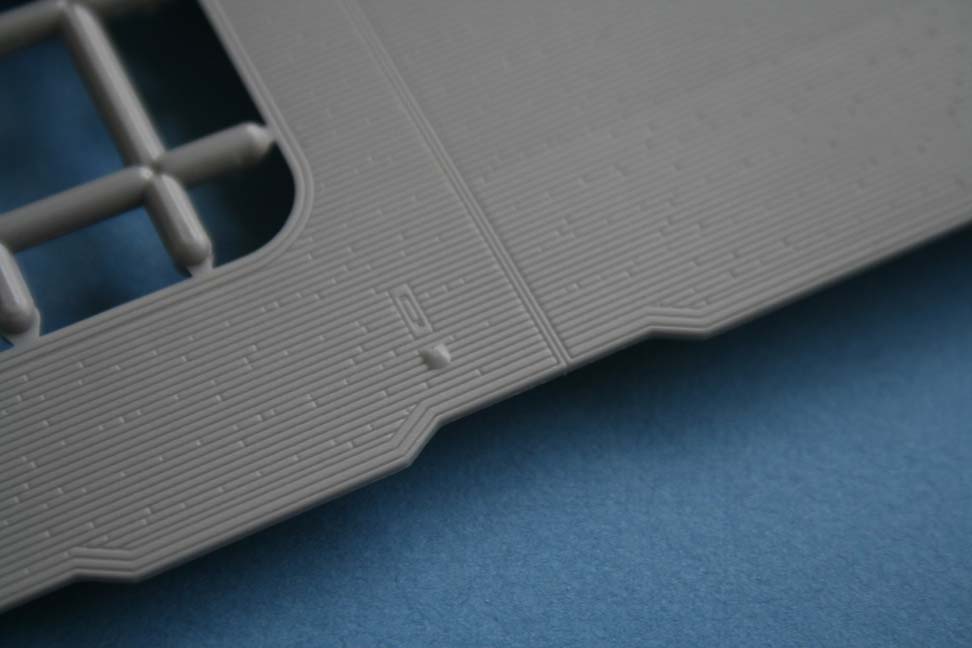
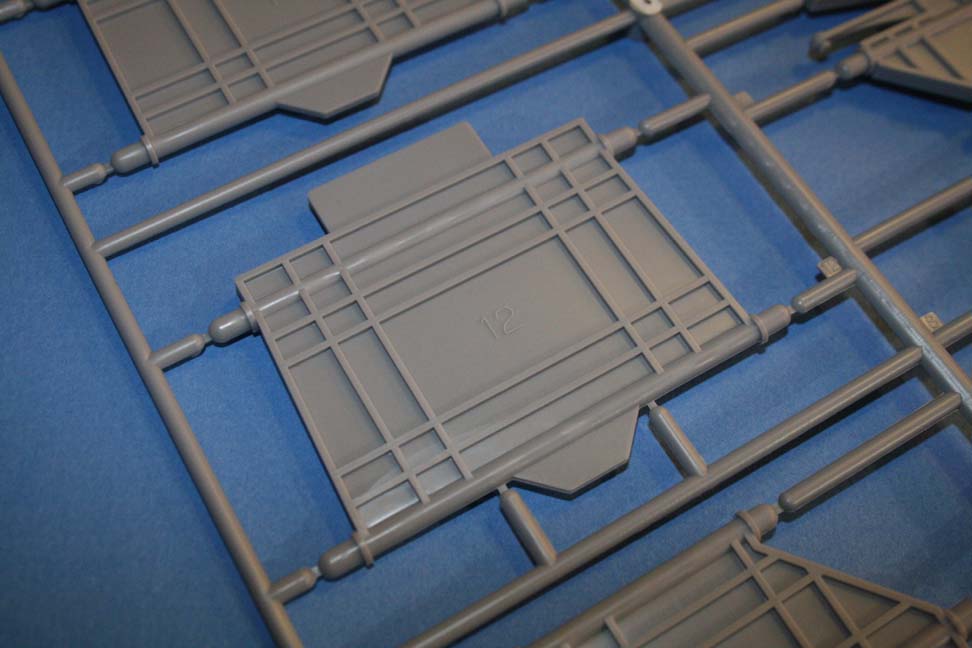
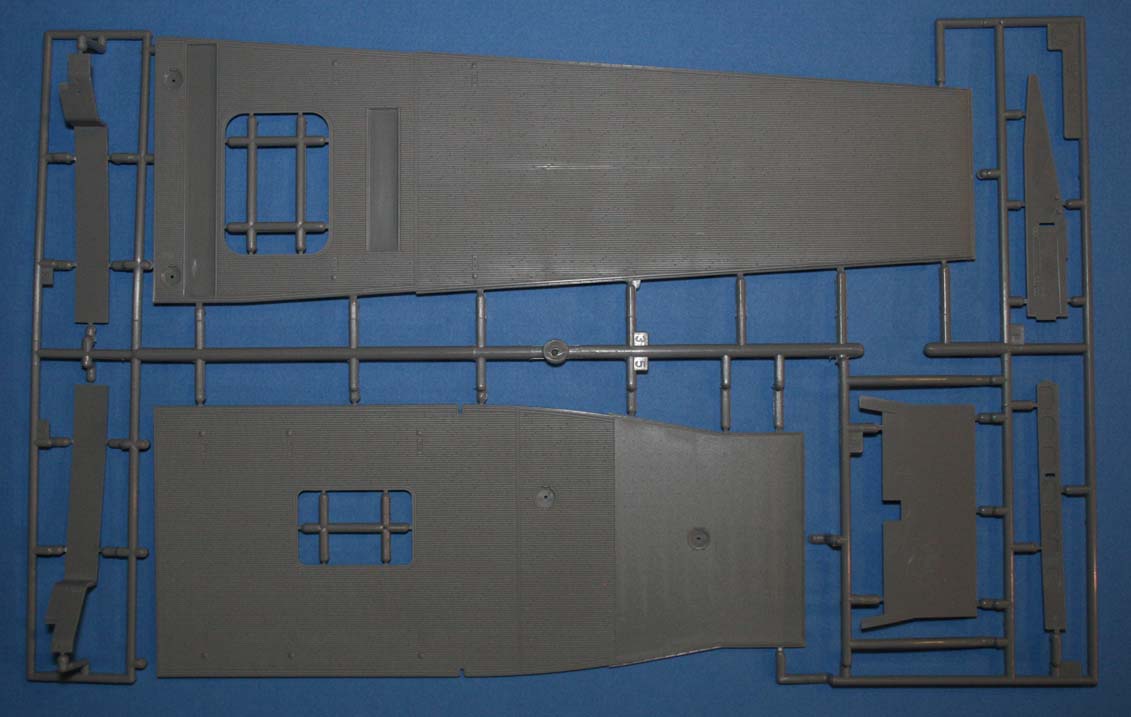
This tree is for the fore and aft flight deck pieces as well as an inset decking area underneath the exhaust stack and part of the aft superstructure. The upper sides of the flight deck are well executed, with fine engraved deck planking that is done in random lengths, giving it a more realistic pattern in my opinion that other manufacturers that simply offset the same length for the entire surface. The lower sides have plenty of knocking pin marks that will require some clean up if one is worried about people sticking lit mirrors underneath the structure, but otherwise I would imagine the busy structure and dark paint would make anything more than a cursory pass with a sanding stick ununneccessaryThere was a slight ripple topside of the deck, where grooves were molded for the underside supports, but it was so subtle I could not get it on camera, so I'm not sure it will even show once paint and markings are on the deck surface. The joining edges of these pieces are well engineered to take place along expansion joints, so there is no worry about lining up planking lines or puttying and rere scribingnless one happens to botch the joining of the flight deck pieces in general. There was some slight flash on the edges of some pieces on my copy; advisable to clean up, but not anything that should take more than 30 seconds per piece. The bottom of the inset deck I mentioned, piece D1, has some rectangular holes in it for no reason I can discern, but in my copy the deck bulged upwards slightly over each of these hulls and I would watch for this and knock them down with a sanding stick or file. |
||||||||||||||||
|
||||||||||||||||
| Tree E | ||||||||||||||||
 |
||||||||||||||||
|
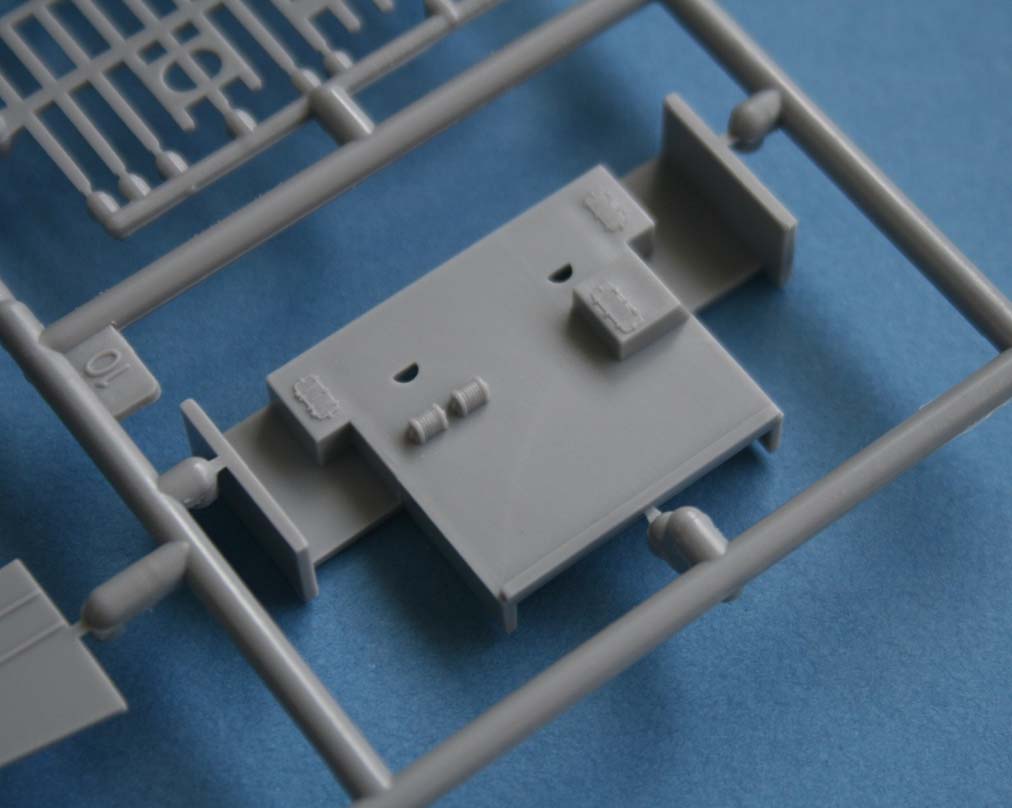
The largest piece here is the midships flight deck, but there are also alignment/joint doubler pieces for the flight deck and some pieces of the aft superstructure. Quality as is before, with only two items of note. Part E10 on mine had some very slight sink marks inboard the upper watertight doors. As these will be just below the flight deck, with all of its bracing, I think this is a moot point. However, Hasegawa chose to separate the deck with the boat tracks into two pieces, so one will have to fill this joint without harming the tracks which span said joint. Depending on your skill at cutting thin pieces of styrene, it may be easier to scribe one side of them to preserve the track location, then shave the detail off to make filling the joint easier before re-adding it with thin styrene strips. This, in my mind would give a more consistent look to the pieces. One last thing that we will not know until building commences, is whether or not they pulled off the "continental divide" on the flight deck. Unlike most carriers of the time, which had a flat deck, Akagi's deck sloped up to the center slightly from fore and aft. It's a very subtle change, and I don't see evidence of it on this deck section, but perhaps it will show a bit more when the deck is glued down to the hull and its supports. |
||||||||||||||||
|
||||||||||||||||
| Tree F & G | ||||||||||||||||
 |
||||||||||||||||
|
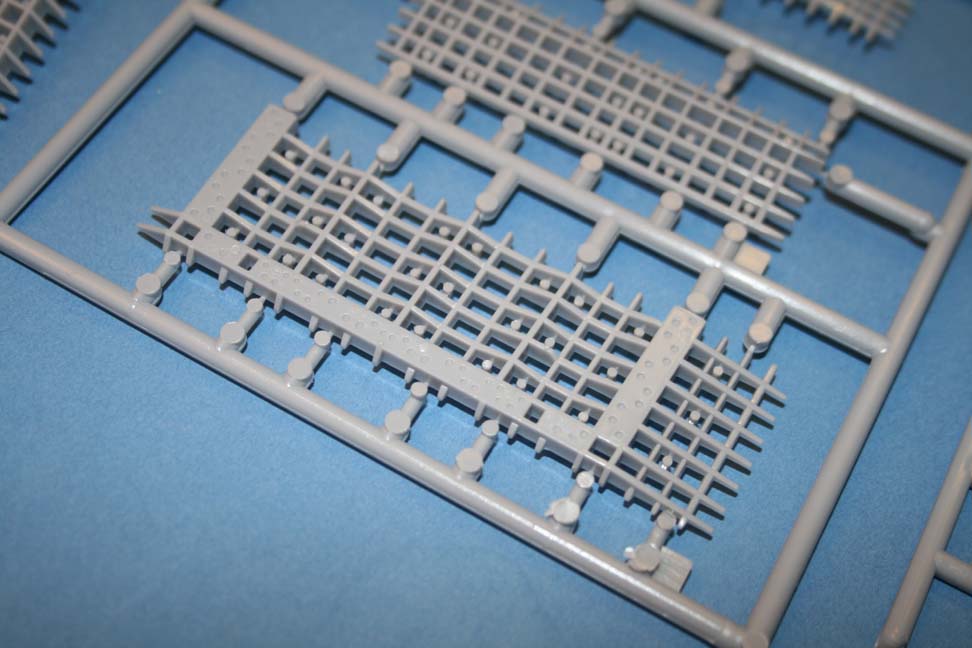
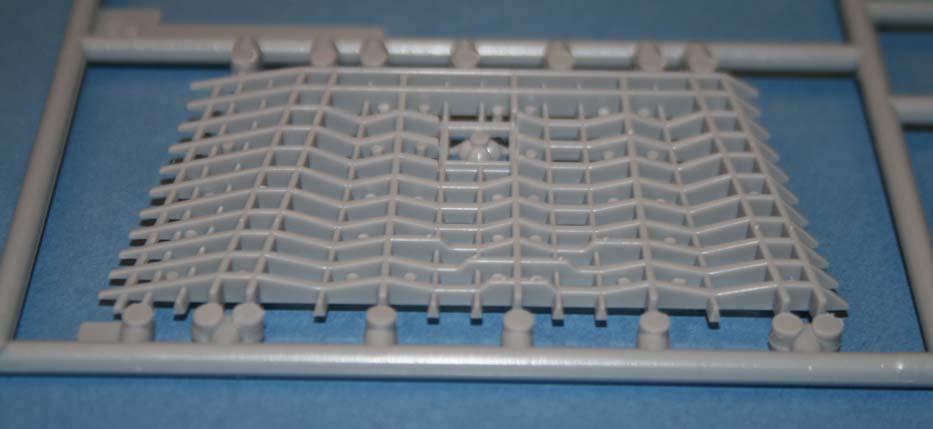
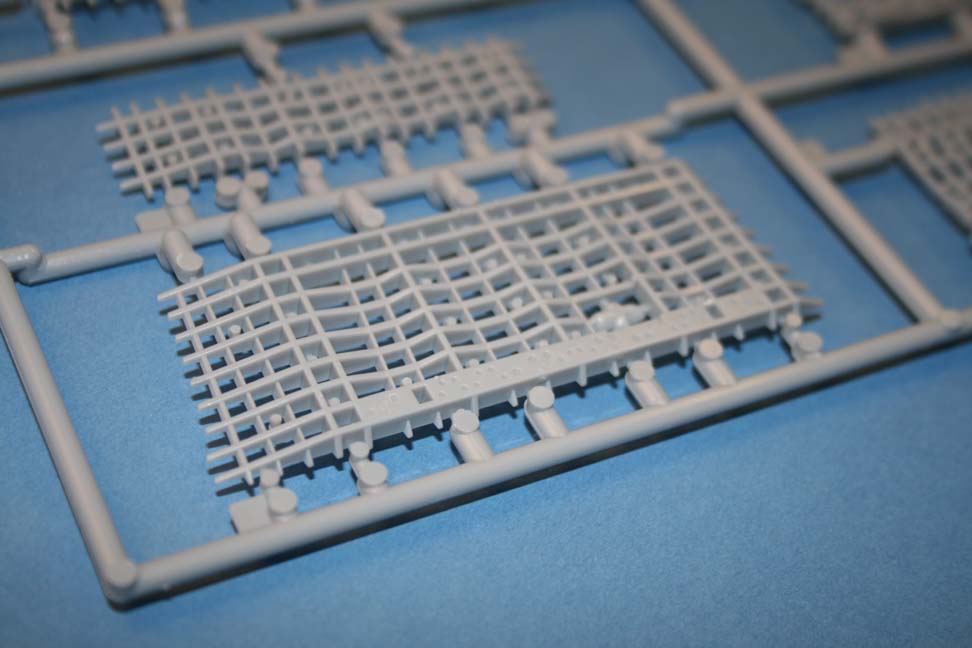
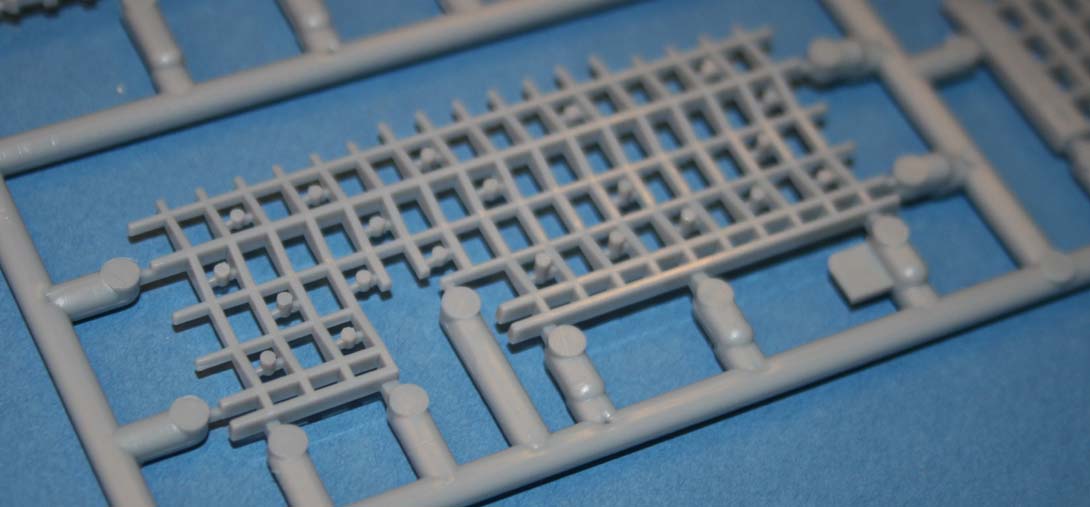
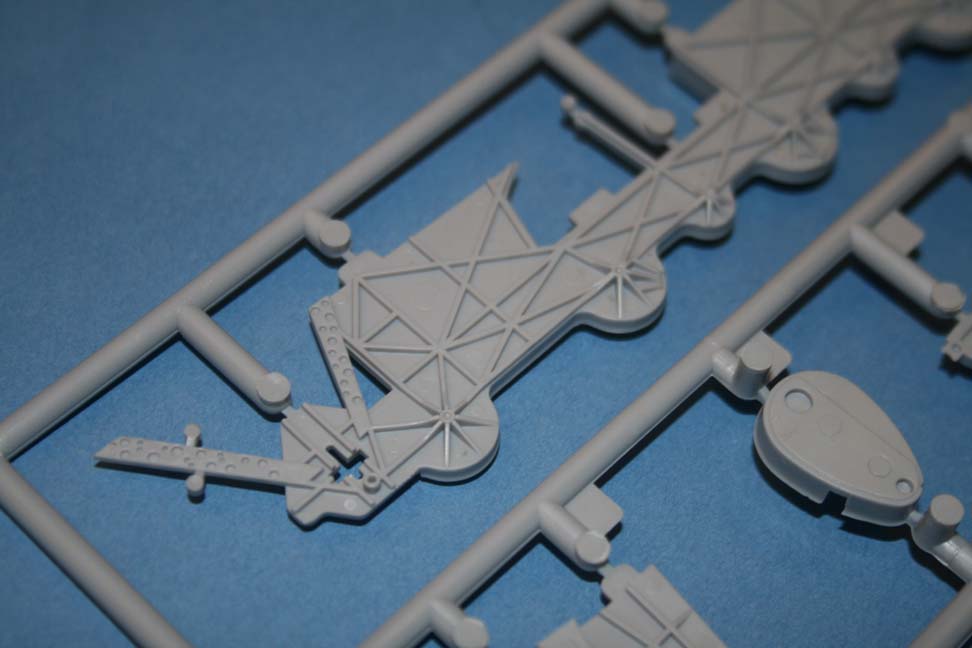
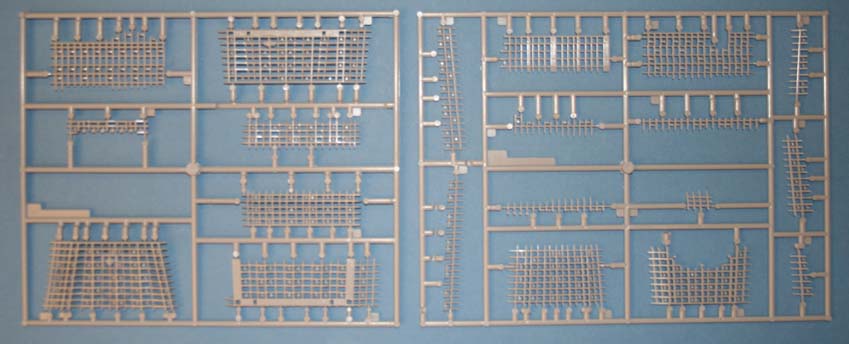
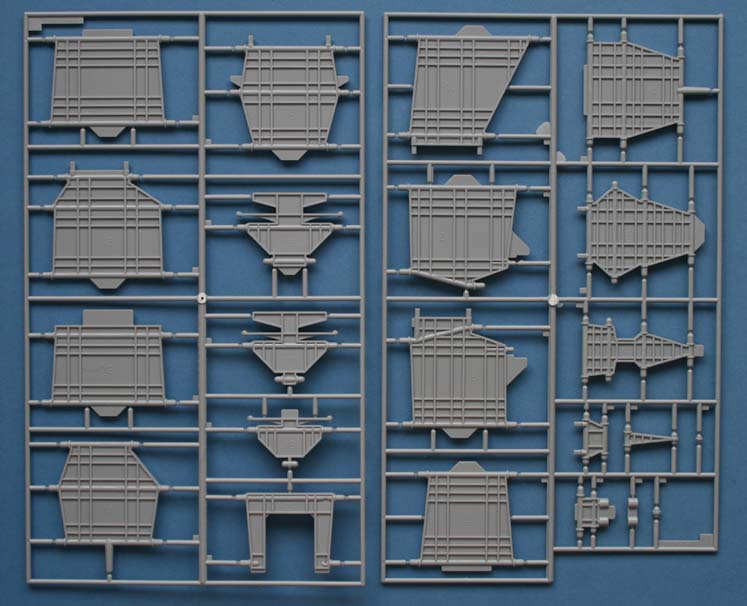
These two trees are for the girders under the flight deck. There blind sprue pieces that will have to be cut off and filed down, but this is still much easier than it would have been had they molded them integral to the flight deck itself and had the knocking pins cut into the girders directly. Hasegawa could have done these with a bit more detail, but it would have easily quadrupled the parts count in plastic and they chose to offer a separate set in brass for those wanting the extra detail and work. This is one area that just screams out for the photo-etch set. |
||||||||||||||||
|
||||||||||||||||
| Tree J | ||||||||||||||||
 |
||||||||||||||||
|
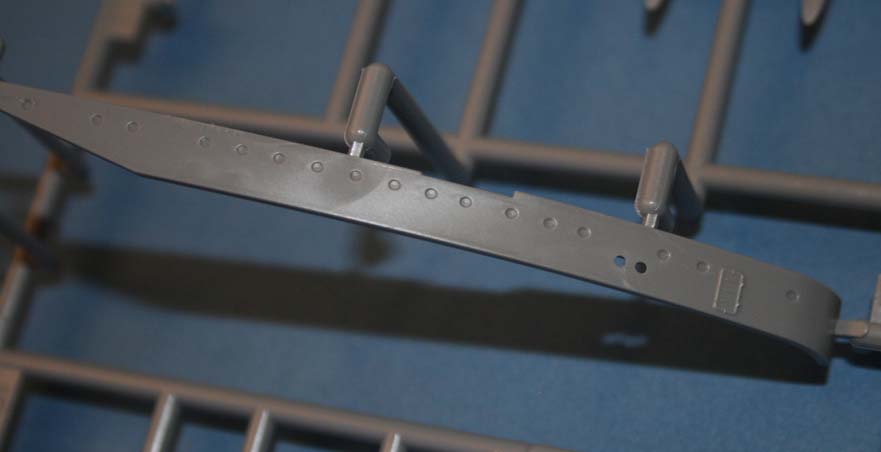
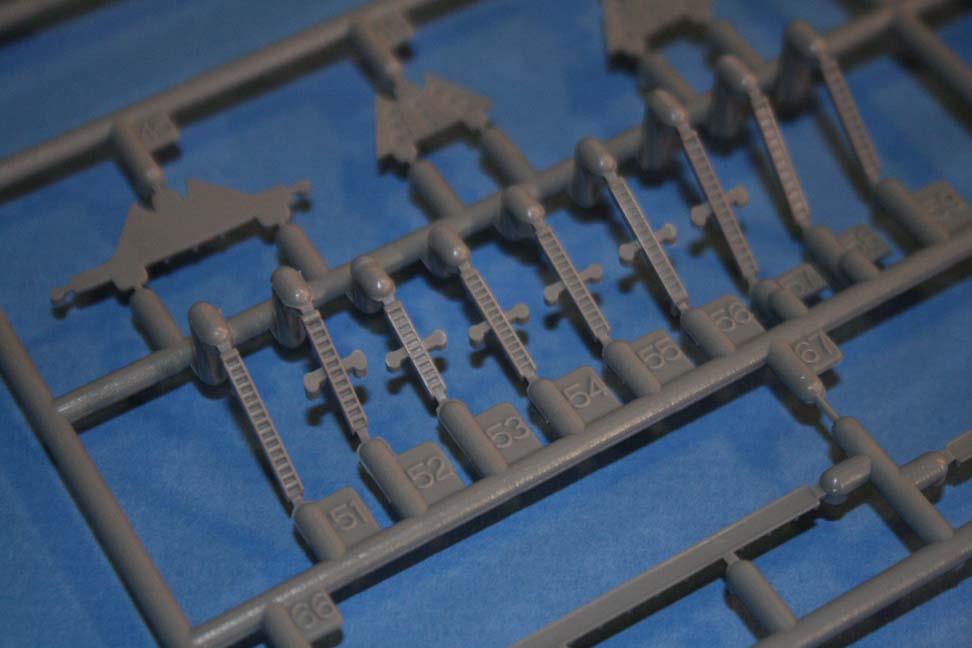
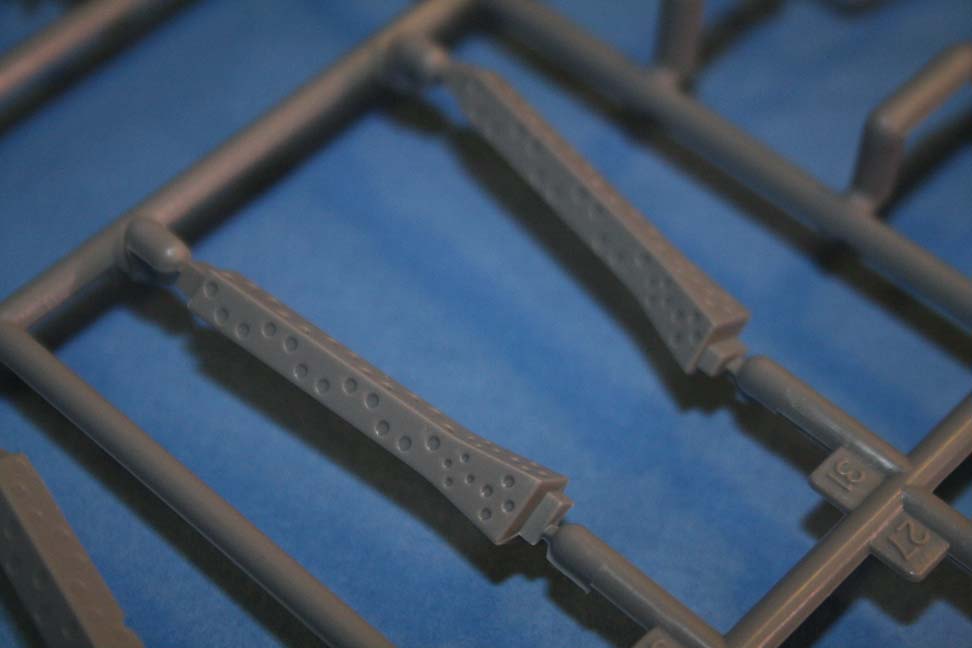
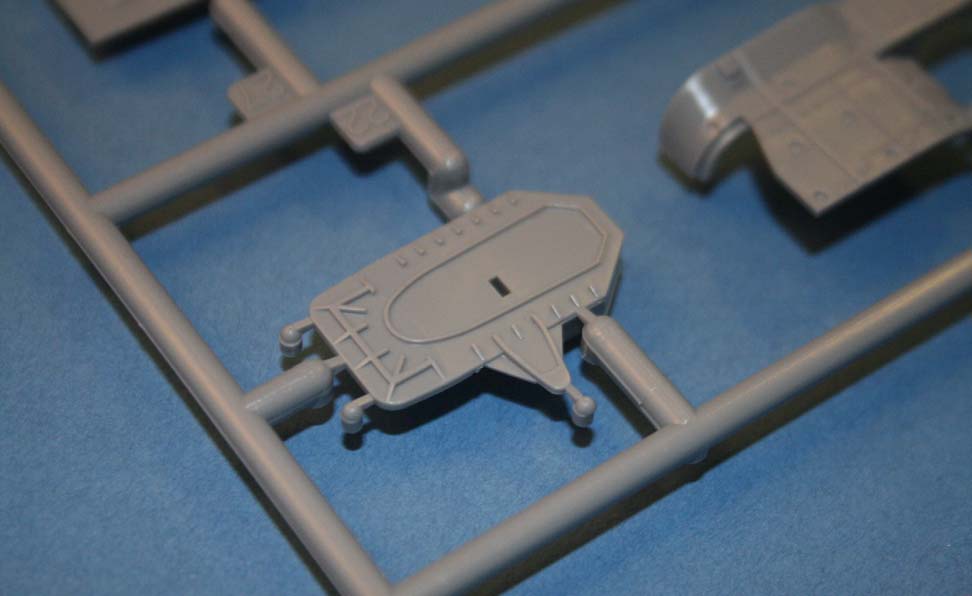
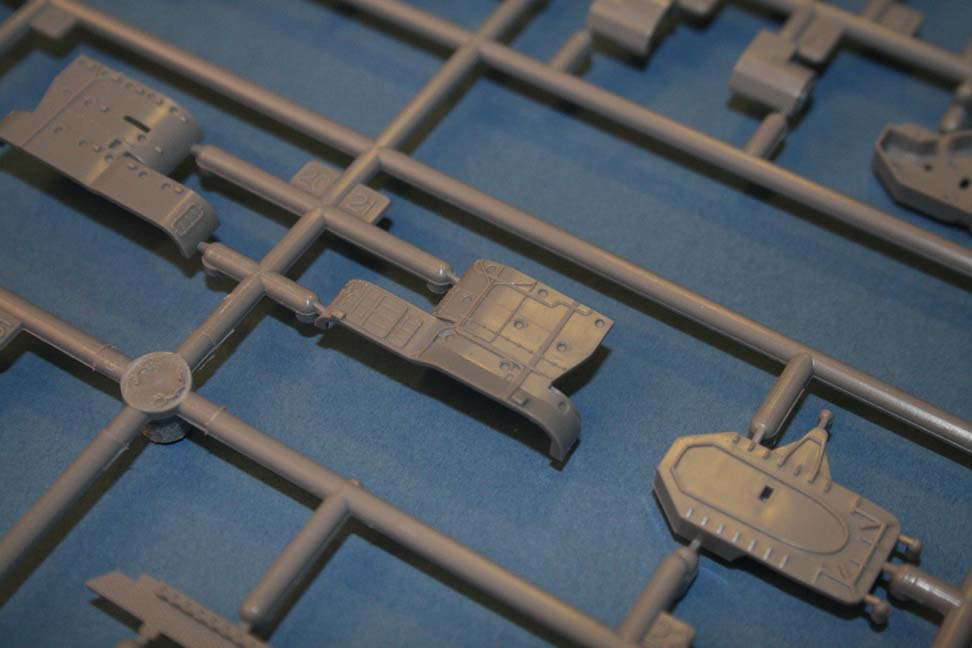
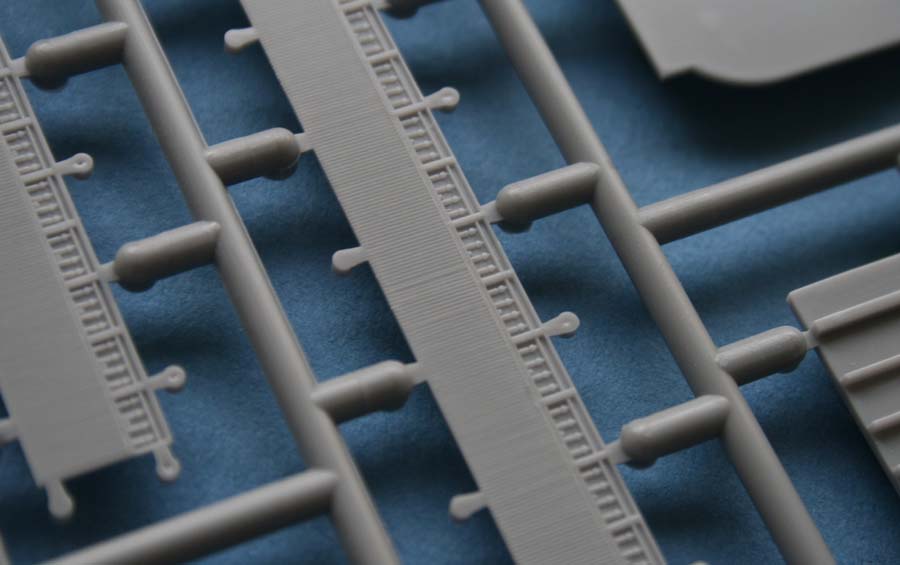
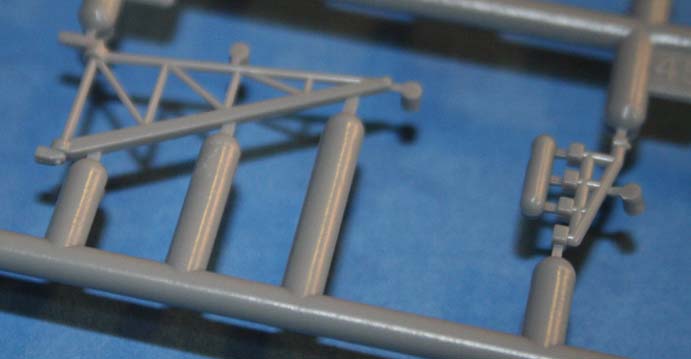
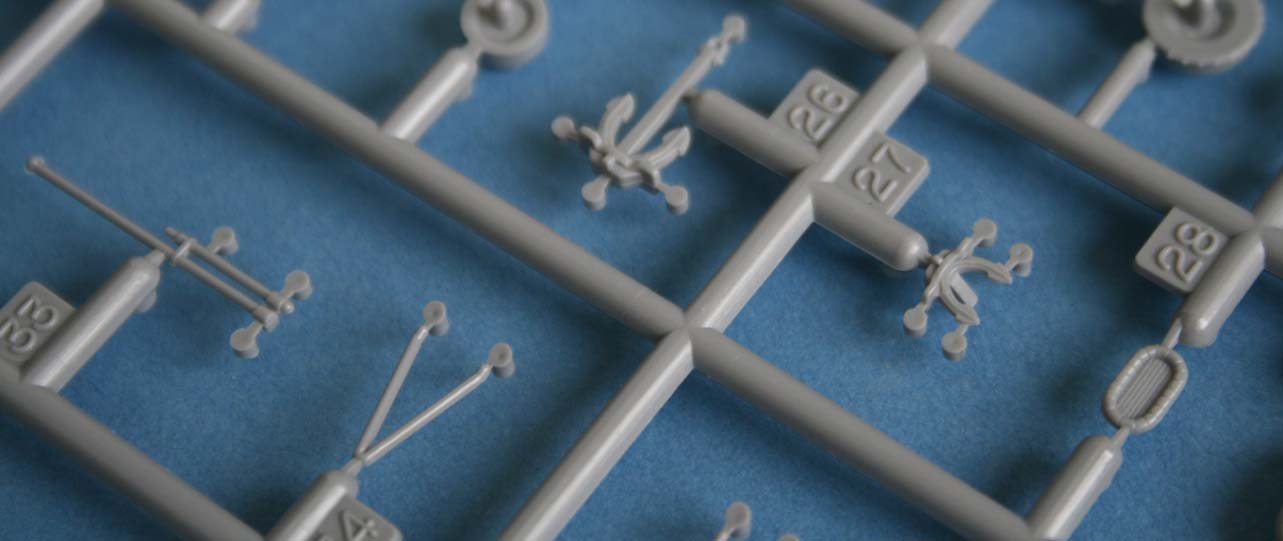
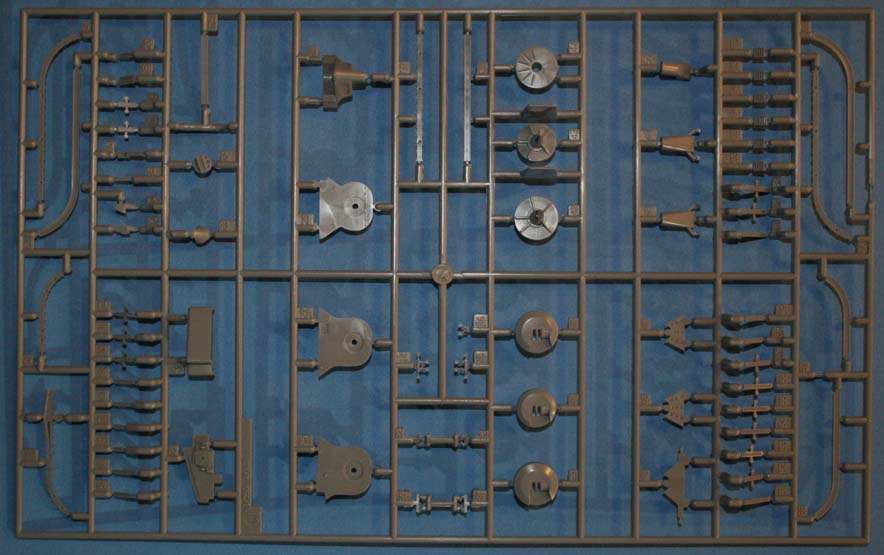
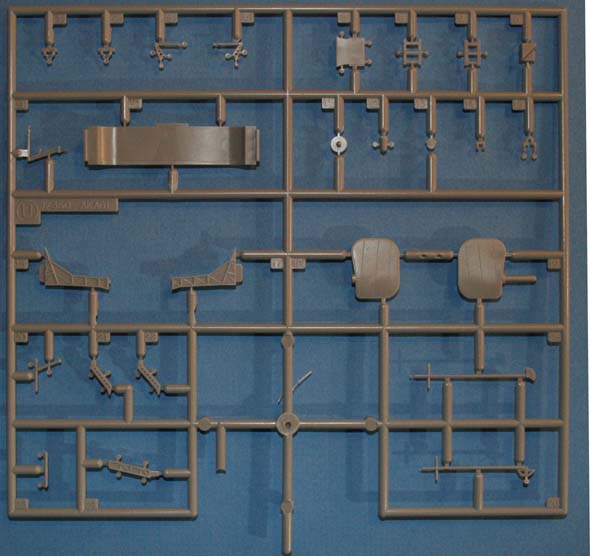
Tree J contains many of the heavier AAA turrets and platforms, inclined ladders and also the overhead tracks for the boat and airplane moving equipment under the stern overhang. Some of the platforms, such as J26, J27, and J28, have a very subtle ripple on the top surface above where there are support members underneath. These probably won't be visible with flat paint and a gun mount above them, but the builder may wish to double check first before committing to any thing. Seven chocks that are the envy of any 1/350th carrier are also molded in this tree. |
||||||||||||||||
|
||||||||||||||||
| Tree K | ||||||||||||||||
 |
||||||||||||||||
|
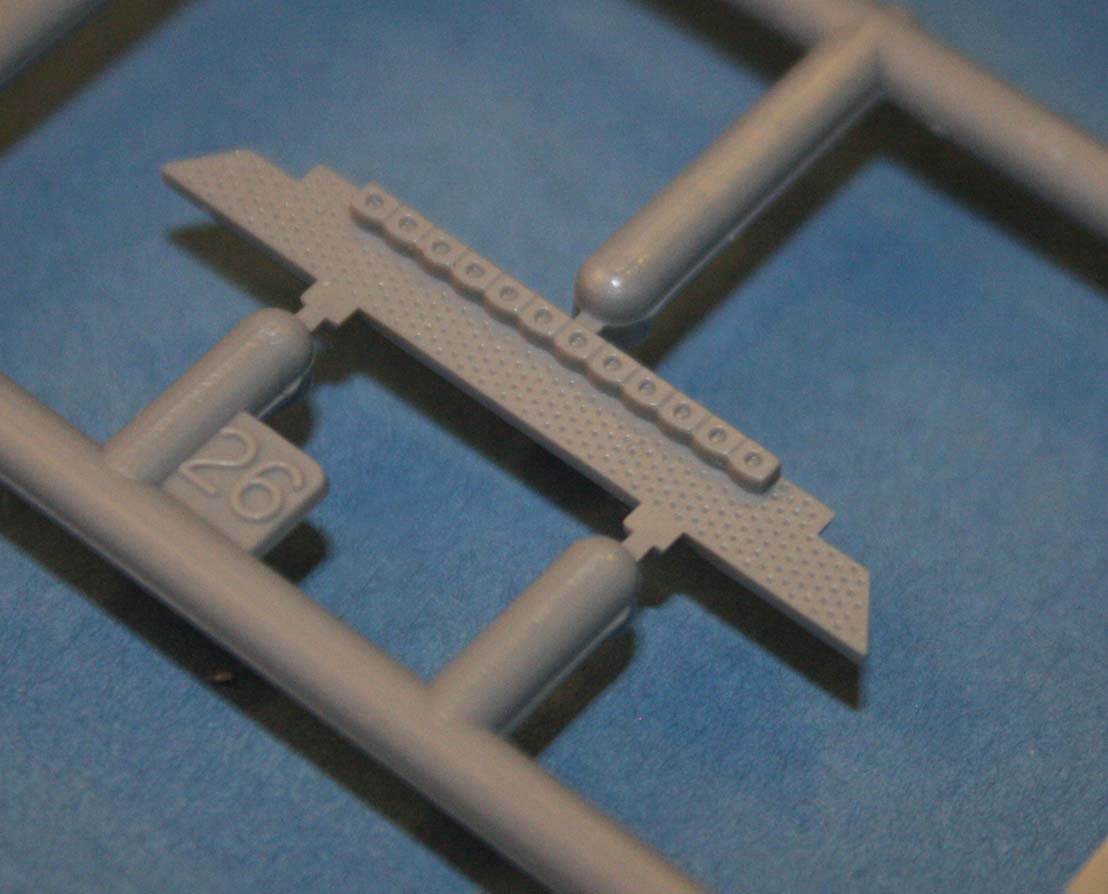
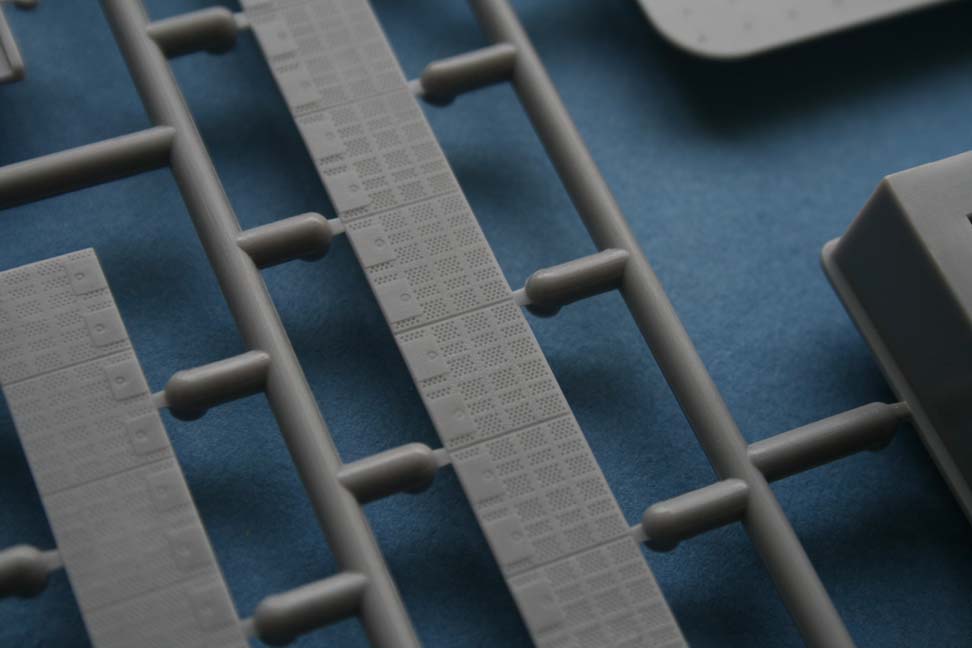
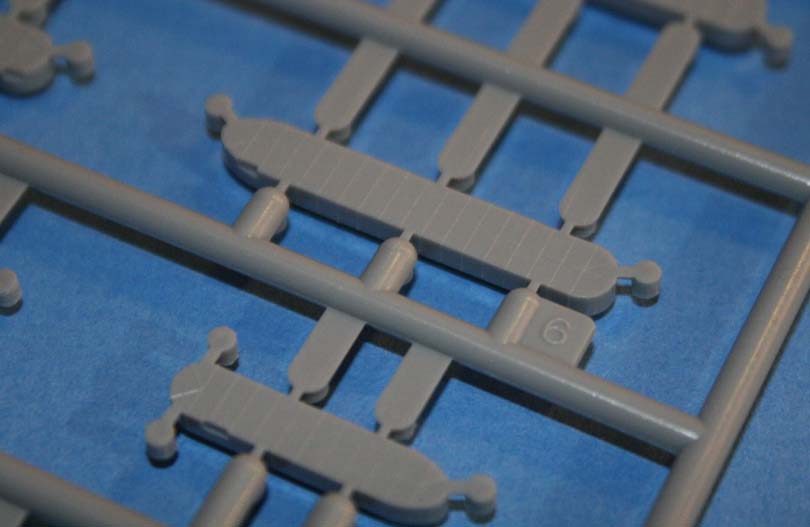
Platforms populate this tree; anti-aircraft gun platforms and catwalks. Many of them have a very fine diamond plate, a bit more than what one would see in scale, but subtle enough as to not be too annoying to those that aren't favorable to it, and probably just perfect to those that do. Perhaps because pf the diamond tread, but also partially because of the thinner support members on the undersides, no visible surface rippling such as what was seen on Tree J was noticeable. |
||||||||||||||||
|
||||||||||||||||
| Tree L | ||||||||||||||||
 |
||||||||||||||||
|
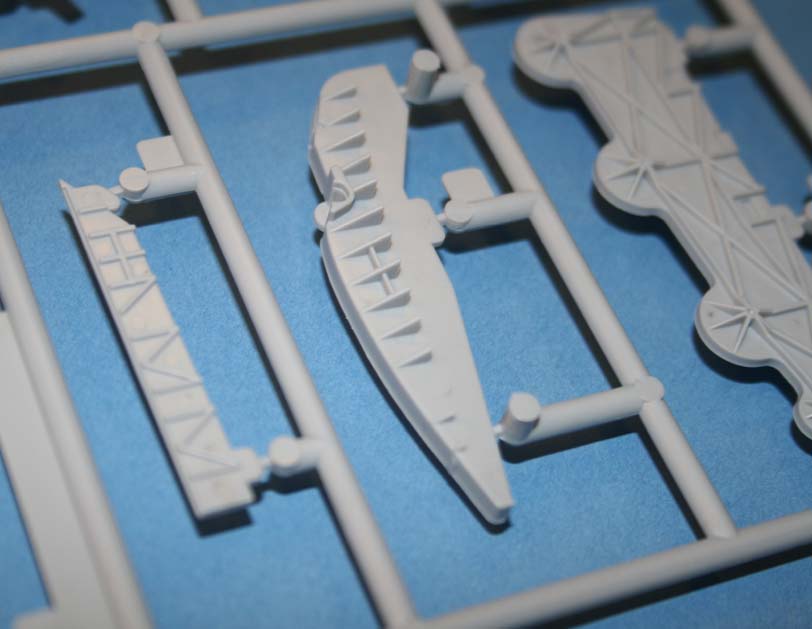
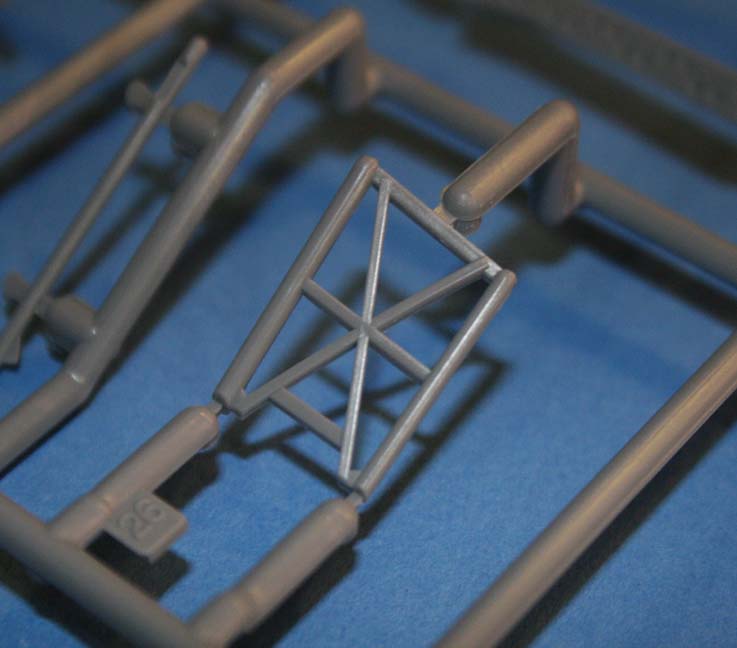
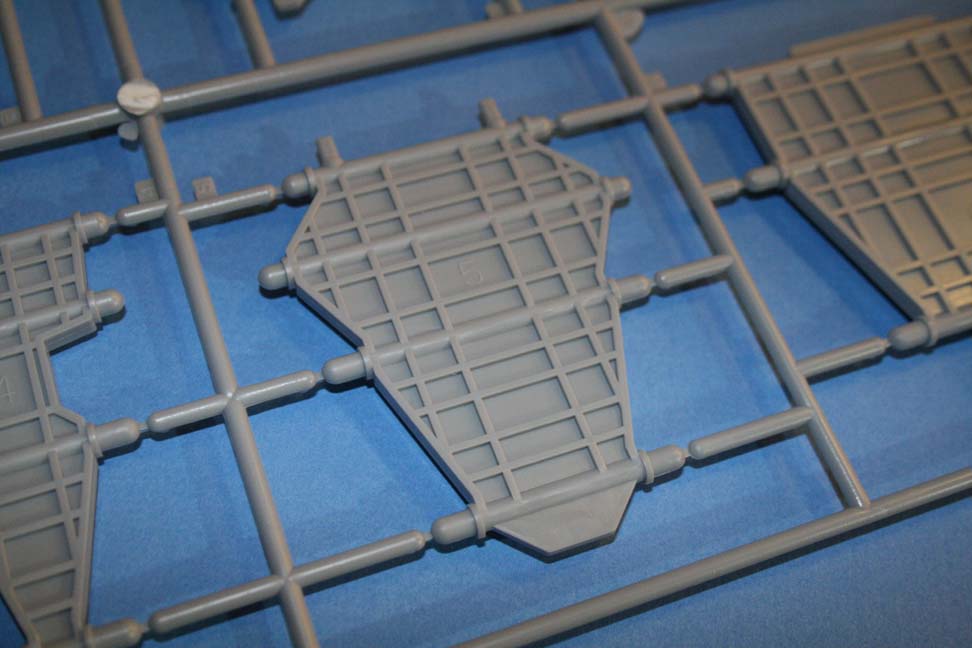
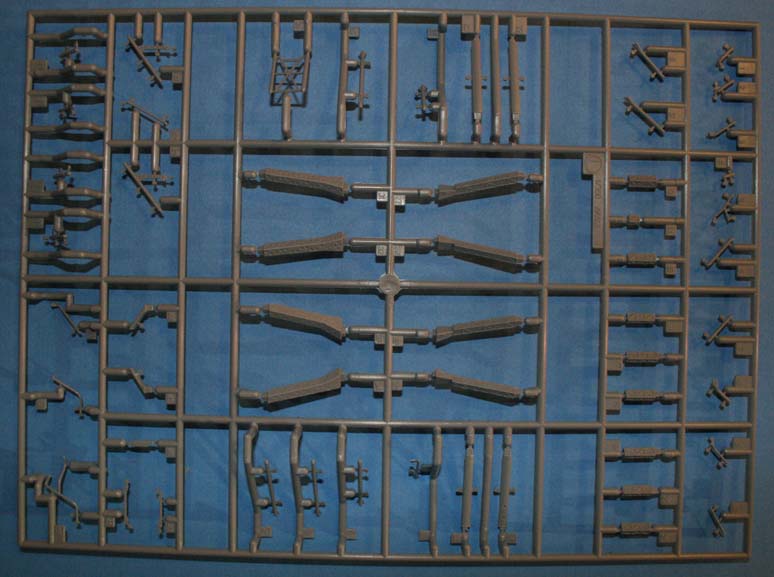
This is the tree for the majority of the vertical supports on the kit; flight deck and other overhangs. Some of the girders, while well molded, could definitely benefit from replacement with photo etch. Some pieces, which are combined posts with flatter structures that have lightening holes molded in them, could easily be drilled for a better appearance, but the lattice girders would definitely be improved with photo-etched replacements. | ||||||||||||||||
|
||||||||||||||||
| Tree N | ||||||||||||||||
 |
||||||||||||||||
|
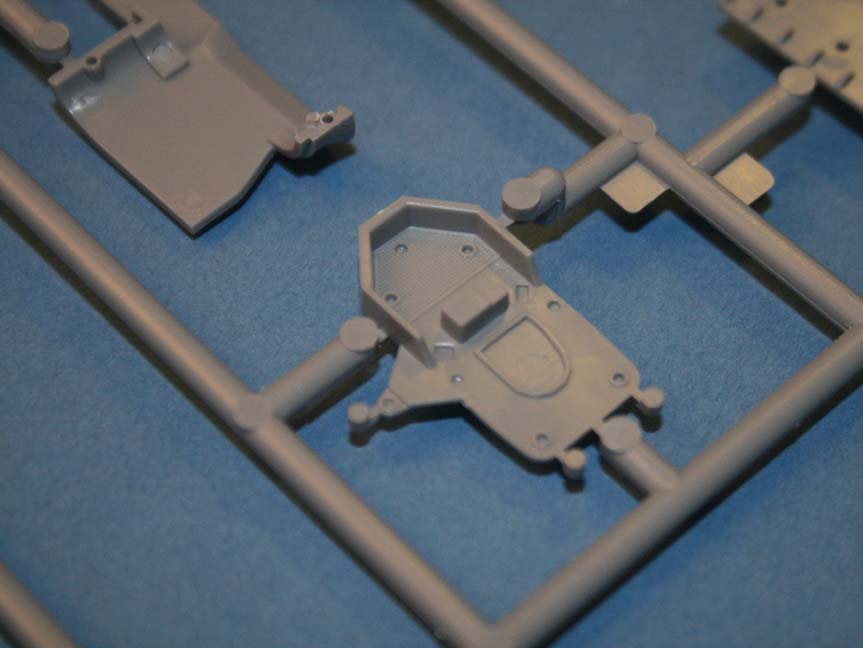
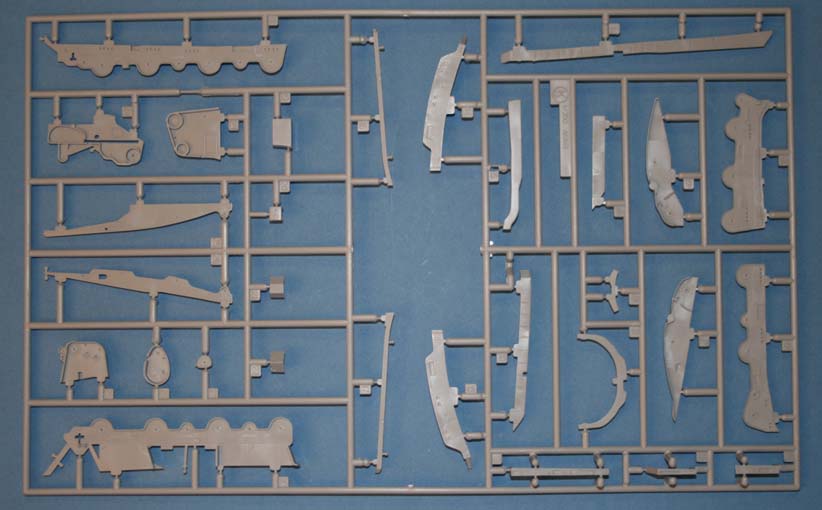
The flight deck island pieces are about 75% of Tree N, with the rest being miscellaneous pieces for platform and boat davits on the starboard side of the ship. Internal ribbing for the island splinter and wind shields is pulled off well, with nice detail both inside and underneath the tubs. |
||||||||||||||||
|
||||||||||||||||
| Tree Q | ||||||||||||||||
 |
||||||||||||||||
|
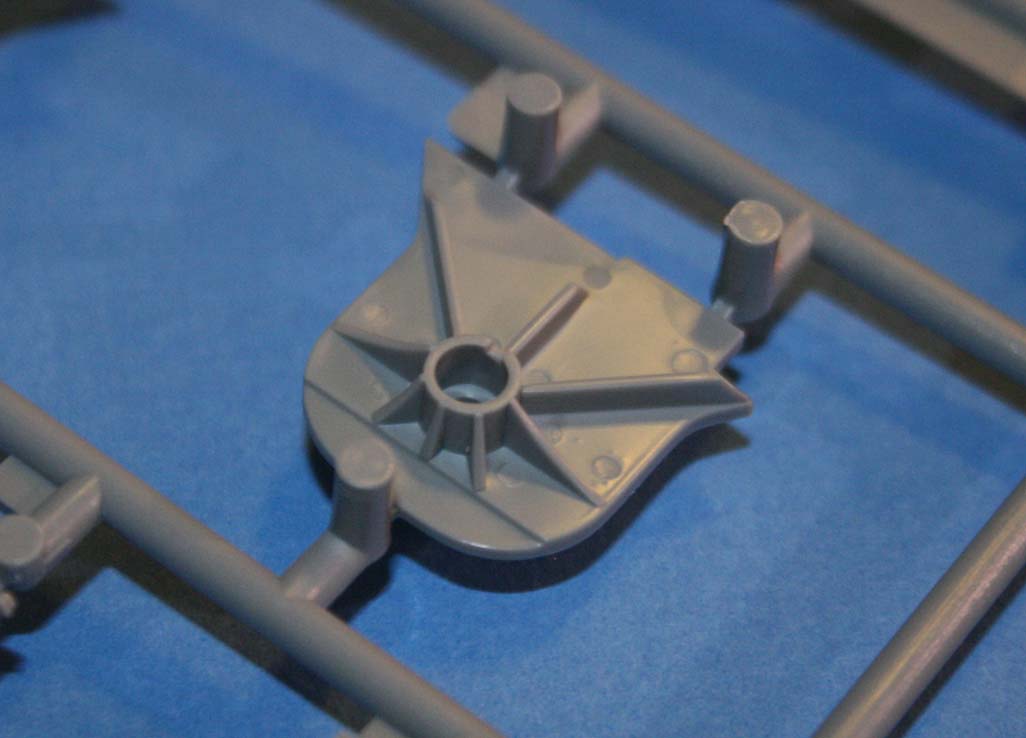
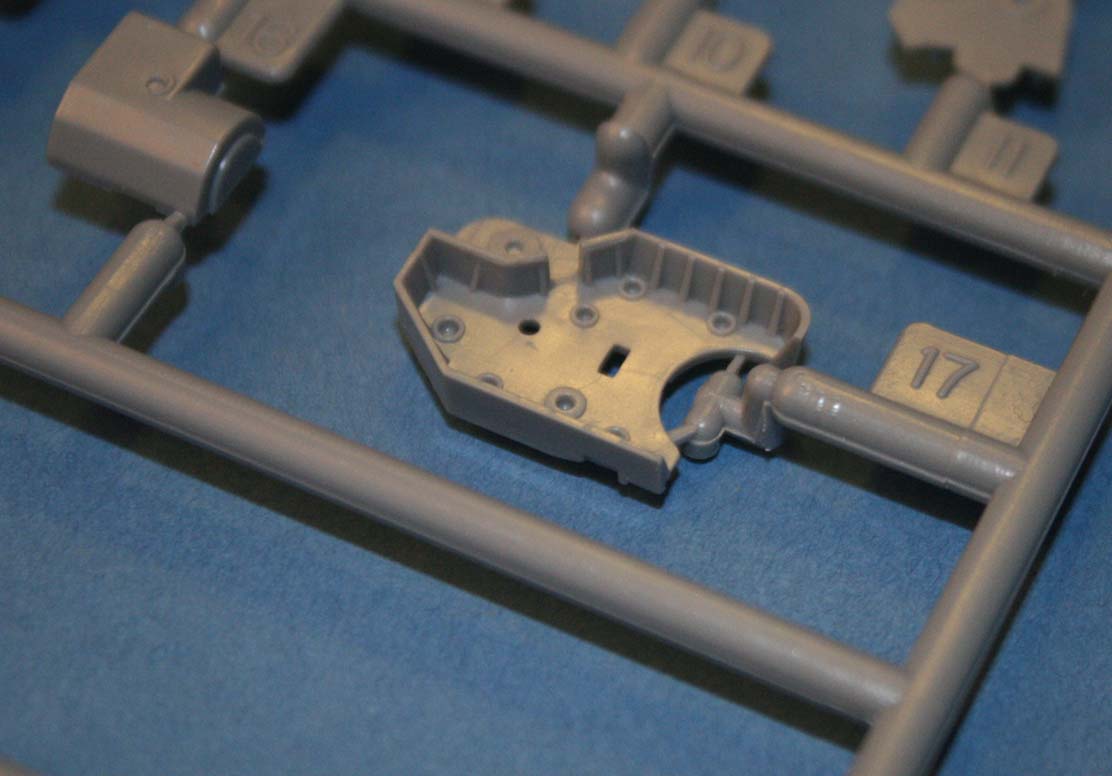
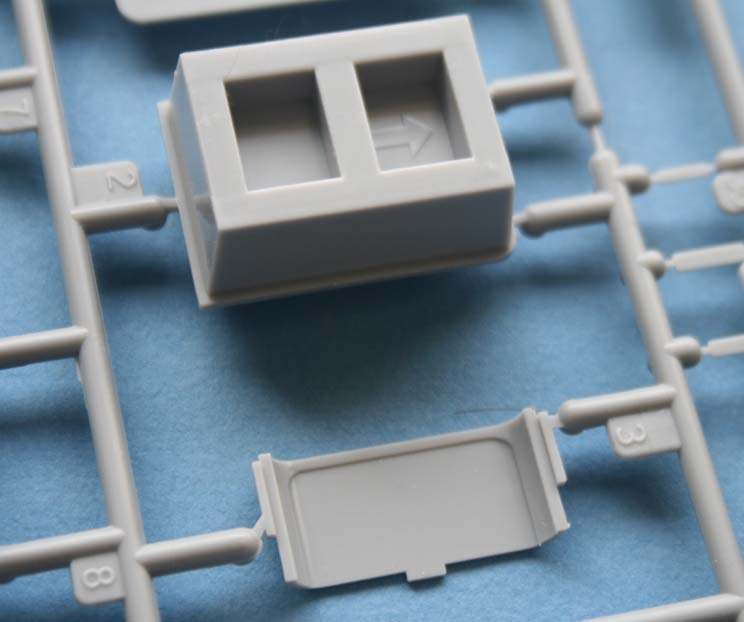
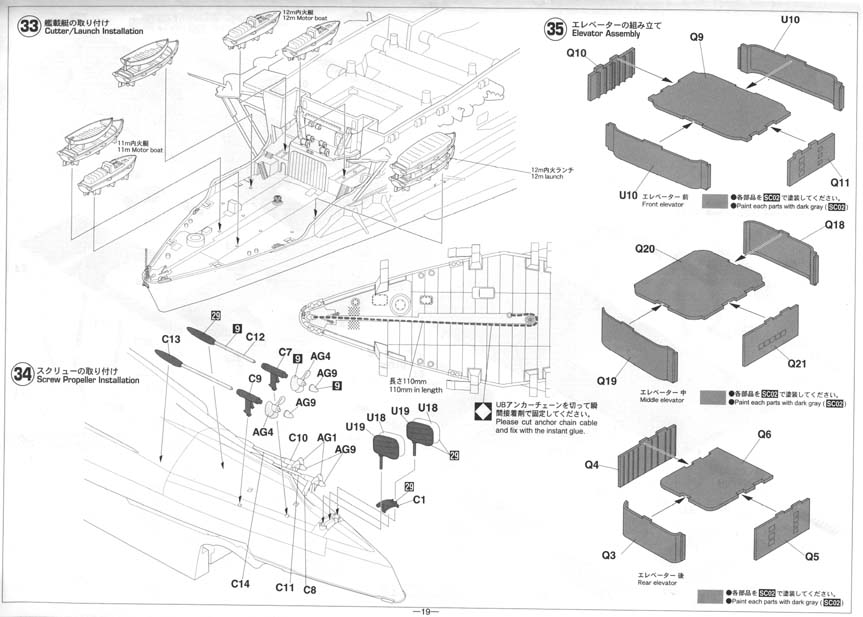
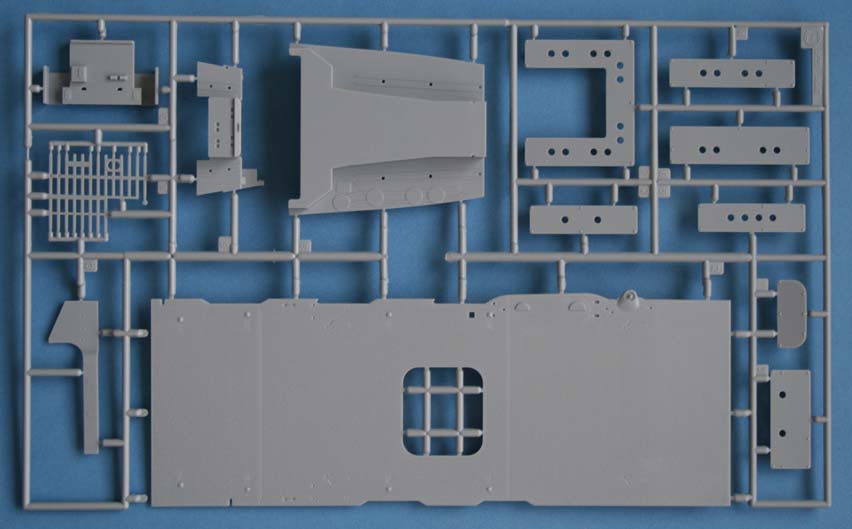
Tree Q contains mostly pieces for the elevator structures, but also a deck and bulkhead pieces for a port -side structure inboard some of the anti-aircraft guns. The elevators themselves are both interesting and somewhat disappointing at the same time. Interesting in that pieces are provided that can be used to pose the elevator up or down without having to glue them permanently in either, but disappointing as no option exists for showing off any of the hangar deck if they are down other than by a lot of surgery and scratch building (Check to see if it's at all possible with the pieces from Tree E). |
||||||||||||||||
|
||||||||||||||||
| Trees R & S | ||||||||||||||||
 |
||||||||||||||||
|
These are the interior support pieces; not a lot to say otherwise. There has been some discussion about adding a hangar deck around the elevators; a cursory investigation shows that with some relatively easy sawing of these members it should be possible to clear the necessary space to add in a new deck, however I know of no detail photos or plans of the structures in this area other than some deck-by-deck level plans in 1/1000 scale printed in the AJ Press "Akagi Volume I" book. |
||||||||||||||||
|
||||||||||||||||
| Tree T | ||||||||||||||||
 |
||||||||||||||||
|
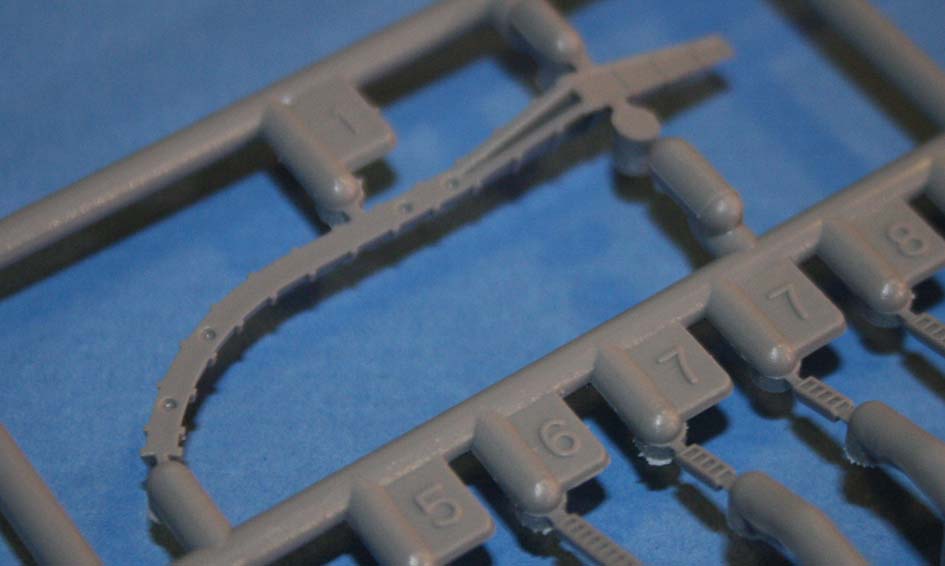
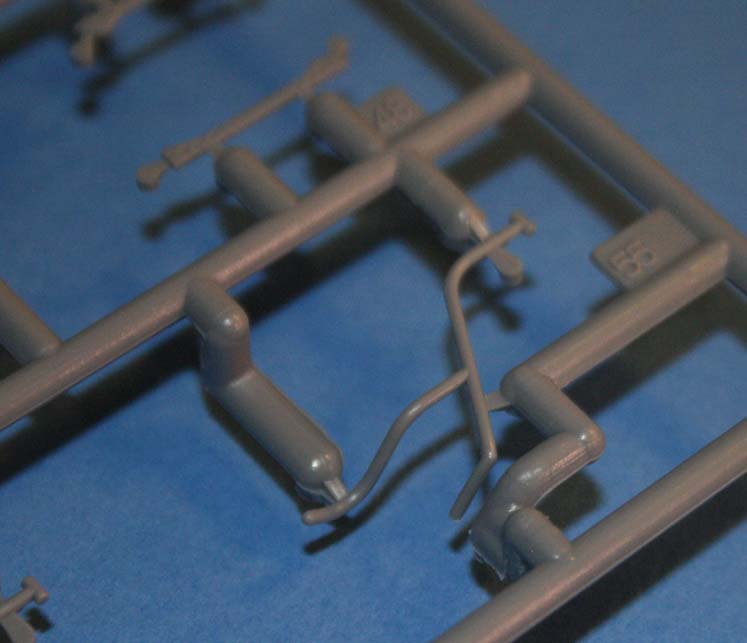
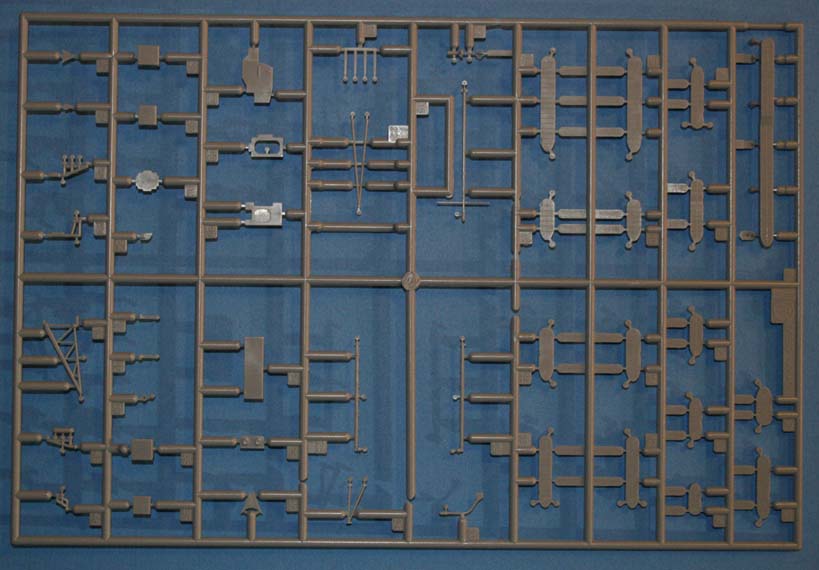
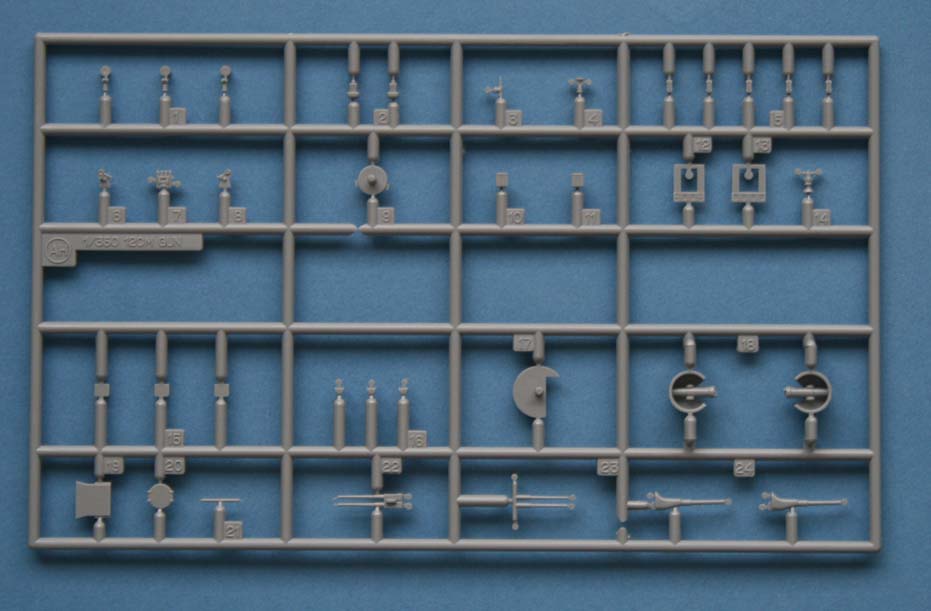
The 45 pieces of this spruce are dedicated to miscellaneous platforms, masts, cranes, landing lights, and flight-deck edge tubs for the aircraft handlers. The masts and booms have as many blind sprues as attachments points, resulting in well formed pieces. Thankfully they have thin attachment points to cut and a minimal amount of flash, so clean-up should be quick, with less chance of needing to apply enough force that you might damage the piece. Super-detailers will want to pay attention to the locations of the inclined ladders that met with the tubs from catwalks and provide the appropriate openings. |
||||||||||||||||
|
||||||||||||||||
| Tree U (Two each) | ||||||||||||||||
 |
||||||||||||||||
|
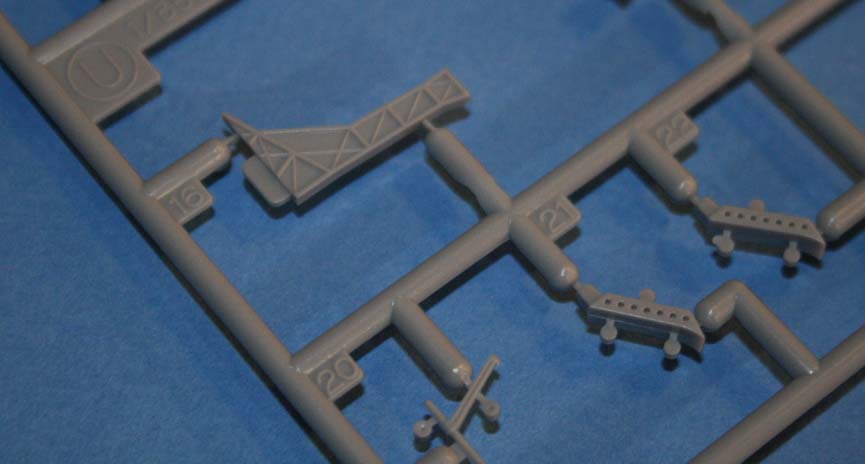
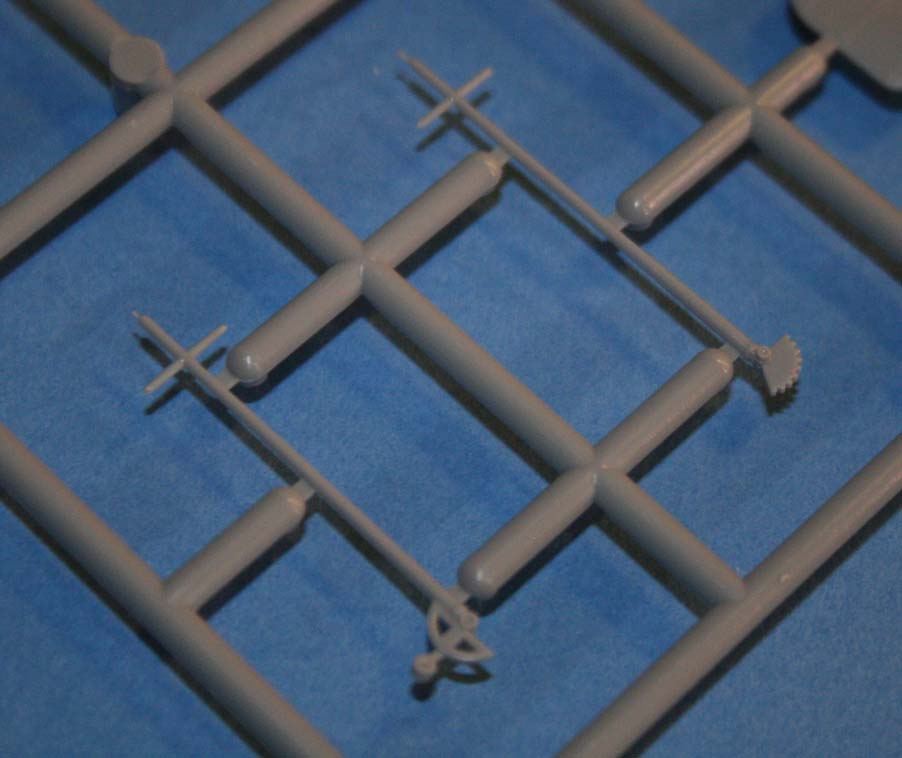
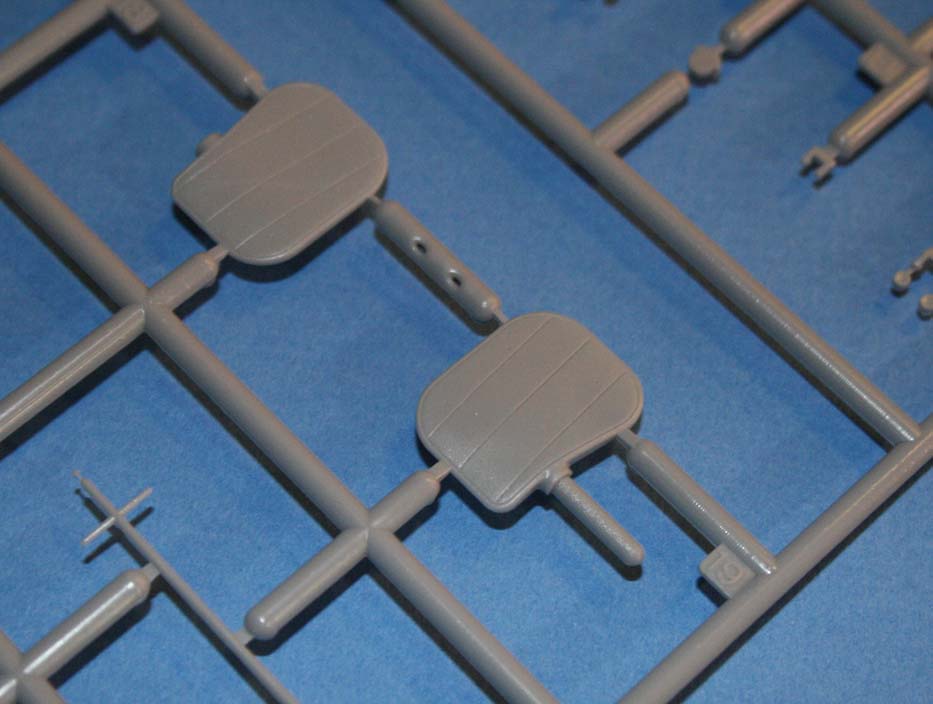
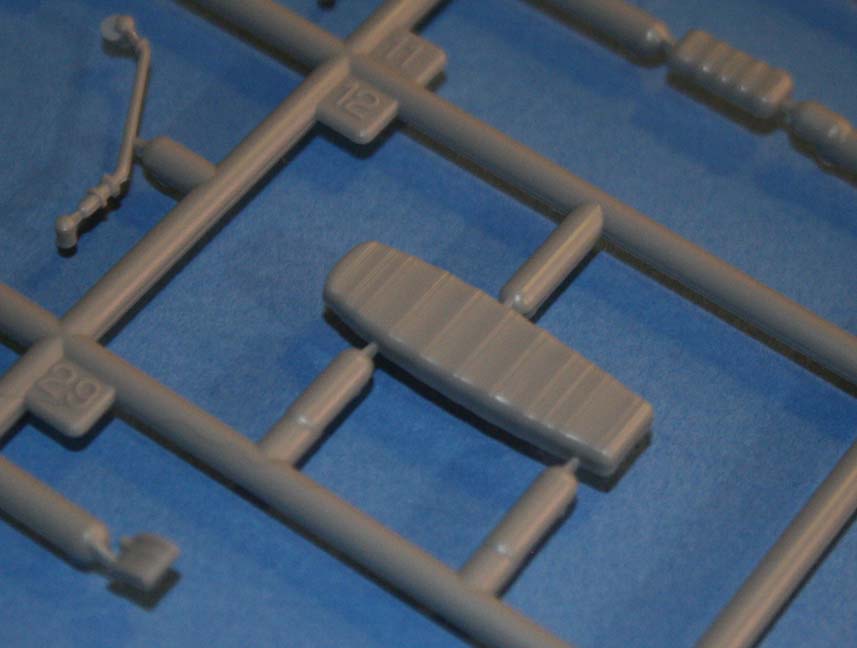
U-Tree us used for parts that there were two of, such as the rudders, supports, and deck-edge antennas. |
||||||||||||||||
|
||||||||||||||||
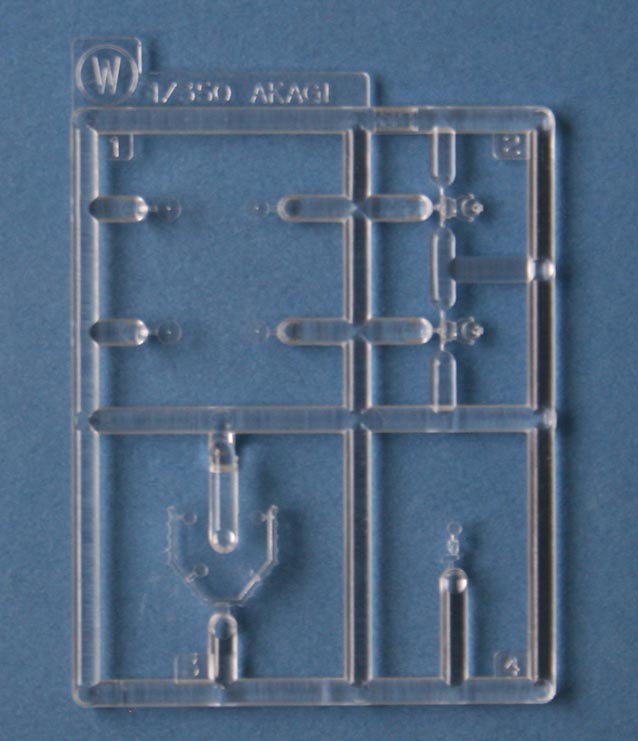
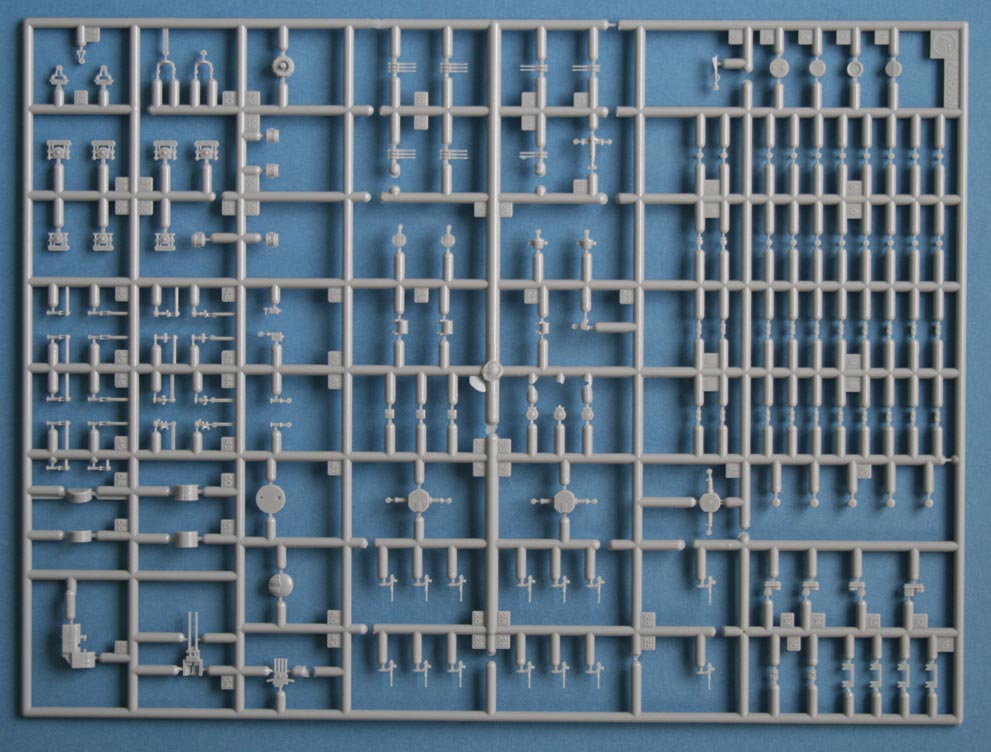
| Tree W (Two each) | ||||||||||||||||
 |
||||||||||||||||
|
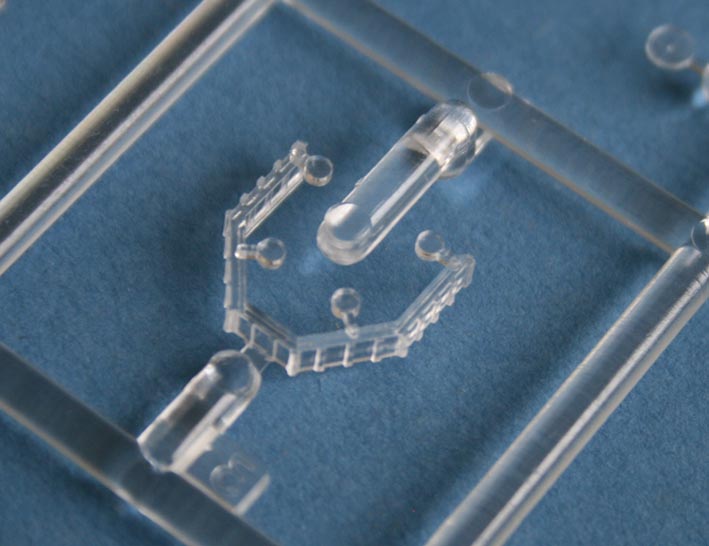
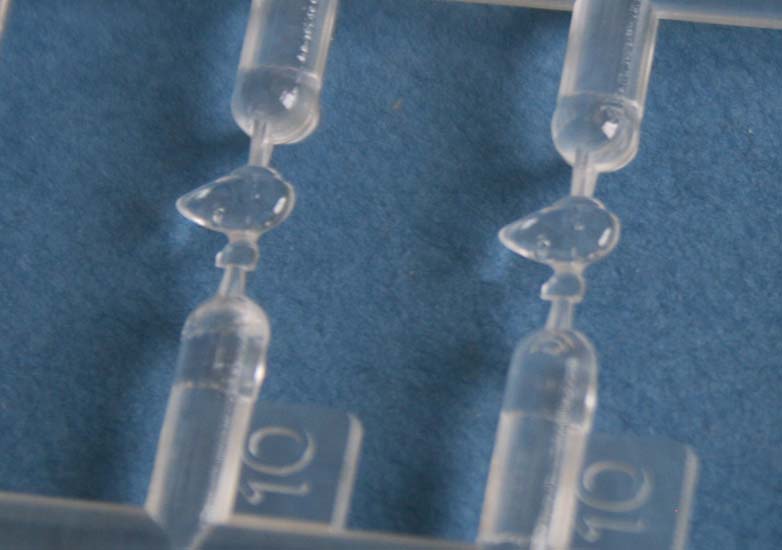
Tree W contains the clear parts of the kit; bridge windows, lenses for larger search lights and entire smaller searchlights. The attachment nubs for the bridge windows are well designed as to not leave remnants that destroy clarity upon removal. |
||||||||||||||||
|
||||||||||||||||
| Tree AE (Four each) | ||||||||||||||||
 |
||||||||||||||||
|
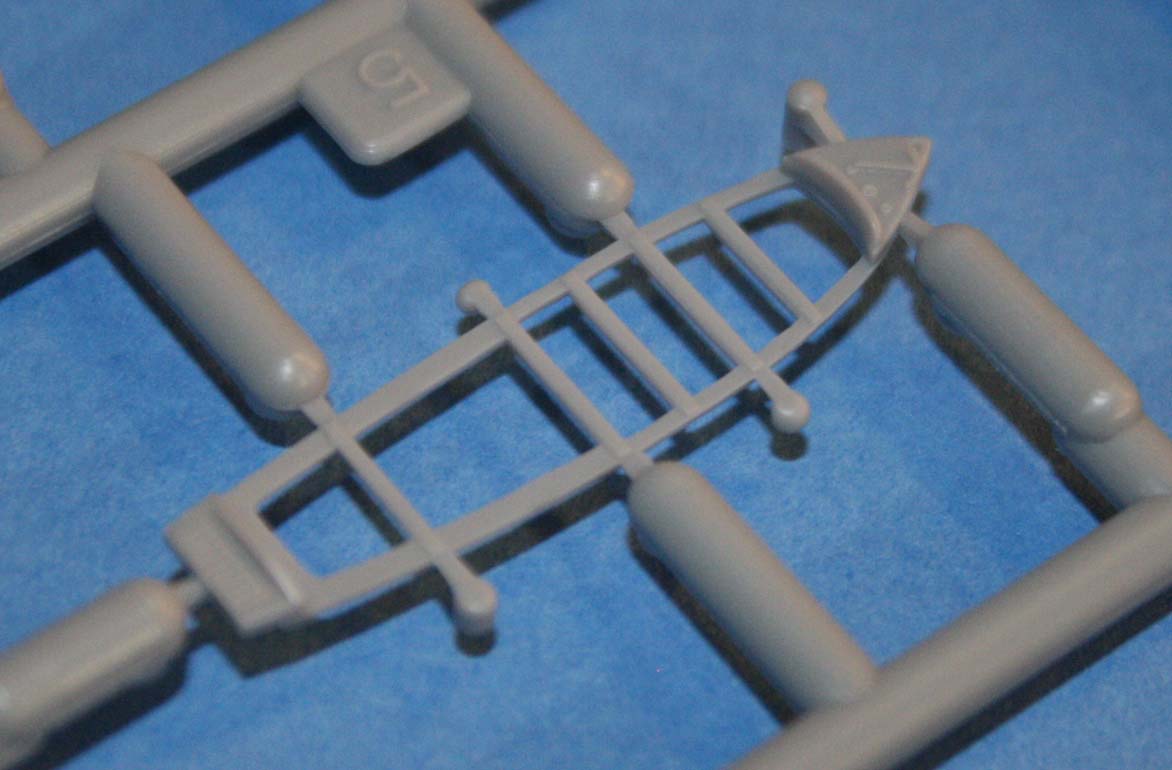
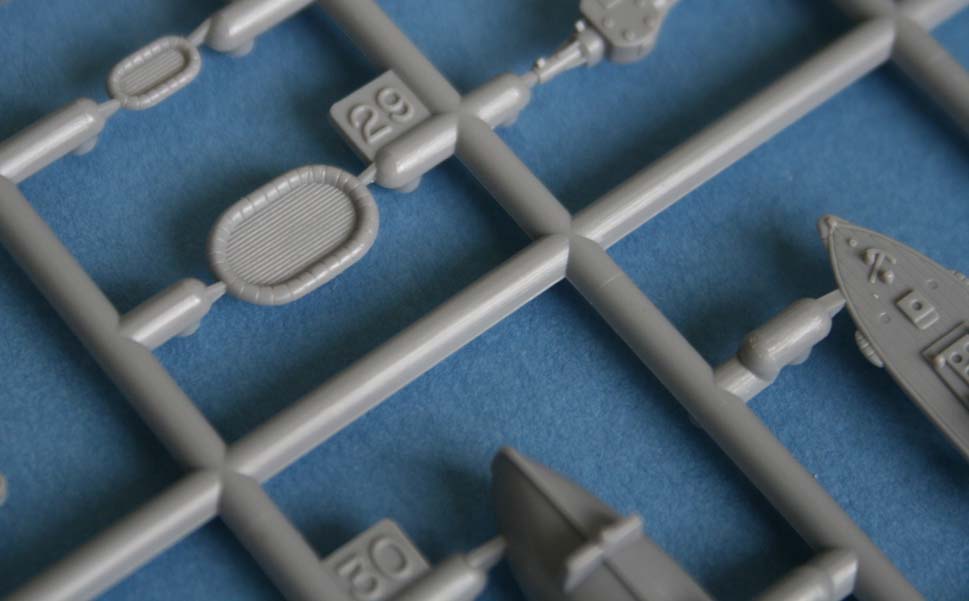
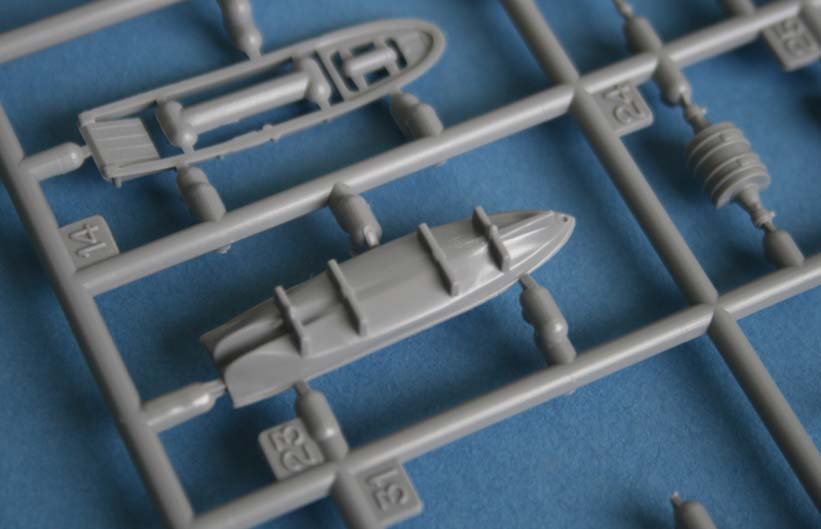
Tree AE is a common tree that was also used in the Nagato and Mutsu kits and contains boats and davits. One of the boats on each tree is not used as well as most of the davits, so your spares box will wind up a little happier from this kit. |
||||||||||||||||
|
||||||||||||||||
| Tree AF (Five each) | ||||||||||||||||
 |
||||||||||||||||
|
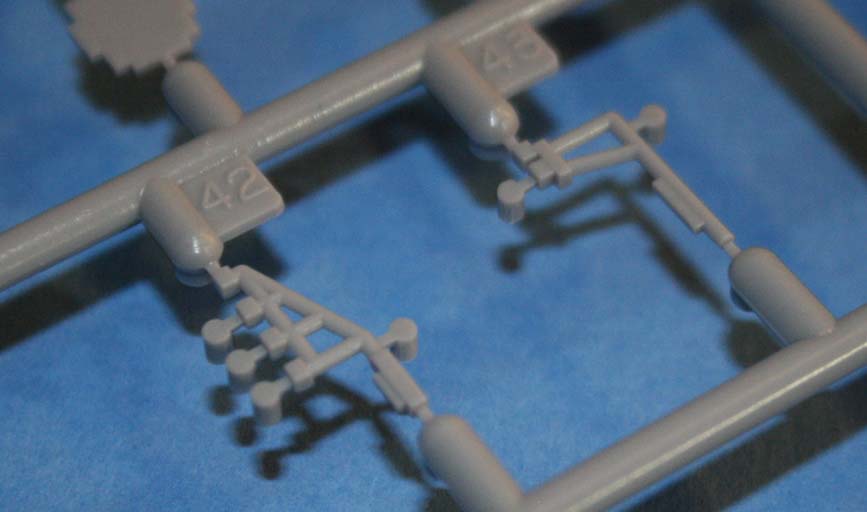
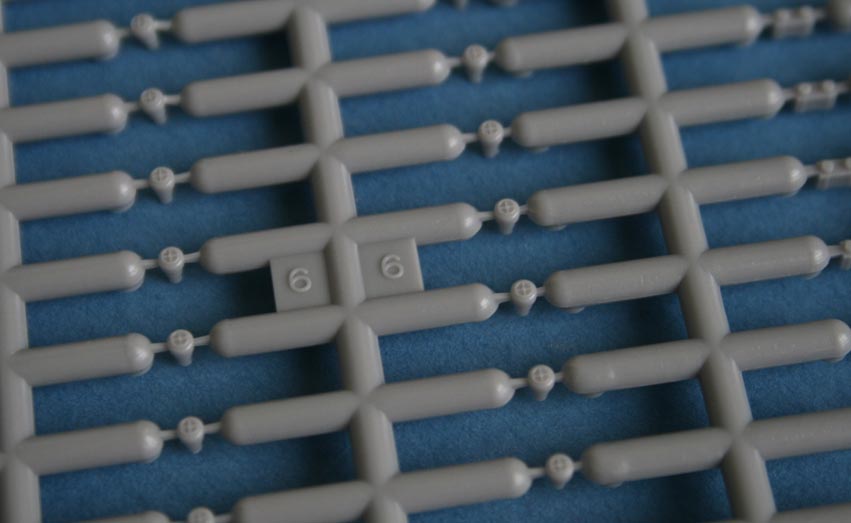
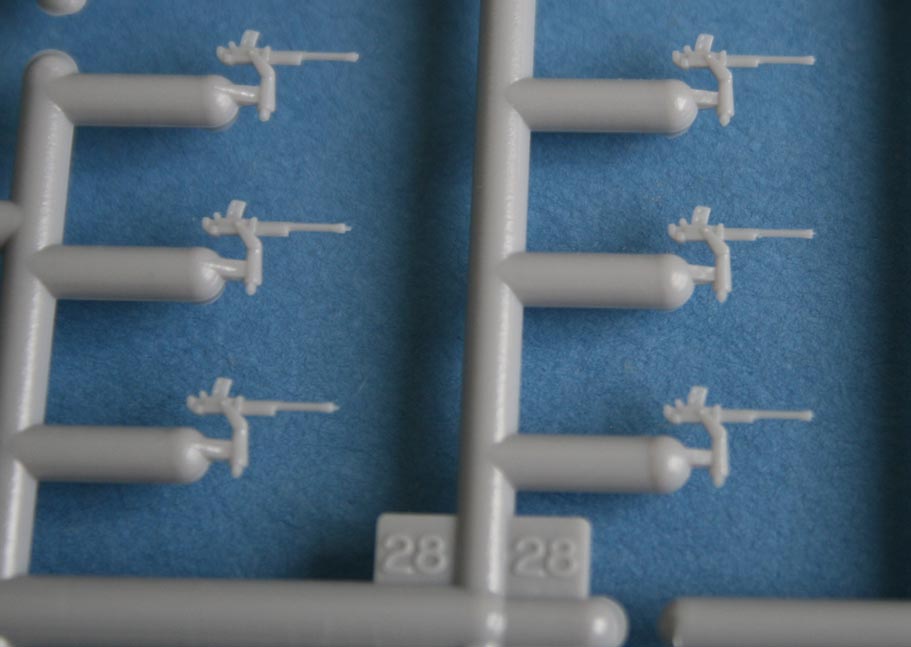
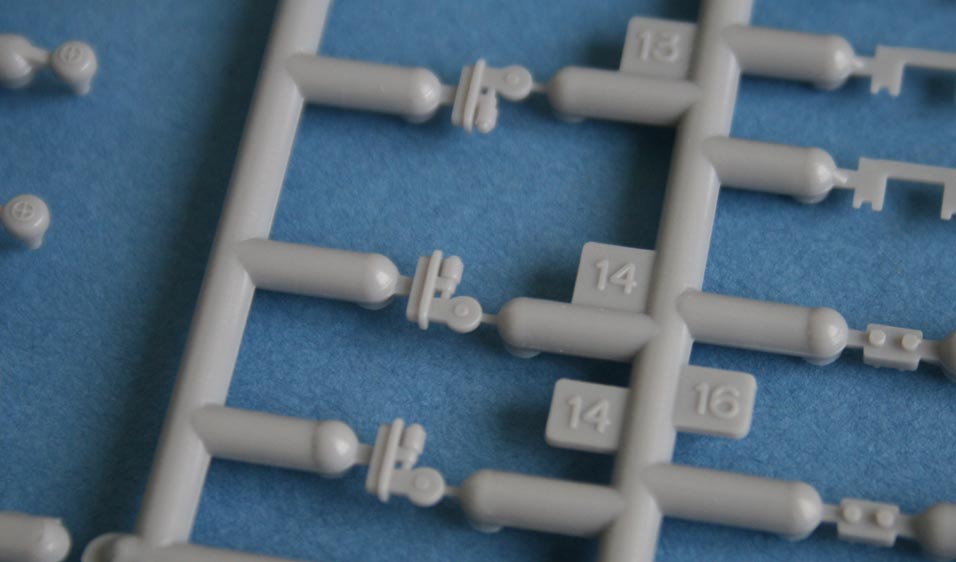
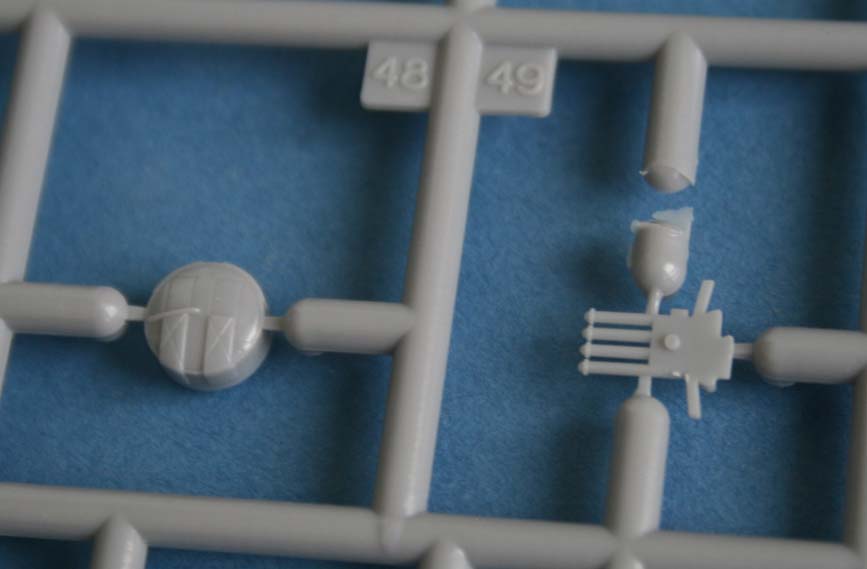
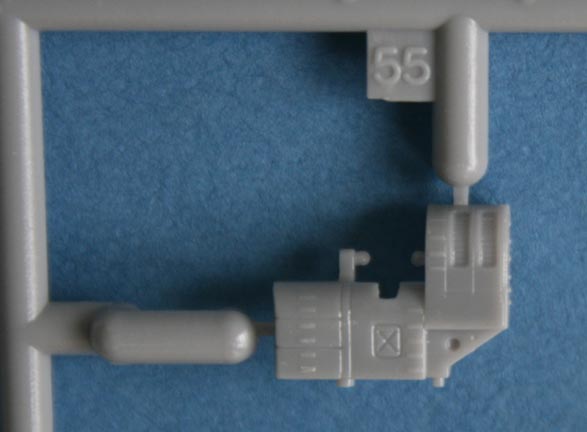
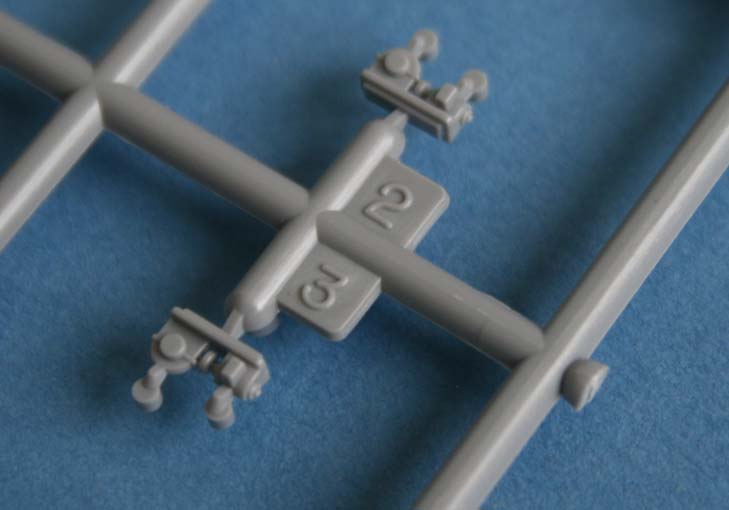
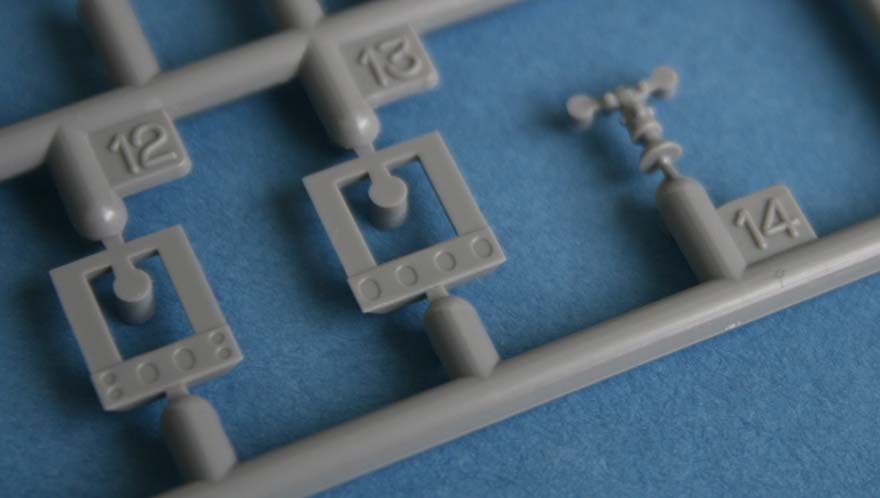
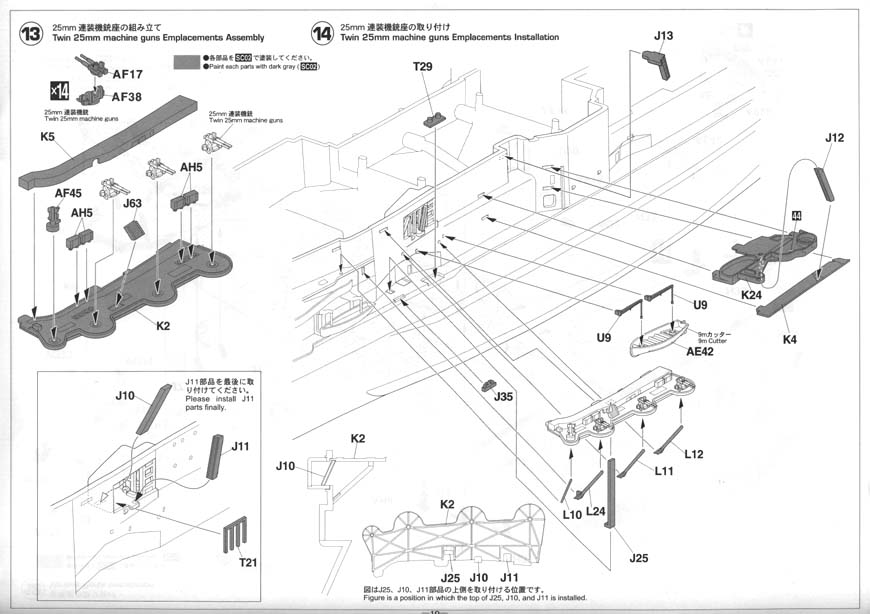
These trees provide the vast majority of the anti-aircraft weapons and directors, with vast swaths of parts also going into the spares bin (roughly 50%). There was a slight overall curve or bow to my trees, but the parts are so small that there is no visible distortion. |
||||||||||||||||
|
||||||||||||||||
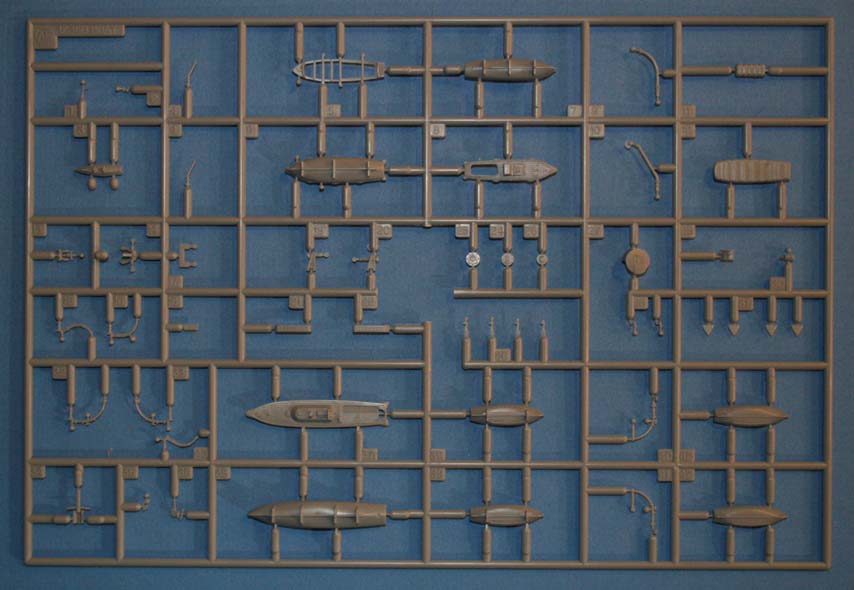
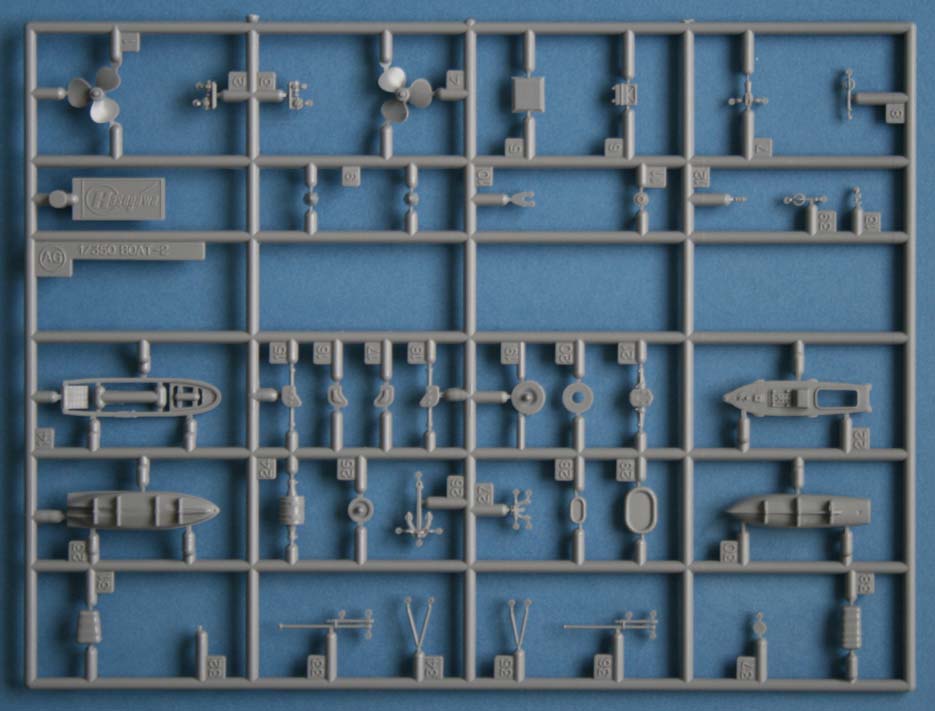
| Tree AG (Two each) | ||||||||||||||||
 |
||||||||||||||||
|
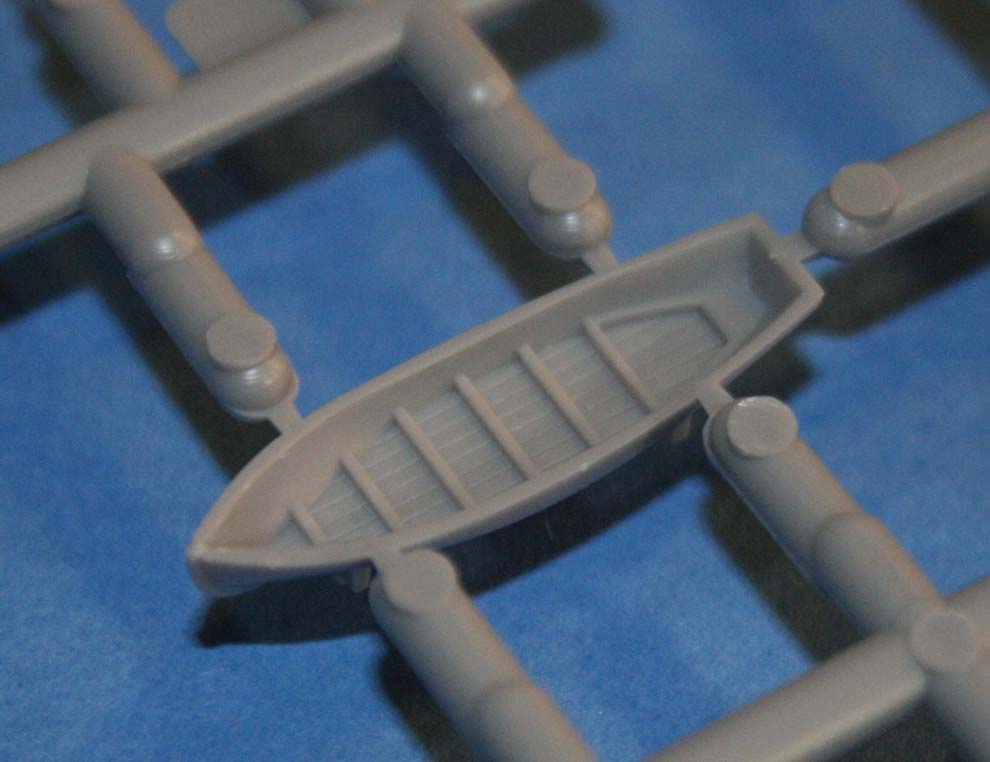
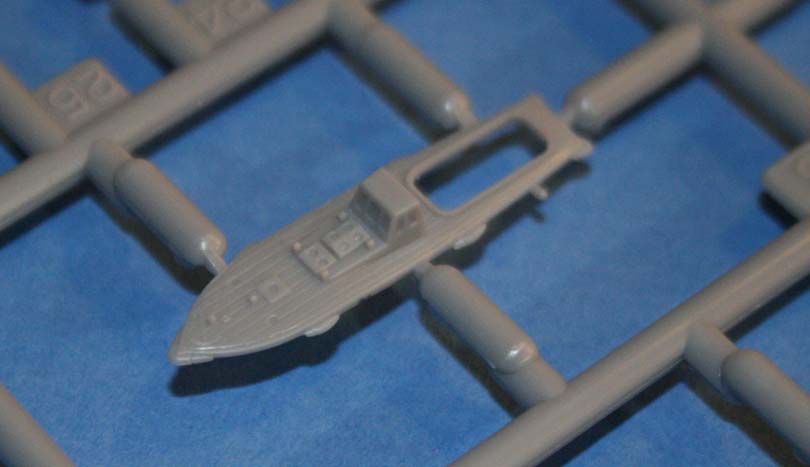
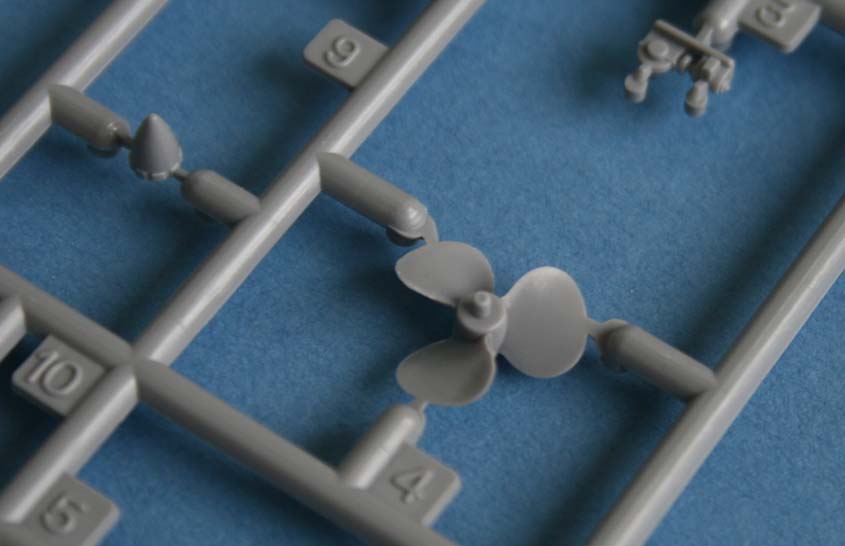
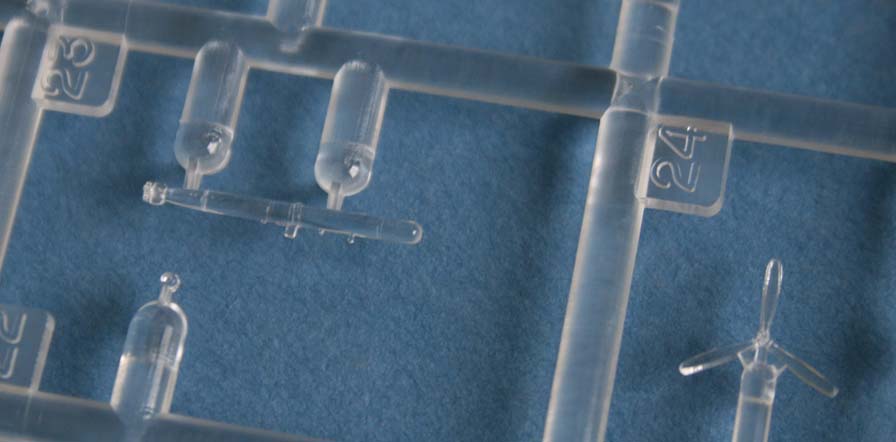
AG contains more duplicated parts, such as anchors, boats and rafts, propellers, and winches. The anchors are exquisite in their detail, and the parts on this tree in general are excellent, with the same crispness and lack of flash as on the rest of the kit. The propellers.... lawdy the propellers! |
||||||||||||||||
|
||||||||||||||||
| Tree AH (Four each) | ||||||||||||||||
 |
||||||||||||||||
|
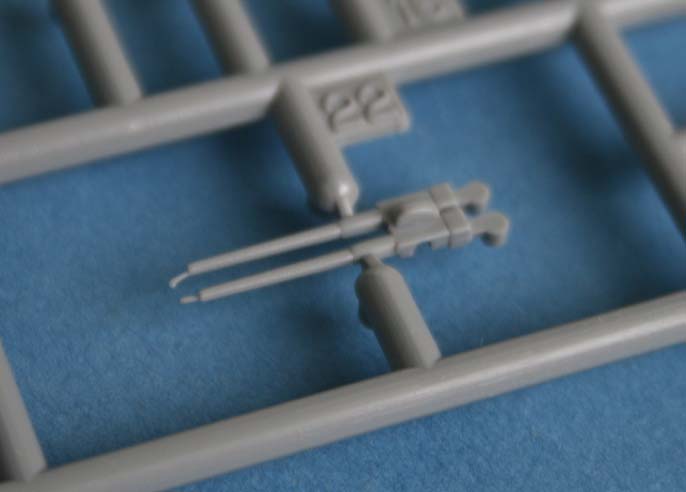
Tree AH contains parts for the six 20cm guns and three 12cm AA guns as well as some other miscellaneous parts. As with the other trees there are plenty of blind sprues to improve flow and thus part quality, and a minimum of flash or mold lines to be cleaned. |
||||||||||||||||
|
||||||||||||||||
| Tree AI (Three each) | ||||||||||||||||
 |
||||||||||||||||
|
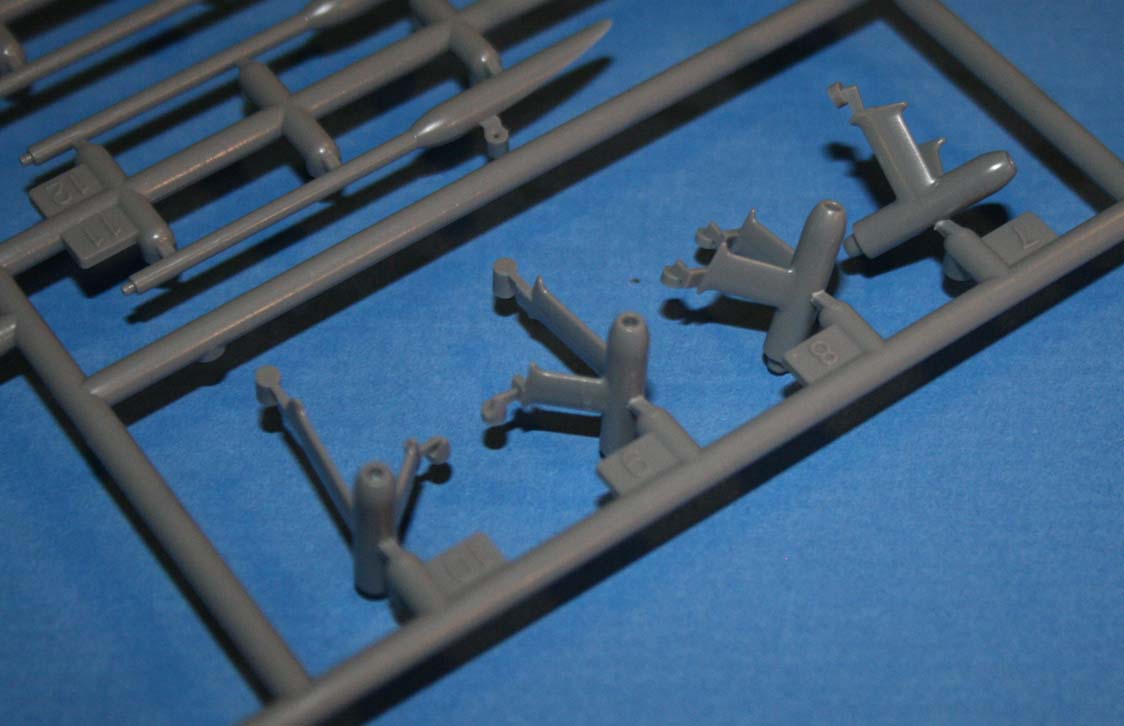
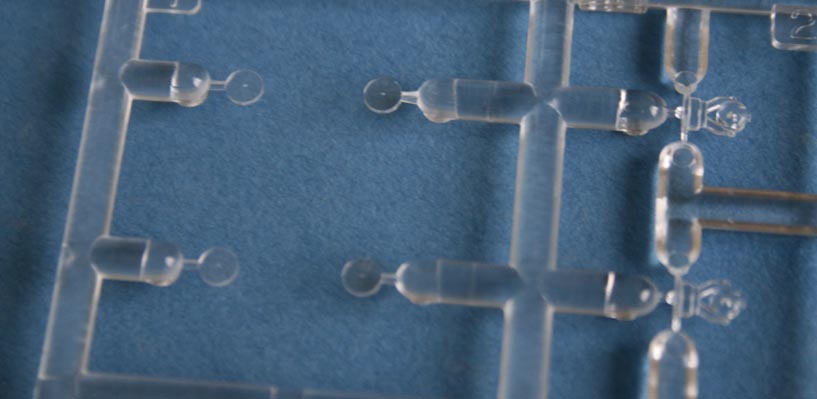
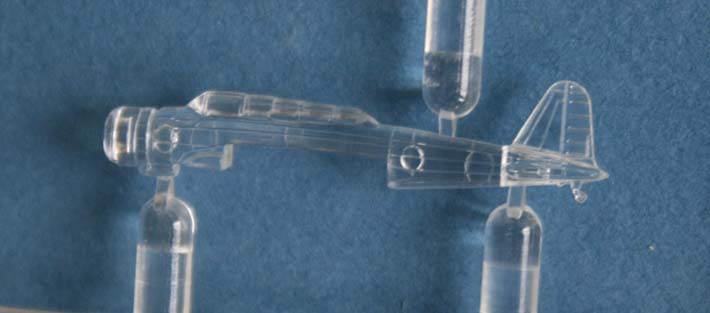
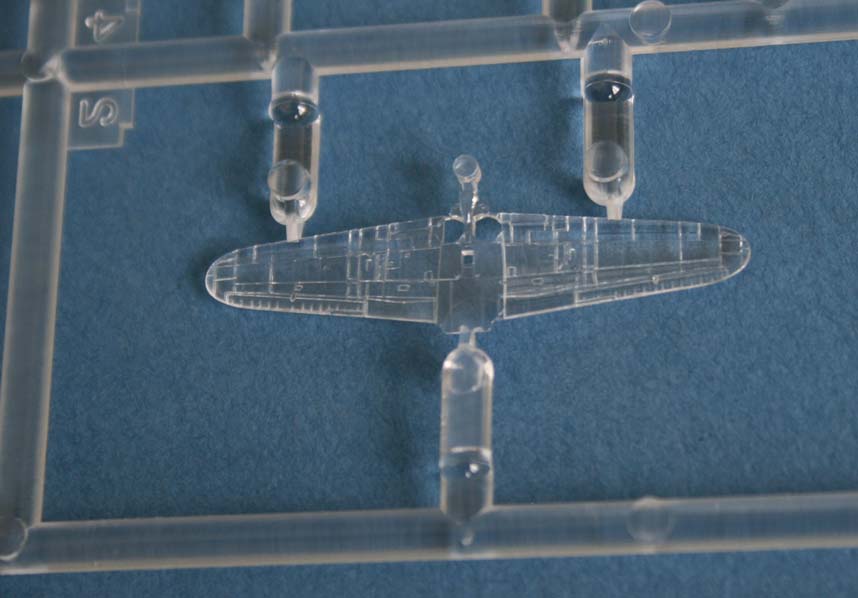
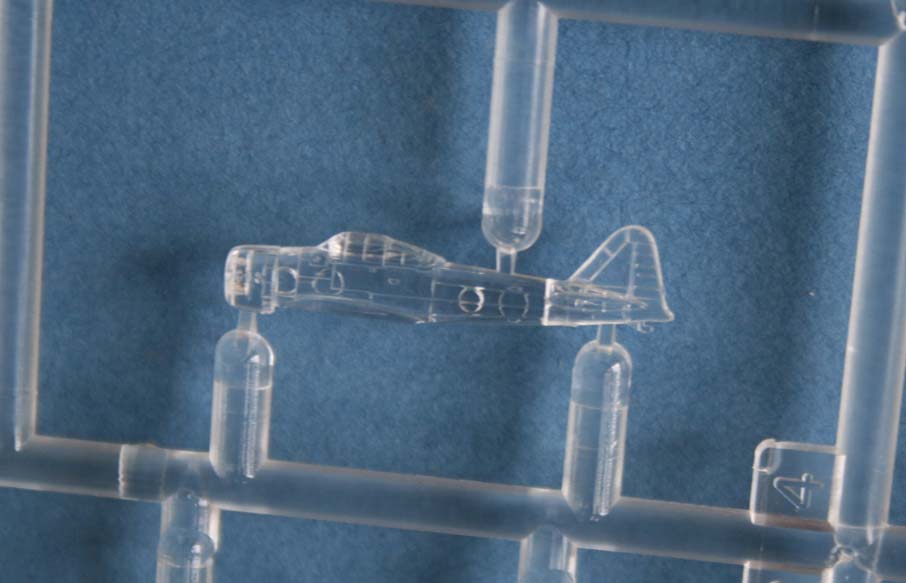
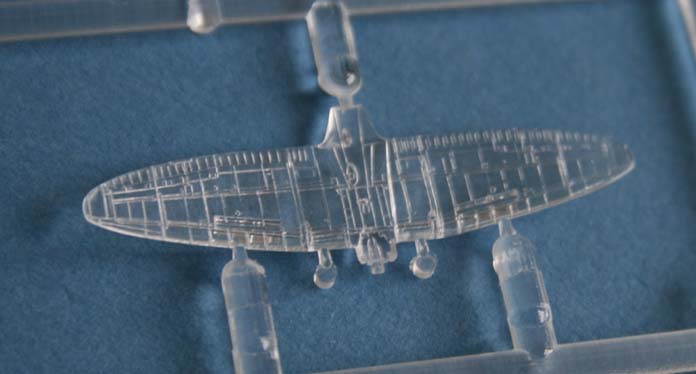
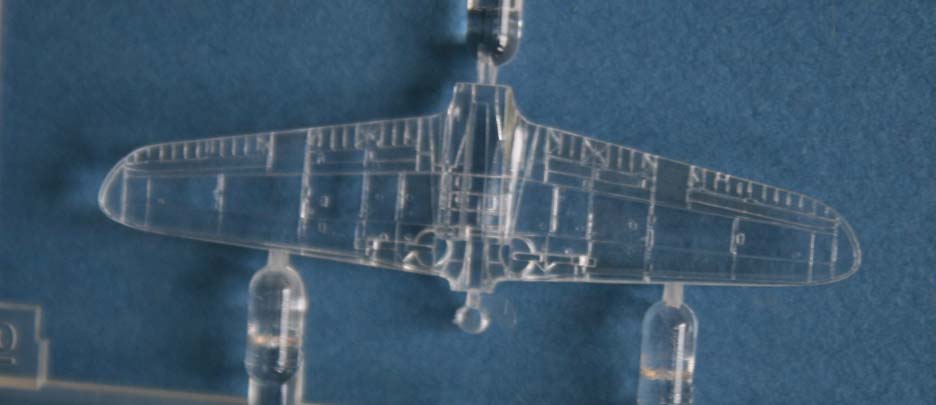
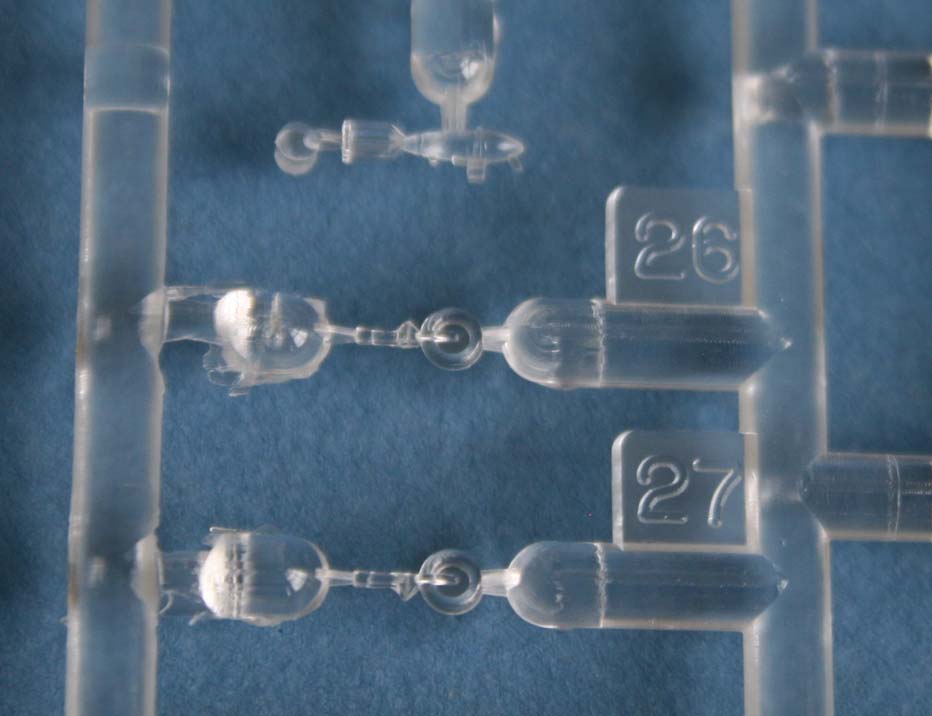
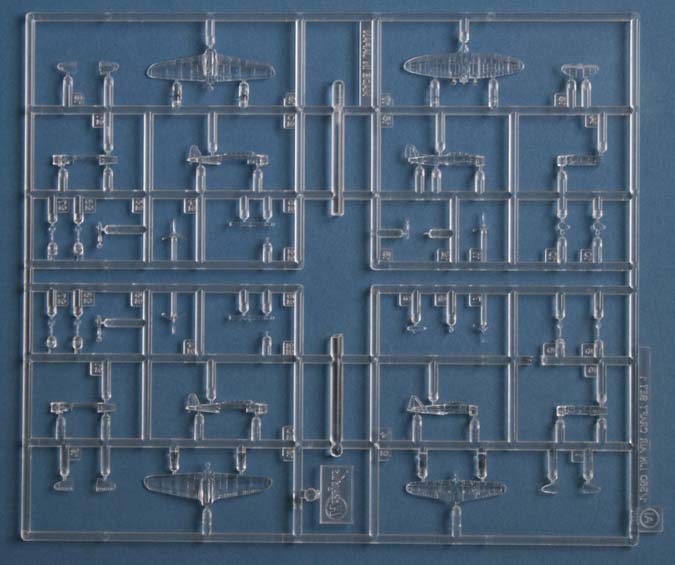
No aircraft carrier is complete without aircraft. The Akagi kit comes with the three main types flown in combat by Akagi. Molded in clear plastic are three A6M "Zero" fighters, six B5N "Kate" torpedo and high-level bombers, and three D3A "Val" dive bombers, with two Kates per tree and one each of the Val and Zero. This is another area where one may incur an extra cost in the kit, as this is far from a full air group. Japanese tactics differed from US Navy tactics to the point that aircraft were kept below decks unless they were actively taking part in a launch or landing cycle. Thus, if one wants to build the ship to portray her during the attack on Pearl Harbor, one has to plan out the aircraft on deck by which wave they want to represent. The first wave was launched with 27 kates carrying a mixture of totorpedoesnd bombs with nine zeros as cover; the second consisted of 18 Val dive bombers and another nine zeros for cover. At no time were Kates, Vals, and Zeros on deck at the same time. Since six B5N Kates are provided in the kit, if you want to do the first wave you will need to buy 21 more. Hasegawa sells additional aircraft nine to a pack, with three each of the Val and Zero, and six of the Kates. That means you will need to buy four separate sets, which site sponsor Free Time Hobbies sells for $18.95 before shipping and applicable tax. The second wave will run you five sets. My prediction is that a secondary trading market will spring up of people who have extras of one type or the other wishing to recoup *SOME* of the cost of populating the deck. The instructions show Kate 3, tail code AI-316 with outer wing panels marked "green is thinly painted over silver. In talking with Pearl Harbor Historian and Student David Aiken, he mentioned that this was probably based on artwork he helped research for this aircraft, but later on in its service career when it had seen a couple of months of service. At the time of Pearl Harbor the paint would have been much newer and not worn.
|
||||||||||||||||
|
||||||||||||||||
| Instructions | ||||||||||||||||
|
A 27 page instruction booklet is included. Crisp isometric drawings lay out the parts and building order well. Building order is fairly straight forward, although most momodelers will still re-order things in order to keep the delicate details off as long as possible to avoid damage.
|
||||||||||||||||
| Decals | ||||||||||||||||
|
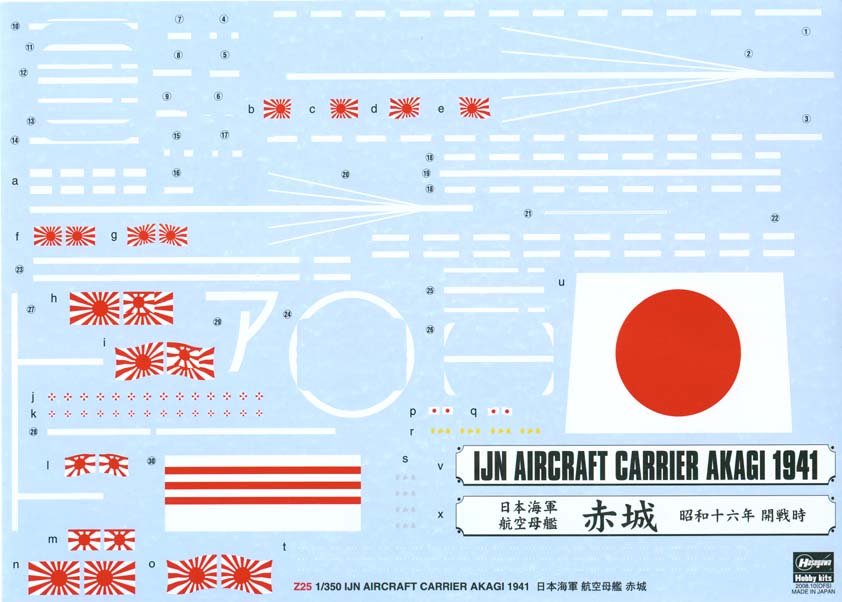
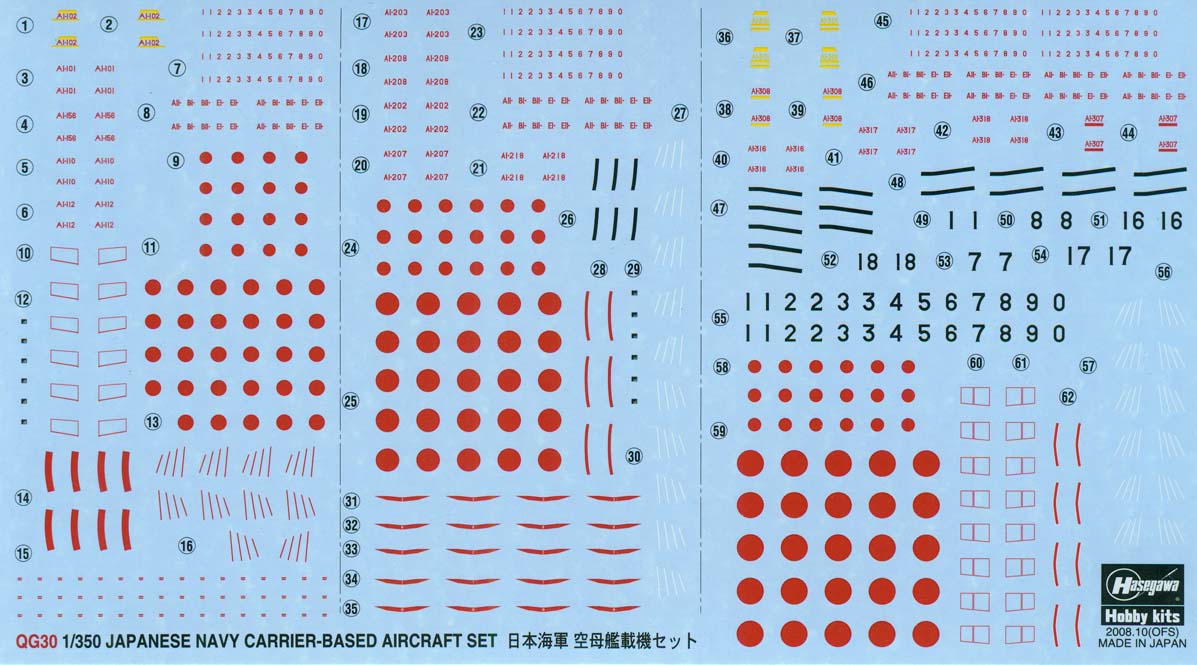
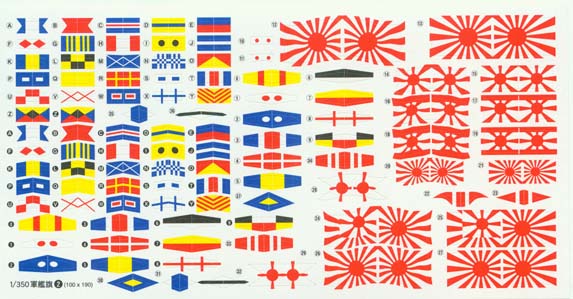
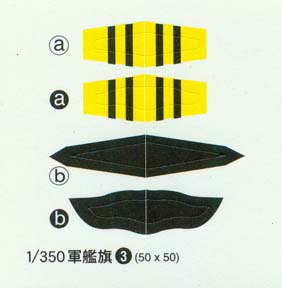
Four separate decals sheets (actually, two of them are stickers) are included; one for the ship, one for the aircraft, and one two for signal flags and pennants. Ship markings are provided for Pearl Harbor and Midway actions. Individual aircraft markings are provided for Akagi aircraft (tail code AI) but tail codes for other carriers of the Kido Butai are also included, albeit you'll to provide the differently-colored tail bands if you choose to use these decals for aircraft from other carriers.
|
||||||||||||||||
| Extras | ||||||||||||||||
Additional Detail Sets (Reviews forthcoming): White Ensign Models PitRoad Special Thanks to Skyway Model Shop for making this review possible! |
||||||||||||||||