IJN Kongo
Reviewed by Jon Somerville
| HISTORY | ||||||||||||||||||||||||||
|
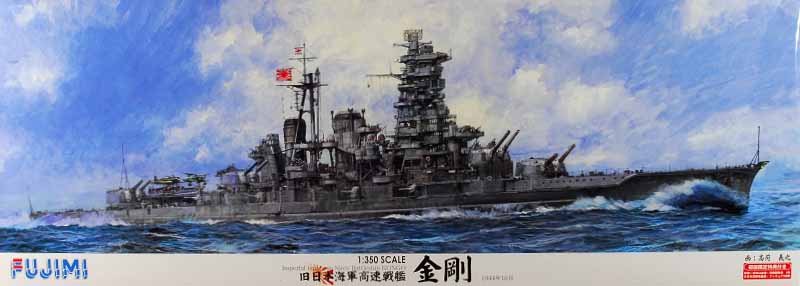
Kongo was the first of a four ship class. She was built during a time of much change in both the IJN and naval warfare which resulted in many alterations during its design and construction. Kongo was designed and built in Britain for Japan. But this would be the last warship built for Japan outside of Japan. The next three ships of the class were Hiei, Kirishima and Haruna all launched in that order with the last being launched less than two years after Kongo. Built as a battlecruiser, Kongo went through major modifications leading up to WWII. By the time WWII came around one would barely recognize Kongo. Three funnels were replaced with two, a large Pagoda Mast and superstructure adorned with search lights and AA guns. In the 30s the Kongos were reclassified as fast battleships and were assigned to fast carrier protection duties due their speeds. All ships of the class were destroyed in WWII with Kongo being sunk on November 21, 1944 by the US submarine Sealion. Up to that point, Kongo had seen action in both Midway and Layte-Gulf. On the 26th of September 1991, Kongo (DDG-173) a modern guided missile destroyer was launched making it the third ship in the Japanese Navy to carry the name. First was in 1877, a sailing ship armored corvette that served all the way up to 1909. The KitCompetition is alive in the Japanese 1/350 scale market now. Clear evidence of that is the release of Kongo in 1/350 by two different companies. The kit reviewed here is the Fujimi copy while the other manufacturer is Aoshima. |
||||||||||||||||||||||||||
| HULL PARTS | ||||||||||||||||||||||||||
|
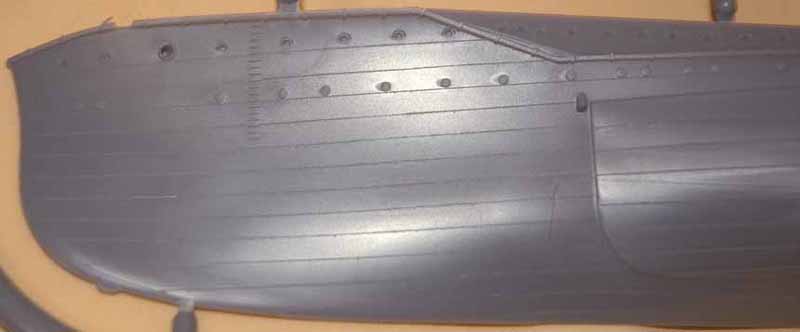
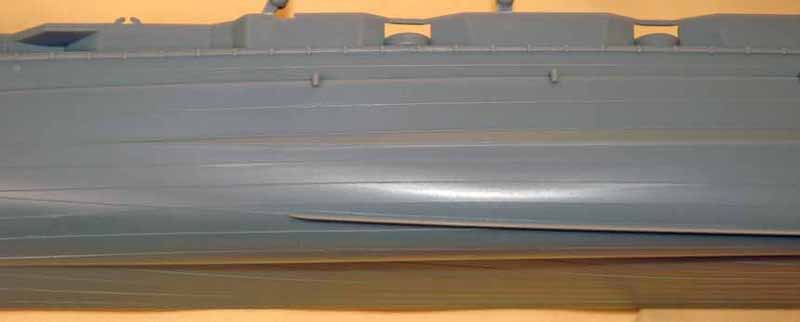
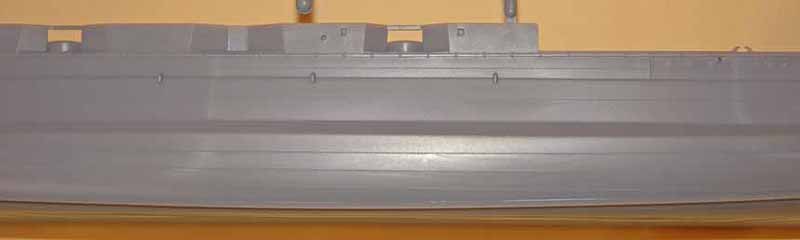
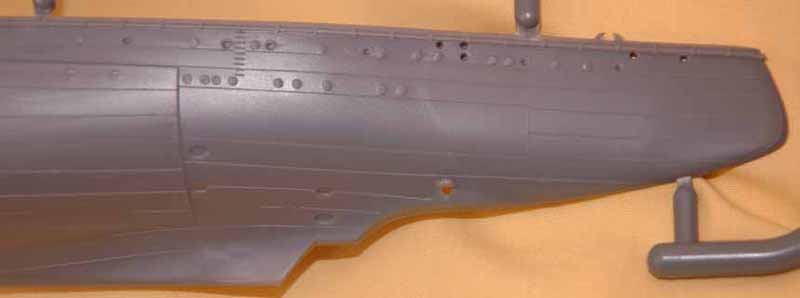
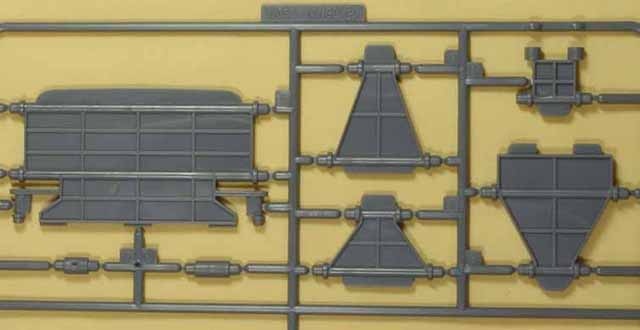
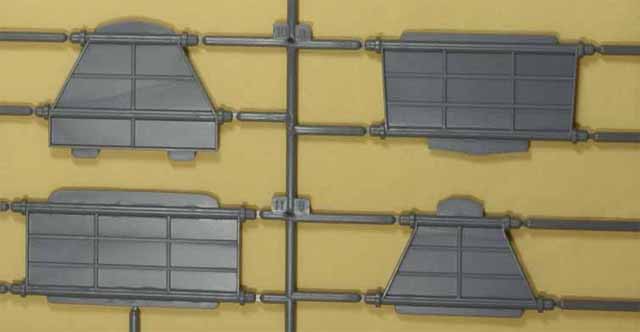
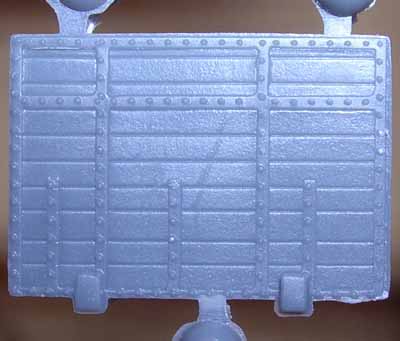
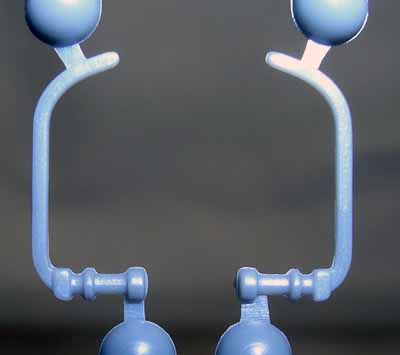
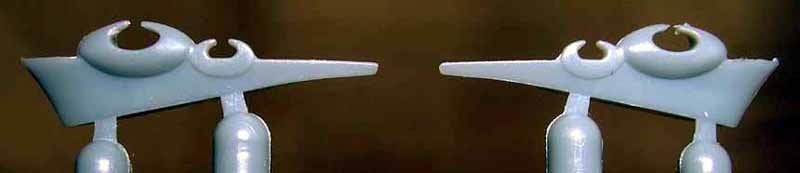
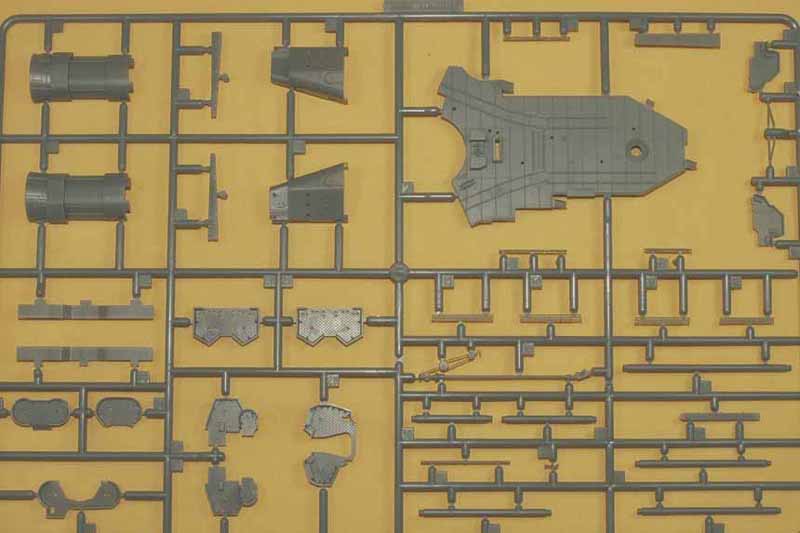
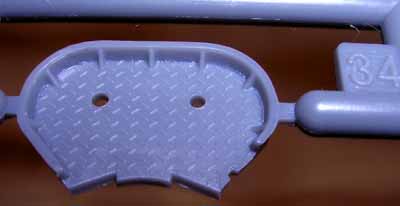
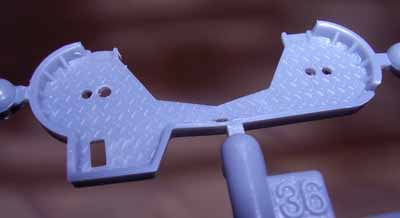
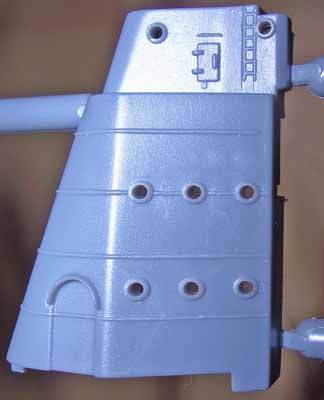
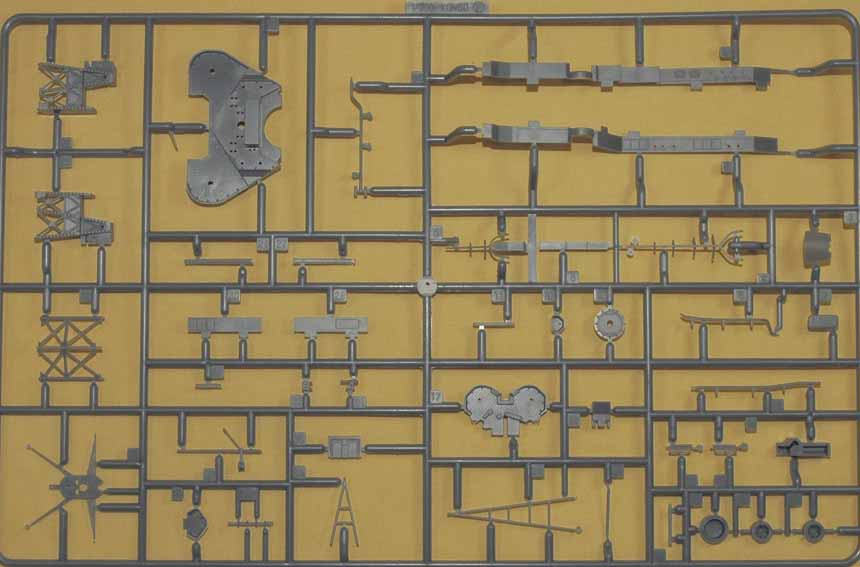
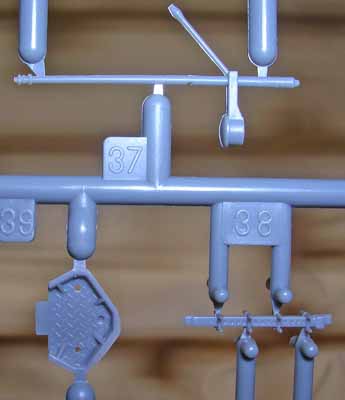
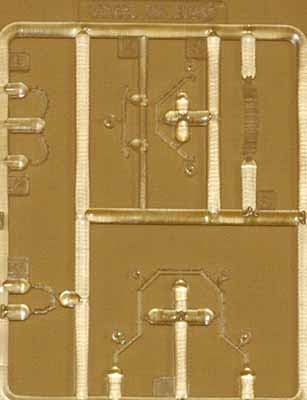
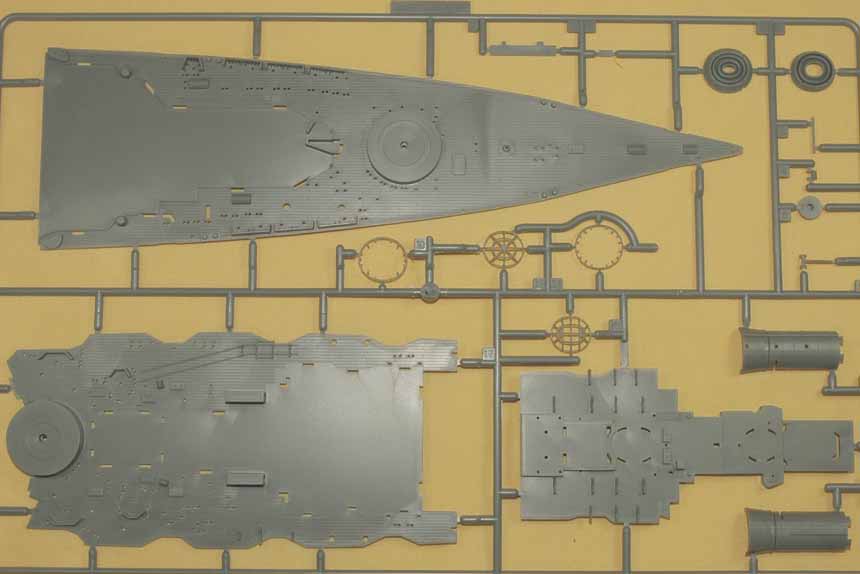
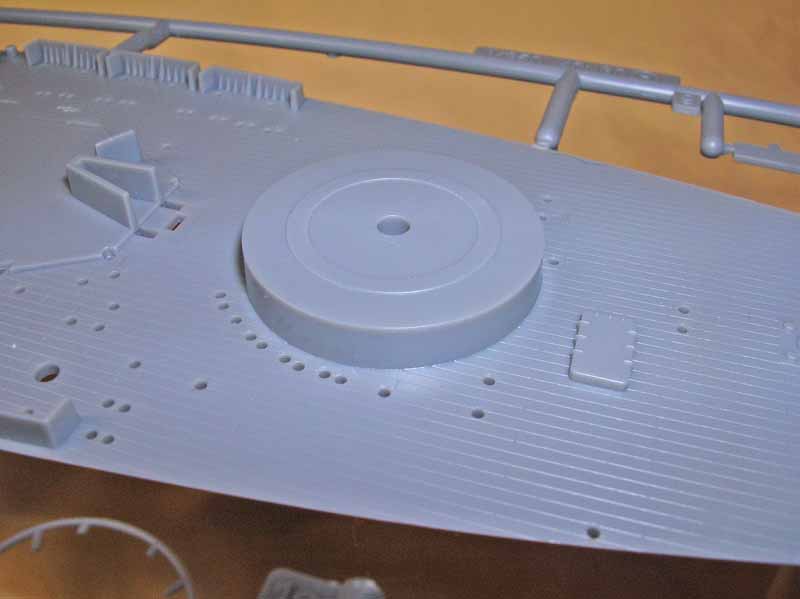
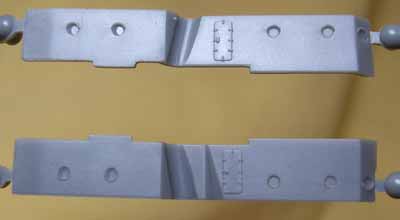
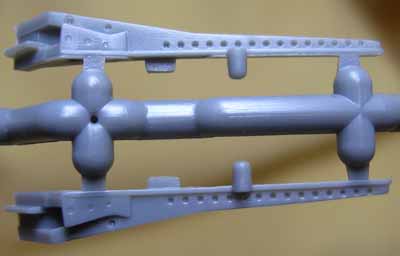
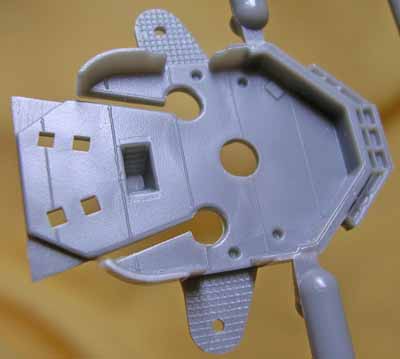
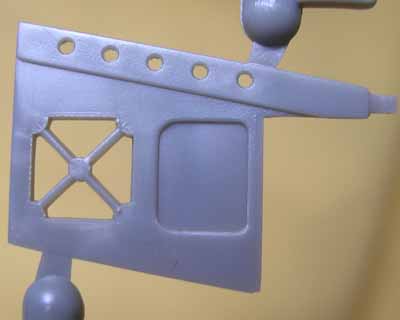
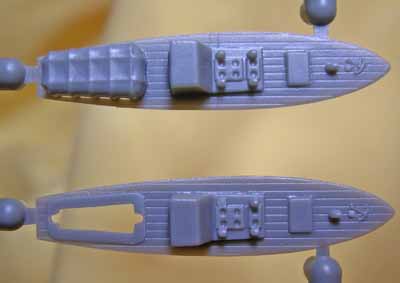
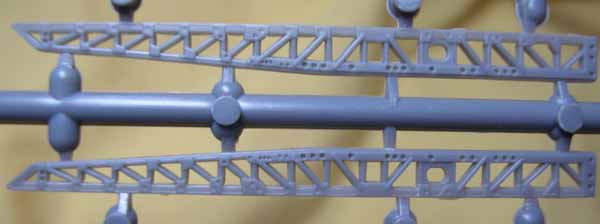
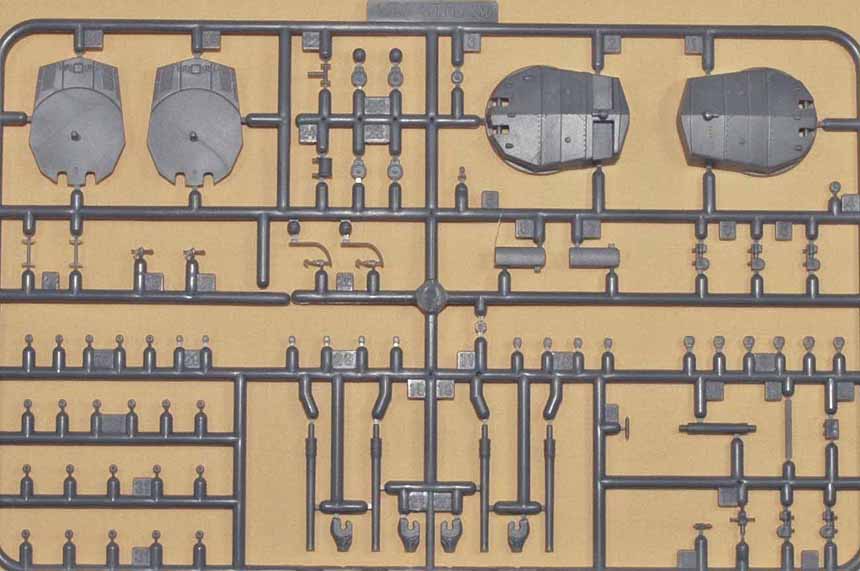
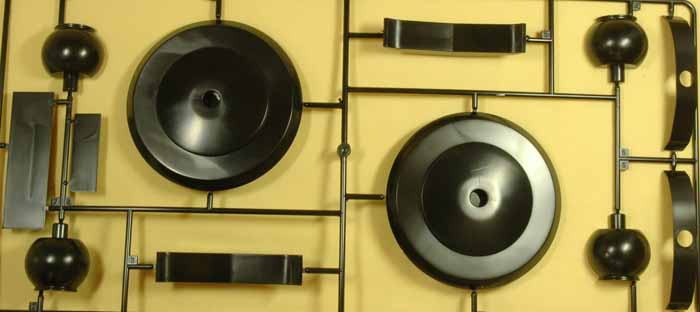
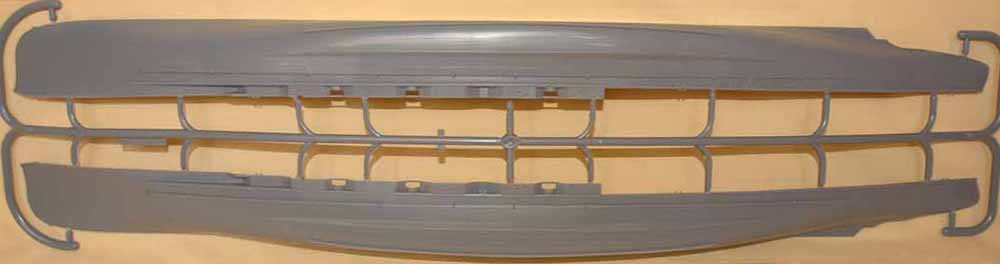
In order to mold the hull in two halves and still have crisp bilge keels, several mold pieces were used. Mold seams that continue past the bilge keels, similar to that which was seen in Akagi can be found on the Kongo kit however not as pronounced as in Akagi which were also minimal. It will not take much to sand them out, but one should be aware of them as they are hard to see and will show up once painted. I would guess it would take about five minutes to clean up these seems depending on how picky you are at protecting the surrounding lines. Degaussing cable is molded onto the hull. Slide molding was used to make the holes for the rudders. Hull platting is finely molded raised lines (not engraved like Akagi and Nagatos hull) that are above and below the waterline. Only problem is there is no line to mark were the waterline is located. It looks like there is, but when you follow the lines down the hull, they change at the torpedo blisters. An experienced modeler will can overcome this obstacle but I think it was a mistake not to include this line. As for the accuracy of the hull plating lines, I have no drawings to compare against. One of the most glaring issues to come up regarding this kit can be seen on these two parts of this sprue. The angle of the corners that frame the 6 inch hull mounted guns. They should be at 90 degree angles to the deck. This area was done correctly with the Aoshima kit but I would not let this be a discouraging factor. It is interesting as one of the reference photos included in the instructions clearly shows the angles are incorrect in the kit. |
||||||||||||||||||||||||||
 |
||||||||||||||||||||||||||
| ||||||||||||||||||||||||||
| SPRUES B&C | ||||||||||||||||||||||||||
|
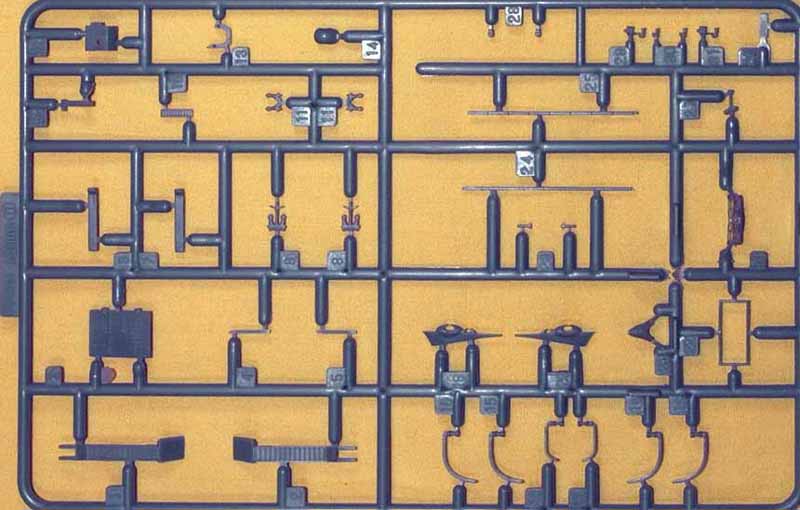
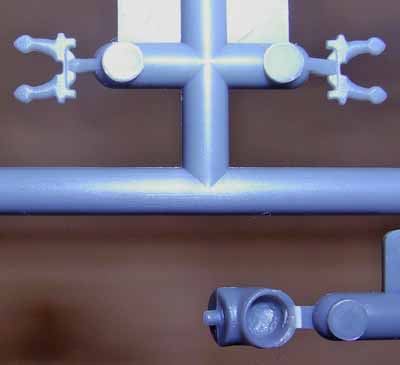
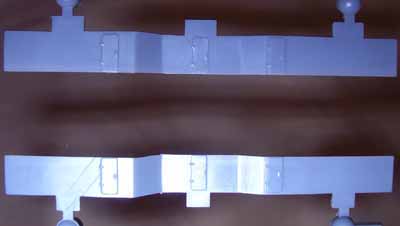
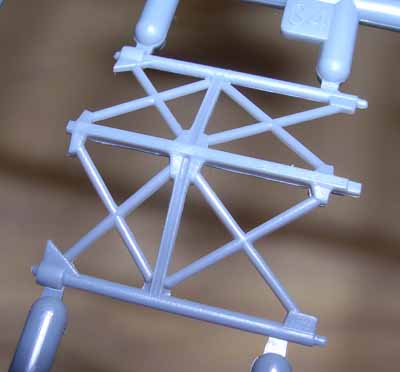
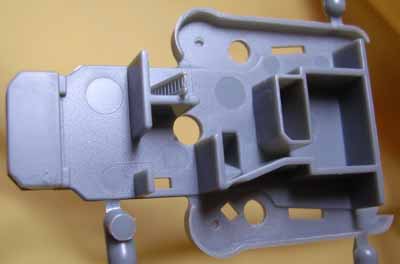
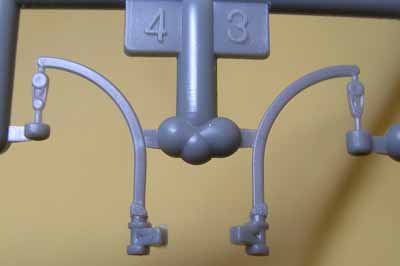
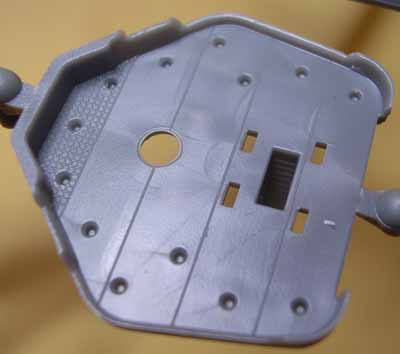
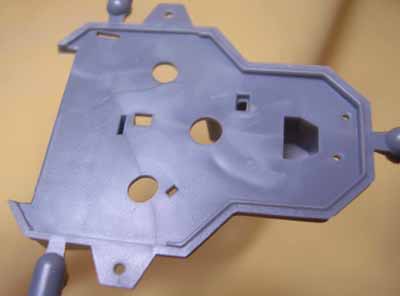
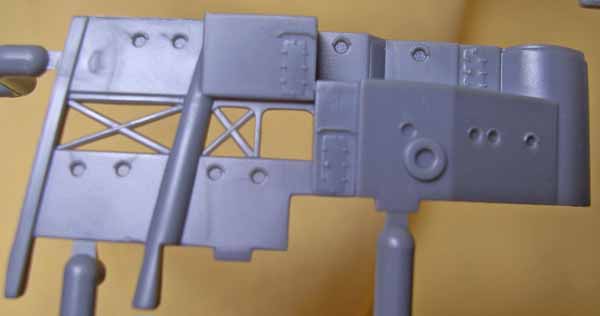
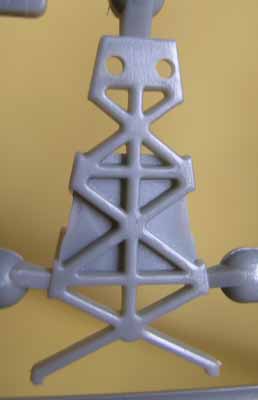
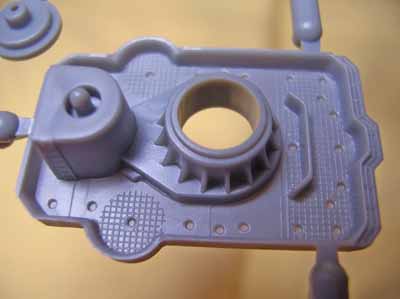
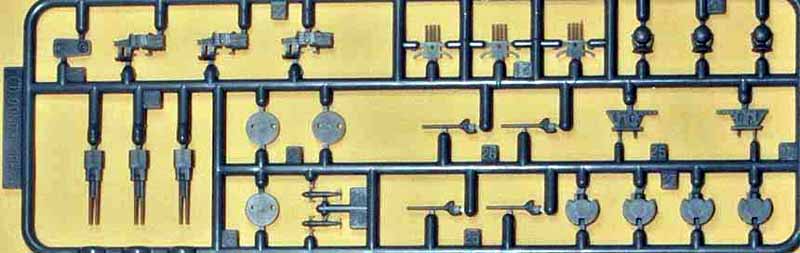
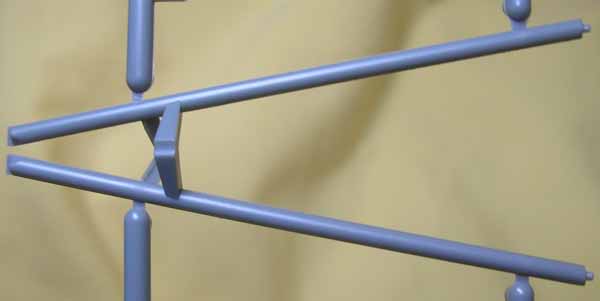
Trees B and C contain the inner hull support structure. When I first started in this hobby of building models in the 80s, it was often written that a modeler will want to remove the guide pins that are molded into the kit as the more advanced modeler can do a better job aligning parts than the kit. To see an entire tree these parts dedicated for the purpose of alignment pins always makes me wonder how much this could through off alignment of the hull halves. But it seems that mold making technology has improved enough that this isnt as much of an issue as it was years ago. The support structure pieces also provide pivot points for both the hull mounted 6 inch guns and the rudders. | ||||||||||||||||||||||||||
|
||||||||||||||||||||||||||
| SPRUE D | ||||||||||||||||||||||||||
|
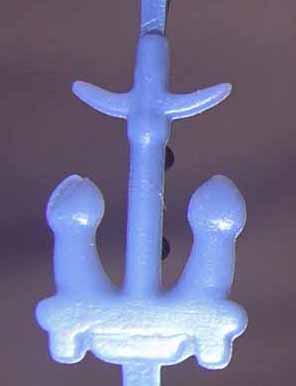
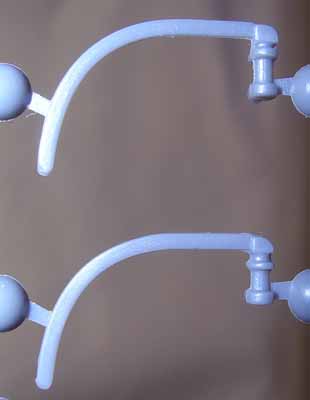
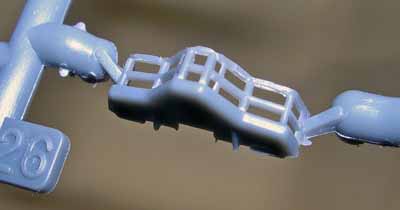
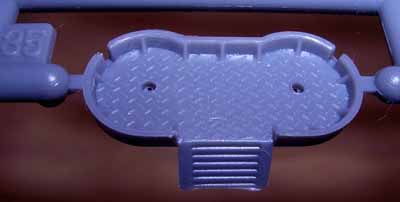
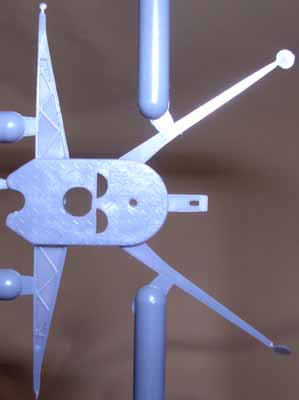
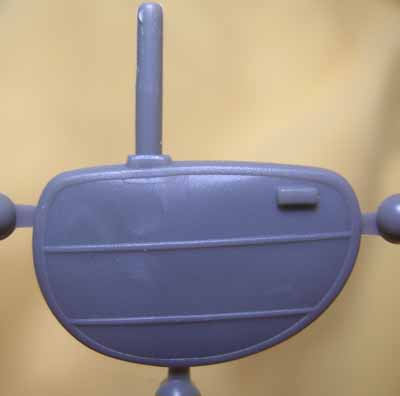
This sprue contains miscellaneous parts intended for the hull. Three parts on this tree help construct the bow and include the imperial seal of Japan. Anchors, hull mounted davits, crew boarding platforms etc. can be found here. |
||||||||||||||||||||||||||
|
||||||||||||||||||||||||||
| SPRUE E | ||||||||||||||||||||||||||
|
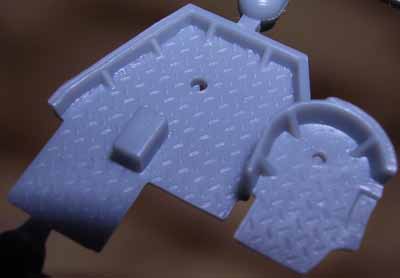
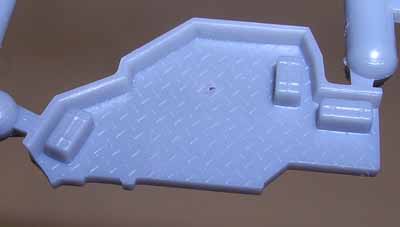
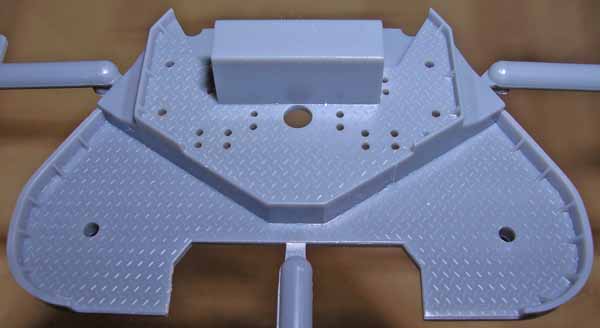
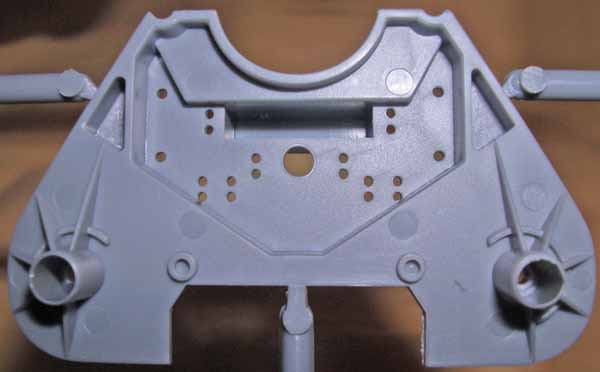
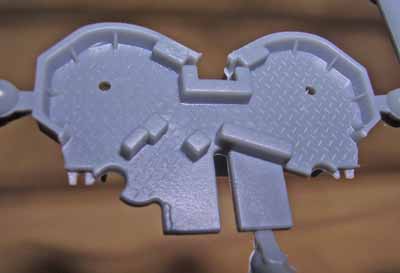
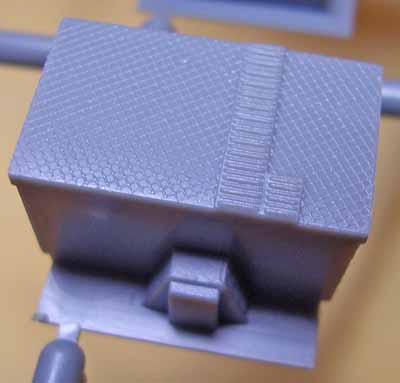
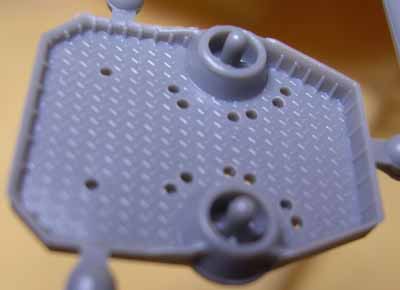
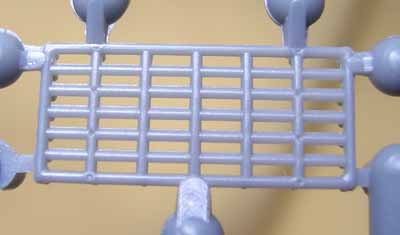
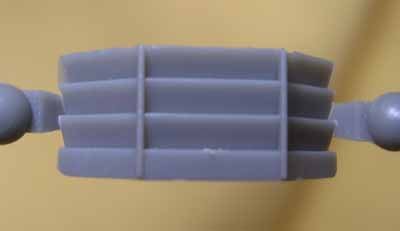
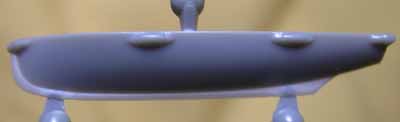
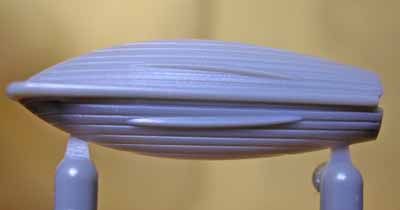
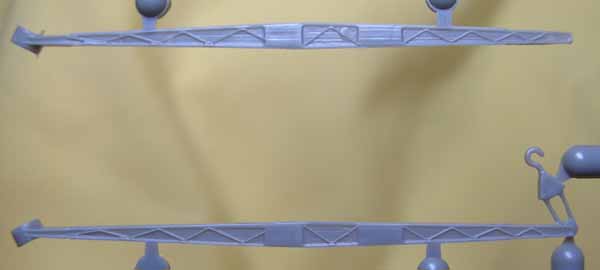
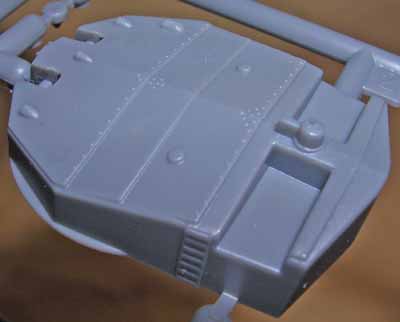
Here you will find the aircraft deck, aft superstructure, forward funnel etc. The aircraft deck is the largest visible area to have linoleum. I havent decided if Ill sand the plastic lines down to replace with real brass rod yet. But these lines do conflict with the float plane dolly tracks. There are two sets of notches in the deck between the tracks for the two dollies. They dont belong, so fill them in unless this is where you want the aircraft dollies located. |
||||||||||||||||||||||||||
|
||||||||||||||||||||||||||
| SPRUE F | ||||||||||||||||||||||||||
|
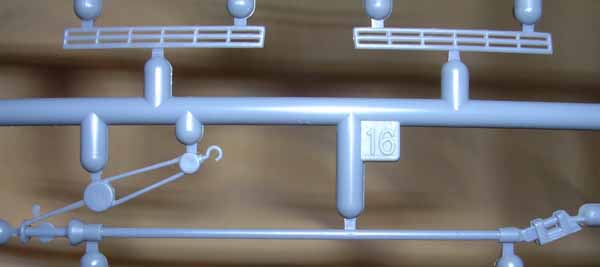
Several miscellaneous parts here, some of the masts, support work, bulkheads and platforms. This is the only parts tree that contains some items not used in this kit, but are for sister ships of the class. |
||||||||||||||||||||||||||
|
||||||||||||||||||||||||||
| SPRUE G | ||||||||||||||||||||||||||
|
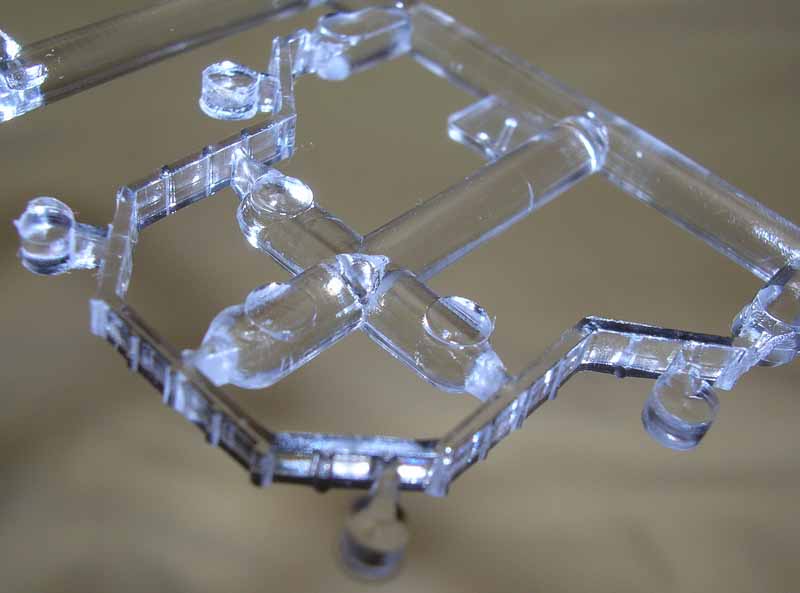
Clear parts for bridge windows are provided here. If you look carefully you can see where they have put the mold connection pin from the part to the tree right into the middle of one of the windows. I probably wont use the windows provided but will opt for PE replacements even though no glass would be used with the photoetch. |
||||||||||||||||||||||||||
|
||||||||||||||||||||||||||
| SPRUE H | ||||||||||||||||||||||||||
|
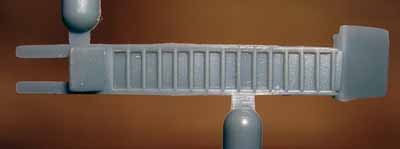
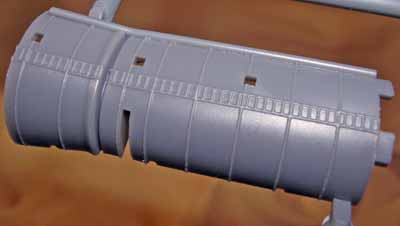
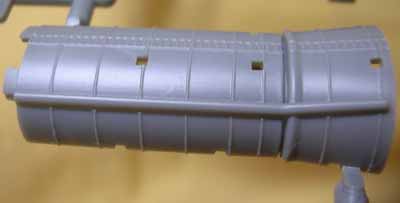
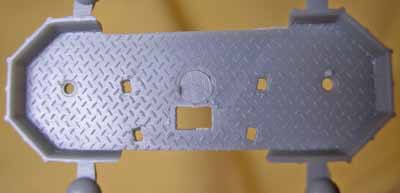
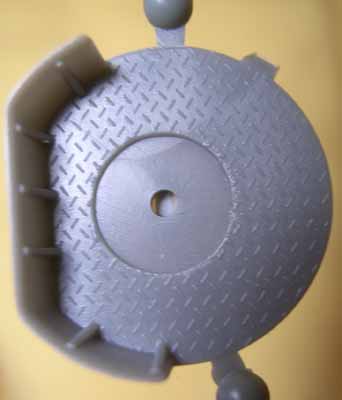
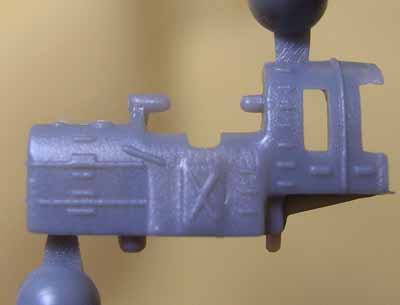
Parts include deck plates and some funnel pieces such as the aft funnel and covers. The finely detailed guards that cover the funnel, if used them, will have to be very carefully removed and attention paid while removing the seams. Ladders molded onto the funnels will be difficult to remove around the molded on jackstays unless you are removing those for photoetch as well. I have referred to the term jackstay which Im not sure is the correct term. They seem to be used frequently in Japanese WWII vessels. Mostly seen on funnels and sometimes seen on bulkheads, hulls and main guns, these handrail like items run horizontally. However, I cant seem to find a better name for them. The jackstays that are molded throughout the kit are nice but not as well molded as you see in the Hasegawa 1/350 Akagi. |
||||||||||||||||||||||||||
| ||||||||||||||||||||||||||
| SPRUE I | ||||||||||||||||||||||||||
|
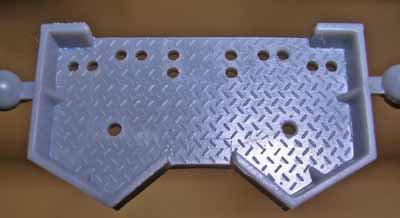
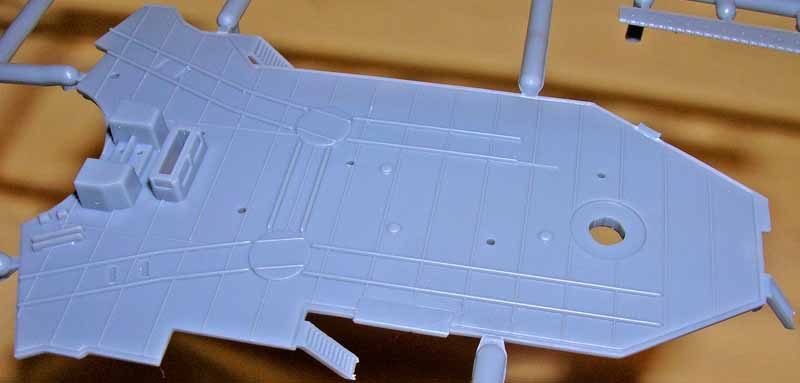
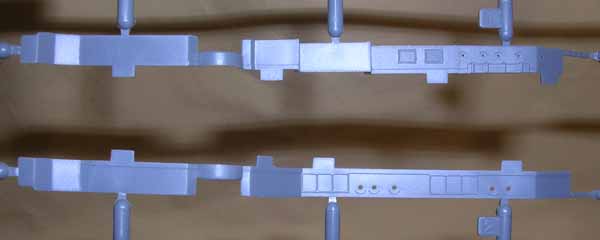
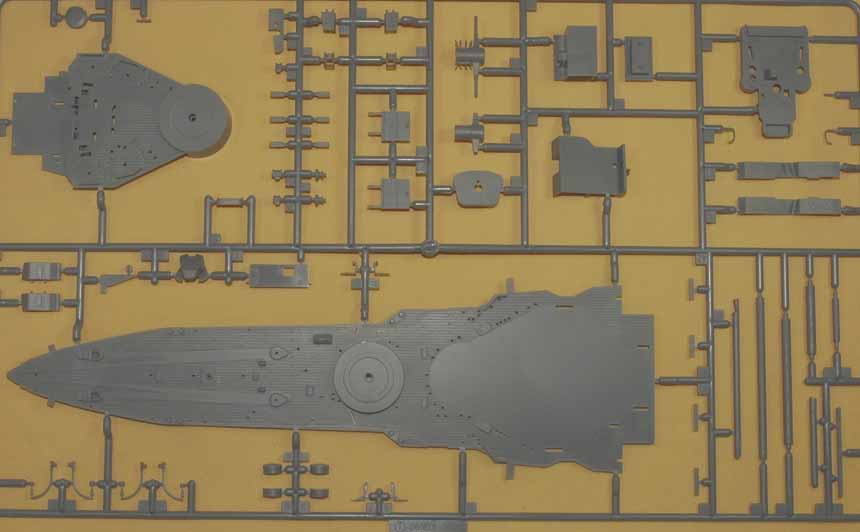
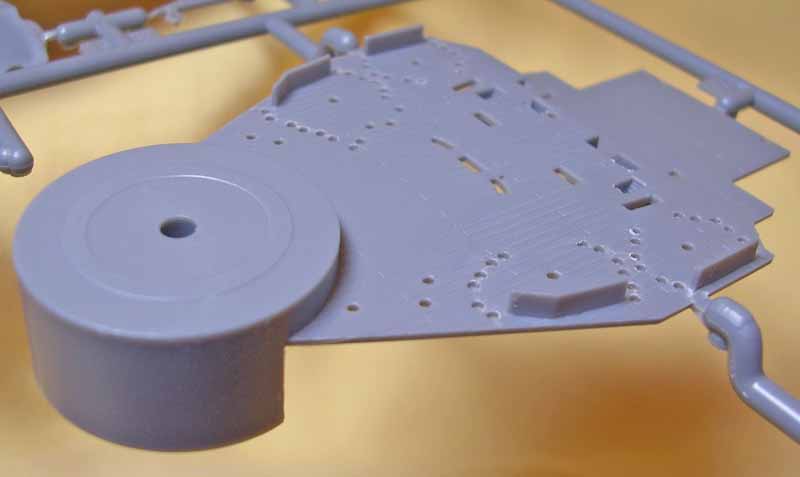
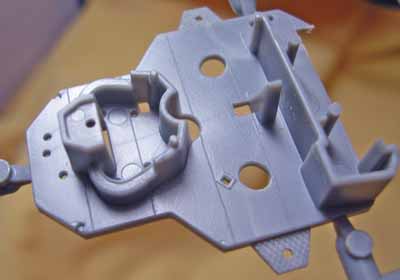
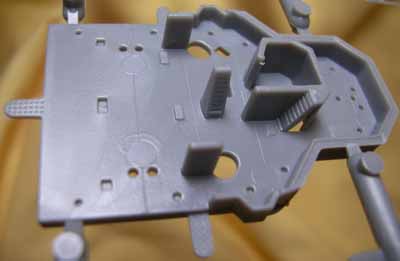
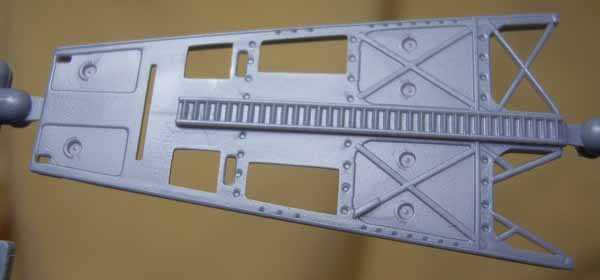
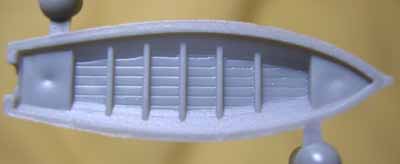
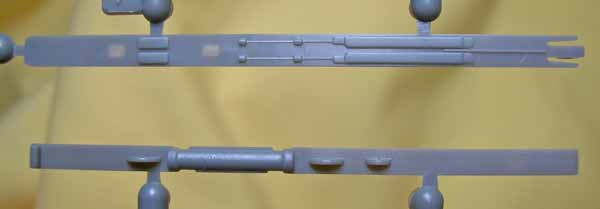
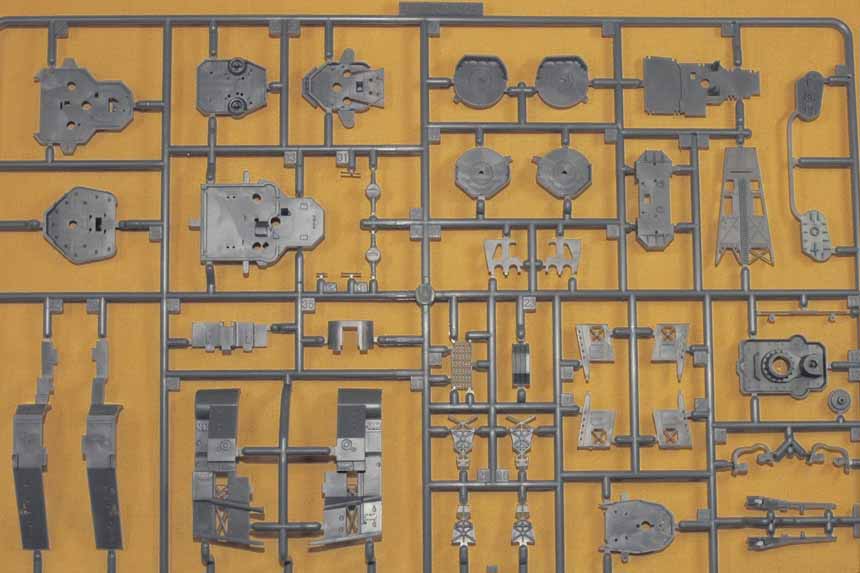
Contains two deck parts including the slender forward main deck. All replicated wooden decks are detailed with individual planks. Larger deck pieces have numerous holes in them for the triple-A guns and ammunition lockers. No anchor chains are molded onto the deck. All these things will make it easier to paint and mask the deck. Many other miscellaneous parts are on this sprue set including bulkheads, mast supports, main range finder and more. |
||||||||||||||||||||||||||
|
||||||||||||||||||||||||||
| SPRUE J | ||||||||||||||||||||||||||
|
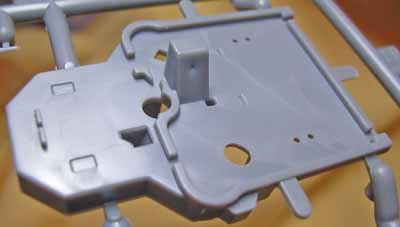
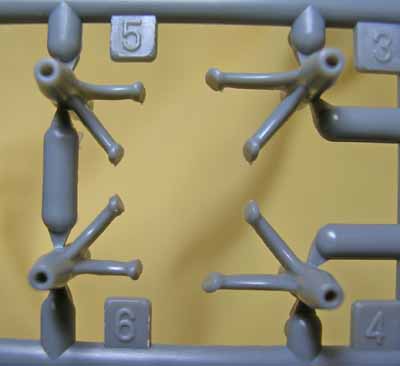
Parts on this tree are largely platforms and supports. Make sure to note which decks have linoleum surfaces. Many parts on this tree are exquisitely molded and are nice to look at. Note that the four gun tubes, numbered 5 through 8, have ladders that will need to be removed if photoetch is preferred. Further photoetch ladders can also be used for some of the platforms, such as seen on parts; 2, 27, 29, 33 and 34. But study the instructions and your construction process well as most are hidden and part of the interior of the bridge. |
||||||||||||||||||||||||||
 |
||||||||||||||||||||||||||
|
||||||||||||||||||||||||||
| SPRUE K | ||||||||||||||||||||||||||
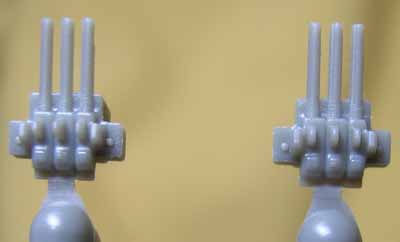
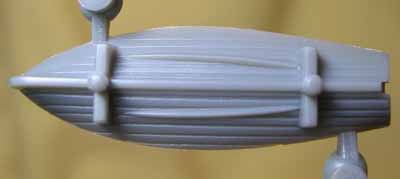
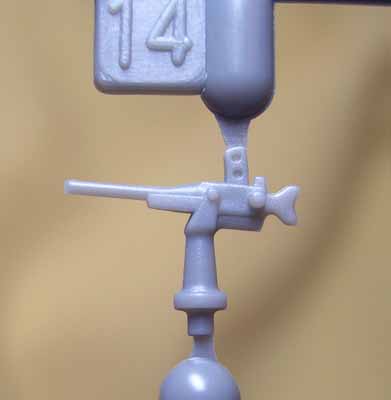
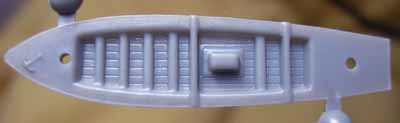
|
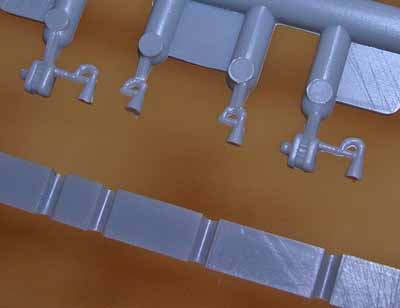
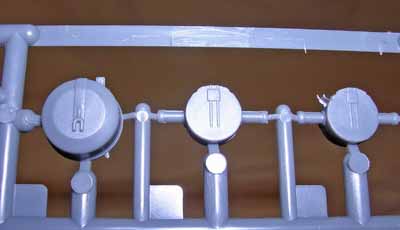
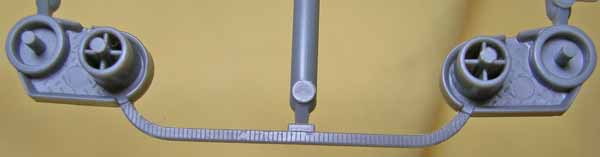
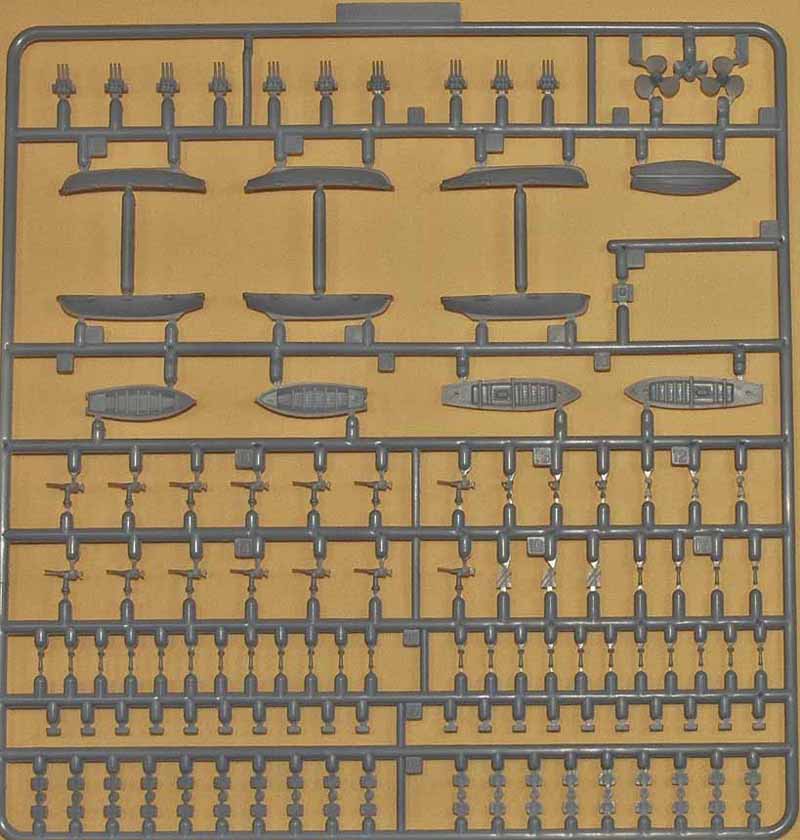
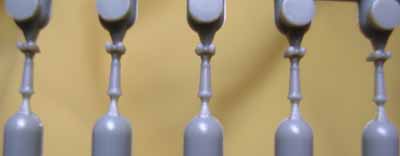
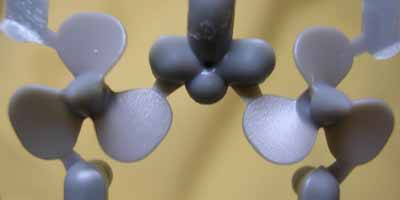
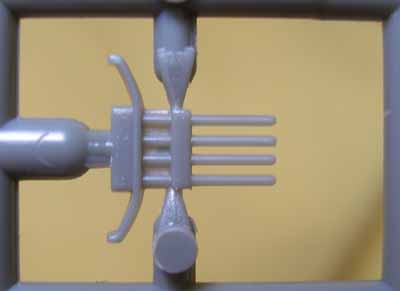
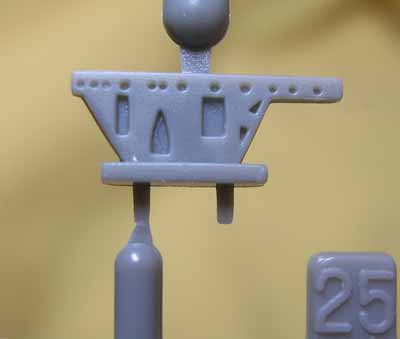
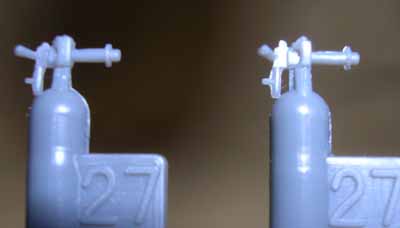
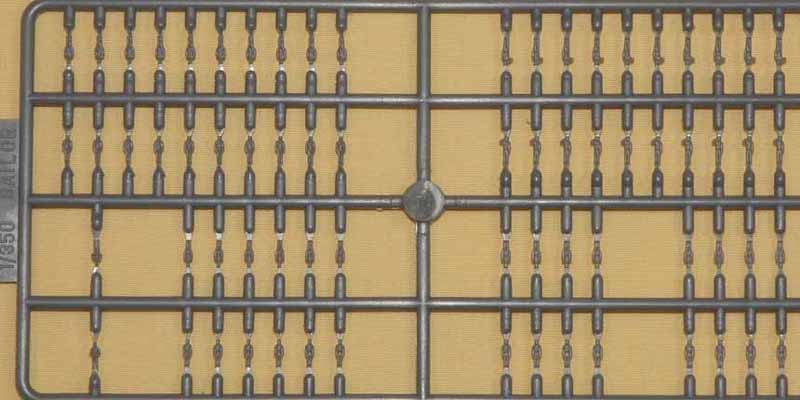
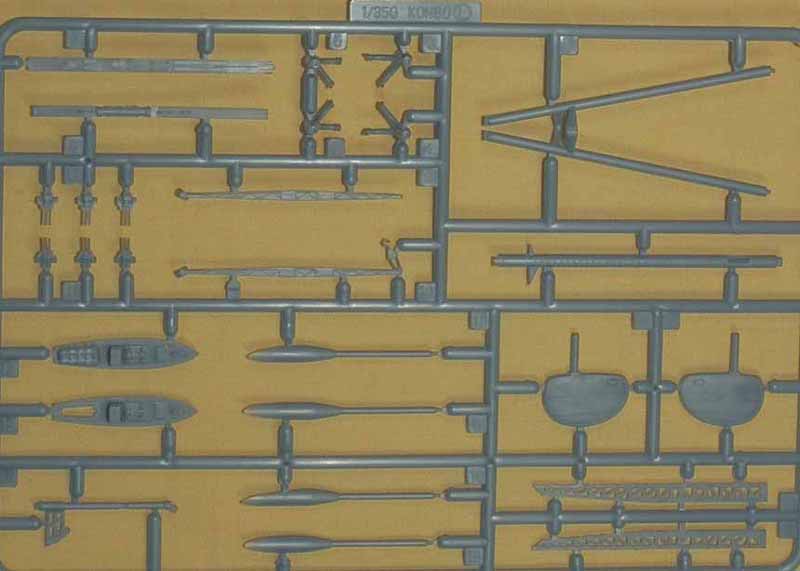
Mostly contains 25mm guns in single and triple mounts, but also lifeboats, ammunition boxes, binocular with stands and propellers. Detail of the 25mm guns is about what would be expected, nothing outstanding here. Check out the attached photos regarding the 25mm guns. In my opinion the propellers have a nice shape, no sink holes but seem to me to be too small. Comparing against photos, they do appear to be small on the real ship. |
||||||||||||||||||||||||||
| ||||||||||||||||||||||||||
| SPRUE L | ||||||||||||||||||||||||||
|
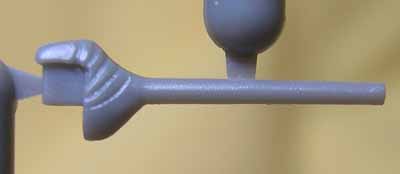
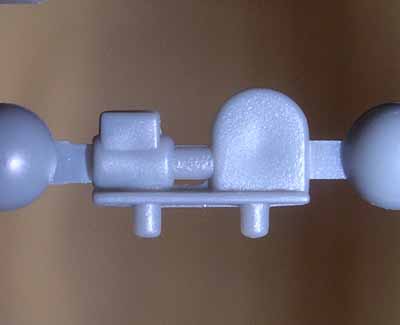
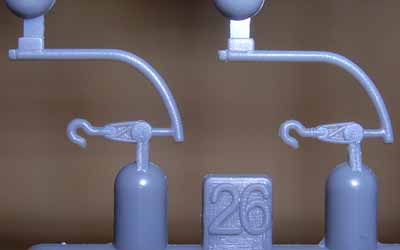
A small sprue that has the rudders, mast parts, propeller shafts and struts, aircraft recovery crane, catapult, twin mount 25mm and large lifeboat decks. I am impressed with the aircraft catapult. Yes, I would still replace with photoetch, but sometimes you hate discarding such a nicely detailed plastic part. This is one of them so add a notch to the score for those modelers who choose to go without photoetching. The propeller mounting struts for the shafts on my kit had some minor sink holes. The twin 25mm gun mounts pointed up above the tree resulting in one (so far) of the delicate gun barrels being broken. |
||||||||||||||||||||||||||
 |
||||||||||||||||||||||||||
|
||||||||||||||||||||||||||
| SPRUE M | ||||||||||||||||||||||||||
|
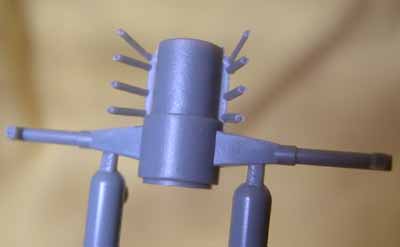
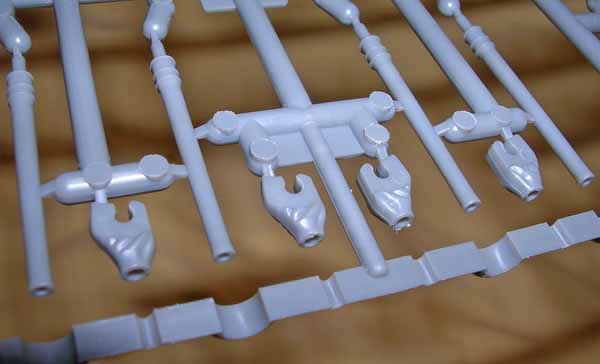
The set comes with two sprue Ms which is primarily the parts for the main turrets. The plastic barrels that come with the kit are extremely well molded and have the slight flare at the tip like it should. Slide molding was used to make the barrel hollow and to make a hole into the plastic molded blast bags to receive the barrel. In the first releases of this kit, there were brass barrels that were provided as an addition but these plastic ones are exceptional. Other than the main guns, there are lots of miscellaneous parts here that largely centre on deck details. |
||||||||||||||||||||||||||
| ||||||||||||||||||||||||||
| SPRUE P | ||||||||||||||||||||||||||
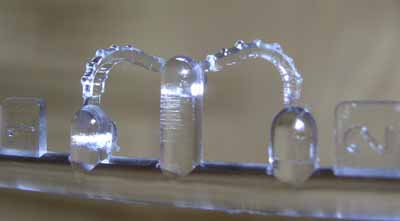
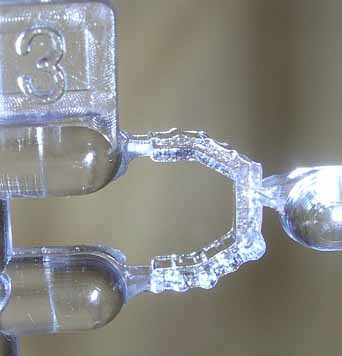
|
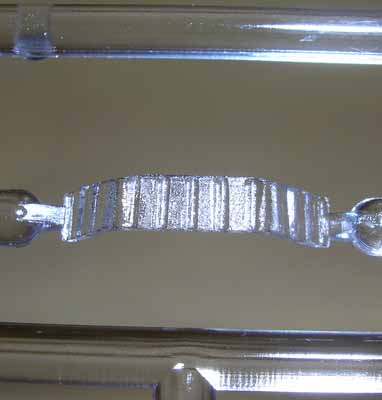
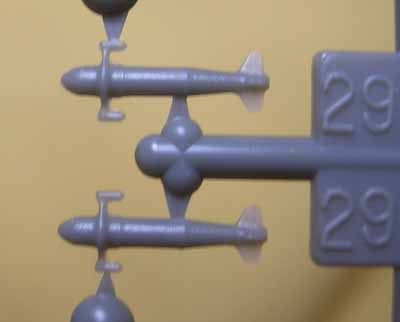
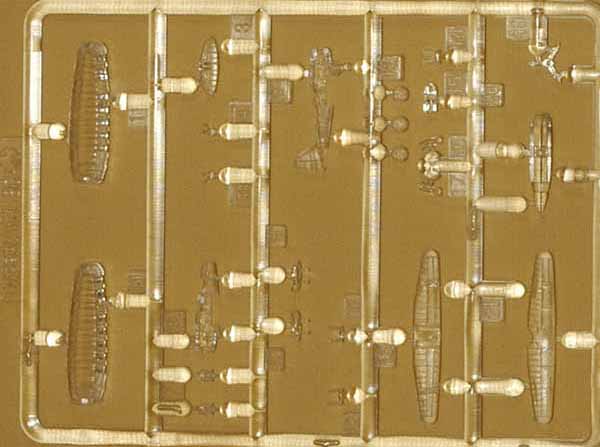
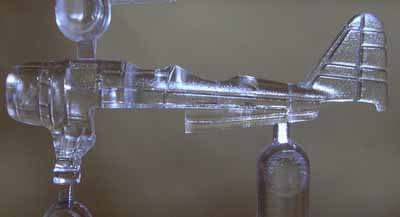
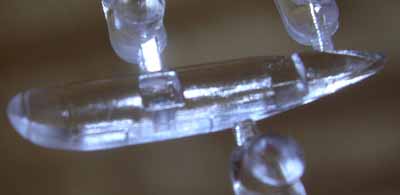
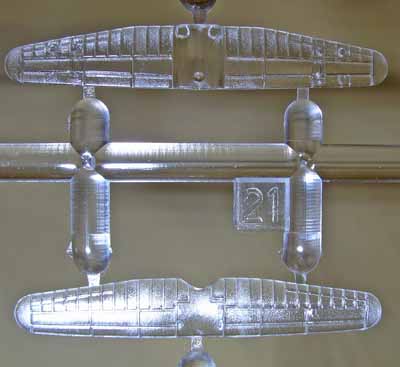
Two sets of this clear sprue come with the kit which provides in total provides two aircraft and canvas covers for some lifeboats. There are very small windows on the sides of the canvas. So small, Im not sure it was worth molding as a clear part. |
||||||||||||||||||||||||||
| ||||||||||||||||||||||||||
| FIGURES | ||||||||||||||||||||||||||
|
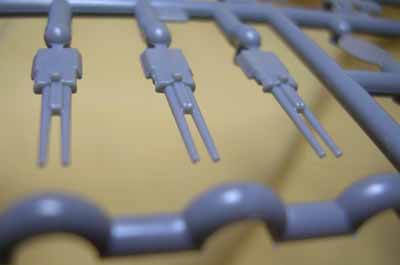
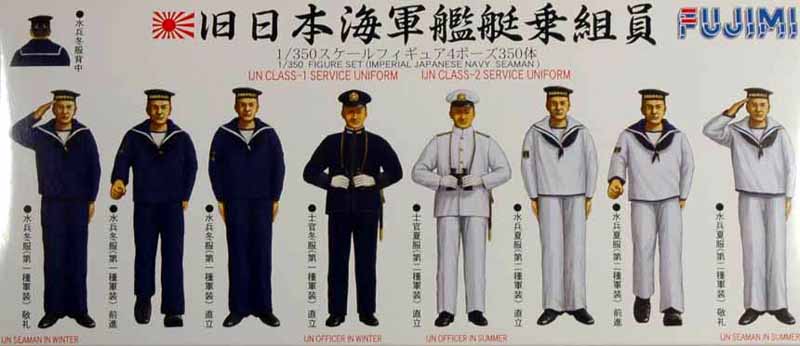
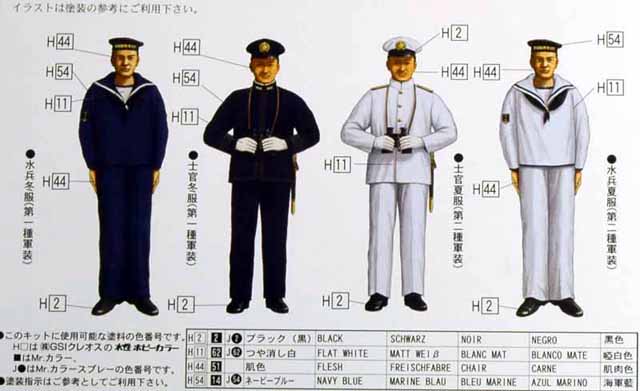
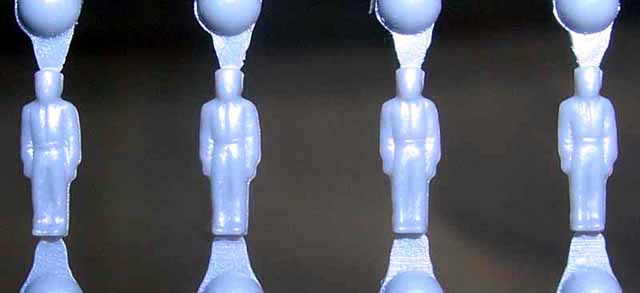
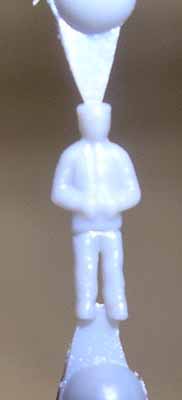
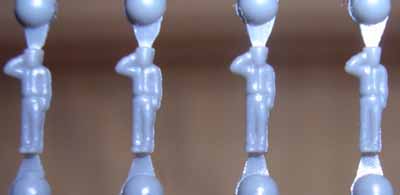
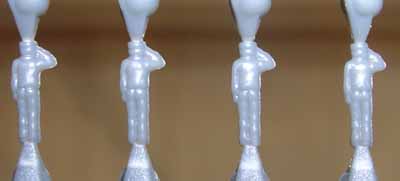
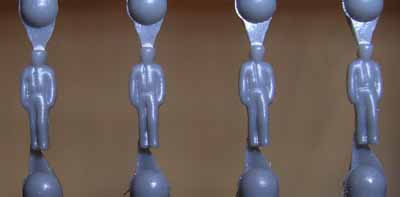
Not to be confused with the scale, the kit comes with 350 1/350 figures. They are in four different posses. The kit contains a box of them, five trees in the box making 70 figures on each tree. The little box artwork itself is very nice and will be handy for a painting guide. |
||||||||||||||||||||||||||
| ||||||||||||||||||||||||||
| MISCELLANEOUS PARTS AND DECALS | ||||||||||||||||||||||||||
|
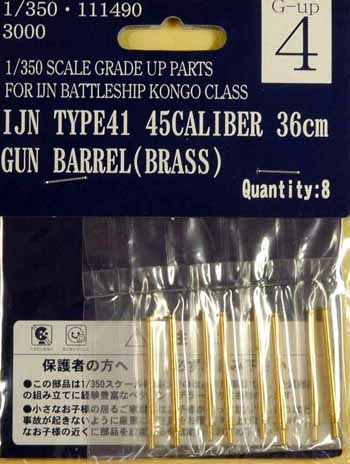
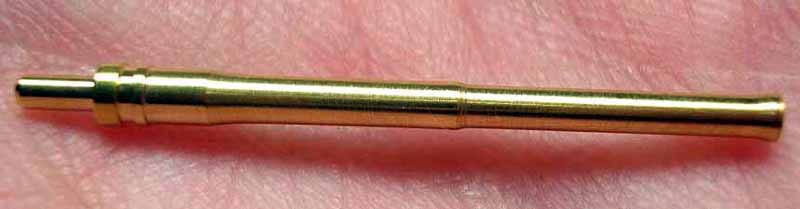
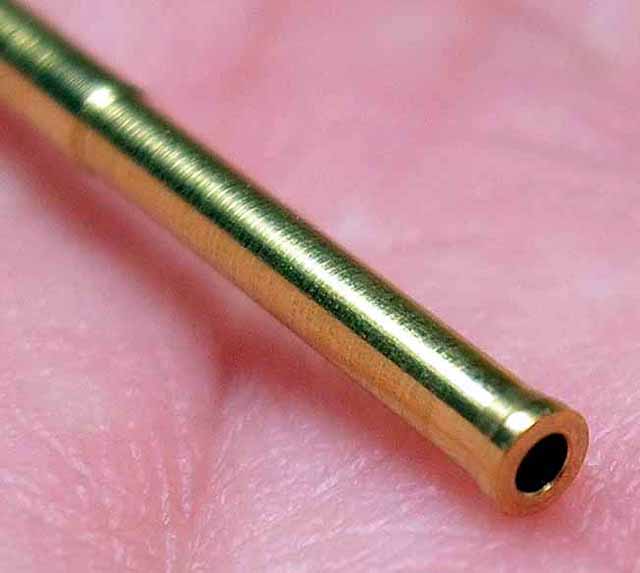
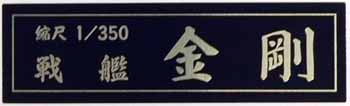
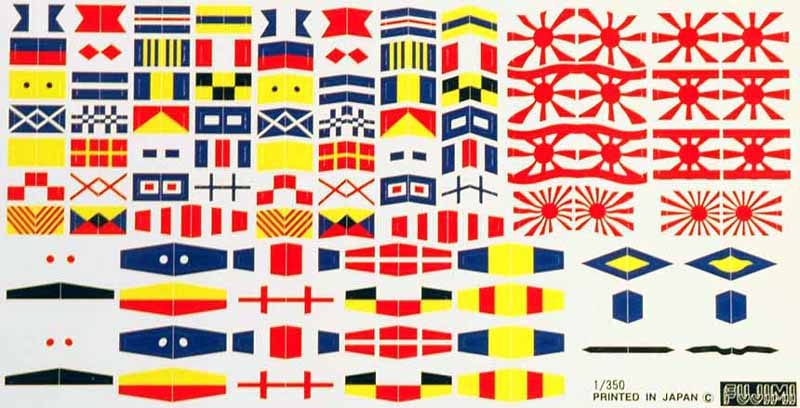
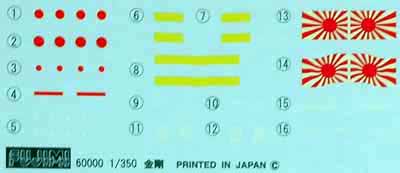
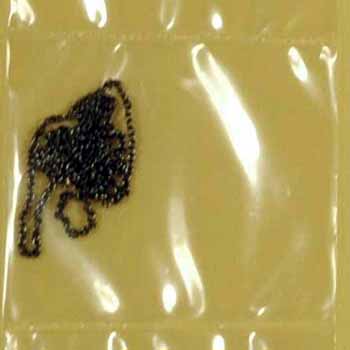
This kit comes with several miscellaneous items; a sprue tree that contains the parts to build a display stand, black anchor chain, and the early purchase bonus mentioned above, brass barrels. The brass barrels are a very welcome addition. Be aware that only the first run will have these but Im not sure when that will end. If you dont get them in your kit, dont despair as the plastic ones in my opinion were very nice. Two set of stickers are provided. One is the name plate, black with gold text. The other sheet is for flags. I think they are a neat addition, but are glossy, so you may want to give them a quick dull coat spray. Decals provide markings for the aircraft, hull draft markings and a Japanese flag. The decals are usable but are not detailed at first glance. A closer look shows they are detailed in a few ways, including crisp white markings with serials numbers for the aircraft. I like that they have yellow decals for the leading edges on the aircraft. This is often missed. Only two colors are laid over each other, red and white. This is seen in the flag and two of the three meatball types. Alignment of the two colors in my decal copy looked very accurate. |
||||||||||||||||||||||||||
| ||||||||||||||||||||||||||
| INSTRUCTIONS | ||||||||||||||||||||||||||
|
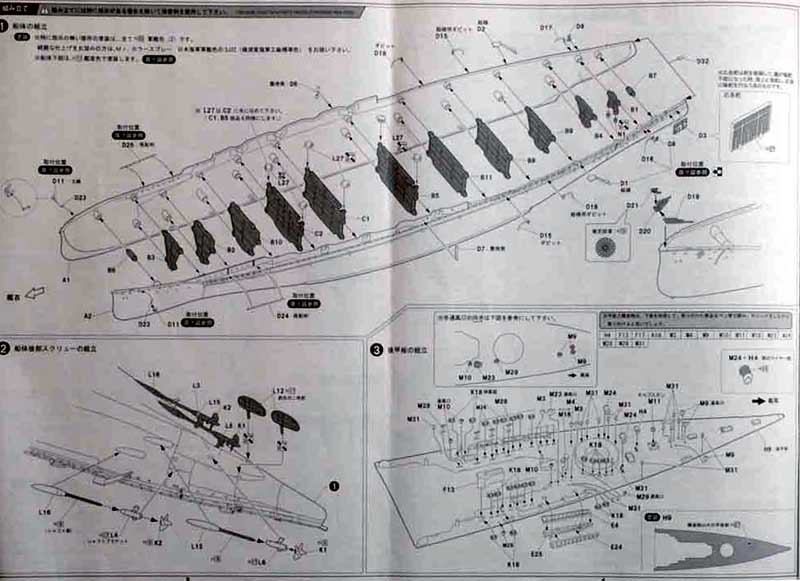
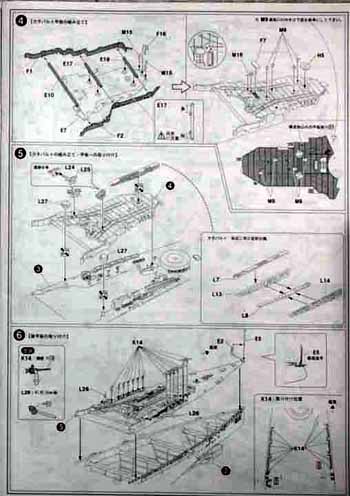
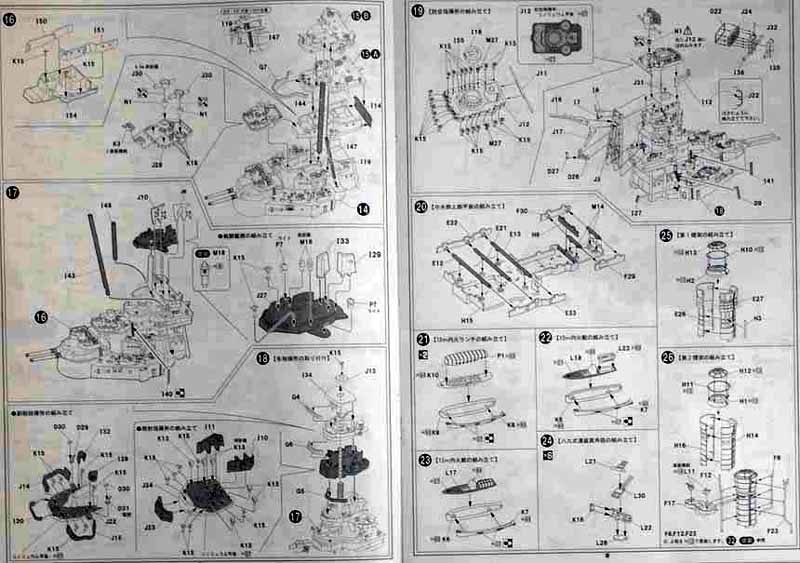
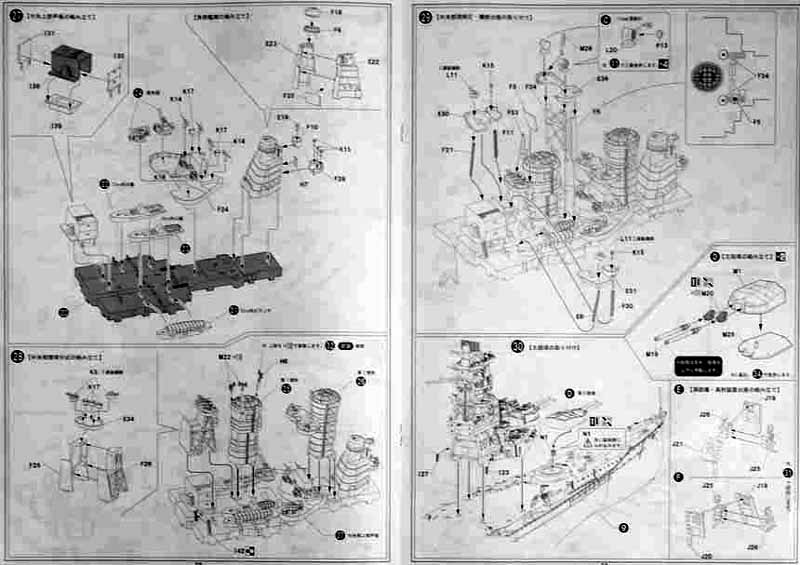
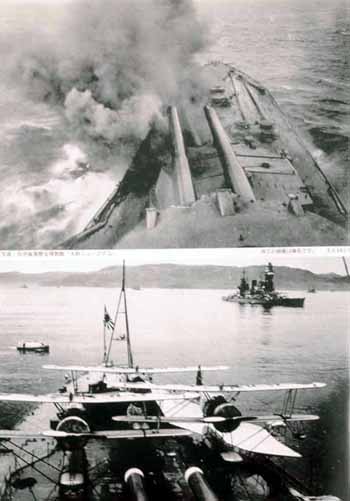
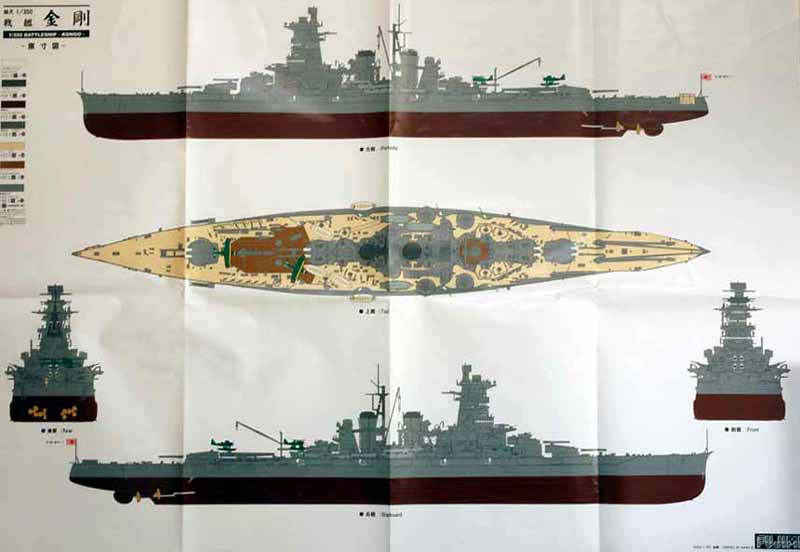
A large design with a semi-gloss cover comprising of 18 pages. The booklet is largely Japanese with the only English text being for the most rudimentary legends. However, you are most likely not going to need any written language to finish this kit as the instructions show excellent illustrated guides. The glossy cover provides some reference material in the form of photos although the dates some photos were taken wont be useful for a 1944 Kongo. Check your references carefully. The first inside page has a fold out making this booklet massive as it starts out already very large. |
 |
|||||||||||||||||||||||||
|
||||||||||||||||||||||||||
| CONCLUSIONS | ||||||||||||||||||||||||||
|
I have always been a fan of the Japanese battleships built during the First World War but modernized leading into the Second World War. Kongo has great lines, a tall pagoda tower and the dual smoke stacks makes her a unique looking class amongst the Japanese battleships of her time. Fujimi has done an excellent job on many levels for this kit. I for one am very happy to have this kit and looking forward to building it. A major pitfall in the kit is the casements that frame the hull mounted 6 inch guns. They should be squared with the deck yet are on slight angles. Photos clearly show this error and for the Fujimi kit this will be a challenging fix. Personally, Id just live with the error. It will certainly make it easier to tell the difference between the Fujimi and Aoshima offerings. With Trumpeter getting the ball rolling for 1/350, companies like Dragon, Hasegawa and Fujimi have taken this scale to a whole new level. I highly recommend this kit, even for the average modeler who may not work with photoetch, will still find this an excellent display kit, one that will surely catch attention and start conversations. |
||||||||||||||||||||||||||