 |
|||||||||||||||||||||||||
|
|
|||||||||||||||||||||||||
IJN
Ise official trial data (after second major modernization, 1937):
|
|||||||||||||||||||||||||
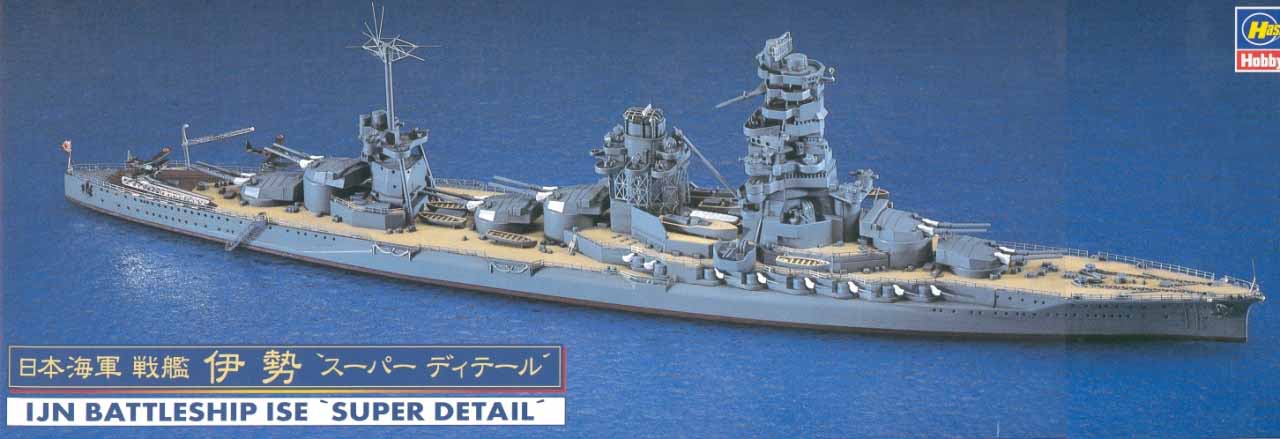
| Ise was completed
December 1917 and commissioned April 1918.
The two Ise-class battleships; Ise and Hyuga was constructed during WWI and were meant to be the third and fourth ships in the Fuso-class, but delays and improvements in the Fuso-design lead to the design being altered. Thus a new class was born which had the 3. and 4. main turret aft of the funnels. After commission Ise was assigned to 1.st Battleship Sqdn. of 1.st fleet. From 1934 until 1937 these ships underwent major reconstruction resulting in the pagoda-style bride area so characteristic for IJN BB's. Ise was the first ship to test IJNs new airborne radar system, carrying this equipment in the battle of Midway 1942. After the disastrous losses of four fleet carriers, Ise and Hyuga was converted into hybrid seaplane tender/battleships. The 5th. and 6th. turrets were removed and the aft deck was covered with a flight deck. After conversion Ise was assigned to 4.th Carrier sqrdn. of 3.rd Fleet, taking part in the Cape Engao engagement during the battle of Leyte gulf as a part of IJN's risky Operation Sho in the Philippine Islands in October 1944. She along with her sister returned to Kure after this and sat out the remainder of the war there until damage from US air raids on july 24th and 28th sunk her at her moorings.
|
|||||||||||||||||||||||||
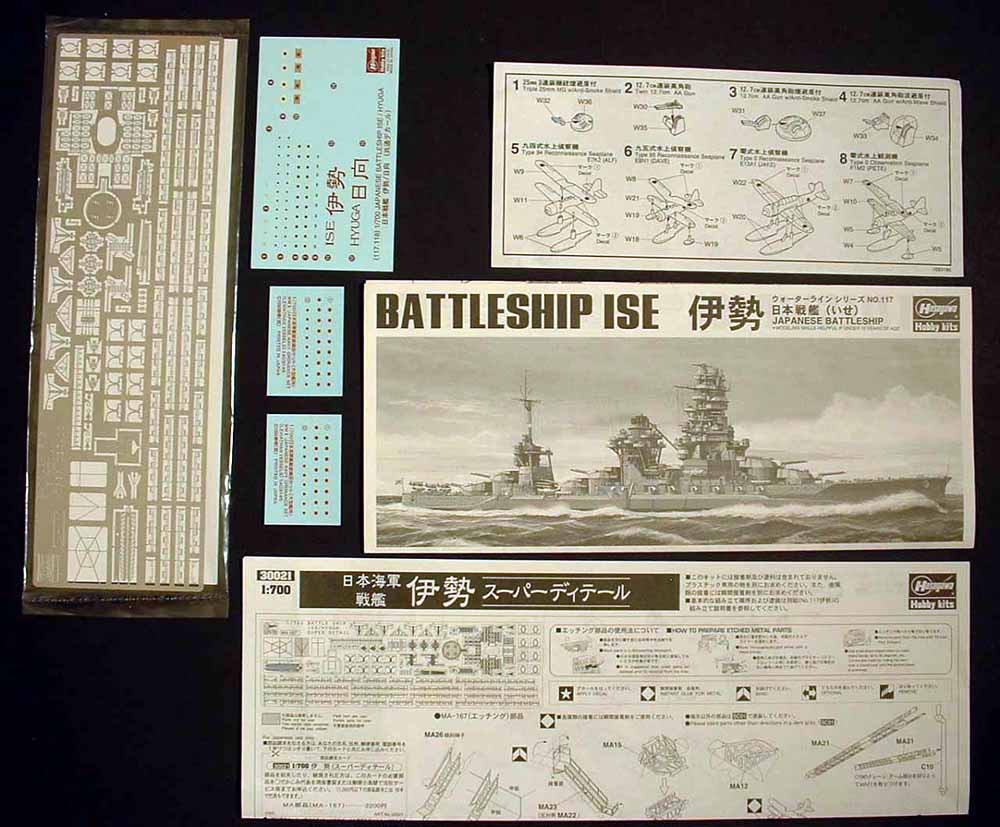
| Hyuga standard
kit (2002) vs. Ise Super Detail-kit (2003)
The
only difference between the standard and the superdetail-kits of Ise/Hyuga
is that SD-kits have a sheet of photoetch. Other than that the plastic
parts are identical to the standard versions. Also the standard kits of
Ise and Hyuga are identical to one other. The only difference for a out-of-box-buildup
will simply be to turn Hyugas aft antenna backwards.
Hasegawa old tooling vs. new tooling In the japanese ModelArt modeling magazine no.6, some 65 pages are devoted to modeling of Ise-class battleships. Among many great pictures is a photo comparing between the old tooling and the new. It is clear that Hasegawa has greatly improved their kitmaking-skills. The details are better, crisper and reasonably accurate when I compare the kits with the Gakken PacWar26-book of the Ise-class. The kits still has some some minor simplifications and inaccuracies and the injection-molded plastic is maybe not as crisp and as Tamiyas or Skywave, but nevertheless the retooled kits of this class are quite satisfactory for today's standards. The new kits are designed with photoetch in mind. For instance if you wanted to replace the searchlight-platforms around the funnel on the old kit, you had to cut off the on-molded platforms and scratchbuild the lower half of the funnel. On the new kits the funnel and platforms are in separate pieces - you just throw away the kit-molded platforms and glue on the photoetch. (unless you want to fix some kit- inaccuracies/simplifications) |
|
||||||||||||||||||||||||
|
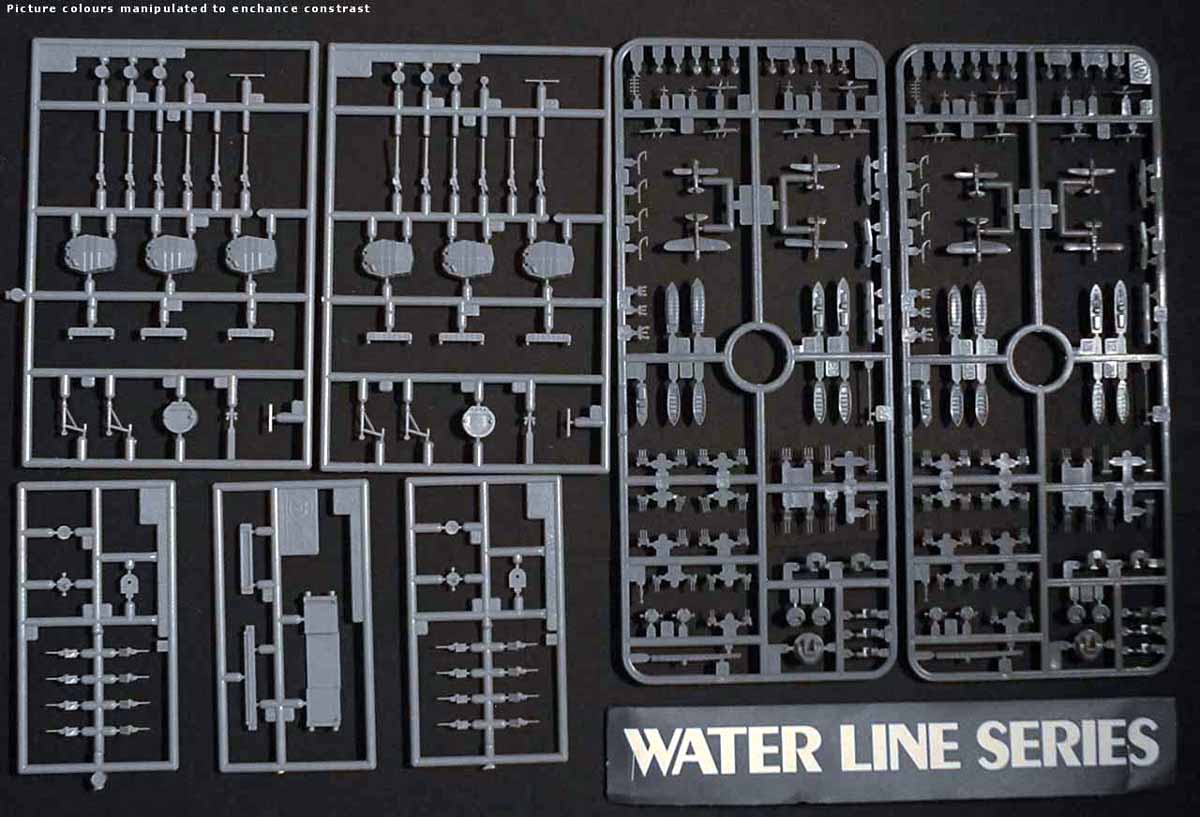
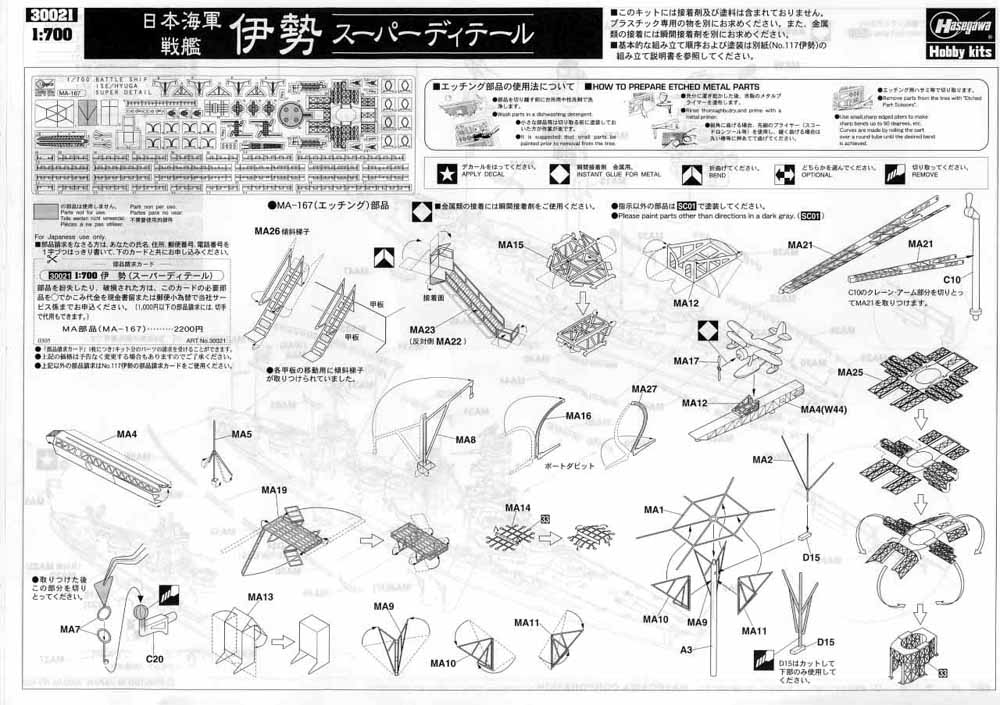
Ise-class SuperDetail photoetch Lately Hasegawa has launched a series of photoetch-sets for their kits. And still are more to come. The Hasegawa-etchings are generally beautiful and since they are made of stainless steel (or aluminum), they are more robust when it comes to accidentally bending parts. On the other hand, it is easier to snap parts at the joint if you stress the joint too much. The several ship specific parts on this fret are most welcome, like the funnel grill, the two searchlight platforms and the aft antenna. These two assemblies are quite a job to but together for shaky hands, but the instructions are quite simple to follow. Included are standard IJN equipment, like boat davits, float plane trolleys, catapults and railings. Beautifully etched! However there is not enough railing and second the railings can be unsatisfactory for a modeler-enthusiast. Small gluing surfaces simplifies the job with attaching the railing to the deck. Handy for the novice modeller, but these surfaces are not pretty to look at for a modeller with perfection in his mind. The surfaces can be snapped off if you like - although this makes them weaker and more difficult to place since the area of the contact points are dramatically decreased. |
|||||||||||||||||||||||||
|
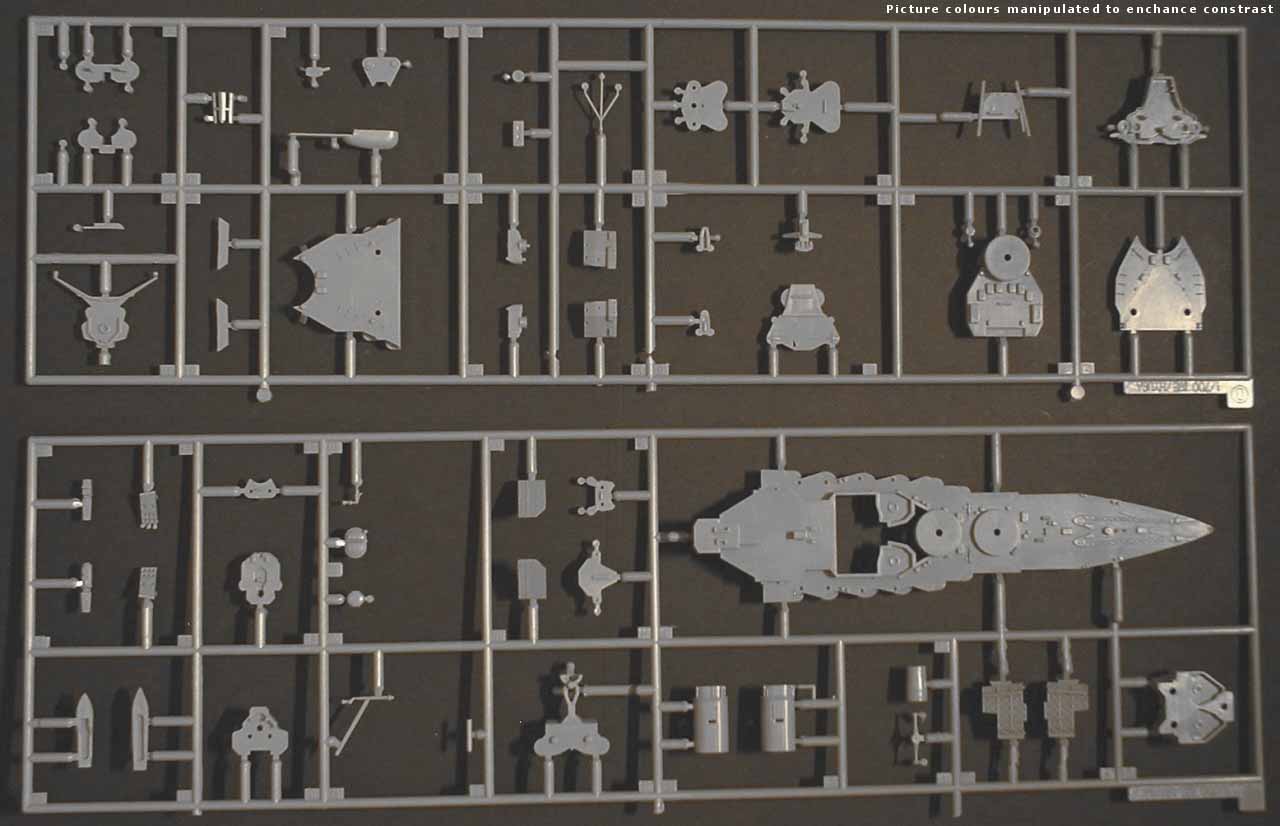
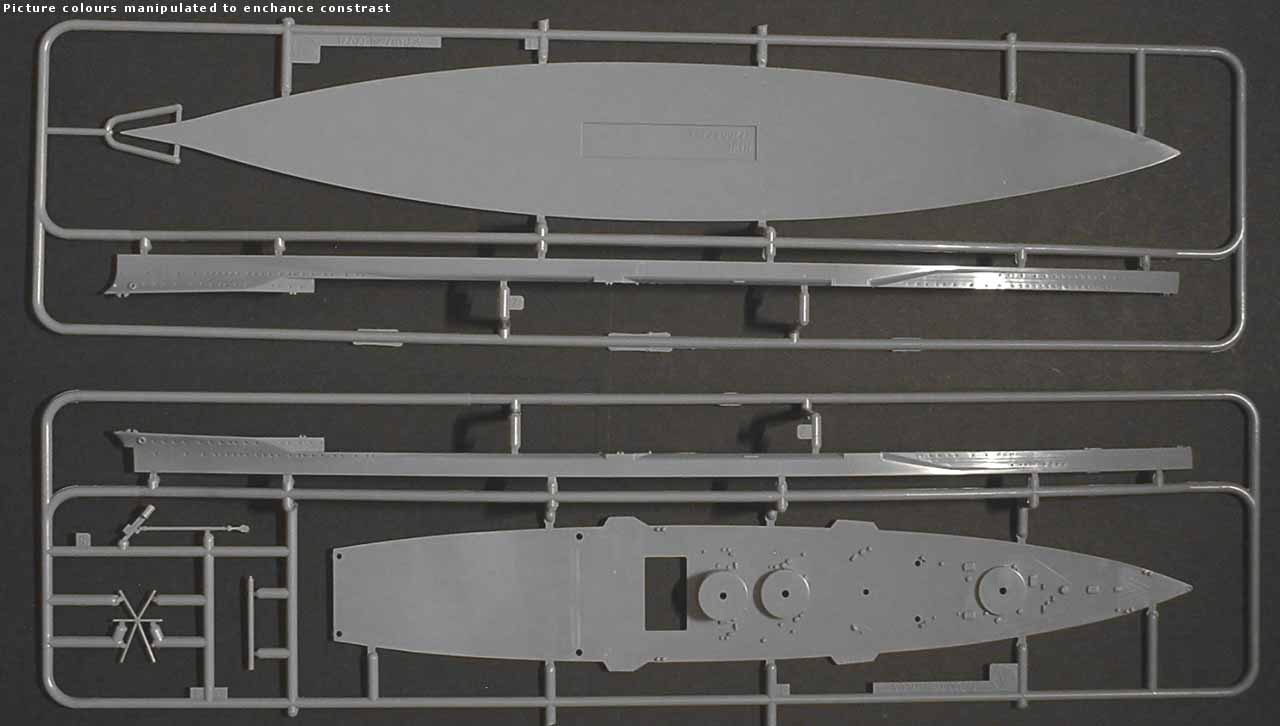
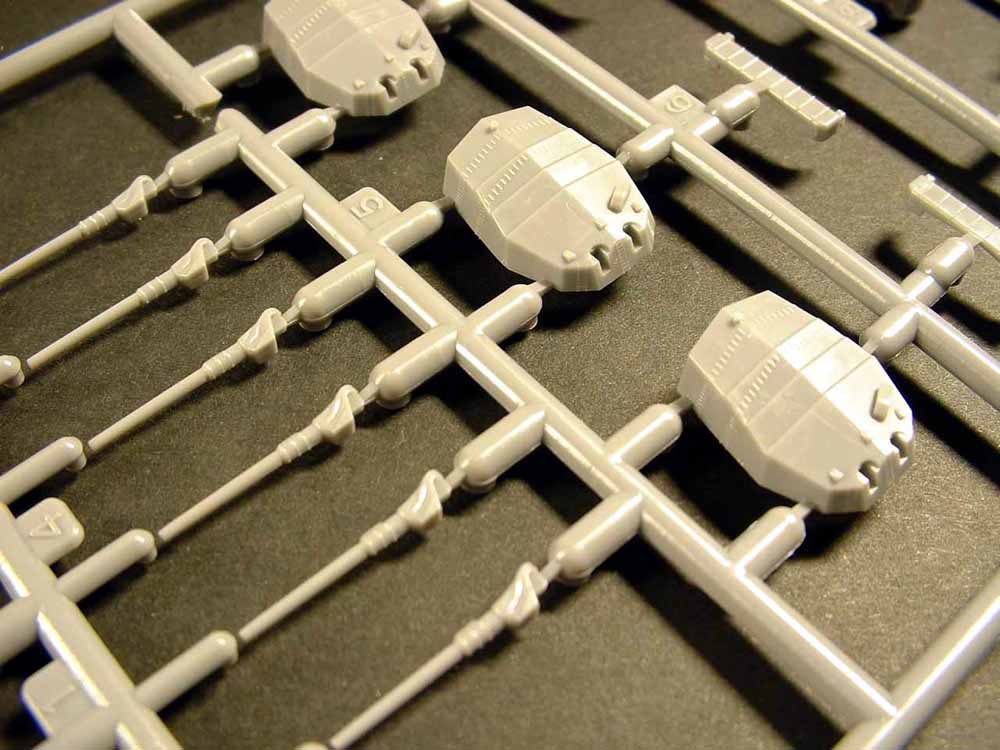
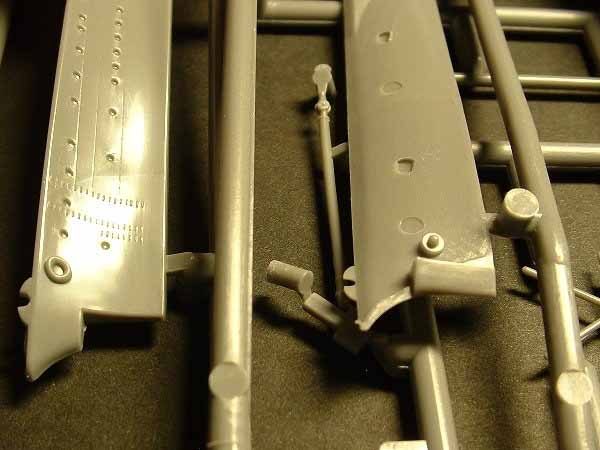
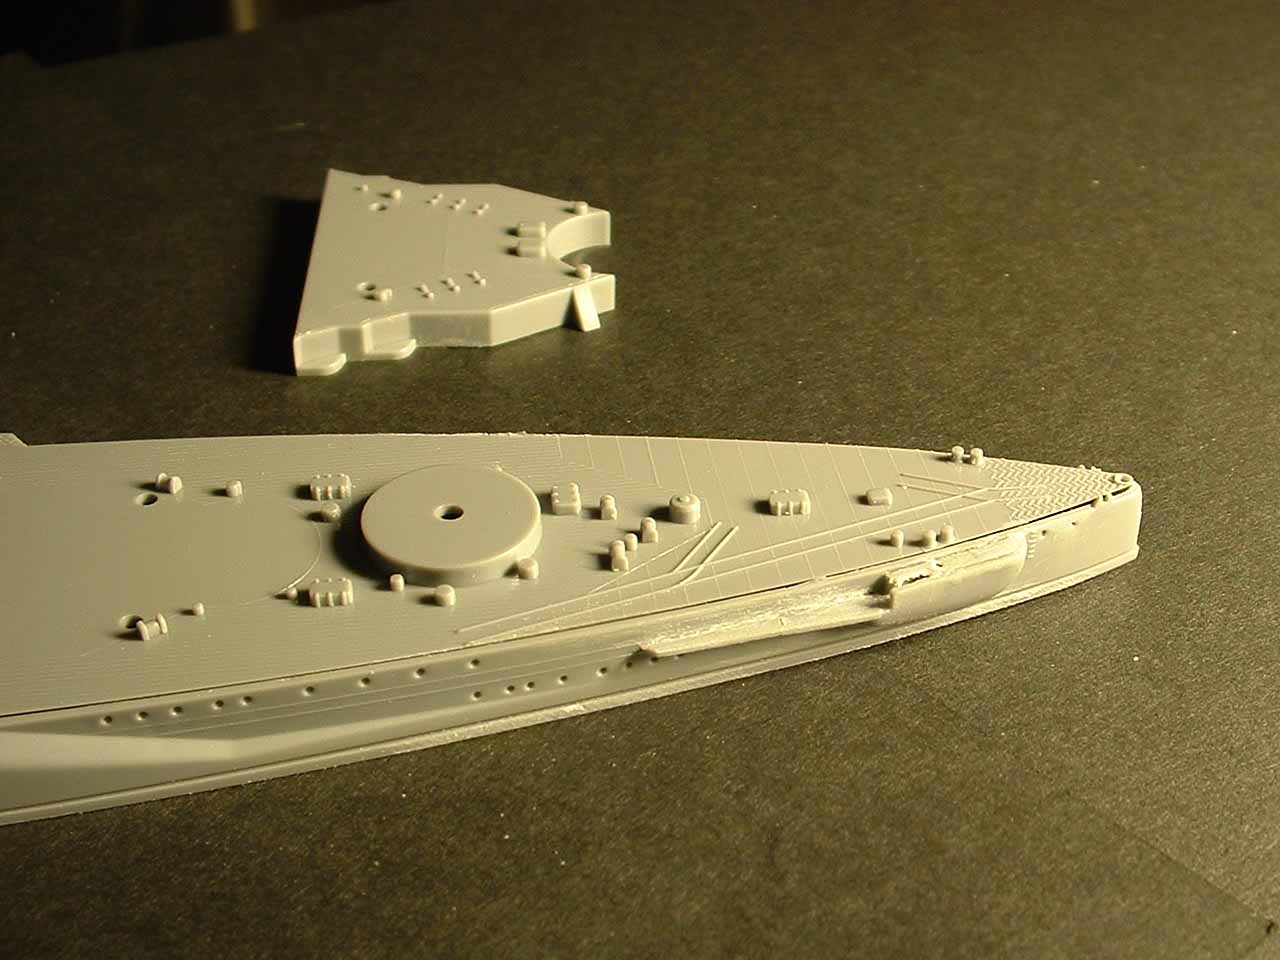
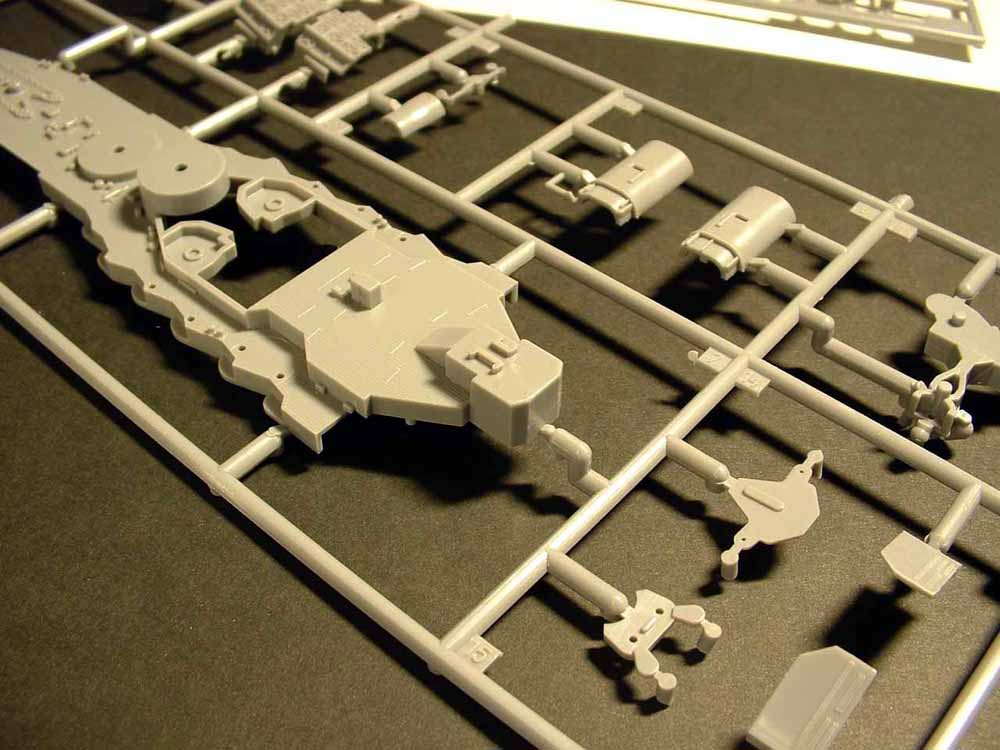
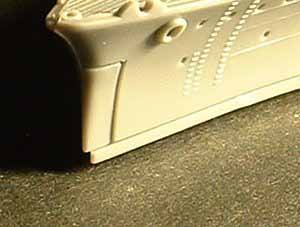
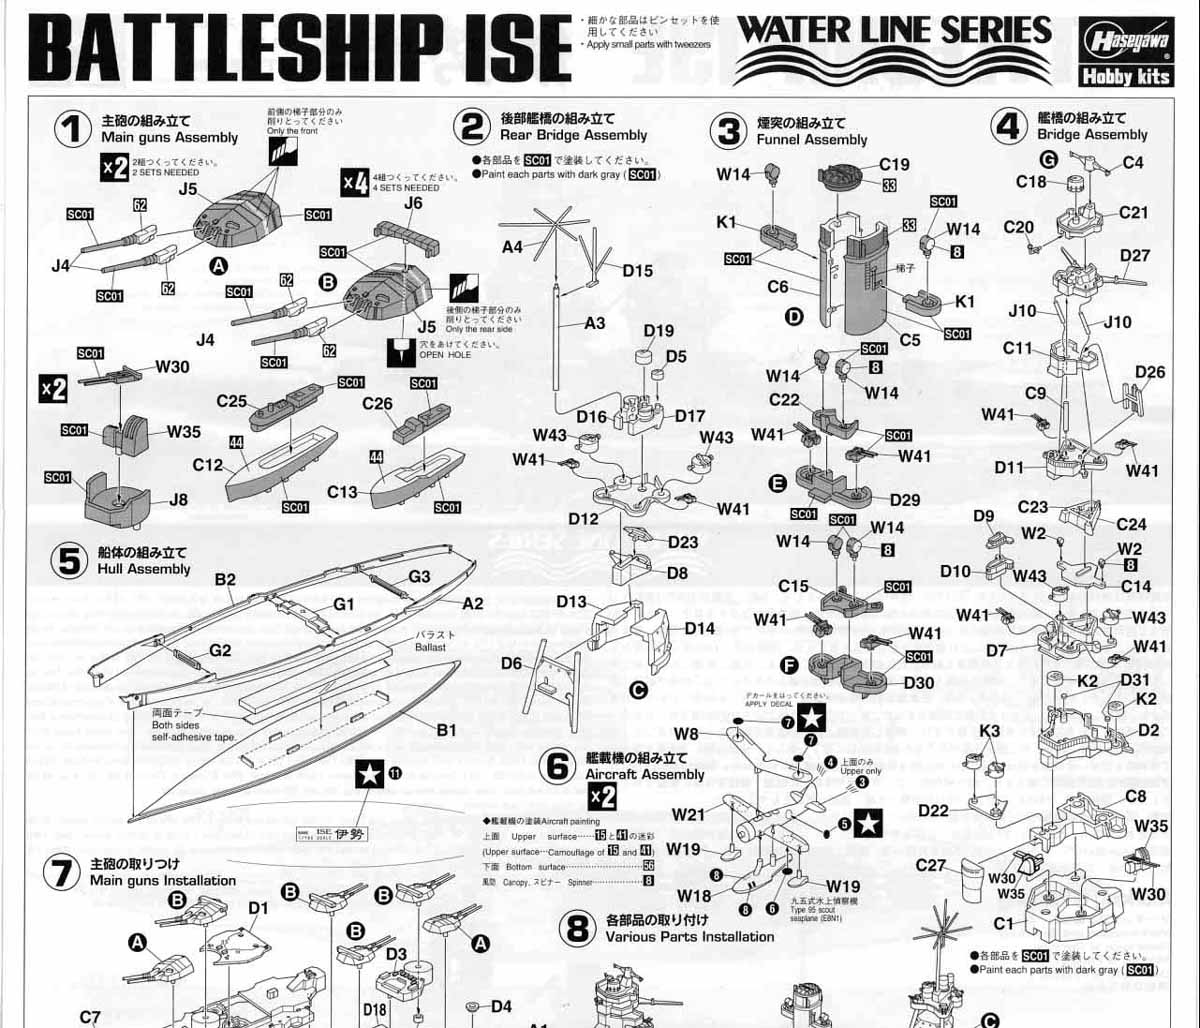
Kit plastic parts Hull
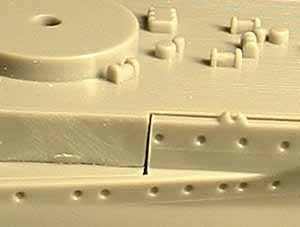
Good detail on the hull halves! Portholes are correctly positioned! Only weak detail is that the towing-fairleads at the bow are poorly shaped. Deck
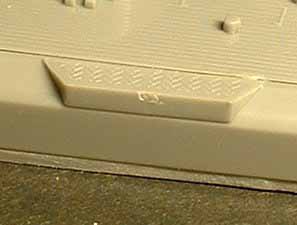
There are only two aztek-stairs and they seems to be designed to be cut off., which is a painless operation. The details on the stairs themselves are OK, but with the photetched replacement parts for this supplied in this kit most people would probably use some plastic surgery on the molded stairs. Some small seams and gaps are visible when at the lower parts of the superstructure and also between the hull and deckparts. Requires some filling and sanding, Bridge
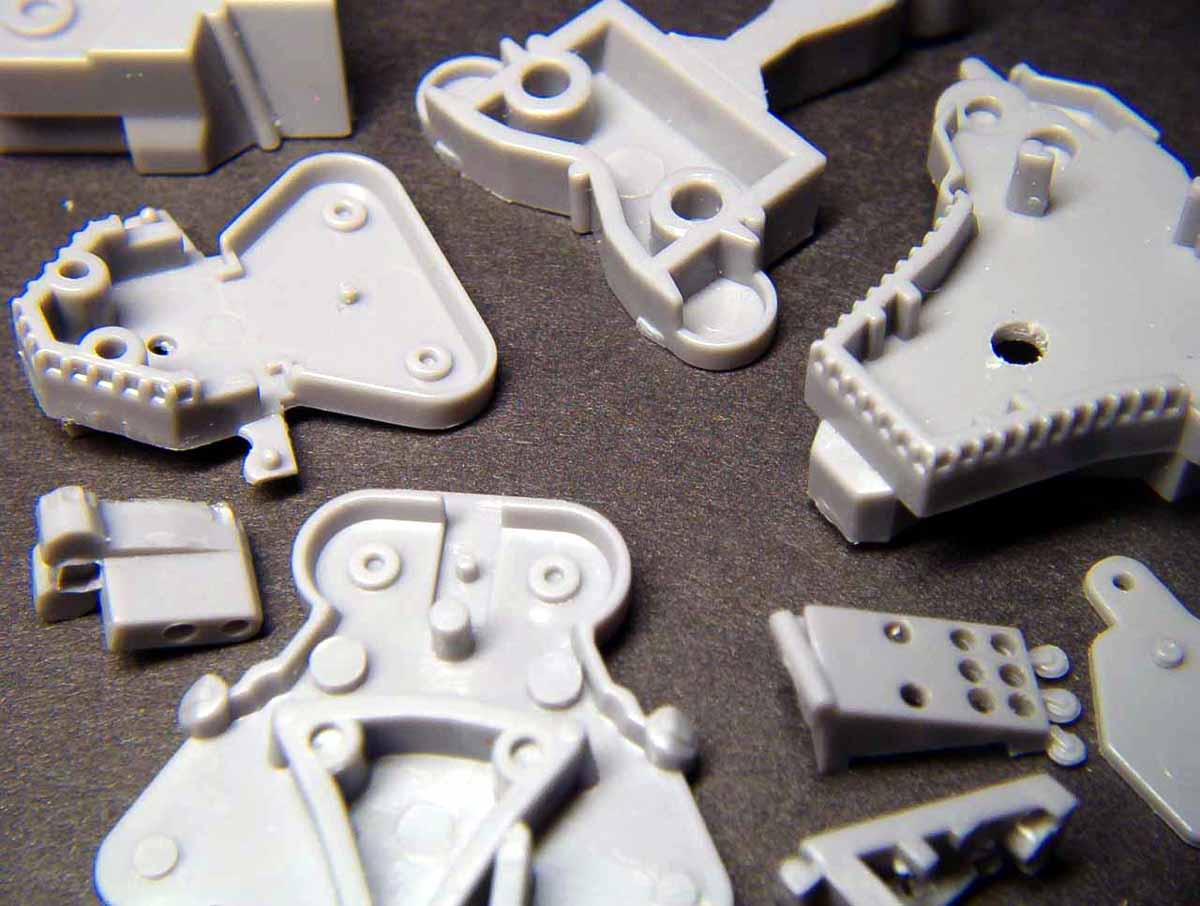
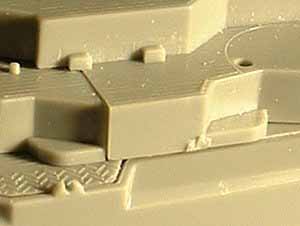
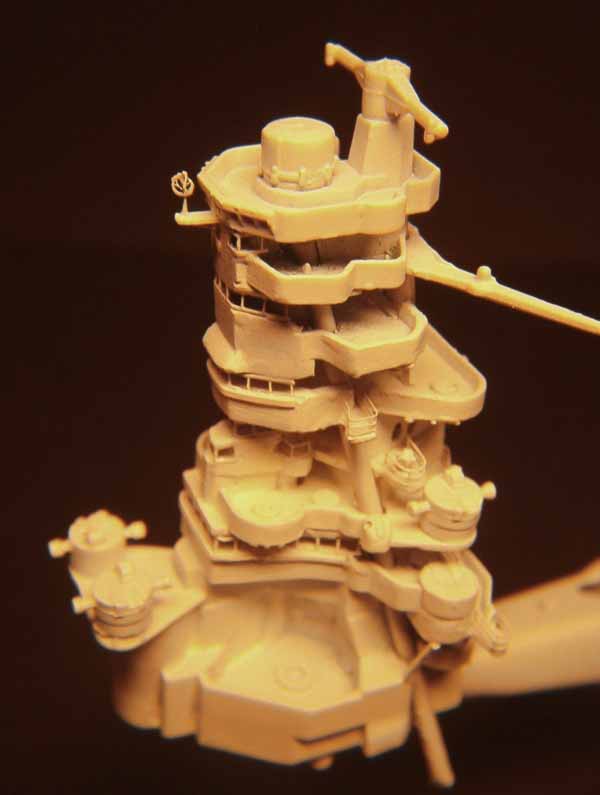
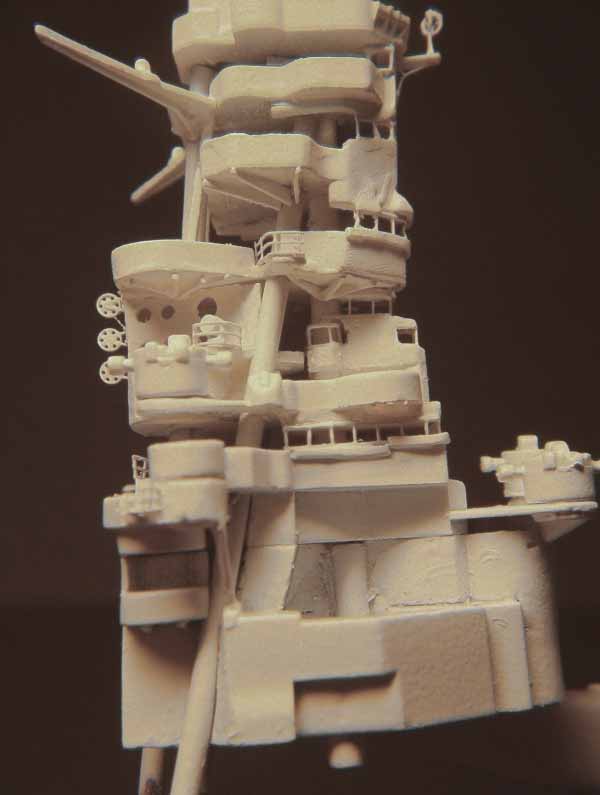
Funnel
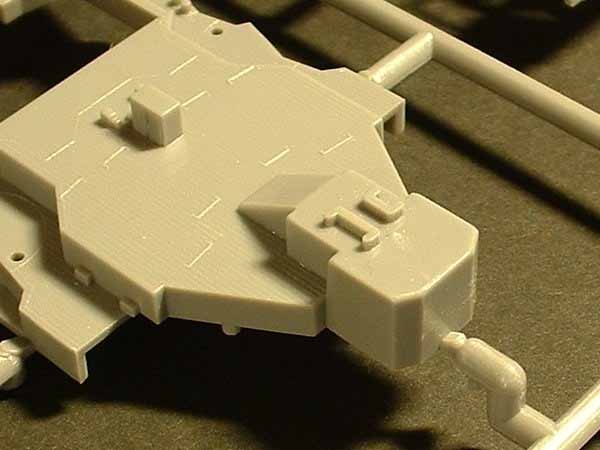
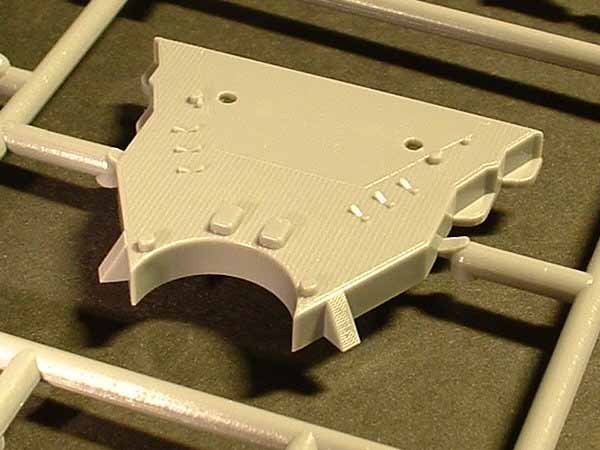
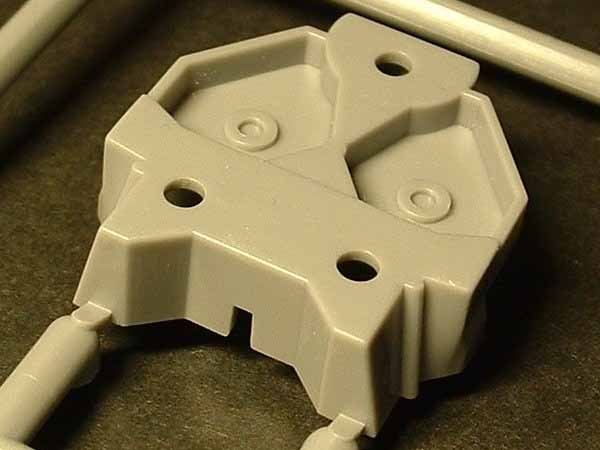
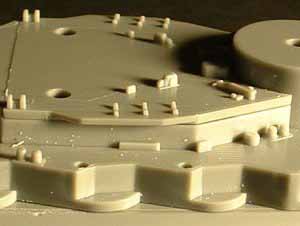
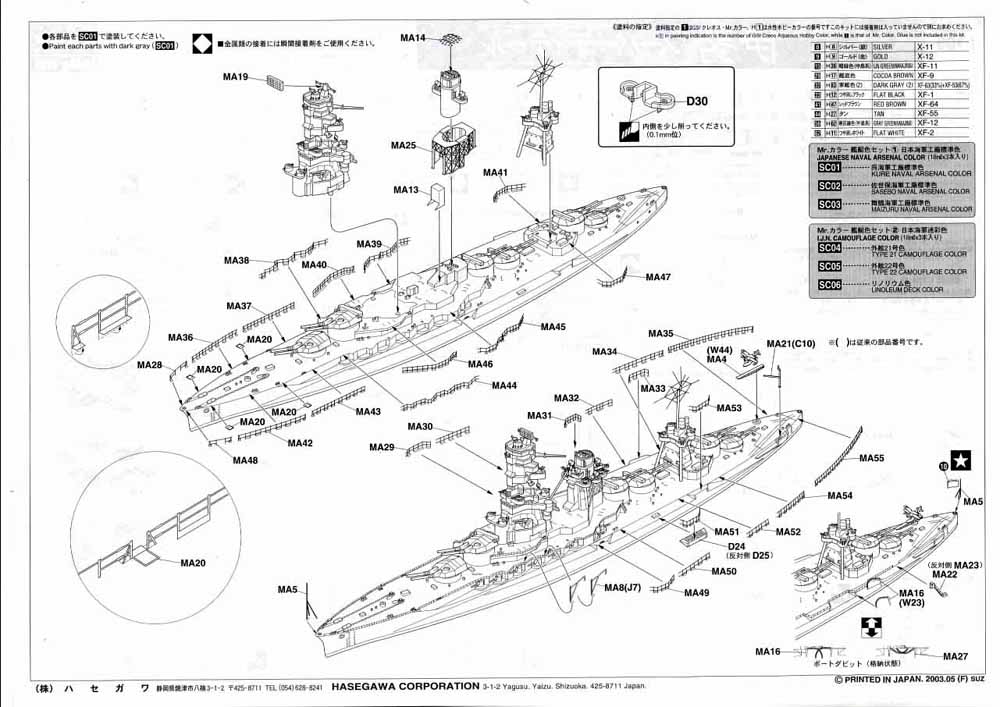
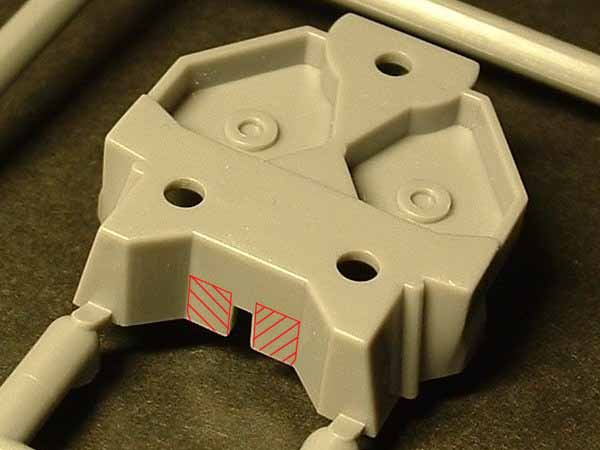
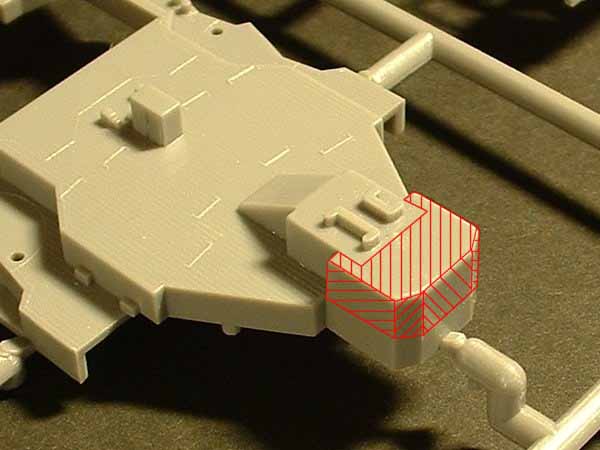
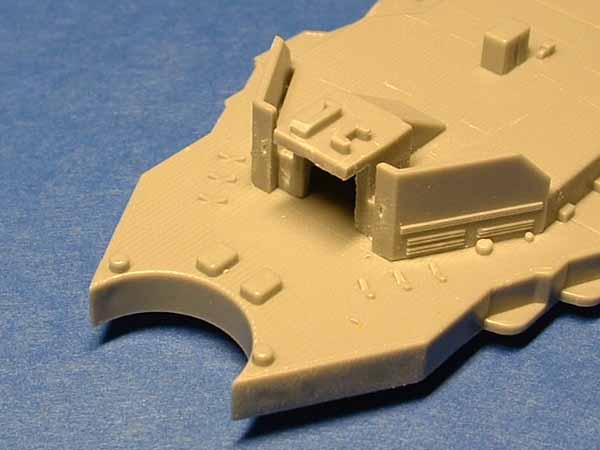
The plastic searchlight platforms support are OK. A great improvement from the old retooling, but most people would replace the plastic pieces with the photoetched supports supplied with this kit. These are great! If you do not dare to play with the photoetched supports, the plastic pieces will look fine with a good weathering job. The platform-support-base is an interesting issue that have put me into hours of studying photographs and drawings of the Gakken PacificWar 26. My conclusions is that Hasegawa has simplified the base. It should have been at the same level as the level rest of the superstructure part. (see the workbench below) The accurate base is barely visible on the 1/110 scale model in the GakPacWar26- book, but nevertheless I think the combined drawings and photos supports my conclusion that Hasegawas base is simplified.. So far I have not seen any 1/700 japanese modelers who have corrected this simplification so I am not 100% certain that I am correct, but I stick with my conclusion for now. General equipment
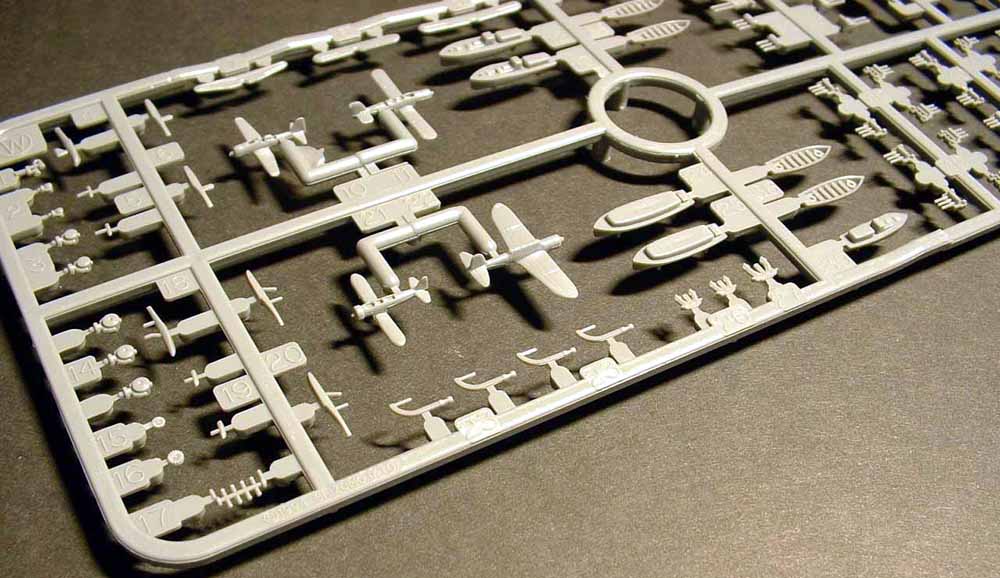
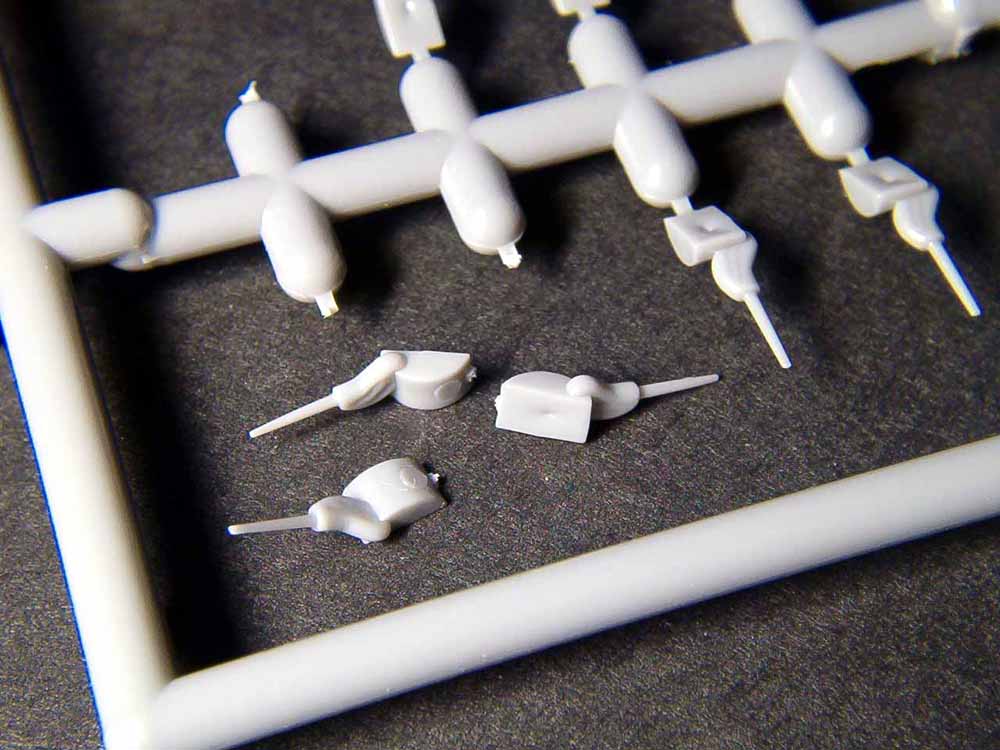
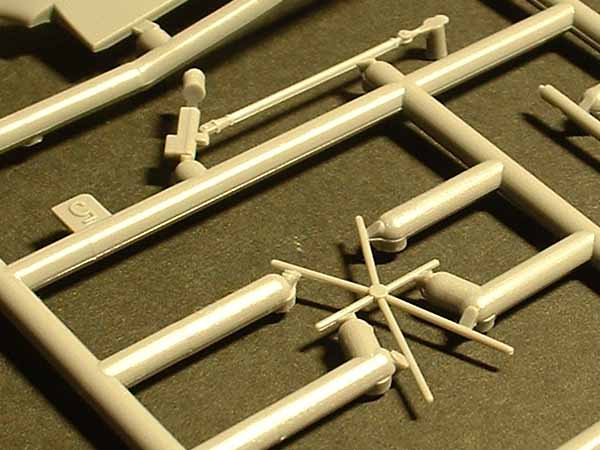
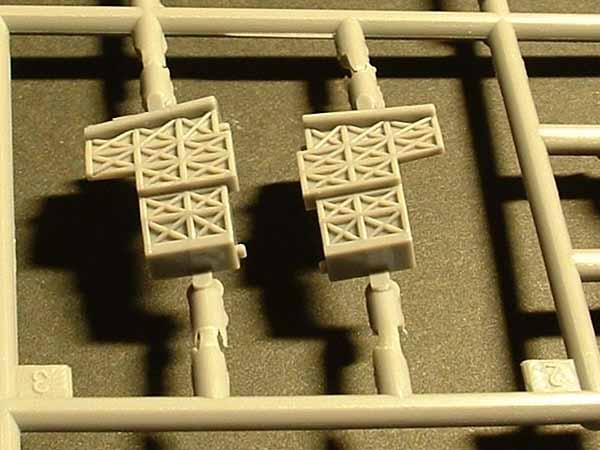
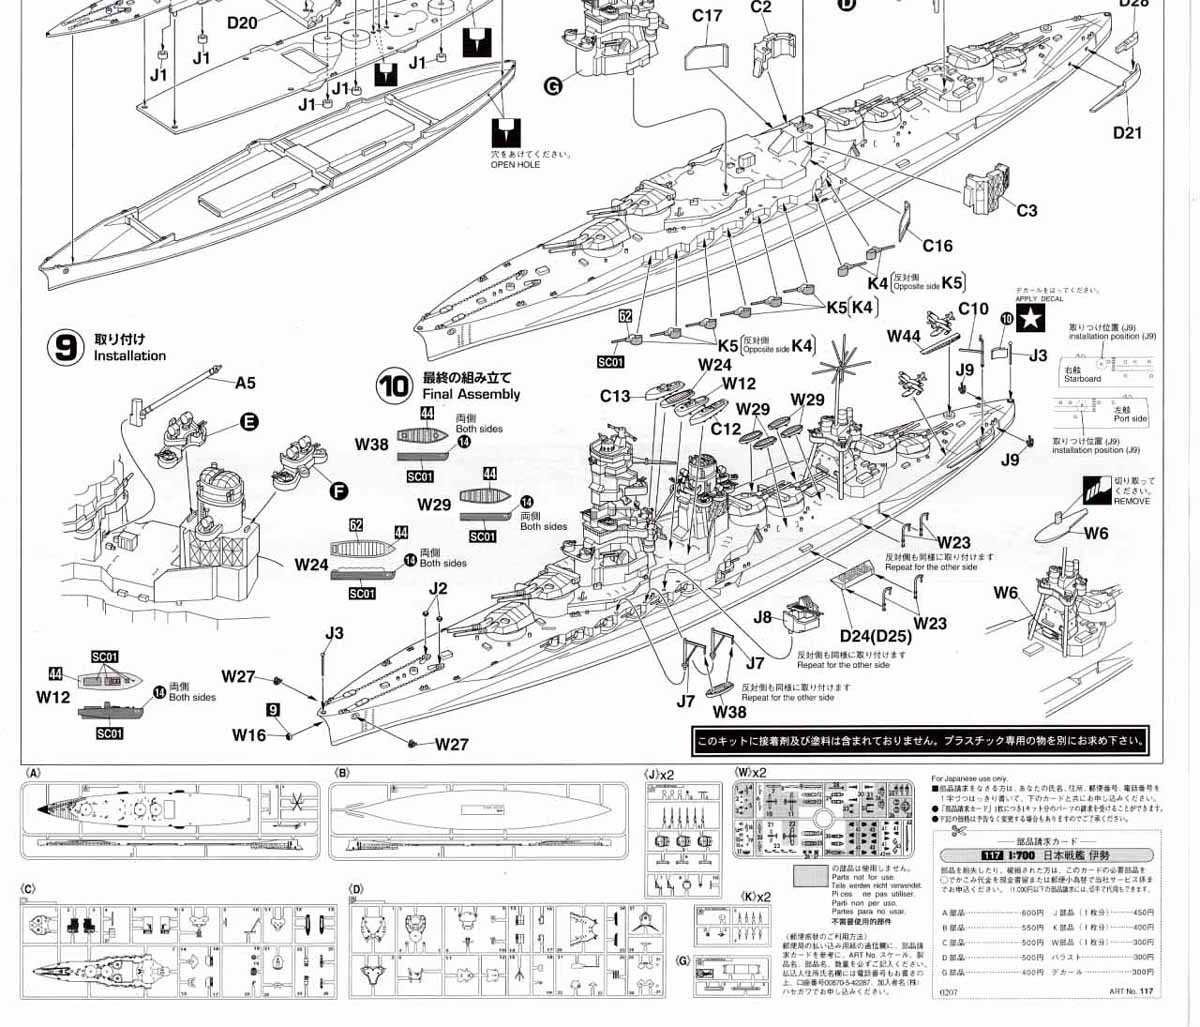
The Shizumo plastic is good and details are excellent. Hasegawa has some better boats tough. More details and the Shizumo-boats have some sinkholes. Also on this W-fret you will find a nice chrysanthemum crest that you should paint in gold and put on the bow! Makes it a true IJN vessel. Armament
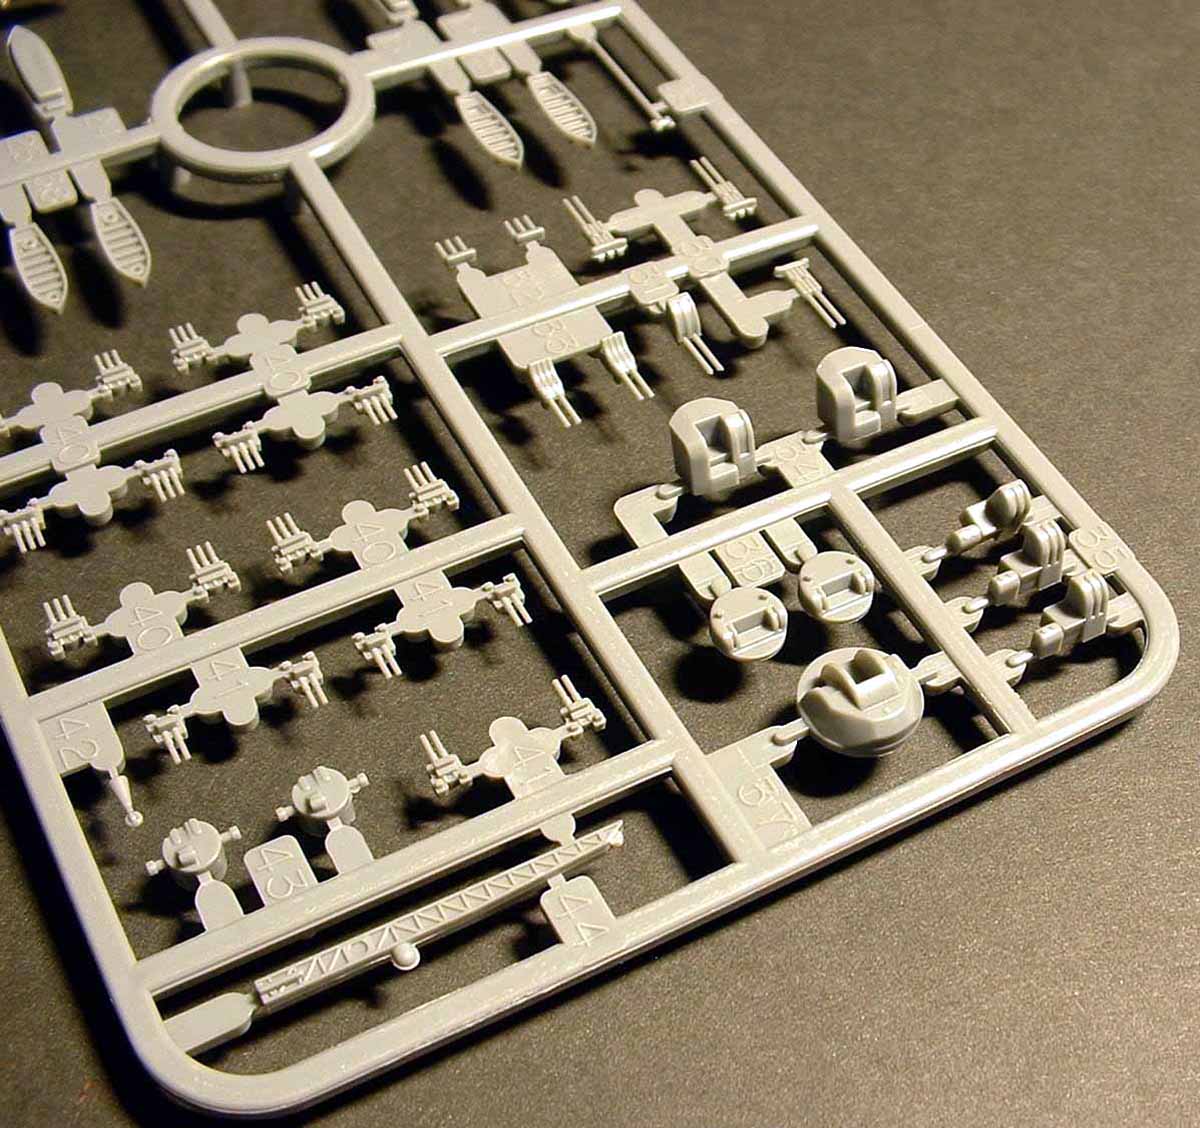
Secondary armament. Blastbags are also molded on. Barrels are thin and seems to be close to correct in dimensions. The turrets are to be glued onto the side of the superstructure. This is to simplify manufacturing of the hybrid-battleship-carrier version of this class, which had all the secondary turrets removed. 127 mm Heavy AA. Mounts are of the external W-fret and way better than Hasegawa's 127 mm mounts on Kongo class battleships. The 25 mm MG are provided on Shizumos W-fret. Nice details but not surprisingly the barrels are a bit over scale. Myself I will use AA-photoetch from FineMolds instead of these plastic Mg's. Instructions Instructions are clear and precise and follows the usual style of japanese
kit-producers. The photoetch-instructions are written in japanese only,
but illustrates clearly how to fold, and where to place parts.
Recommended!! This kit is very good and close to excellent, although no cigar yet! There are seams, but they are easy to fix. Simplifications and a somewhat clumsy bridge-mast makes me want to save the best part of the superlative spectrum for other kits to come. Tough still a bit behind, it is clear that Hasegawa breathes Tamiya and Skywave in their necks with this kit. And I am looking forward to seeing new releases from Hasegawa in the future. If you have no problems with a small amount of occasional filling and sanding (no kit is perfect) - this kit is worth picking up! The photoetched set in this kit makes it better then the standard versions. A bit more expensive - but not much! ($8-$9) No more expensive that it is worth it.If you buy the light-photoetch version to go with the standard kit, the superdetail will overall be cheaper and contain more details anyway. If you have not already bought the standard-set, I will recommend to buy the Super Detail-version. I bought this kit from HobbyLink Japan for $38 USD ; € 32 Euros Tom Kristiansen
|
|||||||||||||||||||||||||
|
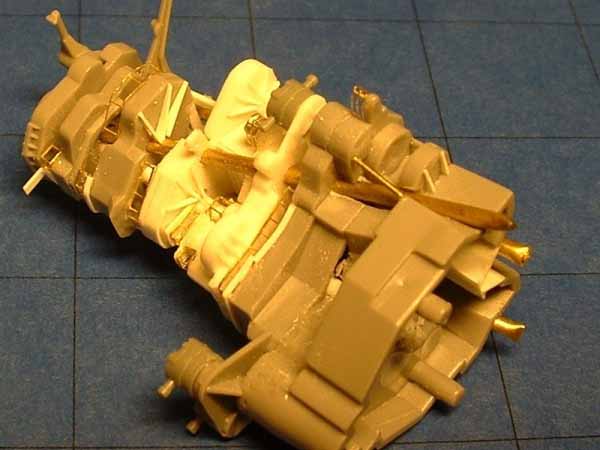
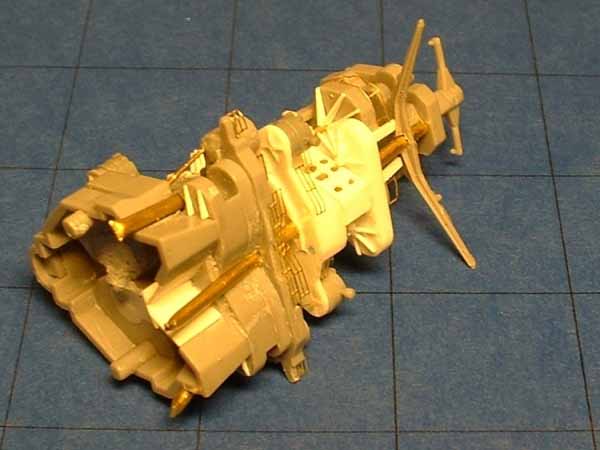
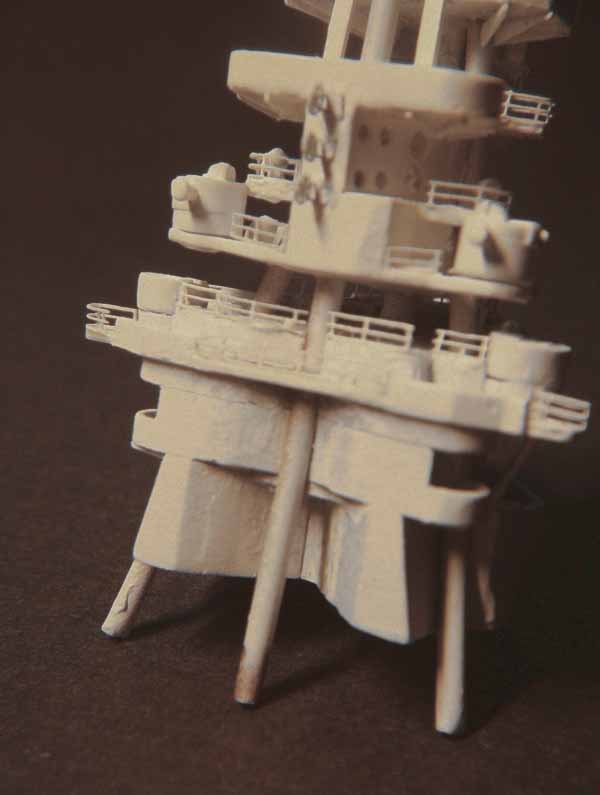
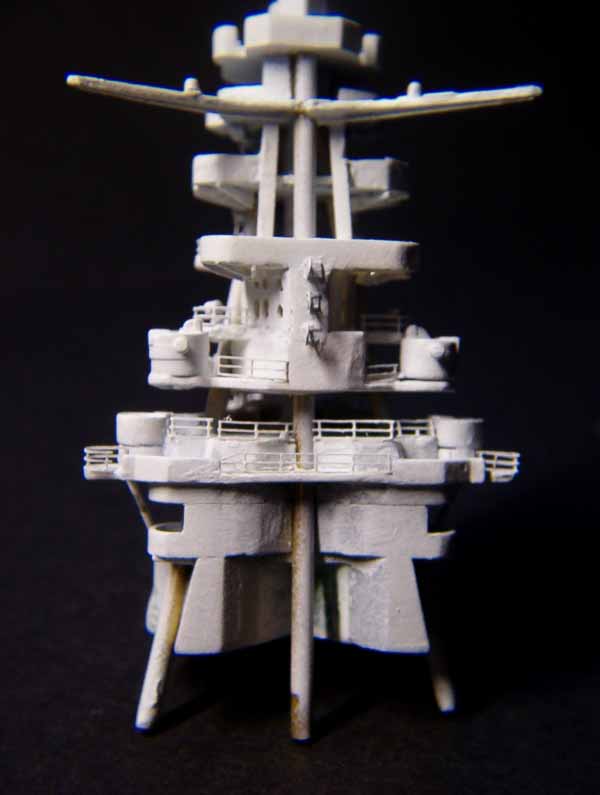
ON
THE WORKBENCH
I am building Ise-superdetail and Hyuga-standard with Hasegawa MA-163 photoetched set. So far I am using Hyuga as a testing rabbit. The errors I do on Hyuga is the ones that i should not do on Ise. Hopefully Ise will be the star of those two but I try to make Hyuga every bit as detailed as well. Some of the modifications that I have decided to do are below: Brass tubing for bridge
support
Bridge windows
Bridge cave-in for Hyuga
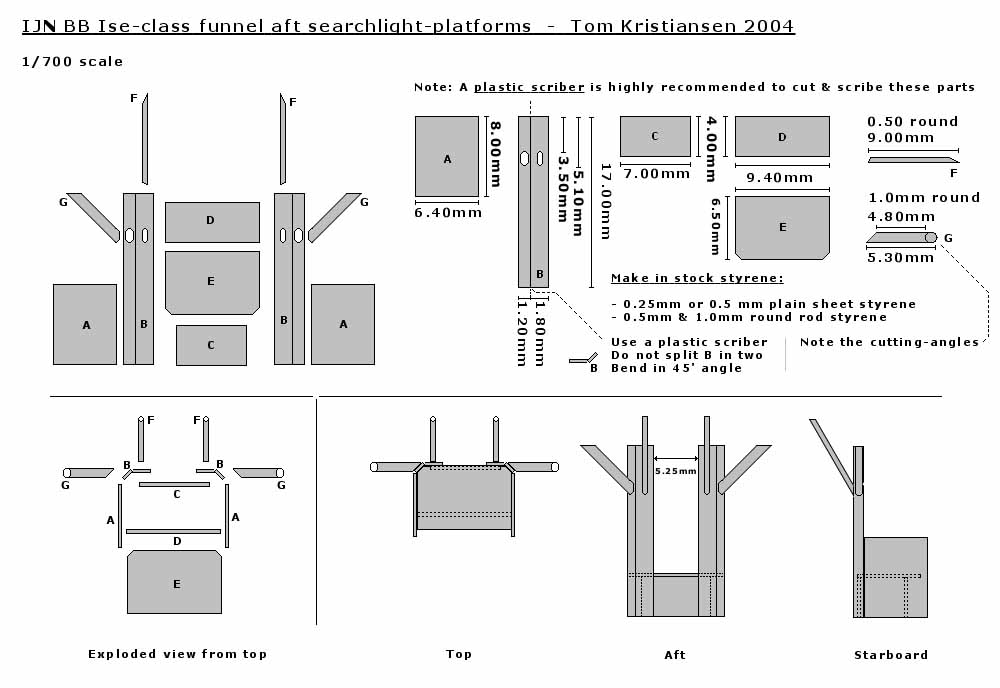
Scratchbuilt searchlight-platform-support
Platform bracings
Antennas
Decals
Tom Kristiansen |
|
||||||||||||||||||||||||