| The ship | |||||||||||||||||||||||||||||||||||||
| HMS Vanguard was the last British battleship and thus inappropriately
named, yet those responsible for naming her in 1941 could not have been
aware of this fate. Originally the British had meant to build a new class
of battleships in the late 1930ies to strengthen their Far East Fleet.
The four units of the Lion class would have been formidable and well-designed
ships with a main armament of nine 16 inch guns. The outbreak of World
War 2 necessitated using available building capacities for the most urgent
projects only, mainly escorts hence work on the Lion class had to be
halted. Soon the entire project was abandoned.
Already in 1939 a proposal was submitted for building at least one battleship based on the Lion design, but using gun mountings left from World War 1. It took until the spring of 1941 until a building order for HMS Vanguard could be placed with John Brown, Clydeside. Despite the high priority now assigned to the project, the shipyard lacked skilled workers, so progress was slow. The ship was launched in 1944 and commissioned only in 1946 too late for the war effort and too late to be really of use. In fact, the Royal Navy´s grave post-war financial situation soon made her more a liability than an asset for the Admiralty. During her very short active service, Vanguard never fired a shot in anger. In 1947 King George VI sailed aboard her on his voyage to South Africa; afterwards she served mainly as Flagship of the Home Fleet, stationed in Portsmouth. At the end of 1954 she was placed in reserve, where she remained for five years. In October, 1959 it was decided to scrap her, after all efforts of preserving her as a museum ship failed. Until the present day, this has happened to many other grand old vessels most recently to HMS Fearless. In August, 1960 she left Portsmouth under tow bound for Faslane fro scrapping; right at the beginning of her last voyage, she broke loose and nearly struck Southsea pier, yet could be brought under control at the last moment and be brought to her final destination without further mishaps. This incident is reminiscent of HMS Warspite a decade before. She also broke loose during her last trip off the cornish coast and beached in Prussia Cove, where she had to be broken up in situ. Those that visit Marazion and St. Michael´s Mount may notice a memorial to this grand old ship. Vanguard was the largest British battleship ever, and probably the best-designed one, too. Her long building period enabled to incorporate lessons learned during wartime. She proved to be a better seaboat than the preceding King George V class, the bows of which had been kept deliberately low to present a free arc for shooting even at zero elevation. The price to pay was a very wet fo`c´sle. Vanguard´s markedly different bow with a more pronounced flare and sheer proved its worth well. Another very notable difference was the transom stern she had received to limit overall length and facilitate docking in as many bases as possible. Her sophisticated fire control systems and radar equipment made use of all the advances made during the war. Other novelties such as an ops room were incorporated into the design, yet not in full due to lack of space. Vanguard´s main armament, a subject of many discussions, comprised of four twin 15 inch mountings originally slated for the two large light cruisers Courageous and Glorious of WW1 notoriety, known as Fisher´s Follies. The actual guns came from a pool of guns that had been used on various vessels of the R class and Queen Elizabeth class. Those mountings and turrets were thoroughly revised and added to the new vessel. Vanguard may be remembered as a well-designed and attractive vessel
that came too late and hence spent her short service as a white elephant.
|
|||||||||||||||||||||||||||||||||||||
| The kit | |||||||||||||||||||||||||||||||||||||
 Michal
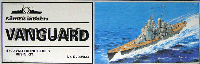
Samek from the Czech Republic has produced an excellent 1:700 resin kit
of HMS Vanguard that also contains the specific PE parts needed, albeit
no railings. The stainless steel PE is made by Eduard . I added machined
brass barrels from NNT plus PE railings and crew figures by Lion Roar.
The kit has been previewed in the English language by Pavel
Vacata on www.modelwarships.com, and in German by Patrick Vogel and
Ralf Schuster on www.modellversium.de
both reviews end up very favorably for the kit. Michal
Samek from the Czech Republic has produced an excellent 1:700 resin kit
of HMS Vanguard that also contains the specific PE parts needed, albeit
no railings. The stainless steel PE is made by Eduard . I added machined
brass barrels from NNT plus PE railings and crew figures by Lion Roar.
The kit has been previewed in the English language by Pavel
Vacata on www.modelwarships.com, and in German by Patrick Vogel and
Ralf Schuster on www.modellversium.de
both reviews end up very favorably for the kit. |
|||||||||||||||||||||||||||||||||||||
| Building the model | |||||||||||||||||||||||||||||||||||||
| The rather small number of parts and the very sharp casting speeded up construction a lot. Little cleanup was necessary, and the instructions, even though hand drawn in a rather simple manner, proved to be mostly useful. The only point I found worthy of improvement concerned construction of the masts I would have appreciated measurements and clearer drawings. The kit PE proved to be useful, especially the safety netting surrounding the Bofors mounts on the superstructure. Yet the material used is very soft and challenging to work with proceed with caution. The Lion Roar railings are very sharp and finely detailed, yet harder to remove from the fret than my personal favorite parts from WEM there is very little space for my scissors or knife around the actual parts. | |||||||||||||||||||||||||||||||||||||
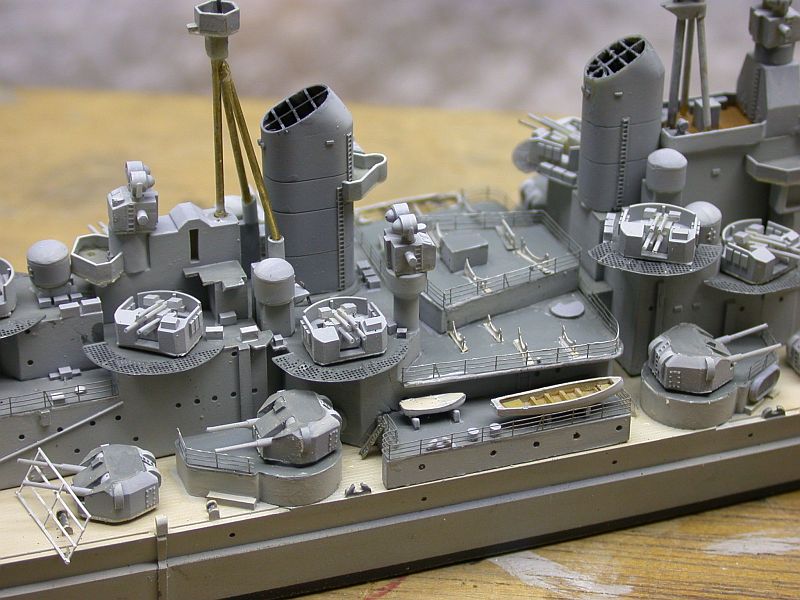
| Construction started by identifying subassemblies that could be built and painted simultaneously the hull, fore and aft superstructure, funnels, turrets, AA mounts, boats, cranes, radars and directors. I left most of them on the thin resin wafers to ease painting. | 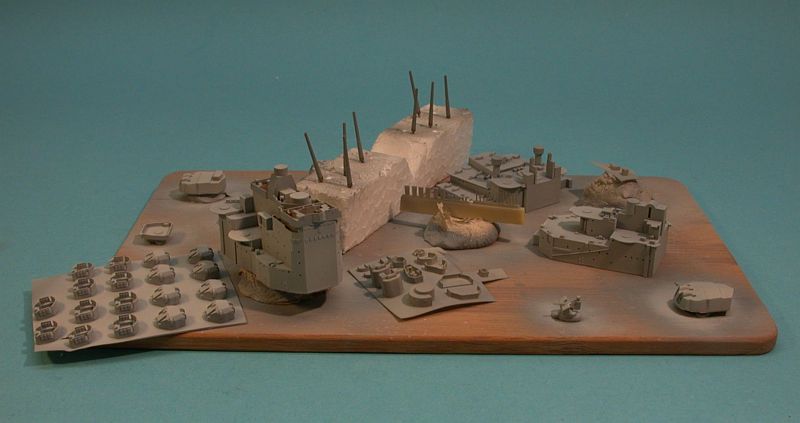 |
||||||||||||||||||||||||||||||||||||
| The hull was cleaned up easily, nonetheless I produced
some unsightly blemishes on the quarterdeck while trying to fill some air
bubbles. As I had already decided to mount a really large awning over the
quarterdeck, I didn´t mind that much. Mounting holes were drilled
through the hull in barbettes A and X using an electric drill in a stand.
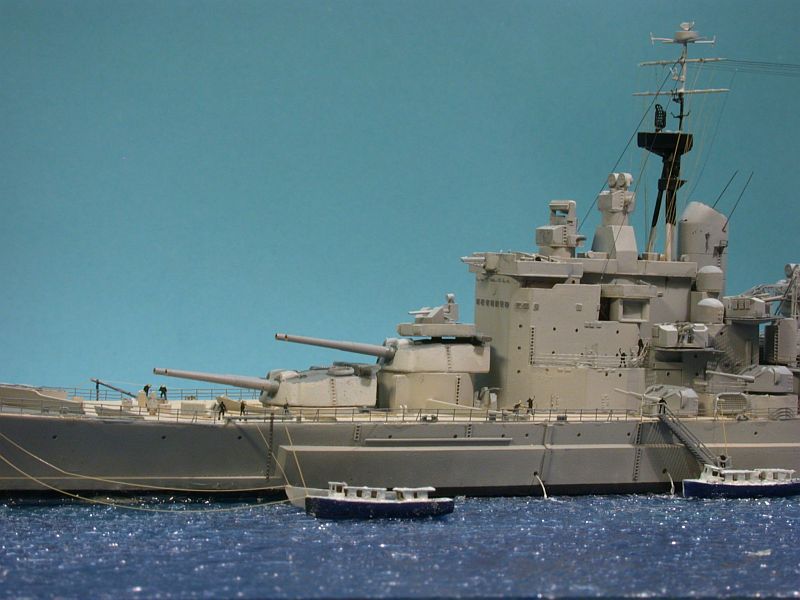
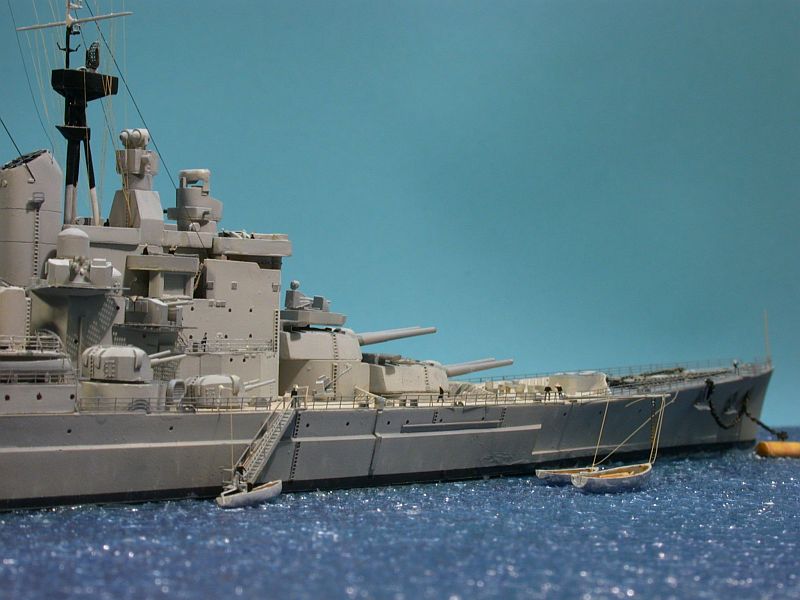
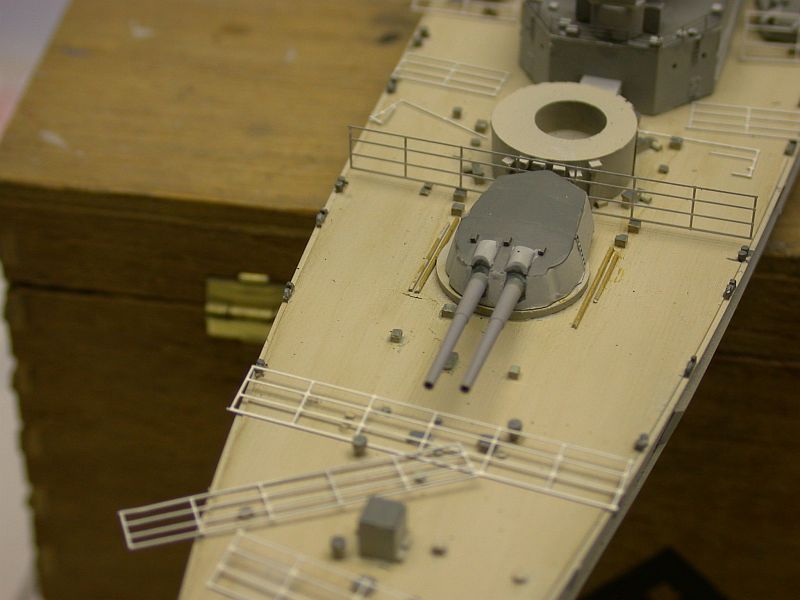
After making sure the two superstructure blocks fit well on the hull, I started gluing the more delicate parts to them. Those boat cradles that later on would not receive boats were replaced by PE items from various WEM sets, mostly from the invaluable Askold set. All the scuttles, hawsers plus those water outlets I could identify on my reference images were drilled open carefully. Constructing the masts was fiddly as it always is, and further complicated by the lack of information in the instructions. Various steel and brass wires were used. The Raven/Roberts drawings were consulted re measurements and placement of the various PE parts. The material used by Eduard proved harder to work with than what I had used previously. Moreover, many parts like inclined ladders looked inferior to generic parts of other manufacturers; where applicable, these were substituted with WEM parts. |
 |
||||||||||||||||||||||||||||||||||||
 |
|||||||||||||||||||||||||||||||||||||
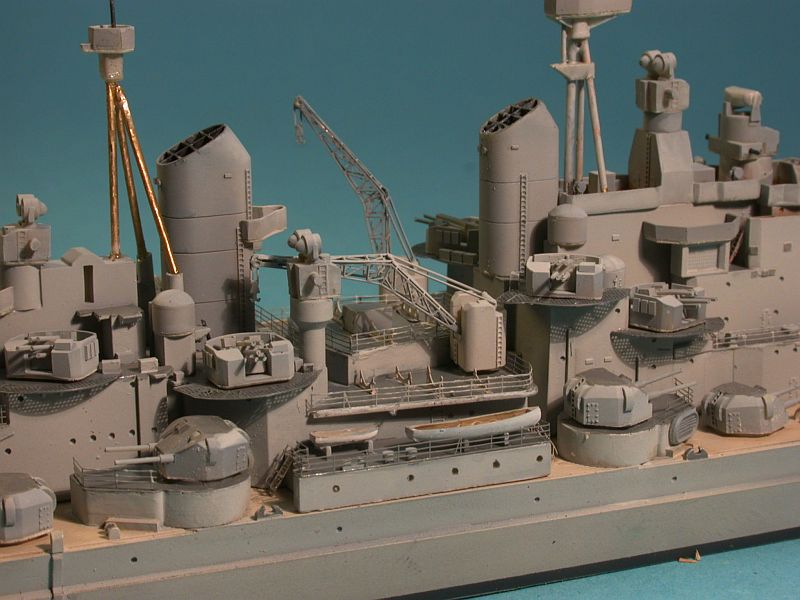
| The hull was primed with enamel primer and then sprayed AP 507 C Light Admiralty Grey (as all weatherworks) using WEM Colourcoats. The boot topping was masked and sprayed a generic dark grey. The wooden decks were hand painted JPS Acrylic IJN Deck Tan and given a watercolour wash. All the remaining steel decks were painted JPS Acrylic IJN Maizuru Grey, the decks covered with Corticene were painted WEM Corticene. As always, the acrylics worked well I hadn´t learned about the ideal thinners for WEM Colourcoats yet, so found working with them less easy. In the meantime, I learned from modeling friends (and tried it myself) that Colourcoats work best with Xtracolor thinners. Cheap CA glue was the only adhesive used. |  |
||||||||||||||||||||||||||||||||||||
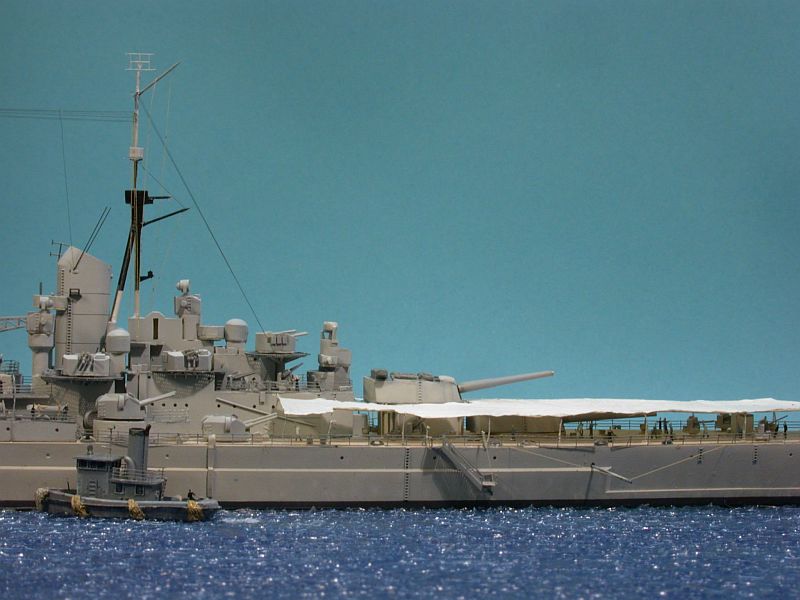
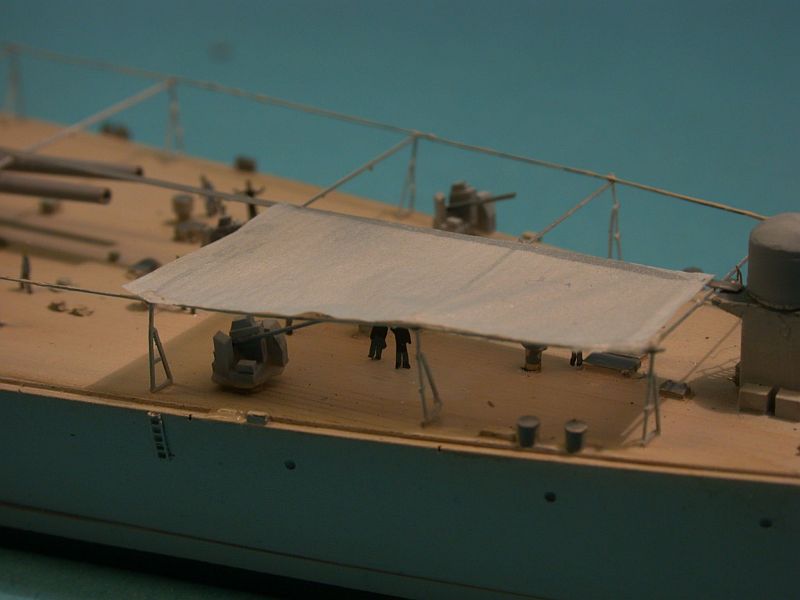
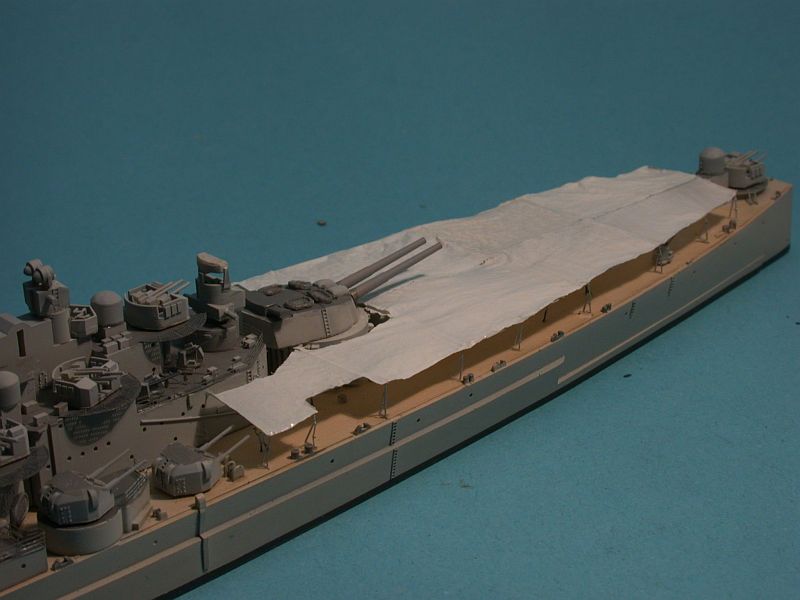
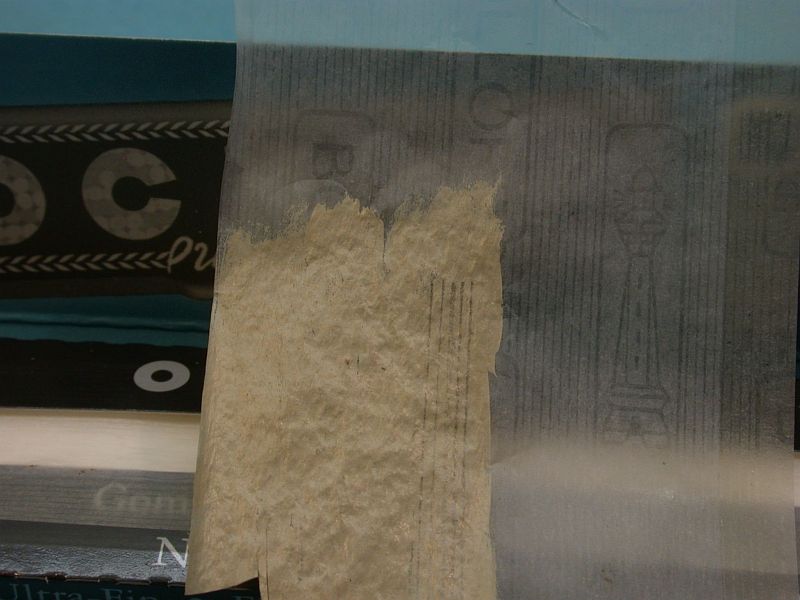
| Making the very large awning took some thought and work; after leafing through my store of PE parts I decided to use some of my stock of Scheuer&Struever´s 1:250 PE railings for the transversal frames. They were reasonably stiff and could be adapted to the various beams needed. Longitudinal fasteners were made from stretched sprue. The material of choice for making awnings is white glue, yet it only works up to a certain size of the individual segments. In this case with fairly large segments, I decided to try something new; so I bought Cigarette Papers Of Considerable Size. These were carefully prepainted with JPS Acrylic IJN Deck Tan and glued to the framing in various segments using white glue. After trimming the excess and touching up the paint, I sealed the awning with Future. |  |
||||||||||||||||||||||||||||||||||||
 |
|||||||||||||||||||||||||||||||||||||
 |
|||||||||||||||||||||||||||||||||||||
| After adding all the subassemblies and crew figures, the
railings were added. Sounding platforms were made by bending the railing
and adding a floor from white glue.
The model was rigged using black and tan stretched sprue respectively for standing rigging and signal lines. The rigging was glued using liquid plastic cement, a heated dental waxing instrument was used for tightening the lines. Finally, the model was given a flat coat to blend things in and hide glue spots. |
 |
||||||||||||||||||||||||||||||||||||
 |
|||||||||||||||||||||||||||||||||||||
| Making the base | |||||||||||||||||||||||||||||||||||||
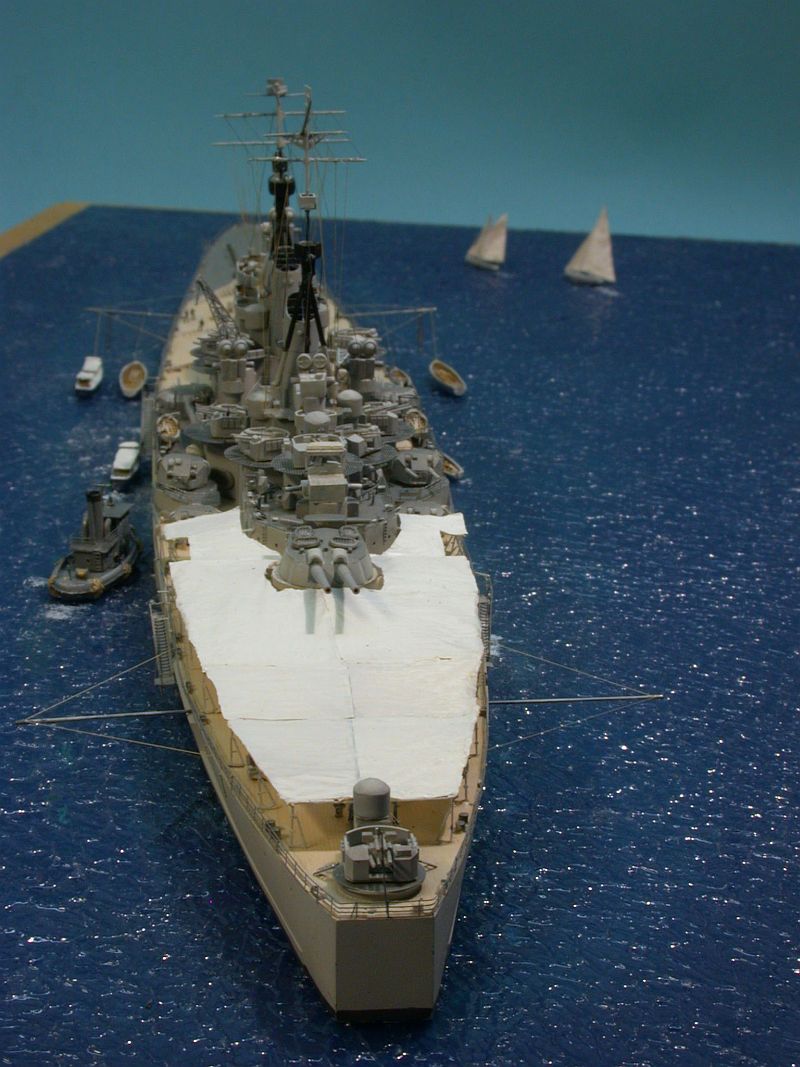
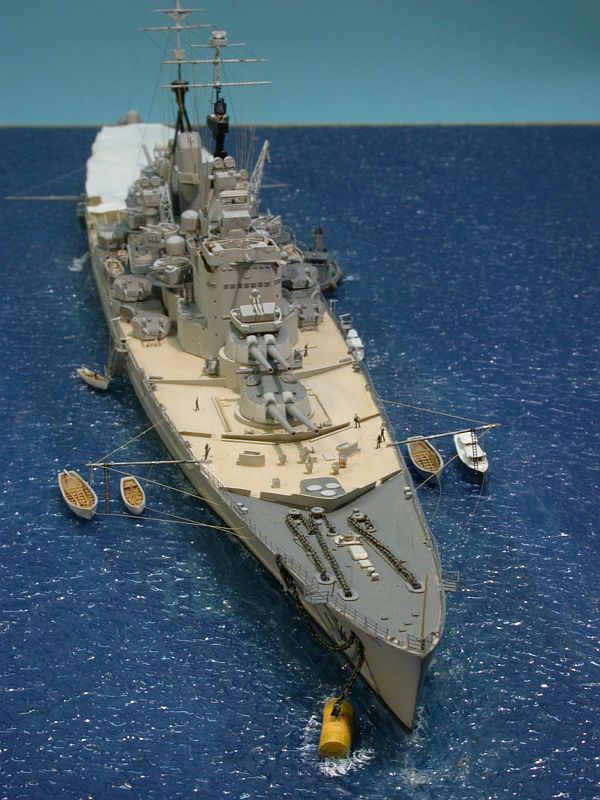
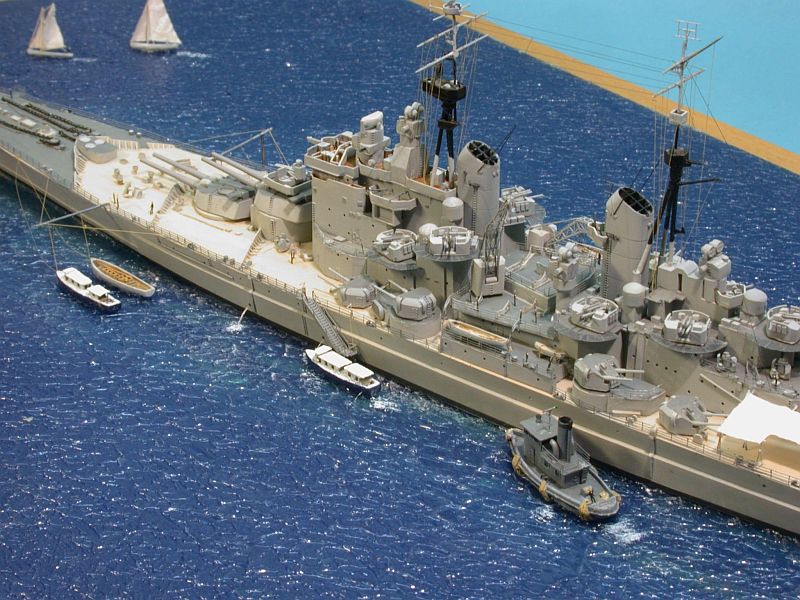
| I had decided right at the beginning to present the vessel in calm waters on a sunny day; one would have to modify the waterline hull to present the vessel in heavy seas. As Vanguard served as flagship for most of her short service, I assumed she would have been kept spick and span and decided against notable weathering. At some point of leafing through my references my eye was caught by an image in Raven/Roberts´ book of Vanguard moored to a buoy, with boat booms and boats deployed, a tug alongside plus a large awning covering her stern. That was how I meant to present her on a sunny day in the early 1950ies off Portsmouth. | |||||||||||||||||||||||||||||||||||||
| I could not obtain a British tug, but Harry Abbott of Battlefleet Models offers a very nice US tug. Assuming and speculating that some U.S. tugs might have been delivered to the UK and not returned after the war, I went with this nice offering. The model consists of three finely cast resin parts and was assembled swiftly. I added cowl ventilators from soldering lead plus a mast from 1:250 PE railing. The tug was weathered using watercolors and pastel chalk. | 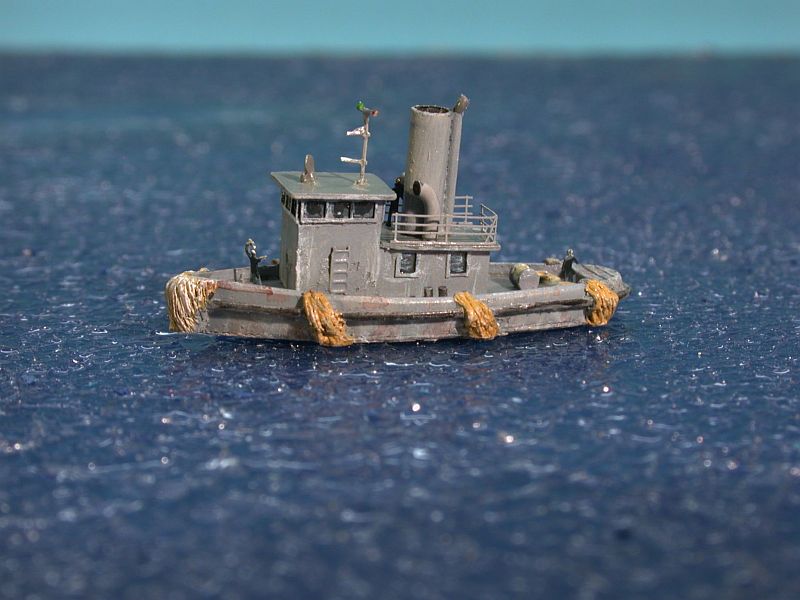 |
||||||||||||||||||||||||||||||||||||
| The mooring buoy was made from a section of styrene tubing, cut in half and closed at the ends with sheet styrene. The mounting ring was made from thin wire and melted into the plastic. The buoy was painted yellow and was weathered seriously. | |||||||||||||||||||||||||||||||||||||
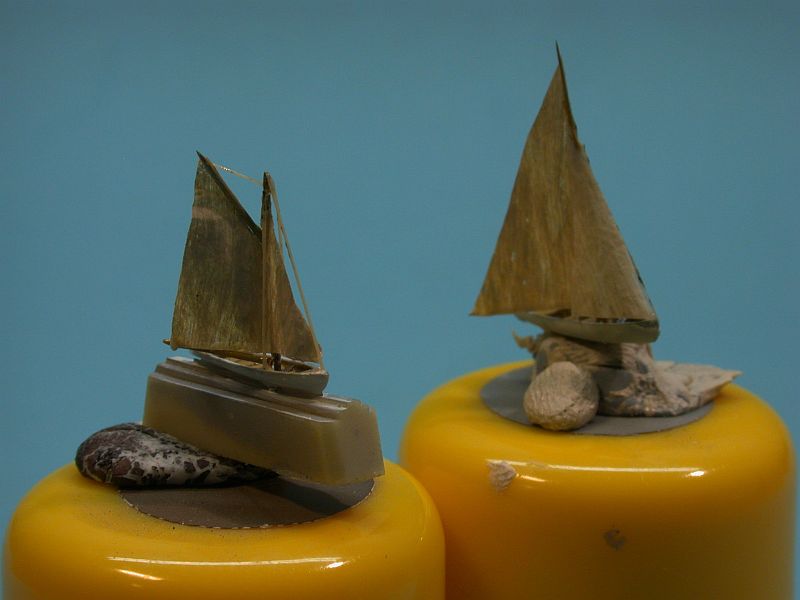
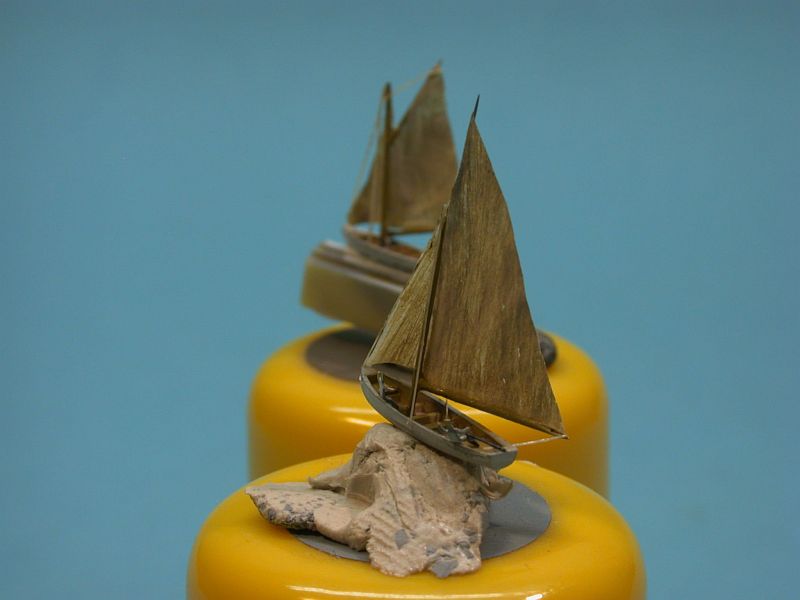
| To make the scene a bit more lively, I decided to add two
sailing boats. To this effect, two of the ship´s boats received a
saling rig made from fine steel wire, cigarette paper and stretched sprue;
the crew (as all the crew figures) is 1:700 Lion Roar PE figures. I have
to thank Jim Baumann a lot for his hints on how sailing vessels should
look and behave, how the crew would be placed and other issues improving
realism; I used a number of images provided by Jim and some from the British
National Maritime Museum´s website.
The base was made from a picture frame. I removed the glass, placed the model on it, and marked where my mounting holes would be. Then I carefully drilled holes through the glass using a diamond bur in my Dremel. Now the ship could be secured to the base using screws. That seemed to work fine yet later on after completion - led to a fine crack in the glass. These days, I would rather use a stainless steel plate with screws or attach the model using acrylic gel. |
 |
||||||||||||||||||||||||||||||||||||
 |
|||||||||||||||||||||||||||||||||||||
 |
|||||||||||||||||||||||||||||||||||||
| The wave patterns were made by adding a coat of clear acrylic
gel to the glass and spreading it with a foam paint roller. The glass was
then painted from below using cheap wall paints from the hardware supermarket.
These days I paint my (plaster) bases from above and then add a number
of coats of gloss lacquer a much easier method and an even nicer result!
After screwing the model to the base, any remaining gaps were filled using acrylic gel. The boats and the tug were also glued to the base using acrylic gel. After curing, the boat booms were rigged using tan stretched sprue. The water spouts from the various outlets were made using stretched clear sprue glued with acrylic gel. The disturbed water below the outlets and around the boats was drybrushed using white artist´s oil paint. The anchor chain from Saemann was weathered with a special burnishing
chemical. The PE kit anchors were used and rigged after studying a lot
of images of RN vessels moored to buoys. The kit contains only two accomodation
ladders, without rails. So I had to cannibalize WEM´s 1:700 HMS Tiger
and 1:600 HMS Ark Royal III set to make four complete sets a fiddly task
yet necessary for the diorama setting.
The images were taken indoors using my trusty Nikon Coolpix 995 on a tripod using manual white balance. |
|||||||||||||||||||||||||||||||||||||
| Sources | |||||||||||||||||||||||||||||||||||||
| Raven / Roberts: British Battleships of World War 2 (I used the much
cheaper German version)
Wikipedia Vanguard page. A Vanguard veteran´s homepage Images at Maritimequest with the image used for the diorama. |
 |
||||||||||||||||||||||||||||||||||||
| Acknowledgements: | |||||||||||||||||||||||||||||||||||||
|
A heartfelt thank you to Jim Baumann for his help and always constructive criticism, and for always giving me that special nudge I need to improve. |
|||||||||||||||||||||||||||||||||||||
| The Ships of Frank Spahr | |||||||||||||||||||||||||||||||||||||

© ModelWarships.com