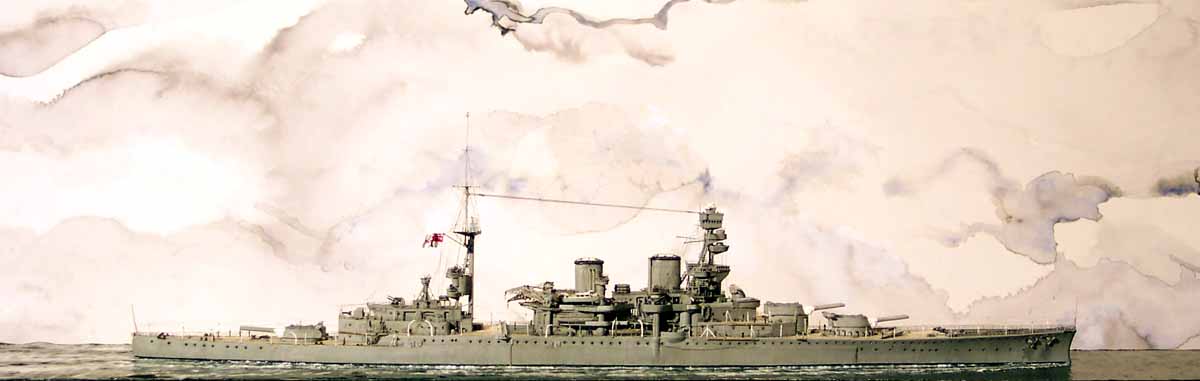
HMS Repulse February 1939
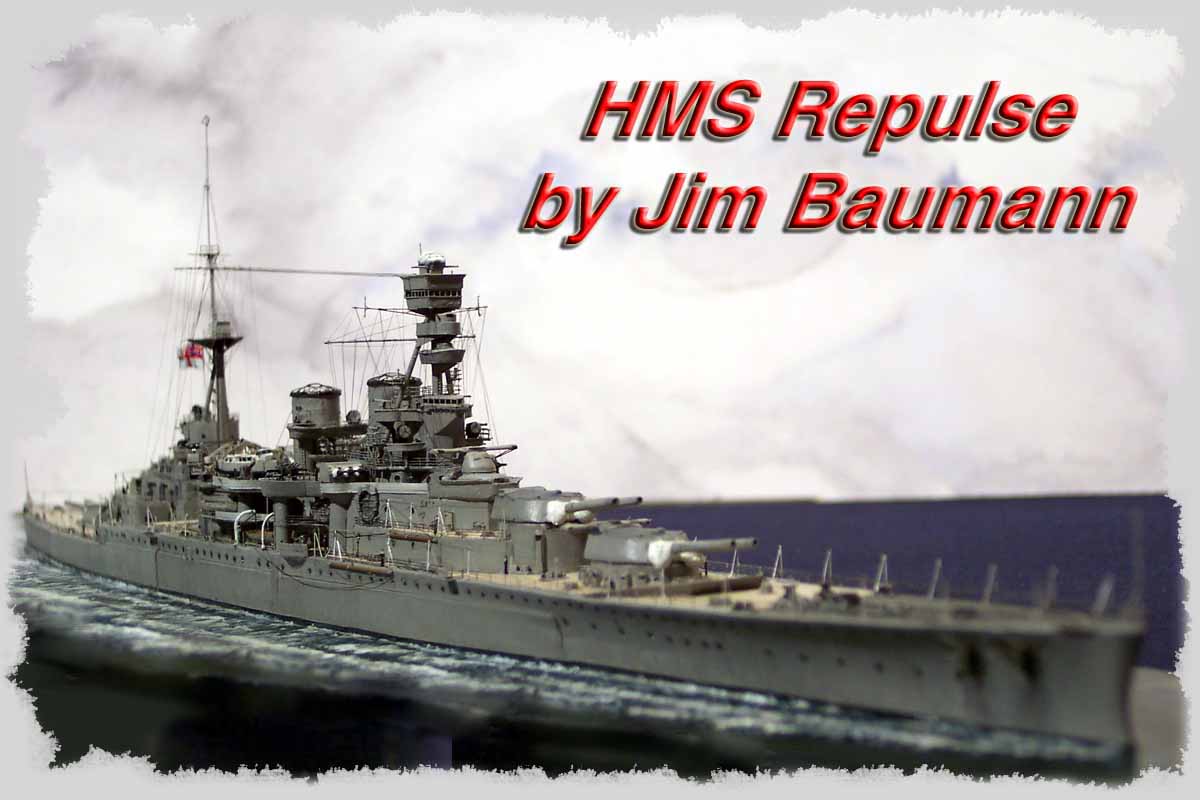
by Jim Baumann
| I decided to build the 1/700 B-Resina
HMS REPULSE when WEM announced their forthcoming HMS RENOWN as I felt that
with the scale fidelity I anticipated of HMS Renown I would otherwise probably
never build the B-Resina offering and she would fester away in my kits
stash if not built first..
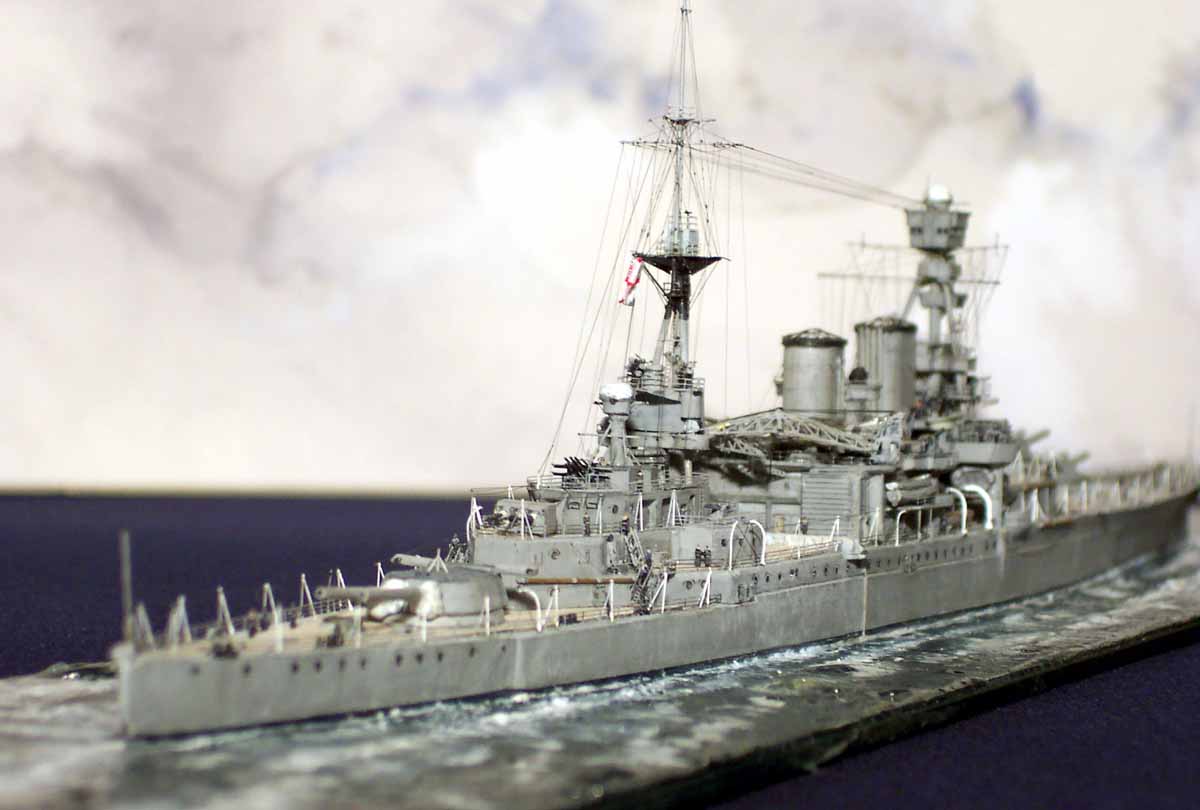
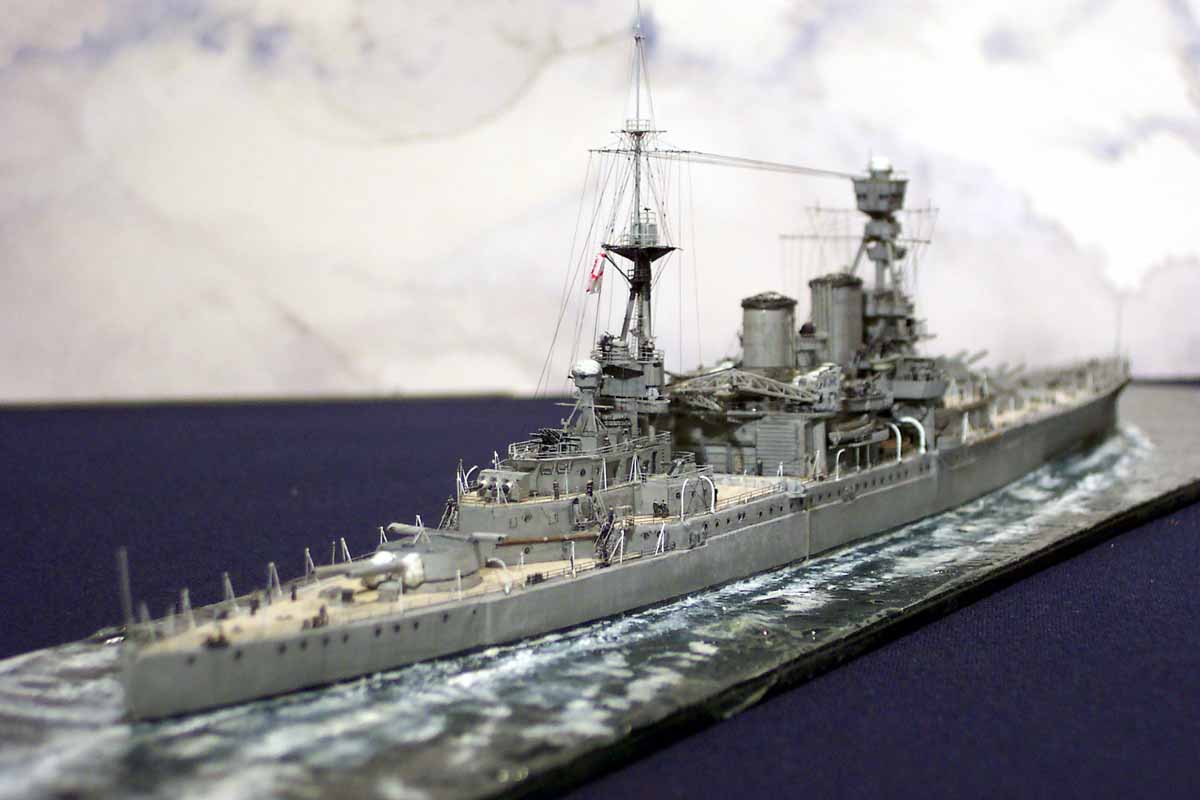
Having built a number of Airfix 1/600 HMS Repulse models in the past I felt a certain nostalgia upon opening the B-resina 1/700 Repulse kit, it all looked kinda homely and familiar....I would be fascinated to know how it is done, but the Resin 1/700 kit bore more than a passing family resemblance to the Airfix kit, foibles,warts and all! I have never really liked the harsh two tone camouflage scheme she wore when sunk so opted to build her immediately pre-war; there being many good clear photographs of her at this stage after the 1936 rebuild and after removal of 4.5"turrets aft but prior to the fitting of the extended engine room vents which are a noticable feature on most HMS Repulse models. I simply wanted to do something a little different from the HMS Repulse modelling norm. |
|||||||||||||||
| I used the drawings and photographs in RAVEN/ROBERTS Batttleships of WW2 along with the breakdown detail drawings in the Profile Morskie HMS REPULSE as well as detail from the Okrety swiata 12(warships of the world) along with my pride and joy purchase ENSIGN 8 Renown and Repulse which filled in the missing link photo...! | |||||||||||||||
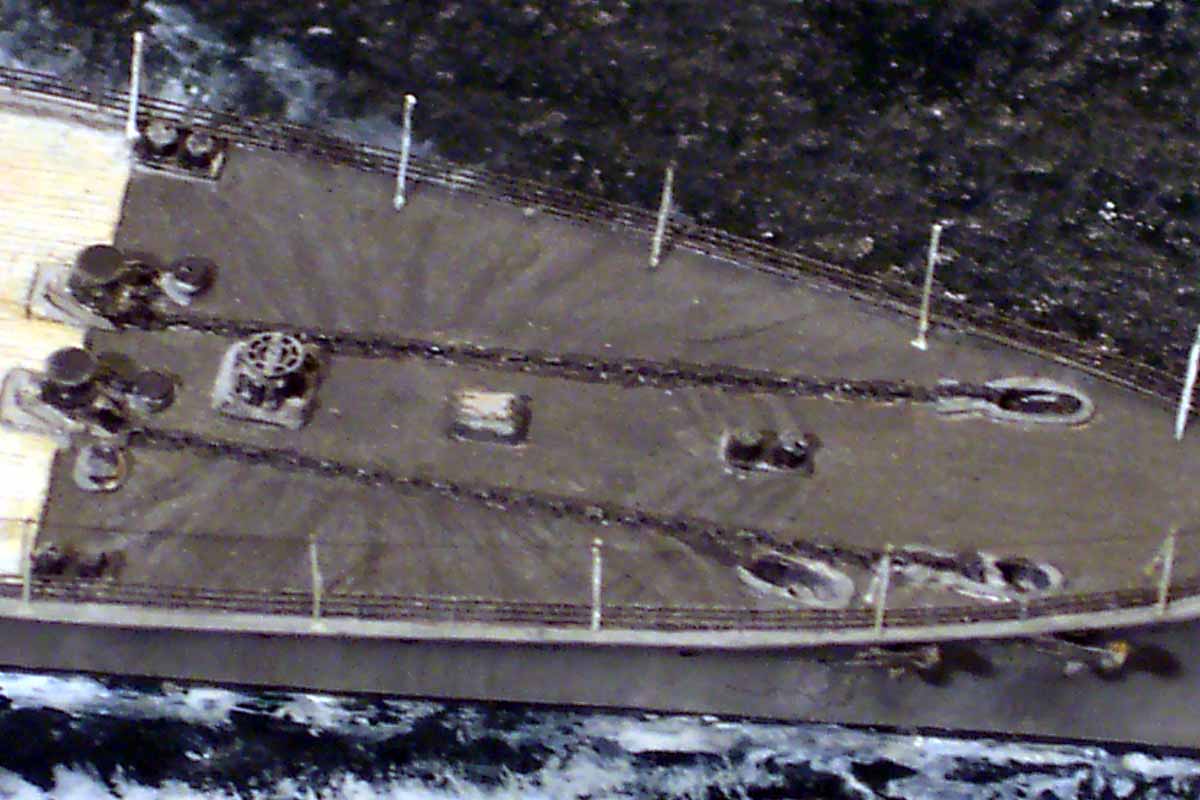
| Armed with this information I set to work on the hull looking
for corrections and refinements to carry out before comitting paint to
deck(my personal launch party)
I proceeded to reduce and remove the tall bumps and ridges around the deckedge as these in scale would have been 4'tall and I could not discern them as beeing that noticably high in plans or photos. I also could not find any reference to the 'crease' in the armour belt in photos or plans, so I skimmed the 'crease' with autobodyfiller and sanded back. I also moved the fore and aft extremities of the belt to concur with the plans. |
click images
to enlarge |
||||||||||||||
 |
|||||||||||||||
 |
|||||||||||||||
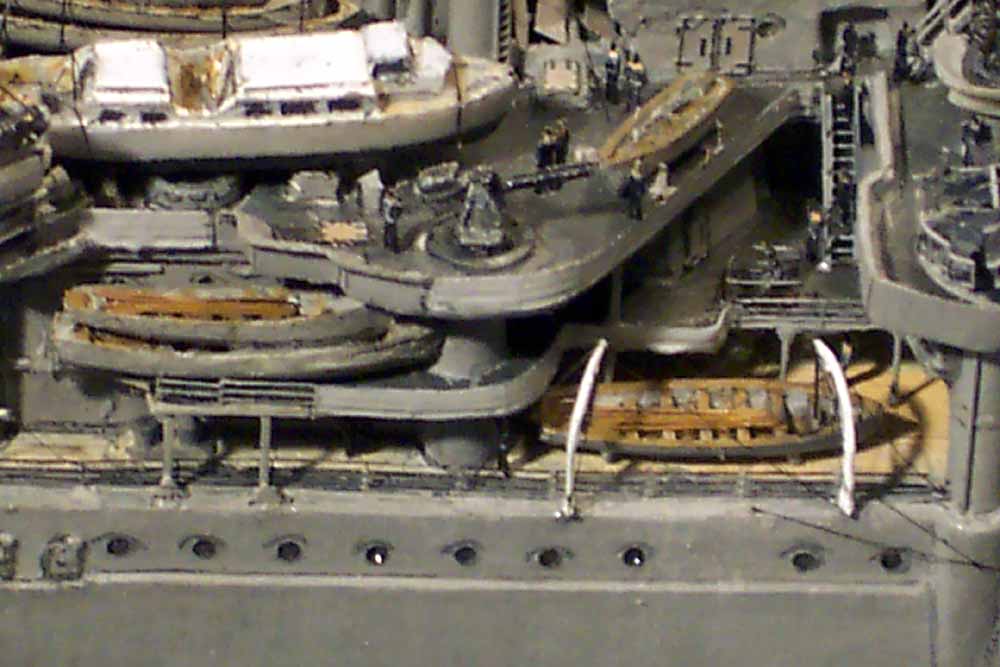
| As I had chosen to show her in 1939 before the vents were extended these had to be removed, as well as the 4 carley floats twixt the funnels and all bulges and platforms for AA weapons along with all solid splintershields; these were fitted later,in my depiction she carried mainly canvas covered railings. I was not happy with the thickness of the various decks and platforms or indeed their outline or stacked total height so made new mast and tripod in alloy tubing. I also made new platforms and splintershields and added the beading at upper edge. | 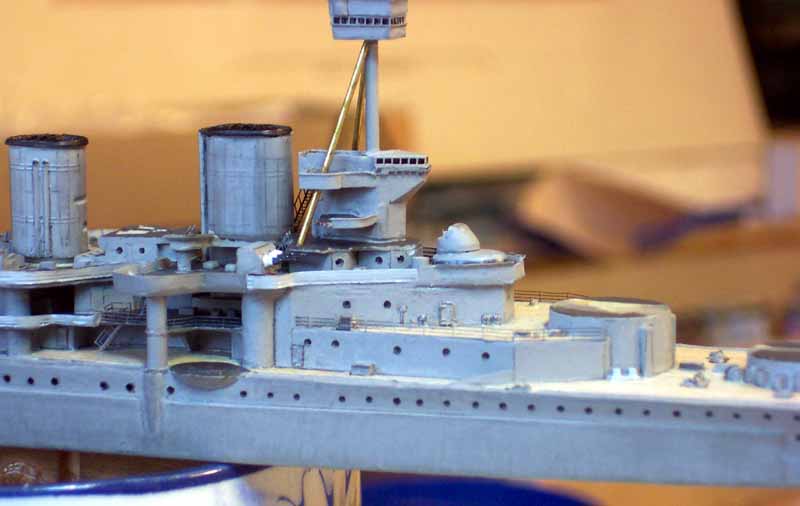 |
||||||||||||||
 |
|||||||||||||||
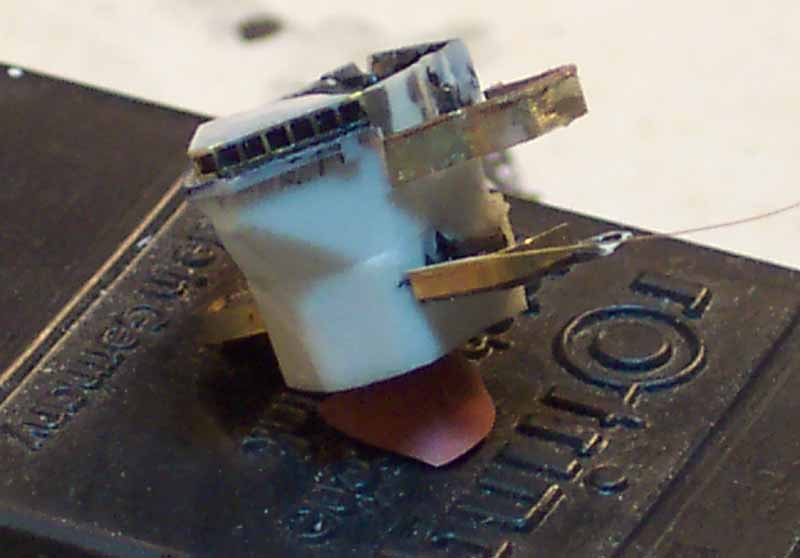
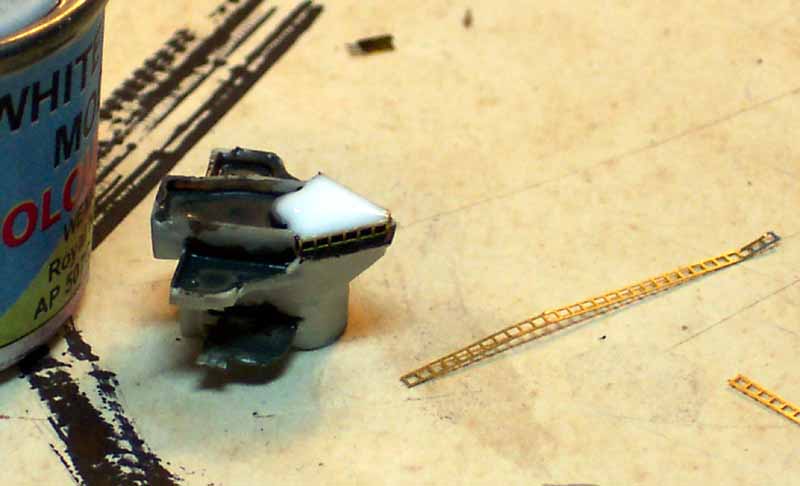
| While dealing with the fwd bridge I was unhappy with the depiction of the windows in the bridge and spotting top so set about hunting thru all my ladderstock.... (came up with WEM Koenig 1//350 narrow ladders) these were a near perfect fit and greatly crisped up the whole picture, but had to remanufacture the bridge roof, I used white glue for this which worked really well(self-levelling) | 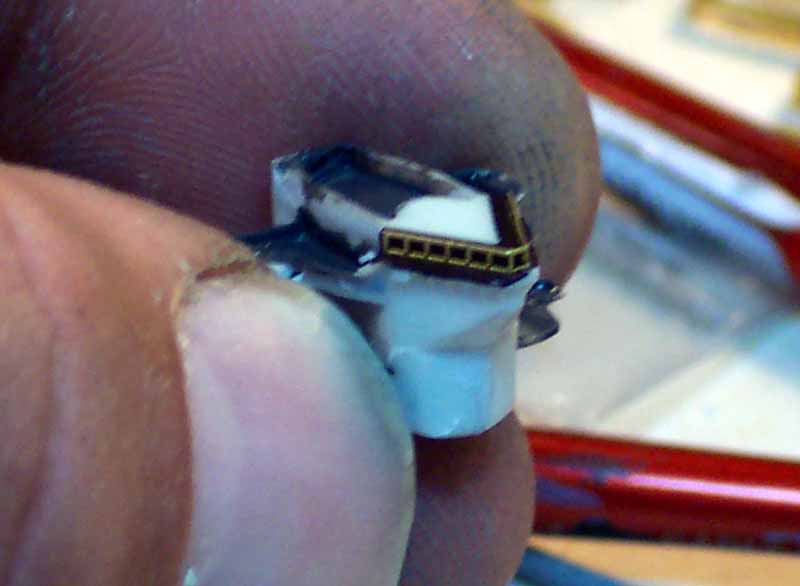 |
||||||||||||||
 |
|||||||||||||||
| I then proceeded to add all the platform and spotting top triangular braces cut from PE scrap with scissors, this was fiddly and tedious as the superglue was sometimes decidedly unsuper; ( I have many small brass triangular shards embedded in carpet.....) |  |
||||||||||||||
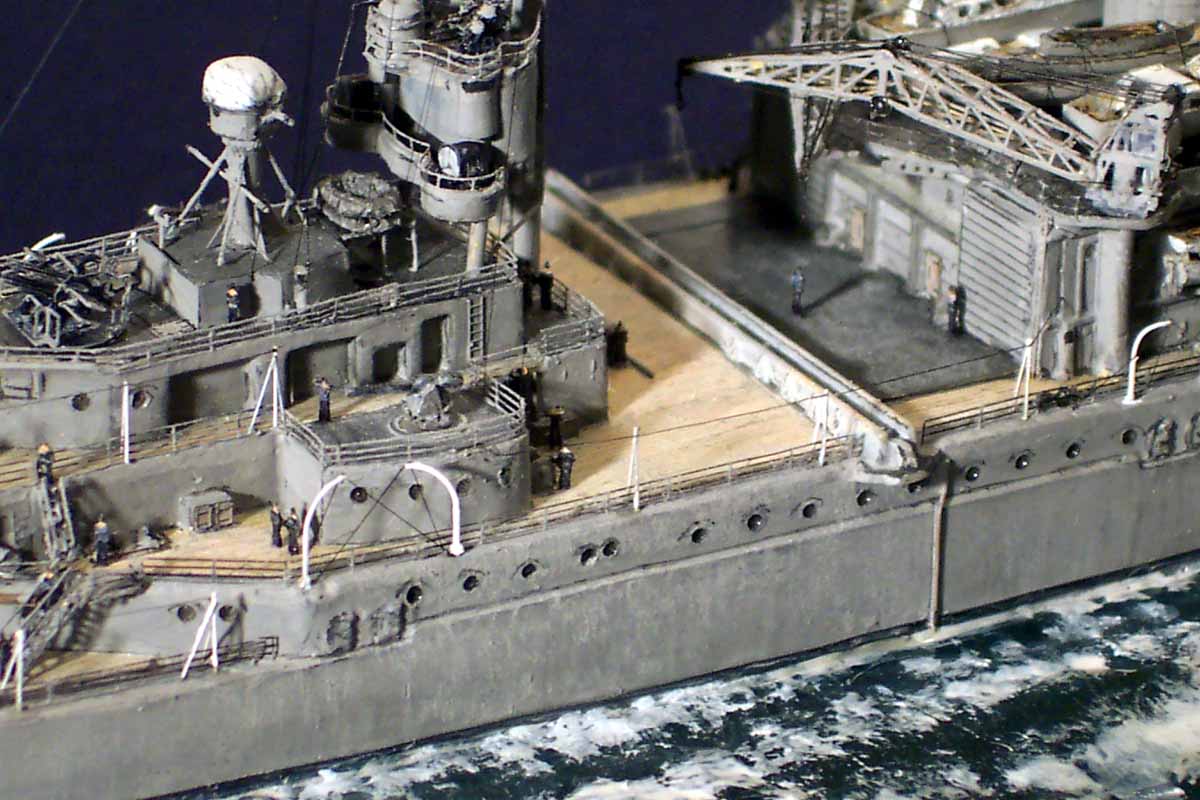
| The casting of the bridge structure lacked some portholes, these and all others on the whole ship were drilled, balcked and glazed with white glue I lightly pencilled in the eyebrows to add depth to the hull. | 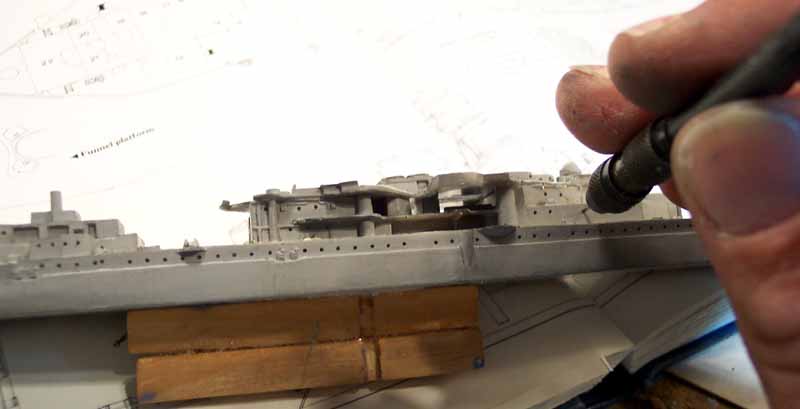 |
||||||||||||||
| Tripod starfish where cobbled together using WEM Rodney/Nelson
and QE Batttleship sets and cutting and adding bits and pieces.The stairway
apertures were cut in and all ladders and companionways installed. Also
added all ' tween deck struts while accessible along with alloy tube for
pompom platform support and more triangular braces on underside . I removed
some resin blobs aft of rangefinder and made new mushroom vents and boxes
replacements and repositioned these according to drawing. The main rangefinder
was missing in my kit so I scratched a replacement.
The vents ahead of the second funnel had open PE lids added(WEM ASKOLD PE casemate plates!) |
 |
||||||||||||||
 |
|||||||||||||||
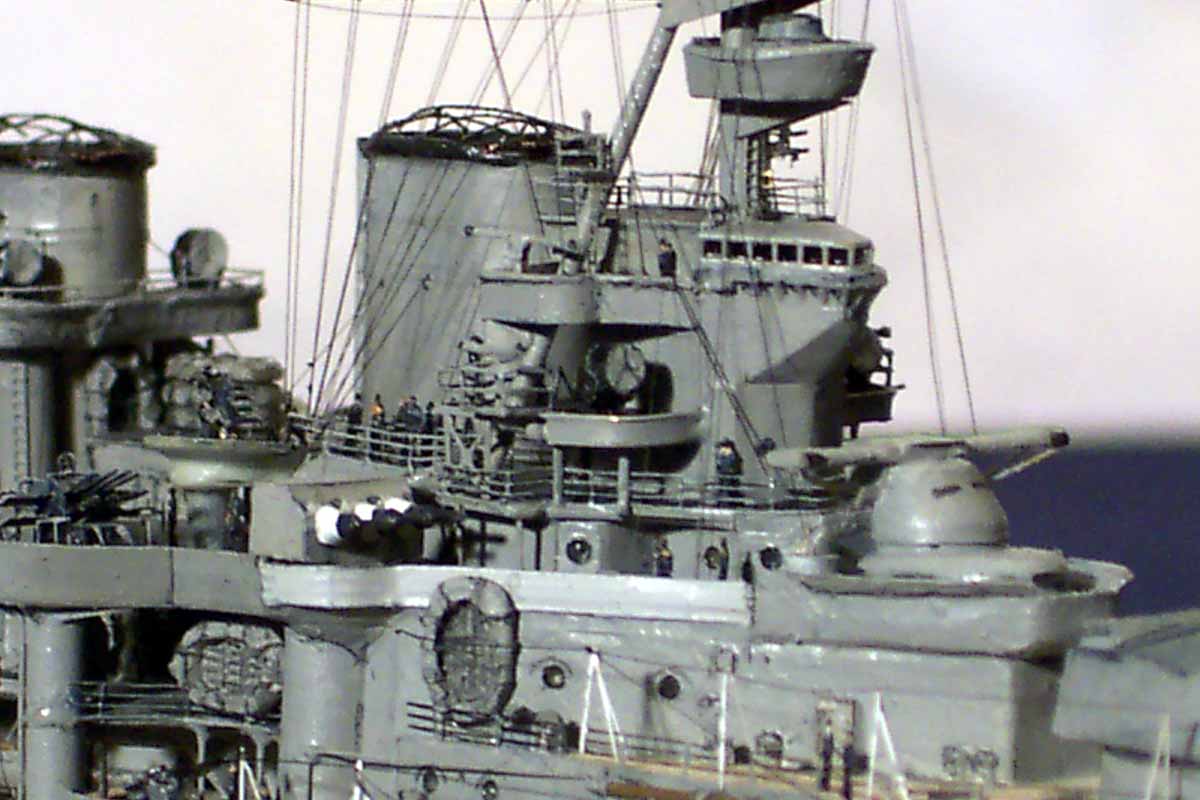
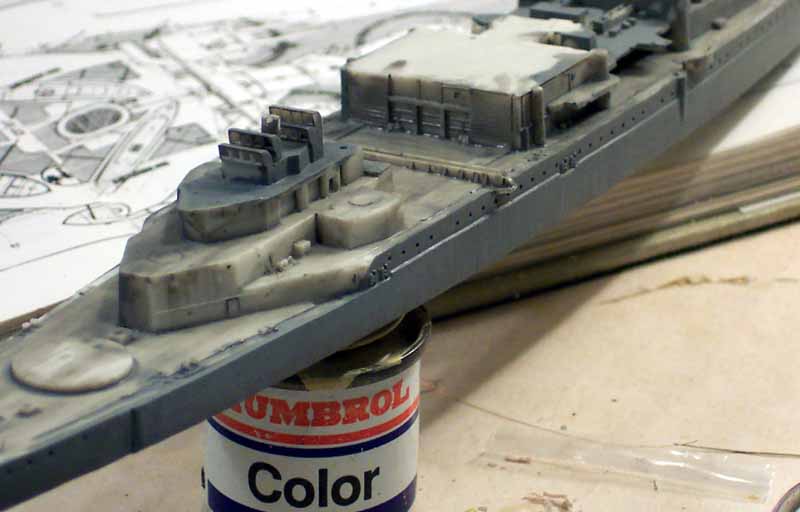
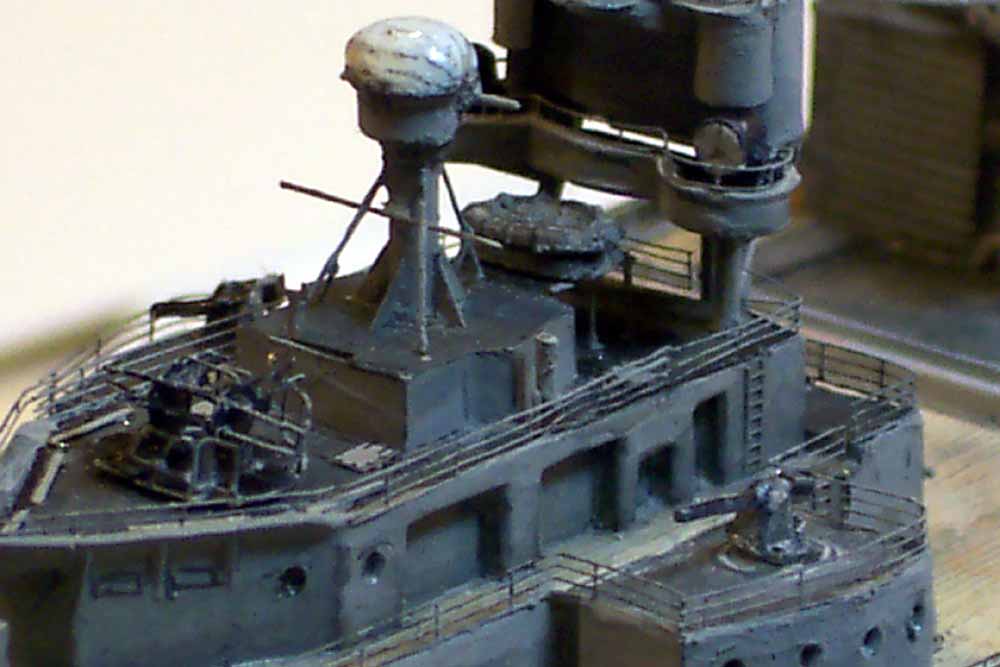
The aft(mainmast) mast superstructure and platforms were
scratchbuilt as the kit supplied item was deformed and did not actually
resemble what should have been there, I sawed the white metal casting block
in half and used brass PE scrap for platforms, automotive body lining tape
to fair the whole lot up along with brass and alloy tubing.
|
|||||||||||||||
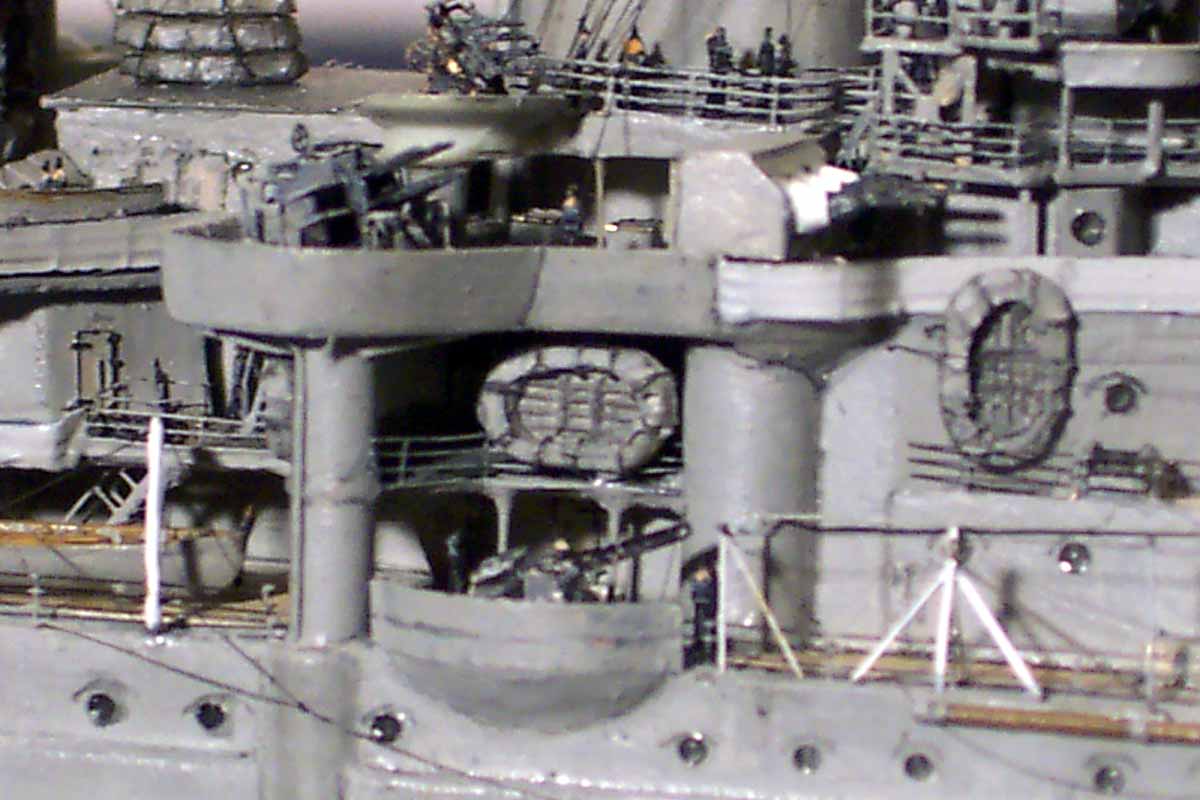
| It was while the ship was getting masted that I noticed two problem areas; I had been kidding myself that the solid funnels with the cast grilles looked fine......!! and that the fwd breakwater would look in scale once painted.............!! | |||||||||||||||
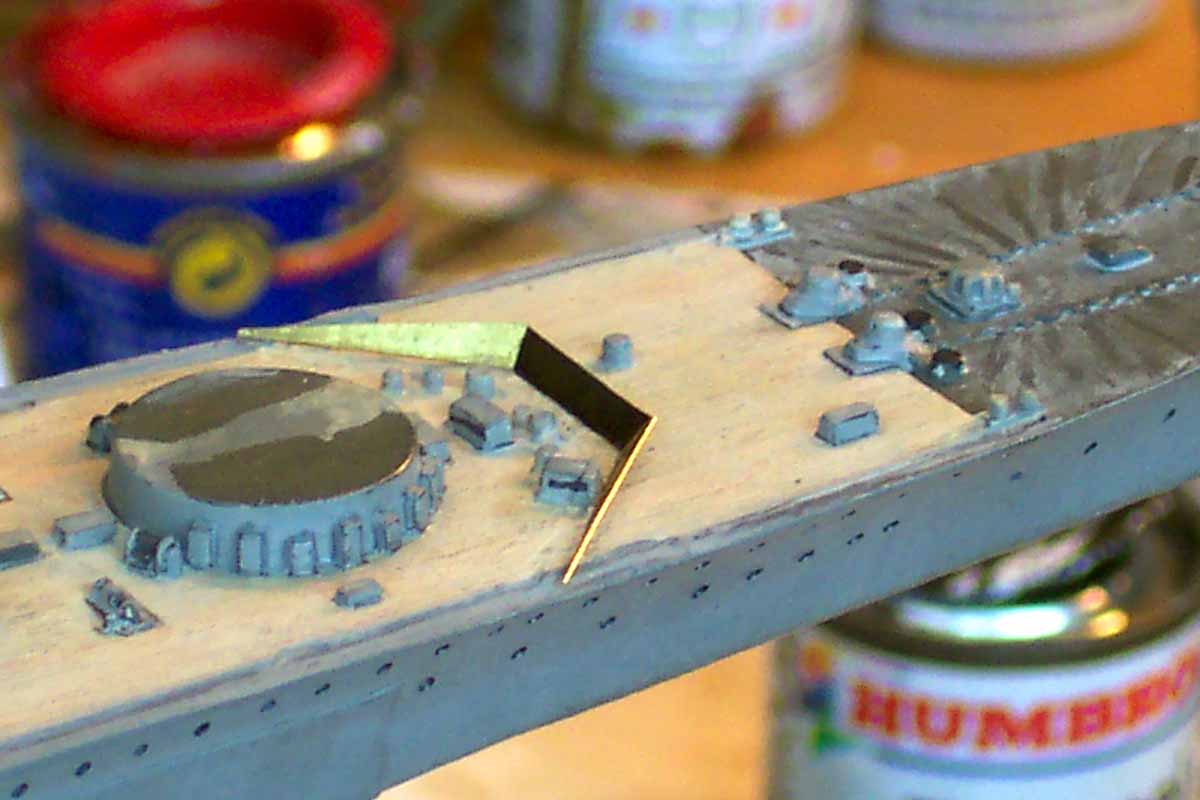
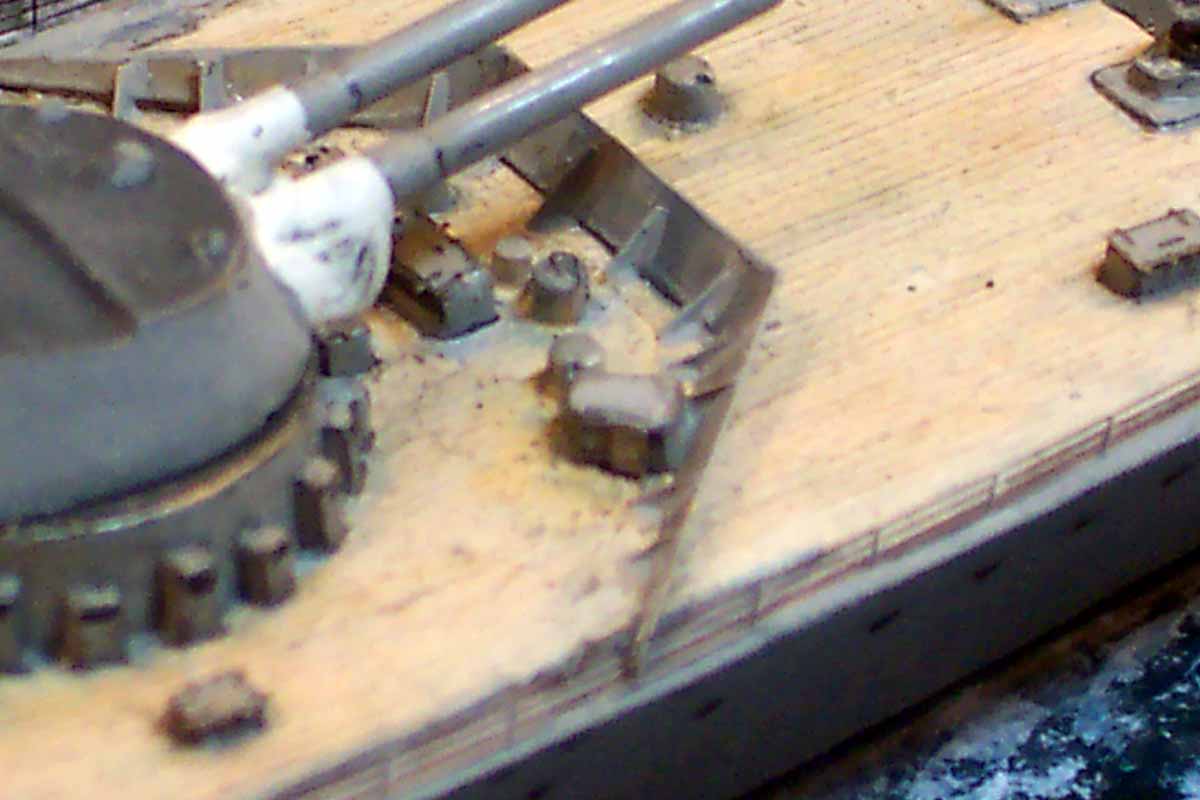
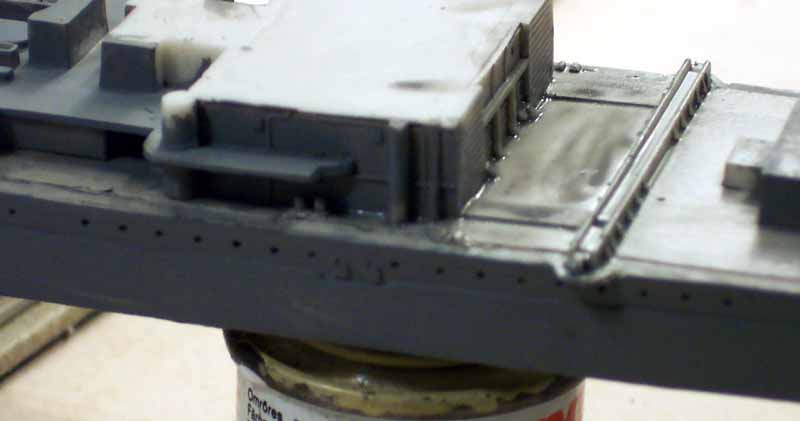
| OFF they had to come; note it is heartrending to grab funnels
with pliers and sheer off once searchlight platfrom and rails are installed.....Even
more so when carving off breakwater ahead of turret after deck is painted....
I made a new breakwater from PE scrap and added the braces using a neat method (it being tricky to cut accurate triangles with reducing heights ...
|
|||||||||||||||
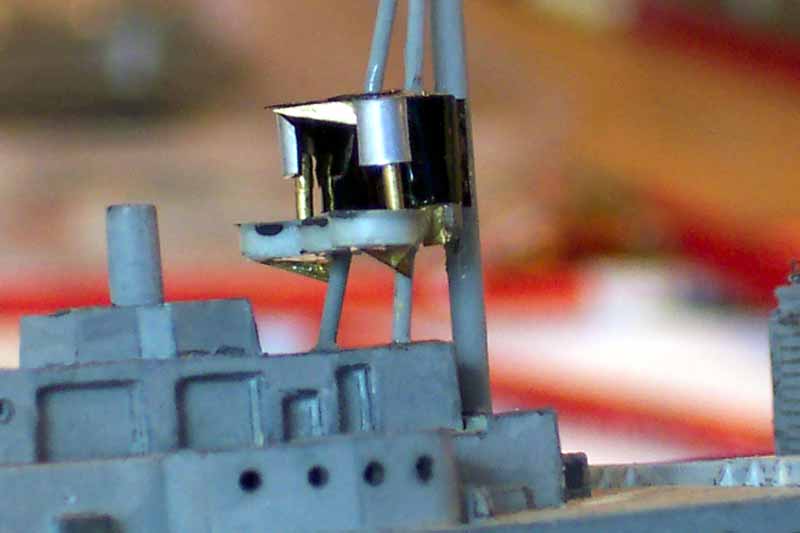
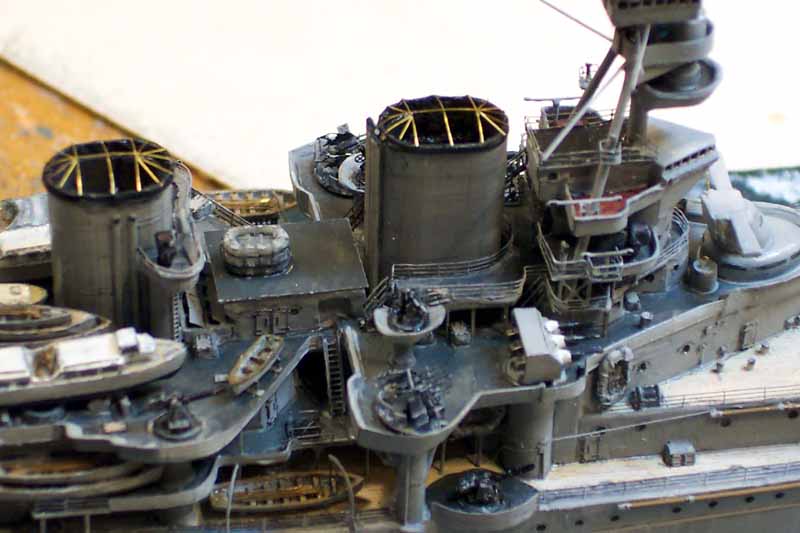
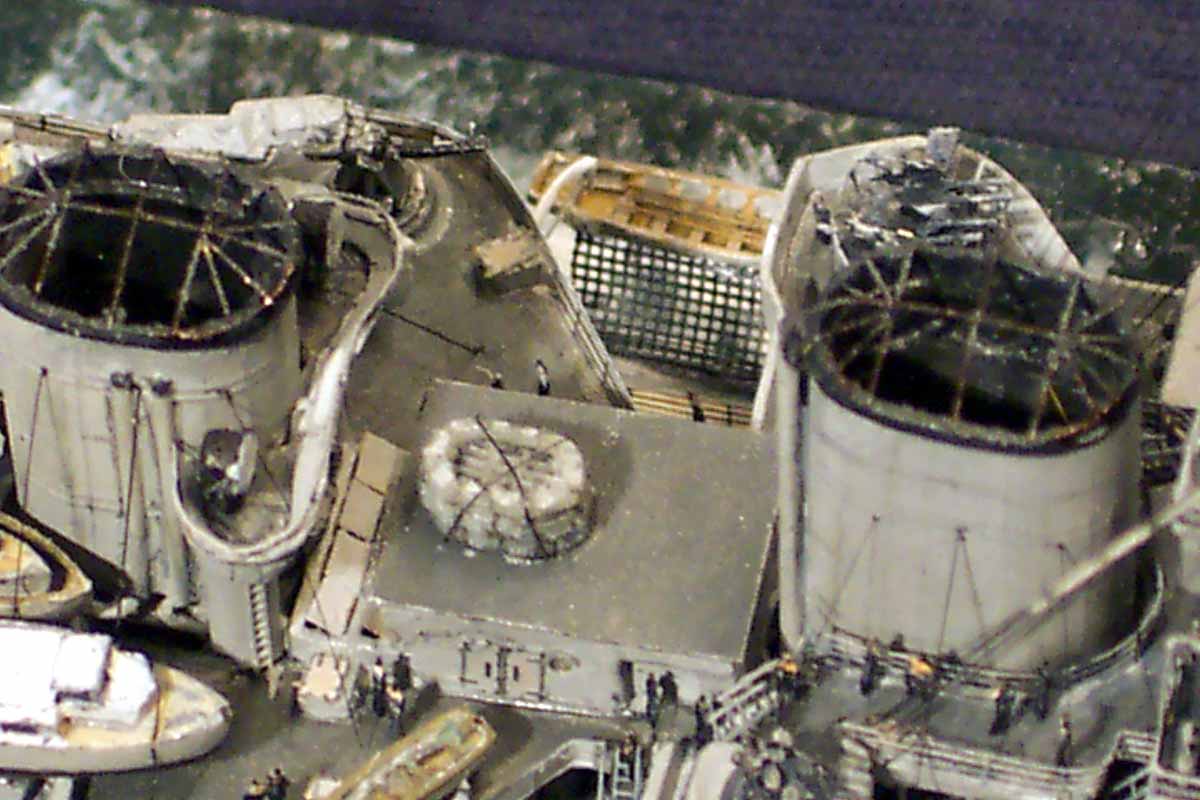
| hollowed the funnels with a drum sanding bit in my minidrill. I took
the opportunity to indicate lightly in pencil the riveting/plate lines
as the funnels looked a bit plain before.
Rangefinders were reshaped and the canopies depicted closed ; the canvas roofs had the framing lines and 'hollowed' canvas shape filed into their tops. |
 |
||||||||||||||
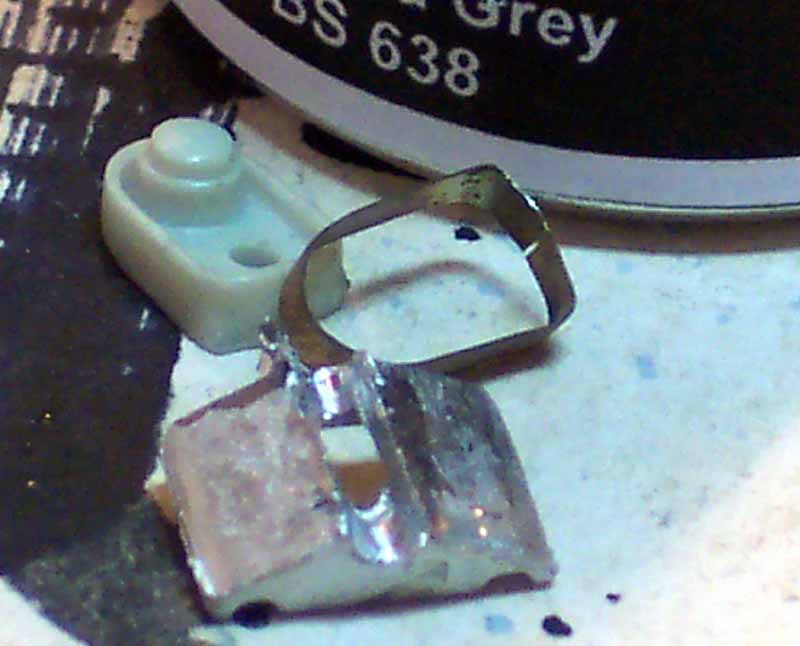
| Drum rangefinders were made of alloy tube with white glue giving the lightly domed top effect. | |||||||||||||||
|
|||||||||||||||
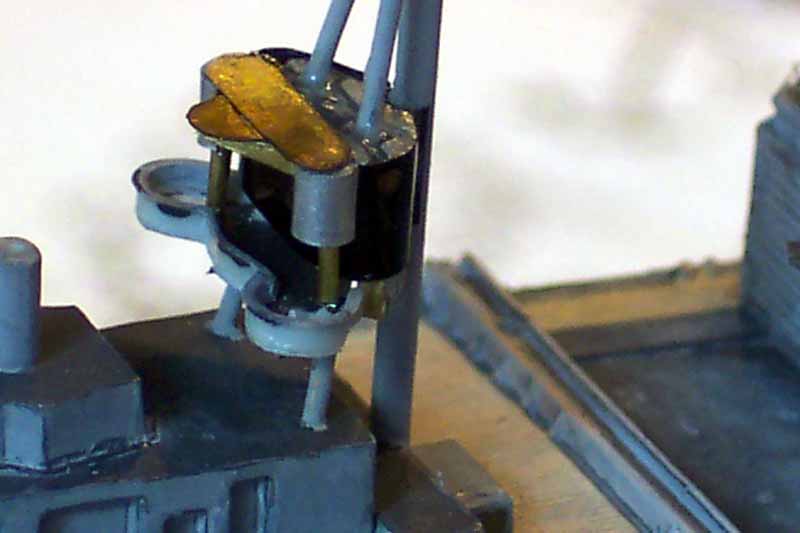
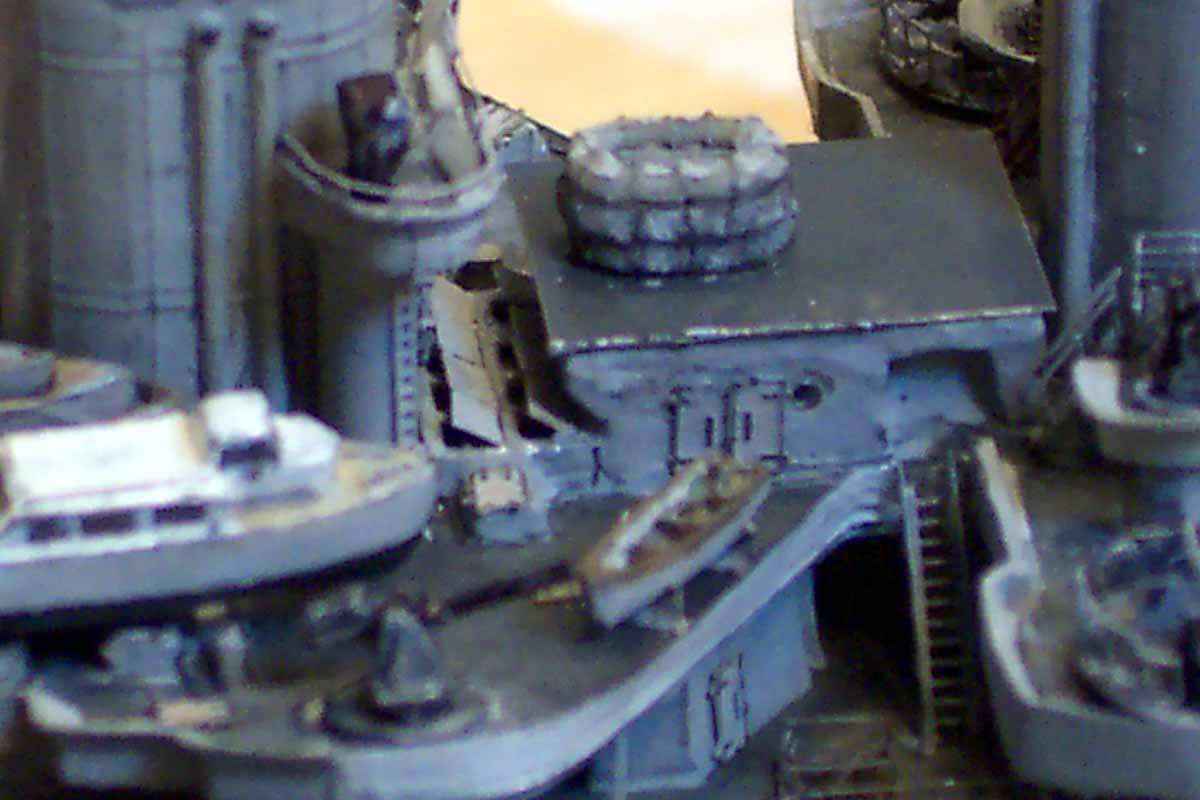
The crane jibs required resembled NOTHING I had on any
PE set, being shorter and less 'kinked' than the KGV items that they were
chopped out and about from. The crane cabs were detailed with motors and
struts, the basis of which was WEM KGV PE crane cabs
|
|||||||||||||||
|
|||||||||||||||
| A special thanks must go Giampiero Galeoti of Regia Marina who along with many friends from both main shipmodelling web-sites came to my rescue at breakneck speed with Carley Floats of various sizes and shapes in astonishing quantities!! | 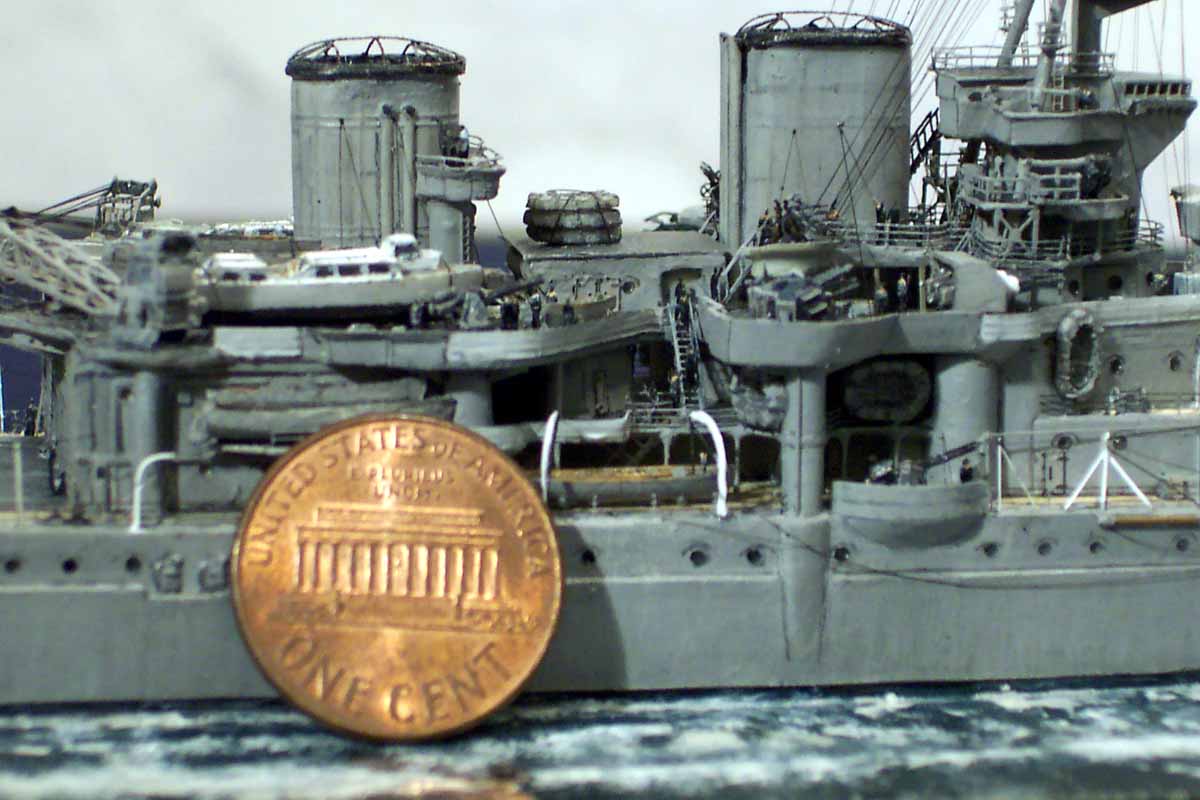 |
||||||||||||||
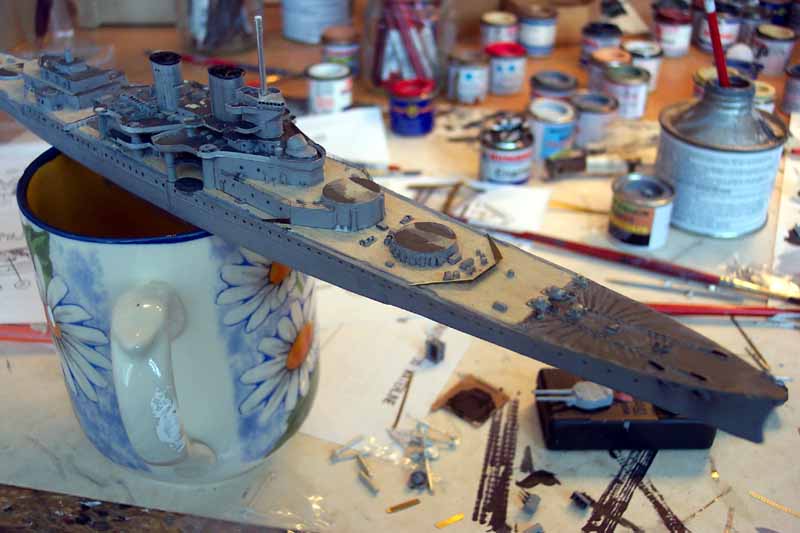
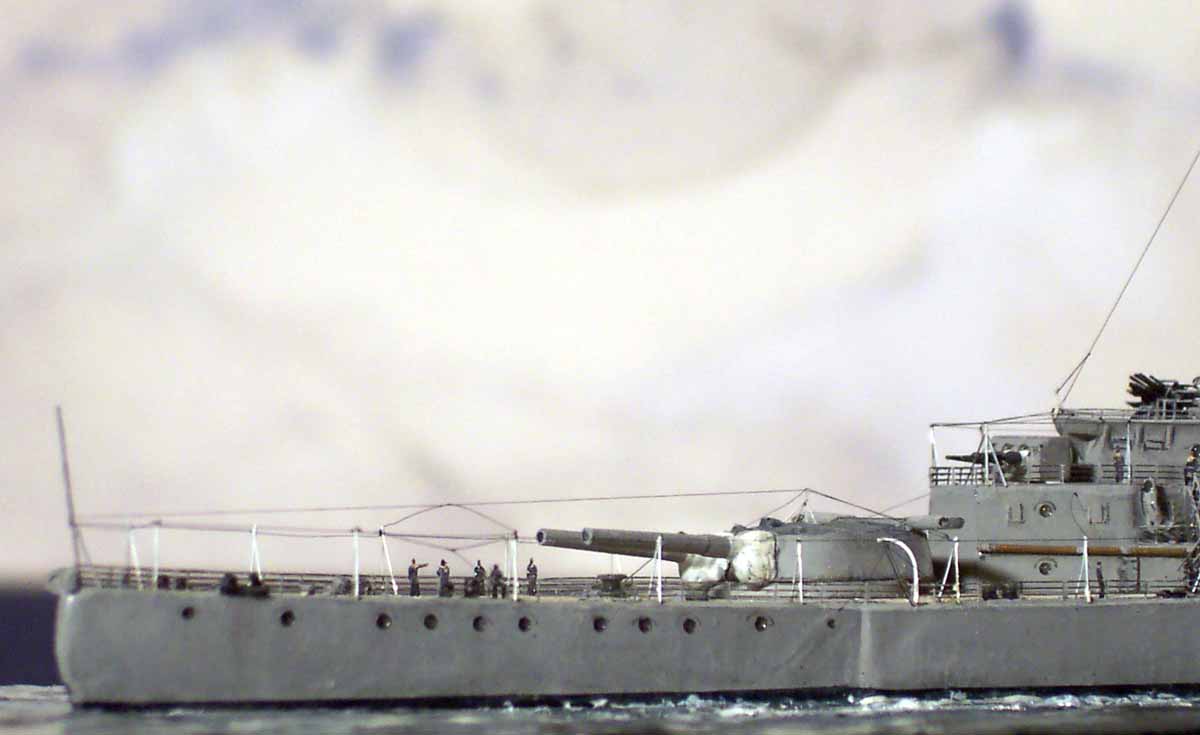
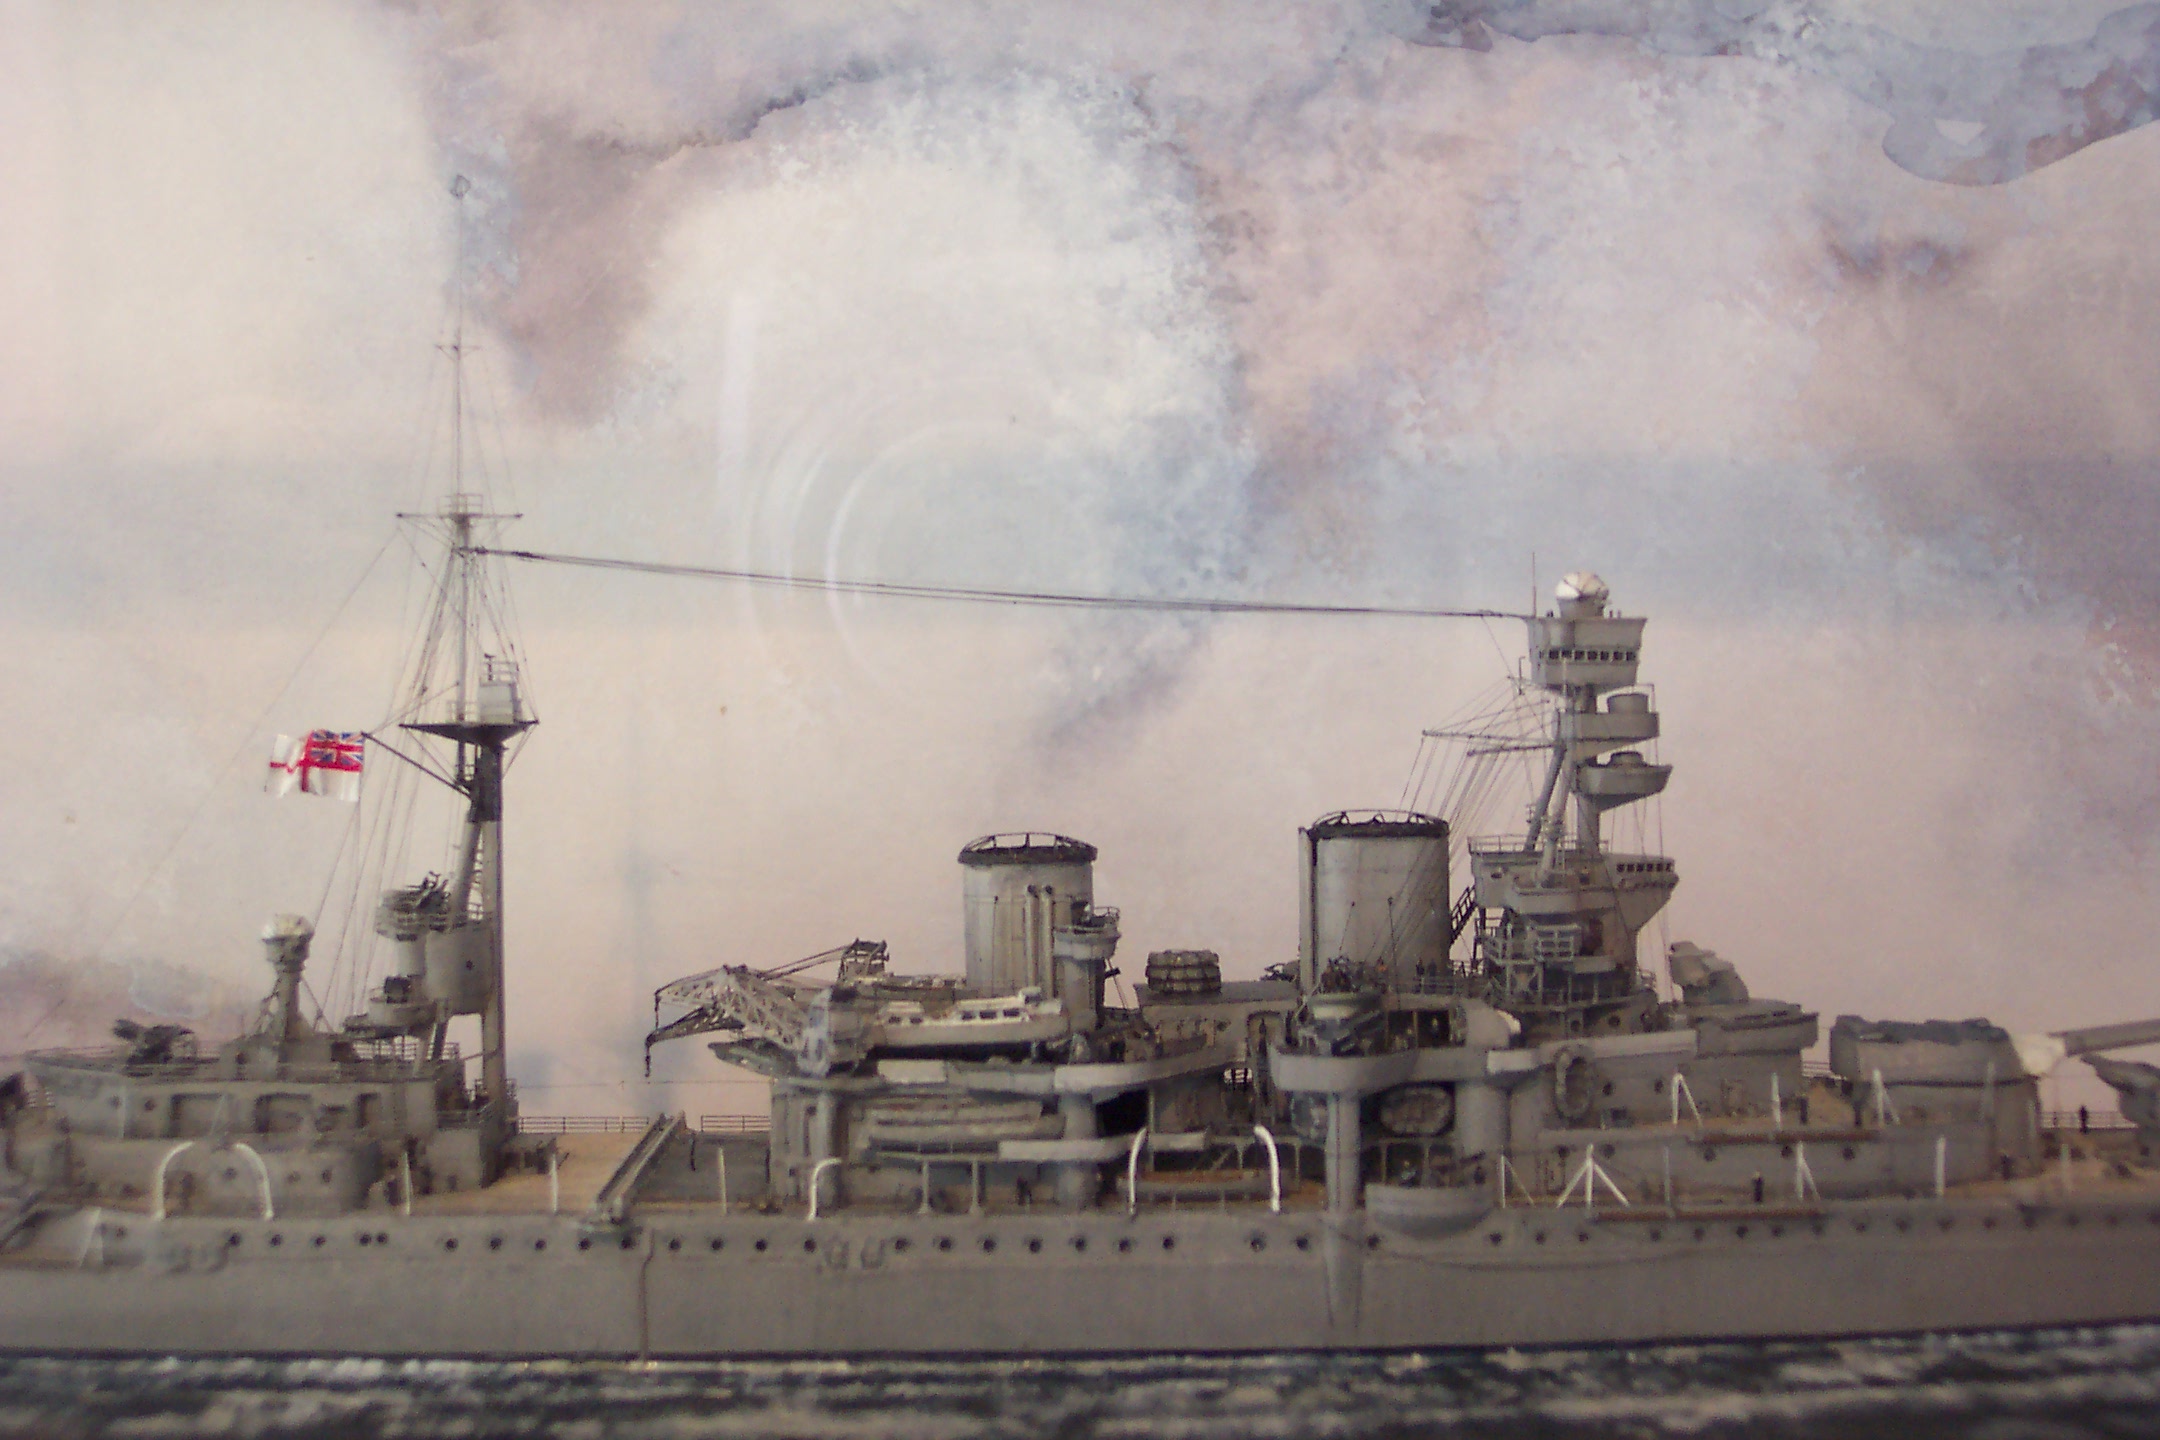
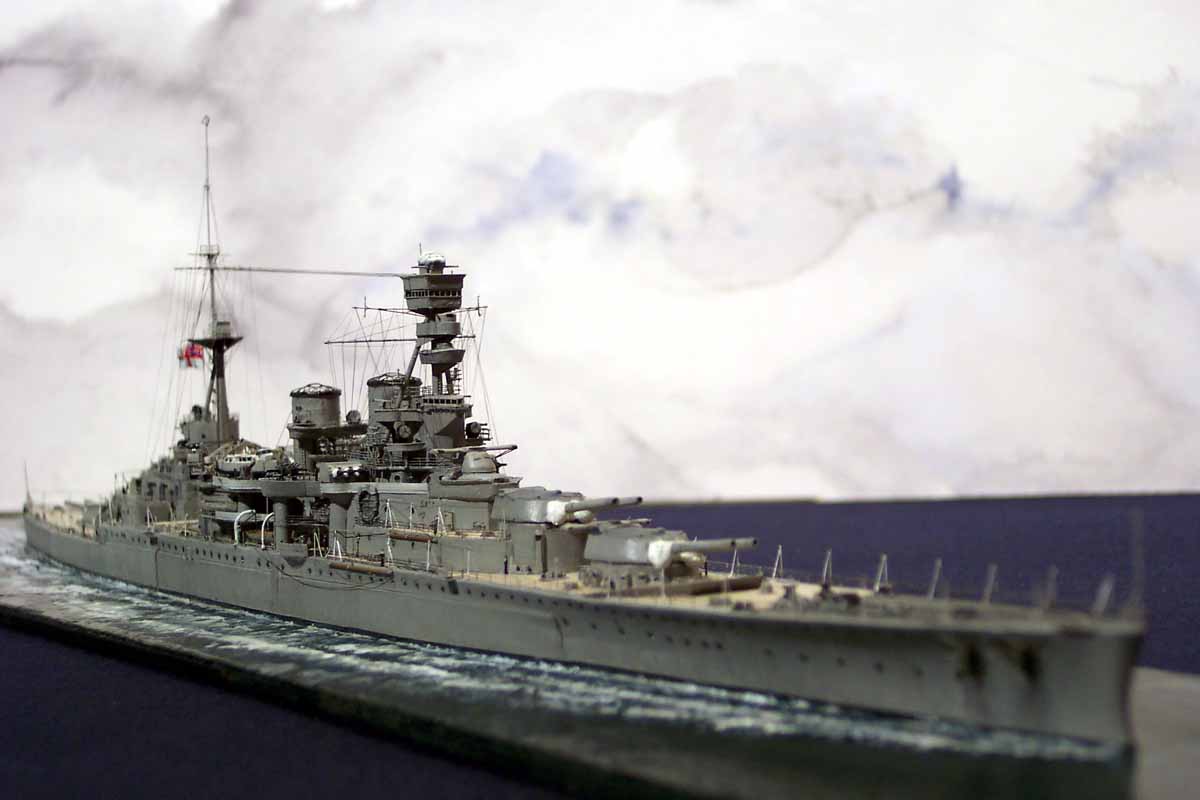
| Conclusion:
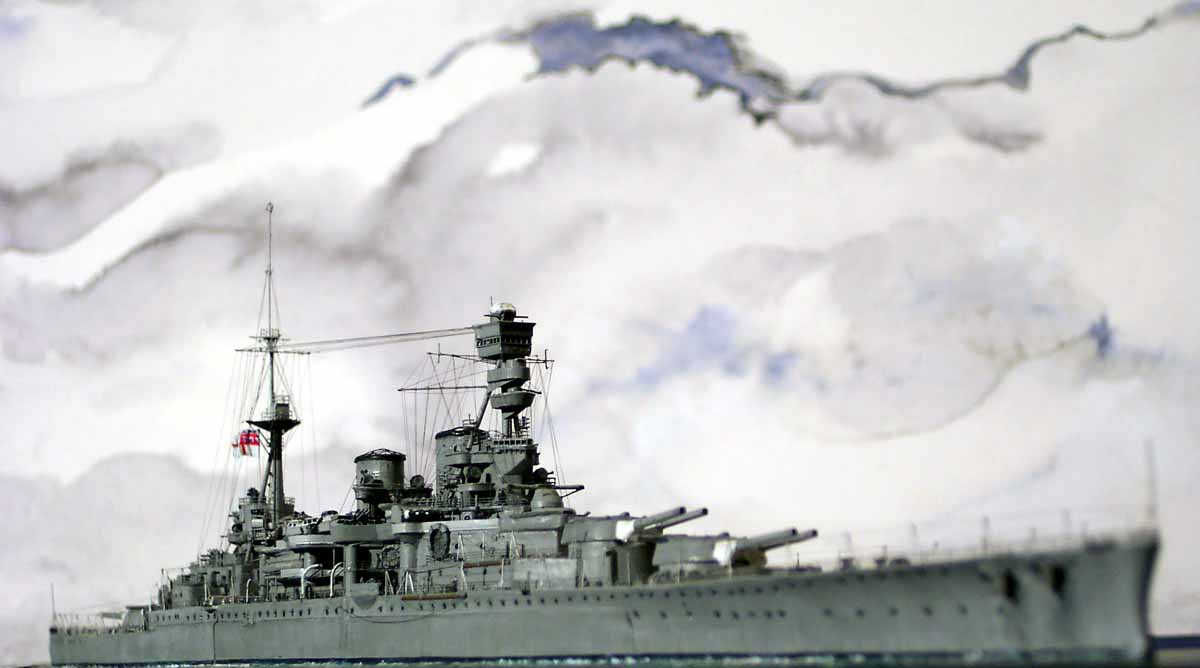
It is NOT my favourite ship model, as with the benefit of hindsight I can see lots of things I could and should have done differently; alas I now have moved on to my next challenge...... An interesting point that I have observed is the sheer size of the model compared with even large ships such as HMS Warspite and Royal Oak. This has an interesting effect in that the whole ship when put under my photo arc lights expanded slighly due to the heat generated in the room by the lights.... removing the lovely realistic sag I had succesfully managed to induce in the long sprue fore and aft antenna cables between the masts,!!! In the photos they look dead straight, perhaps I will re-photograph with a conventional 35mm camera with a long exposure in daylight....This has now been done!! |
|||||||||||||||