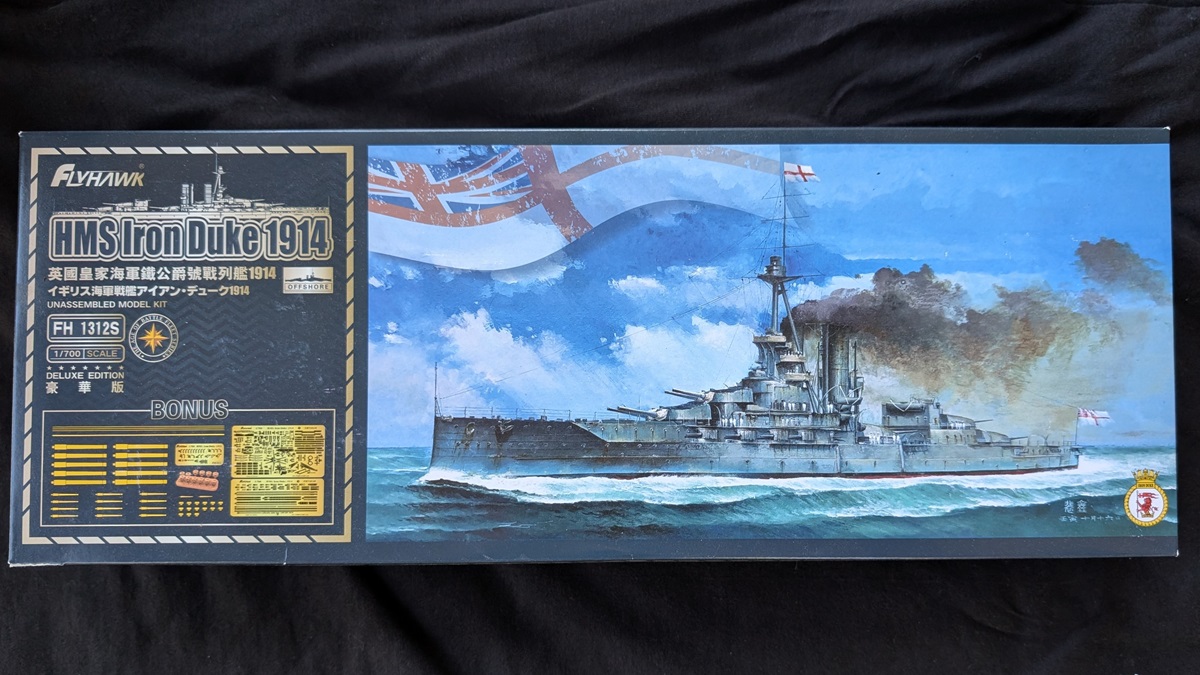
1/700 Iron Duke Deluxe FH1312S
|
Reviewed January 2026 |
|
Reviewed January 2026 |
| HISTORY | ||||||||||||||||||||||||||||||||||
|
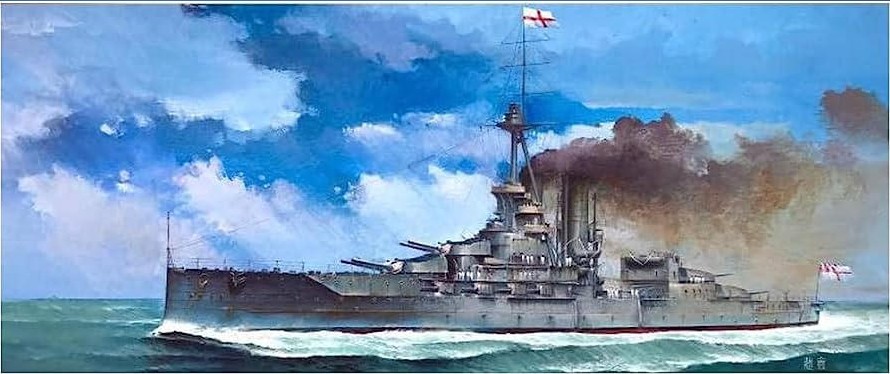
Design History: Iron Duke’s primary change from King George V was increasing the caliber of the secondary guns from 4” to 6”. This change was motivated by the increasing size of torpedo boats and destroyers, and the greater range of their torpedoes (and the retirement of Admiral Fisher, who frowned upon a heavy secondary battery in capital ships). Due to the increased weight of the 6” battery, the guns were mounted lower and closer to the waterline than the 4” guns on earlier ships. They suffered badly from spray and water ingress, with the lowest pair, mounted aft, being particularly unsatisfactory. The aft guns spend so much time submerged beneath the swell of the North Sea that they were relocated to higher positions in the forward superstructure in 1915. The length and beam of the hull were slightly greater than Orion and King George V to offset the increased secondary battery weight. An incidental benefit of the longer hull was that there was finally room on the congested deck for a proper heavy tripod spotting top, ahead of the smoke from the fore funnel. Atop this structure was the new main battery director, which was revolutionary fire control technology at the time. The admiral’s stern walk, which had been absent from recent British capital ships, returned in Iron Duke due to a reversion to a traditional ‘officers aft’ accommodation arrangement. The novel crew arrangement of earlier dreadnoughts, with officer quarters forward and ratings aft, was meant to house officers closer to their action stations. However, that arrangement proved to be awkward and unpopular with both officers and ratings. The Iron Duke class marked two other milestones. They were the first British battleships to mount anti-aircraft guns. A pair of 3” high-angle guns were positioned on the aft superstructure. They were also the last British battleships to burn coal. Ship History: Post war, Iron Duke survived the mass scrapping of the Washington Treaty but quickly went from one of the newest battleships in the fleet to one of the oldest. Soon considered obsolescent, the ship continued service as a battleship until 1931, when the London Naval Treaty required her removal from combat service. Her three sisters were disposed of, but Iron Duke was refitted as a de-militarized training ship. The ship had two turrets removed, along with some of her boilers and most side armor. A variety of smaller caliber guns were embarked for training purposes. By the beginning of WWII, Iron Duke had been reduced to a depot ship and floating AA battery. The ship was damaged by near-miss bombs and beached in October 1939. She was repaired but remained beached in the harbor for the remainder of the war. Iron Duke was officially struck from the registry in 1946 and scrapped in 1948. |
||||||||||||||||||||||||||||||||||
|
The Flyhawk Iron Duke The Kit There are 3 versions of the kit. The basic kit (FH1312) is predominantly injection molded. The Deluxe kit (FH1312S) adds the usual photo etch, as well as tuned brass gun barrels, turned brass deck vents and brass rod stock for some of the masts. If that’s not enough, there is the “Super-Deluxe” kit (FH1312S-SET). That kit has all the Deluxe parts, plus a wood deck, a pre-cut deck paint mask, a display base and a name plate. I would have liked to purchase the paint mask separately, but an email to Flyhawk confirmed that all the super-deluxe items are only available as part of the most expensive kit. This review sample is the mid-grade “regular” Deluxe model. I purchased this kit in early 2025 from Squadron at a price of $63. Of course, as of this writing (November 2025) the tariff situation has made pricing and availability in the US somewhat unpredictable. Note: I have built the similar Flyhawk Agincourt, so some of my comments are based on experience with that kit. Packaging Dimensions This is a waterline kit, so only the waterline length can be verified. I measured by dry fitting the hull halves and waterline plate. The result is:
Source: British Battleships of World War I by R.A. Burt Both are within half a millimeter of the re-scaled official dimensions, which is quite good in my book. Of course, the waterline dimensions would have changed on the real ship depending on how deep it was floating, which could be quite variable. |
||||||||||||||||||||||||||||||||||
|
||||||||||||||||||||||||||||||||||
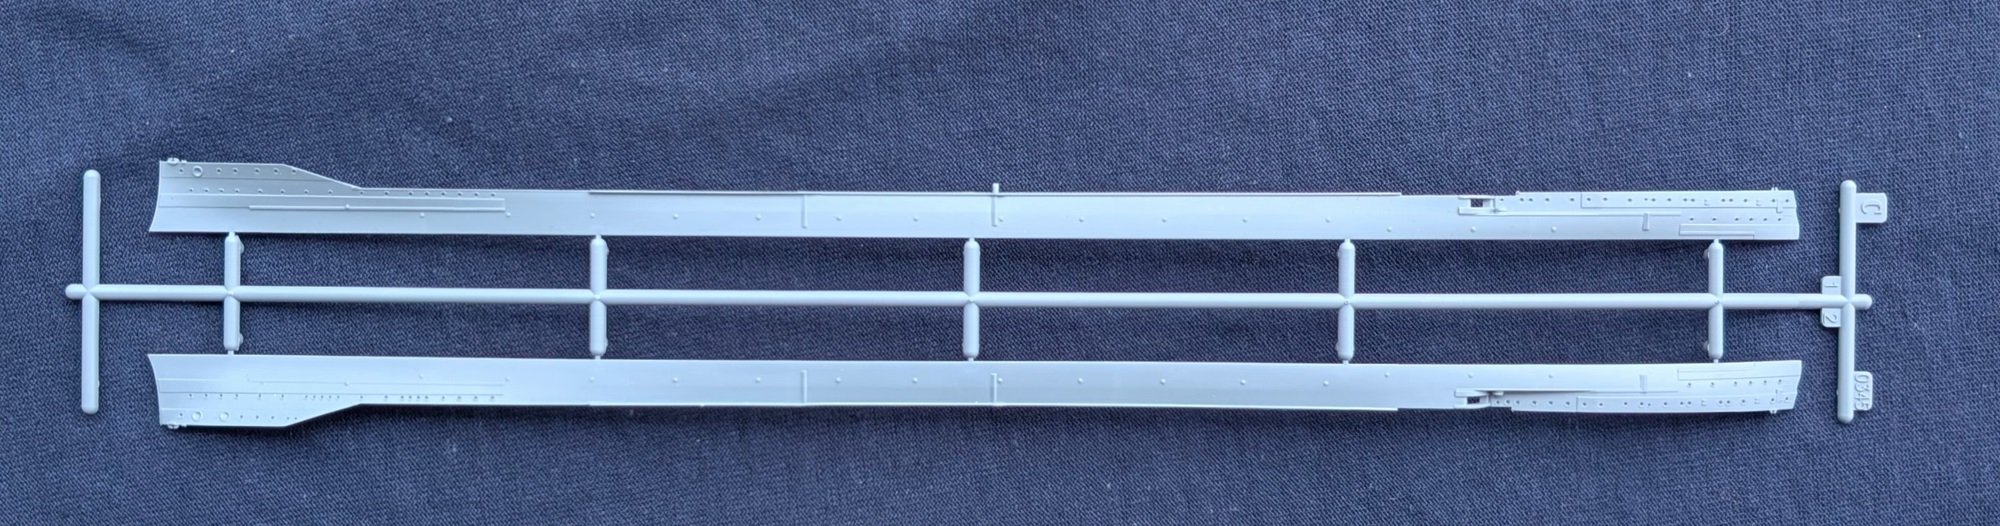
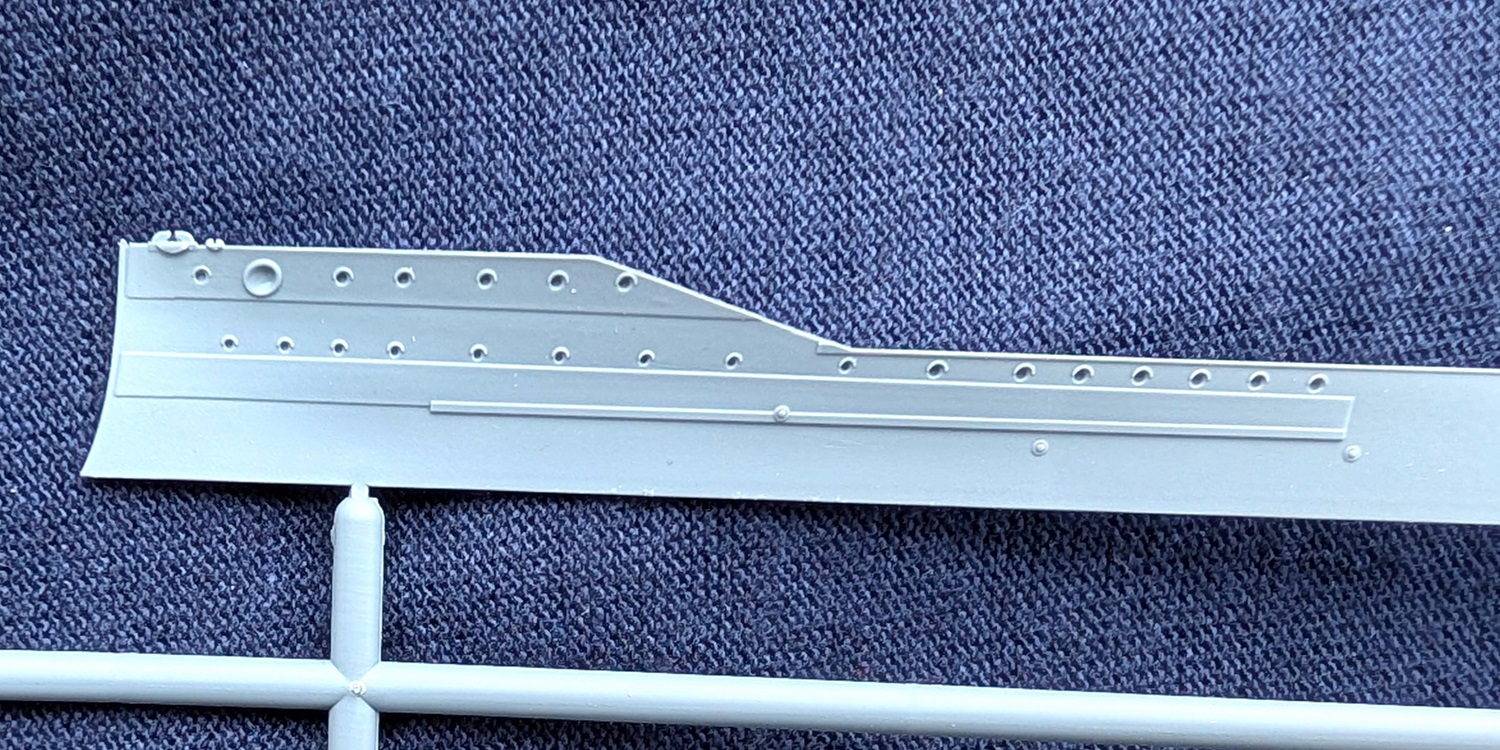
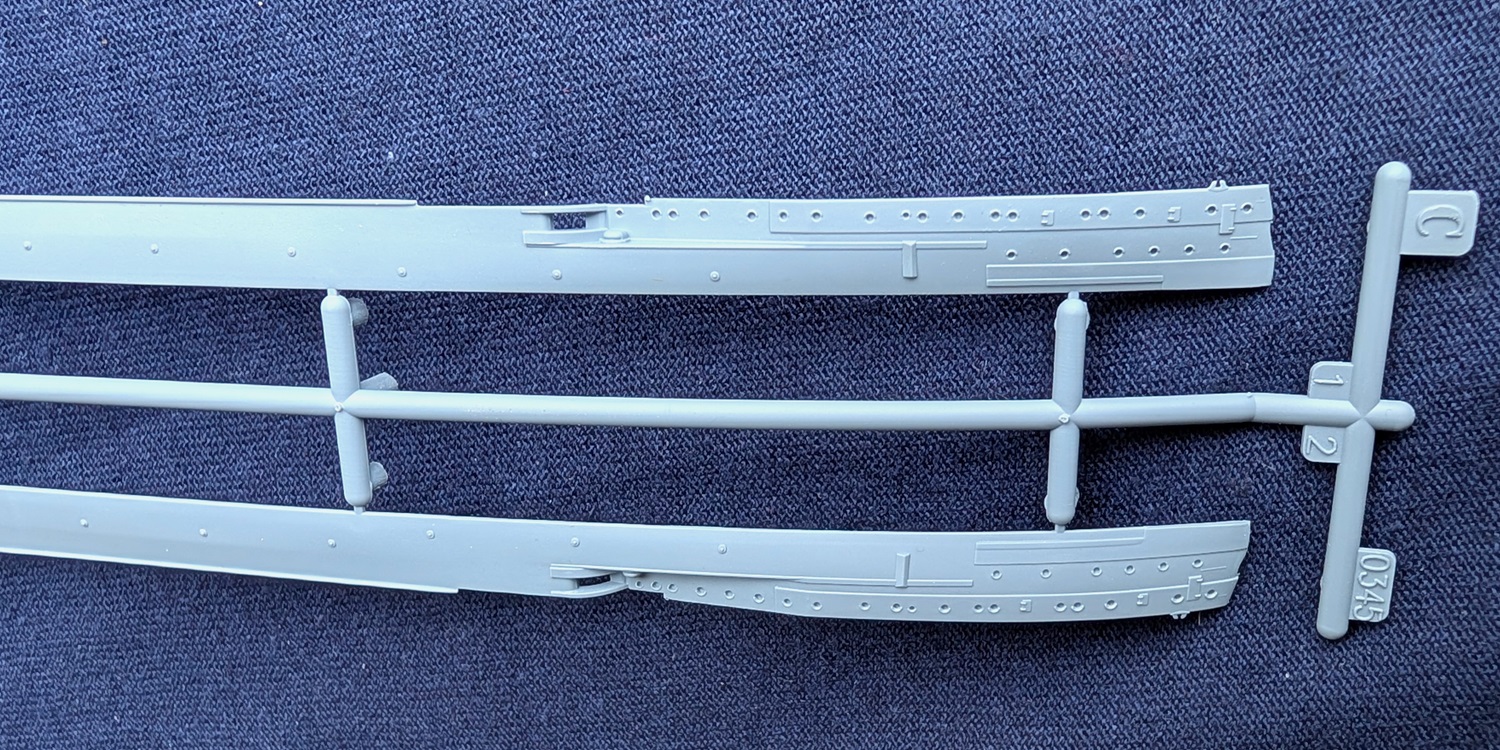
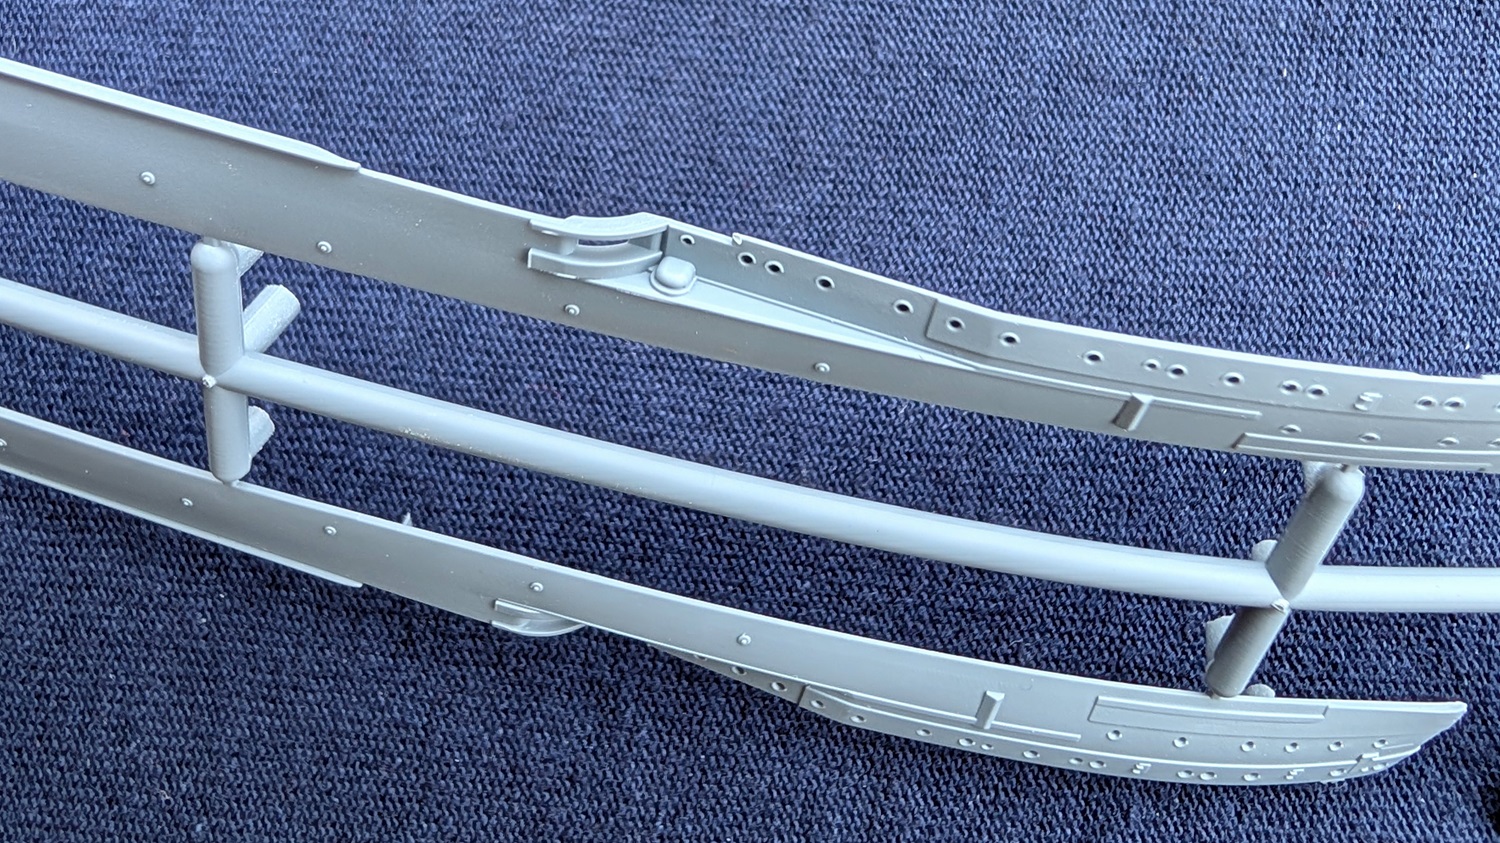
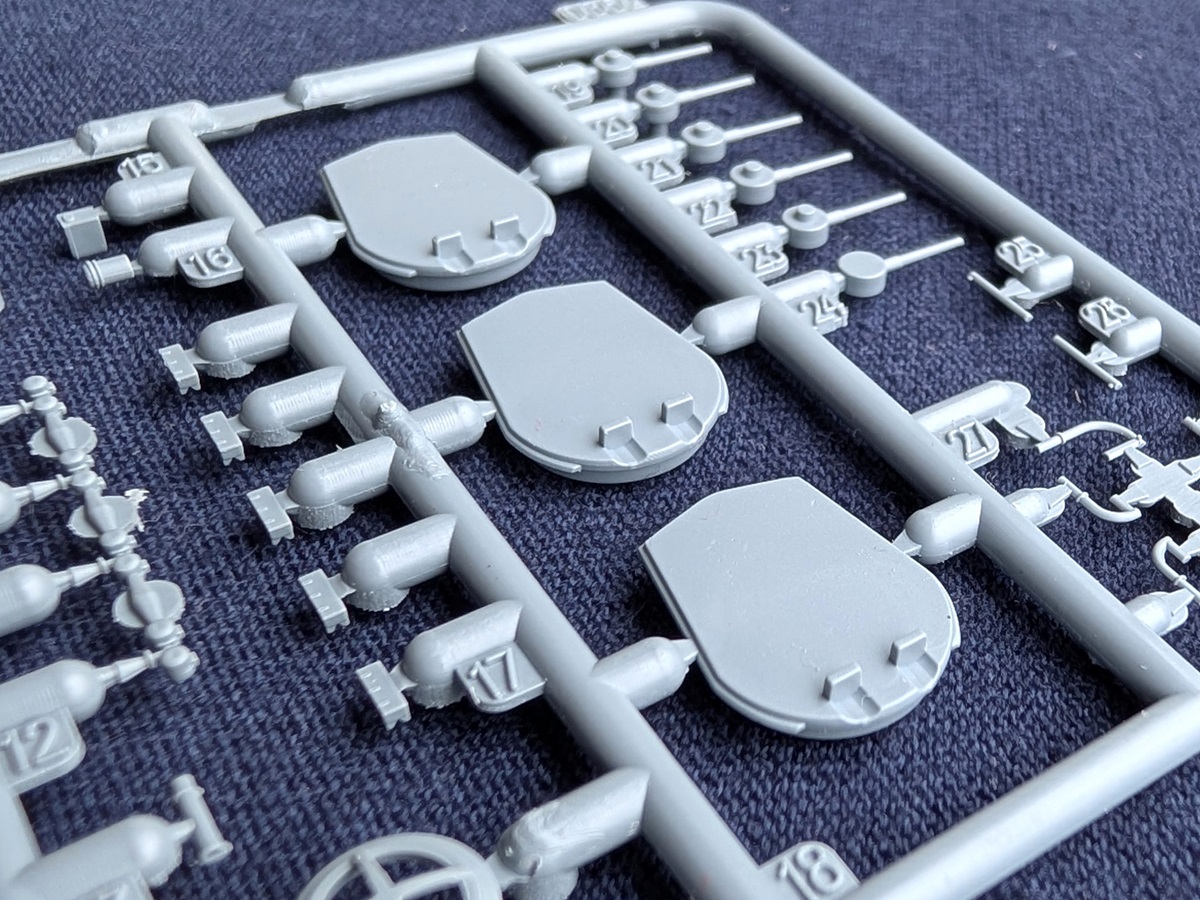
| SPRUES C - HULL SIDES |
|
|||||||||||||||||||||||||||||||||
|
As with other Flyhawk WWI battleships (and unlike their WWII kits), Iron Duke is waterline only. The hull is 2-piece, split port and starboard. The recessed portion of the hull sides around the forward 6” battery are not part of these pieces but are molded with the foredeck. The hull sides are very flexible in the lateral direction, presumably with the intention that they will conform to the profile of the deck and waterline plate when assembled. The shape overall appears to be correct. Flyhawk has properly depicted the slight tumblehome (inward sloping) of the ship’s sides. Some hull plate seams are molded into the sides. To me, this surface detail is a bit too prominent, though not as egregious as some other recent kits. The seams are visible in photographs of the real ship, and the kit pattern seems to match what can be seen on the real ship. The scuttle eyebrows are molded in and very nicely done. |
||||||||||||||||||||||||||||||||||
|
||||||||||||||||||||||||||||||||||
|
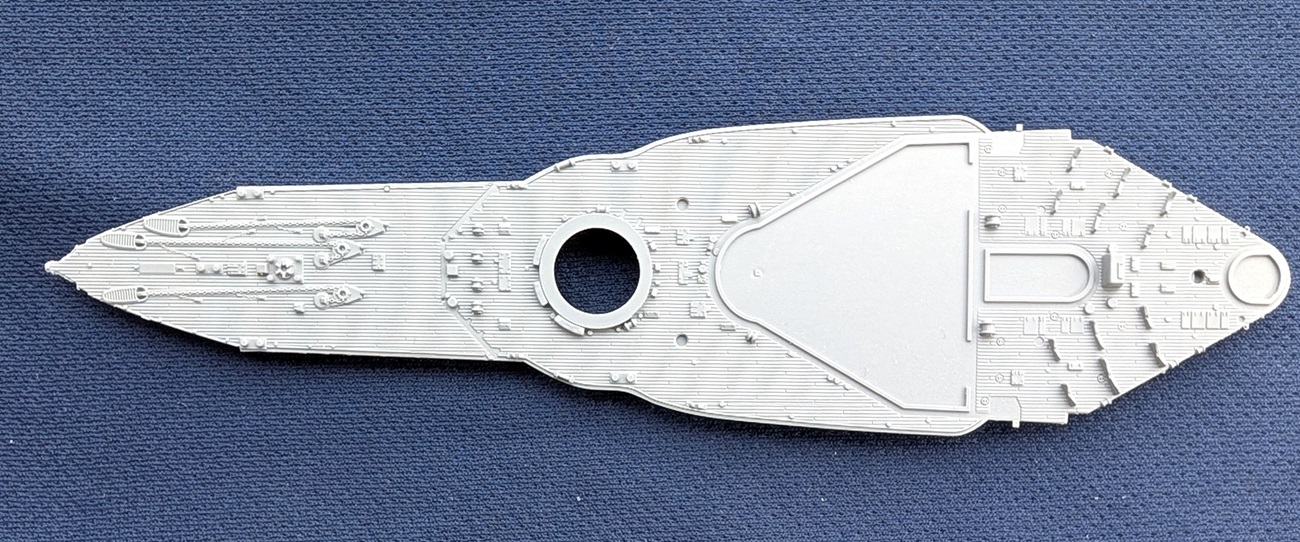
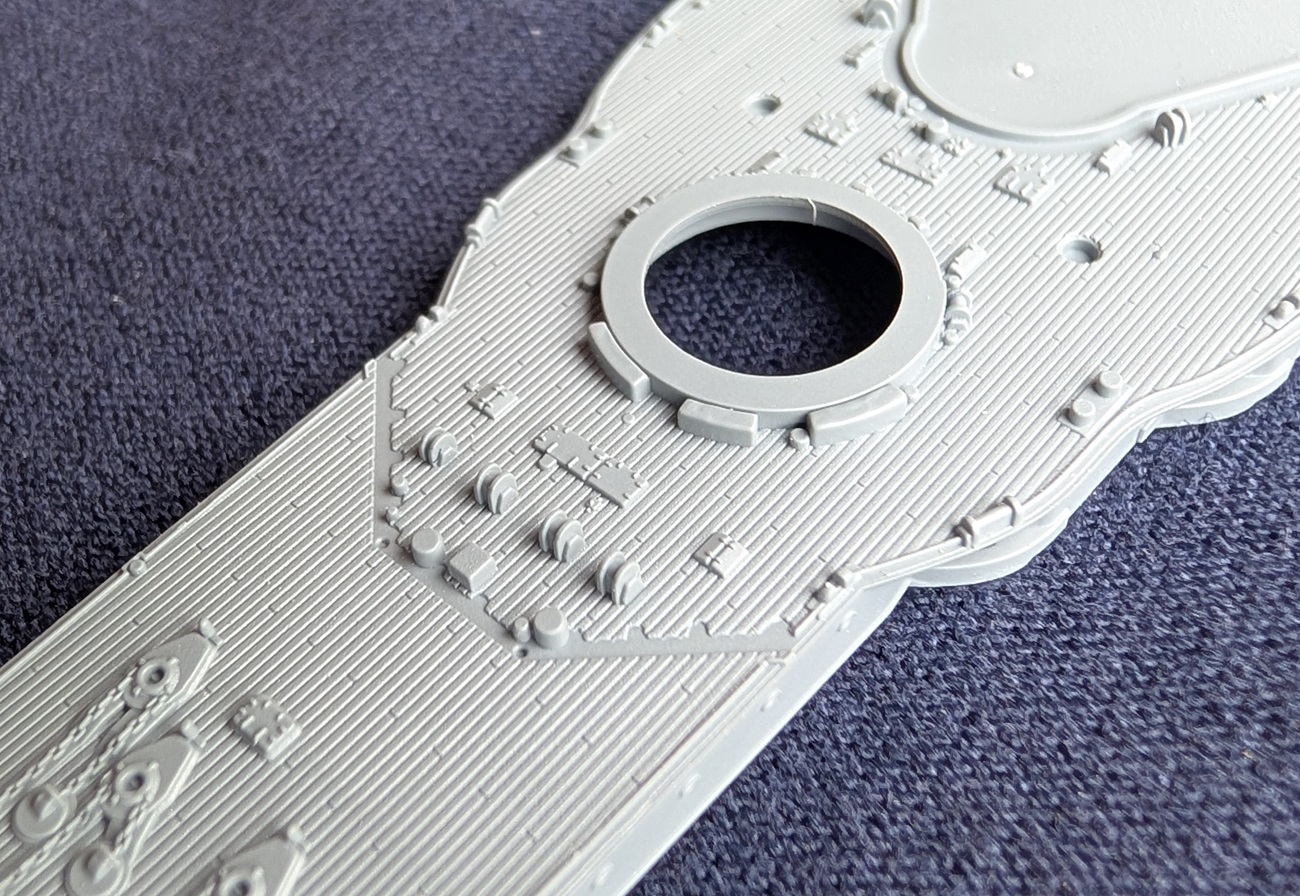
SPRUE P/A- DECKS |
||||||||||||||||||||||||||||||||||
|
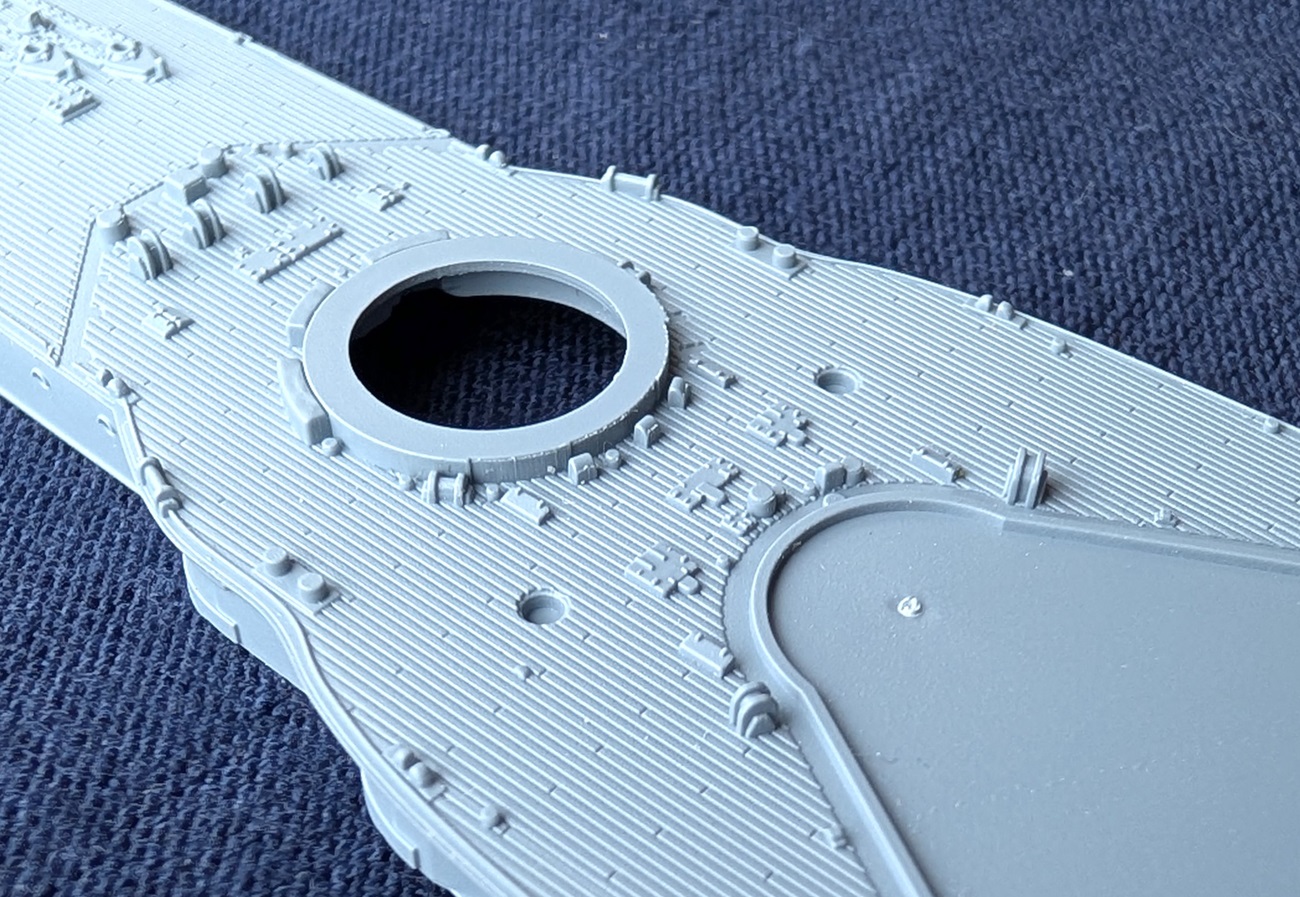
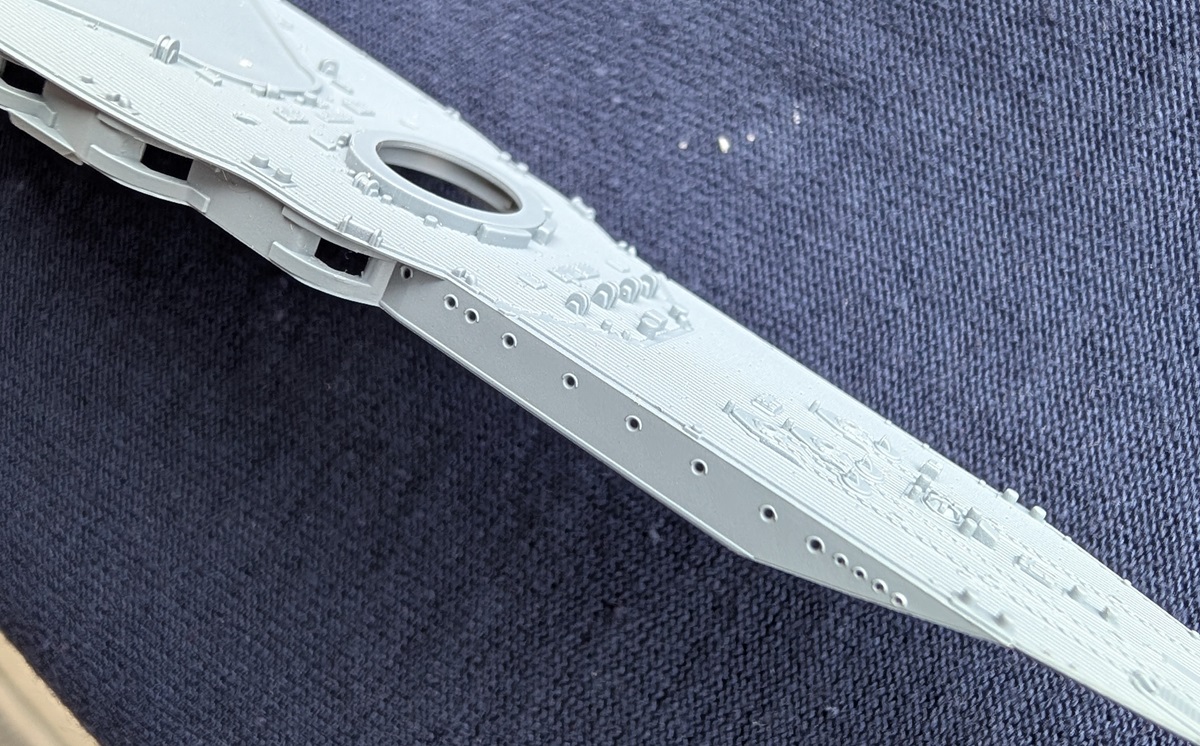
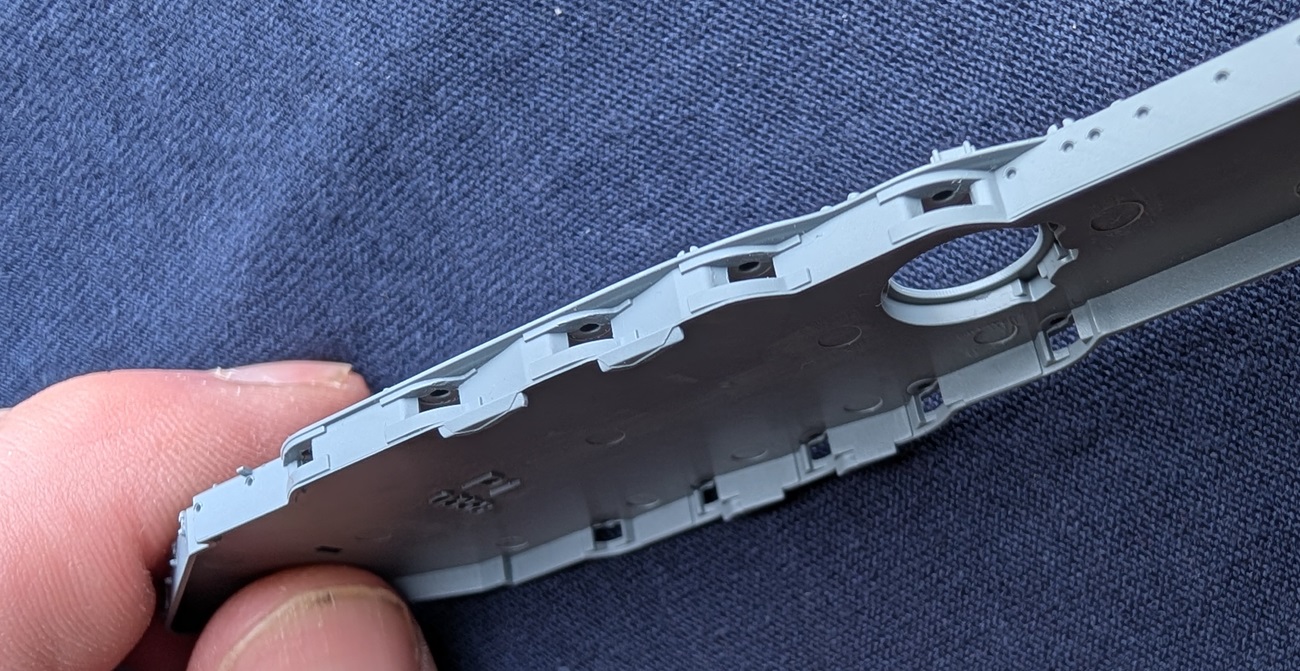
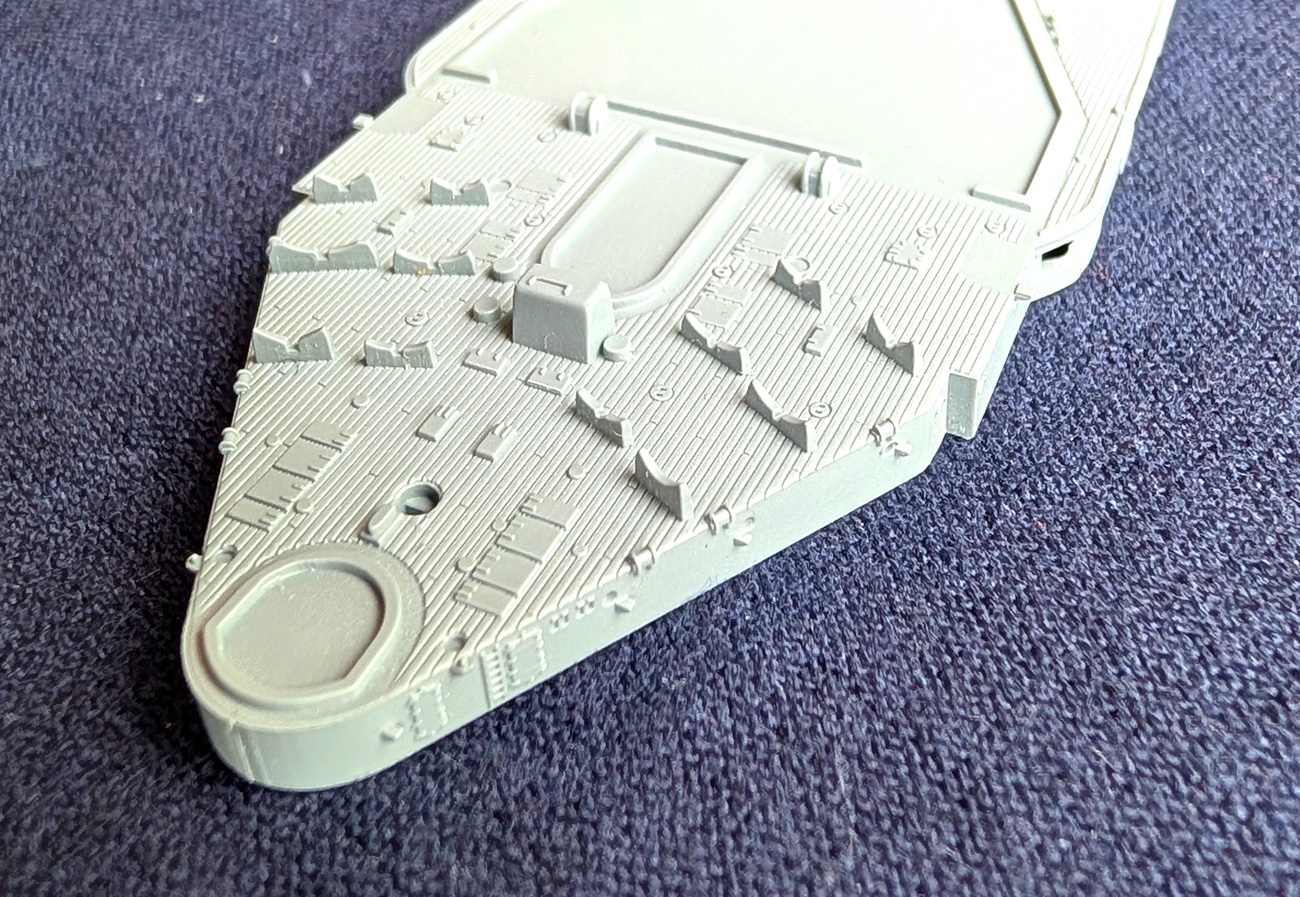
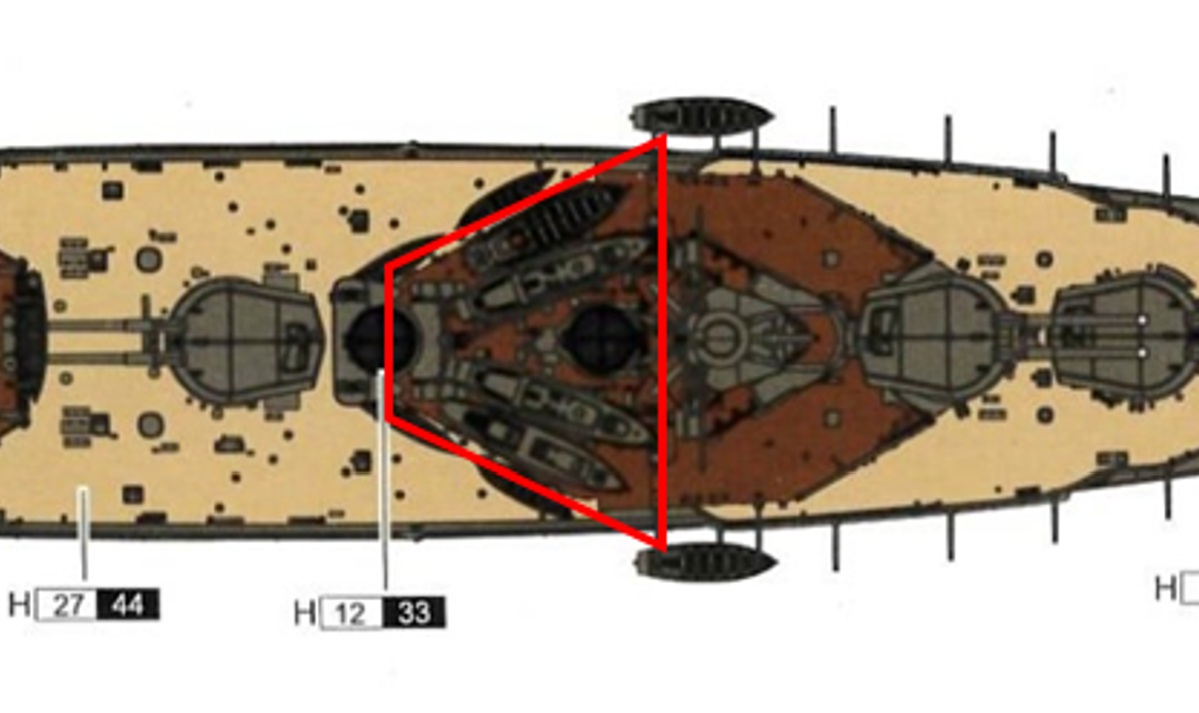
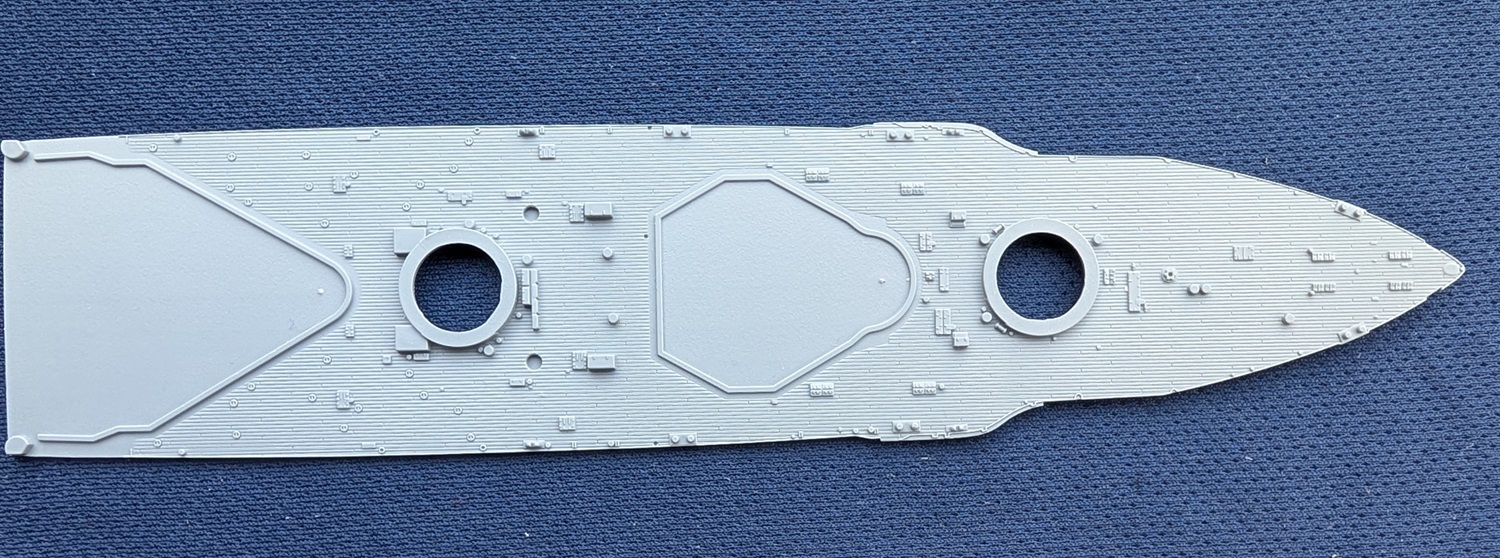
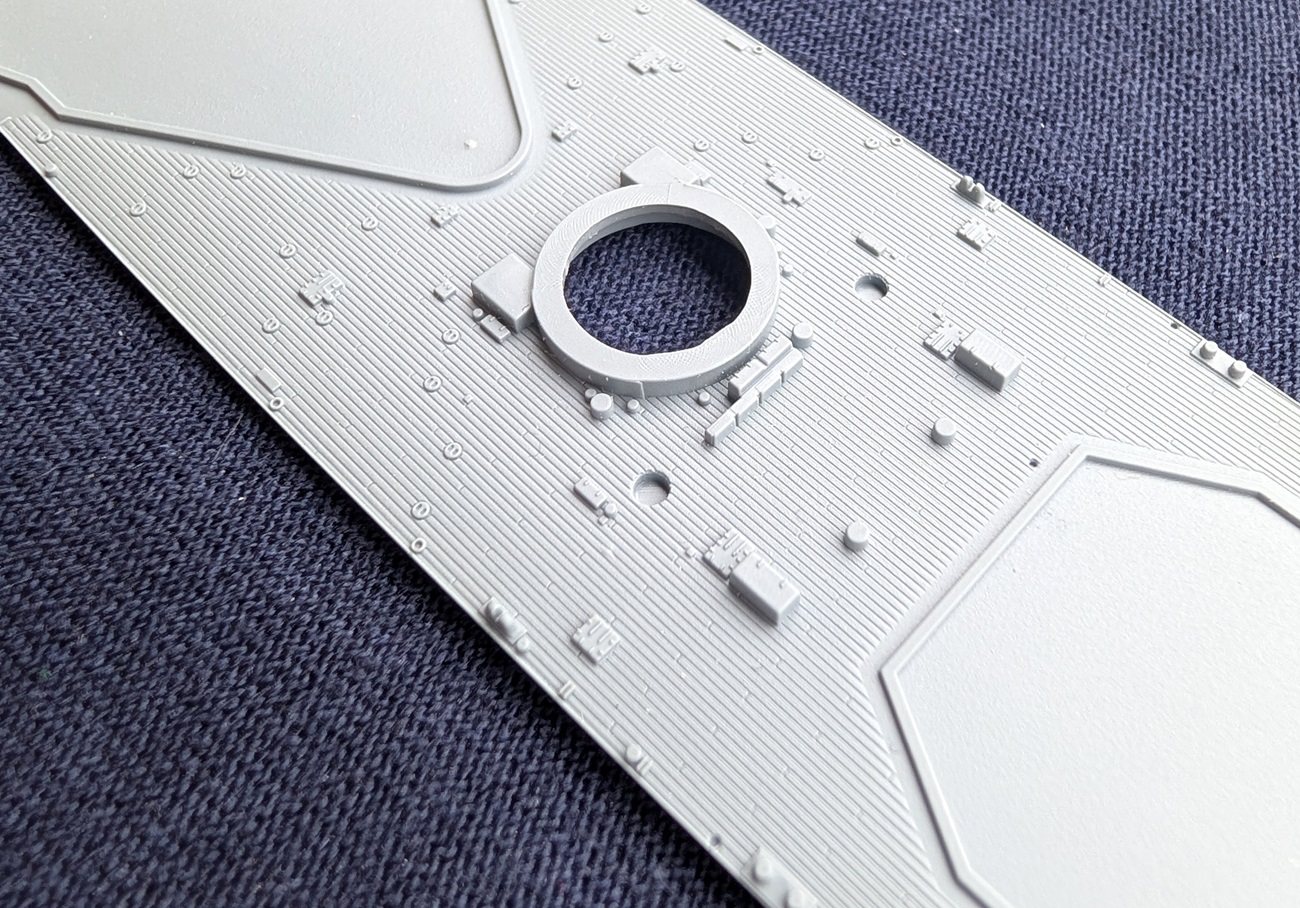
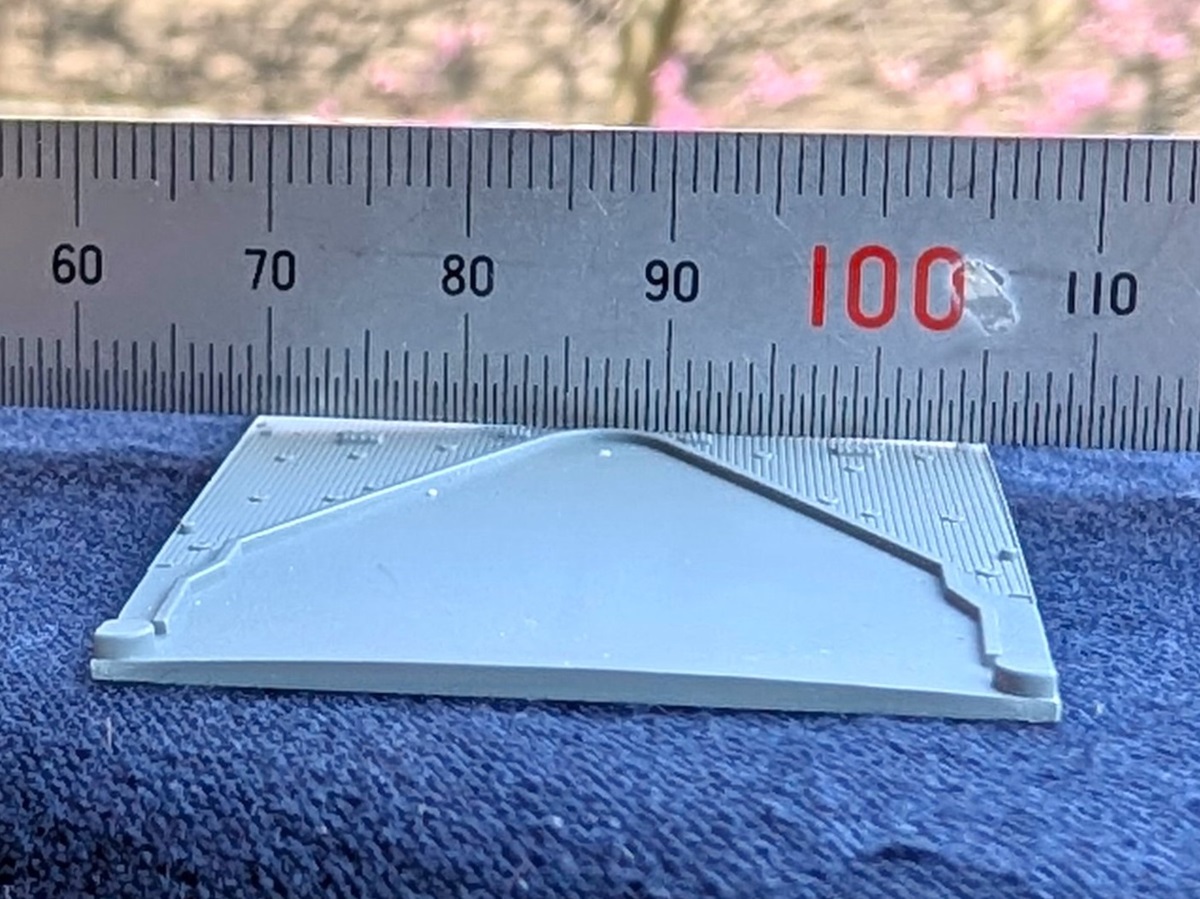
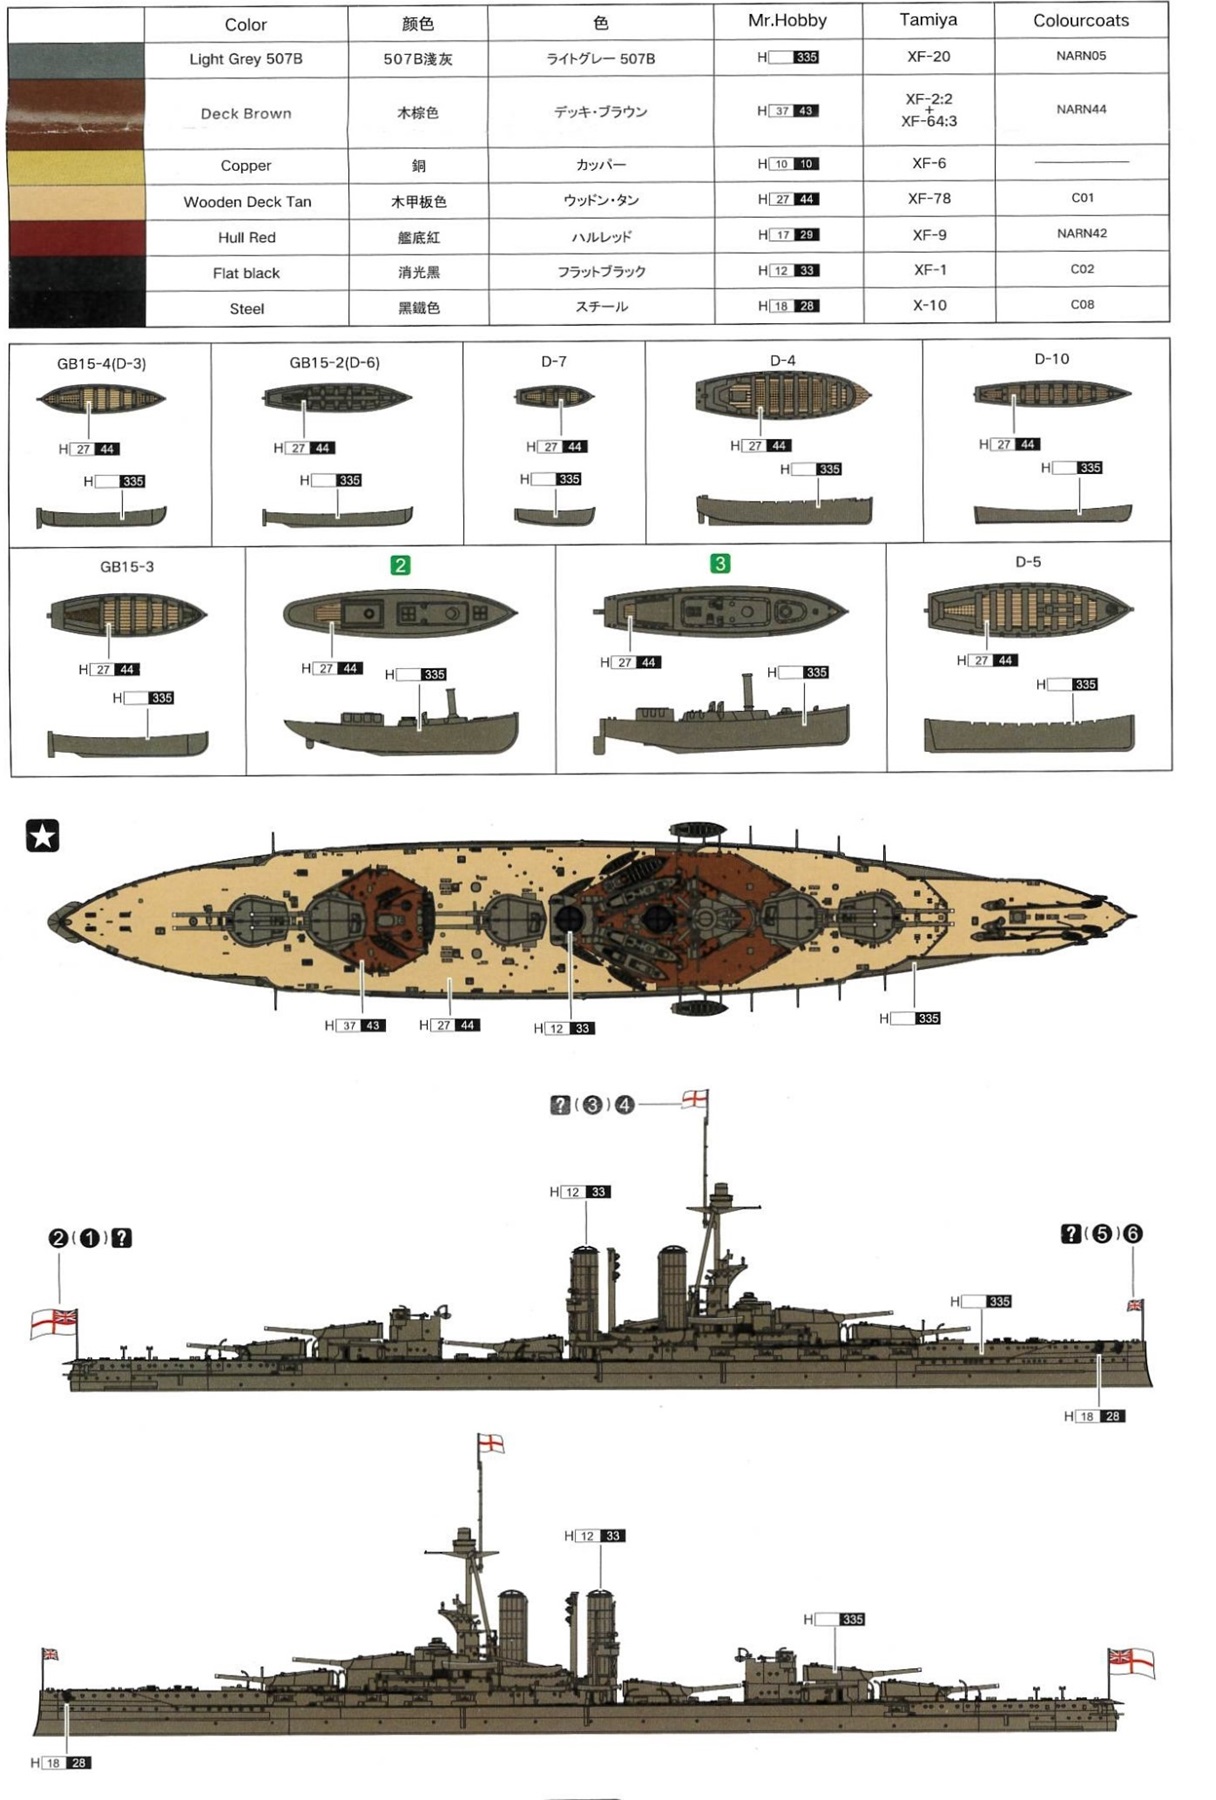
Iron Duke had a raised forecastle, so the deck is split into two pieces. The foredeck incorporates the sides of the hull around the casemates, as well as the vertical bulkheads that separate the foredeck from the lower quarterdeck. Flyhawk has reproduced the subtle camber across the deck (The downward slope from the middle to the outer edge of the decks, which allowed water on the deck to shed over the sides). It is hard to photograph, but I tried to show this in pictures with a straightedge. Deck hatches are finely detailed and sharp. Many small details such as cable reels, vents and boat cradles are molded with the deck. They are generally well rendered for plastic, although the vents are chunky and shapeless. Super-detailers can replace these parts, including the vents, with more intricate parts from the deluxe set. However, because these details are molded with the deck, this will involve a lot of trimming. To my eye, the planking is well done – noticeable but not overly exaggerated. The sea chests and other hatches and doors are well rendered. The design of the fit between the deck and hull sides is, in my opinion, better than the similar Flyhawk Agincourt. The Agincourt deck and hull had tapered edges where they made contact, without any positive stop. This made it difficult to get the deck height exactly right. The Iron Duke kit has a more conventional square stepped mating surface between deck and hull sides. This method should make it easier to get the correct deck height relative to the hull. When building Agincourt, I learned the hard way that having the deck height a little off causes fit issues at the vertical break between the forecastle and quarterdeck. The depiction of the 6” battery is also different than Flyhawk’s Agincourt, which molded the exterior shutters into the hull in the closed position. This meant the actual casemates were permanently ‘hidden’ from view (technically they didn’t exist in the kit at all) and the 6” battery could only be portrayed in the stowed position. The Iron Duke kit does not mold the shutters with the hull. Instead, the casemates themselves are exposed, complete with gun mounts that can be traversed to any position. The shutter doors are now separate photo etch as part of the deluxe kit and can be depicted either open or closed. For the deluxe kit, this is a much better arrangement, although the base kit doesn’t seem to include the shutters at all. For the rivet-counters, (or more pedantically, plank-counters), an apparent discrepancy between the painting instructions and the molded foredeck reveals a minor dilemma, for it seems the ship has a few planks too many! The portion of the foredeck deck behind the forward superstructure, where most of the boats are situated, has molded wood plank detail. However, the painting instructions indicate this area is to be painted “deck brown” like the upper platform levels, suggesting it is Corticene i.e. NOT planked. (Corticene is a linoleum deck surface, similar to the deck surface of Japanese warships in WWII). The overhead drawing from R.A. Burt’s British Battleships of World War I does not shade it as either wood OR Corticene. The original as-fitted plans I have found online are hard to interpret but show no indication of planking in this area. Photo evidence is scant but seems to indicate this area is not planked, and darker than the wood decks (source: photo of Iron Duke in 1939 with boats removed, and the famous photo of Admiral Jellicoe vaulting up the stairs to Iron Duke’s foredeck). The Jellicoe photo suggests that it may not be Corticene either, as there is no sign of any tie-down strips in the visible area. Color photos of a contemporary (c. 1924) model of Iron Duke by Norman Ough, who has a high reputation for accuracy, seems to have the boat deck painted dark gray. In the absence of any further evidence, I will probably go with the gray when I build it. It seems clear that the molded planking on the boat deck in the kit is incorrect. Side note – Thanks to those in the Iron Duke CASF forum who helped shed light on this detail! |
||||||||||||||||||||||||||||||||||
|
||||||||||||||||||||||||||||||||||
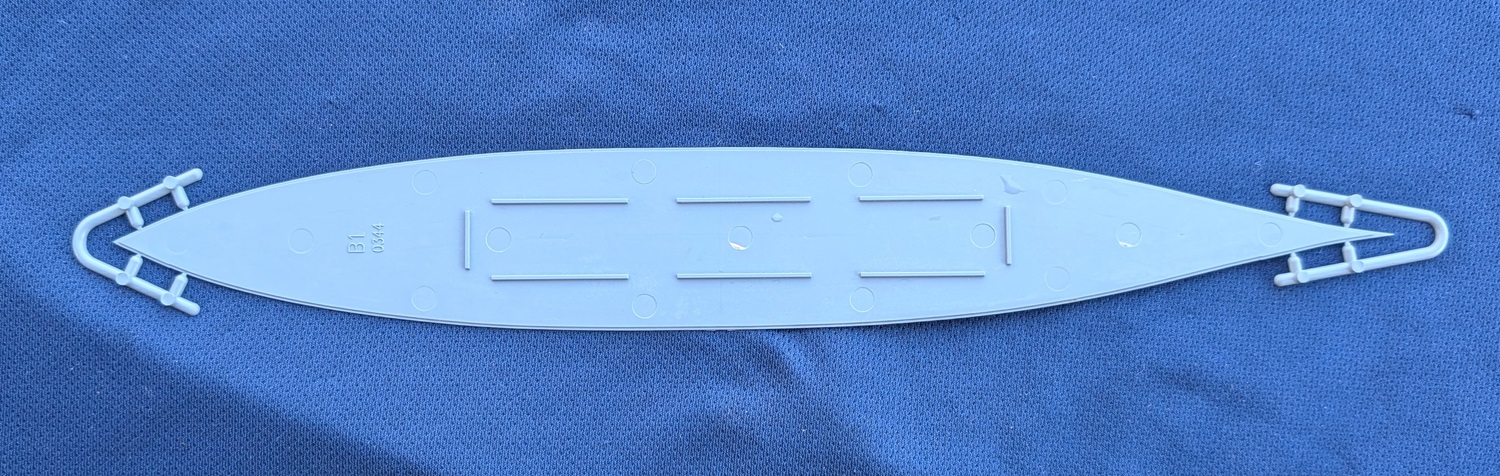
| SPRUE B - WATERLINE BASE | ||||||||||||||||||||||||||||||||||
|
Another change from earlier Flyhawk kits is that the waterline base is meant to sit completely inside the hull sides, rather than underneath. This eliminates a visible seam. The kit includes the obligatory waterline kit ballast, a metal bar that mounts to the plate. |
||||||||||||||||||||||||||||||||||
|
||||||||||||||||||||||||||||||||||
| SPRUE D | ||||||||||||||||||||||||||||||||||
|
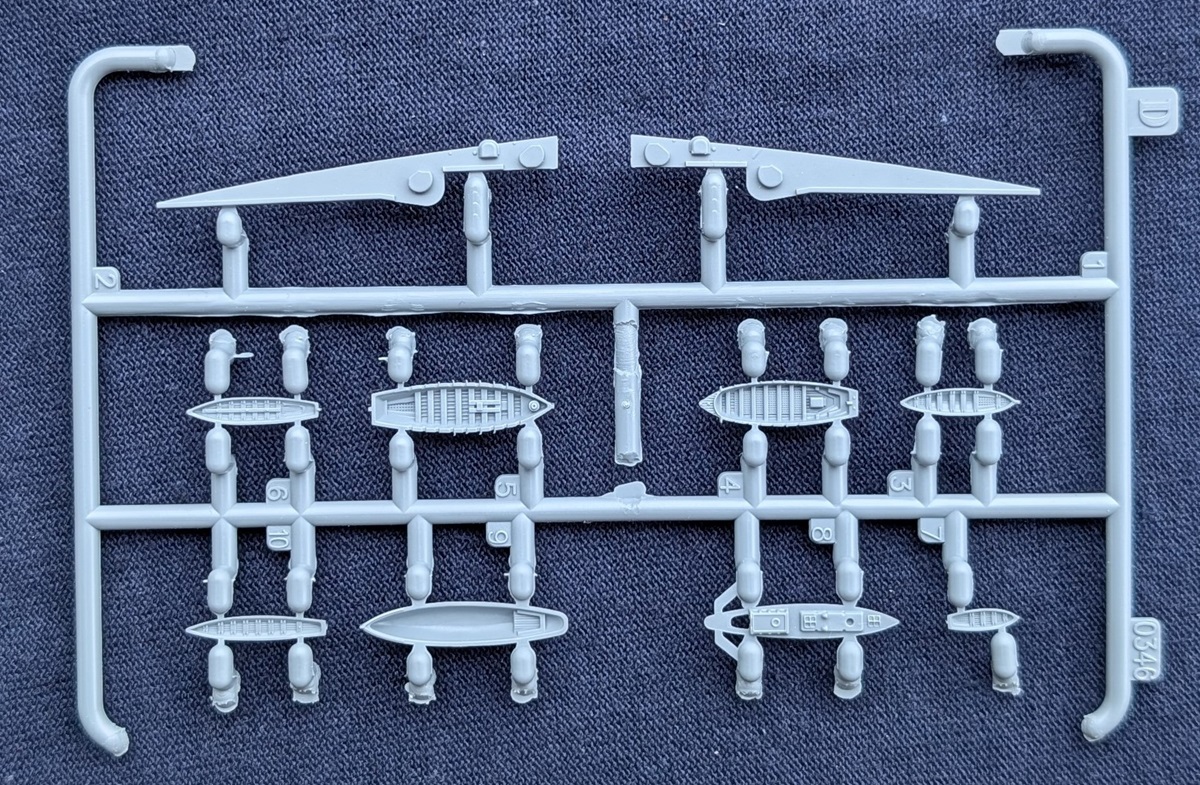
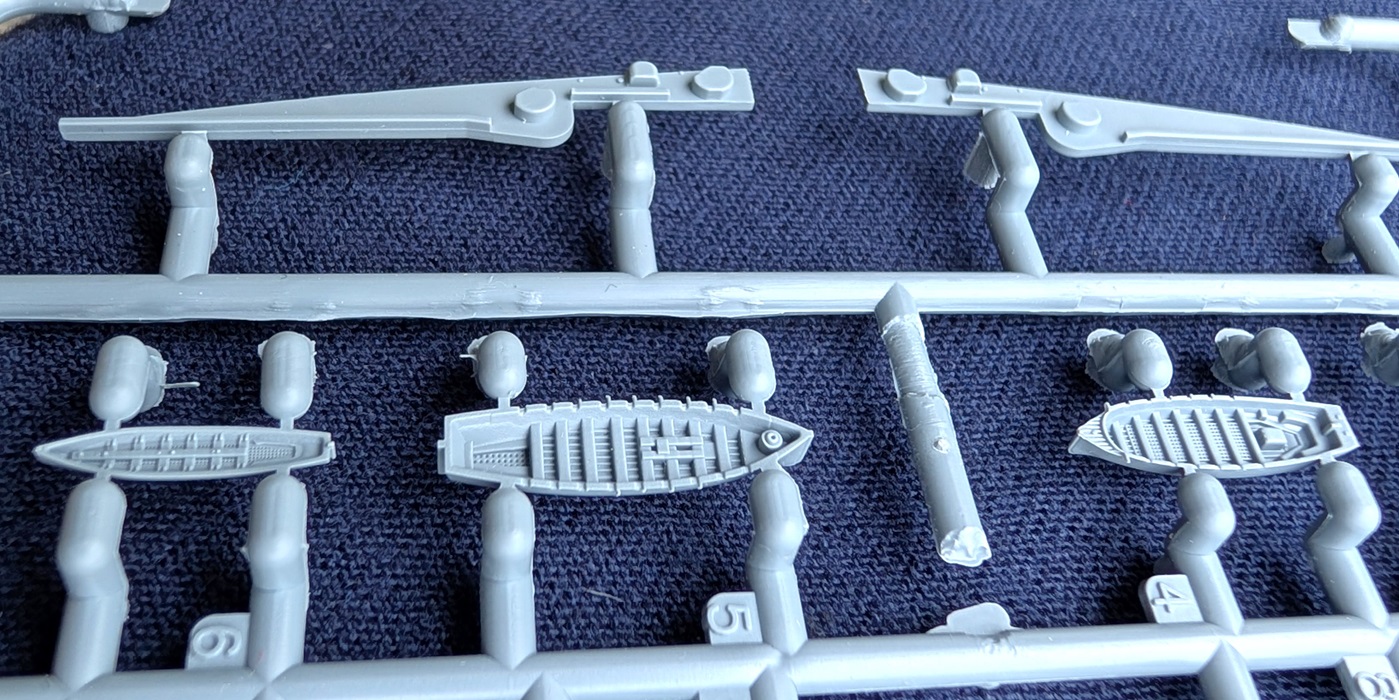
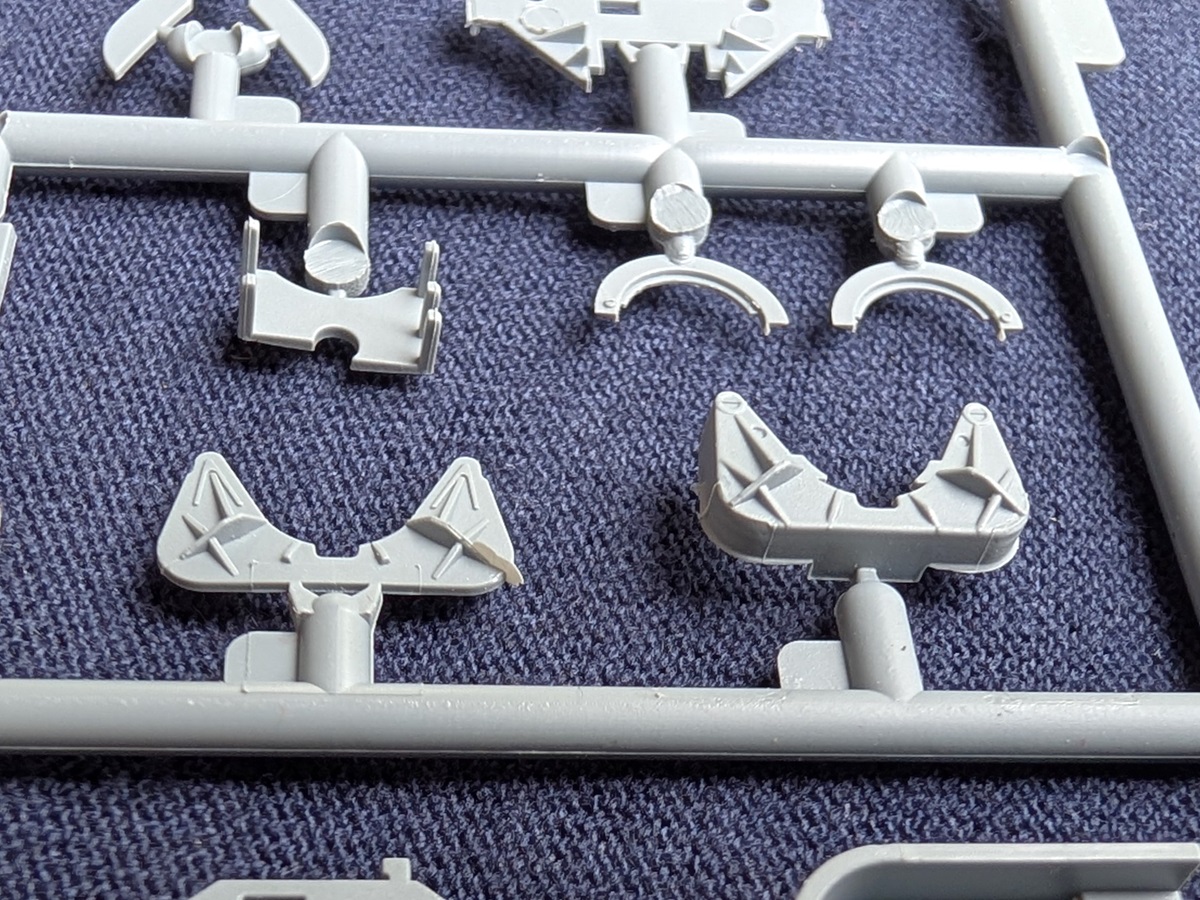
This contains some small boats, and strakes that fill the horizontal space left where the forecastle is recessed for the 6” battery. The two foremost 6” guns on each side are sandwiched between these pieces and the forecastle deck. The boats are sharp and very detailed for molded parts, though there was some mild flash. Note that what appears to be deliberate detail on the sides of some boats in the pictures is actually flash. |
||||||||||||||||||||||||||||||||||
|
||||||||||||||||||||||||||||||||||
| SPRUE E | ||||||||||||||||||||||||||||||||||
|
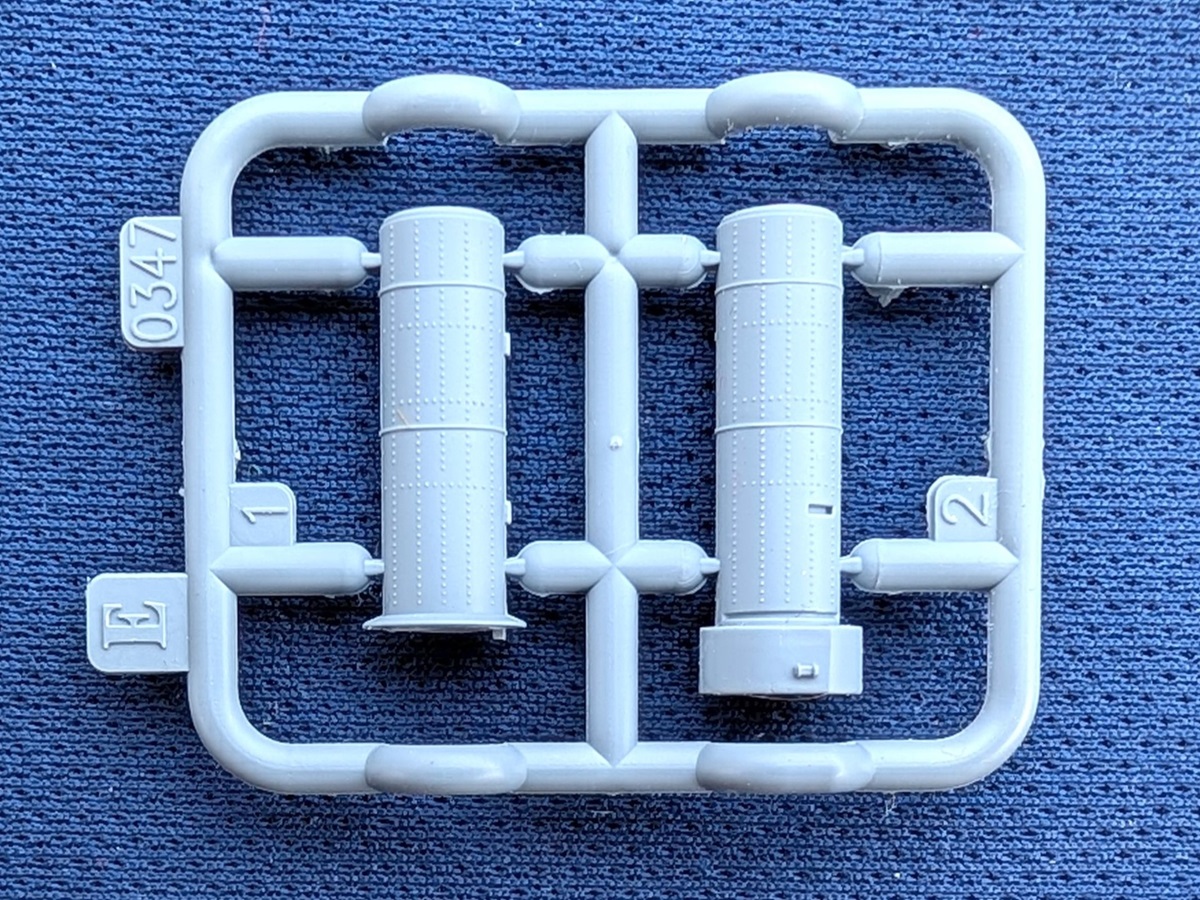
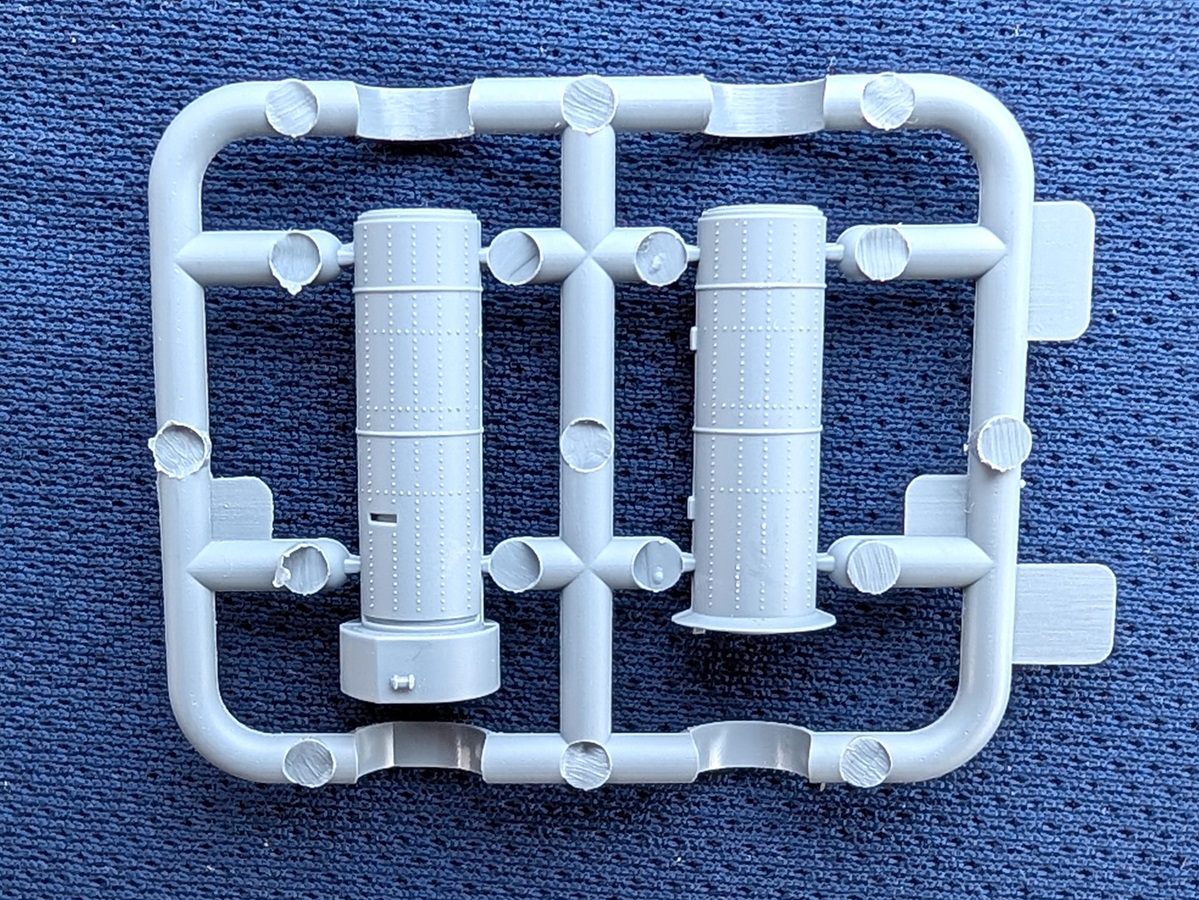
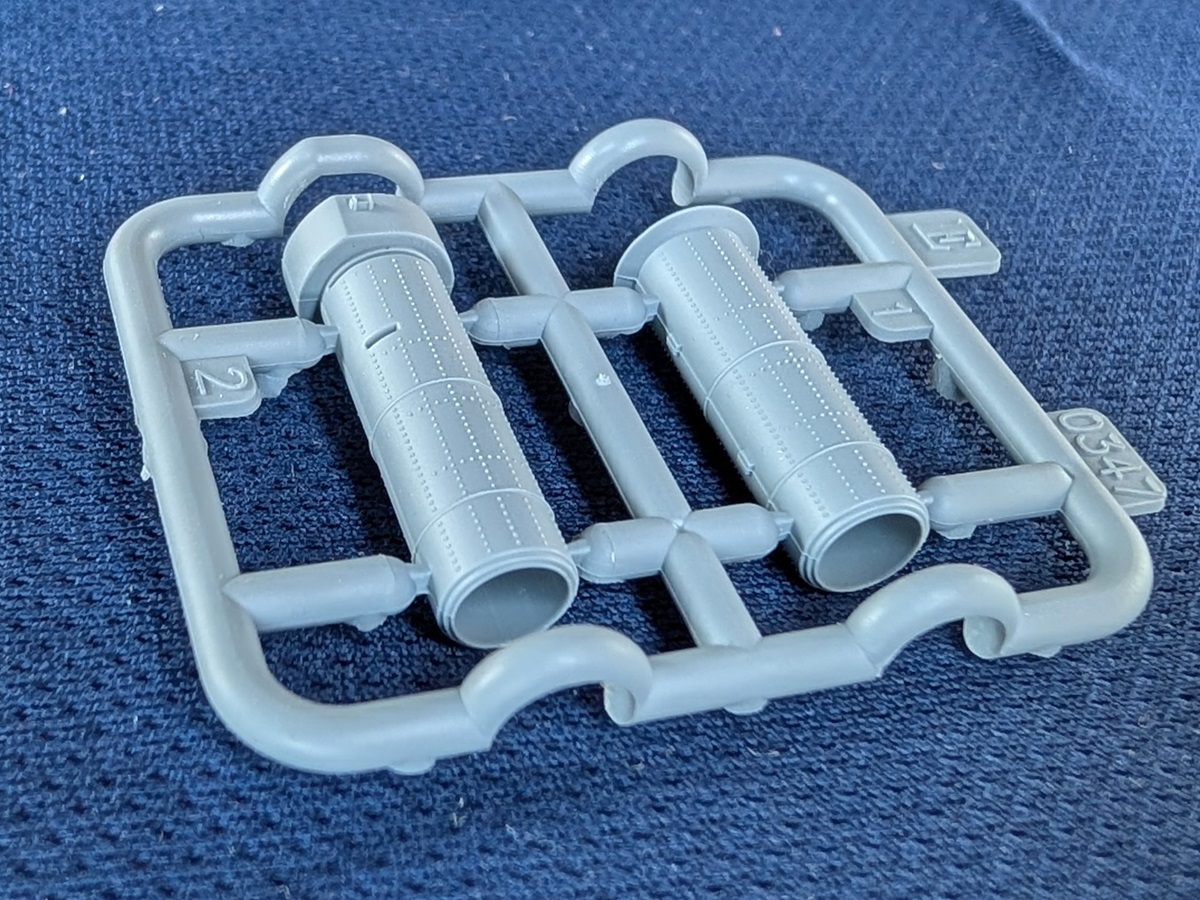
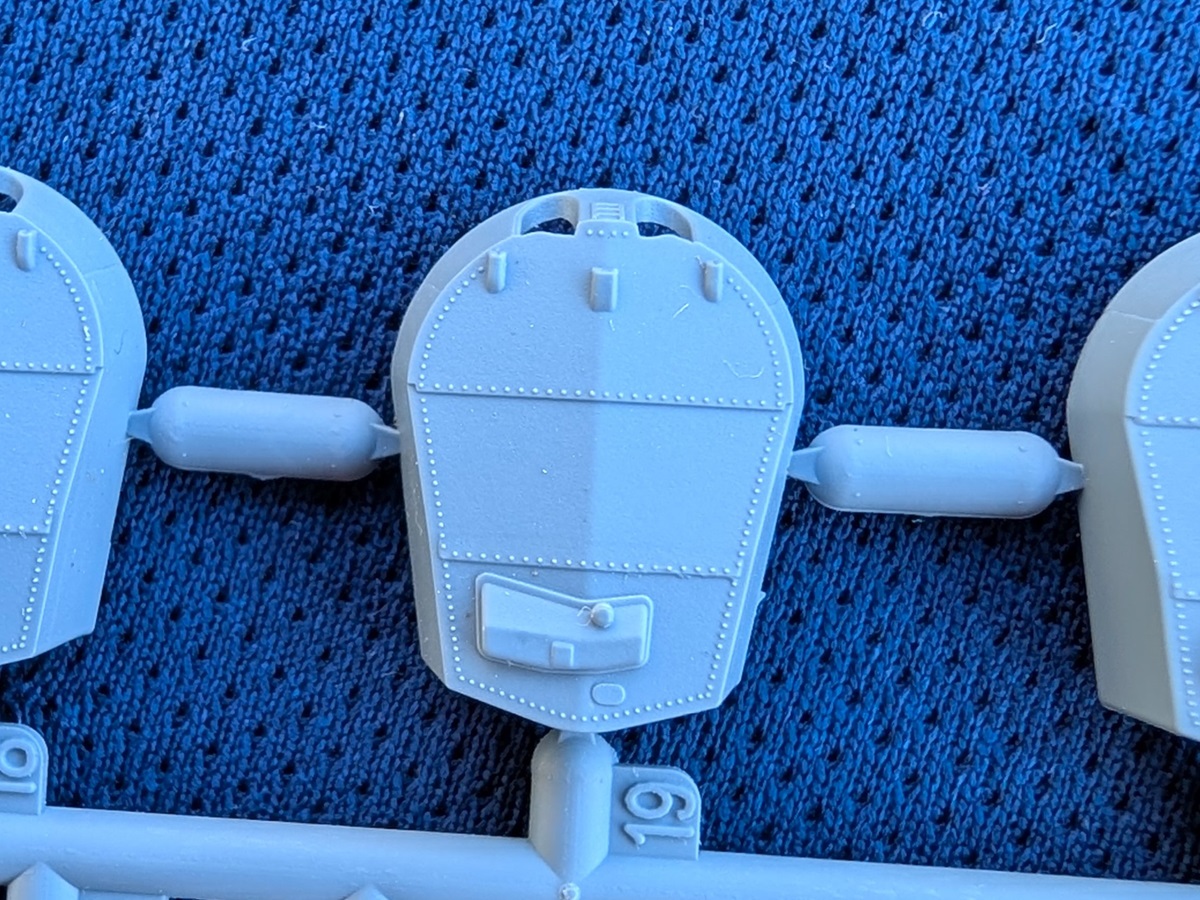
This contains both funnels, each with the main structure molded as one piece. There is considerable rivet detail here, which is sharp but overscale. Public opinion on overscale rivets and micro details seems to vary wildly, so you may have to look at the pictures and decide for yourself. Although I personally think the rivets are a bit overdone, the funnels really drive home how Flyhawk got their reputation. There is a ‘visual mass’ to them that makes me feel as if I am looking at the real thing from a distance rather than a miniature replica. There was a minor blemish on the fore funnel, a small spot on one side where a few rivets were missing or distorted. |
||||||||||||||||||||||||||||||||||
|
||||||||||||||||||||||||||||||||||
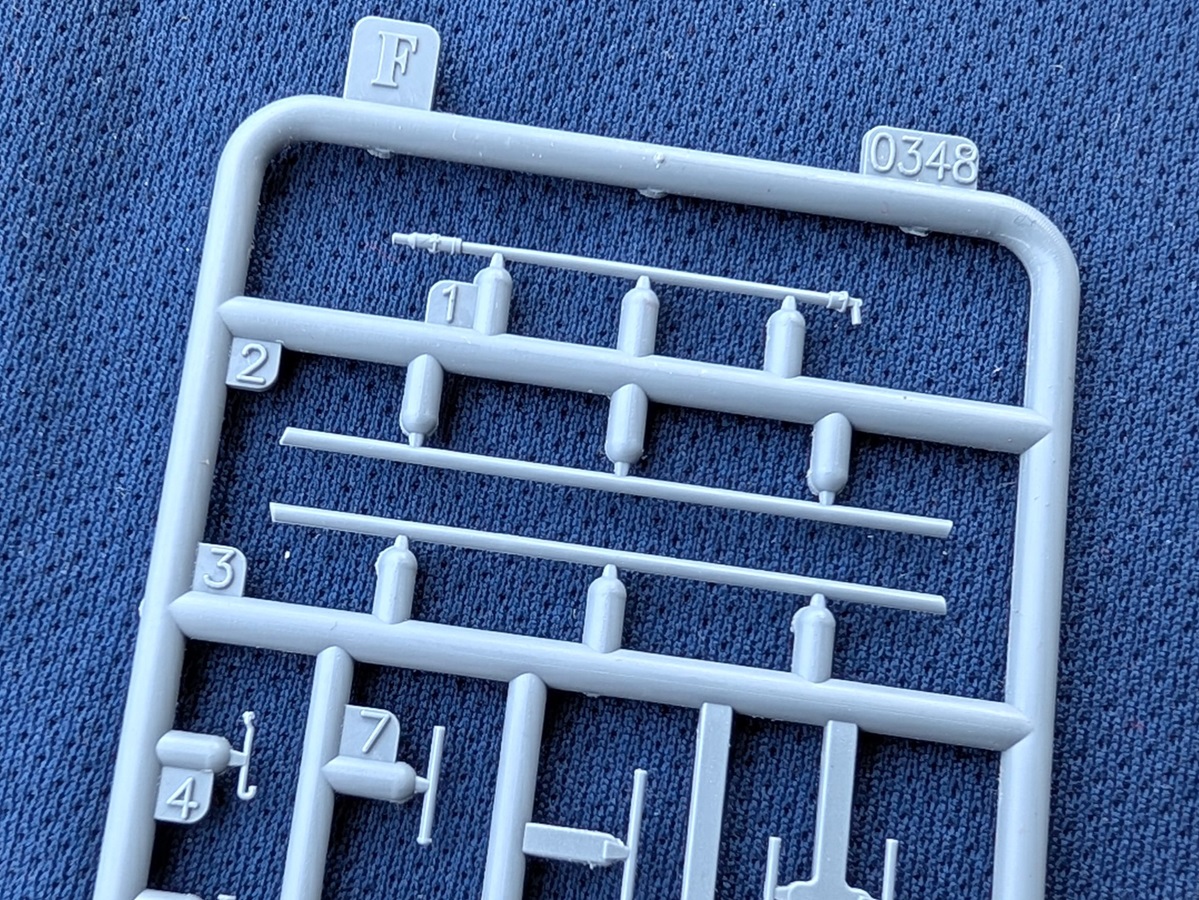
| SPRUE F | ||||||||||||||||||||||||||||||||||
|
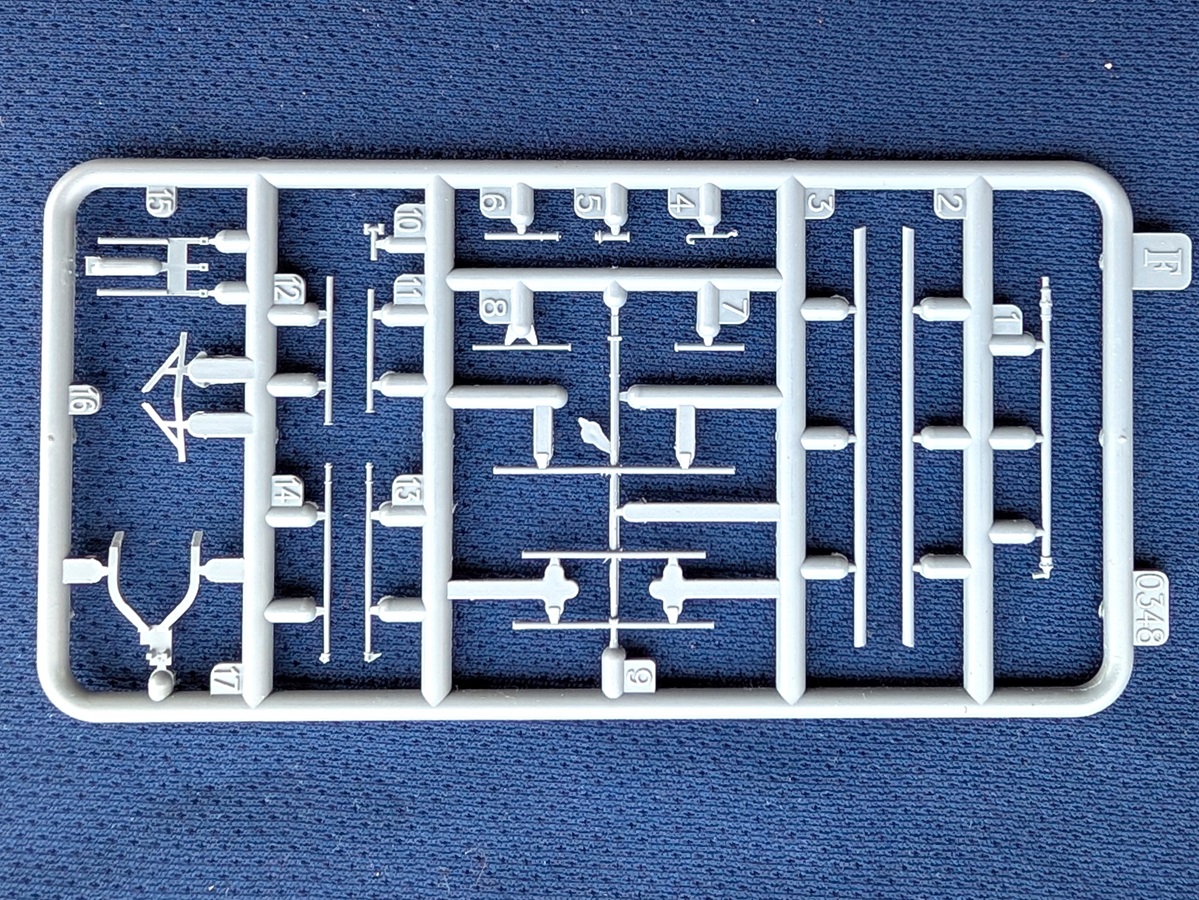
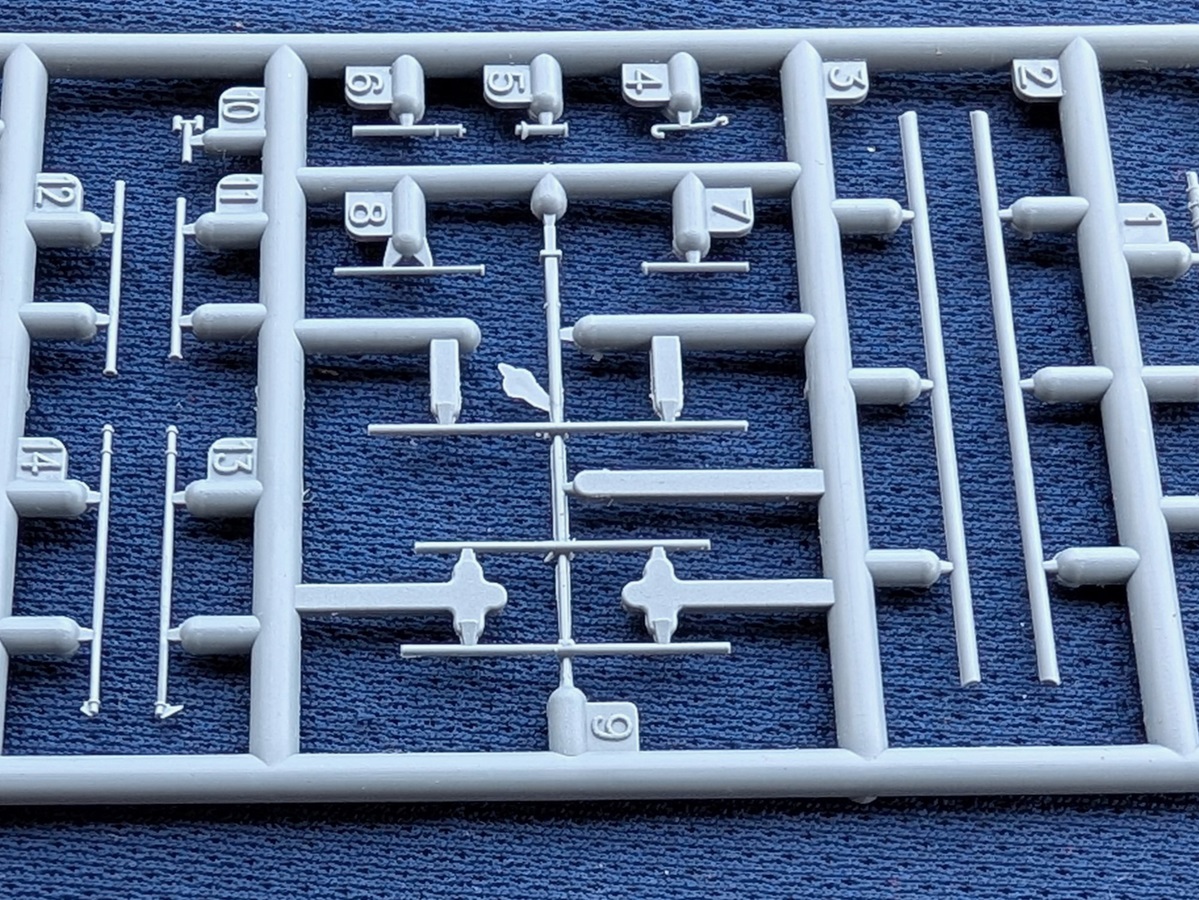
This contains upper masts, booms, the diagonal legs of the tripod foremast, a few vents and a platform straddling the base of the fore funnel. The thinner plastic masts and booms are extremely fine and well detailed for injection molded parts. However, this fidelity means they are exceptionally fragile. They are probably the most difficult pieces in the kit to remove from the sprue without bending or breaking. They are also probably too flexible to support rigging. Many builders will opt to replace them with metal rod, and the deluxe kit includes brass rod to replace the upper mast. |
||||||||||||||||||||||||||||||||||
|
||||||||||||||||||||||||||||||||||
| SPRUE G | ||||||||||||||||||||||||||||||||||
|
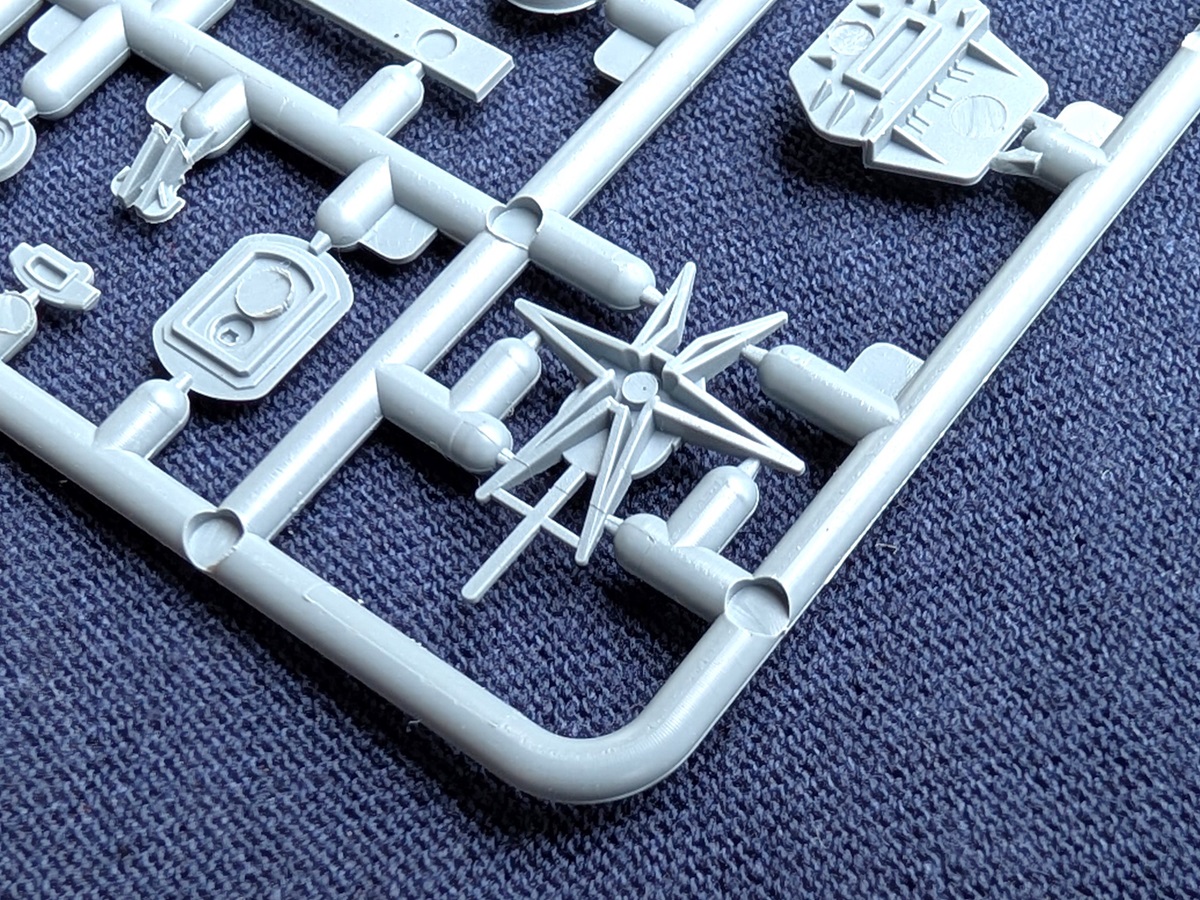
Here we have a several superstructure platforms and bulkheads. The stern walk and the tripod spotting top are also here. The platforms are molded with support bracing on the underside. This bracing is finely done for injection molding, though there was a little bit of flash. The deluxe kit includes photo etch pieces to replace many items on this sprue, including the under-platform bracing. However, the molded bracing is fine enough that you may question whether the laborious cutting off and replacing all of them is worth the effort, especially for those that are mostly hidden when the ship is assembled. Note that most of Iron Duke’s under-platform bracing did not seem to have holes, pockets or other visible weight reducing features. Thus, the only difference between the plastic and brass parts is that the latter are thinner. |
||||||||||||||||||||||||||||||||||
|
||||||||||||||||||||||||||||||||||
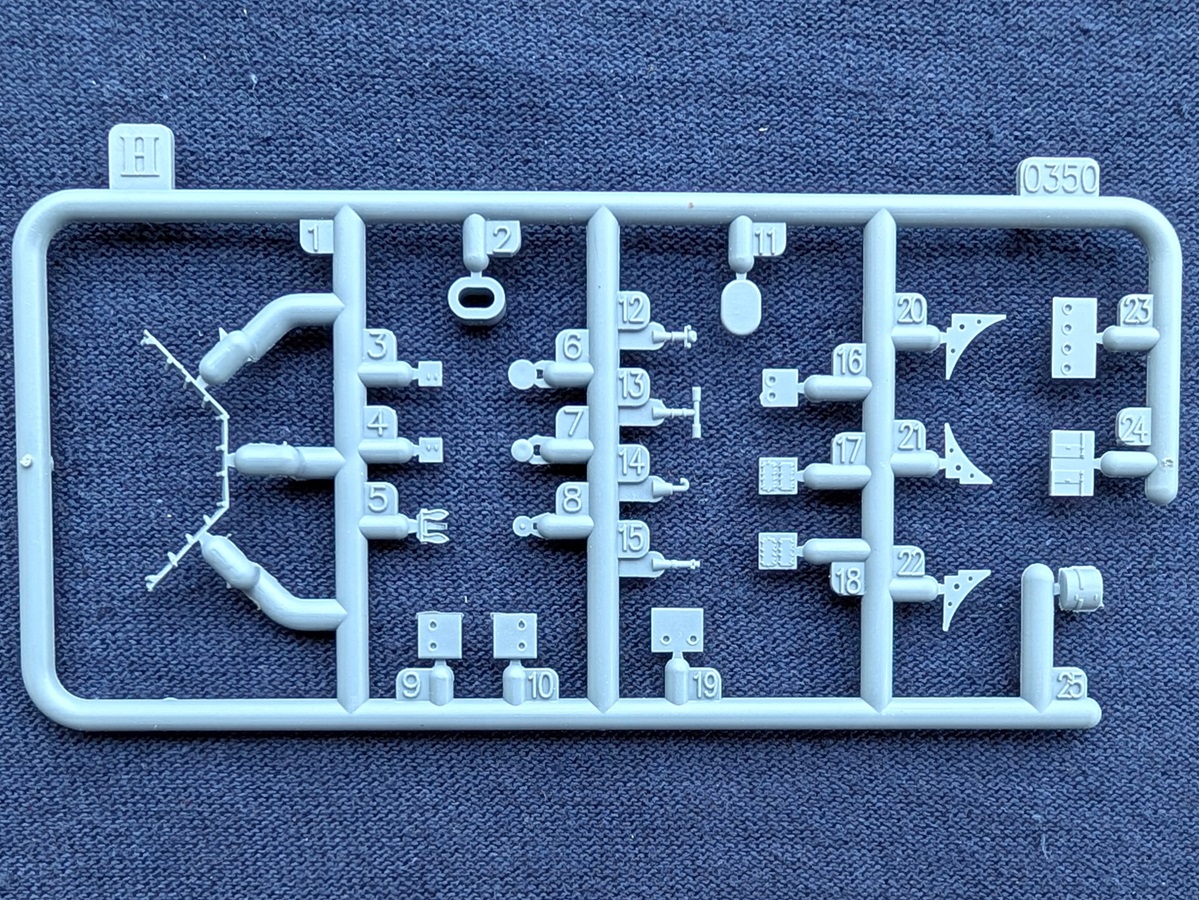
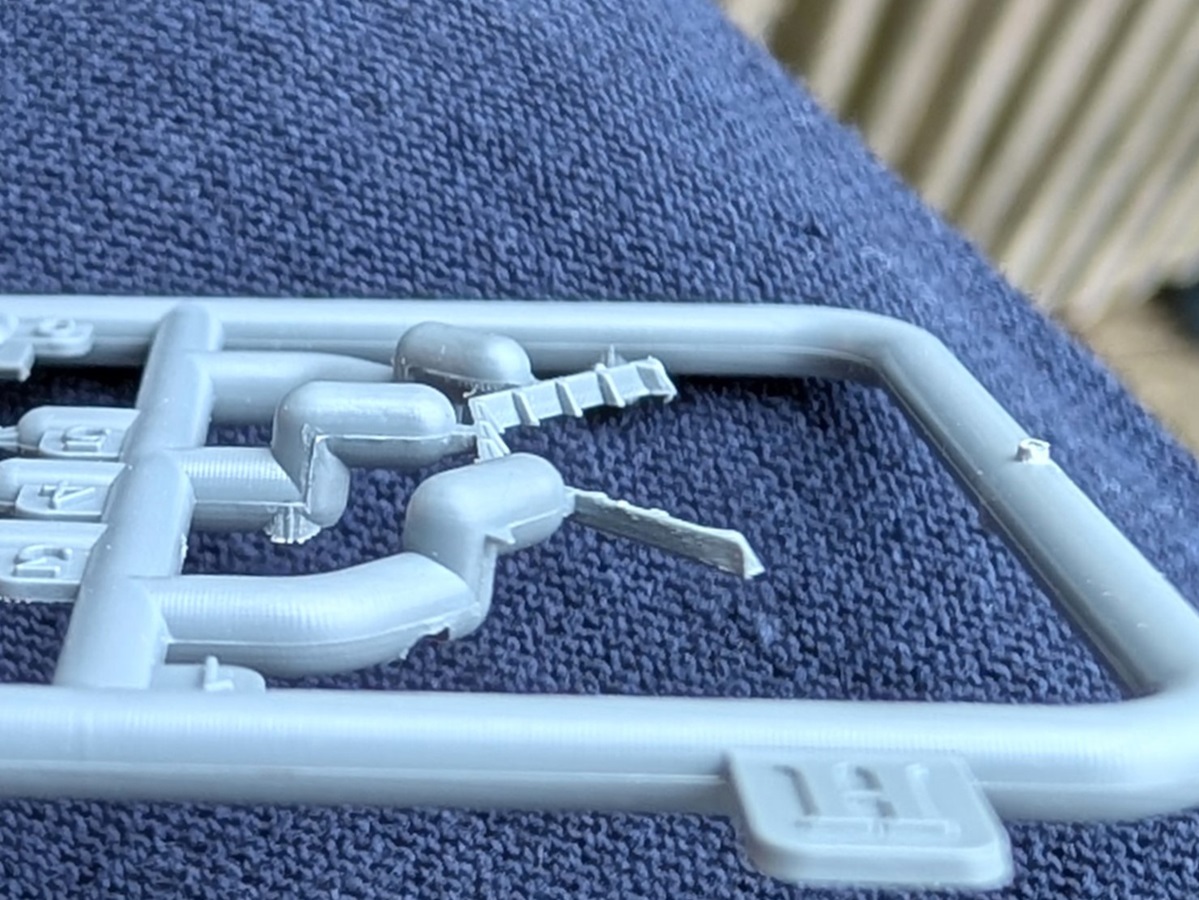
| SPRUE H | ||||||||||||||||||||||||||||||||||
|
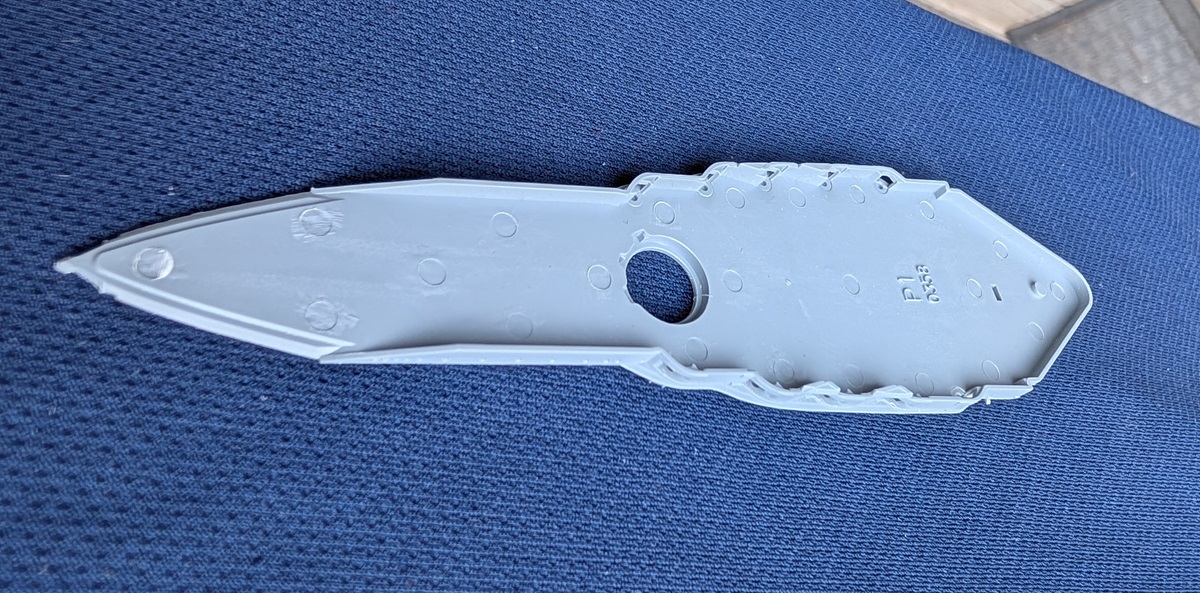
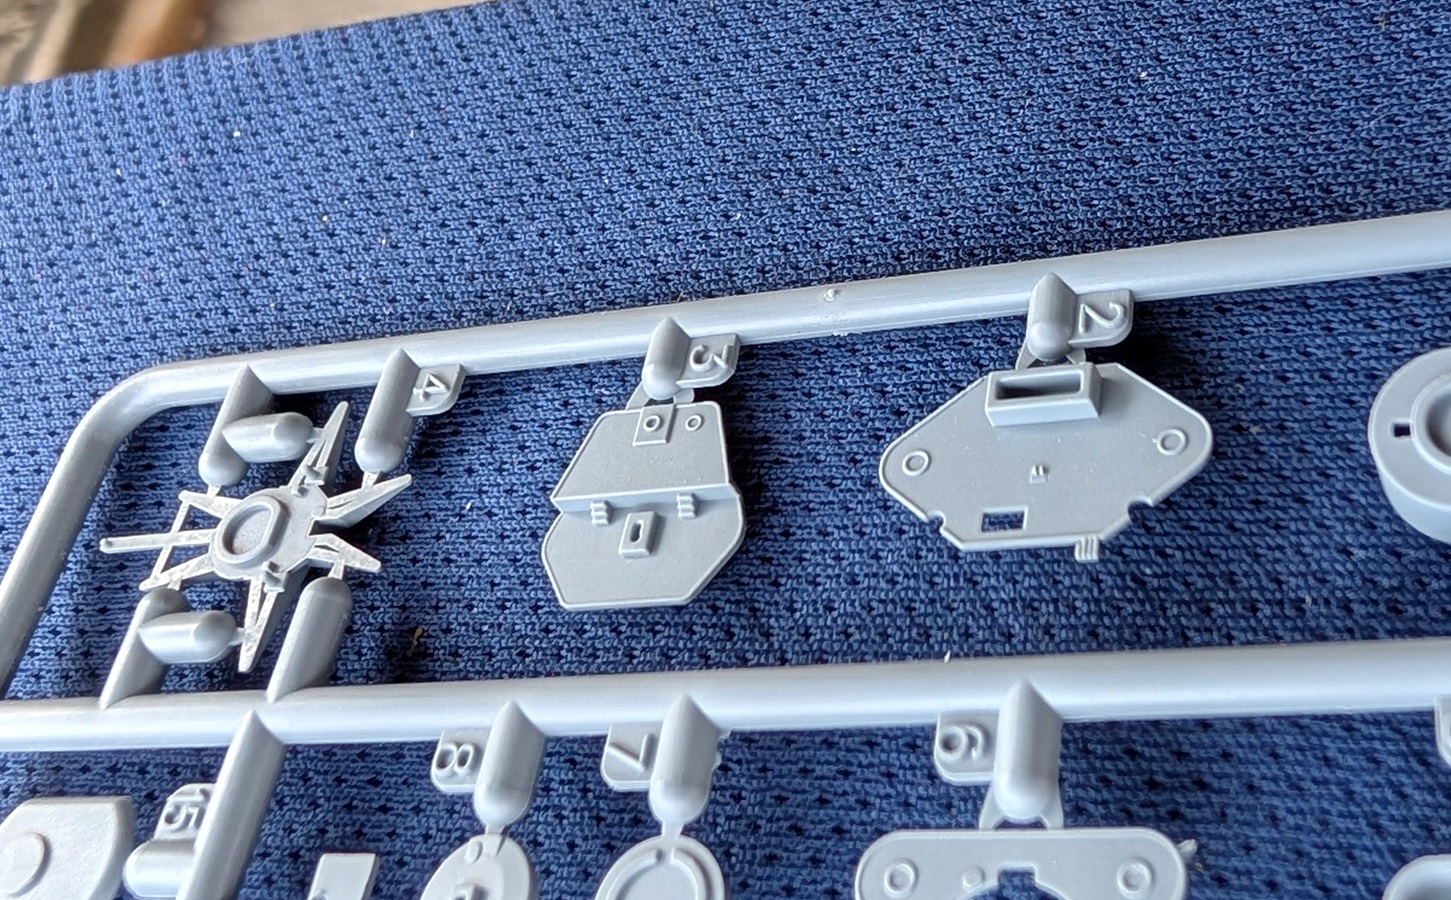
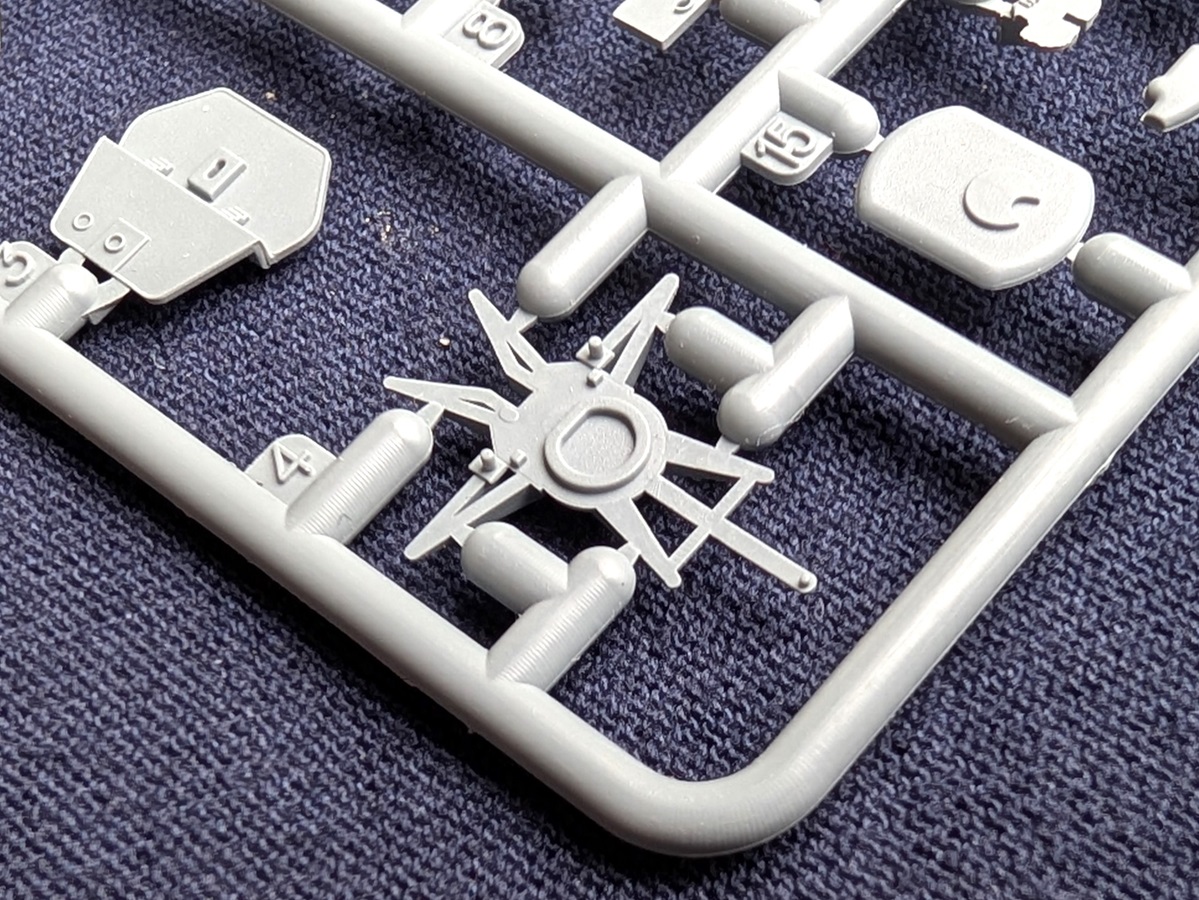
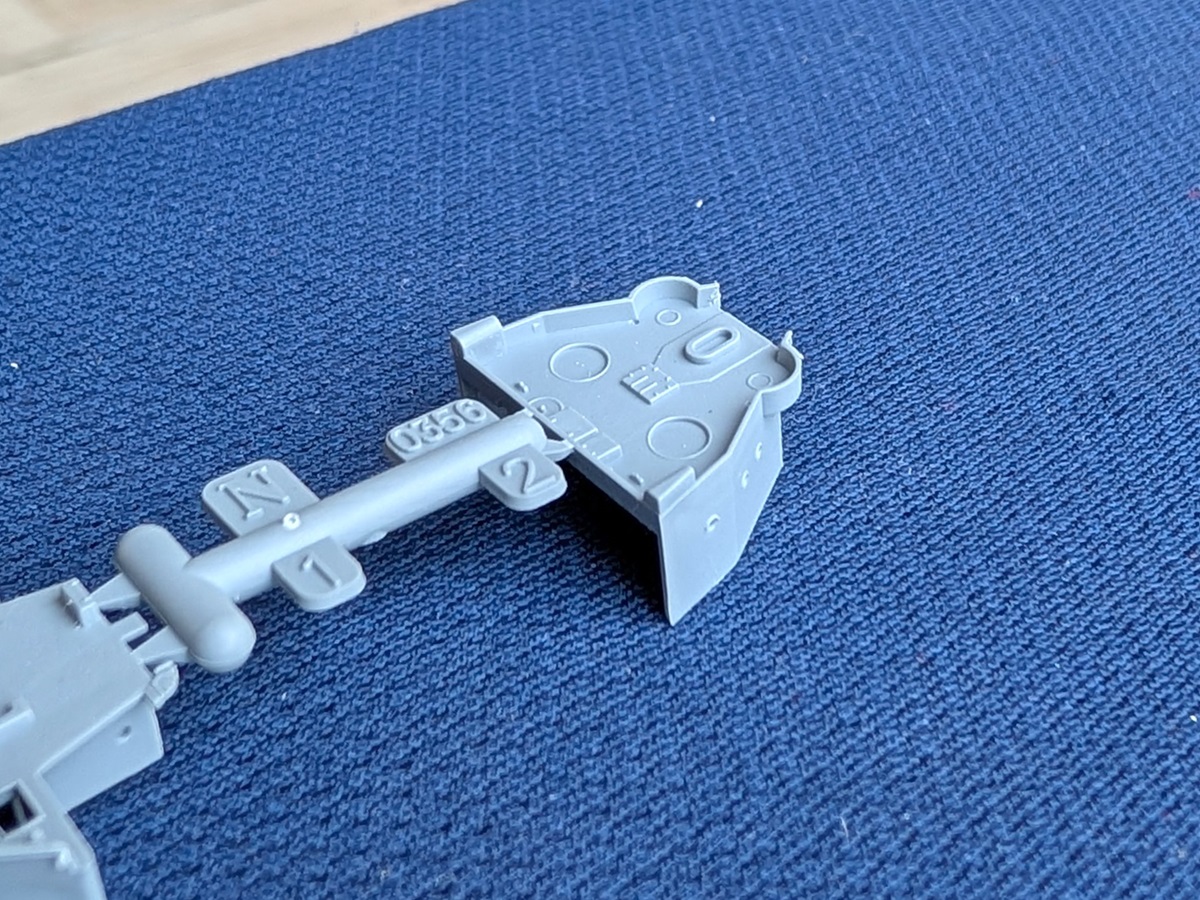
Sprue H has a few more platform braces, bulkheads and other small bits such as the main rangefinder. The stern anchor and the breakwater are on this sprue. Because the breakwater is a separate piece not molded with the deck, the shape can be correctly molded. It is not perpendicular to the deck but raked forward. |
||||||||||||||||||||||||||||||||||
|
||||||||||||||||||||||||||||||||||
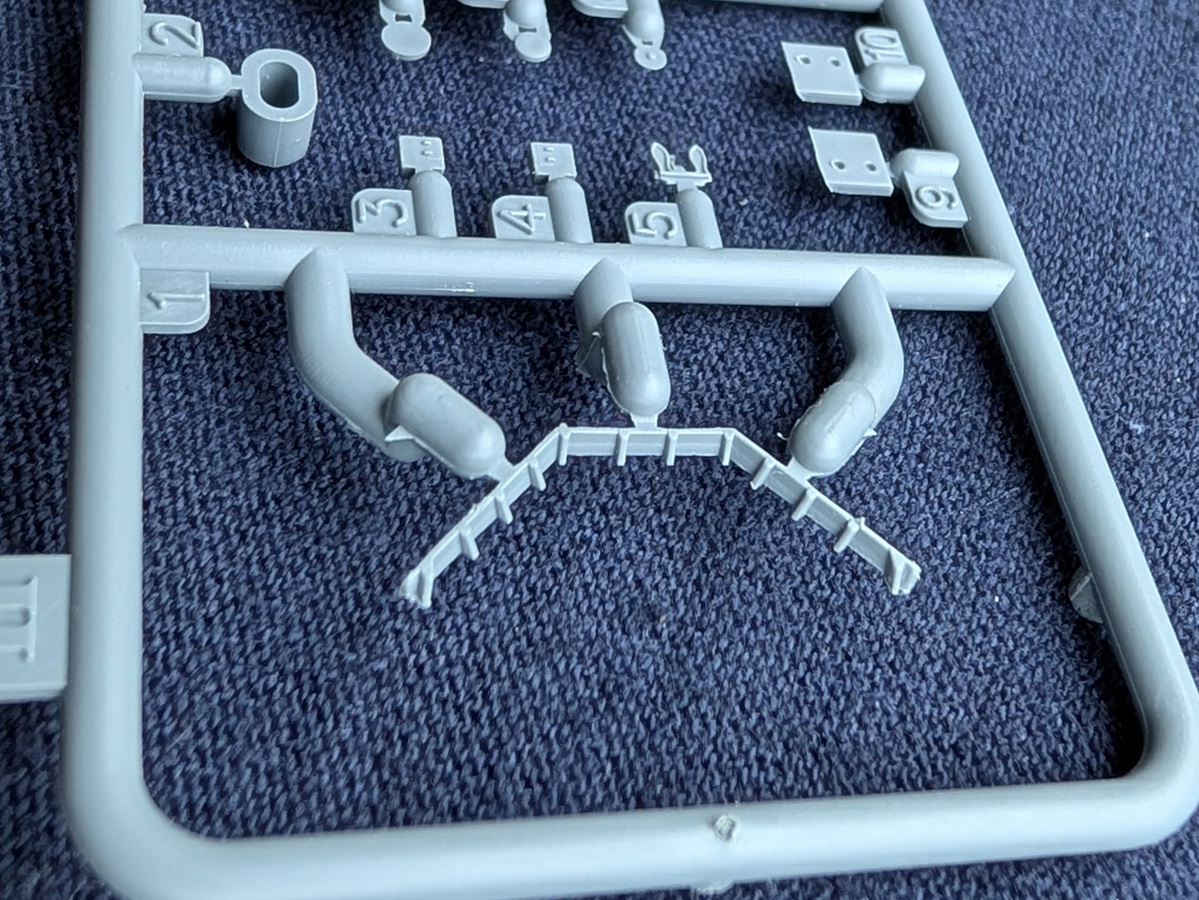
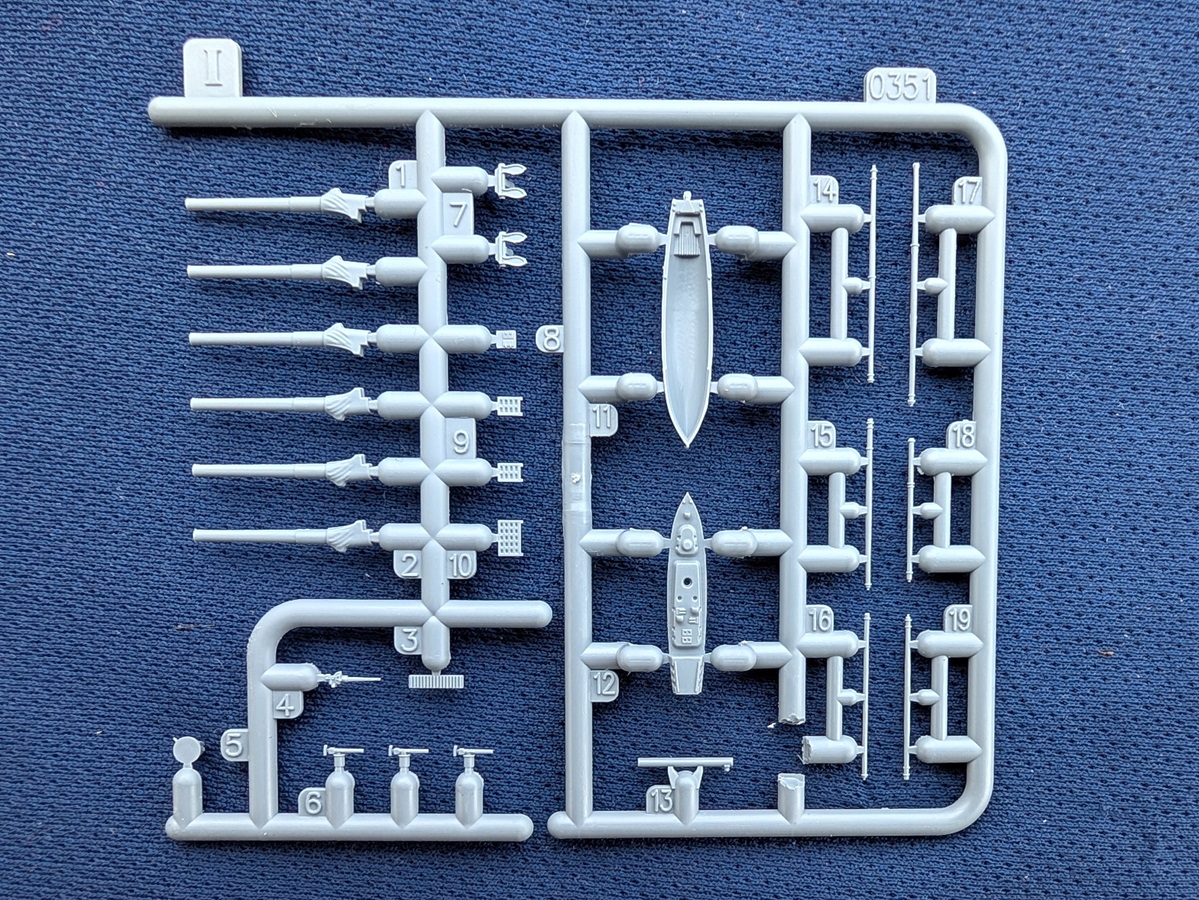
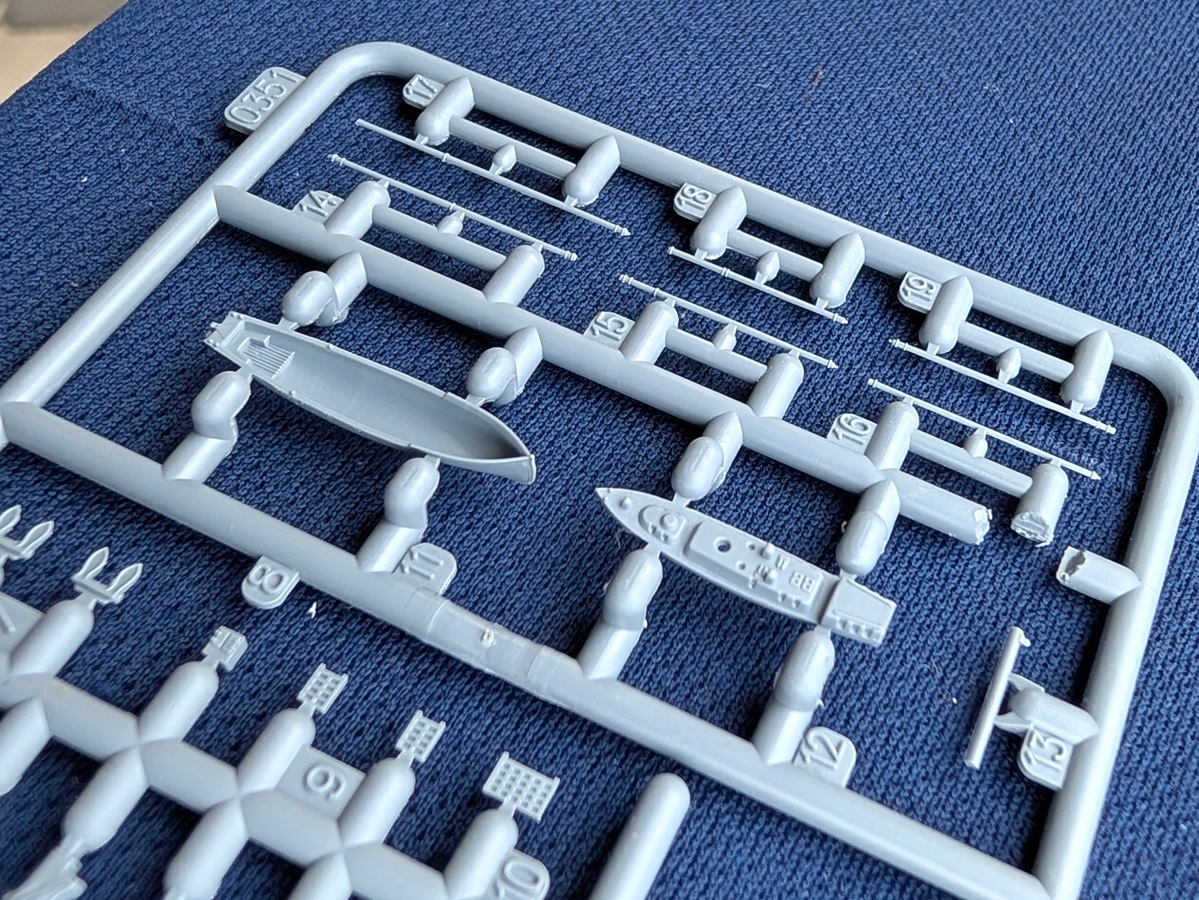
| SPRUE I (X2) | ||||||||||||||||||||||||||||||||||
|
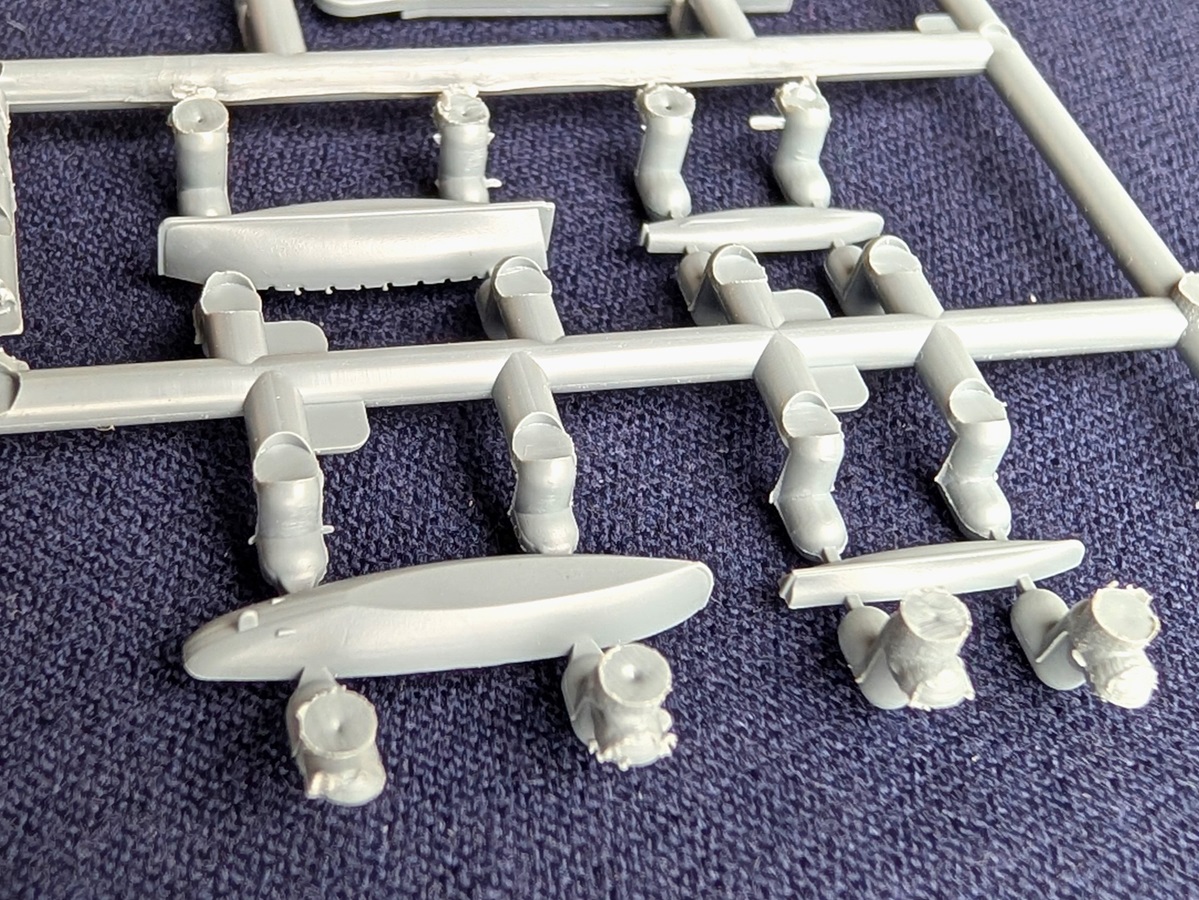
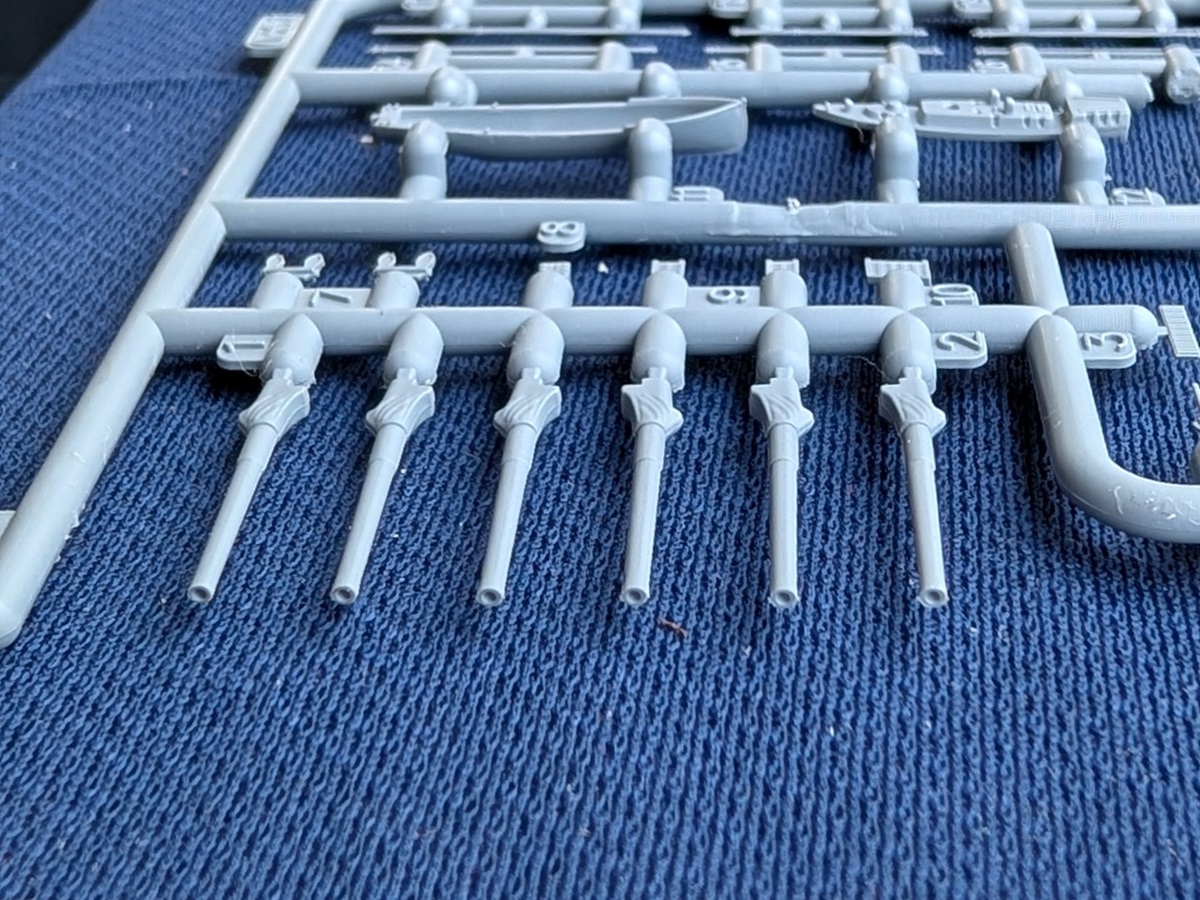
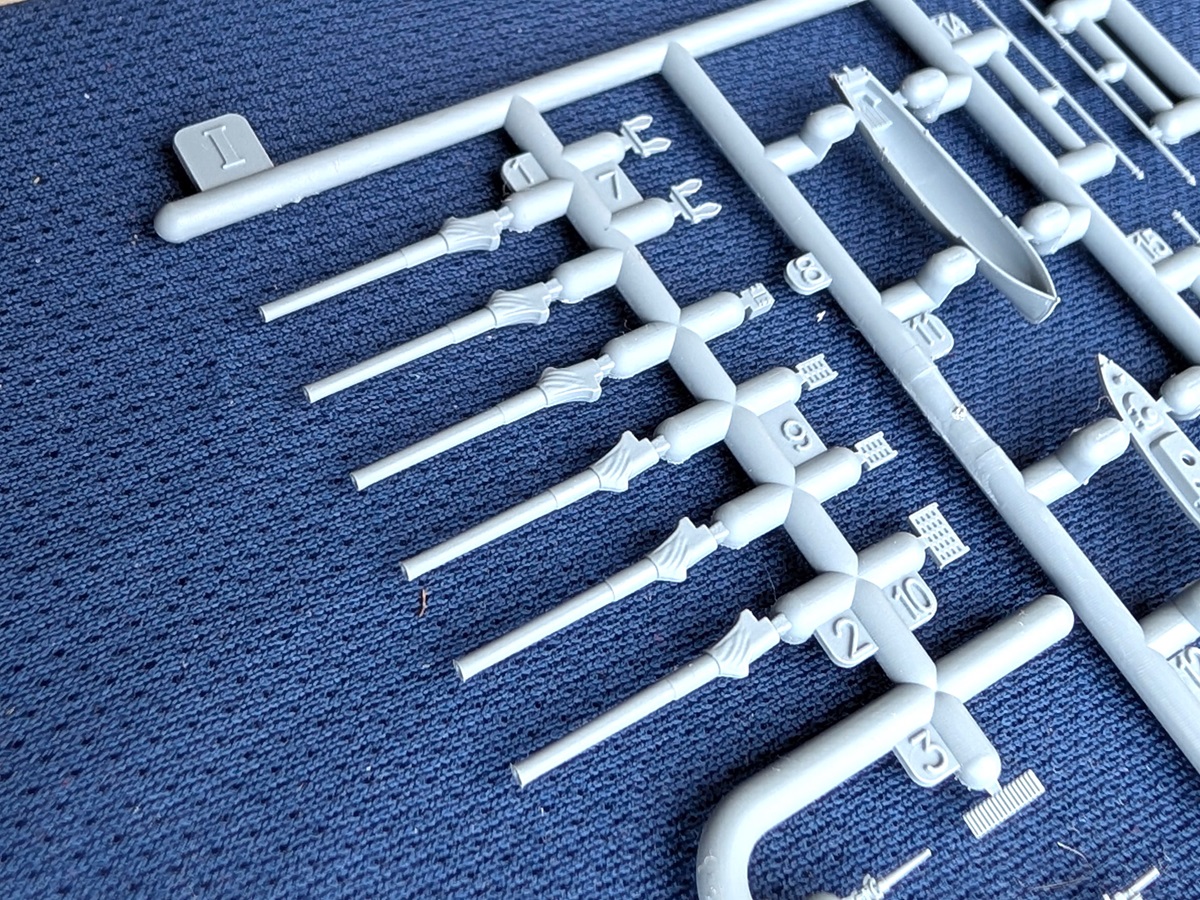
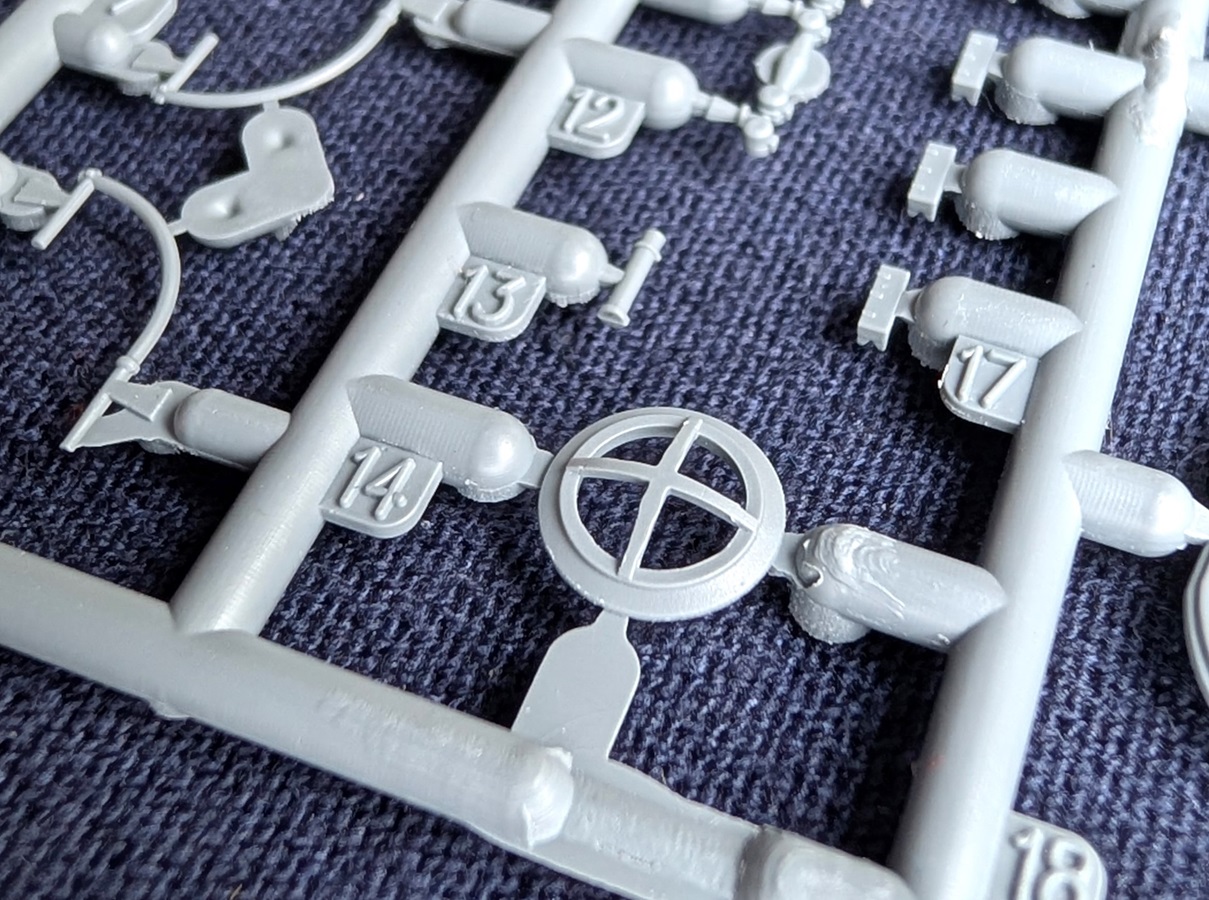
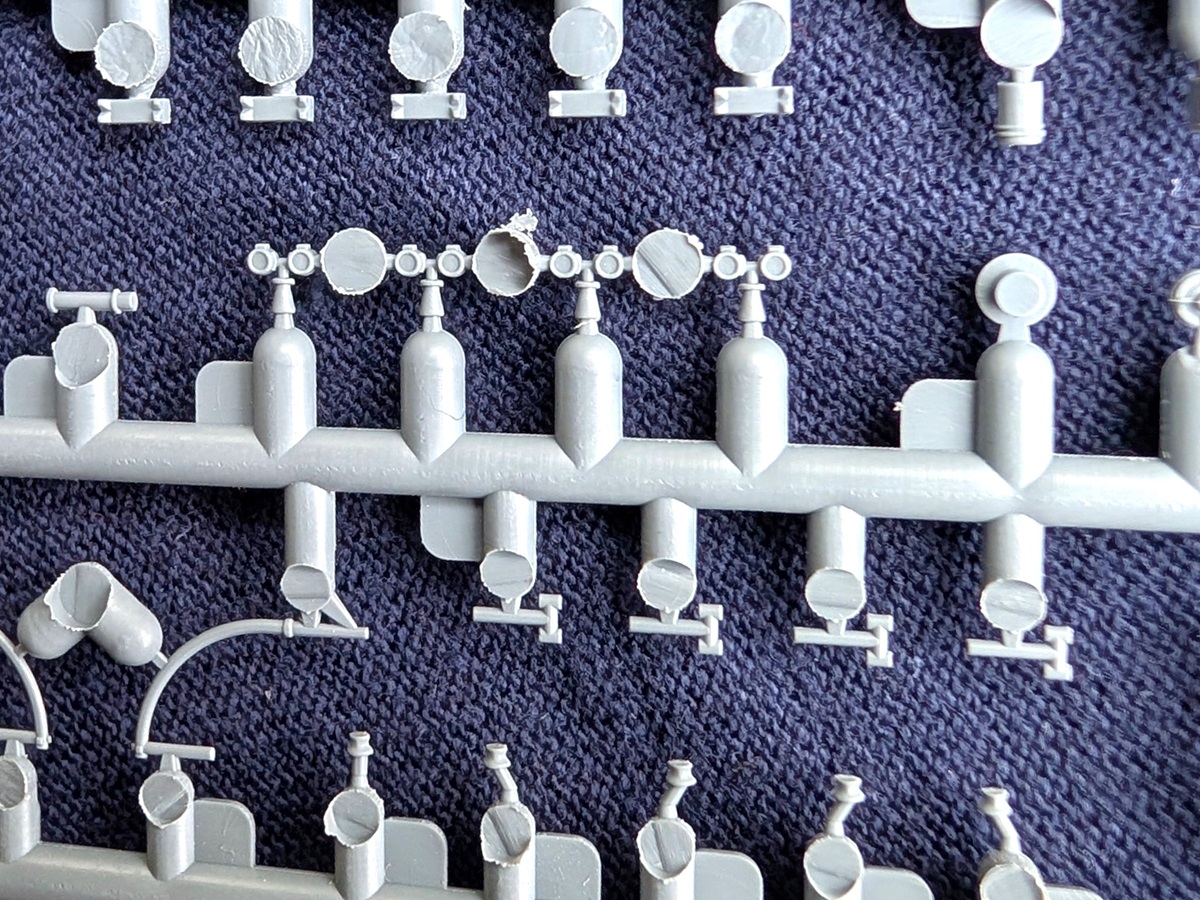
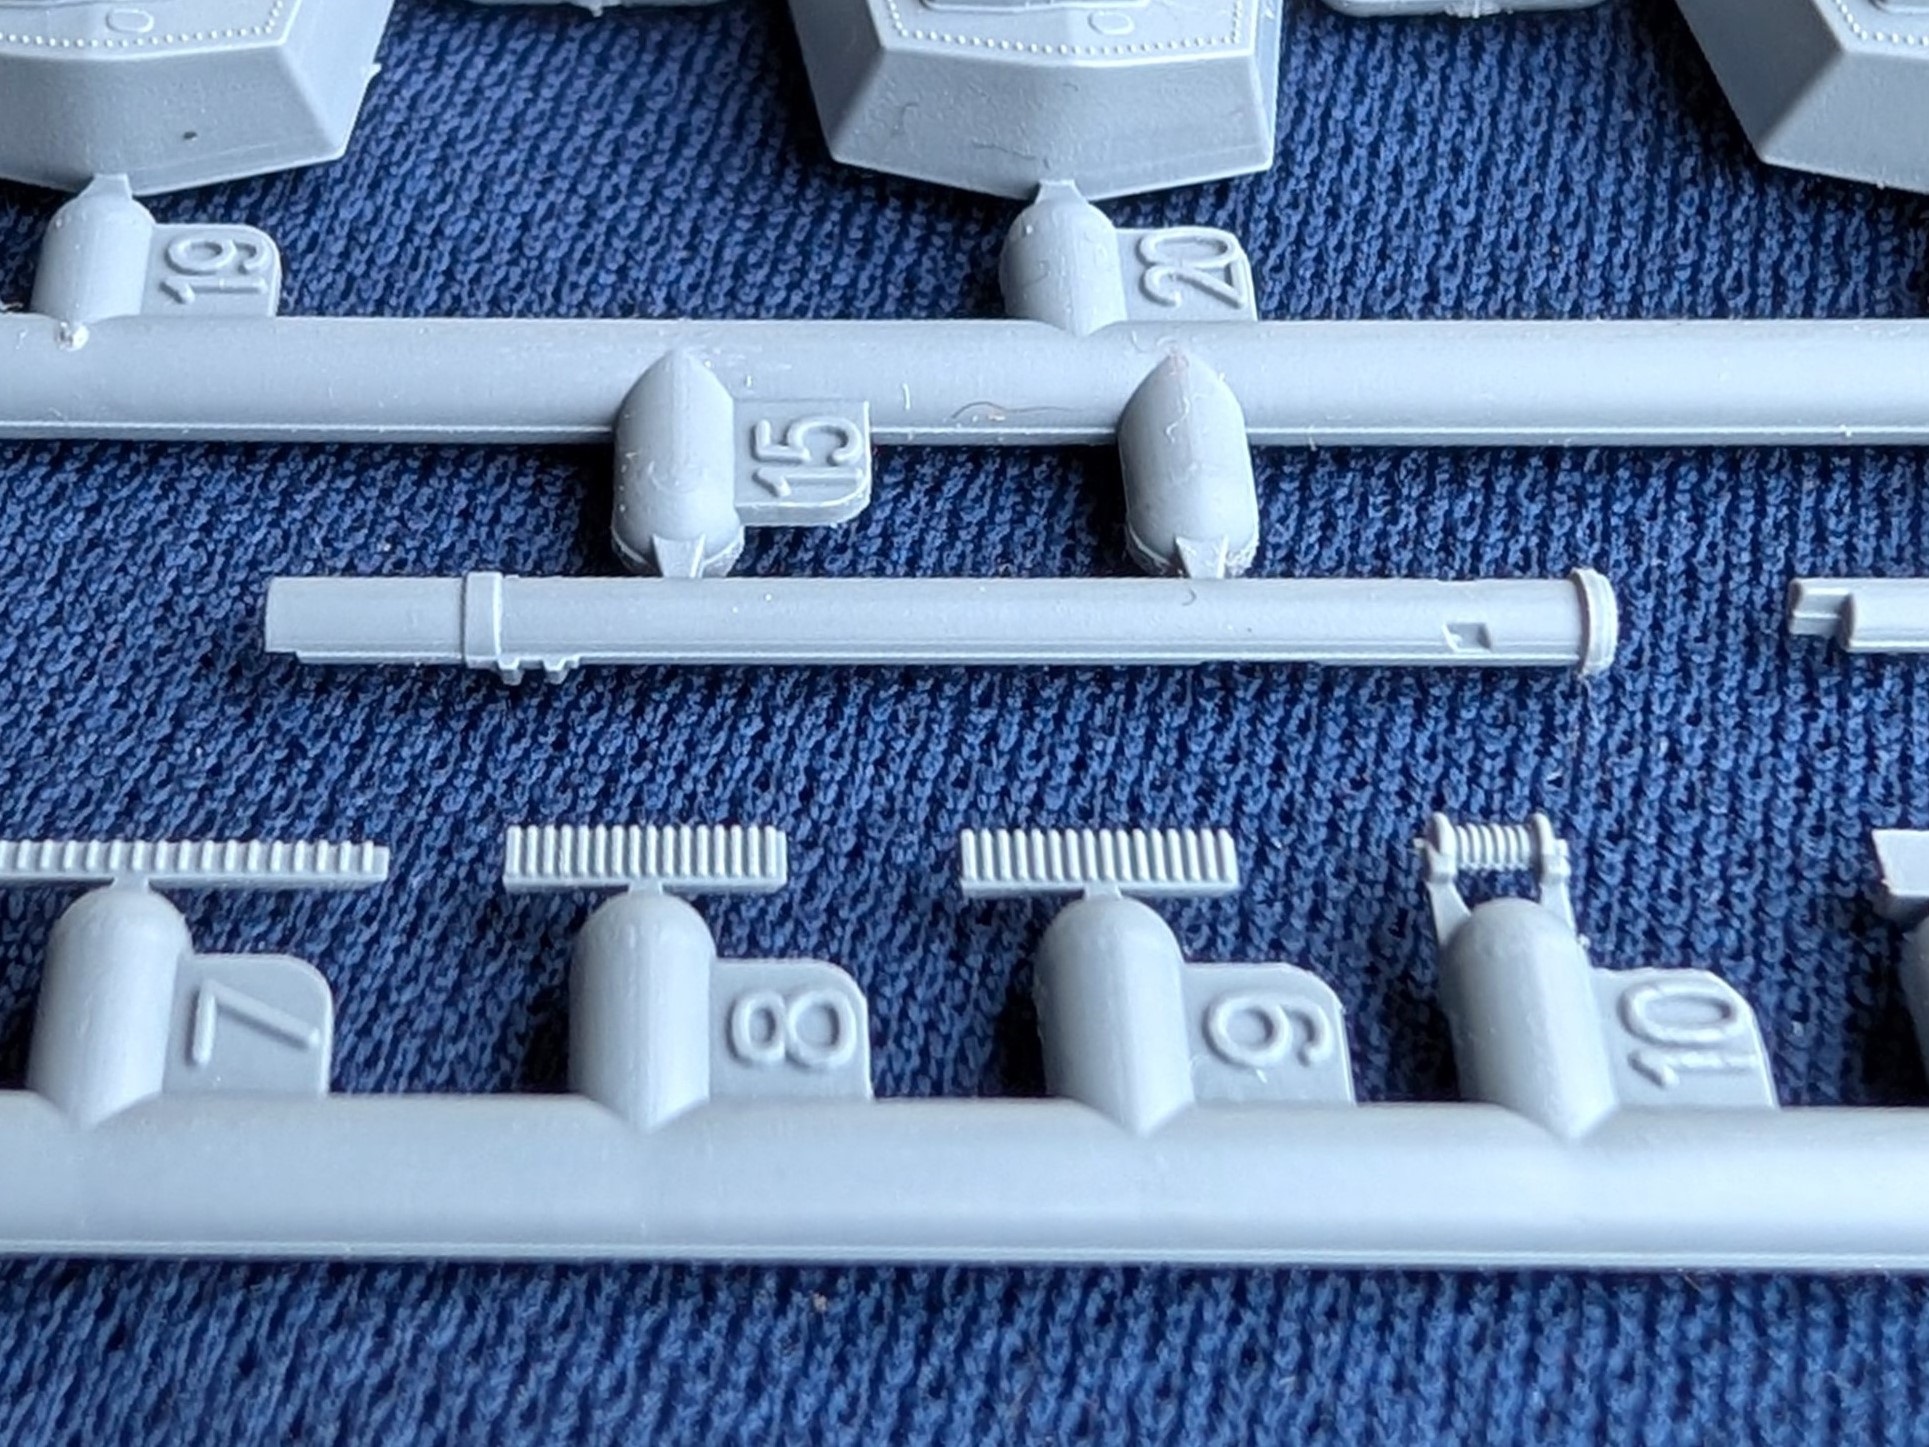
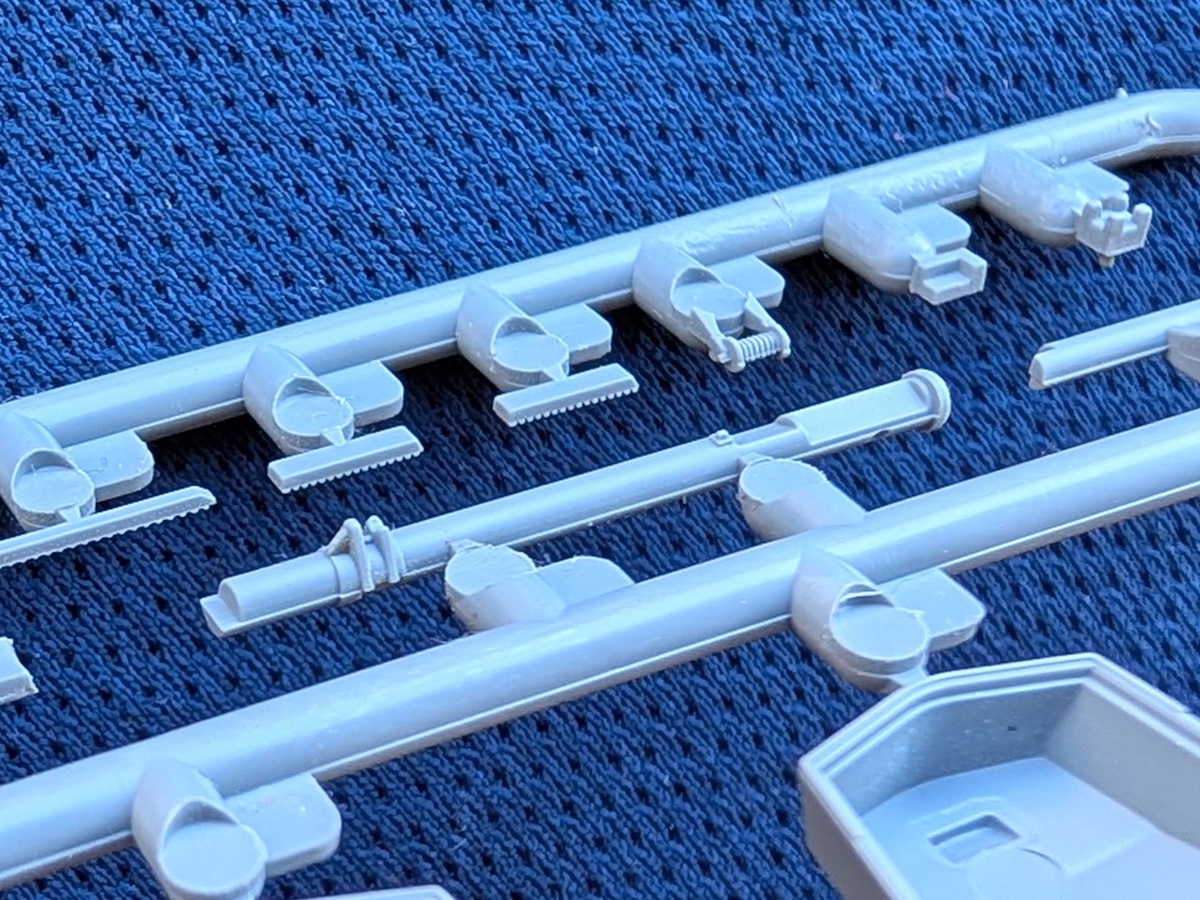
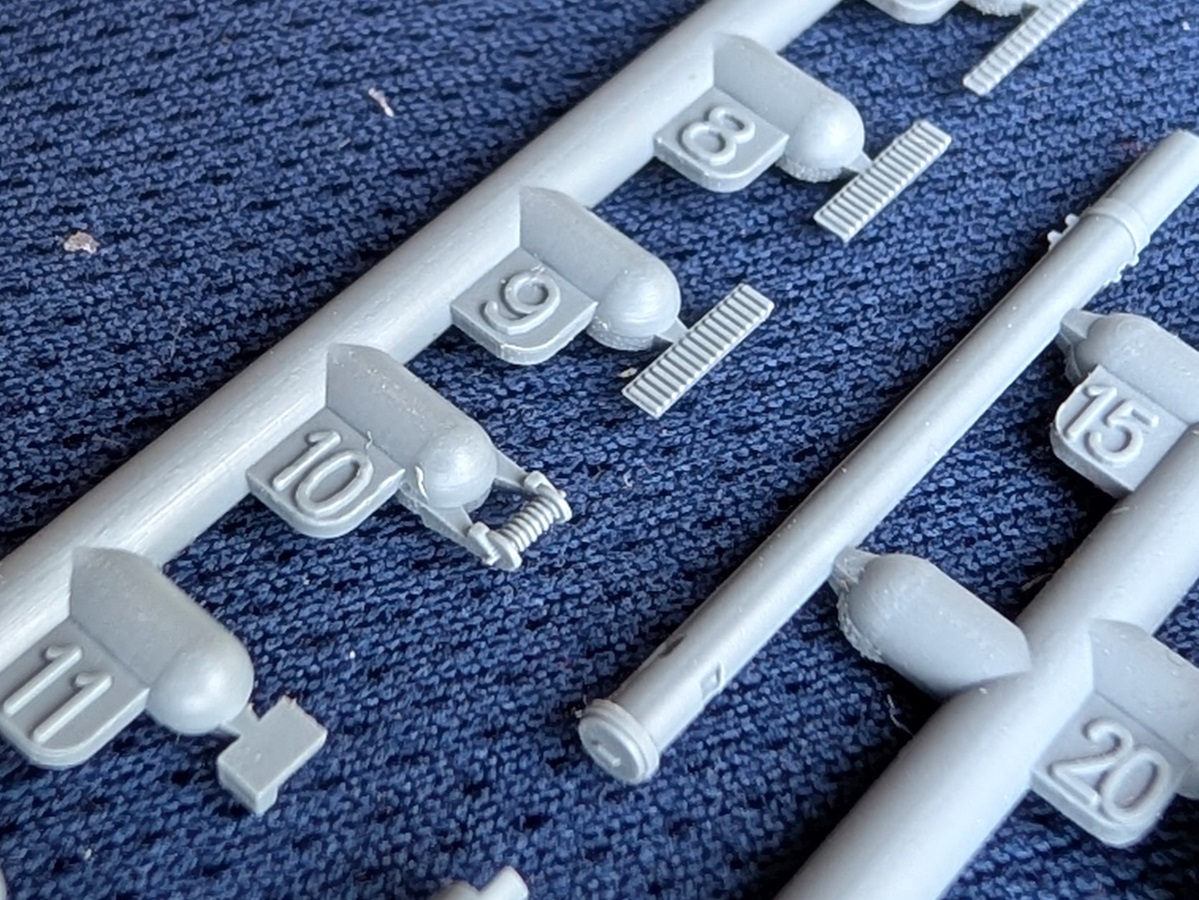
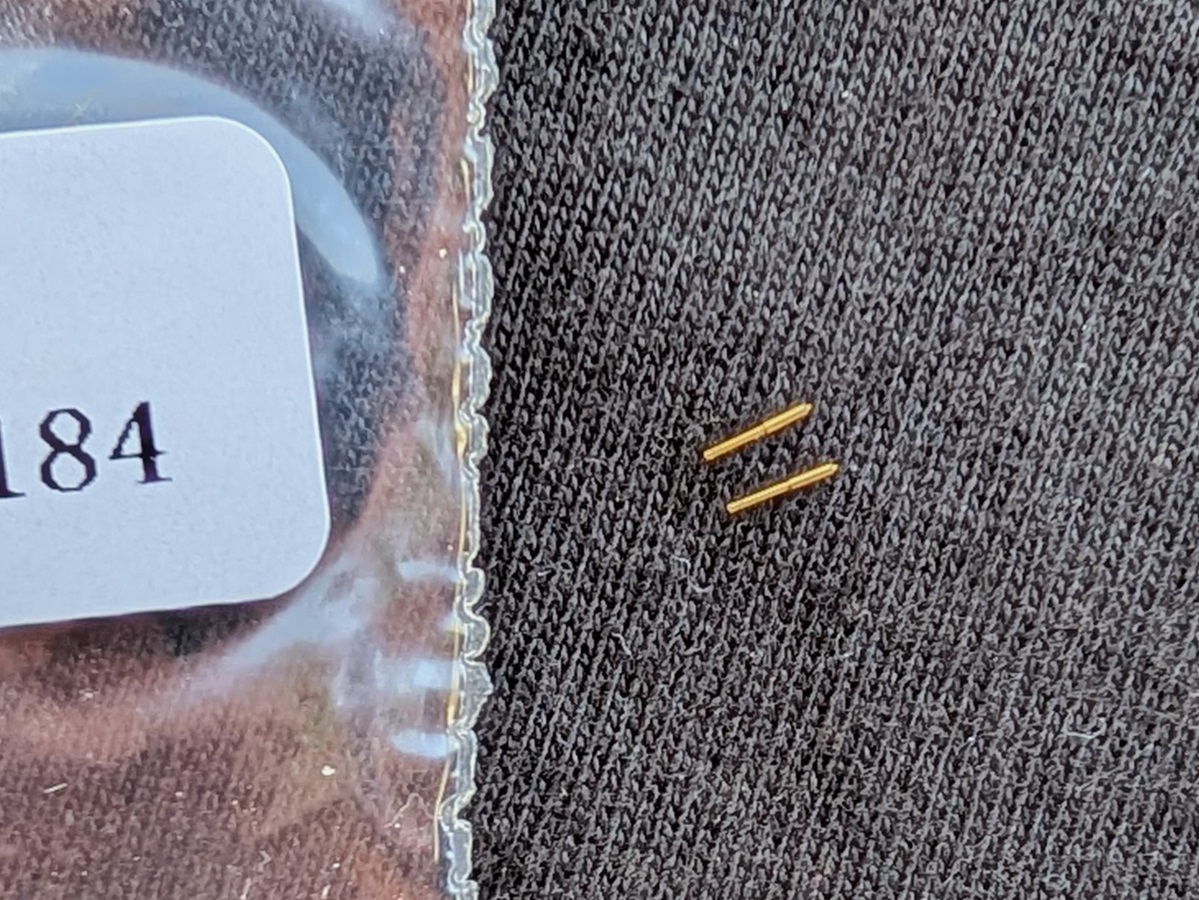
This is a double sprue which has another boat, 3” AA guns, 3-pounder 46mm guns, anchors, more booms, vents(?) and the main 13.5” gun barrels. The barrels are molded at a fixed elevation with blast bags. They are very nice and straight, with hollow muzzles. The slight flare at the muzzle is also correctly depicted. However, the barrel outer diameter looks a bit too large to me. The optional brass barrels from the deluxe kit are slimmer and look closer to scale. |
||||||||||||||||||||||||||||||||||
|
||||||||||||||||||||||||||||||||||
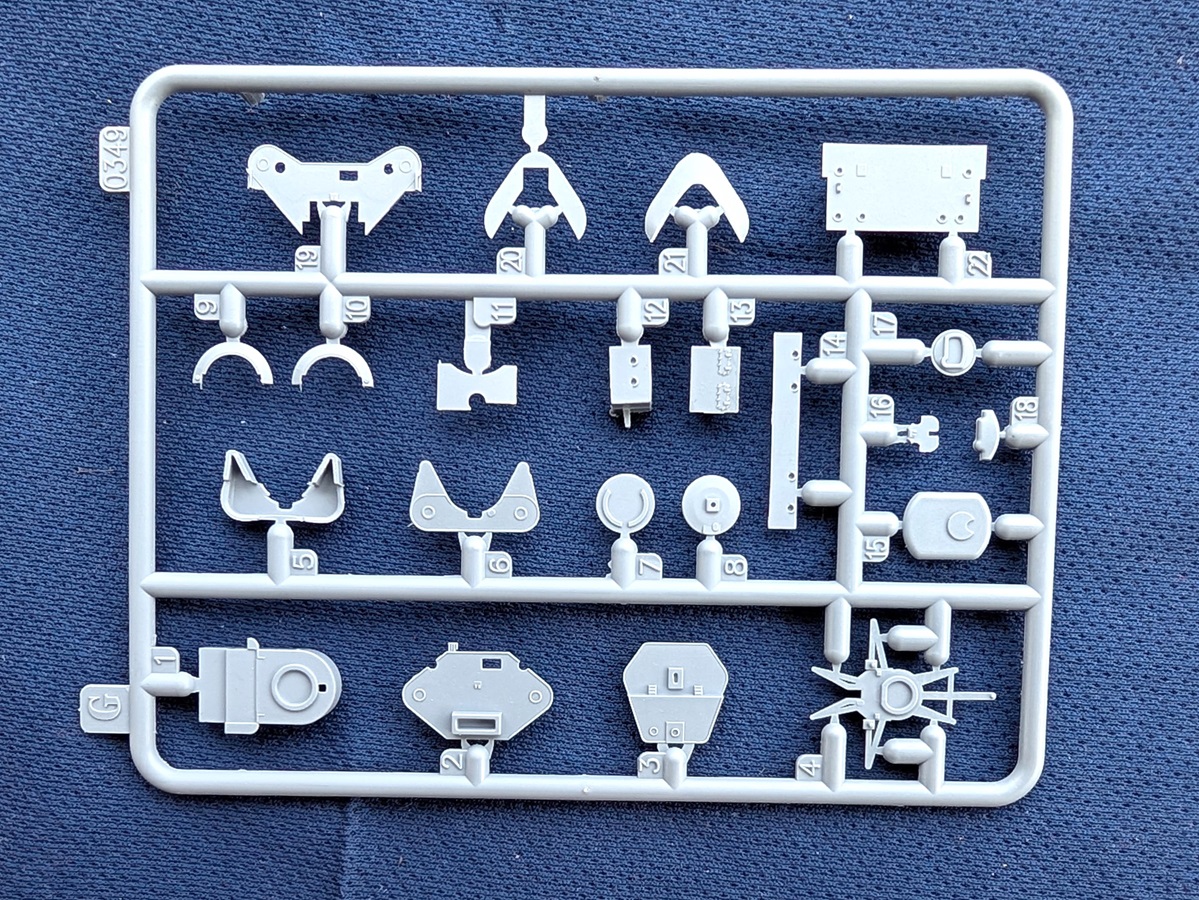
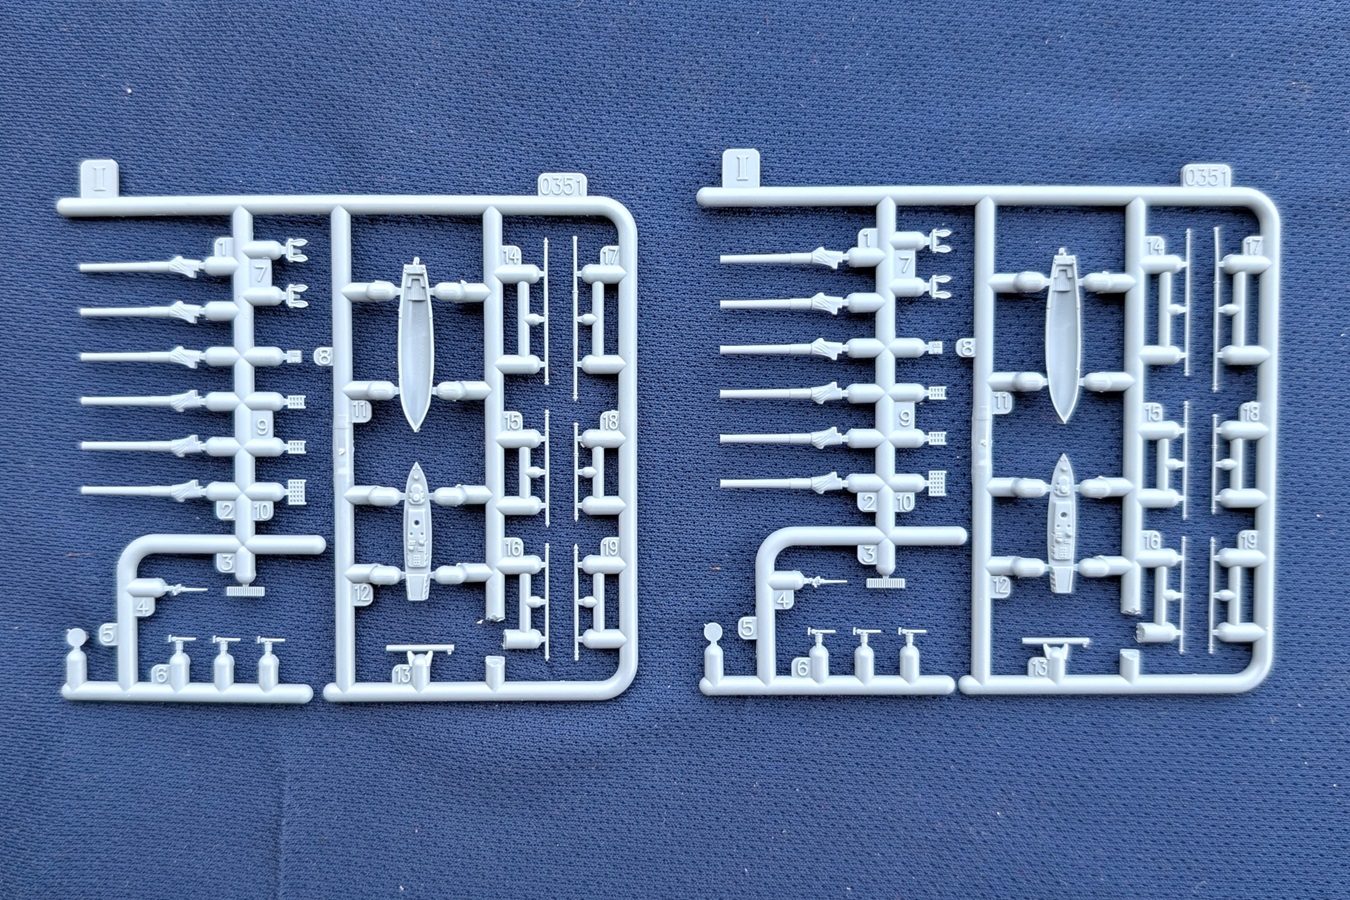
| SPRUE J (X2) | ||||||||||||||||||||||||||||||||||
|
This is another double sprue. There are some davits and other small superstructure bits here. These sprues include the funnel caps, which are again quite good for plastic. 6” guns are here along with the bases for the 13.5” turrets. There are a lot of small parts on this sprue, which is a good representation of the tiny bits the builder will need to work with. The turret bases have an odd feature, a pair of vertical tabs that seem to be intended as a backstop for the gun barrels. They seem redundant at best, as the blast bag bottoms out on the turret face (as it should) before the base of the gun touches the tab. When assembling the turret, take care that no burrs from the sprue attachment are left on the back of the gun barrels – otherwise they WILL touch these tabs, possibly causing a gap between the blast bag and turret face. |
||||||||||||||||||||||||||||||||||
|
||||||||||||||||||||||||||||||||||
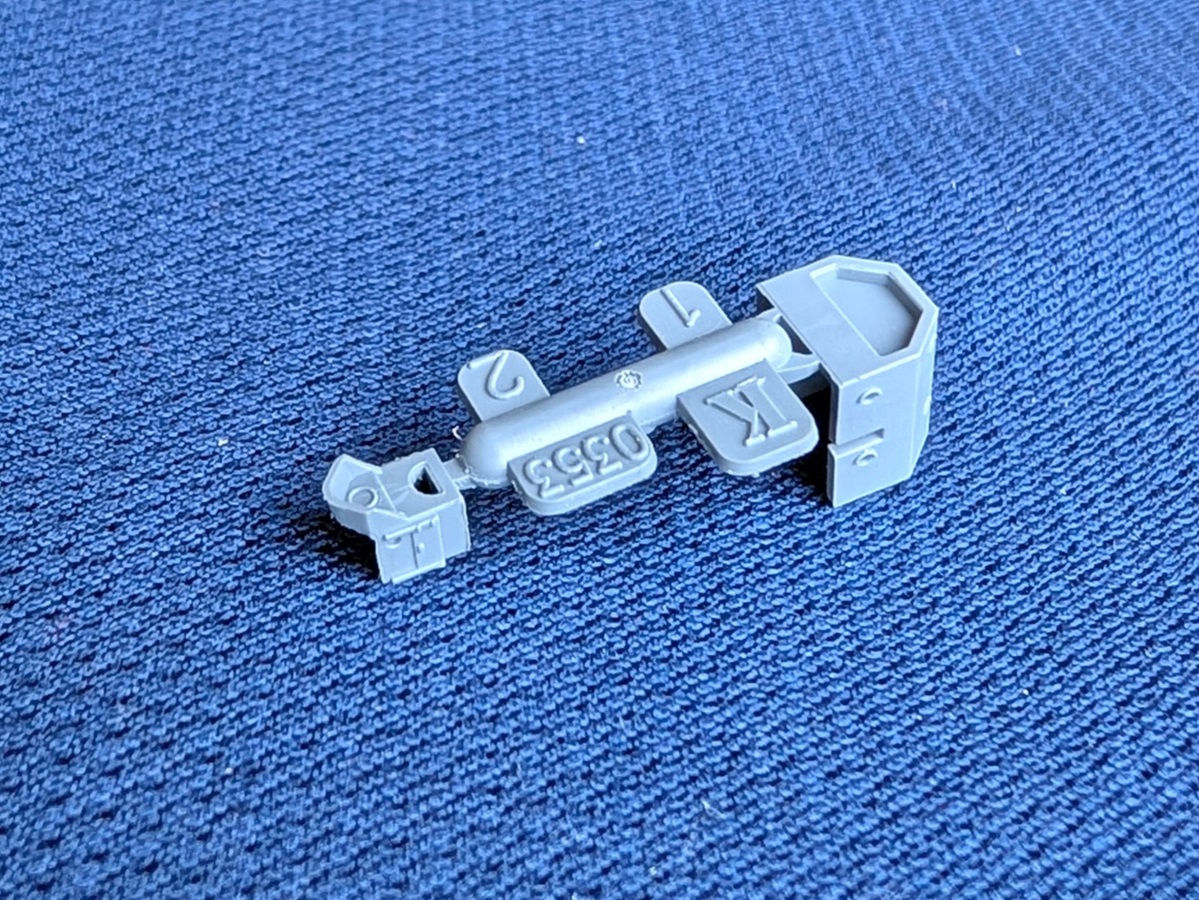
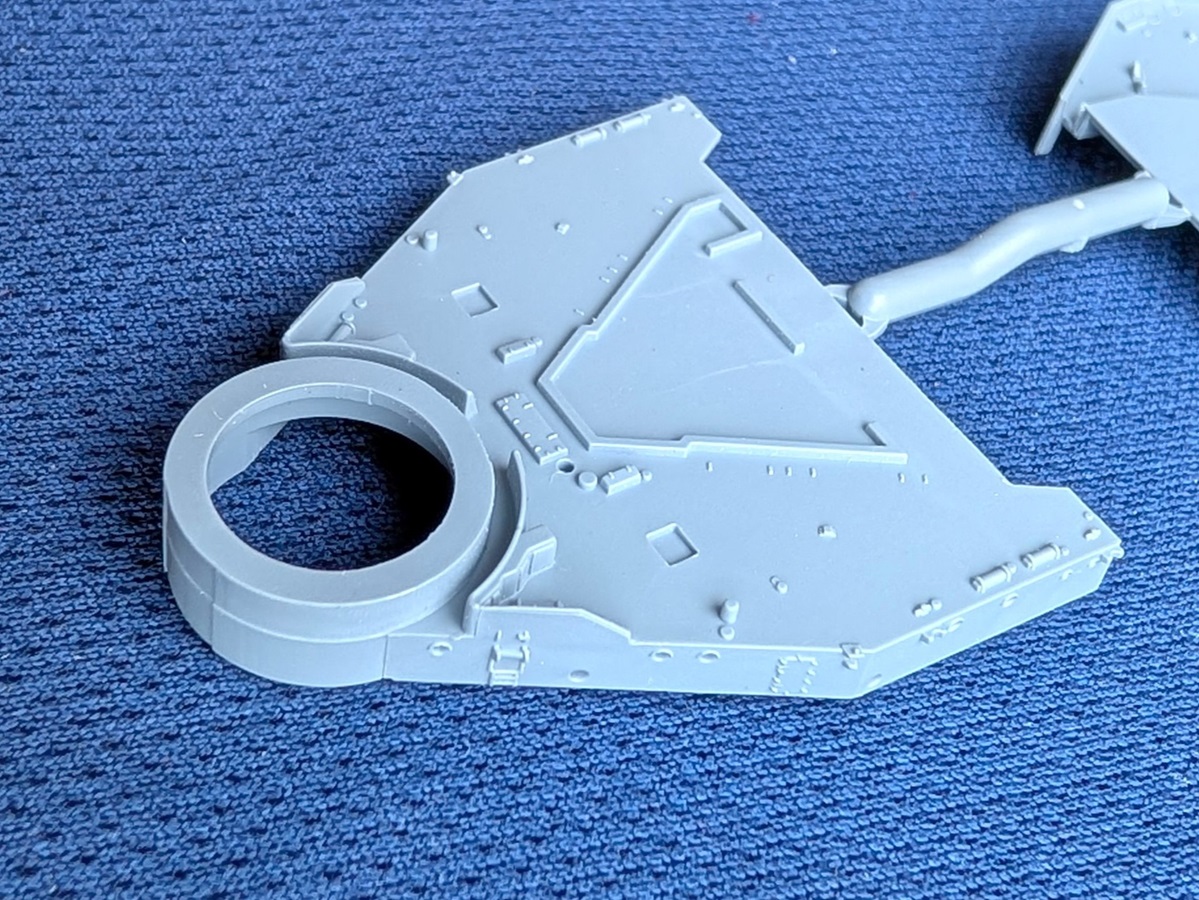
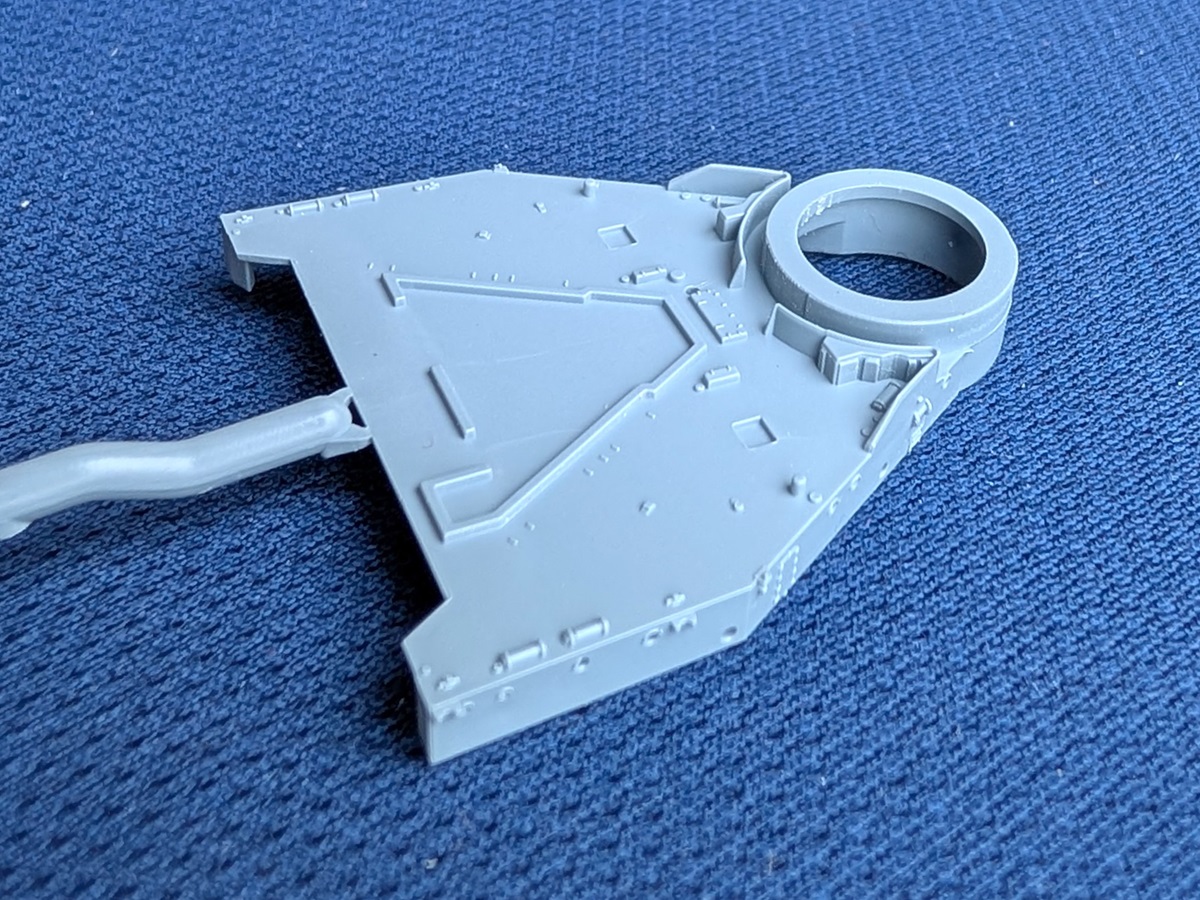
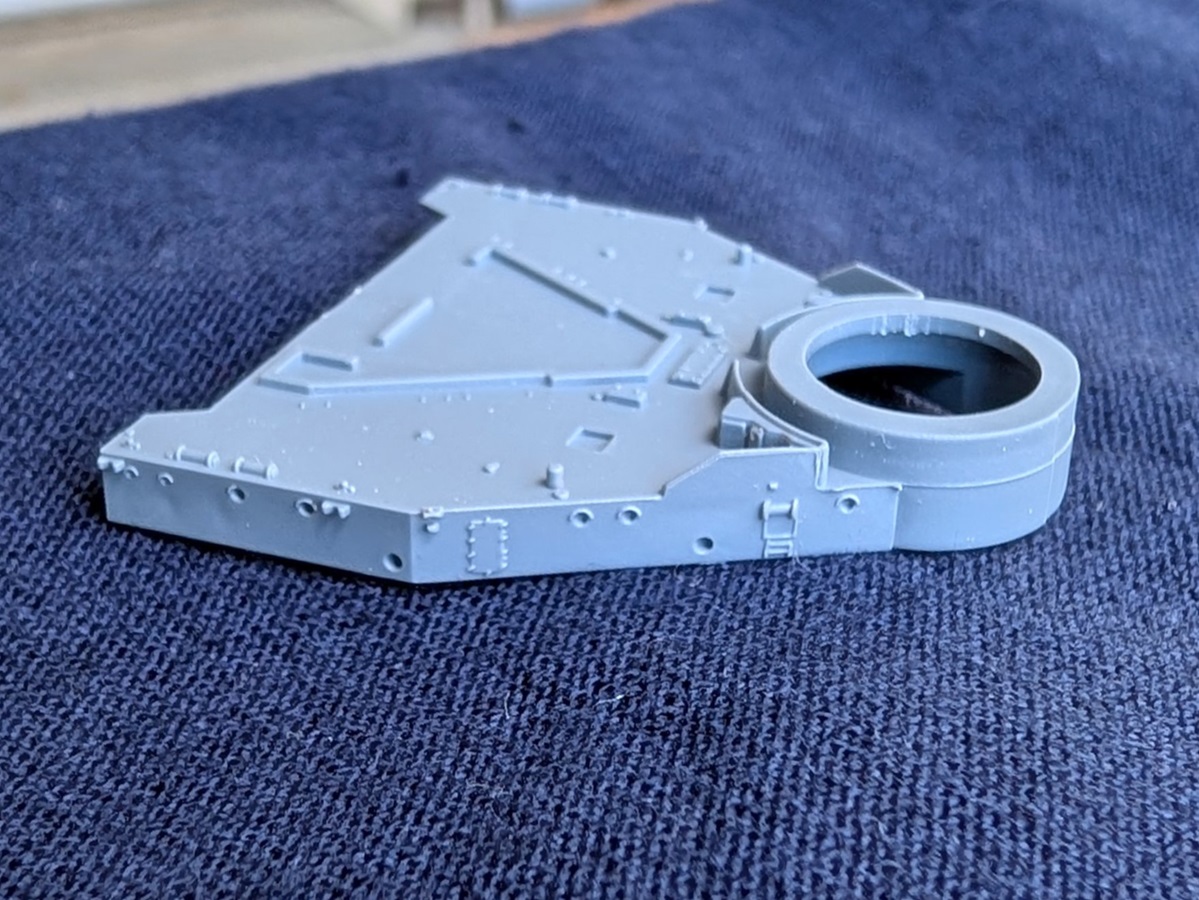
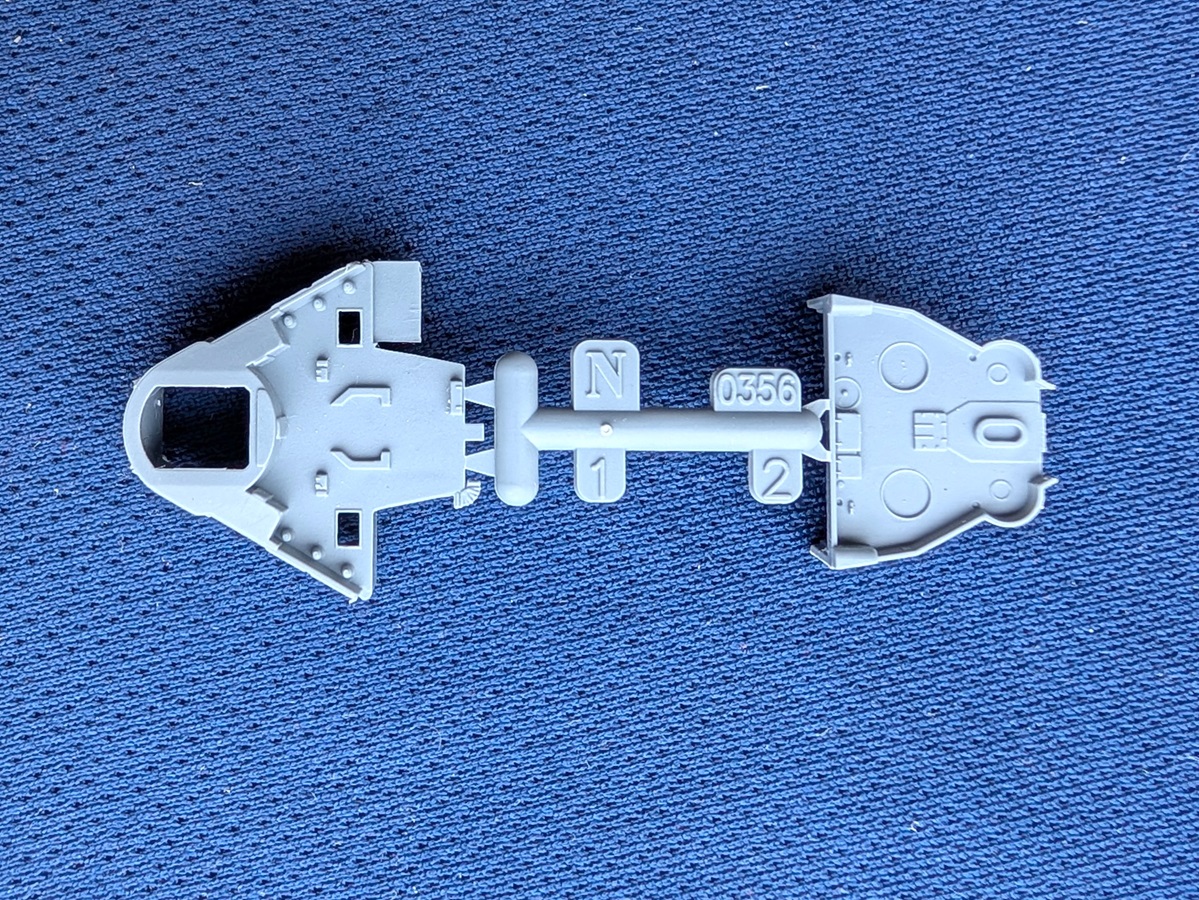
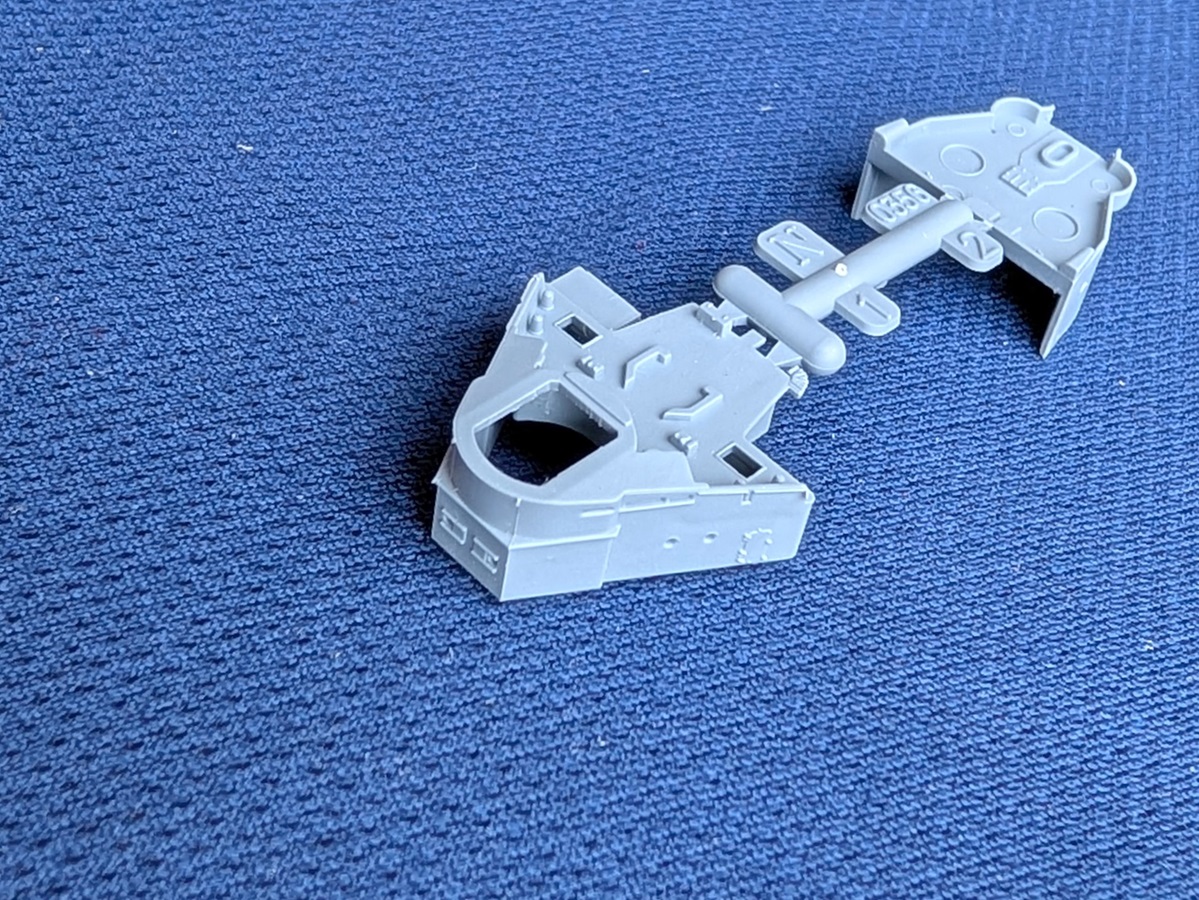
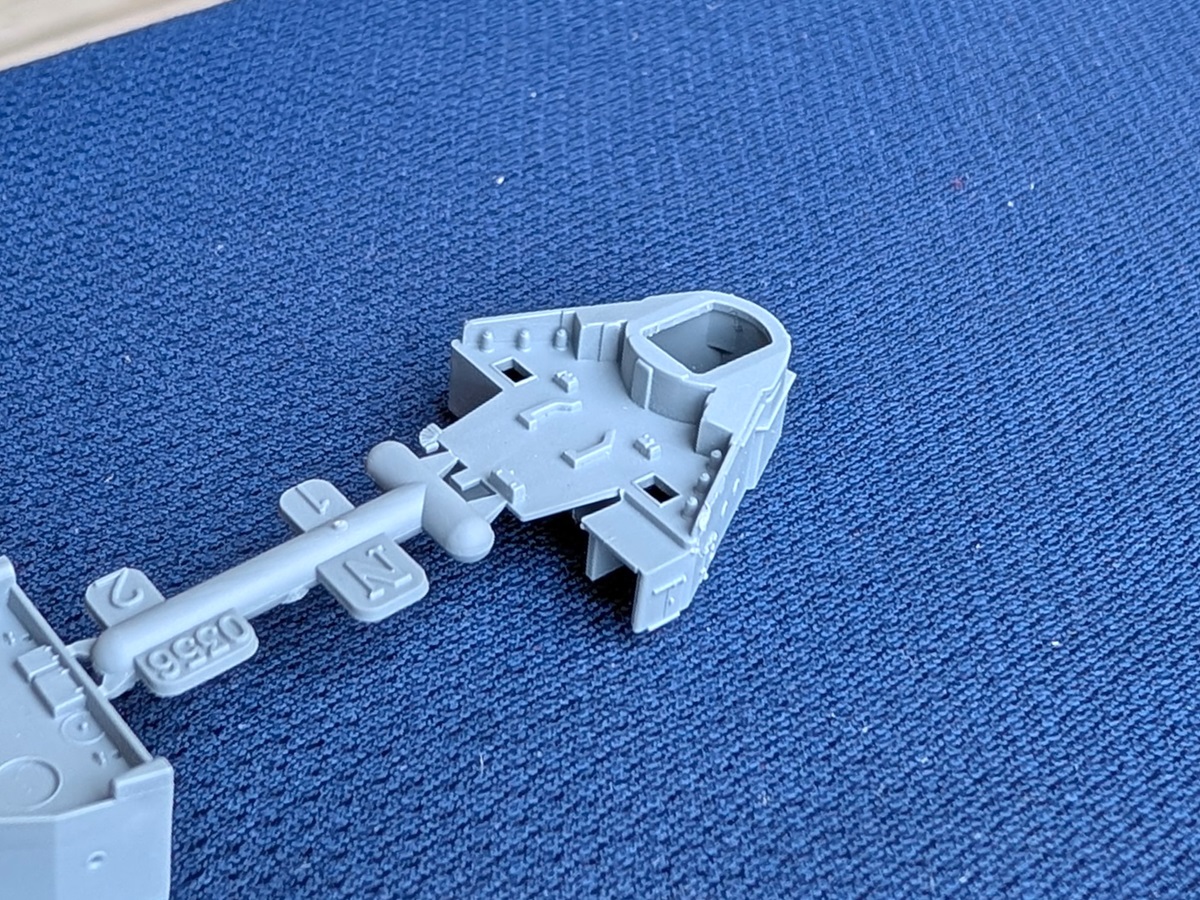
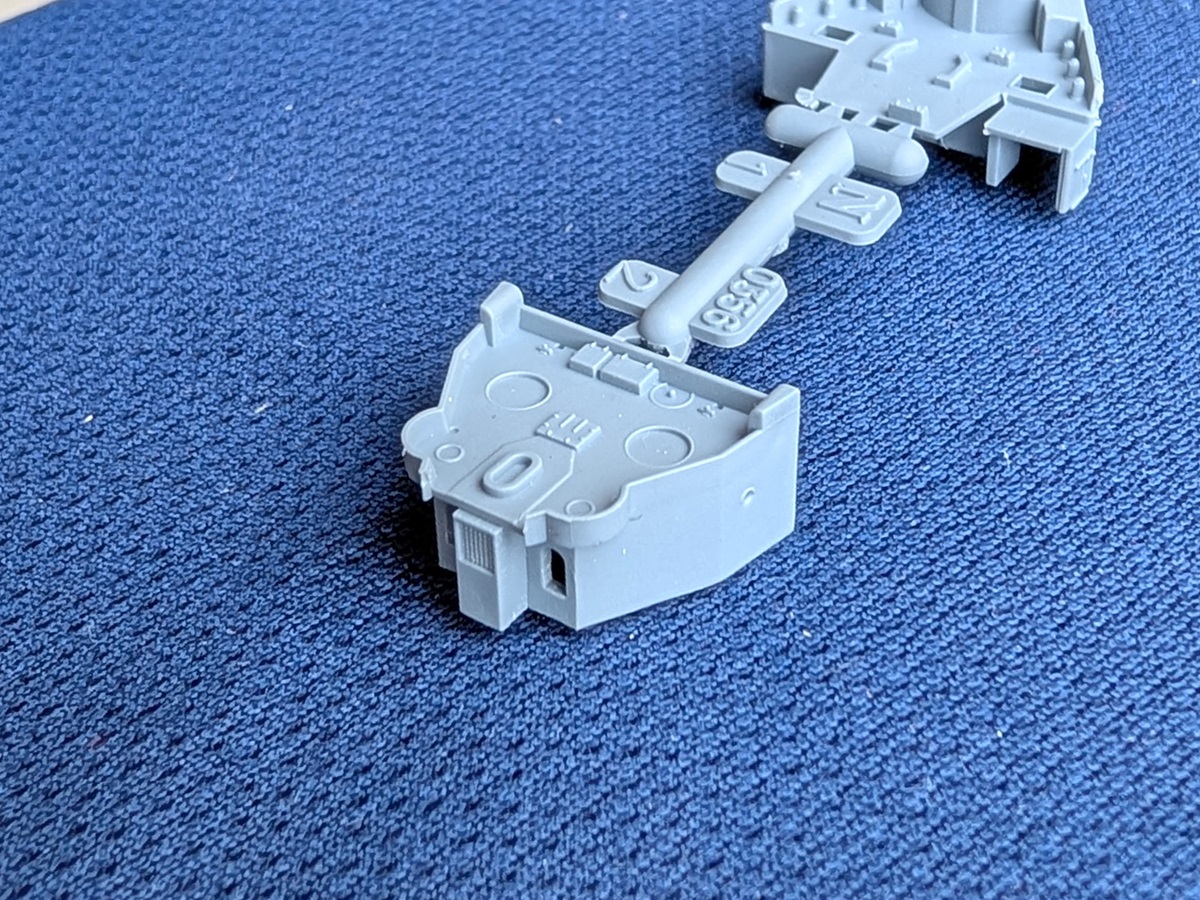
| SPRUE K/L/M/N | |
|||||||||||||||||||||||||||||||||
|
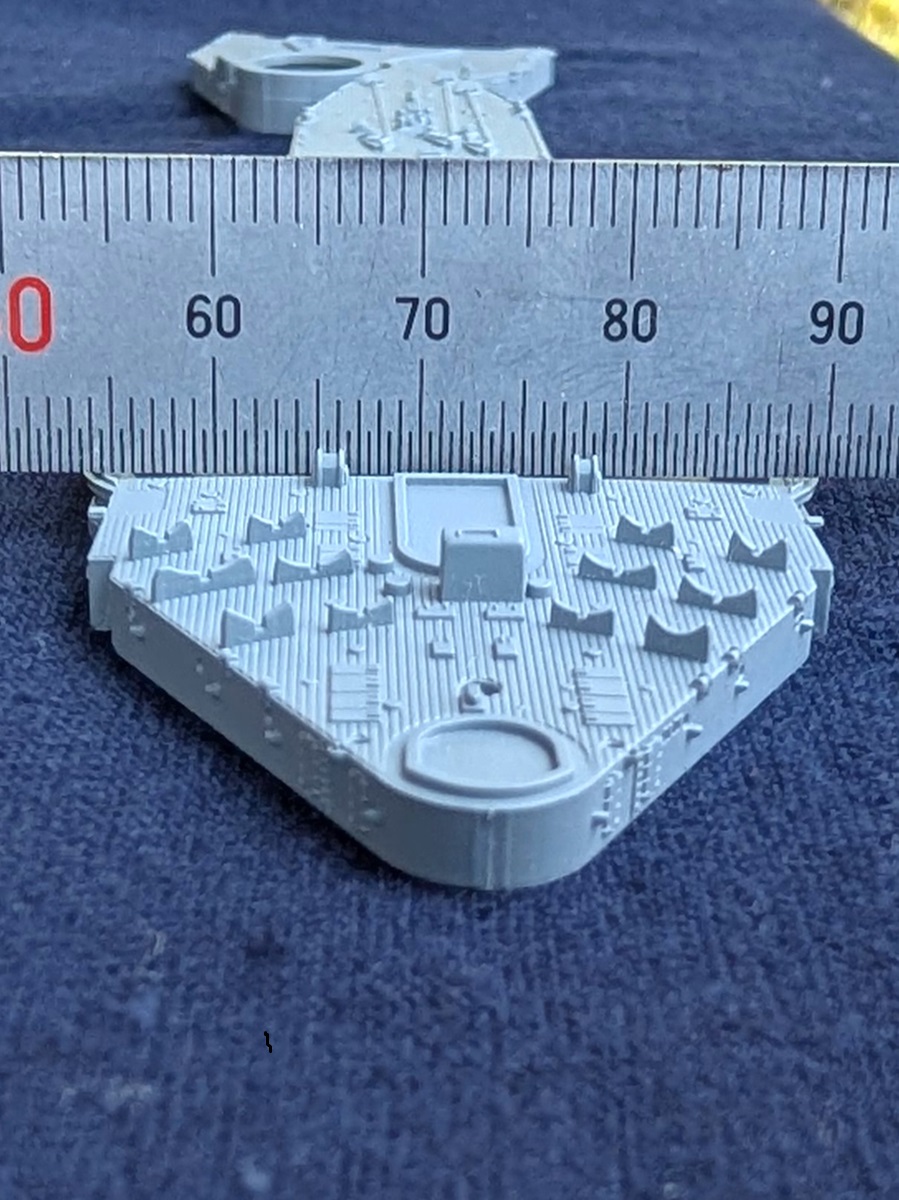
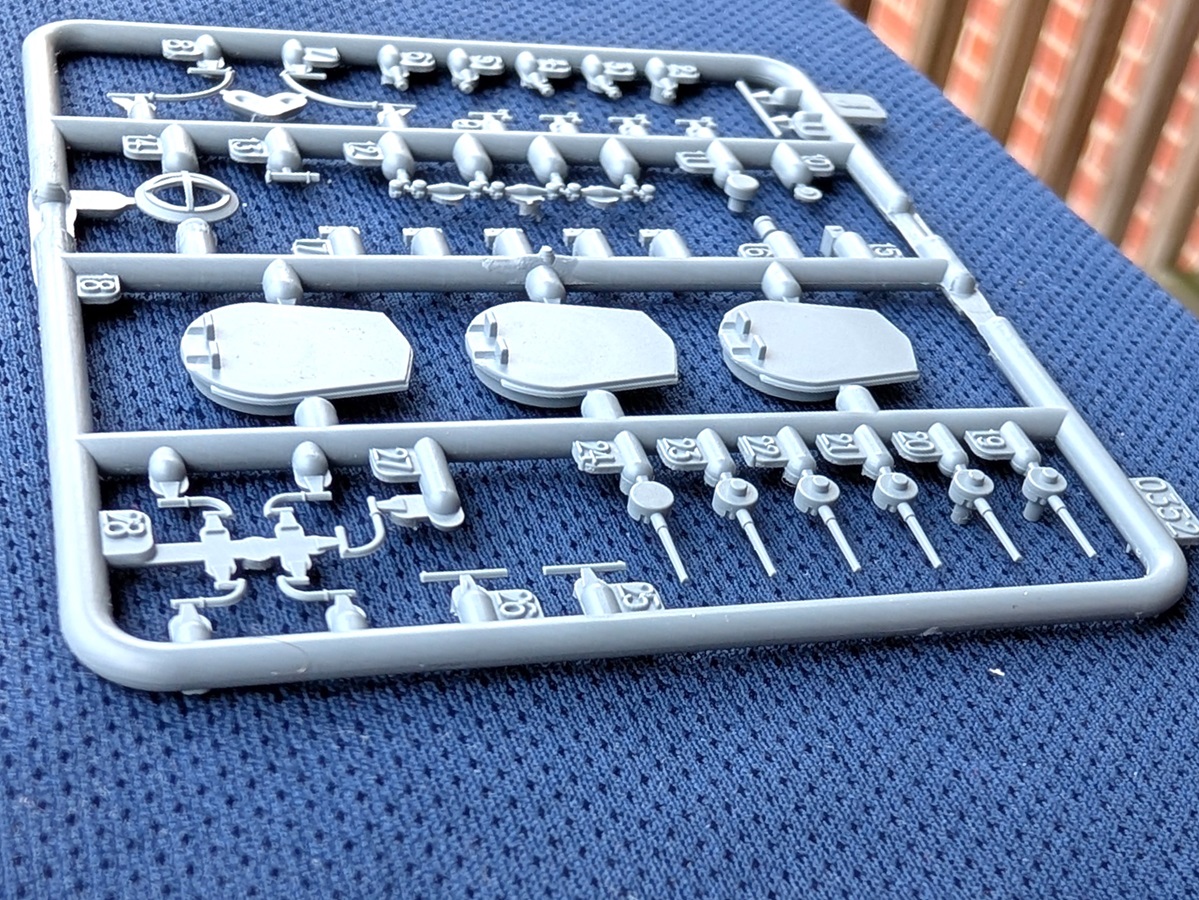
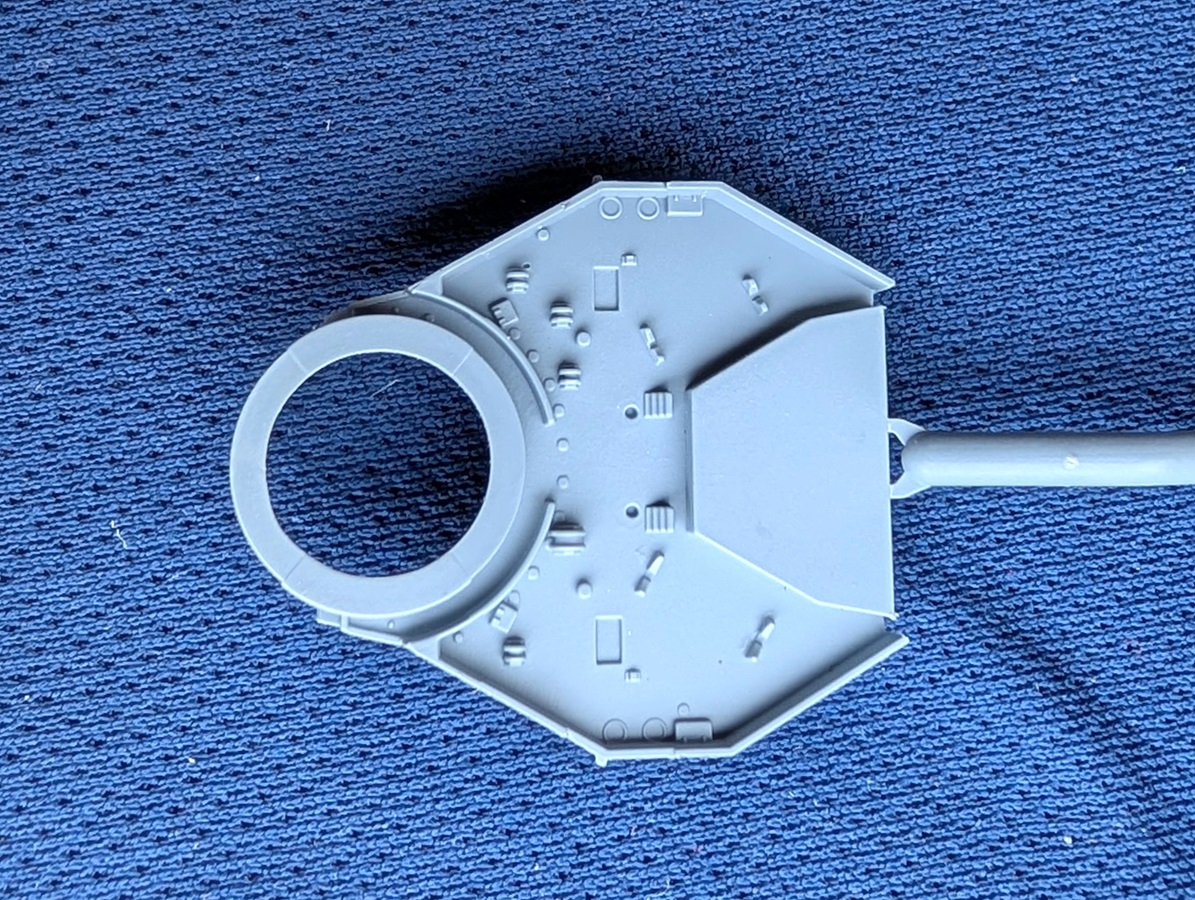
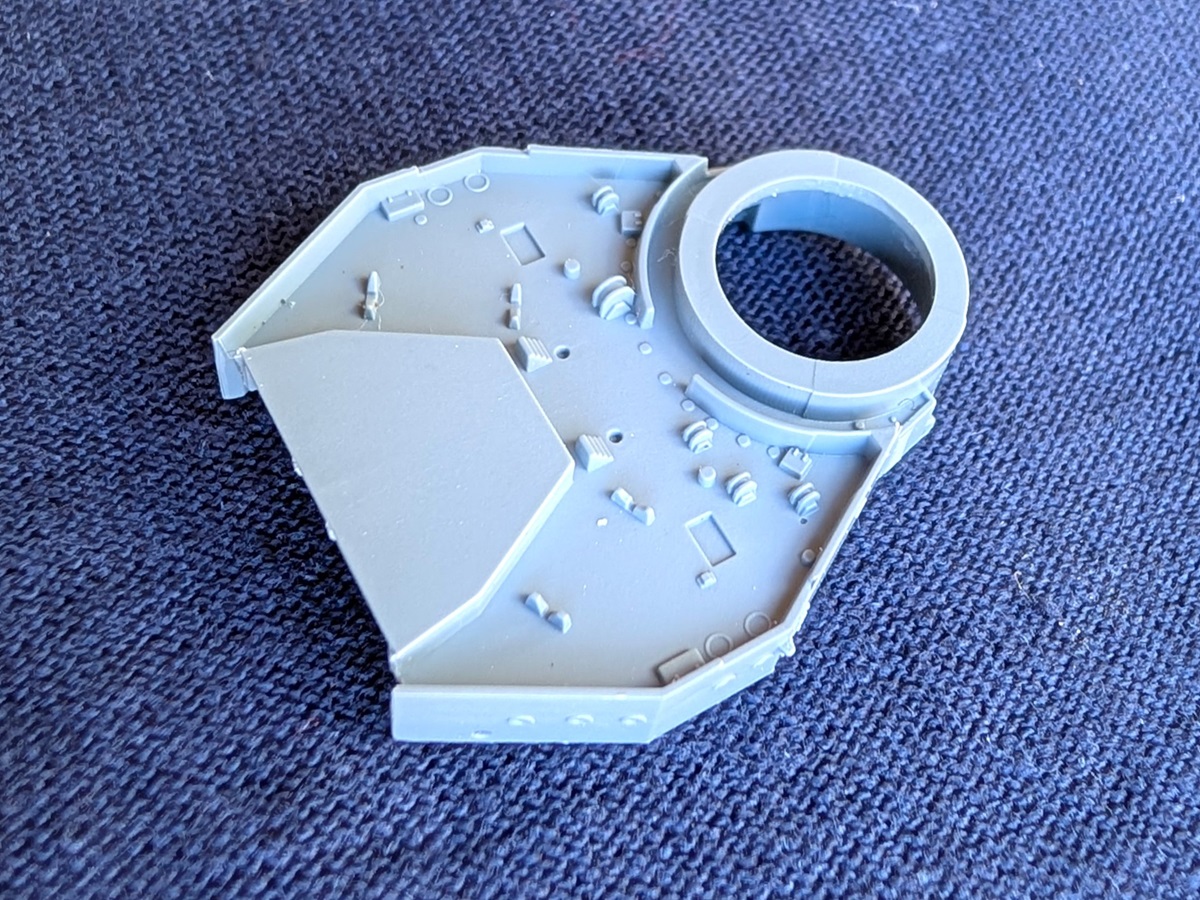
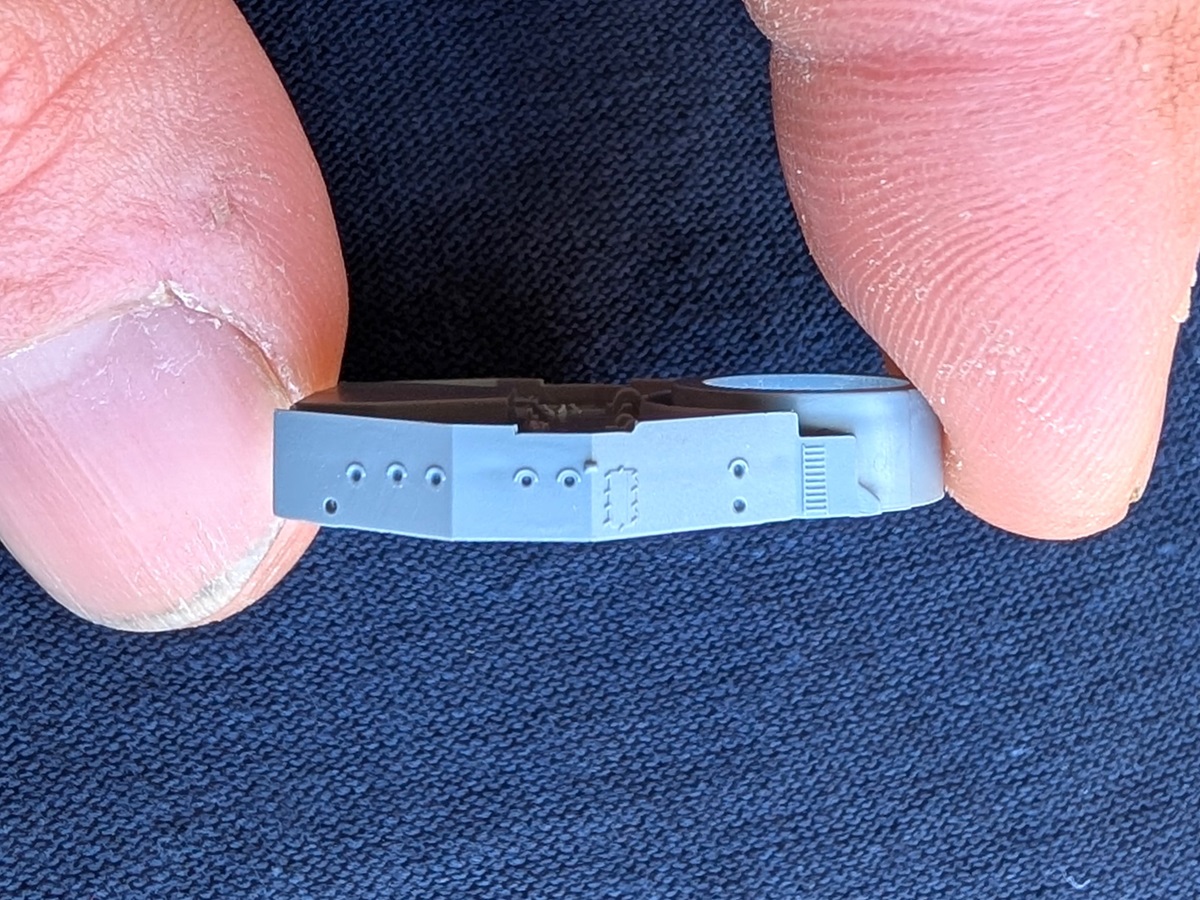
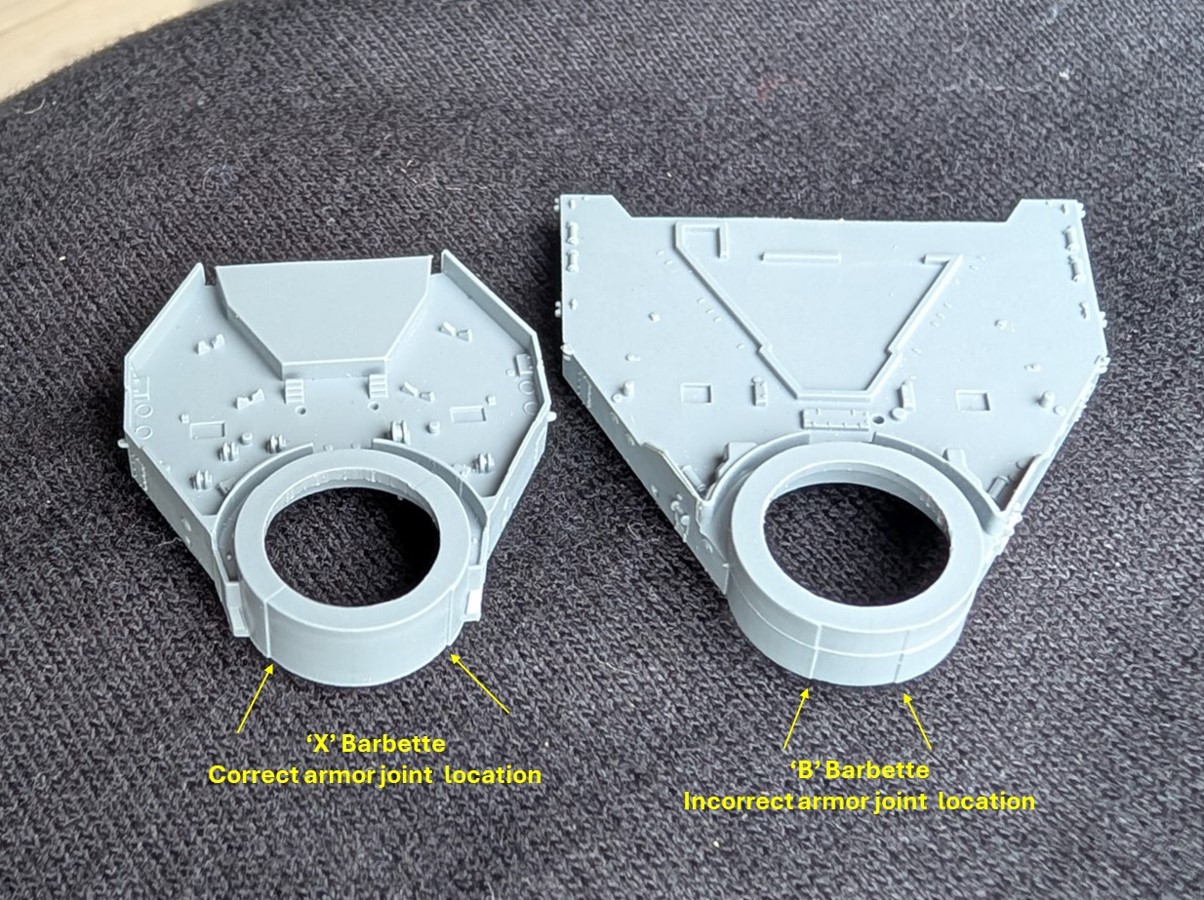
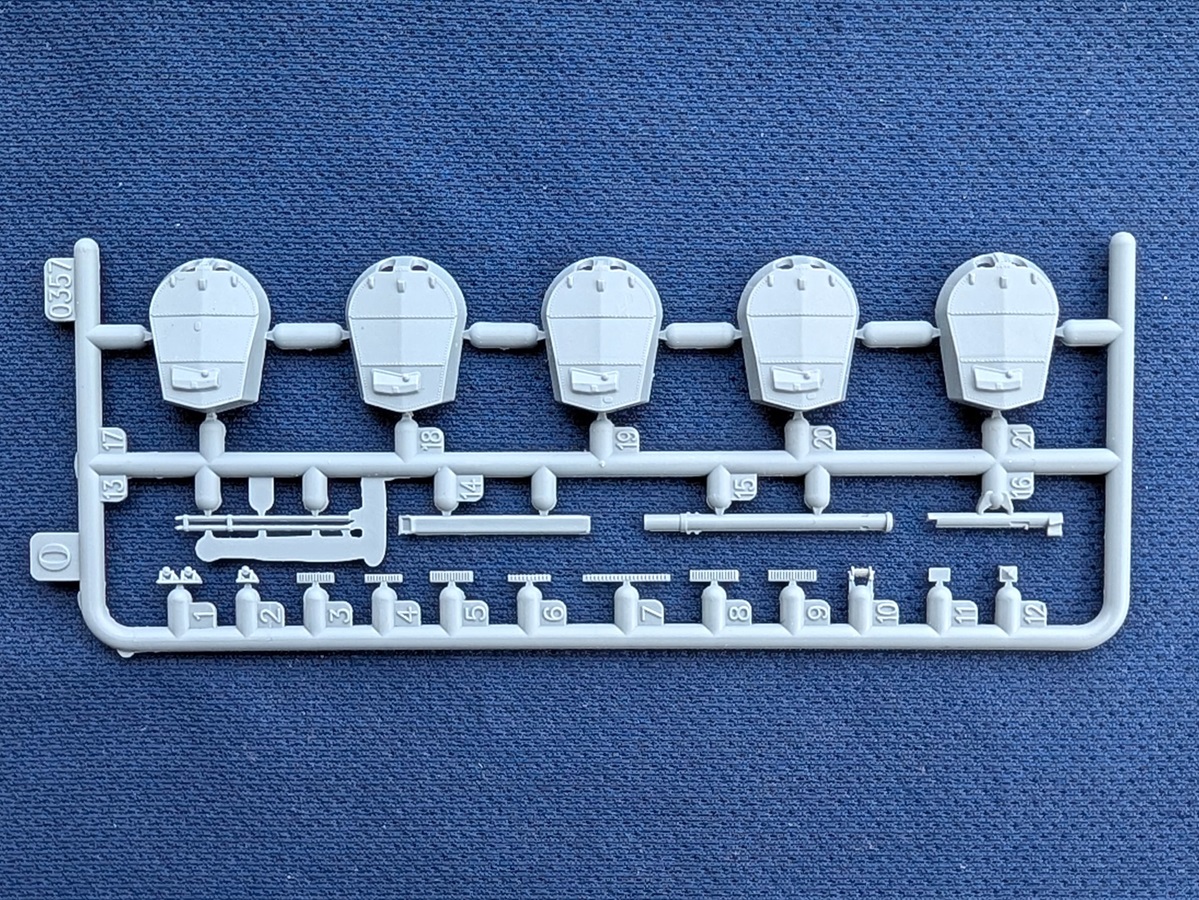
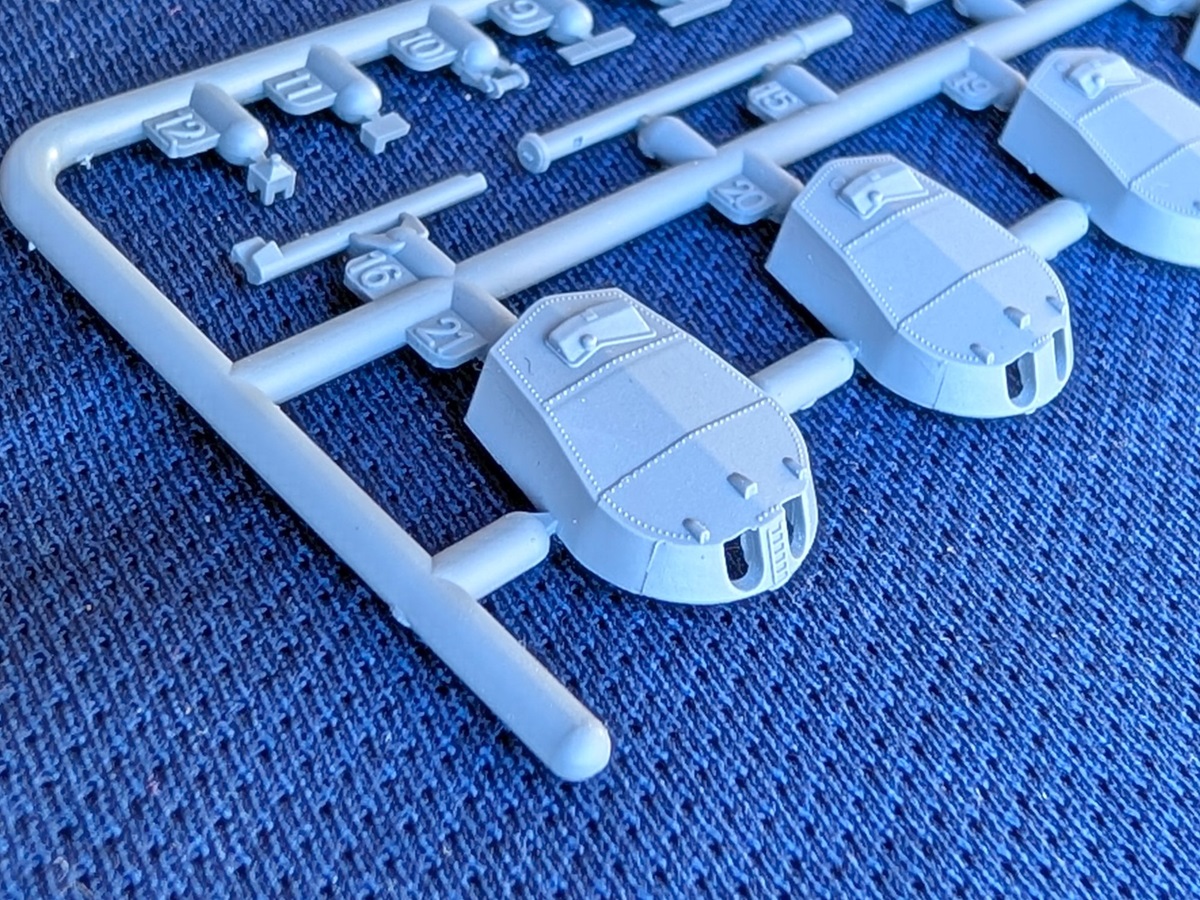
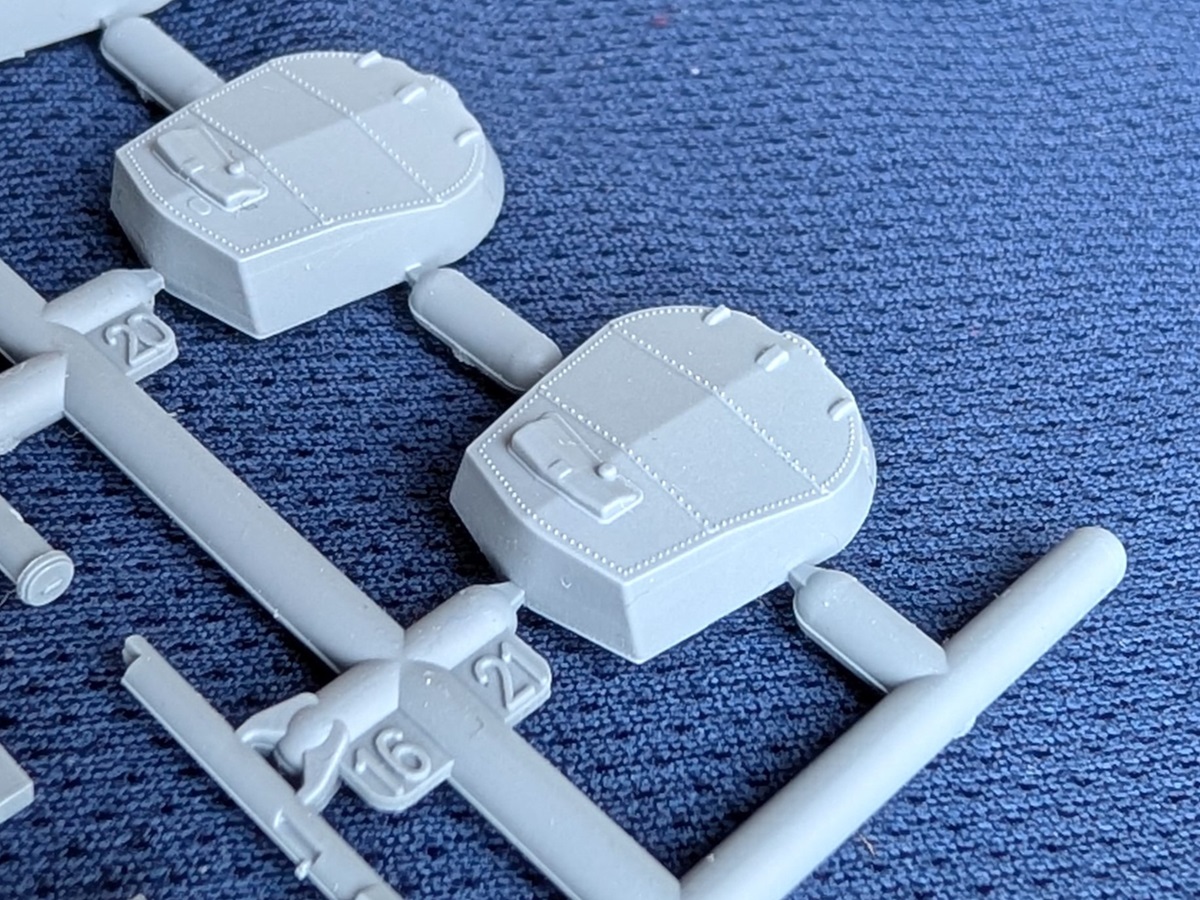
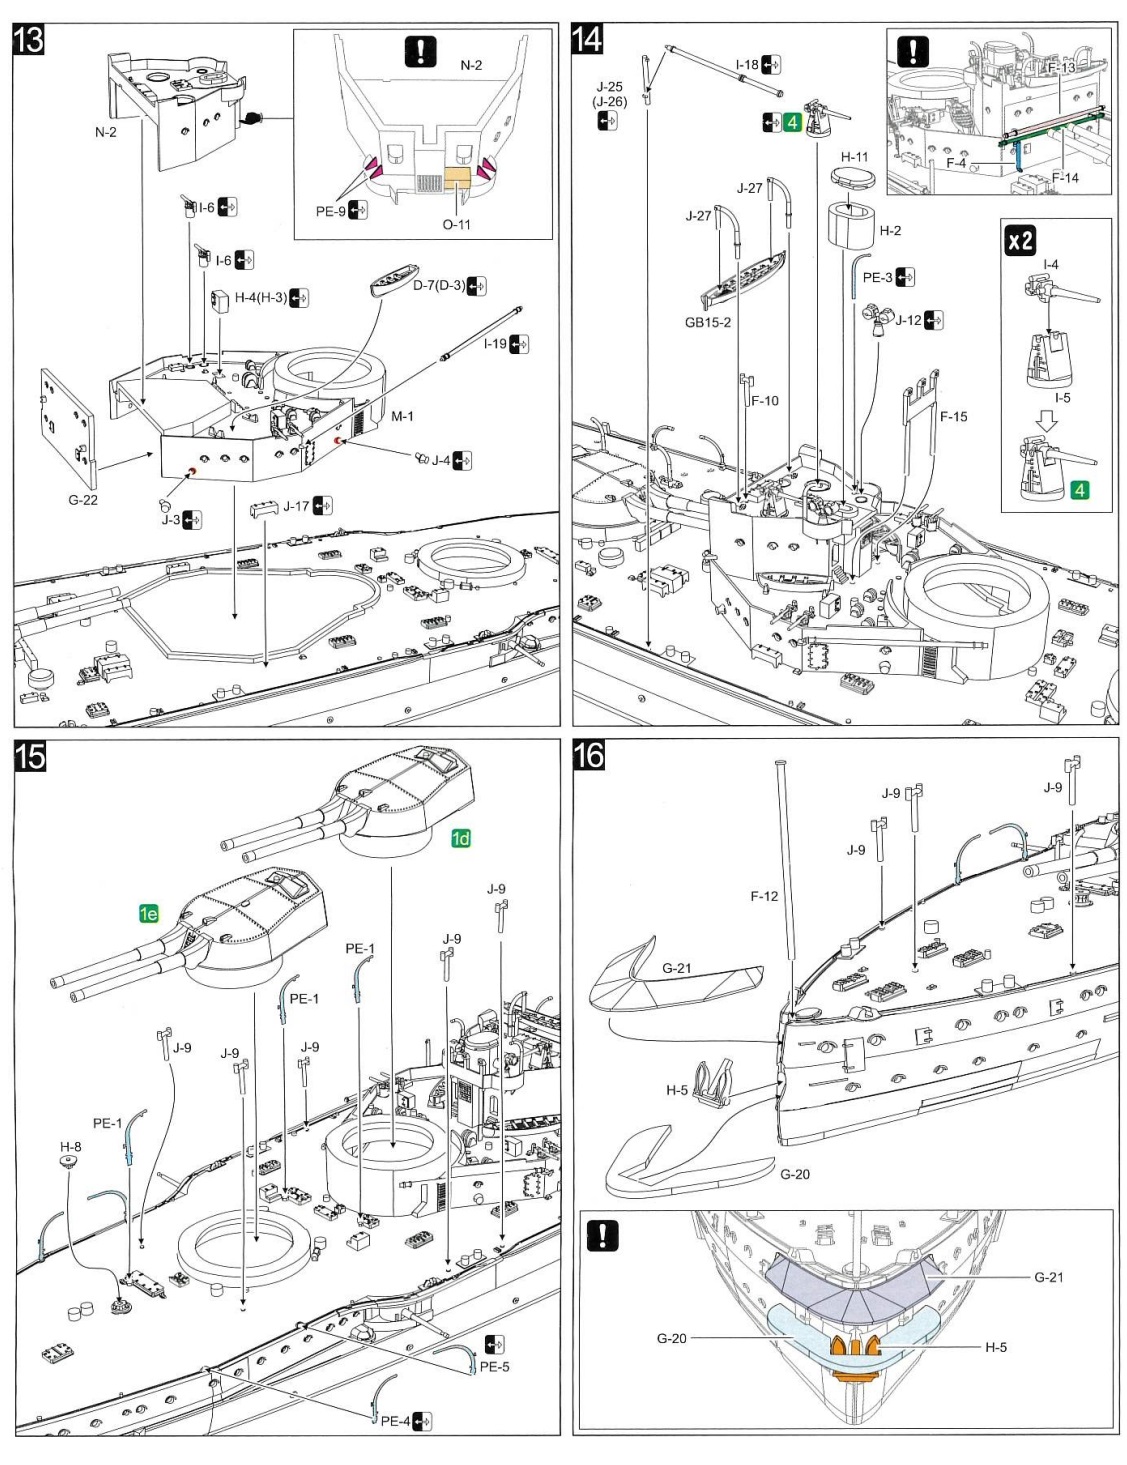
These sprues have only two parts each (L and M are each only one part but are joined on a common sprue). These are the various levels of the fore and aft superstructure. A lot of fine detail is molded into these parts, including doors, portholes with eyebrows and hose reels. The decks of these parts should be Corticene as noted above, but no tie down strips are molded (as seems to be common practice with WWII Japanese kits). Personally, I am not bothered by omitting this detail in a 1/700 ship. I did some little test fitting, and most parts dry fitted perfectly to each other, slotting together easily but with almost no slop. The lowest levels did have a slightly finicky fit to the deck. Since the deck is cambered rather than flat, the base of the superstructure appears to be shaped to match this contour – but perhaps the profile was a touch off. It’s also possible that they will fit more easily once the deck is fixed to the hull. Applying a small amount of pressure seemed to mate these parts satisfactorily. These parts incorporate the barbettes for ‘B’ (#2) turret and ‘X’ (#4) turret. (Warning: major rivet counting ahead!) A subtle detail here is that Flyhawk has seems to have molded the difference in armor thickness around the circumference. These barbettes had thicker armor facing the sides and thinner fore and aft, which is visible in photos of the ship and the original as-fitted plans. It’s an admirable effort, but the break between thin and thick armor is in the wrong spots on B barbette. Ironically it should be more like X barbette, which is correct in this kit. This is quite nitpicky, but it is strange that Flyhawk went through the trouble to add this detail and then got it wrong. |
||||||||||||||||||||||||||||||||||
|
||||||||||||||||||||||||||||||||||
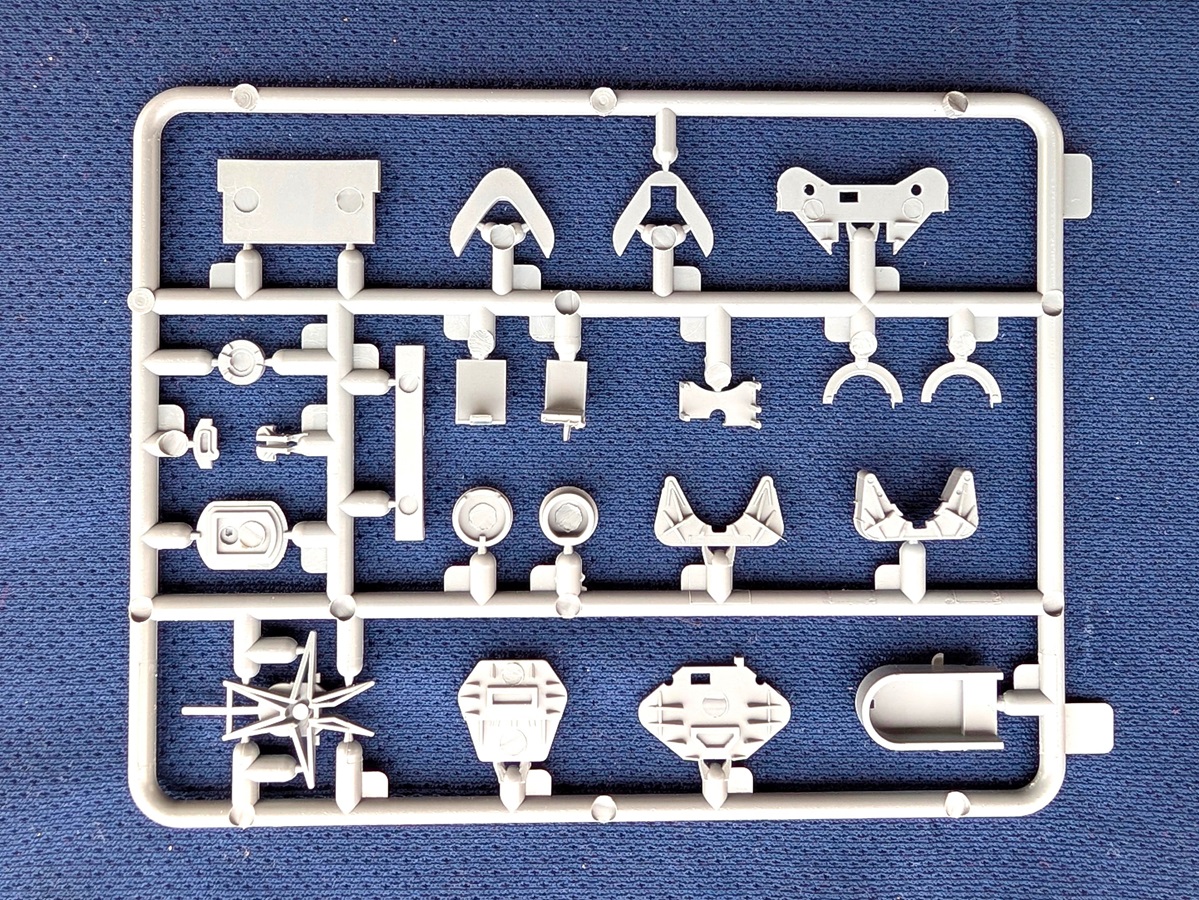
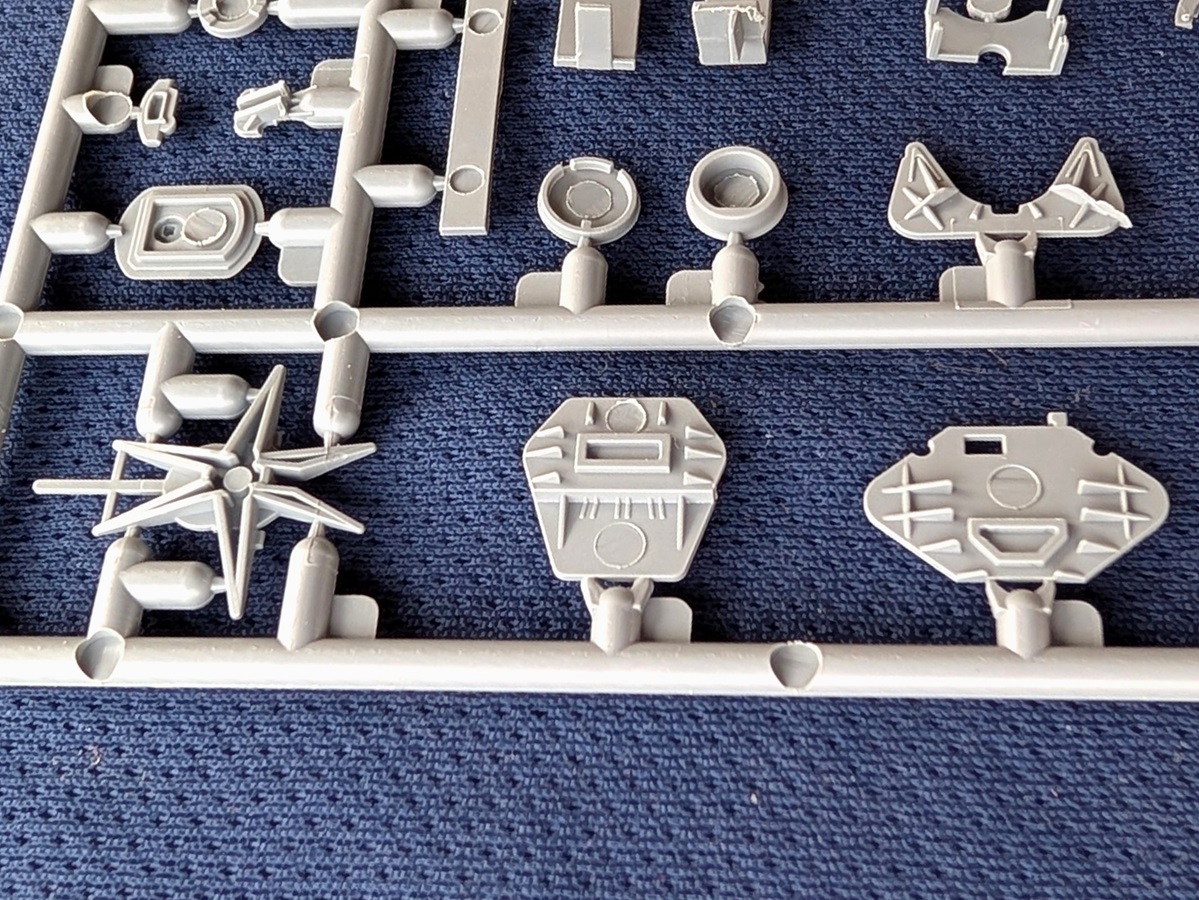
| SPRUE O | ||||||||||||||||||||||||||||||||||
|
Here we have the main turret gun houses, the vertical leg of the tripod, the big derrick post and some smaller pieces for the derrick and funnels. The inclined stairs, of which there are many, are on this sprue. The stairs are a decent effort for plastic, but the deluxe photo etch replacements are far superior. The turrets are sharp and the shape seems correct. There are some messy looking seams in the forward quarters of the turret that look like molding artifacts, although pictures of the real turrets very faintly show a seam in this spot (if the light hits the turret just right). The rivet detail again adds to the ‘visual mass’ of the parts, though it is again overscale and the pattern somewhat simplified from the real ship. The derrick posts have what initially seemed to be a bit of flash. On closer inspection, it appears that there was a slight misalignment of the mold halves. It is not super obvious and should be fairly easy to clean up, but this was present on a few posts and masts (but fortunately not the gun barrels). |
||||||||||||||||||||||||||||||||||
|
||||||||||||||||||||||||||||||||||
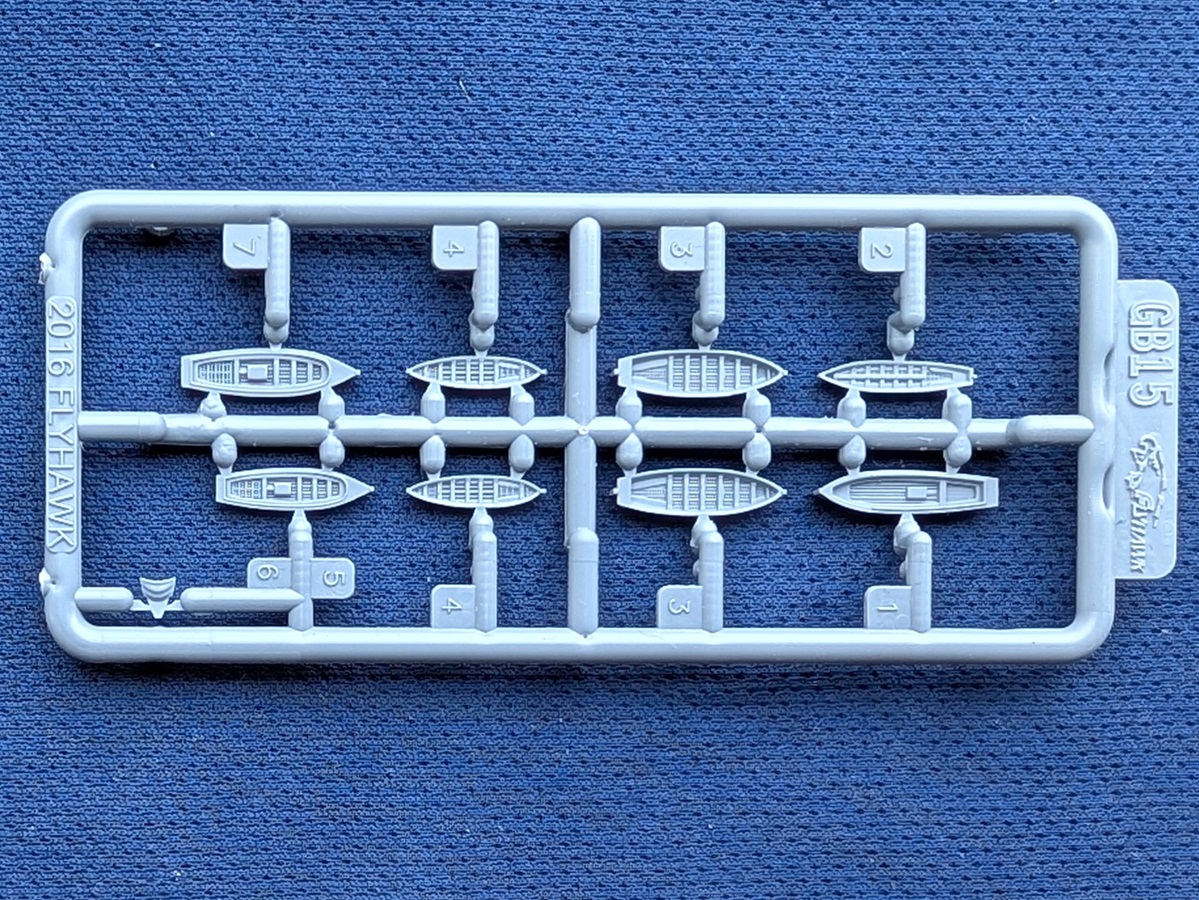
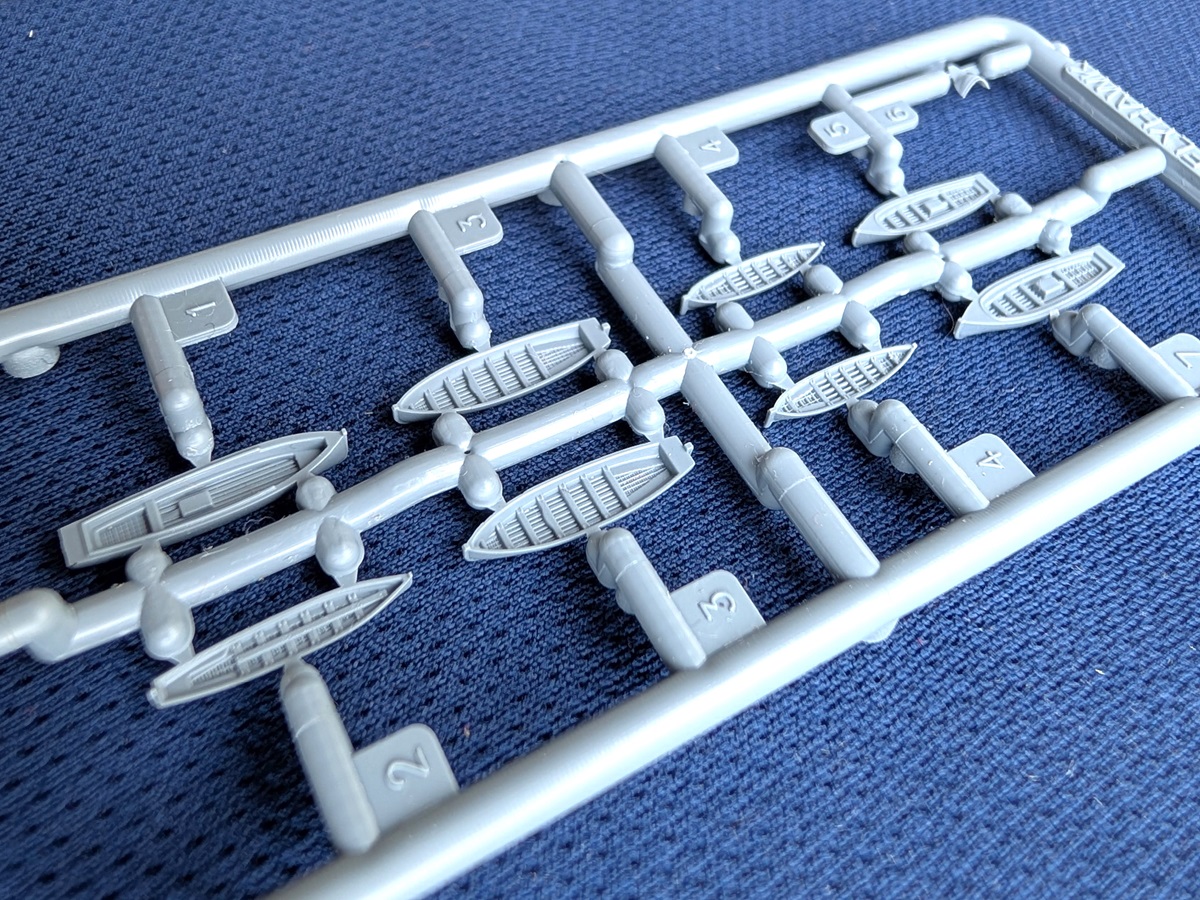
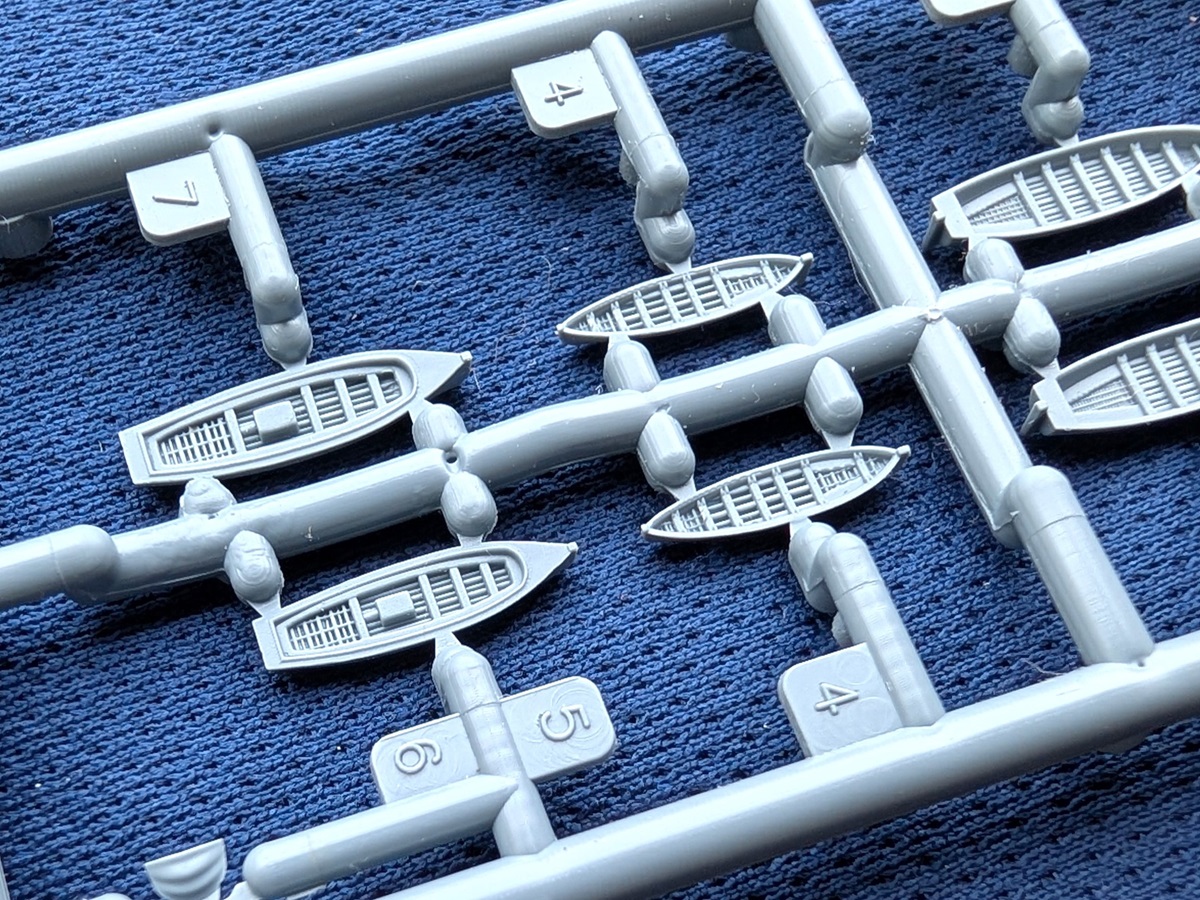
| SPRUE GB15 (x1) | ||||||||||||||||||||||||||||||||||
|
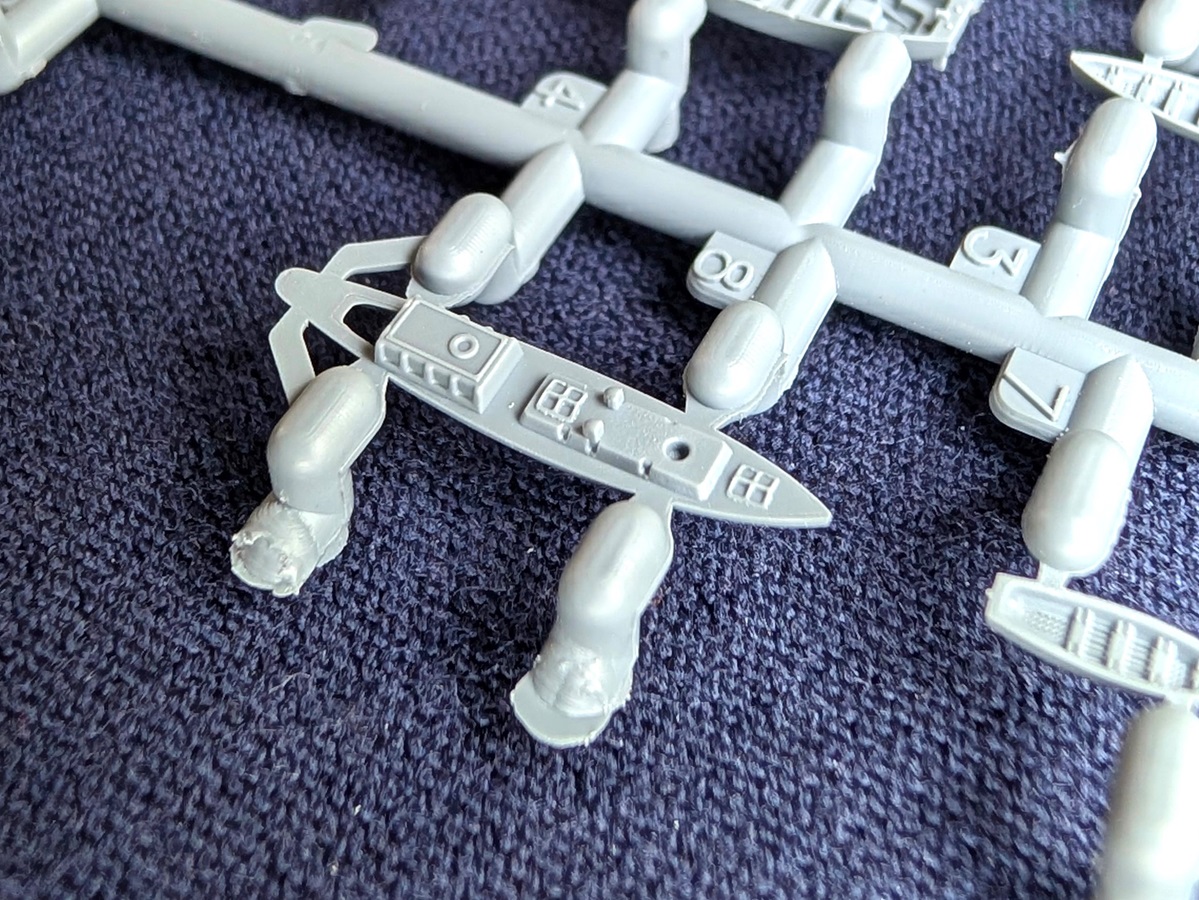
This sprue appears to be a generic Royal Navy sprue. It contains more boats. As expected for a generic sprue, not all the boats are used in the kit. |
||||||||||||||||||||||||||||||||||
|
||||||||||||||||||||||||||||||||||
| BASIC PHOTO-ETCH | ||||||||||||||||||||||||||||||||||
|
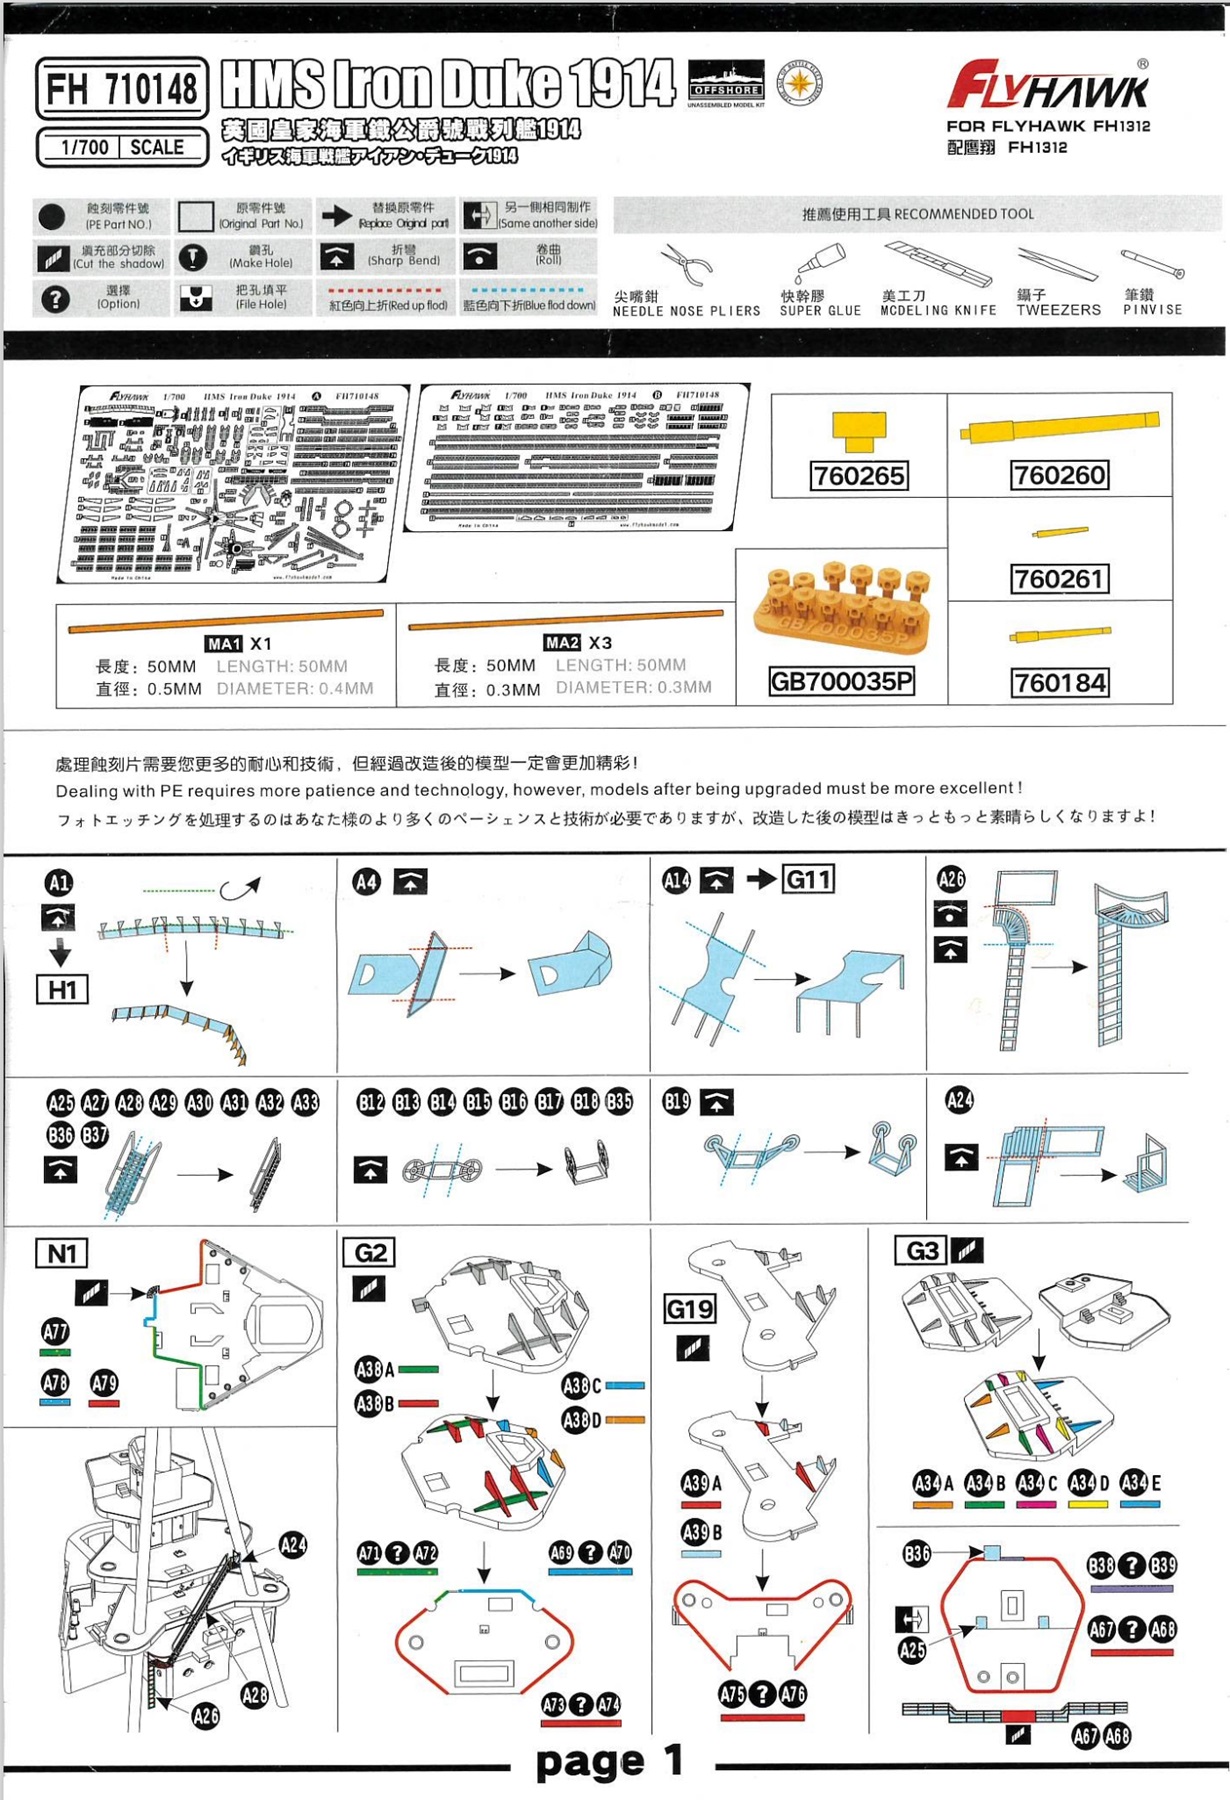
The basic (non-deluxe) kit includes a small photo etch fret. It has small davits that are placed at the deck edge, along with some platform braces and the support framing for the platform on the forward funnel. The 3 big support braces are optional, as plastic pieces are also included. |
||||||||||||||||||||||||||||||||||
|
||||||||||||||||||||||||||||||||||
| DECALS | ||||||||||||||||||||||||||||||||||
|
The only decals included are flags, with are offered both square and wavy shapes. |
||||||||||||||||||||||||||||||||||
|
||||||||||||||||||||||||||||||||||
| DELUXE PARTS | ||||||||||||||||||||||||||||||||||
| TURNED BRASS & 3D PRINTED BARREL MOUNTS | ||||||||||||||||||||||||||||||||||
|
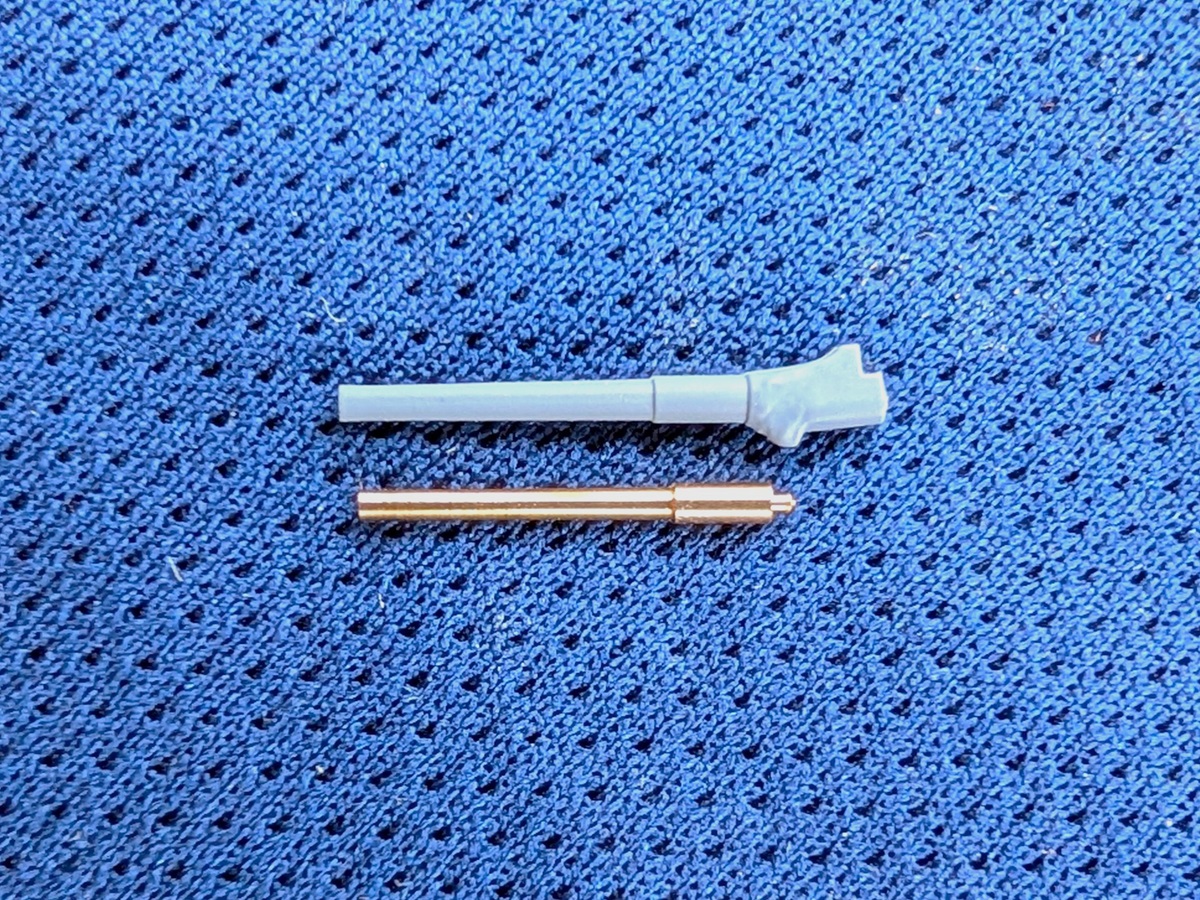
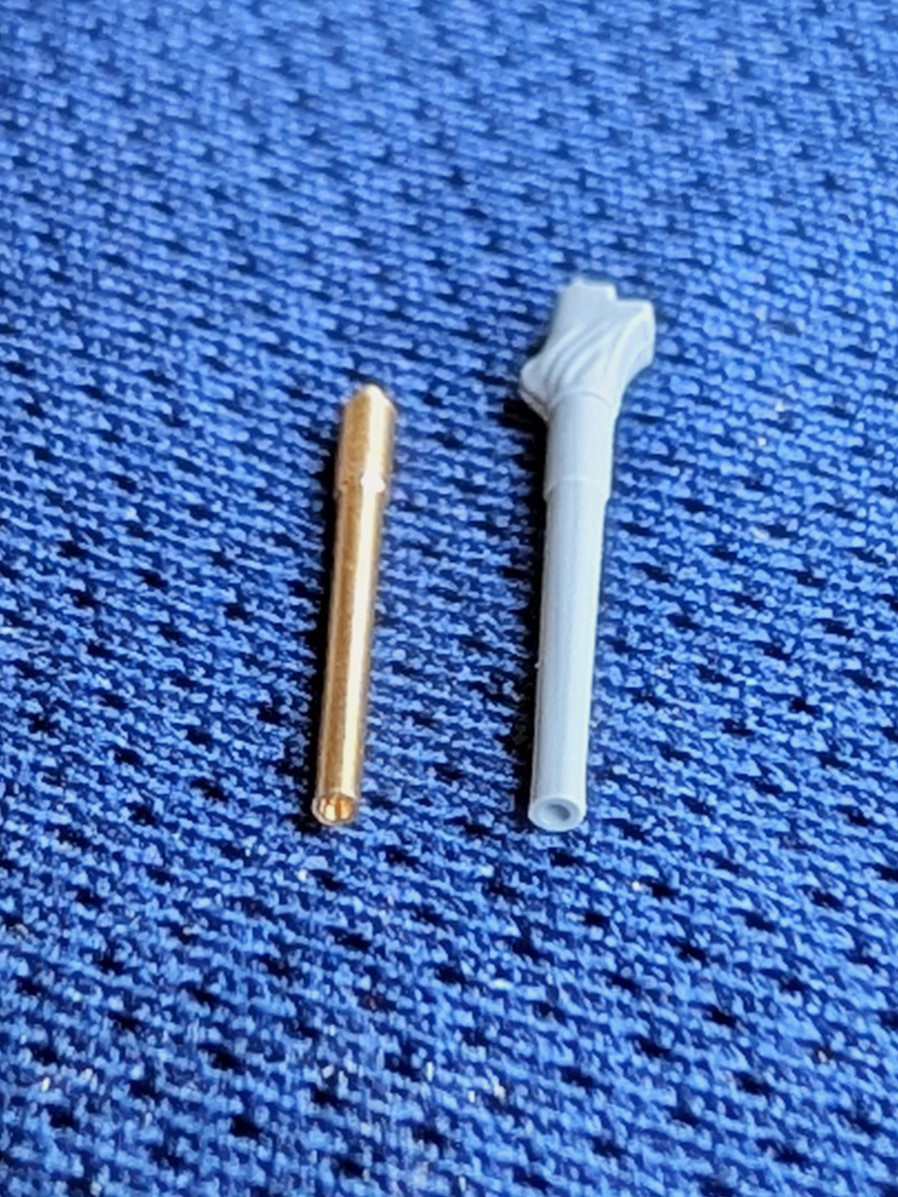
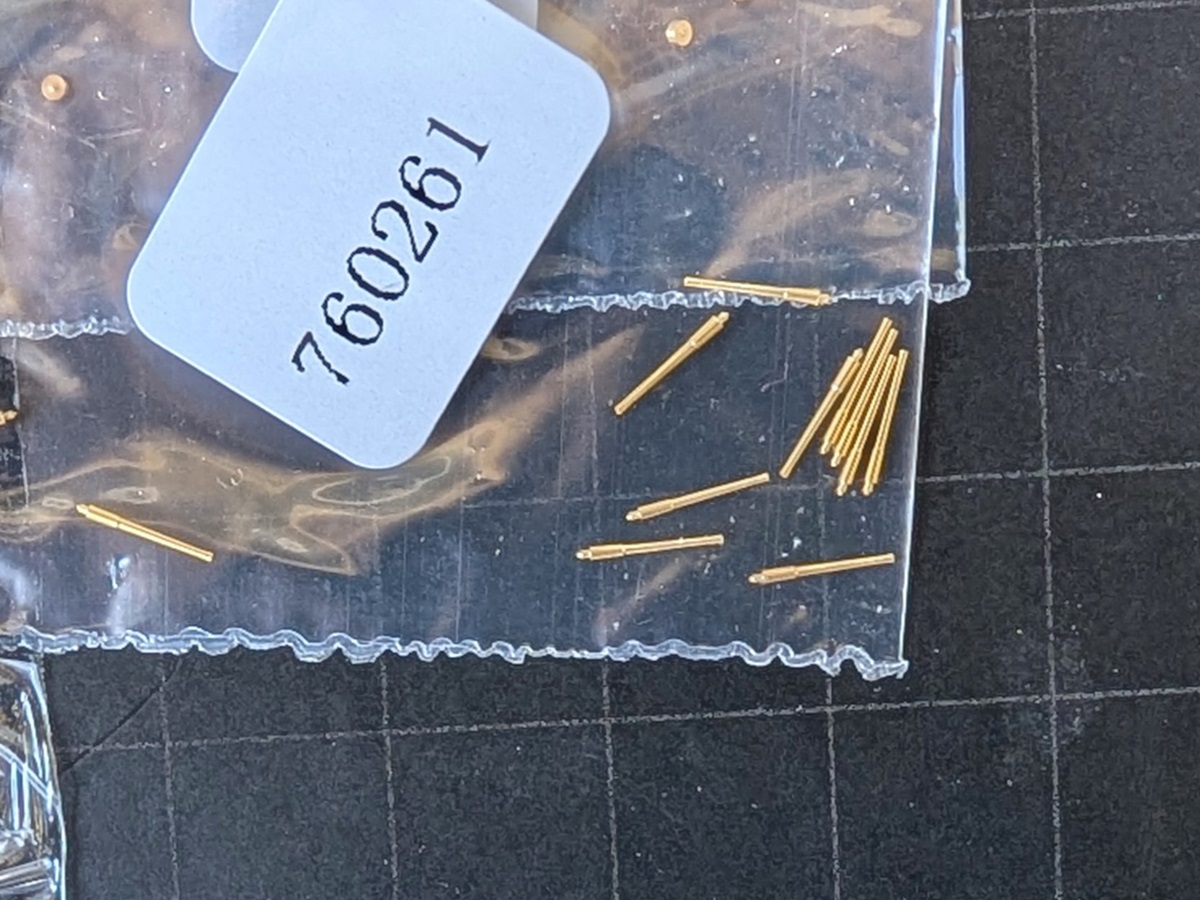
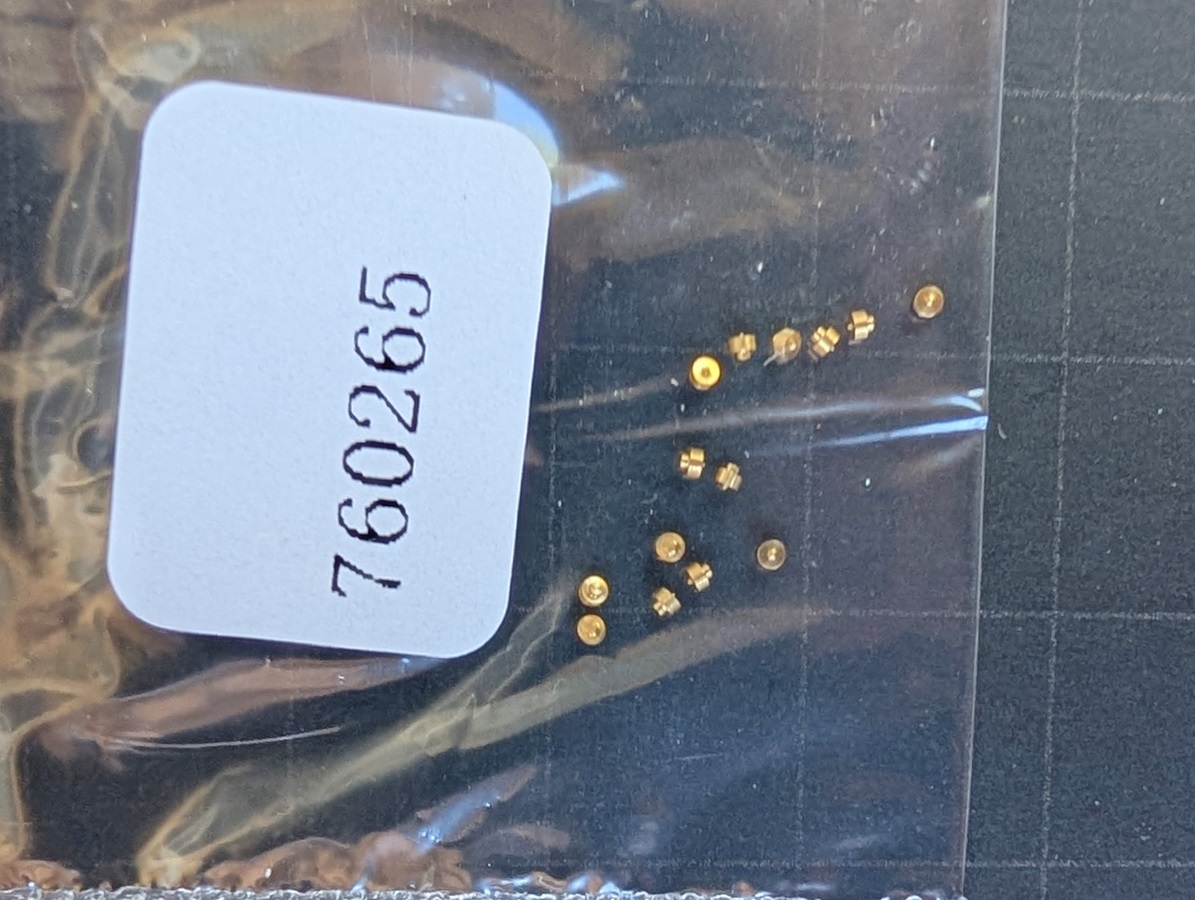
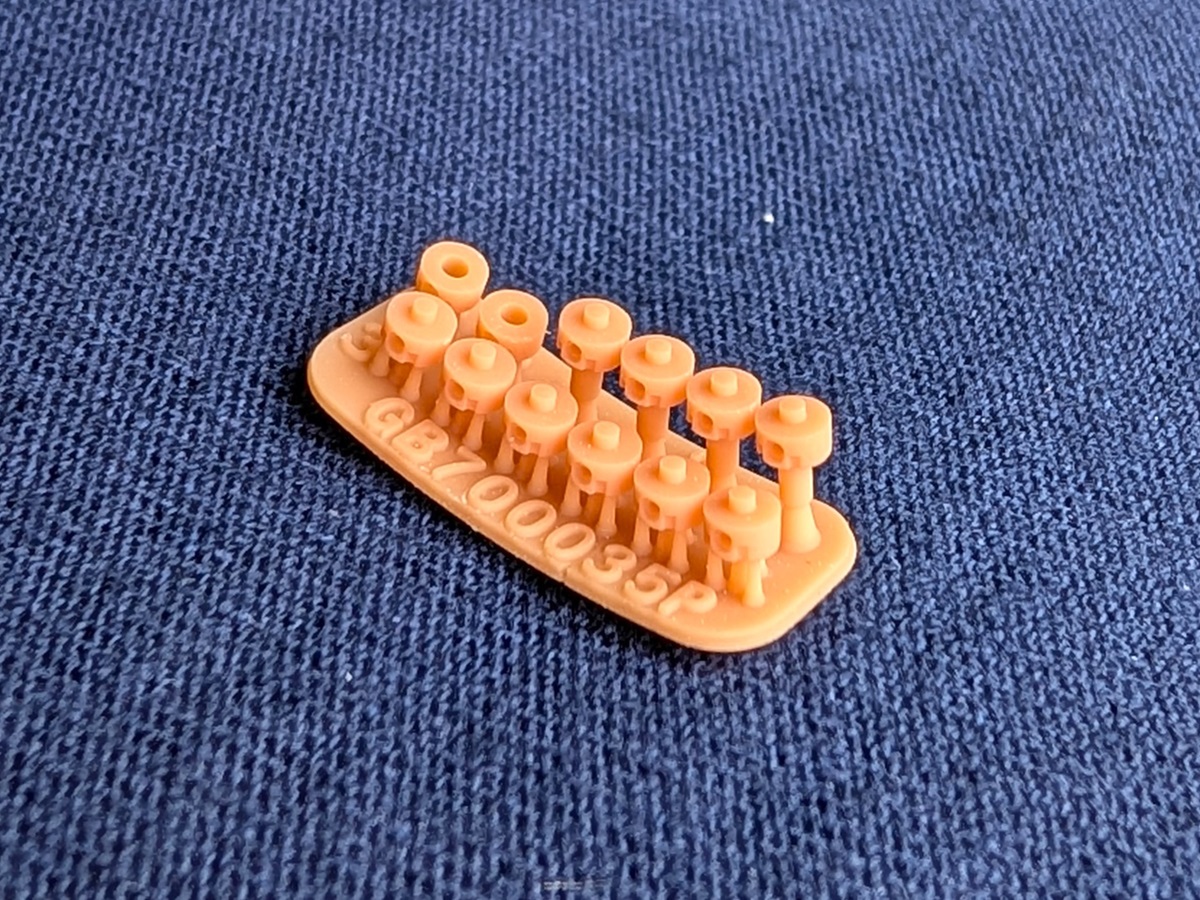
Turned brass barrels are offered for the 13.5”, 6” and 3” AA guns. There are also turned brass vents which replace the chunky molded-on vents throughout the forecastle and quarterdeck. While the basic plastic 13.5” gun barrels are very nice, the brass parts are noticeably slimmer and presumably closer to scale. They certainly look more appropriate to the naked eye. The brass 6” barrels mate with 3D printed bases that are specifically designed for these pieces. This is a nice feature. It eliminates the usual hassle of sawing off the plastic barrels from their bases and manually drilling an alignment hole. The other guns do not get this treatment, but I hope Flyhawk expands on this practice for future releases. One oversight with instructions for 3D printed gun bases: The parts are not all the same, and there is no guidance in the instructions or part numbers for which parts go where. Comparing the 3D printed parts to the base kit plastic parts and then referencing the base kit instructions will show where to put them. |
||||||||||||||||||||||||||||||||||
|
||||||||||||||||||||||||||||||||||
| DELUXE PHOTO-ETCH | ||||||||||||||||||||||||||||||||||
|
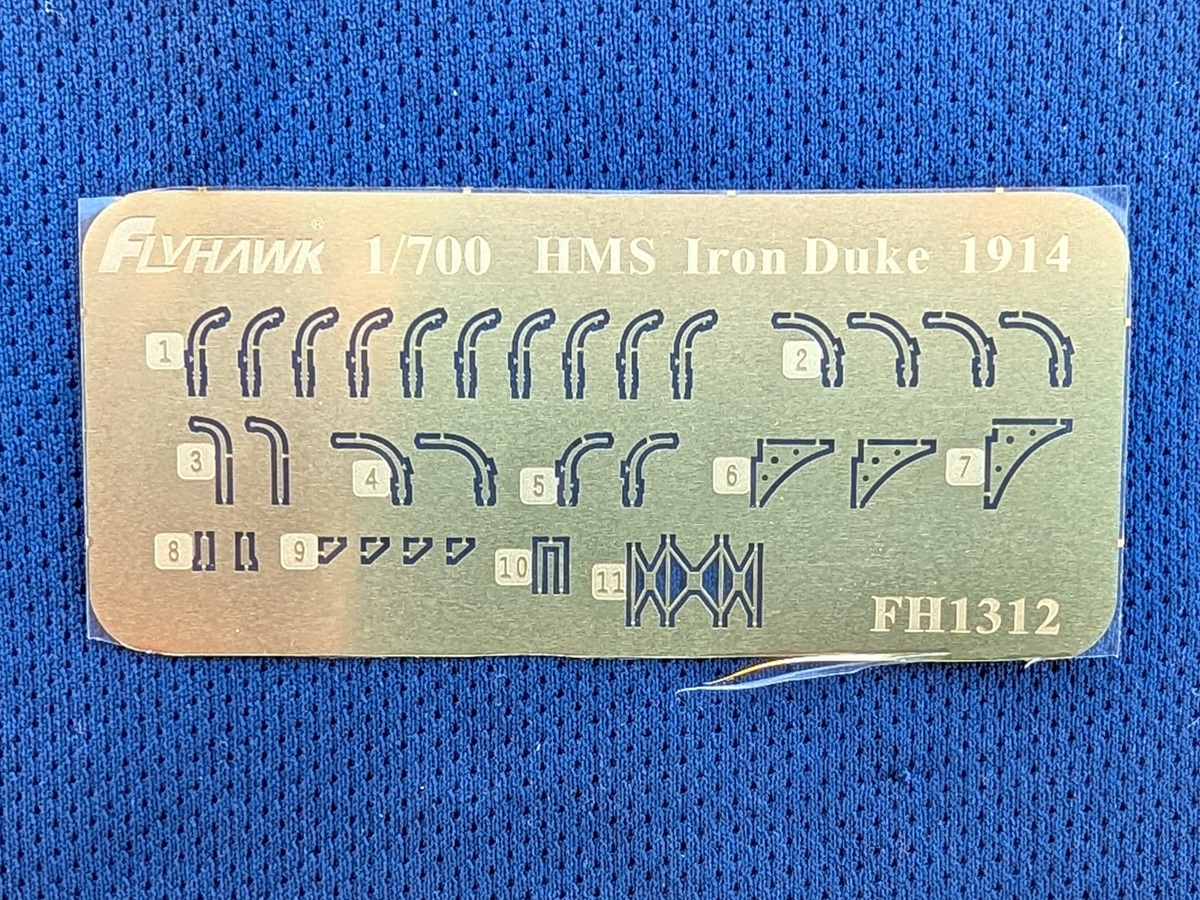
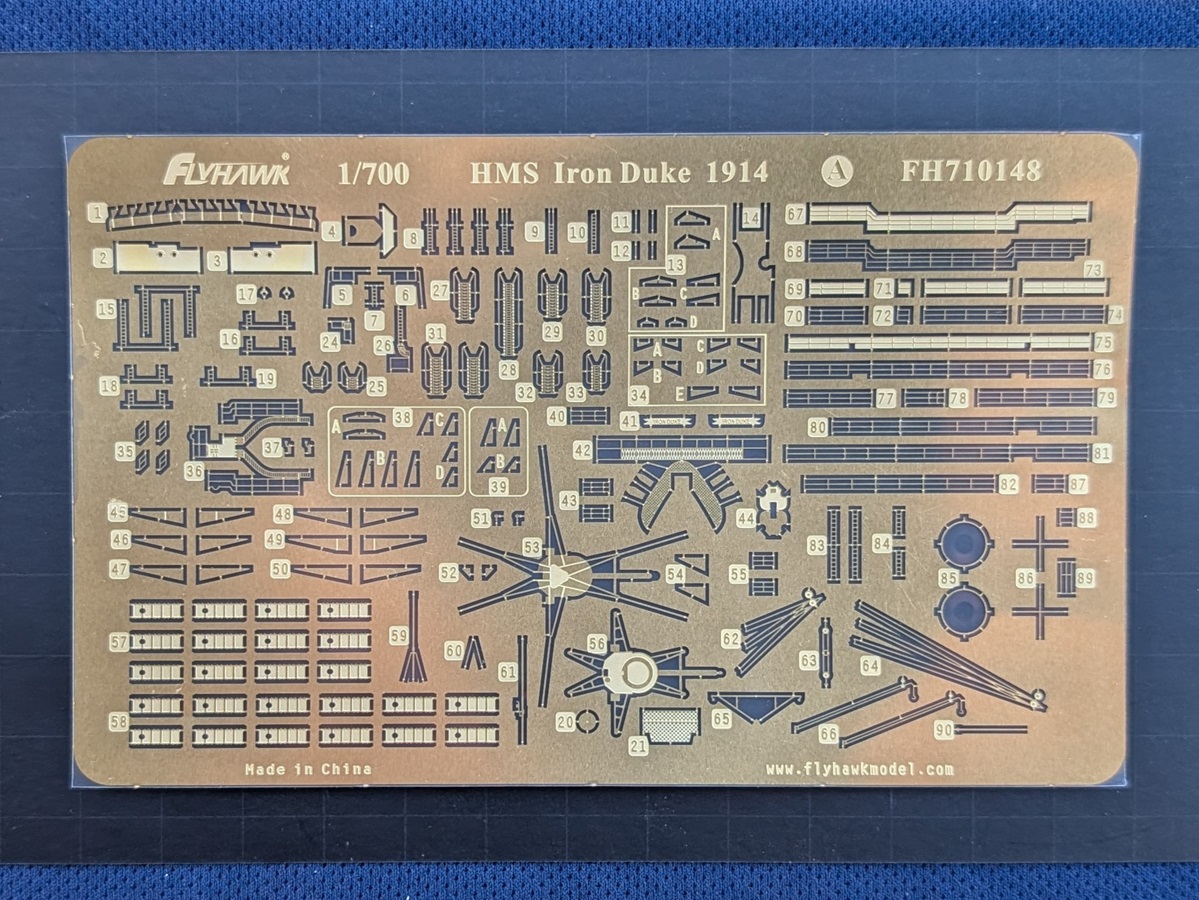
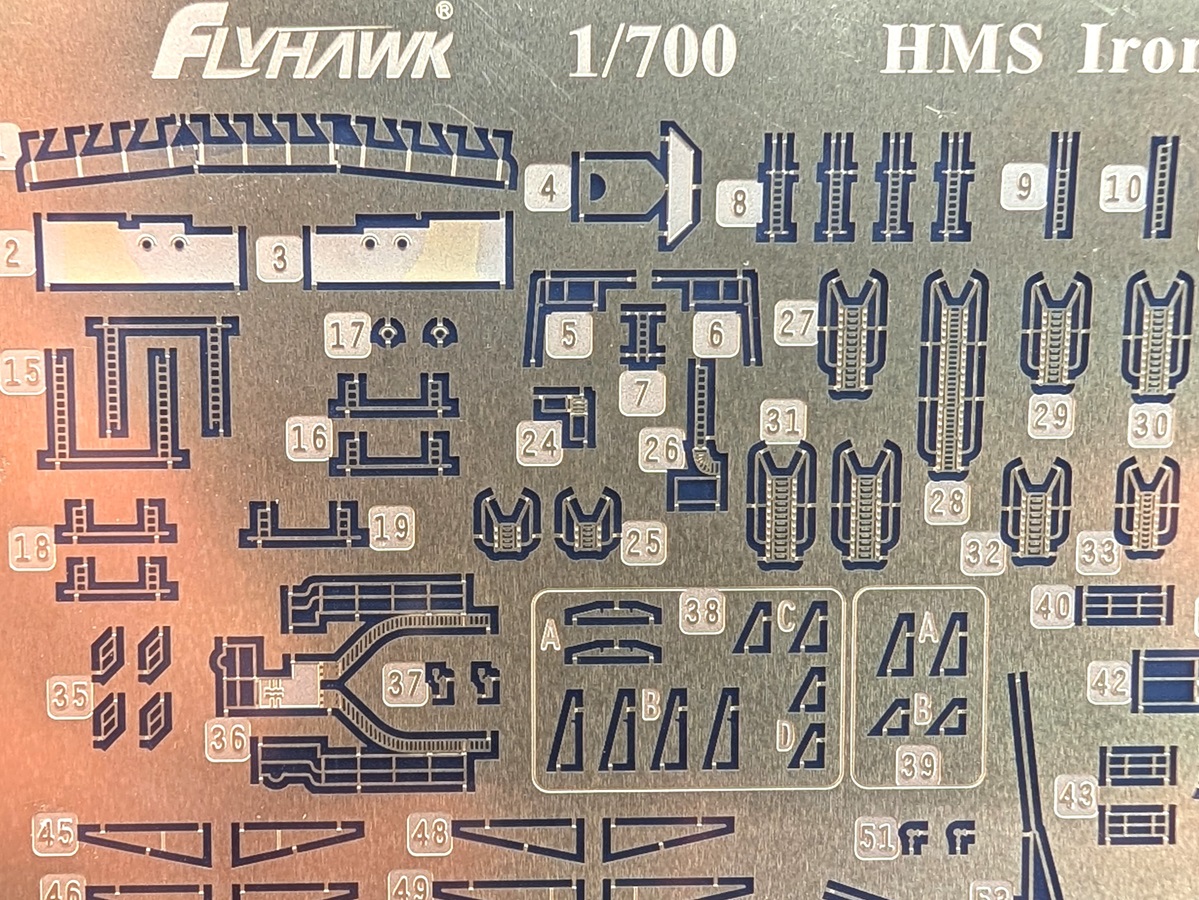
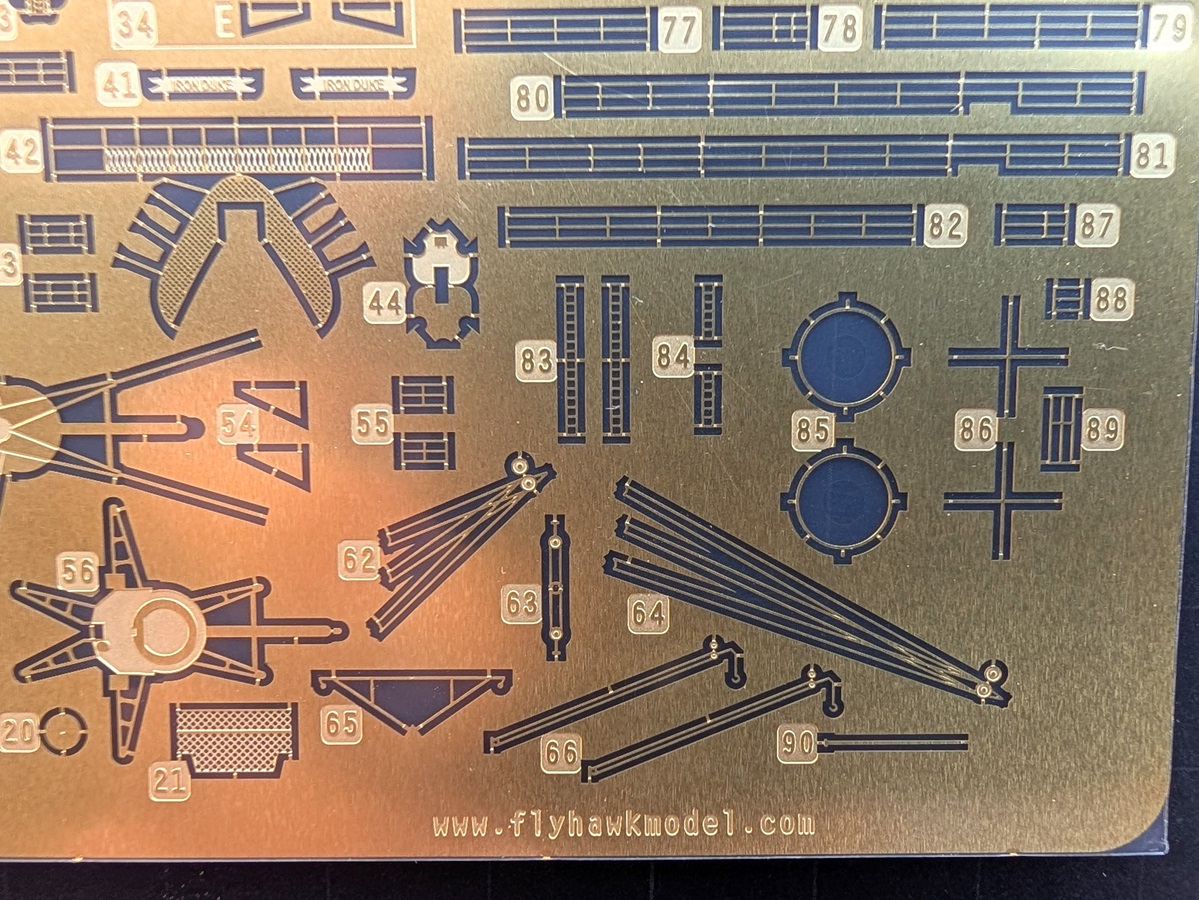
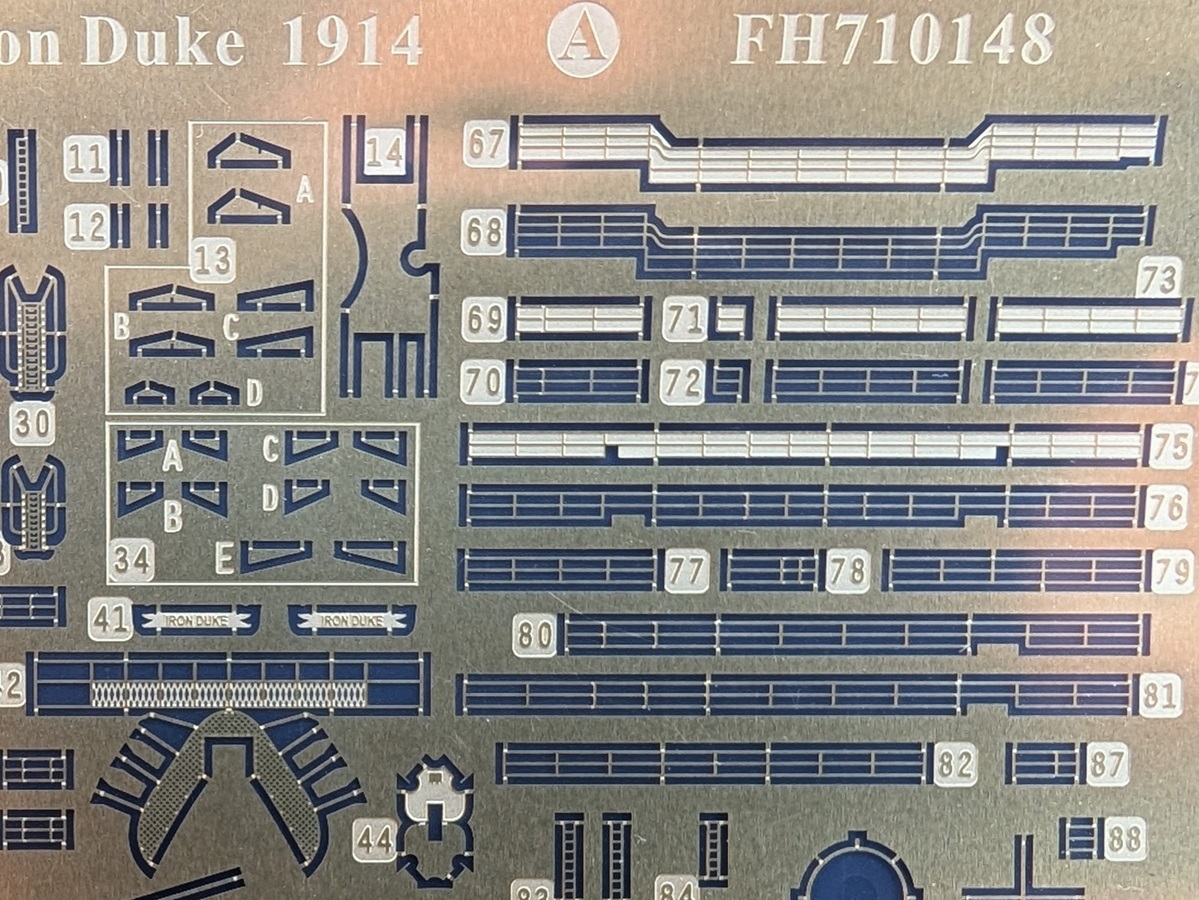
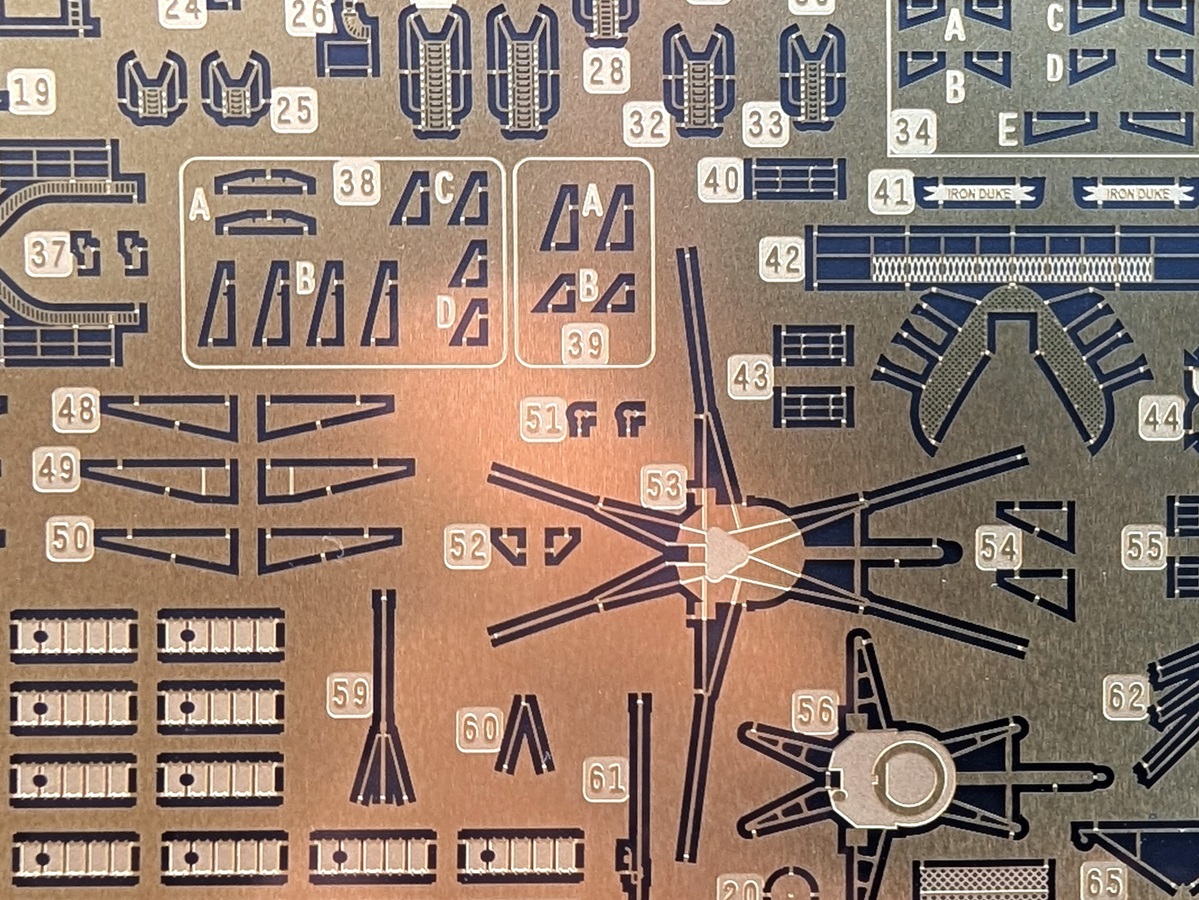
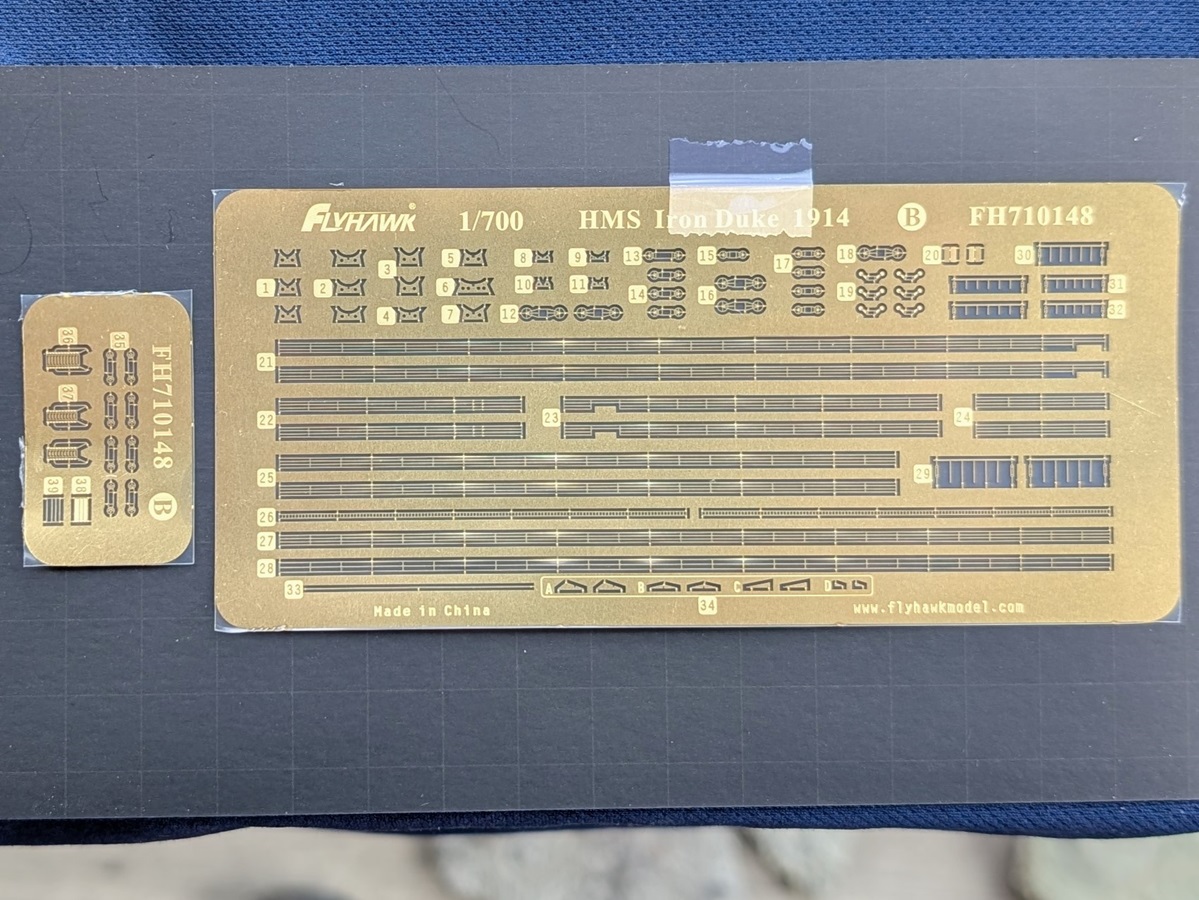
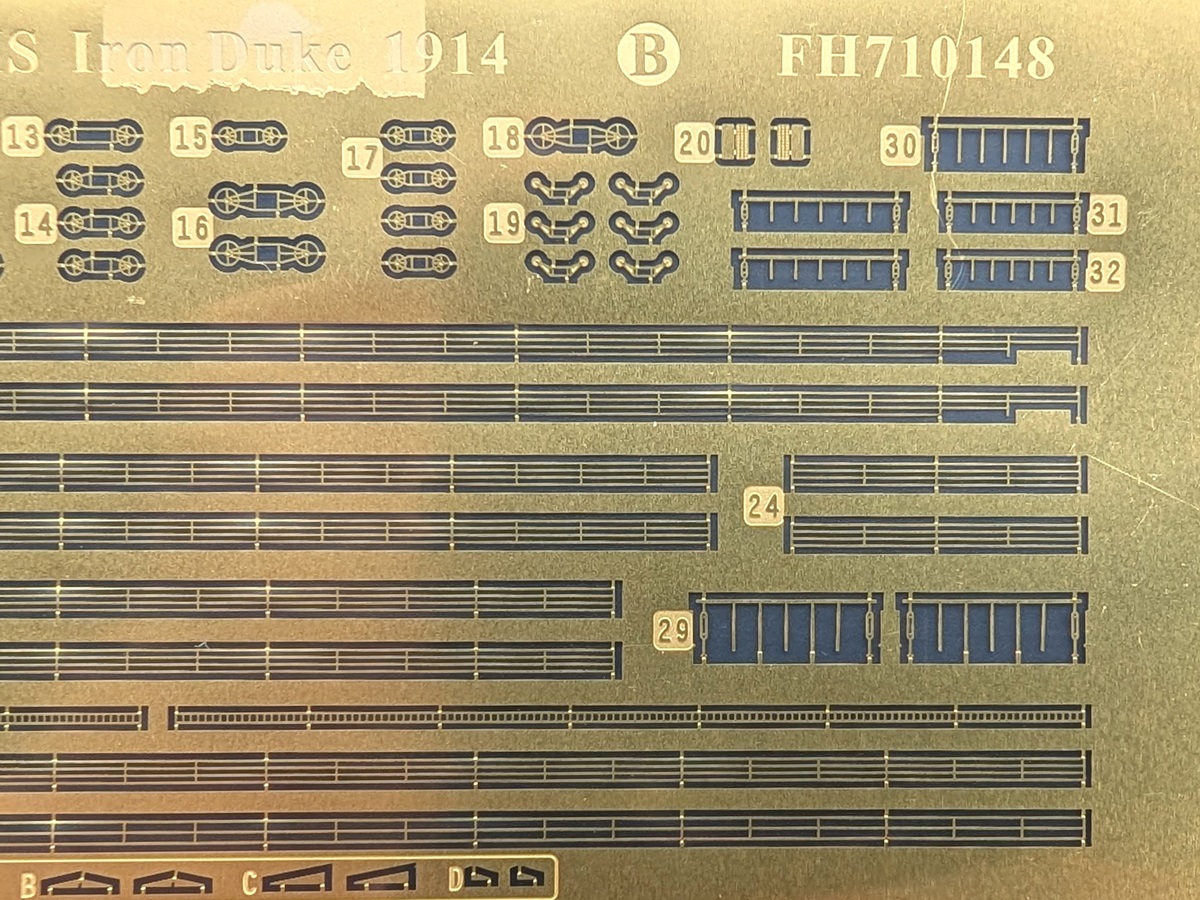
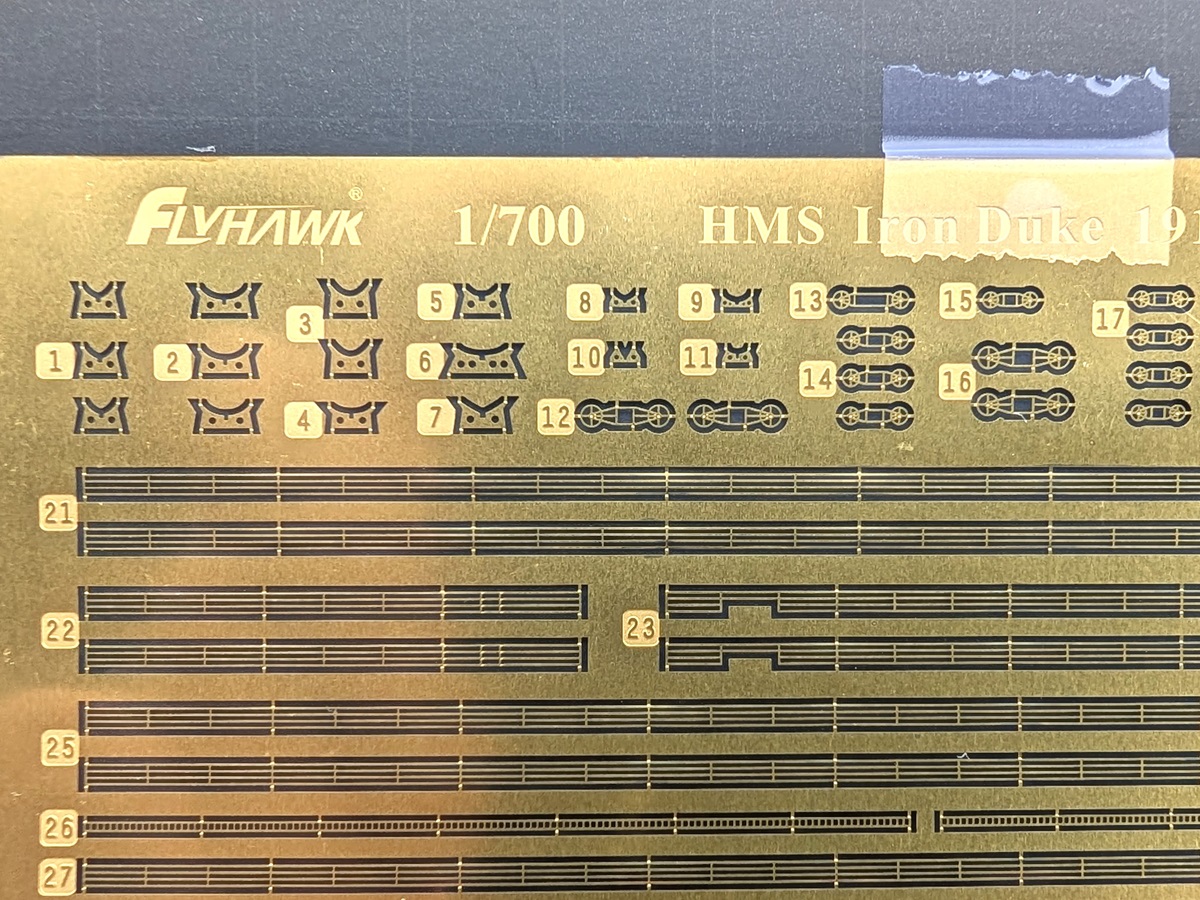
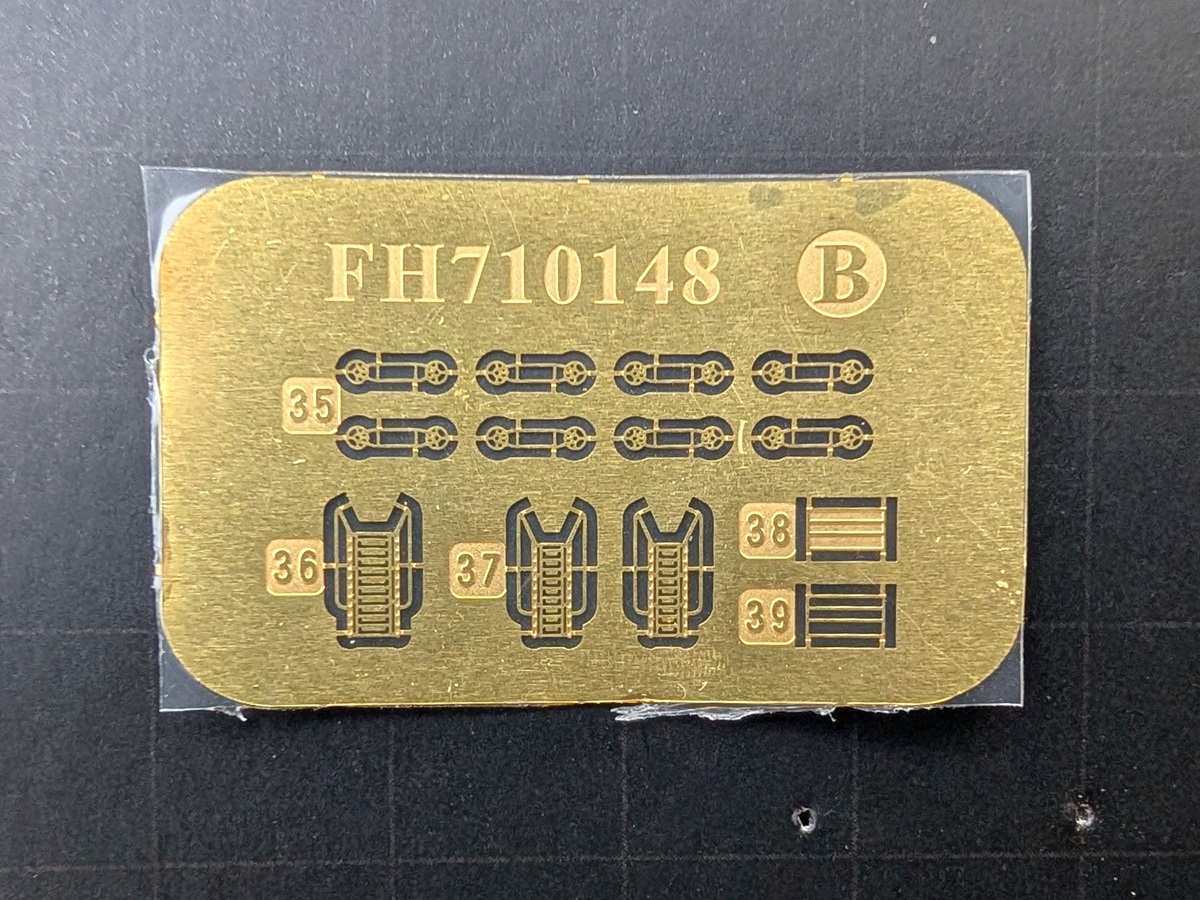
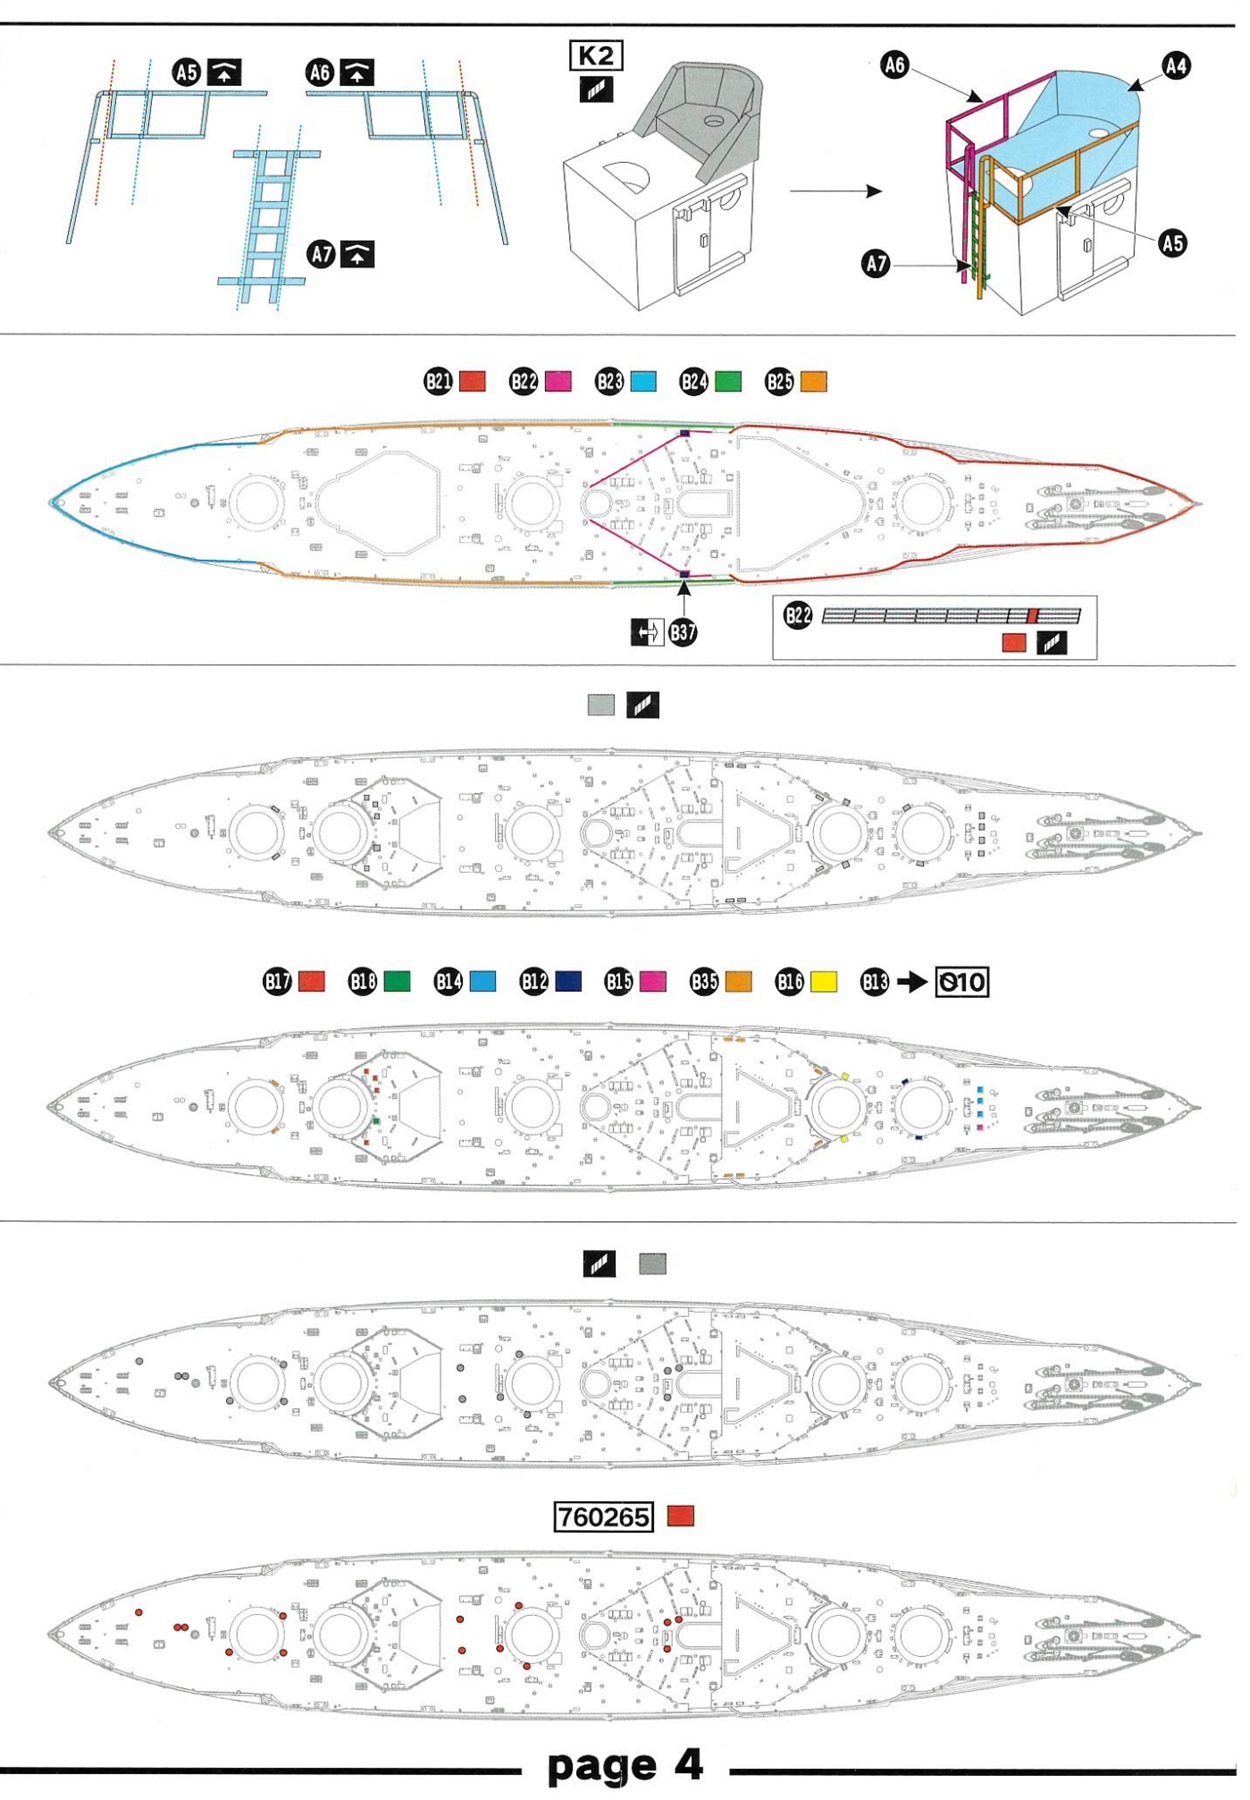
The Iron Duke deluxe photo etch is a bit more extensive than the Flyhawk Agincourt. It includes: - The spotting top and ‘starfish’ atop the main tripod - The breakwater - Two sets of shutters for the 6” guns – one set is for open shutters, the other is for closed - Rigging for derricks. For the big derrick, There are two options for the boom position. - Funnel caps - The stern walk, including Iron Duke nameplates - Cable reels on the deck and a few other spots - Ladders and inclined stairs - Various small platforms - Extensive bracing below the elevated platforms - Jackstaffs - Lots of railing. The rails for upper platforms have two options: Traditional open rails, or relief etched simulated canvas covered rails (as they usually were on the actual ship in service). This is a nice feature. - Boat cradles - Cables, lifelines and accommodation ladders for the seven davit-mounted boats. However, as pointed out in the Iron Duke Calling All Ship Fans forum, the lifelines and ladders may only be appropriate for the two boats hanging outboard over the water. Examination of photos seem to verify this, with no sign of that gear on any boat except the two which are positioned outboard. All the photo etch looks very fine, and similar in approach to other Flyhawk ships. Flyhawk’s photo etch is carefully designed with seams that are easy to fold. Parts will readily bend at the correct spot without the need for bending tools, straight edges etc. The downside is that the joint fatigues quickly, so be very careful with additional flexing of the joint after the initial bend. Speaking of which: The execution of the PE breakwater, in which the triangular support braces are meant to be twisted 90 degrees in one axis and 180 degrees in another, seems like it could be challenging. At least one Youtuber seems to have pulled off folding this part, but if you are less successful, Flyhawk has thankfully included a full set of spare braces for this piece. |
||||||||||||||||||||||||||||||||||
|
||||||||||||||||||||||||||||||||||
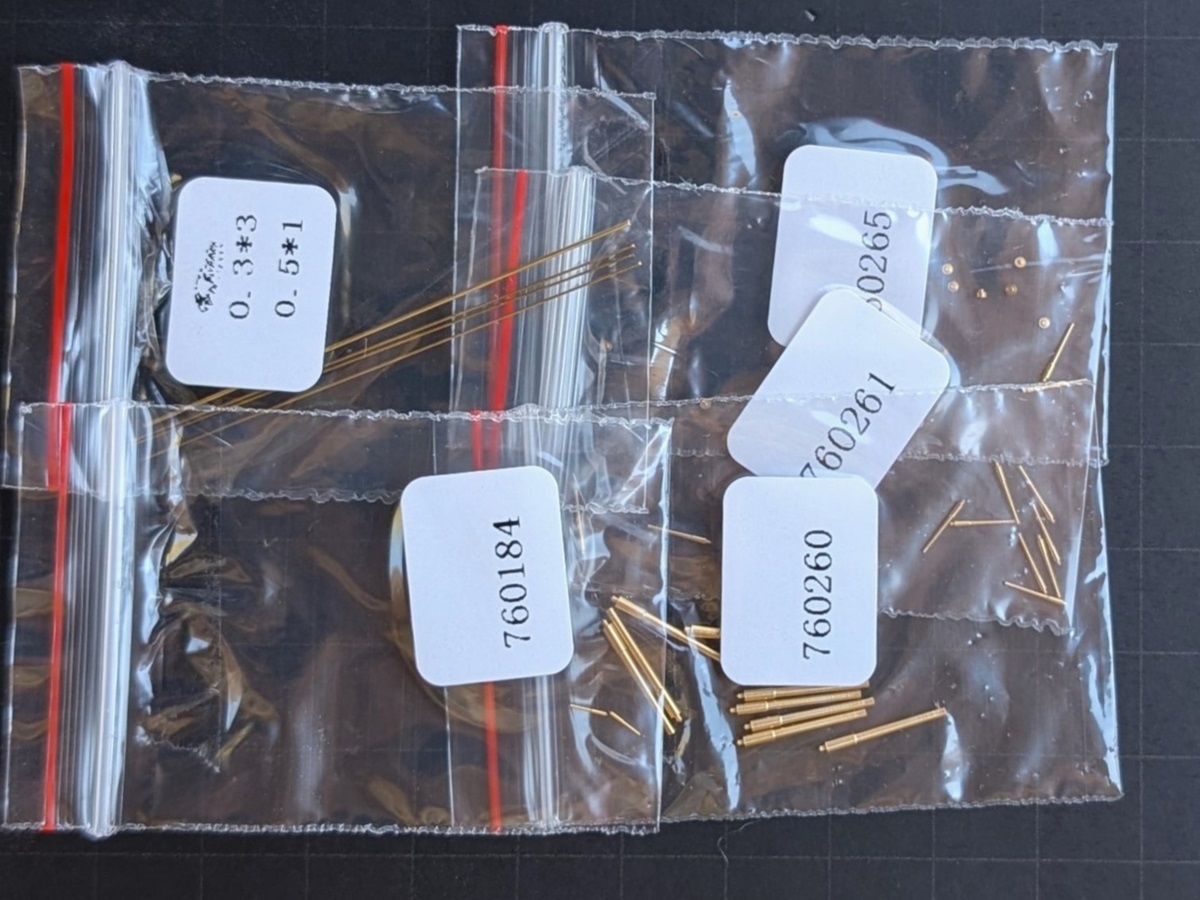
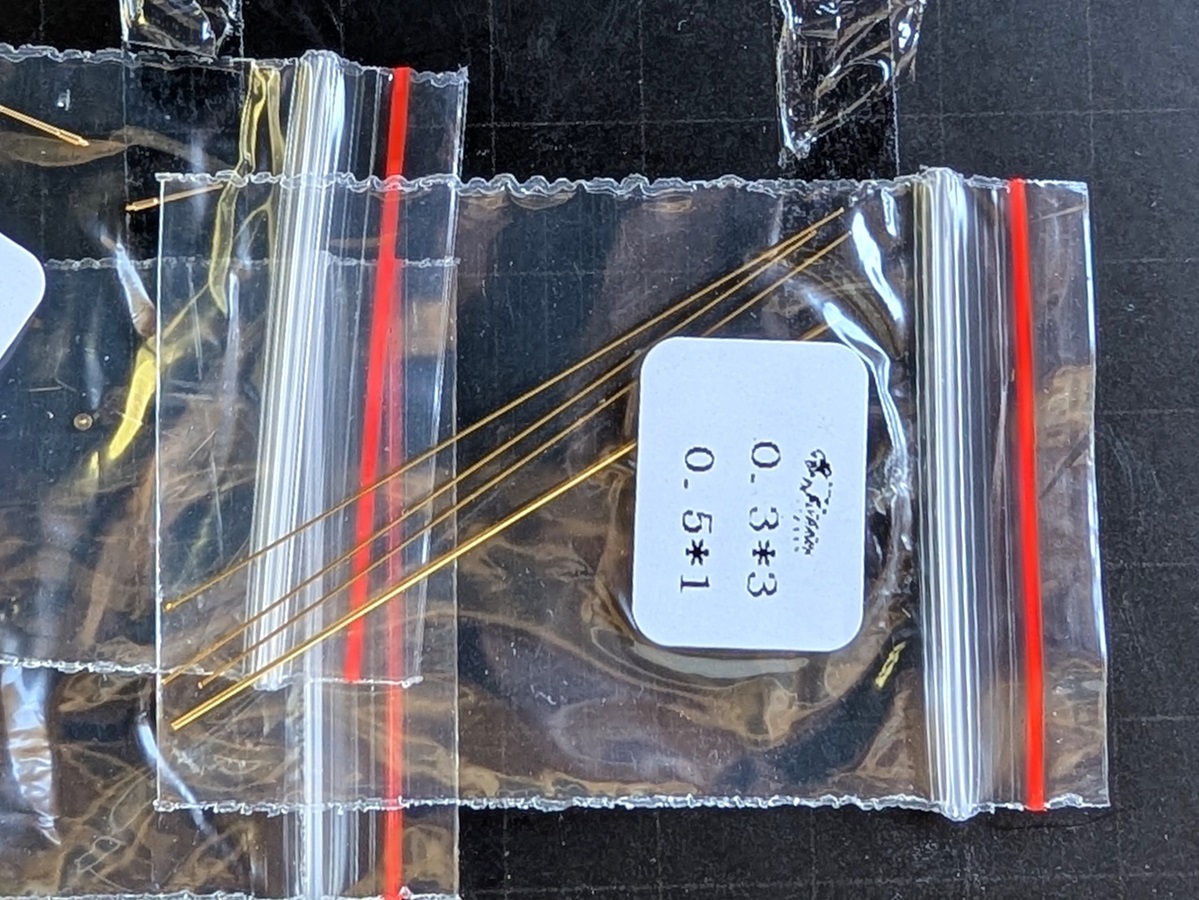
| BRASS ROD | ||||||||||||||||||||||||||||||||||
|
Two diameters of brass rod – 0.3mm and 0.5mm – are included to replace the upper part of the foremast. It’s generic stock so it will need to be cut to length, using the plastic mast as a reference. Builders who plan to add rigging will probably want to use the brass. |
||||||||||||||||||||||||||||||||||
|
||||||||||||||||||||||||||||||||||
| INSTRUCTIONS | ||||||||||||||||||||||||||||||||||
|
The instructions are printed on long foldout sheets. The main instructions only concern the base kit. The deluxe parts have separate instructions, including how to cut or modify the base kit parts as needed. If building the deluxe version, fully read both sets of instructions carefully before beginning. The instructions are mostly very thorough and well thought out. Flyhawk goes to great lengths to make tricky and complicated assembly steps as clear as possible. The deluxe part instructions rely heavily on color coding to identify the placement of parts. I found the colored diagrams to be easier to interpret than in similar diagrams from earlier Flyhawk kits. This is due to better color contrast and bolder, thicker lines. But some of the overhead diagrams for deck details and railing were still a little bit difficult to interpret. Painting instructions are reasonable and call out options for multiple paint manufacturers. I am no authority on WWI paint schemes, but the only (potential) discrepancy I noticed was the previously mentioned boat deck. The hull sides are painted ‘Flat Medum Gray’ in Tamiya parlance. I’m not intimately familiar with this shade, but it looks to be on the darker side, which appears to be appropriate for circa mid-1914 as the kit intends. |
||||||||||||||||||||||||||||||||||
|
||||||||||||||||||||||||||||||||||
| SUMMARY | ||||||||||||||||||||||||||||||||||
|
Overall, this is an excellent kit. It continues Flyhawk’s tradition of excellent molding, fit and detail while making some improvements over earlier kits. As far as accuracy, the incorrect planking on the boat deck is a little bit disappointing, but probably not a significant visual impact once painted over and covered by boats. If you are replacing the molded boat cradles with the deluxe PE upgrades, it may not be too much extra work to fill and sand the plank detail away. Improvements have also been made to the ease of assembly. The Agincourt kit, while high quality, had some design details that made the assembly unnecessarily complicated and annoying. The tapered deck edge I referred to earlier would be one example. The turrets and superstructures also seemed unnecessarily complicated in how they assembled. Interestingly, Flyhawk’s earlier Prince of Wales kit seemed to be better thought out in this regard. I have heard it claimed that Flyhawk WWI kits are designed by a different ‘team’ than their WWII kits. I have no way to verify if that is true, but the British WWI kits do seem to be consistently different in some aspects of their engineering. In any event, the Iron Duke kit appears to have corrected many of the annoyances from Agincourt, which is welcome. I have only two other minor complaints: I would very much like a full-hull option as is offered for the WWII kits. It would also be nice if some of the deluxe and super-deluxe parts were available separately for purchase. Flyhawk has done this in the past with other kits, but not for Iron Duke. As is typical for Flyhawk, this is not the best beginner kit. The builder will need to deal with many tiny and fragile parts, even for the simpler base kit. But the reward is an outstanding model right out of the box of the quintessential battleship. Highly recommended. |
|
|||||||||||||||||||||||||||||||||