|
HMS Scylla was a member of the Dido-class cruisers .She was built at Greenock Scotland. Laid down in April 1939, launched on July 1940 and commissioned in June 1942 HMS Scylla and HMS Charybdis were completed with four twin 4.5 in mountings due to a shortage of 5.25 in mountings. HMS Scylla and her sister soon became known as the 'toothless terrors', but were very effective AA ships, and were designated as AA cruisers HMS Scylla initially served on the infamous Arctic convoy duties and upon her return from PQ18 to Scapa-Flow the ships company was addressed by Winston Churchill standing upon Y-turret. She sailed for Gibraltar in October 1942 and partook in Operation Torch. In December of that year she patrolled the Bay of Biscay in order to intercept Axis Blockade runners. On 1 January 1943 she caught the German ship Rhakotis 200 miles NW of Cape Finisterre. After HMS Scylla opened fire the Germans scuttled the ship. February 1943 saw her return to Arctic Convoys,; June back to the Bay
of Biscay hunting U-boats.
Her active career was ended on 23 June 1944, heading out again at dusk
she had her back broken by a mine. Whilst remaining afloat and towable
she was subsequently declared beyond economic repair.
She was considered a lucky ship; in her 34 months of very active service
where she took part in virtually every aspect of naval warfare she suffered
a single casualty; who was lost overboard.
|
||||||||||||||||||||||
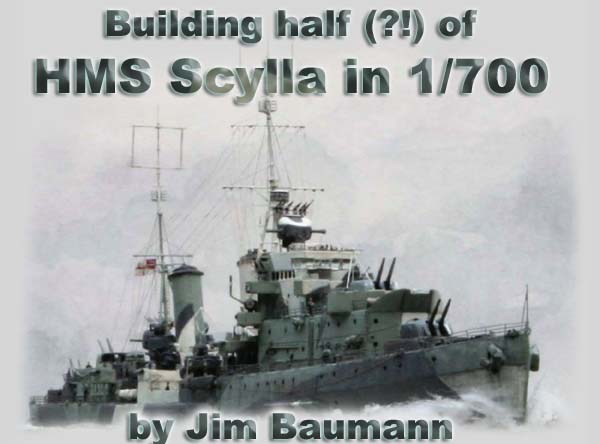
| Building the model | ||||||||||||||||||||||
|
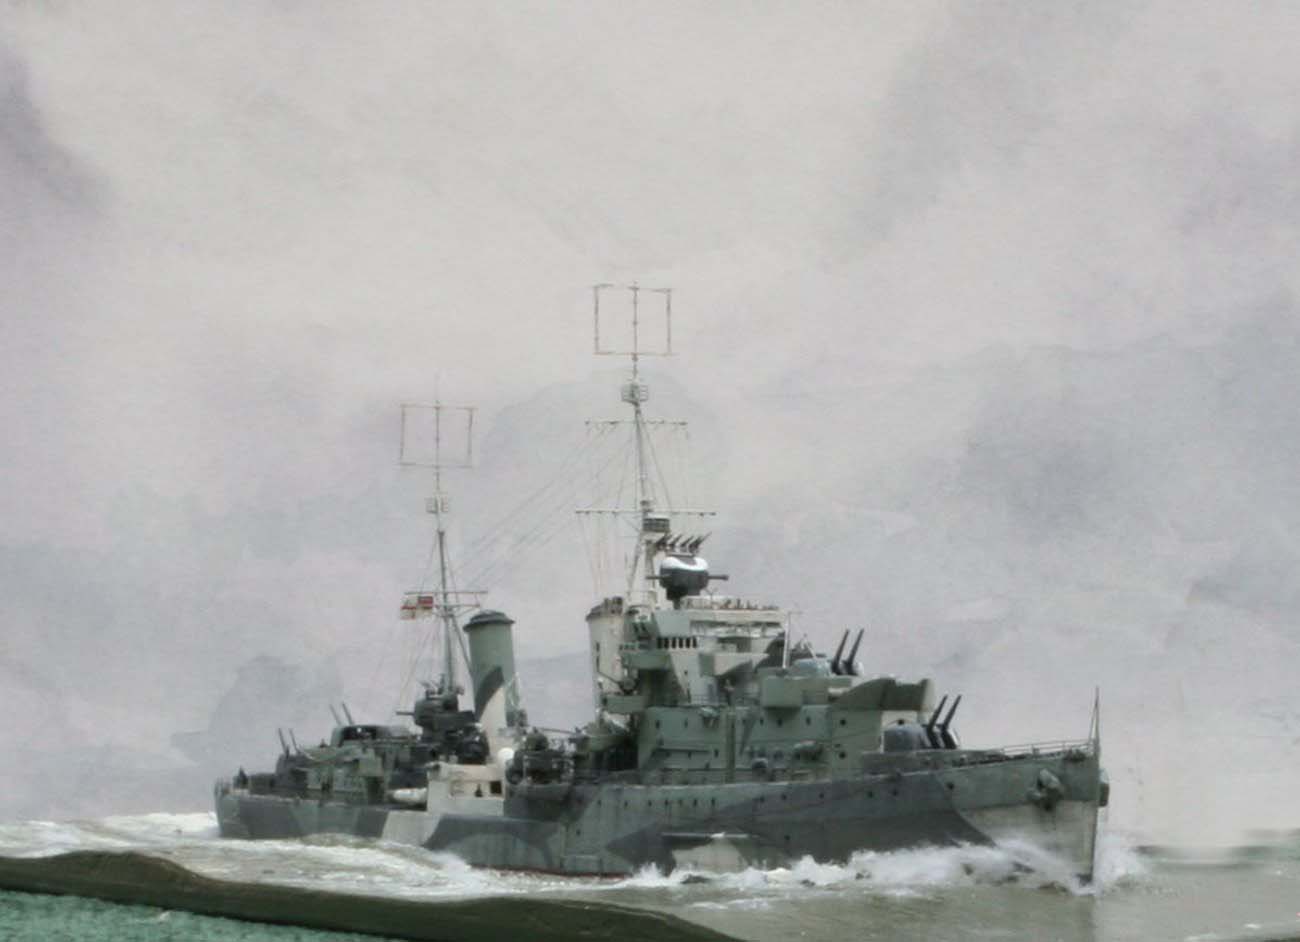
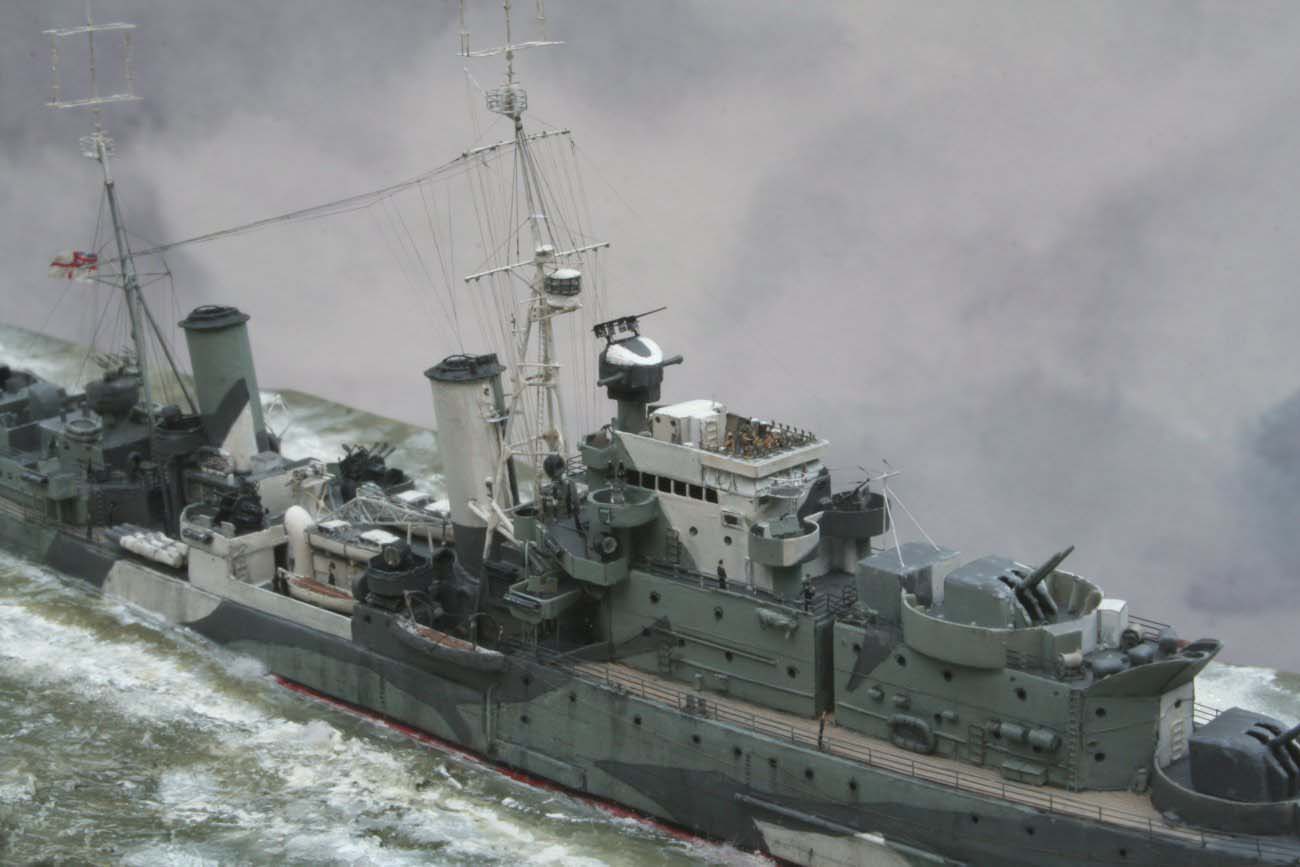
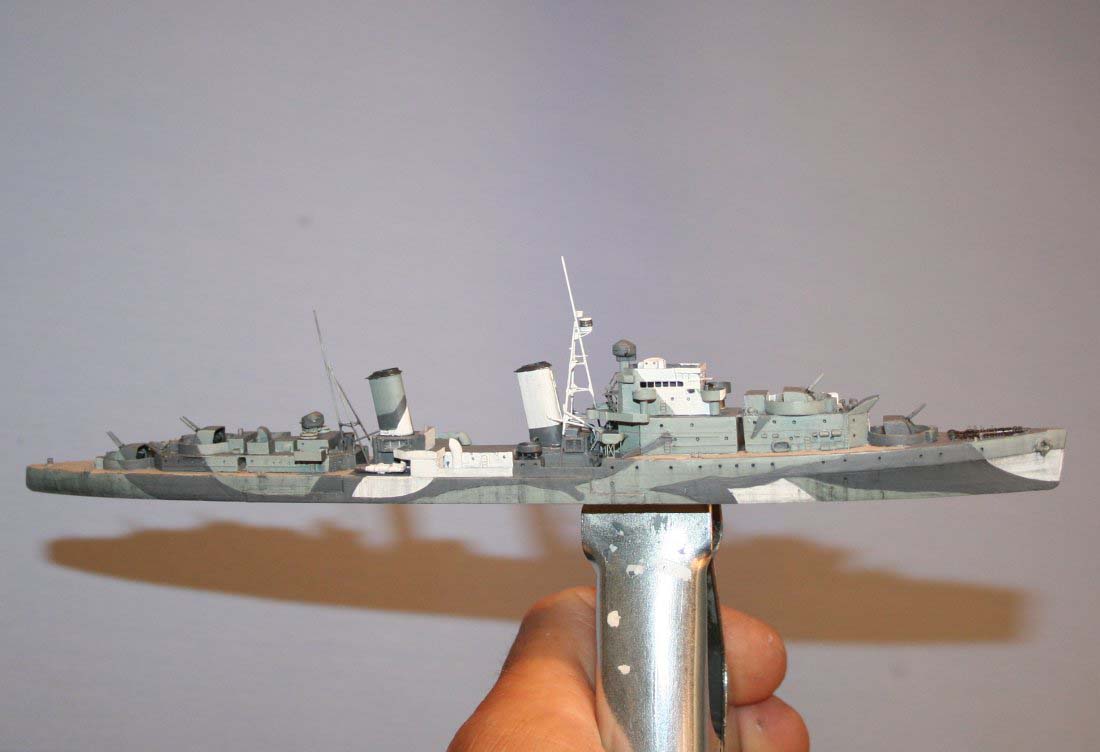
This model was intended as my contribution to a themed Cruiser display at the annual Telford show (UK) Despite WW2 being a little late for my sphere of interest I have always been attracted to the bright blue Camouflage scheme on the box-lid of the WSW 1/700 resin kit, which had resided in my stash for around 5 years . Unfortunately the blue proved erroneous! |
 |
|||||||||||||||||||||
| I had hoped for a short sharp build, but as ever this model
was destined to be full of trials and some tribulations!
Part of the fundamental problem was that it would appear that WSW mastered
the kit based exclusively on the Profile Morskie plans, which upon further
examination of high resolution photos and other drawings were rather flawed
!
|
||||||||||||||||||||||
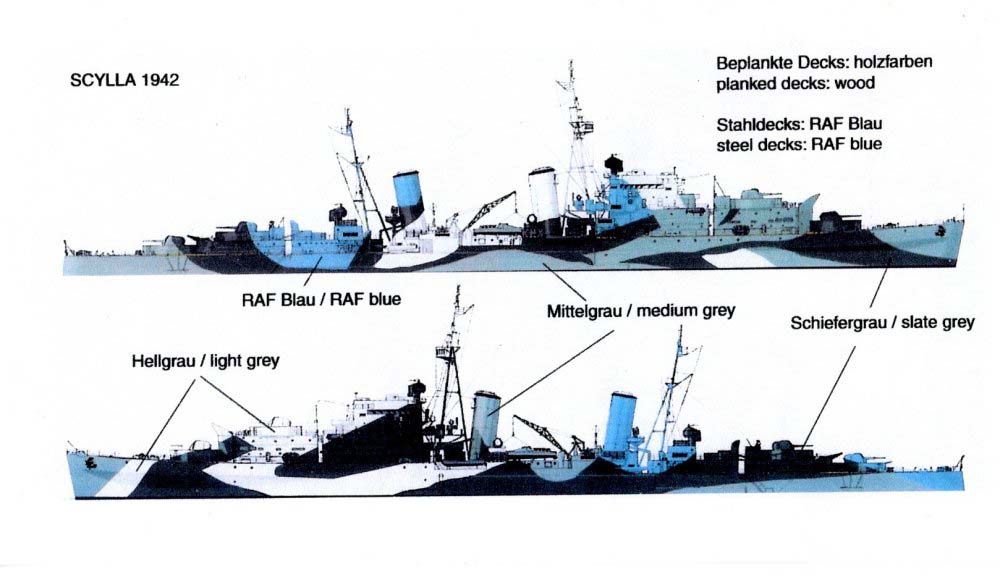
| But perhaps the most obvious and serious mistake was my own fault! Having checked numerous internet sources as well as books such as Cruisers in Camera I chose to believe the often cited port-side camouflage attributed to Scylla to be correct - the same pattern that was shown and captioned in photos in the Profile Morskie but as I found out a long way into the build is actually that of her near sister HMS Charybidis. Fortunately I had to hand a high quality starboard side view, which showed the subtleties of the scheme very well! | 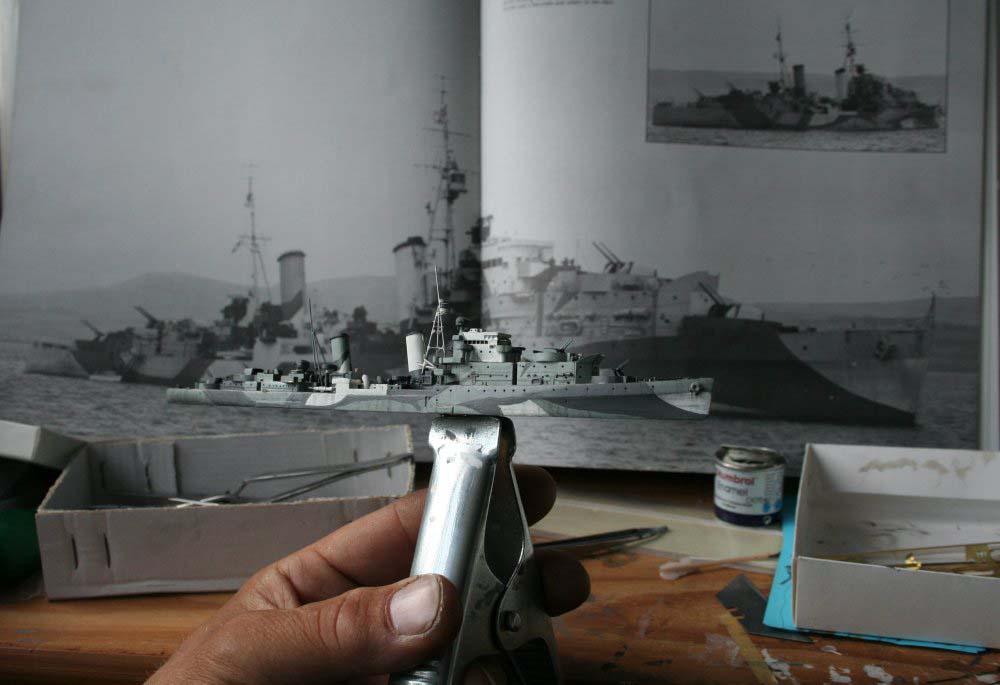 |
|||||||||||||||||||||
| I was too far along with the build to contemplate stripping
paint and detail and as all my 1/700 models reside in wall-mounted display
cases- starboard side showing - I decided to live with the flaw and learn
from my misadventure!
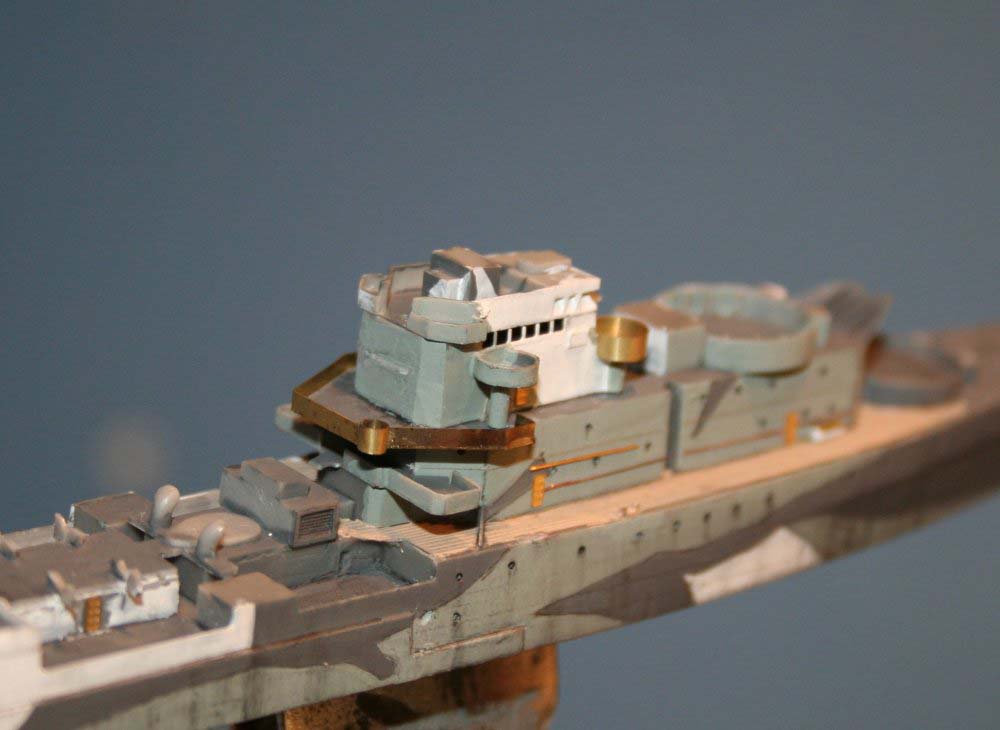
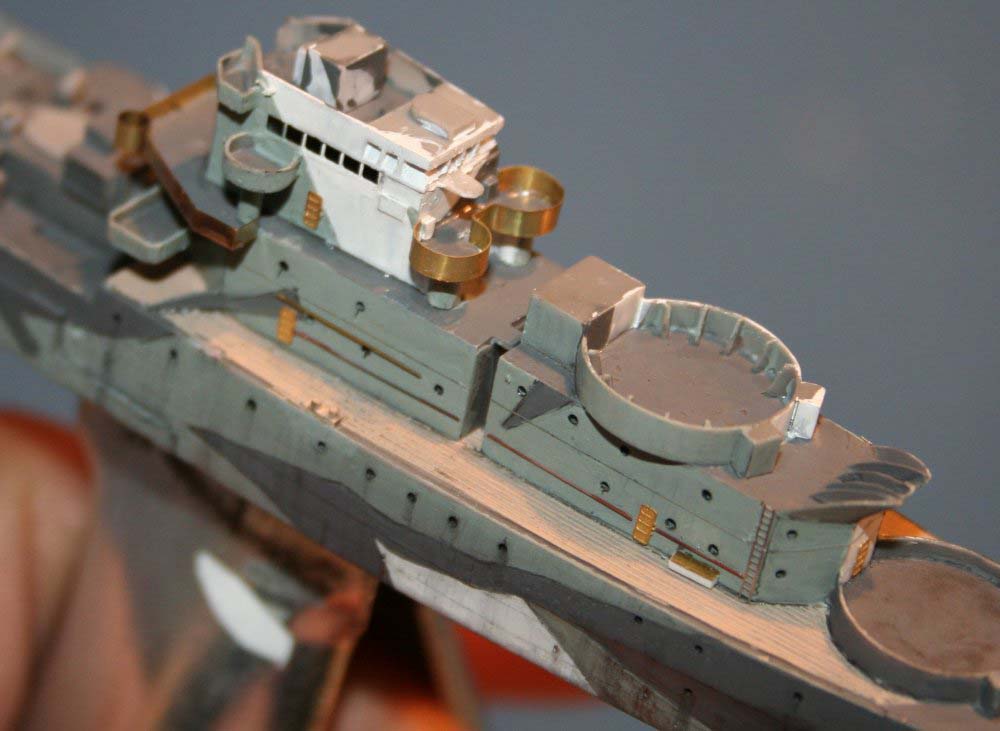
It must be noted that there are subtle variations and shape changes to the camouflage to be ascertained in photos of the ship throughout her career. After initial cleanup of the hull casting, I pared down some wood decks that needed to be steel, sharpened up the distinctive knuckle in the bow and set to finding some PE that would have the exact vertical spacings for inserting into the open gallery on the lower bridge level. After a lengthy search I happened upon a packet of various sized generic ModelRailway PE ladder it always pays to look outside the immediate confines of the ship-modelworld ! Most of the splintershields were removed and replaced with slightly taller brass items being made of the waste surround from PE frets |
 |
|||||||||||||||||||||
 |
||||||||||||||||||||||
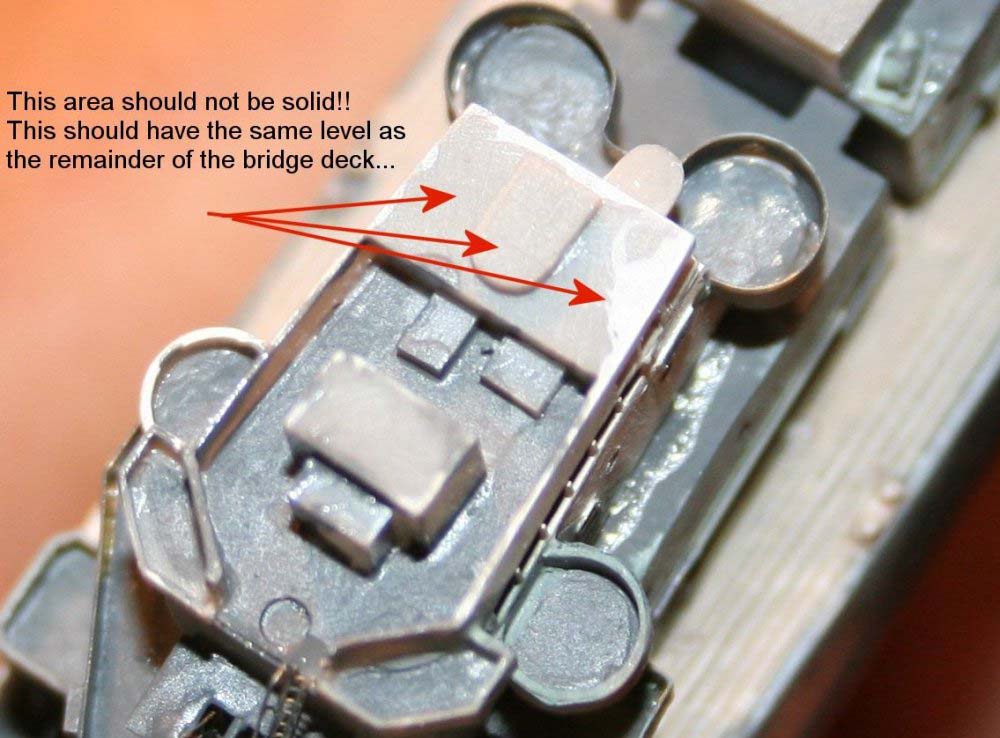
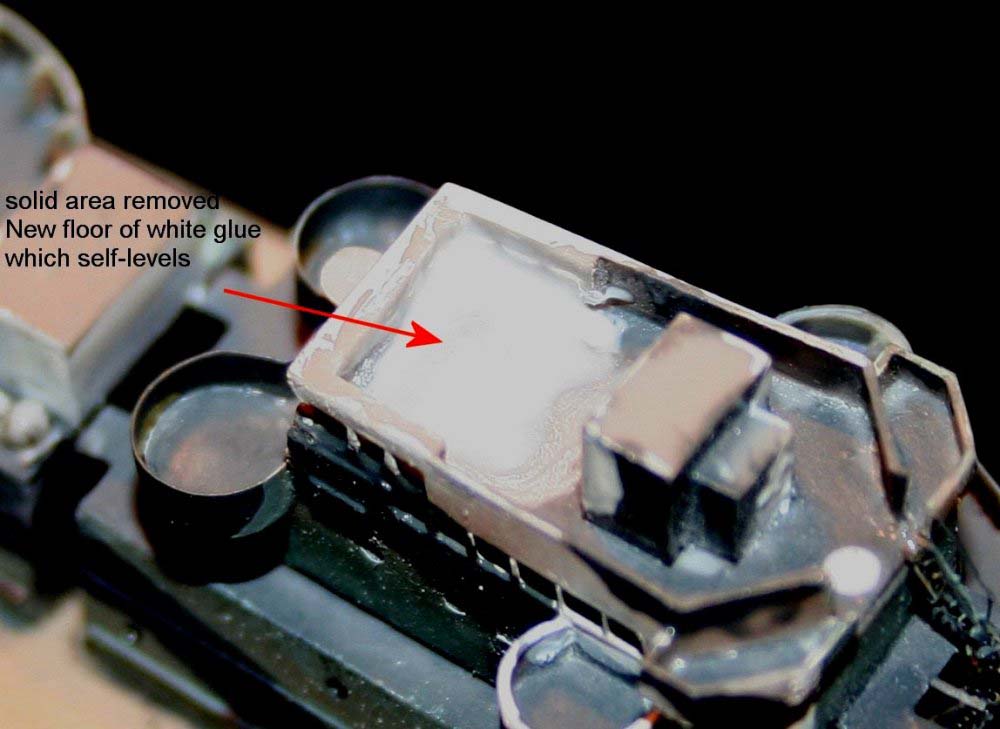
| The top of the Bridge, inexplicably, was cast partially
solid.
I ground this out using a motor tool, lined the sides with paper and levelled the floor with white glue |
 |
|||||||||||||||||||||
 |
||||||||||||||||||||||
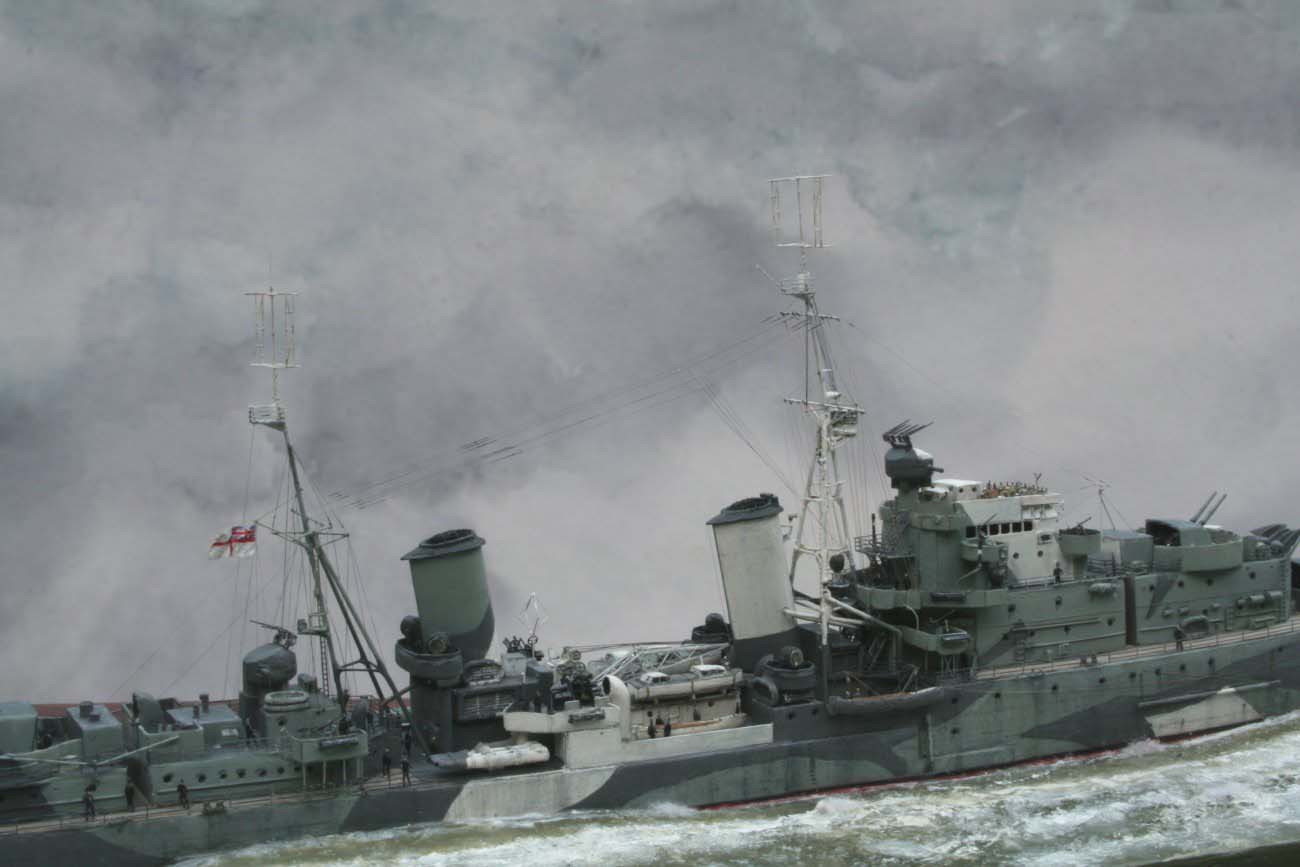
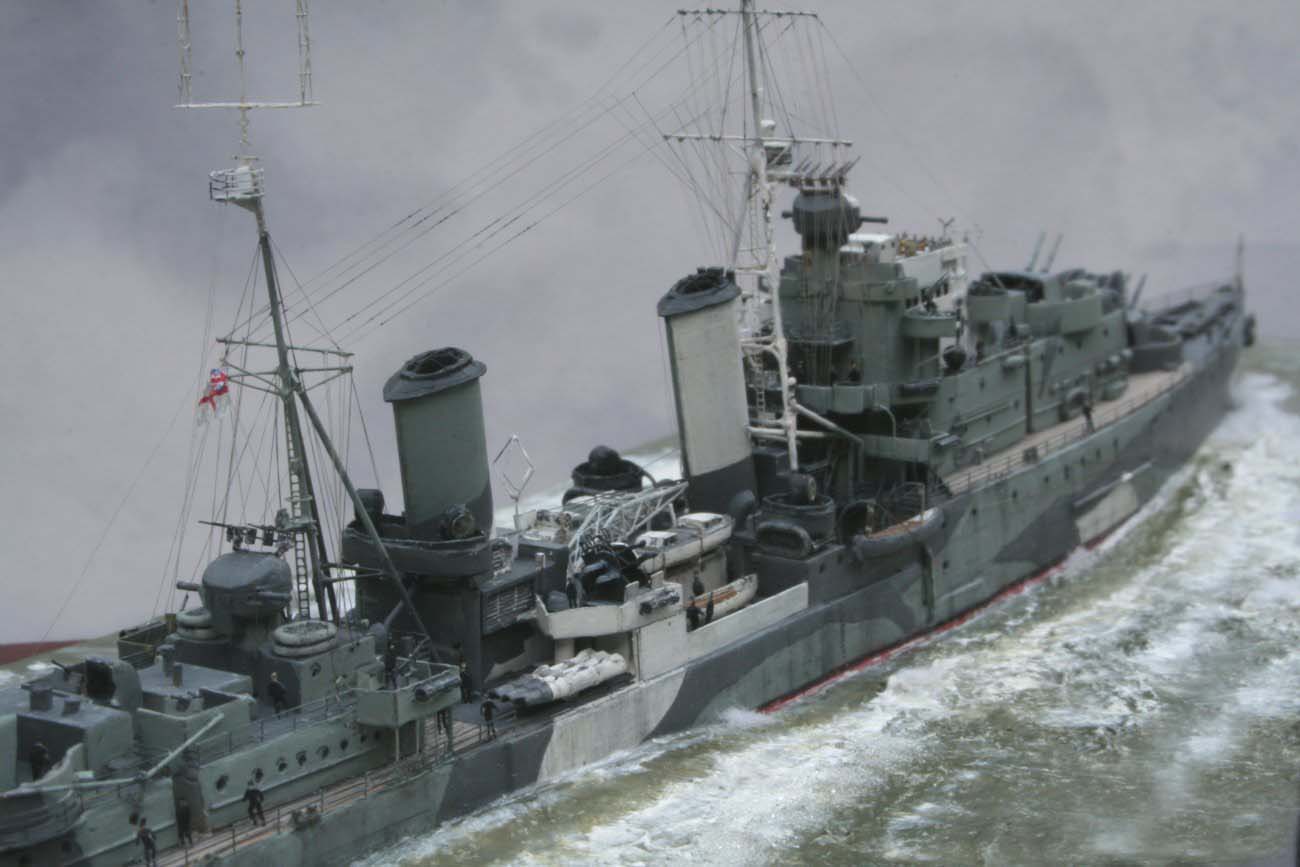
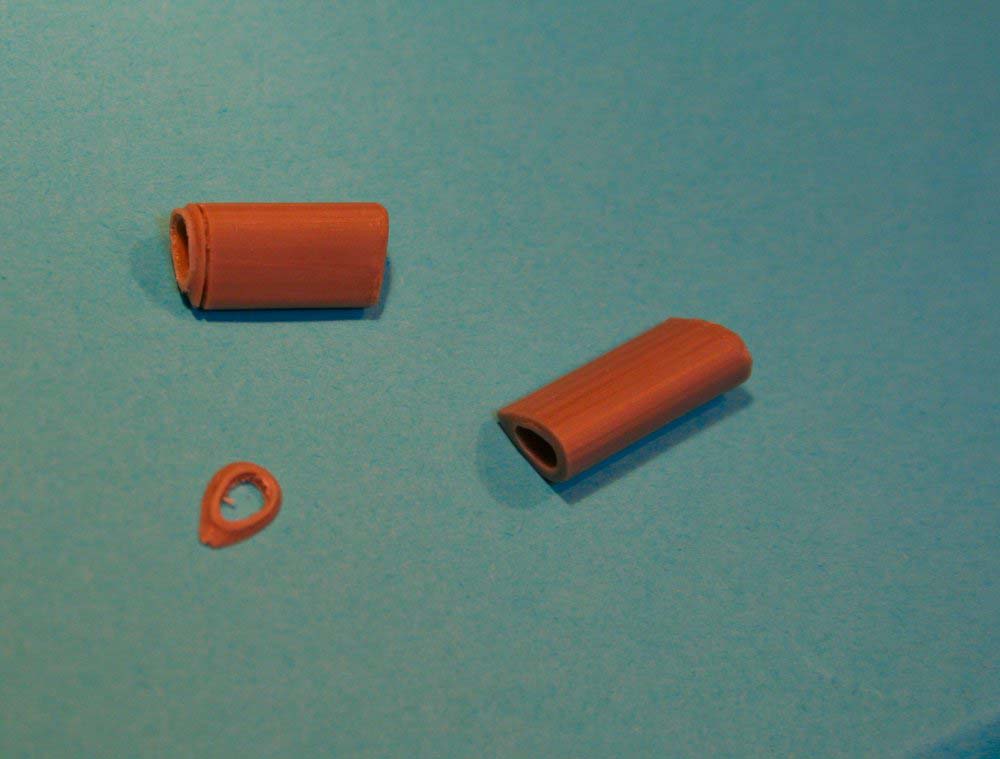
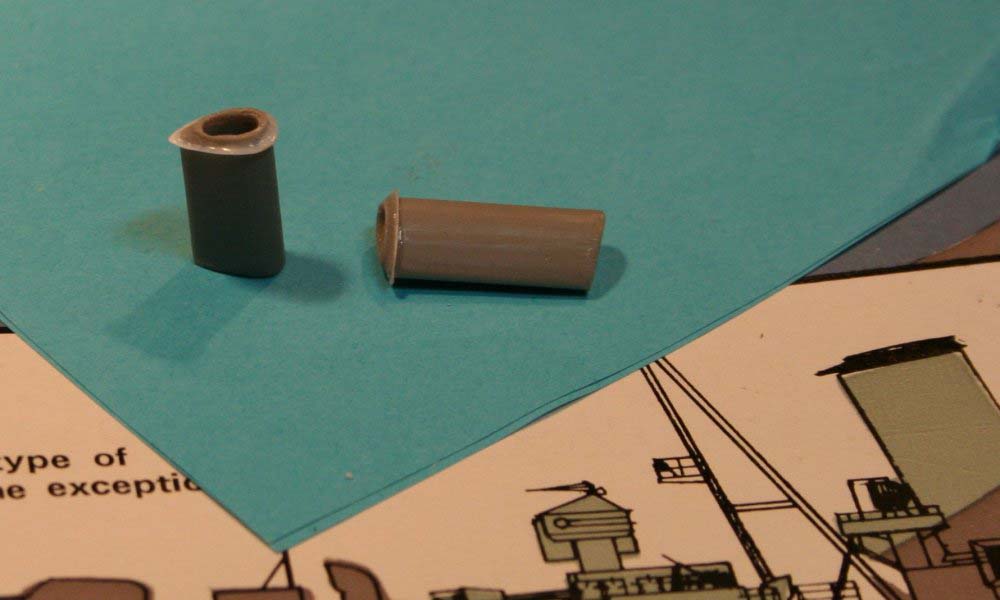
| The funnels lacked the distinctive slightly ribbed plating
effect-this was imparted by gently paring with a knife blade in vertical
strokes. In addition the funnel tops were devoid of the overhanging lip.
The top of the funnel was cut level, the lip made using paper and affixed to funnel top. The paper plate was then infused with CA glue; the cap rim cemented back in place and the cap to plate gap was back-filled with white-glue The remainder of the build was relatively straightforward, with the usual torture of installing stairways, adding handrails along the superstructure, making PE cable reels, and then simulating canvas covers (fwd only) aft they were exposed to the elements. The searchlight platforms had PE supports made and added. |
 |
|||||||||||||||||||||
 |
||||||||||||||||||||||
 |
||||||||||||||||||||||
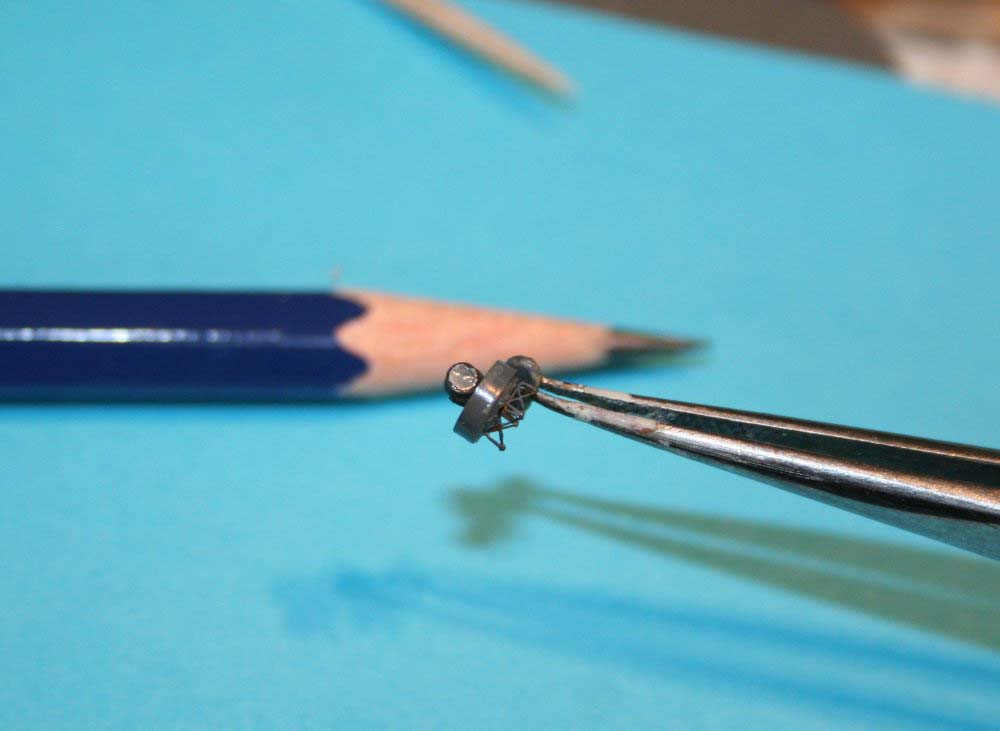
| The searchlights had additional protection added in the forms of canvas screens; cutting small suitably sized superfine PE handrails and forming octagons simulated these. Once installed these were backfilled with white glue to give a fair impression of the canvas screens. | 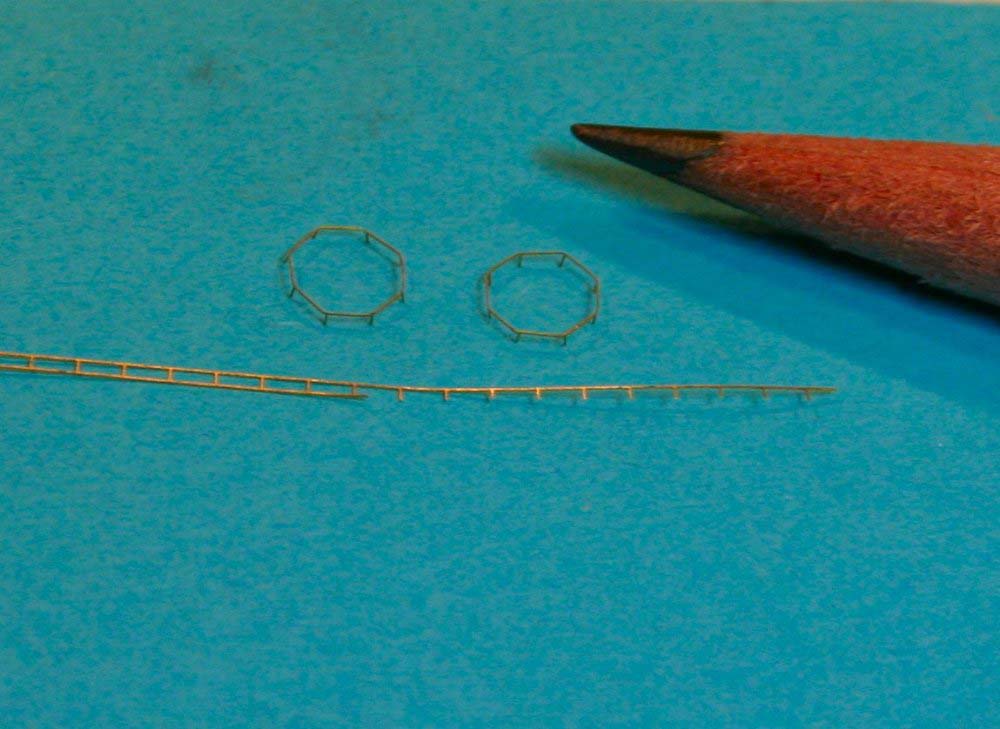 |
|||||||||||||||||||||
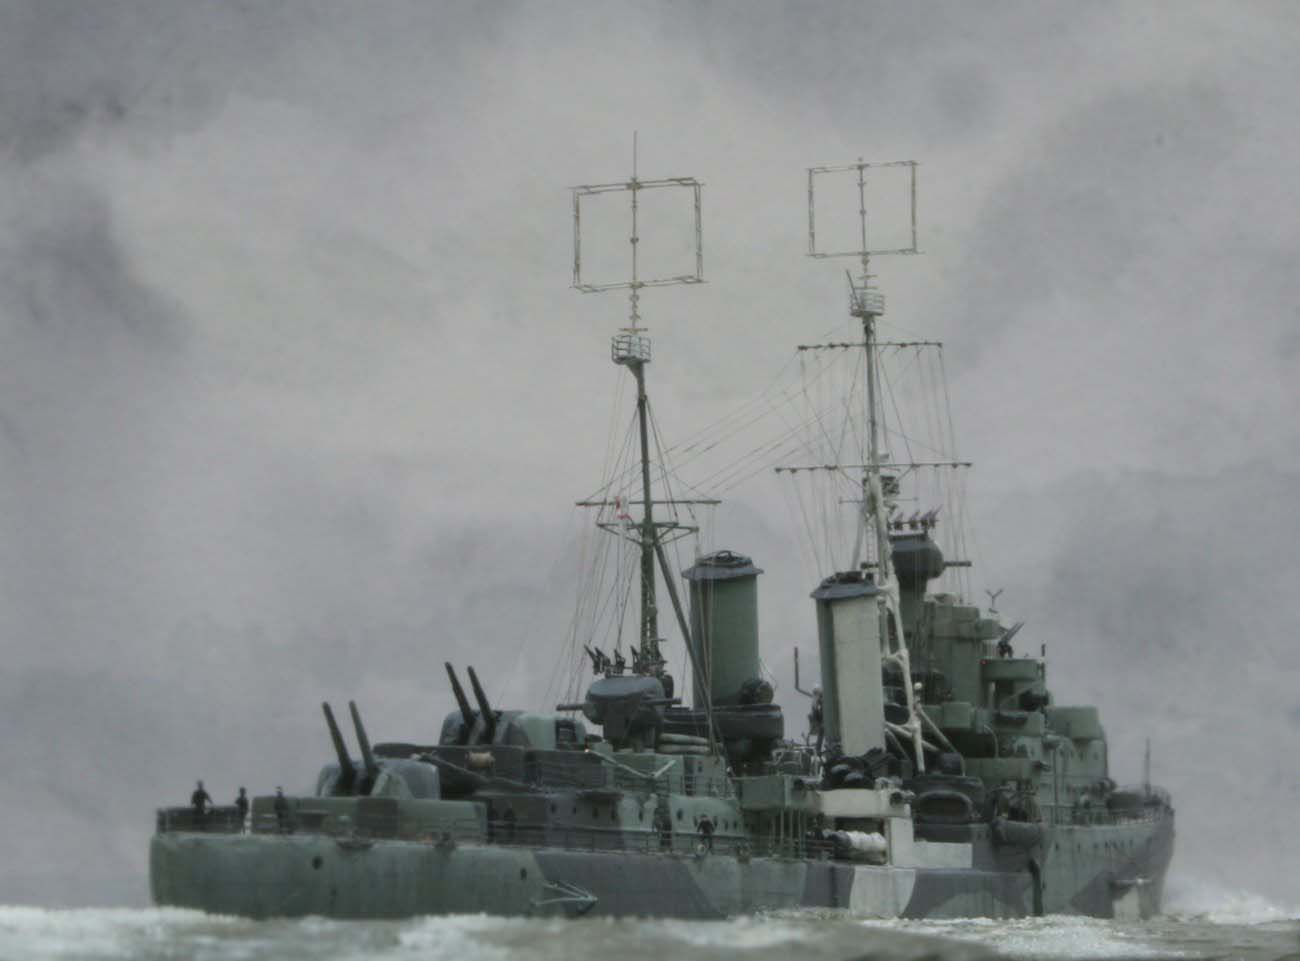
| Whilst adding detailsbut in particular whilst constructing the masts
I found it helpful to have the model held in a powerful spring loaded clamp
via two self tapping screws (some of the same screws that will later
be used for screwing the model to its baseplate)
This allowed me to hold the ship at various angles; prop it up on bow or stern pending what I was attempting to affix . |
 |
|||||||||||||||||||||
| The tripod masts had large gussets joining the cross braces. Masts themselves were made of steel wire, with fine brass braces. The gussets were tiny paper triangles soaked in CA. | 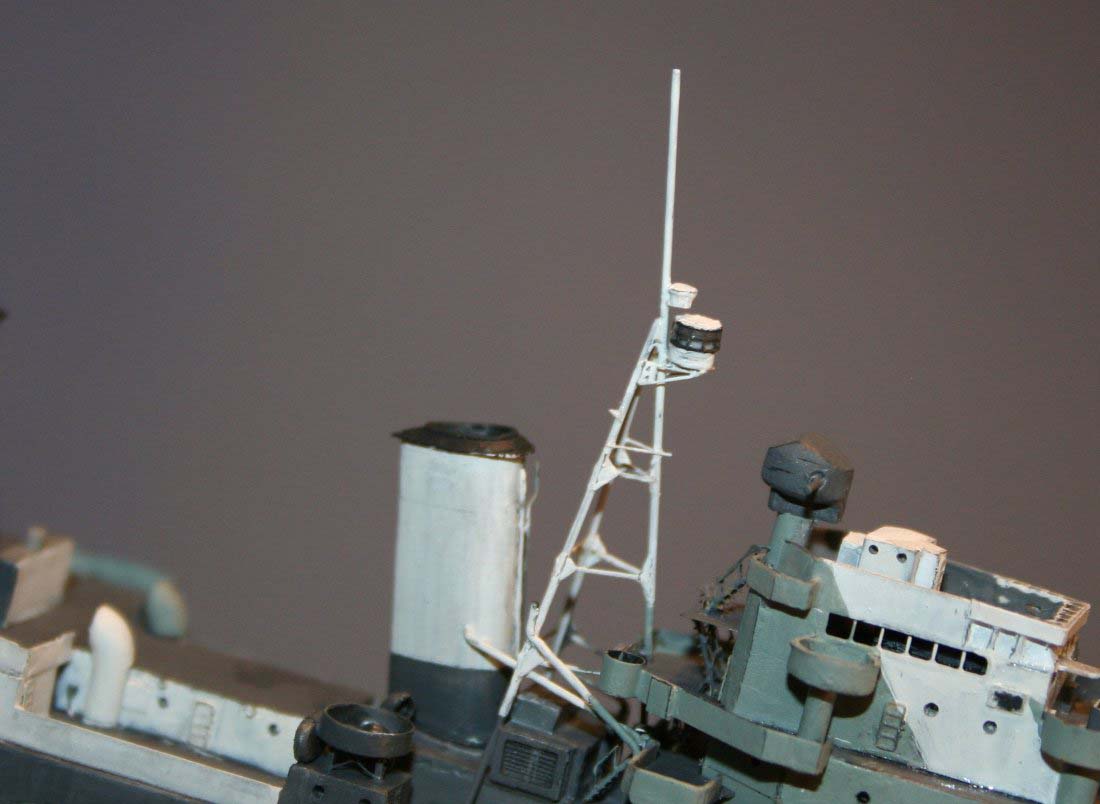 |
|||||||||||||||||||||
| At this stage the model became almost fun-the adding of small details, gleaning ever more details from the photographs I had. I added numerous tiny mushroom vents, round and square. Individually they are virtually invisible-collectively they a to the busy appearance of the ship. A feature on all the photos of the ship were the rolled up floater nets fastened to high points of the ship. There are a few clear photos in Ravens British Cruisers WW2 and Ensign 2 publication which illustrates well the appearance close up. | ||||||||||||||||||||||
| I tried a variety of methods to simulate these; in essence they look like a rolled blanket with uneven sticks attached! Eventually I chose to make them from 1/600 GMM Liner 5-bar rails, rolled, lightly dished in the middle and filled with white glue, painted black and lightly dry brushed. | 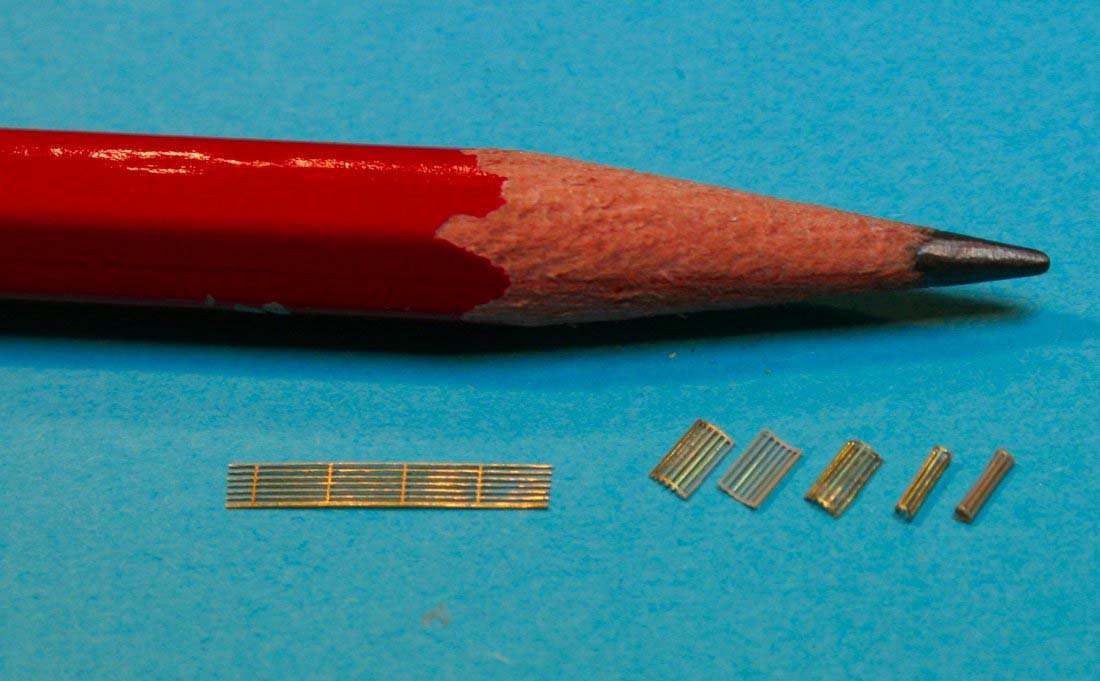 |
|||||||||||||||||||||
| HMS Scylla had a very distinctive crane jib-which was also quite short. The supplied kit part was not only a caricature of the real thing it was also a very crude casting, and simply would not do! After much study of various photos of which all only showed a part of the crane (!) I managed to make a satisfactory semblance of the crane which took an incredible 5 hours to make, mainly due to the crane-jibs numerous small surface area butt-glue joins failing repeatedly every time I touched it! A number of very small pieces of PE, some stretched sprue, paper and small pieces of brass offcuts were used. | 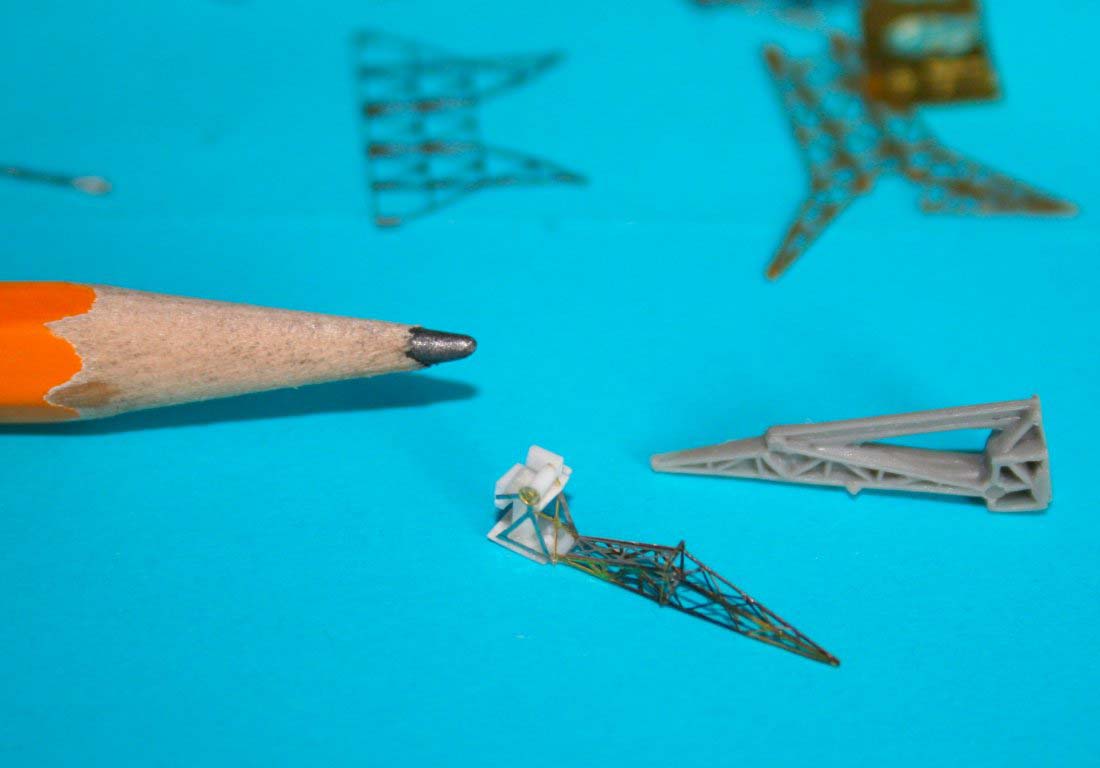 |
|||||||||||||||||||||
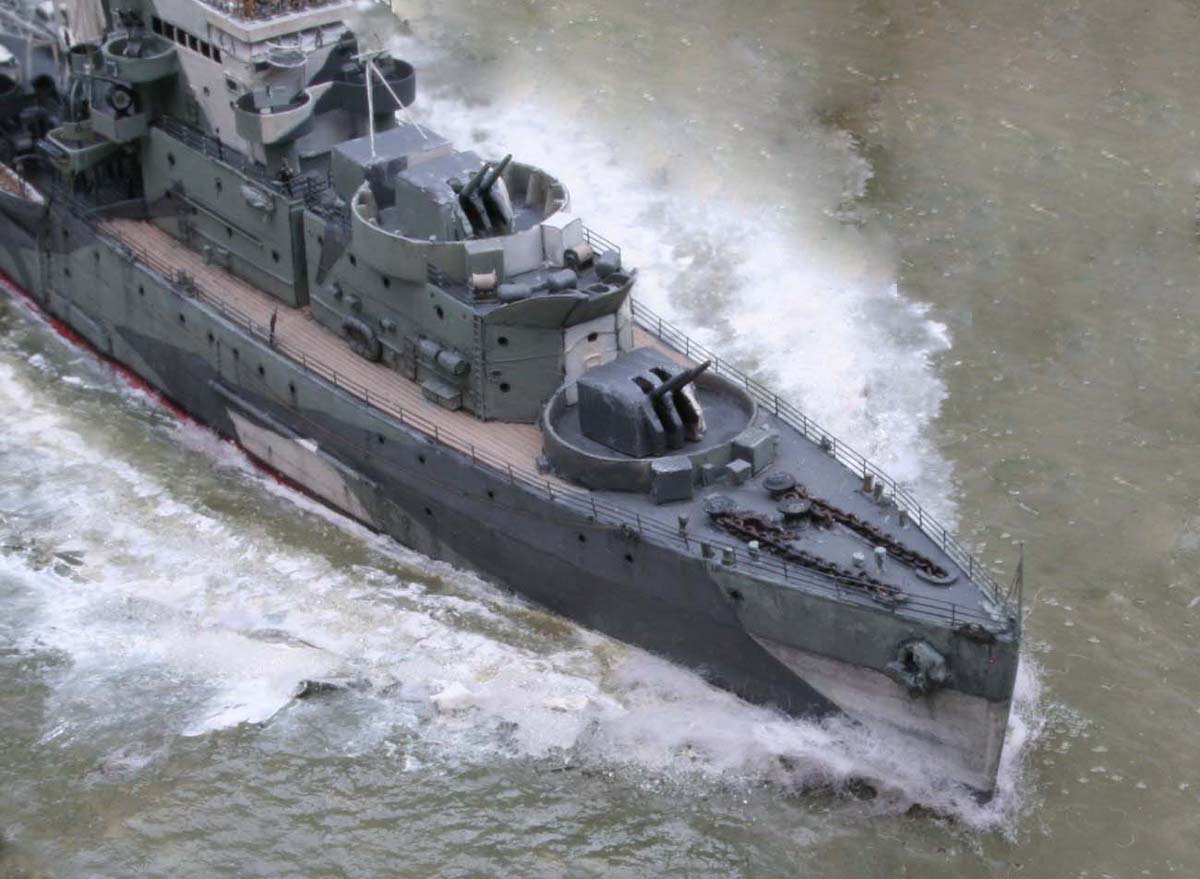
| The Pom -Poms were made using the excellent WEM items; however I added styrene strips to the underside of the ammunition trays and the barrels had the ends thickened with white glue along with additional struts and pipework to give the impression of the real thing. | 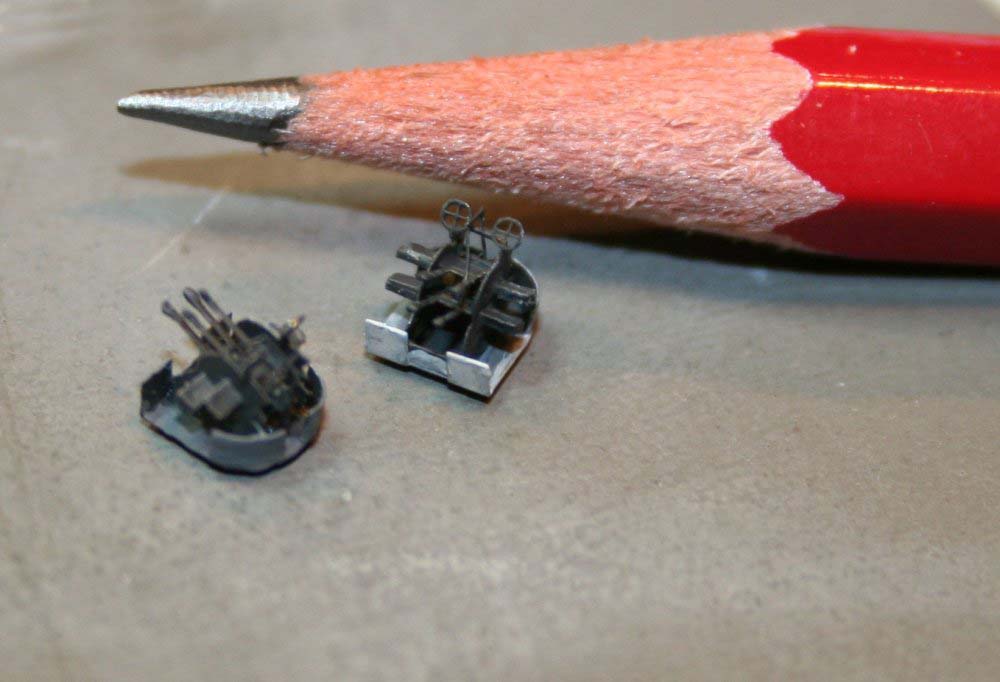 |
|||||||||||||||||||||
| The ships bollards and fairleads were all replaced with
scratch built items, being truer to scale than the vast cast on efforts.
I made the fairleads from thin wire bent to shape, glued in place and then
backfilled with white glue to simulate the casting where it attaches to
the ship.
Ammunition ready-use lockers were installed where I could be sure they were, paravanes were scratch built with paper fins, the open bridge was furnished with a binnacle, voice-pipes and officers in beige duffle-coats as well as a windscreen frame. The wind baffleplates surrounding the bridge were simulated using paint effect. Ships boats were replaced and modified using WEM items from my stock. The curved top splinter shields midships were cut out of paper doubled-symmetrical shapes for each side! Ships railings were GMM Gold plus superfine, cut and shut to suit so as to get stanchions on corners. The Ensign was a Dunagain decal- now sadly unobtainable; crumpled in a sandwich of tissue paper to prevent splitting. Carley floats were a mixture from the spares box - the kit-supplied items whilst attractive were dimensionally far too large when compared to photos. The snakes nest of steam pipes leading from the fwd funnel downwards
were made of cored solder; which made it easier to create the bends. The
turrets were lowered significantly and had their back edges thinned down
by paring with a blade, barrels were replaced with suitably sized IJN items
from my spares box. A mixture of GMM and Eduard PE figures fattened a little
with white glue completed basic construction.
|
||||||||||||||||||||||
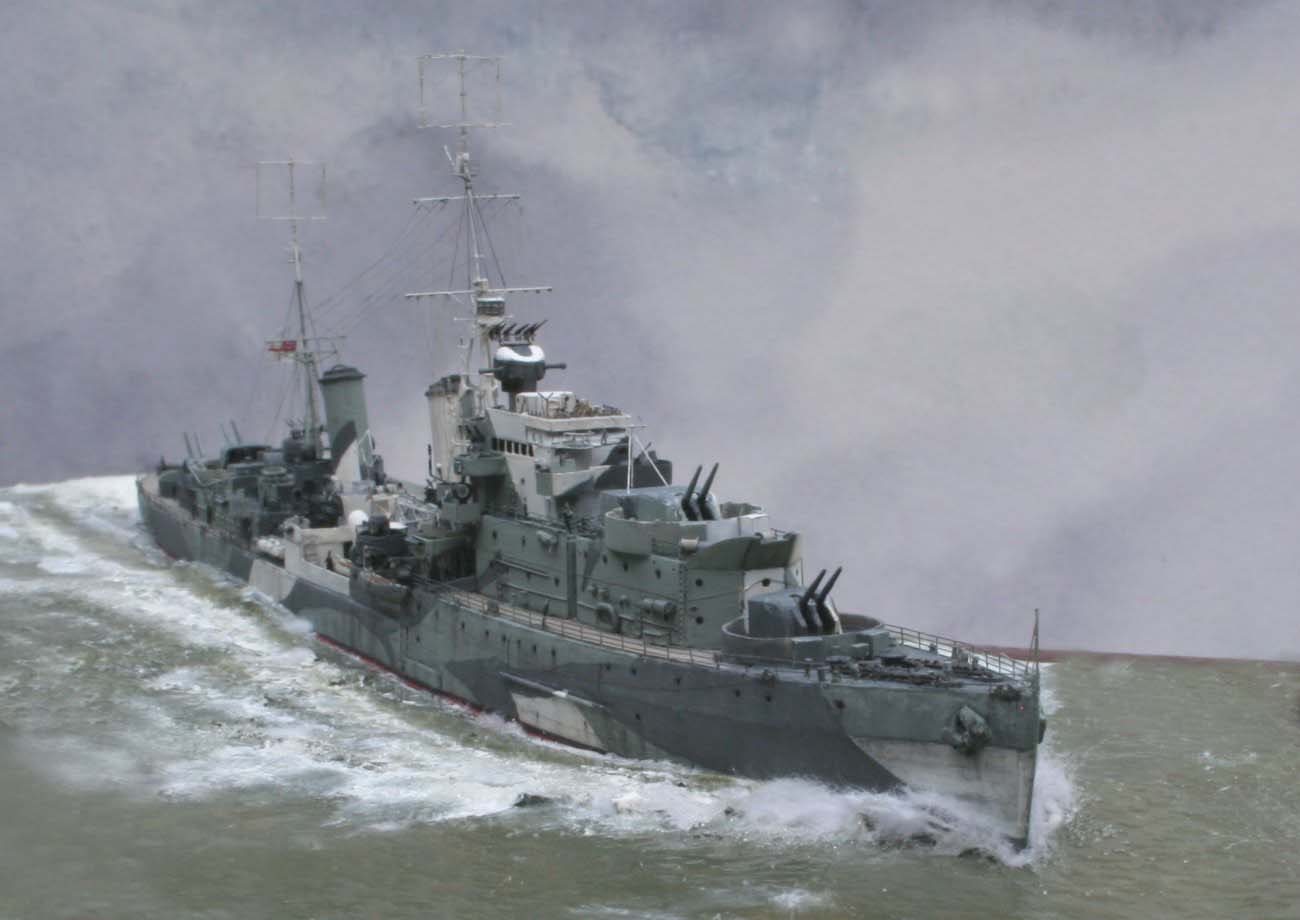
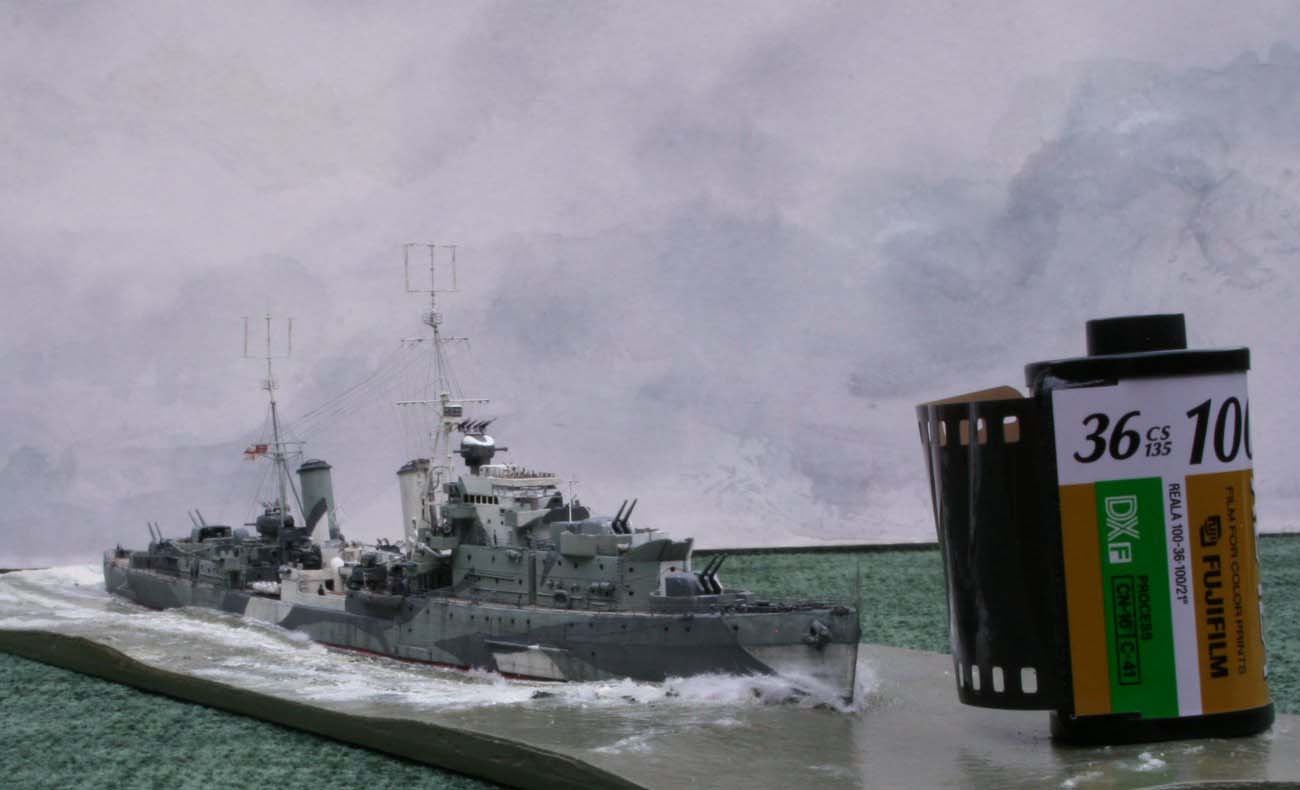
| The model was set in a sea base of artists watercolour
paper glued over cocktail sticks to simulate the swell and the wave form
of the ship moving at speed. Painting was done wet-on-wet to give a blended
look with tonal depth.
A step-by-step description of my method can be found here at MW.com here and here. Once the water was completed I rigged the model using stretched sprue in tan for the signal halyards and black for standing rigging.
|
||||||||||||||||||||||
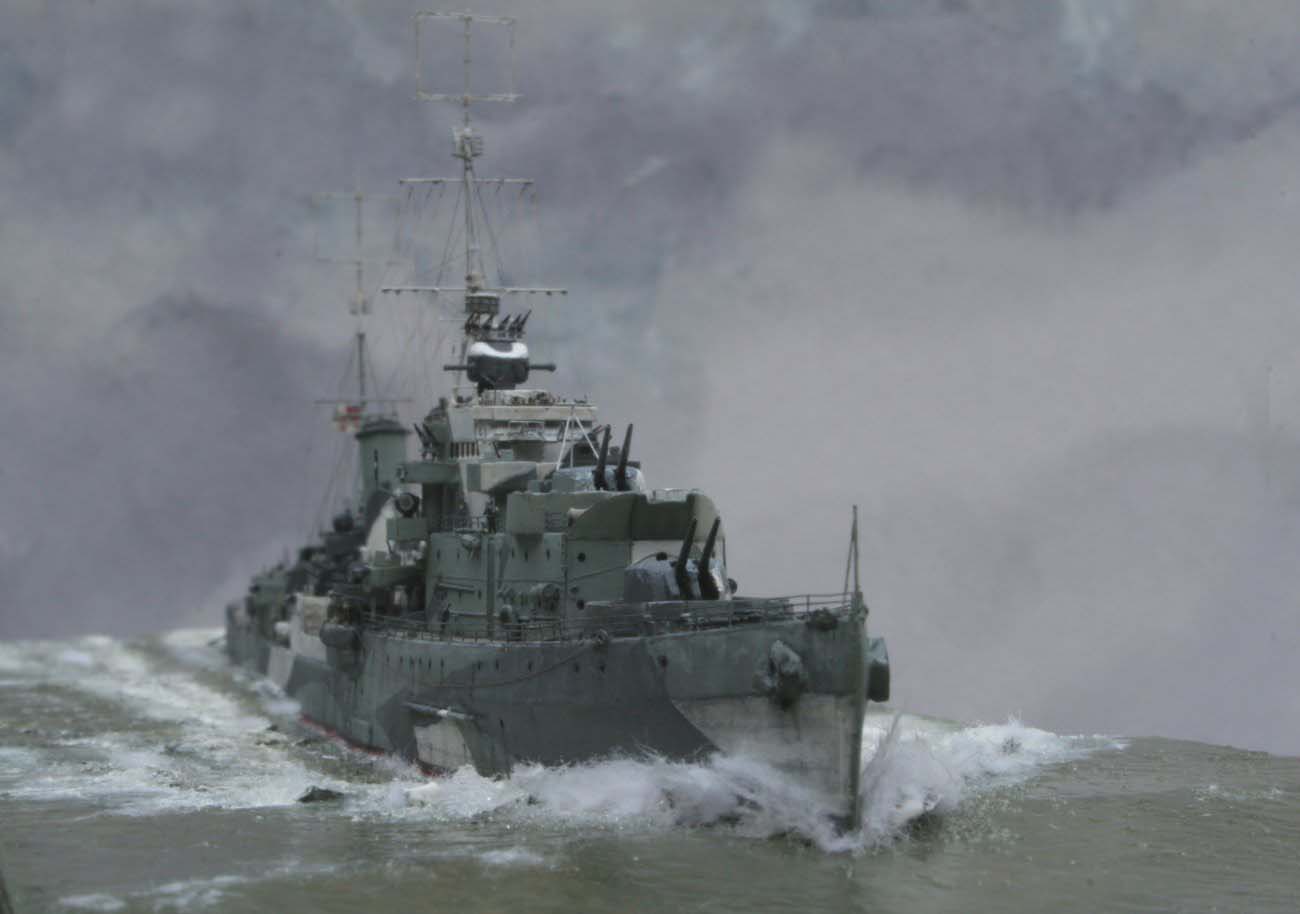
| Aside from the major mistake I made in not checking my references sufficiently
- and thereby finishing up with a starboard-view-only HMS Scylla model,
I eventually did enjoy the build, even allowing for the basic weaknesses
of the kit.
The portside view of a faux HMS Charybdis is marred by the different placement between the two ships of the radar lantern and other smaller equipment . Unfortunately, after (!) I completed the model I was sent yet another
photo that showed a minor error in my shaping of the aft AA positions;
if anyone else is intending to build the WSW kit of HMS Scylla I would
be willing to share my findings and some of the photos that I have purchased.
|
||||||||||||||||||||||
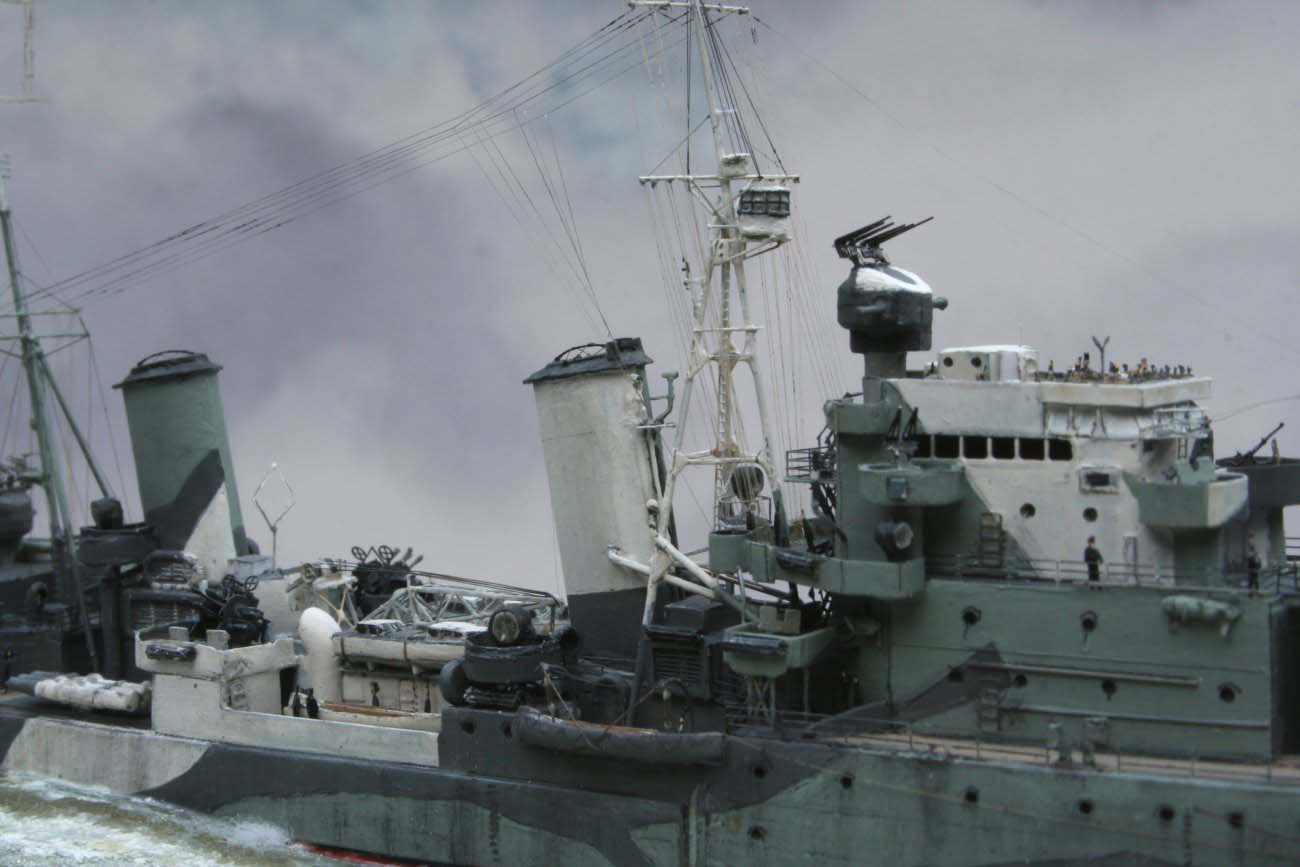
| My sincere thanks go to David Griffith, who kindly performed for me a thorough high res photo survey of the large scale model which is exhibited in the Glasgow Museum of Transport | ||||||||||||||||||||||
| References: | ||||||||||||||||||||||
|
 |
|||||||||||||||||||||
| More of Jim Baumann's work. | ||||||||||||||||||||||

© ModelWarships.com