|
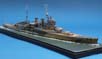
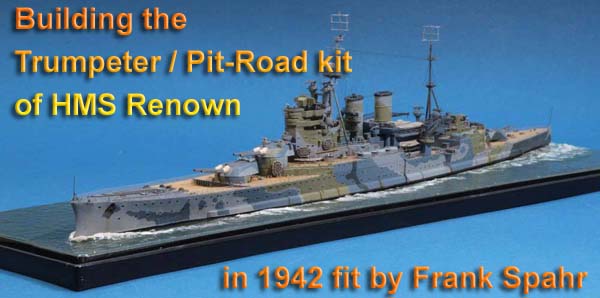
| HMS Renown was the longest serving of Jackie Fisher´s
battlecruisers. Laid down in WW1, she served throughout WW2 and was scrapped
only in 1948. She had received a thorough refit in the 1930ies, along the
lines of the one performed on HMS Queen Elizabeth, which altered her appearance
drastically. During WW2, she wore a rather elaborate and colorful camouflage
scheme.
|
|||||||||
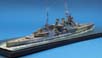
| I built this kit mainly out of box, apart from the following exceptions: I used the excellent PE set by White Ensign Models. This is designed for their own resin kit and comes without instructions, but scans of these are to be obtained on the net. Obviously , some parts were easier to work with than others, but on the whole things went smoothly. The main artillery gun barrels were replaced with machined brass items by BMK. The kit´s masts were also repaced by tapered brass stock from BMK. The bridge windows were cut out and replaced by PE ladder stock. | 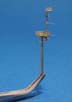 |
||||||||
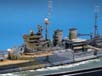
| The paint scheme was hand-painted in a number of acrylic shades I had selected checking with the classic Warship Perspectives booklet on RN camo schemes. The wooden decks were accented with a brownish wash; artist´s oil paints mixed into Humbrol thinner works fine on acrylics in my experience. The numerous boat covers were made from cigarette paper infused with Johnson´s Klear. That produces a rather convincing crinkly-wrinkly texture. | 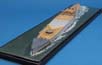 |
||||||||
| The vessel was rigged with tan stretched sprue for signal lines, with black 8/0 UNI flyfishing thread for the heavier rigging lines and with UNI Caenis for the rest. Caenis was also used on the floatplane. | 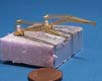 |
||||||||
| PE figures by Lion Roar were used; a final spray of flat coat blended things in and concluded the project. | 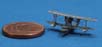 |
||||||||
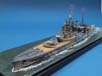
| The model was fixed on a base I had prepared very early in the project. I normally prepare the waterline hull first. This is placed on the display box, and holes are drilled through the base. Screws are then attached to the hull using dental resin. This allows for good handling during the build and for secure mounting to the base. In this case, the model was to be displayed on a common display, so I had to attach the nuts to the hull. | 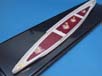 |
||||||||
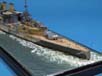
| With the model´s position decided on, I mount it
provisionally to the base using the screws embedded into it. I then mist
paint over the model to mark its perimeter on the base. Now the model is
removed again, and wave effects are sculpted using my putty of choice.
These days, it´s mostly plastic putty from the hardware supermarket
for its cheaper price. Bow wave, disturbed water around the hull and wake
are sculpted using a number of spatula for artist´s oils I found
in some el cheapo shop. A wire brush may be used to hack some more froth
into the wake.
That cured, wall paint is stippled onto the base using a large flat brush. The amount of paint used, the pressure, frequency and direction of stippling will decide upon the surface texture. With a bit of practice, a range of textures may be produced. This white base is then sprayed to the desired shade using modeling acrylics. In this case, I wanted some greyish-green I know from the North Sea, in other cases I´ll begin with green and then switch to blue. The airbrush allows for gentle transformations in shade. That all fully cured (we´re talking a week or two here), the base receives a number of gloss coats. I use hardware supermarket rattle cans of clear solvent-based gloss - that leaves a really shiny and sturdy surface. It will need several weeks to fully cure, though. Hence never leave a model on a base that is not fully cured unless you´re Ok with it staying there. The surface may seem dry to the touch but may nonetheless be sticky when in contact with the model for a few hours. I learned that the hard way, as in a 1/700 Flower class doing somersaults towards a flagstone floor. |
|||||||||
The model, once completed, is then mounted to the base
using the screws. Any remaining gaps between hull and base may be closed
using clear gloss acrylic gel. I tend to apply it with a salve syringe.
Said gel may also be used to build up some highloights and give selected
areas of the base more depth. But please watch out as it will only cure
fully clear in thin layers.
White artist´s oil paint may be used for highlighting wave tops as a finshing touch. All in all this was an enjoyable project and a good kit |
|||||||||
More
of Frank Spahr's work.
Updated 2013

© ModelWarships.com