HMS Abercrombie 1944
Reviewed by Sean Hert
| HISTORY | |||||||||||||||||||||
|
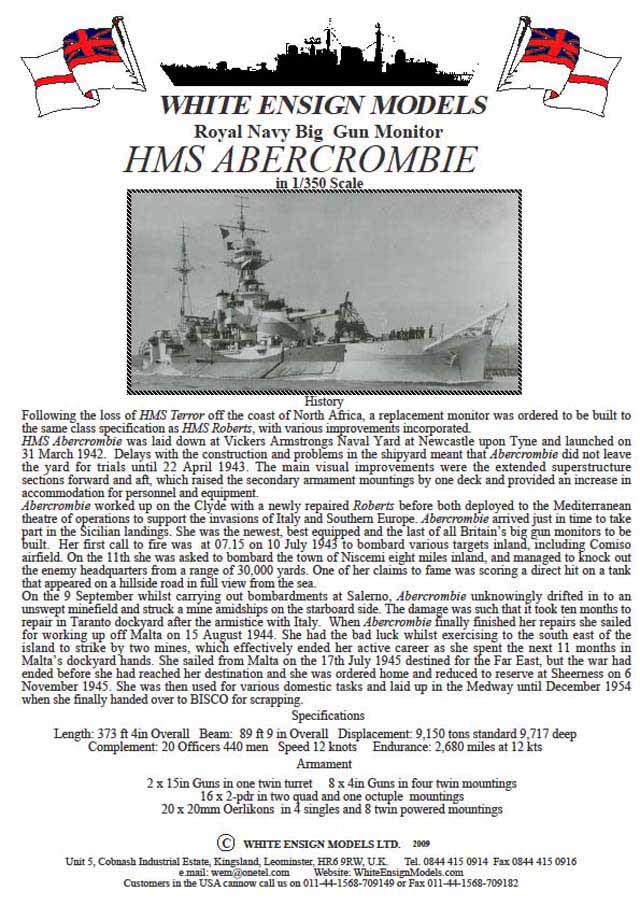
The monitor HMS Abercrombie was the last big gun monitor built for the Royal Navy. Basically a repeat of the HMS Roberts with some minor modifications, Abercrombie was ordered in early 1941 after the loss of the monitor HMS Terror to German JU-87 Stukas off North Africa. Terror had given such great service in the performance of her duties off North Africa that the Admiralty wasted little time in ordering her replacement. Terror's loss was also to influence the final design of Abercrombie, leading her to have a greater and more effective anti-aircraft layout. After trials in April of 1943, Abercrombie first taste of battle was in support of the landings on the Italian island of Sicily, the opening moves of Operation Husky. Abercrombie answered many calls of fire, shelling various targets in Sicily (airfields, artillery batteries, headquarters), some at distances in excess of 30,000 yards. While supporting the landings at Salerno, Abercrombie engaged and destroyed two German Pz.Kpfw. IV's that were harassing the US landings at Red and Green beaches. Abercrombie's close support of the troops lead her astray- and into a minefield, where a mine detonated against her starboard side, amidships. A United States Navy tug came to her support, in a well photographed mission, which brought this British monitor to the attention of most Americans. This signalled the close of Abercrombie's career; she was repaired, then had the misfortune to strike not one but two mines while working up off Malta. The more extensive damage inflicted caused her to miss the rest of the war. Abercrombie was placed in reserve, saw some limited use as accommodations ship, and was broken up in 1954. White Ensign's long awaited Roberts class monitors were released in the first half of 2010. This model of Abercrombie has a waterline length of almost 13", and can be build in either a full hull or waterline version. |
|||||||||||||||||||||
| HULL PARTS | |||||||||||||||||||||
|
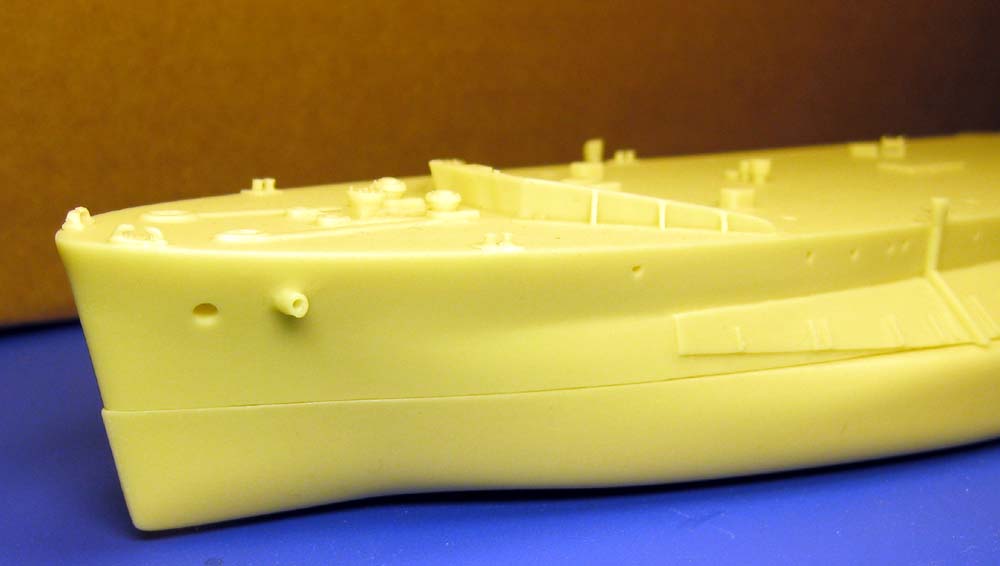
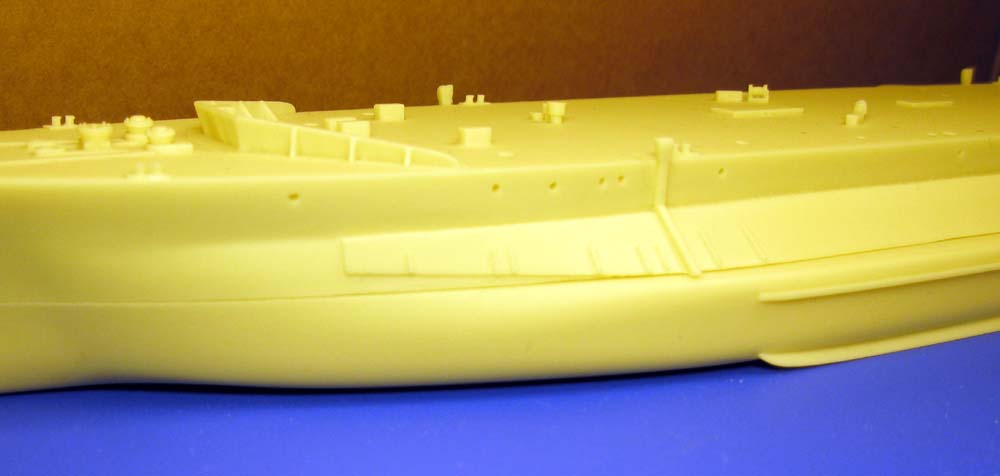
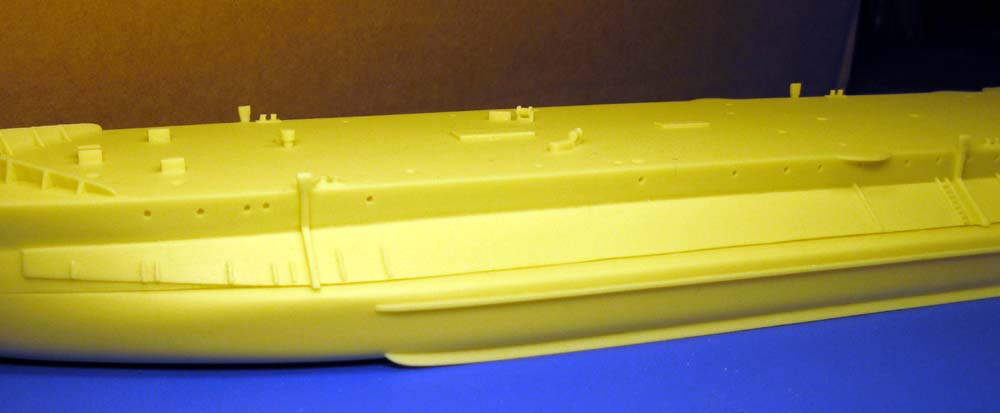
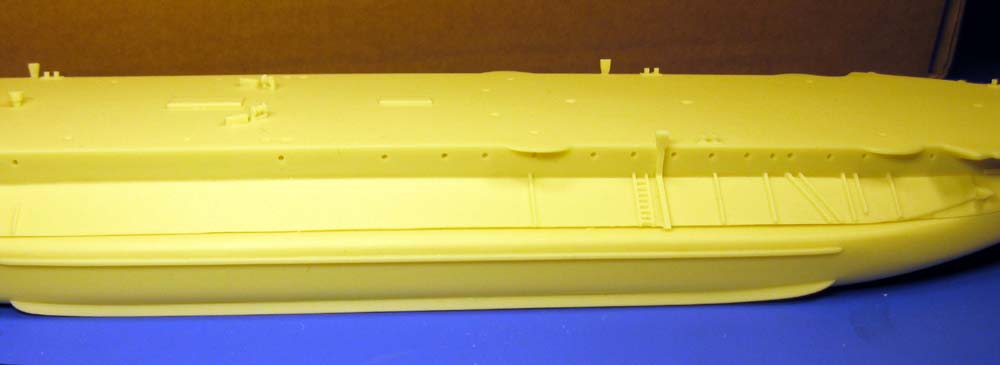
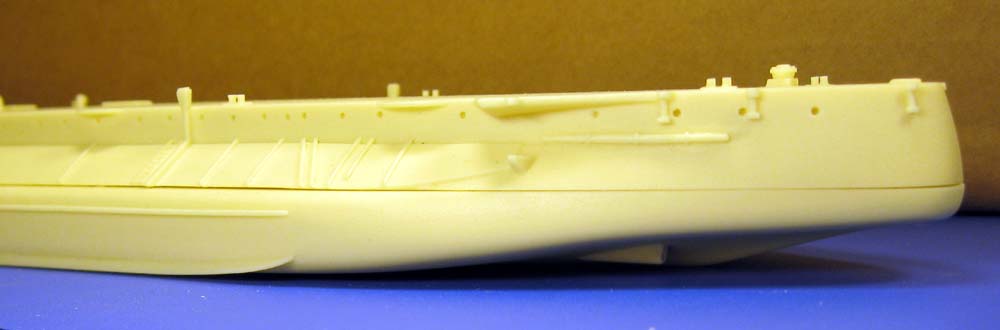
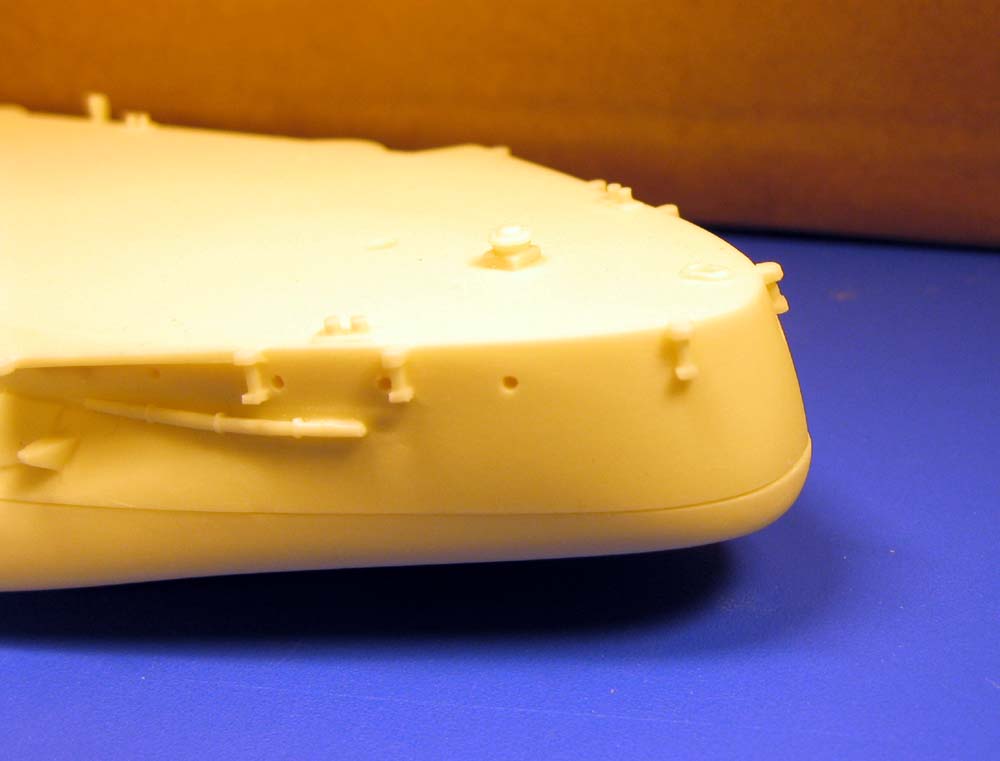
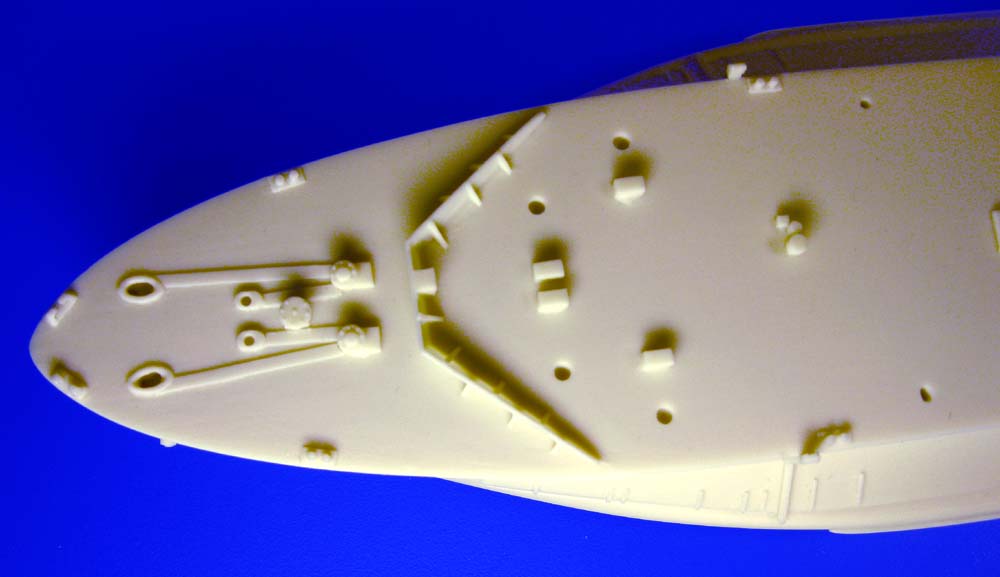
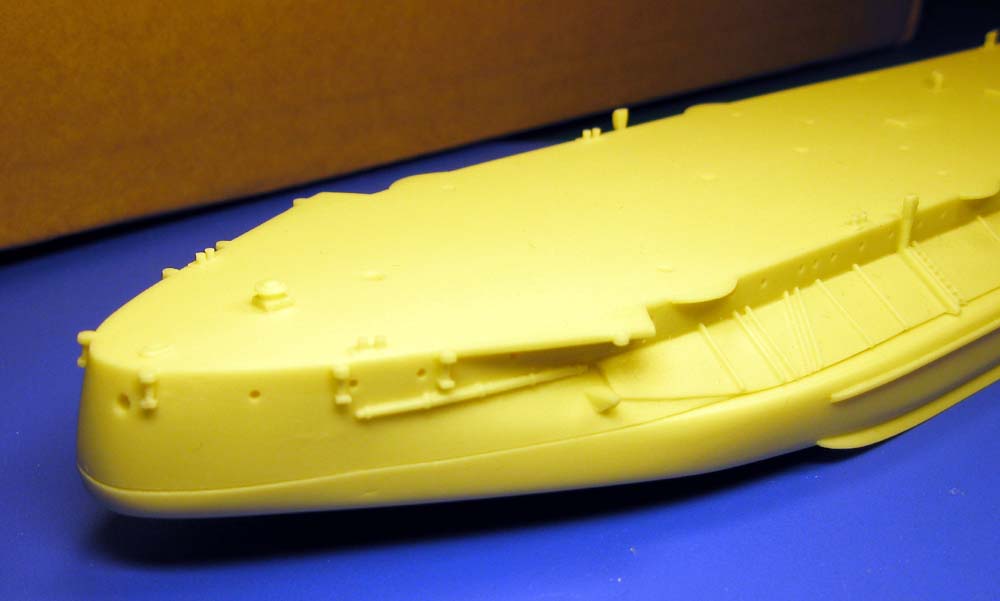
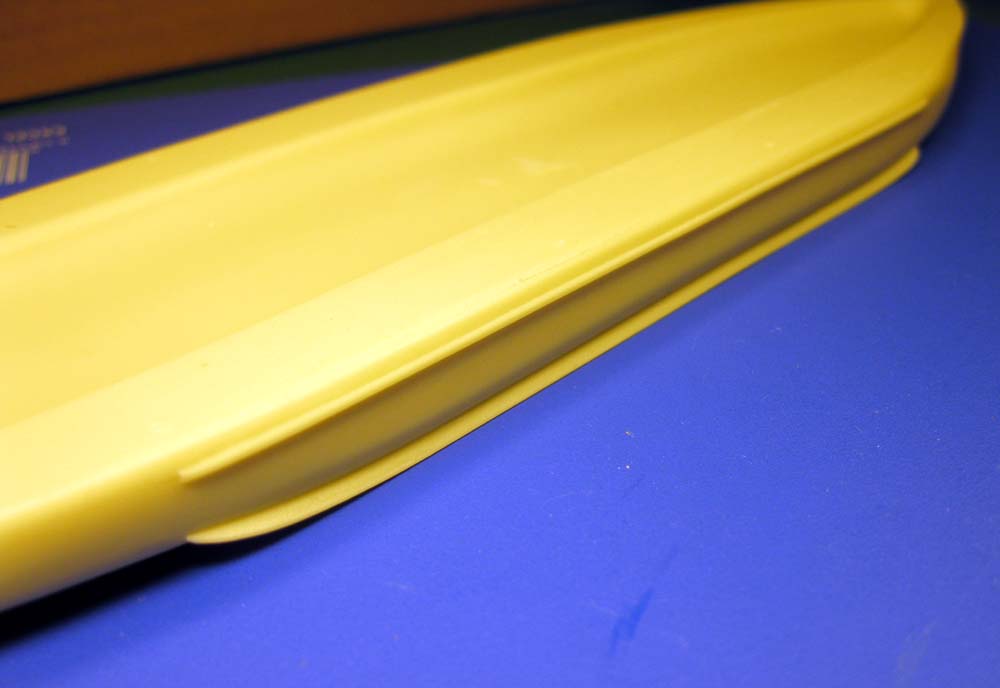
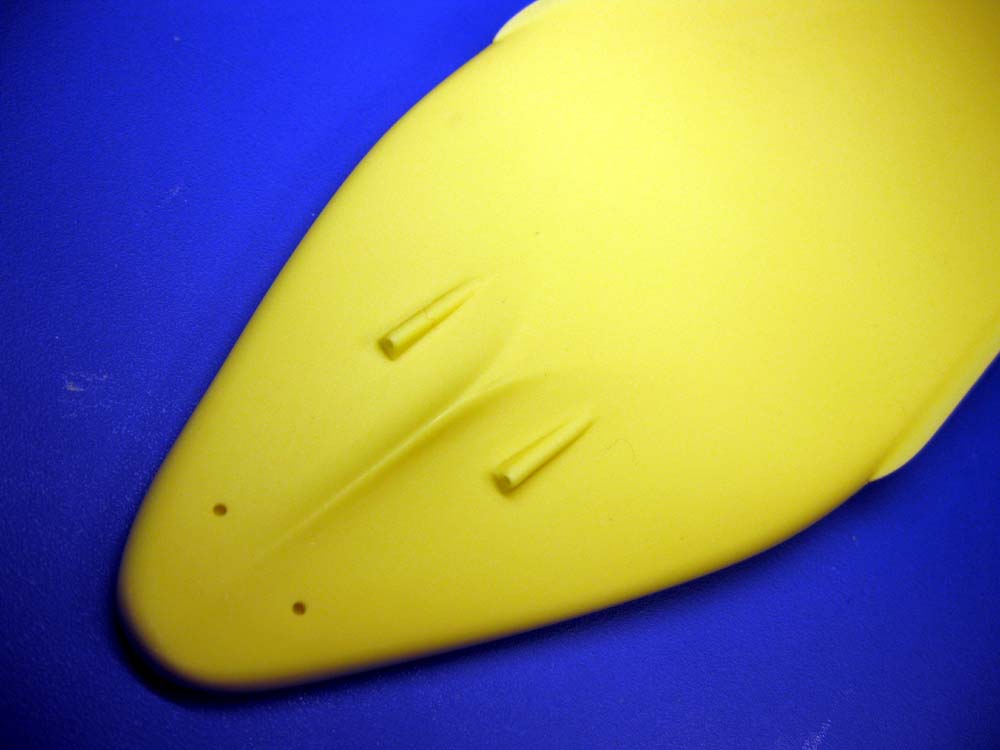
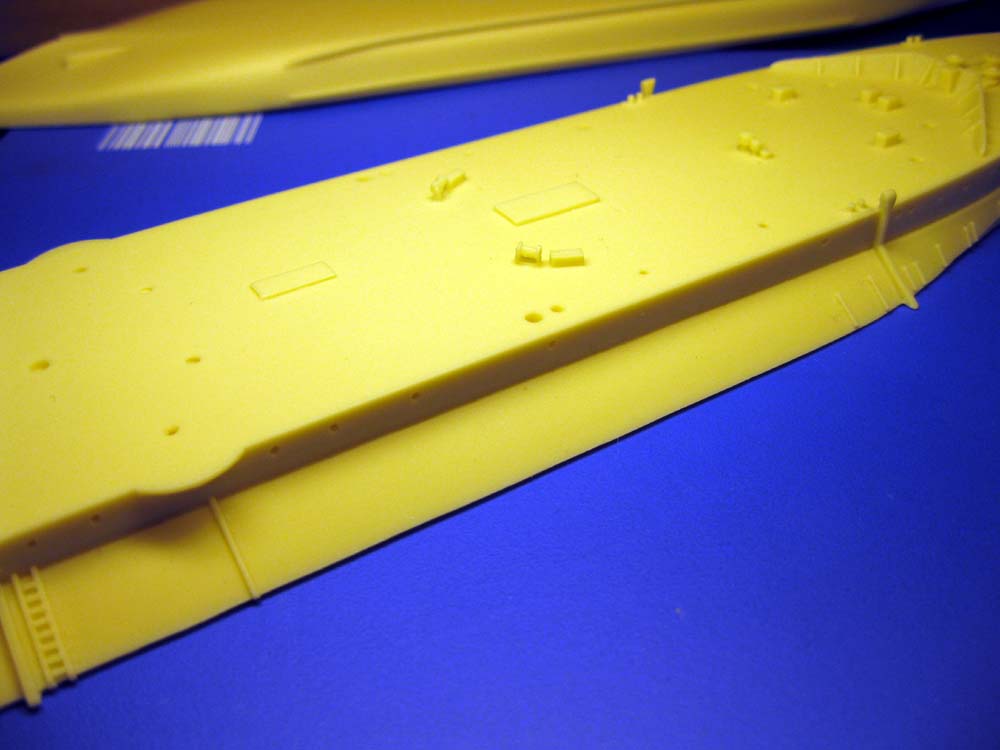
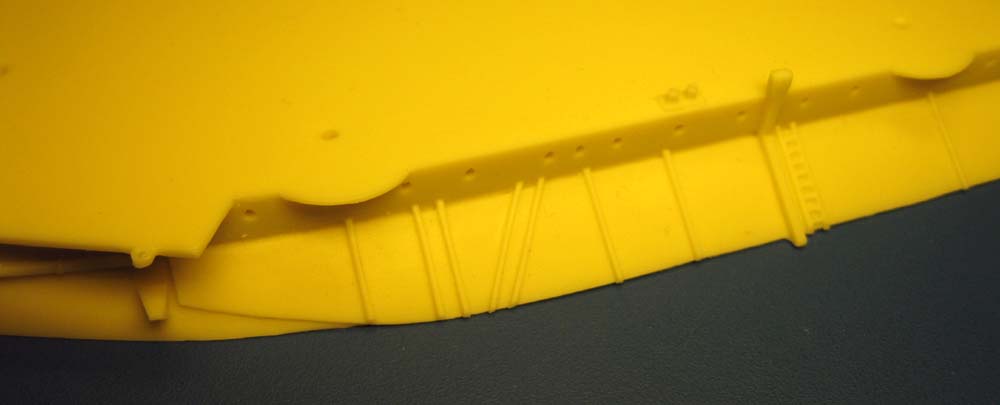
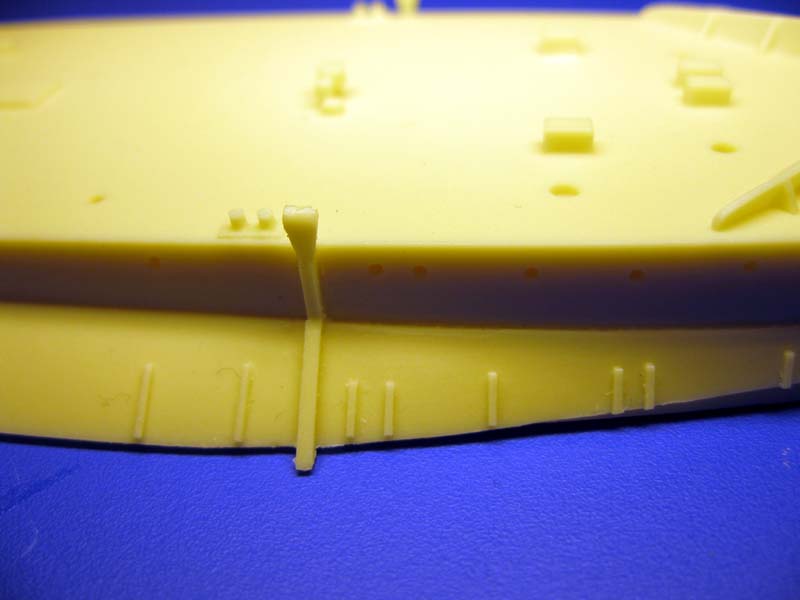
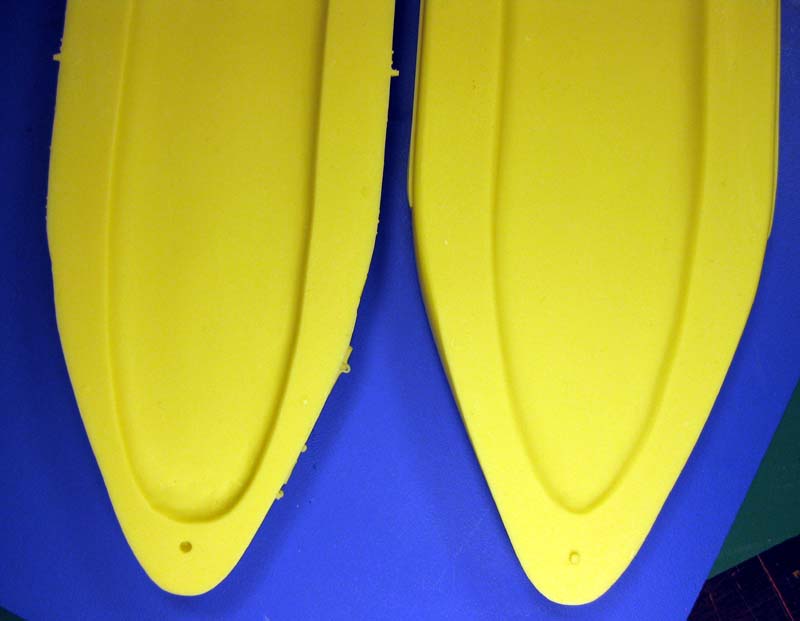
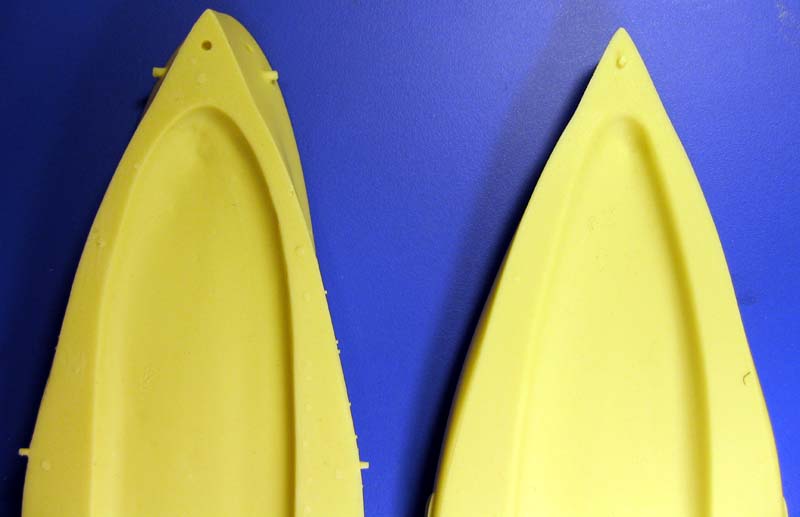
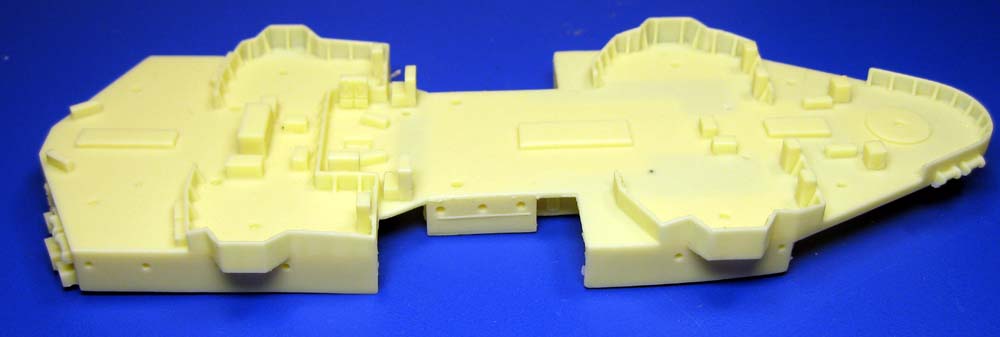
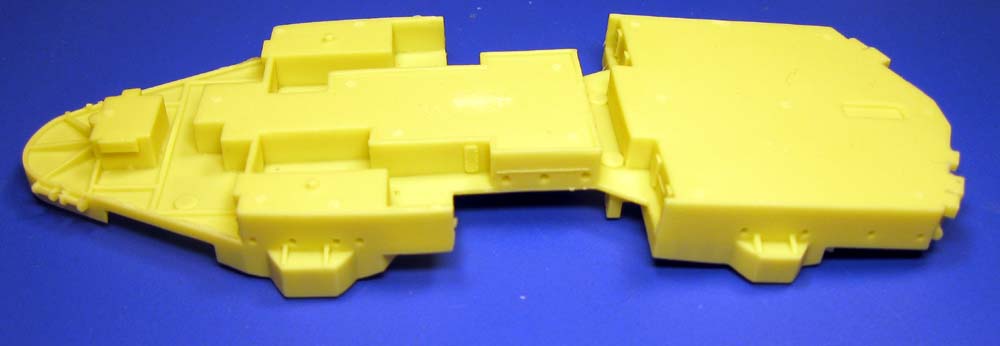
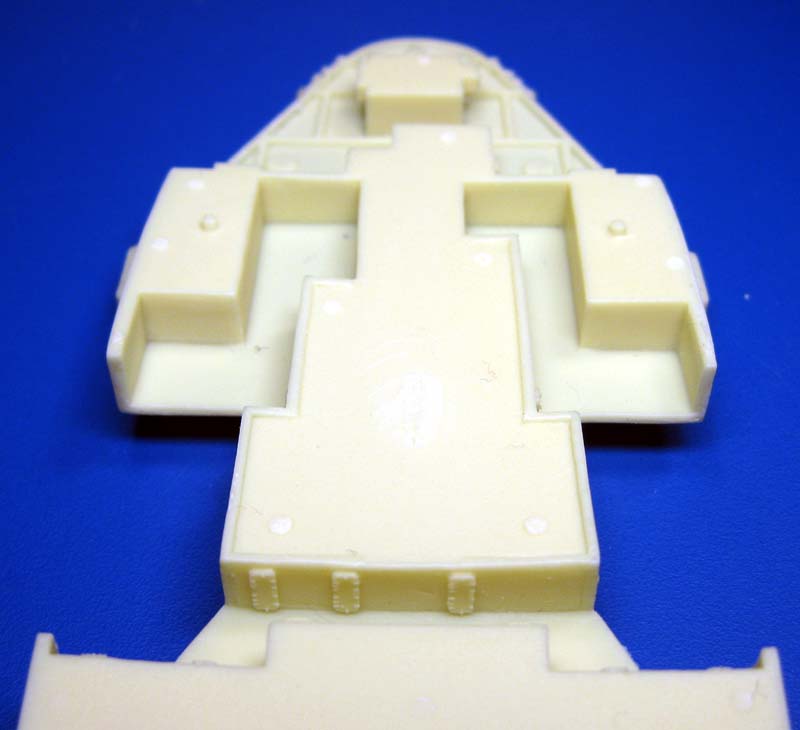
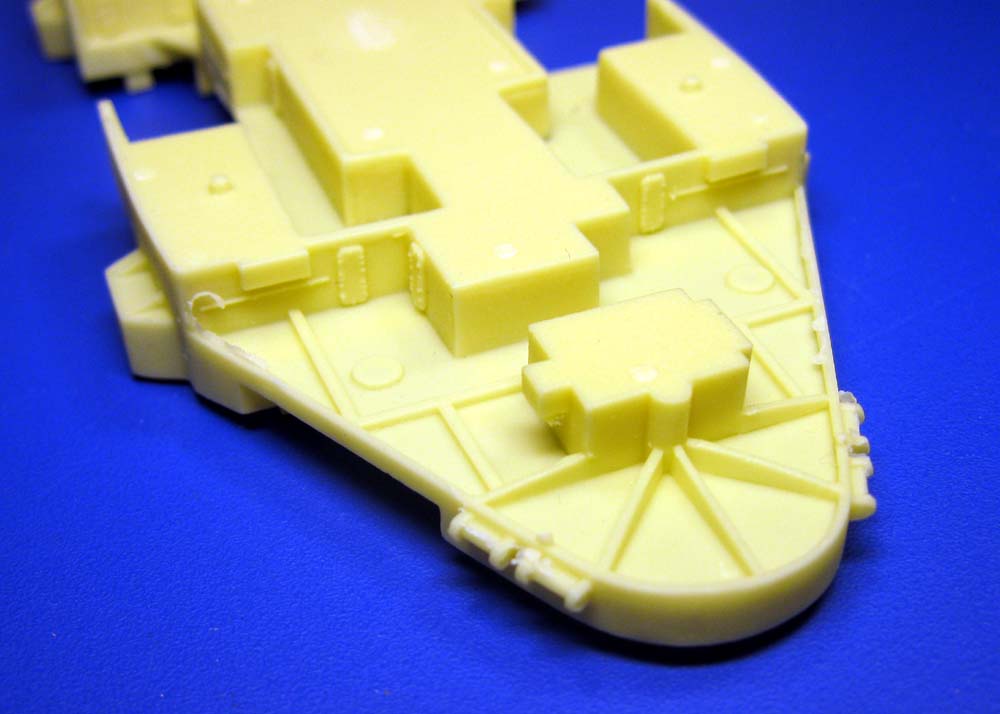
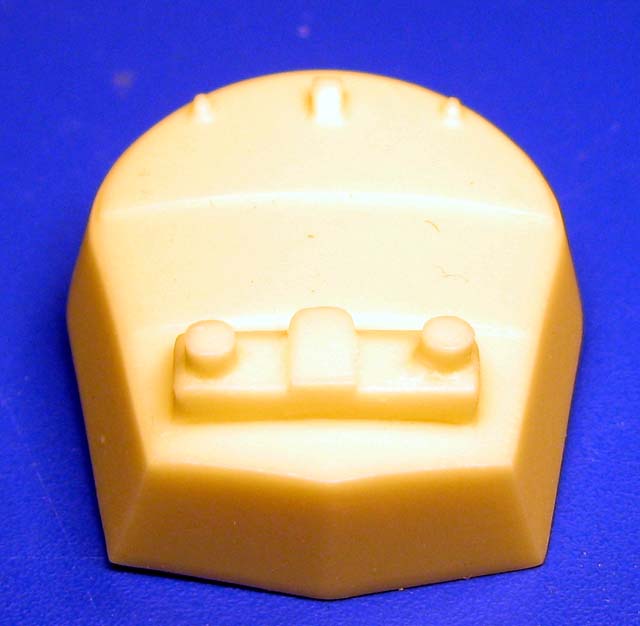
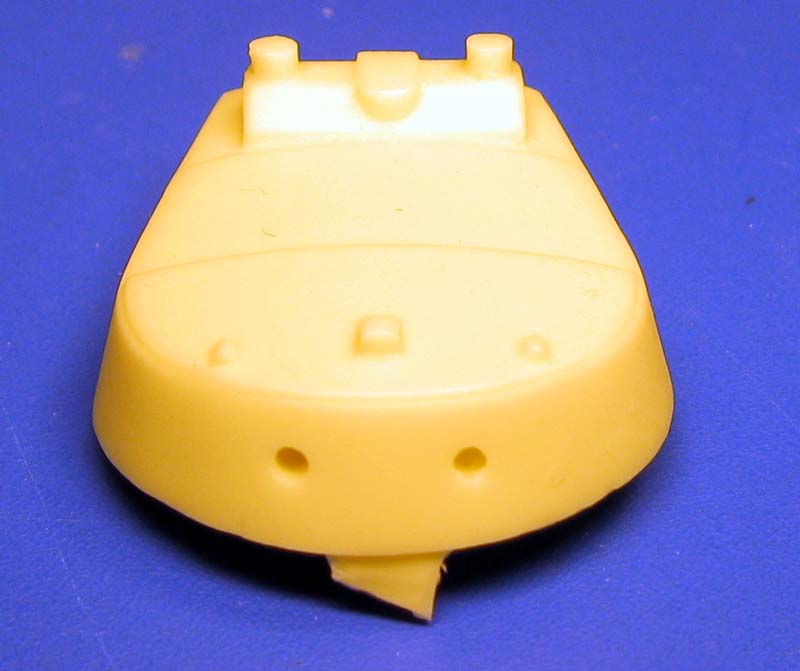
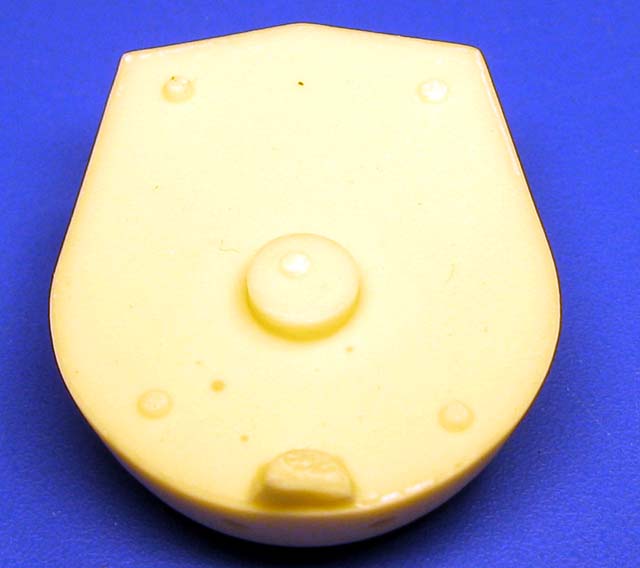
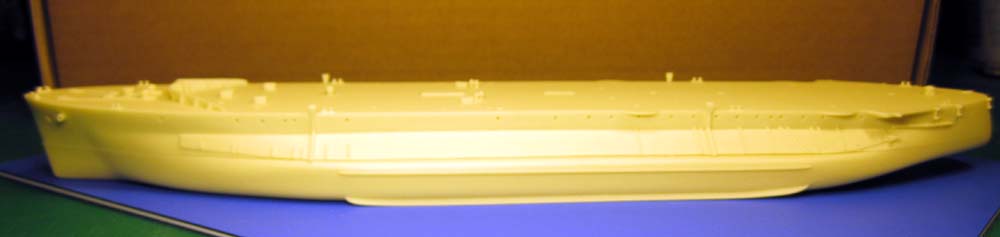
Abercrombie's hull is cast in 2 solid pieces, upper and lower, split at the waterline. The hull has an overall length just shy of 13", and a beam of whopping 3.18"! The upper and lower hulls are semi-hollow cast, saving both weight and materials. The upper hull has locator holes in the bow and stern, with the lower hull having corresponding resin pins molded on. There are some slight impressions of resin sprues that have been removed that seem to be approximately the same diameter as the locator pins, so if you are planning a full hull model, resist the urge to remove them. There is a slight mismatch between the upper and lower hulls in the forward areas; some filling and sanding will be needed for you full hull modelers. The mating surfaces of both hulls have some flash and resin stub remnants, and will require some attention. The upper hull has some very nice detail molded on, including the massive external armor belt and upper half of the distinctive bulge that made these monitors such great and stable gun platforms. One of the things I like about WEM kits is their use of locator holes and raised mounts to aid in part placement; the main deck has many holes, indicating where parts will later be fitted. In addition, there are some details to be removed from the upper hull, details which are particular to her sister ship HMS Roberts. There are some issues with some of the detail molded on the upper hull. For example, the molded on boat booms curve with the hull, instead of being straight. These should probably have been a separate part. A quick glance at some photos also show additional boat booms on Abercrombie that are not present at all. Addendum: In some warmer locales, the chamber between the hull halves could expand and contract over time, and might cause a joint to weaken over time and crack the putty and paint. (A known issue with hollow cast resin models in other hobbies) Full hull modelers way wish to drill a small vent hole, perhaps throught the funnel, to allow pressure to release. |
|||||||||||||||||||||
 |
|||||||||||||||||||||
|
|||||||||||||||||||||
| RESIN PARTS | |||||||||||||||||||||
|
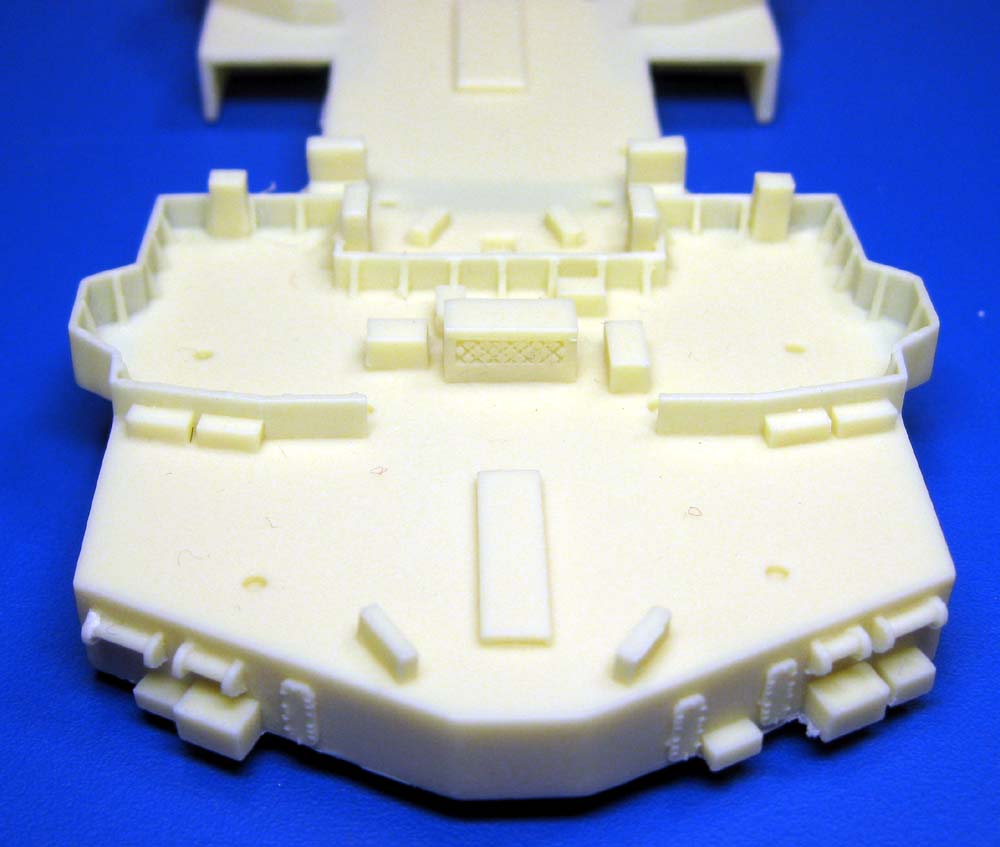
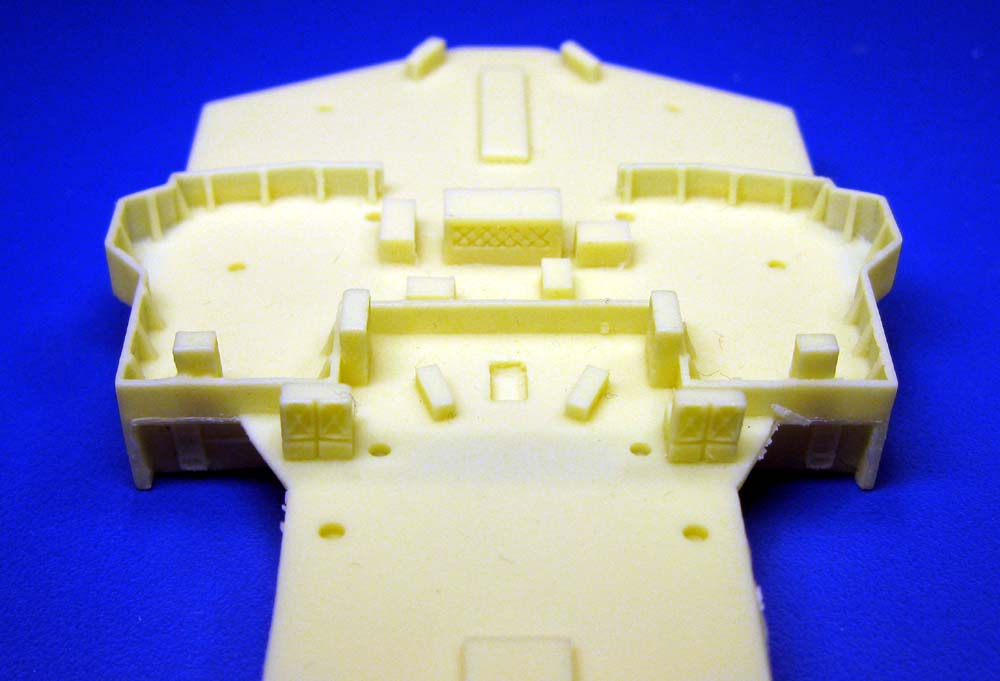
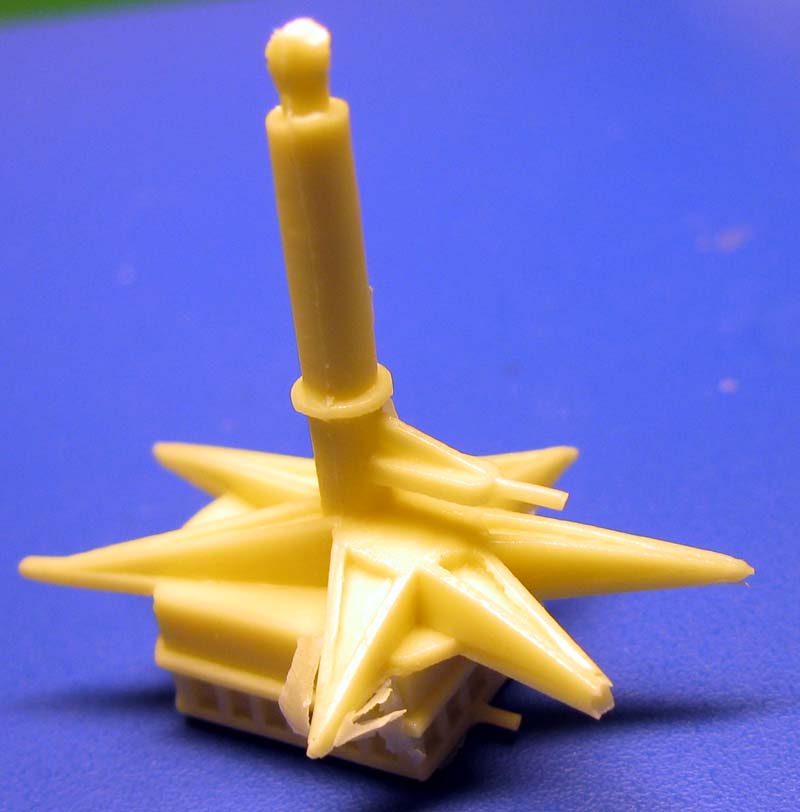
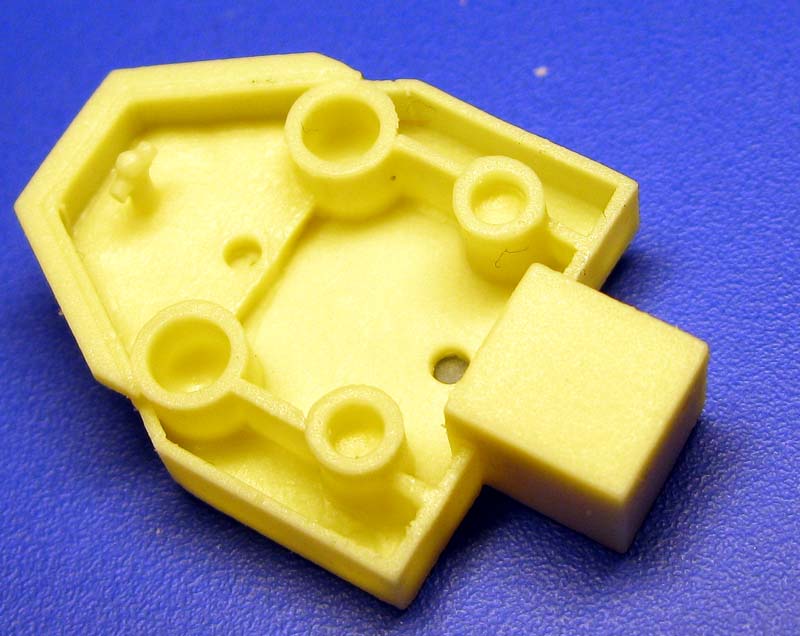
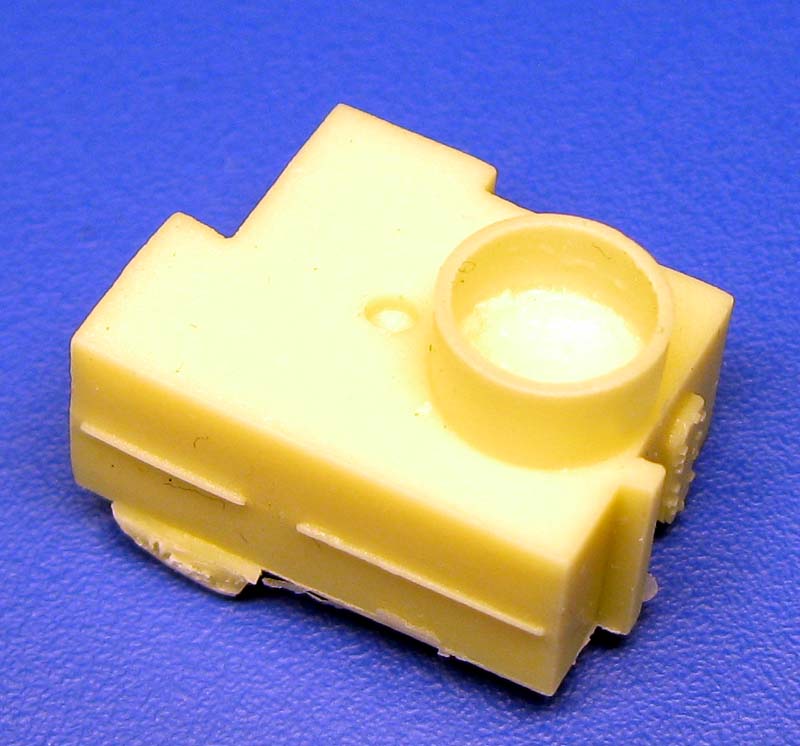
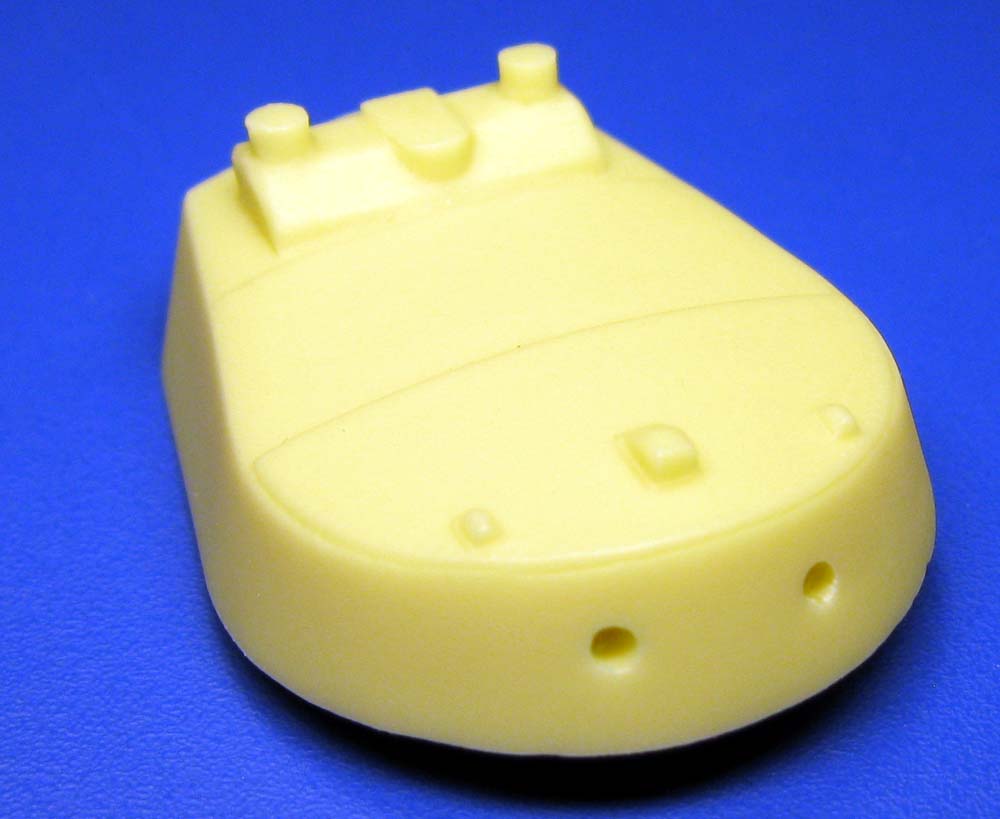
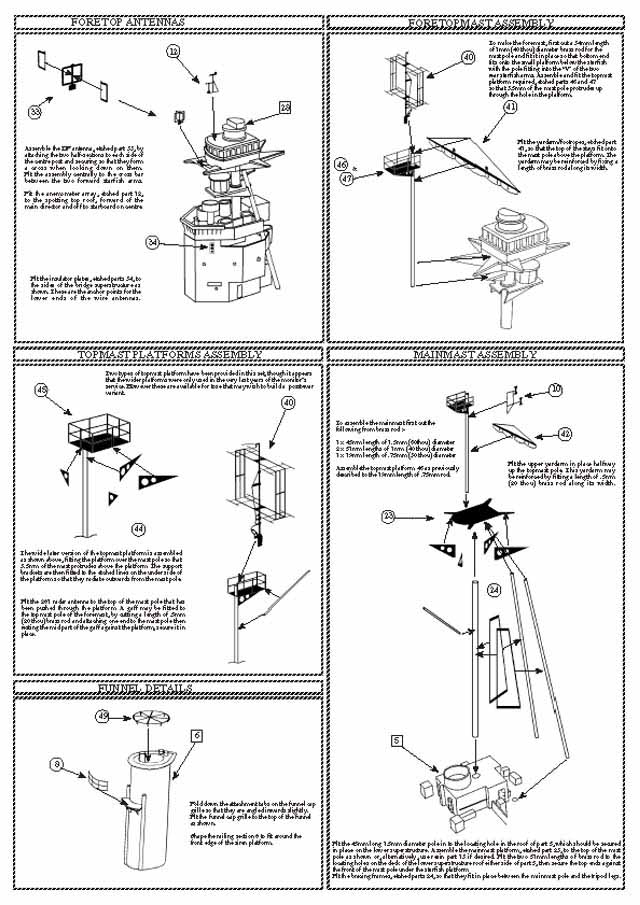
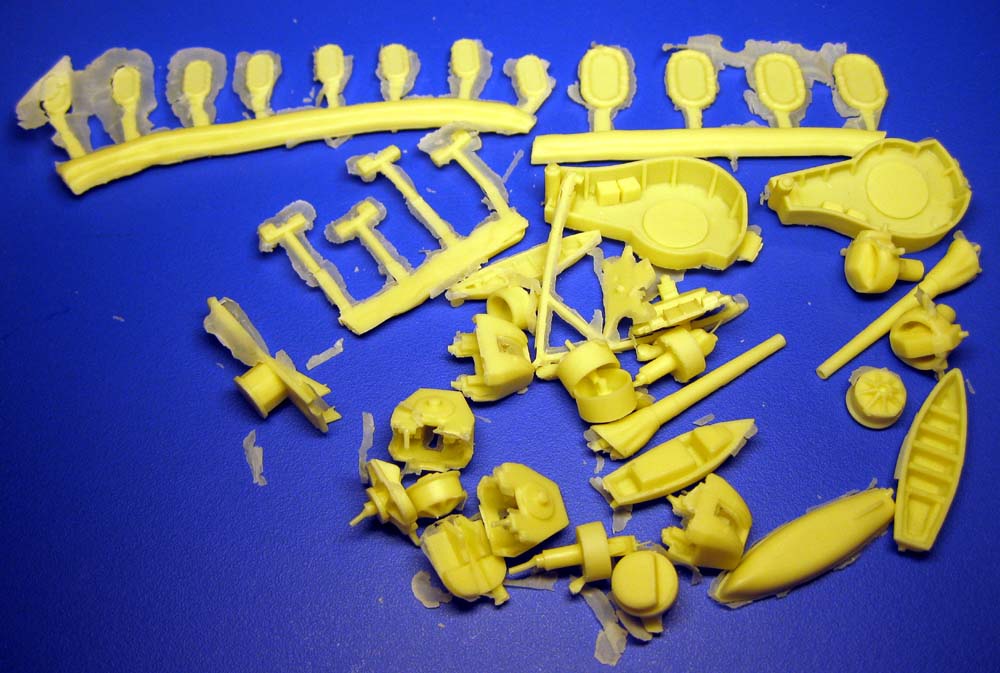
The resin parts for Abercrombie are packaged in a five plastic bags, with a single piece superstructure wrapped in protective bubble wrap. Many of the resin parts in this kit have small resin pour plugs or "stubs" on the bottom, or other casting remnants that shouldn't prove much of a challenge to clean up. The resin parts are nicely cast, and bubble free throughout the kit. No other casting apparent defects can be found either. The parts line up nicely, and should build up quickly. Many of the splinter shields are cast in place, with angled supports, with the superstructure parts, making them a bit thick, but it rarely detracts from the appearance of these parts. Page 2 of the instructions has a complete list of the resin parts included in these bags. The 01 level of the superstructure is cast as a single piece, and comes wrapped in bubble wrap for protection. In this sample, the piece arrived fully intact, but with a slight warp- this warp is negligible, and will be easily corrected when glued down to the hull. This part has the splinter shields, ready ammo boxes and vents already molded integrally to the part. The 01 is really comprised of multiple structures connected by the contiguous shelter deck above. By molding this as one part, WEM has certainly avoided some alignment issues that would have arisen with individual structures. The underside show the proper deck and platform supports also already molded in. Like the main deck of the upper hull, this piece also have WEM's positive location parts placement lugs. The bridge is cast as a large monolithic piece, that will form the base for the compass platform and single piece spotting top. The bridge does appear to be missing the vision slits through the armor for conning tower. The spotting top has the classic starfish molded in, but there is an option to replace this with an intricate photoetch assembly if desired by more advanced modelers. |
|||||||||||||||||||||
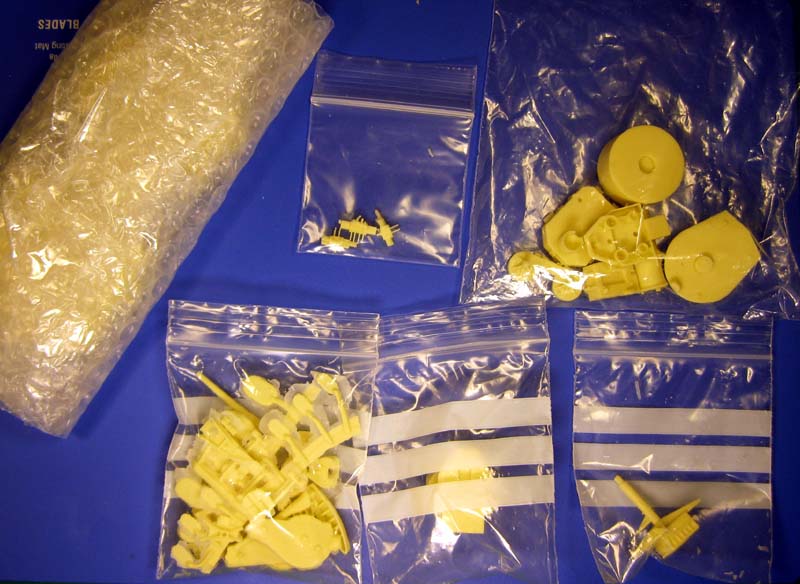
Parts Bags |
|||||||||||||||||||||
|
|||||||||||||||||||||
|
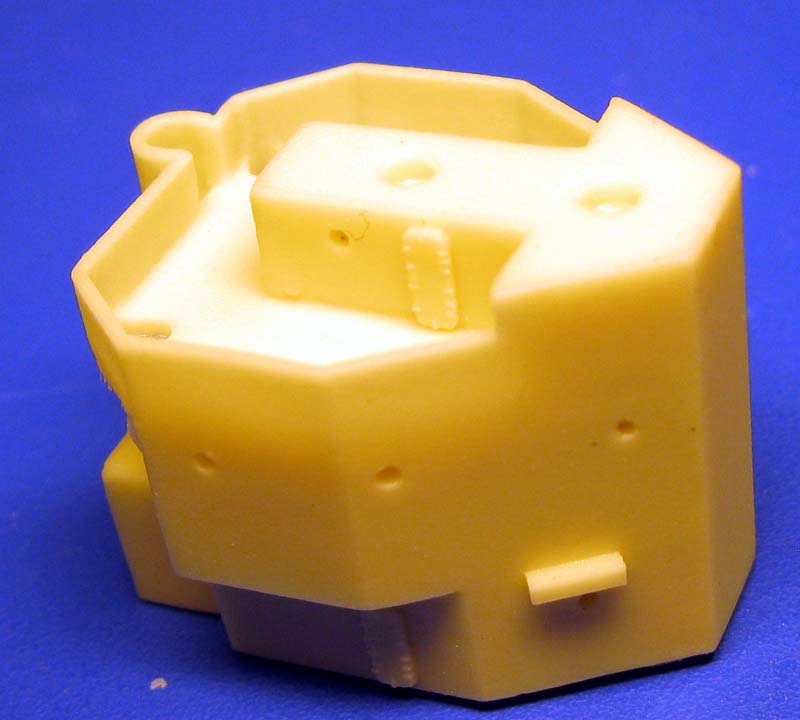
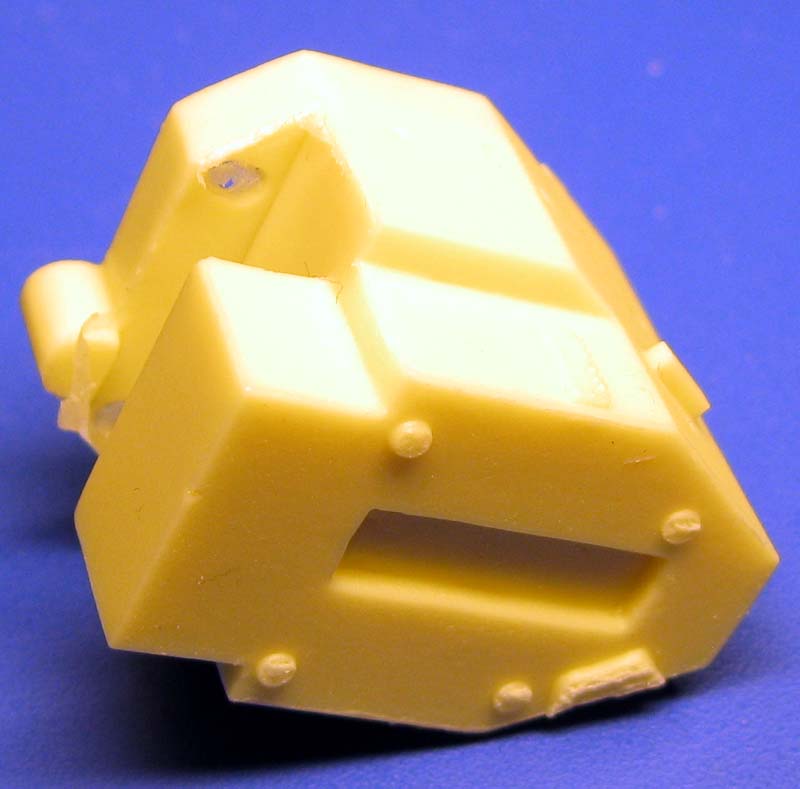
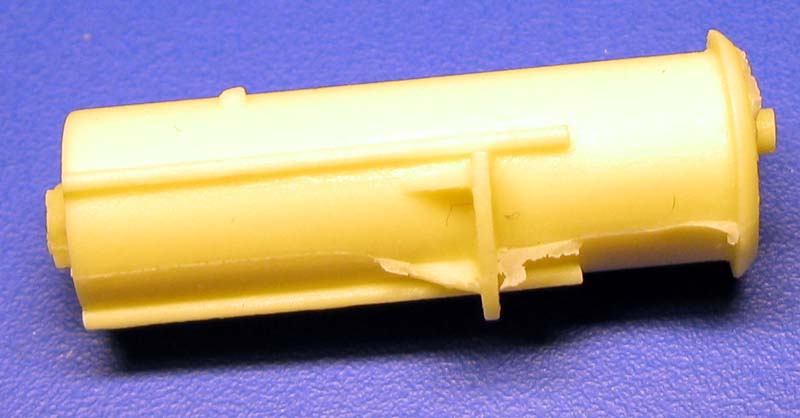
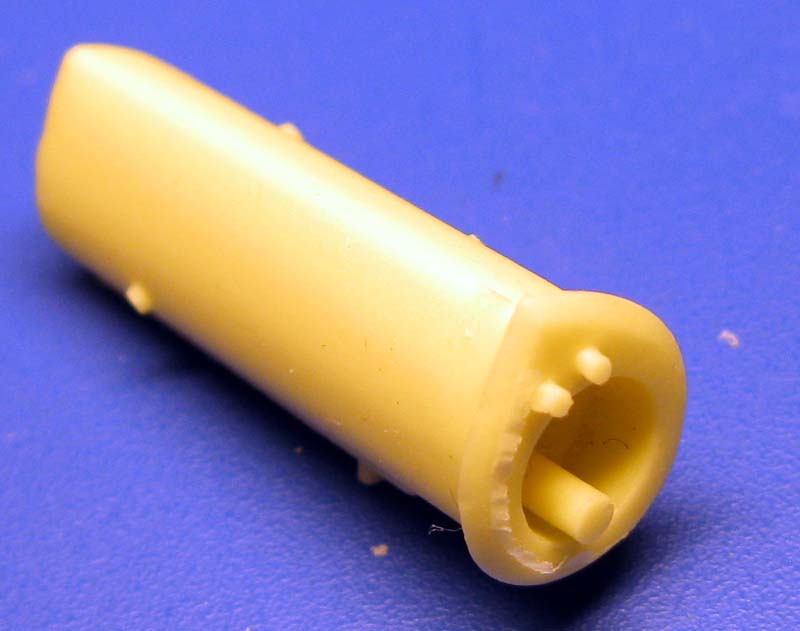
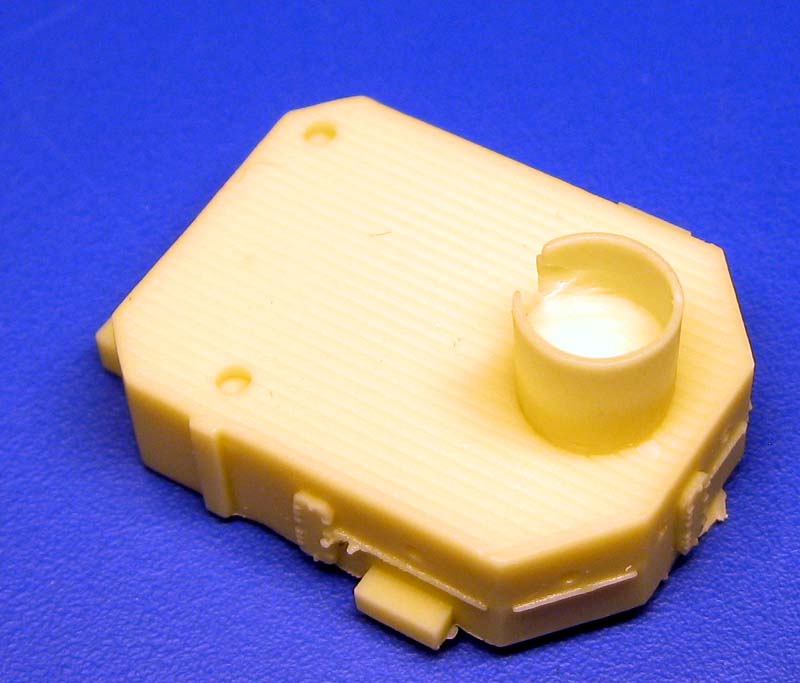
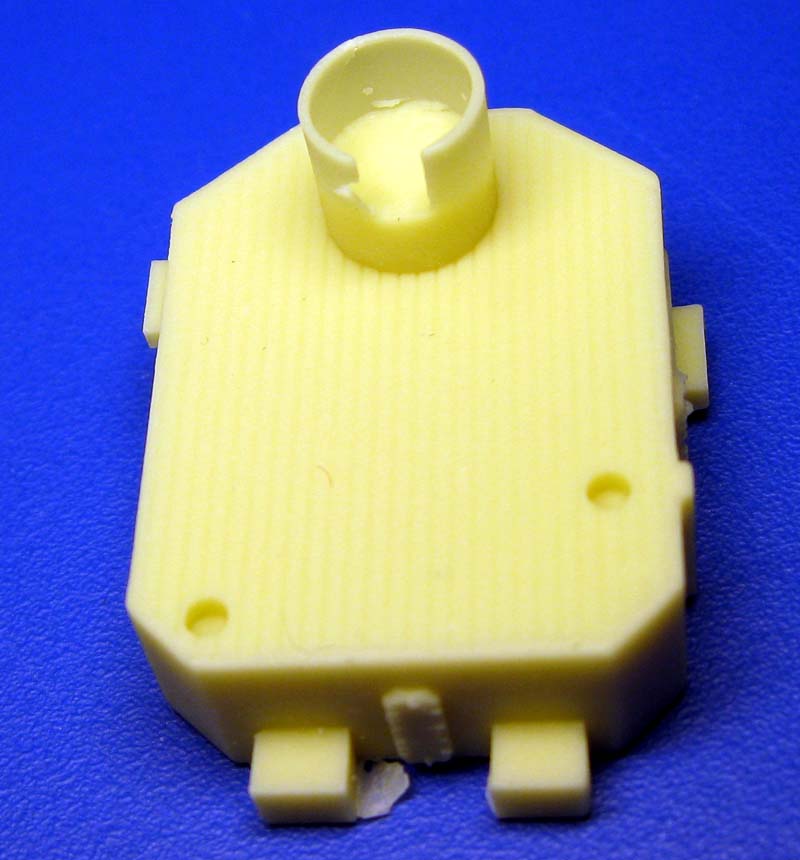
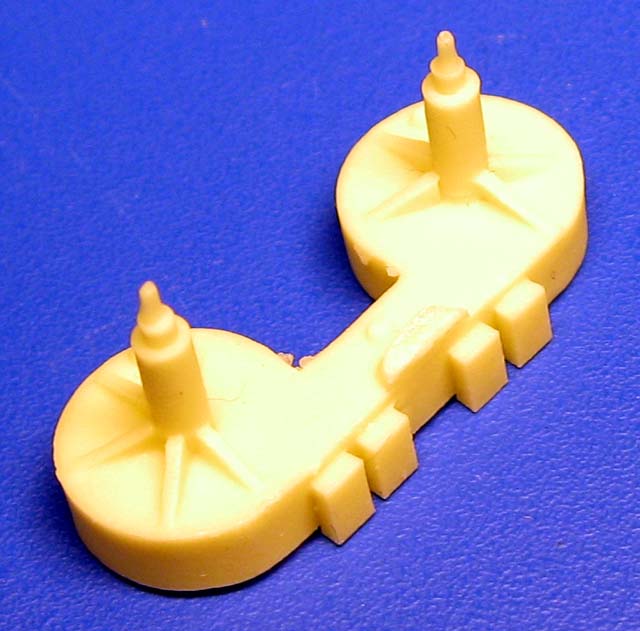
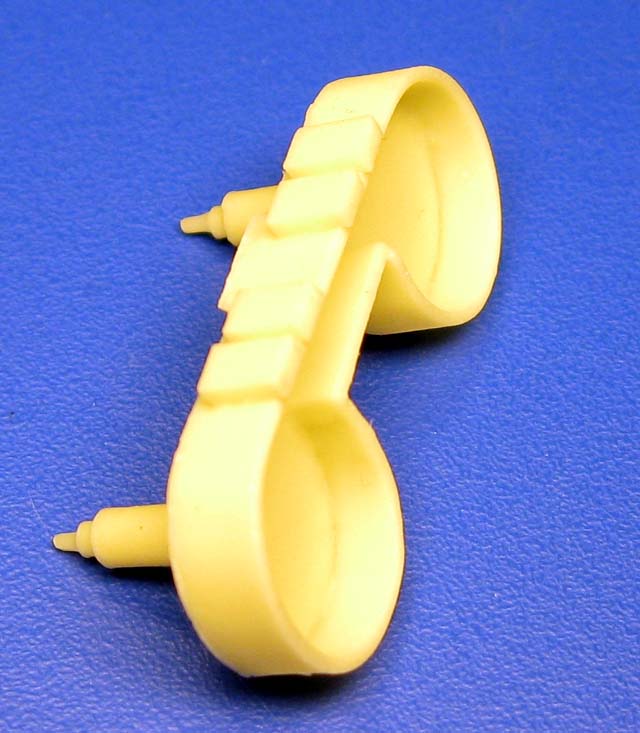
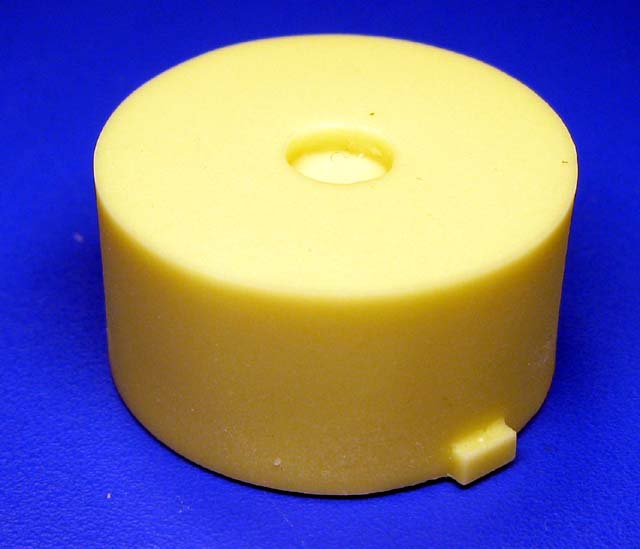
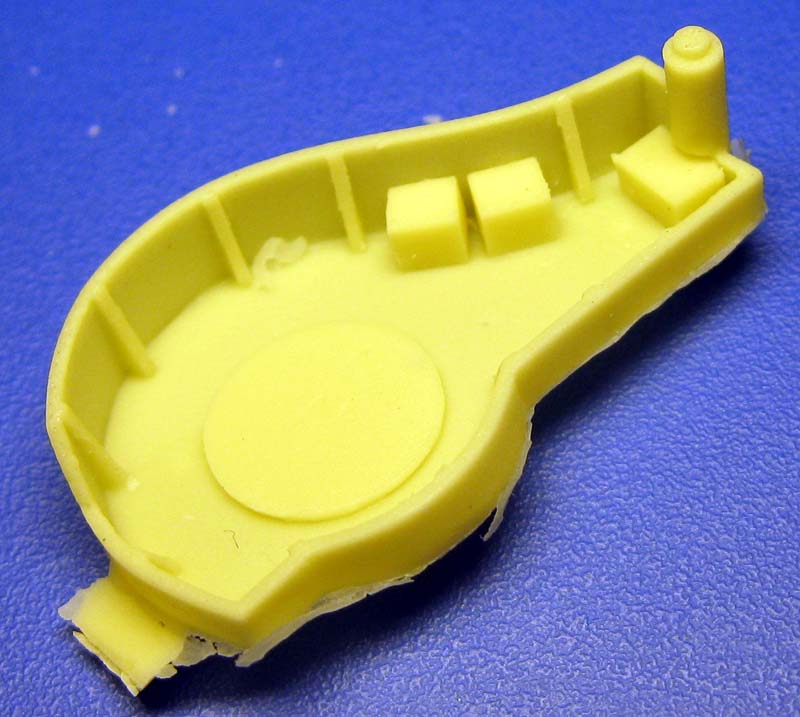
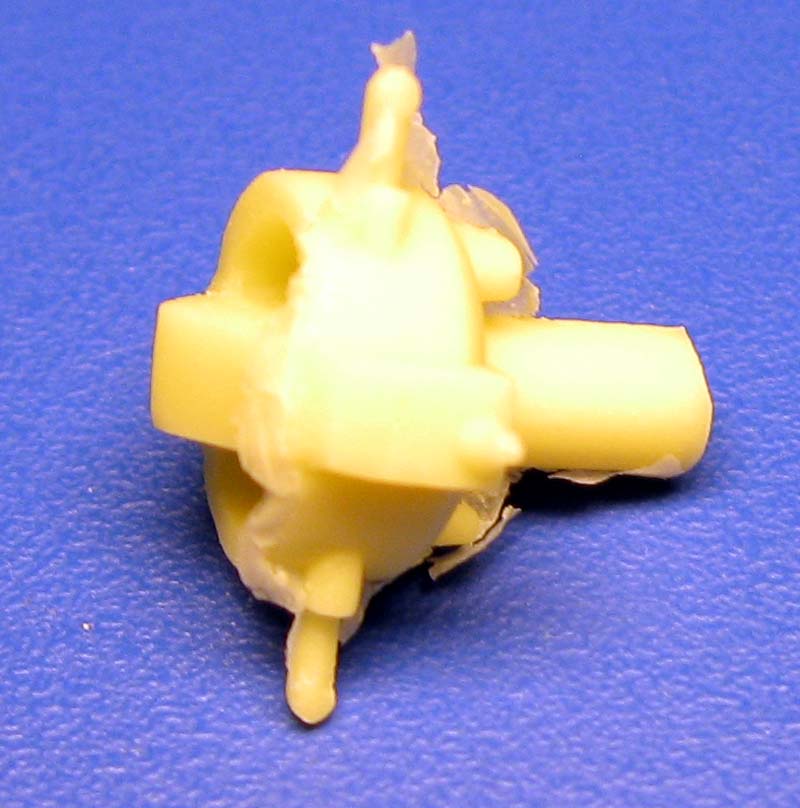
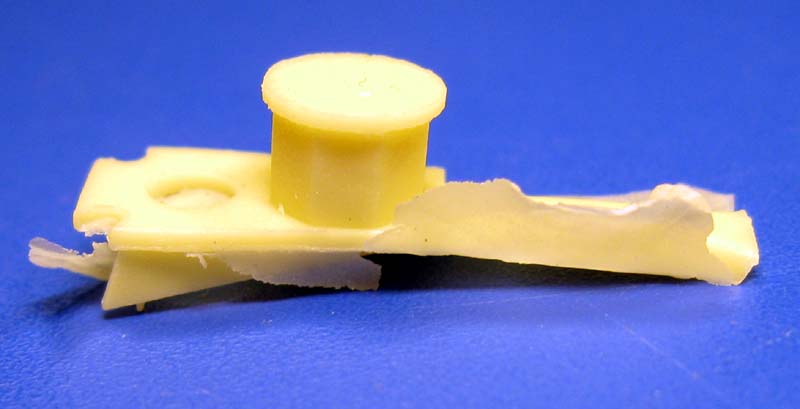
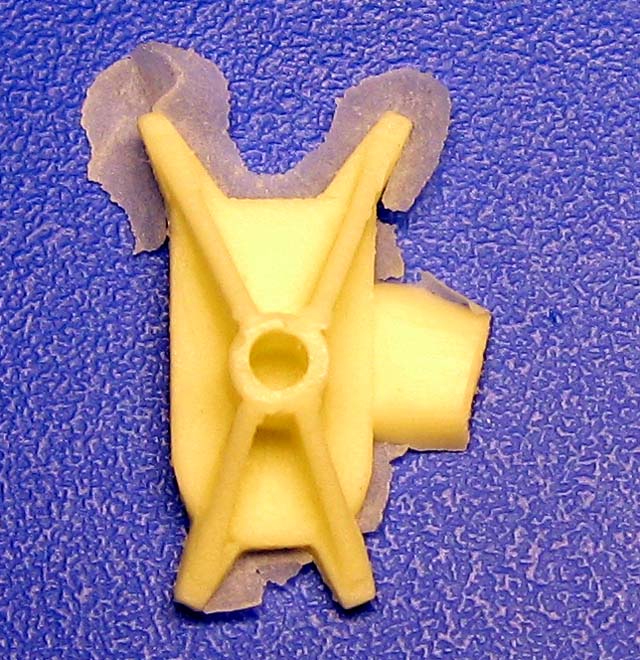
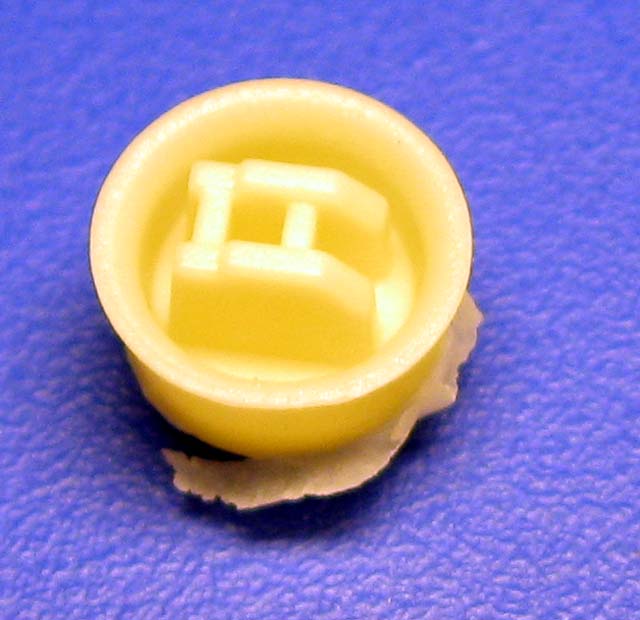
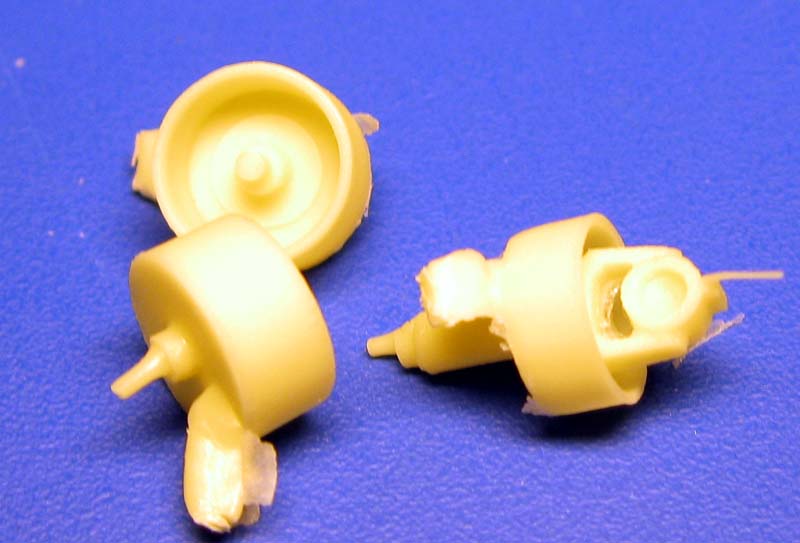
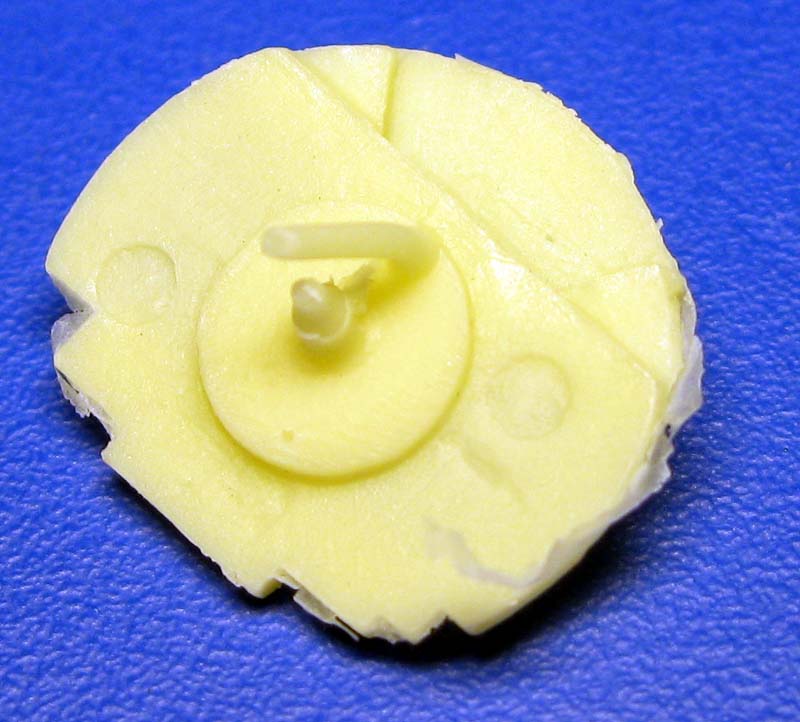
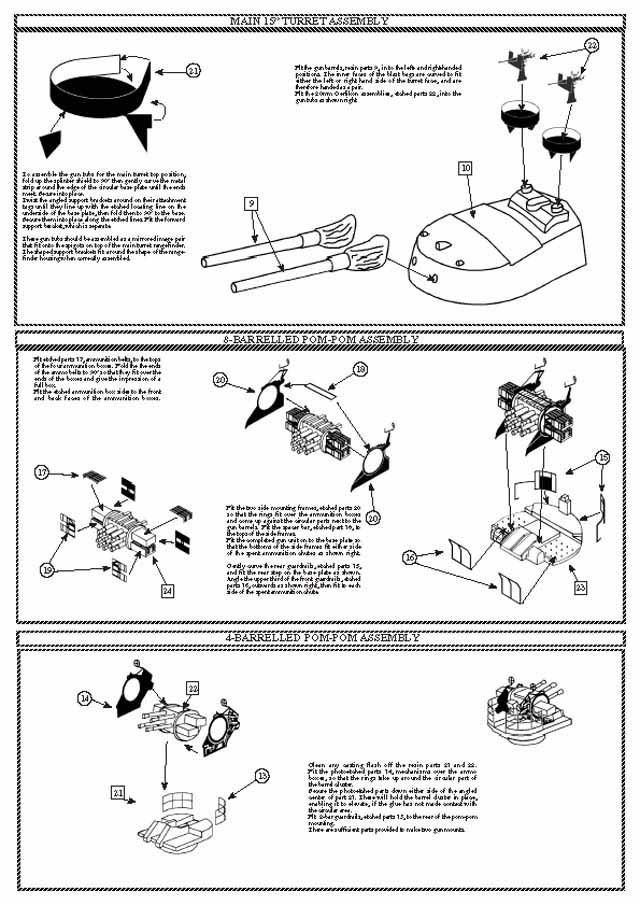
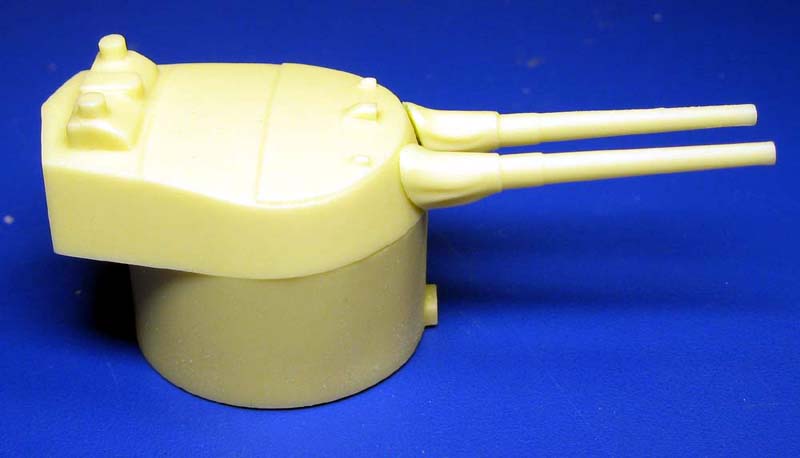
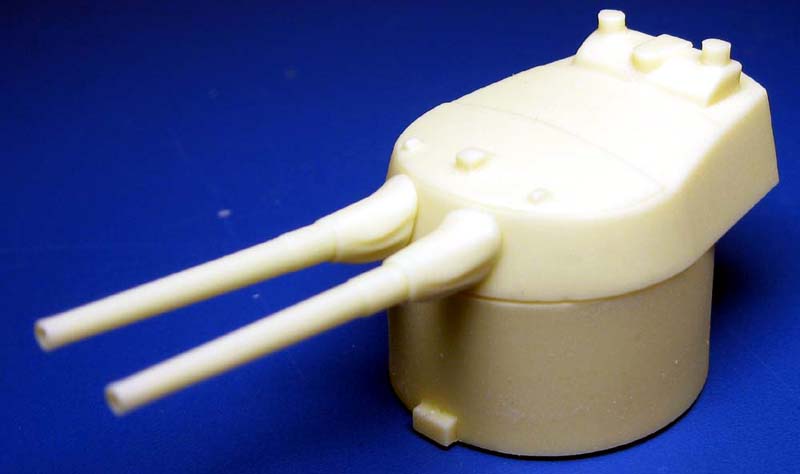
Next we have the compass platform, a few deck houses, the funnel and the parts for the 15" main battery assembly. The deckhouses- the seamen's mess and after deck house (radar and workshops) each have good detail; the planking on the top seamen's mess for example. Each deck house has a platform atop it- a director on the workshops, a searchlight on the mess; each one of these platforms are a little rough on the inside, and may be tricky for some to smooth. The compass platform has the wind deflectors molded in. The funnel is well detailed, and only needs the photoetched railings to be added to be complete. The platform for the 2 twin 20mm's is also cleanly done. The barbette and turret for the 15" battery are both smoothly cast and very well done, with only a slight texture to each. This texture will be easily covered by paint. Each will require only a few swipes of sandpaper to get them to fit snugly together. The turret has two holes on the face for mounting the barrels, and the base for the AA platform on the top. |
|||||||||||||||||||||
 |
|||||||||||||||||||||
|
|||||||||||||||||||||
 |
|||||||||||||||||||||
|
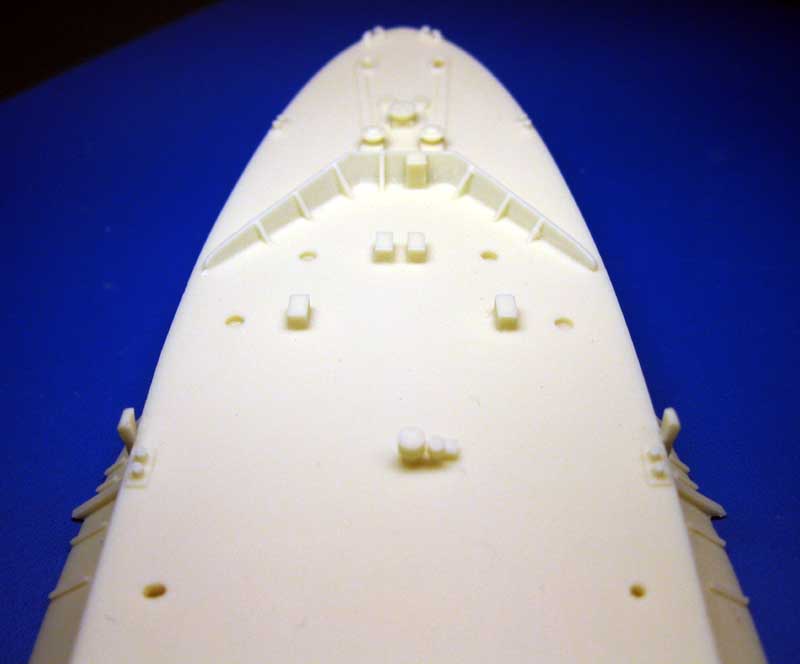
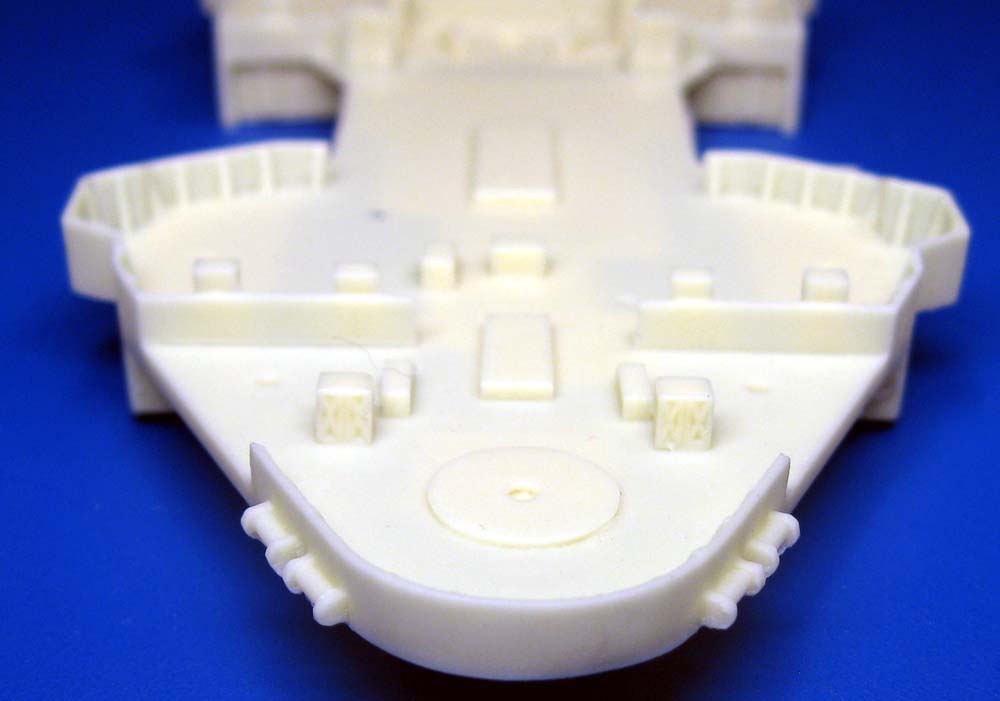
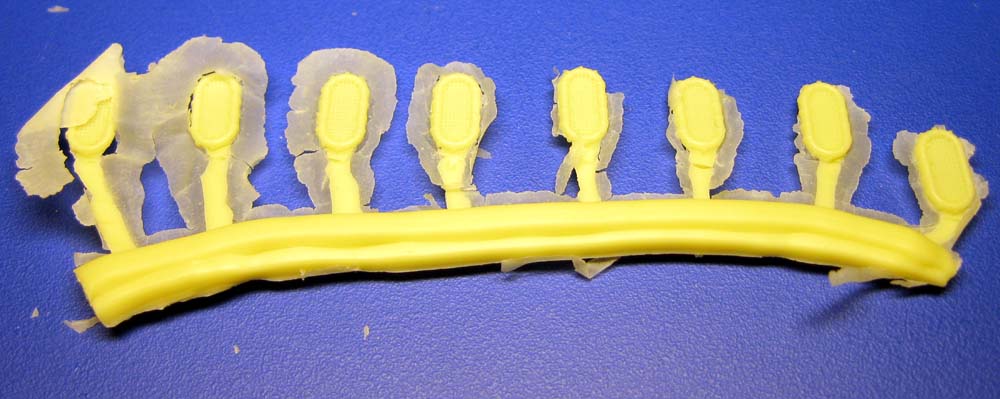
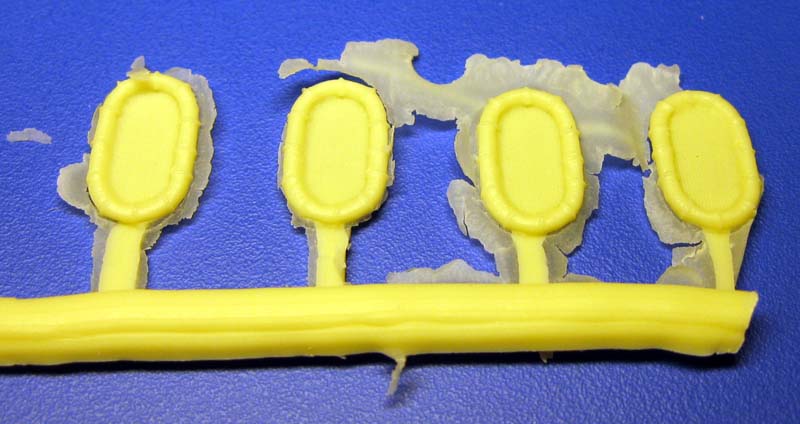
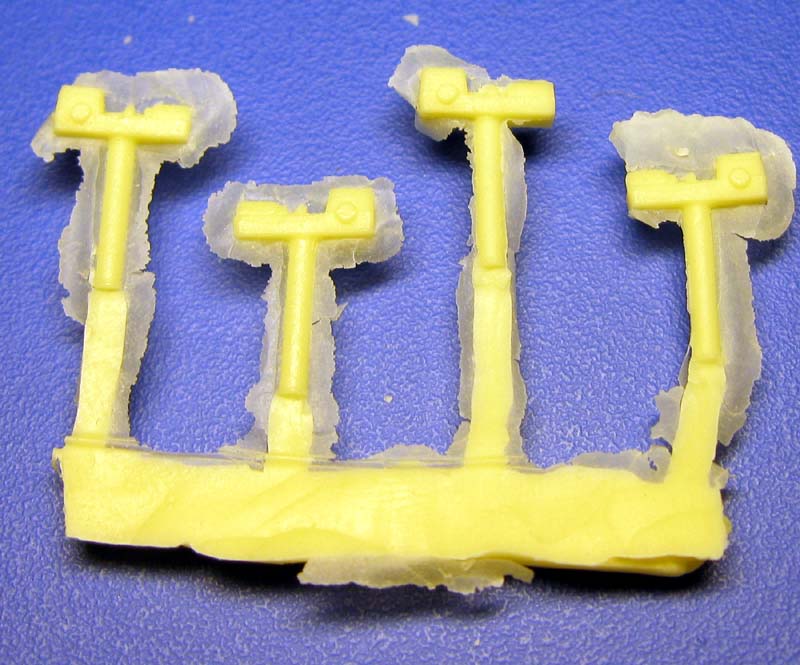
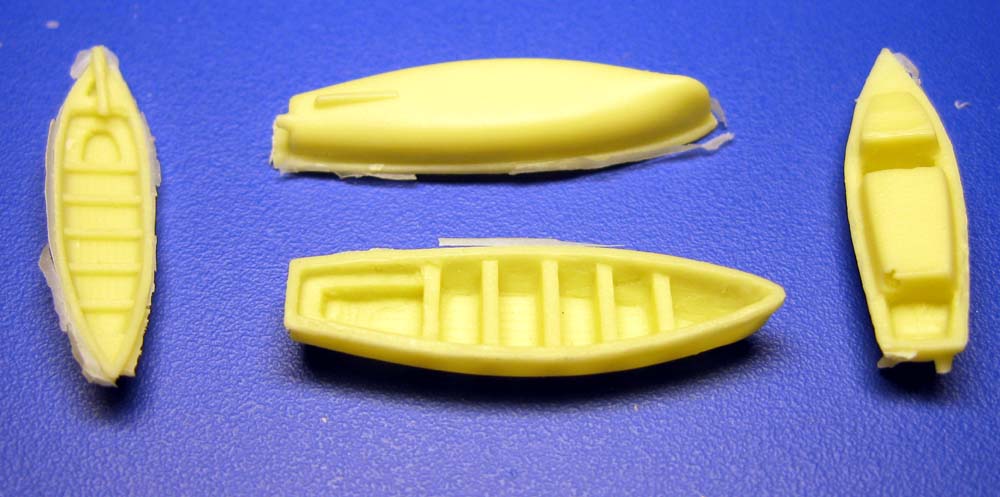
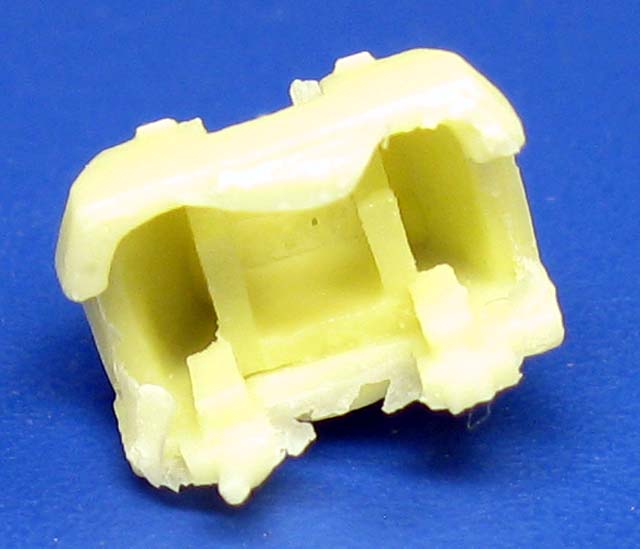
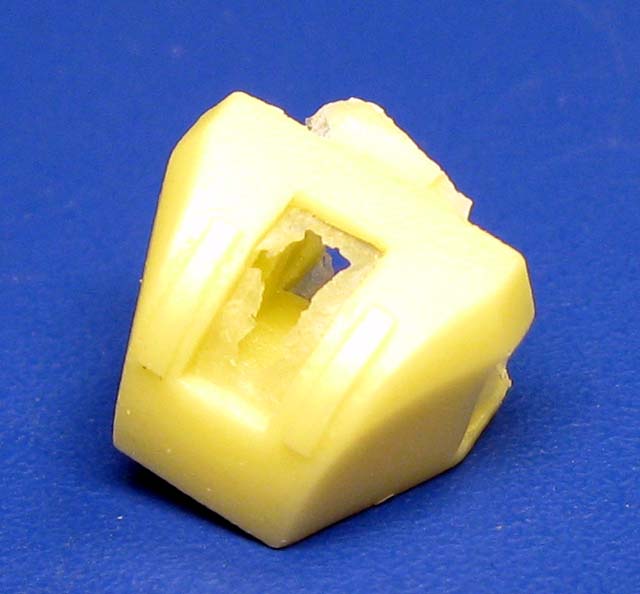
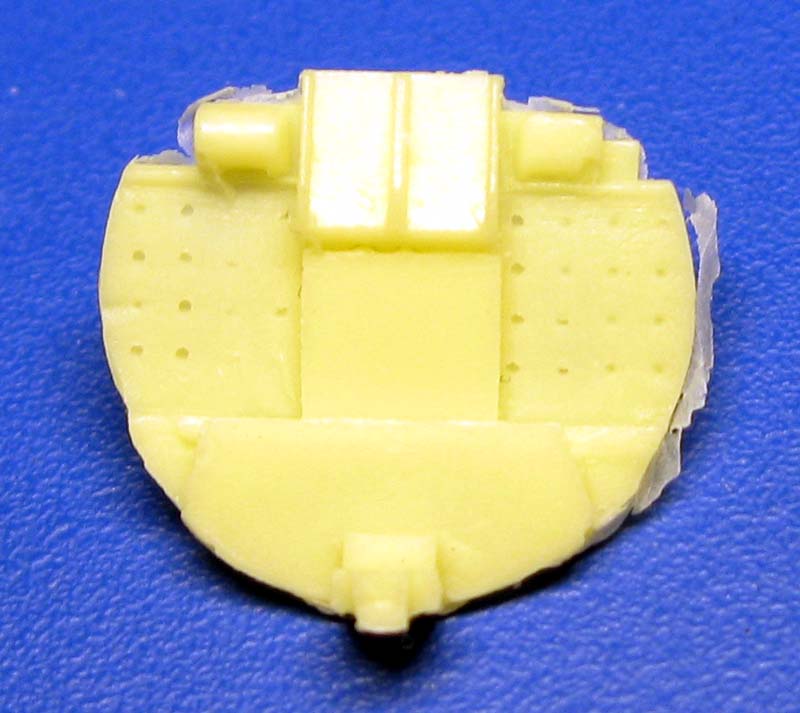
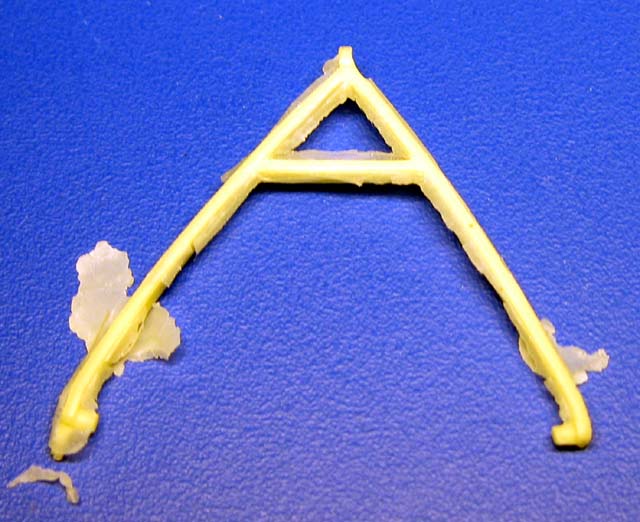
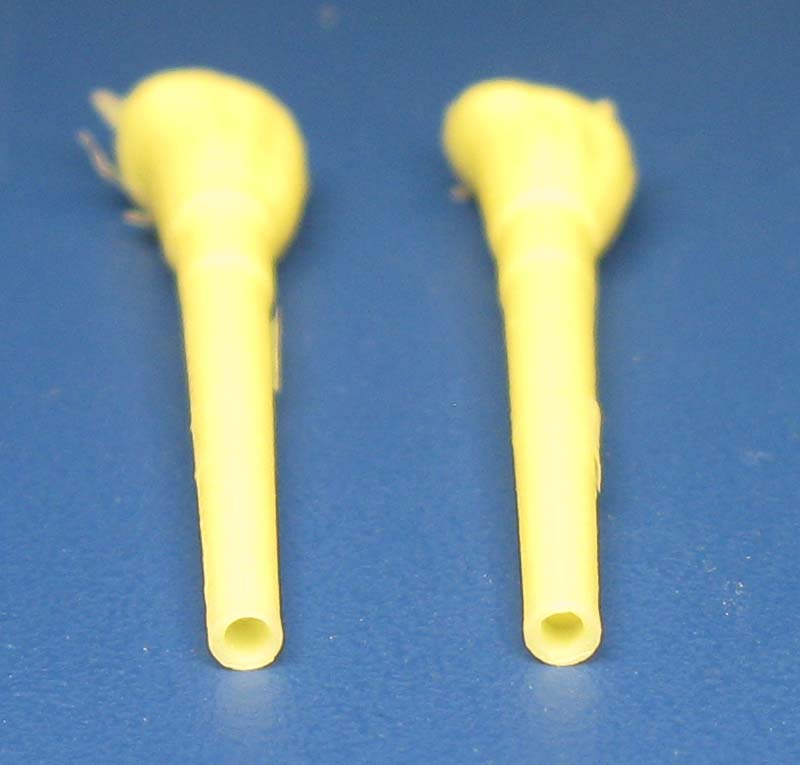
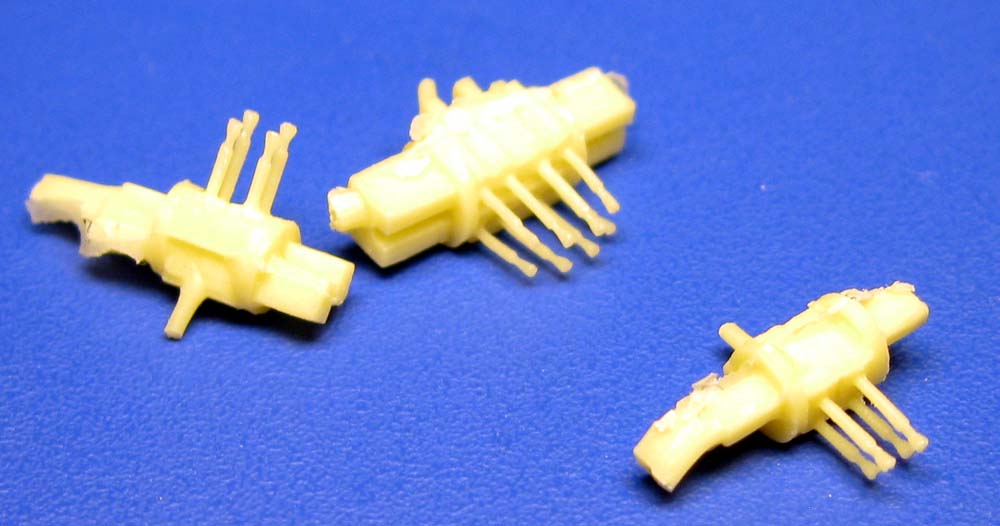
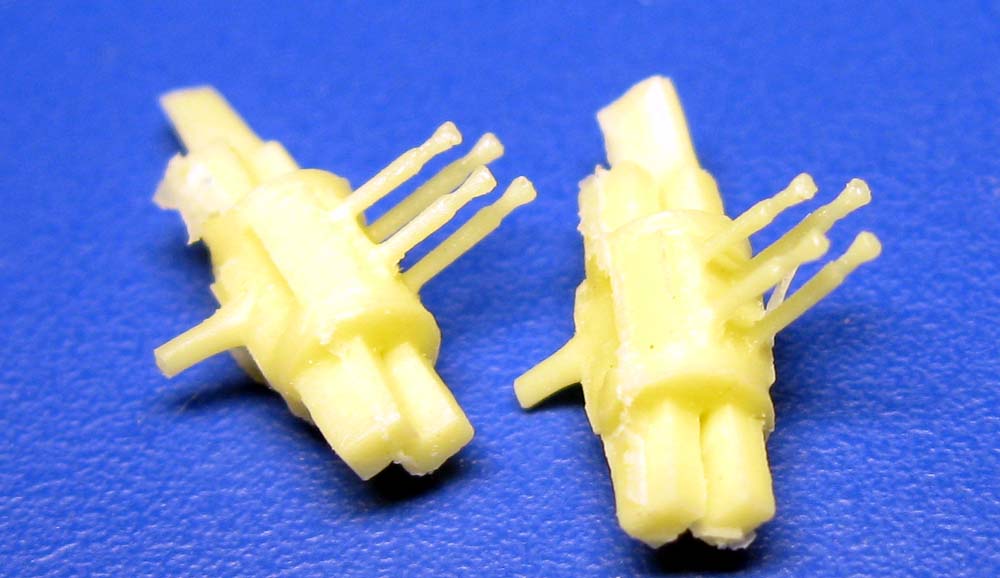
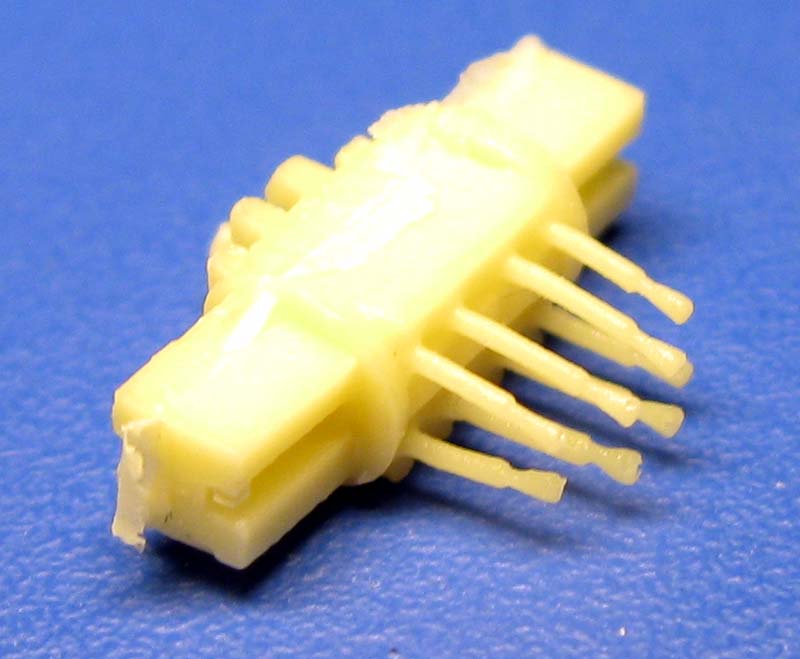
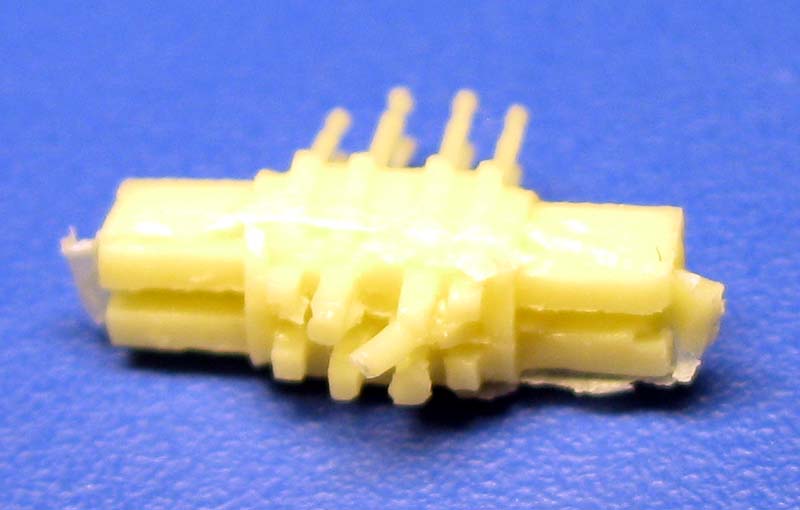
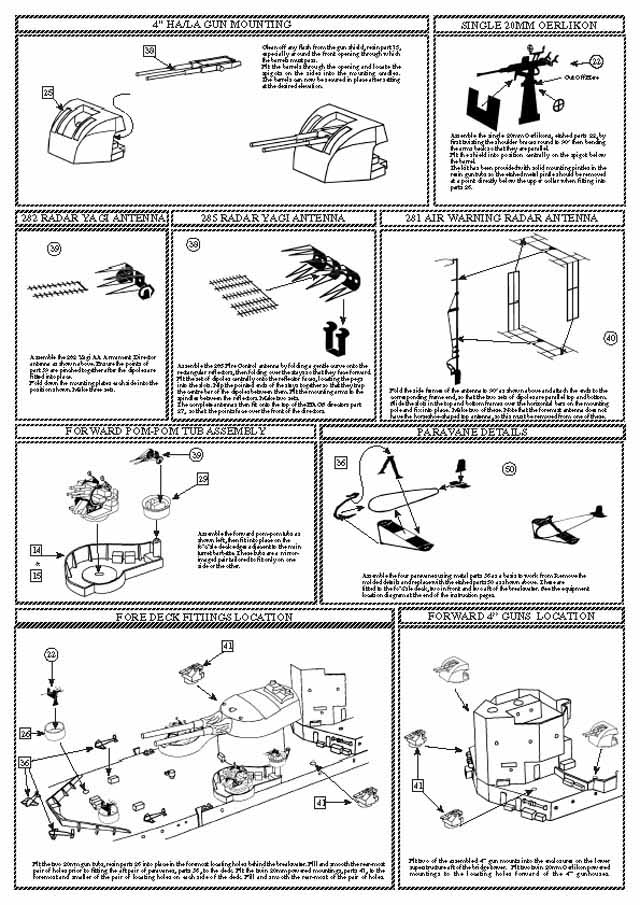
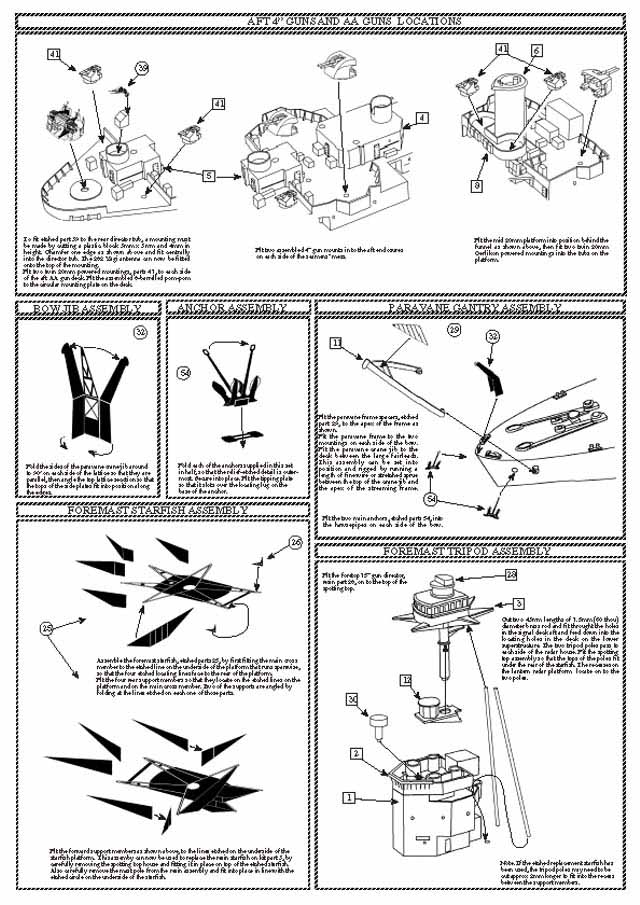
Filling out the resin parts, this final bag has a variety of parts. Included is the foremast platform with the 227 surface search "Lantern" radar; the Carley Rafts; tubs for the gun directors, Pom-Poms and searchlights; deck winches; ship's boats; the main gun barrels, as well as the large paravane gantry for the bow, all these parts and more. The twin 4" HA/LA open gunhouses and the baseplates for the Pom-Poms are also in this bag. The 8-barrelled Pom-Pom base is very nicely done, with perforated decking and angled supports beneath, as well as the nicely detailed boats. The searchlights, which are cast in place on the platforms, are a bit undersized. The 15" gun barrels are well executed, single piece affairs, with open muzzles and blast bloomers molded in place. They are keyed, one each left and right, so they will fit flush with the curved turret face and point forward straight and true. The 2 different Pom-Pom types included in this kit are really very well done. The barrels are molded in place on each mount type, and each barrel is the appropriate length and has the proper flash hiders cones at each muzzle. They are very tiny and delicate, and the pictures do not do them justice. Extra care will need to be exercised when removing remnants of the casting process from these parts to not damage them. |
|||||||||||||||||||||
 |
|||||||||||||||||||||
|
|||||||||||||||||||||
| METAL PARTS | |||||||||||||||||||||
|
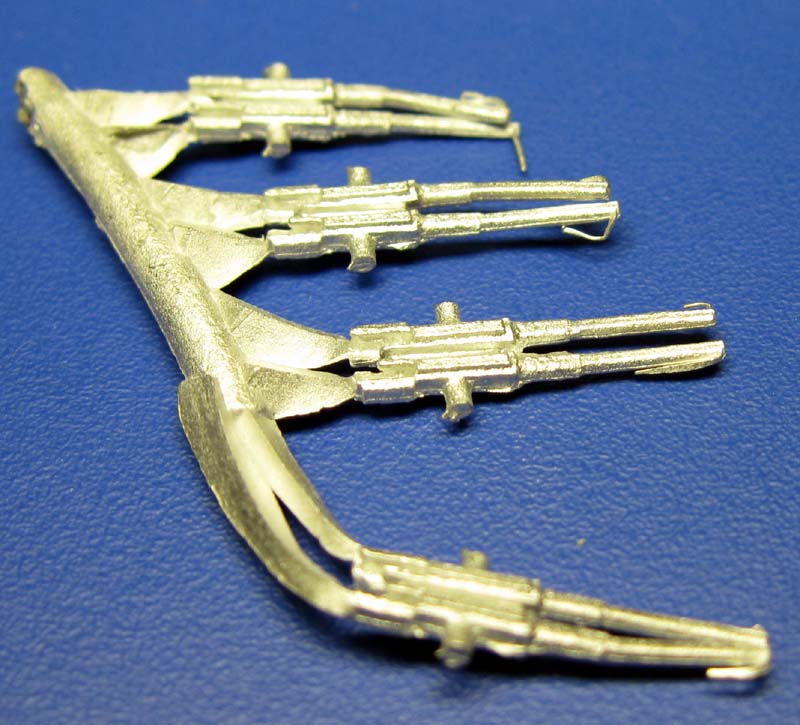
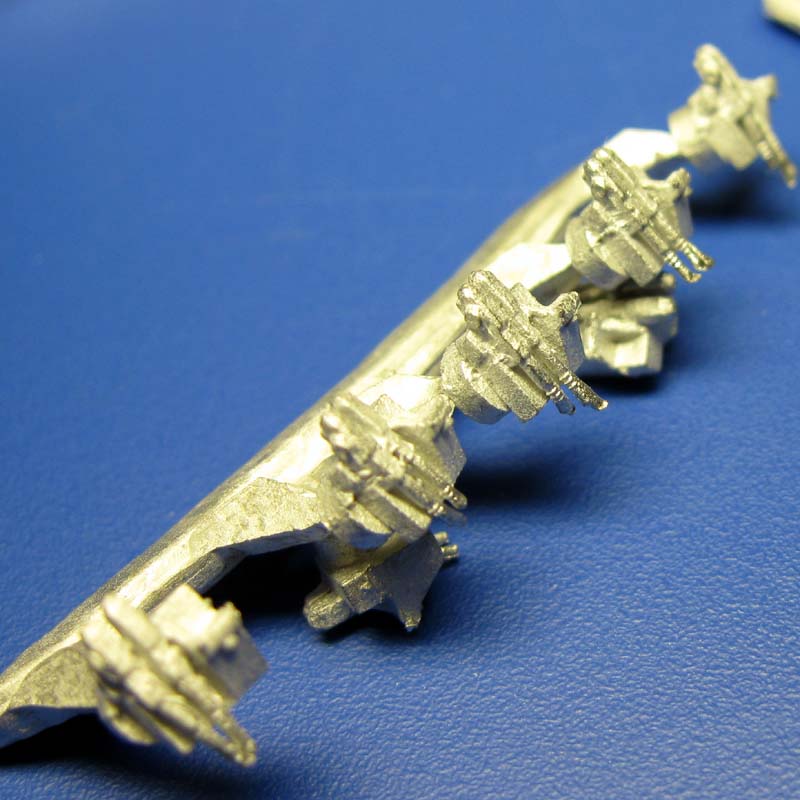
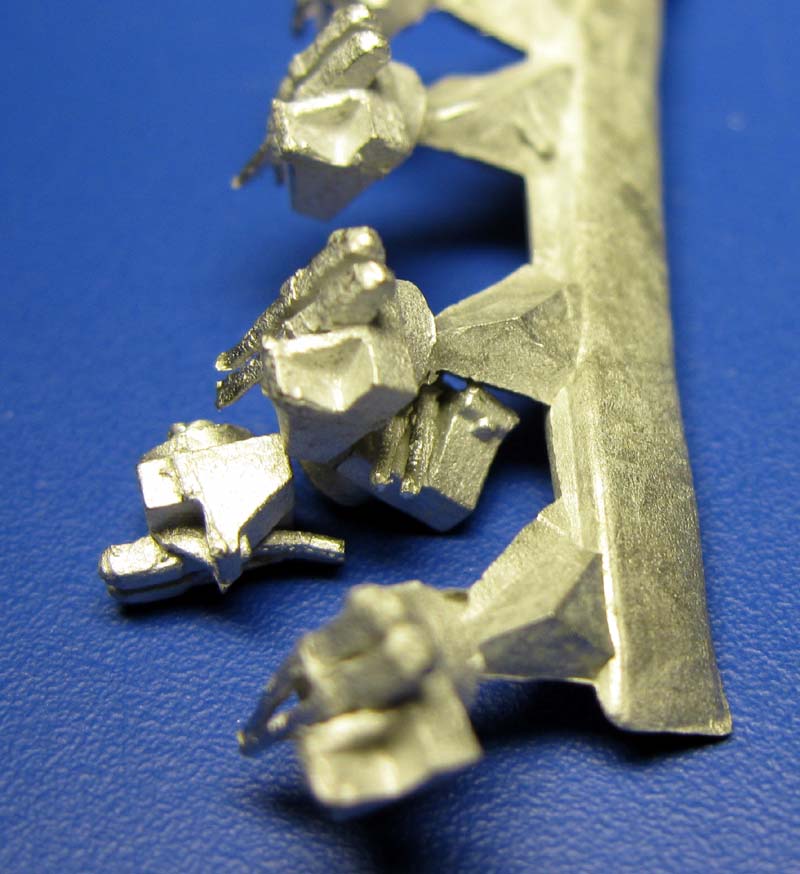
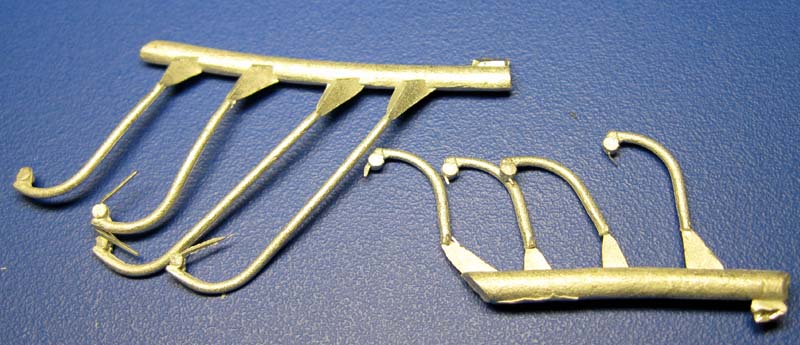
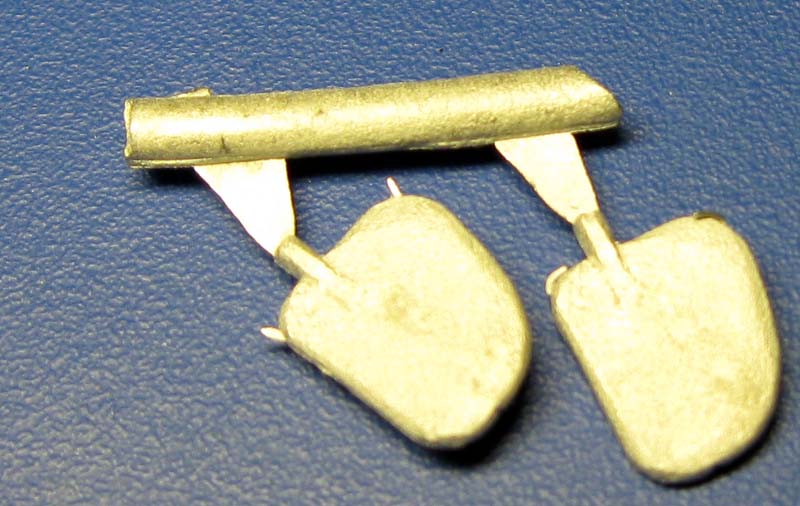
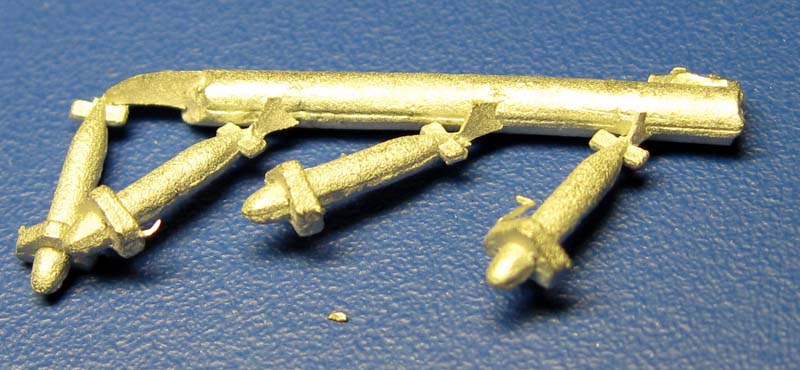
Abercrombie includes a bag of white metal parts for the remaining assemblies. In the bag are secondary and anti-aircraft armaments, paravanes, props and davits. Unfortunately, the davits and paravanes are the only parts that seem without some issue- the paravanes are plain, but most of the detail is to be removed and replaced with photoetch. The 4"/45 (10.2 cm) QF HA MK XVI guns, and the 20mm Oerlikon powered twin Mk V mounts do not meet expectations. The shapes are rough and very basic and most of the barrels are not straight. In addition, the propeller blades are both the wrong pitch and shape. At this level of kit, from a manufacturer with the reputation of White Ensign, more is expected- but in this case, not delivered. There are also some brass rods included for prop shafts, masts/tripods and platforms. These will need to be cut to length, as stated in the instructions. |
|||||||||||||||||||||
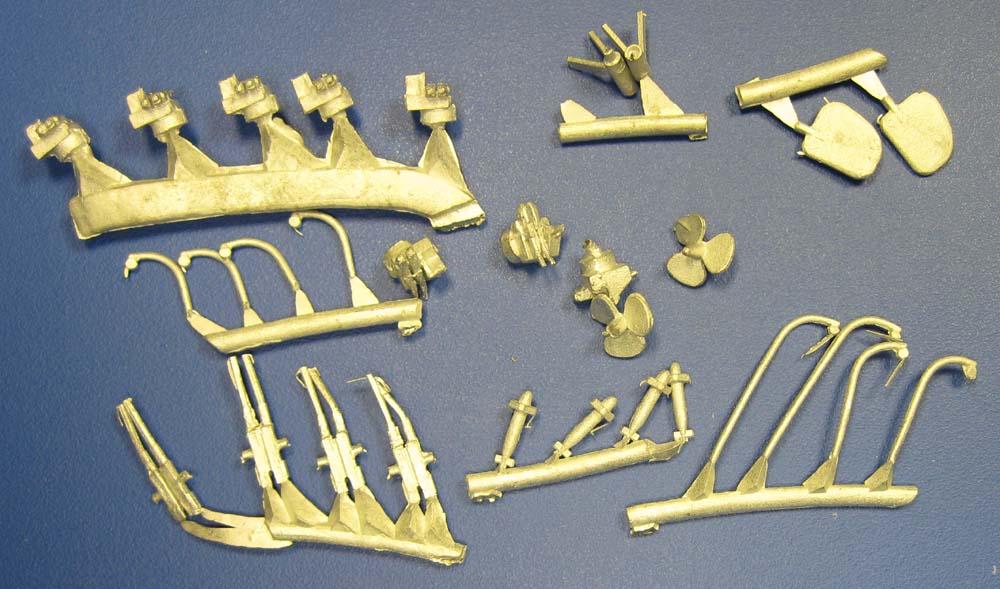
Metal Parts |
|||||||||||||||||||||
|
|||||||||||||||||||||
| PHOTOETCH | |||||||||||||||||||||
|
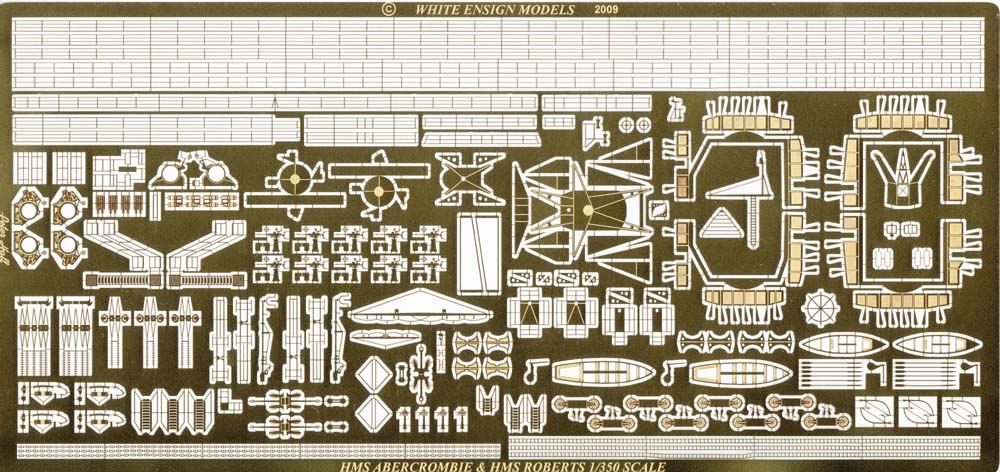
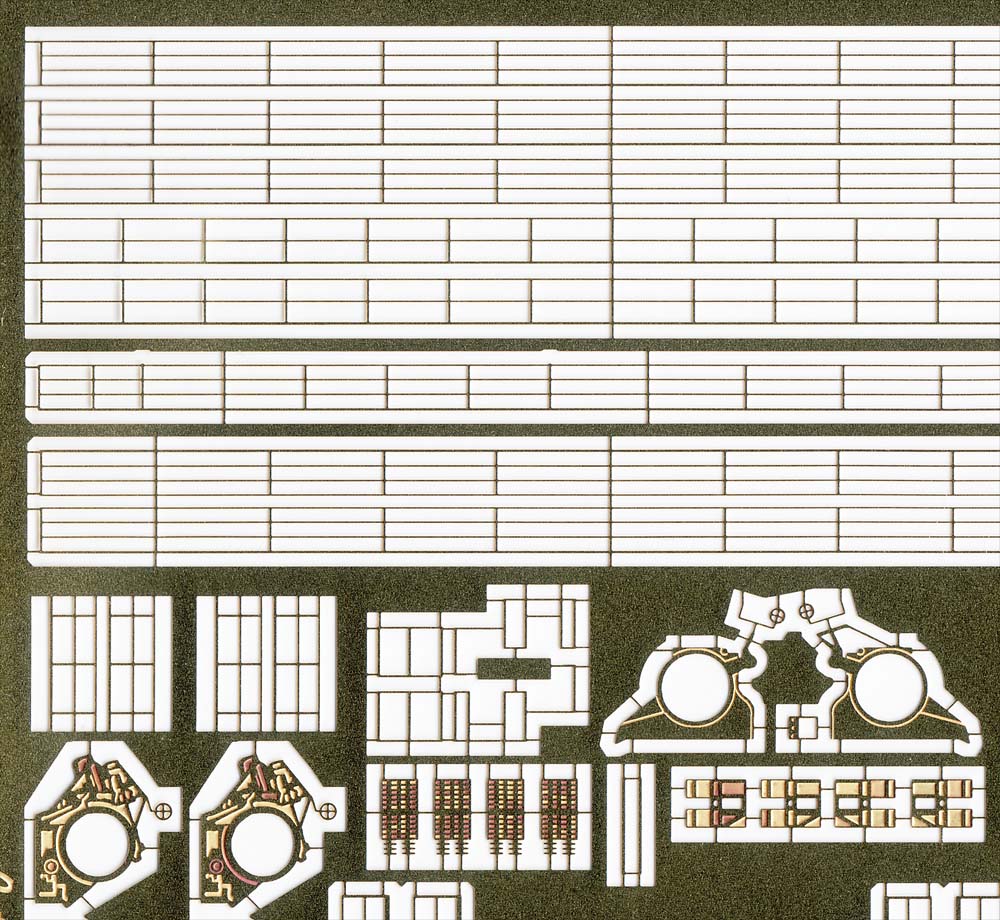
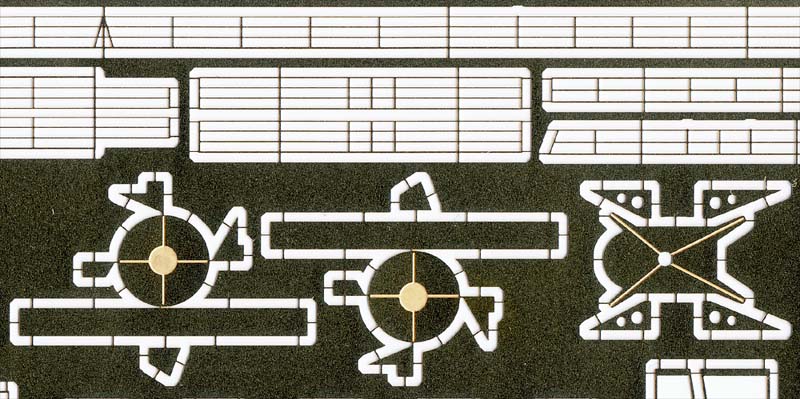
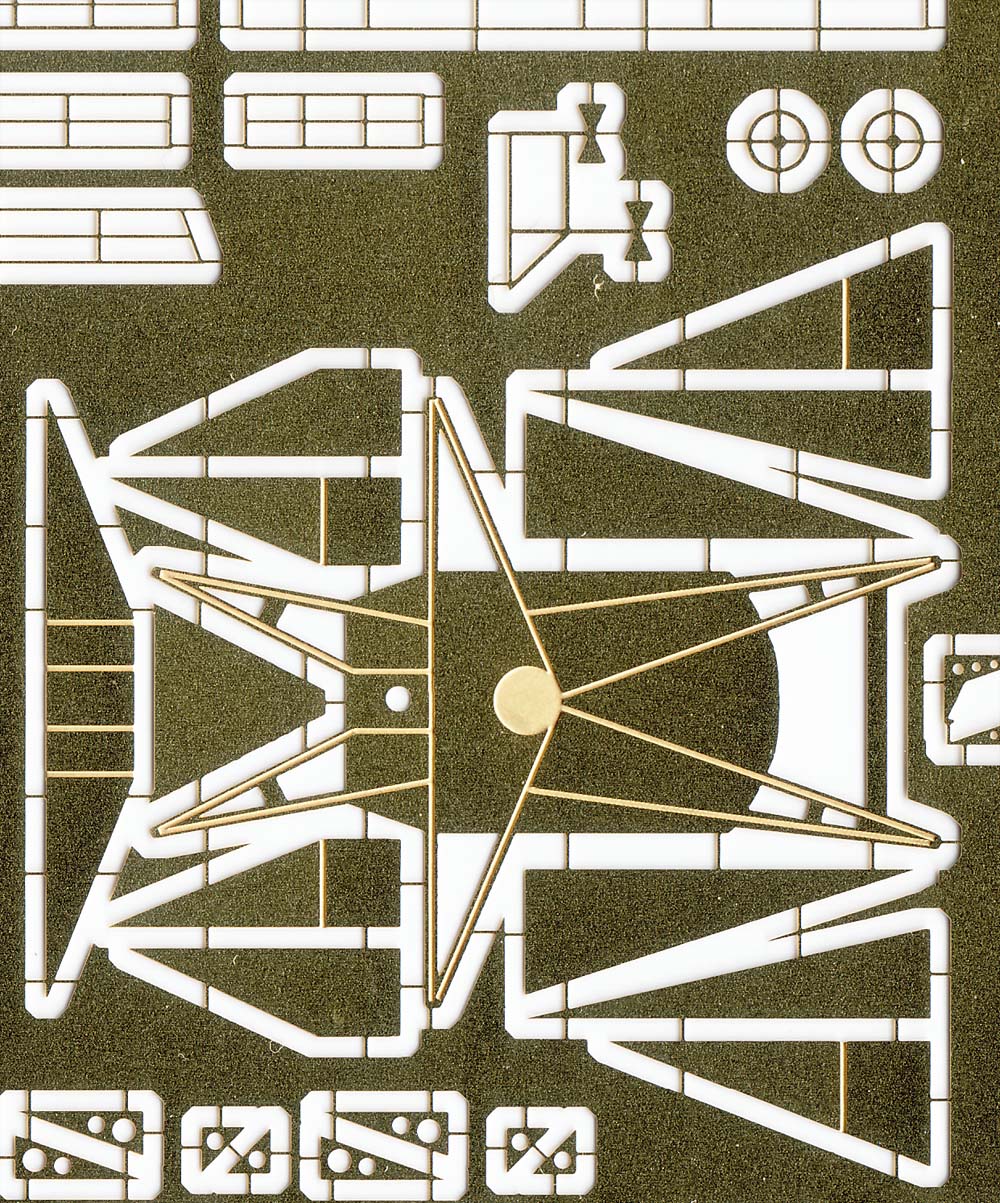
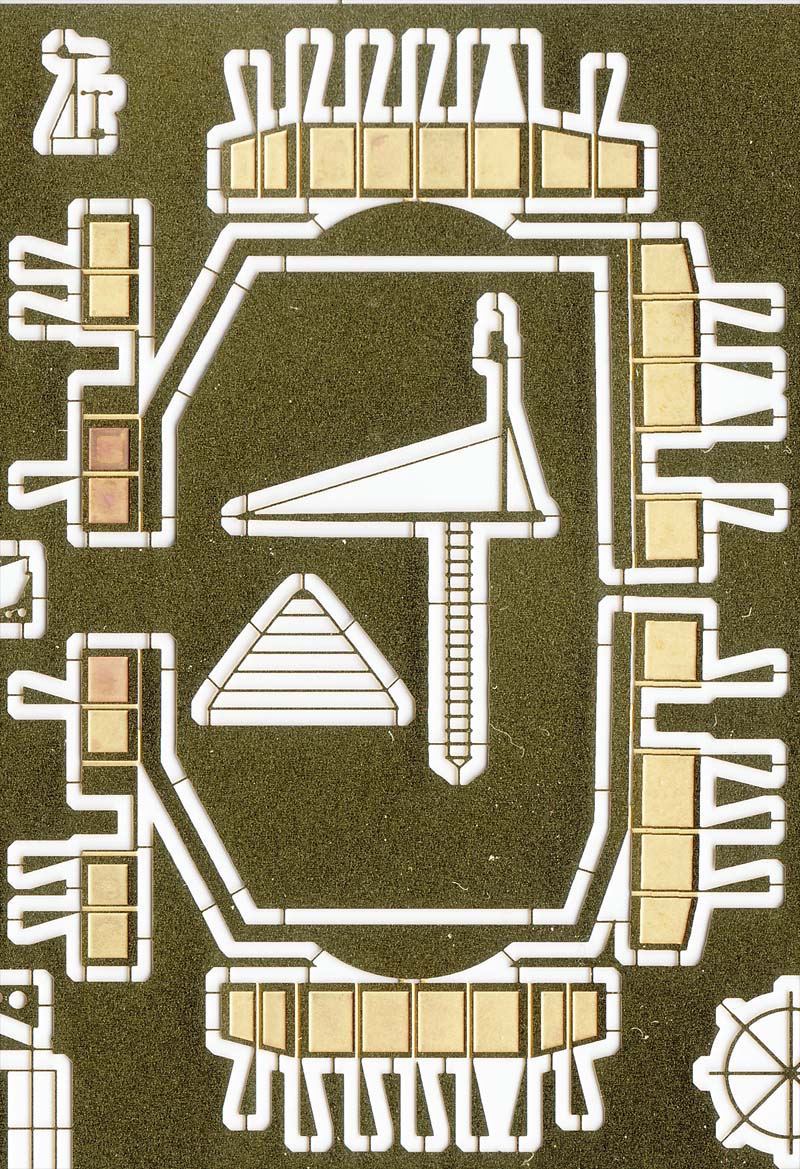
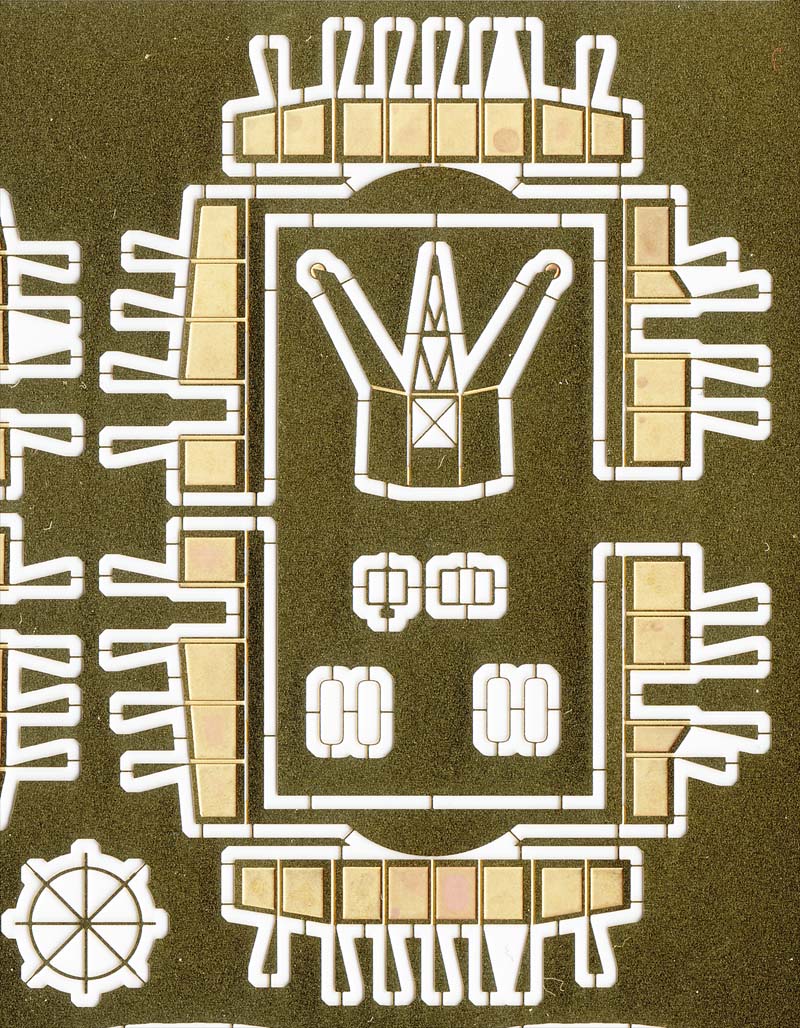
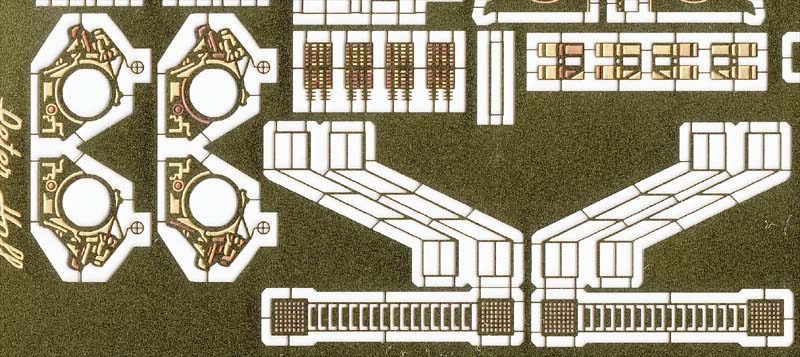
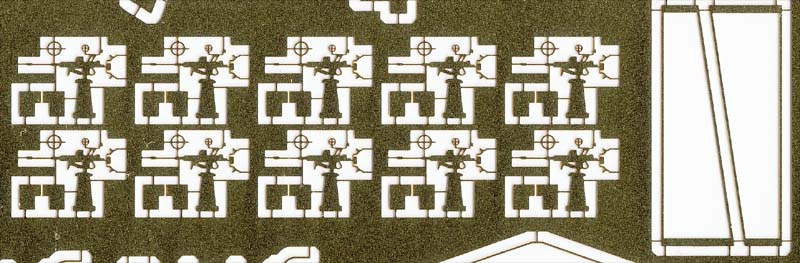
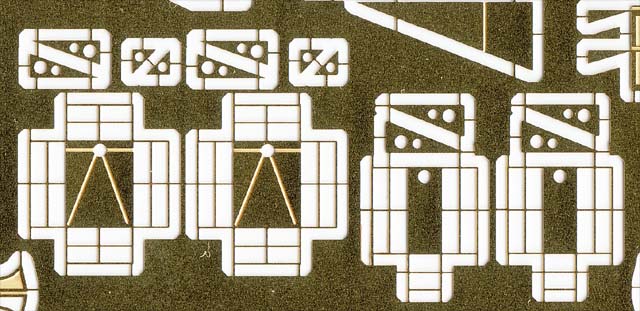
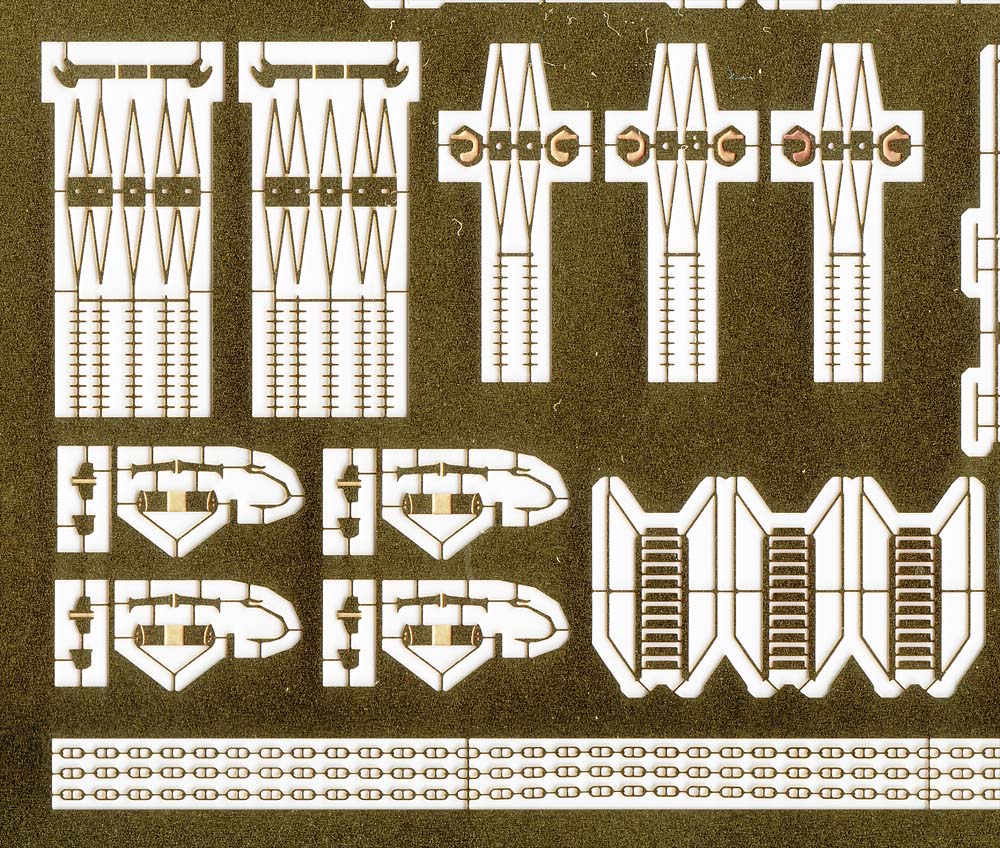
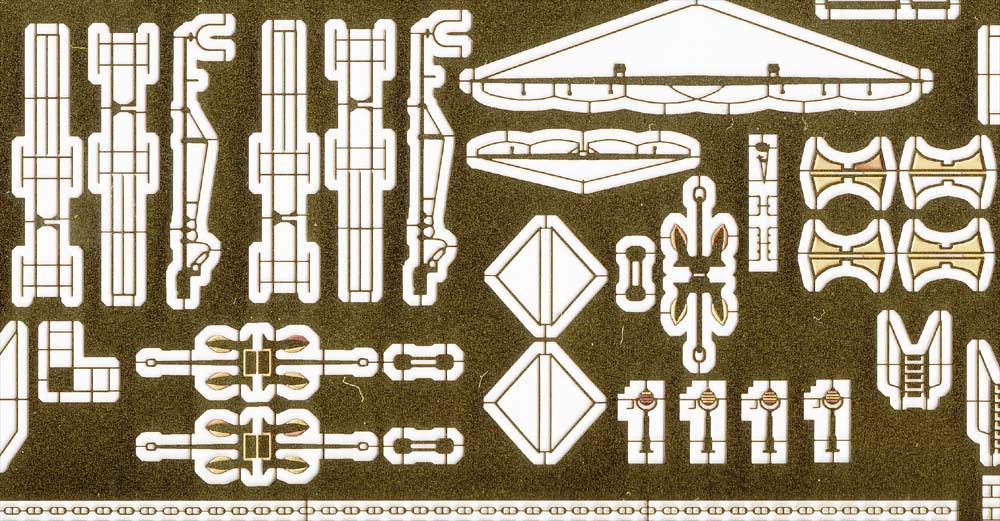
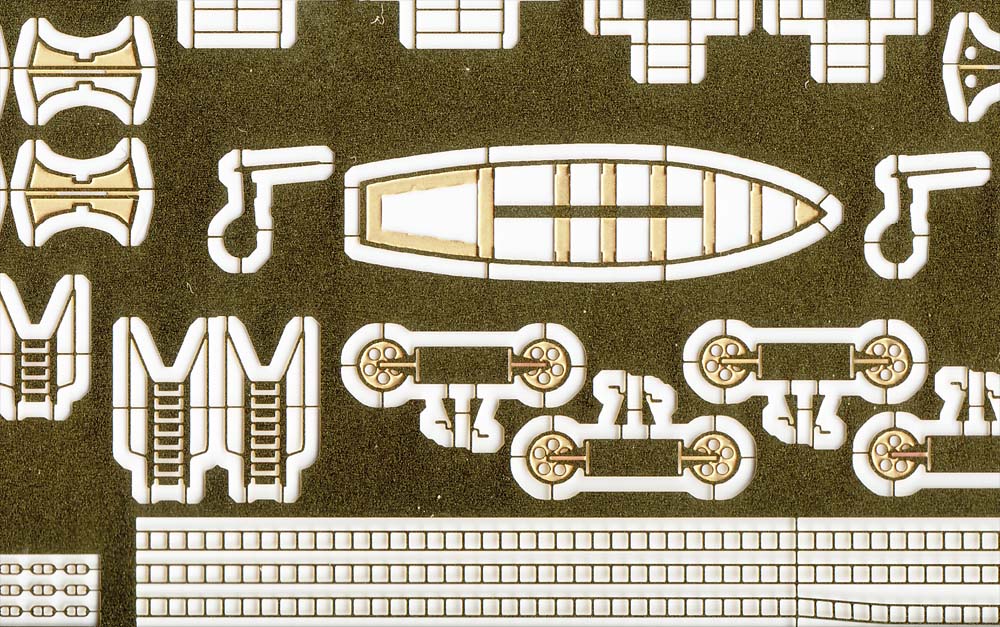
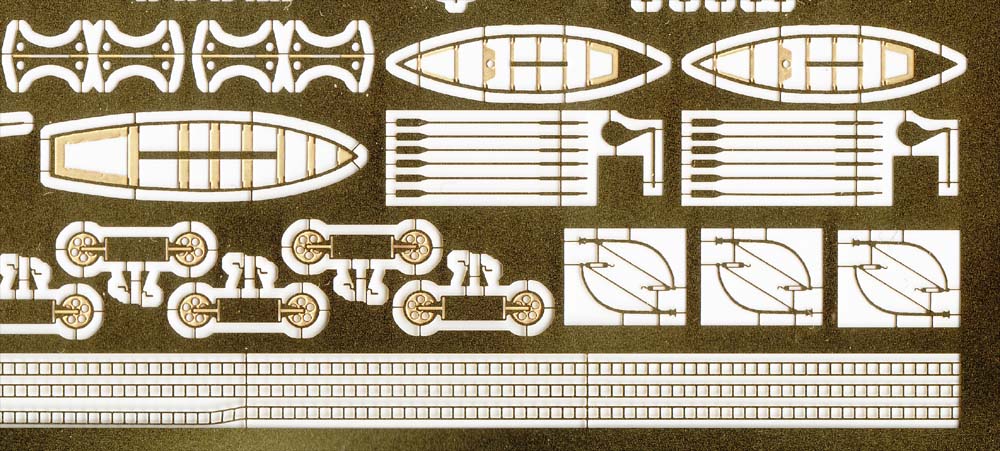
The included photoetch has over 60 parts for detailing your monitor, all executed with WEM's usual talent and skill. This brass fret features many relief-etched parts, including some fine details for the 4- and 8- barrelled Pom-Poms; side mounting frames, ammo boxes, and ammunition belts. The Yagi antennas and starfish assembly may require so some slow going for some modelers, but the results should be worth it. In contrast to the white metal powered twin 20mm Oerlikons, the singles are comprised of only photoetch parts. |
|||||||||||||||||||||
|
|||||||||||||||||||||
|
|||||||||||||||||||||
| DECAL | |||||||||||||||||||||
|
There are no decals included in this kit. |
|||||||||||||||||||||
| INSTRUCTIONS | |||||||||||||||||||||
|
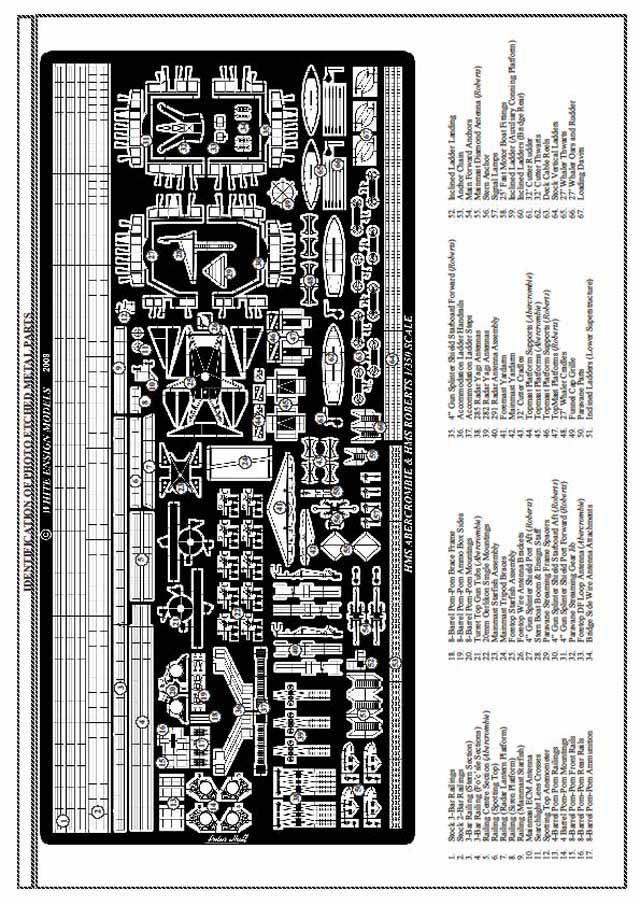
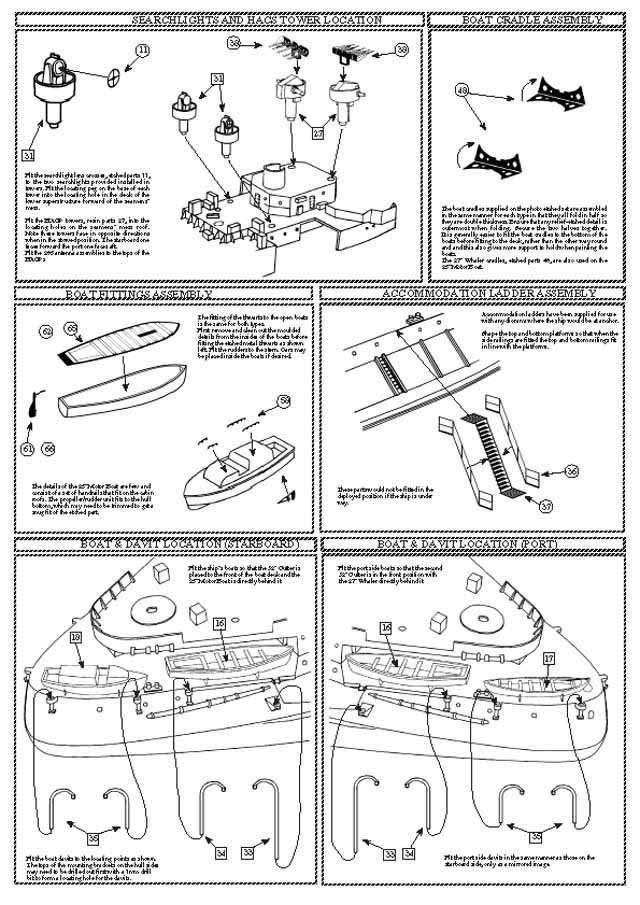
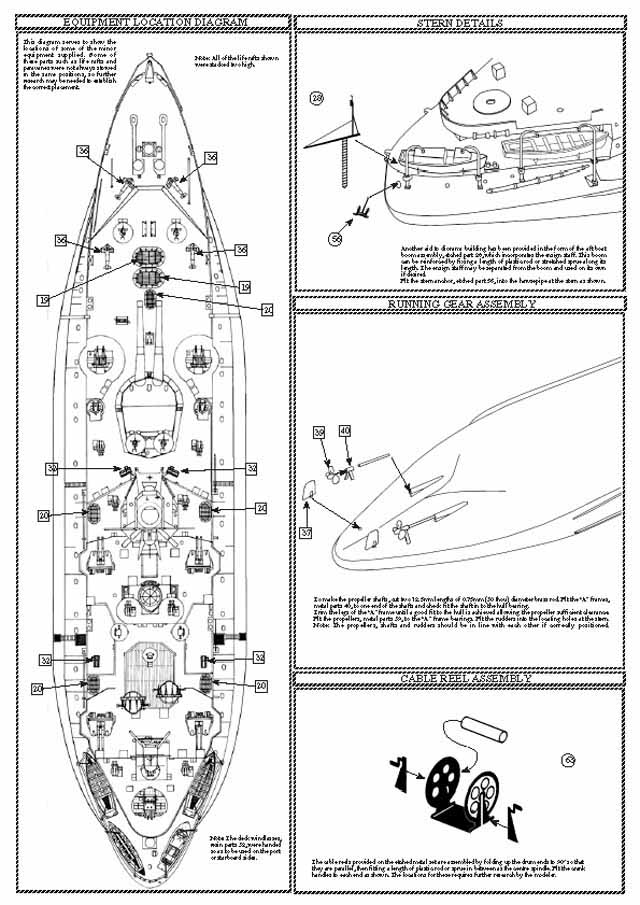
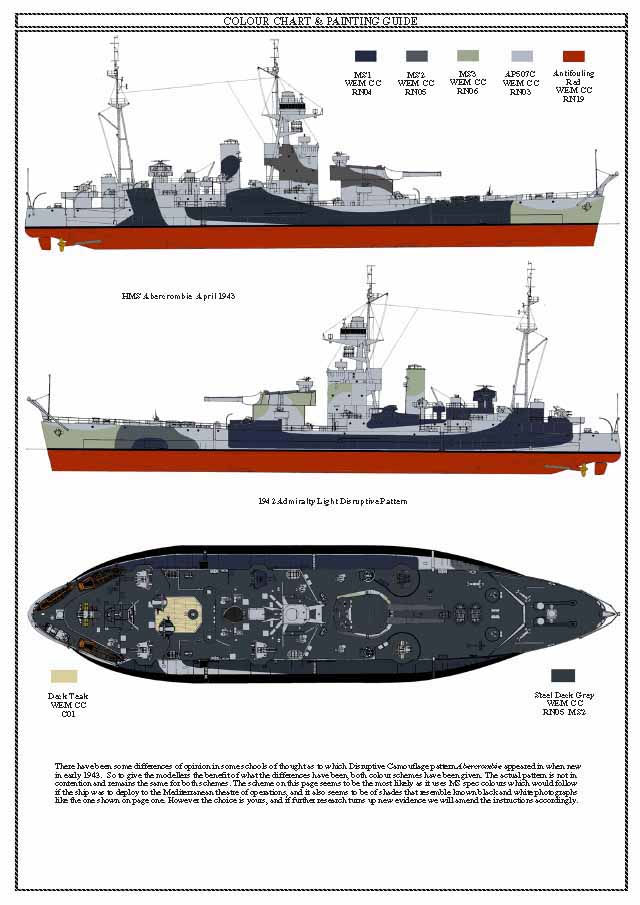
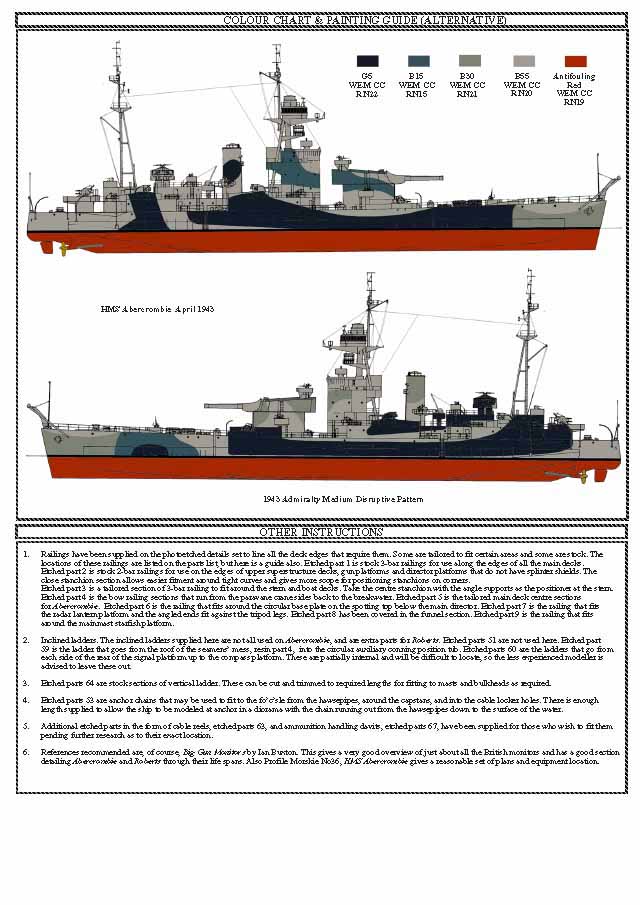
The 12 page instruction sheet has the standard history/parts diagram/kit assembly layout. One slight departure from a more traditional model instruction is the lack of a "step by step" format; there is a large diagram showing the main component location, and then the following pages either show detailed assembly steps for those components or build upon the main assembly with further details. The use of round number boxes for photoetch parts and square number boxes for resin and metal parts, allow the modeler to forecast the required parts for each step at a glance. This method of assembly is an aid when paint complex camoflauge schemes, but will require extra effort for modelers who are using to plastic models and more concise instructions. There are 2 camoflauge schemes shown, a 1942 Admiralty Light Disruptive Pattern for Abercrombie and a 1943 Admiralty Medium Disruptive Pattern, both for Abercrombie in April of 1943. The painting guide states "There have been some differences of opinion... as to which Distruptive Camouflage pattern Abercrombie appeared in when new in early 1943.", so WEM has included both. The patterns are identical, only the colors used are different. This is the source of some slight confusion, as this kit is marketed as a 1944 fit, as stated on the box. |
|||||||||||||||||||||
|
|||||||||||||||||||||
| CONCLUSIONS | |||||||||||||||||||||

"So ugly it's beautiful" is a phrase that seems born to describe monitors. Fat and slow, they did carry some large guns- and unlike other warships with large cailber guns that were re-tasked in air defense roles, the monitor primarily served their intended role- shelling shore targets. White Ensign's long awaited release pays due homage to these ships who served their designed purpose with distinction. The kit is not without its flaws; the white metal guns are disappointing, and for the full hull modeler, correcting the props will prove a difficult task. The use of white metal parts in today's kit market is surprising; it seem more of a step back in technology, not a step forward- especially when you consider the skill levels need to be able to cast the amazing and intricate 8-barrelled Pom-Pom in this kit. There is a definite disparity here- these old school parts need updating. The White Ensign Models 1/350 HMS Abercrombie 1944 Ref: K 3561 is priced at £119.11, or about $172.00. Thanks to White Ensign Models for this review sample. White Ensign models are available direct from WEM |
|||||||||||||||||||||