HMS Abercrombie 1944

Reviewed by Guido Hopp
aka "Tailor"
VMF-'06 "German Gamblers"
Veritable Modelling Friends 2006
Dinslaken, Germany
| HISTORY | |||||||||
|
They Royal Navy incorporated the monitor type ship into their lines to use these heavily armoured and gunned fortresses to take the fighting to the beaches of the enemy. They combined the tactical possibilities of earlier French and British mortar ships with the advantages of modern armour and gunnery technology. Pint point accurate attacks on fortified coastal artillery intended to tie down enemy fire and provide covering fire for landing troops. To provide such service monitors had to be resilient and stable gunnery platforms in the first place, sacrificing speed, manoeuvrability and seaworthiness. Monitors were used in a number of coastal battles. The development of British Monitors peaked out with the Roberts Class Monitor HMS Abercrombie. ( named after General James Abercrombie (1706 April 23, 1781) was a British Army general and commander-in-chief of forces in North America during the French and Indian War (Wikipedia)). As second and final ship of the class Abercrombie was launched on 31st March 1942 and completed fitting out and trials with the following 15 months. She was immediately deployed to the Mediterranean and support landings in Sicily. A series of mine hits kept her from action until 17.July 1945, when she was detached to the PTO. Japan surrendered while she was still underway. Abercrombie was recalled and put into reserve almost immediately. In December 1954 she was sold for scrap. Good things come to those who wait!
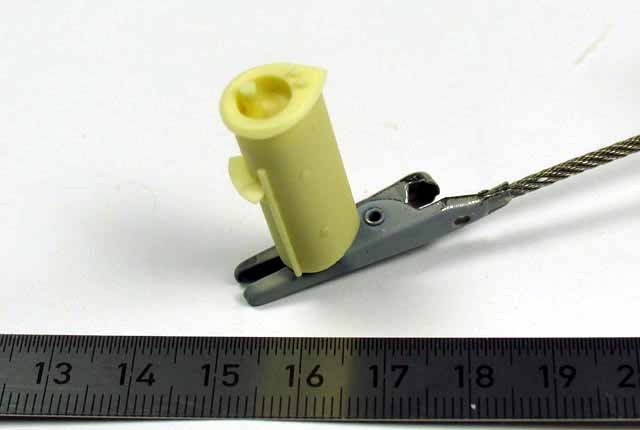
Upon arrival of the box my heart skipped a beat, when I found the box caved in at the bottom, where according to experience- WEM puts their photo etch sheets for their kits. Upon opening the box the usual picture meets the modeller: several zipper-bags of parts are securely wrapped up in bubble wrap. Remaining space in the box is filled with Styrofoam-chips. At the bottom of the box youll find as expected the photo etch sheet. Boy, was I happy to see that it had survived the abuse by the postal service, even though it was only protected by a zipper-bag. The first action I took was to insert a fitting cardboard sheet into that bag. I do sleep better now, indeed. |
|||||||||
| HULL PARTS | |||||||||
|
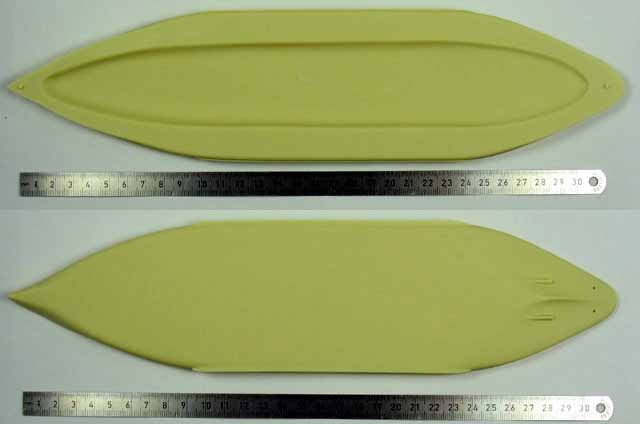
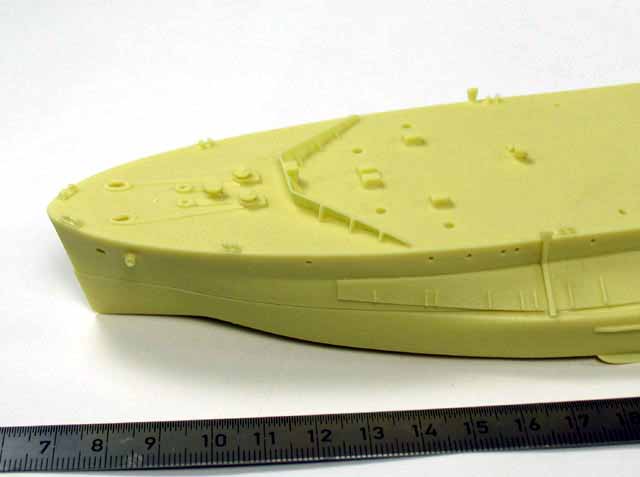
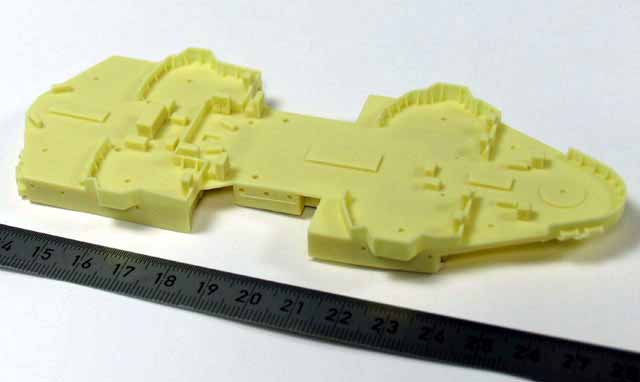
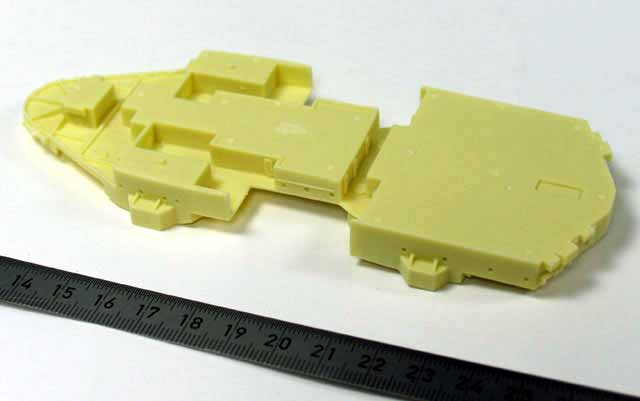
Looking at the hull, youll find that lower and upper hull was split where the sloped sides meet the somewhat box-like underwater ship. Upper and lower hull fit quite nicely leaving only a small gap to fill. Repetitive layers of white glue should do the trick filling these. There is a fine moulding line on top of the underwater ship that needs removing. In the bow area the lower hull seems a tad bit bigger than the upper. The modellers thoroughness sanding this excess away will have a big effect on the final model. In the stern area both hull parts seem to fit almost perfectly. The bottom of the lower hull features positioning holes for propeller shafts and rudders. The upper hull shows a lot of cast detail, such as cable reels, capstans, boat booms at the stern and the breakwater on the fo'c'sle. Personally, I would have preferred to have most of these as separate parts to ease painting. Parts like the breakwater should have been supplied as PE part. but all this nagging at an incredibly high level of quality: There is nothing to complain about either crispness or quality of casting. The boat booms at the stern will have to be corrected as they are too long and conform to the curved lines of the hull while they were dead straight on the original. Other booms as sported by the original are neither cast on nor does the instruction mention their installation in any form. So check your references and have a few length of rod at hand. On either side of the hull you will find massive ladders cast onto the hull. I cant make out a reason why these have not been supplied as PE parts, either. The neither steel deck nor the outside of the hull show any plating lines. My guess is that there were no secure sources for these patterns to be found. As per the instruction some of the cast on features of the hull are to be removed, as they are only applicable for Abercrombies sister HMS Roberts. |
|||||||||
|
|||||||||
| RESIN PARTS | |||||||||
|
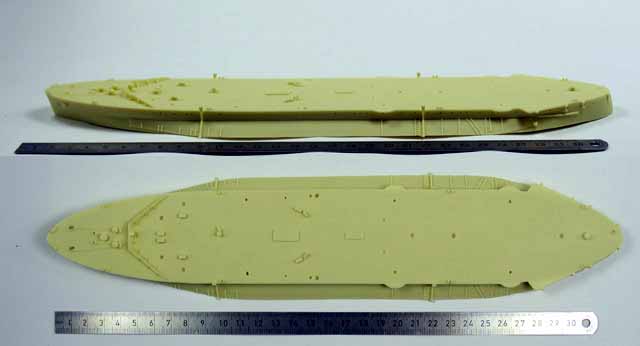
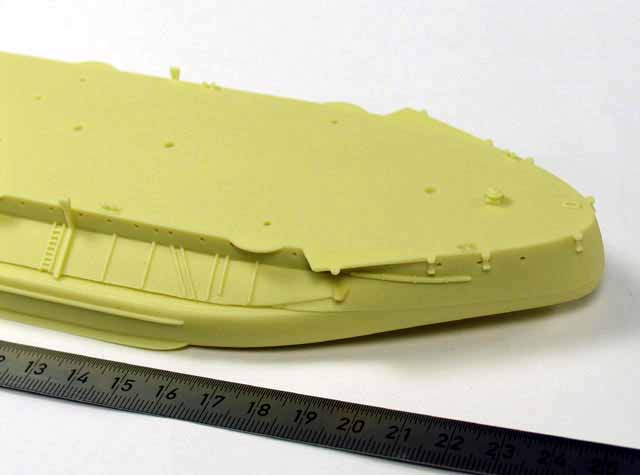
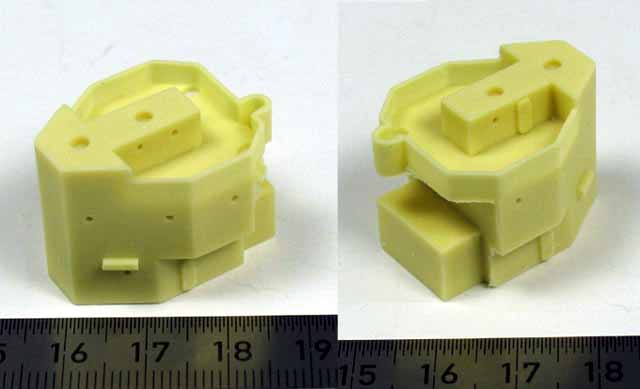
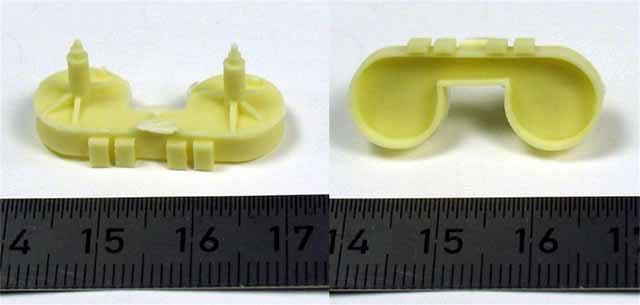
Next bigger part is the upper deck level. As on the upper hull piece many surface details are already cast on. Again, I should have liked separate parts better. The splinter shields and bulwarks are sufficiently thin and have all of their support struts cast on, but may be replaced by PE supplied in the kit (if I do understand the instructions correctly). Additionally youll find plenty of racks and ready ammo lockers right in place, as are all the watertight doors. At this point I want to draw your attention to the fact that there are no PE doors supplied in the kit. So, if you plan on opening doors, youll have to order replacement for the cast on detail. Checking the big upper deck level part from below, it seems that a lot of cleaning up must be done, but actually the part is just fine as it is. So dont you start sanding without proper dry fitting! Only one of the three positioning pins must be removed (in my kit) to make the part fit to the weather deck. On the upper deck part positioning stubs for the deck houses, foremast and funnels are provided. All parts fit well into position. Just a bit of sanding here and there will be required for a flawless fit. As on previous parts the deck houses have details such as reels and door cast on. The funnel sports cast on detail as well. Again, I would have preferred to see them as separate parts, such as the front side platform. |
|||||||||
|
|||||||||
|
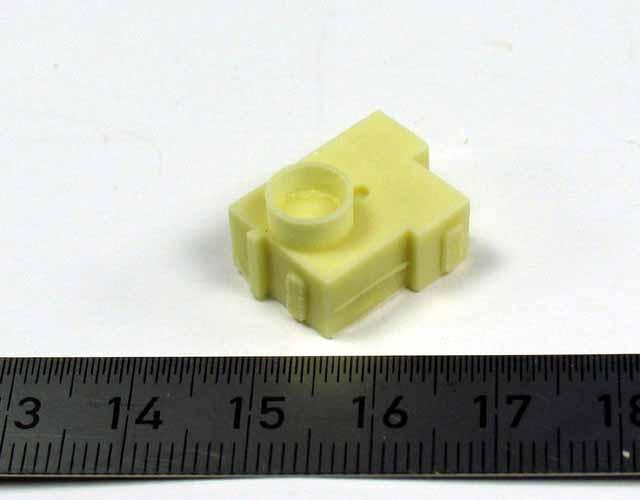
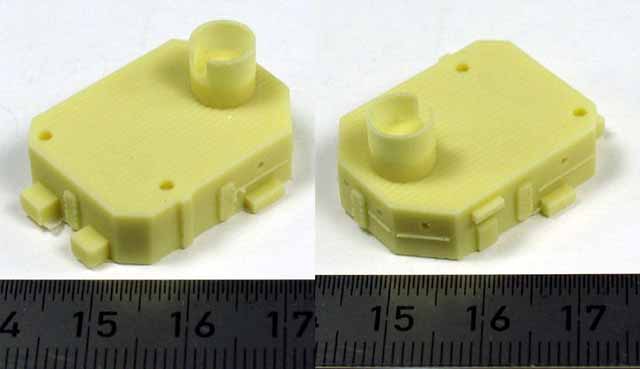
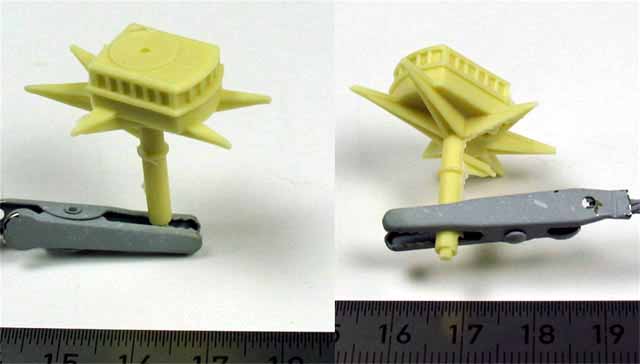
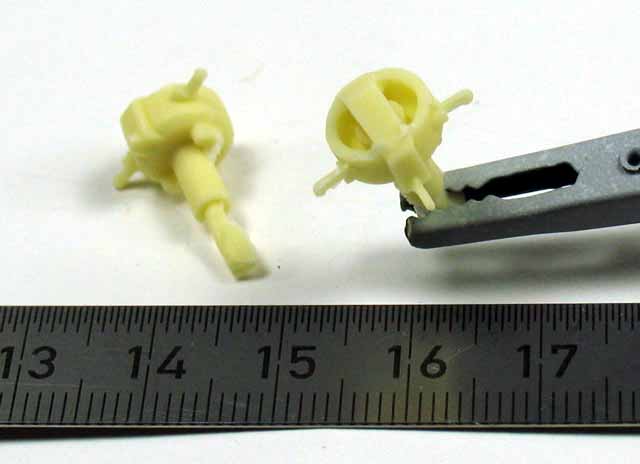
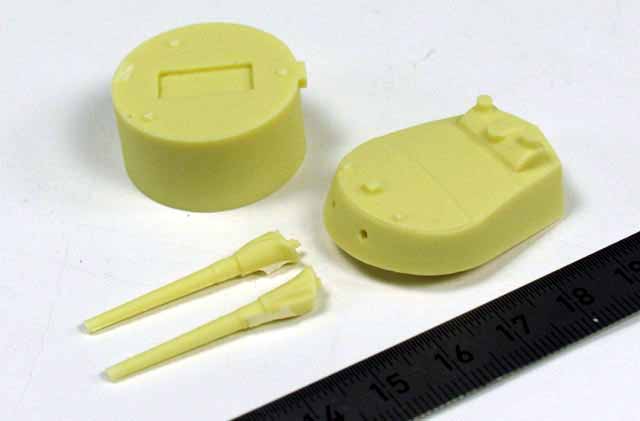
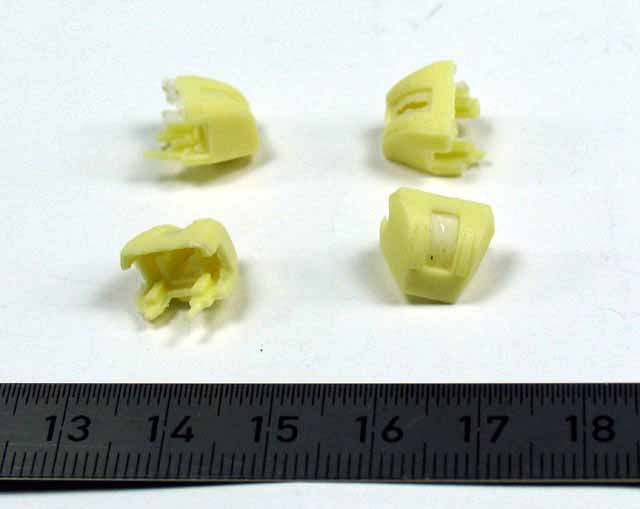
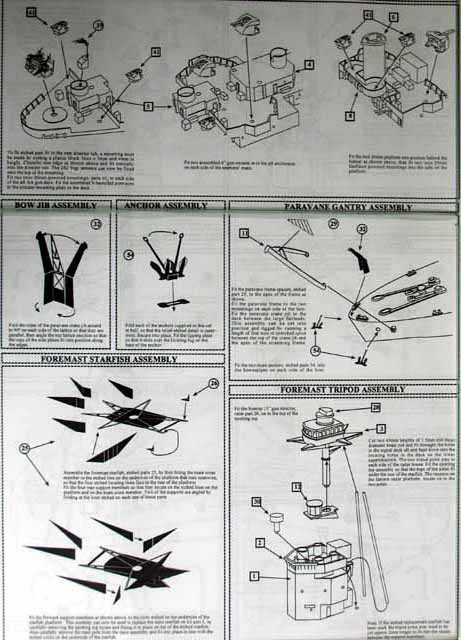
The foremast is made up of four resin parts: Base, open bridge, mast with fighting top and a platform with a cast on 277 radar lantern. The radar will definitely need some extra detail to really look good. The fighting top is a bit of a disappointment. It has big windows all around, which should make it transparent. The part however is solidly cast and will require a lot of work to be opened up. The starfish is moulded on as well, but supplied as a PE assembly at the same time. Quite obviously the PE parts will be the much better choice, but the removal of the cast on starfish will require a lot a careful work. IMHO the whole fighting top part should have been broken down into 4 or even 5 parts of resin and PE in the first place. Obviously the intention was to make the kit buildable, even for the less experienced resin modeller. To me it seems that it ends up being a disappointment and an unnecessary challenge for the more advanced modeller. The open bridge below is sufficiently detailed, even though the tub walls seem a bit thick and I cant find any clue as to where the open bridge would be entered: There is no hatch or door of any kind to be found. Last not least theres the base of the foremast. It has a bit of over pour on the back side, but is otherwise cast flawless, sporting doors and portholes. According to Ian Buxtons Big Gun Monitors, the positions of the portholes are proper according to a picture showing Abercrombies in her 1947 configuration, but are inconsistent with the 1943 fit (the fit in which she wore the Disruptive Camo shown in the instruction). I didnt find any conclusive hint as to when the porthole position had been altered. Vision slits of the armoured bridge right below the open bridge can not be found on the kit |
|||||||||
|
|||||||||
|
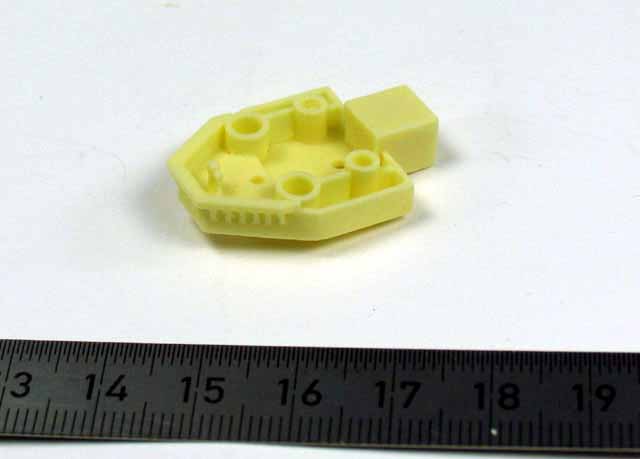
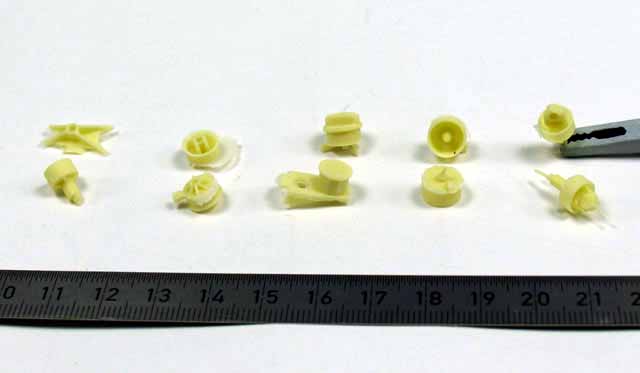
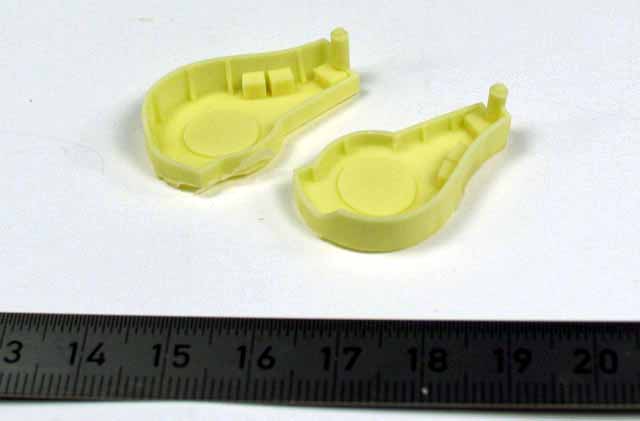
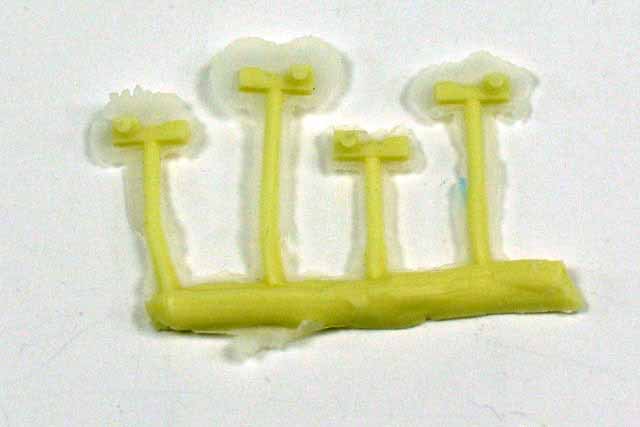
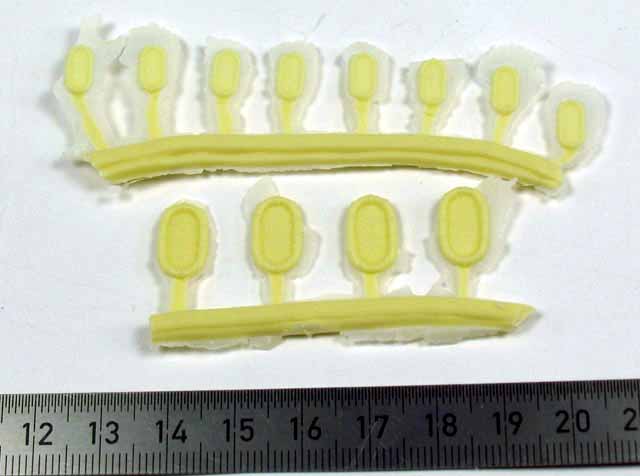
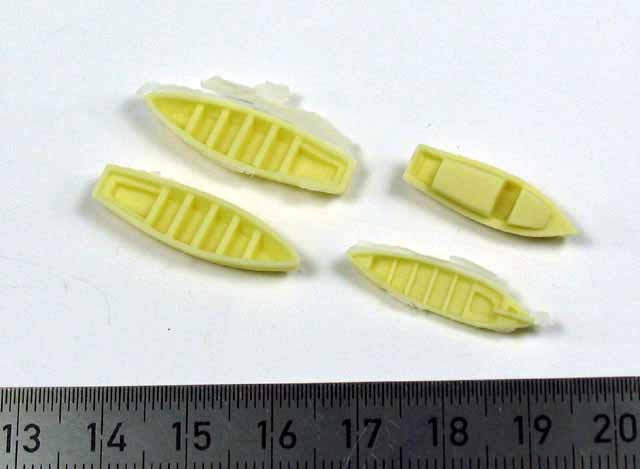
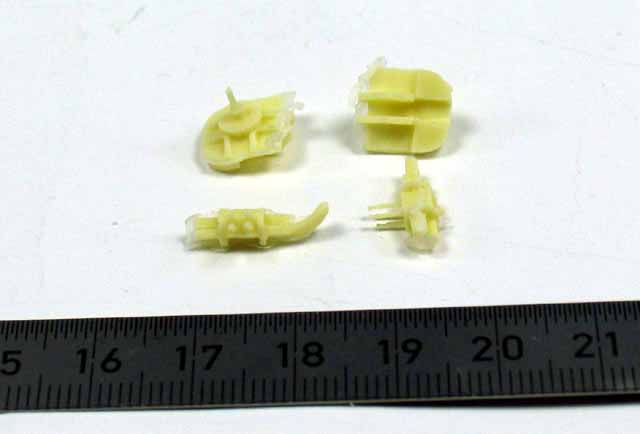
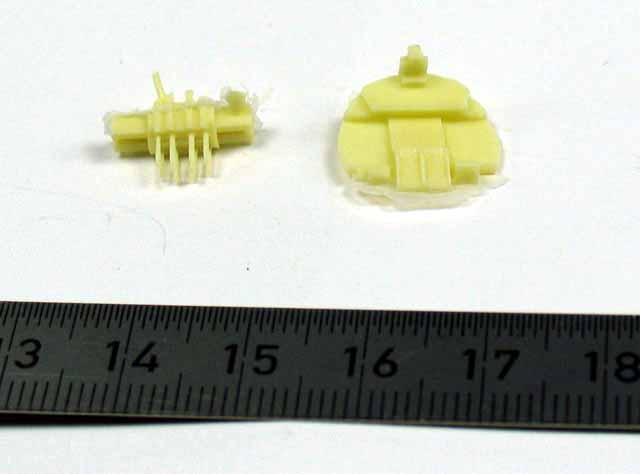
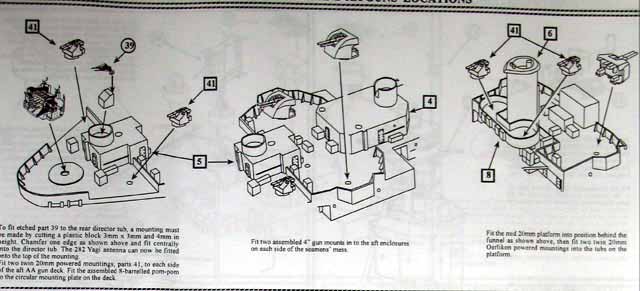
Even though a lot of details are cast on already, even more small parts can be found in several zipper bags. You can find several smaller platforms to take on radar and optical equipment or the starfish for the mainmast. This may be replaced by PE, same as in on the foremast. There are two search light platforms, with the lights already cast on, which makes further detailing and painting unnecessarily complicated. Next to power winches, two sizes of floats and rangefinders, we find a big bandstand for two twin 20mm AA- guns. On the instruction I cant make out, how access was provided to those. Further checking of sources will be necessary. The quad PomPom positions on either side of the barbette are already adorned with ready ammo lockers and further detail. The ships boats are nicely cast and will receive more detail from the PE sheet. Remarkable for all these parts is a big amount of flash that needs removing. |
|||||||||
|
|||||||||
|
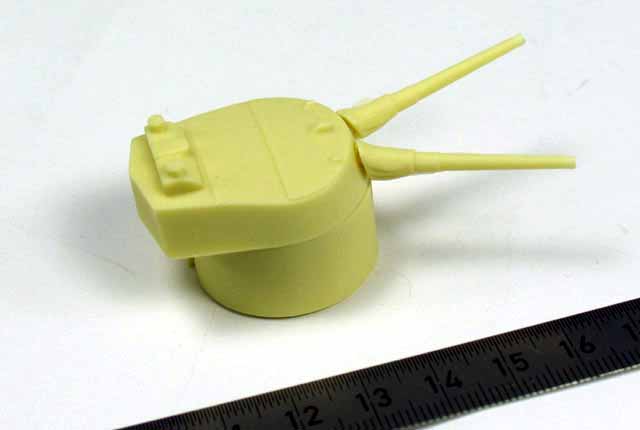
In a fighting ship the main weapon takes a lot of attention. This is no different in the Roberts class monitors, especially since their big 15 guns take up a somewhat elevated position. The barbette part is circular, which is correct for Abercrombie. The turret itself shows nice plating detail and sports the bases for the 20mm gun emplacements. While all other emplacements in this kit are resin cast, these will have to be assembled from PE. The resin 15 guns are simply beautiful with cast on blast bags and open barrels. I reckon that no replacement will be need as the barrels are dead straight, too. However, when you get your kit you might want to check that you have a left hand and a right hand gun, otherwise you might have a slight alignment problem. |
|||||||||
|
|||||||||
|
It is needless to say that, within a weeks time of my claim to WEM I had a proper replacement on my desk free of any charge. Thats why I will order a WEM any time: You just cant beat their service. Air defence weapons make up the last group of resin parts. Same as on the small parts there is quite a bit of flash to be found. The PomPoms will be enhanced by further use of PE parts. |
|||||||||
|
|||||||||
| WHITE METAL PARTS | |||||||||
|
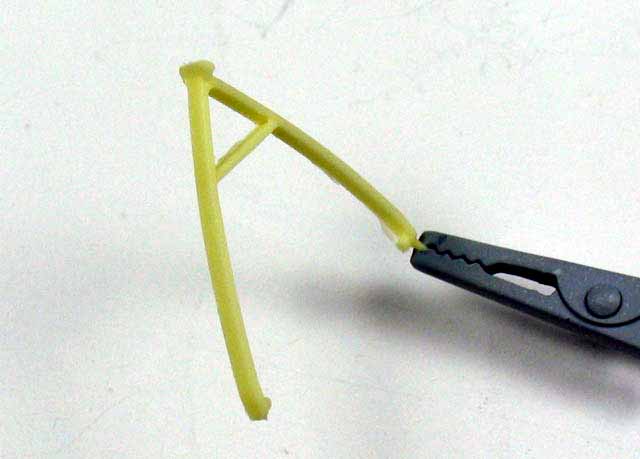
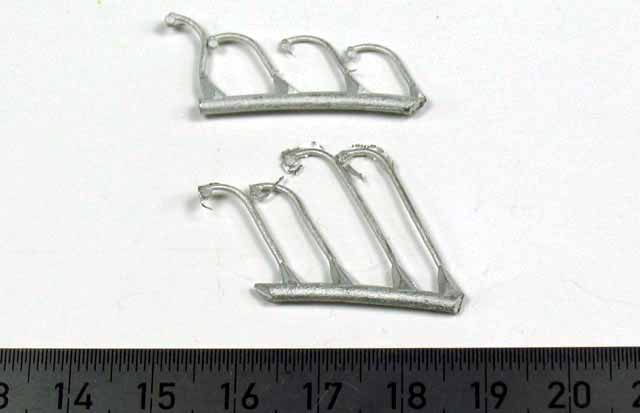
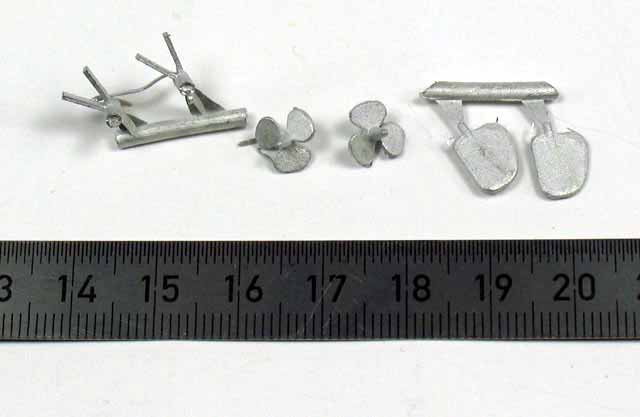
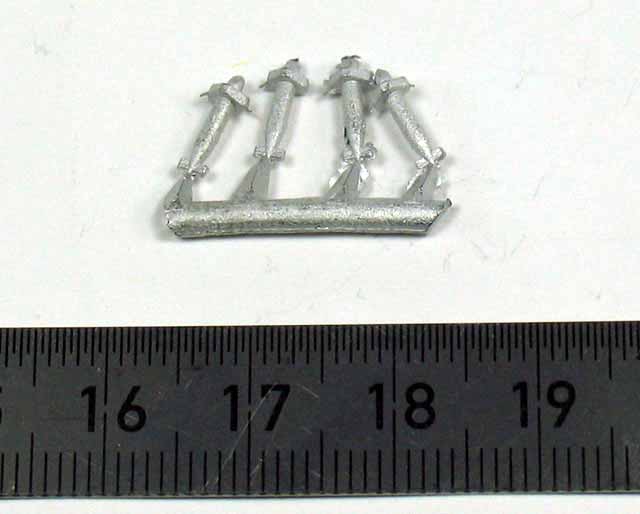
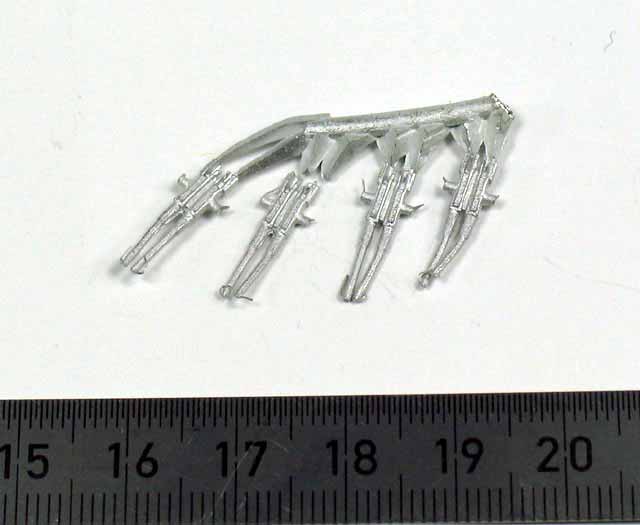
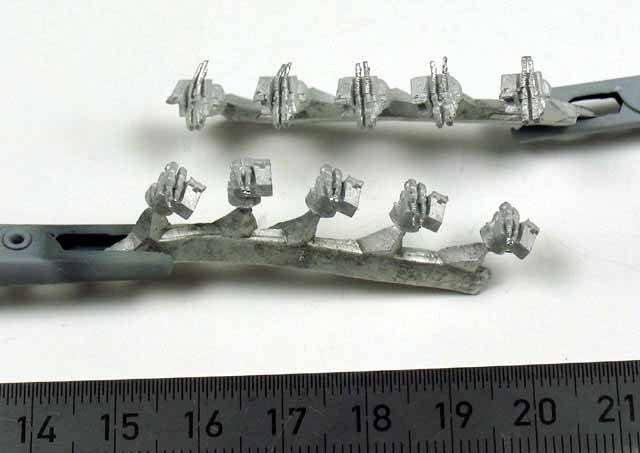
With the white metal parts we have reached the low point of the review. While all the previous parts may be turned into something useful, the white metal parts dont fit the quality of the kit. While davits, rudders and prop-shaft supports may be used without bigger problems, the props seem to be wrong compared with pics in Buxtons book: Either the pitch of the prop blades is wrong or the blade shape is entirely wrong. Anyway, no matter how I look at the props they do not match the pics of the original. The mine clearing paravanes sport cast on fins and planes, but you are asked to removed the cast on detail and replace them with PE parts. Why was the detail cast on in the first place? Barrels and bodies of the 4 AA show little detail and are all bend beyond use. Frankly, I cant see how these can be used. The 20mm Twin AA-guns are flat out disappointing. |
|||||||||
|
|||||||||
| PHOTOETCH | |||||||||
|
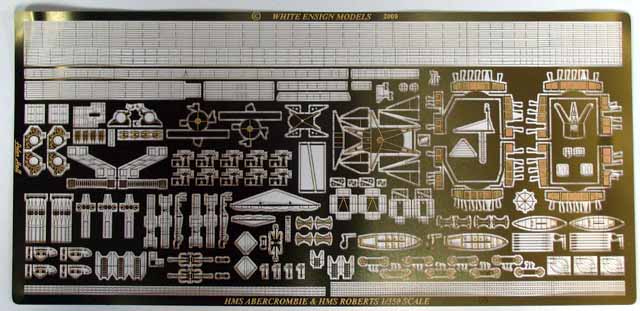
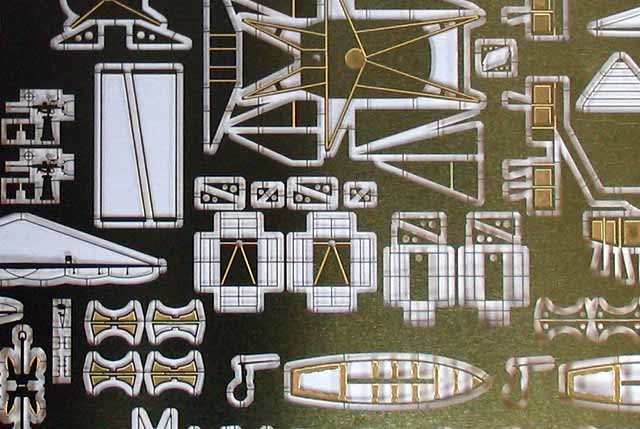
Now, here is clearly WEMs strong suit! The PE sheet is, once again, a work of art. As mentioned previously, I should have liked to see one or the other detail here instead of resin cast, but that is a question of kit layout and does not allow any criticism on the PE itself. |
|||||||||
|
|||||||||
| DECAL | |||||||||
|
Unfortunately we do not get any decals sheet with trimming marks or flags. I should really wish for WEM to add decal sheets to their kits, as it has become customary with many kits. |
|||||||||
| OTHER | |||||||||
|
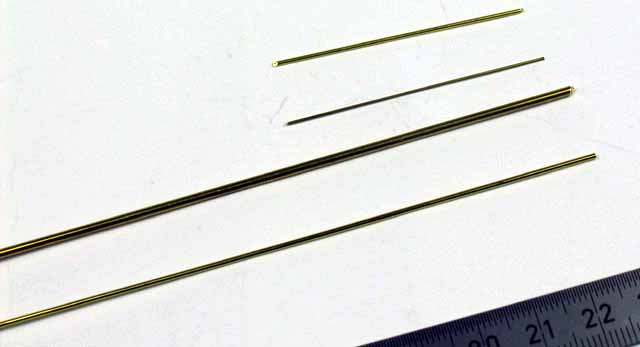
Last not least a range of brass rods are supplied with the kit, which will make up parts of the tripod masts and prop-shafts. |
 |
||||||||
| INSTRUCTIONS | |||||||||
|
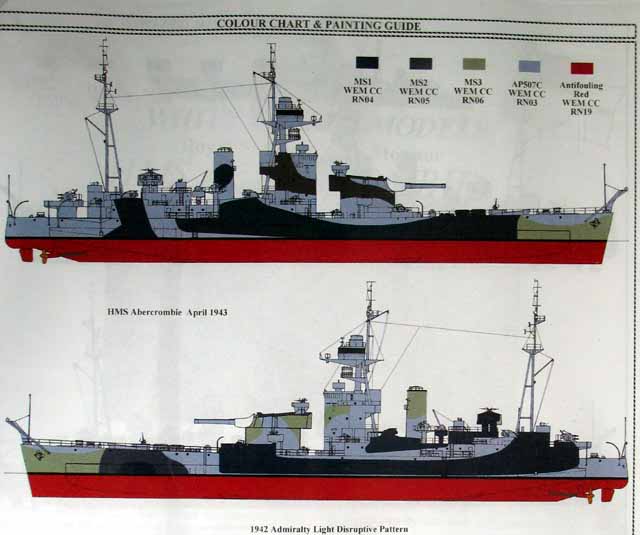
The instruction comprises of 6 A4 sheets and is made up in well known WEM style. The first three pages show a short history of the vessel, a resin parts and photo etch sheet overview. The final two pages are dedicated to Abercrombies camouflage scheme in 1943 and the colour systems thereof. Obviously the experts are not able to determine, if "Admiralty Light Disruptive Pattern" or "Admiralty Medium Disruptive Pattern" were applied to the ship. In-between the first three and last two pages, seven pages give advice about how to put your ship kit together. It seems that all parts and issues have been properly addressed. |
|||||||||
|
|||||||||
| CONCLUSIONS | |||||||||

Strengths:
Weaknesses:
If you wait for something for a long time, sometimes your expectations will rise to a degree, where it is hard to fulfil them. I am VERY happy to finally hold "my" big scale HMS Abercrombie in my hand. No doubt it is a big improvement over the 700th scale kit of Kombrig concerning the accuracy and authenticity. Still, WEMs kit does not fulfil my expectations. Dont get me wrong! WEM has essentially delivered a good model kit: Fit and resin casting quality are great. There are only a few minor accuracy issues, which can be dealt with, even without being a expert modeller. The kit can be recommended without a doubt, but The kit does not represent the cream of the crop. For a market leaders kit in this price level, it does only provide you with a good, solid starting point. For my taste, the kit incorporates too many compromises between whats possible and whats simple enough. The real low point is the white metal parts. Quite obviously the parts were not bent in transport, but already when being plucked from the moulds. IMHO white metal is an out-dated medium. When looking at other products of WEM (or other cottage industrys products) I wonder why white metal is still in use. Well, I guess there is a reason. No doubt there are much worse kits out there is the market for similarly high or even higher prices. The advantages of WEM kits are clearly their great layout, the beautiful photo etch and that they can actually be built without having to date a shrink to talk you down from the window sill between the building sessions. To turn the kit into gold medals will require further input and a stretch of your skill, but it will be worth the effort without a doubt. References: |
|||||||||