|
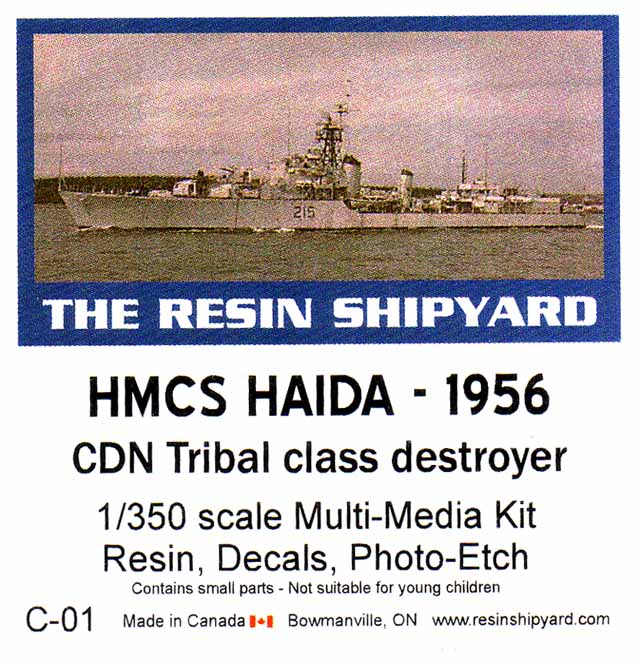
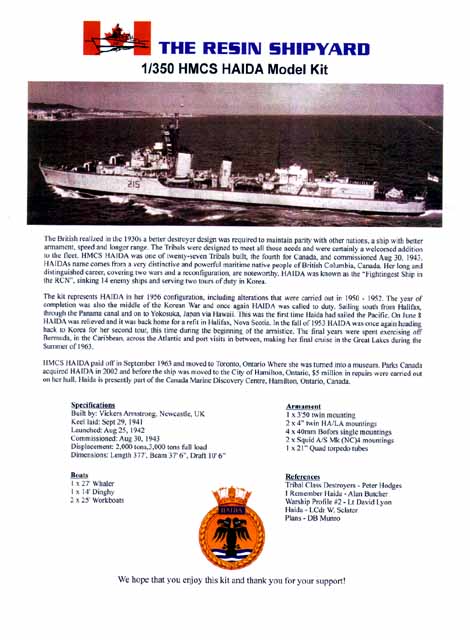
The British realized in the 1930's a better destroyer design was required to maintain parity with other nations,
a ship with better armament, speed and longer range. The Tribals were designed to meet all those needs and were
certainly a welcomed addition to the fleet. HMCS Haida was one of 27 Tribals built, the fourth for Canada, and
commissioned AUG 30, 1943. Haida's name comes from a very distinctive and powerful maritime native people
of British Columbia, Canada. Her long and distinguished career, covering two world wars and a reconfiguration
are noteworthy. Haida was known as the "Fightingest Ship in the RCN," sinking 14 enemy ships adn serving two
tours of duty in Korea.
|
|
This kit represents Haida in her 1956 configuration, including alterations that were carried out in 1950-1952, at which
point she was called again to duty to serve in the Korean War.
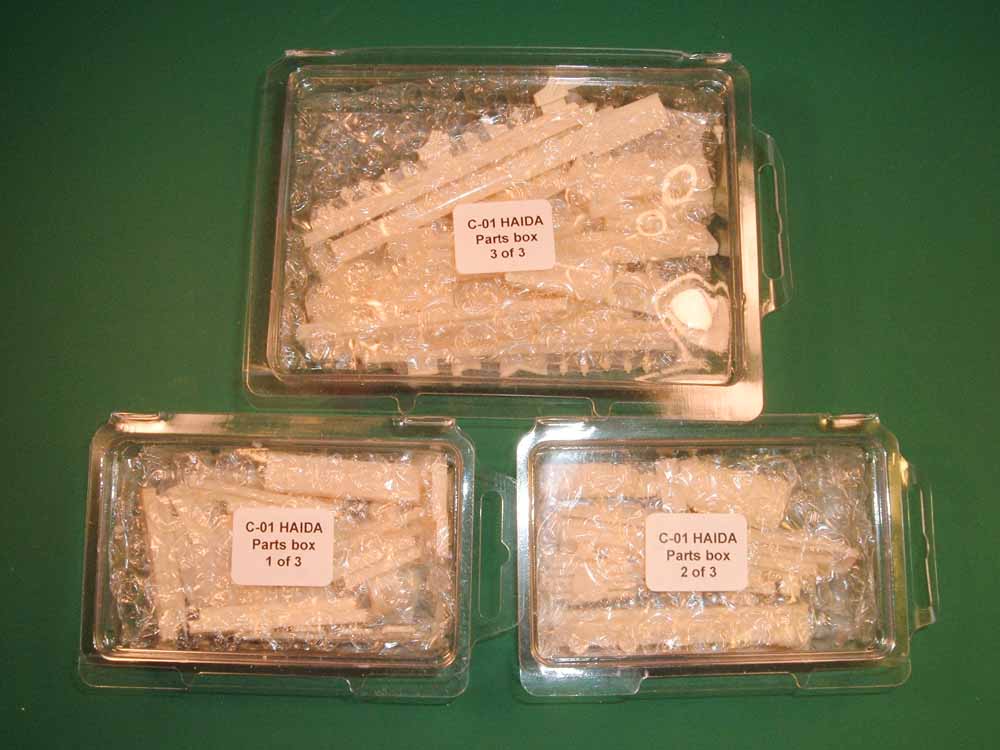
This kit was well packaged in the now standard "resin ship kit box." The hull was wrapped in bubble wrap, the parts
packaged in three separate boxes, with bubble wrap beneath and atop.
(Taken from the HMCS Haida instruction sheet)
|
|
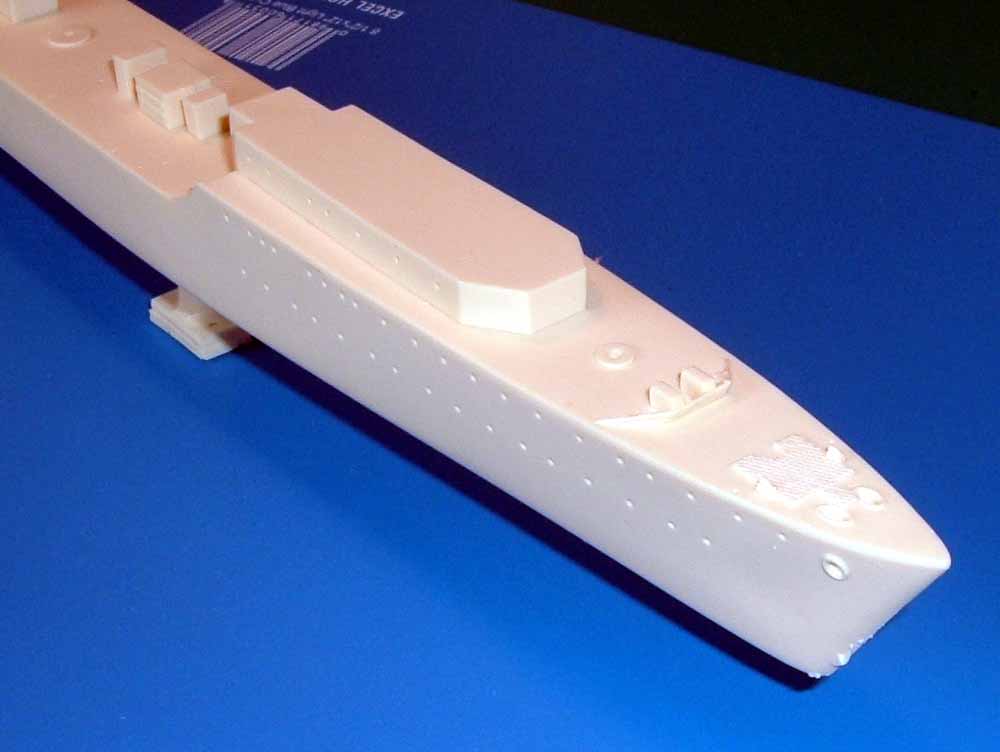
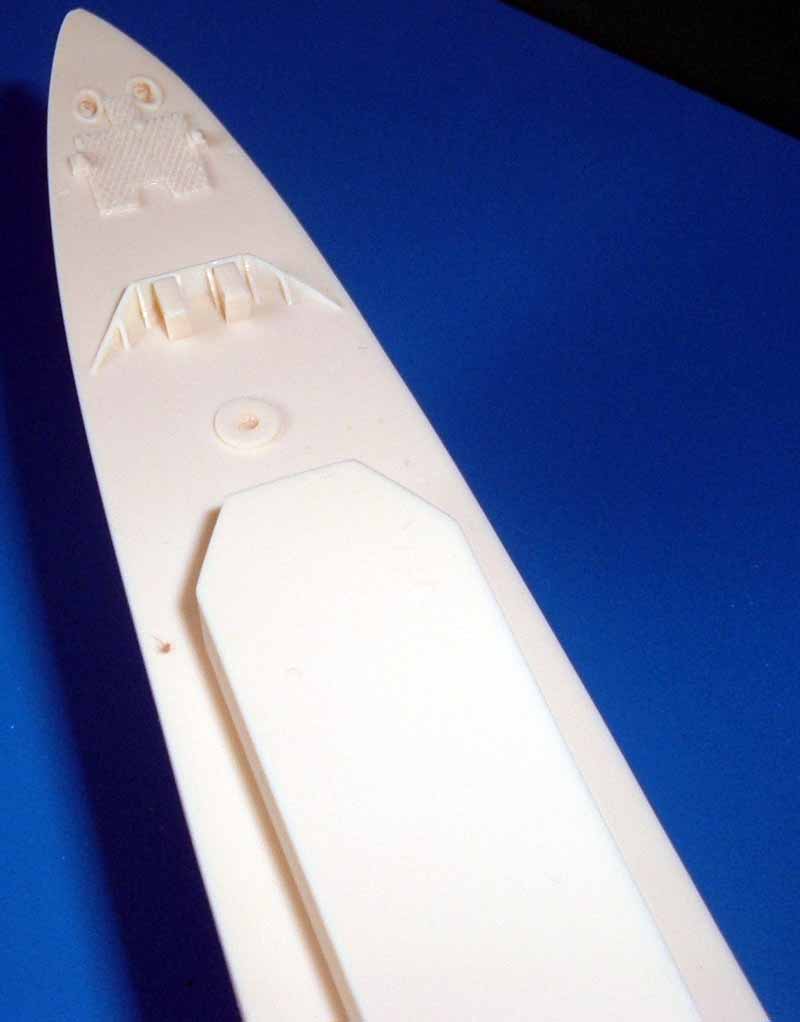
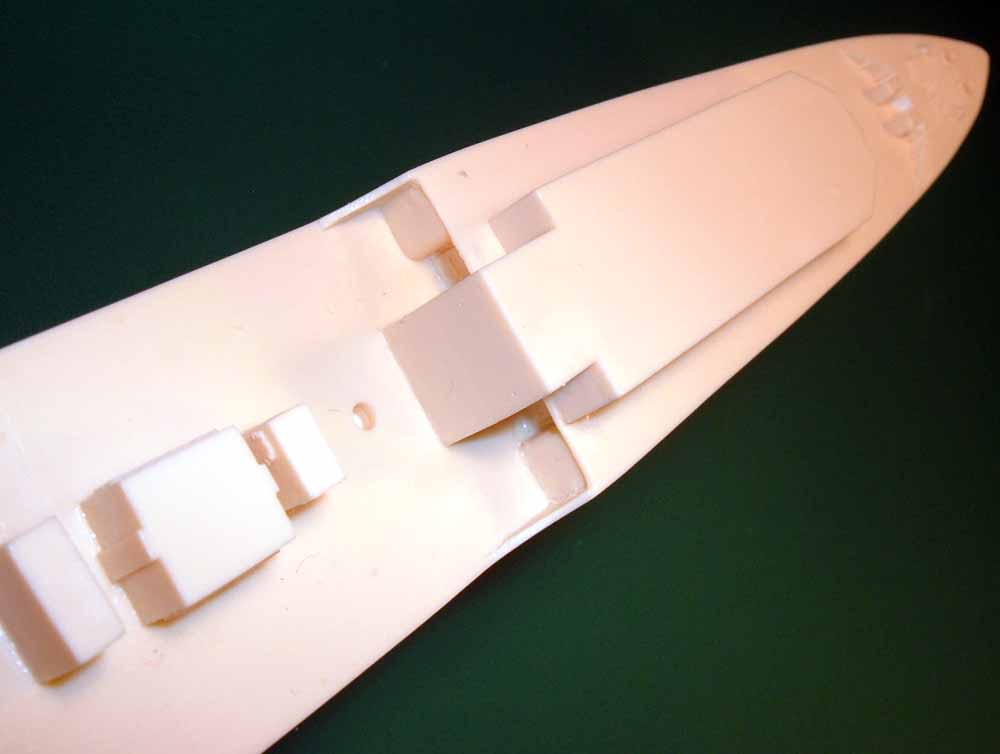
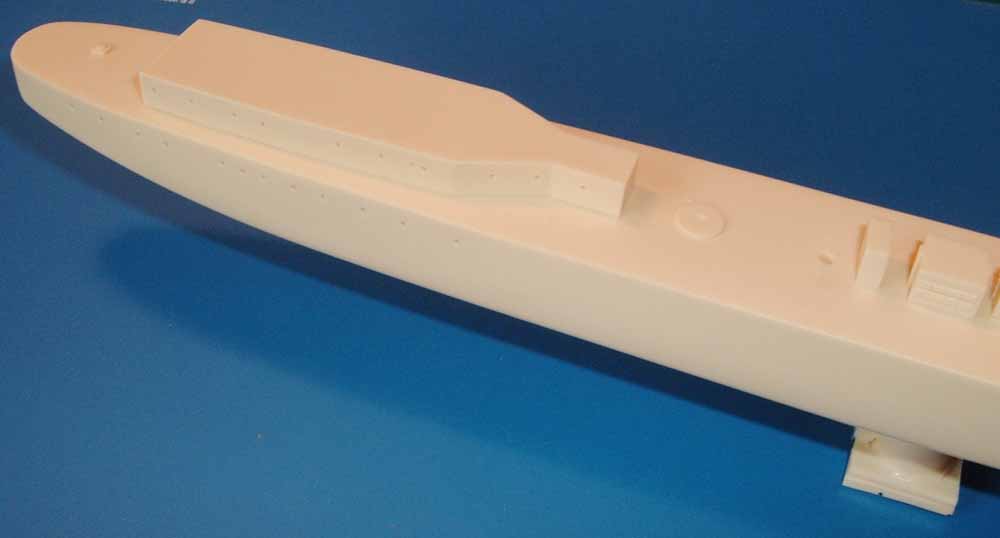
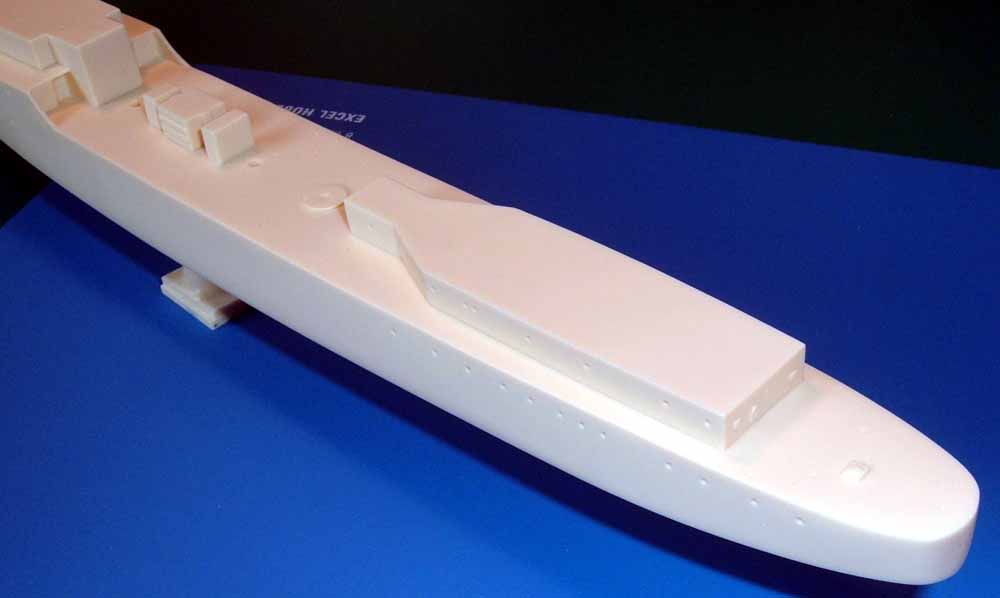
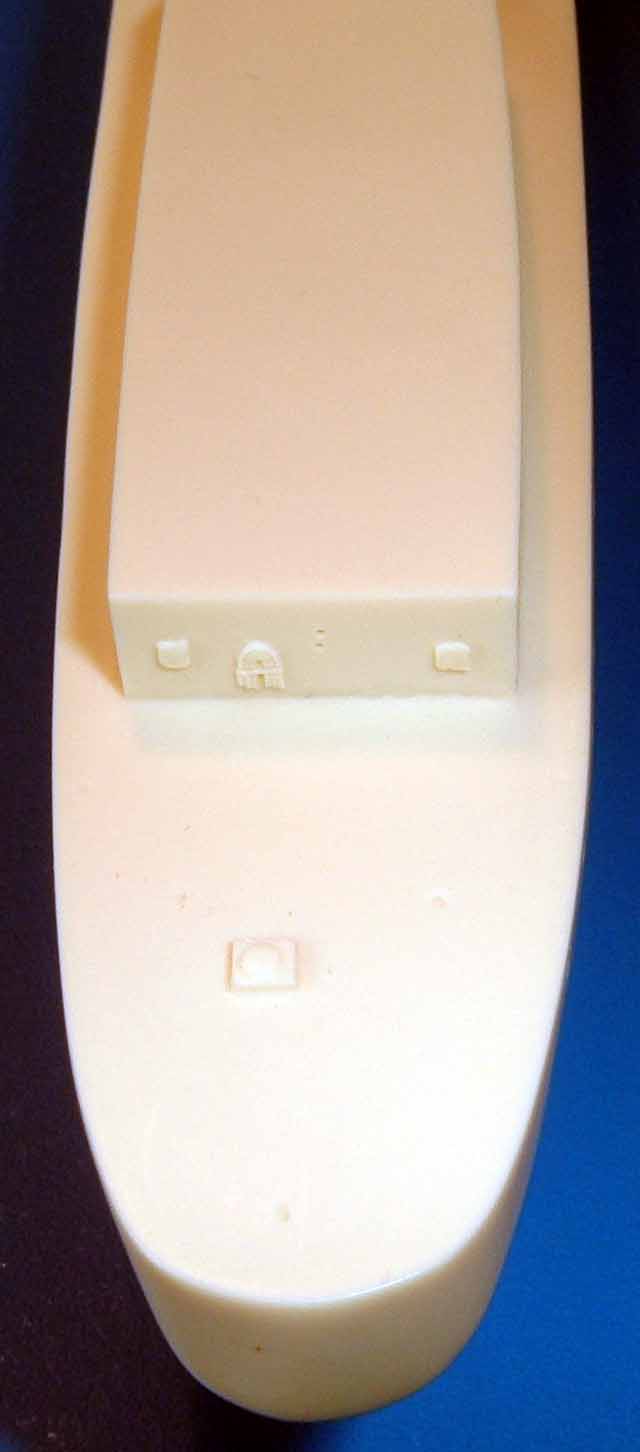
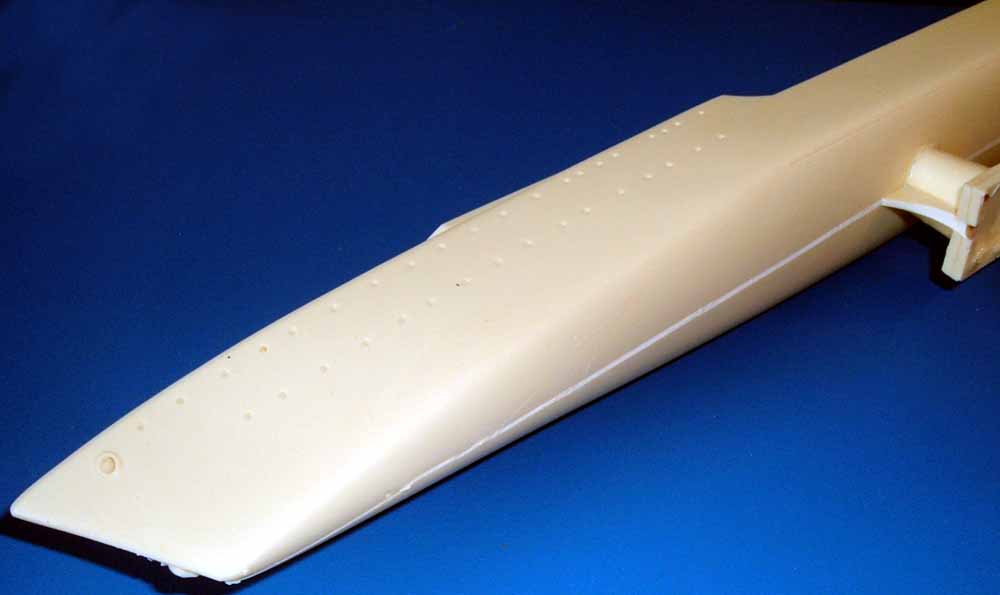
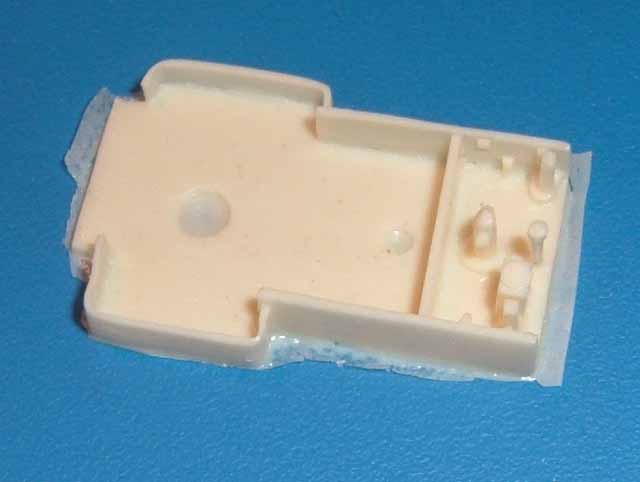
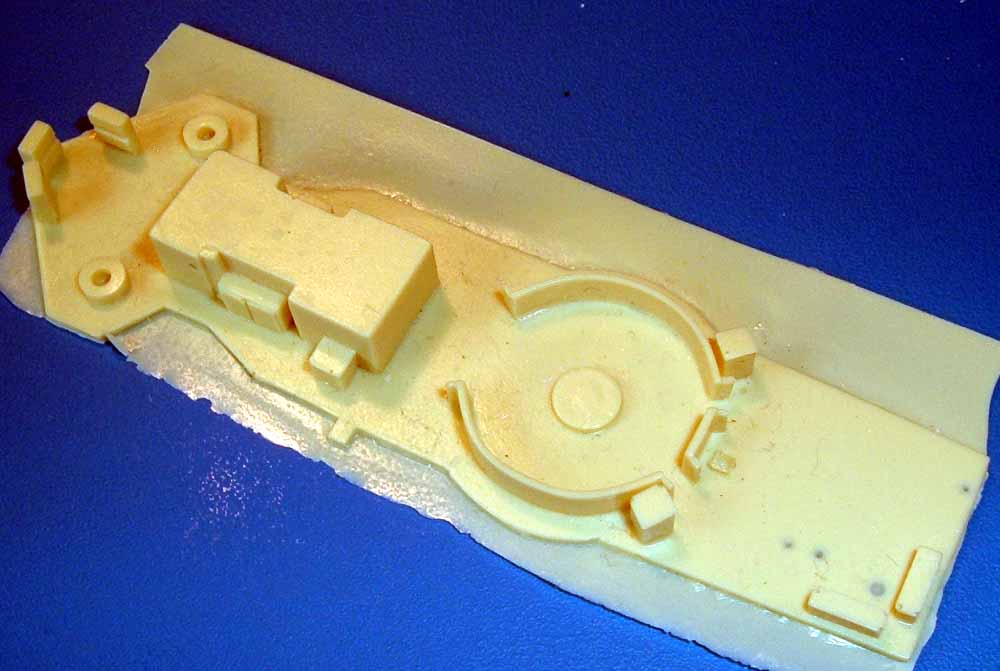
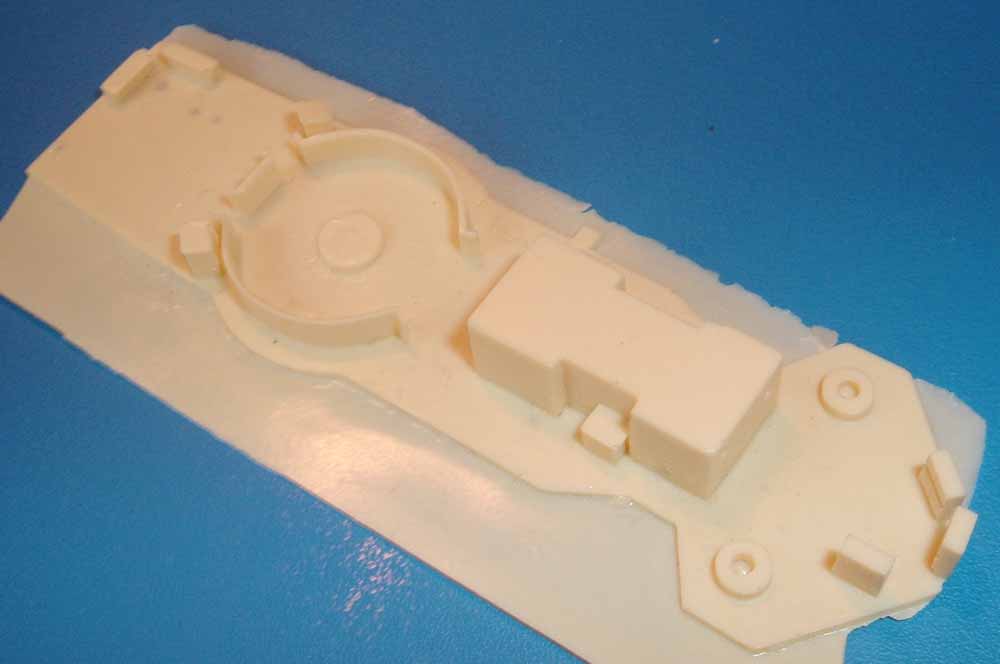
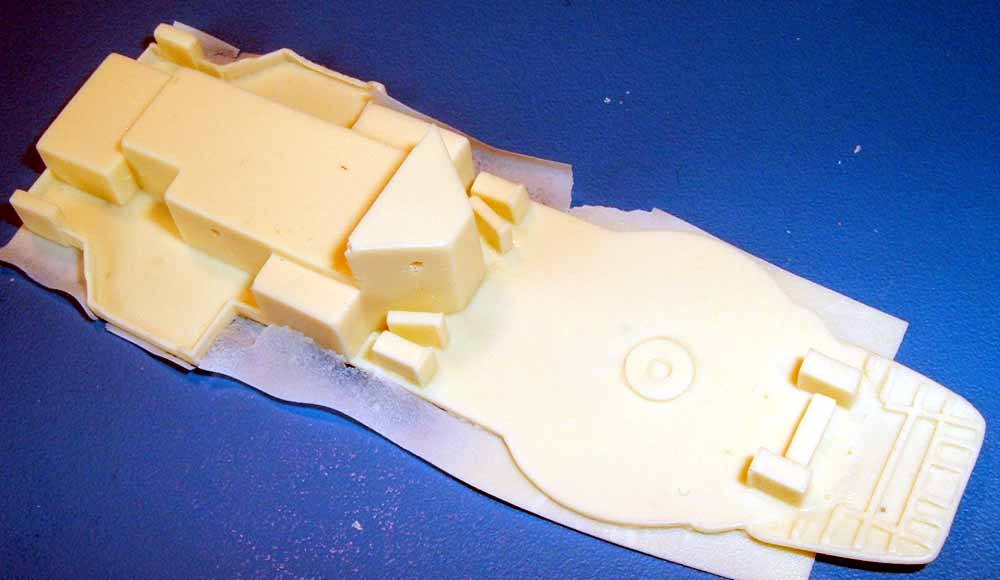
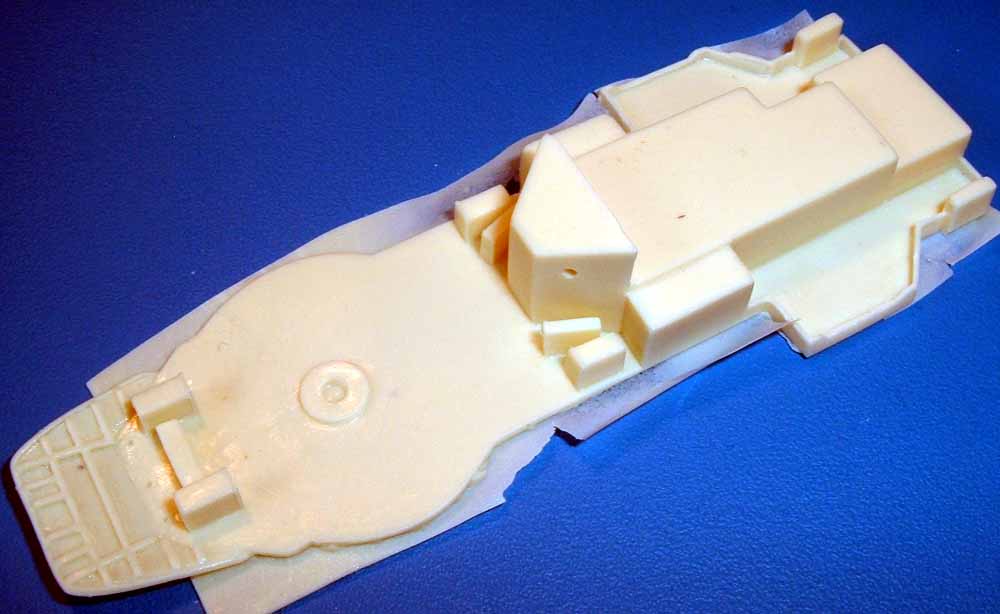
The hull is cast in one piece, and is very cleanly cast, with all the 01 level deck structures in place.
The only real blemishes I can find are along
the mold seam and the casting plug- which is to be expected. Some minor "blobs" along the bow, which a few swipes of
sandpaper will cure. This Tribal hull will only require minimal cleanup
for a full-hull display.
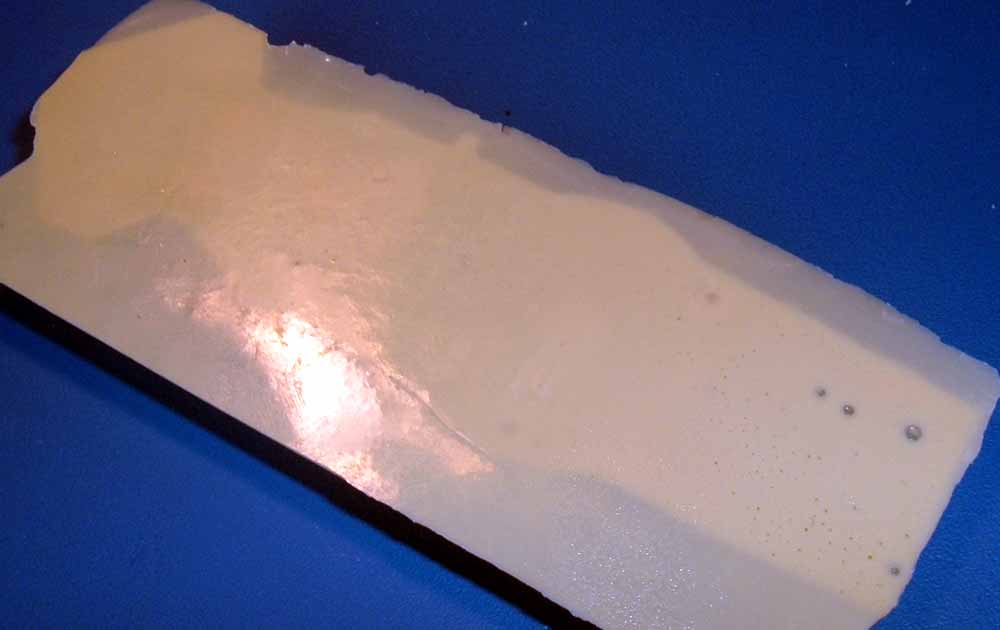
If a modeler wishes a waterline hull,
Resin Shiyard's ordering page states they would be happy to half pour a hull for you, with a slight delay in delivery.
|
Click images
to enlarge |
 |
 |
 |
 |
 |
 |
 |
 |
 |
 |
 |
 |
 |
 |
|
| PARTS BOX #2 |
|
|
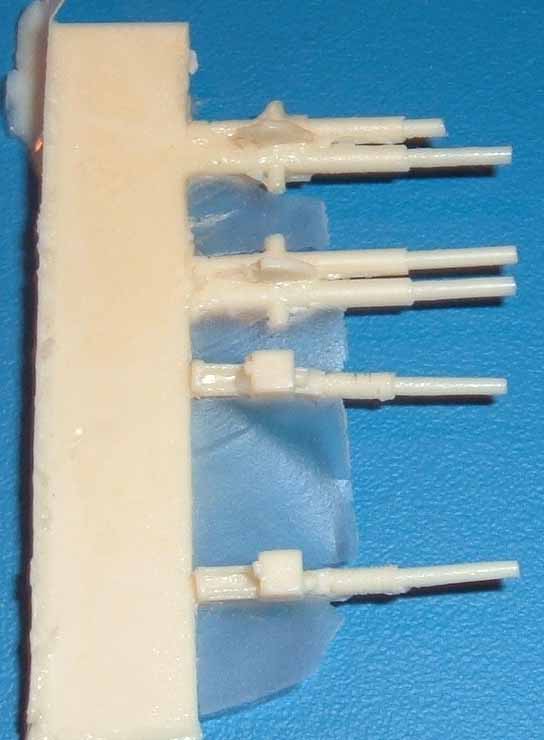
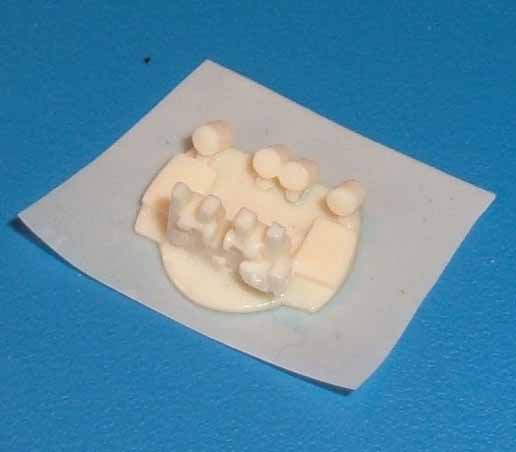
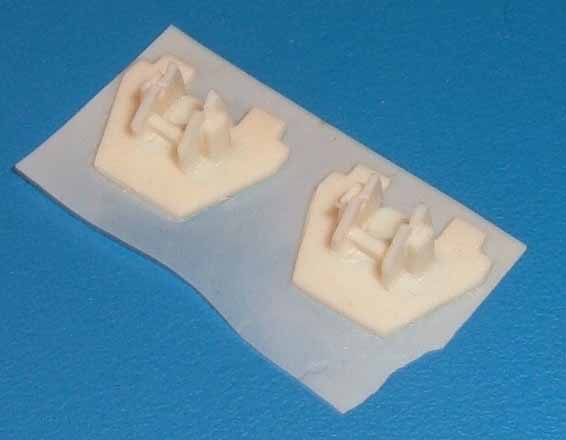
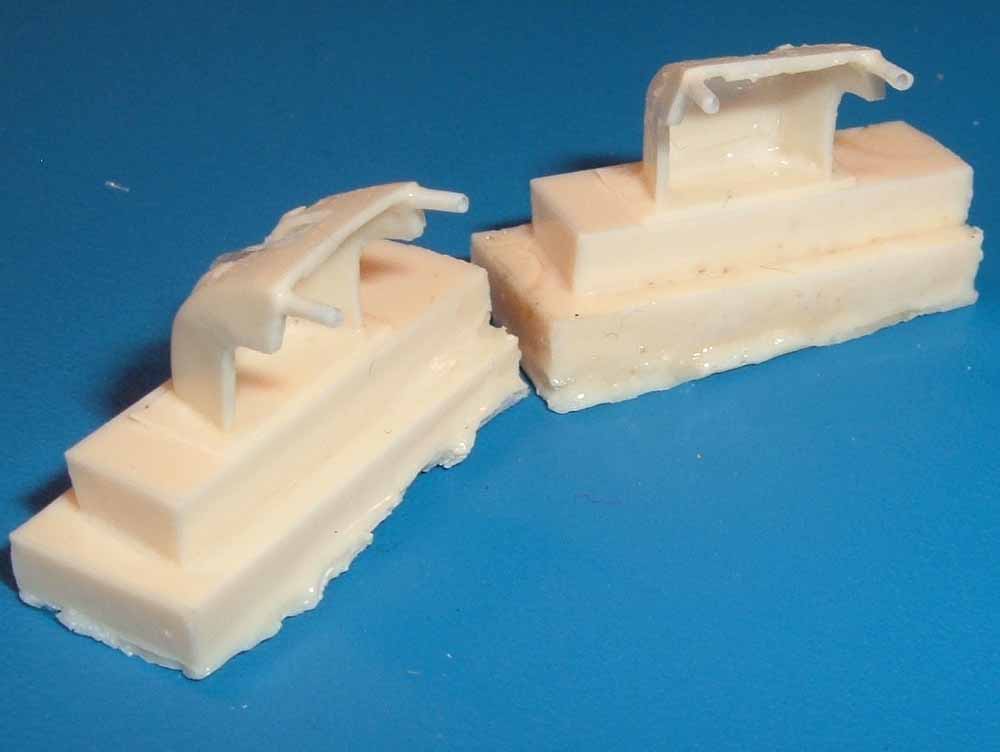
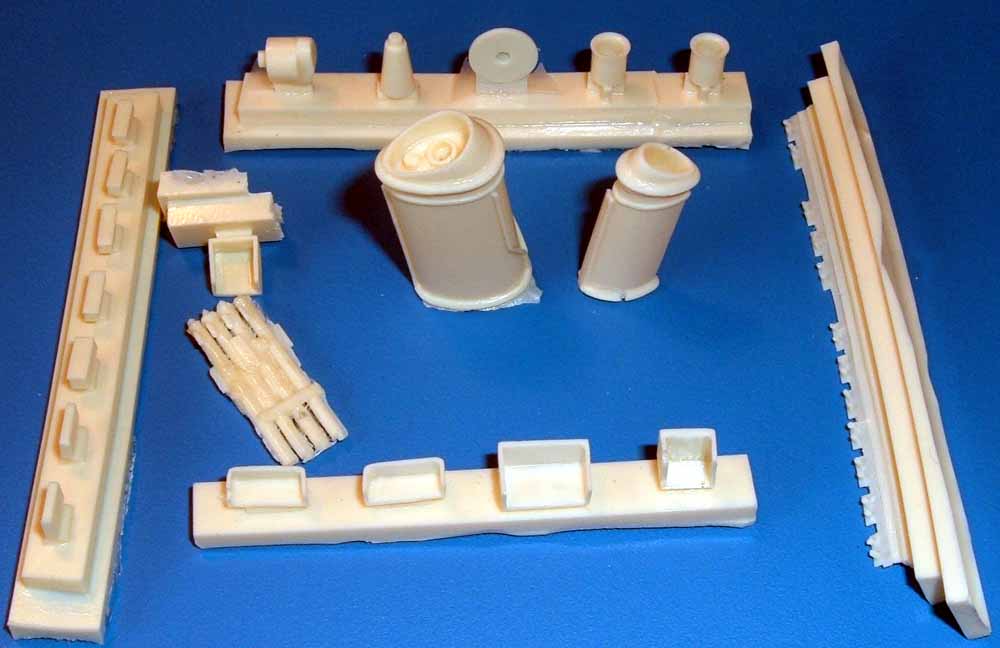
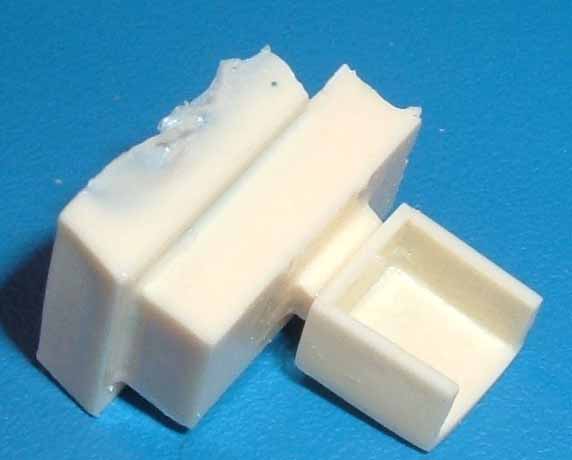
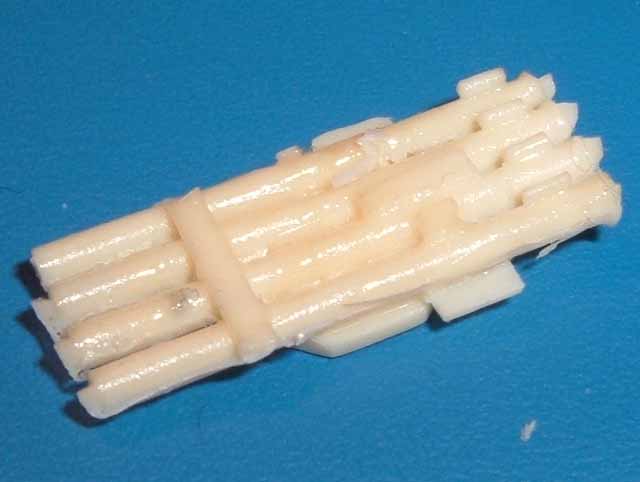
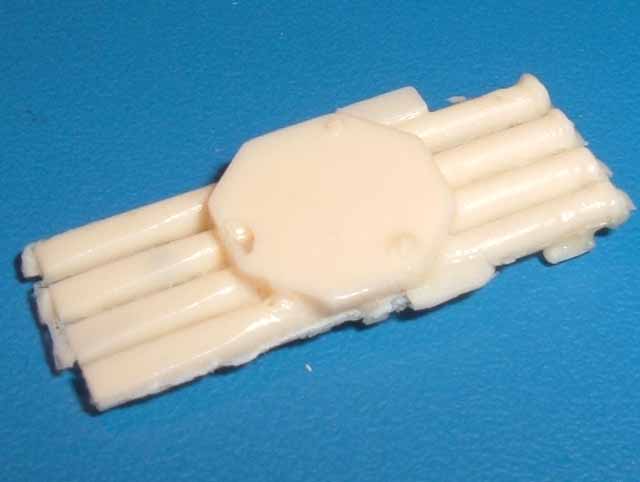
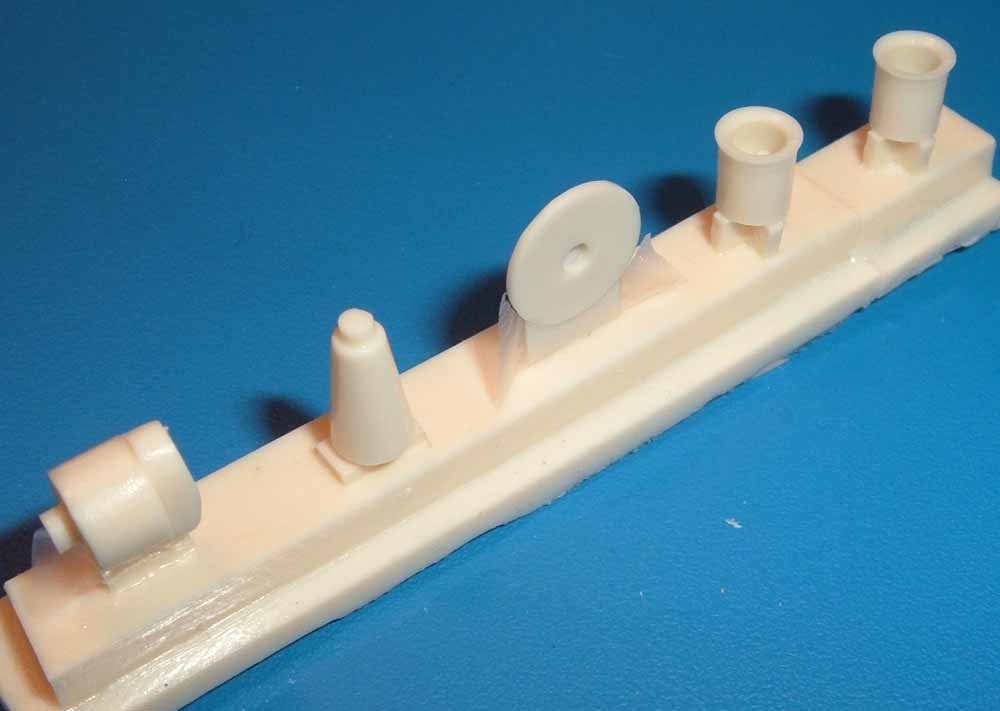
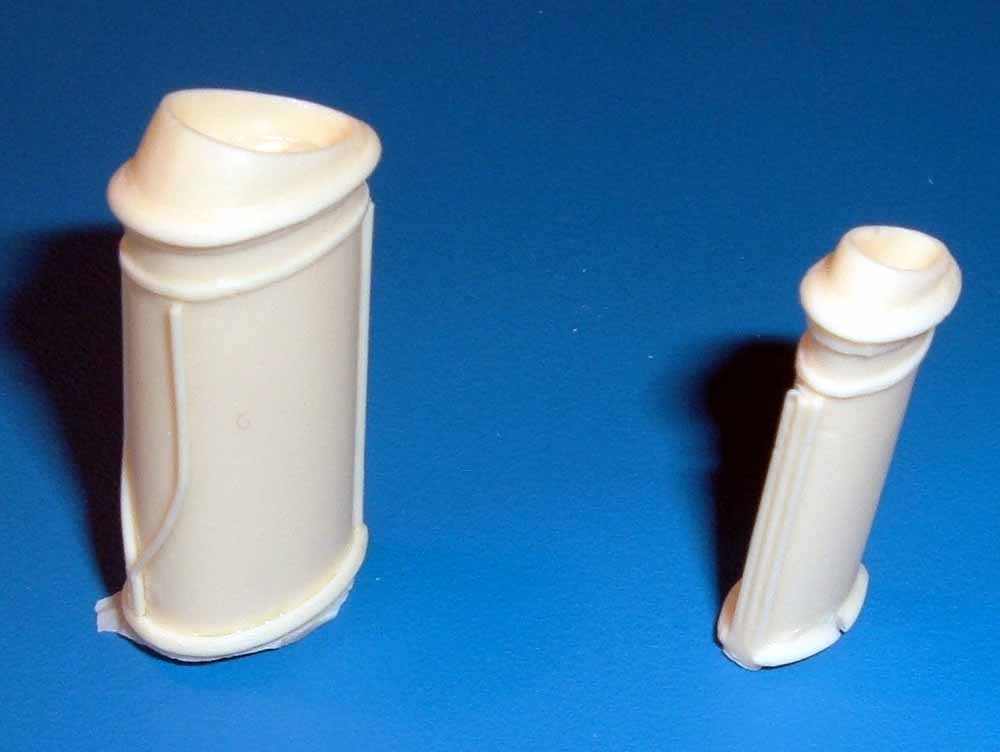
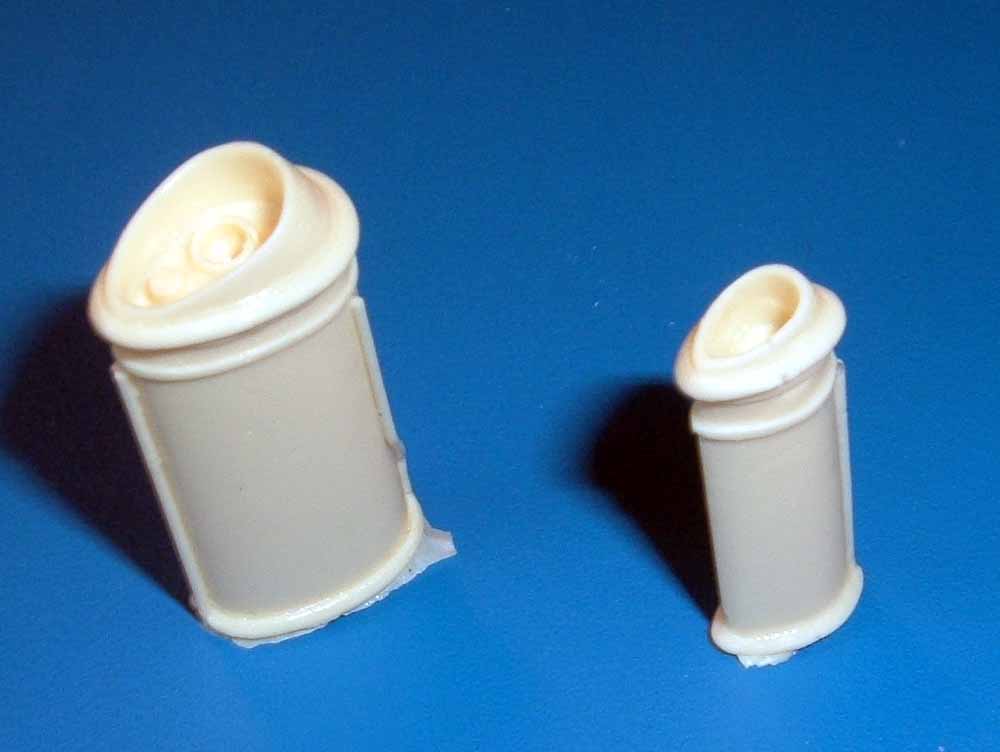
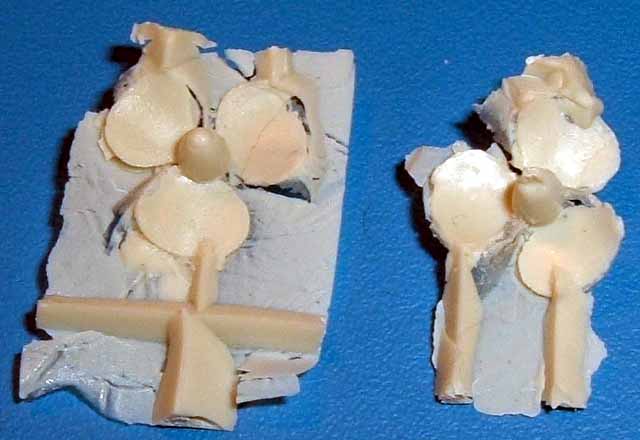
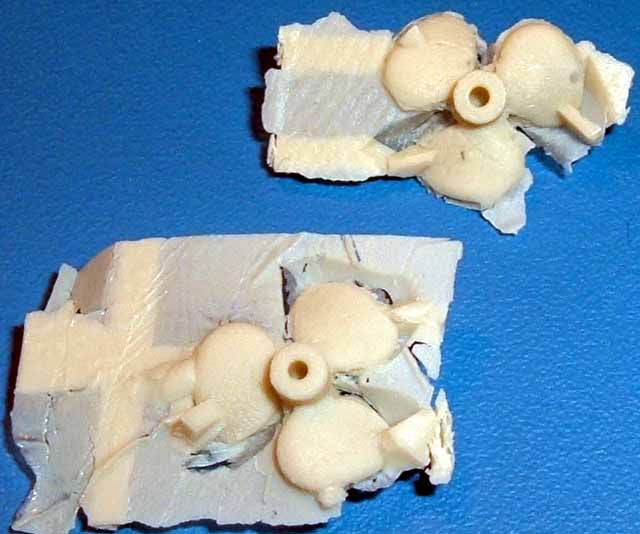
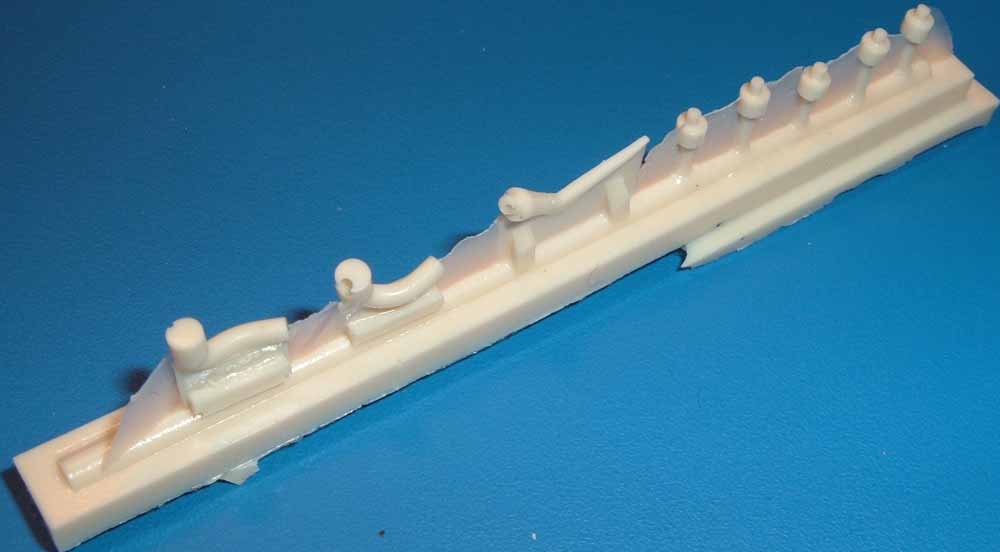
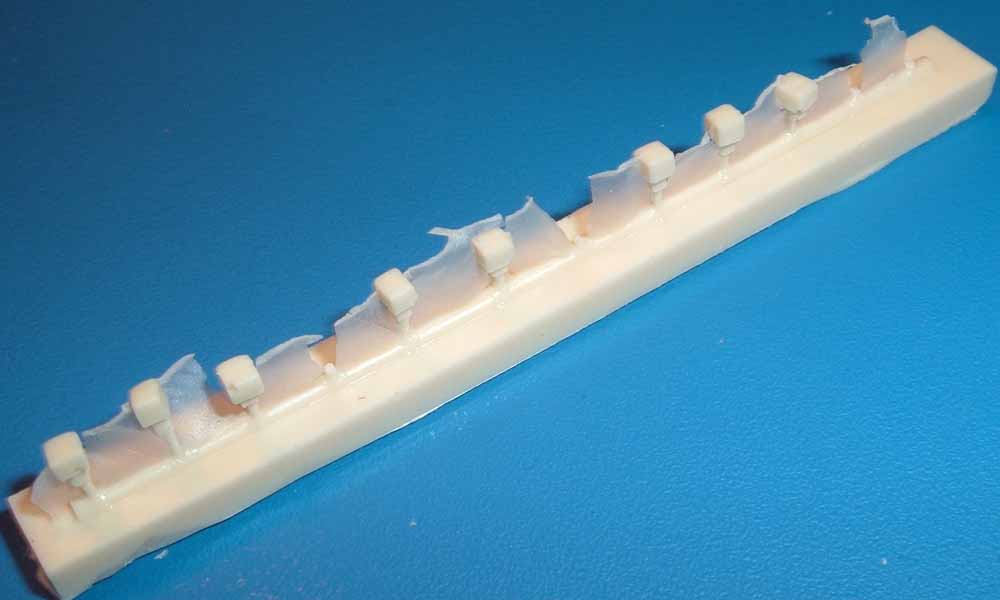
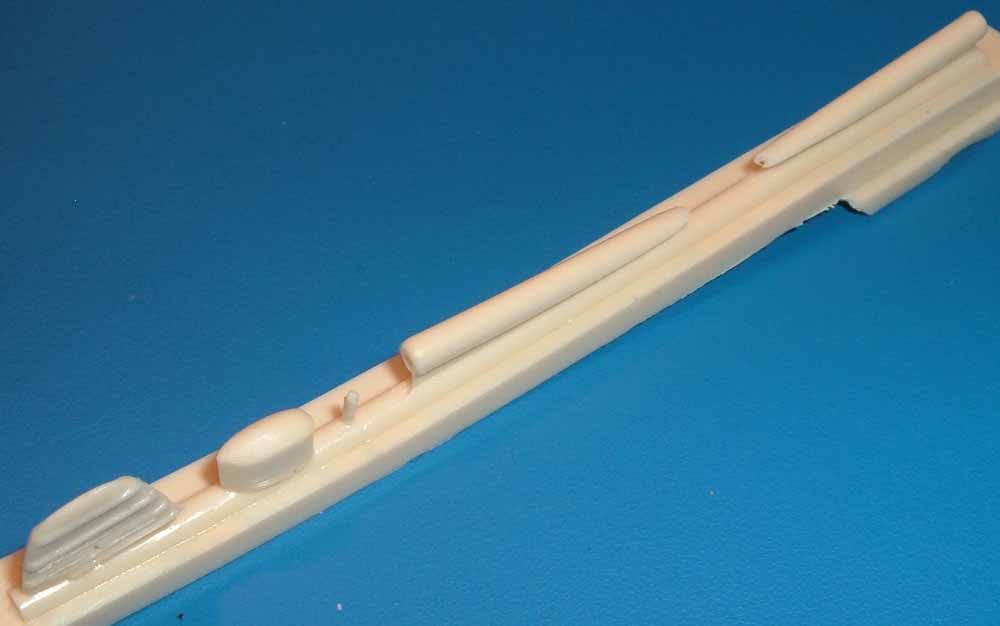
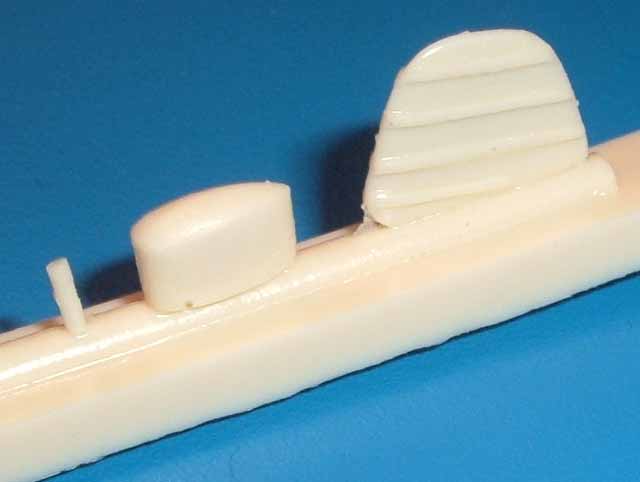
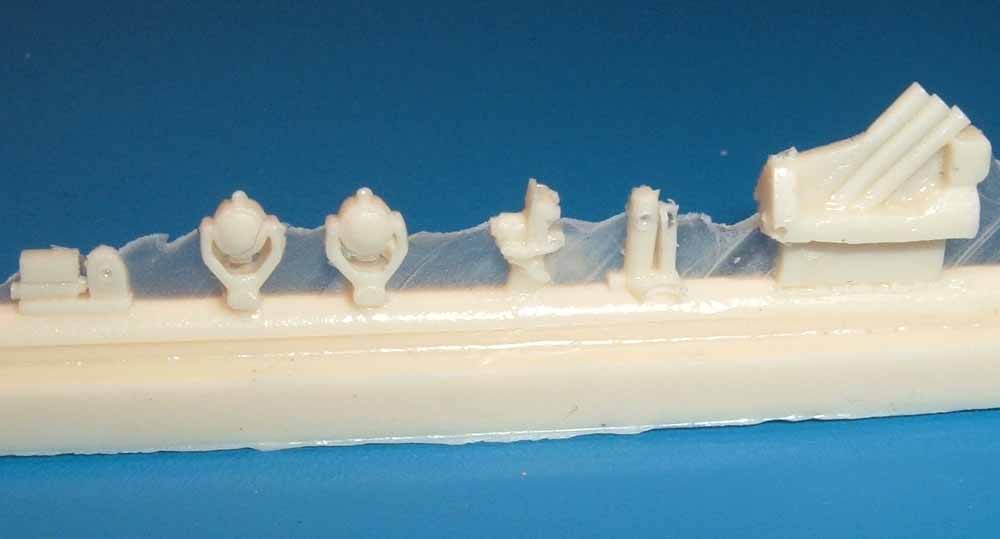
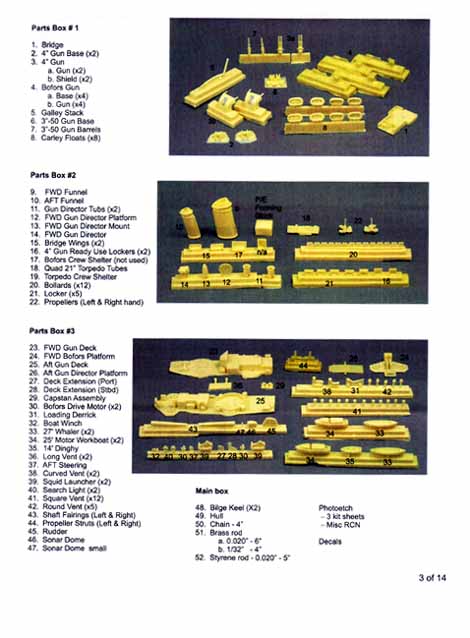
Parts box #2 has the two funnels, some platforms and lockers, and the quad torpedo tubes. The parts list
in the instructions indicates the screws are in this box, but mine are were in box #3- and of a different design than shown.
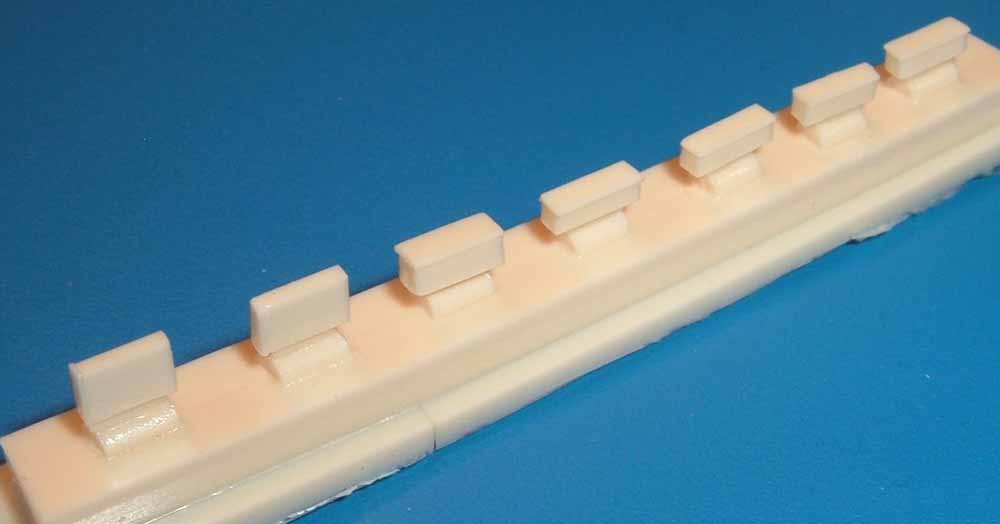
The two stacks are clean, with nice internal details. I found two things especially interesting about the contents
of box #2; the bridge wings as loose parts and the separate, cast bollards. I really like the cast bollards, as the ones
cast on the hull always seem to have a few broken when my kits arrive. And if that weren't enough, there is actually a PE option
for the bollards available as well- PE bases with styrene rod for the bollard.
My parts box #2 did not include the PE forming block for the SPS-6C radar as indicated on the parts list.
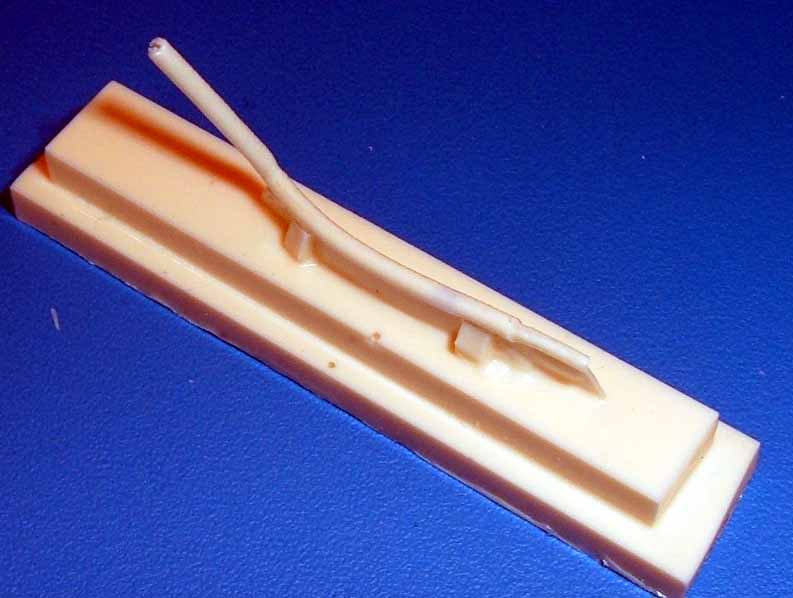
The torpedo tubes are a bit rough, and will require a careful touch.
|
 |
|
|
| PARTS BOX #3 |
|
|
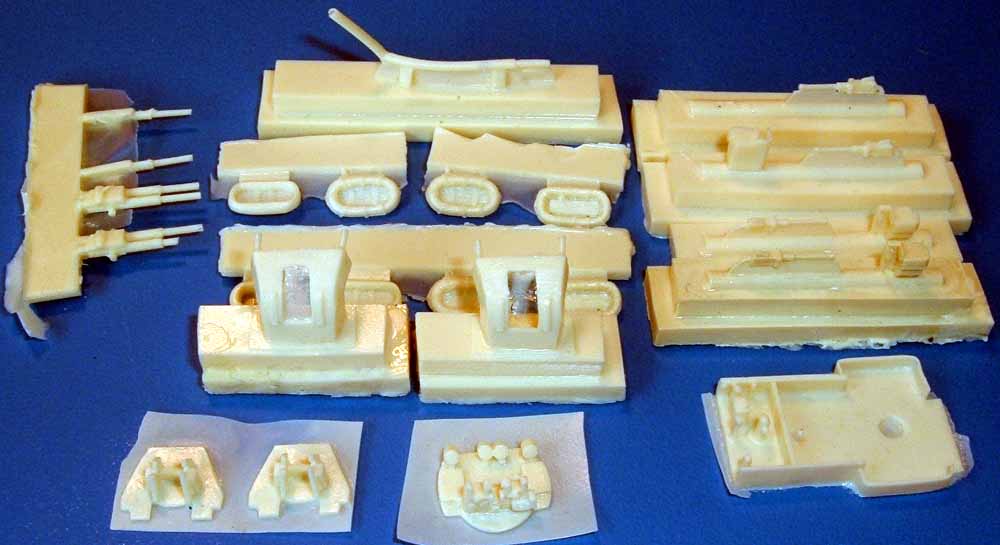
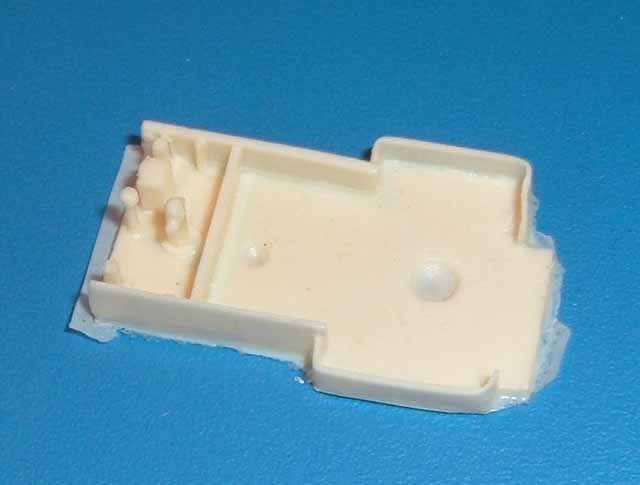
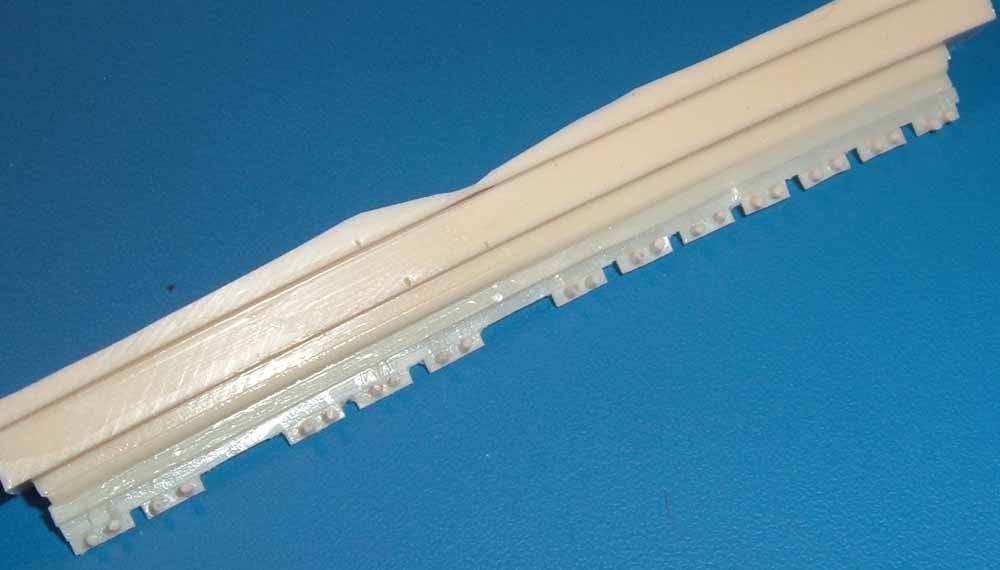
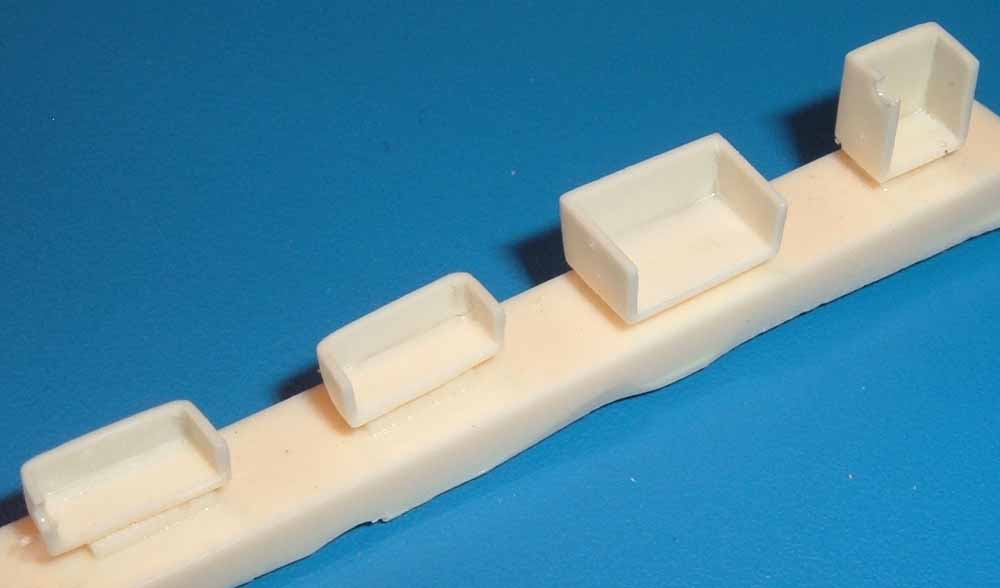
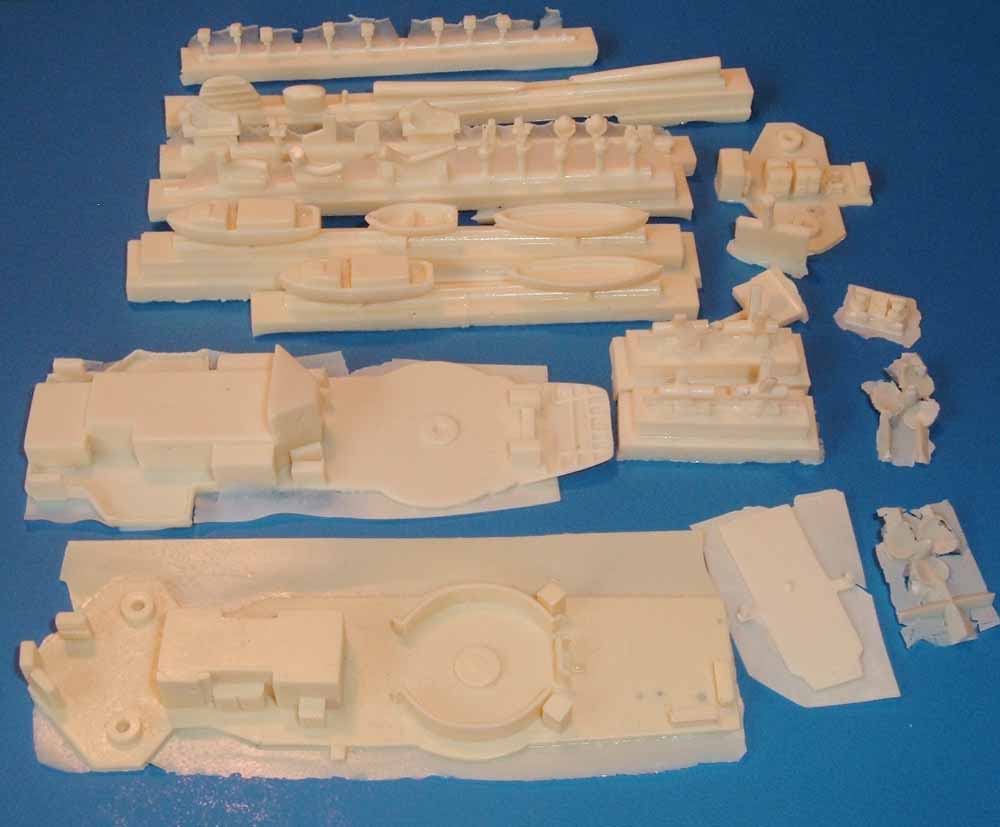
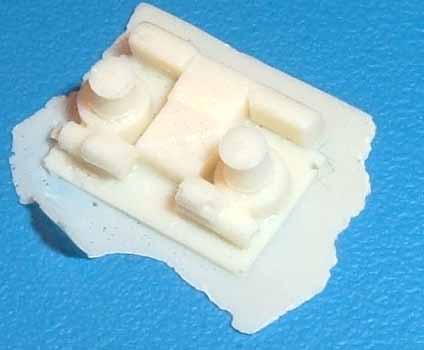
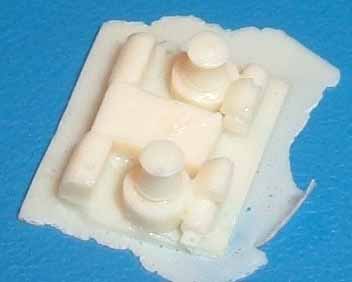
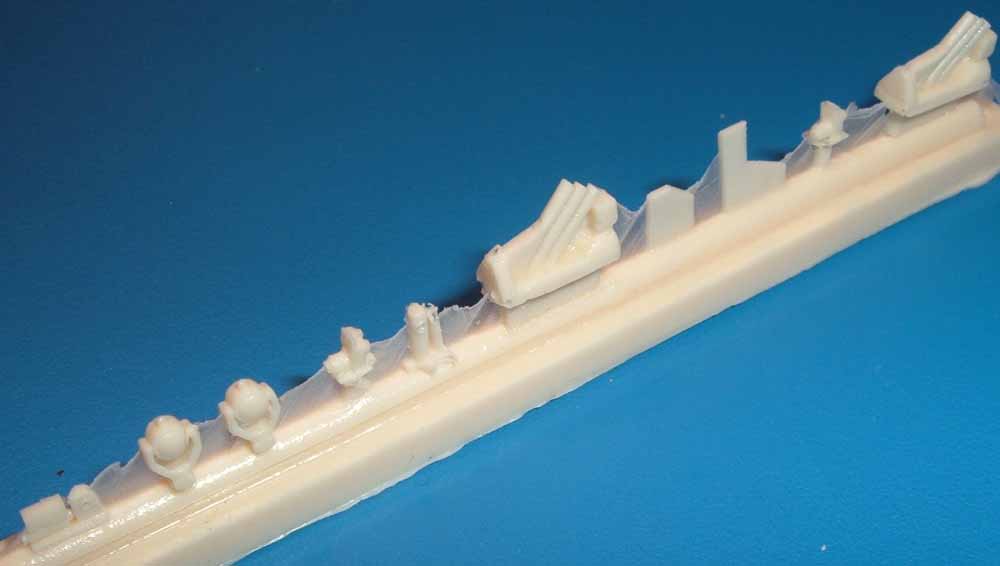
The final parts box is the largest, and is packed with parts. Platforms, bridge structures, ship's boats
and more! This is the first kit I have seen that remembered to include the sonar domes- an appreciated detail.
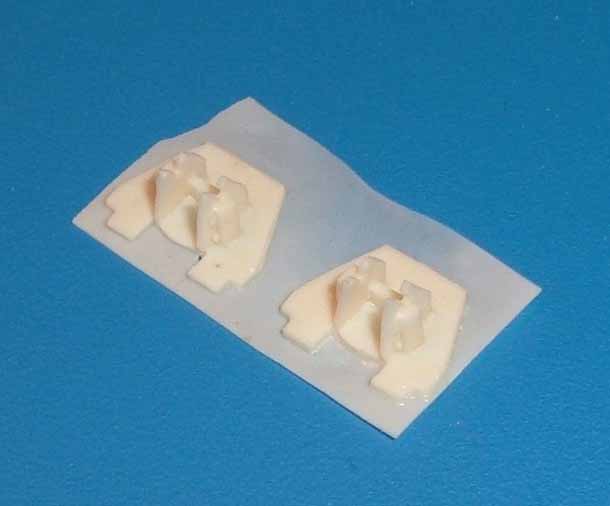
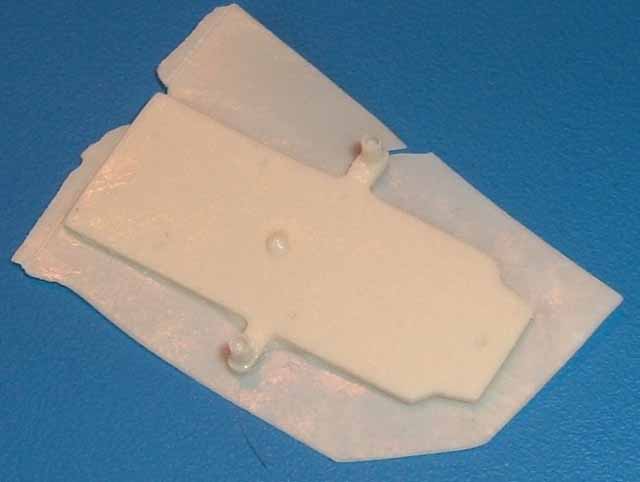
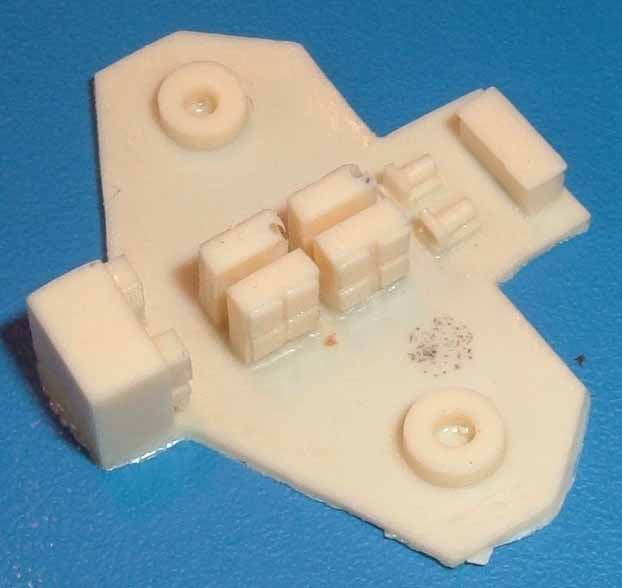
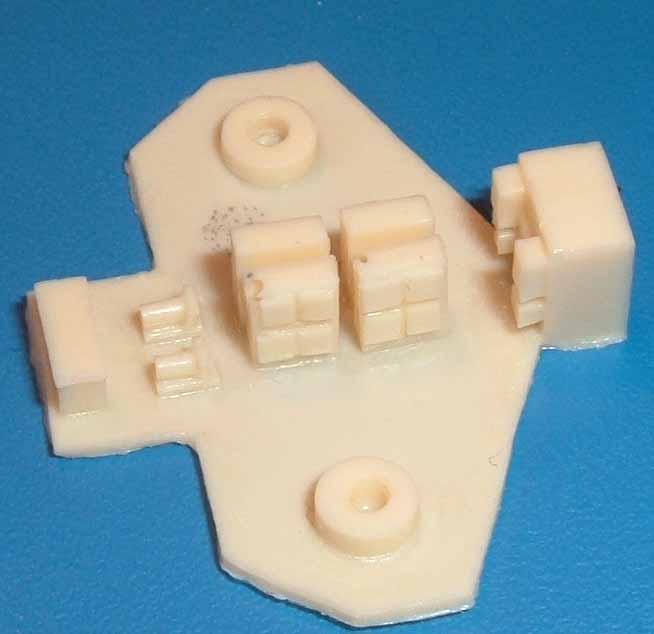
The largest of the parts in this box, the FWD and After gun decks, are cast on thin wafers. They both
have a sheen and slickness indicative of an abundance of mold release in the parts. They will require a very through
cleaning, and maybe a light sanding, before paint will stick. However, they have some great detail;
the weather "lip" which extends forward form the FWD gun deck has some great bracing detail,
and all the angles are sharp and the edges straight.
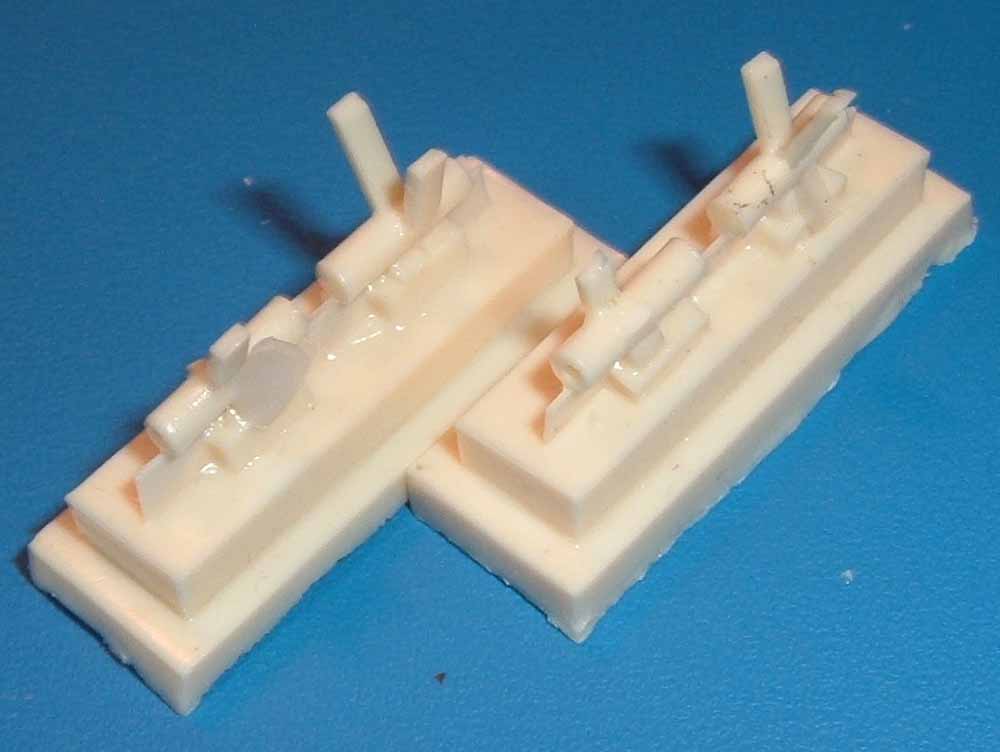
The cast propeller struts are a bit banged up, but the guys at Resin Shipyard thoughtfully included
two of that sprue, so there are 2 good struts.
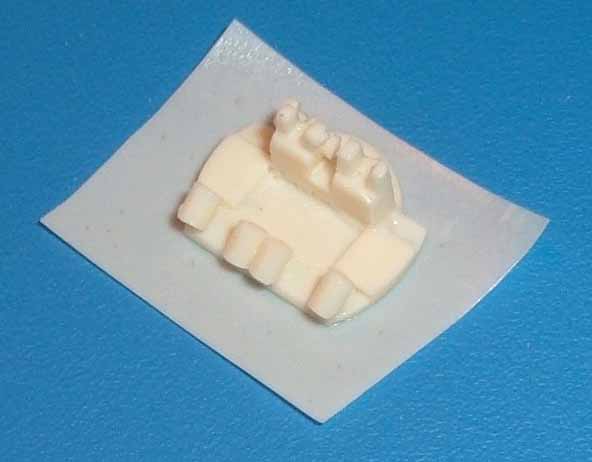
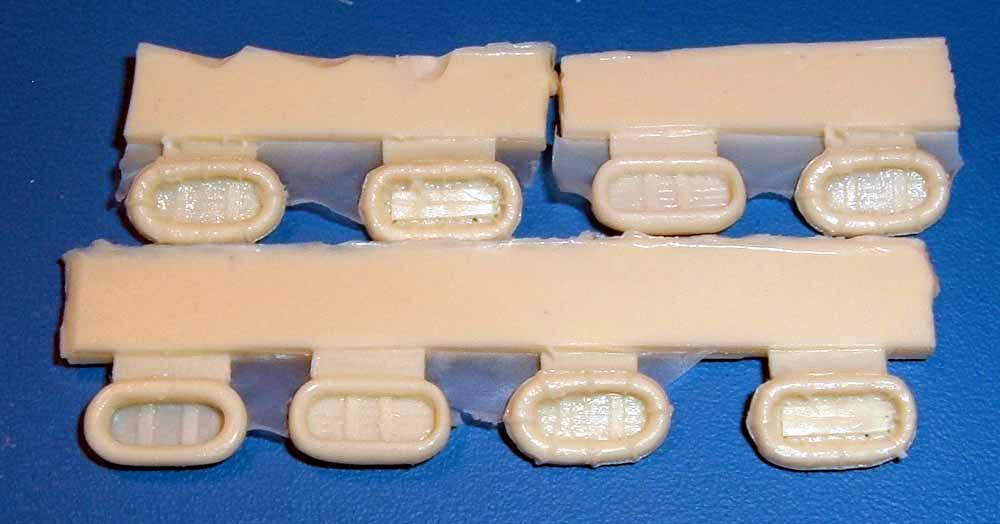
There are many different size and shapes of vents and other little details. I thought the searchlights
were well done, and the 25' Motor Workboat is a nice single casting.
I also included a shot of the parts bag, with supplies of brass rod, styrene rod, and the styrene
bilge keels. Also, taped to the inside of the box is 4" of anchor chain.
|
 |
|
|
| PHOTOETCH |
|
|
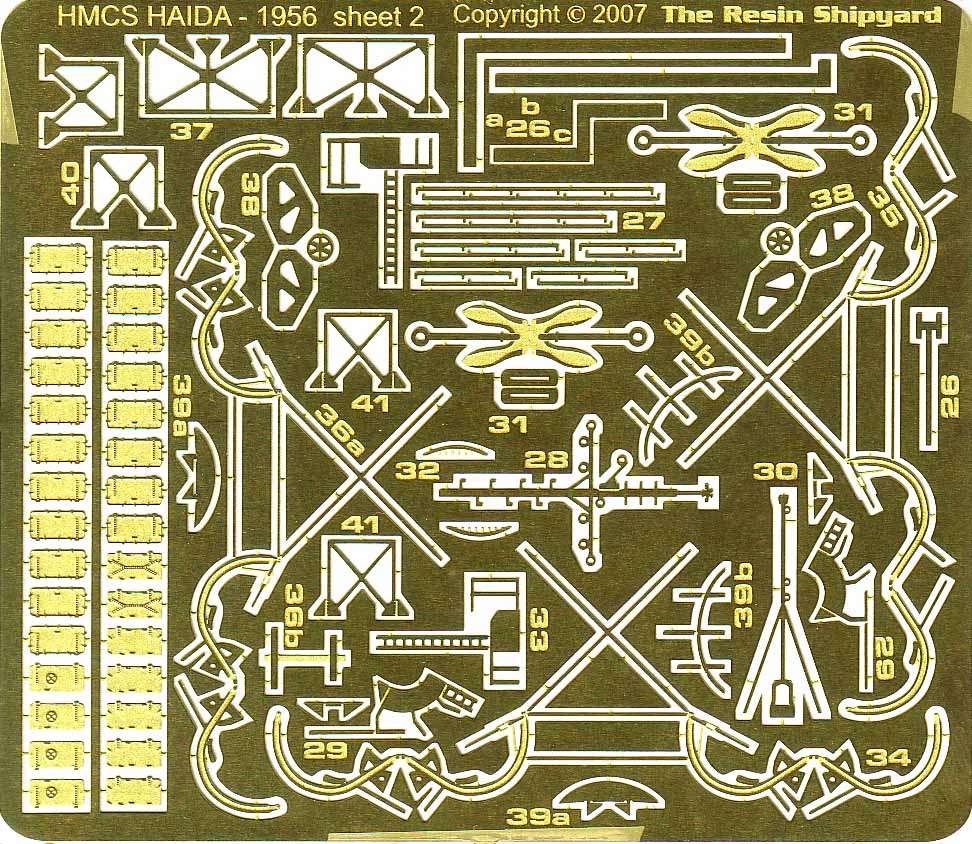
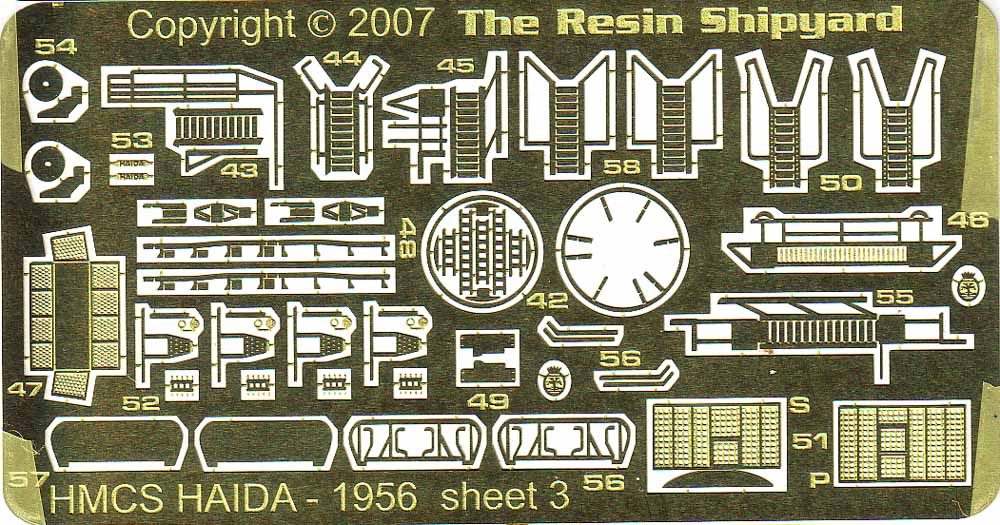
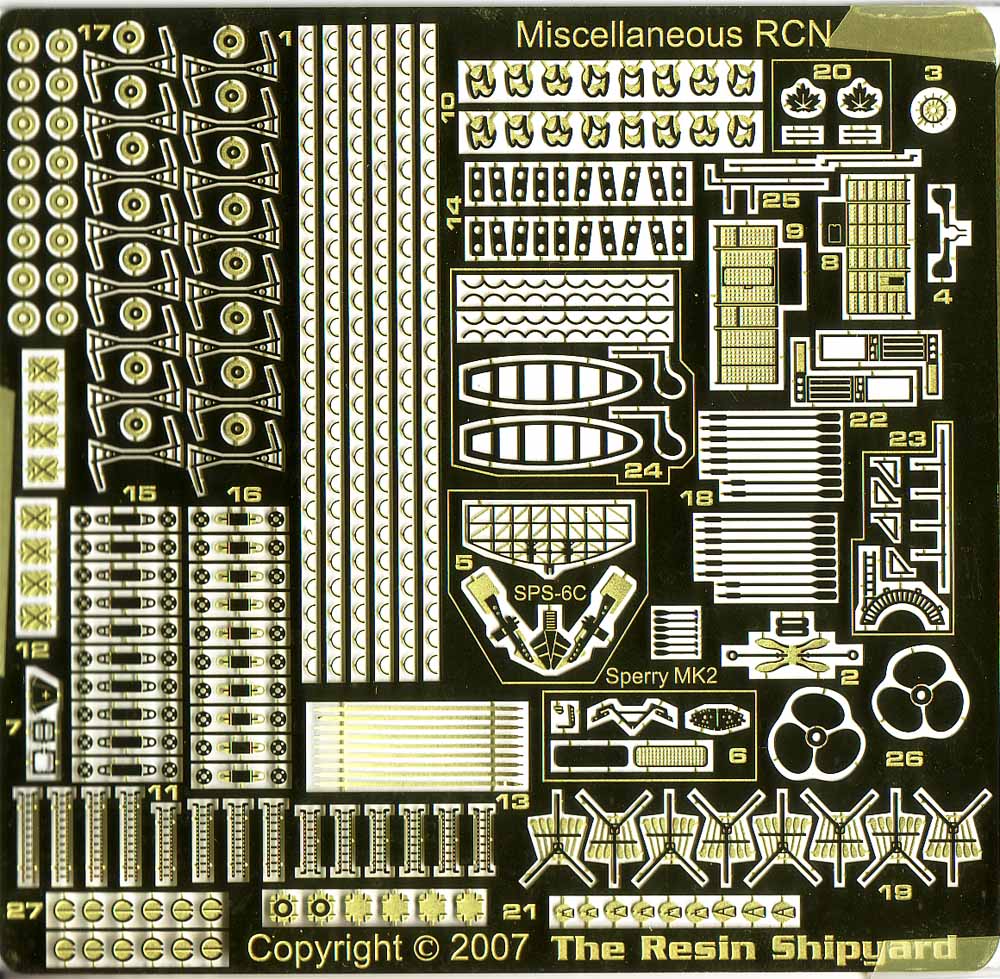
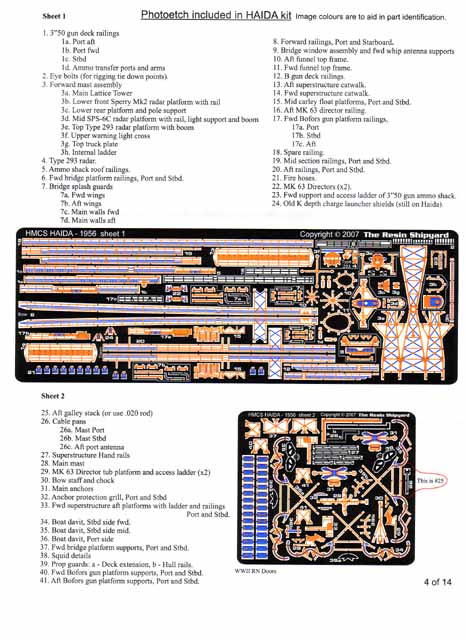
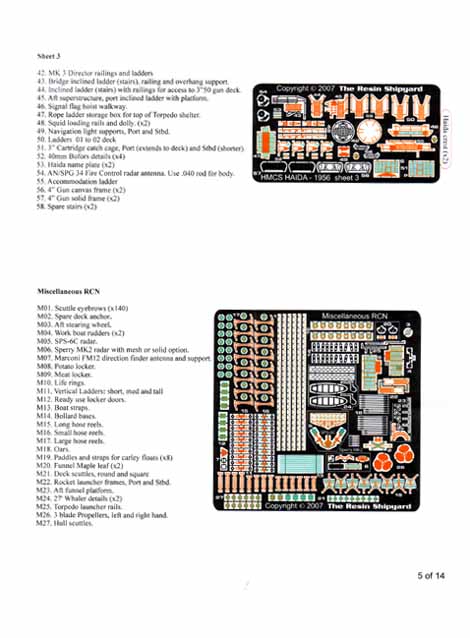
The 4 sheets of photoetched brass details are some of the most extensive sheets
I've ever seen included
in a kit. These sheets are just packed with details.
The first three sheets are specific to the HMCS Haida, with the fourth
being a miscellaneous RCN set.
|
|
|
|
| DECALS |
|
| Resin Shipyard is also Hawk Graphics, and the fine decals are printed by Cartograf. Both black and white
pennant numbers are included, to fit the differing points in the ships life that can be modeled by
this kit. |

|
|
|
| INSTRUCTIONS |
|
|
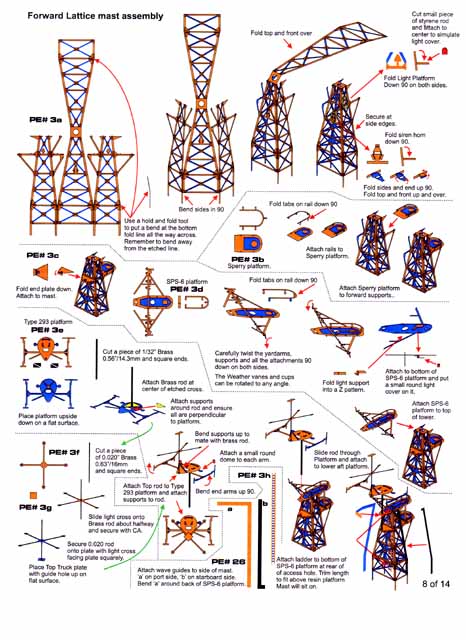
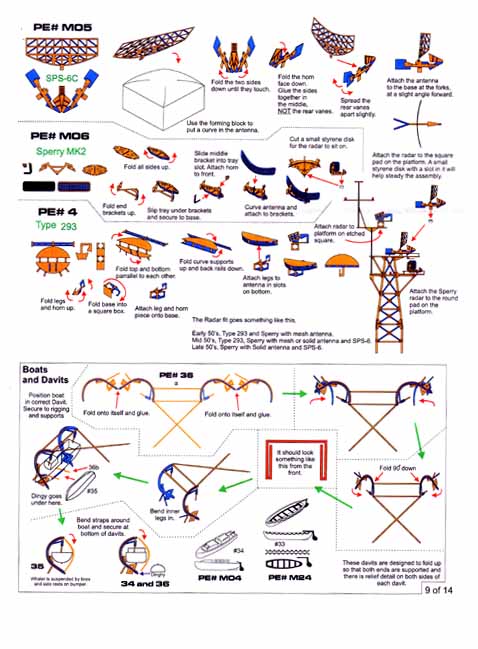
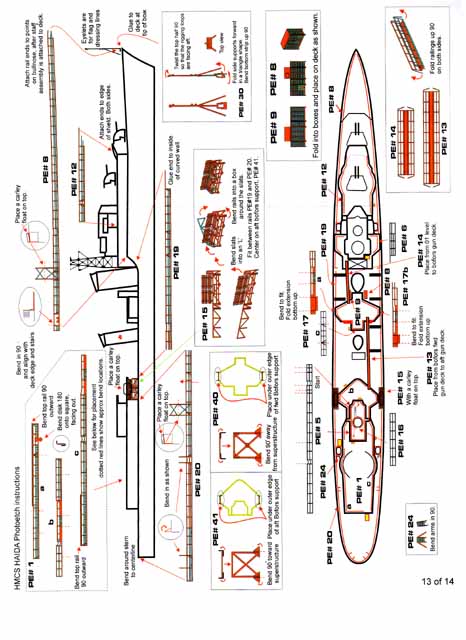
This may be the most extensive 14 page set of instructions I have ever seen. Printed in color, they
are jam packed with information and instruction. The parts list includes color images of the parts
, and false color graphics of the PE frets. Each page is jam-packed with illustrated instructions;
I like the use of blue and orange colors on the PE parts, denoting the difference between the front and
rear of each part to aid in folding and placement; it is an innovation I'd like to see used by other manufacturers.
The instruction sheets are so packed with steps, in fact, it is a bit difficult telling some steps apart. They will require some careful
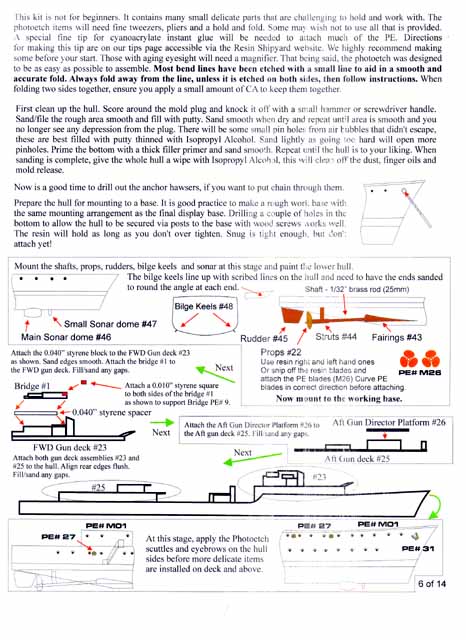
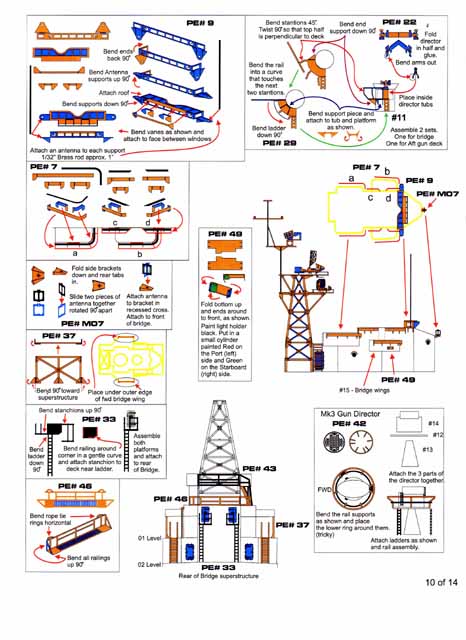
study and planning to avoid mishaps. On page 6, where actual construction begins, there are references to needing .040" and .010" styrene
for the bridge- these are not included in the kit, and don't seem to be referenced anywhere else.
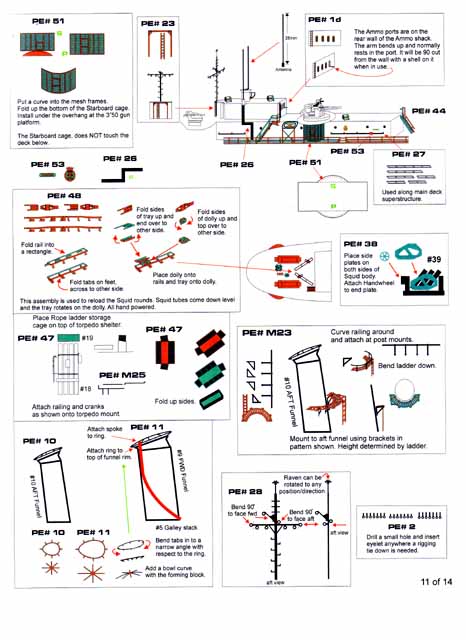
Each step is unnumbered. The instructions state this is so the sub assemblies may be built and
painted in any order to suit the modeler.
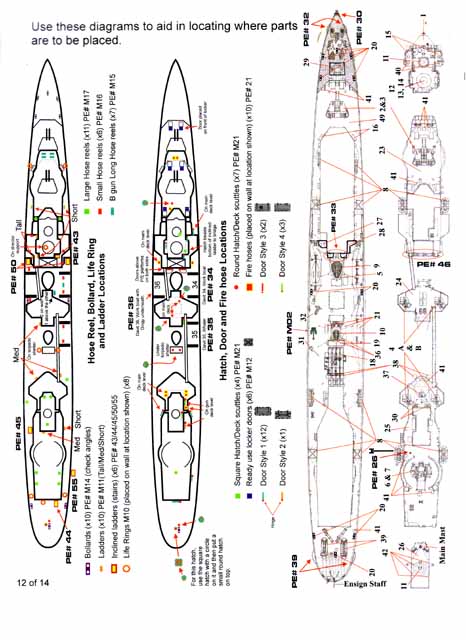
While each sub assembly is well documented, it is left up to the modeler
to place each item on the hull in whatever order is preferred; pages 12 and 13 provides diagrams to aid in planning these steps.
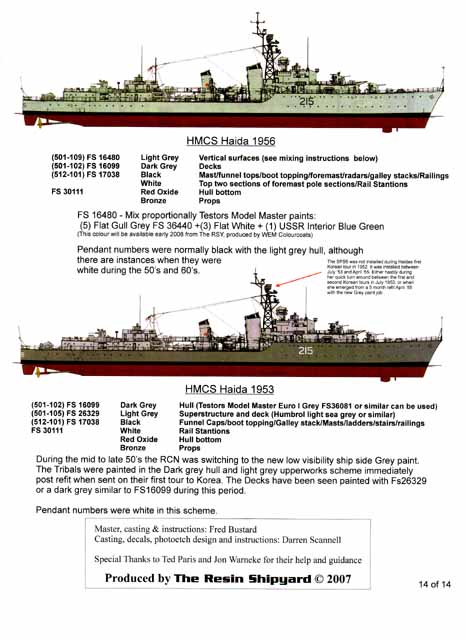
Page 14, the final page, provides color illustrations of the paint recommendations. Two versions of Haida are indicated,
1956 and 1953. The colors are listed with Federal Standard 595b numbers (FS numbers) and Model Master Enamel equivalents. I really like this,
as Testor's Model Master color range is probably the most available to North American modelers. Also, it is stated that Resin Shipyard will
be releasing their own RCN color line in 2008, to be produced by WEM Colourcoats.
|
|
|
| Conclusions: |
|
 Conclusions:
Resin Shiyard
has produced a fine kit of a famous ship that still survives to this day as a museum ship in Hamilton, Ontario, Canada. While the instructions state this is not a kit for beginners,
and I agree, I think it would be a great 2nd or 3rd kit for someone familiar with resin ship
construction and methods. I was actually a bit overwhelmed by the detailed instructions- being used to instructions
coming from the opposite end of the spectrum in information. I would like to see a little more direction on the order of assembly- just to avoid any unforseen pitfalls.
This kit will build up to be the finest example of a Tribal Class destroyer around,
and it is great that
Resin Shiyard has a good kit drawing attention to a neglected subject. I am looking forward
to their release of HMCS Iroquois (280) in 2008.
Resin Shiyard lists this kit at $170.00 CDN, and is available direct from The RSY.
Their website is growing, and is worth a browse. The tips section concerning
making your own CA applicator (referenced in the instructions) and the Walkaround areas are very informative.
|

© ModelWarships.com
|