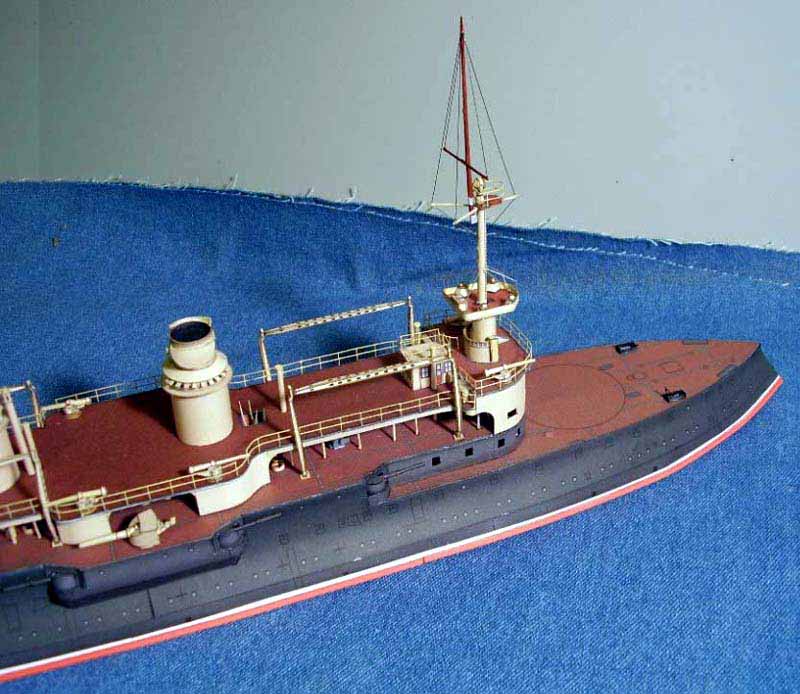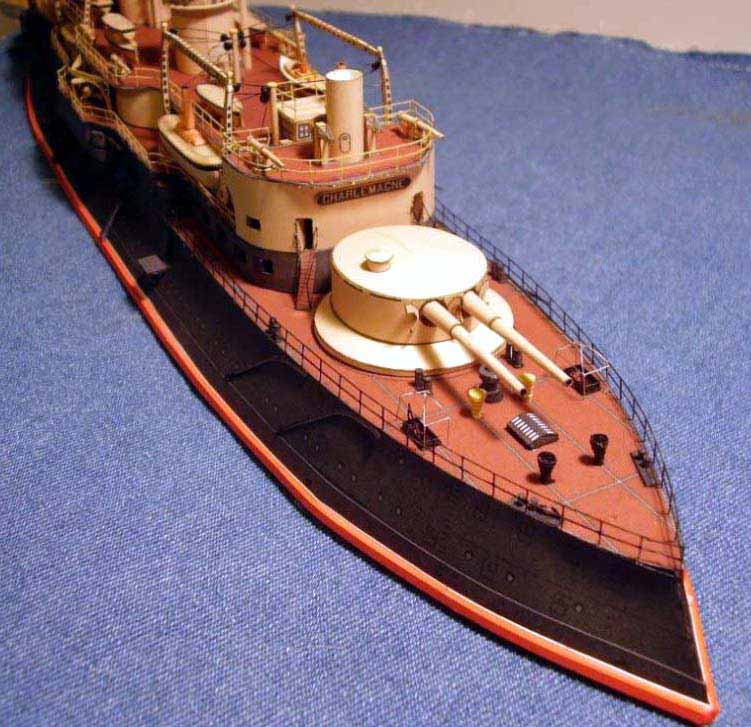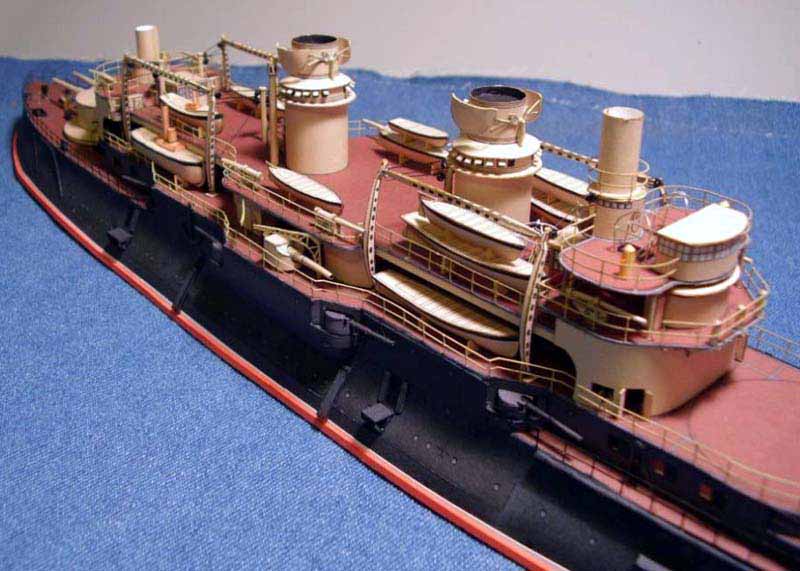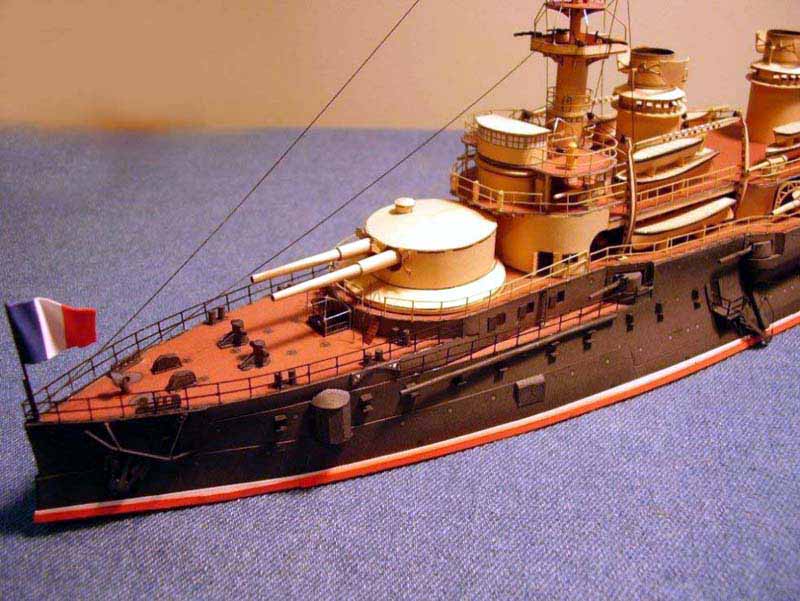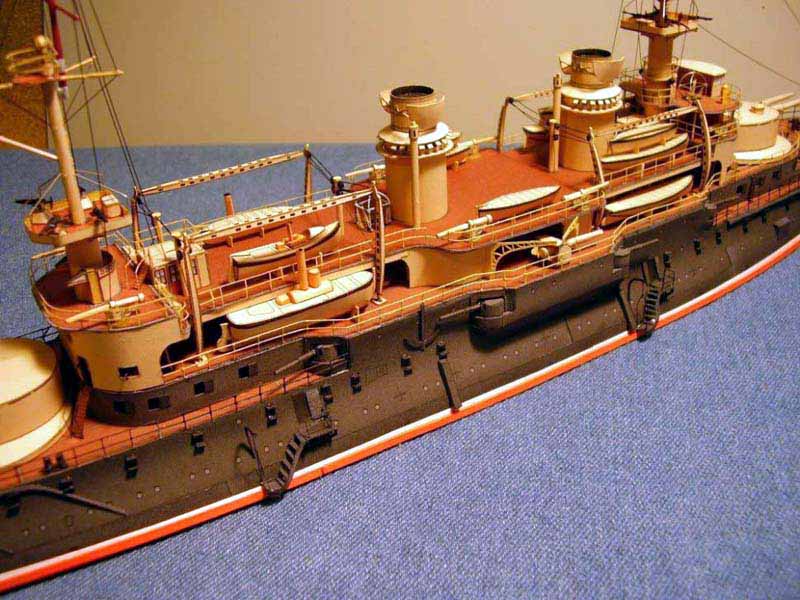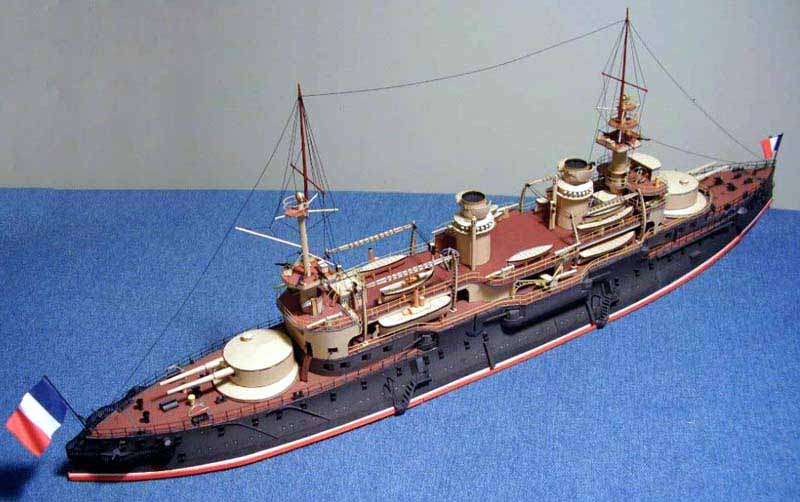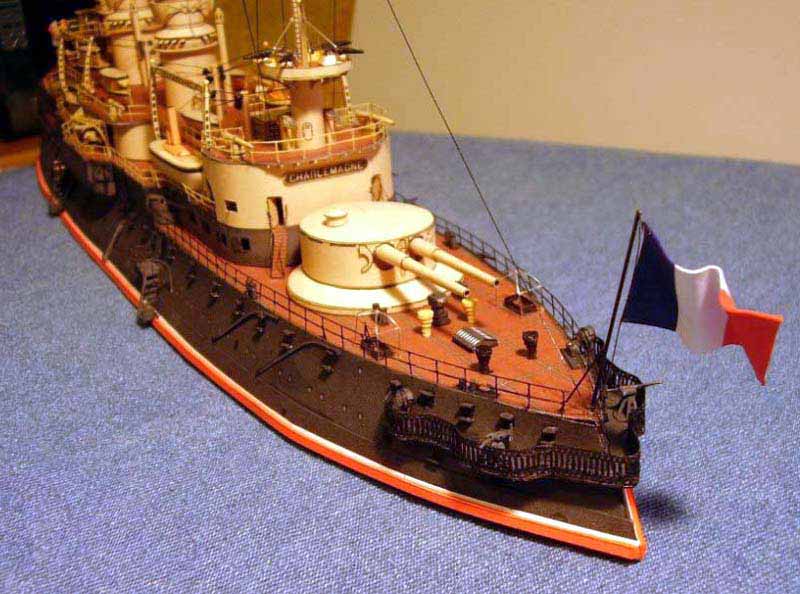
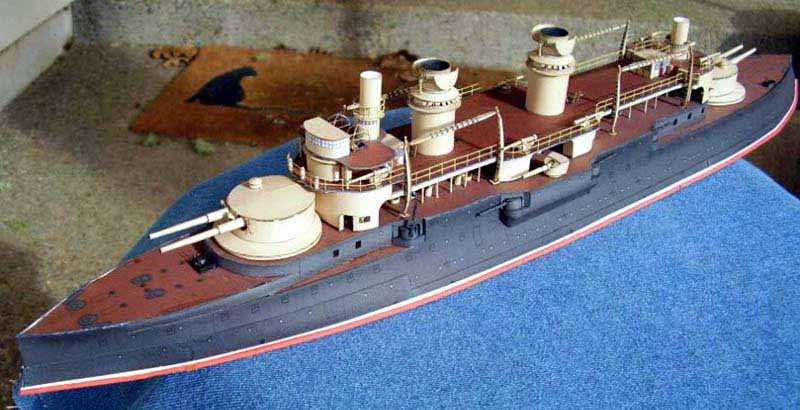
| Here is my model of the French battleship Charlemagne which I have scratchbuilt to 1:250 scale between September and December 2007 based on plans downloaded from the French government website. The model was designed in Rhino 3D and printed out on an ink jet printer onto 100# cardstock. After printing the colored pages need to be sprayed with matte clear coat to give them some protection from smearing and moisture the ink is not water resistant in the least. I build largely with Duco cement, a PV glue. White glues and CAs are more popular with the general modeling community however. | |||||||
| After designing the model in Rhino 3D, I began by building the hull framing with cardstock laminated to 1mm thickness. Parallel long stringers were designed in amidships to provide easier attachment for the top of the hull sides. Although the tumblehome on Charlemagne was not as dramatic as on earlier ships it still is tricky to deal with. The shapes of the cross section frames show this shape. | |||||||
| I placed my recently completed 1:400 model of Masséna next to the framing to give an idea of scale. Masséna is about 9 long . | |||||||
| French ships of this period have treuils or donkey engines mounted in visible places around the deck. Since I was recovering from surgery on my right shoulder at the time I decided to work on something light while I rehabilitated it. These little models are based on plans that can be found on the website and in various books. Unfortunately I found out a few weeks later that I had not scaled them correctly and they needed to be much smaller. But these look rather nice so I like to share the pictures. | 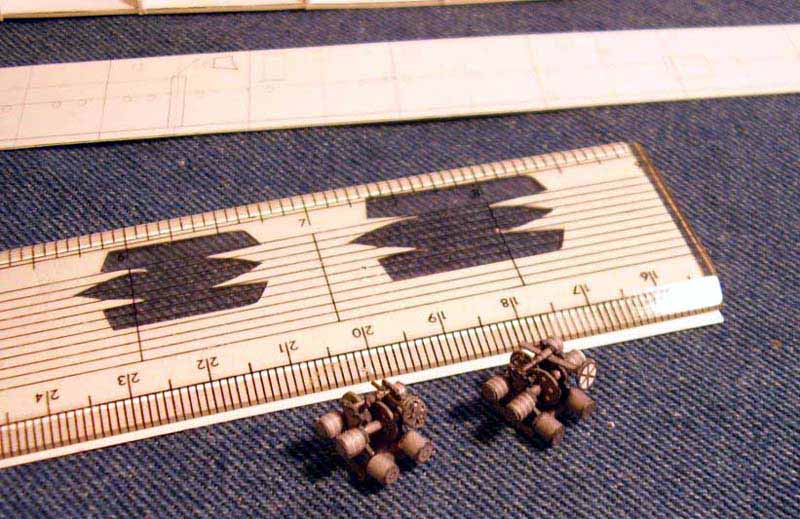 |
||||||
| Unfortunately I suffered with difficulties in lighting Oregon during this time of the year is covered in cloud and drizzles all the time. I could only take photos under natural light occasionally. This photo is interesting for a few reasons. First, it shows Beowulf, a 1:250 commercial kit, for scale. | 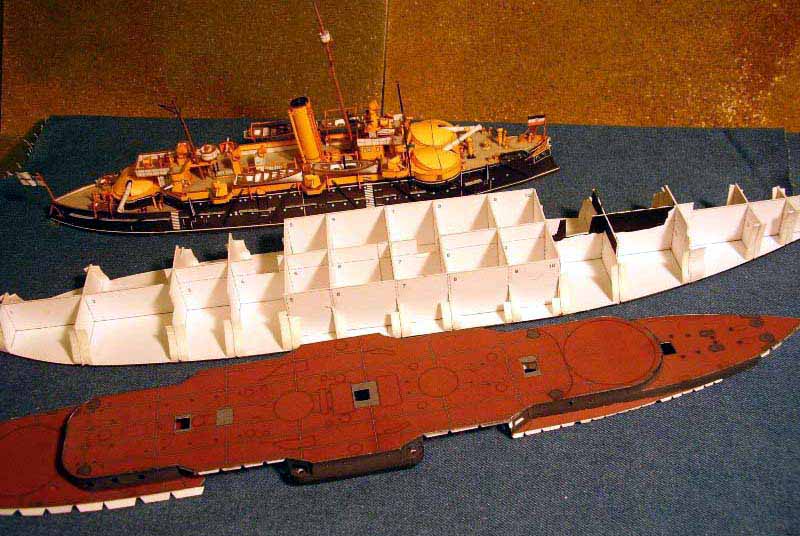 |
||||||
| That model was built by me several years ago and represents a much earlier period in my building skills. The hull framing itself has had the transverse frames beefed up with pieces of thick cardboard. Paper models of ships can suffer from handling during a build with the result that the ribbing shows through the thin card sides eggcrating. These widened frames not only avoid this issue but provide much better sites for gluing. Because of the complex fitting together of the hull sides and the various decks and recesses I decided to build the decks and related sides as a single assembly, which could be placed down and joined all at once. The side bulges with casemates can be seen here. Note also how the center frame strut is notched in various spots in preparation for later detail. | |||||||
| Here the deck/side assembly are fitted neatly into place on the frame. | 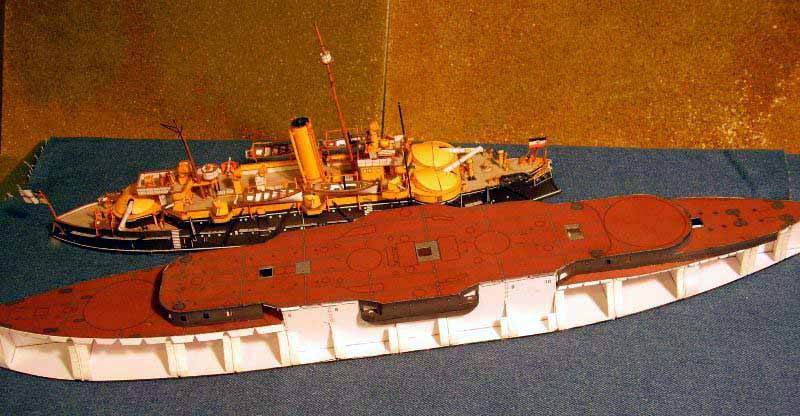 |
||||||
| Part of paper modeling involves warships involves the joy of rolling little tiny gunbarrels. These are the guns for the casemates. Four are completed and the next four have their barrels rolled in preparation for constructing the rest from the pieces shown in the box. |  |
||||||
| Part of paper modeling involves warships involves the joy of rolling little tiny gunbarrels. These are the guns for the casemates. Four are completed and the next four have their barrels rolled in preparation for constructing the rest from the pieces shown in the box. | 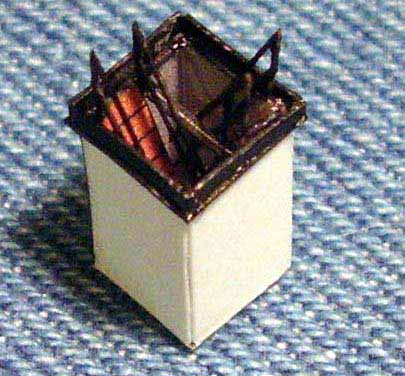 |
||||||
| I built the stairs that penetrate the decks as individual structures that could be inserted later. They actually turned out to be more trouble than they are worth since even with rather late installation I managed to knock off the railings over and over again. The railings are laser cut paper. | 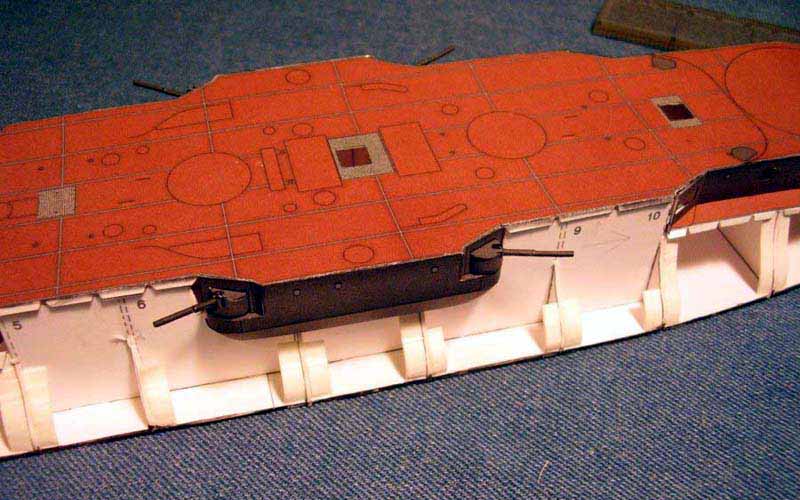 |
||||||
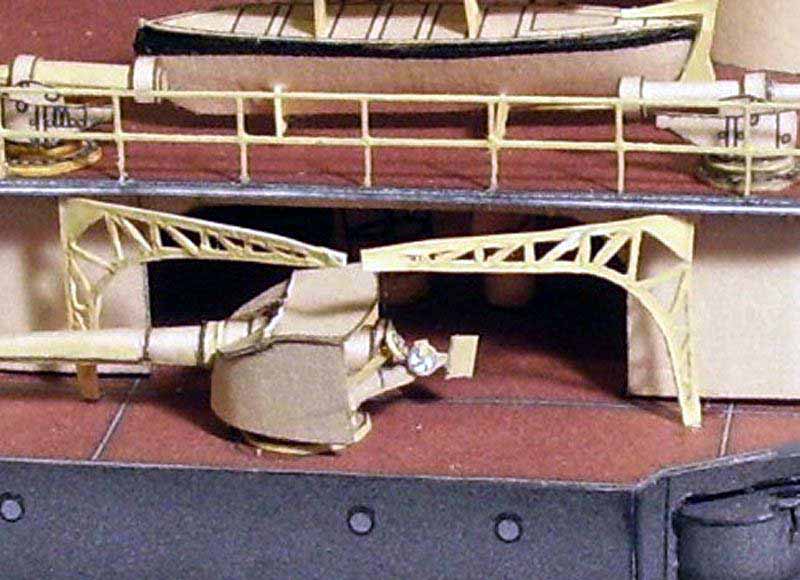
| Secondary casemate armament installed in the side bulges. The parts turn but the barrels are rather delicate. | |||||||
| I struggled to get the buff upperworks color to be correct. I used turrets as test vehicles for this and here are three examples. The sides were shaped and then attached all at once. | 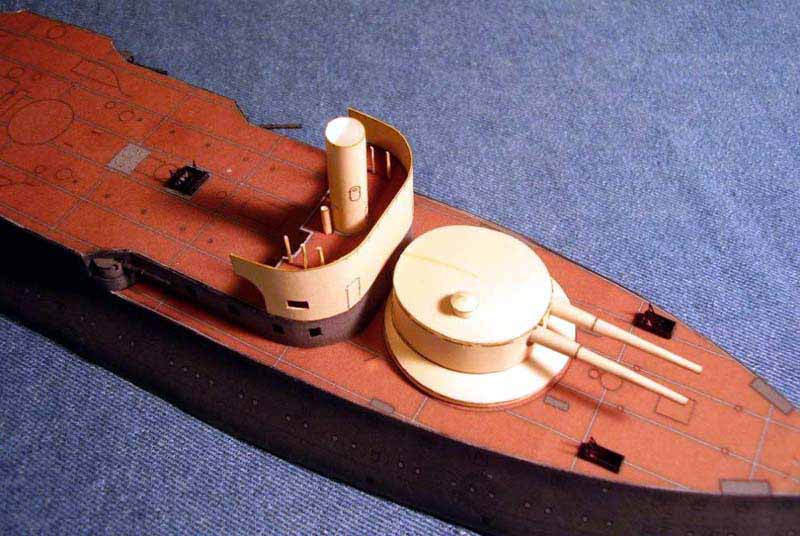 |
||||||
| I studied photos for quite a while to try to figure out the internal detail of the bridge structures. Here is the front with pillars installed and a pair of air passages. Note the deck shading. | |||||||
| More work on the front bridge. I had to remove the tall pillar and replace it with one that had wire support. The pillars are all rolled but out of HP Bright White paper rather than card. | 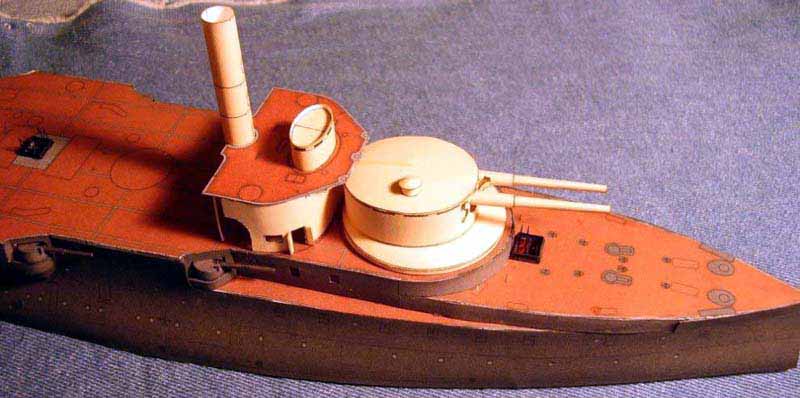 |
||||||
| There are 47mm rapid firing guns mounted at various points around the superstructure of the ship. They are entirely card. I needed to paint the upper parts to be black after inspecting photos. | 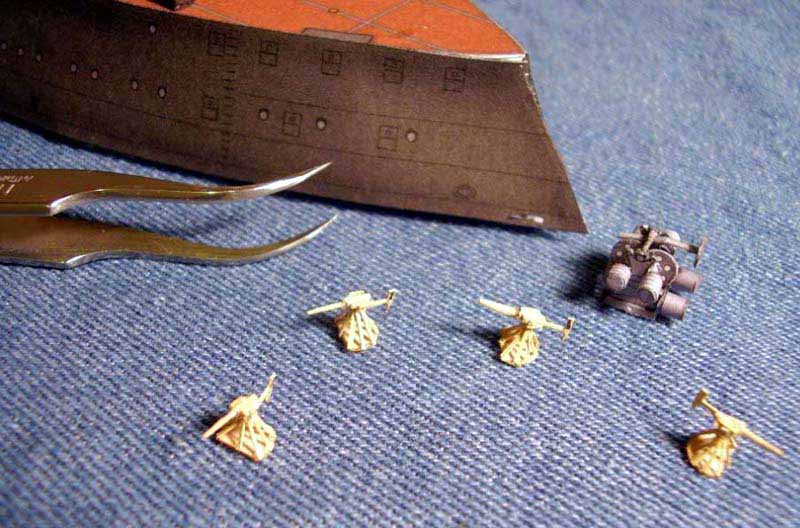 |
||||||
| The aft bridge structure with secondary armament installed. | 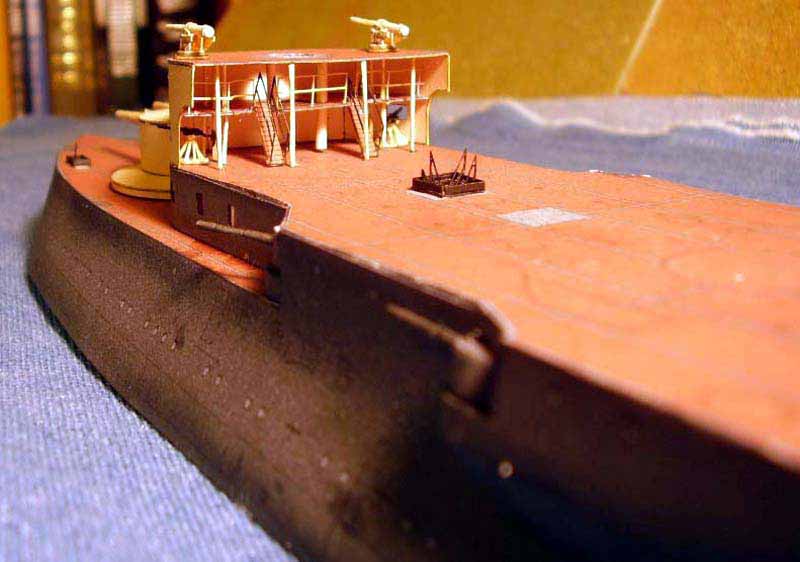 |
||||||
 |
|||||||
| Test fitting of the uppermost flying deck. | 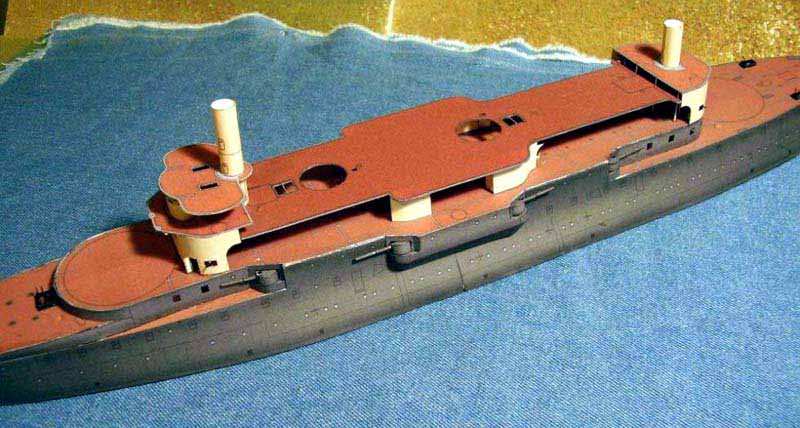 |
||||||
| Upper deck details attached. The pavilion framing over the ladder tops was built of soft beading wire. The circular assemblies with railings were air passages. | 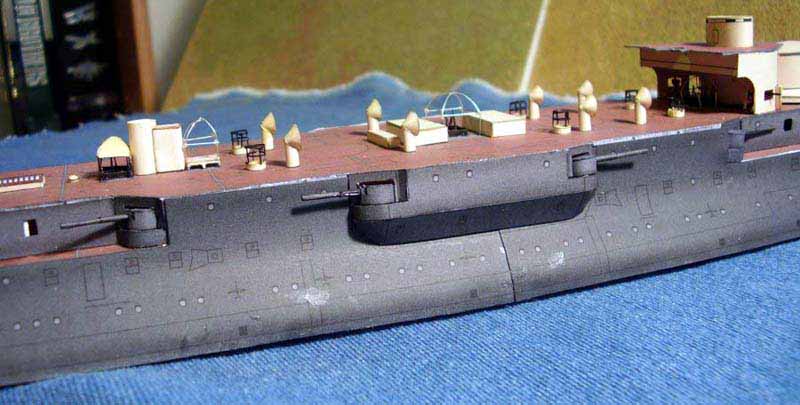 |
||||||
| Designing the funnels took some work since I wanted the geometry of the linkages for the caps to be correct. In theory I could run a wire through and they would rotate correctly and meet neatly over the tops. | 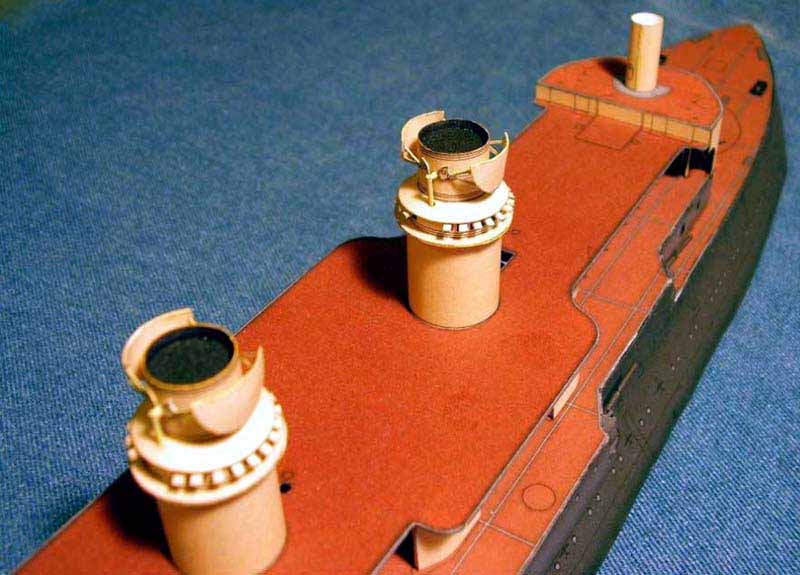 |
||||||
| This is the result of rebuilding the treuils at the correct and smaller size. Oh well, paper modeling is full of these moments. One of the heavier pieces of secondary ordnance is also shown. | 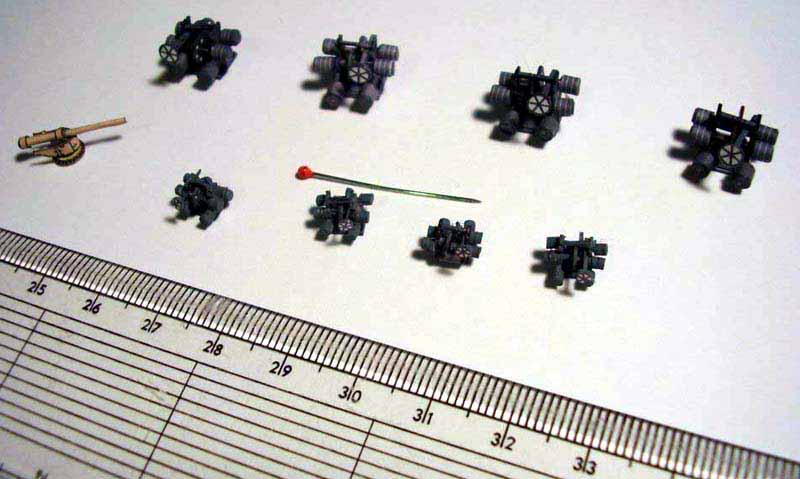 |
||||||
| The flying deck is installed with support pillars underneath.
Paper railings are beginning to be mounted. These are fragile so
I have to balance the desire to put them on as late as possible with the
need to get them in while I still can.
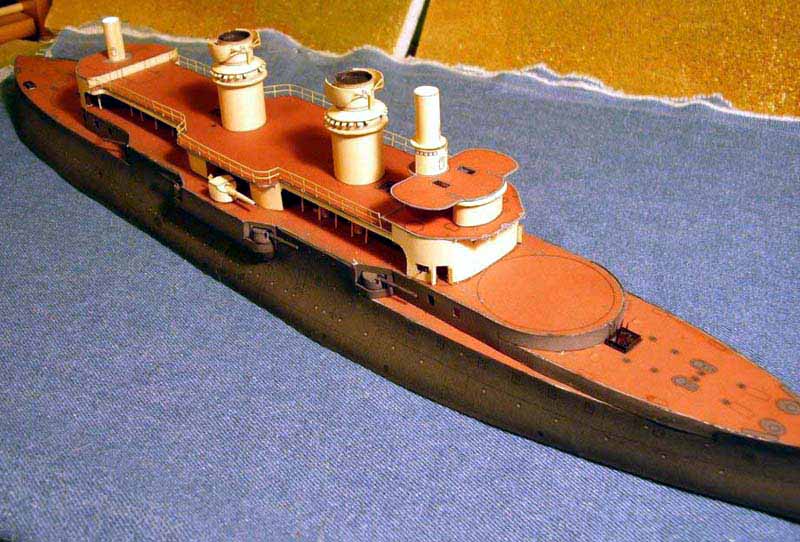
An in progress shot under natural light to give a better idea of the coloring however the buff is too light in this photo. Most of the serious structures are now complete. Im working on the boat cranes and Ive made most of the boats.A shot under natural light showing the boat cranes still in progress.I tried to build most of the delicate detailed structures as separate parts that I could keep separate and glue at the end. This is one of the fighting top/upper mast structures.The entire mast structure is slip fit here for the photo and removes for safe storage. I made these small boat cranes out of cardstock. This is what we call Super Fault Finding Macro Mode (SFFMM) for short it is necessary to show detail but also shows flaws not visible to any human eye. |
 |
||||||
 |
|||||||
 |
|||||||
 |
|||||||
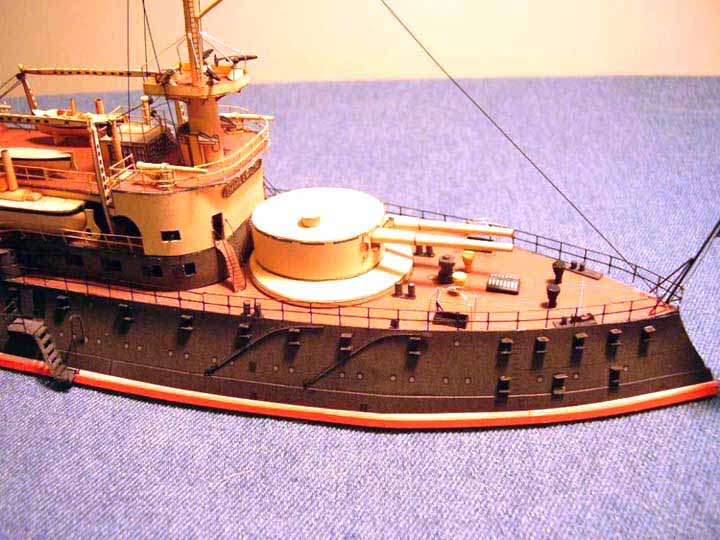
| The admirals walk around the back has an ornate railing. I bought a photo etch kit but decided to do it out of card in order to keep with the spirit of the model. It is about ¼ tall and 5 long. After finishing this task I set it down and went into another room for a minute. I came back and one of our cats had jumped up and gotten ahold of it and chewed off an end. Fortunately I still had just barely enough to complete the work. Cats are great! The admirals walk complete with light guns and searchlights. | |||||||
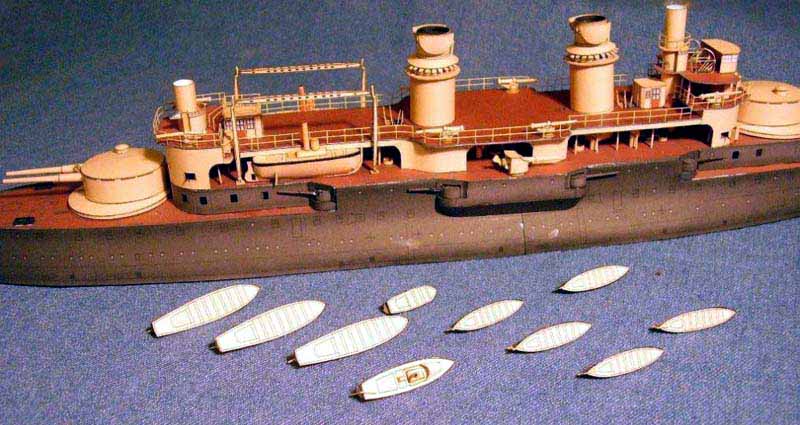
| The model is almost complete! For the nameplate I took a photo and scaled it down and cleaned it up. Rigging on the boat cranes is visible. Rigging is much simplified but accurate. Instead of thread I use ultra thin soft beading wire which I stretch with pliers to straighten. | 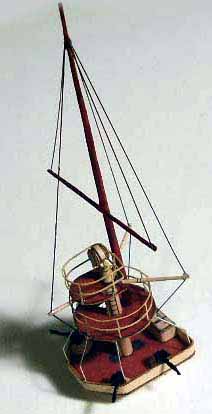 |
||||||
|
|||||||
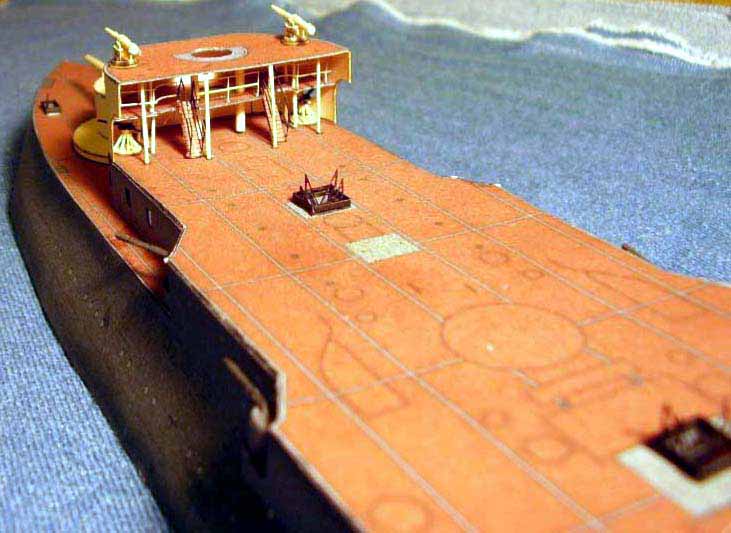
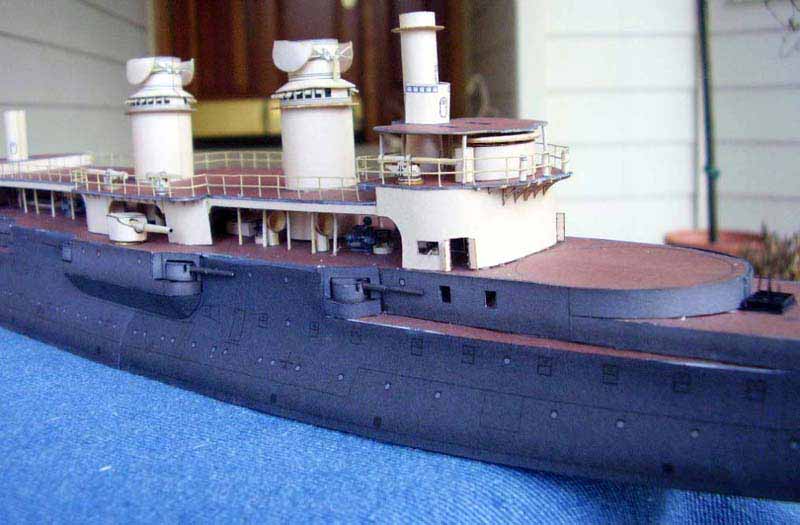
| The large gaping ports along the sides are dominant features in photos
of these French ships. Ideally I would build them by cutting them
out and putting black chambers behind them but since this was my first
1:250 attempt I wanted to keep things simple. The side coloring is
actually blended shades of dark grey and I simply colored the openings
to be black against this before attaching the shutters. If you look carefully
you can see the cables supporting the lower parts of the entry port ladders.
These are built from carefully cut card. It still needs to have its anchor
chains installed. I ordered them and have them now have had them
for months but havent gotten around to it for some reason.
This is the model in its current state. |
 |
||||||
|
|||||||
|
|
|||||||
![]()
© ModelWarships.com